

ZyXEL UNS2300, UNS2700 Hardware Installation Manual

Quick Start Guide
UNS2300 / UNS2700
Unified Network Storage
Version 1.00
Edition 1, 06/2013
Hardware Installation Guide
www.zyxel.com
Copyright © 2013 ZyXEL Communications Corporation

IMPORTANT!
READ CAREFULLY BEFORE USE.
KEEP THIS GUIDE FOR FUTURE REFERENCE.
This guide shows you how to use the rack mounting kit to install the UNS in a rack. Graphics in this
book may differ slightly from your product. Every effort has been made to ensure that the
information in this manual is accurate.
Related Documentation
•User’s Guide
This guide shows how to use the Web Configurator to configure the UNS.
• Web Configurator Online Help
Click the help icon in the web configurator for help in configuring screens and supplementary
information.
UNS Series Hardware Installation Guide2

1.1 Overview
• Mount the UNS in a Rack on page 3
• Insert a Hard Drive on page 6
• About the Power Modules on page 8
• Make Rear Panel Connections on page 9
• Turn on the UNS on page 10
• Observe the LEDs on page 10
• Accessing the UNS on page 14
• Configure the UNS Using the Web Configurator on page 16
CHAPTER 1
Hardware Installation
1.2 Mount the UNS in a Rack
1 Prepare the Installation Requirements
2 Separate the Slide Rails
3 Connect the Inner Rail to the UNS
4 Connect the Outer Rail to the Rack
5 Insert the UNS into the Rack
1.2.1 Prepare the Installation Requirements
• A rack with 2U space.
• Two sliding rails.
• 10 M6 screws for attaching both outer rails to the rack.
• The rack depth can be from 71.12 cm to 91.44 cm (28 to 36 inches).
Note: Failure to use the proper screws may damage the unit.
1.2.1.1 Precautions
• Make sure the rack will safely support the combined weight of all the equipment it contains. The
weight of the UNS with 12 hard drives installed is about 22.8 KG. The maximum load the rails can
hold is 33.56 Kg.
UNS Series Hardware Installation Guide 3
Chapter 1 Hardware Installation
Inner Rail
Outer Rail
1
1
2
• Make sure the position of the UNS does not make the rack unstable or top-heavy. Take all
necessary precautions to anchor the rack securely before installing the unit.
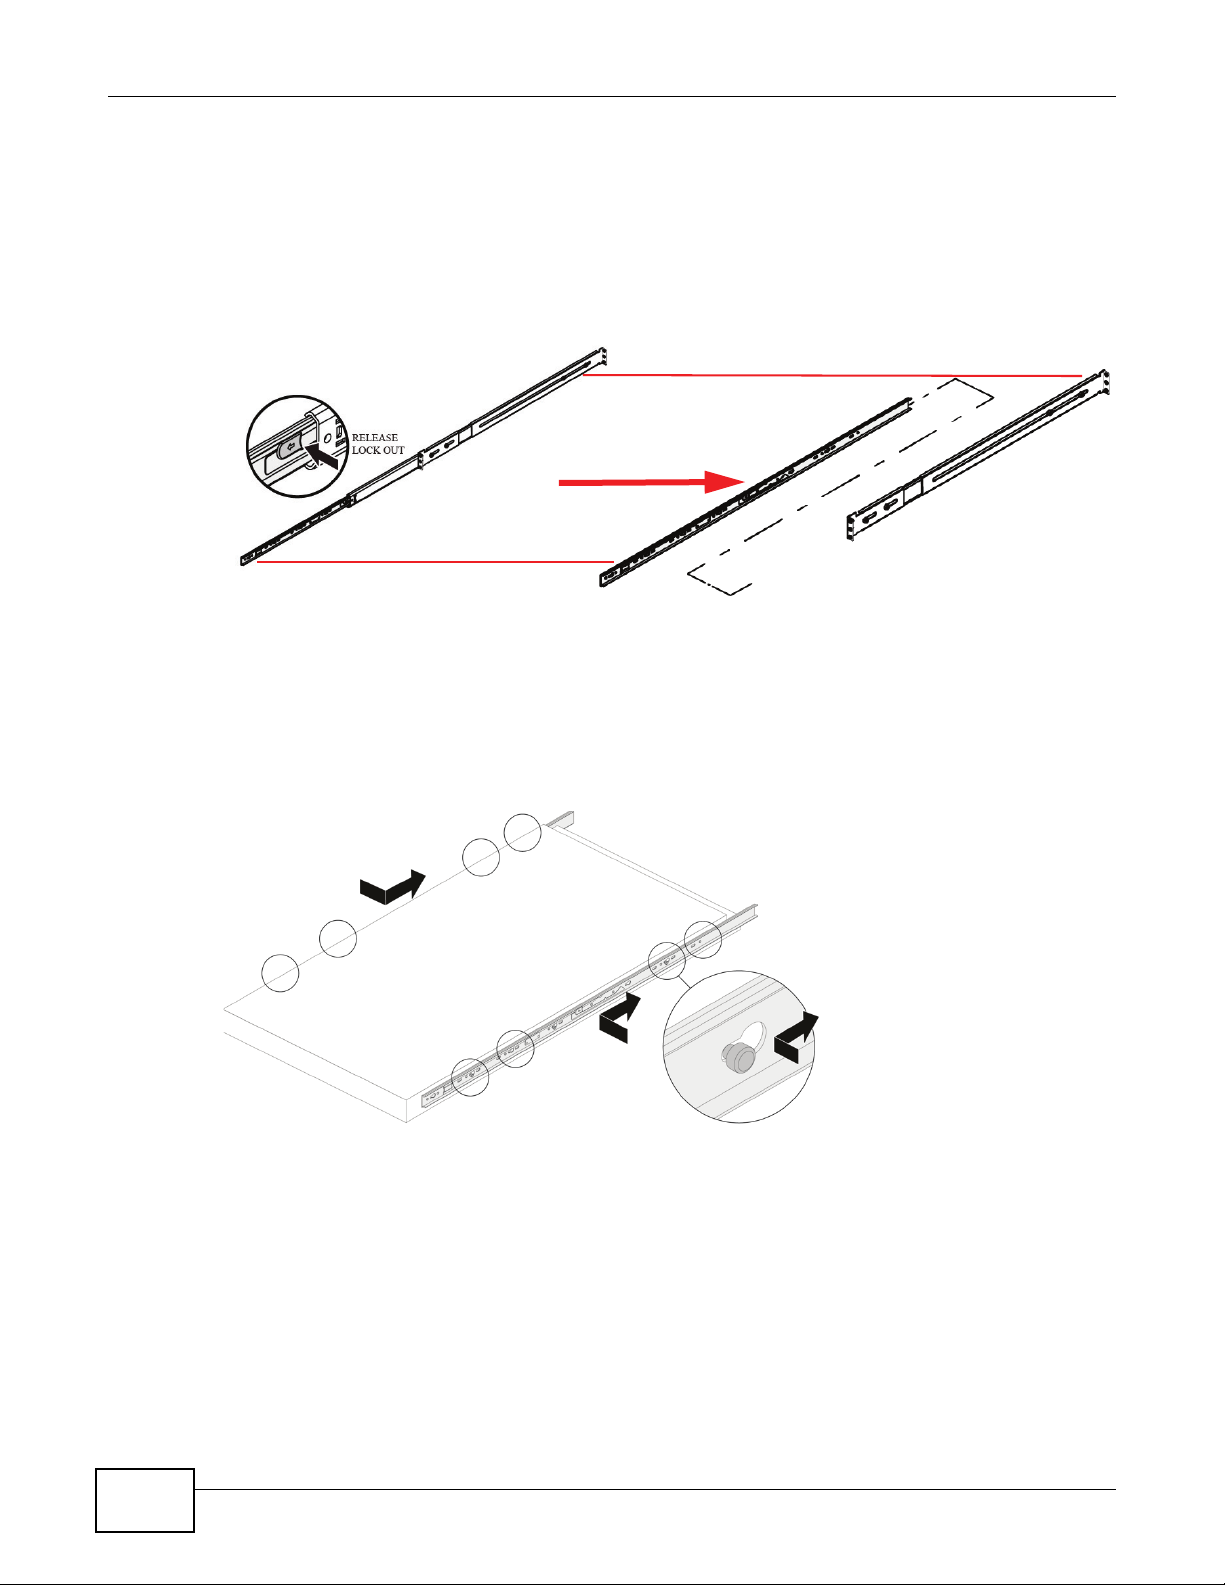
1.2.2 Separate the Slide Rails
A slide rail consists of an inner rail and an outer rail. Release the lock (1) and slide out out the inner
rail completely to separate the rails.
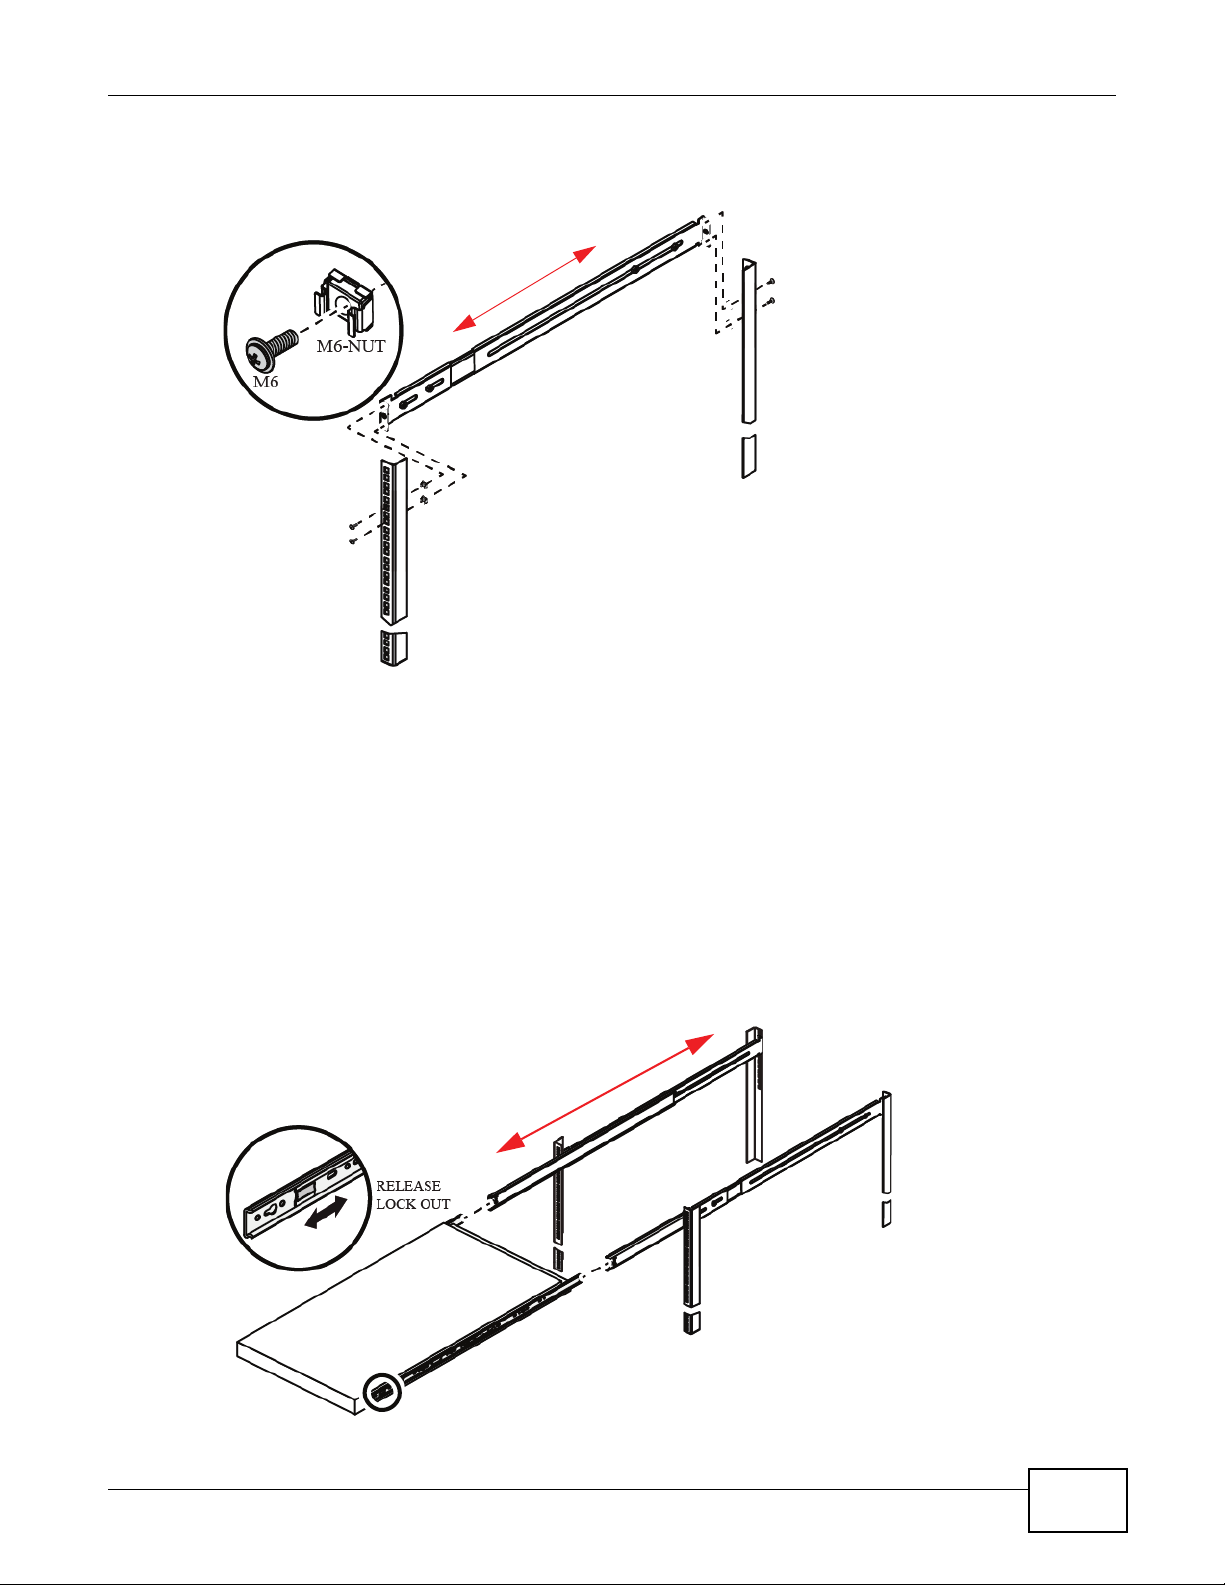
1.2.3 Connect the Inner Rail to the UNS
1 Connect the inner rail to the UNS by latching it onto the screws on the UNS body.
2 Repeat this procedure for the other inner rail on the other side of the UNS.
1.2.4 Connect the Outer Rail to the Rack
Find a space in the rack that is 2U high. The space between two triangles is 1U high.
1 Adjust the length of the outer slide rail to the depth of the rack. The front of the outer rail can slide
out. This is the side that should be at the front of the rack.
4
UNS Series Hardware Installation Guide
Chapter 1 Hardware Installation
1
2
1
2
2 Screw the outer rail onto the side of the rack using the M6 screws and nuts. Repeat for the other
side of the rack.
1.2.5 Insert the UNS into the Rack
It is recommended that two people insert the UNS (with inner railings attached) into the rack.
The inner rail (attached to the UNS) has two locks. Use the inner lock to slide the inner rail into the
outer rail (already attached to the rack).
1 Release the inner lock and slide the UNS with inner rail attached onto the outer rail already fastened
to the rack.
2 Push the inner rail all the way into the outer rail.
UNS Series Hardware Installation Guide
5
Chapter 1 Hardware Installation
3
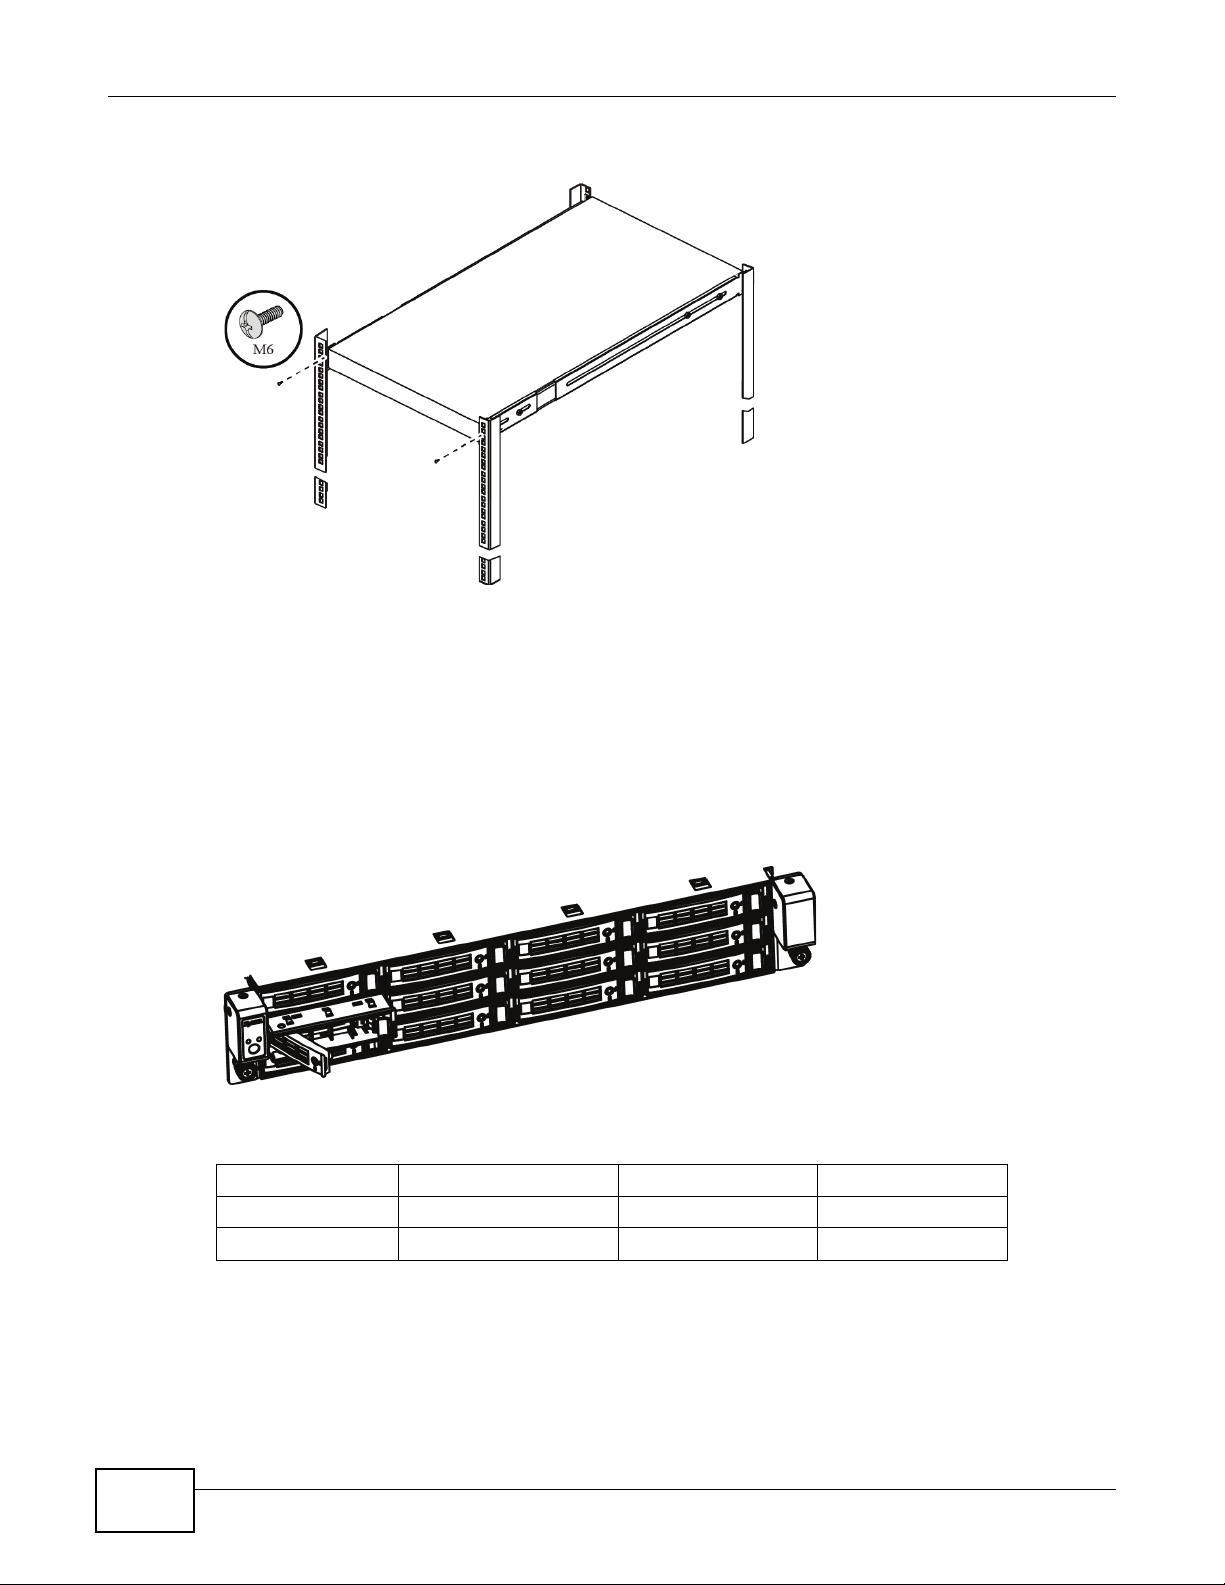
3 Use the screws to fasten the inner rail to the rack.
Note: To remove the UNS from the rack, use the outer lock on the inner rail.
1.3 Insert a Hard Drive
1.3.1 Drive Tray Slot Numbering
The drive trays (with hard drive) can be installed into any slot. T
This is the ordering of the slots
Slot 1 Slot 4 Slot 7 Slot 10
Slot 2 Slot 5 Slot 8 Slot 11
Slot 3 Slot 6 Slot 9 Slot 12
Do the following to remove a hard drive tray from the UNS.
6
UNS Series Hardware Installation Guide
 Loading...