

ZyXEL 2602HWL Setup Manual
Contents
1. 0 Setup Hardware
2. 0 Setup Network
3.0 Setup Wireless
4.0 Test VoIP Account
5.0 Changing Password
1.1 Please ensure that you have the following equipment:
1. ZyXEL 2602HWL
2. Vshaped cable - Green cable (lifeline) and Gray cable (DSL)
note: you need to use double adapter to connect to phone socket
with a fi lter on the green cable.
3. RJ-11 Cable
4. Standard PSTN Telephone
5. Network Card for connection to your PC (not supplied by TPG)
6. Ethernet Cable (blue) for connection to a PC or Hub
7. AC power supply adaptor
8 . Micro Filter
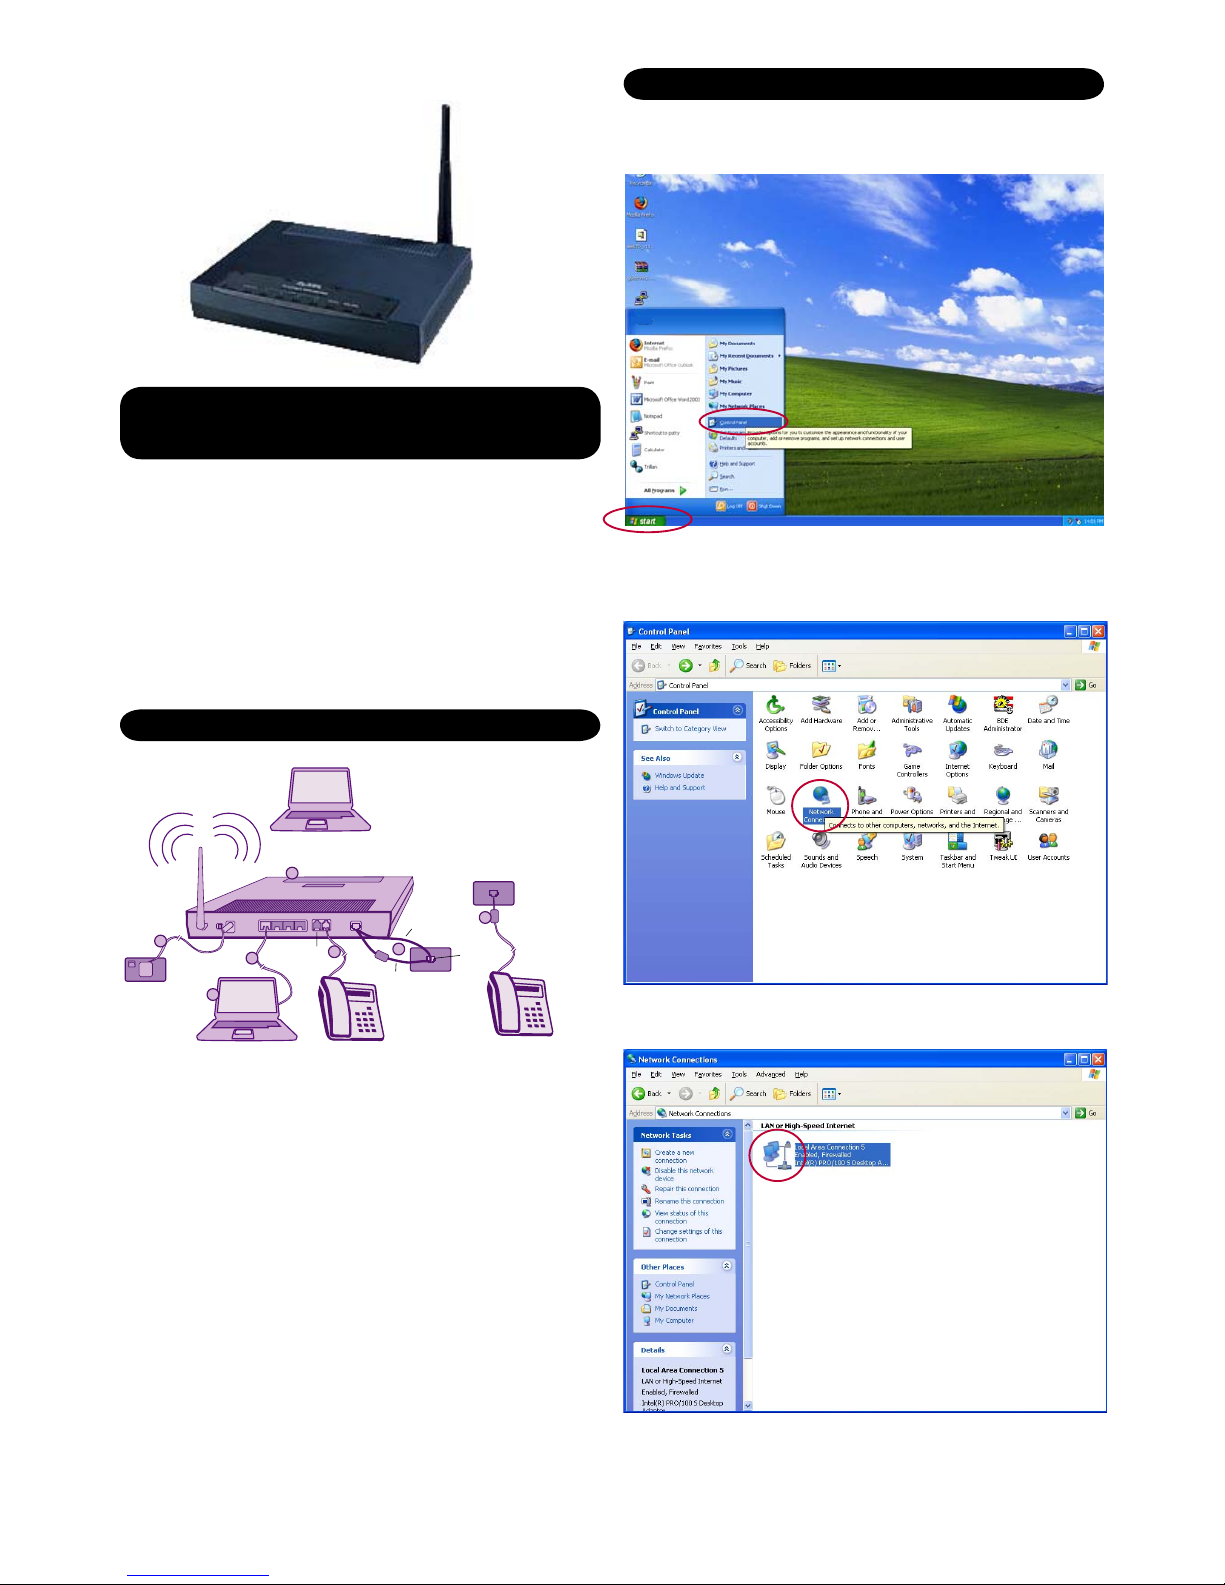
1.2 Please follow the setup diagram above. Please keep in mind
that it is necessary to have a micro fi lter for each device
plugged into a telephone wall socket that is on the same
service number as your ADSL (eg: telephone/answering
machine/fax/PayTV). Your PC should be turned off during this
process.
2.1 Click on the Start button on the bottom left hand corner, and
then choose Control Panel.
2.2 Double click on Network Connections. If there is no icon for
Network Connections, click on Switch to Classic View on
the top left hand corner and then double click on Network
Connections.
2.3 On the Network Connections window double click on Local
Area Connection.
ZyXEL VoIP 2602HWL - Setup guide
1.0 Setup Hardware
2.0 Setup Network
Page 1 of 6
A/C
Adapter
POWER
PHONE1
LINE
PHONE2
1234
DONOT
USE
NOTTO SCALE
1 (ofup to 4)Home Computer(s)
RegularTelephone used
forVoIP out goingcalls
Regular PSTNLandline
Phone Line
WallSocket
Phone Line
WallSocket
PowerPoint
ADSL Filter
RJ-11 Cable
RJ-45 Cable
1.1.
5.5.
6.6.
7.7.
8.8.
3.3.
2.2.
grey line
green line
double
adapter
ADSL-Filter
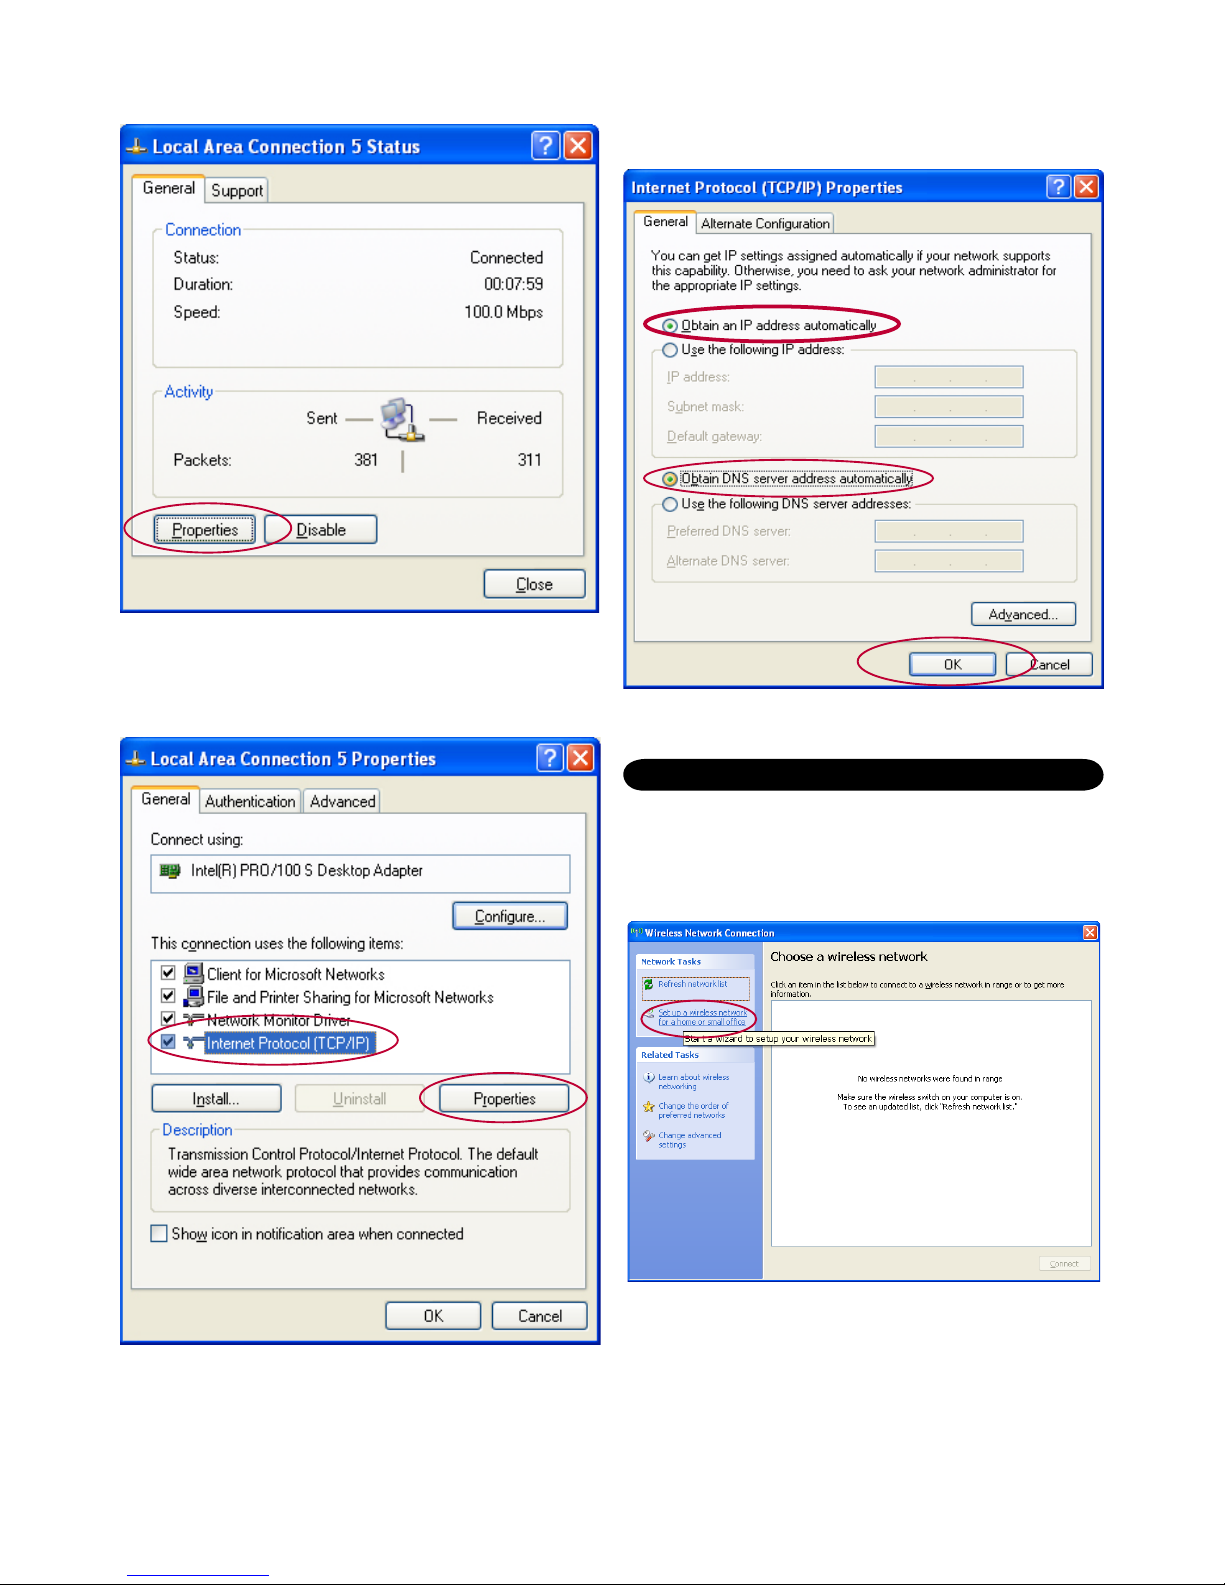
2.4 On the Local Area Connection Status window click on
Properties.
2.5 (a) On the Local Area Connection Properties window click on
Internet Protocol (TCP/IP).
(b) Click Properties.
2.6 (a) On the Internet Protocol (TCP/IP) Properties window click
on Obtain an IP address automatically.
(b) On the Internet Protocol (TCP/IP) Properties window click
on Obtain DNS Service addresses automatically.
(c) Click OK to save the settings.
After you have install your wireless network adapter, you need to run
Wireless Network Installation Wizard (Control Panel - Network
Connection). Please refer to manufacture regarding Installation.
3.1 Choose Setup My Wireless Connection.
Page 2 of 6
3. 0 Setup Wireless
 Loading...