

Page 1
Cleaning instructions
Caution! For a correct cleaning process, please follow the instructions
below. Before getting started, make sure that the machine is nplugged
from mains power.
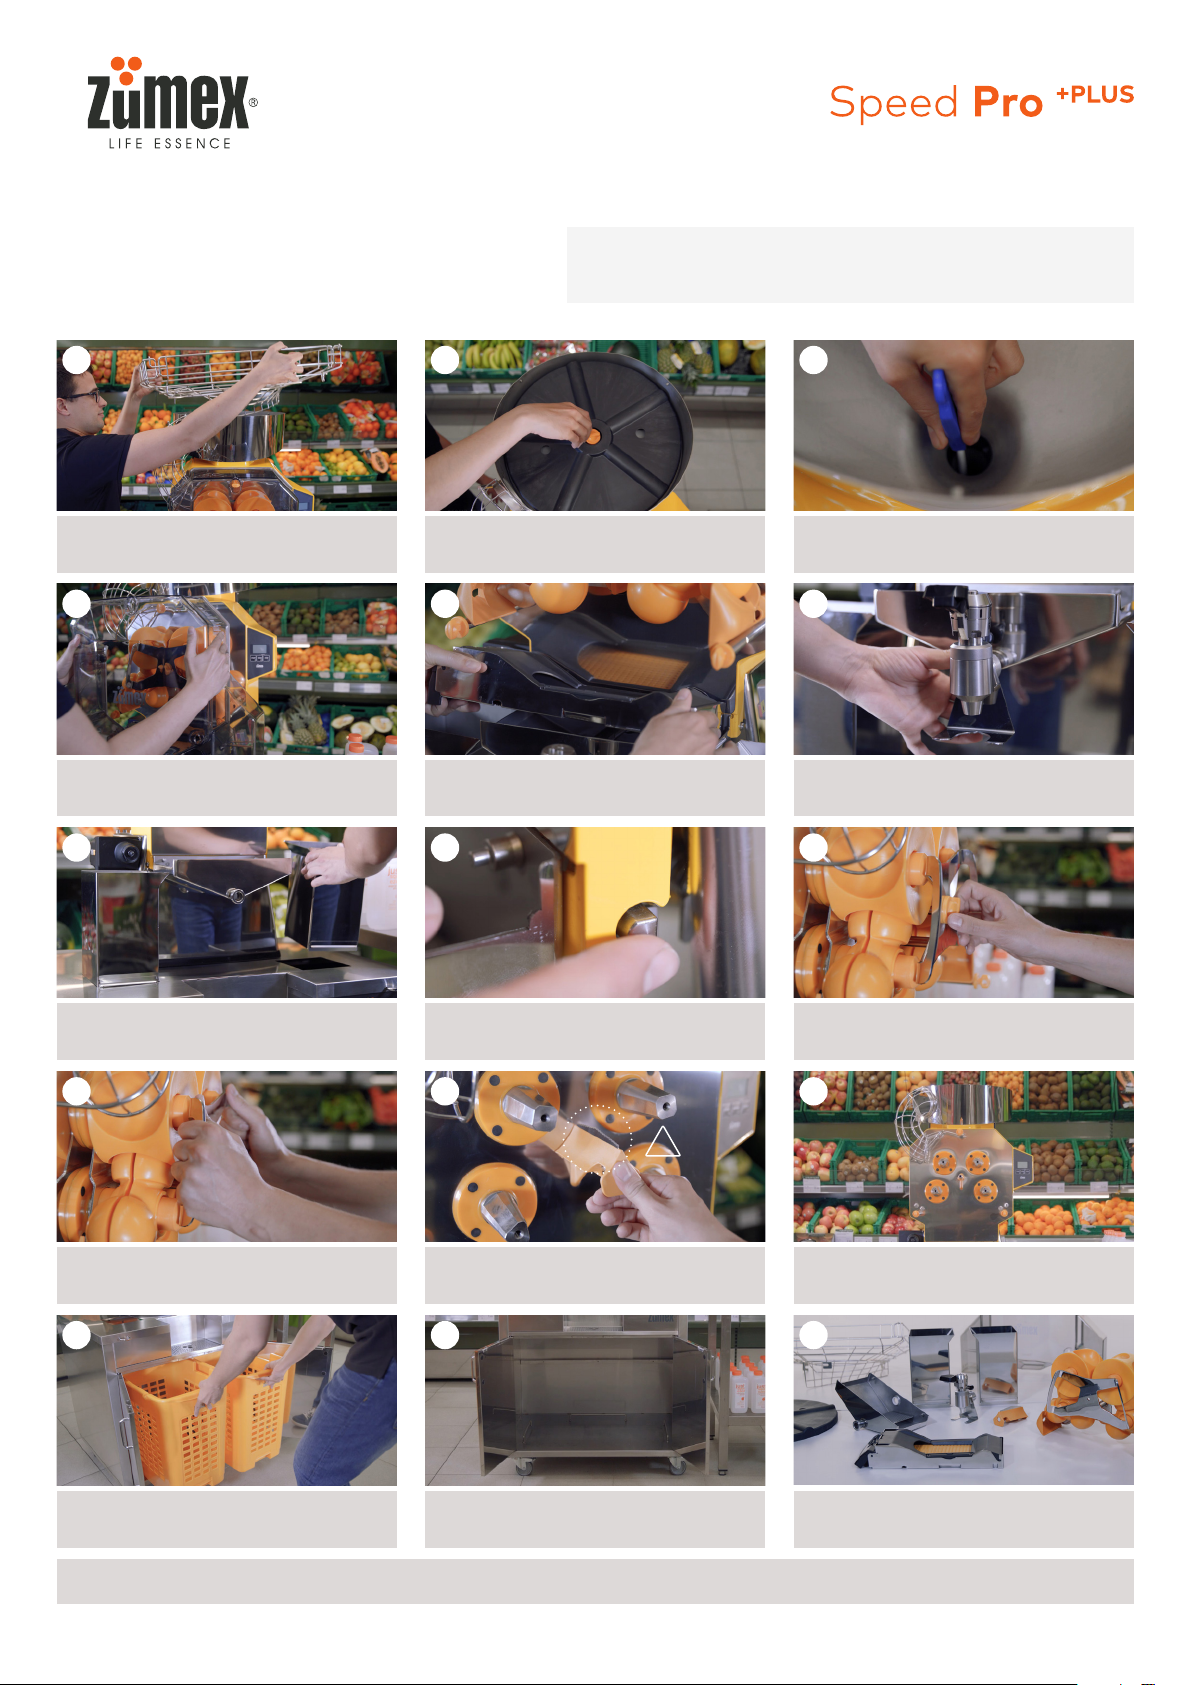
1
Take off the feeder basket.
4
Turn the knobs and take off the front cover
as well as the side outputs.
7
2
Take off the feeder plate by unscrewing the
central knob.
5
Take off the automatic PulpOut System, by
lifting the assembly with the part closest to
you.
8
3
Insert the cleaning brush into the Drain&Clean
hole in the base of the feeder, removing any
residue that you may find in the tube.
6
Remove the 2Services tap by easily unscrewing it.
9
Remove the stainless-steel peel guides.
10
Press the side tabs to remove the bin.
11
!
Remove the Pressing Kit by pulling it
towards you with the stainless-steel handles.
13
Remove the waste trolleys from the base
to empty them.
The cleaning process will be explained in details for each one of the machine’s components below.
Remove the blade by pressing on the centre
and pulling the handle towards you.
Caution! Be careful not to cut yourself.
14
Clean inside the base with a soft sponge.
Unscrew the central knob of the Pressing
Unit.
12
Clean the front part of the machine with a
soft sponge.
15
Once all the parts have been disassembled,
proceed to deep clean the machine.
Zumex Group S.A. Tel. +34 961 301 251. Fax. +34 961 301 255. zumex@zumex.com. Zumex Service Tel: +34 960 800 999. www.zumex.com
Page 2
Cleaning instructions for components
Cleanliness and hygiene warnings
!
It is necessary to clean all parts that come into contact with the juice each day.
All the parts, with the exception of the cover and the tap,
can be put in a dishwasher to clean them.
Cleaning of the extraction area and any of its removable
parts must be done with a sponge soaked in soapy water
suitable for food use. Do not use scouring sponges that
could scratch the surfaces.
It is necessary to sterilise the machine with a disinfectant
product after each cleaning.
Rinse with plenty of water after sterilising, in order to
remove any remaining disinfectant.
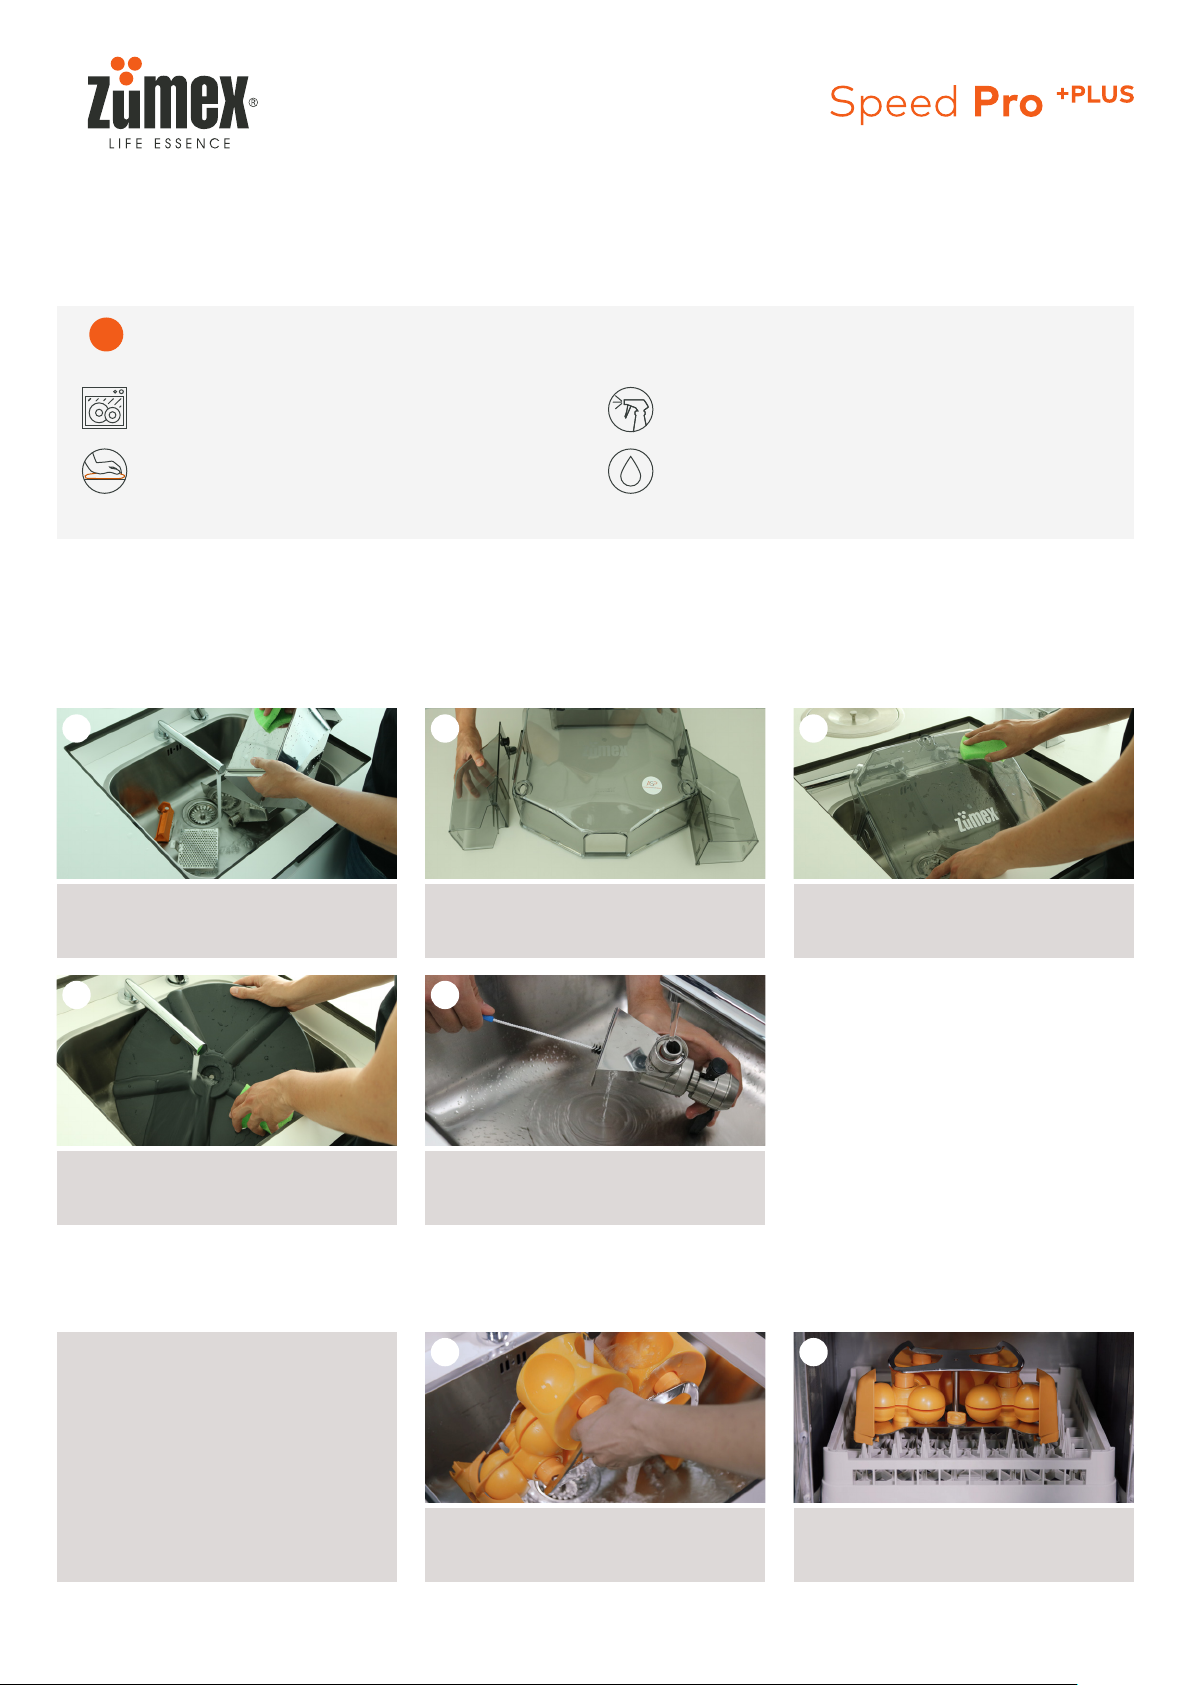
Daily cleaning
Blade, sub-filter, bin, peel guides, feed plate,
front cover, and tap
1 2 3
Clean the blade, sub-filter, bin, and peel
guides piece by piece with soapy water and
then rinse with clean water.
Remove the side outputs from the front
cover.
Clean the side outputs and the central part
of the cover with a soft sponge to avoid damaging the material. Rinse with plenty of
water.
4 5
Clean the feeding plate with a soft sponge
to remove the remaining particles still stuck
to it.
Pressing assembly
To clean quickly,
clean the Pressing Kit assembly
in a single piece under a tap or
in a dishwasher.
Clean the whole tap by letting soapy water
run through the spout. Brush well at both
holes.
1 2
Clean the entire assembly with a sponge
and soap in a single piece under a tap. Move
the juicing heads around to make sure that
they are completely clean.
The assembly can also be washed in
a single piece in a dishwasher.
Zumex Group S.A. Tel. +34 961 301 251. Fax. +34 961 301 255. zumex@zumex.com. Zumex Service Tel: +34 960 800 999. www.zumex.com
Page 3

Cleaning instructions for components
Automatic PulpOut System
1
Rest the PulpOut system on a flat surface
and disassemble the side cover, holding it
from above to remove the ends of the guides.
4
Remove the sweeping belt together with
the other roller and remove both parts.
2
Remove the black upper lid by pushing
upwards on the tabs sticking out.
5
All the parts can be cleaned by hand with a
soft sponge and soapy water.
3
Turn the assembly around and place your
fingers on the sweeping belt by pushing it
outwards to release it.
6
All the parts can also be washed in a dishwasher.
Zumex Group S.A. Tel. +34 961 301 251. Fax. +34 961 301 255. zumex@zumex.com. Zumex Service Tel: +34 960 800 999. www.zumex.com
Page 4

Recommended cleaning instructions
Midday cleaning
Cover, Pressing Kit, and PulpOut System
1
Turn the knobs and take off the front cover
as well as the side outputs.
4
Remove the Pressing Kit by pulling it
towards you with the stainless-steel handles.
7
2
Remove the automatic PulpOut System by
lifting the assembly with the part closest to
you.
5
!
Remove the blade by pressing on the centre
and pulling the handle towards you.
Caution! Be careful not to cut yourself.
3
Unscrew the central knob of the Pressing
Kit.
6
Remove the sub-filter and throw away its
contents.
Replacing parts.
Clean the front area of the machine with a
soft sponge and rinse with a damp paper
towel or water.
Weekly cleaning
2Services Tap
1
Remove the upper part of the tap by twisting the matte thread.
To clean the parts that have
been removed, follow the
general instructions for daily
cleaning.
2
Clean the tube and piston with the brush
supplied with soapy water.
For quick cleaning in the middle
of the day, we recommend
having a kit with spare parts.
This Kit is made up of: a cover,
pressing kit, and PulpOut
system.
Zumex Group S.A. Tel. +34 961 301 251. Fax. +34 961 301 255. zumex@zumex.com. Zumex Service Tel: +34 960 800 999. www.zumex.com
Page 5

Recommended cleaning instructions
Weekly cleaning
Pressing assembly
For deep cleaning, disassemble
the Pressing Kit and clean all
the parts.
Lift the stainless-steel handles
Fortnightly cleaning
Drain&Clean
1
Remove the peel ejectors located on the si-
des at the bottom.
4
Remove the juicing heads.
2
the knob located on the lower central part.
53
Clean all the parts with a sponge and soap,
rinse after with clean water. All the parts
can also be washed in a dishwasher.
1
Insert the cleaning brush into the Drain&Clean
hole in the base of the feeder and remove
any residue that you may find in the drainage tube.
Zumex Group S.A. Tel. +34 961 301 251. Fax. +34 961 301 255. zumex@zumex.com. Zumex Service Tel: +34 960 800 999. www.zumex.com
 Loading...