

Page 1

Z11
User Manual
Page 2

Copyright Statement
Copyright © 2016 Nubia Technology Co., Ltd.
All rights reserved.
No part of this publication may be quoted, reproduced, translated or used in any
form or by any means, electronic or mechanical, including photocopying and
microfilm, without the prior written permission of Nubia Technology Co., Ltd.
Nubia Technology Co., Ltd. reserves the right to make modifications on print
errors or update specifications in this manual without prior notice.
Trademarks
Android is a trademark of Google, Inc.
The product is manufactured under the license of Dolby Laboratory. Dolby and
the double-D symbol are registered trademarks of Dolby Laboratories.
All other trademarks remain the property of their respective owners.
Statement of Third-party Applications
During the installation process of some third-party applications, the issues of
repeated restart or abnormal use of software might be caused by incompatibility
of the third-party applications, rather than the phone itself.
Version 1.0, June 2016
Page 3

Contents
Before you get started ............................................................................ 1
Operation of the Keys 1
Icons on the Status Bar 2
Screen Control 2
Home screen 3
Lock and unlock the screen 5
Calls .......................................................................................................... 6
Make a call 6
Call Settings 7
Answer a call 7
Reject a call 7
End a call 7
Options during a call 8
Call log ...................................................................................................... 9
Voicemail .................................................................................................. 9
Contacts ................................................................................................. 10
Create new contact 10
Search contacts 10
Add to Favorites 10
Contacts group 11
Delete a contact 11
Delete multiple contacts 11
Edit a contact 11
Share a contact 11
Import & export contacts 12
Messaging .............................................................................................. 13
Send a message 13
Receive messages 13
Delete messages 14
Page 4

Message settings 14
Email ....................................................................................................... 15
Set up Email account 15
Check Emails 15
Send an Email 15
Network Applications ............................................................................ 17
Data connection 17
Wi-Fi 17
Tethering & portable hotspot 18
Browser 19
Bluetooth connection 19
GPS ......................................................................................................... 21
Start GPS 21
Connect to the PC.................................................................................. 22
Connected as Media device 22
Connected as Camera device 22
Connected as CD driver 22
Settings................................................................................................... 23
Wireless & Networks 23
Display 24
Notification center 25
Sound 25
Lock screen 26
Fingerprint Identification 26
Security and privacy 27
Accounts 27
Apps 28
Other system settings 28
System update 28
About phone 28
Features .................................................................................................. 29
Page 5

Screen split-up 29
Smart cover 29
Custom bottom key 29
Touch gestures 30
Smart sensing 30
Dual instance 30
Super Screenshot 31
Multimedia .............................................................................................. 32
Camera 32
Camera Family 33
Camcorder 36
Music 38
Video player 38
Gallery 39
TimeManager .......................................................................................... 41
Alarm 41
World Time 41
Stopwatch 41
Timer 4 2
Tools ....................................................................................................... 43
Sound Recorder 43
Backup 43
Calculator 44
Flashlight 44
System update 45
Edge gestures 45
Other ....................................................................................................... 47
My File 47
Calendar 47
NotePad 47
OTG function 48
Page 6

Screen Projection 48
Lock Screen 48
Accelerate 48
Input Method .......................................................................................... 48
Safety Precautions ................................................................................ 49
Using your phone safely 49
Charger care and safety 51
Care & Maintenance 52
Page 7

Before you get started
Thank you for choosing nubia Z11 digital mobile phone, which we’ll simply call
‘phone’ from now on.
Based on Android
appearance and cool user interface, which bring you a brandnew experience.
To guarantee your phone is always in its best condition, please read this manual
carefully before you get started.
And don’t worry if the pictures we use to demonstrate your phone’s functions
look a little different from what you see on its screen. It’s the functions they show
that matter.
If there is any inconsistence caused by function update between user manual
and your phone, please subject to your phone.
Operation of the Keys
Power/Reboot/Lock key
Press and hold: turn on/off the phone.
Press and hold more than 10 seconds: reboot the phone.
Press: turn off and lock the screen, or wake up the screen.
Home key
Press: return to the home screen from any other interface.
Press and hold: open Google search.
Menu key
Press: open the tools menu of the current interface.
Back key
Press: return to the previous menu.
Press and hold: open the list of most recently used applications.
Volume key
Press the upper key to raise the volume and press the lower key to lower the
volume.
TM
platform, the phone adopts a processor with novel
1
Page 8

A
Icons on the Status Bar
Icons Descriptions Icons Descriptions
Battery full
In a call New Email
Missed calls Unread messages
Flight mode enabled Silent mode enabled
Connected to Wi-Fi Vibrate mode enabled
Charging
Wi-Fi hotspots enabled
Music player On
Call forwarding enabled
Headset inserted GPS enabled
Bluetooth On
larm On
SIM/UIM card unavailable
Screen Control
You can control your phone through a series of operations on the screen.
- Touch: touch once on an item on the screen to select it or open whatever you
touch.
- Swipe: slide your fingers on the screen to move through what’s on the screen.
- Press and hold: press your finger down and leave it there for a few seconds to
open a menu specific to what you're doing.
- Drag: drag an item on the screen to perform certain operations.
- Pinch or stretch: In some applications (e.g., Gallery, Browser), touch the screen
with two or more fingers, and then pinch your fingers together on the screen or
stretch them apart to zoom out or in.
2
Page 9

- Rotate: In most screens, rotate your phone sideways to switch the screen from
portrait mode to landscape mode.
Home screen
The home screen appears as the phone is in idle mode. On the home screen,
you can check the status of the phone and access applications.
Extend home screen
The home screen can be extended to exceed the width of the screen to provide
more space for newly added applications, shortcuts, widgets, etc.
Swipe left or right to move to the left or right side of the home screen.
Touch the small dot at the lower part of the screen to directly move to the
corresponding screen.
Self-defined function bar
There are four icons at the bottom of the screen. You can replace these icons
with the applications or shortcuts that you need access most frequently.
1. Press and hold an icon at the function bar and drag it to the area outside the
function bar.
2. Press and hold another icon you want to replace with, and then drag it to an
empty area in the function bar.
Show/hide notification panel
As a new notification icon appears in the notification panel, you can pull down
the notification panel and touch a notification to perform detailed operation.
Swipe up from any place on the screen to hide the notification panel.
Move icons on home screen
Press and hold the icon you want to move, drag it to your desired position on the
screen and release it.
Arrange Icons
1. On the Home screen, press the “Menu” key to select “Arrange Icons”, touch
the icons you want to arrange and move them to the bottom of the screen.
3
Page 10

2. Swipe right to the target screen and touch the icons at the bottom of the
screen to move to the target screen.
3. Touch the icon to add a new screen and touch the icon to set the
current screen as the Home screen.
Remove icons on home screen
To uninstall an application or remove a widget, press and hold the Application or
Widget icon and drag it to the “Remove/Uninstall” icon at the top of the screen.
Note:
The system built-in applications cannot be removed.
Change desktop wallpaper
On the home screen, press the “Menu” key to select “Wallpapers”.
Add widgets
On the home screen, press the “Menu” key to select “Widgets”.
Access recently used applications
1. Press and hold the “Back” key to open a list of most recently used
applications.
2. Touch a thumbnail to enter the relevant application, swipe up on an
application thumbnail to remove the application from the list, and swipe down on
an application thumbnail to lock/unlock the application.
3. Touch the round icon at the lower part of the screen to clear the list.
Note:
The locked applications won’t be removed.
Use shortcuts panel
1. On the home screen or in the process of using an application, pull down the
notification panel to open the shortcuts panel.
2. Swipe down from the shortcuts panel to show more shortcut icons.
shortcut icons to perform the related actions.
4
Touch the
Page 11

Create a folder and add items into the folder
1. On the home screen, press and hold an icon and drag it to another icon on the
screen to create a folder containing these two icons.
2. Press and hold other icons and drag them to the folder.
Lock and unlock the screen
Lock the screen
Press the “Power” key to lock the screen. The phone shall automatically lock the
screen after it’s not used for a while.
Show Music widget
When the screen is locked, press the “Power” key to light up the screen, and
double touch the “Home” key to display the Music widget.
Unlock the screen
1. Press the “Power” key to turn on the LCD.
2. Swipe up from the bottom of the screen to unlock the screen.
Change screen lock method
1. On the home screen, select “Settings” > “Lock screen” > “Screen lock”.
2. Choose the screen lock method.
5
Page 12
Calls
Make a call
Directly make a call
1. On the home screen, touch the icon “Phone” to display the dialing keypad.
2. Touch the numeric buttons to input the telephone number and touch the
button to make a call.
You can also use your Dialer to quick search and call people from your Contacts.
Pay attention to your Dialer, on each button you can find letters. Use this letters
to find your Contact. Start to type name of contact, using Dialer, as when you
type message.
Example: if you need to find and dial Contact with name John, you need dial:
5(JKL) - 6(MNO) - 4(GHI) - 6(MNO).
Note:
If you have inserted two SIM cards, there will be two call icons on the dialing
interface. Select SIM 1 or SIM 2 to make a call.
Make a call from Contacts
On the home screen, touch “Contacts” to select the contact you want to call, and
then touch the icon to make a call.
Make a call from call logs
On the home screen, touch “Phone” to select a call from call logs and touch it to
make a call.
Make an international call
On the home screen, touch “Phone” to display the dialing keypad, press and
hold the “0” key until “+” appears on the screen, and then dial the country code or
region code, city code and phone number.
6
Page 13

Dial a call from messaging
1. On the home screen, touch “Messaging” to open the message interface.
2. Touch the desired message to open it.
3. Touch “Detail” and the icon to call the sender.
Speed dial
On the dialing keypad, press and hold 2-9 key to quickly call the corresponding
contact. Please perform settings according to the prompt.
Call Settings
1. On the home screen, touch “Phone” to display the dialing keypad.
2. Press the “Menu” key to select “Call settings”. You can set the options during a
call. In “More settings” menu, you can set Fixed Dialing Numbers, Call
Forwarding and Call Waiting etc.
Answer a call
The phone shall ring or vibrate (depends on the current mode and settings) upon
an incoming call.
On an incoming call interface, hold the icon and swipe down to answer the
call.
Reject a call
On an incoming call interface, hold the icon and swipe up to reject the call.
If you want to send a text message while rejecting the call, hold the icon “Send
SMS” on the screen and swipe up to select your desire text message.
End a call
Touch the icon to end a call.
7
Page 14

Options during a call
Adjust the volume
In a call, press the volume key to adjust the volume.
Dialpad
Touch “Dialpad” to display the dialing keypad for easy operations.
Speaker
Touch “Hands-free” to enter the hands-free mode and touch it once again to
resume.
Mute
Touch “Mute” to turn off the microphone so the other party is unable to hear your
voice. Touch “Mute” again to turn mute off.
Add a call
Touch “Add a call” to make a conference call.
The function requires the support from the network operator.
Call hold
Touch “Hold” to hold the current call and touch it again to resume the call. This
function requires the support from the network operator.
Call record
Touch “Recorder” to record a call.
Notepad
Touch “Notepad” to quickly record the information in the call.
Contact
Touch “Contact” to enter the list of contacts.
8
Page 15

Call log
1. On the home screen, touch the icon “Phone”.
2. All call logs are displayed on the screen. If you just want to show missed calls
only in Call Log, please touch the Call Log area, pull it down and touch “Show
missed calls only”.
Voicemail
You can set “Forward missed call to voice mail”. If you’ve missed an incoming
call, the caller can leave a voice message.
Note:
Prior to access to voicemail server, you must save voicemail server number.
Please contact your network operator to get the number.
Set voicemail
1. On the home screen, touch “Phone” to display the dialing keypad.
2. Press the “Menu” key to select “Call settings” > “More settings” > “Voicemail
settings”.
3. Touch “Voicemail number” to set.
Listen to voicemail
On the home screen, touch “Phone” to display the dialing keypad, and press and
hold “1” key to listen to voicemail.
9
Page 16

Contacts
In Contacts you can view or manage your contacts.
Create new contact
1. On the home screen, touch “Contacts” and the icon
2. Enter the information of the new contact.
3. Select the storage location.
4. Touch “OK” to save.
Tips :
You can also create new contact from the dialing interface.
.
Search contacts
After you enter “Contacts”, all contacts will be arranged in alphabetical order.
1. Swipe up/down to scroll the list of contacts. You can also quickly scroll the list
by dragging your fingers along the right index.
2. Touch “Search contacts” and enter a contact’s name to quickly find the
contact.
3. Touch a contact’s name to view the details of the contact.
4. When a contact is open, you can touch the icon to dial and touch the
icon to send a message.
Add to Favorites
1. Enter “Contacts” and select the contact you want to add to favorites.
2. Touch the icon “Star”.
3. On the Contacts interface, touch the page “Favorites” to view the contacts you
have added to Favorites.
Note:
You can only add the contacts saved in the phone to Favorites.
10
Page 17

Contacts group
After creating a contacts group, you can send a message or an email to the
whole group.
1. Enter “Contacts” and press the “Menu” key to select “Group”.
2. Touch “Create group”.
3. Enter a name for the group.
4. Touch “Group ringtone” to set the ringtone for the group, and enter a contact’s
name or touch the icon to select from the list of contacts.
5. Touch “OK” to save.
6. Open a group and touch “Send group message” or “Send group Email” at the
bottom of the screen to send a text message or Email to all of the group
members.
Note:
You can only add the contacts saved in the phone to Contacts group.
Delete a contact
1. Enter “Contacts” and touch the contact you want to delete.
2. Select “More” >“Delete”.
Delete multiple contacts
1. On the interface of contacts list, press the “Menu” key to select “Delete
contact”.
2. Select the contacts you want to delete and touch “OK”.
Edit a contact
1. Enter “Contacts” and touch the contact you want to edit.
2. Touch the icon “Edit” at the bottom of the screen.
Share a contact
You can share the information of a contact via Bluetooth, Email, etc.
1. Enter “Contacts” and touch the contact you want to share with others.
11
Page 18

2. Touch the icon “Share”.
Import & export contacts
You can move contacts from the SIM card/SD card to the phone or from the
phone to the SIM card/SD card.
1. Enter “Contacts”.
2. Press the “Menu” key to select “Contacts advanced settings” and choose from
“IMPORT/EXPORT CONTACTS”.
12
Page 19

Messaging
You can send or receive text messages and multimedia messages.
On the home screen, touch “Messaging” to open the message interface.
Send a message
1. On the messaging interface, touch the icon .
2. Type your desired telephone number into the field “To ”.
- Manually input a telephone number or E-mail address. For multiple numbers,
please separate them with a semicolon or comma. As you input an E-mail
address, the phone shall automatically convert it to MMS.
- You can also touch the icon to select your desired telephone number from
Contacts.
3. Type the message text into the field “Type”. Touch the icon to insert a
Photo, Video, Audio or Phrase.
4. Touch the icon to send the message.
Note:
If you have inserted two SIM cards, there will be two sending icons displayed
beside the text. Touch to select SIM 1 or SIM 2 to send a message.
Receive messages
A notification will be shown in the notification panel upon the receipt of a new
message. Touch the notification to view the details or touch “Messaging” to view.
After receiving the messages from Public Service Number, the phone will
automatically categorize these messages into “Messaging” > “Service” for you to
view conveniently.
Press and hold one single message to select Forward, Favorite, Remove, etc.
13
Page 20

Delete messages
On the messaging interface, press and hold a message thread, then select the
message thread(s) you want to delete, and touch “Delete” at the bottom of the
screen.
If you want to delete one single message, touch the message thread to enter,
press and hold the message you want to delete, and touch “Delete” at the
bottom of the screen.
Message settings
On the messaging interface, touch the icon to perform relevant settings.
14
Page 21

Email
You can send or view Email through your personal or corporate Email account.
Please turn on “Mobile data” or connect your phone to a Wi-Fi network before
using the Email function.
Set up Email account
1. On the home screen, touch “Email”.
2. Input your Email address & password and touch “Next”.
3. Perform the operations according to the prompt on the screen.
4. If you cannot set up Email, please touch “Manual setup” and follow the
instructions on the screen. Please consult your Email provider if you are not
aware of the relevant information of your Email account.
After completing the settings of your Email account, you can download your
Email into your phone.
Check Emails
1. If you have set up your Email account, touch “Email” to enter the inbox of this
account.
2. If you want to check Emails of more accounts, select “Settings” > “Add
account.”
3. Touch the account’s name at the top of the screen to select the account you
want to check. Touch “Combined View” to check all of the Email accounts you’ve
set up in one inbox.
4. Scroll the screen and check the Emails.
Send an Email
1. On the Email interface, touch the icon “Compose”.
2. Type the recipient’s address into the field “To ” or touch the icon to
select one recipient from the contacts list.
3. If you need to send by Cc, touch the icon “Add Cc”. If you need to send by Bcc,
select “More” > “Add BCc”.
15
Page 22

4. Touch “Subject” to input the Email subject.
5. Touch the text field to input the text.
6. If you want to attach a file, touch the icon “Attach file”.
7. Touch the icon to send an Email, and select “More” > “Save draft” to save
the Email as draft.
16
Page 23

Network Applications
Data connection
Your phone can connect to the Internet.
Pull down the notification panel to show the Shortcuts panel, and touch “Mobile”
to enable or disable data connection.
On the home screen, you can also select “Settings” > “SIM card settings” >
“More” to perform detailed settings for data connection.
If you have inserted two SIM cards, you can switch between two cards under the
menu “SIM card settings” and perform detailed settings for two SIM cards
respectively.
Note:
You may need to pay for some data service. For details, please consult your
network service provider for details.
If you don’t use mobile network, please promptly disable data connection to
avoid unnecessary charges.
Wi-Fi
Your phone can connect to other network devices through access points or
wireless hotspots.
Enable Wi-Fi
1. On the home screen, select “Settings” > “Wi-Fi”.
2. Touch the switch to turn on Wi-Fi.
3. Your phone shall automatically search available Wi-Fi access points.
4. Select one access point from the list.
- If you’ve selected one open network, your phone will automatically connect to
the network.
- If you’ve selected one secured network, your phone will connect to the network
after you enter the correct password.
17
Page 24

Manually add Wi-Fi
1. On the home screen, select “Settings” > “Wi-Fi”.
2. Touch the switch to turn on Wi-Fi.
3. Touch “Manually add network” to input the network SSID and select the
security type.
4. Touch “OK” to save the settings.
Tethering & portable hotspot
Tethering Wi-Fi hotspot
1. On the home screen, select “Settings” > “Other wireless settings” > “Network
tethering and portable hotspots”.
2. Touch the switch to turn on “Portable Wi-Fi hotspot”.
3. Touch “Set up Wi-Fi hotspot” to edit “Network name”, “Security” and
“Password”.
4. Find your phone’s network name on other devices and connect.
USB tethering
After connecting your phone to the PC through a USB cable, you can use your
phone as Modem to share the phone’s mobile network.
If your operating system is Window 7 or Mac OS X, you can establish network
connection in the following method. If you use other operating system, you need
manually establish a network connection.
1. Connect your phone to the PC through a USB cable,
2. On the home screen, select “Settings” > “Other wireless settings” >Network
tethering and portable hotspots”.
3. Touch the switch to turn on
4. After tethered, you can access to the Internet on your computer through the
phone’s network.
“USB tethering”.
Bluetooth tethering
1. On the home screen, select “Settings” > “Other wireless settings” > “Network
tethering and portable hotspots”.
18
Page 25

2. Touch the tick-box next to “Bluetooth tethering”.
3. Make sure you have turned on Bluetooth and set Visible to all nearby
Bluetooth devices. Scan on other devices and pair with your phone.
Browser
Open browser
1. On the home screen, touch “Browser”.
2. Touch the input field at the top of the screen and input a website address.
3. Touch the icon .
Browser options
When browsing a web page, you can slide to scroll the screen to view other parts
of the web page.
- Pinch your fingers together on the screen or stretch them apart to zoom in or
out. (The function might not be available on some pages.)
- Double touch the screen to return. (The function might not be available on
some pages.)
- Select “More” > “Save to bookmarks” to add the current web page to bookmark,
- Touch “Bookmarks” to open the saved bookmarks,
- Select “More” > “Share” to send the website to others or share with others,
Browser settings
On the browser interface, select “More” > “Settings” to perform settings
according to the prompt on your phone.
Bluetooth connection
Via Bluetooth function, you could exchange data with other nearby Bluetooth
devices.
Since the Bluetooth devices communicate through radio wave, the interference
might exist due to some obstacles or other electronic devices.
19
Page 26

Scan other devices and pair with them
1. On the home screen, select “Settings” > “Bluetooth”.
2. Touch the switch to turn on Bluetooth.
3. Your phone shall automatically scan the nearby Bluetooth devices. Select one
device.
4. Touch “Pair” to pair with two devices. Or input the Bluetooth password and
then touch “OK”.
After the paring request is accepted by other device or the same password is
entered, the pairing is completed.
5. After paired, these two devices can communicate within short distance.
Send data via Bluetooth
You can send music, sound recordings, videos, calendar events, contacts, etc.
via Bluetooth. The operation process depends on what you send.
Below is an example of sending an image via the Bluetooth.
1. On the home screen, touch “Gallery”.
2. Open the image you want to send.
3. Select “Share” > “Bluetooth”.
4. If there is a prompt “Turn on Bluetooth now?” on the screen, touch “Enable”.
5. Select paired device or select one device from the scanning list to pair and
send the file.
Receive data via Bluetooth
1. Turn on Bluetooth and set “Visible to all nearby Bluetooth devices”.
2. Show the notification panel, touch the Bluetooth share notification and touch
“Accept” to receive the file.
3. After the file is received, the phone shall display the notification. If you want to
view the file, show the notification panel and touch the relevant notification.
20
Page 27

GPS
The phone has GPS receiver, so you can start GPS service and use other GPS
functions.
Please try to use GPS function on sunny days. The GPS performance can be
affected by factors such as ceiling, roof or weather. If you want to get the best
performance, please try to move to the area where you can get 360°panoramic
view of the entire sky. The skyscrapers and walls might affect the GPS
performance.
Start GPS
You can receive the position information and search maps only after starting
GPS service.
1. On the home screen, select “Settings” > “Other system settings” > “Location”
2. Touch the switch to turn on “Location”.
3. Select the mode for location services.
21
Page 28

Connect to the PC
Connected as Media device
You can access the files saved in your phone after connecting your phone to
your computer.
1. Connect your phone to your computer through a USB cable.
2. Touch “Transmit files”.
Connected as Camera device
You can access the pictures saved in your phone after your phone is connected
to your computer as Camera device.
1. Connect your phone to your computer through a USB cable.
2. Touch “Transmit photos”.
Connected as CD driver
You can access the driver files in the CD after your phone is connected to your
computer as CD driver.
1. Connect your phone to your computer through a USB cable.
2. Touch “Charge only”.
22
Page 29

Settings
Wireless & Networks
SIM card settings
If you have inserted two SIM cards, your phone shall automatically switch to
Dual Card mode.
1. On the home screen, select “Settings” > “SIM card settings”.
2. Select one SIM card and turn on “Mobile data”. You can also select Network
Type and touch “More” for detailed settings.
Note:
When two SIM cards are inserted, one card is used for data service and the
other card is used for GSM only.
You can make HD voice and video calls after turning on “VOLTE”. This function
requires the support of telecom operators.
Airplane mode
After the Airplane mode is activated, your phone will close all wireless
connections.
1. On the home screen, select “Settings” > “Other wireless settings”.
2. Touch the switch icon next to “Airplane mode”.
Tips :
You can pull down the notification panel to show the Shortcuts panel, and touch
“Airplane mode” to enable or disable the airplane mode.
SMS app
1. On the home screen, select “Settings” > “Other wireless settings”.
2. Touch “SMS app” and select “Hangouts” or “Messaging” to send out a
message.
23
Page 30

VPN
You can create a Virtual Private Network and securely connect to the VPN
through the Internet.
1. On the home screen, select “Settings” > “Other wireless settings” > “VPN”.
2. Set a lock screen PIN or password.
3. Touch “Add”.
4. Enter the VPN server’s name, select the server’s type and enter the server’s
IP address.
5. Tick “PPP encryption” or cancel the tick.
6. Touch “OK”.
7. Touch the connection you have just created, enter the username and
password, and touch “Connect”.
NFC
Allow data exchange when the phone touches another device.
On the home screen, select “Settings” > “Other wireless settings” and touch the
“NFC” button to enable it.
Display
On the home screen, select “Settings” > “Display”. You can change all kinds of
display settings of your phone.
Wallpaper: select the wallpaper on the desktop.
Desk layout: switch the desk layout between 4*5 and 5*5.
Brightness: adjust the screen brightness. If you turn on Automatic brightness,
your phone will adjust the screen brightness automatically according to the
environment.
Breath light: the breath light will light up when you charge or touch your phone.
Screen display preferences: set your preferred screen display effect.
Font size: set the font size for Phone, Messaging, Contacts and Settings.
Auto-rotate screen: the phone automatically rotates according to your screen
direction after you turn it on.
24
Page 31

Notification center
On the home screen, select “Settings” > “Notification Center”.
Applications Notification: manage the apps notifications displayed on the
notification panel.
QS switch definition: manage the shortcuts switch displayed on the notification
panel.
Allow Homestatusbar Dropdown: turn on/off.
Allow Lockscreenstatusbar Dropdown: turn on/off
Show Notification icon: show the icon of apps notification at the status bar after it
is turned on.
Show Netspeed: show the real-time network speed at status bar after it is turned
on.
Show Lockscreen Notification: show the received apps notification on the
lockscreen interface after it is turned on.
Sound
On the home screen, select “Settings” > “Sound” to change different sound
settings of the phone.
Volum e: set the volume for media, ringtone & notifications and alarm.
Silent mode: turn on/off silent mode.
Do not disturb: you can turn on “Do not disturb” at a fixed time. After it is turned
on, you can reject some calls, SMS, activities or reminders. You can perform
detailed settings under “Do not disturb” mode.
Also vibrate for ringing: your phone rings and vibrates upon an incoming call.
Vibrate on touch
touch the keys.
Phone ringtone: set the default incoming call ringtone.
Message alert sound: set the default messaging sound.
Notification sound: set the default notification ringtone.
Other sounds: choose whether or not to turn on Dial pad tone, Screen lock
sound, Touch sound, and Power-on sound.
Dolby ATMOS: provide you complete entertainment experience in videos, audios
and games.
: after the function is turned on, your phone vibrates when you
25
Page 32

Lock screen
Screen lock: select Swipe, Pattern, PIN or password to set the screen lock.
Sleep: adjust the delay before the screen automatically turns off.
Fingerprint Identification
Fingerprint is the most secure key. You can unlock the screen and encrypt apps
through fingerprint identification to increase the safety of your phone.
Fingerprint registration
1. On the home screen, select “Settings” > “Fingerprint Identification”.
2. Touch “Add Fingerprint” to select an unlock method.
3. Press your finger on the fingerprint identification sensor.
4. Release your finger after a while and press your finger on the sensor again.
Use the same finger to repeat this operation till your finger is identified 100%.
5. Touch “Done”.
Fingerprint unlock
1. On the “Fingerprint Identification” interface, turn on “Unlocking handSet”.
2. When the phone is locked, press the “Power” key to light up the screen and
press your finger on the fingerprint identification sensor to unlock your phone.
Wake up Blank Screen
1. On the “Fingerprint Identification” interface, turn on “Wake up Blank Screen”.
2. When the screen is blank, press your finger on the fingerprint identification
sensor to wake up the screen.
Photo
1. On the “Fingerprint Identification” interface, turn on “Photo”.
2. On the camera interface, press any finger on the fingerprint identification
sensor to take photos.
26
Page 33

Super Screenshot
1. On the “Fingerprint Identification” interface, turn on “Super Screenshot”.
2. Press and hold the fingerprint identification sensor to enable Super
Screenshot .
App lock
1. On the “Fingerprint Identification” interface, press “App lock”.
2. Turn on “Fingerprint to unlock app” and set a lock for the corresponding app.
Unlock App through fingerprint
Touch the encrypted app on the home screen, press your finger on the
fingerprint identification sensor and enter the app after your fingerprint is
identified.
Security and privacy
On the home screen, select “Settings” > “Security and Privacy”.
App lock
you need unlock by pattern or fingerprint.
Make passwords visible: show passwords you are entering.
Set up SIM/RUIM card lock: after “Lock SIM card” is enabled, you need enter
PIN when turning on your phone.
Device administrator: view or deactivate the device administrators.
Unknown sources: allow installations of apps from unknown sources.
Trusted credentials: display the trusted CA credentials.
Install from storage: install the encrypted credentials from your SD card.
Clear credentials: clear all credentials.
Help nubia Do Better: we will make statistics for the usage of various product
functions to promote our product and service.
: It is used to encrypt your apps. When you open the encrypted apps,
Accounts
On the home screen, select “Settings” > “Accounts”.
Touch “Add account” to add accounts requiring synchronization.
27
Page 34

Apps
On the home screen, select “Settings” > “Apps”.
You can view and manage the downloaded applications.
Touch one single application to stop or remove it. You can also clear the App
data, cache, and change the storage location of the application.
Other system settings
On the home screen, select “Settings” > “Other system settings”.
Location: turn on GPS positioning.
Language and input methods: set up the menu language, default input method,
etc.
Date and time: set the date and time displayed on your phone.
Battery: turn on Battery percentage, Battery alert & Powersave and view the
battery status.
Memory: view the memory status of your phone.
Storage: view the space of internal storage and OTG storage device
Backup and reset: restore your phone to factory settings and clear all data.
Accessibility:
Turning on “Magnification gestures” and “Large text” can help those with
disabilities use their phone more conveniently.
After turning on “Press keys to take screenshots”, you can press the Power key
and Volume- key at the same time to capture the current screen.
System update
On the home screen, select “Settings” > “System update”.
You can check whether there is the latest software version on the server or not
after your phone is connected to the Internet.
About phone
On the home screen, select “Settings” > “About phone”.
You can view the Cell phone name, Model number, Kernel version, etc.
28
Page 35

Features
Screen split-up
1. On the home screen, select “Settings” > “Features” > “Screen split-up”.
2. Turn on “Screen split-up” to split the screen into two areas. You can handle
different tasks in these two areas.
3. After turning on “Screen split-up”, you can swipe up from the bottom of the
screen to split up the screen.
4. The upper screen shows the homepage of split-screen and the lower screen
shows the applications used in Split-screen mode. Touch an icon to enter its
corresponding application, or drag an icon to another split-screen to start the
application.
5. The screen split-up control bar is located in the middle of the screen. You can
adjust the size of two screens by dragging the control bar up or down.
6. Touch the line in the middle of the control bar to display the following icons.
/ : switch between Self-adaptable and Keep aspect ratio.
7. Press the “Home” key twice to exit the split-screen mode.
Smart cover
If your phone has a smart cover, you can perform relevant settings:
On the home screen, select “Settings” > “Features” > “Smart cover”.
Enable smart cover: turn it on to use the smart cover function on your phone.
Auto unlock: when the screen is locked, you can open the cover to unlock your
screen.
Open and close the cover to answer: if there is an incoming call when the cover
is closed, you can open and close the cover to answer the call.
Custom bottom key
You can define the functions of the three keys at the bottom of the phone.
On the home screen, select “Settings” > “Feature” > “Custom bottom key”, and
select what you prefer according to the prompts on the screen.
29
Page 36

Touch gestures
You can user your gestures to perform fast operations on the screen.
On the home screen, select “Settings” > “Features” > “Touch gestures” to
perform detailed settings.
Palm screen lock
After this function is enabled, cover the screen with your palm to turn off and lock
the screen if the screen is ON.
Tri finger screenshot
After this function is enabled, you can swipe up with three fingers to take a
screenshot.
Tri finger switch app
After this function is enabled, you can swipe left or right with three fingers to
switch among the opened applications.
Smart sensing
With the smart sensing function, you can control your phone with a flip, shake,
etc.
On the home screen, select “Settings” > “Features” > “Smart sensing” to set
these up.
Flip to mute/pause
Flip the phone to mute the ringer, pause the media player or snooze the alarm.
Shake to clear
On the notification bar, shake the phone to clear notifications. On the multitask
interface, shake the phone to clear memory and most recently used applications.
Dual instance
You can duplicate one app into two identical apps and respectively log into two
accounts.
On the home screen, select “Settings” > “Features” > “Dual instance”.
30
Page 37

Super Screenshot
Press and hold the “Power” key and “Vol um e” key to enable Super Screenshot.
On the home screen, select “Settings” > “Features” > “Super Screenshot”.
If you turn on “Screenshot through Fingerprint region”, you can also enable
Super Screenshot by holding the fingerprint region.
Free snapshot
Enter “Free snapshot” by default after you enable Super Screenshot.
1. Click the Graphic tool to make snapshot.
2. Touch “Graffiti” to add mosaic effects or freely smear on the photo.
3. Touch “Save” to save the photo.
Long screenshot
1. Enter “Super screenshot” and touch “Long screenshot”.
2. Touch “Start” to scroll down automatically from the current page; touch “Stop”
to end or automatically complete capturing the screen.
Screen recording
1. Enter “Super screenshot” and touch “Screen recording”.
2.
Touch “Start” to start and touch “Stop” to end.
31
Page 38

Multimedia
Camera
You can take photos with your phone. You can set the photo taken with your
phone as wallpaper, or send to others via MMS, Email.
Note:
Please respect others’ rights and abide by local regulations and customs when
taking photos.
Standard camera
1. On the home screen, touch “Camera” to open the standard camera by default.
- Touch the icon to enter the Settings. You can turn on/off HDR, Grid, Face
detection, etc.
- Touch the icon to switch among Flashlight ON/Flashlight OFF/Auto
Flashlight.
- Touch the icon to open/close “Smart Photo”.
- Touch the icon to switch among 3S/5S/10S/OFF.
- Touch the icon to switch between front camera and back camera.
- Touch the icon to select a kind of special effects.
- Pinch/stretch your fingers on the screen to adjust the focus.
- Touch the position on the screen where you want to focus, and the focus frame
will move to this position.
- You can drag the square focus frame and round metering frame on the screen
respectively; long press to lock the frames.
- Touch the icon beside the metering frame and swipe up/down to adjust
the exposure compensation.
2. Touch the icon to take photos; hold the icon to take continuous
32
Page 39

shots. The photos will be automatically saved.
3. Touch the photo thumbnail in the lower left corner of the screen to view the
If you have opened “Smart Photo” during shooting, you can press and
photo.
hold the photo to view the dynamic effect.
Professional parameter settings
1. Enter “Camera” and swipe left/right to “PRO”.
2. Touch the icon at the right side of the screen to set Shutter speed, White
Balance, ISO and Focus.
3. Touch the icon to take photos.
Tips :
Touch the icon to view the Quick Start Guide to your nubia camera.
Panorama
1. Enter “Camera” and swipe left/right to “PANO”.
2. Touch the icon to slowly move your phone and start shooting, and
touch the icon to end.
Camera Family
Enter “Camera” and swipe left/right to “Camera-Family”.
Multi Exposure
1. In Camera Family, touch “Multi Exposure”.
2. There are various multi-exposure modes at the bottom of the screen. Touch
an icon to select your desired mode.
3. Touch the icon to shoot. You can take photos according to the prompt
on the screen and combine them into one photo.
33
Page 40

Light Painting
Light Painting allows you to shoot the track that light sources are moving through
long-time exposure.
Please use a tripod in a dark environment and use light sources such as
flashlight to draw your desire pattern in the sky.
1. In Camera Family, touch “Light Painting”.
2. Touch the icon to take a photo, observe the effect on the screen and
touch the icon after you are satisfied with the effect.
Electronic Aperture
Electronic aperture is a kind of aperture priority shooting mode, which is used to
adjust the size of the aperture and make the camera automatically adjust its
shutter speed.
It’s suitable for you to shoot a static landscape, night view, still object or
slowly-moving object.
Please use a tripod while taking photos.
1. In Camera Family, touch “Electronic Aperture”.
2. Touch the icon at the right side of the screen to set White Balance, Focus,
Aperture & Compensation.
3. Touch the icon to shoot.
Slow Shutter
Slow shutter is a kind of slow shutter shooting mode, which allows you to adjust
the exposure time.
It is suitable for you to shoot scenes with insufficient light, animated objects such
as human beings, vehicles, rain/snow, misty waves or colorful light track.
1. In Camera Family, touch “Slow Shutter”.
2. Touch the icon at the right side of the screen to set White Balance, ISO, Focus
& Shutter Speed.
3. Touch the icon to shoot.
34
Page 41

Star Track
Star Track allows you to shoot the track that stars are running around through
long-time exposure.
Try to shoot your photos on a clear, starry night and use a tripod in a dark
environment.
1. In Camera Family, touch “Star Track”.
2. Touch the icon at the right side of the screen to set White Balance, ISO, Focus
& Shutter Speed.
3. Touch the icon to start shooting and touch the icon to end
shooting.
Video Maker
1. In Camera Family, touch “Video Maker”.
2. Hold the icon to record a video, release the icon to pause, hold
the icon again to continue recording and touch the icon to end.
3. Select the photos that will appear in the video clip. You can select Original
sound, Silence or add some music for the video clip. You can also set the playing
order and playing speed.
4. After that, touch the icon to save settings.
Trajectory
1. In Camera Family, touch “Trajectory”.
2. Hold your phone steadily and touch the icon to take snapshots.
3. Select at least three photos and touch the icon to save the combined
photo.
DNG
DNG is a kind of mainstream lossless raw image format. It preserves rich image
information recorded by camera and allows for future image processing.
35
Page 42

Meanwhile it provides better image quality.
Storage directory: Internal storage/DCIM/Camera/Dng
Output format: JPG+DNG
1. In Camera Family, touch “DNG”.
2. Touch the icon to shoot.
3. Choose the DNG format file in the storage directory.
4. Open the DNG file using Photoshop’s insert Camera Raw.
5. Perform individual post-processing of each property such as image color.
6. Save the file as required format after adjustment, normally JPG format.
Note:
The DNG format images cannot be temporarily previewed or edited at the mobile
phone end.
Clone
Clone is a kind of funny shooting mode. Clone the moving persons and objects
on the same scene through continuous shooting to create innovative images.
1. In Camera Family, touch “Clone”.
2. Hold your camera still or use a tripod, touch the icon to take the first
photo.
3. Move the objects you want to clone and take 5 shots at most.
4. Touch the icon .
5. Touch “Painter” and “Eraser” and smear on the second photo and the
subsequent photos. The red area covered is the display area after combination.
Camcorder
You can record video clips with your phone.
Note:
Please respect others’ rights and abide by local regulations and customs when
recording video clips.
36
Page 43
1. On the home screen, touch “Camera” and swipe left/right to “VIDEO”.
2. Aim your lens at an object and adjust accordingly.
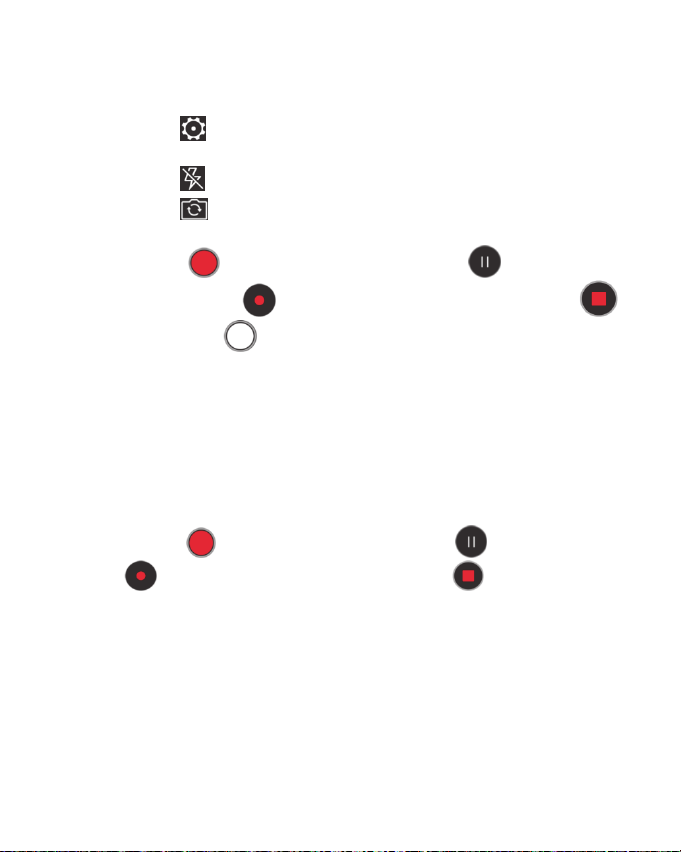
- Touch the icon to set Video quality, Video high frame rate, focus lock
when video recording and Zoom when video recording.
- Touch the icon to switch among Flashlight ON/Flashlight OFF.
- Touch the icon to switch between front camera and back camera.
- You can respectively drag the focus frame and metering frame.
3. Touch the icon to start recording, touch the icon to pause
recording, touch the icon to continue recording and touch the icon
to end. Touch the icon
recording.
4. After video recording, touch the Thumbnails icon at the lower left corner of the
screen to view the video clips you have just recorded.
to take a photo during the process of video
Slow Motion
You can record slow motion video and watch it in slow motion. You can also
create a video partition and play it back in slow motion.
1. Enter “Camera” and swipe left/right to “SLO-MO”.
2. Touch the icon to start shooting, touch the icon to pause, touch
the icon to continue shooting and touch the icon to end.
3. Touch the thumbnail at the lower left corner of the screen to view the video.
4. Touch the icon “Edit”, you can drag the two vertical lines at the upper part of
the screen to adjust the video partition and play it back in slow motion.
Time-lapse photography
With time-lapse photography, you can record the slowly-changing scenes in your
life (such as sunrise, sunset) into a video clip and play it back quickly.
1. Enter “Camera” and swipe left/right to “TIME-LAPSE”.
37
Page 44

2. Touch the icon to start shooting and touch the icon to end.
Music
You can listen to the music saved in your phone through the music player.
Play music
Before playing music, please firstly copy music files into your phone.
On the home screen, touch “Music” to open the music player.
1. If you enter the music player for the first time, select “All Music” > “Scan Music”
to automatically search all music files saved in the phone.
2. Touch a music file to start playing and touch the icon to stop playing.
3. During the process of playing music, you can press the volume key to adjust
the volume.
4. Touch the playing song’s thumbnail to enter one single music player interface.
- Touch the icon to add the current song to Favorites.
- Touch the icon to return to the music playlist.
- Touch the icon Lrc to Display lyrics
- Touch the icon to switch among Random play, Repeat current song and
Repeat all songs.
- Touch the icon to select Delete, Set ringtone etc.
Add playlist
You can create some playlists to manage your music files.
1. On the music interface, select “Playlists” > “Add playlist”.
2. Input a playlist name and touch “Confirm”.
3. Touch “Add Music”, select one music file and touch “Add”.
Video player
With Video player, you can watch the videos saved in your phone.
1. On the home screen, touch “Video” to open the list of videos.
38
Page 45

2. Select one video and touch it to play.
During the process of playing videos, you can touch the screen to stop playing
the video and touch the screen again to continue to play it.
- Touch the icon to enable Picture-in-Picture function. A small suspending
image appears after you touch the icon.
- Touch the icon
- Select > “Snapshot” to capture the current screen.
- Select > “Share” to share the video with your friends.
You can perform the following operations with your fingers:
- Slide your fingers on the screen to the left/right to fast forward/rewind. The time
progress appears at the top of the screen.
- Pinch your fingers together on the screen or stretch them apart to adjust the
display ratio of the screen.
- Swipe up/down to adjust the volume.
/
to Lock/unlock the screen.
Gallery
On the home screen, touch “Gallery” to view all photos and videos in your phone.
You can use video player to play the videos.
View photos
1. Select the album you want to open and touch the photos you want to view.
2. Double touch the photo to zoom in and double touch it again to zoom out.
3. Touch “Edit” to edit the photo.
4. Pinch your fingers together and swipe up or down to delete photos.
Play slideshow
1. Enter “Gallery” > “Camera” to select an album.
2. Press and hold one single photo to display a menu at the bottom of the screen.
Touch to select multiple photos.
3. Select “More” > “Slideshow”.
39
Page 46

Jigsaw
1. Enter “Gallery” > “Camera” to select an album.
2. Press and hold one single photo to display a menu at the bottom of the screen.
Touch to select multiple photos.
3. Select “More” > “Jigsaw”.
40
Page 47

TimeManager
On the home screen, touch “TimeManager” to set Alarm, check World Time, use
Stopwatch and Timer function.
Alarm
Add alarm
1. Select the “Alarms” page and touch “Add alarm”.
2. Perform detailed settings of a new alarm based on your requirements.
3. Touch “OK” to complete the alarm settings.
Turn on/off alarm
On the “Alarms” page, drag the scrollbar to the right/left side to turn on/off the
alarm.
Delete alarm
On the “Alarms” page, press and hold the alarm you want to delete, and touch
“Delete alarm”.
World Time
Add city
1. Select the “World Time” page.
2. Touch “Add city” and select cities based on your requirements. On the “World
Time” page, display the time for different cities.
Delete City
On the “World Time” page, press and hold the city you want to delete, and touch
“Delete”.
Stopwatch
1. Select the “Stopwatch” page.
41
Page 48

2. Touch “Start” to start the stopwatch, touch “Record” to record the current time,
and touch “Pause” touch “Pause” to stop the stopwatch.
3. Touch “Reset” to reset the stopwatch.
Timer
1. Select the “Timer” page.
2. Touch “Custom timer” and swipe up/down to set the countdown time.
3. Touch “Start” to start the countdown.
4. As the countdown time is up, touch “Dismiss” to stop alert.
42
Page 49

Tools
Sound Recorder
Record audio files
On the home screen, select “Tools” > “Sound Recorder” to turn on the sound
recorder.
1. Move the microphone on your phone close to your mouth and touch the icon
to start recording.
2. Touch the icon to stop recording, touch the icon to continue
recording and touch the icon to end.
3. Enter a name for your recording and touch the button “OK” to save it.
4. Touch the name of your recording to play it.
Set a recording file as incoming call ringtone
Press and hold a recording file till the shortcut menu appears, and select the icon
“More”> “Set as ringtone”.
Cut a recording file
Press and hold a recording file till the shortcut menu appears, touch the icon
“Cut”, drag the scrollbar at both ends of the recording file and reserve the
contents between both ends.
Add tag to a recording file
Press and hold a recording file till the shortcut menu appears, touch the icon
“Ta g” to select a tag for the recording file. You can also touch the button “Add tag”
to add your personalized tags.
Backup
On the home screen, select “Tools” > “Backup”.
43
Page 50

Local backup
You can backup your data in your phone storage
1. On the page of “Backup”, touch “Create Local Backup”.
2. Touch to select the data you want to backup.
3. Touch “Start”.
Scheduled backup
1. Touch the icon and touch “Scheduled backup”.
2. Touch the switch to turn on “Scheduled backup”.
3. Touch “Backup time settings” to set the backup time and backup location.
4. Touch “Backup content” to select the backup data.
Calculator
On the home screen, select “Tools” > “Calculator” to perform simple calculations.
Slide your fingers on the screen to the left/right to switch between Simple
calculator and Advanced calculator.
Flashlight
Turn on flashlight
On the home screen, select “Tools” > “Flashlight” to turn on the flashlight.
When your phone is locked, press the “Power” key to light up the screen; press
and hold the “Home” key to directly turn on the flashlight, and swipe up from the
bottom of the screen to keep the flashlight always ON.
Turn off flashlight
On the Flashlight interface, touch the switch button to turn off the flashlight; or
slide down to open the status bar and touch “Close” next to Flashlight.
Enter SOS mode
No matter whether you turn on the flashlight or not, touch “SOS” to enter SOS
mode; at this moment the flashlight shall flash to send out a distress signal.
44
Page 51

System update
On the home screen, select “Tools” > “System update”.
You can check whether there is the latest software version on the server or not
after your phone is connected to the Internet.
You can also obtain software update packages from our official website, copy the
update packages into the root directory of your phone’s internal storage, and
select > “local update” to select the update package.
Note:
1. Please back up your data before updating your software because this could
be risky.
2. Software update consumes a large amount of data flow. Please update your
software under a Wi-Fi network.
3. Please make sure your phone’s battery level is higher than 30% during the
process of software update.
4. Please do not plug in/out the SIM card, SD card or OTG device; and do not
reboot your phone during the process of software update.
Edge gestures
You can operate your phone by using gestures on the left/right side of the
screen.
Select “Tools” > “Edge gestures”.
Double-click the edge
Double click the top edge of the screen to quickly return to the previous
interface.
Swipe up/down from the edge
Slide one finger up or down on the left / right side of the screen to switch
background apps or enable apps.
Swipe repeatedly from edges
Slide one finger up or down on either side of the screen to accelerate your
45
Page 52

phone.
Swipe from both edges
Slide two fingers up or down on both sides of the screen to adjust the screen
brightness.
Hold the edge and swipe inward
Hold one finger on either side of the screen and swipe inward to switch among
the recently used apps.
46
Page 53

Other
My File
You can manage the files (including pictures, music, videos, documents, zips,
APKs and folders) on the phone through File Manager.
Calendar
On the home screen, touch “Calendar” and select Day, Week, Month or Year to
show your calendar.
Create new event
1. On the Calendar interface, touch the icon “Add”.
2. Enter detailed information of the event and touch “Save”.
Edit a event
1. On the Calendar interface, select ”More” > “Agenda list”.
2. Touch the event you want to edit and touch the button “Edit”.
Display and SYNC calendar
1. On the Calendar interface, select “More” > “Settings” > “Calendars to display”.
2. Select the calendars you want to display.
3. Touch “Add account” to synchronize the calendars for other accounts.
NotePad
1. On the home screen, touch “NotePad”.
2. Touch the icon .
3. Enter the text, insert your recording and select an image, touch “More” to mark
with different colors and set the reminder.
4. Touch “Save” after that.
5. On the Notepad page:
Touch a single record to view details.
47
Page 54

Press and hold a single record to select “Delete” or “To p ”.
OTG function
The phone supports OTG function. After connecting your phone with the external
devices (U disk, mouse, keyboard, etc.) through the OTG cable, you can
transmit data between your phone and external devices, and you can also view
& manage the data in the external devices through the application "My File ".
If you want to use the function, please purchase the OTG cable.
Screen Projection
With this application, you can project your phone’s screen to those large wireless
display devices such as TV, Projector (these devices support Wi-Fi Display), or
project your phone’s screen to another nubia phone supporting screen
projection.
Lock Screen
On the home screen, touch the icon “Lock Screen” to lock the screen
immediately.
Accelerate
On the home screen, touch the icon “Accelerate” to clear background apps and
speed up your phone.
Input Method
The phone has the preinstalled Android input method and the TouchPal X input
method.
48
Page 55

Safety Precautions
Using your phone safely
On the road
Using a phone while driving is illegal in many countries. Please follow local laws
and drive safely at all times.
Near sensitive electronics
Don’t use your phone near sensitive electronic equipment – particularly medical
devices such as pacemakers – as it could cause them to malfunction. It can also
interfere with the operation of fire detectors and other automatic-control
equipment.
For more information about how your phone affects pacemakers or other
electronic equipment, please contact the manufacturer or your local distributor.
Your phone may cause interference when used near TVs, radios or automated
office equipment.
While flying
Your phone can cause interference with aircraft equipment, so it’s essential that
you follow airline regulations. If airline personnel ask you to switch off your
phone, or to disable its wireless functions, please do as they say.
In a hospital
Your phone may interfere with the normal operation of medical equipment.
Follow all hospital regulations and turn it off when you’re asked to by posted
warnings or medical staff.
At a gas station
Don’t use your phone at gas stations. In fact, it’s always best to turn it off
whenever you’re near fuels, chemicals or explosives.
49
Page 56

Around water
Keep your phone away from water (or any other liquid). It’s not a waterproof
model.
Making repairs
Never take your phone apart. Please leave that to the professionals.
Unauthorized repairs could break the terms of your warranty.
Broken antenna
Don’t use your phone if the antenna is damaged, as it could cause injury.
Please do not touch or cover the antenna area (the upper part on the back of
your phone) during a conversation to avoid affecting talk quality and consuming
more battery power, which might reduce the talk time and standby time.
Around children
Keep your phone out of children’s reach. It should never be used as a toy.
Original accessories
Only use the original accessories supplied with your phone or those approved by
the manufacturer. Using unapproved accessories may affect performance, void
the warranty, break national regulations on the use of phones, or even cause
injury.
Near explosives
Turn off your phone in or near areas where explosive materials are used. Always
obey local laws and turn off your phone when requested.
Emergency calls
To make an emergency call, your phone must be turned on and in an area where
there’s network coverage. Dial the national emergency number and touch ‘send’.
Explain exactly where you are and don’t hang up until help has arrived.
Working temperature
50
Page 57
The working temperature for the phone is between 0°C and 45°C. Please don’t
use the phone outside the range. Using the phone under too high or too low a
temperature might cause problems.
Eyesight
Please do not use your phone in dim light for a long time to avoid damage to
your eyesight.
For some people, exposure to flashing lights (such as TV) might trigger seizures
or dizziness. If you have a history of seizures or epilepsy, consult a doctor before
playing video games or enabling a flashlight feature on your phone.
Safety information
In order to protect your personal information and prevent disclosure of sensitive
information, please set a phone password and change it from time to time, make
sure to back up important data, back up the data on your phone before disposal
and reset your phone.
Please do not download unknown applications or browse suspected websites in
order to protect your phone from malicious applications and viruses.
At very high volume, prolonged listening to a phone can damage your
hearing.
Charger care and safety
- Only plug into voltages between 110VAC and 220VAC. Using a voltage outside
that range can damage the phone/charger – and cause the battery to leak or
catch fire.
- Never short-circuit the charger – this may cause electrocution, overheating or
damage.
- Don’t charge the phone in direct sunlight or in an area where it’s damp, dusty,
or on a vibrating surface. Charging your phone near – or on – a TV or radio could
interfere with transmission.
51
Page 58

- Don’t use the charger if the power cable is damaged. It may cause a fire or give
someone an electric shock.
- Keep water well away from the charger. If the charger does get splashed by
water, or any other kind of liquid, immediately unplug it to avoid overheating, fire
or electrocution.
- Don’t take the charger apart. It could cause injury, give you an electric shock or
catch fire.
- Never touch any charger, electric cable or socket with wet hands.
- Don’t place heavy objects on the electric cable.
- If the cable is damaged, don’t try to fix it yourself – it could cause a fire or
electrocute you.
- Always unplug the charger before you clean it.
- When unplugging the charger, hold the plug itself, rather than pulling on the
cable. A damaged cable can cause electrocution or fire.
Care & Maintenance
The following advice will help you to keep your phone looking good and
performing well…
- Use a soft dry cloth to clean your phone and charger. Don’t use liquids such as
alcohol, dilution agents or benzene.
- From time-to-time, clean the socket where the charger cable connects to the
phone. Dust tends to gather there. This will ensure a good connection.
- Don’t use needles, pen points or other sharp objects on the keypad or screen.
- Don’t use your phone with wet hands – it could injure you and damage the
phone.
- Don’t use your phone in a dusty or dirty environment.
- Keep your phone away from extremes of heat – like radiators or ovens. It may
explode if it gets too hot.
- If your phone gets wet and the color of the label on it changes, the warranty will
be void, even if the warranty period hasn’t expired.
- If there’s anything wrong with the phone, battery, charger, or any accessory,
please send them to your nearest service center for inspection.
52
 Loading...