

Zesto 800 Installation Manual
OWNER'S , SERVICE & INSTRUCTION
MANUAL
SNEVOKCEDCIRTCELE
MANUAL# 0605
008X208
SLEDOM
SS209,209XSS309,309
SS2021,2021XSS3021,3021
SS2051,2051XSS3051,3051
IMPORTANT INSTRUCTIONS FOR OVEN
INSTALLATION, OPERATION AND MAINTENANCE
FOOD EQUIPMENT MANUFACTURING INC.
MANUFACTURIER D'EQUIPEMENT EN ALIMENTATION INC.
6450 HUTCHISON, MONTREAL, QUEBEC, H2V 4C8 TEL(514)278-4621 FAX(514)278-4622
e-mail: info@zesto.ca www.zesto.ca
1
MANUAL# 0605
NOTICE
A permanently connected appliance provided with casters
or wheels on all legs of the appliance shall be provided with
a means for securing the appliance to the building structure
to limit the movement of the appliance so that stress is not
transmitted to the electrical supply conduit complying
with either UL 197 or ISBN 0-7629-0856-4
‘’WARNING – Risk of Electric Shock – Appliance must be secured to
building structure. See Installation Instructions’’
IMPORTANT FOR YOUR SAFETY
Improper installation, adjustment, service or maintenance can cause
property damage, injury or death. Read the installation, operating and
maintenance instructions thoroughly before installing this equipment.
FOR YOUR SAFETY
liquids in the vicinity of this or any other appliance.
CAUTION
Electical disconect breaker should be installed on
each oven section with a minimum 3mm spaced
contact. Disconect the power supply before any
Do not store or use gasoline or flammable vapors or
CAUTION
Risk of electric shock. Do Not Obstruct Access
to this Panelboard. No Storage in this Area
repairs or maintainance work is perfomed on oven.
IN THE EVENT OF A POWER F AILURE DO NOT ATTEMPT
TO OPERATE THIS DEVICE. SHUT OFF POWER.
2
MANUAL# 0605
SAVE THESE INSTRUCTIONS FOR FUTURE USE
GENERAL: Read these instructions and keep them for future reference. Before installing the oven, consult your
local building authority and obtain a building permit if necessary . Do not modify or alter the construction of the oven
or any of its components. Install the oven as described in these instructions. Use only genuine components.
Failure to do so will void the Certification approvals and the warranty of this oven.
PURCHASER’S RESPONSIBILITY
1. To see that the electric services for the oven are installed on site in accordance with the manufacturer’s
specifications.
2. To unload, uncrate and install the oven in its proper location in accordance with the Installation Operation
Manual.
3. To see that the electric services are connected properly by a qualified licensed ELECTRICIEN or installer of
your choice. All such connections must be in accordance with applicable Code requirements.
4. Do not attempt to operate the oven until connection of utility service has been fully inspected by a qualified
technician.
INSTALLATION CODES AND ST ANDARDS:
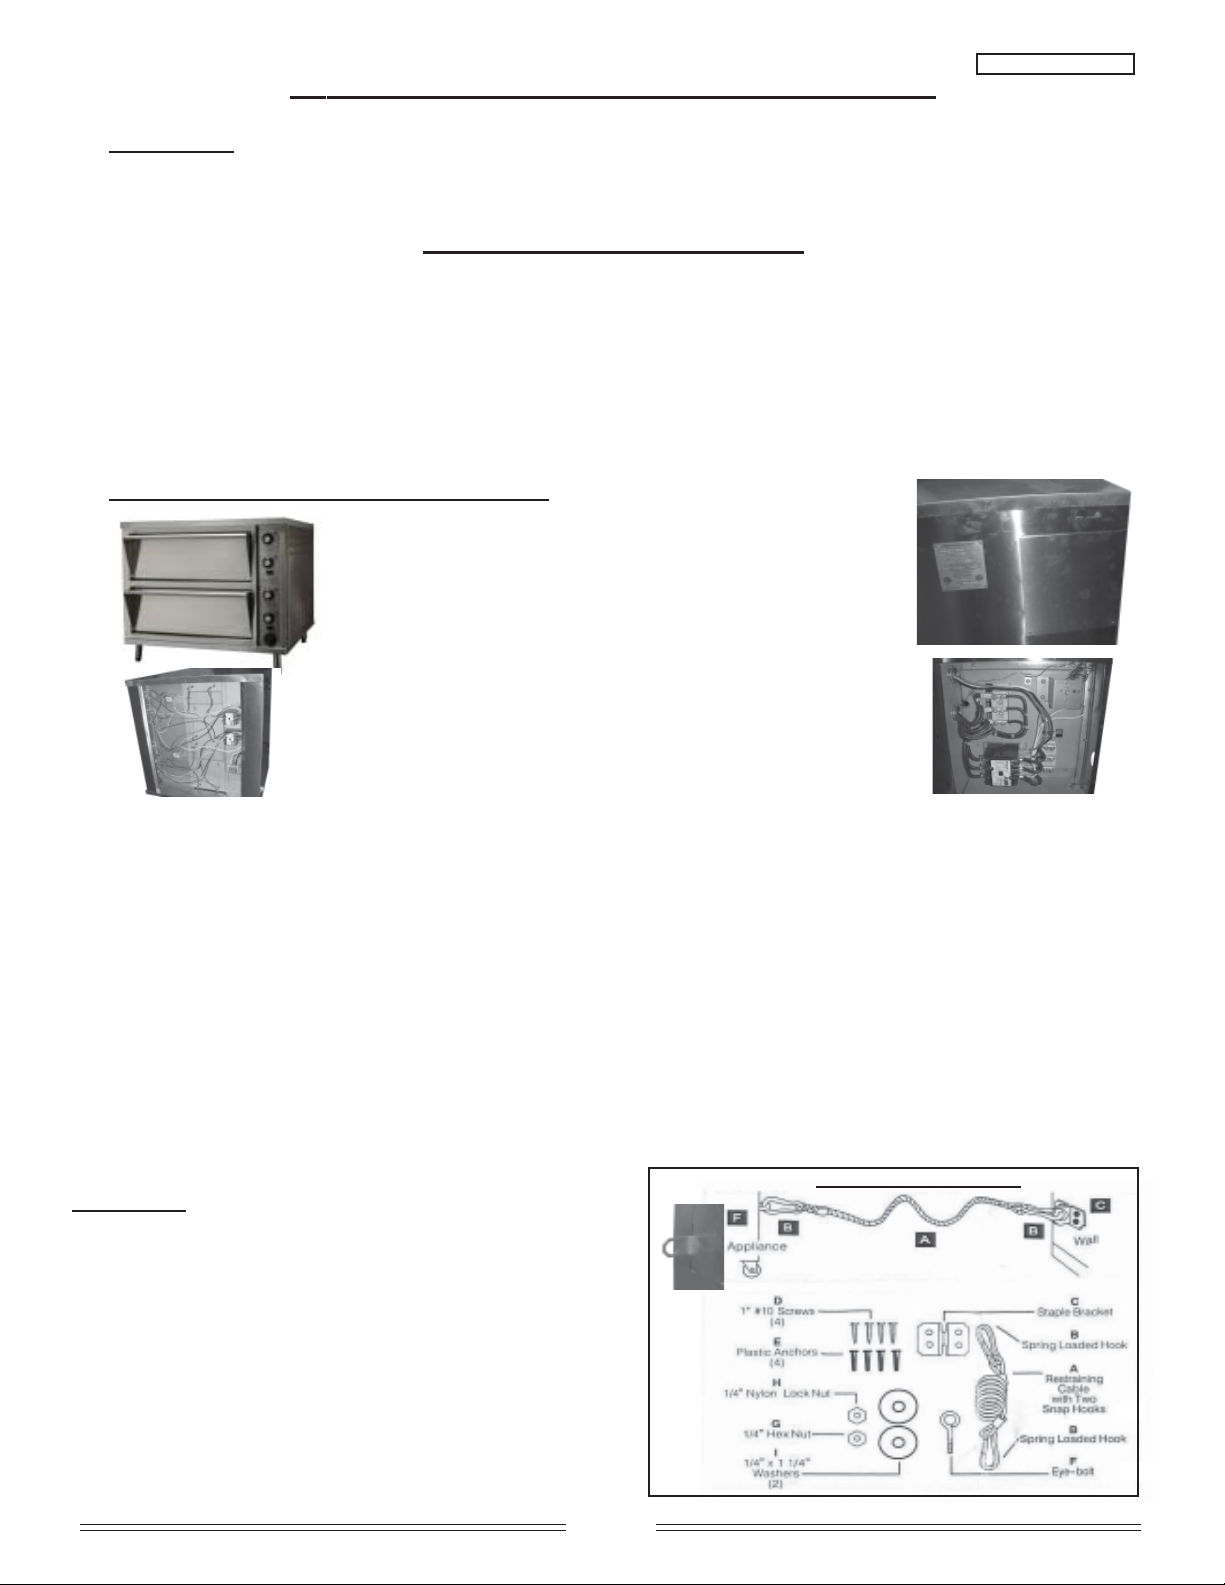
Input voltage and phasing must
match the units voltage & phasing.
Remove left side panel and enter the
service line through the rear of the
unit and connect to the teminal block.
800 Series 900, 1200 & 1500 Series
This oven complies with the National Standards of Canada and the United States and is certified by the Warnock
Hersey Inchcape Services and ETL under the standards of UL 197 (ANSI / UL STD.) and National Sanitation
Foundation (NSF). In Canada the installation must conform with local codes or, in the absence of local codes, with
the current CAN/CGA B149 Inst allation Code.
The oven, when installed, must be electrically grounded in accordance with the local codes or , in the absence of
local codes, with the current Canadian Electrical Code: CSA C22.2 Number 109. In the United States, installations
must conform with local codes, with the current UL 197 (ANSI / UL STD.).
The oven, when installed, must be electrically grounded in accordance with local codes or , in the absence of local
codes, with the American National Electrical Code; ANSI/NFPA 70 (latest edition).
A seperate electrical switch box must be provided for each oven. For stacked ovens, each oven
must be considered as a seperate oven.
RESTRAINING DEVICE KIT
WARNING: WHEN OPTIONAL CASTERS OR
WHEELS ARE SUPPLIED THEY COME WITH A
RESTRAINING DEVICE KIT AND MUST BE
INST ALLED AS ILLUSTRA TED.
SECUREL Y FASTEN (C) ST APLE BRACKET
TO W ALL. ATT ACH (B) SPRING LOADED
HOOKS TO (C) AND (F). THE APPLIANCE SHALL
BE INST ALLED USING FLEXIBLE CONDUIT.
Adequate means must be provided to limit the movement
of the appliance without depending on or transmitting
stress to the electrical conduit
3
MANUAL# 0605
WARNING:
* INST ALLA TION AND REPAIR SHOULD BE DONE BY A QUALIFIED SERVICE PERSON. THE
APPLIANCE SHOULD BE INSPECTED BEFORE USE AND A T LEAST ANNUALLY BY A
QUALIFIED SERVICE TECHNICIAN.
* DO NOT MODIFY THIS APPLIANCE.
WARNING: * DO NOT MODIFY THIS APPLIANCE.
* DO NOT BLOCK THE AIR REGISTERS ON THE OVEN AS THIS WILL CAUSE THE OVEN TO 0VERHEAT.
WARNING: DO NOT USE THIS APPLIANCE IF ITS CONTROL HAS BEEN UNDER W ATER. IMMEDIA TELY CALL A
QUALIFIED SERVICE TECHNICIAN TO INSPECT THE APPLIANCE AND TO REPLACE ANY P ART OF THE
COMPONENTS WHICH HAS BEEN UNDER WATER.
INSTALLATION
RECEIVING: Immediatly after receiving the oven, check for possible shipping damages. If this oven is found to be
damaged, save the packaging material and contact the carrier within 15 days of delivery. Prior to installation, verify that the
type of gas (natural or propane) agree with the specifications on the oven data plate, located on right exterior side panel.
Do not use the door or the handle to lift oven.
LOCATION: Verify that the doors and access routes into kitchen area are checked for clearance. (When crate is turned
on its side, the oven will pass through a 864mm [34"] door opening). The equipment area
must be kept free and clear of combustibles. Maintain clearances from combustible or
noncombustible construction of at least 76mm (3") from the side and 76mm (3") from the back of the
oven. The installation location must allow adequate clearances for servicing and proper operation.
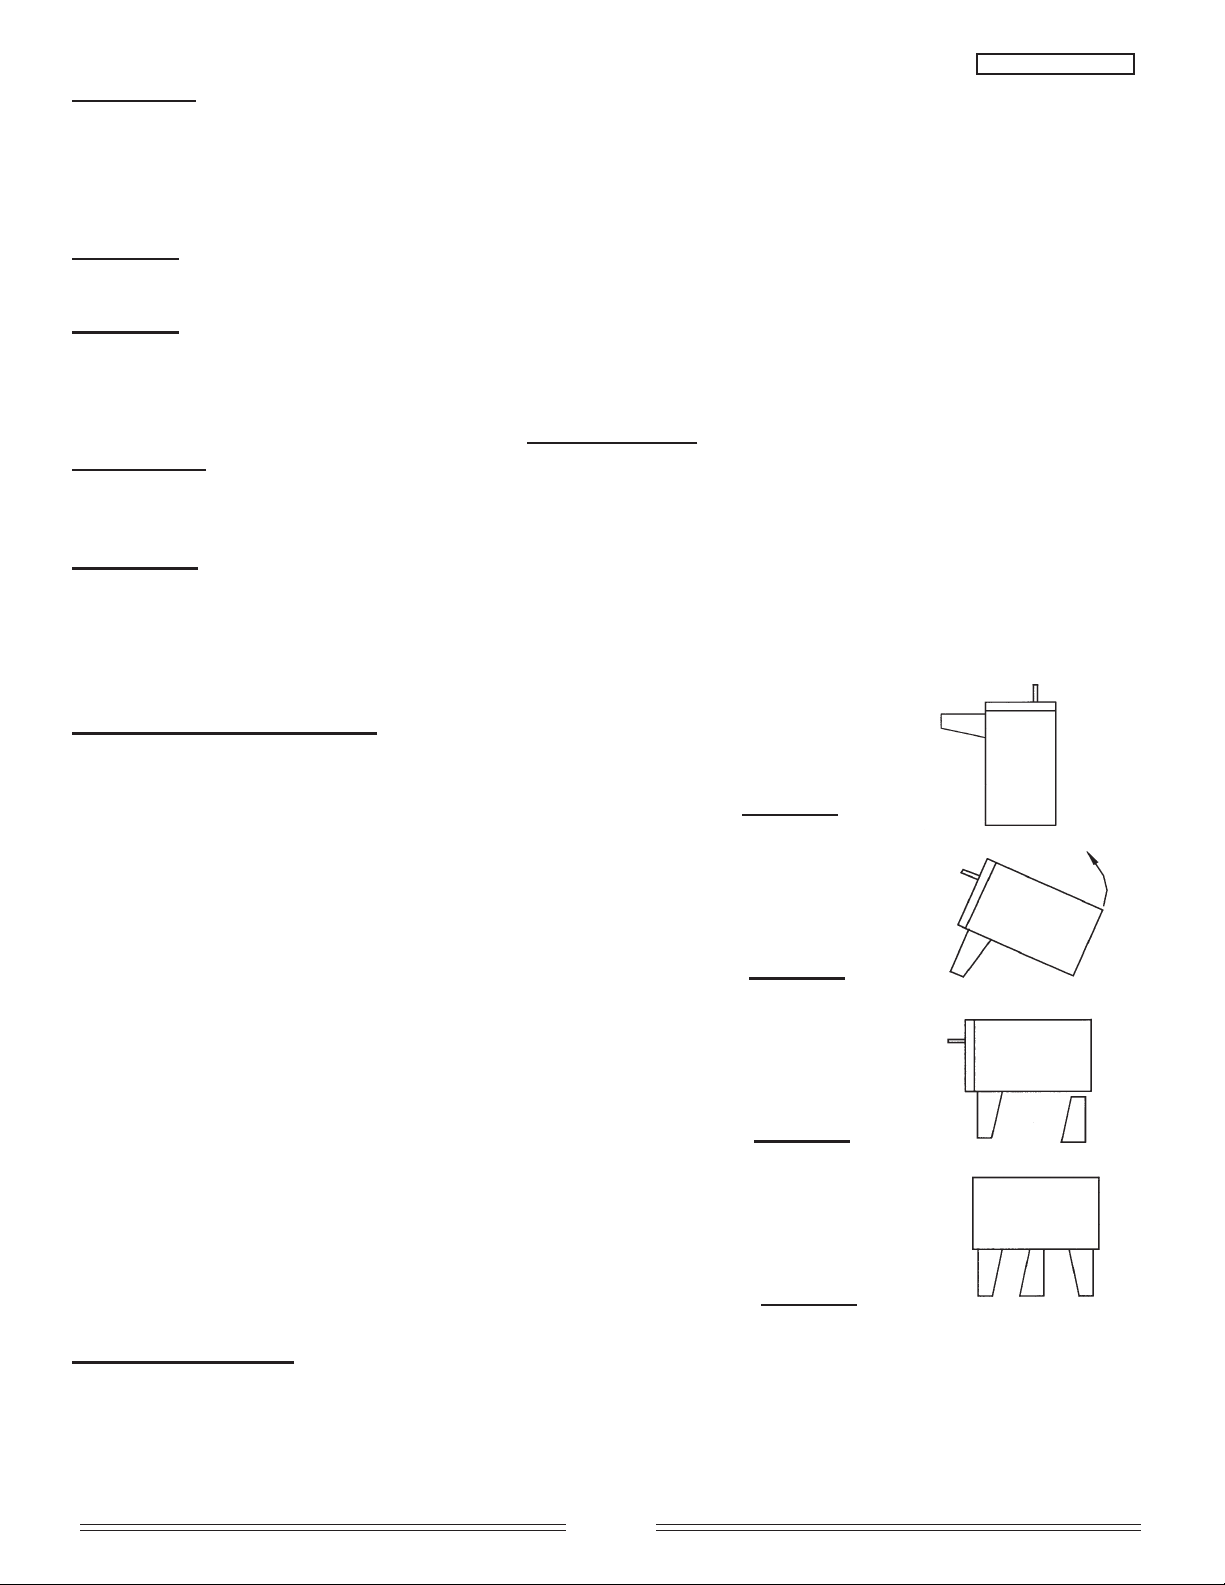
INSTALLING BASIC OVEN:
1) Tilt oven on back side and fasten front legs to oven.
STEP #1
2) Tilt oven forward on front legs and lift from back
until oven is resting on front legs.
STEP #2
3) Place one of the remaining legs upside down so that large
end of leg is resting on floor and place under back
center of oven. STEP #3
4) Attach the remaining leg and then lift the oven slightly removing
the leg that was used as a brace, turn right side up, and install.
When legs are securely fastened place oven. STEP #4
STACKING OVENS: Lift and place oven on top of bottom one.
No fasteners are required, the weight of the oven will keep it in place.
4
 Loading...