

Page 1

EN
User manual 2
ES
Manual de instrucciones 16
Dishwasher
Lavavajillas
ZSF2430
Page 2

Contents
Safety information _ _ _ _ _ _ _ _ _ _ _ _ _ _ _ _ _ _ 2
Control panel _ _ _ _ _ _ _ _ _ _ _ _ _ _ _ _ _ _ _ _ 3
Washing programmes _ _ _ _ _ _ _ _ _ _ _ _ _ _ _ _ 4
Use of the appliance _ _ _ _ _ _ _ _ _ _ _ _ _ _ _ _ _ 5
Setting the water softener _ _ _ _ _ _ _ _ _ _ _ _ _ _ 5
Use of dishwasher salt _ _ _ _ _ _ _ _ _ _ _ _ _ _ _ _ 6
Use of rinse aid _ _ _ _ _ _ _ _ _ _ _ _ _ _ _ _ _ _ _ 6
Loading cutlery and dishes _ _ _ _ _ _ _ _ _ _ _ _ _ 7
Use of detergent _ _ _ _ _ _ _ _ _ _ _ _ _ _ _ _ _ _ _ 8
Safety information
For your safety and correct operation of the appli-
ance, read this manual carefully before installation
and use. Always keep these instructions with the appliance even if you move or sell it. Users must fully know the
operation and safety features of the appliance.
Correct use
• The appliance is designed exclusively for domestic
use.
• Only use the appliance to clean household utensils that
are applicable for dishwashers.
• Do not put solvents in the appliance. Risk of explosion.
• Put the knives and all items with sharp points in the
cutlery basket with their points down. If not, put in a
horizontal position in the main basket.
• Use only branded products for dishwashers (detergent,
salt, rinse aid).
• If you open the door while the appliance is in opera-
tion, hot steam can escape. Risk of skin burns.
• Do not remove dishes from the dishwasher before the
end of the washing programme.
• When the washing programme is completed, discon-
nect the mains plug from the mains socket and close
the water tap.
• Only an authorised service engineer can repair this ap-
pliance. Use only original spare parts.
• Do not do repairs yourself to prevent injury and dam-
age to the appliance. Always contact your local Service
Force Centre.
Setting and starting a washing programme _ _ _ _ _ _ 9
Care and cleaning _ _ _ _ _ _ _ _ _ _ _ _ _ _ _ _ _ 10
What to do if… _ _ _ _ _ _ _ _ _ _ _ _ _ _ _ _ _ _ 11
Technical data _ _ _ _ _ _ _ _ _ _ _ _ _ _ _ _ _ _ _ 13
Environment concerns _ _ _ _ _ _ _ _ _ _ _ _ _ _ _ 13
Installation _ _ _ _ _ _ _ _ _ _ _ _ _ _ _ _ _ _ _ _ 13
Water connection _ _ _ _ _ _ _ _ _ _ _ _ _ _ _ _ _ 14
Electrical connection _ _ _ _ _ _ _ _ _ _ _ _ _ _ _ _ 15
Subject to change without notice
General safety
• Persons (including children) with reduced physical
sensory, mental capabilities or lack of experience and
knowledge must not use the appliance. They must have
supervision or instruction for the operation of the appliance by a person responsible for their safety.
• Obey the safety instructions from the manufacturer of
the dishwasher detergent to prevent burns to eyes,
mouth and throat.
• Do not drink the water from the dishwasher. Detergent
residues can stay in your appliance.
• Always close the door when you do not use the appliance to prevent injury and not to stumble over the open
door.
• Do not sit or stand on the open door.
Child safety
• Only adults can use this appliance. Children must get
supervision to make sure that they do not play with the
appliance.
• Keep all the packaging away from children. There is a
risk of suffocation.
• Keep all detergents in a safe area. Do not let children
touch the detergents.
• Keep children away from the appliance when the door
is open.
Installation
• Make sure that the appliance is not damaged because
of transport. Do not connect a damaged appliance. If
necessary, contact the supplier.
• Remove all packaging before first use.
2
Page 3

• A qualified and competent person must do the electrical installation.
• A qualified and competent person must do the plumbing installation.
• Do not change the specifications or modify this product. Risk of injury and damage to the appliance.
• Do not use the appliance:
– if the mains cable or water hoses are damaged,
Control panel
1 Programme knob
2 Start/cancel button /(Cancel)
3 Delay start button
4 Indicator lights
5 On/off indicator light
– if the control panel, worktop or plinth area are dam-
aged, that you can get access to the inner side of the
appliance.
Contact your local Service Force Centre.
• Do not drill into the sides of the appliance to prevent
damage to hydraulic and electrical components.
Warning! Carefully obey the instructions for
electrical and water connections.
5 4
1 2 3
Indicator lights
Comes on when the washing phase or the rinsing phase operates.
Comes on when the drying phase operates.
Comes on when the washing programme is completed. Auxiliary functions:
• Level of the water softener.
• An alarm if the appliance has a malfunction.
Comes on when it is necessary to fill the salt container. Refer to 'Use of dishwasher salt'.
After you fill the container, the salt indicator light can continue to stay on for some hours. This does not have
1)
an unwanted effect on the operation of the appliance.
1) When the salt container is empty, the related indicator light does not come on while a washing programme operates.
Delay start button
Use the delay start button to delay the start of the washing
programme with an interval of 3 hours. Refer to the chapter 'Setting and starting a washing programme'.
Programme knob and on/off indicator light
• To set a washing programme, turn the programme
knob clockwise or anticlockwise. The programme
3
Page 4

marker on the programme knob must agree with one of
the washing programmes on the control panel.
– The on/off indicator light comes on (position ON).
• To set the appliance to the off position, turn the programme knob until the programme marker agrees with
the on/off indicator light.
– The on/off indicator light goes off (position OFF).
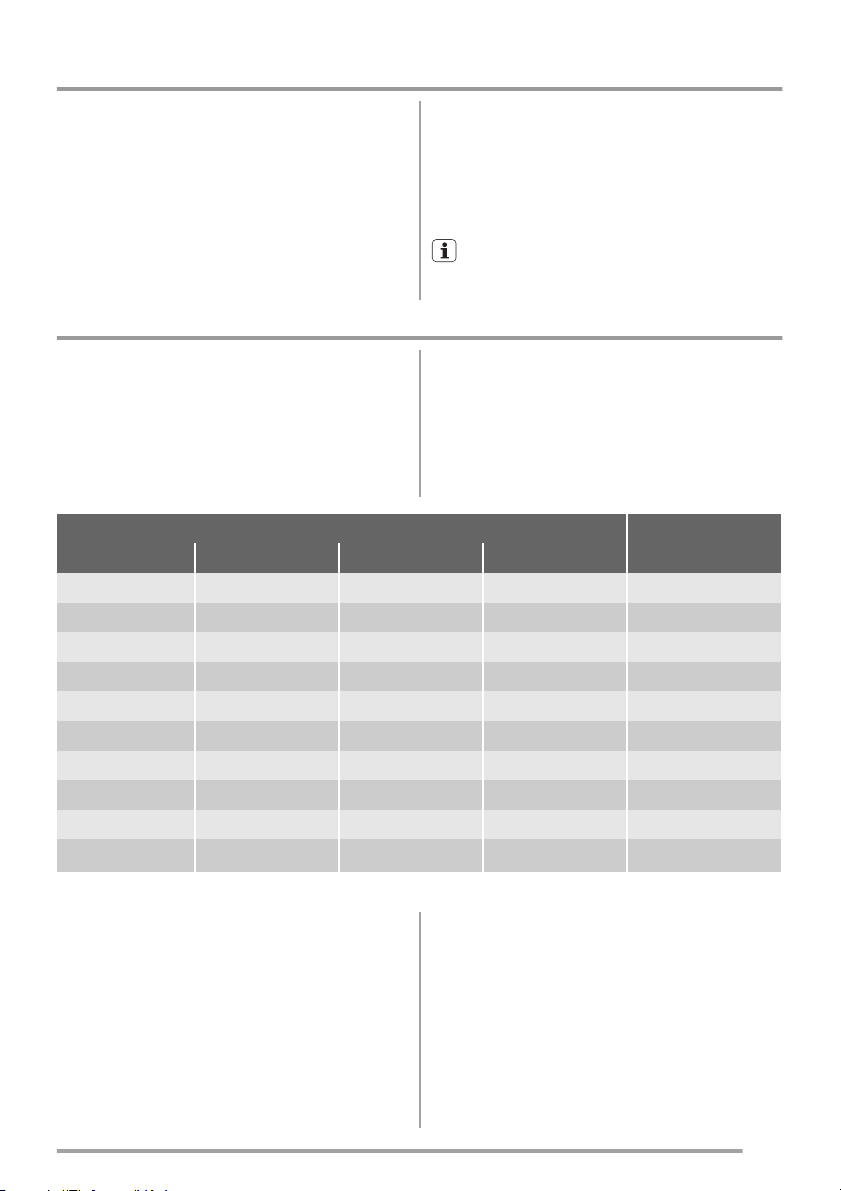
Washing programmes
Washing programmes
Programme Degree of soil Type of load Programme description
Heavy soil Crockery, cutlery, pots
and pans
Normal soil Crockery and cutlery Prewash
1)
1) Test programme for test institutes. Please refer to separate leaflet supplied, for test data.
Normal soil Crockery and cutlery Prewash
Normal or light soil Crockery and cutlery Main wash up to 50°C
Normal or light soil Delicate crockery and
glassware
Prewash
Main wash up to 70°C
2 intermediate rinses
Final rinse
Drying
Main wash up to 65°C
1 intermediate rinse
Final rinse
Drying
Main wash up to 55°C
1 intermediate rinse
Final rinse
Drying
1 intermediate rinse
Final rinse
Main wash up to 40°C
1 intermediate rinse
Final rinse
Consumption values
Programme Duration (in minutes) Energy (in kWh) Water (in litres)
117 1,15 9
94 0,80 7
157 0,63 7
36 0,4 6
31 0,35 6
The pressure and temperature of the water, the variations of power supply and the quantity of dishes
can change these values.
4
Page 5
Use of the appliance
Refer to the following instructions for each step of procedure:
1. Make a check if the water softener level is correct for
the water hardness in your area. If necessary set the
water softener.
2. Fill the salt container with dishwasher salt.
3. Fill the rinse aid dispenser with rinse aid.
4. Load cutlery and dishes into the dishwasher.
5. Set the correct washing programme for the type of
load and soil.
6. Fill the detergent dispenser with the correct quantity
of detergent.
7. Start the washing programme.
If you use detergent tablets, refer to the chapter 'Use
of detergent'.
Setting the water softener
The water softener removes minerals and salts from the
water supply. Minerals and salts can have bad effect on
the operation of the appliance.
Water hardness is measured in equivalent scales:
• German degrees (dH°).
• French degrees (°TH).
Water hardness
°dH mmol/l °TH Clarke
>24 >4.2 >40 > 29 10
22- 24 3,9- 4,2 39- 40 27- 29 9
20- 22 3,5- 3,9 35- 39 25- 27 8
18- 20 3,2- 3,5 32- 35 23- 25 7
16- 18 2,8- 3,2 28- 32 20- 23 6
13- 16 2,3- 2,8 23- 28 17-20 5
10- 13 1,8- 2,3 18- 23 13- 17 4
7- 10 1,2- 1,8 12- 18 9- 13 3
4- 7 0.7- 1,2 7- 12 5- 9 2
< 4 < 0.7 < 7 < 5
1) No use of salt required.
• mmol/l (millimol per litre - international unit for the
hardness of water).
• Clarke.
Adjust the water softener to the water hardness in your
area. If necessary, contact your local water authority.
Water hardness setting
1)
1
Electronic adjustment
The water softener is set at the factory at level 5.
1. Press and hold the start/cancel button. Turn the programme knob clockwise until the programme marker
agrees with the first washing programme on the control panel.
2. Release the start/cancel button when the on/off indicator light and the start/cancel indicator light start to
flash.
– At the same time, the end indicator light flashes to
show the level of the water softener.
Example:
5 flashes, pause, 5 flashes, pause, etc... = level 5
3. Press the start/cancel button one time to increase the
water softener level by one step.
5
Page 6
The end indicator light shows the new level. 4. Turn the programme knob to the off position to save
the operation.
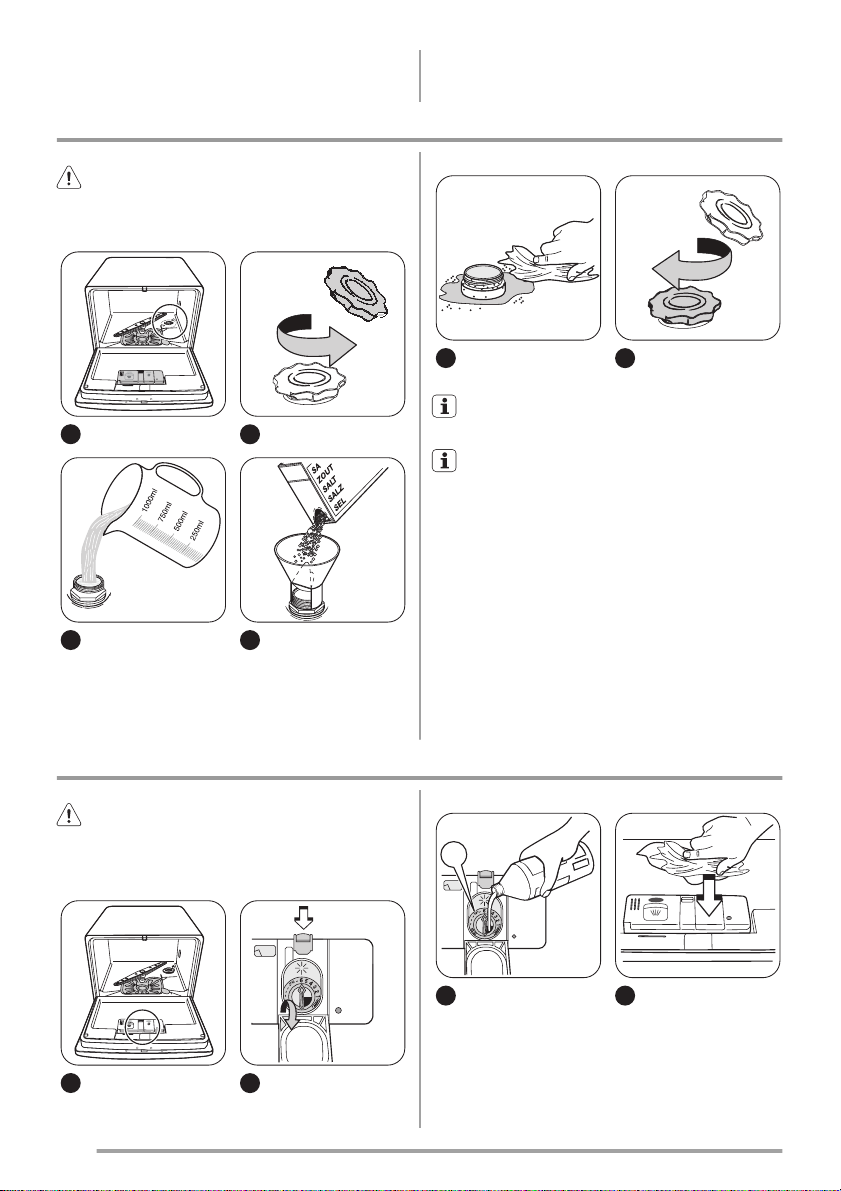
Use of dishwasher salt
Caution! Only use dishwashers salt. Types of salt
that are not applicable for dishwashers cause
damage to the water softener.
1 2
3
Fill the salt container with
1 litre of water (only the
first operation).
4
Use of rinse aid
Caution! Only use branded rinse aid for
dishwashers.
Do these steps to fill the rinse aid dispenser:
5
It is normal that water overflows from the salt container when you fill it with salt.
Make sure that there is no grain of salt outer of the
salt compartment. Salt which stays on the tank for a
while drills the tank. It is recommended to start a washing
programme immediately after you fill the salt container.
This prevents of corrosion because of spilled salt.
When you set electronically the water softener to level 1,
the salt indicator light does not stay on.
max
6
1 2
6
3
4
Page 7

Fill when the rinse aid indicator (B) becomes clear.
B
5
Caution! Do not fill the rinse aid dispenser with
other products (e.g. dishwasher cleaning agent,
liquid detergent). There is a risk of damage to the
appliance.
Loading cutlery and dishes
Adjusting the dosage of rinse aid
The rinse aid dial is set at
the factory at position 1.
To increase or decrease
the dosage refer to 'What
to do if...'
Helpful hints and tips
Caution! Only use the appliance for household
utensils that are applicable for dishwashers.
Do not use the appliance to clean objects that can absorb
water (sponges, household cloths, etc.).
• Before you load cutlery and dishes, do these steps:
– Remove all food remainings and debris.
– Make burnt, remaining food in pans soft.
• While you load cutlery and dishes, do these steps:
– Load hollow items (e.g. cups, glasses and pans)
with the opening down.
– Make sure that water does not collect in the contain-
er or in a deep base.
– Make sure that cutlery and dishes do not lie inside
one another.
– Make sure that cutlery and dishes do not cover oth-
er cutlery and dishes.
– Make sure that glasses do not touch other glasses.
– Put small objects in the cutlery basket.
• Plastic items and pans with non-stick coatings can
keep water droplets.
• Plastic items do not dry as well as porcelain and steel
items.
• Put light items in the main basket. Make sure that the
items do not move.
Caution! Make sure that the spray arm can move
freely before you start a washing programme.
Primary basket
Arrange the
deep dishes and
large lids
around the edge
of the basket.
Arrange the
items to let water touch all
1
Arrange items on and below the cup
racks. For longer items fold the cup
racks up.
surfaces.
Cutlery basket
Warning! Do not put long-bladed knives in a vertical position to prevent injury.
Arrange long and/or sharp items of cutlery horizontally in
the primary basket. Be careful with sharp items such as
knives.
7
Page 8

1
Use the cutlery basket for:
• forks and spoons with
the handles down.
• knives with the handles
up.
2
Use the cutlery grid. If the
dimensions of the cutlery
prevent use of the cutlery
grid, remove it.
Use of detergent
Only use detergents (powder, liquid or tablet) that
are applicable for dishwashers.
Follow the data on the packaging:
• Dosage recommended by the manufacturer.
• Storage recommendations.
The instructions on the packaging usually refer to large
dishwashers (12 settings).
Do not use more than the correct quantity of detergent to save an environment.
A
3
Fill the detergent dispenser
(A) with detergent.
B
4
If you use a washing programme with prewash
phase, put more detergent
in the prewash detergent
compartment (B).
A
1
2
5
6
Use of detergent tablets
Put the detergent tablet in the detergent dispenser (A).
Detergent tablets contain:
• detergent
8
Page 9

•rinse aid
• other cleaning agents.
Do these steps to use detergent tablets:
1. Make sure that the detergent tablets are applicable for
your water hardness. Refer to the instructions from
the manufacturer.
2. Set the lowest levels of water hardness and rinse aid
dosage.
It is not necessary to fill the salt container and the
rinse aid dispenser.
Do these steps when the drying results are not
satisfactory:
1. Fill the rinse aid dispenser with rinse aid.
Setting and starting a washing programme
2. Set the rinse aid dosage to position 2.
Do these steps to use the detergent powder again:
1. Fill the salt container and the rinse aid dispenser.
2. Set the water softener to the highest level.
3. Do a washing programme without dishes.
4. Adjust the water softener. Refer to the chapter 'Setting
the water softener'.
5. Adjust the rinse aid dosage.
Different brands of detergent dissolve in different
times. Some detergent tablets do not have the best
cleaning results during short washing programmes. Use
long washing programmes when you use detergent tablets
to fully remove the detergent.
Do these steps to set and start a washing programme:
1. Close the door.
2. Turn the programme knob to set the washing programme. Refer to the chapter 'Washing programmes'.
– The on/off indicator light comes on.
– The phase indicator light for the washing pro-
gramme starts to flash.
3. Press the start/cancel button.
– The washing programme starts automatically.
– The start/cancel indicator light comes on.
– When the programme starts, only the phase in
progress indicator light stays on.
When the washing programme operates, you cannot
change the programme. Cancel the washing pro-
gramme.
Warning! Only interrupt or cancel a washing
programme if necessary.
Caution! Open the door carefully. Hot steam can
come free.
Cancelling a washing programme
• Press and hold the start/cancel button for approximate-
ly 5 seconds.
– The start/cancel indicator light goes off.
– The phase indicator lights starts to flash.
The washing programme is cancelled.
At this time you can do these steps:
1. Switch off the appliance.
2. Set a new washing programme.
Fill the detergent dispenser with detergent before you
set a new washing programme.
Interrupting a washing programme
Open the door.
• The programme stops.
Close the door.
• The programme continues from the point of interruption.
Setting and starting a washing programme with
delay start
1. Set a washing programme.
2. Press the delay start button.
– The delay start indicator light comes on.
3. Press the start/cancel button.
– The countdown of the delay start starts.
– The phase indicator lights go off.
When the countdown is completed, the washing programme automatically starts.
• The delay start indicator light goes off.
• The phase indicator light comes on.
Do not open the door during the countdown to pre-
vent interruption of the countdown. When you close
the door again, the countdown continues from the point of
interruption.
9
Page 10

Cancelling a delay start:
1. Press and hold the start/cancel button for approximately 5 seconds.
– The start/cancel indicator light and delay start in-
dicator light go off.
– The phase indicator lights start to flash.
2. Press the start/cancel button to start the washing programme.
Care and cleaning
End of the washing programme
Switch off the appliance in these conditions:
• The appliance stops automatically.
• The end indicator light comes on.
For better drying results, keep the door ajar for some minutes before you remove the dishes.
Let the dishes cool down before you remove them from
the appliance. Hot dishes are easily damaged.
Warning! Switch the appliance off before you clean
the filters.
Cleaning the filters
Important! Do not use the appliance without the filters.
Make sure that the installation of the filters is correct.
Incorrect installation will cause unsatisfactory washing
results and damage to the appliance.
1
2
Remove the filters A and B
from the bottom of the appliance.
2
1
1
2
5
Put the filters back. Turn
A
the microfilter clockwise
to lock it.
Cleaning the spray arm
B
Regularly examine the spray arm. Remove remaining food
from the holes in the spray arm.
Do these steps to remove and to put the spray arm back:
10
1
3
4
Fully clean the filters below running water.
2
Page 11

3
External cleaning
Clean the external surfaces of the appliance and control
panel with a damp soft cloth. Only use neutral detergents.
Do not use abrasive products, scouring pads or solvents
(acetone, trichloroethylene etc...).
Frost precautions
Caution! Do not install the appliance where the
temperature is below 0 °C. The manufacturer is not
responsible for damage because of frost.
What to do if…
If not possible, empty the appliance and close the door.
Disconnect the water inlet hose and remove water from the
water inlet hose.
Long periods of non-operation
Do these steps when you do not use the appliance for a
long period:
1. Disconnect the mains plug from the mains socket.
2. Close the water tap.
3. Keep the door open to prevent unpleasant smells.
4. Keep the inner side of the appliance clean (filters especially).
The appliance does not start or stops during operation.
If there is a fault, first try to find a solution to the problem
yourself. If you cannot find a solution to the problem
yourself, contact the Service Force Centre.
Fault code and malfunction Possible cause and solution
• continuous flash of the start/cancel indicator light
• 1 flash of the end indicator light
The dishwasher does not fill with water
• continuous flash of the start/cancel indicator light
• 2 flashes of the end indicator light
The dishwasher will not drain
• The water tap is blocked or furred with limescale.
Clean the water tap.
• The water tap is closed.
Open the water tap.
• The filter in the water inlet hose is blocked.
Clean the filter.
• The connection of the water inlet hose is not correct. The hose can be
kinked or squashed.
Make sure that the connection is correct.
• There is a blockage in the sink spigot.
Clean the sink spigot.
• The connection of the water drain hose is not correct. The hose can
be kinked or squashed.
Make sure that the connection is correct.
Caution! Switch off the appliance before you do the
below suggested corrective actions.
11
Page 12

Fault code and malfunction Possible cause and solution
• the drain pump operates continuously
• Close the water tap and contact your local Service Force Centre.
• all indicators lights on the control panel
go off
The anti-flood device operates
The programme does not start • The appliance door is not closed.
Close the door.
• Mains plug is not connected in.
Put in the mains.
• The fuse has blown out in the household fuse box.
Replace the fuse.
• Delay start is set.
Cancel the delay start to start the programme immediately.
After the check, switch on the appliance. The programme
continues from the point of interruption. If the malfunction
shows again, contact your Service Force Centre.
For other fault codes, not described in the chart, contact
your Service Force Centre.
These data are necessary to help you quickly and correctly:
• Product number (PNC)
• Serial number (S.N.)
For these data, refer to the rating plate.
Write the necessary data here:
Model description : ..........
Product number : ..........
Serial number : ..........
• Model (Mod.)
The cleaning results are not satisfactory
The dishes are not clean • The selected washing programme is not applicable for the type of load and
soil.
• The basket is loaded incorrectly so that water cannot reach all surfaces.
• Spray arm does not turn freely because of incorrect arrangement of the load.
• The filters are dirty or not correctly installed.
• The quantity of detergent is too little or missing.
Limescales particles on the dishes • The salt container is empty.
• The water softener is adjusted on a wrong level.
• The salt container cap is not closed correctly.
The dishes are wet and dull • No rinse aid has been used.
• The rinse aid dispenser is empty.
There are streaks, milky spots or a
• Decrease the rinse aid dosage.
bluish coating on glasses and
dishes
Dry water drop signs on glasses
and dishes
• Increase rinse aid dosage.
• The detergent can be the cause.
12
Page 13

Technical data
Dimensions Width cm 54,5
Height cm 44,7
Depth cm 48,0-49,0
Electrical connection - Voltage
- Overall power - Fuse
Water supply pressure Minimum 0,8 bar (0,08 MPa)
Maximum 10 bar (1,0 MPa)
Capacity Place settings 6
Information on the electrical connection is given on the rating plate on the back of
appliance.
Environment concerns
The symbol on the product or on its packaging
indicates that this product may not be treated as
household waste. Instead it should be taken to the
appropriate collection point for the recycling of electrical
and electronic equipment. By ensuring this product is
disposed of correctly, you will help prevent potential
negative consequences for the environment and human
health, which could otherwise be caused by inappropriate
waste handling of this product. For more detailed
information about recycling of this product, please contact
your local council, your household waste disposal service
or the shop where you purchased the product.
The packaging materials are environmentally friendly and
can be recycled. The plastic components are identified by
Installation
Warning! Make sure that mains plug is
disconnected from the mains socket during
installation.
Fitting the appliance
Put the appliance adjacent to a water tap and a drain.
When you put the appliance in place, make sure that the
water hoses are not kinked or squashed.
Install the appliance on a kitchen sink, worktop or builtin..
markings, e.g. >PE<, >PS<, etc. Discard the packaging
materials in the applicable container at the community
waste disposal facilities.
Warning! To discard the appliance, follow the
procedure:
• Pull the mains plug out of the socket.
• Cut off the mains cable and mains plug and discard
them.
• Discard the door catch. This prevents the children to
close themselves inside the appliance and endanger
their lives.
Positioning
Install the dishwasher into the furniture of the
kitchen.
min. 450+5
min. 500
min. 550
Make sure that the dimensions of the recess
agree with the given dimensions.
Make sure that there are
openings in the furniture
for the inlet hose, the water drain hose and the
mains cable.
13
Page 14

Adjusting the level of the appliance
Make sure that the appliance is level to close and seal the
door correctly. If the level of the appliance is correct, the
Water connection
door does not catch on the sides of the cabinet. If the door
does not close correctly, loosen or tighten the adjustable
feet until the appliance is level.
Inlet hose
The appliance has safety features to prevent that the
water in the appliance goes back into the drinking
water system.
Connect the appliance to a hot (max. 60°) or cold water
supply.
If the hot water comes from alternative sources of energy
that are more environmentally friendly (e.g. solar or photovoltaic panels and aeolian), use a hot water supply to
decrease energy consumption.
It is important that a water tap or stopcock is near the
dishwasher with easy access.
If the water inlet hose is too short, replace the water inlet
hose with an applicable, longer high-pressure hose. Do
not connect an extension hose.
To suit the installation, it is possible to turn the end of the
hose that is connected to the dishwasher. Do these steps :
1. Loosen the
retaining
nut.
2. Turn the
hose.
3. Tighten the
retaining
Connect the inlet hose to a water tap
with an external thread of 3/4”.
Warning! Make sure that the retaining nut and all
other connections are tight before you move the
dishwasher into position.
Warning! Always use a new water inlet hose. Do not
use connection hoses from an old appliance.
nut.
pump automatically starts to drain the remaining water out
of the dishwasher.
Warning! Only if the dishwasher is connected to the
mains socket, the water safety system operates
when the dishwasher is off.
Two procedures are possible to install the water drain
hose :
1
2
max. 75cm
1. Attach the plastic curve supplied at the end of the
hose.
Put the water drain hose in the sink.
2. Connect the water drain hose to the water drain system.
The hose must be less than 75 cm above the bottom
of the dishwasher to prevent incorrect operation of
appliance.
If you connect the water
drain hose to a trap spigot
under the sink, remove the
plastic membrane (A). If
you do not remove the
membrane, remaining food
can cause a blockage in the
drain hose spigot
Drain hose
The appliance has water safety system to prevent
water damage. If there is a malfunction, the drain
14
Page 15

Electrical connection
Warning! The manufacturer is not responsible if you
do not follow these safety precautions.
This appliance needs to be earthed according to safety
precautions.
Make sure that the rated voltage and type of power on the
rating plate agree with the voltage and the power of the
local power supply.
Always use a correctly installed shockproof socket.
Do not use multi-way plugs, connectors and extension
cables. There is a risk of fire.
Do not replace the mains cable yourself. Contact the
Service Force Centre.
Make sure that the mains plug is accessible after
installation.
Do not pull the mains cable to disconnect the appliance.
Always pull the mains plug.
15
Page 16

Índice de materias
Información sobre seguridad _ _ _ _ _ _ _ _ _ _ _ _ 16
Panel de mandos _ _ _ _ _ _ _ _ _ _ _ _ _ _ _ _ _ 17
Programas de lavado _ _ _ _ _ _ _ _ _ _ _ _ _ _ _ _ 18
Uso del aparato _ _ _ _ _ _ _ _ _ _ _ _ _ _ _ _ _ _ 19
Ajuste del descalcificador de agua _ _ _ _ _ _ _ _ _ 19
Uso de sal para lavavajillas _ _ _ _ _ _ _ _ _ _ _ _ _ 20
Uso de abrillantador _ _ _ _ _ _ _ _ _ _ _ _ _ _ _ _ 21
Carga de cubiertos y vajilla _ _ _ _ _ _ _ _ _ _ _ _ _ 21
Uso de detergente _ _ _ _ _ _ _ _ _ _ _ _ _ _ _ _ _ 22
Información sobre seguridad
Por su seguridad y para garantizar el funcionamien-
to correcto del aparato, antes de instalarlo y utilizarlo por primera vez lea atentamente este manual. Conserve
siempre estas instrucciones con el aparato, aunque lo
cambie de lugar o lo venda. Los usuarios deben conocer a
la perfección el funcionamiento y las características de seguridad del aparato.
Uso correcto
• No realice las reparaciones personalmente para evitar
lesiones personales y daños al aparato. Póngase siempre en contacto con el Centro de servicio técnico.
• Utilice el aparato sólo para lavar utensilios aptos para
lavavajillas.
• No introduzca disolventes en el lavavajillas. Existe
riesgo de explosión.
• Los cuchillos y otros objetos con puntas afiladas de-
ben colocarse en el cesto para cubiertos con la punta
hacia abajo, o en posición horizontal en el cesto principal.
• Utilice sólo productos específicos para lavavajillas (de-
tergente, sal, abrillantador).
• No abra la puerta con el aparato en funcionamiento, ya
que puede producirse la salida de vapor caliente. Existe riesgo de quemaduras.
• No retire platos del lavavajillas antes de que finalice el
ciclo de lavado.
• Cuando el programa de lavado haya concluido, es con-
veniente desenchufar el lavavajillas y cerrar el grifo.
• Este producto debe ser reparado sólo por personal de
servicio técnico homologado, y sólo con piezas de recambio originales.
Selección e inicio de un programa de lavado _ _ _ _ 23
Mantenimiento y limpieza _ _ _ _ _ _ _ _ _ _ _ _ _ 24
Qué hacer si… _ _ _ _ _ _ _ _ _ _ _ _ _ _ _ _ _ _ 26
Datos técnicos _ _ _ _ _ _ _ _ _ _ _ _ _ _ _ _ _ _ _ 27
Aspectos medioambientales _ _ _ _ _ _ _ _ _ _ _ _ 27
Instalación _ _ _ _ _ _ _ _ _ _ _ _ _ _ _ _ _ _ _ _ _ 28
Conexión de agua _ _ _ _ _ _ _ _ _ _ _ _ _ _ _ _ _ 28
Conexión eléctrica _ _ _ _ _ _ _ _ _ _ _ _ _ _ _ _ _ 29
Salvo modificaciones
• No realice las reparaciones personalmente para evitar
lesiones personales y daños al aparato. Póngase siempre en contacto con el Centro de servicio técnico.
Instrucciones generales de seguridad
• Las personas (incluidos niños) con discapacidad física, sensorial o mental, o con experiencia y conocimiento insuficientes, no deben utilizar el electrodoméstico. Sólo podrán utilizarlo bajo la supervisión o
instrucción de la persona responsable de su seguridad.
• Siga las instrucciones de seguridad respecto al detergente para lavavajillas suministradas por el fabricante
para evitar quemaduras en ojos, boca y garganta.
• No beba el agua del lavavajillas. Podría haber restos de
detergente en el aparato.
• Cierre siempre la puerta del aparato cuando no lo utilice, para evitar que las personas sufran lesiones o tropiecen con la puerta abierta.
• No se siente ni se ponga de pie sobre la puerta abierta.
Seguridad de los niños
• Este aparato sólo puede ser utilizado por adultos. Es
necesario supervisar a los niños para evitar que jueguen con el aparato.
• Mantenga todos los materiales de embalaje alejados de
los niños. Existe riesgo de asfixia.
• Mantenga los detergentes en un lugar seguro. No permita que los niños toquen los detergentes.
• Mantenga a los niños alejados del aparato cuando la
puerta esté abierta.
16
Page 17

Instalación
• Compruebe que el aparato no ha sufrido daños en el
transporte. No conecte el aparato si está dañado. Si es
necesario, contacte al proveedor.
• Retire todo el material de embalaje antes del primer
uso.
• La instalación eléctrica de este aparato debe estar a
cargo de un profesional cualificado y competente.
• La instalación de fontanería de este aparato debe estar
a cargo de un profesional cualificado y competente.
• No altere las especificaciones ni modifique este producto. Existe el riesgo de lesiones personales y de daños para el aparato.
Panel de mandos
• No utilice el aparato:
– si el cable de alimentación o los tubos de agua es-
tán dañados,
– si el panel de mandos, la superficie superior o la
zona inferior (base) presentan daños, de modo que
pudiera accederse fácilmente al interior del aparato.
Póngase en contacto con el Centro de Servicio técnico.
• No perfore los lados del aparato para no producir daños en los componentes hidráulicos y eléctricos.
Advertencia Siga atentamente las instrucciones
sobre las conexiones eléctricas y de agua.
5 4
1 2 3
1 Mando de programas
2 Tecla de inicio/cancelación (Cancel)
3 Tecla de inicio diferido
4 Indicadores luminosos
5 Indicador luminoso de encendido/apagado
Indicadores luminosos
Se enciende durante la fase de lavado o de aclarado.
Se enciende durante la fase de secado.
Se enciende cuando ha finalizado el programa de lavado. Funciones auxiliares:
• nivel del descalcificador de agua,
• intervención de una alarma debido a un fallo de funcionamiento.
17
Page 18

Indicadores luminosos
Se enciende cuando es necesario llenar el depósito de sal. Consulte 'Uso de sal para lavavajillas'.
El indicador puede permanecer encendido durante horas después de la recarga sin que afecte al funciona-
1)
miento del aparato.
1) Se mantiene apagado mientras hay un programa de lavado en marcha.
Tecla de inicio diferido
Utilice la tecla de inicio diferido para retrasar hasta 3 horas el comienzo del programa de lavado. Consulte 'Selección e inicio de un programa de lavado'.
Mando de programas e indicador luminoso de
encendido/apagado
• Para seleccionar un programa de lavado, gire el mando
de programas a derecha o izquierda. El indicador de
programa, situado en el mando, se debe corresponder
con el programa de lavado que se indica en el panel de
mandos.
– Se enciende el indicador luminoso de encendido/
apagado (posición ON)
• Para apagar el aparato, gire el mando de programas
hasta que el indicador de programa coincida con el indicador luminoso de encendido/apagado.
– Se apaga el indicador luminoso de encendido/apa-
gado (posición OFF).
Programas de lavado
Programas de lavado
Programa Grado de suciedad Tipo de carga Descripción del programa
Gran suciedad Vajilla, cubertería, ca-
cerolas y sartenes
Suciedad normal Vajilla y cubertería Prelavado
1)
1) Programa de prueba para organismos de control. Para obtener información sobre los datos de prueba, consulte el folleto aparte
suministrado.
Suciedad normal Vajilla y cubertería Prelavado
Suciedad normal o lige-raVajilla y cubertería Lavado principal de hasta 50 °C
Suciedad normal o lige-raVajilla y cristalería fi-naLavado principal de hasta 40 °C
Prelavado
Lavado principal de hasta 70 °C
2 aclarados intermedios
Aclarado final
Secado
Lavado principal de hasta 65 °C
1 aclarado intermedio
Aclarado final
Secado
Lavado principal de hasta 55 °C
1 aclarado intermedio
Aclarado final
Secado
1 aclarado intermedio
Aclarado final
1 aclarado intermedio
Aclarado final
18
Page 19

Valores de consumo
Programa Duración (en minutos) Consumo de energía (en
117 1,15 9
94 0,80 7
157 0,63 7
36 0,4 6
31 0,35 6
La presión y temperatura del agua, así como de las
variaciones del suministro de energía y la cantidad
de platos, pueden cambiar estos valores.
Uso del aparato
Agua (en litros)
kWh)
Consulte las instrucciones siguientes para cada paso del
procedimiento:
1. Haga una prueba para verificar si el nivel de descalci-
ficador de agua es correcto para la dureza del agua de
su zona. Si es necesario, ajuste el descalcificador de
agua.
2. Llene el recipiente de sal con sal para lavavajillas.
3. Cargue el distribuidor de líquido abrillantador.
4. Cargue los cubiertos y la vajilla en el lavavajillas.
5. Seleccione el programa de lavado adecuado para el
tipo y suciedad de la carga.
6. Llene el distribuidor de detergente con la cantidad de
detergente adecuada.
7. Inicie el programa de lavado.
Si utiliza pastillas de detergente, consulte "Uso de
detergente".
Ajuste del descalcificador de agua
El descalcificador elimina los minerales y sales del suministro de agua. Los minerales y sales pueden tener un
efecto negativo en el funcionamiento del aparato.
La dureza del agua se mide en escalas equivalentes:
• Grados alemanes (dH°).
• Grados franceses (°TH).
Dureza del agua
°dH mmol/l °TH Clarke
>24 >4,2 >40 > 29 10
22 - 24 3,9 - 4,2 39 - 40 27 - 29 9
20 - 22 3,5 - 3,9 35 - 39 25 - 27 8
18 - 20 3,2 - 3,5 32 - 35 23 - 25 7
16 - 18 2,8 - 3,2 28 - 32 20 - 23 6
• mmol/l (milimol por litro, unidad internacional de la
dureza del agua).
• Clarke.
Ajuste el descalcificador de agua según la dureza del agua
de su zona. Si es necesario, solicite información a la compañía local de suministro de agua.
Ajuste de la dureza del
agua
19
Page 20

Dureza del agua
°dH mmol/l °TH Clarke
13 - 16 2,3 - 2,8 23 - 28 17 - 20 5
10 - 13 1,8 - 2,3 18 - 23 13 - 17 4
7 - 10 1,2 - 1,8 12 - 18 9 - 13 3
4 - 7 0,7 - 1,2 7 - 12 5 - 9 2
< 4 < 0,7 < 7 < 5
1) No es necesario utilizar sal.
Ajuste de la dureza del
agua
1)
1
Ajuste electrónico
El descalcificador de agua se ajusta en fábrica en el nivel
5.
1. Mantenga pulsada la tecla de inicio/cancelación. Gire
el mando de programas a la derecha hasta que el indicador de programa coincida con el primer programa de lavado del panel de mandos.
2. Suelte la tecla de inicio/cancelación cuando los indicadores luminosos de encendido/apagado e inicio/
cancelación empiecen a parpadear.
– Al mismo tiempo, el indicador de finalización par-
padea para mostrar el nivel del descalcificador de
agua.
Uso de sal para lavavajillas
Precaución Utilice exclusivamente sal específica
para lavavajillas. Los tipos de sal no indicados para
lavavajillas dañan el descalcificador de agua.
1
2
Ejemplo:
5 parpadeos, pausa, 5 parpadeos, pausa, etc. = nivel 5
3. Pulse la tecla de inicio/cancelación una vez para aumentar un incremento el nivel de descalcificador de
agua.
El indicador de finalización muestra el nuevo nivel.
4. Gire el mando de programas a la posición de desconexión para memorizar el nuevo dato.
3
Llene el depósito de sal
con 1 litro de agua (sólo en
la primera operación).
4
20
Page 21

5
Uso de abrillantador
Es normal que el agua desborde el depósito al cargar la sal.
Compruebe que no queda ningún grano de sal fuera
del compartimento de sal. La sal que queda en el
depósito durante un tiempo lo perfora. Se recomienda iniciar un programa de lavado justo después de llenar el depósito de sal. Esto evita la corrosión por la sal derramada.
6
El indicador de sal no se enciende si el nivel del descalcificador se ajusta automáticamente en 1.
Precaución Utilice exclusivamente abrillantador de
marca para lavavajillas.
Siga estos pasos para llenar el distribuidor de abrillantador:
1 2
max
3
4
Carga de cubiertos y vajilla
Llene el depósito de abrillantador cuando el indicador ( B) aparezca transparente.
B
5
Precaución No llene el distribuidor de abrillantador
con otro producto (por ej., agente limpiador de
lavavajillas o detergente líquido). Podría dañar el aparato.
Ajuste de la cantidad de abrillantador
El selector de abrillantador se ajusta en fábrica
en la posición 1.
Para aumentar o reducir
la dosificación, consulte
"Qué puede hacer..."
Consejos útiles
Precaución Utilice el aparato sólo para lavar
utensilios aptos para lavavajillas.
No utilice el aparato para lavar objetos que puedan absorber agua (esponjas, paños de cocina, etc.).
• Antes de cargar cubiertos o platos en el lavavajillas, si-
ga estos pasos:
– Elimine todos los restos de comida y desechos.
– Ablande los restos de comida pegada en las cazue-
las.
• Al cargar cubiertos y platos en el lavavajillas, siga es-
tos pasos:
21
Page 22

– Coloque los objetos huecos (por ejemplo, tazas, va-
sos, cazuelas) boca abajo.
– Asegúrese de que el agua no queda almacenada en
los recipientes ni en los fondos.
– Asegúrese de que los cubiertos y los platos no se
acoplan entre sí.
– Asegúrese de que los cubiertos y los platos no se
cubren unos a otros.
– Asegúrese de que los vasos no chocan entre sí.
– Coloque los objetos pequeños en el cesto de cu-
biertos.
• Los objetos de plástico y las sartenes con revestimiento antiadherente tienden a retener gotas de agua.
• Estos objetos no se secan tan bien como los de porcelana y de acero.
• Coloque los objetos ligeros en el cesto principal. Asegúrese de que los objetos no se mueven.
Precaución Antes de comenzar el programa de
lavado, compruebe que el brazo aspersor gira
libremente y sin obstáculos.
Cesto principal
Ordene los
platos hondos
y las tapas
grandes en el
borde del cesto. Ordene los
objetos de
modo que el
1
Ordene los objetos encima y debajo de
los estantes para tazas. Para los objetos más altos, pliegue los estantes para tazas hacia arriba.
agua llegue a
todas las superficies.
Cesto para cubiertos
Advertencia Para evitar daños, no coloque los cuchillos de hoja larga en posición vertical.
Coloque los objetos largos y/o afilados en el cesto principal y en posición horizontal. Tenga cuidado al manejar
objetos afilados.
1
Utilice el cesto de cubiertos para:
• colocar los tenedores y
cucharas con los mangos hacia abajo.
• colocar los cuchillos
con los mangos hacia
arriba.
2
Utilice la rejilla para cubiertos. Si el tamaño de los
cubiertos no permite utilizar la rejilla, retírela.
Uso de detergente
Utilice sólo detergentes (en polvo, líquido o tabletas) que sean especiales para lavavajillas.
Siga los datos del fabricante indicados en el envase:
• dosis recomendada por el fabricante,
• recomendaciones de almacenaje.
Las instrucciones del envase suelen ser para lavavajillas
grandes (12 cubiertos).
22
Para evitar problemas de contaminación, no utilice
más cantidad de detergente que la recomendada.
Page 23

1
A
3
Llene el distribuidor de detergente ( A).
A
5
2
B
4
Si utiliza un programa de
lavado con fase de prelavado, ponga más detergente
en el compartimiento de
prelavado ( B).
6
Uso de pastillas de detergente
Coloque la pastilla de detergente en el distribuidor de detergente ( A).
Las pastillas de detergente contienen:
• detergente
• abrillantador
• otros agentes de limpieza.
Siga estos pasos para utilizar pastillas de detergente:
1. Compruebe que las pastillas de detergente son adecuadas para la dureza del agua. Consulte las instrucciones del fabricante.
2. Seleccione los ajustes más bajos de dureza del agua
y de dosis de abrillantador.
No es necesario llenar el depósito de sal ni el distribuidor de abrillantador.
Siga estos pasos si el resultado del secado no es
satisfactorio:
1. Llene el distribuidor de líquido abrillantador.
2. Ajuste la cantidad de abrillantador en la posición 2.
Siga estos pasos para utilizar otra vez detergente en
polvo:
1. Llene los recipientes de sal y de abrillantador.
2. Ajuste el descalcificador de agua al nivel máximo.
3. Ejecute un programa de lavado con el aparato vacío.
4. Ajuste el descalcificador de agua. Consulte 'Ajuste
del descalcificador de agua'.
5. Ajuste la cantidad de abrillantador.
Las distintas marcas de detergente no tardan lo
mismo en disolverse. Algunas pastillas de detergente no ofrecen los mejores resultados de limpieza en
los programas de lavado breves. Si utiliza pastillas de detergente, emplee programas de lavado prolongados para
eliminar por completo los restos de detergente.
Selección e inicio de un programa de lavado
Siga estos pasos para seleccionar e iniciar un programa
de lavado:
1. Cierre la puerta.
2. Gire el mando de programas para ajustar el programa
de lavado. Consulte el capítulo 'Programas de lavado'.
– Se enciende el indicador luminoso de encendido/
apagado.
– Empieza a parpadear el indicador de fase del pro-
grama de lavado.
3. Pulse la tecla de inicio/cancelación.
– El programa de lavado se inicia de manera auto-
mática.
– Se enciende el indicador de inicio/cancelación.
23
Page 24

– Cuando se inicia el programa, sólo permanece en-
cendido el indicador del avance de fase.
Una vez iniciado, no es posible cambiar el programa de lavado en marcha. Cancele el programa de
lavado.
Advertencia Interrumpa o cancele un programa de
lavado sólo si es necesario.
Precaución Abra la puerta con cuidado. Puede salir
vapor caliente.
Cancelación de un programa de lavado
• Mantenga pulsada la tecla de inicio/cancelación durante unos 5 segundos.
– Se apaga el indicador de inicio/cancelación.
– Los indicadores de fase empiezan a parpadear.
El programa de lavado se ha cancelado.
En ese momento puede realizar estas operaciones:
1. Apagar el aparato.
2. Seleccionar otro programa de lavado.
Llene el distribuidor de detergente antes de seleccionar
un nuevo programa de lavado.
Interrupción de un programa de lavado
Abra la puerta.
• El programa se detiene.
Cierre la puerta.
• El programa continúa a partir del punto en que se interrumpió.
Selección e inicio de un programa de lavado con
inicio diferido
1. Seleccione un programa de lavado.
2. Pulse el botón de inicio diferido.
– Se enciende el indicador luminoso de inicio diferi-
do.
3. Pulse la tecla de inicio/cancelación.
– Comienza la cuenta atrás para el inicio diferido.
– Los indicadores luminosos de fase se apagan.
El programa de lavado se pone en marcha de forma automática cuando termina la cuenta atrás.
• Se apaga el indicador de inicio diferido.
• El indicador de fase se enciende.
Durante la cuenta atrás no abra la puerta del lavava-
jillas para evitar que se interrumpa el proceso.
Cuando vuelva a cerrar la puerta del lavavajillas, la cuenta
atrás continuará desde el punto en que se haya interrumpido.
Cancelación del inicio diferido:
1. Mantenga pulsada la tecla de inicio/cancelación du-
rante unos cinco (5) segundos.
– Los indicadores luminosos de encendido/apagado
e inicio diferido se apagan.
– Los indicadores luminosos de fase empiezan a
parpadear.
2. Pulse la tecla de inicio/cancelación para comenzar el
programa de lavado.
Finalización del programa de lavado
Apague el aparato en estos casos:
• El aparato se detiene automáticamente.
• Se enciende el indicador de fin de programa.
Para mejorar los resultados del secado, mantenga la puerta entreabierta durante unos minutos antes de retirar la vajilla.
Espere a que la vajilla se enfríe antes de retirarla del aparato. Los platos calientes se dañan con facilidad.
Mantenimiento y limpieza
Advertencia Apague el aparato antes de limpiar los
filtros.
Limpieza de los filtros
Importante No utilice el aparato sin filtros. Compruebe
que los filtros están bien colocados. Su instalación
incorrecta provocará resultados de lavado insatisfactorios
y dañará el aparato.
24
Page 25

A
B
1
2
Retire los filtros A y B de
la base del aparato.
2
1
3
1
4
Limpie a fondo los filtros
bajo el agua corriente.
2
5
Vuelva a colocar los filtros. Gire el microfiltro
hacia la derecha para bloquearlo.
Limpieza del brazo aspersor
Revise periódicamente el brazo aspersor. Elimine los restos de comida que pueda haber en los orificios del brazo
aspersor.
Siga estos pasos para retirar y volver a colocar el brazo
aspersor:
1
3
2
Limpieza del exterior
Limpie las superficies externas de la máquina y del panel
de mandos con un paño suave y húmedo. Utilice sólo detergentes neutros. No utilice productos abrasivos, estropajos ni disolventes (acetona, tricloroetileno, etc.).
Precauciones contra la congelación
Precaución No instale el aparato en un lugar donde
la temperatura descienda por debajo de 0 °C. El
fabricante no se hace responsable de daños producidos
por el hielo.
Si no es posible evitarlo, vacíe el aparato y cierre la puerta. Desconecte el tubo de entrada de agua y haga salir el
agua que pueda contener.
Periodos prolongados sin funcionamiento
Siga estos pasos cuando no utilice el aparato por un tiempo prolongado:
1. Desenchufe el aparato.
2. Cierre el grifo de agua.
3. Deje la puerta abierta para evitar olores desagrada-
bles.
4. Limpie a fondo el interior del aparato (especialmente
los filtros).
25
Page 26

Qué hacer si…
El aparato no se pone en marcha o se detiene durante el
funcionamiento.
Si existe un desperfecto, intente corregirlo. Si no logra
solucionar el problema, póngase en contacto con el Centro de Servicio técnico.
Código de error y fallo de funcionamiento Causa y soluciones posibles
• parpadeo continuo del indicador de inicio/cancelación
• 1 parpadeo del indicador de finalización
El lavavajillas no carga agua
• parpadeo continuo del indicador de inicio/cancelación
• 2 parpadeos del indicador de finalización
El lavavajillas no desagua
• La bomba de desagüe funciona continuamente
• Todos los indicadores del panel están
apagados
El dispositivo antiinundación está funcionando
El programa no se inicia • La puerta del aparato no está cerrada.
• El grifo está bloqueado o tiene incrustaciones calcáreas.
Limpie el grifo.
• El grifo está cerrado.
Abra el grifo.
• El filtro del tubo de entrada de agua está obstruido.
Limpie el filtro.
• La conexión del tubo de entrada de agua no es correcta. El tubo podría estar doblado o aplastado.
Compruebe que la conexión es correcta.
• El sumidero está obstruido.
Limpie el sumidero.
• La conexión del tubo de desagüe no es correcta. El tubo podría estar
doblado o aplastado.
Compruebe que la conexión es correcta.
• Cierre el grifo y póngase en contacto con el Centro de servicio técnico.
Cierre la puerta.
• El enchufe no está bien conectado.
Conecte bien el enchufe.
• Se ha quemado el fusible de la caja de fusibles de la vivienda.
Cambie el fusible.
• El inicio diferido está activado.
Cancele el inicio diferido para que el programa comience de inmediato.
Precaución Apague el aparato antes de llevar a cabo
las acciones de corrección recomendadas.
Después de la comprobación, encienda el aparato. El programa continúa a partir del punto en que se interrumpió.
Si reaparece el fallo de funcionamiento, llame al Centro de
servicio técnico.
En caso de producirse otros códigos de avería, comuníquese con el Centro de servicio técnico.
26
Estos datos son necesarios para poder ayudarle de manera rápida y correcta:
• Modelo (Mod.)
• Número del producto (PNC)
• Número de serie (S.N.)
Page 27

Para conocer esos datos, consulte la placa de datos técnicos.
Escriba aquí los datos necesarios:
Los resultados de lavado no son satisfactorios
La vajilla no está limpia • El programa de lavado seleccionado no es adecuado al tipo de carga y grado
de suciedad de la vajilla.
• El cesto no está bien cargado y el agua no puede llegar a todas las superficies.
• El brazo aspersor no gira libremente por la disposición incorrecta de la carga.
• Los filtros están sucios o mal instalados.
• Se ha utilizado poco o ningún detergente.
Se observan restos de cal en la
vajilla
La vajilla aparece mojada y deslucida
Se ven rayas, puntos blancos o
una película azulada en copas y
platos
Se observan gotas de agua en vajilla y cristalería
• El depósito de sal está vacío.
• El descalcificador está ajustado a un nivel inapropiado para el agua.
• La tapa del recipiente de sal no está debidamente cerrada.
• No se utilizó abrillantador.
• El distribuidor de abrillantador está vacío.
• Reduzca la dosis del abrillantador.
• Aumente la dosificación de abrillantador.
• La causa podría ser el detergente.
Descripción del modelo : ..........
Número del producto : ..........
Número de serie : ..........
Datos técnicos
Medidas Ancho (cm) 54,5
Alto (cm) 44,7
Fondo (cm) 48,0-49,0
Conexión eléctrica - Voltaje -
Potencia total - Fusible
Presión del suministro de
agua
Máxima 10 bar (1 MPa)
Capacidad Cubiertos 6
Los datos de la conexión eléctrica se indican en la placa de datos técnicos, situada en
la parte posterior del aparato.
Mínima 0,8 bar (0,08 MPa)
Aspectos medioambientales
El símbolo que aparece en el aparato o en su
embalaje, indica que este producto no se puede tratar
como un residuo normal del hogar. Se deberá entregar,
sin coste para el poseedor, bien al distribuidor, en el acto
de la compra de un nuevo producto similar al que se
deshecha, bien a un punto municipal de recolección
selectiva de equipos eléctricos y electrónicos para su
reciclaje. Al asegurarse de que este producto se desecha
27
Page 28

correctamente, usted ayudará a evitar posibles
consecuencias negativas para el medio ambiente y la
salud pública, lo cual podría ocurrir si este producto no
se gestionara de forma adecuada. Para obtener
información más detallada sobre el reciclaje de este
producto, póngase en contacto con el Ayuntamiento de su
Municipio, ó con la tienda donde lo compró.
Los materiales de embalaje son ecológicos y se pueden
reciclar. Los componentes plásticos se identifican con
marcas, por ej. >PE<, >PS<, etc. Deseche los materiales
Instalación
de embalaje en los contenedores de uso público destinados a tal efecto.
Advertencia Para desechar el aparato, siga este
procedimiento:
• Extraiga el enchufe de la toma de red.
• Corte el cable y el enchufe y deséchelos.
• Deseche el cierre de la puerta. Esto evitará que los niños al jugar queden atrapados dentro y pongan su vida
en peligro.
Advertencia Asegúrese de que el enchufe está
desconectado de la toma de red durante la
instalación.
Instalación del aparato
Coloque el aparato junto a un grifo de agua y un desagüe.
Al colocar la máquina en su lugar, asegúrese de que los
tubos de agua no queden doblados ni aplastados.
Instale el aparato en un fregadero, sobre una encimera o
encastrado.
Colocación
Instale el lavavajillas en
un mueble de la cocina.
Compruebe que las medi-
min. 450+5
min. 500
min. 550
das de la cavidad coinciden con las del aparato.
Asegúrese de que el mueble tiene aberturas para el
tubo de entrada de agua,
el tubo de desagüe y el
cable de alimentación.
Conexión de agua
Tubo de entrada de agua
El aparato cuenta con funciones de seguridad que
impiden que el agua utilizada regrese al sistema de
agua potable.
Conecte el aparato a una toma de agua caliente (máx. 60°)
o fría.
Si el agua caliente procede de fuentes de energía alternativas más ecológicas (por ej., placas solares, fotovoltaicas
Ajuste del nivel del aparato
Compruebe que el aparato está nivelado para poder cerrar
y ajustar la puerta de manera correcta. Si el nivel del aparato es correcto, la puerta no rozará los laterales del mueble. Si la puerta no cierra bien, afloje o apriete las patas
ajustables hasta obtener la nivelación correcta.
o de energía eólica), utilice un suministro de agua caliente
que reduzca el consumo de energía.
Es importante que haya un grifo o una llave de agua de
fácil acceso cerca del lavavajillas.
Si el tubo de entrada de agua es demasiado corto, cámbielo por otro más largo y de más presión. No conecte un
tubo de extensión.
Para adaptar la instalación, es posible girar el extremo del
tubo conectado al lavavajillas. Siga estos pasos :
28
Page 29

1. Afloje la
tuerca de
sujeción.
2. Gire el tubo.
3. Apriete la
tuerca de
sujeción.
Conecte el tubo de entrada a un grifo con rosca externa de 3/4 pulgadas.
Advertencia Asegúrese de que la tuerca de sujeción
y todas las demás conexiones están bien apretadas
antes de colocar el lavavajillas en su lugar.
Advertencia Utilice siempre un tubo de entrada de
agua nuevo. No utilice tubos de conexión de
aparatos antiguos.
Tubo de desagüe
El aparato tiene un sistema de seguridad que impide
que el agua pueda dañarlo. En caso de un fallo de
funcionamiento, la bomba de desagüe se pone en marcha
automáticamente y extrae el agua del lavavajillas.
Advertencia El sistema de seguridad del agua
funciona con el lavavajillas apagado sólo si está
conectado a la toma de corriente.
El tubo de desagüe puede instalarse con uno de los dos
procedimientos posibles:
1
2
max. 75cm
1. Conecte la curva plástica suministrada al extremo
del tubo.
Coloque el tubo de desagüe en el fregadero.
2. Conecte el tubo de desagüe al sistema de drenaje
del fregadero.
Para que el aparato funcione correctamente, el tubo
debe quedar a menos de 75 cm de la parte inferior
del lavavajillas.
Si conecta el tubo de desagüe al sumidero, bajo el
fregadero, retire la membrana de plástico (A). Si no
retira la membrana, los residuos de comida pueden
bloquear la salida del tubo
de desagüe
Conexión eléctrica
Advertencia El fabricante no se hace responsable de
las consecuencias de no seguir las instrucciones de
seguridad.
Conecte el aparato a tierra según las instrucciones de
seguridad.
Compruebe que el voltaje nominal y el tipo de suministro
eléctrico que figuran en la placa de datos técnicos
coinciden con los del suministro local.
Utilice siempre una toma con aislamiento de conexión a
tierra correctamente instalada.
No utilice enchufes o conectores múltiples ni cables
prolongadores. Existe riesgo de incendio.
No cambie personalmente el cable de alimentación.
Póngase en contacto con el Centro de servicio técnico.
Compruebe que el enchufe es accesible después de la
instalación.
No tire del cable de alimentación para desconectar el
aparato. Tire siempre del enchufe.
29
Page 30

30
Page 31

31
Page 32

www.zanussi.com/shop
156984321-A-352010
 Loading...