

Zanussi ZRC250 USER MANUAL

KÜHLSCHRANK
REFRIGERATEUR
FRIDGE
FRIGORIFERO
ZRC 250
BEDIENUNGSANLEITUNG
MODE D’EMPLOI
INSTRUCTION BOOKLET
LIBRETTO ISTRUZIONI
2223 205-91
12
Sommaire
Avertissements et conseils importants 10
Renseignements pour l’élimination des
matériaux d’emballage 11
Utilisation 12
Nettoyage 12
Mise en service 12
Réglage de la température 12
Réfrigération 13
Tablettes amovibles 13
Positionnement des balconnets de la
contre-porte 13
Conseils 14
Conseils pour la réfrigération 14
Entretien 14
Nettoyage 14
Arrêt prolongé 14
Changement de l’ampoule 14
Dégivrage 15
Anomalie de fonctionnement 15
Installation 16
Emplacement 16
Arrêts pour tablettes 16
Branchement électrique 16
Entretoises postérieures 17
Réversibilité de la porte 17
Nettoyage
L’appareil étant convenablement installé, nous vous
conseillons de le nettoyer soigneusement avec de
l’eau tiède savonneuse, pour enlever l’odeur
caractéristique de «neuf».
N’utilisez pas de produits abrasifs, de
poudre à récurer ni d’éponge métallique.
Utilisation
Mise en service
Enfoncez la fiche dans la prise de courant
Tournez le bouton du thermostat (B) vers la droite
sur une position moyenne.
Le voyant (A) s’allume.
Pour arrêter l’appareil tournez le bouton du
thermostat (B) sur la position «O».
Réglage de la température
La température est réglée automatiquement et peut
être augmentée (moins froid) en tournant le bouton
vers les
● les plus petits ou bien diminuée (plus froid)
en le tournant vers les ● les plus grands.
En tout cas, l’exacte position doit être repérée en
considérant que la température interne dépend des
facteurs suivants:
• température ambiante;
• fréquence d’ouverture des portes;
• quantité d’aliments conservés;
• emplacement de l’appareil.
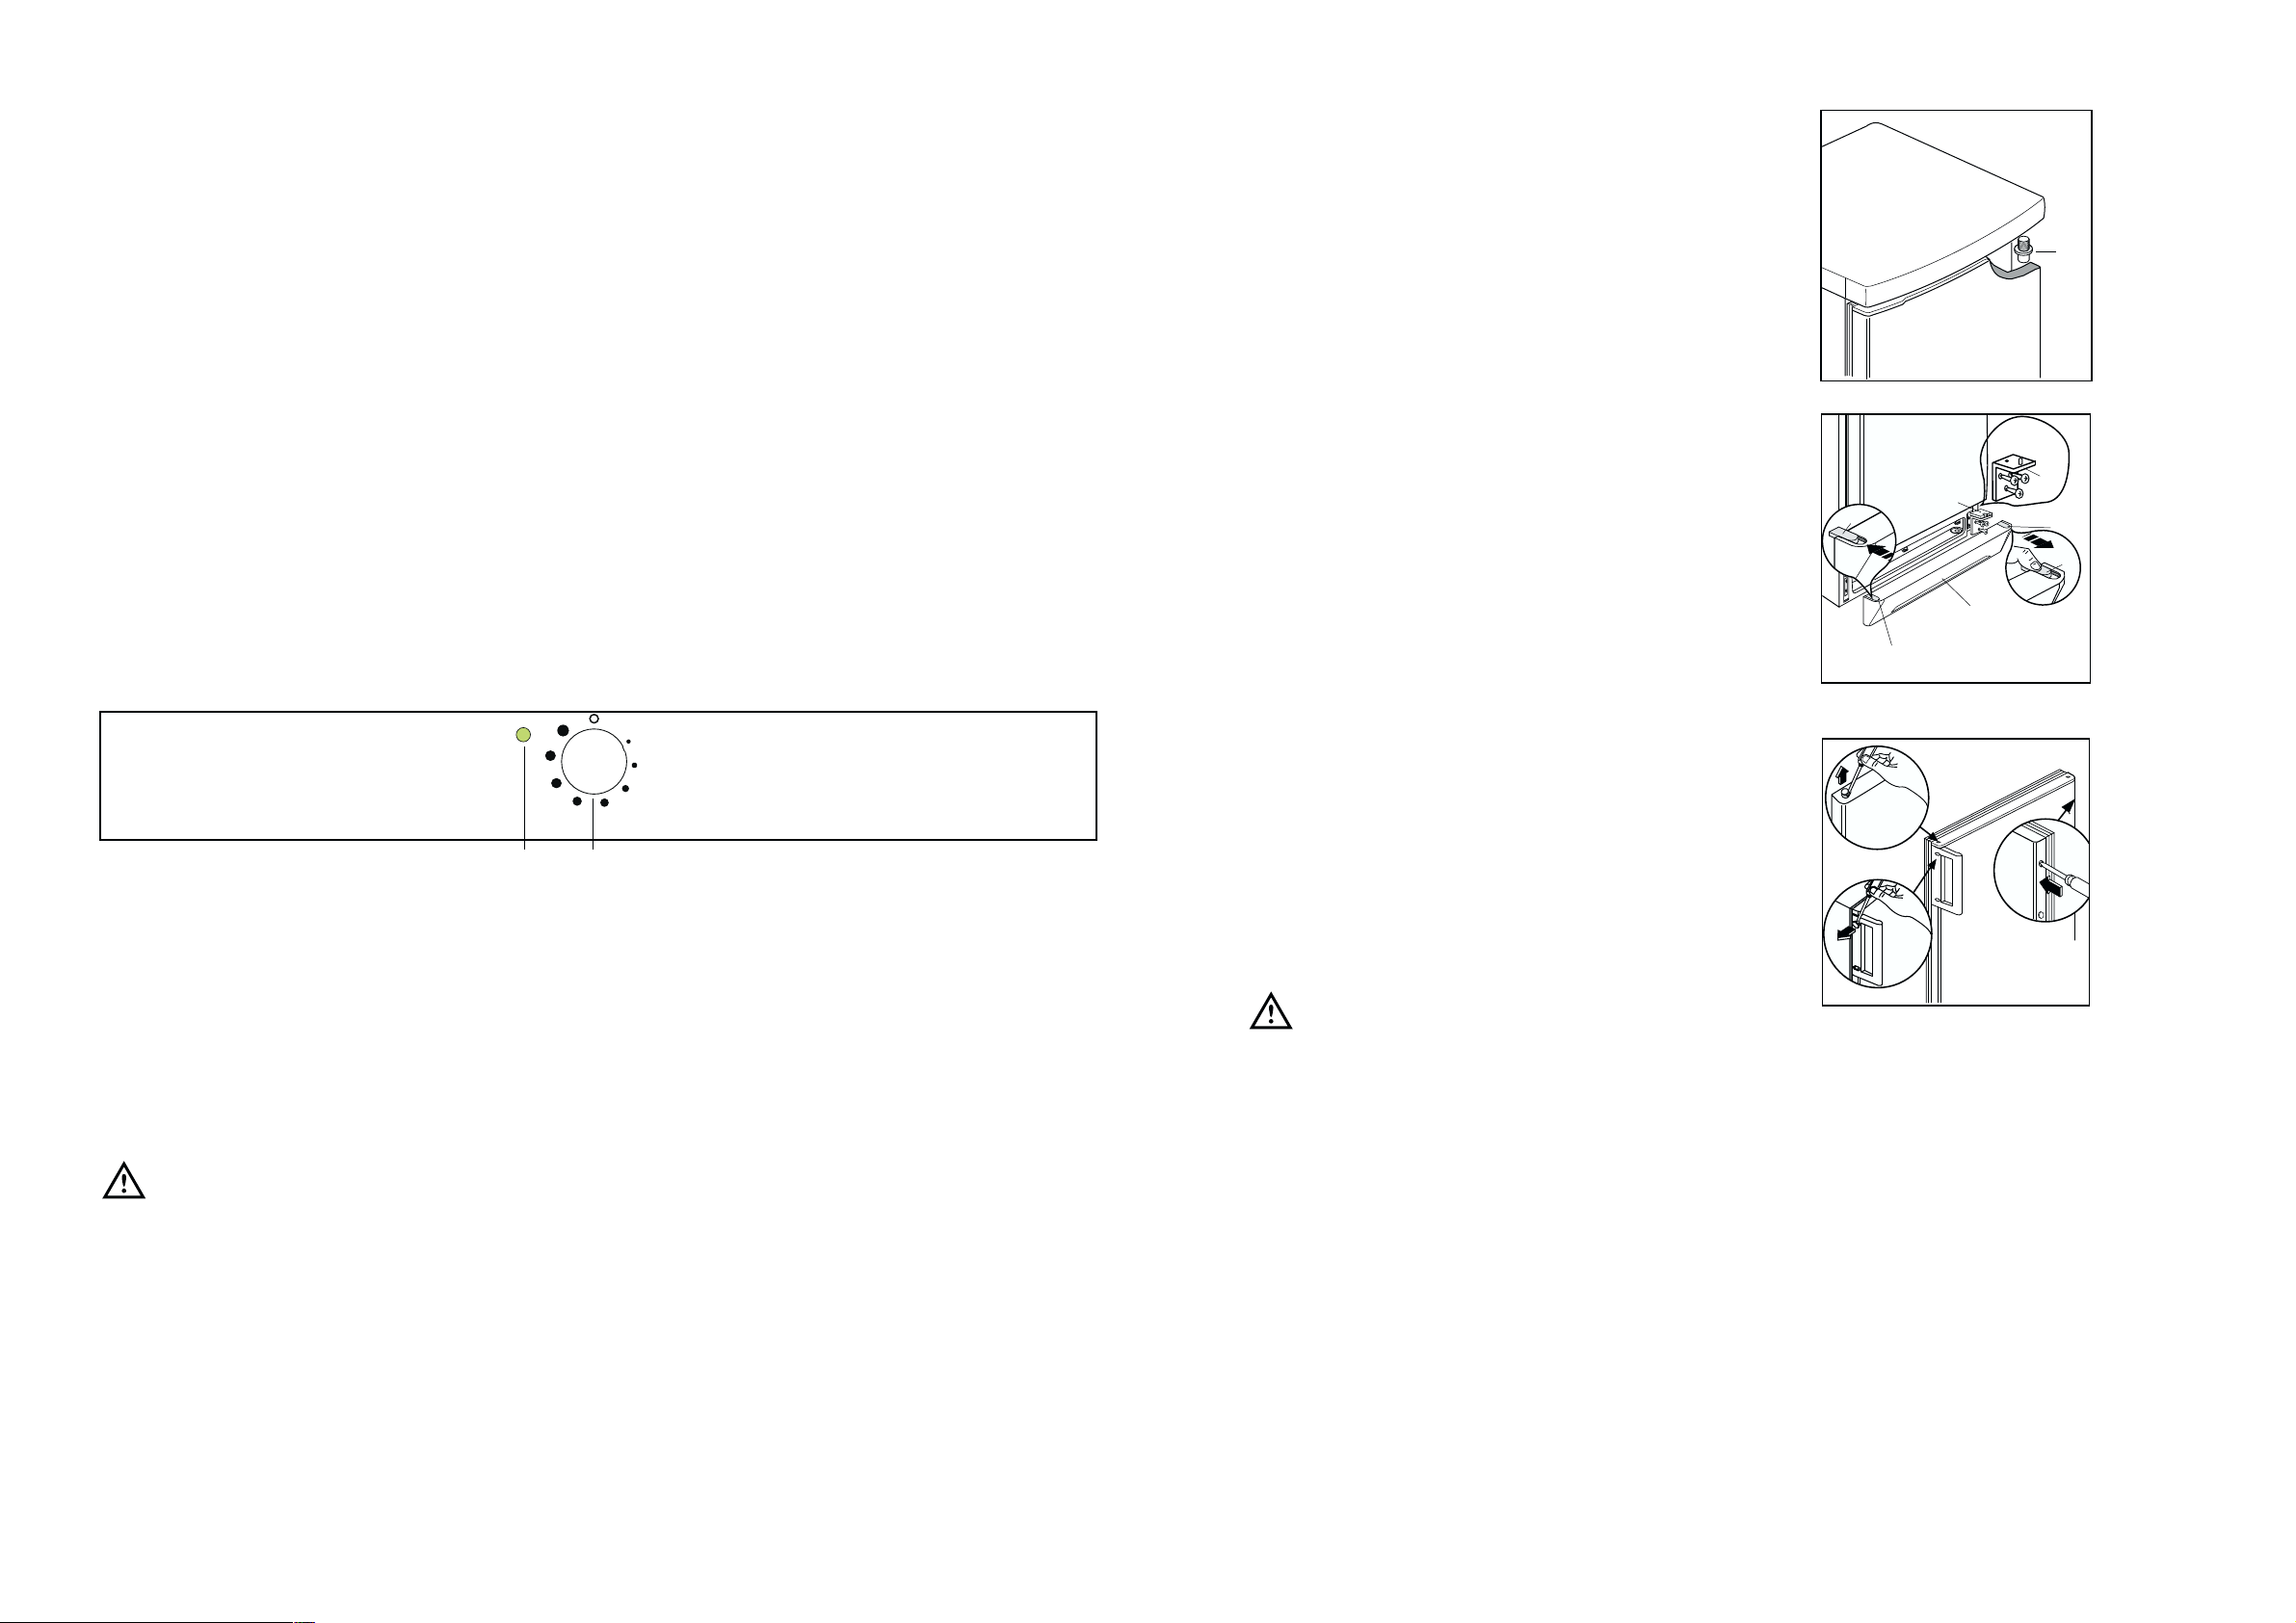
Tableau de commande
A. Voyant de fonctionnement
B. Bouton du thermostat
25
Changing the opening direction of
the doors
Before carrying out any operations, remove the plug
from the power socket.
To change the opening direction of the door,
proceed as follows:
1. pull off the ventilation grille (D) which is clipped
into place;
2. remove the bottom hinge (E) by unscrewing its
three fixing screws;
3. remove the door, releasing it from the upper pin
(G);
4. unscrew the upper pin (G) and refit it on the
opposite side;
5. remove the two plugs of the door (where
available), discovering the holes for the hinge
pins, assemble them on the opposite side;
6. using a 10 mm spanner, unscrew the hinge pin
(E) and reassemble it on the opposite side of the
hinge;
7. reassemble the lower hinge (E) on the opposite
side, using the screws previously removed; insert
the hole cover (G) on the lower hinge. Slide the
hole cover (F) out of the ventilation grille (D) by
pushing it in the direction of the arrow and
reassemble it on the opposite side;
8. reassemble the door;
9. refit the ventilation grille (D), clipping it into
place.
10.Dismantle the handles and reassemble them on
the opposite side. Cover the holes left open with
the plugs contained in the documentation pack.
Warning:
After having reversed the opening direction of
the doors check that all the screws are properly
tightened and that the magnetic seal adheres to
the cabinet. If the ambient temperature is cold
(i.e. in Winter), the gasket may not fit perfectly to
the cabinet. In that case, wait for the natural
fitting of the gasket or accelerate this process by
heating up the part involved with a normal
hairdrier.
G
F
D
PR18
F
F
F
E
E
D162/a
AB
13
Réfrigération
Pour obtenir le meilleur rendement du compartiment
réfrigérateur:
• n’introduisez pas d’aliments encore chauds ou de
liquides en évaporation dans la cuve;
• couvrez les aliments, surtout s’ils sont
aromatiques;
• placez les denrées de façon à ce que l'air puisse
circuler tout autour.
Important
Si le thermostat est réglé sur la position de froid
maximum, lorsque la température ambiante est
élevée et que l'appareil est plein, il est possible
que le compresseur fonctionne en régime
continu. Dans ce cas, il y a un risque de
formation excessive de givre sur la paroi
postérieure à l’intérieur de l’appareil. Pour éviter
cet inconvénient, placez le thermostat sur une
position moins élevée, de façon à permettre un
dégivrage automatique et, par conséquent, des
économies de courant.
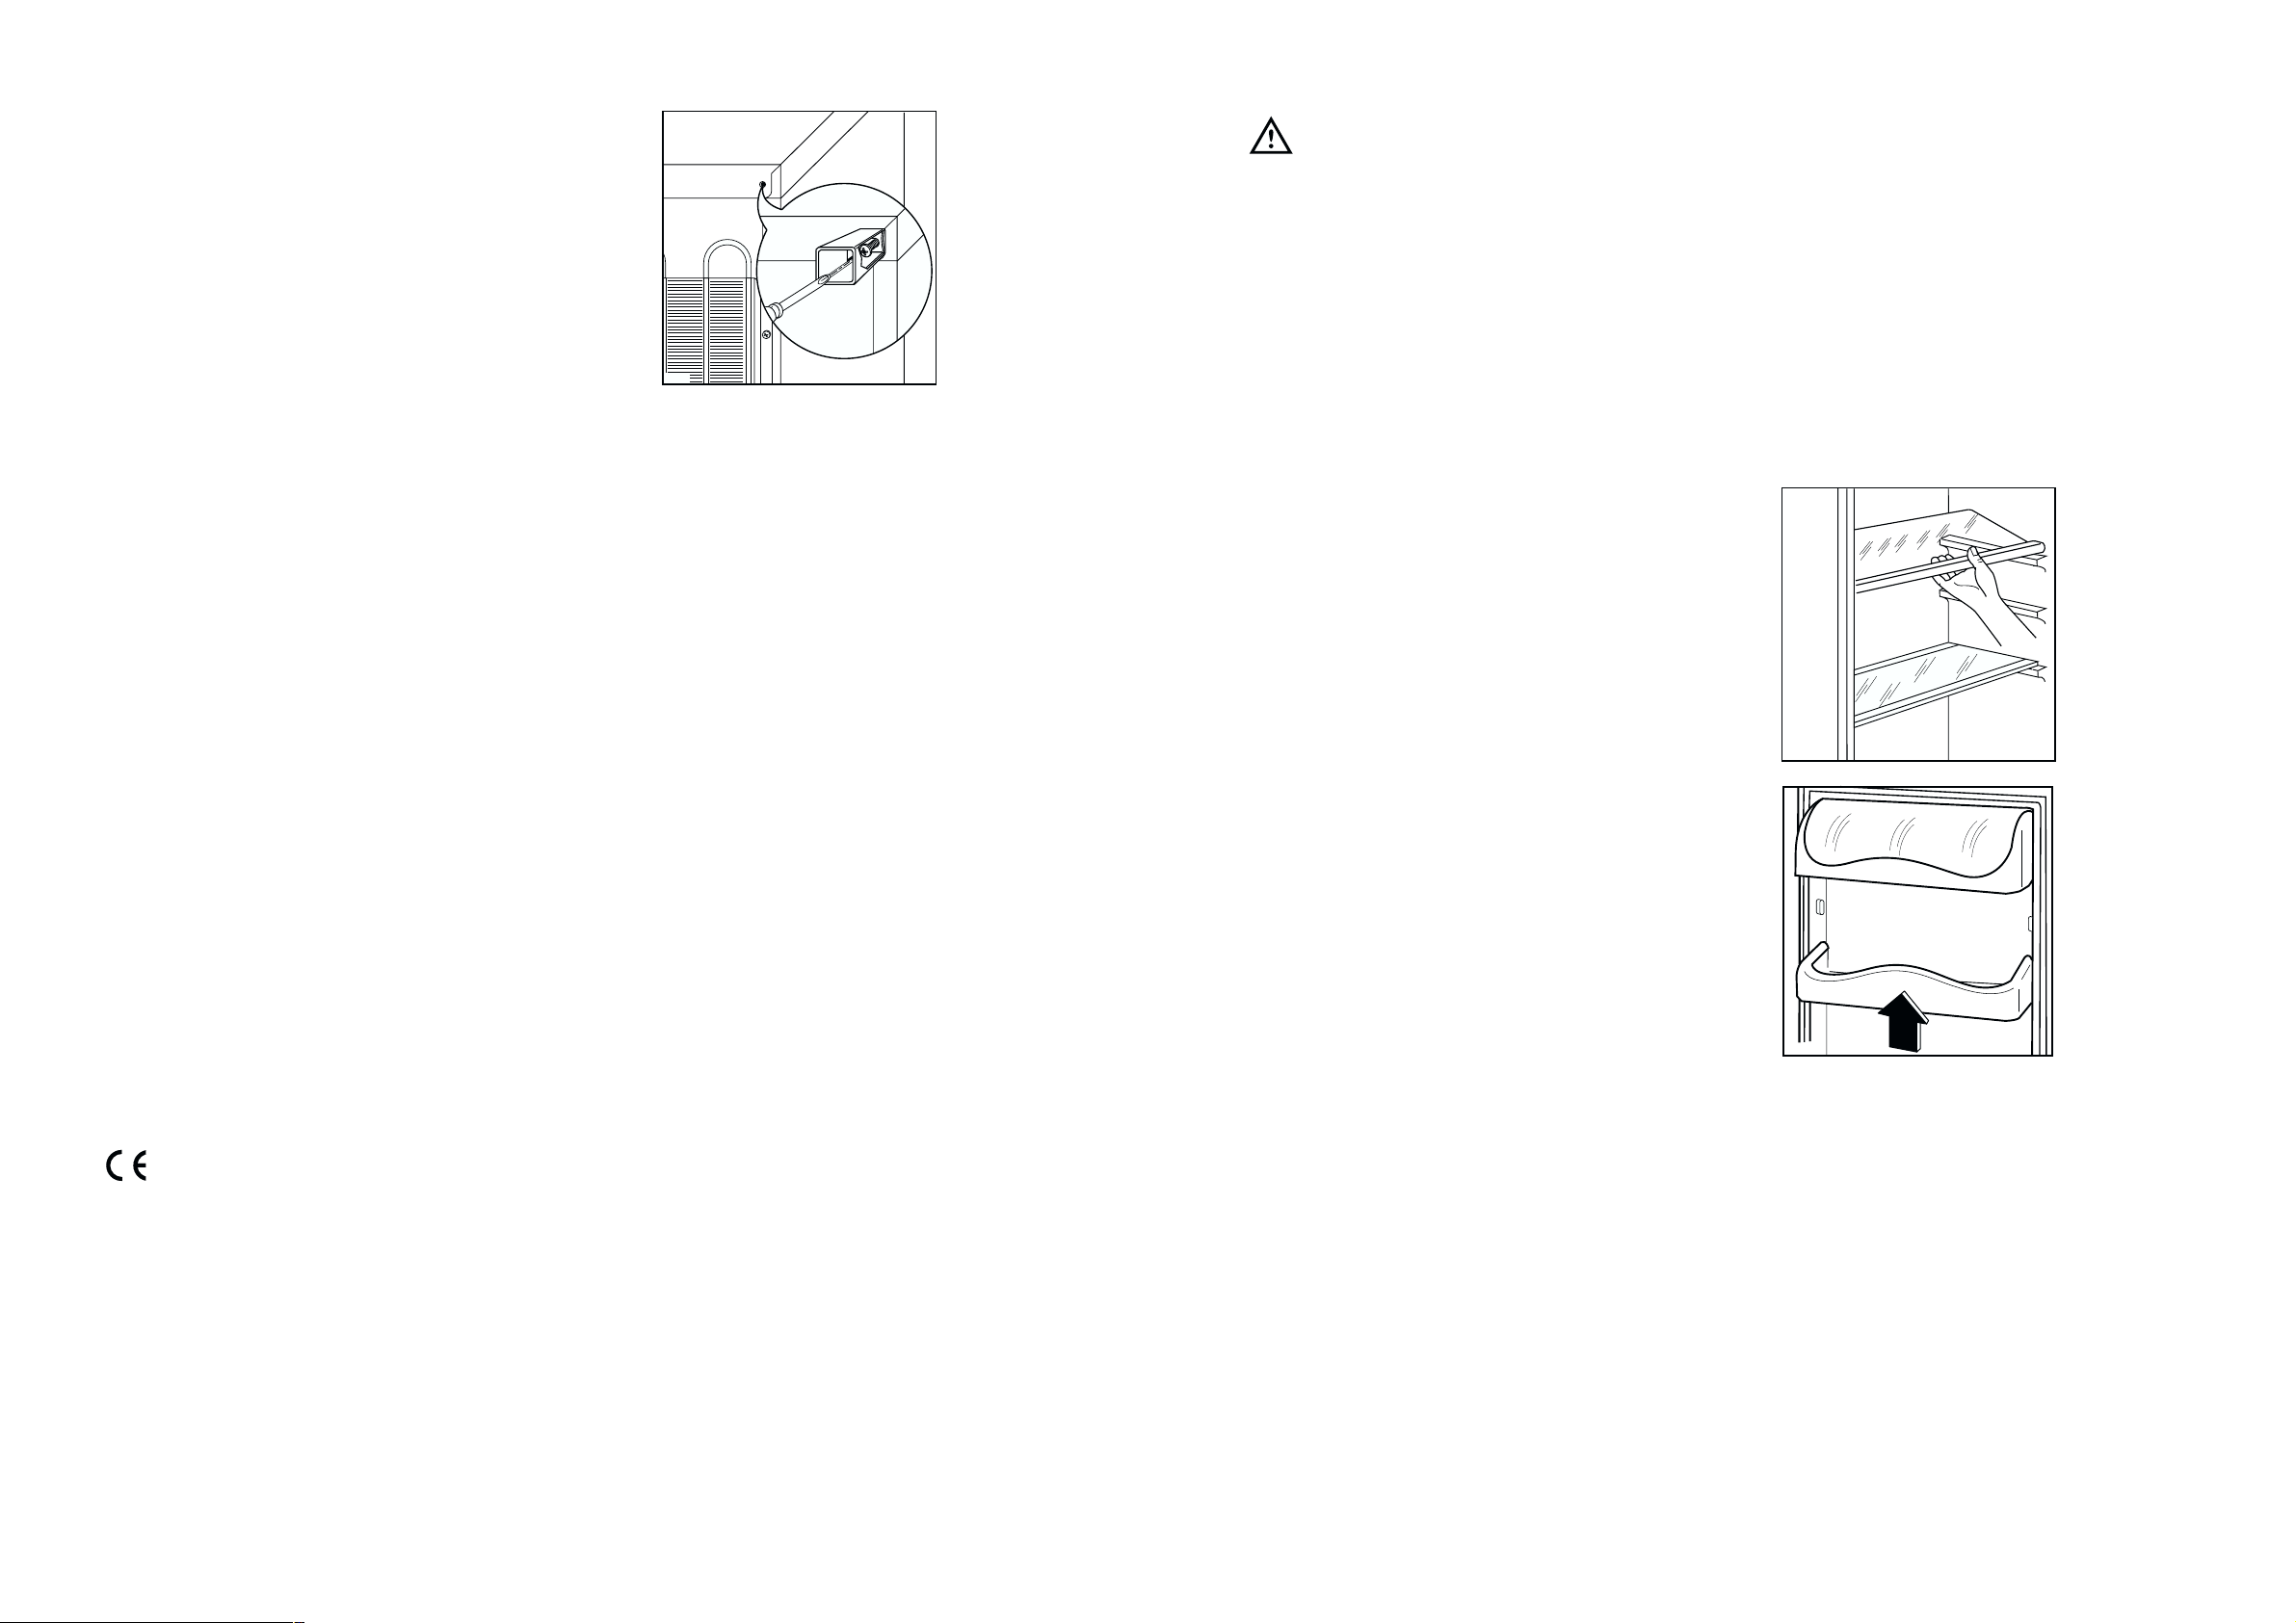
Positionnement des balconnets de
la contre-porte
Il est possible de changer de place les balconnets.
A cet effet procédez comme suit:
Dégagez les balconnets en agissant dans le sens
indiqué par les flèches. Remontez les balconnets à
la hauteur désirée.
Tablettes amovibles
Les glissières se trouvant sur les parois de la cuve
vous permettent de positionner les tablettes à
différentes hauteurs, selon vos besoins.
D338
PR260
24
Electrical connection
Before plugging in, ensure that the voltage and
frequency shown on the serial number plate
correspond to your domestic power supply.Voltage
can vary by ±6% of the rated voltage.
For operation with different voltages, a suitably sized
auto-transformer must be used.
The appliance must be earthed.
The power supply cable plug is provided with a
contact for this purpose.
If the domestic power supply socket is not earthed,
connect the appliance to a separate earth in
compliance with current regulations, consulting a
specialist technician.
The Manufacturer declines all responsibility if
the above safety precautions are not observed.
This appliance complies with the following
E.E.C. Directives:
- 87/308 EEC of 2/6/87 relative to radio interference
suppression.
- 73/23 EEC of 19.2.73 (Low Voltage Directive) and
subsequent modifications;
- 89/336 EEC of 3.5.89 (Electromagnetic
Compatibility Directive) and subsequent
modifications.
Rear spacers
In the bag with the documentation, there are two
spacers which must be fitted in the two top
corners.
Slacken the screws and insert the spacer under the
screw head, then re-tighten the screws.
ATTENTION!
It must be possible to disconnect the appliance from
the mains power supply; the plug must therefore be
easily accessible after installation.
D594
 Loading...