

Zanussi ZKF641HN, ZKF641HX, ZKF641HW, ZKF641HB User Manual
Electric Ceramic Hob
ZKF641H
Operating and Installation Instructions
User Instructions
Important hints on safety 3
Description of the appliance 4
Before first use 4
Operating Instructions 5
Ceramic glass surface 5
Heat Controls & Settings 5
Residual heat indicator 6
Pots and pans 6
Energy Saving tips 6
Maintenance and Cleaning 7
Something Not Working 8
Customer Care 8
Service and Spare Parts 8
Guarantee Conditions 9
Service Force Centres 10
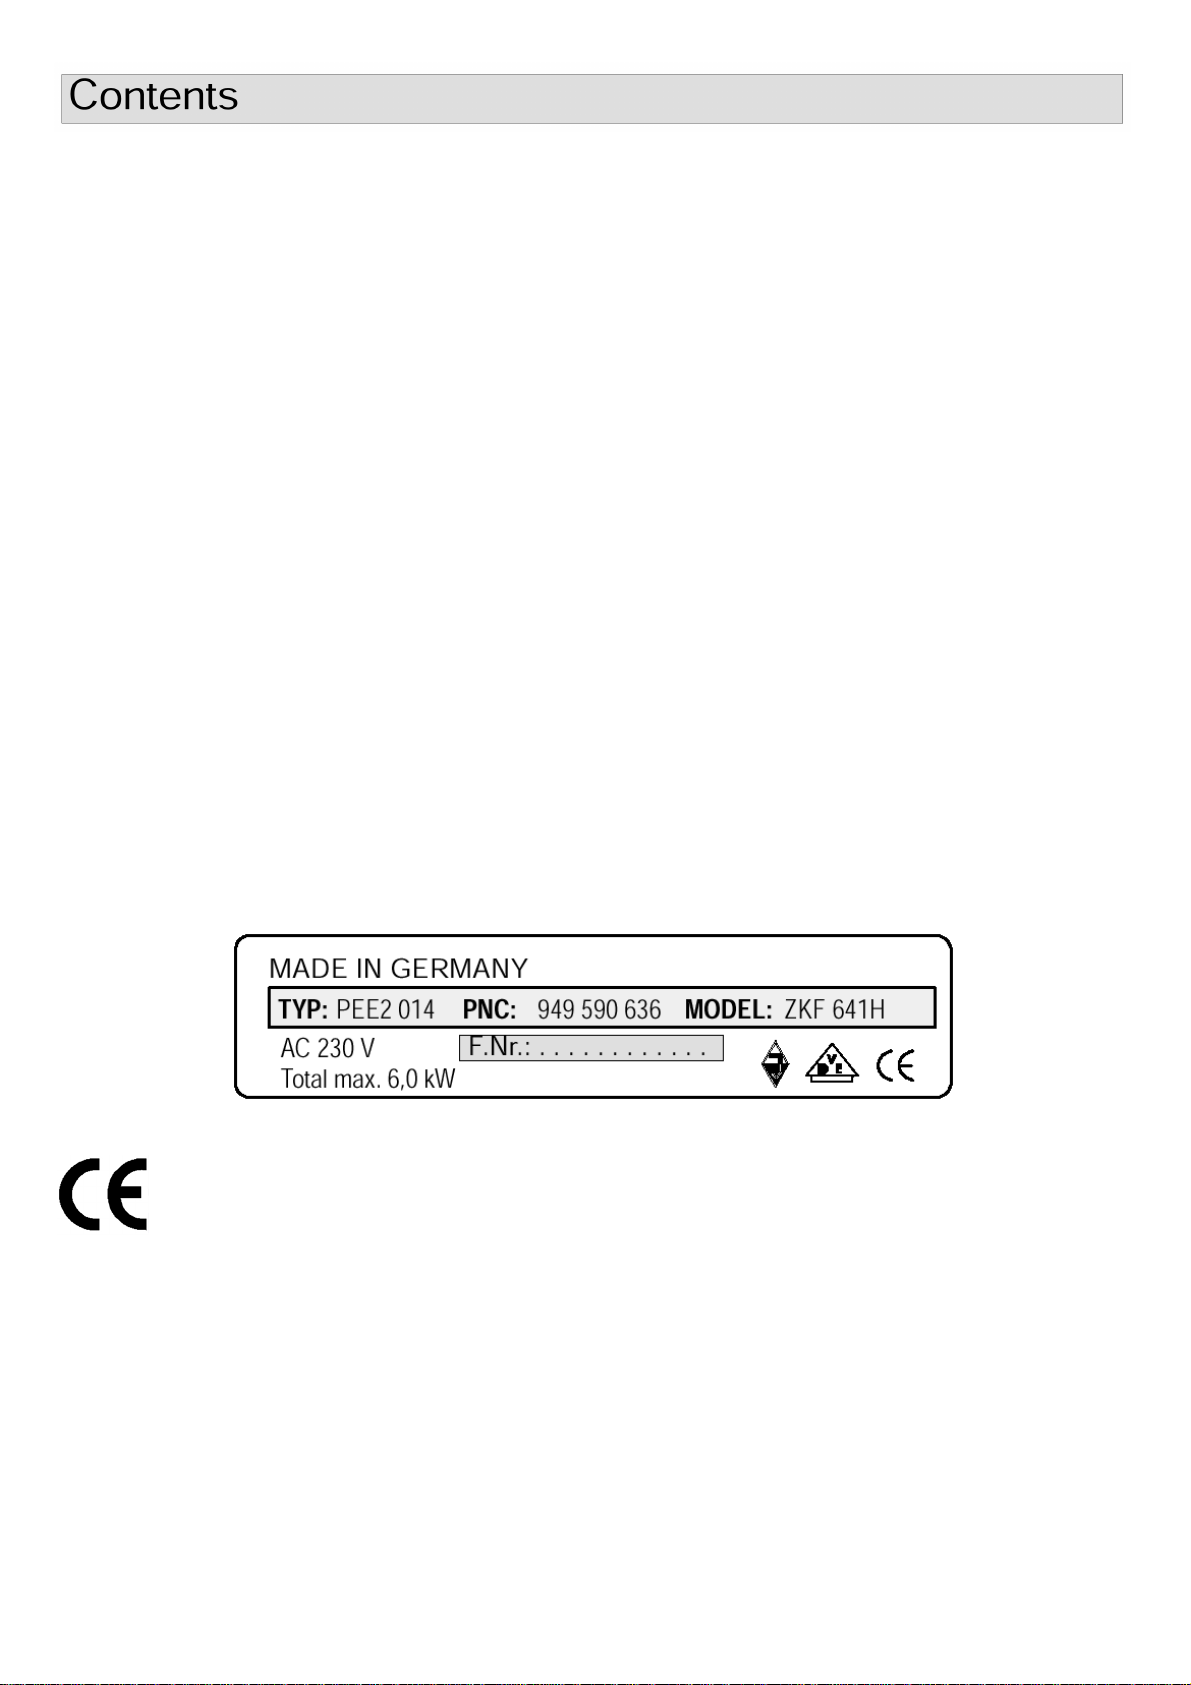
RATING PLATE
The rating plate is located on the bottom of t he appliance. Once the appliance has been built-in the rating
plate is no longer visible. Please write the ‘F Nr.’ into t he box below.
This appliance is corresponding to
the EG-rules 73/23/EWG, 89/336/EWG
and 90/683/EWG.
Installation Instructions
Technical Details 12
Unpacking and Disposal 12
Installing in the kitchen worktop 12
Building-In 13
Electrical Connection 14
This safety information is provided in the interests of your safety. Please read it carefully
before installing or using the hob. If you are unsure if the meaning of any of the warnings
please contact our Customer Care Department.
Installation
• This appliance must be installed by a qualified
electrician / competent person, according t o t he
manufacturer’s instructions and to the relevant
British Standards.
• Remove all packaging before using the
appliance.
• Ensure the electrical supply complies with the
type stated on the rating plate.
• Do not attempt to modify the hob in any way.
• Do not install the hob if the ceramic glass is
damaged or cracked.
Child Safety
• This appliance is designed to be operated by
adults. Do not allow children to play near or with
the appliance.
• The appliance gets hot when it is in use.
Children should be kept away until it has cooled.
• Children can also injure themselves by pulling
pots or pans off the hob.
During Use
• Only use the hob when it is fully installed.
• This hob is intended for domestic cooking only.
It is not designed for commercial or indust rial
purposes.
• Ensure the power ON/OFF switch is off when
the hob is not in use.
• When using other electrical appliances, ensure
the cable does not come into contact with the
hot surfaces of the hob.
• Do not use unstable or misshapen pans on the
hob.
• Never leave the hob unattended when cooking
with fat or oil.
• Never use plastic or aluminium foil dishes on the
hob.
Safety Hints and information
Environmental information
• The cooking zones heat up quickly when they
are turned on. Only turn them on when a
saucepan is on the cooking zone.
• The residual heat indicator will not operate if
there is a power failure.
• Do not store temperature sensitive or
inflammable materials (e.g. deter gent s or
aerosols) in drawers or cupboards underneath
the hob.
• The hob surface must not be used for storage or
as a working area.
• Do not allow sugar (solid or liquid) or plastic to
come into contact with the hob surface when
hot.
• Clean the hob in accordance with the
Maintenance and Cleaning instructions.
• Do not use the hob if the glass is damaged or
becomes cracker, contact your local Service
Force Centre.
Service
• This hob should only be repaired or serviced by
an authorised Service Engineer and always
insist on genuine spare parts.
Disposal
• Please dispose of any packaging material and
old appliances at authorised disposal sites with
due regard for the environment.
3
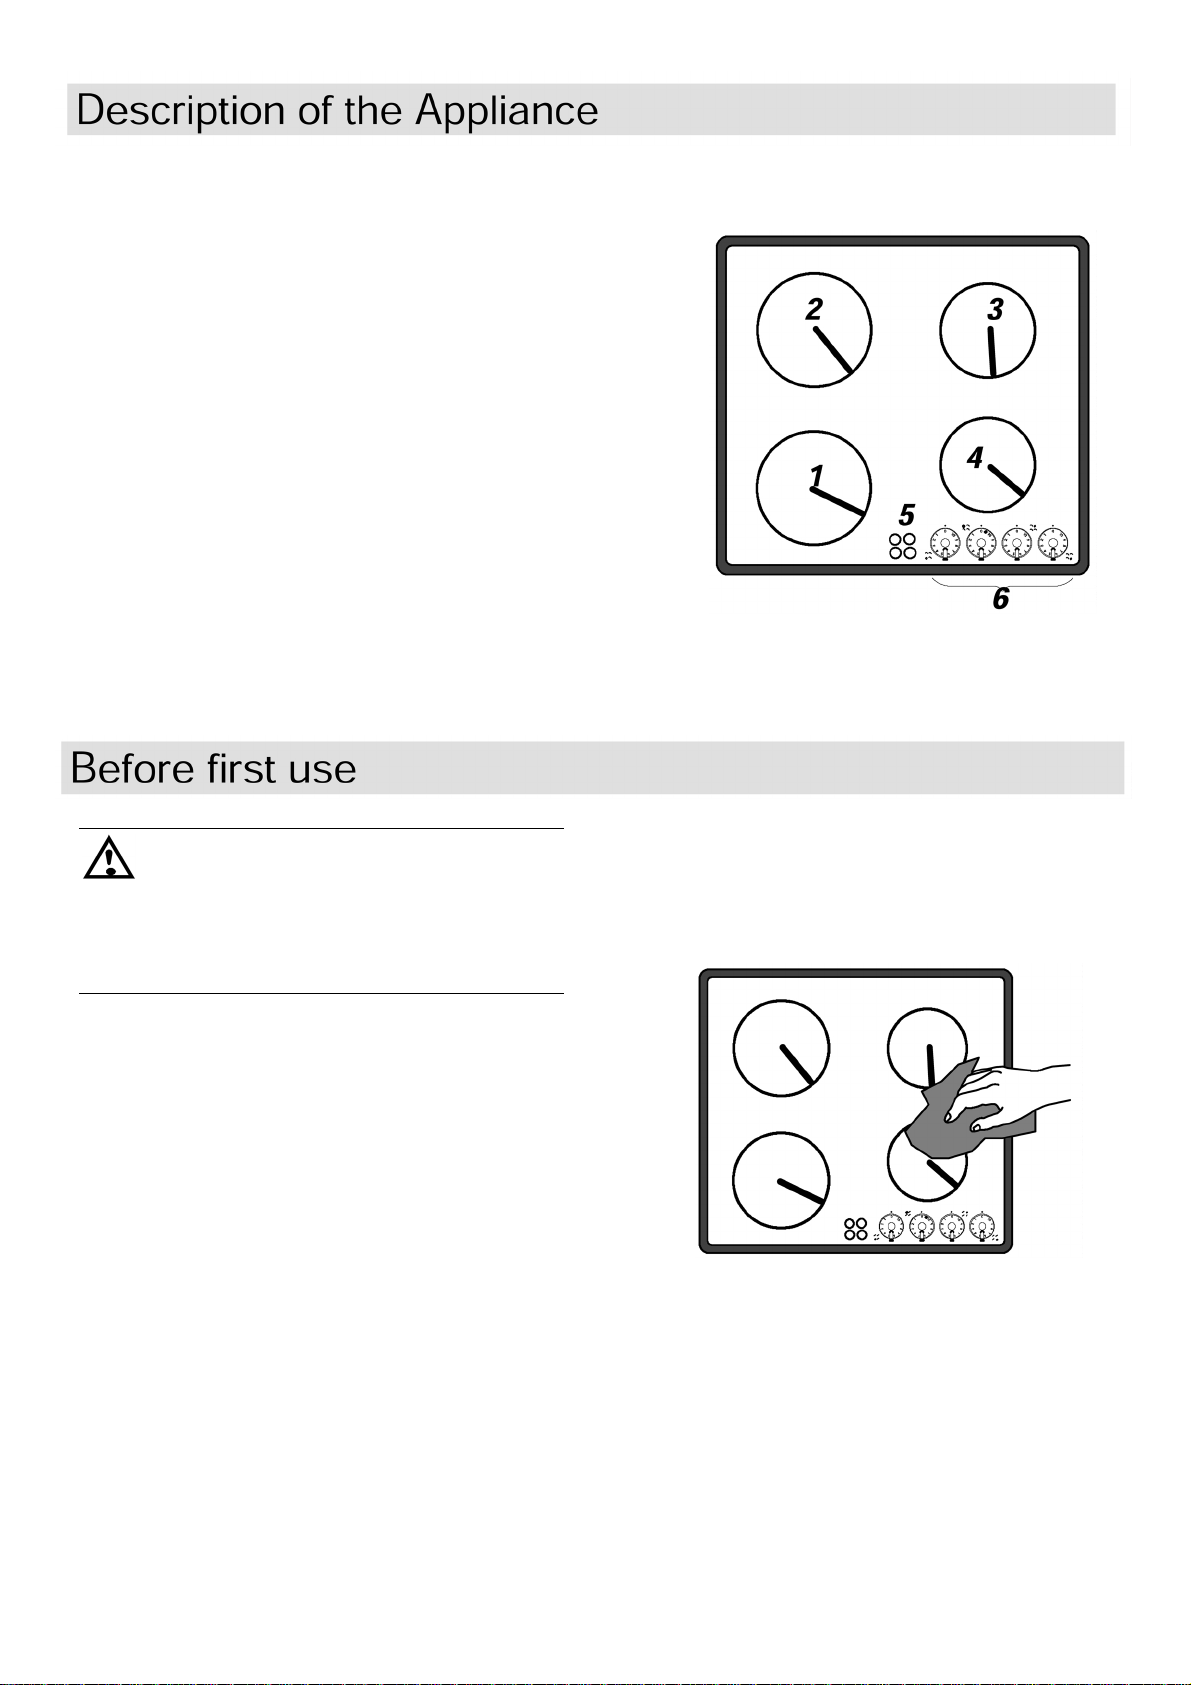
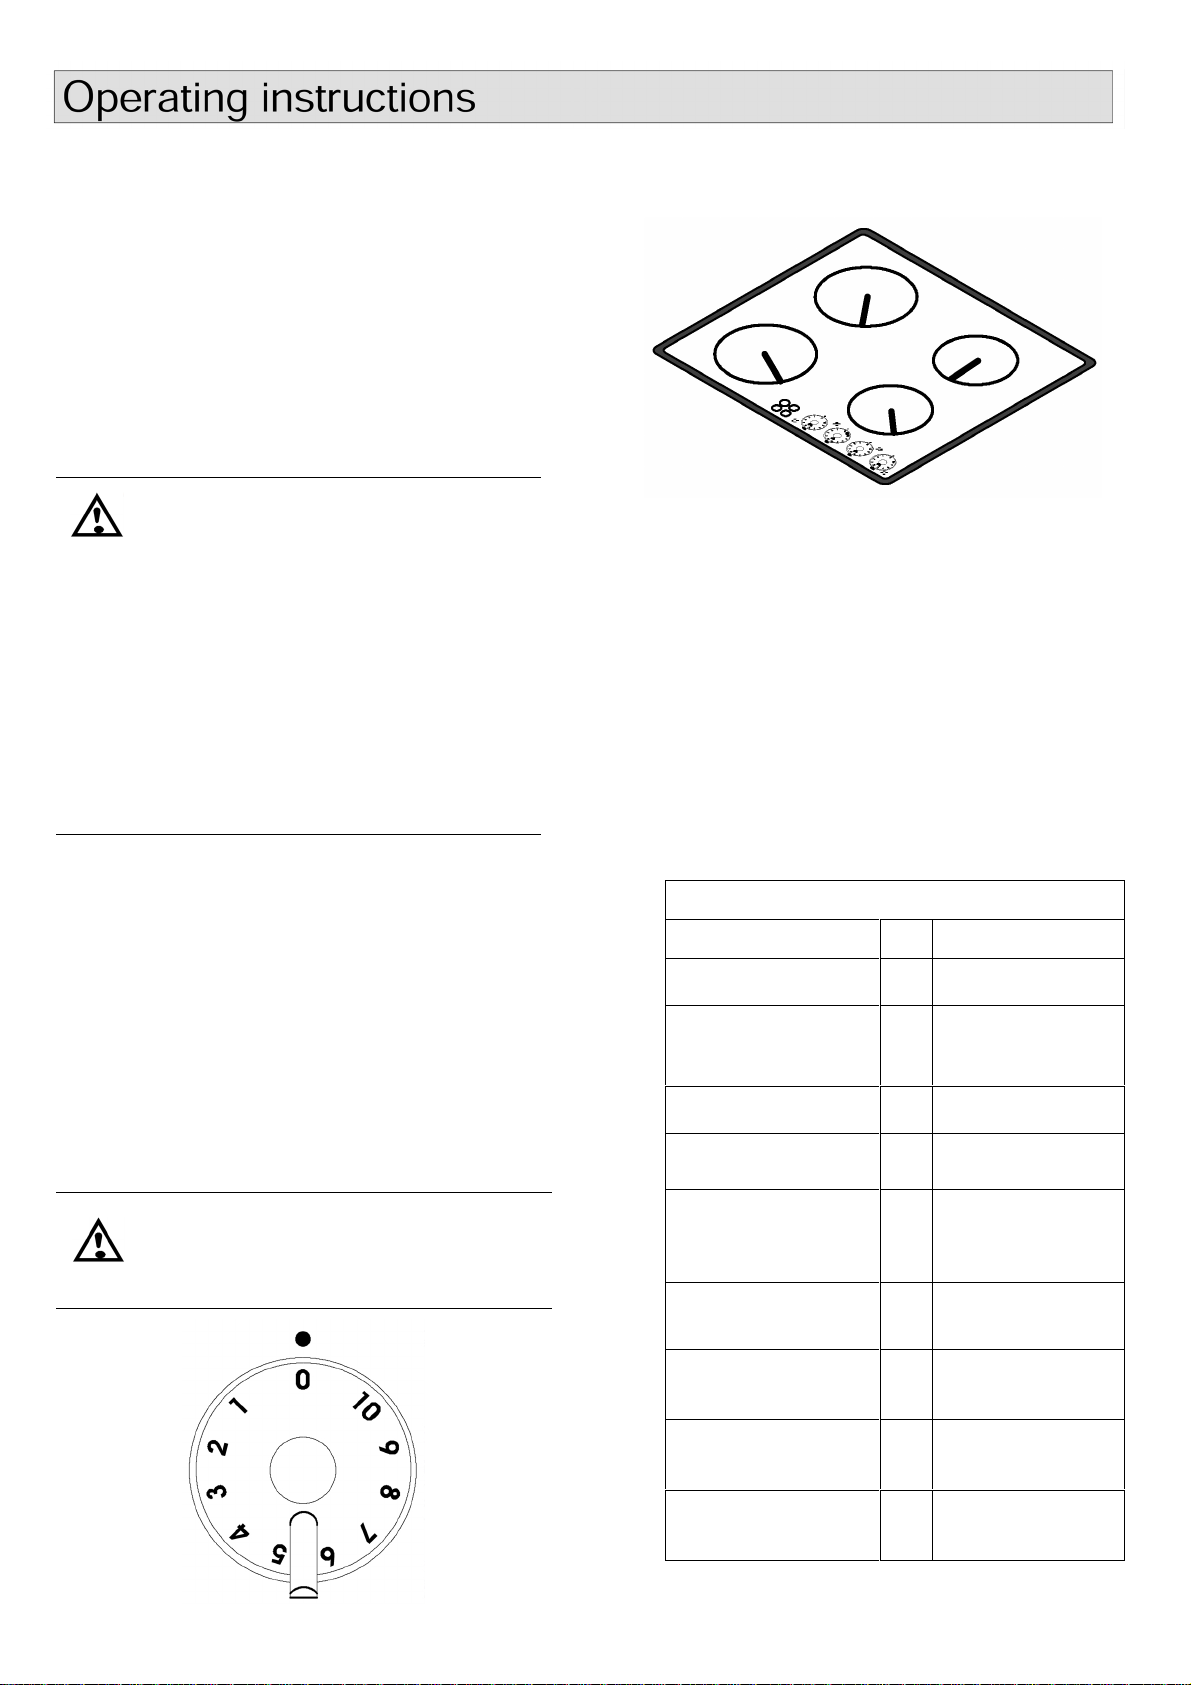
1. Cooking Zone ø 180 mm 1800 W
2. Cooking Zone ø 180 mm 1800 W
3. Cooking Zone ø 145 mm 1200 W
4. Cooking Zone ø 145 mm 1200 W
5. Residual Heat Indicator
6. Heat setting control knobs
Voltage AC 230 V
Total connected Load 6.0 kW
Please check that the appliance was
delivered in perfect condition.
Appliances with obvious transport
damage must not be connected to t he
mains.
First Cleaning
In order to remove any remnants left by pr oduct ion,
clean the hob before it is first use.
Ensure any labels and protective films on the hob
are removed.
Clean the ceramic glass and the frame with hot
water and a little washing up liquid added.
First Heating Up
Check each cooking zone, in turn, by briefly
switching to the maximum setting (10).
When using the ceramic hob for the first time it can
temporarily emit an odour.
4
Ceramic glass surface
The cooking surface is made of proven ceramic
glass. The surface is non-porous and, in addition,
insensitive to quick variations in temperature.
Therefore pots may be moved from a hot t o a cold
zone.
When switching on the cooking zones you may
hear a short-term audible buzzing sound of the
radiant elements. This will not harm the
performance of the appliance.
Keep all objects and materials that
might smelt away from the heat zones.
Sugar solutions, food stuff s wit h a high
sugar content, plastics, or kit c hen f oil –
must be removed immediately with a
glass scraper. If this type of soiling is
not removed immediately it can cause
irreparable damage to the cer am ic
glass surface. Which is not covered by
the guarantee.
When the surface has cooled, wipe
over with a damp cloth and Vitroclen.
Heat Controls
The cooking zones regulate the heating capacity of
the cooking zones.
The control knobs for the cooking zones can be
turned to the left and to the right to desired
position.
1 = minimum setting
10 = maximum setting
0 = OFF
After use make sure t hat the appliance is
switched off by ensuring that all cont rol
knobs are set to ‘0’.
Heat Zone Setting Chart
Function Examples
OFF
Keeping warm,
gentle heating,
beating or melting
Swelling, defrosting
Frying without crust
Simmering, swelling
Boiling
0
Small amounts of
1
hotpot, sauce,
2
butter or chocolate
Rice, spinach
3
Omelette, fried
4
eggs
Vegetables, fruit
with little liquid,
5
farinaceous
product
Potatoes, stews,
6
soups, sauces
5
Frying
Baking
Quick frying
Parboiling, lightly
frying
Schnitzel, cutlets,
meatballs, fish
7
fillets in deep fat.
Potato fritters,
pancakes, fried
8
eggs
… the switch back
9
to an appropriate
10
setting
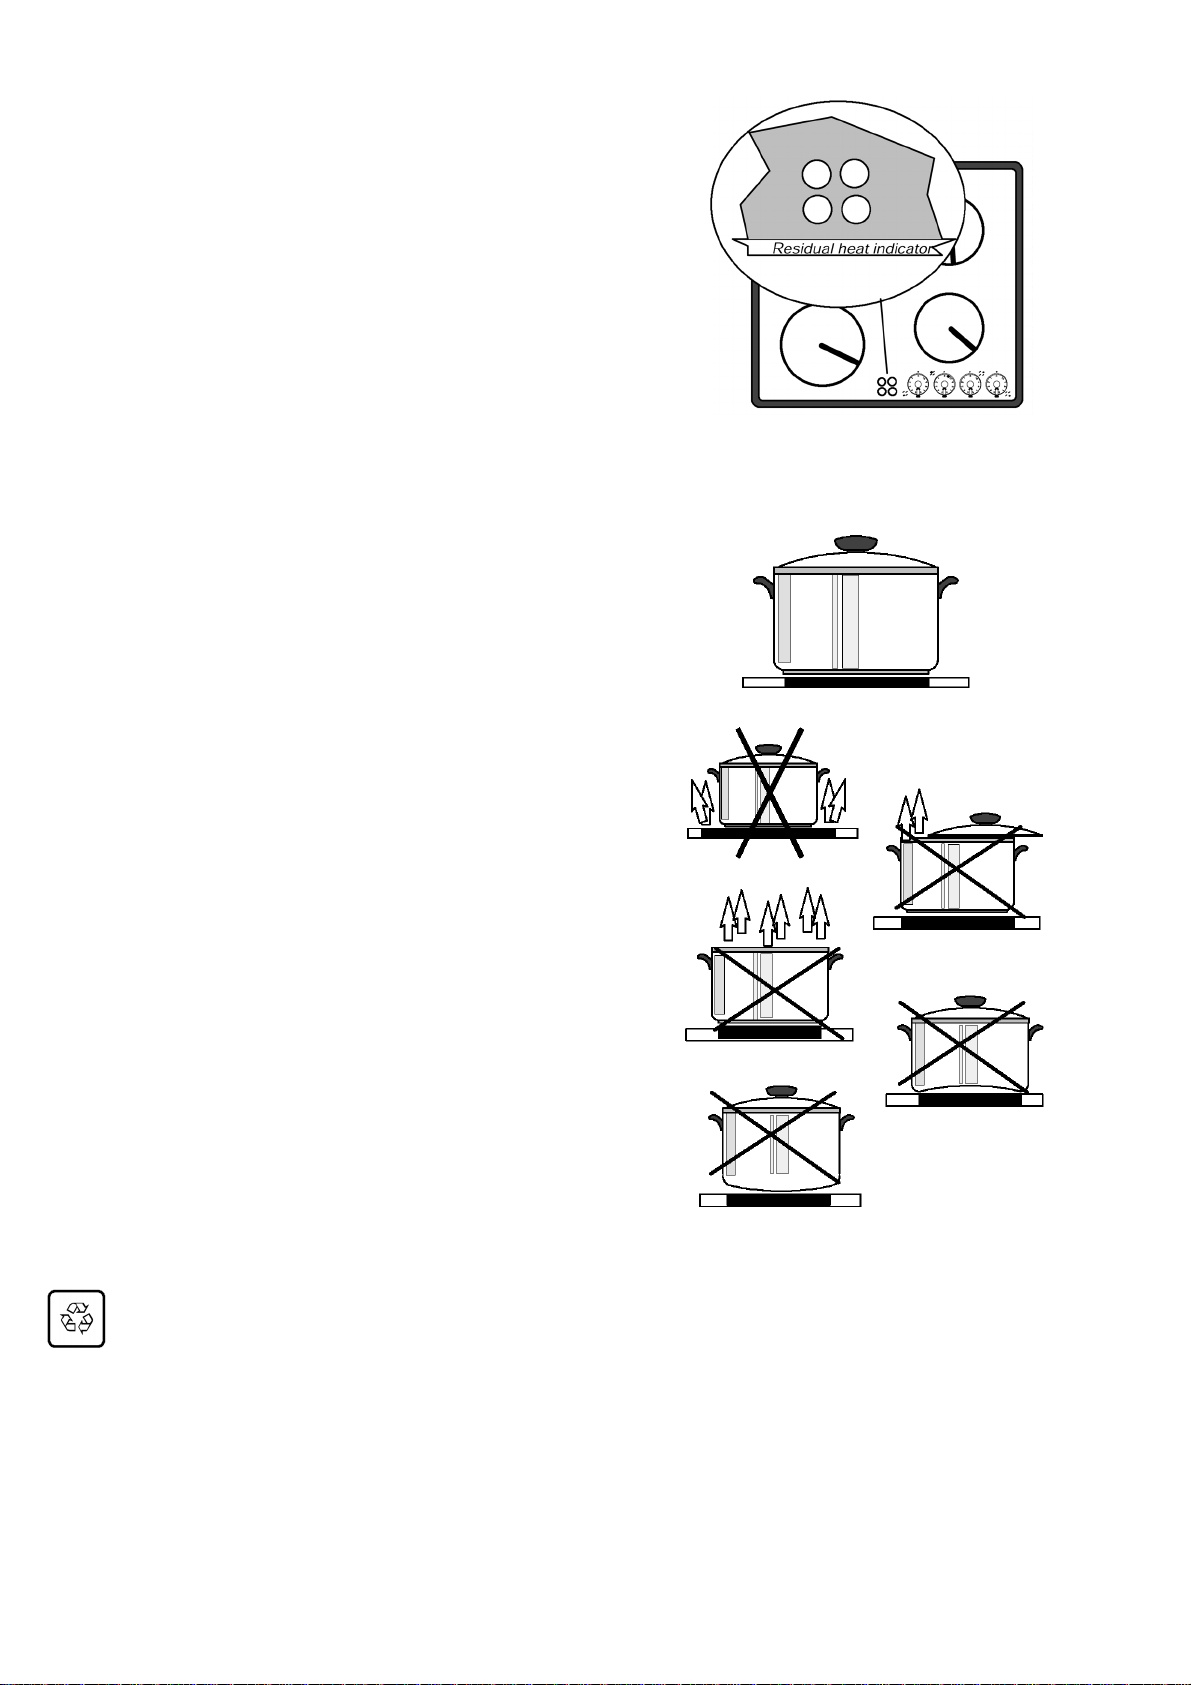
Residual Heat indicator
Each cooking zone is related to one indicator. The
warning lamp illuminates when the surface of the
corresponding cooking zone reaches a
temperature which could cause burns.
The indicator remains illuminated after t he area
heated has been switched off as long as the
residual heat of the corresponding cooking zone
could cause burns.
The light will go out when the temperature f alls
below 60°C.
Saucepans and frying pans.
Saucepans and frying pans should not be smaller
than the cooking zone, and preferably not more
that 10-15 mm larger than the cooking zone.
The bases should always be clean and dry. Cook
with a lid in place.
Always using cooking and frying utensils with
smooth, flat bottoms. Bases wit h bur r s and sharp
edges will scratch the ceramic glass surface.
Scratches can also be caused by grains of sand
(e.g. originating from washed vegetables) , drawn
over the cooking surface with the pan, or by burrs
and rims on the base of pans.
To avoid scratching or damaging the ceramic
glass surface, pots and pans should be moved
on the hob by lifting them and not by sliding.
Utensils with aluminium and copper bases can
leave behind metallic discolouration which can only
be removed with difficulty and sometimes not at all.
When cold, pan bases normally curve slightly
inwards by approx. 0.1-0.5 mm (concave). In no
case should they curve outwards (convex).
Follow any guidelines provided by the saucepan
manufacturer. Ensure that they ar e r ecommended
for use on ceramic hobs.
Energy Consumption
To save energy, you should…
• Only use cooking and frying utensils with flat
smooth bases.
• Place pots and pans in position before switching
on the cooking zone.
• Wherever possible, cover pots and pans with a
lid.
• Switch off the cooking zone a few minutes
before the end of the cooking time, in order to
make use of the residual heat.
• Use the residual heat of the cooking zone for
keeping food warm, or for. melting.
• Position pots and pans centrally on the cooking
zone
6
 Loading...