


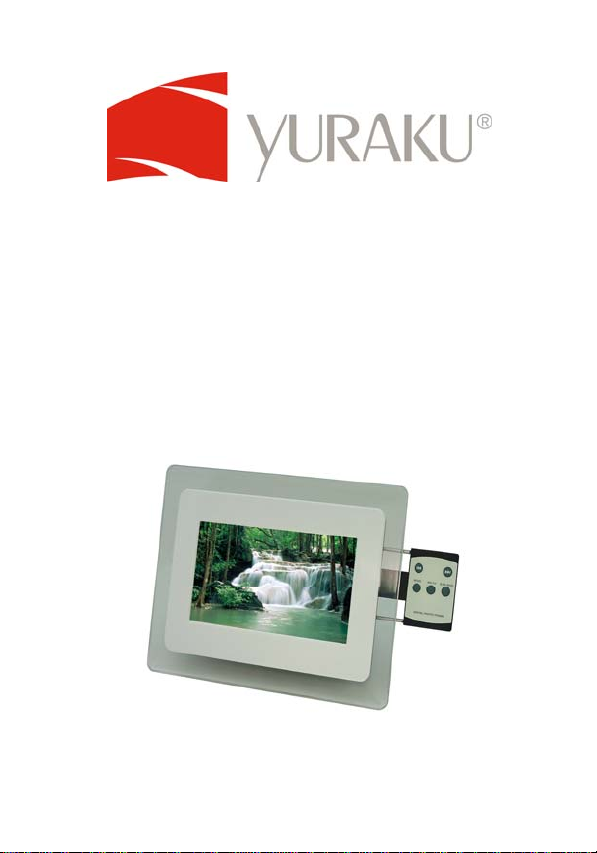
YUR.PHOTO 7B2
2
YYuurr..PPhhoottoo 77BB22
YYuurr..PPhhoottoo 8855BB22
YYuurr..PPhhoottoo 99BB2
User's Manual
Please read this manual before operating
version1.5
For 7", 8.5” and 9" Models

Yur.Photo 7B2 / 85B2 / 9B2
Important Safety Instructions
WARNING:
Do not expose this device to wate r or moisture.
The device should be situated away from sources of high heat such as
radiators or stoves.
The device should be connected to a power supply only of the type
described in the operating instructions or as marked on the unit.
Care should be taken so that objects are not placed on , nor liquids spilled
on or insi de the device.
The user should not attempt to service the device beyond those means
described in these operating instructions. All other servicing should be
referred to qualifie d serv ice personn el.
Note: Photos and illustrations in the manual might differ from the actual
product due the changeable frame designs.
All specifications and information are subject to changes without further notice 2
Yur.Photo 7B2 / 85B2 / 9B2
Getting Started
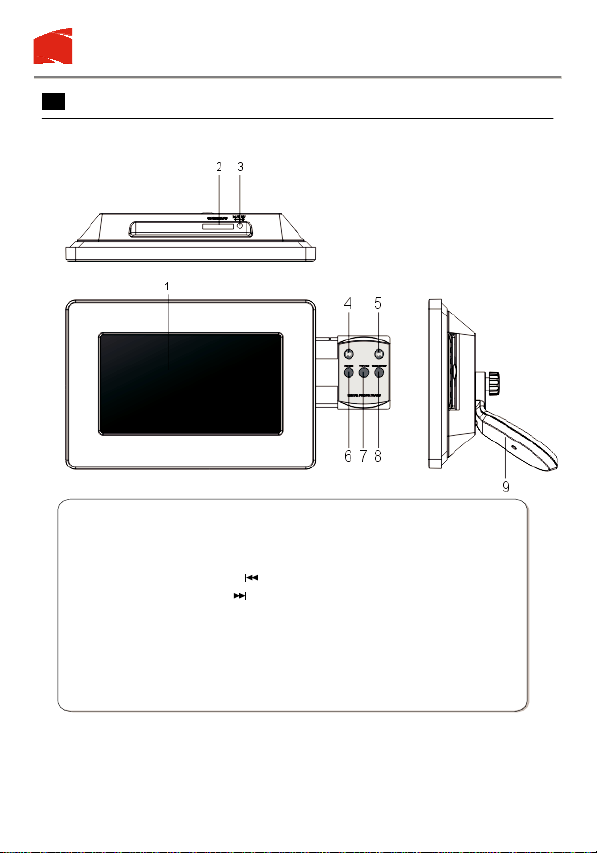
Locating Controls and Connections
1. LCD screen
2. SD/MMC/MS/XD memory slot
3. Power DC IN Jack
4. SKIP-BACKWARD( )
5. SKIP-FORWARD( )
6. ROTAT E: Use to rotate the p hoto .
7. 16:9/4:3: Use to switch among Wide Screen 16:9, Auto Zoom
Regular Screen 4:3.
8. SLIDE SHOW ON/OFF
9. Stand
All specifications and information are subject to changes without further notice 3
Yur.Photo 7B2 / 85B2 / 9B2
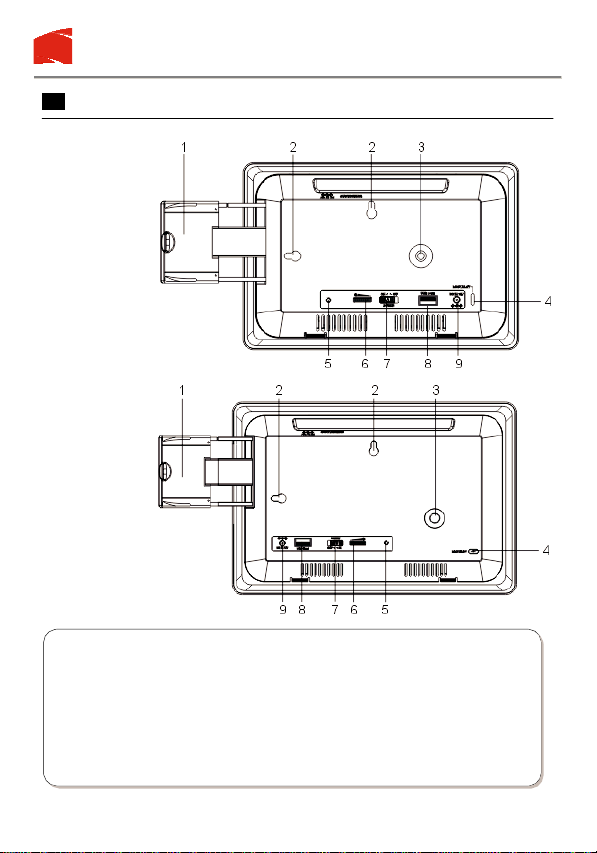
Illustration
7"
model
8.5”and
9"
model
1.Retractable keypad
2. Key holes for wall mount.
3. Stand screw hole
4. LOCK SLOT: for connection of lockable chain lock.
5. Power on/off indicating LED
6. Screen brightness adjustment knob
7. POWER ON/OFF
8. USB Slot
9. DC power input
All specif ications and information are subject to changes without further notice 4
Yur.Photo 7B2 / 85B2 / 9B2
Positioning
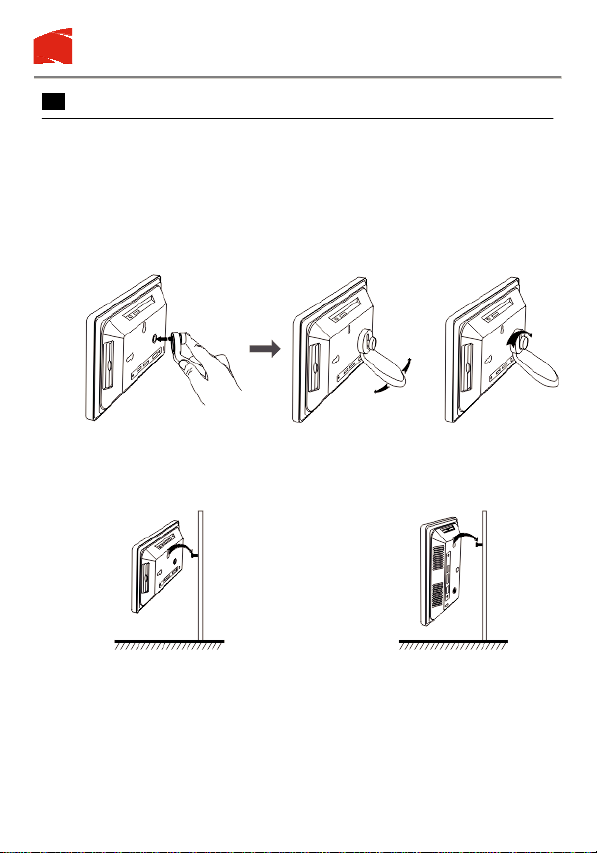
Placing the Photo Frame
You can place this Photoframe on a flat surface or hang it on the wall.
Place on a flat surface
1. Screw in the stand to the stand screw hole on the back of the
Photoframe.
2. Adjust the stand position for vertical or horizontal placement,
tighten the screw.
Hang on the wall
1. Insert a screw into your desired spot on the wall.
2. Place one of the KEY HOLES, depending on your desired
Frame orientation, over the screw and hang the Frame.
All specif ications and information are subject to changes without further notice 5
Horizontal Vertical
 Loading...