

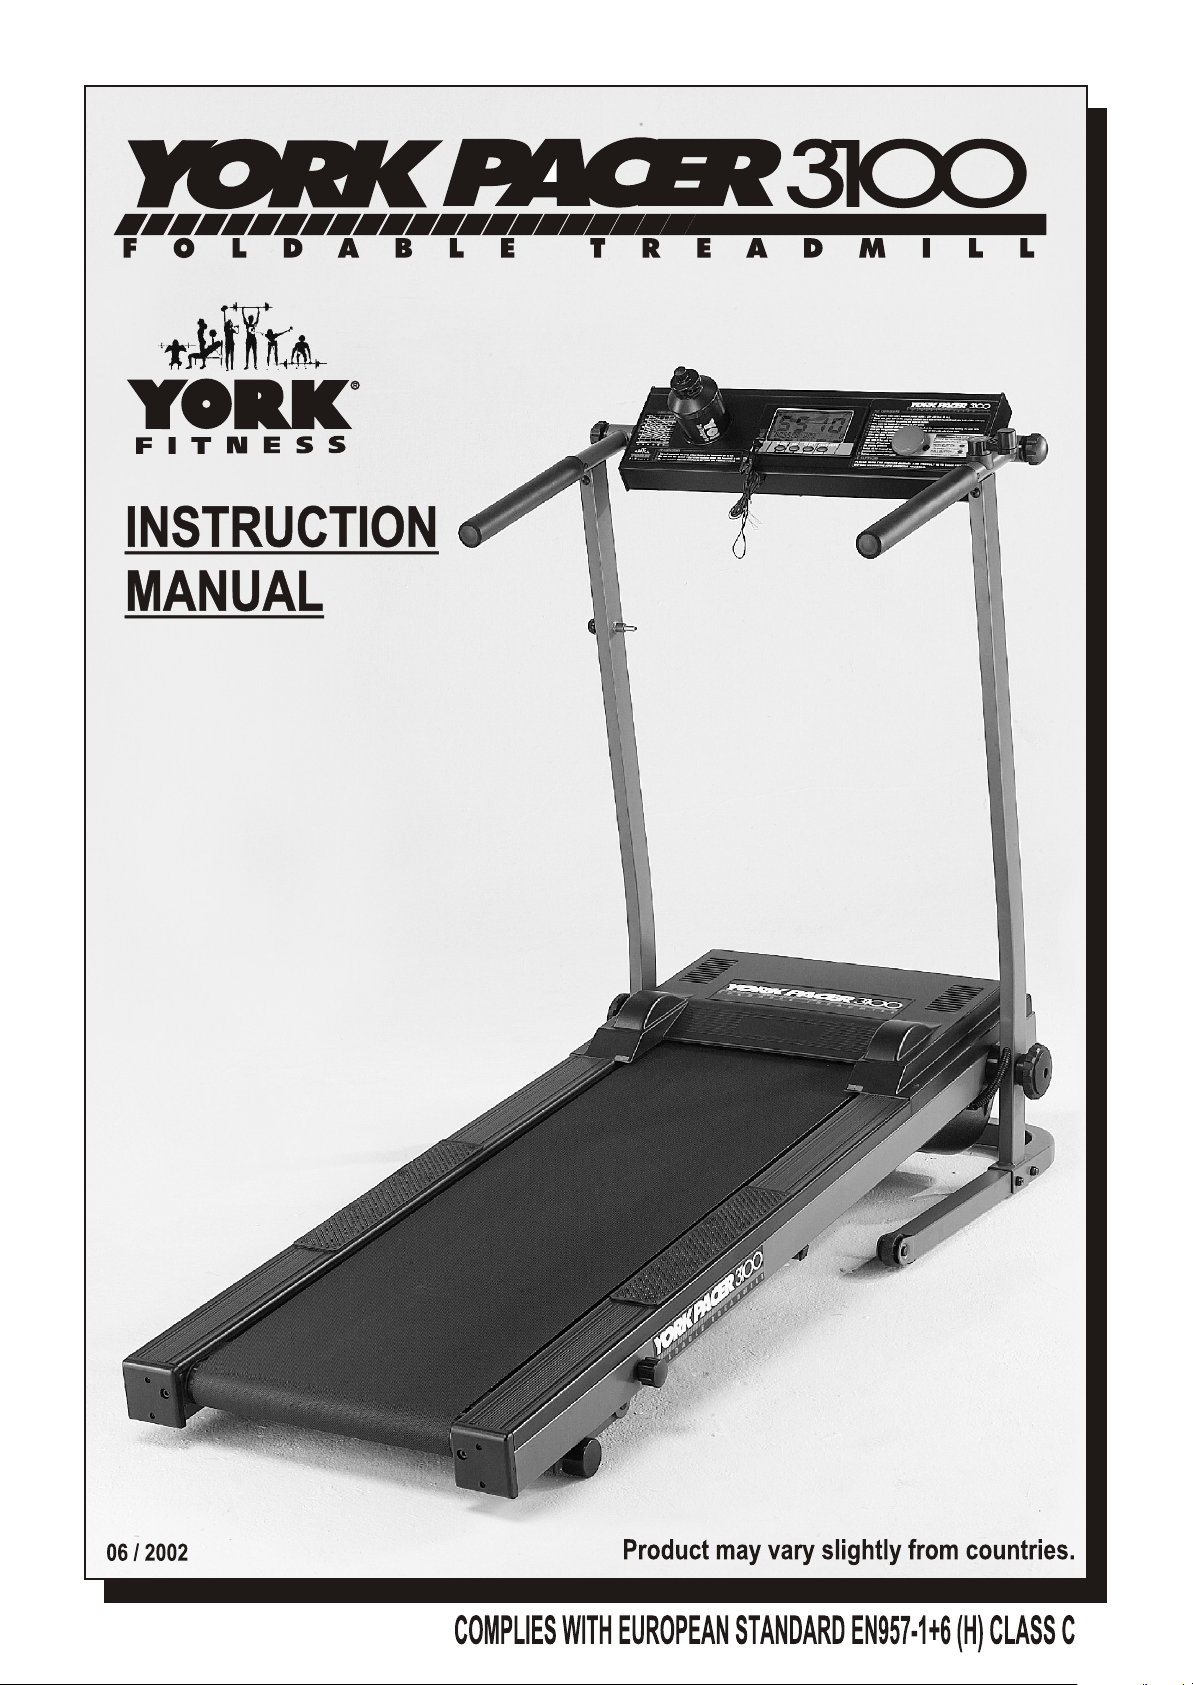
York Fitness Racer 3100 Instruction Manual
31O O

YORK PACER 3100 TREADMILL
SAFETY GUIDELINES:
Please read and follow the following safety guidelines:
Before beginning any exercise program, you should consult with your doctor.
It is recommended that you undergo a complete physical examination.
Read this owner’s manual and follow the instructions.
Assemble and operate the YORK PACER 3100 on a solid, level surface.
Always allow a clear space measuring 1m wide and 2m long immediately behind
the YORK PACER 3100.
The treadmill will not sperate without the power lead.
Always remove the power lead when not in use and store away from children.
Never allow children on or near the treadmill.
You will need at least one person to help you assemble this unit, two would be better.
The treadmill running belt will not stop immediately if any object becomes caught in the
belt of rollers.
Always check the treadmill before using it.
Make sure all parts are assembled, and nuts and bolts are tightened.
Do not use the treadmill if the unit is disassembled in any way.
Keep hands away from moving parts.
The weight limit for this treadmill is 225 lbs (100 kgs).
Wear proper workout clothing: Do not wear loose clothing.
Do not wear shoes with leather soles or high heels. Tie all long hair back.
Don’t rock the unit from side to side.
Care should be taken when mounting and dismounting the unit.
Do not place any liquid on any part of the treadmill.
To prevent shock, keep all electric components, such as the motor, cord and switch away
from water.
Do not use any accessories that aren’t specifically recommended by the manufacturer,
these might cause injuries or cause the unit to fail.
Work within your recommended exercise level, do NOT work to exhaustion.
If you feel any pain or abnormal systems, STOP YOUR WORKOUT IMMEDIATELY.
Consult your physician immediately.
Turn off the treadmill while adjusting or working near the rear roller.
WARNING
This appliance must be EARTHED.---IMPORTANT
The YORK PACER 3100 is designed for the use and enjoyment of the serious trainer as
well as the dedicated user. By following the above precautions and using good judgement and
common sense, you will have safe and pleasurable exercise regimen with the YORK PACER 3100.
CARE AND MAINTENANCE
Use a warm damp cloth with mild detergent to
keep your YORK PACER 3100 clean.
SHOULD YOU REQUIRE ANY ASSISTANCE REGARDING THIS PRODUCT PLEASE CONTACT YORK DIRECTLY.
YORK BARBELL (U.K.) LTD.
CHURCHILL WAY, DAVENTRY,
NORTHANTS, NN11 4YB ENGLAND
TEL: (01327) 701-824
HELP LINE
(8:30am- 4:30pm)
FAX: (01327) 706-704
E-MAIL: helpdesk@yorkfitness.co.uk
TOOLS REQUIRED
The tools enclosed in the carton are one multi-purpose
spanner (which has a screwdriver function) and one allen key.
YORK BARBELL (AUST.) LTD.
UNIT 1, LOT 2, SWAFFHAM ROAD,
MINTO, N.S.W. 2566 AUSTRALIA
TEL: (02) 9603-8444
HELP LINE
(8:30am- 4:30pm)
FAX: (02) 9603-8555
E-MAIL: paulyork@ozemail.com.au
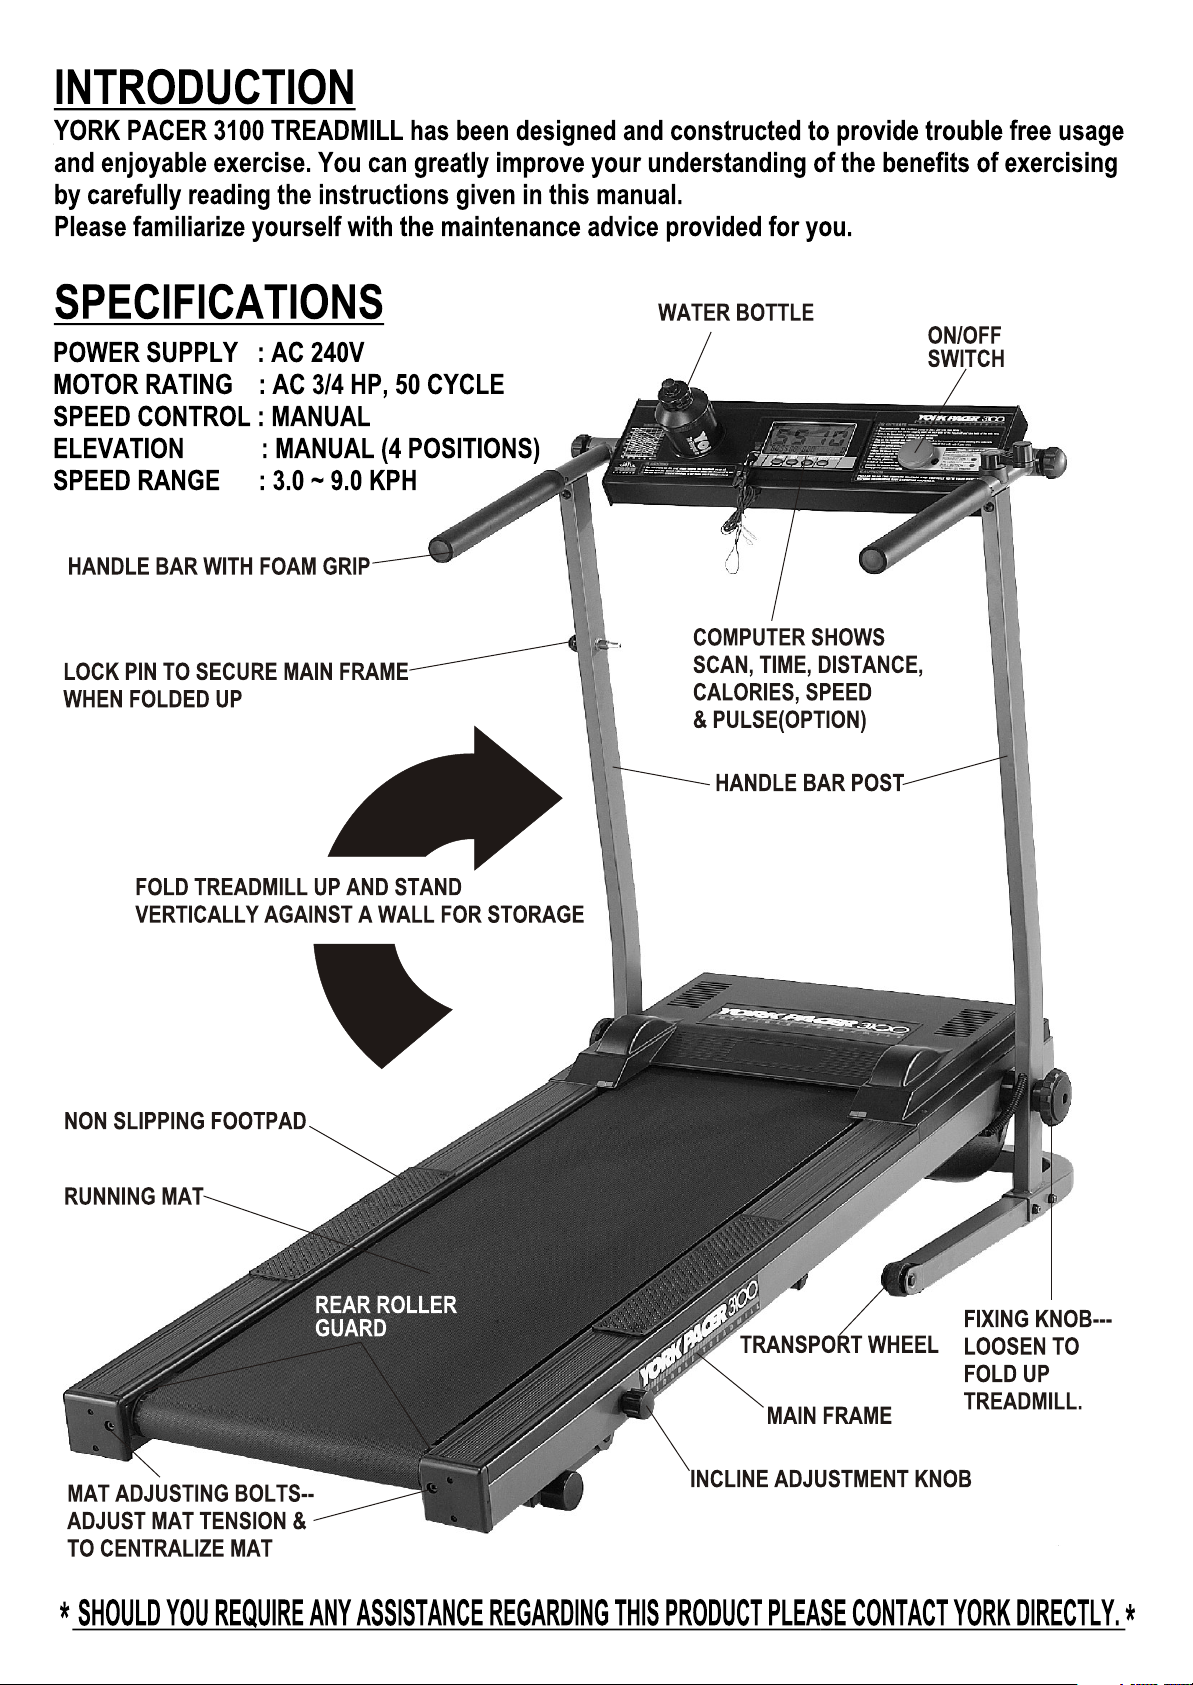
GENERAL
REMOVE ALL THE PARTS OF YOUR TREADMILL FORM THE CARTON AND
PLACE THEM ON THE FLOOR CAREFULLY!!
ASSEMBLING YOUR TREADMILL IS SIMPLE, PLEASE NOTE THAT THE
MAIN FRAME IS HEAVY; WE RECOMMEND THAT YOU GET SOMEONE TO
HELP YOU WHEN ATTACHING THE FRONT STABILIZER TO THE MAIN FRAME.
FOLLOW THESE INSTRUCTION CAREFULLY AND IT SHOULD TAKE YOU
AROUND 10-15 MINUTES.
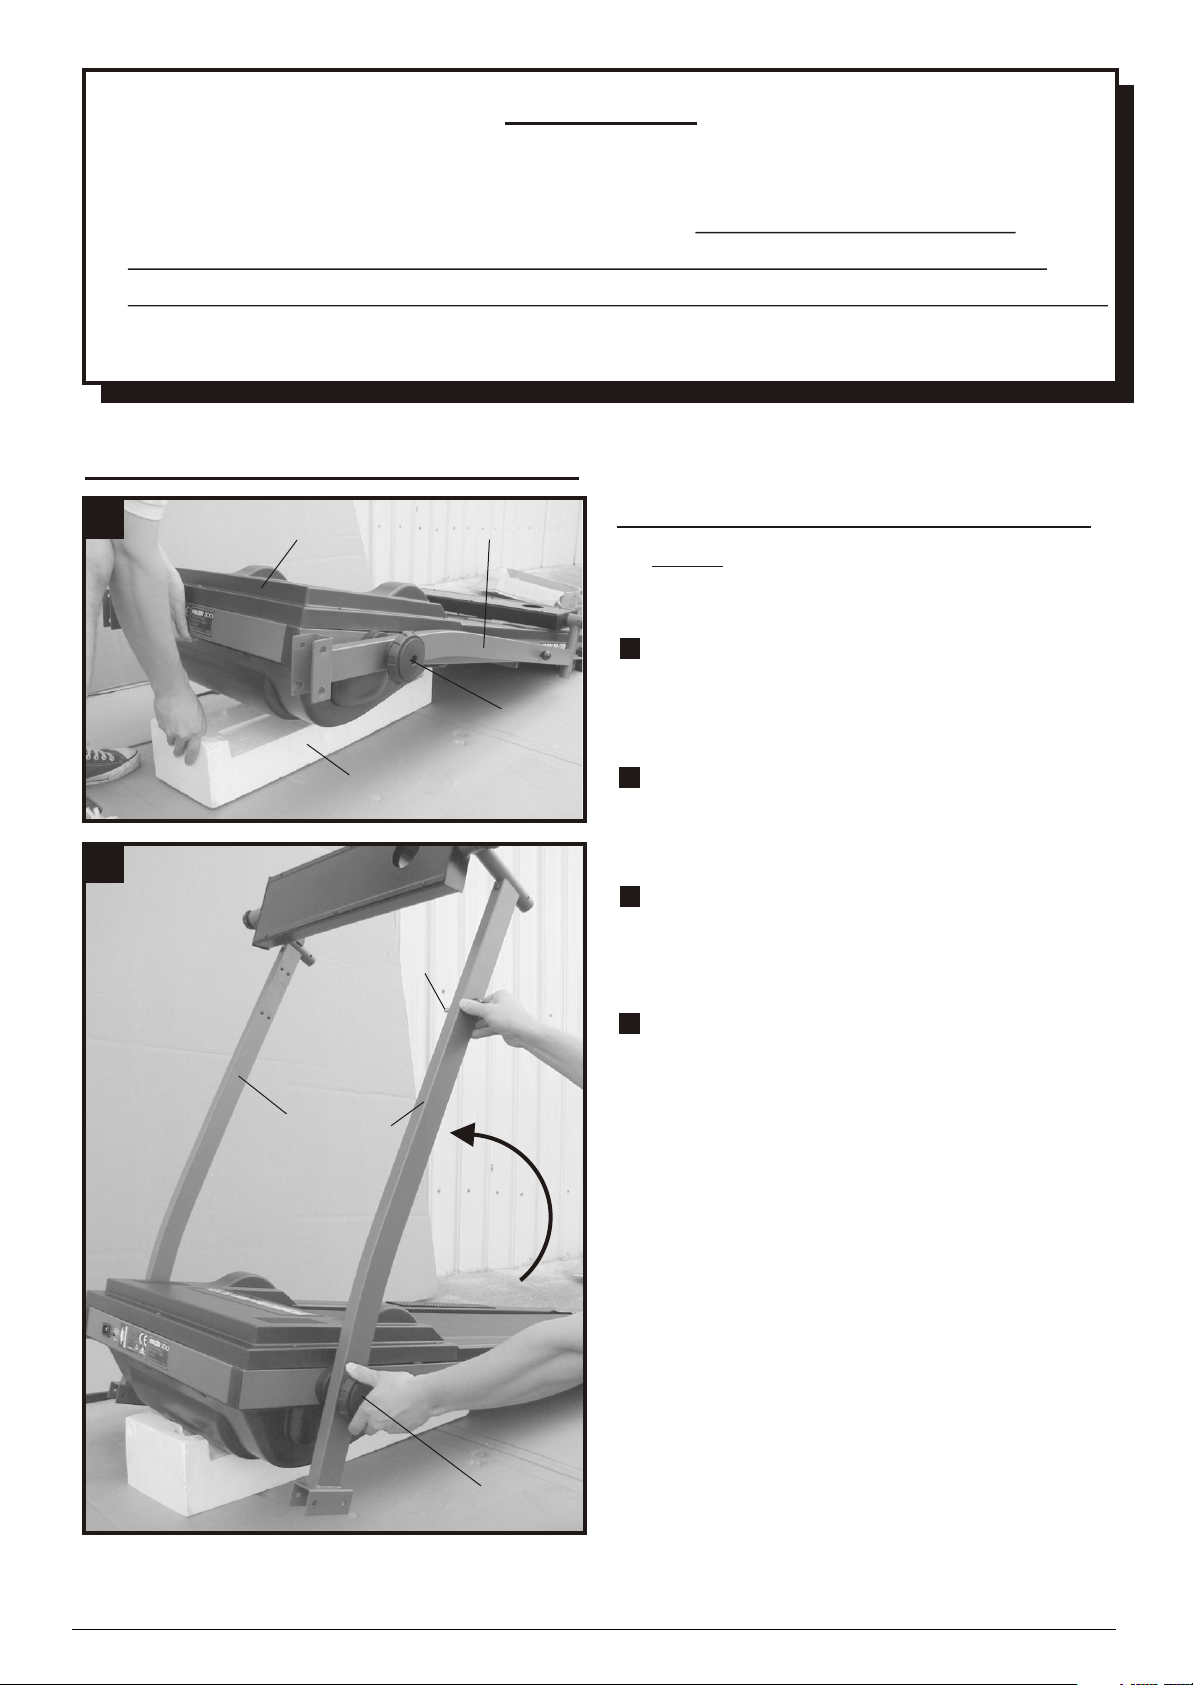
ASSEMBLY INSTRUCTION
A
B
MAIN FRAME
POLYFOAM BLOCK
HANDLE BAR
POST
LOCK
PIN
FIXING
KNOB
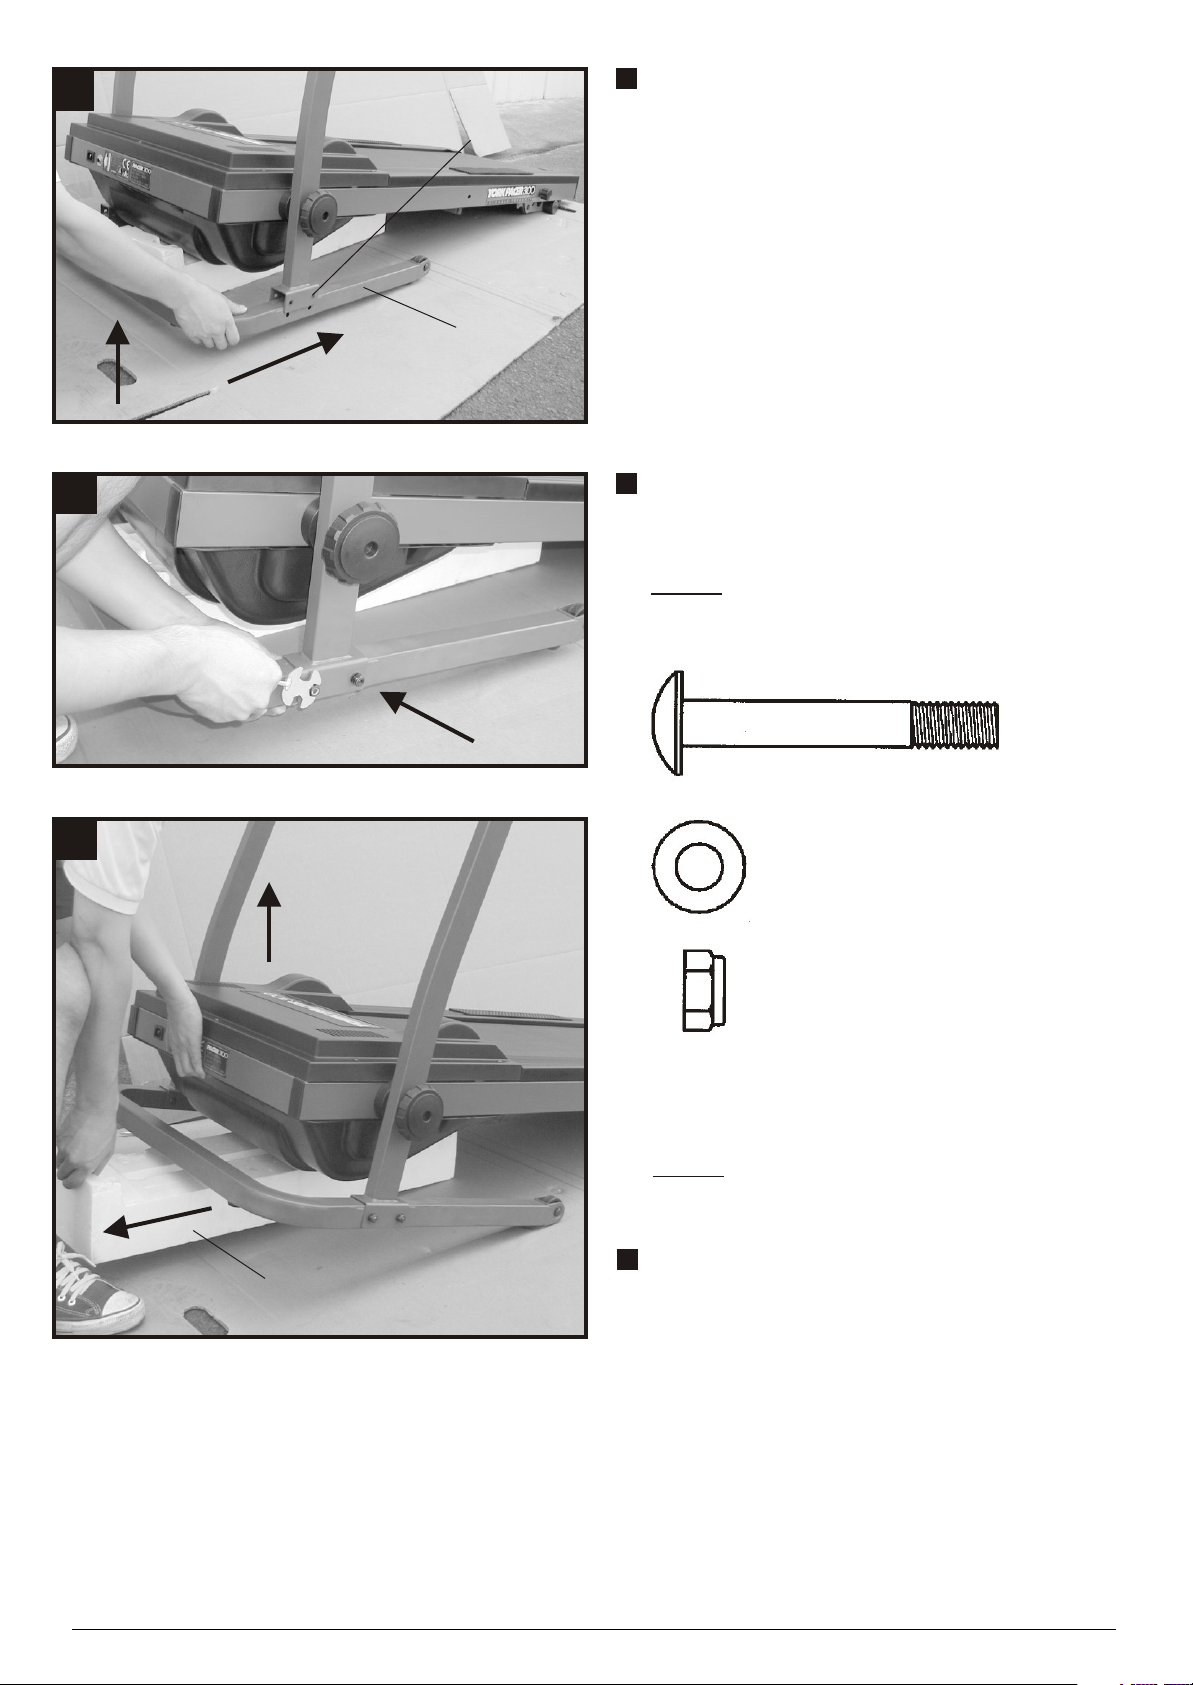
ATTACH THE FRONT STABILIZER
NOTE: The main frame is heavy, you may
need someone to help you.
Raise the front of the treadmill and place a
polyfoam block (from the carton) underneath
the treadmill.
Loosen the two fixing knobs on both sides
of handle bar post.
Pull the lock pin on handle bar post then
raise the handle bar posts upright carefully
as shown.
Tighten the two fixing knobs to secure the
handle bar posts in position.
HANDLE BAR
POST
FIXING
KNOB
SHOULD YOU REQUIRE ANY ASSISTANCE REGARDING THIS PRODUCT PLEASE CONTACT YORK DIRECTLY.
*
*
C
HANDLE BAR
POST BRACKET
FRONT
STABILIZER
Place the front stabilizer in position - align
the holes in the brackets with the holes in the
front stabilizer.
D
E
Fasten with four carriage bolts, washers and
locknuts.
NOTE: Make sure you fasten the carriage
bolts securely to avoid shaking and
discomfort when running.
X4
X4
X4
NOTE: The main frame is heavy, you may
need someone to help you do this.
Raise the front end of the treadmill and
POLYFOAM BLOCK
SHOULD YOU REQUIRE ANY ASSISTANCE REGARDING THIS PRODUCT PLEASE CONTACT YORK DIRECTLY.
*
remove the polyfoam block from underneath
of the treadmill.
*
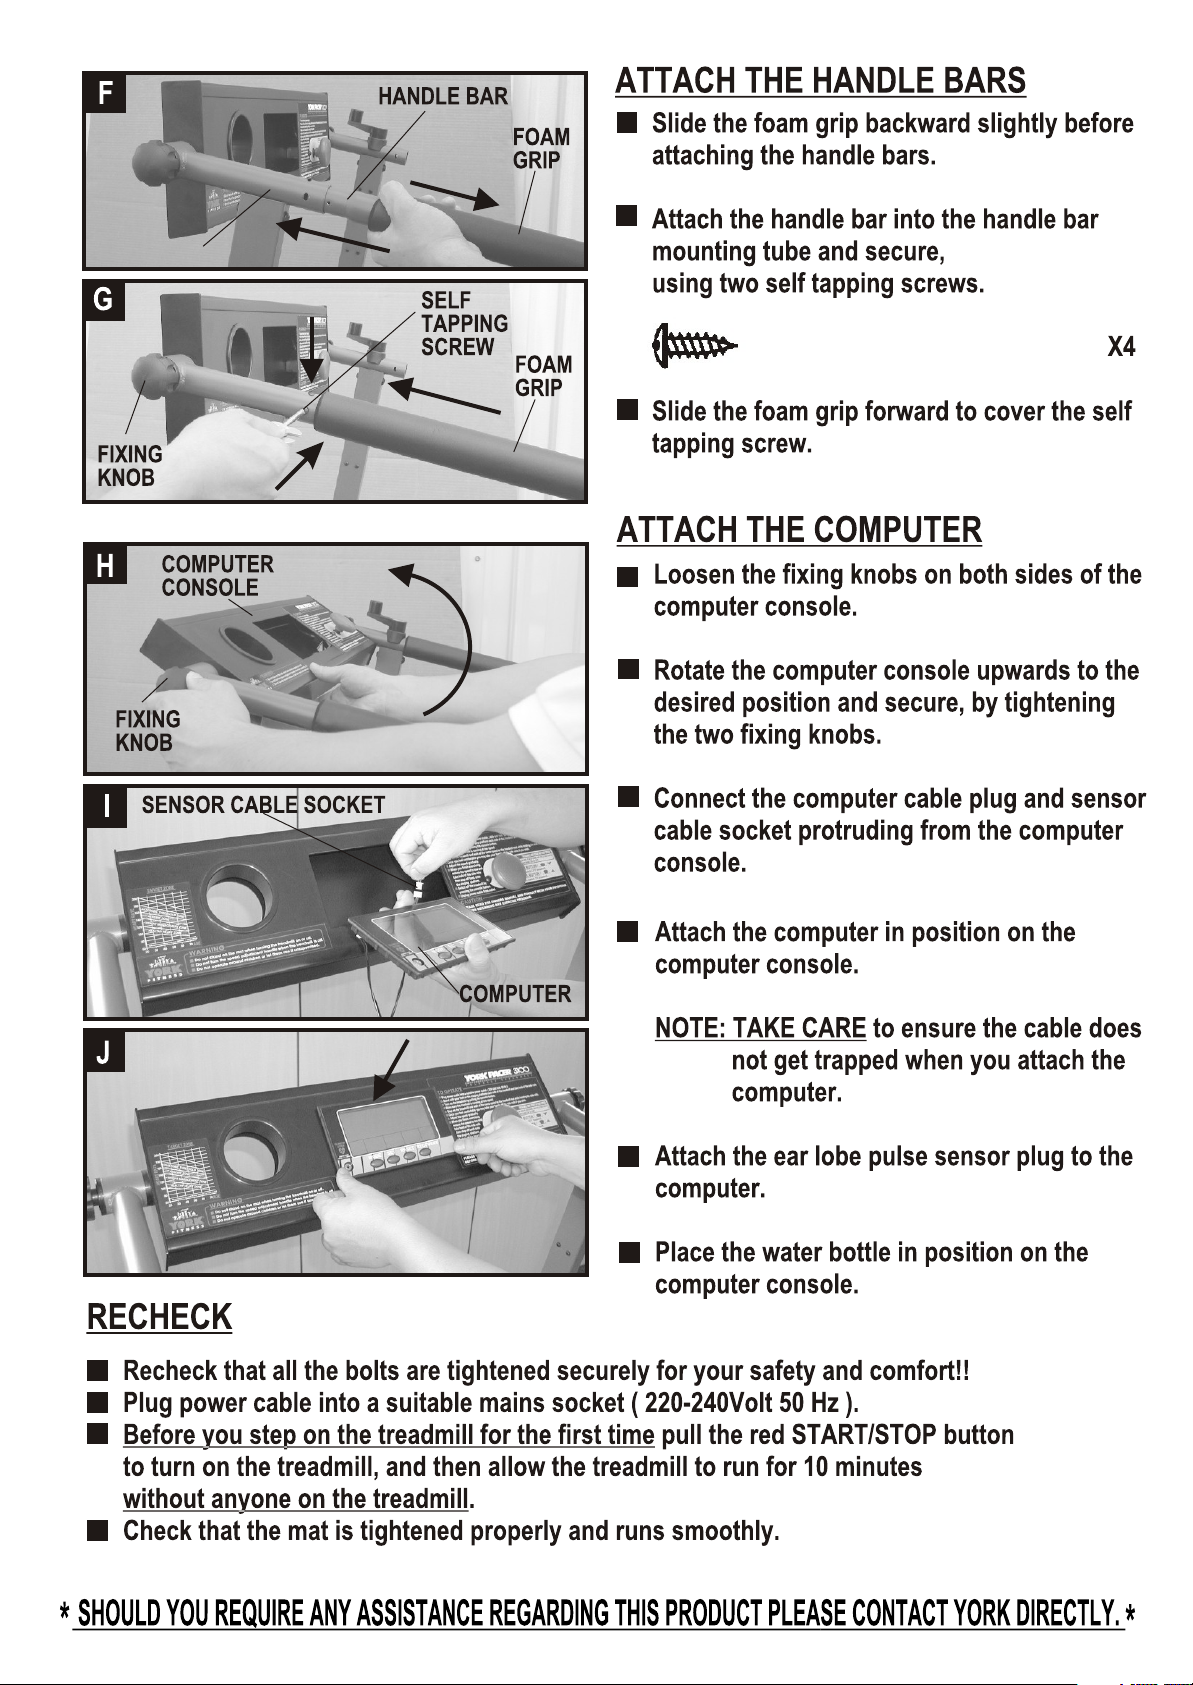
HANDLE BAR
MOUNTING
TUBE

OPERATING INSTRUCTIONS
The following procedure has been proven to be the safest and easiest method of mounting
the treadmill. For your protection, carefully read and follow these simple steps:
CAUTION: Treadmill may start at fast speed. Stand on side platforms, and hold side rails
when switching treadmill off or on.
1. Be sure the treadmill is positioned on a flat, level surface, and that it is set on the proper
speed and incline for your individual exercise requirement.
2. Plug in the treadmill power cable to a suitable power outlet. ( 220 - 240 VOLT, 50Hz ).
3. Turn on the treadmill power switch, which is located near where the power cable
attaches to the treadmill.
4. Straddle the running mat with your feet firmly planted on the right and left staging platforms.
Stand close enough so you can extend your arms to touch the computer, START/STOP button
and the speed adjustment handle.
CAUTION: Do not stand on the mat during the preliminary test.
5. Follow the instructions written on right side of computer console “TO OPERATE”.
6. Pull red START/STOP button to the “ON” position.
7. Place your weight on the right foot, extend the left onto the walking platform one normal step
ahead of you. Allow the left leg to follow the platform mat movement. Repeat this manoeuver
several times until you become familiar with the required pace.
8. Once you determine the pace, simply follow the “in motion” leg with the stationary leg in a
normal walking manner. Continue to grip the handles firmly until you are walking normally.
After gaining stability and confidence, release your grip on the handles and let your arms
swing freely and naturally at your side.
NOTE: Walking straight on the treadmill is aided by focussing on a stationary object across the
room in front of you.
Walk as if you were approaching that object.
9. To adjust the speed simply start the treadmill and turn speed adjustment handle-- To increase speed - Turn speed adjustment handle clockwise.
To decrease speed - Turn speed adjustment handle anti-clockwise.
WARNING: Do not turn the adjustment handle when the treadmill is off.
This may cause the motor to overload at turn on.
If this occurs, the power switch will automatically shut the treadmill off.
To restart, turn the speed adjustment handle to maximum speed (ccw) and then reset
the power switch before restarting treadmill.
10. IN AN EMERGENCY
In an emergency take hold of the handrails and place your feet on the side rails provided,
once you are stable, push the stop button. The treadmill will then begin to decelerate
until it stops.
SHOULD YOU REQUIRE ANY ASSISTANCE REGARDING THIS PRODUCT PLEASE CONTACT YORK DIRECTLY.
*
*
 Loading...