

User Guide
YS6801- UC/SM - SO301
Smart Power Strip

Contents
Introduction······························································1
Features··································································3
Product Requirements·················································3
Set Up Smart Power Strip·············································4
Using YoLink App with Smart Power Strip··························8
YoLink Control···························································13
Maintaining the Smart Power Strip································16
Specifications··························································18
Troubleshooting························································19
Customer Service & Warranty·······································20
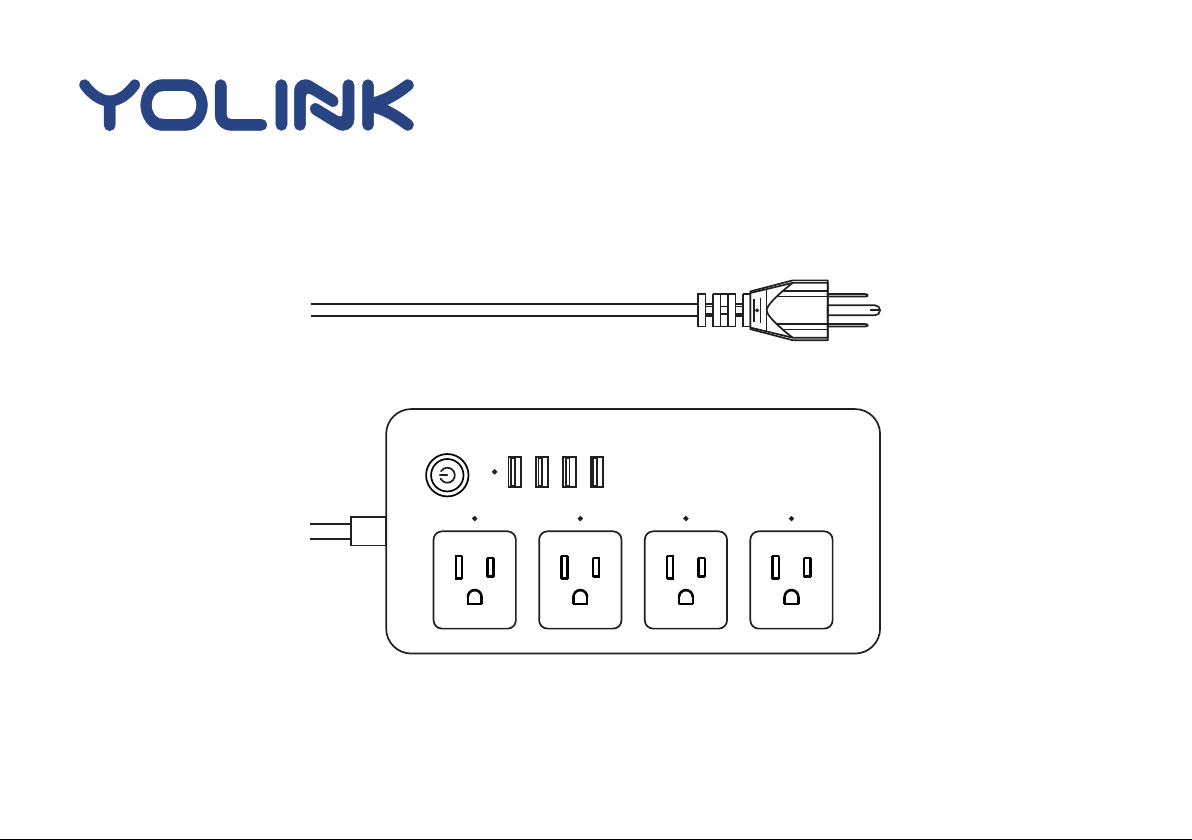
Introduction
With independent control of 4 smart outlets and 4 USB ports, you can easily control lights
and home electric devices via YoLink App on your iOS or Android device.
POWE R BUTTON
Tur n on o r off
YoLink Power Strip
USB PO RT
OUTLE T 1
Plug in your device and control it
independently from your smartphone
OUTLE T 2 OUTLE T 3 OUTLE T 4
Charge your tablet,
smartphone or other devices.
Default is turned on
1

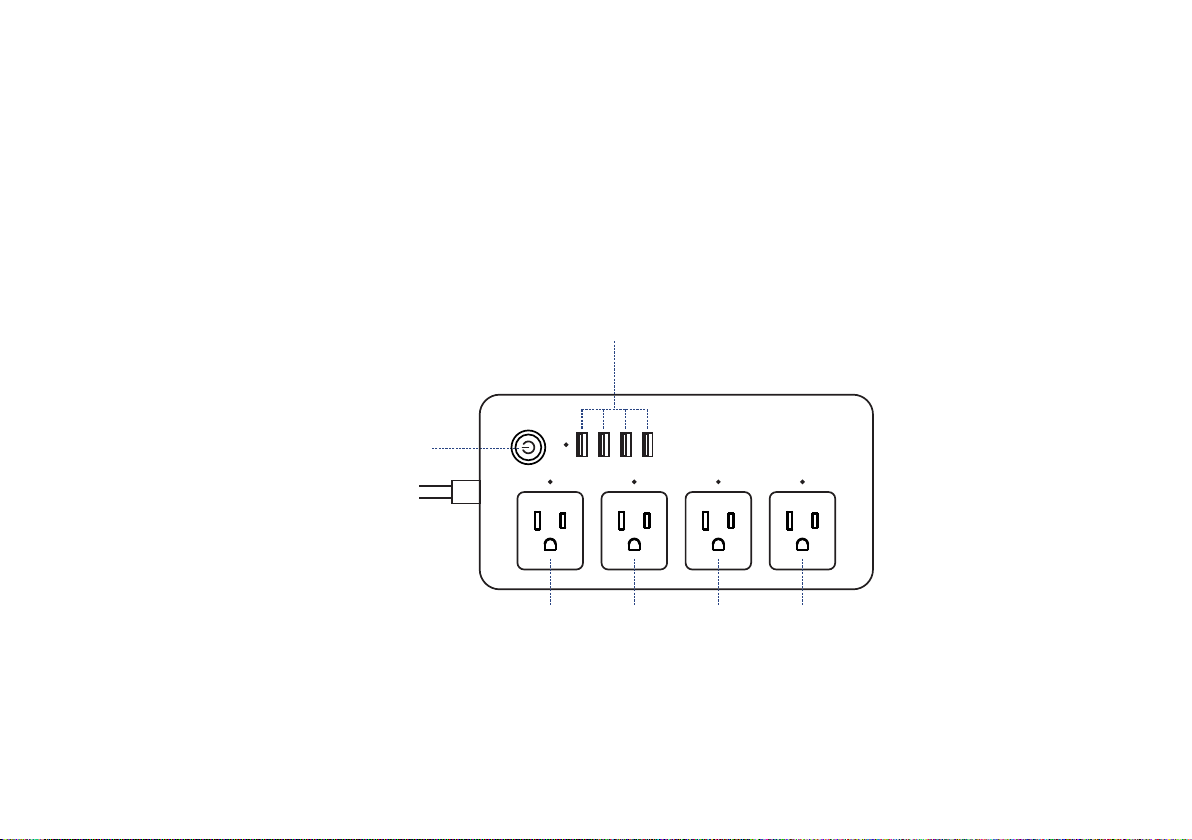
LED light can show you the current status. See the explanation below:s
Blue
At least one plug or USB ports is on.
Red
All plugs and USB is off.
Red
The plug is on.
Red
The USB ports are on.
Blinking Blue
Connecting to cloud.
Fast B linking Blue
Set up connection with devices.
Slow Blinking Blue
Updating.
Fast B linking Red
Remove connection with devices.
Blinking Red and Blue
Factory resetting.
2

Features
Indi vidual Con trol - Indepen dently con trol 4 smart outl ets and USB ports vi a YoLink App
on your iO S or Andr oid device.
Control from anywhere - Control your Smart Power Strip remotely via YoLink App on your
iOS or Android device.
Timer & Schedule - Automatically turn on or off household appliance after or at a certain time.
Scene - O n e click control. Tap the scene b u t t o n to Independently turn o n or off 4 s m art
plugs and a c t i o n of other devices.
Automation - Set up rules for “If this then that” function.
Voice Control - Use Alexa or Google Assistant to control your devices with voice commands.
YoLi n k Co n trol - , turn on or o ff Power Stri p No interne t is requ i red your Smart w h en y o u
set up your plug with a YoLink contro ller.
Product Requirements
1. A YoLink Hub.
2. A smartphone or tablet running iOS 9 or higher; Android 4.4 or higher.
3
Set Up Smart Power Strip
Follow the steps below to set up your Smart Power Strip via YoLink App.
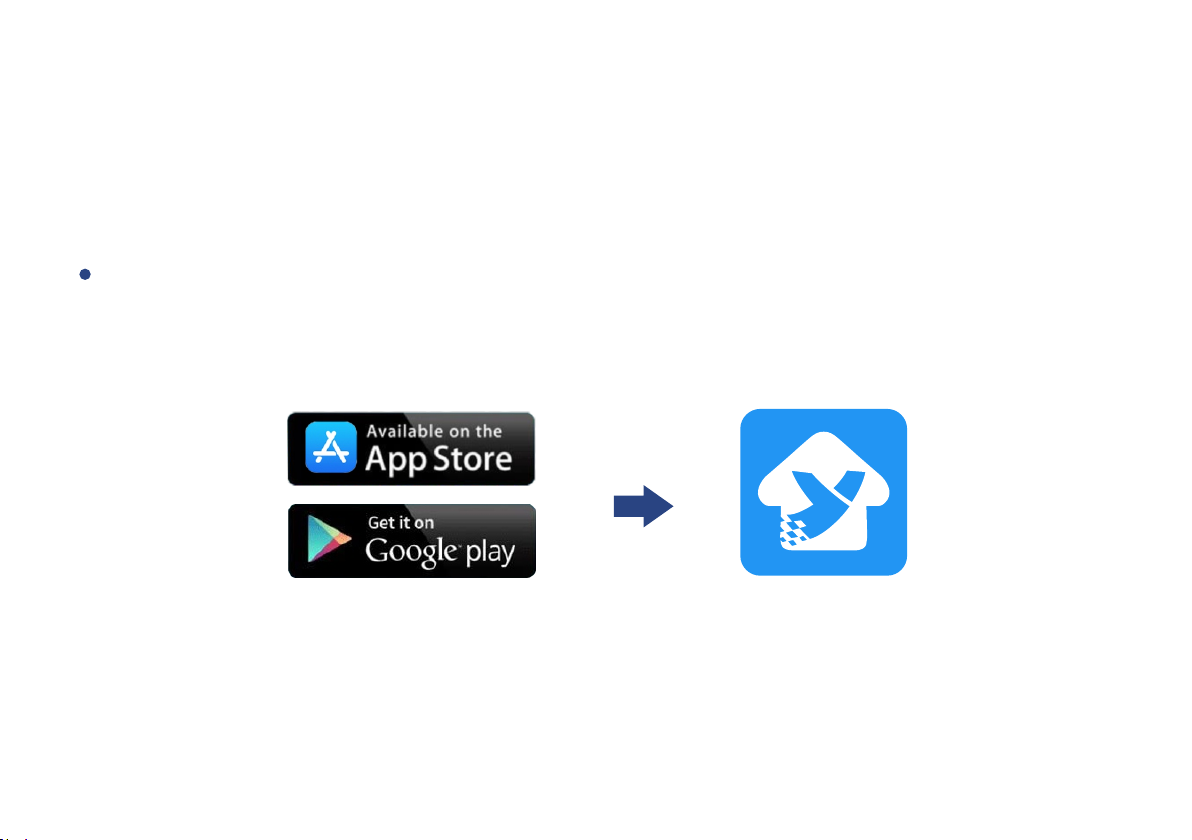
Step 1: Set up YoLink App
Get the YoLink App from the Apple App Store or Google Play.
4
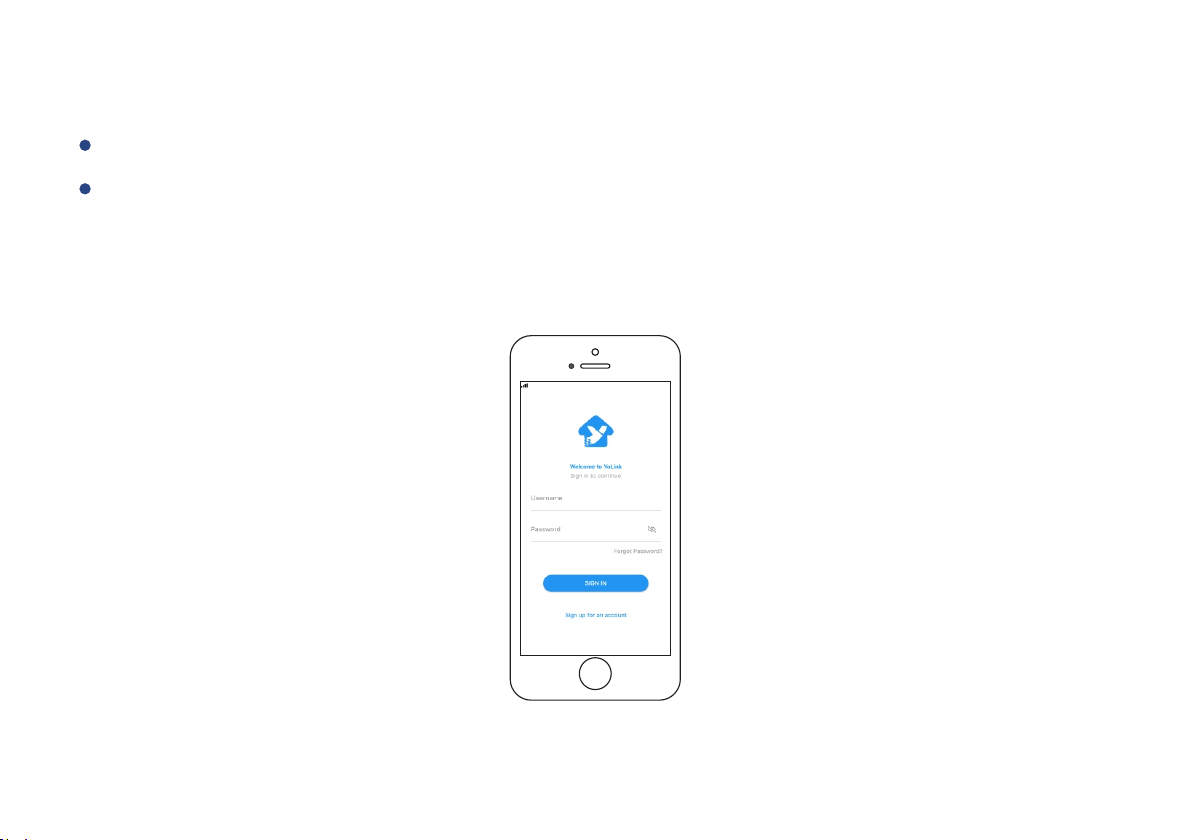
Step 2: Log in or sign up with YoLink account
Open the App. Use your YoLink account to log in.
If you d o n ’ t hav e a YoLink account, tap Sign u p for an account a n d follow the steps
to sign u p an account.
5
Step 3: Add device to YoLink App
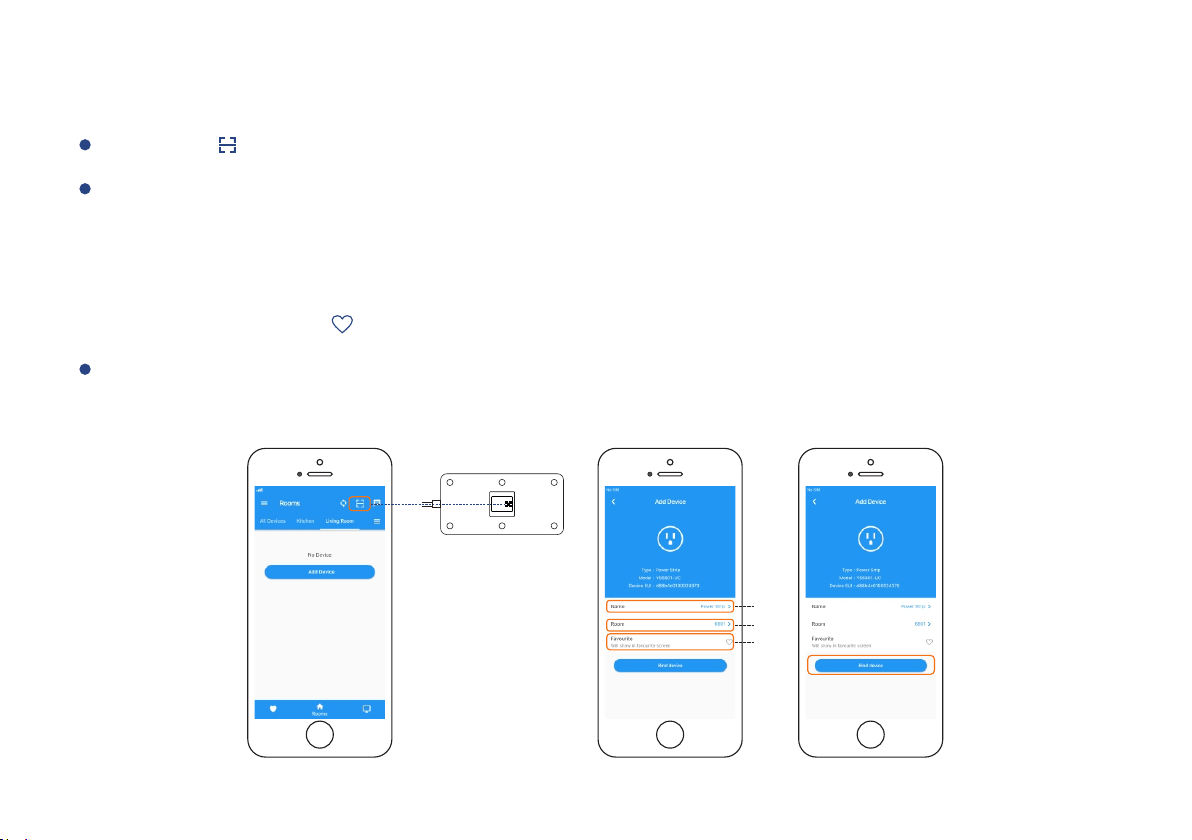
Tap the “ ” in YoLink App. Scan the QR Code on the device.
You can customize the name, set the room, add to/remove from favourite.
a. Name - Name Smart Power Strip.
b. Room - Choose a room for Smart Power Strip.
c. Favourite - Click “ ” icon to add/remove from Favourite.
Tap the “Bind Device” to add the device to your YoLink account.
a
b
c
6

Step 4: Connect to the cloud
Plug into an outlet and your device will connect to the cloud automatically.
Note
Make sure you hub is connected to inte rnet.
Internet
Cloud
7

Using YoLink App with Smart Power Strip
Details
You can customize the name, set the room, add to/remove from favourite, check device history.
a. Nam e - N am e Sm a rt Pow e r S tr i p o r 4 o u tl e ts
an d US B in d i v i d ua l ly.
b. Room - Choose a room for Smart Power Strip.
c. Favourite - Click “ ” icon to add/remove from
Favourite.
d. History - Check history log for the Power Strip.
e. Delete - The device will be r e moved from y our
account .
Tap the “ S m a r t ” in App to g o to its Power St r i p
controls.
Tap the “ ” icon at the top-right corner to go to
details.
a
b
c
d
e
Tap the icon for each of the settings you want to
personalize.
8

Timer
With YoLink App, you can set up a timer to turn on or/and off 4 outlets individually.
Tap the “ S m a r t ” in App to g o to its Power St r i p
controls.
Tap “Timer” for timer setting.
Choose action from “ON”, “OFF”, or “ON then OFF”.
Set t he timer duration in Hours and Minutes for
one o r more plugs.
Tap “ ” icon to save.
Note
One timer will run only once. You can set a new
timer a fter the timer has already run or once
you c ancel it.
The timer here is running at device without internet.
9

Schedule
You ca n cr eate ON/OF F s chedule s to au tomate you r pl ugged-i n d evices to work ar ound
your ho me and work sched ules.
Tap the “ S m a r t ” in App to g o to its Power St r i p
controls.
Tap “Schedule ” to open the Schedule screen,
tap “ ” to a d d a n e w schedule.
Wit hin the Add Schedu le scre en, set t he time ,
you r pref erred stat e (“ON ”,”OFF” or “ON then
OFF ”) for the con nected device, and repeat ing
fre quency.
Tap “ ” icon to save.
Activate or deactivate the schedule at schedule
screen.
Swipe left each schedule to edit or delete it.
Note
You can keep maximum 10 schedules at one time.
The s chedule here is running at device without
internet.
You may try to ad d schedul e at Automat i o n
where y ou c a n add a s many a s you w a nt. Th e
automat i o n setting is save d in cl o u d .
10

Scene
Set one-click control for multiple devices in your YoLink App. You only run a scene via your
YoLink App.
Tap “Smart” to switch to Smart Screen.
Tap “ ” to create your own Scene.
To set a Scene, you will be able to put one or more
devices under this scene, and define their actions
and/or states.
To execute a Scene, you may tap any scene at
“Smart” or “Favourite” if you mark it as favourite.
Swipe left any Scene order to edit or delete it.
Note
You must have at least one YoLink Device in order
to create a Scene.
11

Automation
Automation allows you to set up “If This Then That” rules so the devices could act
automatically.
Tap “Smar t ” to switch to Smart screen a nd t a p
“Automat i o n ” .
Tap “ ” to create an automation.
To set an Automation, you will need to set a
trigger time, local weather condition, or choose a
device with certain stage as a triggered condition.
Then set one or more devices, scenes to be
executed.
12

YoLink Control
YoLink Control is our unique “device to device” control technology. Under YoLink Control,
the devices can be controlled without internet or Hub. Devices which send out command
is called controller(Master). Devices which receive command and act accordingly is called
responder(Receiver). Controller and responder list will show you below.
You will need to set it up physically.
Controller List
YS7704-UC Door Sensor
YS7705-UC Garage Door Sensor
YS7804-UC Motion Sensor
YS7903-UC Leak Sensor
YS3603-UC YoLink Remote
YS6602-UC YoLink Plug
Responder List
YS6602-UC YoLink Plug
YS6604-UC YoLink Plug Mini
YS5705-UC In-wall Switch
YS6604-UC YoLink Plug Mini
YS5705-UC In-wall Switch
YS6704-UC In-wall Outlet
YS6801-UC Smart Power Strip
Continuously ..updating
YS6704-UC In-wall Outlet
YS6801-UC Smart Power Strip
Continuously ..updating
13

Pairing
Fin d a p o w er strip as c o ntr o l ler ( M ast e r ). Hold t he power butto n for 5 -10 seco n d s,
the light will flash b lue quick l y.
Find another action device as responder(Receiver). Hold the power/set button for 5-10
seconds, the device will enter pairing mode.
After pairing succeed, the light will stop flashing.
When the power strip turns on, the responder will turn on as well. When the power strip
turns off, the responder will turn off as well.
Unpairing
Find a power stripcontrol l e r ( Master) . Ho l d
the p o w er b u t ton f o r 10-15 seconds, t h e light
will fl a sh r e d quickly.
Find a Receiverresponder( ) action device. Hold
the power/set button for 10-15 seconds, the
device will enter un-pairing mode.
The above two devices will unpair by themselves
and the light stops flashing.
POWE R BUTTON
Afte r unbund ling, When the power strip turns
on, the res ponder will no lon ger turn on. When
the power strip turn s off, th e res ponder will no
long er t urn off.
14

YoLink Control Diagram
CLOSED
OPENED
PAIRED
CLOSED
TURN ONTURN OFF
OPENED
TURN OFFTURN OFF
UNPAIRED
15

Maintaining the Smart Power Strip
Firmware Update
En su re ou r cu s t o m e r ha v e th e b e s t u s e r e x p e r i e n c e. Hi gh ly r e c o m m e n d yo u c o u l d
up da te ou r ne w e s t ve r s i o n fi r m w a r e .
Tap the “ S m a r t ” in App to g o to its Power St r i p
controls.
Tap the “ ” icon at the top-right corner to go to
details.
Tap “Firmware”.
The light will be slowly blinking blue during the
update and stop blinking when the update done.
Note
Only the Smart Power Strip that i s currently
reacha b l e an d has an availabl e upda t e wil l be
shown in the Details screen.
16

Factory Reset
Factory reset will erase all your settings and bring it back to default. After the factory reset,
your device will still in your Yolink account.
Hold the power button for 20-25 seconds until the LED blinks red and green alternately.
Factory reset will be done when the light stops flashing.
POWE R BUTTON
17

Specifications
Input:
AC Power Output:
USB Power Output:
Environment:
100 ~ 120V AC, 60Hz
100 ~ 120V AC, 10A MAX (Resistive)
5V DC, 2.1A
-30°C ~ 70°C (Humidity <90%)
18

Troubleshooting
Problem Possible Reason
Hub is offline.
Po w e r s t r i p is offl i n e .
Timer does not r un.
Othe r problems.
Hub is powered off.
Power strip does not power on. Please power on . the power strip
Product defective.
There was a power blackout before
time r executes.
Product defecti ve.
Solution
Please reconnect your hub to the Internet
and press the power button of the power
strip once.
Please power on the hub again and press
the power button of the power strip once.
Please contact customer service.
Please press the button once to power
turn on/off , you can the power strip also
turn on/off power strip via YoLink App the
or set a new timer.
Please contact customer service.
19

If you are unable to get your power strip working
Please contact Our Customer Service during business hours
US Live Tech Support: 1-844-292-1947 M-F 9am - 5pm PST
Email: support@YoSmart.com
YoSmart Inc. 17165 Von Karman Avenue, Suite 105, Irvine, CA 92614
WARRANTY 1 Year Limited Electrical Warranty
YoSmart warr ants to th e ori ginal resi denti al us er of this prod uct t hat it will be free from defects in materials
an d wor kmans hip, under normal use, for 1 year from the date of pu rchase. Us er mu st pr ovide a cop y of
or iginal purch ase rec eipt. Thi s warra nty Doe s Not Cover abuse or misused products or products used in
co mmercial applicat ions. T his warranty does not ap ply to power stri ps that have been improp erly installed,
mo dified, put to a use ot her t han designed, or subjected to ac ts of God ( such as floods, lightning,
ea rthquakes, etc.). This wa rrant y is limited to repa iring o r replacing of this power s trip only at YoSma rt's
so le discretio n. YoSm art will NOT be liabl e for the cost of installing, r emovi ng, nor rein stall ing this product,
no r direc t, indi rect, o r conse quent ial dam ages to p ersons or property resulting from the us e of this p roduc t.
Th is warranty only covers the co st of rep lacem ent parts or repla cemen t units, it does no t cover
sh ipping & handl ing fee s.
To implement this warranty please give us a call during business hours at 1-844-292-1947, or visit
www.yosmart.com.
REV1.0 Copyright 2019. YoSmart, Inc. All rights reserved.
20

FCC Statement
This equipment has been tested and found to comply with the limit s for a C lass B di gital device, pursuant to
part 1 5 of the FCC Rules. These limits are designed to provi de reasonable protection aga inst harmful
interference in a residential installat ion. This equipment generates, uses and can radiat e radio frequency
energy and, if not installed and used in accordance with the instructions, may cause harmful interference to
radio commun i c a t i o n s. H o wever, t h e re i s n o g u a r a ntee that interferenc e w i l l n o t o c c ur i n a
particular installation. If this equipm ent does cause h armful interference to radio or televisio n reception,
which can be determined by turning the equipm ent off and on, the user is encouraged to try to correc t the
interference by one or more of the following measures:
Reorient or relocate the receiving antenna.
Incr ease the separation between the equipment and receiver.
Connect the equipment into an outlet on a circuit different from that to which the receiver is connected.
Consult the dealer or an experienced radio / TV technician for h elp.
This device complies with part 15 of the FCC Rules. Operation is subject to the following two conditions:
1) This device may not cause harmful interference.
2) This device must accept any inter ference received, including interference that may cause undesired
operation. Any ch anges or modific ations not expr essly approved by the party responsible for compliance
could void the user ’s authorit y to operate t he equipment.
Note: The manufacturer is not responsible for any radio or TV interference caused by unauthorized
modifications to this equipment. Such modifications could void the user ’s authority to operate the equipment.

FCC RF Radiation Exposure Statement
This equipment complies with FCC RF radiation exposure limits set forth for an uncontrolled environment.
This device and its a ntenna must not be co-located or ope rating in conjunction with any other
antenna or transmitter.
“To comply with FCC RF exposure compliance requirements, this grant is applicable to only Mobile
Configurations. The antennas used for this transmitter must be installed to provide a separation distance of
at least 20 cm from all persons and must not be co-located or operating in conjunction with any other antenna
or transmitter.”
 Loading...