

Page 1
Page 2

Copyright
Copyright © 2019 YEALINK(XIAMEN) NETWORK TECHNOLOGY
Copyright © 2019 Yealink (Xiamen) Network Technology CO., LTD. All rights reserved. No parts of this publication may
be reproduced or transmitted in any form or by any means, electronic or mechanical, photocopying, recording, or otherwise, for any purpose, without the express written permission of Yealink (Xiamen) Network Technology CO., LTD.
Under the law, reproducing includes translating into another language or format.
When this publication is made available on media, Yealink (Xiamen) Network Technology CO., LTD. gives its consent to
downloading and printing copies of the content provided in this file only for private use but not for redistribution. No
parts of this publication may be subject to alteration, modification or commercial use. Yealink (Xiamen) Network Technology CO., LTD. will not be liable for any damages arising from use of an illegally modified or altered publication.
Trademarks
Yealink®, the logo and the name and marks is trademark of Yealink (Xiamen) Network Technology CO., LTD, which are
registered legally in China, the United States, EU (European Union) and other countries.
All other trademarks belong to their respective owners. Without Yealink’s express written permission, recipient shall not
reproduce or transmit any portion hereof in any form or by any means, with any purpose other than personal use.
End User License Agreement
This End User License Agreement ("EULA") is a legal agreement between you and Yealink. By installing, copying or otherwise using the Products, you: (1) agree to be bounded by the terms of this EULA, (2) you are the owner or an authorized user of the device, and (3) you represent and warrant that you have the right, authority and capacity to enter into
this agreement and to abide by all its terms and conditions, just as if you had signed it. The EULA for this product is
available on the Yealink Support page for the product.
Patent Information
China, the United States, EU (European Union) and other countries are protecting one or more patents of accompanying products and/or patents being applied by Yealink.
Customer Feedback
We are striving to improve our documentation quality and we appreciate your feedback. Email your opinions and comments to [email protected].
Technical Support
Visit Yealink WIKI (http://support.yealink.com/) for the latest firmware, guides, FAQ, Product documents, and more.
For better service, we sincerely recommend that you use Yealink Ticketing system (https://ticket.yealink.com) to submit
all your technical issues.
Page 3

GNU GPL INFORMATION
Yealink device firmware contains third-party software under the GNU General Public License (GPL). Yealink uses software under the specific terms of the GPL. Please refer to the GPL for the exact terms and conditions of the license.
The original GPL license, source code of components licensed under GPL and used in Yealink products can be downloaded online: http://www.yealink.com/onepage_83.html.
Page 4

Before You Begin
Before You Begin
Yealink administrator guide provides general guidance on setting up phone network, provisioning and managing
devices.
This guide is not intended for end-users, but for a technical audience. You can do the following with this guide:
l Set up a VoIP network and provisioning server.
l Provision the device with features and settings.
l Troubleshoot, update and maintain devices.
The information in this guide is applicable to the following Yealink devices except where noted:
l T5 series phones, including T57W, T54W, T53W, and T53.
l T4 series phones, including T4U (T48U, T46U, T43U), T4S (T48S, T46S, T42S, T41S), T48G, T46G, T42G, T41P, and
T40P/G.
l T2 series phones, including T29G, T27G, T23P/G, T21(P) E2, and T19(P) E2.
l CP920 IP conference phones.
l Expansion modules, including EXP20, EXP40, EXP43, and EXP50.
Read the Yealink Products Regulatory Notices guide for all regulatory and safety guidance.
Related Documentations
The following related documents are available:
l Quick Start Guides, describe how to assemble phones and configure the most basic features available on the
phones.
l User Guides, describe how to configure and use the basic and advanced features available on the phones via the
phone user interface.
l Auto Provisioning Guide, describes how to provision the devices using the boot file and configuration files.
The Auto Provisioning Guide is to serve as basic guidance for provisioning Yealink devices with a provisioning
server. If you are a novice, this guide is helpful for you.
l Using features integrated with Broadsoft UC-One, refer to the following two guides to have a better knowledge of
BroadSoft features.
IP Phones Deployment Guide for BroadSoft UC-One Environments, describes how to configure BroadSoft features
on the BroadWorks web portal and phones.
IP Phone Features Integrated with BroadSoft UC-One User Guide, describes how to configure and use IP phone features integrated with BroadSoft UC-One on Yealink phones.
For support or service, please contact your Yealink reseller or go to Yealink Technical Support online: http://sup-
port.yealink.com/.
Recommended References
For more information on configuring and administering other Yealink products not included in this guide, refer to the
product support page at Yealink Technical Support.
To access the latest Release Notes or other guides for Yealink devices, refer to the Document Download page for your
phone at Yealink Technical Support.
If you want to find Request for Comments (RFC) documents, type http://www.ietf.org/rfc/rfcNNNN.txt (NNNN is the
RFC number) into the location field of your browser.
i
Page 5

Administrator’s Guide for SIP-T2 Series/T4 Series/T5 Series/CP920 IP Phones
For other references, look for the hyperlink or web info throughout this administrator guide.
ii
Page 6

Table of Contents
Table of Contents
Before You Begin
Related Documentations
Recommended References
Table of Contents
Getting Started
Requirements
Yealink IP Phones in a Network
Initialization Process Overview
Loading the ROM File
Configuring the VLAN
Querying the DHCP (Dynamic Host Configuration Protocol) Server
Contacting the Provisioning Server
Updating Firmware
Downloading the Resource Files
Verifying Startup
Network Configurations
IPv4 and IPv6 Wired Network Settings
Wired Network IP Addressing Mode Configuration
IPv4 Wired Network Configuration
IPv6 Wired Network Configuration
DHCP Option for IPv4
Supported DHCP Option for IPv4
DHCP Option 66, Option 43 and Custom Option
DHCP Option 42, Option 2 and Option 100
DHCP Option 12
DHCP Option 12 Hostname Configuration
DHCP Option 120
DHCP Option 120 Configuration
DHCP Option 60
DHCP Option 60 Configuration
DHCP Option for IPv6
Supported DHCP Option for IPv6
DHCP Option 59 and Custom Option
VLAN
LLDP Configuration
CDP Configuration
Manual VLAN Configuration
DHCP VLAN Configuration
VLAN Setting Configuration
Wi-Fi
Wi-Fi Configuration
i
i
i
1
20
20
20
21
22
22
22
22
22
22
22
23
23
23
24
28
31
32
32
32
33
33
34
34
34
34
35
35
35
36
36
37
38
40
41
41
41
1
Page 7

Administrator’s Guide for SIP-T2 Series/T4 Series/T5 Series/CP920 IP Phones
Wireless Network IP Addressing Mode Configuration
IPv4 Wireless Network Configuration
IPv6 Wireless Network Configuration
Real-Time Transport Protocol (RTP) Ports
RTP Ports Configuration
Network Address Translation (NAT)
NAT Traversal Configuration
Keep Alive Configuration
Rport Configuration
SIP Port and TLS Port Configuration
Internet Port and PC Port
Supported Transmission Methods
Internet Port and PC Port Configuration
VPN
VPN Related Files
VPN Configuration
Quality of Service (QoS)
Voice and SIP QoS Configuration
802.1x Authentication
802.1x Authentication Configuration
TR-069 Device Management
Supported RPC Methods
TR-069 Configuration
46
47
51
55
55
56
56
59
59
60
60
61
61
62
62
63
63
64
65
65
67
67
68
Phone Provisioning
Boot Files, Configuration Files, and Resource Files
Boot Files
Common Boot File
MAC-Oriented Boot File
Boot File Attributes
Customizing a Boot File
Configuration Files
Common CFG File
MAC-Oriented CFG File
MAC-local CFG File
Configuration File Customization
Customizing a Configuration File
Configuration File Attributes
Resource Files
Supported Resource Files
Files Download Process
Provisioning Methods
Provisioning Methods Priority
Web User Interface
Accessing the Web User Interface
71
71
71
72
72
72
73
73
74
75
75
75
75
76
76
77
78
78
79
79
80
2
Page 8

Table of Contents
Quick Login Configuration
Web Server Type Configuration
Navigating the Web User Interface
Phone User Interface
Central Provisioning
Auto Provisioning Settings Configuration
User-Triggered Provisioning Settings Configuration
Viewing Configurations Configured via Different Provisioning Methods
Setting Up a Provisioning Server
Supported Provisioning Protocols
Provisioning Protocols Configuration
Supported Provisioning Server Discovery Methods
Zero Touch Provision Configuration
PnP Provision Configuration
DHCP Provision Configuration
Static Provision Configuration
Configuring a Provisioning Server
Keeping User’s Personalized Settings after Auto Provisioning
Keeping User’s Personalized Settings Configuration
Auto Provisioning Flowchart for Keep User’s Personalized Configuration Settings
Example: Keeping User’s Personalized Settings
Clearing User's Personalized Configuration Settings
Example: Deploying Phones from the Provisioning Server
80
81
82
83
83
84
90
91
92
92
92
93
93
94
94
96
97
97
98
99
99
100
100
Security Features
User and Administrator Identification
User and Administrator Identification Configuration
User Access Level Configuration
Auto Logout Time
Auto Logout Time Configuration
Phone Lock
Operation Behaviors on Lock Phone
Phone Lock Configuration
Transport Layer Security (TLS)
Supported Cipher Suites
Supported Trusted and Server Certificates
Supported Trusted Certificates
TLS Configuration
Secure Real-Time Transport Protocol (SRTP)
SRTP Configuration
Encrypting and Decrypting Files
Configuration Files Encryption Tools
Configuration Files Encryption and Decryption
Contact Files Encryption and Decryption
Encryption and Decryption Configuration
103
103
103
104
105
105
105
106
107
108
109
110
110
112
115
116
118
118
118
119
119
3
Page 9

Administrator’s Guide for SIP-T2 Series/T4 Series/T5 Series/CP920 IP Phones
Example: Encrypting Configuration Files
Incoming Network Signaling Validation
Incoming Network Signaling Validation Configuration
USB Port Lock
USB Port Lock Configuration
Firmware Upgrade
Firmware for Each Phone Model
Firmware Upgrade Configuration
Troubleshooting Methods
Log Files
Local Logging
Local Logging Configuration
Exporting the Log Files to a Local PC
Uploading Log to the USB Flash Drive
Viewing the Log Files
Syslog Logging
Syslog Logging Configuration
Viewing the Syslog Messages on Your Syslog Server
Resetting Phone and Configuration
Reset to Factory Configuration
Resetting the IP phone to Default Factory Settings
Resetting the IP phone to Custom Factory Settings
Custom Factory Configuration
Deleting the Custom Factory Settings Files
Resetting a Configuration to Default Factory Setting
Packets Capture
Capturing the Packets via Web User Interface
Capturing the Packets in Enhanced Way
Capturing the Packets in Normal Way
Ethernet Software Capturing Configuration
Span to PC Port Configuration
Watch Dog
Watch Dog Configuration
Network Diagnostics
Ping and Traceroute Diagnostics
Network Reachability Detection Configuration
Analyzing Configuration Files
Exporting CFG Configuration Files from Phone
Importing CFG Configuration Files to Phone
Configuration Files Import URL Configuration
Exporting BIN Files from the Phone
Importing BIN Files from the Phone
BIN Files Import URL Configuration
Exporting All the Diagnostic Files
122
123
123
124
124
126
126
127
128
128
128
128
131
132
132
133
133
135
136
136
137
137
137
138
138
138
138
139
139
140
140
140
141
141
141
142
143
144
144
144
144
145
145
145
4
Page 10

Table of Contents
Device Status
Viewing Device Status
Phone Reboot
Rebooting the IP Phone Remotely
Notify Reboot Configuration
Rebooting the Device via the Phone User Interface
Rebooting the Device via Web User Interface
Troubleshooting Solutions
IP Address Issues
The device does not get an IP address
Solving the IP conflict problem
The Specific format in configuring IPv6 on Yealink phones
Time and Date Issues
Display time and date incorrectly
Display Issues
The phone screen is blank
The phone displays “No Service”
Phone Book Issues
Difference between a remote phone book and a local phone book
Audio Issues
Increasing or decreasing the volume
Get poor sound quality during a call
There is no sound when the other party picks up the call
Play the local ringback tone instead of media when placing a long-distance number without plus 0
Wi-Fi and Bluetooth Issues
The wireless signal strength is low
The phone cannot connect to Bluetooth devices all the time
The Bluetooth headset affects IP phone’s voice quality
Firmware and Upgrading Issues
Fail to upgrade the phone firmware
Verifying the firmware version
The IP phone does not update the configurations
System Log Issues
Fail to export the system log to a provisioning server (FTP/TFTP server)
Fail to export the system log to a syslog server
Protocols and Ports Issues
What communication protocols and ports do Yealink IP phones support?
Password Issues
Restore the administrator password
The web screen displays "Default password is in use. Please change!"
Logo Issues
Why does the IP phone use DOB format logo file instead of popular BMP, JPG and so on?
Power and Startup Issues
Both PoE cable and power adapter is connected to the phone
146
146
146
146
147
147
147
148
148
148
148
148
149
149
149
149
149
149
149
150
150
150
150
150
150
150
150
151
151
151
151
152
152
152
152
152
152
154
154
154
155
155
155
155
5
Page 11

Administrator’s Guide for SIP-T2 Series/T4 Series/T5 Series/CP920 IP Phones
The power LED indicator has no lights
The Phone screen is black
The IP phone always displays the Yealink logo
Other Issues
The difference among user name, register name, and display name
On code and off code
The difference between RFC 2543 Hold enabled and disabled
The difference between Shared Call Appearance (SCA) and Bridge Lines Appearance (BLA)
Using Handsets with T57W/T54W/T53W/T53 Phones
Handset Backlight
Handset Backlight Configuration
Handset Keypad Light
Handset Keypad Light Configuration
Handset Wallpaper
Handset Wallpaper Configuration
Handset Screen Saver
Handset Screen Saver Configuration
Handset Name
Handset Name Configuration
Number Assignment
Number Assignment Configuration
End Call on Hook
End Call on Hook Configuration
Advisory Tones
Advisory Tones Configuration
Base PIN
Base PIN Configuration
DECT Intercom
DECT Intercom Configuration
Shared Directory
Shared Directory Configuration
Shared Contact File Customization
Shared Contact File Elements and Attributes
Customizing Shared Contact File
Satellite Mode
Satellite Mode Configuration
Example: Configuring the Satellite Mode Feature
Repeater Settings Parameters
Handset Settings Parameters
Custom Handset Related Configurations
Handset Firmware Upgrade Configuration
155
155
155
155
155
155
155
156
157
157
157
158
158
159
159
159
159
160
160
160
161
162
162
162
163
164
164
165
165
166
166
166
167
167
167
168
169
170
171
175
175
Audio Features
Alert Tone
Alert Tone Configuration
6
178
178
178
Page 12

Table of Contents
Touch Tone
Touch Tone Configuration
Ring Tones
Custom Ringtone Limit
Ringtone Configuration
Distinctive Ring Tones
Supported Alert-Info Headers Format
Alert-Info: Bellcore-drN
Alert-Info: ringtone-N/Alert-Info: ringtone-RingN.wav (or Alert-Info: MyMelodyN/Alert-Info:
MyMelodyRingN.wav) 185
Alert-Info: <URL >
Alert-Info: info=info text;x-line-id=0
Distinctive Ring Tones Configuration
Ringer Device
Ringer Device Configuration
Audio Volume
Ringer Volume Configuration
Sending Volume Configuration
Tones
Supported Tones
Tones Configuration
Audio Codecs
Supported Audio Codecs
Audio Codecs Configuration
Packetization Time (PTime)
Supported PTime of Audio Codec
PTime Configuration
Early Media
Early Media Configuration
Headset Prior
Headset Prior Configuration
Dual Headset
Dual Headset Configuration
Acoustic Clarity Technology
Acoustic Echo Cancellation (AEC)
AEC Configuration
Noise Suppression
Noise Suppression Configuration
Background Noise Suppression (BNS)
Automatic Gain Control (AGC)
Voice Activity Detection (VAD)
VAD Configuration
Comfort Noise Generation (CNG)
CNG Configuration
Jitter Buffer
Jitter Buffer Configuration
180
180
180
180
181
183
183
184
186
186
187
188
188
189
189
189
191
191
193
198
198
200
203
203
204
205
205
206
206
206
207
207
207
208
208
208
208
208
208
209
209
209
209
209
7
Page 13

Administrator’s Guide for SIP-T2 Series/T4 Series/T5 Series/CP920 IP Phones
Smart Noise Block
Smart Noise Block Configuration
Acoustic Shield
Acoustic Shield Configuration
DTMF
DTMF Keypad
Transmitting DTMF Digit
Transmitting DTMF Digit Configuration
Suppress DTMF Display
Suppress DTMF Display Configuration
Transfer via DTMF
Transfer via DTMF Configuration
Local DTMF Tone
Local DTMF Tone Configuration
Voice Quality Monitoring (VQM)
RTCP-XR
RTCP-XR Configuration
VQ-RTCPXR
Voice Quality Reports
Voice Quality Reports Configuration
VQ-RTCPXR Display
VQ-RTCPXR Display Configuration
Central Report Collector
Central Report Collector Configuration
211
211
212
212
213
213
213
214
215
215
216
216
216
217
217
217
217
218
218
218
220
220
223
223
Phone Customization
Language
Supported Languages
Language Display Configuration
Language for Phone Display Customization
Customizing a Language Pack for Phone Display
Custom Language for Phone Display Configuration
Example: Setting a Custom Language for Phone Display
Language for Web Display Customization
Customizing a Language Pack for Web Display
Customizing a Language Pack for Note Display
Custom Language for Web and Note Display Configuration
Contrast
Contrast Configuration
Wallpaper
Wallpaper Configuration
Wallpaper Customization
Custom Wallpaper Picture Limit
Custom Wallpaper Configuration
Deleting a Custom Picture
225
225
226
226
227
227
228
228
229
229
230
231
231
231
232
232
234
234
235
235
8
Page 14

Table of Contents
Adding a Wallpaper from a USB Flash Drive
Example: Setting a Custom Picture as Wallpaper
Transparency
Transparency Configuration
Screen Saver
Screensaver Display Customization
Screensaver File Elements and Attributes
Customizing the Screen Saver File
Custom Screensaver Picture Limit
Screensaver Configuration
Adding a Screensaver Picture from a USB Flash Drive
Deleting a Screensaver Picture
Backlight
Supported Backlight Options
Backlight and Time Configuration
Label Length for Line Key Display
Label Length Display Configuration
Label Alignment for Line/Ext Key Display
Label Alignment Display Configuration
Page Switch Key
Page Switch Key Configuration
Page Tips
Phone Page Tips
Phone Page Tips Indicator
Phone Page Tips Configuration
Expansion Module Page Tips
Expansion Module Page Tips Indicator
Expansion Module Page Tips Configuration
Time and Date
Time Zone
NTP Settings
NTP Configuration
DST Settings
Auto DST File Attributes
Customizing Auto DST File
DST Configuration
Time and Date Manually Configuration
Time and Date Format Configuration
Date Customization Rule
Idle Clock Display
Idle Clock Display Configuration
Logo Customization
Custom Logo Picture Limit
Customizing a Logo Picture
Custom Logo Configuration
235
236
236
236
237
237
238
238
239
239
242
242
243
243
244
245
246
247
247
247
248
248
248
248
249
249
249
250
250
250
254
254
256
256
257
258
260
260
262
262
263
263
263
264
264
9
Page 15

Administrator’s Guide for SIP-T2 Series/T4 Series/T5 Series/CP920 IP Phones
Example: Setting a Custom Logo Display
Call Display
Call Display Configuration
Display Method on Dialing
Display Method on Dialing Configuration
Key As Send
Key As Send Configuration
Softkey Layout
Softkey Layout File Customization
Softkey Layout File Elements and Attributes
Customizing Softkey Layout File
Softkey Layout Configuration
Example: Setting the Soft Keys Layout in Talking State
Input Method
Keypad Input Method File Customization
Customizing the Keypad Input Method File
Onscreen Keyboard Input Method File Customization
Description of the Onscreen Keyboard Input Method Files
Lang File Elements and Attributes
Customizing a Lang File
Ime File Elements and Attributes
Customizing an Ime File
Layout File Elements and Attributes
Customizing a Layout File
Input Method Configuration
Example: Configuring the French Onscreen Keyboard Input Method
Notification Popups
Notification Popups Configuration
Power LED Indicator
Power LED Indicator Configuration
Bluetooth
Bluetooth Configuration
Handset/Headset/Speakerphone Mode
Handset/Headset/Speakerphone Mode Configuration
DSS Keys
Supported DSS Keys
Supported Dsskey Types
Line Keys
Line Keys Configuration
Example: Set a Park/Retrieve Key for FAC Call Park Mode
Example: Set a Park/Retrieve Key for Transfer Call Park Mode
Example: Setting a Line Key as Directed Pickup key
Example: Setting a Line Key as Group Pickup key
Example: Setting a Line Key as Forward Key
Example: Setting a Line Key as BLF List key
265
265
266
268
269
269
269
270
270
271
271
272
274
274
274
275
275
276
276
277
277
278
278
279
279
281
282
282
283
283
286
286
288
288
290
290
291
292
292
296
296
297
297
298
299
10
Page 16

Table of Contents
Example: Setting a Line Key as Private Hold key
Example: Setting a Line Key as Multicast Paging key
Programmable Keys
Supported Programmable Keys
Programmable Keys Configuration
Ext Keys
Ext Keys Configuration
Dsskey Lock Configuration
Enhanced DSS Keys
Guidelines for Configuring Enhanced DSS Keys
Macro Action Strings
EDK Configuration
EDK List Configuration
EDK User Input Prompt Configuration
EDK Soft Keys Configuration
Example: Configuring EDK List for a Line Key
Example: Using EDK Macro Strings as the Contact Number
Power Saving
Power Saving Configuration
Search Source List in Dialing
Search Source File Customization
Search Source File Attributes
Customizing Search Source File
Search Source List Configuration
Recent Call Display in Dialing
Recent Call in Dialing Configuration
Icon Customization
Custom Icons Configuration
Warnings Display
Warnings Display Configuration
299
299
299
300
300
304
304
307
307
308
308
312
312
313
315
318
319
319
320
322
323
323
324
324
326
326
326
327
327
327
Account Settings
Account Registration
Supported Accounts
SIP Accounts Registration Configuration
PSTN Account Configuration
Registration Settings Configuration
Outbound Proxy in Dialog
Outbound Proxy in Dialog Configuration
Server Redundancy
Behaviors When Working Server Connection Fails
Registration Method of the Failover/Fallback Mode
Fallback Server Redundancy Configuration
Failover Server Redundancy Configuration
SIP Server Name Resolution
329
329
329
329
333
334
336
337
337
338
339
339
340
344
11
Page 17

Administrator’s Guide for SIP-T2 Series/T4 Series/T5 Series/CP920 IP Phones
SIP Server Name Resolution Configuration
Static DNS Cache
Behave with a Configured DNS Server
Static DNS Cache Configuration
Logon Wizard
Logon Wizard Configuration
Multiple Line Keys per Account
Multiple Line Keys per Account Configuration
Auto Line Labels Rule Configuration
Default Account
Directory
Local Directory
Contact Avatars and Icons Picture Limit
Preparing the Tar Formatted File
Local Contact File Customization
Local Contact File Elements and Attributes
Customizing Local Contact File
Local Contact Files and Resource Upload
Example: Adding Contacts Using a Contact File
Local Contacts Backup
Favorite Contacts
Favorites Configuration
Google Contacts
Google Contacts Configuration
Signing in to the Google Contact Server
Lightweight Directory Access Protocol (LDAP)
LDAP Attributes
Securely Storing the LDAP Credentials
LDAP Configuration
Remote Phone Book
Remote Phone Book File Customization
Remote Phone Book File Elements
Customizing Remote Phone Book File
Remote Phone Book Configuration
Example: Configuring a Remote Phone Book
Directory List for Directory/Dir Soft Key
Directory List File Customization
Directory List File Attributes
Customizing Directory List File
Directory List Configuration
Example: Configuring a Directory List
Directory Search Settings
Directory Search Settings Configuration
Number Matching Settings
344
345
345
346
349
349
351
351
353
354
356
356
356
357
358
358
360
360
362
363
364
364
365
365
366
366
367
367
367
374
374
375
375
376
377
378
378
378
380
380
381
382
382
383
12
Page 18

Table of Contents
Number Matching Settings Configuration
Example: Matching Contacts with the Caller's Phone Number Using the Regular Expression
Call Log
Call Log Display
Call Log Configuration
Call Logs Backup
Call Features
Dial Plan Defined by Four Patterns (Old Dial Plan Mechanism)
Basic Regular Expression Syntax for Four Patterns
Replace Rule File Customization
Replace Rule File Attributes
Customizing the Replace Rule File
Dial Now File Customization
Dial Now File Attributes
Customizing the Dial Now File
Replace Rule Configuration
Dial Now Configuration
Area Code Configuration
Block Out Configuration
Example: Adding Replace Rules Using a Replace Rule File
Dial Plan Defined by Digit Map (New Dial Plan Mechanism)
Basic Regular Expression Syntax for Digit Map
Digit Map for All Lines Configuration
Digit Map for a Specific Line Configuration
Emergency Dialplan and Enhanced 911
Emergency Dialplan and Enhanced 911 Configuration
Hotline
Hotline Configuration
Off Hook Hot Line Dialing
Off Hook Hot Line Dialing Configuration
Live Dialpad
Live Dialpad Configuration
Auto Redial
Auto Redial Configuration
Recall Configuration
Speed Dial
Speed Dial Key Configuration
Password Dial
Password Dial Configuration
Call Timeout
Call Timeout Configuration
Anonymous Call
Anonymous Call Configuration
Call Number Filter
383
384
385
385
385
388
390
390
391
392
392
392
392
393
393
393
394
396
397
398
398
398
400
403
407
407
411
411
412
413
413
413
414
414
415
415
416
416
416
417
417
418
418
419
13
Page 19

Administrator’s Guide for SIP-T2 Series/T4 Series/T5 Series/CP920 IP Phones
Call Number Filter Configuration
IP Address Call
IP Address Call Configuration
Ignoring Incoming Calls
Ignoring Incoming Calls Configuration
Off Hook Answering
Off Hook Answering Configuration
Auto Answer
Auto Answer Configuration
Anonymous Call Rejection
Anonymous Call Rejection Configuration
Call Waiting
Call Waiting Configuration
Do Not Disturb (DND)
DND Settings Configuration
DND Feature Configuration
DND in Phone Mode Configuration
DND in Custom Mode Configuration
DND Synchronization for Server-side Configuration
Multiple Call Appearances
Multiple Call Appearances Configuration
Call Hold
Call Hold Configuration
Music on Hold (MoH) Configuration
Call Mute
Microphone Mute Configuration
Keep Mute
Keep Mute Configuration
Mute Alert Tone
Mute Alert Tone Configuration
Call Forward
Call Forward Settings Configuration
Call Forward Feature Configuration
Call Forward in Phone Mode Configuration
Call Forward in Custom Mode Configuration
Call Forward Synchronization for Server-side Configuration
Call Transfer
Call Transfer Configuration
Transfer Mode for Dsskey Configuration
Conference
Conference Type Configuration
Local Conference Configuration
Network Conference Configuration
USB Recording
USB Recording Configuration
419
420
420
420
421
421
421
422
422
425
425
426
427
428
428
430
430
431
432
434
434
435
435
437
438
438
439
439
439
439
440
440
442
442
446
451
452
453
454
454
454
455
456
456
457
14
Page 20

Table of Contents
Multicast Paging
Multicast Paging Group Configuration
Multicast Listening Group Configuration
Multicast Paging Settings
Multicast Paging Settings Configuration
Advanced Features
Call Pickup
Directed Call Pickup
Directed Call Pickup Configuration
Group Call Pickup
Group Call Pickup Configuration
Dialog Info Call Pickup
Dialog Info Call Pickup Configuration
Call Completion
Call Completion Configuration
Example: Using Call Completion
Call Park and Retrieve
Call Park and Retrieve Configuration
Example: Setting Call Park and Retrieve in FAC Mode
Example: Setting Call Park and Retrieve in Transfer Mode
Automatic Call Distribution (ACD)
ACD Key Configuration
ACD Configuration
Example: Setting ACD
Busy Lamp Field
BLF Key Configuration
BLF List Configuration
State Indicator of Remote Line
BLF/BLF List Subscription
BLF/BLF List Subscription Configuration
Visual and Audio Alert for Monitor Lines
Visual and Audio Alert for BLF Lines Configuration
Example: Configuring Visual and Audio Alert for Monitor Lines
LED Mode for BLF/BLF List Key
Supported BLF LED Modes
BLF LED Mode Configuration
BLF/BLF List Key LED Status and Behavior Configuration
Supported BLF/BLF List Key Behaviors
BLF Key LED/Icon and Behavior for Idle State Configuration
BLF Key LED/Icon and Behavior for Call-in State Configuration
BLF Key LED/Icon and Behavior for Call-out State Configuration
BLF Key LED/Icon and Behavior for Talking State Configuration
BLF Key LED/Icon and Behavior for Parked-Against State Configuration
BLF Key LED/Icon and Behavior for Hold State Configuration
457
458
459
460
460
463
463
463
463
465
465
466
467
468
470
470
471
471
473
473
473
474
474
476
476
477
477
480
480
481
483
483
486
487
487
488
489
489
490
491
492
494
495
496
15
Page 21

Administrator’s Guide for SIP-T2 Series/T4 Series/T5 Series/CP920 IP Phones
BLF Key LED/Icon and Behavior for DND State Configuration
BLF Key for Intercom Configuration
Call Information Display Configuration
Shared Line
State Indicator of Shared Line
Shared Call Appearance (SCA) Configuration
SCA Configuration
Bridge Lines Appearance (BLA)
BLA Configuration
Intercom
Intercom Key Configuration
State Monitor for Intercom Contact
State Indicator of Intercom Contact
State Monitor for Intercom Contact Configuration
Outgoing Intercom Configuration
Incoming Intercom Configuration
CSTA Control
CSTA Control Configuration
Action URL
Predefined Events List
Variable Values List
Action URL Configuration
Action URI
Supported HTTP/HTTPS GET Request
Supported SIP Notify Message
Variable Values List
Action URI Configuration
Example: Capturing the Current Screen of the Phone
Example: Placing a Call via Web User Interface
Voice Mail
MWI for Voice Mail Configuration
Short Message Service (SMS)
SMS Configuration
XML Browser
XML Browser Configuration
Hot Desking
Hot Desking Key Configuration
Hot Desking Configuration
497
498
498
498
499
500
500
501
501
502
503
503
503
504
504
505
507
507
507
508
510
511
521
521
522
523
526
527
528
529
529
531
531
531
532
534
534
534
General Features
Line Identification Presentation
CLIP and COLP Configuration
Return Code for Refused Call
Return Code for Refused Call Configuration
Return Code for Unanswered Call
16
536
536
536
538
538
538
Page 22

Table of Contents
Return Code for Unanswered Call Configuration
Hide Feature Access Codes
Hide Feature Access Codes Configuration
Accept SIP Trust Server Only
Accept SIP Trust Server Only Configuration
100 Reliable Retransmission
100 Reliable Retransmission Configuration
SIP Session Timer
SIP Session Timer Configuration
Session Timer
Session Timer Configuration
Reboot in Talking
Reboot in Talking Configuration
Reserve # in User Name
Reserve # in User Name Configuration
Busy Tone Delay
Busy Tone Delay Configuration
CFG File Version Information
CFG File Version Information Configuration
Media Loopback
Media Loopback Configuration
Cloud
Cloud Configuration
539
539
539
540
540
540
541
541
542
542
543
544
544
544
545
545
545
546
546
547
547
548
548
Configuration Parameters
BroadSoft Parameters
BroadSoft Settings
Broadsoft UC
Broadsoft XSI
Broadsoft ACD
Broadsoft Centralized Call Recording
Broadsoft Security Classification
Broadsoft Hoteling
Broadsoft Flexible Seating
Broadsoft Call Decline
Broadsoft Network Directory
Broadsoft Visual Voice Mail
Broadsoft SCA
Broadsoft Call Park
Broadsoft Emergency Call
BroadSoft Call Waiting Sync
Start2Start ACD Parameters
Alcatel-Lucent Barge in Parameters
Ethernet Interface MTU Parameter
SIP Settings Parameters
550
550
550
550
553
556
560
561
561
562
563
564
568
568
569
571
572
572
573
575
575
17
Page 23

Administrator’s Guide for SIP-T2 Series/T4 Series/T5 Series/CP920 IP Phones
Call Settings Parameters
Appendix
RFC and Internet Draft Support
Reading Icons
579
581
581
583
18
Page 24

Table of Contents
19
Page 25

Getting Started
Getting Started
This chapter describes where Yealink devices fit in your network and provides basic initialization instructions of
devices.
Topics
Requirements
Yealink IP Phones in a Network
Initialization Process Overview
Verifying Startup
Requirements
In order to perform as SIP endpoints in your network successfully, you need the following in deployments:
l A working IP network is established.
l VoIP gateways configured for SIP.
l The latest (or compatible) firmware of the device is available.
l A call server is active and configured to receive and send SIP messages.
l A text editor, such as Notepad++, to create and edit boot files, configuration files, and resource files.
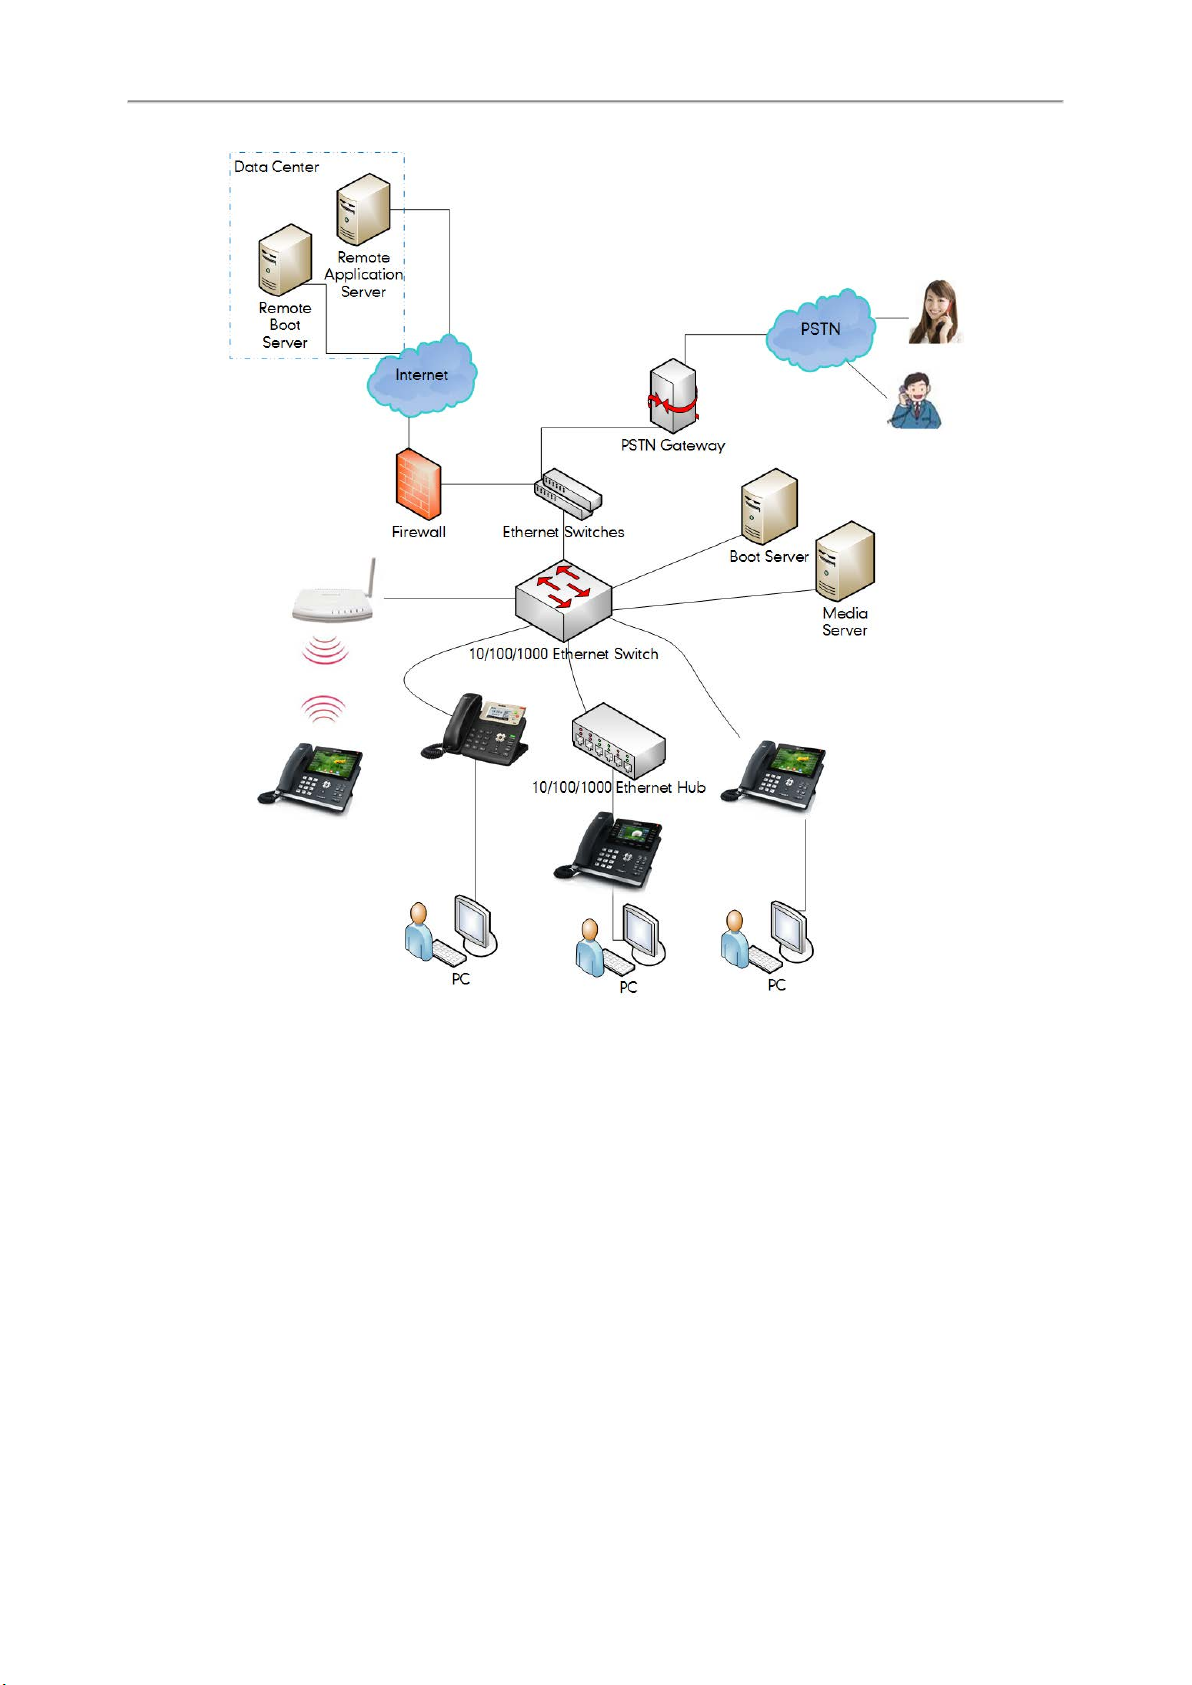
Yealink IP Phones in a Network
Most Yealink phones are connected physically through a Category 5E (CAT5E) cable to a 10/100/1000Mbps Ethernet
LAN, and send and receive all data using the same packet-based technology. Some phones support the wireless network.
Since the IP phone is a data terminal, digitized audio being just another type of data from its perspective, the phone is
capable of vastly more than traditional business phones. Moreover, Yealink phones run the same protocols as your
office personal computer, which means that you can develop many innovative applications without resorting to specialized technology.
There are many ways to set up a phone network using Yealink phones. The following shows an example of a network
setup:
20
Page 26
Administrator’s Guide for SIP-T2 Series/T4 Series/T5 Series/CP920 IP Phones
Initialization Process Overview
The initialization process of the device is responsible for network connectivity and operation of the device in your local
network. Once you connect your device to the network and to an electrical supply, the device begins its initialization
process.
Topics
Loading the ROM File
Configuring the VLAN
Querying the DHCP (Dynamic Host Configuration Protocol) Server
Contacting the Provisioning Server
Updating Firmware
Downloading the Resource Files
21
Page 27

Getting Started
Loading the ROM File
The ROM file resides in the flash memory of the device. The device comes from the factory with a ROM file preloaded.
During initialization, the device runs a bootstrap loader that loads and executes the ROM file.
Configuring the VLAN
If you connect the device to a switch, the switch notifies the device of the VLAN information defined on the switch (if
using LLDP or CDP). The device can then proceed with the DHCP request for its network settings (if using DHCP).
Querying the DHCP (Dynamic Host Configuration Protocol) Server
The device is capable of querying a DHCP server.
After establishing network connectivity, the device can obtain the following network parameters from the DHCP server
during initialization:
l IP Address
l Subnet Mask
l Default Gateway
l Primary DNS (Domain Name Server)
l Secondary DNS
By default, the devices obtain these parameters from a DHCPv4. You can configure network parameters of the device
manually if any of them are not supplied by the DHCP server.
Contacting the Provisioning Server
If you configure the device to obtain configurations from the provisioning server, it will be connected to the provisioning server, and then download the boot file and configuration file(s) during startup. The device will be able to
resolve and update configurations written in the configuration file(s). If the device does not obtain configurations from
the provisioning server, it will use the configurations stored in the flash memory.
Updating Firmware
If you define the access URL of firmware in the configuration file, the device will download the firmware from the provisioning server. If the MD5 value of the downloaded firmware file differs from that stored in the flash memory, the
device will perform a firmware update.
You can manually upgrade the firmware if the device does not download the firmware from the provisioning server.
Downloading the Resource Files
In addition to the configuration file(s), the device may require resource files before it provides service. These resource
files are optional, but if you deploy some particular features, these files are required.
Verifying Startup
When the IP phone begins the initialization process, it cycles through the following steps:
1. The power LED indicator glows red.
2. The message “Welcome Initializing… please wait” appears on the phone screen when the IP phone starts up.
3. The main phone screen displays the following:
l Time and date
l Soft key labels
4. Press the OK/√key or select Menu > Status to check the phone status, for example, firmware version.
If the phone has successfully passed through these steps, it starts up properly and is ready for use.
22
Page 28
Network Configurations
You can make custom network configurations.
Topics
IPv4 and IPv6 Wired Network Settings
DHCP Option for IPv4
DHCP Option for IPv6
VLAN
Wi-Fi
Real-Time Transport Protocol (RTP) Ports
Network Address Translation (NAT)
Internet Port and PC Port
VPN
Quality of Service (QoS)
802.1x Authentication
TR-069 Device Management
Network Configurations
IPv4 and IPv6 Wired Network Settings
You can configure the devices to operate in IPv4, IPv6, or dual-stack (IPv4/IPv6) mode.
After establishing wired network connectivity, the devices obtain the IPv4 or IPv6 network settings from a Dynamic
Host Configuration Protocol (DHCPv4 or DHCPv6) server. We recommend using DHCP where possible to eliminate
repetitive manual data entry.
You can also configure IPv4 or IPv6 network settings manually.
Note
Yealink devices comply with the DHCPv4 specifications documented in RFC 2131, and DHCPv6 specifications documented in
RFC 3315.
Topics
Wired Network IP Addressing Mode Configuration
IPv4 Wired Network Configuration
IPv6 Wired Network Configuration
Wired Network IP Addressing Mode Configuration
The following table lists the parameters you can use to configure IP addressing mode for the wired network.
Parameter
Description It configures the IP addressing mode for the wired network.
static.network.ip_address_mode
[1]
<y0000000000xx>.cfg
0-IPv4
Permitted
Values
Default 0
Web UI Network > Basic > Internet Port > Mode (IPv4/IPv6)
1-IPv6
2-IPv4 & IPv6
23
Page 29
Administrator’s Guide for SIP-T2 Series/T4 Series/T5 Series/CP920 IP Phones
Color Screen Phones:
Phone UI
Menu > Advanced (default password: admin) > Network > WAN Port > IP Mode
Black-and-white Screen Phones:
Menu > Settings > Advanced Settings (default password: admin) > Network > WAN Port > IP Mode
Parameter
static.network.preference
[1]
<y0000000000xx>.cfg
It specifies IPv4 or IPv6 as the preferred wired network in a Dual-Stack mode.
Description
Note: It works only if “static.network.ip_address_mode” is set to 2 (IPv4 & IPv6).
Permitted
Values
0-IPv6
1-IPv4
Default 0
Web UI Network > Basic > Internet Port > Preference(IPv4/IPv6)
Color Screen Phones:
Menu > Advanced (default password: admin) > Network > WAN Port > Preference
Phone UI
Black-and-white Screen Phones:
Menu > Settings > Advanced Settings (default password: admin) > Network > WAN Port > Preference
Parameter
account.X.sip_server_mode
[2]
<MAC>.cfg
It specifies the preferred network and query mode in a Dual-Stack mode when a domain name is con-
Description
figured for a SIP server.
Note: It works only if “static.network.ip_address_mode” is set to 2 (IPv4 & IPv6).
0-Specify IPv4 as the preferred network and A query will be performed preferentially.
Permitted
Values
1-Specify IPv6 as the preferred network and AAAA query will be performed preferentially.
2-The preferred network is configured by “static.network.preference”.
Default 0
[1]
If you change this parameter, the phone will reboot to make the change take effect.
[2]
X is the account ID. For T57W/T54W/T48U/T48S/T48G/T46U/T46S/T46G/T29G, X=1-16; for
T53W/T53/T43U/T42G/T42S, X=1-12; for T41P/T41S/T27G, X=1-6; for T40P/T40G/T23P/T23G, X=1-3; for T21(P) E2, X=12; for T19(P) E2/CP920, X=1.
IPv4 Wired Network Configuration
The following table lists the parameters you can use to configure IPv4 wired network.
Parameter
static.network.internet_port.type
It configures the Internet port type for IPv4 wired network.
Description
Note: It works only if “static.network.ip_address_mode” is set to 0 (IPv4) or 2 (IPv4 & IPv6).
Permitted
Values
0-DHCP
2-Static IP
Default 0
Web UI T57W/T54W/T53W/T53/T48U/T46U/T43U:
[1]
<y0000000000xx>.cfg
24
Page 30
Network > Basic > IPv4 Config > Configuration Type
Other Phones:
Network > Basic > IPv4 Config
Color Screen Phones:
Network Configurations
Phone UI
Menu > Advanced (default password: admin) > Network > WAN Port > IPv4
Black-and-white Screen Phones:
Menu > Settings > Advanced Settings (default password: admin) > Network > WAN Port > IPv4
Parameter
static.network.internet_port.ip
It configures the IPv4 address for the wired network.
Description
Note: It works only if “static.network.ip_address_mode” is set to 0 (IPv4) or 2 (IPv4 & IPv6), and "stat-
ic.network.internet_port.type" is set to 2 (Static IP).
Permitted
Values
IPv4 Address
Default Blank
T57W/T54W/T53W/T53/T48U/T46U/T43U:
Network > Basic > IPv4 Config > Configuration Type (Static IP) > IP Address
Web UI
Other Phones:
Network > Basic > IPv4 Config > Static IP Address > IP Address
Color Screen Phones:
Menu > Advanced (default password: admin) > Network > WAN Port > IPv4 > Static IP > IP Address
Phone UI
Black-and-white Screen Phones:
[1]
<y0000000000xx>.cfg
Menu > Settings > Advanced Settings (default password: admin) > Network > WAN Port > IPv4 > Static
IPv4 Client > IP Address
Parameter
static.network.internet_port.mask
It configures the IPv4 subnet mask for the wired network.
Description
Note: It works only if "static.network.internet_port.type" is set to 2 (Static IP).
Permitted
Values
Subnet Mask
Default Blank
T57W/T54W/T53W/T53/T48U/T46U/T43U:
Network > Basic > IPv4 Config > Configuration Type (Static IP) > Subnet Mask
Web UI
Other Phones:
Network > Basic > IPv4 Config > Static IP Address > Subnet Mask
Color Screen Phones:
Menu > Advanced (default password: admin) > Network > WAN Port > IPv4 > Static IP > Subnet Mask
Phone UI
Black-and-white Screen Phones:
Menu > Settings > Advanced Settings (default password: admin) > Network > WAN Port > IPv4 > Static
[1]
<y0000000000xx>.cfg
25
Page 31
Administrator’s Guide for SIP-T2 Series/T4 Series/T5 Series/CP920 IP Phones
IPv4 Client > Subnet Mask
Parameter
static.network.internet_port.gateway
[1]
<y0000000000xx>.cfg
Description
It configures the IPv4 default gateway for the wired network.
Note: It works only if "static.network.internet_port.type" is set to 2 (Static IP).
Permitted
Values
IPv4 Address
Default Blank
T57W/T54W/T53W/T53/T48U/T46U/T43U:
Network > Basic > IPv4 Config > Configuration Type (Static IP) > Default Gateway
Web UI
Other Phones:
Network > Basic > IPv4 Config > Static IP Address > Default Gateway
Color Screen Phones:
Menu > Advanced (default password: admin) > Network > WAN Port > IPv4 > Static IP > Default Gateway
Phone UI
Black-and-white Screen Phones:
Menu > Settings > Advanced Settings (default password: admin) > Network > WAN Port > IPv4 > Static
IPv4 Client > Default Gateway
Parameter
static.network.static_dns_enable
It triggers the static DNS feature to on or off for the wired network.
Description
Note: It works only if “static.network.internet_port.type” is set to 0 (DHCP).
Permitted
Values
0-Off, the phone will use the IPv4 DNS obtained from DHCP.
1-On, the phone will use manually configured static IPv4 DNS.
[1]
<y0000000000xx>.cfg
Default 0
Web UI Network > Basic > IPv4 Config > Static DNS
Color Screen Phones:
Menu > Advanced (default password: admin) > Network > WAN Port > IPv4 > Type(DHCP) > Static DNS
Phone UI
Black-and-white Screen Phones:
Menu > Settings > Advanced Settings (default password: admin) > Network > WAN Port > IPv4 > DHCP
IPv4 Client > Static DNS
Parameter
static.network.primary_dns
[1]
It configures the primary IPv4 DNS server for the wired network.
Description
Note: It works only if “static.network.ip_address_mode” is set to 0 (IPv4) or 2 (IPv4 & IPv6). In the DHCP
environment, you need to make sure “static.network.static_dns_enable" is set to 1 (On).
Permitted
Values
IPv4 Address
Default Blank
T57W/T54W/T53W/T53/T48U/T46U/T43U:
Web UI
Network > Basic > IPv4 Config > Static DNS > Primary DNS
<y0000000000xx>.cfg
26
Page 32
Phone UI
Parameter
Network Configurations
Other Phones:
Network > Basic > IPv4 Config > Static IP Address > Primary DNS
Color Screen Phones:
Menu > Advanced (default password: admin) > Network > WAN Port > IPv4 > Static IP > Pri.DNS
In the DHCP environment:
Menu > Advanced (default password: admin) > Network > WAN Port > IPv4 > DHCP > Static DNS
(Enabled) > Pri.DNS
Black-and-white Screen Phones:
Menu > Settings > Advanced Settings (default password: admin) > Network > WAN Port > IPv4 > Static
IPv4 Client > Pri.DNS
In the DHCP environment:
Menu > Settings > Advanced Settings (default password: admin) > Network > WAN Port > IPv4 > DHCP
IPv4 Client > Static DNS (Enabled) > Pri.DNS
static.network.secondary_dns
[1]
<y0000000000xx>.cfg
It configures the secondary IPv4 DNS server for the wired network.
Description
Note: It works only if “static.network.ip_address_mode” is set to 0 (IPv4) or 2 (IPv4 & IPv6). In the DHCP
environment, you need to make sure “static.network.static_dns_enable" is set to 1 (On).
Permitted
Values
IPv4 Address
Default Blank
T57W/T54W/T53W/T53/T48U/T46U/T43U:
Network > Basic > IPv4 Config > Static DNS > Secondary DNS
Web UI
Other Phones:
Network > Basic > IPv4 Config > Static IP Address > Secondary DNS
Color Screen Phones:
Menu > Advanced (default password: admin) > Network > WAN Port > IPv4 > Static IP > Sec.DNS
In the DHCP environment:
Menu > Advanced (default password: admin) > Network > WAN Port > IPv4 > DHCP > Static DNS
(Enabled) > Sec.DNS
Phone UI
Black-and-white Screen Phones:
Menu > Settings > Advanced Settings (default password: admin) > Network > WAN Port > IPv4 > Static
IPv4 Client > Sec.DNS
In the DHCP environment:
Menu > Settings > Advanced Settings (default password: admin) > Network > WAN Port > IPv4 > DHCP
IPv4 Client > Static DNS (Enabled) > Sec.DNS
[1]
If you change this parameter, the phone will reboot to make the change take effect.
27
Page 33
Administrator’s Guide for SIP-T2 Series/T4 Series/T5 Series/CP920 IP Phones
IPv6 Wired Network Configuration
If you configure the network settings on the phone for an IPv6 wired network, you can set up an IP address for the
phone by using SLAAC (ICMPv6), DHCPv6 or by manually entering an IP address. Ensure that your network environment supports IPv6. Contact your ISP for more information.
When you enable both SLAAC and DHCPv6 on the phone, the server can specify the IP phone to obtain the IPv6
address and other network settings either from SLAAC or from DHCPv6, if the SLAAC server is not working, the phone
will try to obtain the IPv6 address and other network settings via DHCPv6.
The following table lists the parameters you can use to configure IPv6 wired network.
Parameter
Description
Permitted
Values
Default 0
Web UI
Phone UI
Parameter
Description
Permitted
Values
[1]
[1]
<y0000000000xx>.cfg
<y0000000000xx>.cfg
static.network.ipv6_internet_port.type
It configures the Internet port type for IPv6 wired network.
Note: It works only if “static.network.ip_address_mode” is set to 1 (IPv6) or 2 (IPv4 & IPv6).
0-DHCP
1-Static IP
T57W/T54W/T53W/T53/T48U/T46U/T43U:
Network > Basic > IPv6 Config > Configuration Type
Other Phones:
Network > Basic > IPv6 Config
Color Screen Phones:
Menu > Advanced (default password: admin) > Network > WAN Port > IPv6
Black-and-white Screen Phones:
Menu > Settings > Advanced Settings (default password: admin) > Network > WAN Port > IPv6
static.network.ipv6_internet_port.ip
It configures the IPv6 address for the wired network.
Note: It works only if “static.network.ip_address_mode” is set to 1 (IPv6) or 2 (IPv4 & IPv6), and "static.network.ipv6_internet_port.type" is set to 1 (Static IP).
IPv6 Address
Default Blank
T57W/T54W/T53W/T53/T48U/T46U/T43U:
Web UI
Phone UI
28
Network > Basic > IPv6 Config > Configuration Type (Static IP) > IP Address
Other Phones:
Network > Basic > IPv6 Config > Static IP Address > IP Address
Color Screen Phones:
Menu > Advanced (default password: admin) > Network > WAN Port > IPv6 > Static IP > IP Address
Black-and-white Screen Phones:
Menu > Settings > Advanced Settings (default password: admin) > Network > WAN Port > IPv6 > Static
Page 34
IPv6 Client > IP Address
Parameter
static.network.ipv6_prefix
It configures the IPv6 prefix for the wired network.
Description
Note: It works only if “static.network.ip_address_mode” is set to 1 (IPv6) or 2 (IPv4 & IPv6), and "stat-
ic.network.ipv6_internet_port.type" is set to 1 (Static IP).
Permitted
Values
Integer from 0 to 128
Default 64
T57W/T54W/T53W/T53/T48U/T46U/T43U:
[1]
Network Configurations
<y0000000000xx>.cfg
Web UI
Network > Basic > IPv6 Config > Configuration Type (Static IP) > IPv6 Prefix(0~128)
Other Phones:
Network > Basic > IPv6 Config > Static IP Address > IPv6 Prefix(0~128)
Color Screen Phones:
Menu > Advanced (default password: admin) > Network > WAN Port > IPv6 > Static IP > IPv6 IP Prefix
Phone UI
Black-and-white Screen Phones:
Menu > Settings > Advanced Settings (default password: admin) > Network > WAN Port > IPv6 > Static
IPv6 Client > IPv6 IP Prefix
Parameter
static.network.ipv6_internet_port.gateway
It configures the IPv6 default gateway for the wired network.
Description
Note: It works only if “static.network.ip_address_mode” is set to 1 (IPv6) or 2 (IPv4 & IPv6), and "stat-
ic.network.ipv6_internet_port.type" is set to 1 (Static IP).
Permitted
Values
IPv6 Address
Default Blank
T57W/T54W/T53W/T53/T48U/T46U/T43U:
Network > Basic > IPv6 Config > Configuration Type (Static IP) > Default Gateway
Web UI
Other Phones:
[1]
<y0000000000xx>.cfg
Phone UI
Parameter
Description
Permitted
Network > Basic > IPv6 Config > Static IP Address > Default Gateway
Color Screen Phones:
Menu > Advanced (default password: admin) > Network > WAN Port > IPv6 > Static IP > Default Gateway
Black-and-white Screen Phones:
Menu > Settings > Advanced Settings (default password: admin) > Network > WAN Port > IPv6 > Static
IPv6 Client > Default Gateway
static.network.ipv6_static_dns_enable
[1]
<y0000000000xx>.cfg
It triggers the static IPv6 DNS feature to on or off for the wired network.
Note: It works only if “static.network.ipv6_internet_port.type” is set to 0 (DHCP).
0-Off, the phone will use the IPv6 DNS obtained from DHCP.
29
Page 35
Administrator’s Guide for SIP-T2 Series/T4 Series/T5 Series/CP920 IP Phones
Values 1-On, the phone will use manually configured static IPv6 DNS.
Default 0
Web UI Network > Basic > IPv6 Config > IPv6 Static DNS (Static IPv6 DNS)
Color Screen Phones:
Menu > Advanced (default password: admin) > Network > WAN Port > IPv6 > Type(DHCP) > Static DNS
Phone UI
Black-and-white Screen Phones:
Menu > Settings > Advanced Settings (default password: admin) > Network > WAN Port > IPv6 > DHCP
IPv6 Client > Static DNS
Parameter
static.network.ipv6_primary_dns
[1]
<y0000000000xx>.cfg
It configures the primary IPv6 DNS server for the wired network.
Description
Note: It works only if “static.network.ip_address_mode" is set to 1 (IPv6) or 2 (IPv4 & IPv6). In DHCP envir-
onment, you also need to make sure “static.network.ipv6_static_dns_enable" is set to 1 (On).
Permitted
Values
IPv6 Address
Default Blank
T57W/T54W/T53W/T53/T48U/T46U/T43U:
Network > Basic > IPv6 Config > Static IPv6 DNS > Primary DNS
Web UI
Other Phones:
Network > Basic > IPv6 Config > Static IP Address > Primary DNS
Color Screen Phones:
Menu > Advanced (default password: admin) > Network > WAN Port > IPv6 > Static IP > Primary DNS
In DHCP environment:
Menu > Advanced (default password: admin) > Network > WAN Port > IPv6 > DHCP > Static DNS
(Enabled) > Primary DNS
Phone UI
Black-and-white Screen Phones:
Menu > Settings > Advanced Settings (default password: admin) > Network > WAN Port > IPv6 > Static
IPv6 Client > Pri.DNS
In DHCP environment:
Menu > Settings > Advanced Settings (default password: admin) > Network > WAN Port > IPv6 > DHCP
IPv6 Client > Static DNS(Enabled) > Pri.DNS
Parameter
static.network.ipv6_secondary_dns
[1]
<y0000000000xx>.cfg
It configures the secondary IPv6 DNS server for the wired network.
Description
Note: It works only if “static.network.ip_address_mode" is set to 1 (IPv6) or 2 (IPv4 & IPv6). In DHCP envir-
onment, you also need to make sure “static.network.ipv6_static_dns_enable" is set to 1 (On).
Permitted
Values
IPv6 Address
Default Blank
Web UI T57W/T54W/T53W/T53/T48U/T46U/T43U:
30
Page 36
Phone UI
Parameter
Network Configurations
Network > Basic > IPv6 Config > Static IPv6 DNS > Secondary DNS
Other Phones:
Network > Basic > IPv6 Config > Static IP Address > Secondary DNS
Color Screen Phones:
Menu > Advanced (default password: admin) > Network > WAN Port > IPv6 > Static IP > Secondary DNS
In DHCP environment:
Menu > Advanced (default password: admin) > Network > WAN Port > IPv6 > DHCP > Static DNS
(Enabled) > Secondary DNS
Black-and-white Screen Phones:
Menu > Settings > Advanced Settings (default password: admin) > Network > WAN Port > IPv6 > Static
IPv6 Client > Sec.DNS
In DHCP environment:
Menu > Settings > Advanced Settings (default password: admin) > Network > WAN Port > IPv6 > DHCP
IPv6 Client > Static DNS(Enabled) > Sec.DNS
static.network.ipv6_icmp_v6.enable
[1]
<y0000000000xx>.cfg
It enables or disables the phone to obtain IPv6 wired network settings via SLAAC (Stateless Address Auto-
Description
Permitted
Values
Default 1
Supported
Devices
Web UI Network > Advanced > ICMPv6 Status > Active
[1]
If you change this parameter, the phone will reboot to make the change take effect.
configuration).
Note: It works only if “static.network.ipv6_internet_port.type” is set to 0 (DHCP).
0-Disabled
1-Enabled
T57W, T54W, T53W, T53, T48U, T48S, T48G, T46U, T46S, T46G, T43U, T29G
DHCP Option for IPv4
The phone can obtain IPv4-related parameters in an IPv4 network via DHCP option.
Note
For more information on DHCP options, refer to RFC 2131 or RFC 2132.
Topics
Supported DHCP Option for IPv4
DHCP Option 66, Option 43 and Custom Option
DHCP Option 42, Option 2 and Option 100
DHCP Option 12
DHCP Option 120
DHCP Option 60
31
Page 37
Administrator’s Guide for SIP-T2 Series/T4 Series/T5 Series/CP920 IP Phones
Supported DHCP Option for IPv4
The following table lists common DHCP options for IPv4 supported by Yealink phones.
Parameters
Subnet Mask 1 Specify the client’s subnet mask.
Time Offset 2
Router 3 Specify a list of IP addresses for routers on the client’s subnet.
Time Server 4 Specify a list of time servers available to the client.
Domain Name Server 6 Specify a list of domain name servers available to the client.
Host Name 12 Specify the name of the client.
Domain Server 15
Network Time Protocol
Servers
Vendor-Specific Information
Vendor Class Identifier 60 Identify the vendor type.
TFTP Server Name 66
Timezone/DST 100 Specify a POSIX timezone string.
DHCP
Option
Specify the offset of the client's subnet in seconds from Coordinated Universal
Time (UTC).
Specify the domain name that the client should use when resolving hostnames
via DNS.
42 Specify a list of NTP servers available to the client by IP address.
43 Identify the vendor-specific information.
Identify a TFTP server when the 'sname' field in the DHCP header has been
used for DHCP options.
Description
SIP Server/Outbound
Proxy Server
120 Convey a SIP server’s or outbound proxy server’s location to the client.
DHCP Option 66, Option 43 and Custom Option
During the startup, the phone automatically detects the DHCP option for obtaining the provisioning server address.
The priority is as follows: custom option > option 66 (identify the TFTP server) > option 43.
The phone can obtain the Auto Configuration Server (ACS) address by detecting option 43 during startup.
Note
If you fail to configure the DHCP options for discovering the provisioning server on the DHCP server, enable the phone to
automatically discover the provisioning server address. One possibility is that connecting to the secondary DHCP server that
responds to DHCP INFORM queries with a requested provisioning server address. For more information, refer to RFC 3925.
Related Topic
DHCP Provision Configuration
DHCP Option 42, Option 2 and Option 100
Yealink phones support using the NTP server address offered by DHCP.
DHCP option 42 is used to specify a list of NTP servers available to the client by IP address. NTP servers should be listed
in order of preference.
DHCP option 2 is used to specify the offset of the client’s subnet in seconds from Coordinated Universal Time (UTC).
32
Page 38

Network Configurations
DHCP option 100 is used to specify the timezone information (time zone and daylight-saving offset). The priority is as
follows: option 100 > option 2.
Related Topic
NTP Settings
DHCP Option 12
You can specify a hostname for the phone when using DHCP. The DHCP client uses option 12 to send a predefined
hostname to the DHCP registration server.
See RFC 1035 for character set restrictions.
Topic
DHCP Option 12 Hostname Configuration
DHCP Option 12 Hostname Configuration
The following table lists the parameter you can use to configure DHCP option 12 hostname.
Parameter
Description It specifies a hostname for the phone when using DHCP.
Permitted
Values
Default
static.network.dhcp_host_name
String within 99 characters
For T57W phones: SIP-T57W.
For T54W phones: SIP-T54W.
For T53W phones: SIP-T53W.
For T53 phones: SIP-T53.
For T48U phones: SIP-T48U.
For T48G phones: SIP-T48G.
For T48S phones: SIP-T48S.
For T46U phones: SIP-T46U.
For T46G phones: SIP-T46G.
For T46S phones: SIP-T46S.
For T43U phones: SIP-T43U.
For T42G phones: SIP-T42G.
[1]
<y0000000000xx>.cfg
For T42S phones: SIP-T42S.
For T41P phones: SIP-T41P.
For T41S phones: SIP-T41S.
For T40P phones: SIP-T40P.
For T40G phones: SIP-T40G.
For T29G phones: SIP-T29G.
For T27G phones: SIP-T27G.
33
Page 39

Administrator’s Guide for SIP-T2 Series/T4 Series/T5 Series/CP920 IP Phones
For T23P phones: SIP-T23P.
For T23G phones: SIP-T23G.
For T21(P) E2 phones: SIP-T21P_E2.
For T19(P) E2 phones: SIP-T19P_E2.
For CP920 phones: SIP-CP920.
Web UI Features > General Information > DHCP Hostname
[1]
If you change this parameter, the phone will reboot to make the change take effect.
DHCP Option 120
DHCP option 120 is used by the SIP client to locate a SIP server or outbound proxy server.
Topic
DHCP Option 120 Configuration
DHCP Option 120 Configuration
The following table lists the parameter you can use to configure DHCP option 120.
Parameter sip.dhcp.option120.mode <y0000000000xx>.cfg
Description It configures whether to use DHCP option 120 for obtaining the outbound proxy server IP address.
0-Do not check with the DHCP server for the outbound proxy server IP address.
1-The value obtained from DHCP option 120 is used as outbound proxy server IP address (can resolve up
to two domain names or IPv4 addresses). If “account.X.outbound_proxy_enable = 1”, and the primary outbound proxy server is configured, the address from DHCP option 120 is used as secondary one; if the
Permitted
Values
Default 0
primary outbound proxy server is not configured, the address from DHCP option 120 is used as the
primary one.
2-The value obtained from DHCP option 120 is used as SIP server IP address (can resolve up to only one
IPv4 address). If the primary SIP server is configured, the address from DHCP option 120 is used as secondary one; if the primary SIP server is not configured, the address from DHCP option 120 is used as the
primary one.
DHCP Option 60
DHCP option 60 is used to indicate the vendor type. Servers can use option 43 to return the vendor-specific information to the client.
You can set the DHCP option 60 type.
Topic
DHCP Option 60 Configuration
DHCP Option 60 Configuration
The following table lists the parameters you can use to configure DHCP option 60.
Parameter static.network.dhcp.option60type <y0000000000xx>.cfg
34
Page 40
Description It configures the DHCP option 60 type.
Network Configurations
Permitted
Values
Default 0
Parameter static.auto_provision.dhcp_option.option60_value <y0000000000xx>.cfg
Description It configures the vendor class identifier string to use in the DHCP interaction.
Permitted
Values
Default yealink
Web UI Settings > Auto Provision > IPv4 DHCP Option Value
Phone UI
0-ASCII, vendor-identifying information is in ASCII format.
1-Binary, vendor-identifying information is in the format defined in RFC 3925.
String within 99 characters
Color Screen Phones:
Menu > Advanced (default password: admin) > Auto Provision > IPv4 DHCP Option Value
Black-and-white Screen Phones:
Menu > Settings > Advanced Settings (default password: admin) > Auto Provision > IPv4 DHCP Option
Value
DHCP Option for IPv6
The phone can obtain IPv6-related parameters in an IPv6 network via DHCP option.
Topics
Supported DHCP Option for IPv6
DHCP Option 59 and Custom Option
Supported DHCP Option for IPv6
The following table lists common DHCP options for IPv6 supported by Yealink phones.
Parameters
DNS Server 23 Specify a list of DNS servers available to the client.
DNS Domain
Search List
SNTP Server 31 Specify a list of Simple Network Time Protocol (SNTP) servers available to the client.
Information
Refresh Time
Boot File URL 59 Specify a URL for the boot file to be downloaded by the client.
DHCP
Option
24 Specify a domain search list to a client.
Specify an upper bound for how long a client should wait before refreshing inform-
32
ation retrieved from DHCPv6.
Description
DHCP Option 59 and Custom Option
During the startup, the phone automatically detects the DHCP option for obtaining the provisioning server address.
The priority is as follows: custom option > option 59.
Related Topic
35
Page 41
Administrator’s Guide for SIP-T2 Series/T4 Series/T5 Series/CP920 IP Phones
DHCP Provision Configuration
VLAN
The purpose of VLAN configurations on the phone is to insert a tag with VLAN information to the packets generated
by the phone. When VLAN is properly configured for the ports (Internet port and PC port) on the phone, the phone will
tag all packets from these ports with the VLAN ID. The switch receives and forwards the tagged packets to the corresponding VLAN according to the VLAN ID in the tag as described in IEEE Std 802.3.
In addition to manual configuration, the phone also supports automatic discovery of VLAN via LLDP, CDP or DHCP.
The assignment takes effect in this order: assignment via LLDP/CDP, manual configuration, then assignment via DHCP.
For more information on VLAN, refer to VLAN Feature on Yealink IP Phones.
Topics
LLDP Configuration
CDP Configuration
Manual VLAN Configuration
DHCP VLAN Configuration
VLAN Setting Configuration
LLDP Configuration
LLDP (Linker Layer Discovery Protocol) is a vendor-neutral Link Layer protocol, which allows the phones to advertise its
identity and capabilities on the local network.
When LLDP feature is enabled on the phones, the phones periodically advertise their own information to the directly
connected LLDP-enabled switch. The phones can also receive LLDP packets from the connected switch and obtain
their VLAN IDs.
The following table lists the parameters you can use to configure LLDP.
Parameter
Description It enables or disables the LLDP feature.
Permitted
Values
Default 1
Web UI Network > Advanced > LLDP > Active
Phone UI
Parameter
static.network.lldp.enable
0-Disabled
1-Enabled, the phone attempts to determine its VLAN ID through LLDP.
Color Screen Phones:
Menu > Advanced (default password: admin) > Network > LLDP > LLDP Status
Black-and-white Screen Phones:
Menu > Settings > Advanced Settings (default password: admin) > Network > LLDP > LLDP Status
static.network.lldp.packet_interval
[1]
[1]
<y0000000000xx>.cfg
<y0000000000xx>.cfg
Description
Permitted
Values
36
It configures the interval (in seconds) that how often the phone sends the LLDP request.
Note: It works only if “static.network.lldp.enable” is set to 1 (Enabled).
Integer from 1 to 3600
Page 42
Default 60
Web UI Network > Advanced > LLDP > Packet Interval (1~3600s)
Color Screen Phones:
Network Configurations
Phone UI
Menu > Advanced (default password: admin) > Network > LLDP > Packet Interval
Black-and-white Screen Phones:
Menu > Settings > Advanced Settings (default password: admin) > Network > LLDP > Packet Interval
[1]
If you change this parameter, the phone will reboot to make the change take effect.
CDP Configuration
CDP (Cisco Discovery Protocol) allows the phones to receive and/or transmit device-related information from/to directly connected devices on the local network.
When CDP feature is enabled on the phones, the phones periodically advertise their own information to the directly
connected CDP-enabled switch. The phones can also receive LLDP packets from the connected switch and obtain their
VLAN IDs.
The following table lists the parameters you can use to configure CDP.
Parameter
static.network.cdp.enable
Description It enables or disables the CDP feature.
Permitted
Values
0-Disabled
1-Enabled, the phone attempts to determine its VLAN ID through CDP.
Default 1
[1]
<y0000000000xx>.cfg
Web UI Network > Advanced > CDP > Active
Color Screen Phones:
Menu > Advanced (default password: admin) > Network > CDP > CDP Status
Phone UI
Black-and-white Screen Phones:
Menu > Settings > Advanced Settings (default password: admin) > Network > CDP > CDP Status
Parameter
static.network.cdp.packet_interval
[1]
<y0000000000xx>.cfg
It configures the interval (in seconds) that how often the phone sends the CDP request.
Description
Note: It works only if “static.network.cdp.enable” is set to 1 (Enabled).
Permitted
Values
Integer from 1 to 3600
Default 60
Web UI Network > Advanced > CDP > Packet Interval (1~3600s)
Color Screen Phones:
Menu > Advanced (default password: admin) > Network > CDP > CDP Interval
Phone UI
Black-and-white Screen Phones:
Menu > Settings > Advanced Settings (default password: admin) > Network > CDP > CDP Interval
[1]
If you change this parameter, the phone will reboot to make the change take effect.
37
Page 43
Administrator’s Guide for SIP-T2 Series/T4 Series/T5 Series/CP920 IP Phones
Manual VLAN Configuration
You can configure VLAN for the Internet port and PC port manually. Before configuring VLAN on the phones, you
need to obtain the VLAN ID from your network administrator.
For CP920 phones, you can only configure VLAN for the Internet port manually, because they only have an Internet
port.
The following table lists the parameters you can use to configure VLAN manually.
Parameter
Description It enables or disables the VLAN for the Internet port.
Permitted
Values
Default 0
Web UI Network > Advanced > VLAN > WAN Port > Active
Phone UI
Parameter
Description
Permitted
Values
Default 1
static.network.vlan.internet_port_enable
0-Disabled
1-Enabled
Color Screen Phones:
Menu > Advanced (default password: admin) > Network > VLAN > WAN Port > VLAN Status
Black-and-white Screen Phones:
Menu > Settings > Advanced Settings (default password: admin) > Network > VLAN > WAN Port > VLAN
Status
static.network.vlan.internet_port_vid
It configures the VLAN ID for the Internet port.
Note: It works only if “static.network.vlan.internet_port_enable” is set to 1 (Enabled).
Integer from 1 to 4094
[1]
[1]
<y0000000000xx>.cfg
<y0000000000xx>.cfg
Web UI Network > Advanced > VLAN > WAN Port > VID (1-4094)
Color Screen Phones:
Menu > Advanced (default password: admin) > Network > VLAN > WAN Port > VID Number
Phone UI
Parameter
Description
Permitted
Values
Default 0
Web UI Network > Advanced > VLAN > WAN Port > Priority
Black-and-white Screen Phones:
Menu > Settings > Advanced Settings (default password: admin) > Network > VLAN > WAN Port > VID
Number
static.network.vlan.internet_port_priority
It configures the VLAN priority for the Internet port.
7 is the highest priority, 0 is the lowest priority.
Note: It works only if “static.network.vlan.internet_port_enable” is set to 1 (Enabled).
Integer from 0 to 7
[1]
<y0000000000xx>.cfg
38
Page 44
Phone UI
Parameter
Network Configurations
Color Screen Phones:
Menu > Advanced (default password: admin) > Network > VLAN > WAN Port > Priority
Black-and-white Screen Phones:
Menu > Settings > Advanced Settings (default password: admin) > Network > VLAN > WAN Port > Priority
static.network.vlan.pc_port_enable
[1]
<y0000000000xx>.cfg
Description
It enables or disables the VLAN for the PC port.
Note: It works only if “static.network.pc_port.enable” is set to 1 (Auto Negotiation).
Permitted
Values
0-Disabled
1-Enabled
Default 0
Supported
Devices
All phones except CP920
Web UI Network > Advanced > VLAN > PC Port > Active
Color Screen Phones:
Menu > Advanced (default password: admin) > Network > VLAN > PC Port > VLAN Status
Phone UI
Black-and-white Screen Phones:
Menu > Settings > Advanced Settings (default password: admin) > Network > VLAN > PC Port > VLAN
Status
Parameter
static.network.vlan.pc_port_vid
[1]
It configures the VLAN ID for the PC port.
Description
Note: It works only if “static.network.pc_port.enable” is set to 1 (Auto Negotiation) and “stat-
ic.network.vlan.pc_port_enable” is set to 1 (Enabled).
Permitted
Values
Integer from 1 to 4094
<y0000000000xx>.cfg
Default 1
Supported
Devices
All phones except CP920
Web UI Network > Advanced > VLAN > PC Port > VID (1-4094)
Color Screen Phones:
Menu > Advanced (default password: admin) > Network > VLAN > PC Port > VID Number
Phone UI
Black-and-white Screen Phones:
Menu > Settings > Advanced Settings (default password: admin) > Network > VLAN > PC Port > VID
Number
Parameter
static.network.vlan.pc_port_priority
[1]
It configures the VLAN priority for the PC port.
Description
7 is the highest priority, 0 is the lowest priority.
Note: It works only if “static.network.pc_port.enable” is set to 1 (Auto Negotiation) and “static.network.vlan.pc_port_enable” is set to 1 (Enabled).
<y0000000000xx>.cfg
39
Page 45
Administrator’s Guide for SIP-T2 Series/T4 Series/T5 Series/CP920 IP Phones
Permitted
Values
Default 0
Supported
Devices
Web UI Network > Advanced > VLAN > PC Port > Priority
Phone UI
[1]
If you change this parameter, the phone will reboot to make the change take effect.
Integer from 0 to 7
All phones except CP920
Color Screen Phones:
Menu > Advanced (default password: admin) > Network > VLAN > PC Port > Priority
Black-and-white Screen Phones:
Menu > Settings > Advanced Settings (default password: admin) > Network > VLAN > PC Port > Priority
DHCP VLAN Configuration
When the VLAN discovery method is set to DHCP, the phone examines the DHCP option for a valid VLAN ID. You can
customize the DHCP option used to request the VLAN ID.
The following table lists the parameters you can use to configure DHCP VLAN discovery.
Parameter
static.network.vlan.dhcp_enable
[1]
<y0000000000xx>.cfg
Description It enables or disables the DHCP VLAN discovery feature.
Permitted
Values
Default 1
Web UI Network > Advanced > VLAN > DHCP VLAN > Active
Phone UI
Parameter
Description
Permitted
Values
Default 132
Web UI Network > Advanced > VLAN > DHCP VLAN > Option (1-255)
0-Disabled
1-Enabled
Color Screen Phones:
Menu > Advanced (default password: admin) > Network > VLAN > DHCP VLAN > DHCP VLAN
Black-and-white Screen Phones:
Menu > Settings > Advanced Settings (default password: admin) > Network > VLAN > DHCP VLAN >
DHCP VLAN
static.network.vlan.dhcp_option
It configures the DHCP option from which the phone will obtain the VLAN settings.
Multiple DHCP options (at most five) are separated by commas.
Integer from 1 to 255
[1]
<y0000000000xx>.cfg
Phone UI
40
Color Screen Phones:
Menu > Advanced (default password: admin) > Network > VLAN > DHCP VLAN > Option
Black-and-white Screen Phones:
Page 46
Menu > Settings > Advanced Settings (default password: admin) > Network > VLAN > DHCP VLAN >
Option
[1]
If you change this parameter, the phone will reboot to make the change take effect.
VLAN Setting Configuration
The following table lists the parameter you can use to configure the VLAN setting.
Network Configurations
Parameter
Description
Permitted
Values
Default 0
[1]
If you change this parameter, the phone will reboot to make the change take effect.
static.network.vlan.vlan_change.enable
It enables or disables the phone to obtain VLAN ID using lower preference of VLAN assignment method,
or to close the VLAN feature when the phone cannot obtain VLAN ID.
The priority of each method is LLDP/CDP > Manual > DHCP VLAN.
0-Disabled
1-Enabled, the phone attempts to use the lower priority method when failing to obtain the VLAN ID using
higher priority method. If all the methods are attempted, the phone will disable VLAN feature.
[1]
<y0000000000xx>.cfg
Wi-Fi
Wi-Fi feature enables you to connect the phones to the organization’s wireless network. Wi-Fi feature is only applicable to T57W/T54W/T53W/T53/T48U/T48S/T48G/T46U/T46S/T46G/T43U/T42S/T41S/T29G/T27G/CP920 phones.
You can configure the phones to operate in IPv4, IPv6, or dual-stack (IPv4/IPv6) mode, and configure IPv4 or IPv6 wireless network settings manually.
Note
To use Wi-Fi feature on T53/T48U/T48S/T48G/T46U/T46S/T46G/T43U/T42S/T41S/T29G/T27G phones, make sure the Wi-Fi
USB dongle is properly connected to the USB port on the back of the phone.
Topics
Wi-Fi Configuration
Wireless Network IP Addressing Mode Configuration
IPv4 Wireless Network Configuration
IPv6 Wireless Network Configuration
Wi-Fi Configuration
The following table lists the parameters you can use to configure Wi-Fi.
Parameter
Description It enables or disables the Wi-Fi feature.
Permitted
Values
Default 1
Supported
Devices
static.wifi.function.enable
0-Disabled
1-Enabled
T57W, T54W, T53W, T53, T48U, T48S, T48G, T46U, T46S, T46G, T43U, T42S, T41S, T29G, T27G, CP920
[1]
<y0000000000xx>.cfg
41
Page 47
Administrator’s Guide for SIP-T2 Series/T4 Series/T5 Series/CP920 IP Phones
Parameter
static.network.redundancy.mode
[1]
<y0000000000xx>.cfg
Description It configures the network connection mode to be used preferentially.
0-If Wi-Fi mode is activated, the wired network is unavailable; Wi-Fi mode must be deactivated if you
Permitted
Values
want to use the wired network.
1-Use wireless network preferentially.
2-Use wired network preferentially.
Default 2
Supported
Devices
Parameter
T57W, T54W, T53W, T53, T48U, T48S, T48G, T46U, T46S, T46G, T43U, T42S, T41S, T29G, T27G, CP920
static.network.redundancy.failback.timeout
[1]
<y0000000000xx>.cfg
It configures the time to wait (minutes) for the phone to switch to the preferred network (configured by
Description
“static.network.redundancy.mode”).
Note: It works only if “static.network.redundancy.mode” is set to 1 or 2.
Integer from 0 to 1440
Permitted
Values
0-The phone will not switch as long as the current network is available.
1 to 1440–The phone will keep using the current network for the specified time after the preferentially
used network becomes available. If the preferentially used network is still available after the specified
time, the phone performs a network switch while the phone is not in use.
Default 55
Supported
Devices
T57W, T54W, T53W, T53, T48U, T48S, T48G, T46U, T46S, T46G, T43U, T42S, T41S, T29G, T27G, CP920
Parameter static.wifi.enable <y0000000000xx>.cfg
It activates or deactivates the Wi-Fi mode.
Description
Note: It works only if “static.wifi.function.enable” is set to 1 (Enabled).
Permitted
Values
0-Disabled
1-Enabled
Default 0
Supported
Devices
T57W, T54W, T53W, T53, T48U, T48S, T48G, T46U, T46S, T46G, T43U, T42S, T41S, T29G, T27G, CP920
Web UI Network > Wi-Fi > Wi-Fi Active
Color Screen Phones:
Menu > Basic > Wi-Fi > Wi-Fi
Phone UI
Black-and-white Screen Phones:
Menu > Settings > Basic Settings > Wi-Fi
Parameter
static.wifi.X.label
[2]
<y0000000000xx>.cfg
It configures the profile name of a specific wireless network.
Description
Note: It works only if “static.wifi.enable” is set to 1 (Enabled).
Permitted
Values
String within 32 characters
42
Page 48
Default Blank
Network Configurations
Supported
Devices
T57W, T54W, T53W, T53, T48U, T48S, T48G, T46U, T46S, T46G, T43U, T42S, T41S, T29G, T27G, CP920
Web UI Network > Wi-Fi > Profile Name
Color Screen Phones:
Menu > Basic > Wi-Fi > Wi-Fi (On) > Known Network (press Add) > Profile Name
Menu > Basic > Wi-Fi > Wi-Fi (On) > Known Network > Option > Edit > Profile Name
Phone UI
Black-and-white Screen Phones:
Menu > Settings > Basic Settings > Wi-Fi (On) > Known Network (press Add) > Profile Name
Menu > Settings > Basic Settings > Wi-Fi > Wi-Fi (On) > Known Network > Option > Edit > Profile Name
Parameter
static.wifi.X.ssid
[2]
It configures the SSID of a specific wireless network.
Description
SSID is a unique identifier for accessing wireless access points.
Note: It works only if “static.wifi.enable” is set to 1 (Enabled).
Permitted
Values
String within 32 characters
Default Blank
Supported
Devices
T57W, T54W, T53W, T53, T48U, T48S, T48G, T46U, T46S, T46G, T43U, T42S, T41S, T29G, T27G, CP920
<y0000000000xx>.cfg
Web UI Network > Wi-Fi > SSID
Color Screen Phones:
Menu > Basic > Wi-Fi > Wi-Fi (On) > Known Network (press Add) > SSID
Menu > Basic > Wi-Fi > Wi-Fi (On) > Known Network > Option > Edit > SSID
Phone UI
Black-and-white Screen Phones:
Menu > Settings > Basic Settings > Wi-Fi (On) > Known Network (press Add) > SSID
Menu > Settings > Basic Settings > Wi-Fi > Wi-Fi (On) > Known Network > Option > Edit > SSID
Parameter
static.wifi.X.priority
[2]
It configures the priority for a specific wireless network.
Description
5 is the highest priority, 1 is the lowest priority.
Note: It works only if “static.wifi.enable” is set to 1 (Enabled).
Permitted
Values
Integer from 1 to 5
Default 1
Supported
Devices
T57W, T54W, T53W, T53, T48U, T48S, T48G, T46U, T46S, T46G, T43U, T42S, T41S, T29G, T27G, CP920
Web UI Network > Wi-Fi > Change Priority
<y0000000000xx>.cfg
Phone UI Color Screen Phones:
43
Page 49
Administrator’s Guide for SIP-T2 Series/T4 Series/T5 Series/CP920 IP Phones
Menu > Basic > Wi-Fi > Wi-Fi (On) > Known Network > Option > Move Up/Move Down
Black-and-white Screen Phones:
Menu > Settings > Basic Settings > Wi-Fi > Wi-Fi (On) > Known Network > Option > Move Up/Move
Down
Parameter
static.wifi.X.security_mode
[2]
<y0000000000xx>.cfg
Description
It configures the security mode of a specific wireless network.
Note: It works only if “static.wifi.enable” is set to 1 (Enabled).
Permitted
Values
NONE, WEP, WPA-PSK, WPA2-PSK, WPA-EAP or WPA2-EAP
Default NONE
Supported
Devices
T57W, T54W, T53W, T53, T48U, T48S, T48G, T46U, T46S, T46G, T43U, T42S, T41S, T29G, T27G, CP920
Web UI Network > Wi-Fi > Secure Mode
Color Screen Phones:
Menu > Basic > Wi-Fi > Wi-Fi (On) > Known Network (press Add) > Security Mode
Menu > Basic > Wi-Fi > Wi-Fi (On) > Known Network > Option > Edit > Security Mode
Phone UI
Black-and-white Screen Phones:
Menu > Settings > Basic Settings > Wi-Fi (On) > Known Network (press Add) > Security Mode
Menu > Settings > Basic Settings > Wi-Fi > Wi-Fi (On) > Known Network > Option > Edit > Security
Mode
Parameter
static.wifi.X.cipher_type
[2]
It configures the encryption type of a specific wireless network.
<y0000000000xx>.cfg
If “static.wifi.X.security_mode” is set to NONE, the permitted value of this parameter is NONE.
Description
If “static.wifi.X.security_mode” is set to WEP, the permitted value of this parameter is WEP.
If “static.wifi.X.security_mode” is set to other values, the permitted values of this parameter are TKIP, AES
or TKIP AES.
Note: It works only if “static.wifi.enable” is set to 1 (Enabled).
Permitted
Values
NONE, WEP, TKIP, AES or TKIP AES
Default NONE
Supported
Devices
T57W, T54W, T53W, T53, T48U, T48S, T48G, T46U, T46S, T46G, T43U, T42S, T41S, T29G, T27G, CP920
Web UI Network > Wi-Fi > Cipher Type
Color Screen Phones:
Menu > Basic > Wi-Fi > Wi-Fi (On) > Known Network (press Add) > Cipher Type
Phone UI
Menu > Basic > Wi-Fi > Wi-Fi (On) > Known Network > Option > Edit > Cipher Type
Black-and-white Screen Phones:
Menu > Settings > Basic Settings > Wi-Fi (On) > Known Network (press Add) > Cipher Type
44
Page 50
Menu > Settings > Basic Settings > Wi-Fi > Wi-Fi (On) > Known Network > Option > Edit > Cipher Type
Parameter
static.wifi.X.password
It configures the password of a specific wireless network.
Description
Note: It works only if “static.wifi.enable” is set to 1 (Enabled) and “static.wifi.X.security_mode” is set to
WEP, WPA-PSK or WPA2-PSK.
Permitted
Values
String within 64 characters
Default Blank
[2]
Network Configurations
<y0000000000xx>.cfg
Supported
Devices
T57W, T54W, T53W, T53, T48U, T48S, T48G, T46U, T46S, T46G, T43U, T42S, T41S, T29G, T27G, CP920
Web UI Network > Wi-Fi > PSK
Color Screen Phones:
Menu > Basic > Wi-Fi > Wi-Fi (On) > Known Network (press Add) > WPA Shared Key
Menu > Basic > Wi-Fi > Wi-Fi (On) > Known Network > Option > Edit > WPA Shared Key
Phone UI
Black-and-white Screen Phones:
Menu > Settings > Basic Settings > Wi-Fi (On) > Known Network (press Add) > WPA Shared Key
Menu > Settings > Basic Settings > Wi-Fi > Wi-Fi (On) > Known Network > Option > Edit > WPA Shared
Key
Parameter
static.wifi.X.eap_type
[2]
It configures the EAP authentication mode of a specific wireless network.
Description
Note: It works only if “static.wifi.enable” is set to 1 (Enabled) and “static.wifi.X.security_mode” is set to
WPA-EAP or WPA2-EAP.
Permitted
Values
TTLS, PEAP or TLS
Default Blank
Supported
Devices
Parameter
T57W, T54W, T53W, T53, T48U, T48S, T48G, T46U, T46S, T46G, T43U, T42S, T41S, T29G, T27G, CP920
static.wifi.X.eap_user_name
[2]
<y0000000000xx>.cfg
<y0000000000xx>.cfg
It configures the EAP authentication username of a specific wireless network.
Description
Note: It works only if “static.wifi.enable” is set to 1 (Enabled), “static.wifi.X.security_mode” is set to WPA-
EAP or WPA2-EAP and “static.wifi.X.eap_type” is set to TTLS or PEAP.
Permitted
Values
String within 32 characters
Default Blank
Supported
Devices
T57W, T54W, T53W, T53, T48U, T48S, T48G, T46U, T46S, T46G, T43U, T42S, T41S, T29G, T27G, CP920
Web UI Network > Wi-Fi > User Name
Color Screen Phones:
Phone UI
Menu > Basic > Wi-Fi > Wi-Fi (On) > Known Network (press Add) > User Name
45
Page 51
Administrator’s Guide for SIP-T2 Series/T4 Series/T5 Series/CP920 IP Phones
Menu > Basic > Wi-Fi > Wi-Fi (On) > Known Network > Option > Edit > User Name
Black-and-white Screen Phones:
Menu > Settings > Basic Settings > Wi-Fi > Wi-Fi (On) > Known Network (press Add) > User Name
Menu > Settings > Basic Settings > Wi-Fi > Wi-Fi (On) > Known Network > Option > Edit > User Name
Parameter
static.wifi.X.eap_password
[2]
<y0000000000xx>.cfg
It configures the EAP authentication password of a specific wireless network.
Description
Note: It works only if “static.wifi.enable” is set to 1 (Enabled) and “static.wifi.X.security_mode” is set to
WPA-EAP or WPA2-EAP.
Permitted
Values
String within 64 characters
Default Blank
Supported
Devices
T57W, T54W, T53W, T53, T48U, T48S, T48G, T46U, T46S, T46G, T43U, T42S, T41S, T29G, T27G, CP920
Web UI Network > Wi-Fi > PSK
Color Screen Phones:
Menu > Basic > Wi-Fi > Wi-Fi (On) > Known Network (press Add) > WPA Shared Key
Menu > Basic > Wi-Fi > Wi-Fi (On) > Known Network > Option > Edit > WPA Shared Key
Phone UI
Black-and-white Screen Phones:
Menu > Settings > Basic Settings > Wi-Fi > Wi-Fi (On) > Known Network (press Add) > WPA Shared Key
Menu > Settings > Basic Settings > Wi-Fi > Wi-Fi (On) > Known Network > Option > Edit > WPA Shared
Key
Parameter static.wifi.show_scan_prompt <y0000000000xx>.cfg
Description
It enables or disables the phone to prompt you whether to scan Wi-Fi after connecting Wi-Fi USB dongle
to the IP phone.
0-Disabled, the phone will enable the Wi-Fi feature and try to connect to the known wireless network
Permitted
Values
(according to the priority) automatically. But if the phone fails to connect to any known wireless network,
the phone will still display the Wi-Fi scanning prompt when connecting to the phone.
1-Enabled
Default 1
Supported
Devices
[1]
If you change this parameter, the phone will reboot to make the change take effect.
[2]
X is Wi-Fi ID. X=1-5.
T53, T48U, T48S, T48G, T46U, T46S, T46G, T43U, T42S, T41S, T29G, T27G
Wireless Network IP Addressing Mode Configuration
The following table lists the parameters you can use to configure IP addressing mode for the wireless network.
Parameter
static.network.wifi.ip_address_mode
Description It configures the IP addressing mode for the wireless network.
Permitted
0-IPv4
46
[1]
<y0000000000xx>.cfg
Page 52
Network Configurations
Values
Default 0
Supported
Devices
Web UI Network > Wi-Fi > Internet Port > Mode (IPv4/IPv6)
Phone UI
Parameter
Description
Permitted
Values
Default 0
Supported
Devices
1-IPv6
2-IPv4 & IPv6
T57W, T54W, T53W, T53, T48U, T48S, T46U, T46S, T43U, T42S, T41S, T27G, CP920
Color Screen Phones:
Menu > Advanced (default password: admin) > Network > Wi-Fi Port > IP Mode
Black-and-white Screen Phones:
Menu > Settings > Advanced Settings (default password: admin) > Network > Wi-Fi Port > IP Mode
static.network.wifi.preference
It specifies IPv4 or IPv6 as the preferred wireless network in a Dual-Stack mode.
Note: It works only if “static.network.wifi.ip_address_mode” is set to 2 (IPv4 & IPv6).
0-IPv6
1-IPv4
T57W, T54W, T53W, T53, T48U, T48S, T46U, T46S, T43U, T42S, T41S, T27G, CP920
[1]
<y0000000000xx>.cfg
Web UI Network > Wi-Fi > Internet Port > Preference(IPv4/IPv6)
Color Screen Phones:
Phone UI
[1]
If you change this parameter, the phone will reboot to make the change take effect.
Menu > Advanced (default password: admin) > Network > Wi-Fi Port > Preference
Black-and-white Screen Phones:
Menu > Settings > Advanced Settings (default password: admin) > Network > Wi-Fi Port > Preference
IPv4 Wireless Network Configuration
The following table lists the parameters you can use to configure IPv4 wireless network.
Parameter
Description
Permitted
Values
Default 0
Supported
Devices
Web UI
static.network.wifi.internet_port.type
It configures the Internet port type for IPv4 wireless network.
Note: It works only if “static.network.wifi.ip_address_mode” is set to 0 (IPv4) or 2 (IPv4 & IPv6).
0-DHCP
2-Static IP
T57W, T54W, T53W, T53, T48U, T48S, T46U, T46S, T43U, T42S, T41S, T27G, CP920
T57W/T54W/T53W/T53/T48U/T46U/T43U:
Network > Wi-Fi > IPv4 Config > Configuration Type
[1]
<y0000000000xx>.cfg
47
Page 53
Administrator’s Guide for SIP-T2 Series/T4 Series/T5 Series/CP920 IP Phones
Other Phones:
Network > Wi-Fi > IPv4 Config
Color Screen Phones:
Phone UI
Menu > Advanced (default password: admin) > Network > Wi-Fi Port > IPv4
Black-and-white Screen Phones:
Menu > Settings > Advanced Settings (default password: admin) > Network > Wi-Fi Port > IPv4
Parameter
static.network.wifi.internet_port.ip
It configures the IPv4 address for the wireless network.
Description
Note: It works only if “static.network.wifi.ip_address_mode” is set to 0 (IPv4) or 2 (IPv4 & IPv6), and "stat-
ic.network.wifi.internet_port.type" is set to 2 (Static IP).
Permitted
Values
IPv4 Address
Default Blank
Supported
Devices
T57W, T54W, T53W, T53, T48U, T48S, T46U, T46S, T43U, T42S, T41S, T27G, CP920
T57W/T54W/T53W/T53/T48U/T46U/T43U:
Network > Wi-Fi > IPv4 Config > Configuration Type (Static IP) > IP Address
Web UI
Other Phones:
Network > Wi-Fi > IPv4 Config > Static IP Address > IP Address
Color Screen Phones:
Menu > Advanced (default password: admin) > Network > Wi-Fi Port > IPv4 > Static IP > IP Address
Phone UI
Black-and-white Screen Phones:
[1]
<y0000000000xx>.cfg
Menu > Settings > Advanced Settings (default password: admin) > Network > Wi-Fi Port > IPv4 > Static
IPv4 Client > IP Address
Parameter
static.network.wifi.internet_port.mask
It configures the IPv4 subnet mask for the wireless network.
Description
Note: It works only if “static.network.wifi.ip_address_mode” is set to 0 (IPv4) or 2 (IPv4 & IPv6), and "stat-
ic.network.wifi.internet_port.type" is set to 2 (Static IP).
Permitted
Values
Subnet Mask
Default Blank
Supported
Devices
T57W, T54W, T53W, T53, T48U, T48S, T46U, T46S, T43U, T42S, T41S, T27G, CP920
T57W/T54W/T53W/T53/T48U/T46U/T43U:
Network > Wi-Fi > IPv4 Config > Configuration Type (Static IP) > Subnet Mask
Web UI
Other Phones:
Network > Wi-Fi > IPv4 Config > Static IP Address > Subnet Mask
Color Screen Phones:
Phone UI
Menu > Advanced (default password: admin) > Network > Wi-Fi Port > IPv4 > Static IP > Subnet Mask
[1]
<y0000000000xx>.cfg
48
Page 54
Black-and-white Screen Phones:
Menu > Settings > Advanced Settings (default password: admin) > Network > Wi-Fi Port > IPv4 > Static
IPv4 Client > Subnet Mask
Parameter
static.network.wifi.internet_port.gateway
It configures the IPv4 default gateway for the wireless network.
Description
Note: It works only if “static.network.wifi.ip_address_mode” is set to 0 (IPv4) or 2 (IPv4 & IPv6), and "stat-
ic.network.wifi.internet_port.type" is set to 2 (Static IP).
Permitted
Values
IPv4 Address
Default Blank
[1]
Network Configurations
<y0000000000xx>.cfg
Supported
Devices
Web UI
Phone UI
Parameter
Description
Permitted
Values
Default 0
T57W, T54W, T53W, T53, T48U, T48S, T46U, T46S, T43U, T42S, T41S, T27G, CP920
T57W/T54W/T53W/T53/T48U/T46U/T43U:
Network > Wi-Fi > IPv4 Config > Configuration Type (Static IP) > Default Gateway
Other Phones:
Network > Wi-Fi > IPv4 Config > Static IP Address > Default Gateway
Color Screen Phones:
Menu > Advanced (default password: admin) > Network > Wi-Fi Port > IPv4 > Static IP > Default Gate-
way
Black-and-white Screen Phones:
Menu > Settings > Advanced Settings (default password: admin) > Network > Wi-Fi Port > IPv4 > Static
IPv4 Client > Default Gateway
static.network.wifi.static_dns_enable
[1]
<y0000000000xx>.cfg
It triggers the static DNS feature to on or off for the wireless network.
Note: It works only if “static.network.wifi.internet_port.type” is set to 0 (DHCP).
0-Off, the phone will use the IPv4 DNS obtained from DHCP.
1-On, the phone will use manually configured static IPv4 DNS.
Supported
Devices
T57W, T54W, T53W, T53, T48U, T48S, T46U, T46S, T43U, T42S, T41S, T27G, CP920
Web UI Network > Wi-Fi > IPv4 Config > Static DNS
Color Screen Phones:
Menu > Advanced (default password: admin) > Network > Wi-Fi Port > IPv4 > Type(DHCP) > Static DNS
Phone UI
Black-and-white Screen Phones:
Menu > Settings > Advanced Settings (default password: admin) > Network > Wi-Fi Port > IPv4 > DHCP
IPv4 Client > Static DNS
Parameter
static.network.wifi.primary_dns
[1]
It configures the primary IPv4 DNS server for the wireless network.
Description
Note: It works only if “static.network.wifi.ip_address_mode” is set to 0 (IPv4) or 2 (IPv4 & IPv6). In DHCP
<y0000000000xx>.cfg
49
Page 55
Administrator’s Guide for SIP-T2 Series/T4 Series/T5 Series/CP920 IP Phones
environment, you also need to make sure “static.network.wifi.static_dns_enable" is set to 1 (On).
Permitted
Values
IPv4 Address
Default Blank
Supported
Devices
T57W, T54W, T53W, T53, T48U, T48S, T46U, T46S, T43U, T42S, T41S, T27G, CP920
T57W/T54W/T53W/T53/T48U/T46U/T43U:
Network > Wi-Fi > IPv4 Config > Static DNS > Primary DNS
Web UI
Other Phones:
Network > Wi-Fi > IPv4 Config > Static IP Address > Primary DNS
Color Screen Phones:
Menu > Advanced (default password: admin) > Network > Wi-Fi Port > IPv4 > Static IP > Pri.DNS
In DHCP environment:
Menu > Advanced (default password: admin) > Network > Wi-Fi Port > IPv4 > DHCP > Static DNS
(Enabled) > Pri.DNS
Phone UI
Black-and-white Screen Phones:
Menu > Settings > Advanced Settings (default password: admin) > Network > Wi-Fi Port > IPv4 > Static
IPv4 Client > Pri.DNS
In DHCP environment:
Menu > Settings > Advanced Settings (default password: admin) > Network > Wi-Fi Port > IPv4 > DHCP
IPv4 Client > Static DNS (Enabled) > Pri.DNS
Parameter
static.network.wifi.secondary_dns
It configures the secondary IPv4 DNS server for the wireless network.
Description
Note: It works only if “static.network.wifi.ip_address_mode” is set to 0 (IPv4) or 2 (IPv4 & IPv6). In DHCP
environment, you also need to make sure “static.network.wifi.static_dns_enable" is set to 1 (On).
Permitted
Values
IPv4 Address
Default Blank
Supported
Devices
T57W, T54W, T53W, T53, T48U, T48S, T46U, T46S, T43U, T42S, T41S, T27G, CP920
T57W/T54W/T53W/T53/T48U/T46U/T43U:
Network > Wi-Fi > IPv4 Config > Static DNS > Secondary DNS
Web UI
Other Phones:
Network > Wi-Fi > IPv4 Config > Static IP Address > Secondary DNS
Color Screen Phones:
Menu > Advanced (default password: admin) > Network > Wi-Fi Port > IPv4 > Static IP > Sec.DNS
Phone UI
In DHCP environment:
[1]
<y0000000000xx>.cfg
50
Menu > Advanced (default password: admin) > Network > Wi-Fi Port > IPv4 > DHCP > Static DNS
(Enabled) > Sec.DNS
Page 56
Network Configurations
Black-and-white Screen Phones:
Menu > Settings > Advanced Settings (default password: admin) > Network > Wi-Fi Port > IPv4 > Static
IPv4 Client > Sec.DNS
In DHCP environment:
Menu > Settings > Advanced Settings (default password: admin) > Network > Wi-Fi Port > IPv4 > DHCP
IPv4 Client > Static DNS (Enabled) > Sec.DNS
[1]
If you change this parameter, the phone will reboot to make the change take effect.
IPv6 Wireless Network Configuration
If you configure the network settings on the phone for an IPv6 network, you can set up an IP address for the phone by
using SLAAC (ICMPv6), DHCPv6 or by manually entering an IP address. Ensure that your network environment supports
IPv6. Contact your ISP for more information.
When you enable both SLAAC and DHCPv6 on the phone, the server can specify the IP phone to obtain the IPv6
address and other network settings either from SLAAC or from DHCPv6, if the SLAAC server is not working, the phone
will try to obtain the IPv6 address and other network settings via DHCPv6.
The following table lists the parameters you can use to configure IPv6 wireless network.
[1]
[1]
<y0000000000xx>.cfg
<y0000000000xx>.cfg
Parameter
Description
Permitted
Values
Default 0
Supported
Devices
Web UI
Phone UI
Parameter
static.network.wifi.ipv6_internet_port.type
It configures the Internet port type for IPv6 wireless network.
Note: It works only if “static.network.wifi.ip_address_mode” is set to 1 (IPv6) or 2 (IPv4 & IPv6).
0-DHCP
1-Static IP
T57W, T54W, T53W, T53, T48U, T48S, T46U, T46S, T43U, T42S, T41S, T27G, CP920
T57W/T54W/T53W/T53/T48U/T46U/T43U:
Network > Wi-Fi > IPv6 Config > Configuration Type
Other Phones:
Network > Wi-Fi > IPv6 Config
Color Screen Phones:
Menu > Advanced (default password: admin) > Network > Wi-Fi Port > IPv6
Black-and-white Screen Phones:
Menu > Settings > Advanced Settings (default password: admin) > Network > Wi-Fi Port > IPv6
static.network.wifi.ipv6_internet_port.ip
Description
Permitted
Values
It configures the IPv6 address for the wireless network.
Note: It works only if “static.network.wifi.ip_address_mode” is set to 1 (IPv6) or 2 (IPv4 & IPv6), and "stat-
ic.network.wifi.ipv6_internet_port.type" is set to 1 (Static IP).
IPv6 Address
51
Page 57
Administrator’s Guide for SIP-T2 Series/T4 Series/T5 Series/CP920 IP Phones
Default Blank
Supported
Devices
T57W, T54W, T53W, T53, T48U, T48S, T46U, T46S, T43U, T42S, T41S, T27G, CP920
T57W/T54W/T53W/T53/T48U/T46U/T43U:
Network > Wi-Fi > IPv6 Config > Configuration Type (Static IP) > IP Address
Web UI
Other Phones:
Network > Wi-Fi > IPv6 Config > Static IP Address > IP Address
Color Screen Phones:
Menu > Advanced (default password: admin) > Network > Wi-Fi Port > IPv6 > Static IP > IP Address
Phone UI
Black-and-white Screen Phones:
Menu > Settings > Advanced Settings (default password: admin) > Network > Wi-Fi Port > IPv6 > Static
IPv6 Client > IP Address
Parameter
static.network.wifi.ipv6_prefix
It configures the IPv6 prefix for the wireless network.
Description
Note: It works only if “static.network.wifi.ip_address_mode” is set to 1 (IPv6) or 2 (IPv4 & IPv6), and "stat-
ic.network.wifi.ipv6_internet_port.type" is set to 1 (Static IP).
Permitted
Values
Integer from 0 to 128
Default 64
[1]
<y0000000000xx>.cfg
Supported
Devices
T57W, T54W, T53W, T53, T48U, T48S, T46U, T46S, T43U, T42S, T41S, T27G, CP920
T57W/T54W/T53W/T53/T48U/T46U/T43U:
Network > Wi-Fi > IPv6 Config > Configuration Type (Static IP) > IPv6 Prefix(0~128)
Web UI
Other Phones:
Network > Wi-Fi > IPv6 Config > Static IP Address > IPv6 Prefix(0~128)
Color Screen Phones:
Menu > Advanced (default password: admin) > Network > Wi-Fi Port > IPv6 > Static IP > IPv6 IP Prefix
Phone UI
Black-and-white Screen Phones:
Menu > Settings > Advanced Settings (default password: admin) > Network > Wi-Fi Port > IPv6 > Static
IPv6 Client > IPv6 IP Prefix
Parameter
static.network.wifi.ipv6_internet_port.gateway
It configures the IPv6 default gateway for the wireless network.
Description
Note: It works only if “static.network.wifi.ip_address_mode” is set to 1 (IPv6) or 2 (IPv4 & IPv6), and "stat-
ic.network.wifi.ipv6_internet_port.type" is set to 1 (Static IP).
Permitted
Values
IPv6 Address
Default Blank
[1]
<y0000000000xx>.cfg
Supported
Devices
52
T57W, T54W, T53W, T53, T48U, T48S, T46U, T46S, T43U, T42S, T41S, T27G, CP920
Page 58
T57W/T54W/T53W/T53/T48U/T46U/T43U:
Network Configurations
Web UI
Network > Wi-Fi > IPv6 Config > Configuration Type (Static IP) > Default Gateway
Other Phones:
Network > Wi-Fi > IPv6 Config > Static IP Address > Default Gateway
Color Screen Phones:
Menu > Advanced (default password: admin) > Network > Wi-Fi Port > IPv6 > Static IP > Default Gate-
way
Phone UI
Black-and-white Screen Phones:
Menu > Settings > Advanced Settings (default password: admin) > Network > Wi-Fi Port > IPv6 > Static
IPv6 Client > Default Gateway
Parameter
static.network.wifi.ipv6_static_dns_enable
[1]
<y0000000000xx>.cfg
It triggers the static IPv6 DNS feature to on or off for the wireless network.
Description
Note: It works only if “static.network.wifi.ipv6_internet_port.type” is set to 0 (DHCP).
Permitted
Values
0-Off, the phone will use the IPv6 DNS obtained from DHCP.
1-On, the phone will use manually configured static IPv6 DNS.
Default 0
Supported
Devices
T57W, T54W, T53W, T53, T48U, T48S, T46U, T46S, T43U, T42S, T41S, T27G, CP920
Web UI Network > Wi-Fi > IPv6 Config > IPv6 Static DNS (Static IPv6 DNS)
Color Screen Phones:
Menu > Advanced (default password: admin) > Network > Wi-Fi Port > IPv6 > Type(DHCP) > Static DNS
Phone UI
Black-and-white Screen Phones:
Menu > Settings > Advanced Settings (default password: admin) > Network > Wi-Fi Port > IPv6 > DHCP
IPv6 Client > Static DNS
Parameter
static.network.wifi.ipv6_primary_dns
It configures the primary IPv6 DNS server for the wireless network.
Description
Note: It works only if “static.network.wifi.ip_address_mode" is set to 1 (IPv6) or 2 (IPv4 & IPv6). In DHCP
environment, you also need to make sure “static.network.wifi.ipv6_static_dns_enable" is set to 1 (On).
Permitted
Values
IPv6 Address
Default Blank
Supported
Devices
T57W, T54W, T53W, T53, T48U, T48S, T46U, T46S, T43U, T42S, T41S, T27G, CP920
T57W/T54W/T53W/T53/T48U/T46U/T43U:
Network > Wi-Fi > IPv6 Config > Static IPv6 DNS > Primary DNS
Web UI
Other Phones:
Network > Wi-Fi > IPv6 Config > Static IP Address > Primary DNS
[1]
<y0000000000xx>.cfg
Phone UI Color Screen Phones:
53
Page 59
Administrator’s Guide for SIP-T2 Series/T4 Series/T5 Series/CP920 IP Phones
Menu > Advanced (default password: admin) > Network > Wi-Fi Port > IPv6 > Static IP > Pri.DNS
In DHCP environment:
Menu > Advanced (default password: admin) > Network > Wi-Fi Port > IPv6 > DHCP > Static DNS
(Enabled) > Pri.DNS
Black-and-white Screen Phones:
Menu > Settings > Advanced Settings (default password: admin) > Network > Wi-Fi Port > IPv6 > Static
IPv6 Client > Pri.DNS
In DHCP environment:
Menu > Settings > Advanced Settings (default password: admin) > Network > Wi-Fi Port > IPv6 > DHCP
IPv6 Client > Static DNS(Enabled) > Pri.DNS
Parameter
static.network.wifi.ipv6_secondary_dns
[1]
<y0000000000xx>.cfg
It configures the secondary IPv6 DNS server for the wireless network.
Description
Note: It works only if “static.network.wifi.ip_address_mode" is set to 1 (IPv6) or 2 (IPv4 & IPv6). In DHCP
environment, you also need to make sure “static.network.wifi.ipv6_static_dns_enable" is set to 1 (On).
Permitted
Values
IPv6 Address
Default Blank
Supported
Devices
T57W, T54W, T53W, T53, T48U, T48S, T46U, T46S, T43U, T42S, T41S, T27G, CP920
T57W/T54W/T53W/T53/T48U/T46U/T43U:
Network > Wi-Fi > IPv6 Config > Static IPv6 DNS > Secondary DNS
Web UI
Other Phones:
Network > Wi-Fi > IPv6 Config > Static IP Address > Secondary DNS
Color Screen Phones:
Menu > Advanced (default password: admin) > Network > Wi-Fi Port > IPv6 > Static IP > Sec.DNS
In DHCP environment:
Menu > Advanced (default password: admin) > Network > Wi-Fi Port > IPv6 > DHCP > Static DNS
(Enabled) > Sec.DNS
Phone UI
Black-and-white Screen Phones:
Menu > Settings > Advanced Settings (default password: admin) > Network > Wi-Fi Port > IPv6 > Static
IPv6 Client > Sec.DNS
In DHCP environment:
Menu > Settings > Advanced Settings (default password: admin) > Network > Wi-Fi Port > IPv6 > DHCP
IPv6 Client > Static DNS(Enabled) > Sec.DNS
Parameter
static.network.wifi.ipv6_icmp_v6.enable
[1]
<y0000000000xx>.cfg
Description
Permitted
54
It enables or disables the phone to obtain IPv6 wireless network settings via SLAAC (Stateless Address
Autoconfiguration).
Note: It works only if “static.network.wifi.ipv6_internet_port.type” is set to 0 (DHCP).
0-Disabled
Page 60

Values 1-Enabled
Default 1
Network Configurations
Supported
Devices
Web UI Network > Advanced > Wi-Fi ICMPv6 Status > Active
[1]
If you change this parameter, the phone will reboot to make the change take effect.
T57W, T54W, T53W, T53, T48U, T48S, T46U, T46S, T43U
Real-Time Transport Protocol (RTP) Ports
Since the phone supports conferencing and multiple RTP streams, it can use several ports concurrently. You can specify the phone’s RTP port range.
The UDP port used for RTP streams is traditionally an even-numbered port. If the port 11780 is used to send and receive
RTP for the first voice session, additional calls would then use ports 11782, 11784, 11786, and so on. The phone is compatible with RFC 1889 - RTP: A Transport Protocol for Real-Time Applications - and the updated RFC 3550.
Topic
RTP Ports Configuration
RTP Ports Configuration
The following table lists the parameters you can use to configure RTP ports.
Parameter
Description It configures the minimum local RTP port.
static.network.port.min_rtpport
[1]
<y0000000000xx>.cfg
Permitted
Values
Default 11780
Web UI Network > Advanced > Local RTP Port > Min RTP Port (1024~65535)
Parameter
Description It configures the maximum local RTP port.
Permitted
Values
Default 12780
Web UI Network > Advanced > Local RTP Port > Max RTP Port (1024~65535)
Parameter
Description It configures the symmetrical RTP feature.
Permitted
Values
Integer from 1024 to 65535
static.network.port.max_rtpport
Integer from 1024 to 65535
features.rtp_symmetric.enable
0-Disabled
1-reject RTP packets arriving from a non-negotiated IP address
2-reject RTP packets arriving from a non-negotiated port
3-reject RTP packets arriving from a non-negotiated IP address or a non-negotiated port
[1]
[1]
<y0000000000xx>.cfg
<y0000000000xx>.cfg
Default 0
55
Page 61
Administrator’s Guide for SIP-T2 Series/T4 Series/T5 Series/CP920 IP Phones
[1]
If you change this parameter, the phone will reboot to make the change take effect.
Network Address Translation (NAT)
NAT enables phones with private unregistered addresses to communicate with devices with globally unique registered
addresses.
Topics
NAT Traversal Configuration
Keep Alive Configuration
Rport Configuration
SIP Port and TLS Port Configuration
NAT Traversal Configuration
The phones can traverse NAT gateways to establish and maintain connections with external devices.
Yealink phones support three NAT traversal techniques: manual NAT, STUN and ICE. If you enable manual NAT and
STUN, the phone will use the manually-configured external IP address for NAT traversal. The TURN protocol is used as
part of the ICE approach to NAT traversal.
The following table lists the parameters you can use to configure NAT traversal.
Parameter
Description
Permitted
Values
Default 0
Web UI Account > Register > NAT
Phone UI
Parameter
account.X.nat.nat_traversal
It enables or disables the NAT traversal for a specific account.
Note: If it is set to 1 (STUN), it works only if “static.sip.nat_stun.enable” is set to 1 (Enabled); if it is set to 2
(Manual NAT), it works only if “static.network.static_nat.enable” is set to 1 (Enabled).
0-Disabled
1-STUN
2-Manual NAT
Color Screen Phones:
Menu > Advanced (default password: admin) > Accounts > Account X > NAT Status
Black-and-white Screen Phones:
Menu > Settings > Advanced Settings (default password: admin) > Accounts > AccountX > NAT Status
Note: Manual NAT cannot be configured via the phone user interface.
static.network.static_nat.enable
[1]
[2]
<MAC>.cfg
<y0000000000xx>.cfg
Description It enables or disables the manual NAT feature.
Permitted
Values
Default 0
Web UI Network > NAT > Manual NAT > Active
Parameter
56
0-Disabled
1-Enabled
static.network.static_nat.addr
[2]
<y0000000000xx>.cfg
Page 62
It configures the IP address to be advertised in SIP signaling.
Network Configurations
Description
It should match the external IP address used by the NAT device.
Note: It works only if “static.network.static_nat.enable” is set to 1 (Enabled).
Permitted
Values
IP Address
Default Blank
Web UI Network > NAT > Manual NAT > IP Address
Parameter
static.sip.nat_stun.enable
[2]
<y0000000000xx>.cfg
Description It enables or disables the STUN (Simple Traversal of UDP over NATs) feature.
Permitted
Values
0-Disabled
1-Enabled
Default 0
Web UI Network > NAT > STUN > Active
Color Screen Phones:
Menu > Advanced (default password: admin) > Network > NAT > NAT Status
Phone UI
Black-and-white Screen Phones:
Menu > Settings > Advanced Settings (default password: admin) > Network > NAT > NAT Status
Parameter
static.sip.nat_stun.server
[2]
<y0000000000xx>.cfg
Description
It configures the IP address or domain name of the STUN server.
Note: It works only if “static.sip.nat_stun.enable” is set to 1 (Enabled).
Permitted
Values
IP Address or Domain Name
Default Blank
Web UI Network > NAT > STUN > STUN Server
Color Screen Phones:
Menu > Advanced (default password: admin) > Network > NAT > STUN Server
Phone UI
Black-and-white Screen Phones:
Menu > Settings > Advanced Settings (default password: admin) > Network > NAT > STUN Server
Parameter
static.sip.nat_stun.port
[2]
It configures the port of the STUN server.
Description
Note: It works only if “static.sip.nat_stun.enable” is set to 1 (Enabled).
Permitted
Values
Integer from 1024 to 65535
Default 3478
Web UI Network > NAT > STUN > STUN Port (1024~65535)
<y0000000000xx>.cfg
Phone UI
Color Screen Phones:
Menu > Advanced (default password: admin) > Network > NAT > STUN Port
57
Page 63

Administrator’s Guide for SIP-T2 Series/T4 Series/T5 Series/CP920 IP Phones
Black-and-white Screen Phones:
Menu > Settings > Advanced Settings (default password: admin) > Network > NAT > STUN Port
Parameter
static.ice.enable
[2]
<y0000000000xx>.cfg
Description It enables or disables the ICE (Interactive Connectivity Establishment) feature.
Permitted
Values
0-Disabled
1-Enabled
Default 0
Web UI Network > NAT > ICE > Active
Parameter
static.sip.nat_turn.enable
[2]
<y0000000000xx>.cfg
Description It enables or disables the TURN (Traversal Using Relays around NAT) feature.
Permitted
Values
0-Disabled
1-Enabled
Default 0
Web UI Network > NAT > TURN > Active
Parameter
static.sip.nat_turn.server
[2]
<y0000000000xx>.cfg
It configures the IP address or the domain name of the TURN server.
Description
Note: It works only if “static.sip.nat_turn.enable” is set to 1 (Enabled).
Permitted
Values
IP Address or Domain Name
Default Blank
Web UI Network > NAT > TURN > TURN Server
Parameter
static.sip.nat_turn.port
[2]
It configures the port of the TURN server.
Description
Note: It works only if “static.sip.nat_turn.enable” is set to 1 (Enabled).
Permitted
Values
Integer from 1024 to 65535
Default 3478
Web UI Network > NAT > TURN > TURN Port (1024~65535)
Parameter
static.sip.nat_turn.username
[2]
It configures the user name to authenticate to the TURN server.
Description
Note: It works only if “static.sip.nat_turn.enable” is set to 1 (Enabled).
Permitted
Values
String
Default Blank
Web UI Network > NAT > TURN > User Name (Username)
Parameter
static.sip.nat_turn.password
[2]
<y0000000000xx>.cfg
<y0000000000xx>.cfg
<y0000000000xx>.cfg
58
Page 64
Network Configurations
Description
Permitted
Values
Default Blank
Web UI Network > NAT > TURN > Password
[1]
X is the account ID. For T57W/T54W/T48U/T48S/T48G/T46U/T46S/T46G/T29G, X=1-16; for
T53W/T53/T43U/T42G/T42S, X=1-12; for T41P/T41S/T27G, X=1-6; for T40P/T40G/T23P/T23G, X=1-3; for T21(P) E2, X=12; for T19(P) E2/CP920, X=1.
[2]
If you change this parameter, the phone will reboot to make the change take effect.
It configures the password to authenticate to the TURN server.
Note: It works only if “static.sip.nat_turn.enable” is set to 1 (Enabled).
String
Keep Alive Configuration
Yealink phones can send keep-alive packets to the NAT device for keeping the communication port open.
The following table lists the parameters you can use to configure keep alive.
Parameter
Description It sets the type of keep-alive packets sent by phone.
account.X.nat.udp_update_enable
0-Disabled
[1]
<MAC>.cfg
Permitted
Values
Default 1
Web UI Account > Advanced > Keep Alive Type
Parameter
Description
Permitted
Values
Default 30
Web UI Account > Advanced > Keep Alive Interval(Seconds)
[1]
X is the account ID. For T57W/T54W/T48U/T48S/T48G/T46U/T46S/T46G/T29G, X=1-16; for
T53W/T53/T43U/T42G/T42S, X=1-12; for T41P/T41S/T27G, X=1-6; for T40P/T40G/T23P/T23G, X=1-3; for T21(P) E2, X=12; for T19(P) E2/CP920, X=1.
1-Default (the phone sends the corresponding packets according to the transport protocol)
2-Options (the phone sends SIP OPTIONS packets to the server)
3-Notify (the phone sends SIP NOTIFY packets to the server)
account.X.nat.udp_update_time
It configures the interval (in seconds) at which the phone sends a keep-alive package.
Note: It works only if “account.X.nat.udp_update_enable” is set to 1, 2 or 3.
Integer from 15 to 2147483647
[1]
<MAC>.cfg
Rport Configuration
Rport allows a client to request that the server sends the response back to the source IP address and port from which
the request originated. It helps the phone traverse symmetric NATs.
Rport feature depends on support from a SIP server. For more information, refer to RFC 3581.
The following table lists the parameter you can use to configure rport.
59
Page 65

Administrator’s Guide for SIP-T2 Series/T4 Series/T5 Series/CP920 IP Phones
Parameter
Description It enables or disables the phone to add the "rport" parameter in the Via header.
Permitted
Values
Default 0
Web UI Account > Advanced > RPort
[1]
X is the account ID. For T57W/T54W/T48U/T48S/T48G/T46U/T46S/T46G/T29G, X=1-16; for
T53W/T53/T43U/T42G/T42S, X=1-12; for T41P/T41S/T27G, X=1-6; for T40P/T40G/T23P/T23G, X=1-3; for T21(P) E2, X=12; for T19(P) E2/CP920, X=1.
account.X.nat.rport
0-Disabled
1-Enabled, the INVITE Contact header uses the port in the "rport" parameter but does not use the source
IP address in the "received" parameter in the Via header of server's response.
2-Enable Direct Process, the INVITE Contact header uses the port in the "rport" parameter and uses the
source IP address in the "received" parameter in the Via header of server's response.
[1]
<MAC>.cfg
SIP Port and TLS Port Configuration
You can configure the SIP and TLS source ports on the phone. Otherwise, the phone uses default values (5060 for
UDP/TCP and 5061 for TLS).
If NAT is disabled, the port number shows in the Via and Contact SIP headers of SIP messages. If NAT is enabled, the
phone uses the NAT port number (and NAT IP address) in the Via and Contact SIP headers of SIP messages, but still
using the configured source port.
The following table lists the parameters you can use to configure SIP port and TLS port.
Parameter sip.listen_port <y0000000000xx>.cfg
Description
Permitted
Values
Default 5060
Web UI Settings > SIP > Local SIP Port
Parameter sip.tls_listen_port <y0000000000xx>.cfg
Description
Permitted
Values
Default 5061
Web UI Settings > SIP > TLS SIP Port
It specifies the local SIP port.
If it is set to 0, the phone will automatically listen to the local SIP port.
0, Integer from 1024 to 65535
It specifies the local TLS listen port.
If it is set to 0, the phone will not listen to the TLS service.
0, Integer from 1024 to 65535
Internet Port and PC Port
Yealink phones support two Ethernet ports: Internet port and PC port. You can enable or disable the PC port on the
phones. The CP920 phones have Internet port only.
Topics
60
Page 66

Network Configurations
Supported Transmission Methods
Internet Port and PC Port Configuration
Supported Transmission Methods
Three optional methods of transmission configuration for the IP phone Internet port and PC port:
l Auto-negotiate
l Half-duplex (transmit in 10Mbps or 100Mbps)
l Full-duplex (transmit in 10Mbps, 100Mbps or 1000Mbps (1000Mbps is only applicable to
T57W/T54W/T53W/T53/T48U/T48S/T48G/T46U/T46S/T46G/T43U/T42G/T42S/T40G/T29G/T27G/T23G/CP920 phones))
Auto-negotiate is configured for both Internet and PC ports on the IP phone by default.
Internet Port and PC Port Configuration
The following table lists the parameters you can use to configure the Internet port and PC port.
Parameter
static.network.pc_port.enable
[1]
Description It enables or disables the PC port.
Permitted
Values
0-Disabled
1-Auto Negotiation
Default 1
Supported
Devices
All phones except CP920
Web UI Network > PC Port > PC Port Active
Parameter
static.network.internet_port.speed_duplex
It configures the network speed over Ethernet of the Internet port.
Note: For
Description
T57W/T54W/T53W/T53/T48U/T48S/T48G/T46U/T46S/T46G/T43U/T42G/T42S/T40G/T29G/T27G/T23G/CP920
phones, you can set the transmission speed to 1000Mbps/Auto Negotiation to transmit in 1000Mbps if
the phone is connected to the switch supports Gigabit Ethernet. We recommend that you do not change
this parameter.
0-Auto Negotiation
1-Full Duplex 10Mbps
2-Full Duplex 100Mbps
Permitted
3-Half Duplex 10Mbps
Values
4-Half Duplex 100Mbps
[1]
<y0000000000xx>.cfg
<y0000000000xx>.cfg
5-Full Duplex 1000Mbps (only applicable to
T57W/T54W/T53W/T53/T48U/T48S/T48G/T46U/T46S/T46G/T43U/T42G/T42S/T40G/T29G/T27G/T23G/CP920
phones)
Default 0
Web UI Network > Advanced > Port Link > WAN Port Link
Parameter
static.network.pc_port.speed_duplex
[1]
<y0000000000xx>.cfg
Description It configures the network speed over Ethernet of the PC port.
61
Page 67

Administrator’s Guide for SIP-T2 Series/T4 Series/T5 Series/CP920 IP Phones
Note: It works only if “static.network.pc_port.enable” is set to 1 (Auto Negotiation). For
T57W/T54W/T53W/T53/T48U/T48S/T48G/T46U/T46S/T46G/T43U/T42G/T42S/T40G/T29G/T27G/T23G
phones, you can set the transmission speed to 1000Mbps/ Auto Negotiation to transmit in 1000Mbps if
the phone is connected to the switch supports Gigabit Ethernet. We recommend that you do not change
this parameter.
0-Auto Negotiation
1-Full Duplex 10Mbps
2-Full Duplex 100Mbps
Permitted
Values
Default 0
3-Half Duplex 10Mbps
4-Half Duplex 100Mbps
5-Full Duplex 1000Mbps (only applicable to
T57W/T54W/T53W/T53/T48U/T48S/T48G/T46U/T46S/T46G/T43U/T42G/T42S/T40G/T29G/T27G/T23G
phones)
Supported
Devices
Web UI Network > Advanced > Port Link > PC Port Link
Parameter
Description It configures how the phone processes packets for the PC port when VLAN is enabled on the PC port.
Permitted
Values
Default 1
Supported
Devices
[1]
If you change this parameter, the phone will reboot to make the change take effect.
All phones except CP920
static.network.vlan.pc_port_mode
0-The phone forwards the packets sent from the PC port to the Internet port directly.
1-If there are no VLAN tags in the packets sent from the PC port to the Internet port, the phone tags the
packets and then forward them; else, the phone forwards the packets directly.
All phones except CP920
[1]
<y0000000000xx>.cfg
VPN
Yealink phones use OpenVPN to achieve VPN feature. To prevent disclosure of private information, tunnel endpoints
must authenticate each other before a secure VPN tunnel is established. After you configure VPN feature on the IP
phone, the phone will act as a VPN client and use the certificates to authenticate with the VPN server.
For more information, refer to OpenVPN Feature on Yealink phones.
Topics
VPN Related Files
VPN Configuration
VPN Related Files
To use VPN, you should collect the VPN-related files into one archive file in .tar format and then upload this tar file.
The VPN-related files include certificates (ca.crt and client.crt), key (client.key) and the configuration file (vpn.cnf) of
the VPN client.
62
Page 68
Network Configurations
The following table lists the unified directories of the OpenVPN certificates and key in the configuration file (vpn.cnf)
for Yealink phones:
VPN Files Description Unified Directories
ca.crt CA certificate /config/openvpn/keys/ca.crt
client.crt Client certificate /config/openvpn/keys/client.crt
client.key Private key of the client /config/openvpn/keys/client.key
VPN Configuration
The following table lists the parameters you can use to configure the VPN.
Parameter
Description It enables or disables the OpenVPN feature.
Permitted
Values
Default 0
Web UI Network > Advanced > VPN > Active
Phone UI
Parameter static.openvpn.url <y0000000000xx>.cfg
Description
Permitted
Values
static.network.vpn_enable
0-Disabled
1-Enabled
Color Screen Phones:
Menu > Advanced (default password: admin) > Network > VPN > VPN Active
Black-and-white Screen Phones:
Menu > Settings > Advanced Settings (default password: admin) > Network > VPN > VPN Active
It configures the access URL of the *.tar file for OpenVPN.
Example:
static.openvpn.url = http://192.168.10.25/OpenVPN.tar
URL within 511 characters
[1]
<y0000000000xx>.cfg
Default Blank
Web UI Network > Advanced > VPN > Upload VPN Config
[1]
If you change this parameter, the phone will reboot to make the change take effect.
Quality of Service (QoS)
VoIP is extremely bandwidth and delay-sensitive. QoS is a major issue in VoIP implementations, regarding how to guarantee that packet traffic is not delayed or dropped due to interference from other lower priority traffic. VoIP can guarantee high-quality QoS only if the voice and the SIP packets are given priority over other kinds of network traffic. The
phones support the DiffServ model of QoS.
Voice QoS
63
Page 69
Administrator’s Guide for SIP-T2 Series/T4 Series/T5 Series/CP920 IP Phones
In order to make VoIP transmissions intelligible to receivers, voice packets should not be dropped, excessively delayed,
or made to suffer varying delay. DiffServ model can guarantee high-quality voice transmission when the voice packets
are configured to a higher DSCP value.
SIP QoS
The SIP protocol is used for creating, modifying, and terminating two-party or multi-party sessions. To ensure good
voice quality, SIP packets emanated from the phones should be configured with a high transmission priority.
DSCPs for voice and SIP packets can be specified respectively.
Note
For voice and SIP packets, the phone obtains DSCP info from the network policy if LLDP feature is enabled, which takes precedence over manual settings. For more information on LLDP, refer to LLDP Configuration.
Topic
Voice and SIP QoS Configuration
Voice and SIP QoS Configuration
The following table lists the parameters you can use to configure voice QoS and SIP QoS.
Parameter
static.network.qos.audiotos
It configures the DSCP (Differentiated Services Code Point) for voice packets.
Description
The default DSCP value for RTP packets is 46 (Expedited Forwarding).
Permitted
Values
Integer from 0 to 63
Default 46
T57W/T54W/T53W/T53/T48U/T46U/T43U:
Network > Advanced > QoS > Voice QoS (0~63)
Web UI
Other Phones:
Network > Advanced > Voice QoS > Voice QoS (0~63)
Parameter
static.network.qos.signaltos
It configures the DSCP (Differentiated Services Code Point) for SIP packets.
Description
The default DSCP value for SIP packets is 26 (Assured Forwarding).
Permitted
Values
Integer from 0 to 63
Default 26
T57W/T54W/T53W/T53/T48U/T46U/T43U:
[1]
[1]
<y0000000000xx>.cfg
<y0000000000xx>.cfg
Web UI
Network > Advanced > QoS > SIP QoS (0~63)
Other Phones:
Network > Advanced > Voice QoS > SIP QoS (0~63)
[1]
If you change this parameter, the phone will reboot to make the change take effect.
64
Page 70

Network Configurations
802.1x Authentication
Yealink phones support the following protocols for 802.1x authentication:
l EAP-MD5
l EAP-TLS (requires Device and CA certificates, requires no password)
l EAP-PEAP/MSCHAPv2 (requires CA certificates)
l EAP-TTLS/EAP-MSCHAPv2 (requires CA certificates)
l EAP-PEAP/GTC (requires CA certificates)
l EAP-TTLS/EAP-GTC (requires CA certificates)
l EAP-FAST (supports EAP In-Band provisioning, requires CA certificates if the provisioning method is Authenticated
Provisioning)
For more information on 802.1x authentication, refer to Yealink 802.1X Authentication.
Topic
802.1x Authentication Configuration
802.1x Authentication Configuration
The following table lists the parameters you can use to configure 802.1x authentication.
Parameter
static.network.802_1x.mode
[1]
Description It configures the 802.1x authentication method.
0-EAP-None, no authentication
1-EAP-MD5
2-EAP-TLS
Permitted
Values
3-EAP-PEAP/MSCHAPv2 (EAP-MSCHAPv2)
4-EAP-TTLS/EAP-MSCHAPv2
5-EAP-PEAP/GTC
6-EAP-TTLS/EAP-GTC
7-EAP-FAST
Default 0
Web UI Network > Advanced > 802.1x > 802.1x Mode
Color Screen Phones:
Menu > Advanced (default password: admin) > Network > 802.1x > 802.1x Mode
Phone UI
Black-and-white Screen Phones:
<y0000000000xx>.cfg
Parameter
Description
Permitted
Values
Menu > Settings > Advanced Settings (default password: admin) > Network > 802.1x > 802.1x Mode
static.network.802_1x.eap_fast_provision_mode
[1]
<y0000000000xx>.cfg
It configures the EAP In-Band provisioning method for EAP-FAST.
Note: It works only if “static.network.802_1x.mode” is set to 7 (EAP-FAST).
0-Unauthenticated Provisioning, EAP In-Band provisioning is enabled by server unauthenticated PAC
(Protected Access Credential) provisioning using the anonymous Diffie-Hellman key exchange.
65
Page 71
Administrator’s Guide for SIP-T2 Series/T4 Series/T5 Series/CP920 IP Phones
1-Authenticated Provisioning, EAP In-Band provisioning is enabled by server authenticated PAC provisioning using certificate-based server authentication.
Default 0
Web UI Network > Advanced > 802.1x > Provisioning Mode
Parameter
static.network.802_1x.anonymous_identity
[1]
<y0000000000xx>.cfg
It configures the anonymous identity (user name) for 802.1X authentication.
Description
It is used for constructing a secure tunnel for 802.1X authentication.
Note: It works only if “static.network.802_1x.mode” is set to 2, 3, 4, 5, 6 or 7.
Permitted
Values
String within 512 characters
Default Blank
Web UI Network > Advanced > 802.1x > Anonymous Identity
Parameter
static.network.802_1x.identity
[1]
<y0000000000xx>.cfg
Description It configures the identity (user name) for 802.1x authentication.
Permitted
Values
String within 32 characters
Default Blank
Web UI Network > Advanced > 802.1x > Identity
Color Screen Phones:
Menu > Advanced (default password: admin) > Network > 802.1x > Identity
Phone UI
Black-and-white Screen Phones:
Menu > Settings > Advanced Settings (default password: admin) > Network > 802.1x > Identity
Parameter
static.network.802_1x.md5_password
[1]
<y0000000000xx>.cfg
Description
It configures the password for 802.1x authentication.
Note: It is required for all methods except EAP-TLS.
Permitted
Values
String within 32 characters
Default Blank
Web UI Network > Advanced > 802.1x > MD5 Password
Color Screen Phones:
Menu > Advanced (default password: admin) > Network > 802.1x > MD5 Password
Phone UI
Black-and-white Screen Phones:
Menu > Settings > Advanced Settings (default password: admin) > Network > 802.1x > MD5 Password
Parameter static.network.802_1x.root_cert_url <y0000000000xx>.cfg
It configures the access URL of the CA certificate.
Description
The format of the certificate must be *.pem, *.crt, *.cer or *.der.
66
Page 72

Note: It works only if “static.network.802_1x.mode” is set to 2, 3, 4, 5, 6 or 7. If the authentication method
is EAP-FAST, you also need to set “static.network.802_1x.eap_fast_provision_mode” to 1 (Authenticated
Provisioning).
Permitted
Values
Default Blank
Web UI Network > Advanced > 802.1x > CA Certificates
Parameter static.network.802_1x.client_cert_url <y0000000000xx>.cfg
URL within 511 characters
It configures the access URL of the device certificate.
Network Configurations
Description
Permitted
Values
Default Blank
Web UI Network > Advanced > 802.1x > Device Certificates
Parameter
Description It enables or disables the 802.1x-logoff feature for the PC port.
Permitted
Values
Default 0
Supported
Devices
[1]
If you change this parameter, the phone will reboot to make the change take effect.
The format of the certificate must be *.pem.
Note: It works only if “static.network.802_1x.mode” is set to 2 (EAP-TLS).
URL within 511 characters
static.network.802_1x.proxy_eap_logoff.enable
0-Disabled
1-Enabled, the 802.1x logoff message is sent to the authenticator when the PC is disconnected.
All phones except CP920
[1]
<y0000000000xx>.cfg
TR-069 Device Management
TR-069 is a technical specification defined by the Broadband Forum, which defines a mechanism that encompasses
secure auto-configuration of a CPE (Customer-Premises Equipment), and incorporates other CPE management functions into a common framework. TR-069 uses common transport mechanisms (HTTP and HTTPS) for communication
between CPE and ACS (Auto Configuration Servers). The HTTP(S) messages contain XML-RPC methods defined in the
standard for configuration and management of the CPE.
For more information on TR-069, refer to Yealink TR-069 Technote.
Topics
Supported RPC Methods
TR-069 Configuration
Supported RPC Methods
The following table provides a description of RPC methods supported by the phones.
67
Page 73
Administrator’s Guide for SIP-T2 Series/T4 Series/T5 Series/CP920 IP Phones
RPC Method Description
GetRPCMethods This method is used to discover the set of methods supported by the CPE.
SetParameterValues This method is used to modify the value of one or more CPE parameters.
GetParameterValues This method is used to obtain the value of one or more CPE parameters.
GetParameterNames This method is used to discover the parameters accessible on a particular CPE.
GetParameterAttributes This method is used to read the attributes associated with one or more CPE parameters.
SetParameterAttributes This method is used to modify attributes associated with one or more CPE parameters.
Reboot This method causes the CPE to reboot.
This method is used to cause the CPE to download a specified file from the designated location.
Download
File types supported by the phones are:
l Firmware Image
l Configuration File
This method is used to cause the CPE to upload a specified file to the designated location.
Upload
ScheduleInform
File types supported by the phones are:
l Configuration File
l Log File
This method is used to request the CPE to schedule a one-time Inform method call (separate
from its periodic Inform method calls) sometime in the future.
FactoryReset This method resets the CPE to its factory default state.
TransferComplete
This method informs the ACS of the completion (either successful or unsuccessful) of a file
transfer initiated by an earlier Download or Upload method call.
AddObject This method is used to add a new instance of an object defined on the CPE.
DeleteObject This method is used to remove a particular instance of an object.
TR-069 Configuration
The following table lists the parameters you can use to configure TR-069.
Parameter static.managementserver.enable <y0000000000xx>.cfg
Description It enables or disables the TR-069 feature.
Permitted
Values
0-Disabled
1-Enabled
Default 0
Web UI Settings > TR069 > Enable TR069
Parameter static.managementserver.username <y0000000000xx>.cfg
It configures the TR-069 ACS server user name used to authenticate the phone.
Description
Leave it blank if no authentication is required.
68
Page 74

Network Configurations
Permitted
Values
Default Blank
Web UI Settings > TR069 > ACS Username
Parameter static.managementserver.password <y0000000000xx>.cfg
Description
Permitted
Values
Default Blank
Web UI Settings > TR069 > ACS Password
Parameter static.managementserver.url <y0000000000xx>.cfg
Description It configures the access URL of the TR-069 ACS server.
Permitted
Values
Default Blank
Web UI Settings > TR069 > ACS URL
String within 128 characters
It configures the TR-069 ACS server password used to authenticate the phone.
Leave it blank if no authentication is required.
String within 64 characters
URL within 511 characters
Parameter
Description It configures the user name used to authenticate the connection requests from the ACS server.
Permitted
Values
Default Blank
Web UI Settings > TR069 > Connection Request Username
Parameter
Description It configures the password used to authenticate the connection requests from the ACS server.
Permitted
Values
Default Blank
Web UI Settings > TR069 > Connection Request Password
Parameter static.managementserver.periodic_inform_enable <y0000000000xx>.cfg
Description It enables or disables the phone to periodically report its configuration information to the ACS server.
Permitted
Values
static.managementserver.connection_request_username
String within 128 characters
static.managementserver.connection_request_password
String within 64 characters
0-Disabled
1-Enabled
<y0000000000xx>.cfg
<y0000000000xx>.cfg
Default 1
Web UI Settings > TR069 > Enable Periodic Inform
69
Page 75

Administrator’s Guide for SIP-T2 Series/T4 Series/T5 Series/CP920 IP Phones
Parameter static.managementserver.periodic_inform_interval <y0000000000xx>.cfg
Description
Permitted
Values
Default 60
Web UI Settings > TR069 > Periodic Inform Interval (seconds)
It configures the interval (in seconds) at which the phone reports its configuration to the ACS server.
Note: It works only if “static.managementserver.periodic_inform_enable” is set to 1 (Enabled).
Integer from 5 to 4294967295
70
Page 76

Phone Provisioning
Phone Provisioning
You can provision multiple phones with the same settings for large-scale deployments.
For more information, refer to Yealink SIP IP Phones Auto Provisioning Guide.
Topics
Boot Files, Configuration Files, and Resource Files
Provisioning Methods
Setting Up a Provisioning Server
Keeping User’s Personalized Settings after Auto Provisioning
Example: Deploying Phones from the Provisioning Server
Boot Files, Configuration Files, and Resource Files
You can use boot files, configuration files, and resource files to configure phone features and apply feature settings to
phones. You can create or edit these files using a text editor such as Notepad++.
You can ask the distributor or Yealink FAE for template files. You can also obtain the template files online: http://sup-
port.yealink.com/documentFront/forwardToDocumentFrontDisplayPage.
Topics
Boot Files
Configuration Files
Resource Files
Files Download Process
Boot Files
Yealink phones support boot files. The boot files maximize the flexibility to allow you to customize features and settings for multiple phones.
With the boot file, you can specify which configuration files should be downloaded. It is effective for you to provision
the phones in different deployment scenarios:
l For all phones
l For a group of phones
l For specific phone models
l For a single phone
Yealink phones support two types of boot files: common boot file and MAC-Oriented boot file. You can use the default
boot template file “y000000000000.boot” to create MAC-Oriented boot file by making a copy and renaming it.
Note
You can select whether to use the boot file or not according to your deployment scenario. If you do not want to use the
boot file, please go to Configuration Files.
Topics
Common Boot File
MAC-Oriented Boot File
Boot File Attributes
Customizing a Boot File
71
Page 77

Administrator’s Guide for SIP-T2 Series/T4 Series/T5 Series/CP920 IP Phones
Common Boot File
Common boot file, named y000000000000.boot, is effective for all phones. You can use a common boot file to apply
common feature settings to all of the phones rather than a single phone.
MAC-Oriented Boot File
MAC-Oriented boot file, named <MAC>.boot. It will only be effective for a specific IP phone. In this way, you have
high permission to control each phone by making changes on a per-phone basis.
You can create a MAC-Oriented boot file for each phone by making a copy and renaming the boot template file
(y000000000000.boot). For example, if your phone MAC address is 00156574B150, rename the template file as
00156574b150.boot (lowercase).
Tips
MAC address, a unique 12-digit serial number is assigned to each phone. You can obtain it from the bar code on the back
of the phone.
Boot File Attributes
The following table lists the attributes you need to know in the boot template file.
Attributes Description
#!version:1.0.0.1 It must be placed in the first line. Do not edit and delete.
Each “include” statement can specify a location of a configuration file. The configuration file format must be *.cfg.
The locations in the angle brackets or double quotation marks support two forms:
include:config <xxx.cfg>
include:config "xxx.cfg"
l Relative path (relative to the boot file):
For example, sip.cfg, HTTP Directory/sip.cfg
l Absolute path (or URL):
For example, http://10.2.5.258/HTTP Directory/sip.cfg
The location must point to a specific CFG file.
The [$MODEL] can be added to specify settings for specific phone models.
$MODEL represents the phone model name.
The valid phone model names are T57W, T54W, T53W, T53, T48U, T48S, T48G, T46U,
[$MODEL]
T46S, T46G, T43U, T42S, T42G, T41P, T41S, T40P, T40G, T29G, T27G, T23P, T23G,
T21P_E2, T19P_E2, and CP920.
Multiple phone models are separated by commas. For example, [T46S, T23G].
Note: The phone model name T21P_E2 is applicable to T21P E2 and T21 E2 phones.
Enable or disable the overwrite mode.
overwrite_mode
72
1-(Enabled) - If the value of a parameter in configuration files is left blank, or if a
non-static parameter in configuration files is deleted or commented out, the factory default value takes effect.
0-(Disabled) - If the value of a parameter in configuration files is left blank, deleted
or commented out, the pre-configured value is kept.
Note: Overwrite mode can only be used in boot files. If a boot file is used but “overwrite_mode” is not configured, the overwrite mode is enabled by default.
Page 78

Attributes Description
Enable or disable the exclude mode. The exclude mode applies to the configuration files specified in the boot file.
0-Disabled (Append Mode), the phone downloads its own model-specific configuration files and downloads other model-unspecified configuration files.
Phone Provisioning
specific_model.excluded_mode
Tips
The line beginning with “#” is considered to be a comment. You can use “#” to make any comment on the boot file.
1-Enabled (Exclude Mode), the phone attempts to download its own model-specific configuration files; if there are no own model-specific configuration files
found on the server, it downloads model-unspecified configuration files.
Note: Exclude mode can only be used in boot files. If a boot file is used but “specific_model.excluded_mode” is not configured, the exclude mode is disabled by
default.
Customizing a Boot File
Procedure
1. Open a boot template file.
2. To add a configuration file, add include:config < > or include:config “” to the file. Each starts on a separate line.
3. Specify a configuration file for downloading.
For example:
include:config <configure/sip.cfg >
include:config “http://10.2.5.206/configure/account.cfg”
include:config “http://10.2.5.206/configure/dialplan.cfg”
4. To specify configuration files for specific phone models, add specific phone models in front of include:config < >
or include:config “”. Multiple phone model names are separated by commas.
For example:
[T46S, T48S]include:config <configure/sip.cfg >
[T23G]include:config “http://10.2.5.206/configure/account.cfg”
## file sip.cfg only applies to T46S and T48S phones, file account.cfg only applies to T23G phones
5. Specify the overwrite mode and exclude mode.
For example:
overwrite_mode = 1
specific_model.excluded_mode = 1
6. Save the boot file and place it on the provisioning server.
Related Topic
Boot File Attributes
Configuration Files
Yealink supports two configuration template files: Common CFG file and MAC-Oriented CFG file.
These configuration files contain two kinds of parameters:
73
Page 79

Administrator’s Guide for SIP-T2 Series/T4 Series/T5 Series/CP920 IP Phones
l Static: The parameters start with a prefix “static.”, for example, static.auto_provision.custom.protect.
l Non-static: The parameters do not start with a prefix “static.”, for example, local_time.date_format.
You can deploy and maintain a mass of Yealink phones automatically through configuration files stored in a provisioning server.
Note
For protecting against unauthorized access, you can encrypt configuration files. For more information on encrypting configuration files, refer to Encrypting and Decrypting Files.
Topics
Common CFG File
MAC-Oriented CFG File
MAC-local CFG File
Configuration File Customization
Configuration File Attributes
Common CFG File
Common CFG file, named <y0000000000xx>.cfg, contains parameters that affect the basic operation of the IP phone,
such as language and volume. It will be effective for all phones in the same model. The common CFG file has a fixed
name for each phone model.
The following table lists the name of the common CFG file for each phone model:
Phone Model Common CFG file
T57W y000000000097.cfg
T54W y000000000096.cfg
T53W/T53 y000000000095.cfg
T48U y000000000109.cfg
T48G y000000000035.cfg
T48S y000000000065.cfg
T46U y000000000108.cfg
T46G y000000000028.cfg
T46S y000000000066.cfg
T43U y000000000107.cfg
T42G y000000000029.cfg
T42S y000000000067.cfg
T41P y000000000036.cfg
74
T41S y000000000068.cfg
T40P y000000000054.cfg
T40G y000000000076.cfg
Page 80

Phone Provisioning
Phone Model Common CFG file
T29G y000000000046.cfg
T27G y000000000069.cfg
T23P/G y000000000044.cfg
T21(P) E2 y000000000052.cfg
T19(P) E2 y000000000053.cfg
CP920 y000000000078.cfg
MAC-Oriented CFG File
MAC-Oriented CFG file, which is named after the MAC address of the IP phone. For example, if the MAC address of an
IP phone is 00156574B150, the name of MAC-Oriented CFG file is 00156574b150.cfg (lowercase). It contains parameters
unique to a particular phone, such as account registration. It will only be effective for a MAC-specific IP phone.
MAC-local CFG File
MAC-local CFG file, which is named after the MAC address of the IP phone. For example, if the MAC address of an IP
phone is 00156574B150, the name of MAC-local CFG file is 00156574b150-local.cfg (lowercase). It contains changes
associated with a non-static parameter that you make via the web user interface or phone user interface (for example,
changes for time and date formats, ring tones, and DSS keys).
This file generates only if you enable the provisioning priority mechanism. It is stored locally on the IP phone and you
can upload it to the provisioning server each time the file updates. This file enables the users to keep their personalized
configuration settings, even though the IP phone performs auto provisioning.
This file supports the overwrite mode. That is, you can clear the user's personalized configurations settings by deleting
a parameter or leaving the value of a parameter blank in the MAC-local CFG file on the server. Note that if there is no
MAC-local CFG file found on the server, the MAC-local CFG file on the phone will not be cleared.
Note
The non-static changes that you made before enabling the provisioning priority mechanism are not saved in the generated
MAC-local file, but the previous settings still take effect on the phone. The static changes are never be saved to the
<MAC>-local.cfg file.
The provisioning priority mechanism is enabled by the parameter “static.auto_provision.custom.protect”.
Configuration File Customization
You can create some new CFG files by making a copy and renaming the configuration template file (for example,
sip.cfg, account.cfg). You can rearrange the parameters in the configuration template file and create your own configuration files with parameters you want. This flexibility is especially useful when you want to apply specific settings to
a group of phones.
Topic
Customizing a Configuration File
Customizing a Configuration File
1. Copy and rename a configuration template file. For example, sip.cfg.
2. Rearrange the parameters in the sip.cfg, and set the valid values for them.
For example:
phone_setting.contrast = 7
75
Page 81
Administrator’s Guide for SIP-T2 Series/T4 Series/T5 Series/CP920 IP Phones
local_time.time_format = 1
account.1.anonymous_call = 1
account.2.dnd.enable = 1
features.dnd.enable = 0
3. To specify parameters for specific phone models, add specific phone models in the front of the corresponding para-
meters. Multiple phone model names are separated by commas.
For example:
[T46S,T48S]voice_mail.number.1 = *5
[T27G]account.1.dnd.enable = 1
[T46S]account.2.dnd.enable = 1
[T48S]features.dnd.enable = 0
## These parameters only apply to their own specific phone models.
4. Save the configuration file and place it on the provisioning server.
Related Topic
Configuration File Attributes
Configuration File Attributes
The following table lists the attributes you need to know in the configuration template file.
Attributes Description
#!version:1.0.0.1 It must be placed in the first line. Do not edit and delete.
Specify the parameters and values to apply specific settings to the phones.
Configuration Parameter=Valid
Value
(for example, account.1.dnd.enable = 1)
l Separate each configuration parameter and value with an equal sign
l Set only one configuration parameter per line
l Put the configuration parameter and value on the same line and do not break
the line
The [$MODEL] can be added in front of the configuration parameter to specify the
value for specific phone models. $MODEL represents the phone model.
The valid phone model names are T57W, T54W, T53W, T53, T48U, T48S, T48G, T46U,
T46S, T46G, T43U, T42S, T42G, T41P, T41S, T40P, T40G, T29G, T27G, T23P, T23G,
[$MODEL]
T21P_E2, T19P_E2, and CP920.
Multiple phone models are separated by commas. For example, [T46S, T23G].
Note: The phone updates model-specific configurations and those model-unspecified configurations. The phone model name T21P_E2 is applicable to T21P E2 and
T21 E2 phones.
Tips
The line beginning with “#” is considered to be a comment. You can use “#” to make any comment on the boot file.
Resource Files
Resource files are optional, but if the particular feature is being employed, these files are required. You need to place
resource files on the provisioning server. The phones request the resource files in addition to the configuration files during auto provisioning.
76
Page 82
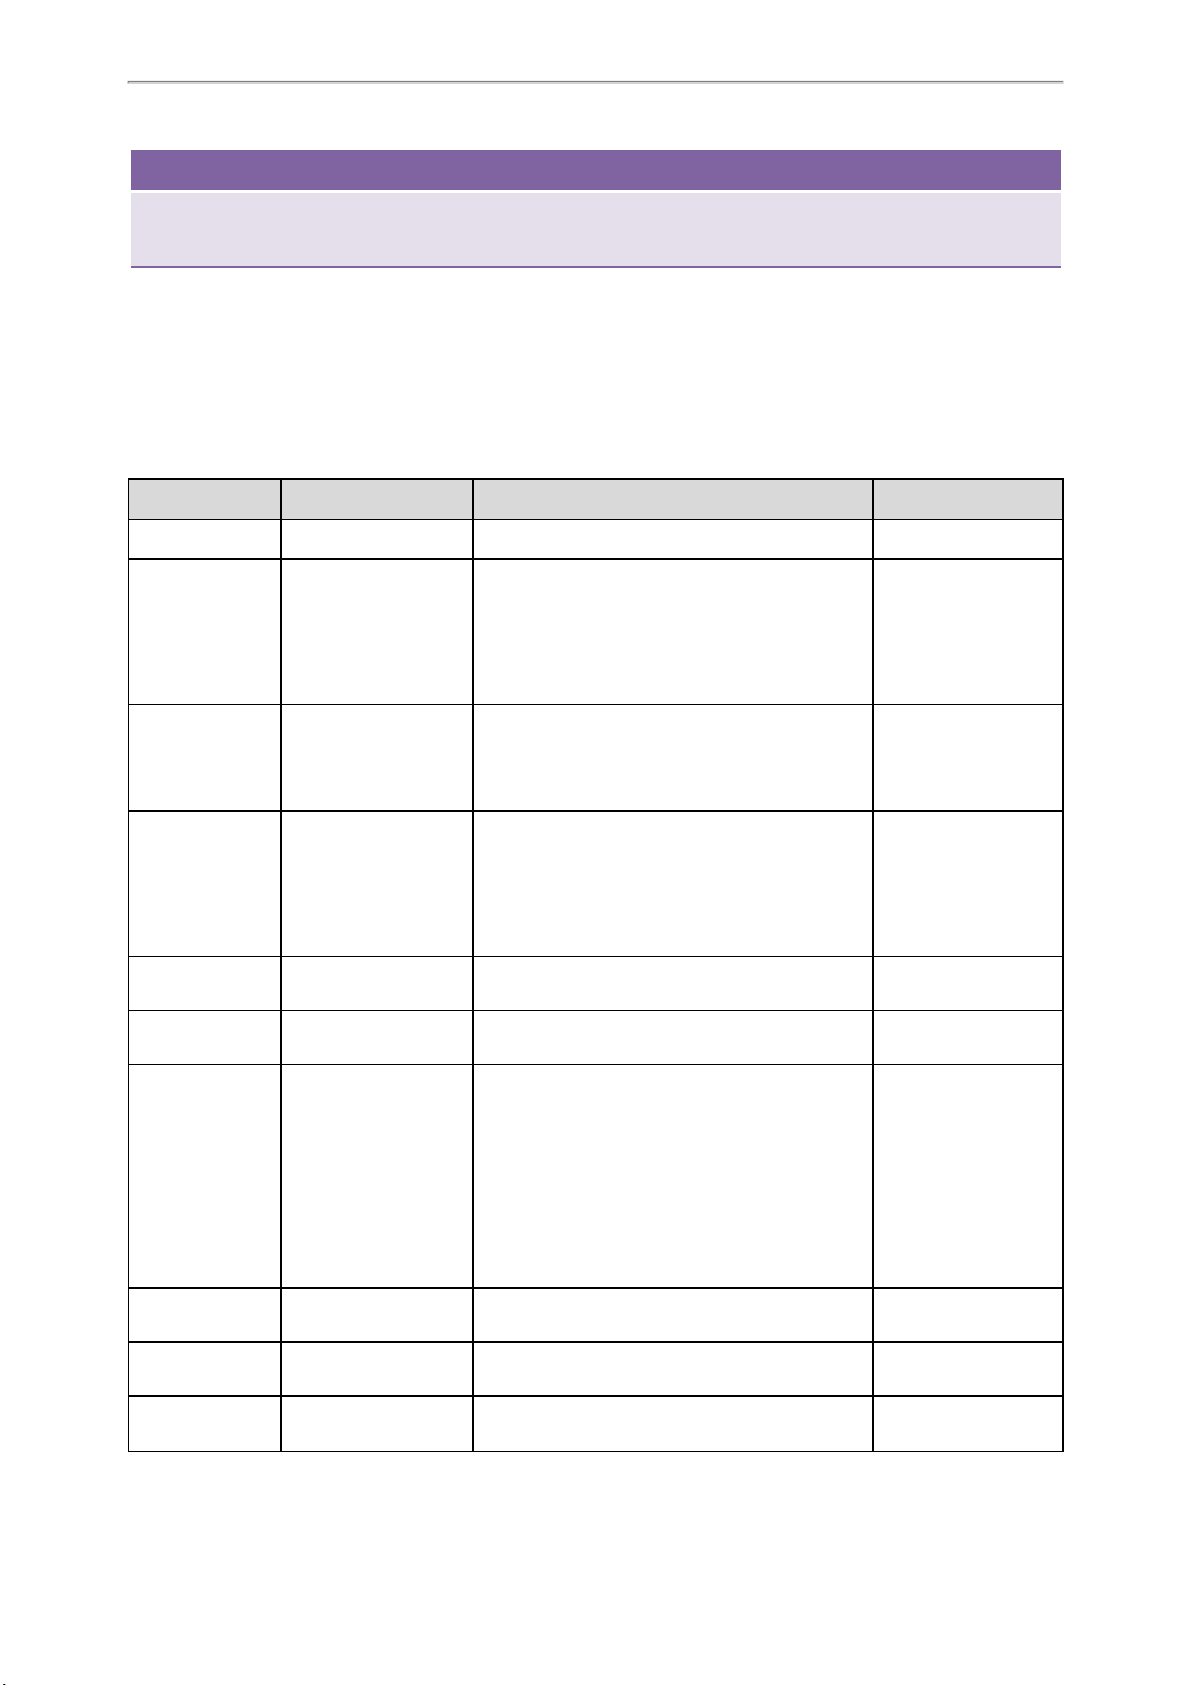
Phone Provisioning
Tips
If you want to specify the desired phone to use the resource file, the access URL of the resource file should be specified in
the MAC-Oriented CFG file. During auto provisioning, the phones will request the resource files in addition to the configuration files.
Topic
Supported Resource Files
Supported Resource Files
Yealink supplies some template of resource files for you, so you can directly edit the files as required.
The following table lists the resource files Yealink supplies:
Template File File Name Description Reference in Section
AutoDST Template AutoDST.xml Add or modify time zone and DST settings. DST Settings
For example,
Language Packs
Keypad Input
Method File
Onscreen Keyboard Input
Method File
Replace Rule Template
Dial Now Template DialNow.xml Customize dial now rules for the dial plan.
000.GUI.English.lang
1.English_note.xml
1.English.js
ime.txt
Russian_ime.txt
Hebrew_ime.txt
ime.txt
keyboard_lang.xml
keyboard_ime_*.xml
keyboard_layout_*.xml
DialPlan.xml Customize replace rules for the dial plan.
CallFailed.xml
Customize the translation of the existing language
on the phone/web user interface.
Customize the existing input method.
Customize the onscreen keyboard input method.
Language for Phone
Display Customization
Language for Web Display Customization
Keypad Input Method
File Customization
Onscreen Keyboard
Input Method File Customization
Replace Rule File Customization
Dial Now File Customization
CallIn.xml
Softkey Layout
Template
Directory Template favorite_setting.xml Customize the directory list.
Super Search Template
Local Contact File contact.xml Add or modify multiple local contacts.
Connecting.xml
Customize soft key layout for different call states.
Dialing.xml
RingBack.xml
Talking.xml
super_search.xml Customize the search source list.
Softkey Layout File Customization
Directory List File Customization
Search Source File Customization
Local Contact File Customization
77
Page 83
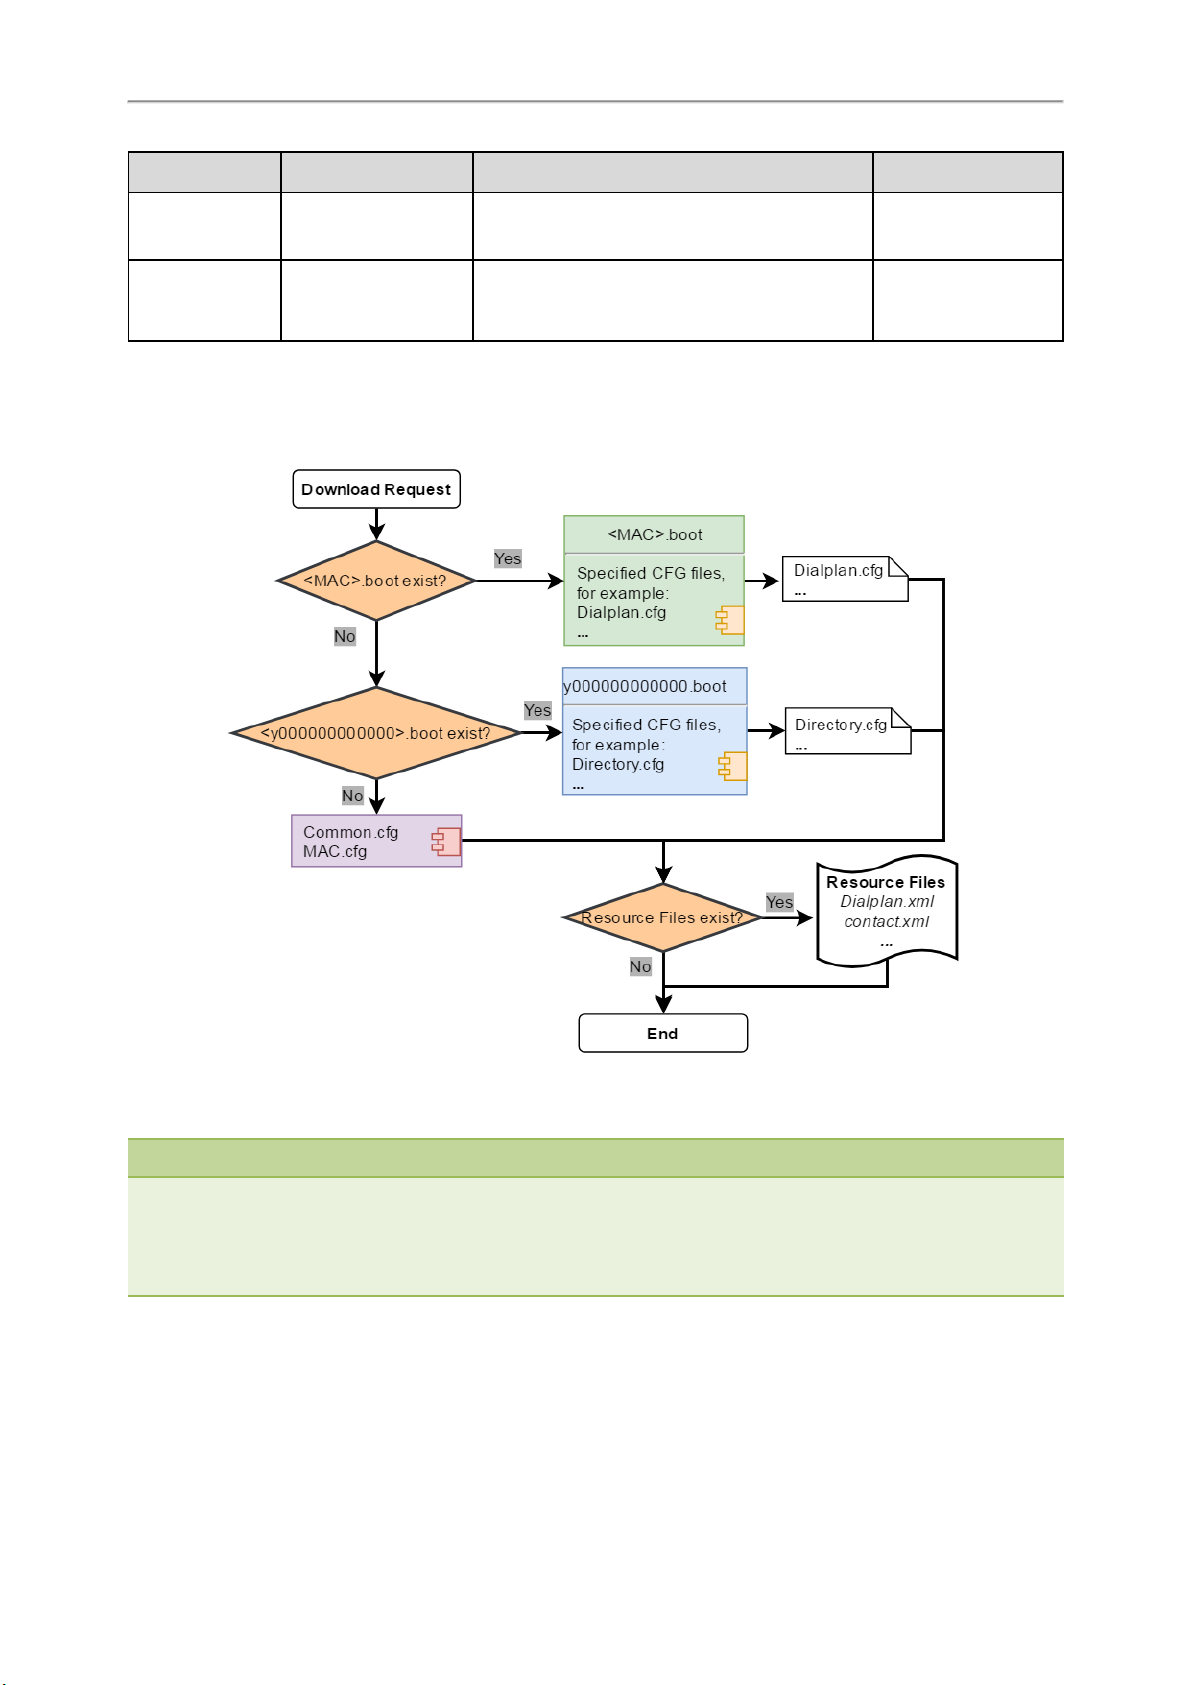
Administrator’s Guide for SIP-T2 Series/T4 Series/T5 Series/CP920 IP Phones
Template File File Name Description Reference in Section
Remote Phone
Book Template
Screen Saver Template
Department.xml
Menu.xml
CustomScreenSaver.xml
Add or modify multiple remote contacts.
Customize the XML items (for example, notifications, company logo) which will be displayed
on the screen saver.
Remote Phone Book
File Customization
Screensaver Display
Customization
Files Download Process
When you provision the phones, the phones will request to download the boot files, configuration files and resource
files from the provisioning server according to the following flowchart:
The parameters in the newly downloaded configuration files will override the same parameters in files downloaded
earlier.
Note
For the phone running firmware version 82 or earlier, it downloads configuration files referenced in the boot file in
sequence.
For the phone running firmware version 83 or later, “specific_model.excluded_mode” determines which configuration
files referenced in the boot file to be downloaded.
Provisioning Methods
Yealink provides two ways to provision your phones:
78
Page 84
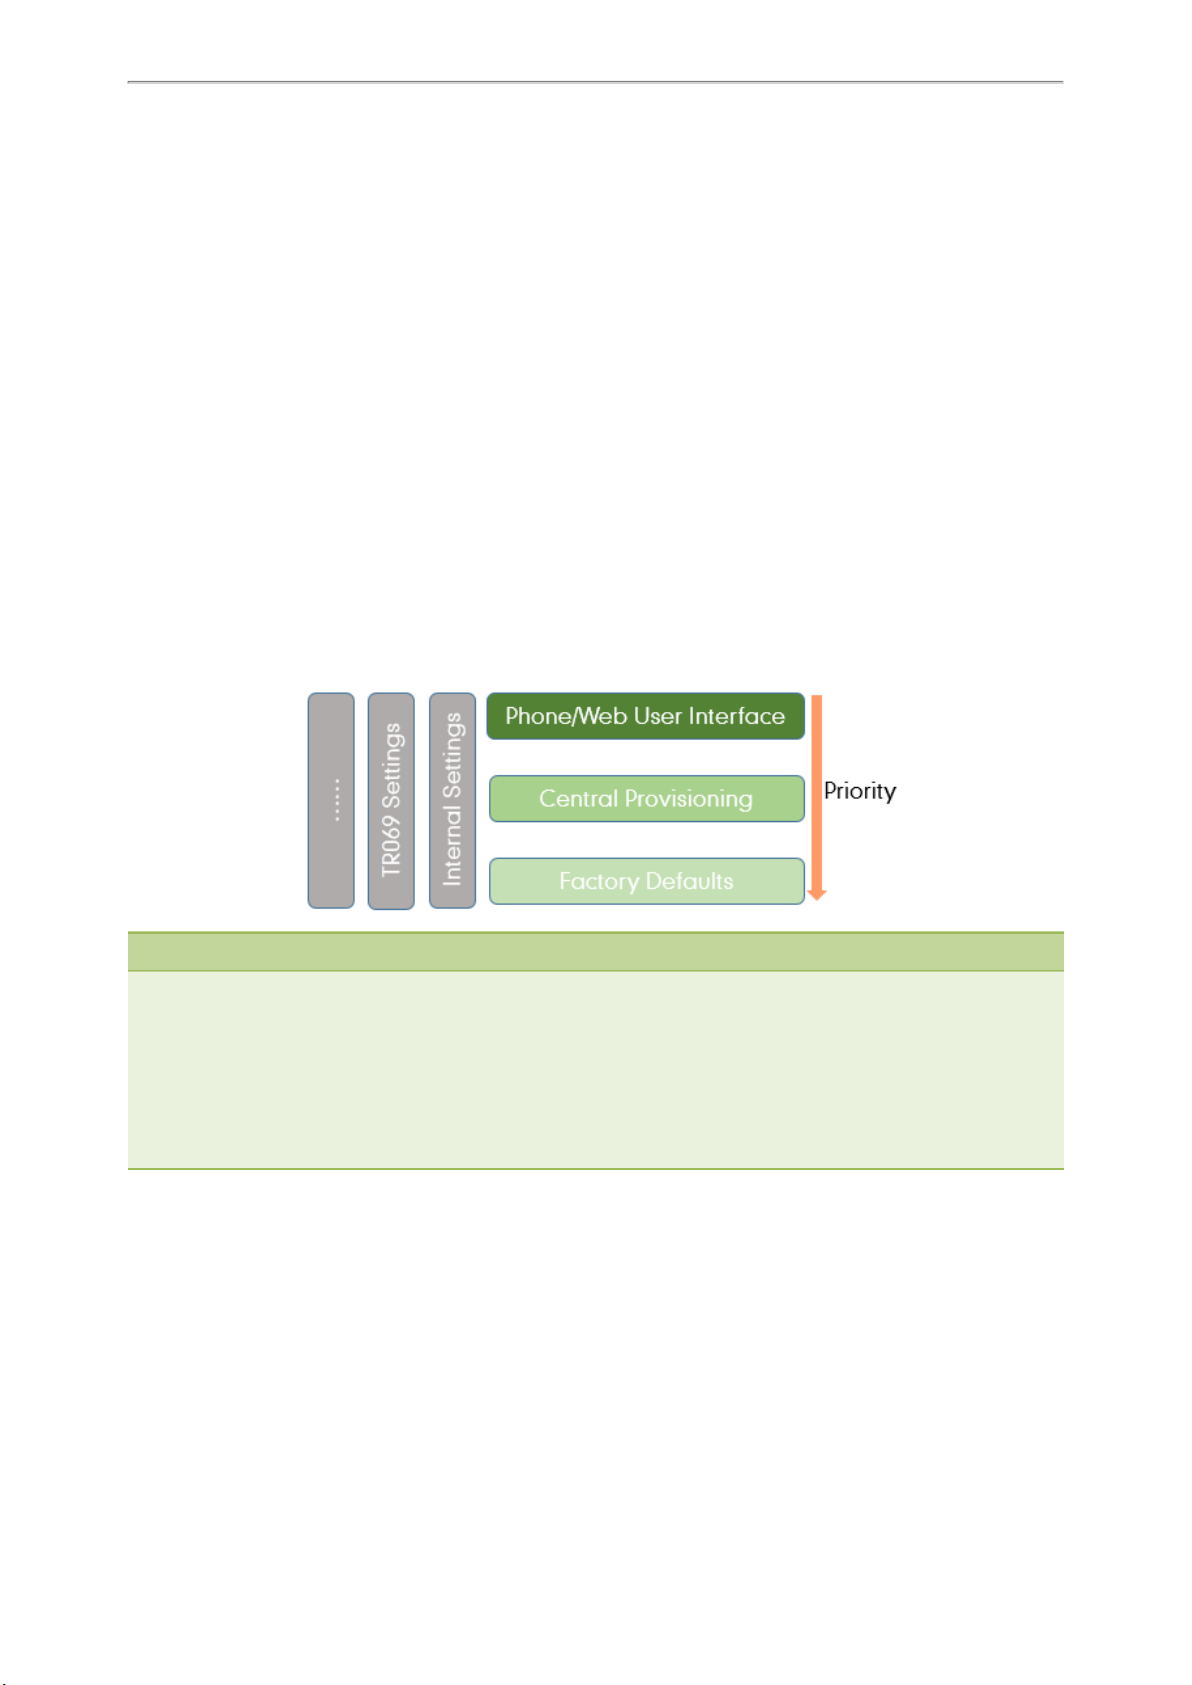
Phone Provisioning
l Manual Provisioning: provisioning via the local phone user interface or web user interface.
l Central Provisioning: provisioning through configuration files stored in a central provisioning server.
The method you use depends on how many phones need to be deployed and what features and settings to be configured. Manual provisioning on the web or phone user interface does not contain all of the phone settings available
with the centralized method. You can use the web user interface method in conjunction with a central provisioning
method and phone user interface method. We recommend using centralized provisioning as your primary provisioning
method when provisioning multiple phones.
Topics
Provisioning Methods Priority
Web User Interface
Phone User Interface
Central Provisioning
Viewing Configurations Configured via Different Provisioning Methods
Provisioning Methods Priority
There is a priority for configuration among the provisioning methods - settings you make using a higher priority provisioning method override settings made using a lower priority provisioning method.
The precedence order for configuration parameter changes is as follows (highest to lowest):
Note
The provisioning priority mechanism takes effect only if “static.auto_provision.custom.protect” is set to 1. For more information on this parameter, refer to Keeping User’s Personalized Settings Configuration.
Static parameters have no priority. They take effect no matter what method (web user interface or phone user interface
or configuration files) you are using for provisioning.
Static parameters are the parameters that start with a prefix “static.”, for example, the parameters associated with auto
provisioning/network/syslog, TR069 settings and internal settings (the temporary configurations to be used for program running).
Web User Interface
You can configure the phones via the web user interface, a web-based interface that is especially useful for remote configuration.
Because features and configurations vary by phone models and firmware versions, options available on each page of
the web user interface can vary as well. Note that the features configured via the web user interface are limited. Therefore, you can use the web user interface in conjunction with a central provisioning method and phone user interface.
79
Page 85

Administrator’s Guide for SIP-T2 Series/T4 Series/T5 Series/CP920 IP Phones
When configuring the phones via the web user interface, you require a user name and password for access. For a user,
the default user name and password are “user” (case-sensitive). For an administrator, the default user name and password are “admin” (case-sensitive).
Note
When you manually configure a phone via the web user interface or phone user interface, the changes associated with nonstatic parameters you make will be stored in the MAC-local CFG file. For more information on MAC-local CFG file, refer to
MAC-local CFG File.
Topics
Accessing the Web User Interface
Quick Login Configuration
Web Server Type Configuration
Navigating the Web User Interface
Accessing the Web User Interface
Procedure
1. Find the device IP address. Press the OK key when the phone is idle or navigate to Menu > Status on the phone.
2. Enter the IP address in the address bar of a web browser on your PC.
For example, for IPv4: http://192.168.0.10 or 192.168.0.10; for IPv6: http://[2005:1:1:1:215:65ff:fe64:6e0a] or
[2005:1:1:1:215:65ff:fe64:6e0a].
3. Enter the user name and password.
4. Click Login.
Related Topics
Web Server Type Configuration
User and Administrator Identification
Quick Login Configuration
You can access to the web user interface quickly using the request URI. It will locate you in the Status web page after
accessing the web user interface. It is helpful to quickly log into the web user interface without entering the username
and password in the login page.
The request URI for T57W/T54W/T53W/T53/T48U/T46U/T43U phones:
https://phoneIPAddress/api/auth/login?@username:password
Example: https://192.168.0.10/api/auth/login?@admin:admin
The request URI for other phones:
https://username:password@phoneIPAddress
Example: https://admin:[email protected]
Yealink phones support domain name customization. You can use a custom domain name to access the web user interface.
Note
Accessing the web user interface by request URI may be restricted by the web explorer (for example, Internet Explorer).
For security purposes, we recommend that you use this feature in a secure network environment.
80
Page 86
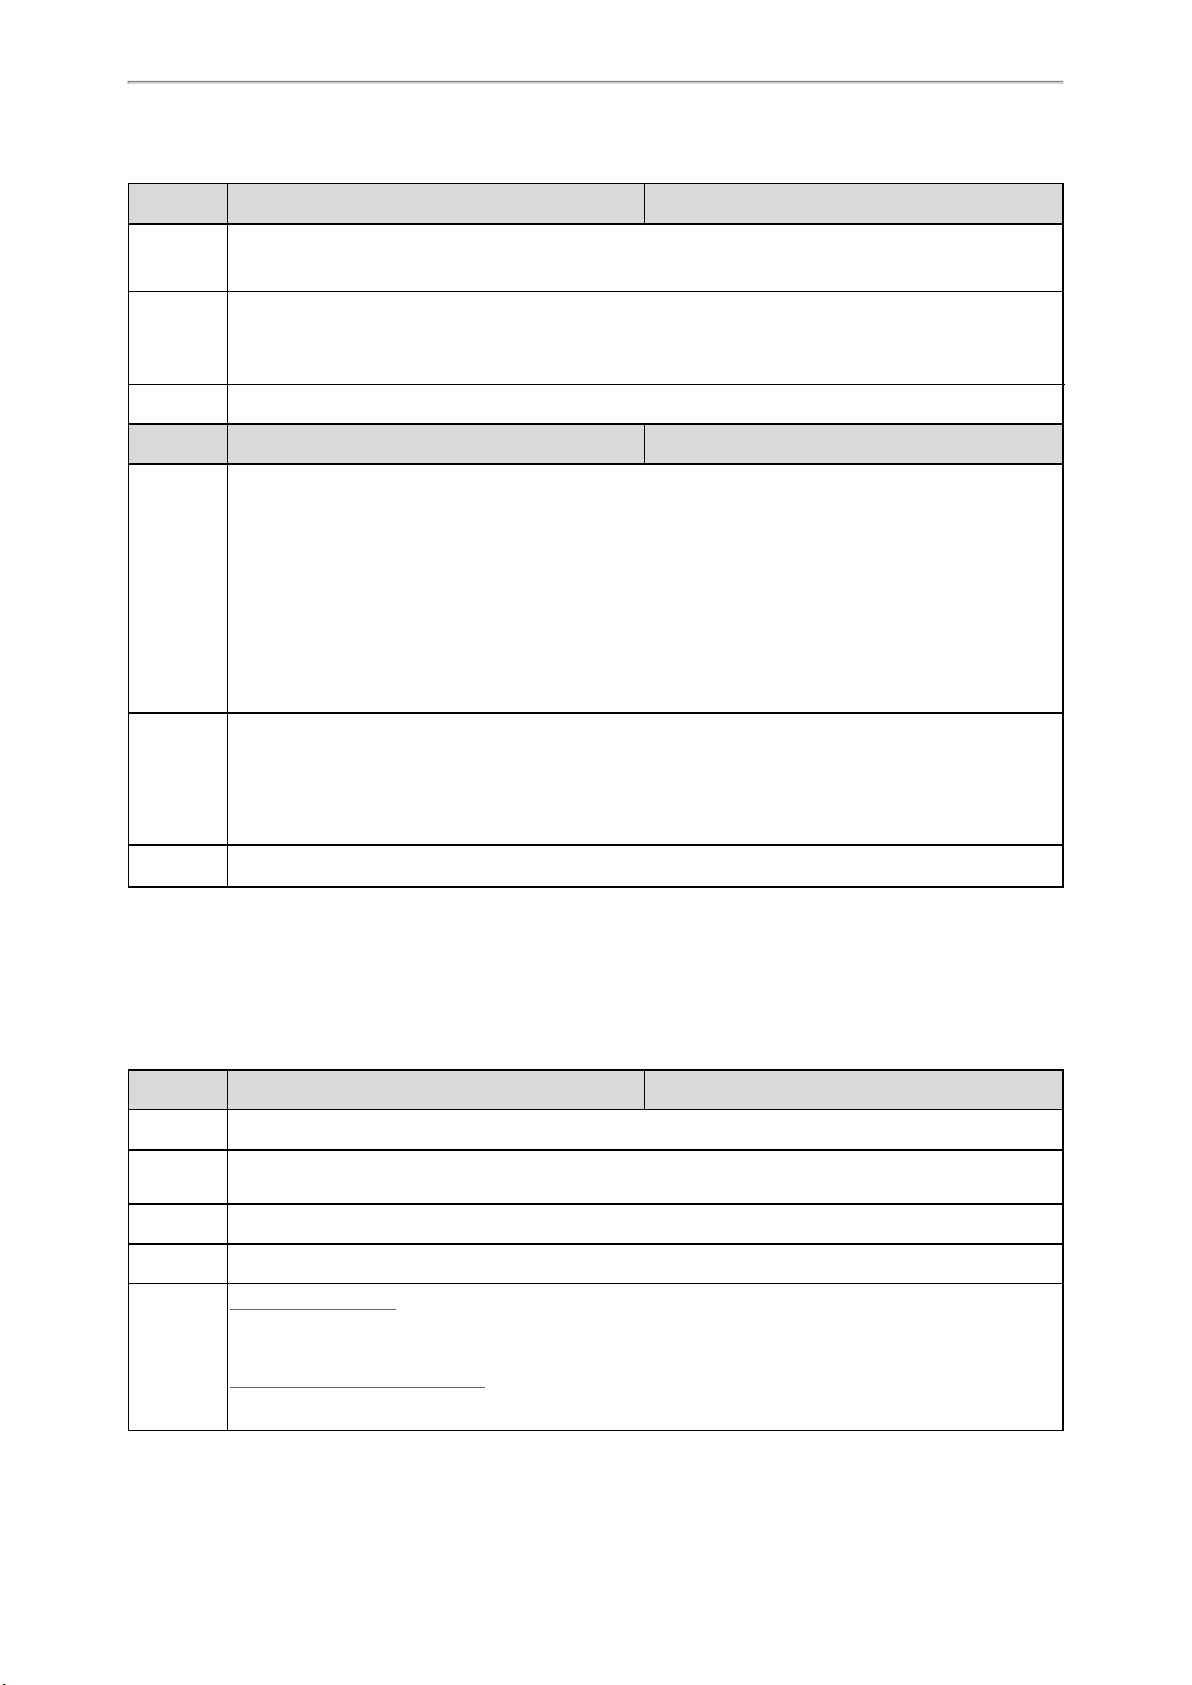
The following table lists the parameters you can use to configure quick login.
Parameter wui.quick_login <y0000000000xx>.cfg
Phone Provisioning
Description
Permitted
Values
Default 0
Parameter wui.secure_domain_list <y0000000000xx>.cfg
Description
Permitted
Values
It enables or disables the quick login feature.
Note: It works only if “static.wui.https_enable” is set to 1 (Enabled).
0-Disabled
1-Enabled, you can quickly log into the web user interface using a request URI (for example, https://IP/ap-
i/auth/login?@admin:admin).
It configures the valid domain name to access the web user interface of the phone.
Multiple domain names are separated by semicolons.
Example:
wui.secure_domain_list = test.abc.com
You are only allowed to use test.abc.com or IP address to access the web user interface of the phone.
Note: To use a domain name to access the web user interface of the phone, make sure your DNS server
can resolve the domain name to the IP address of the phone.
String
If it is left blank, you are only allowed to use the IP address to access the web user interface of the phone.
If it is set to “any”, you can use IP address or any domain name to access the web user interface of the
phone.
Default any
Web Server Type Configuration
Yealink phones support both HTTP and HTTPS protocols for accessing the web user interface. You can configure the
web server type. Web server type determines the access protocol of the web user interface. If you disable to access web
user interface using the HTTP/HTTPS protocol, both you and the user cannot access the web user interface.
The following table lists the parameters you can use to configure web server type.
Parameter
Description It enables or disables to access the web user interface of the phone over a non-secure tunnel (HTTP).
Permitted
Values
Default 1
Web UI Network > Advanced > Web Server > HTTP
Phone UI
static.wui.http_enable
0-Disabled
1-Enabled
Color Screen Phones:
Menu > Advanced (default password: admin) > Network > Web Server > HTTP Status
Black-and-white Screen Phones:
Menu > Settings > Advanced Settings (default password: admin) > Network > Web Server > HTTP Status
[1]
<y0000000000xx>.cfg
81
Page 87
Administrator’s Guide for SIP-T2 Series/T4 Series/T5 Series/CP920 IP Phones
Parameter
Description
Permitted
Values
static.network.port.http
It configures the port used to access the web user interface of the phone over a non-secure tunnel
(HTTP).
Integer from 1 to 65535
[1]
<y0000000000xx>.cfg
Default 80
Web UI Network > Advanced > Web Server > HTTP Port (1~65535)
Color Screen Phones:
Menu > Advanced (default password: admin) > Network > Web Server > HTTP Port
Phone UI
Black-and-white Screen Phones:
Menu > Settings > Advanced Settings (default password: admin) > Network > Web Server > HTTP Port
Parameter
static.wui.https_enable
[1]
<y0000000000xx>.cfg
Description It enables or disables to access the web user interface of the phone over a secure tunnel (HTTPS).
Permitted
Values
0-Disabled
1-Enabled
Default 1
Web UI Network > Advanced > Web Server > HTTPS
Color Screen Phones:
Menu > Advanced (default password: admin) > Network > Web Server > HTTPS Status
Phone UI
Black-and-white Screen Phones:
Menu > Settings > Advanced Settings (default password: admin) > Network > Web Server > HTTPS Status
Parameter
static.network.port.https
[1]
<y0000000000xx>.cfg
Description It configures the port used to access the web user interface of the phone over a secure tunnel (HTTPS).
Permitted
Values
Integer from 1 to 65535
Default 443
Web UI Network > Advanced > Web Server > HTTPS Port (1~65535)
Color Screen Phones:
Menu > Advanced (default password: admin) > Network > Web Server > HTTPS Port
Phone UI
Black-and-white Screen Phones:
Menu > Settings > Advanced Settings (default password: admin) > Network > Web Server > HTTPS Port
[1]
If you change this parameter, the phone will reboot to make the change take effect.
Navigating the Web User Interface
When you log into the web user interface successfully, the device status is displayed on the first page of the web user
interface. You can click the navigation bar to customize or click Log Out to log out of the web user interface.
The following figure is an example when you navigate to Settings > Preference:
82
Page 88
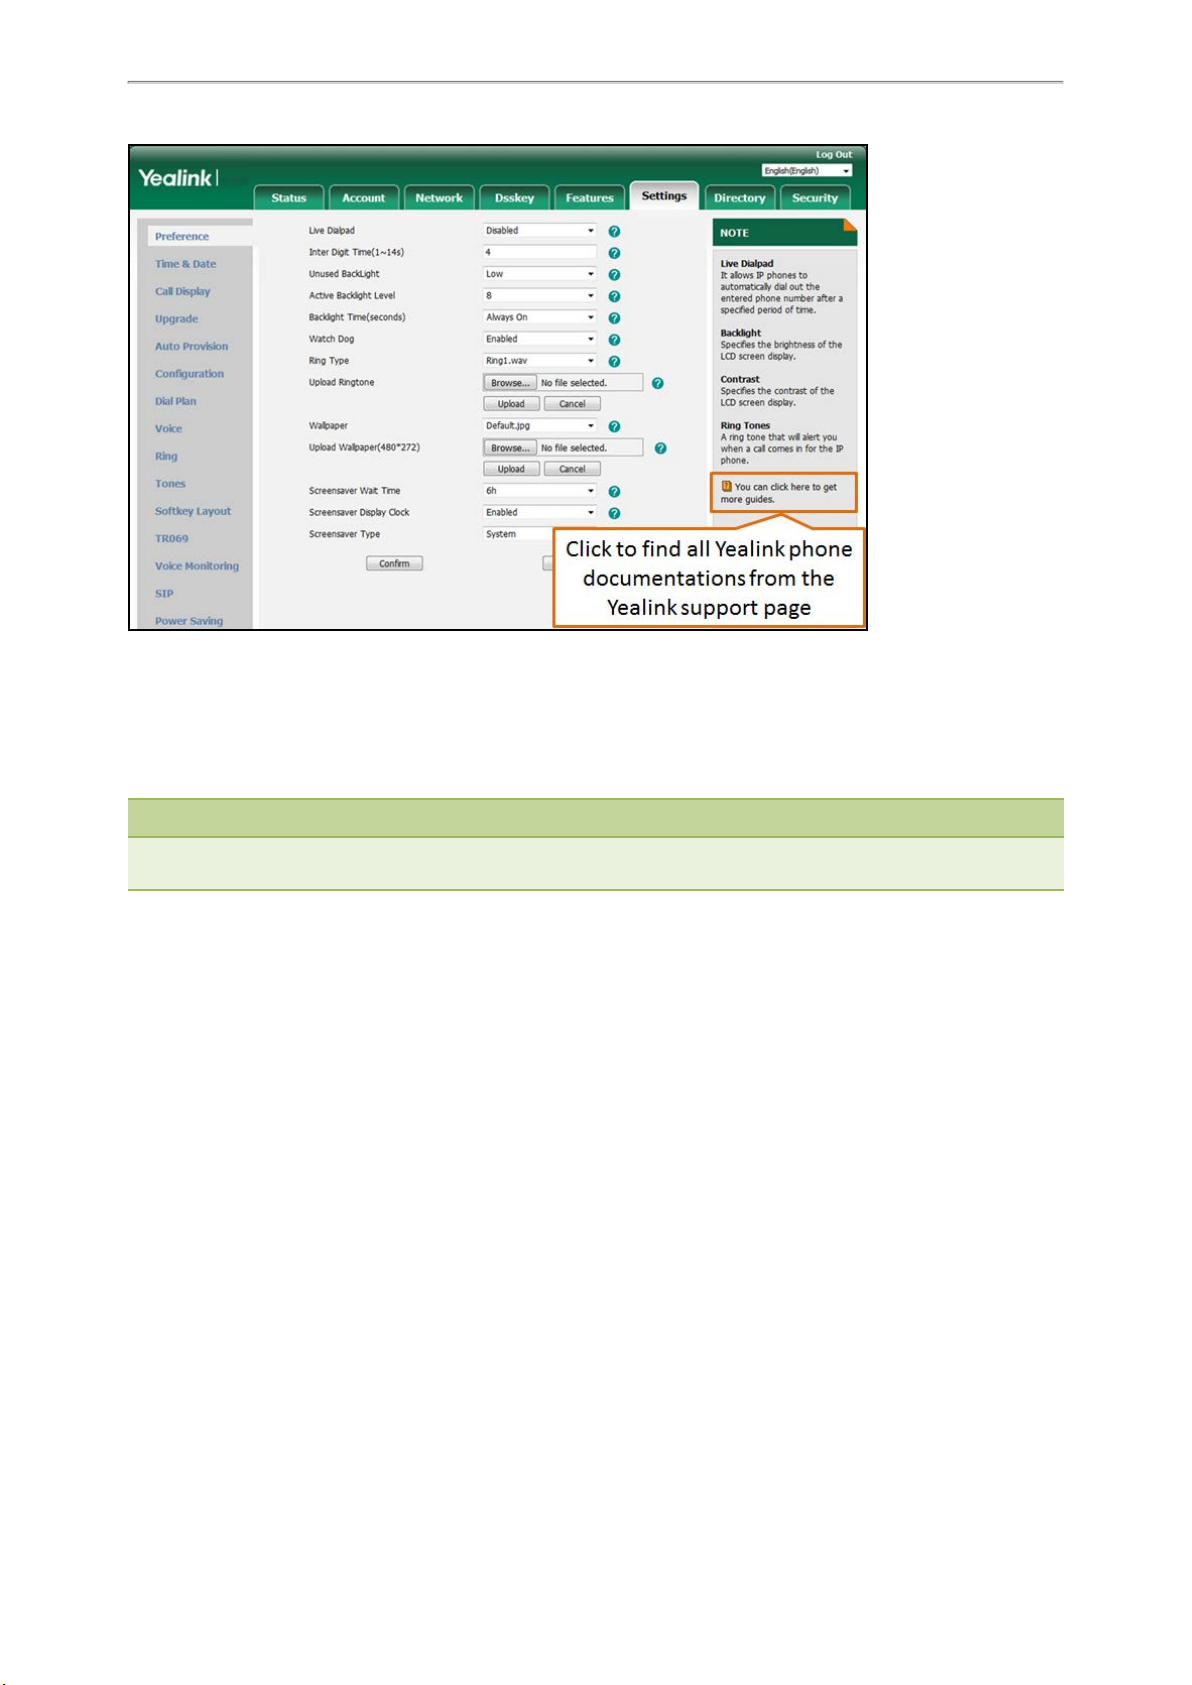
Phone Provisioning
Phone User Interface
The phone user interface makes configurations available to users and administrators; but the Advanced/Advanced Set-
tings option is only available to administrators and requires an administrator password (default: admin).
You can configure the phones via the phone user interface on a per-phone basis.
Note
When you manually configure a phone via the phone user interface, the changes associated with non-static parameters you
make will be stored in the MAC-local CFG file. For more information on MAC-local CFG file, refer to MAC-local CFG File.
Related Topic
User and Administrator Identification
Central Provisioning
Central provisioning enables you to provision multiple phones from a provisioning server that you set up, and maintain
a set of boot files, configuration files and resource files for all phones in the central provisioning server.
The following figure shows how the phone interoperates with provisioning server when you use the centralized provisioning method:
83
Page 89
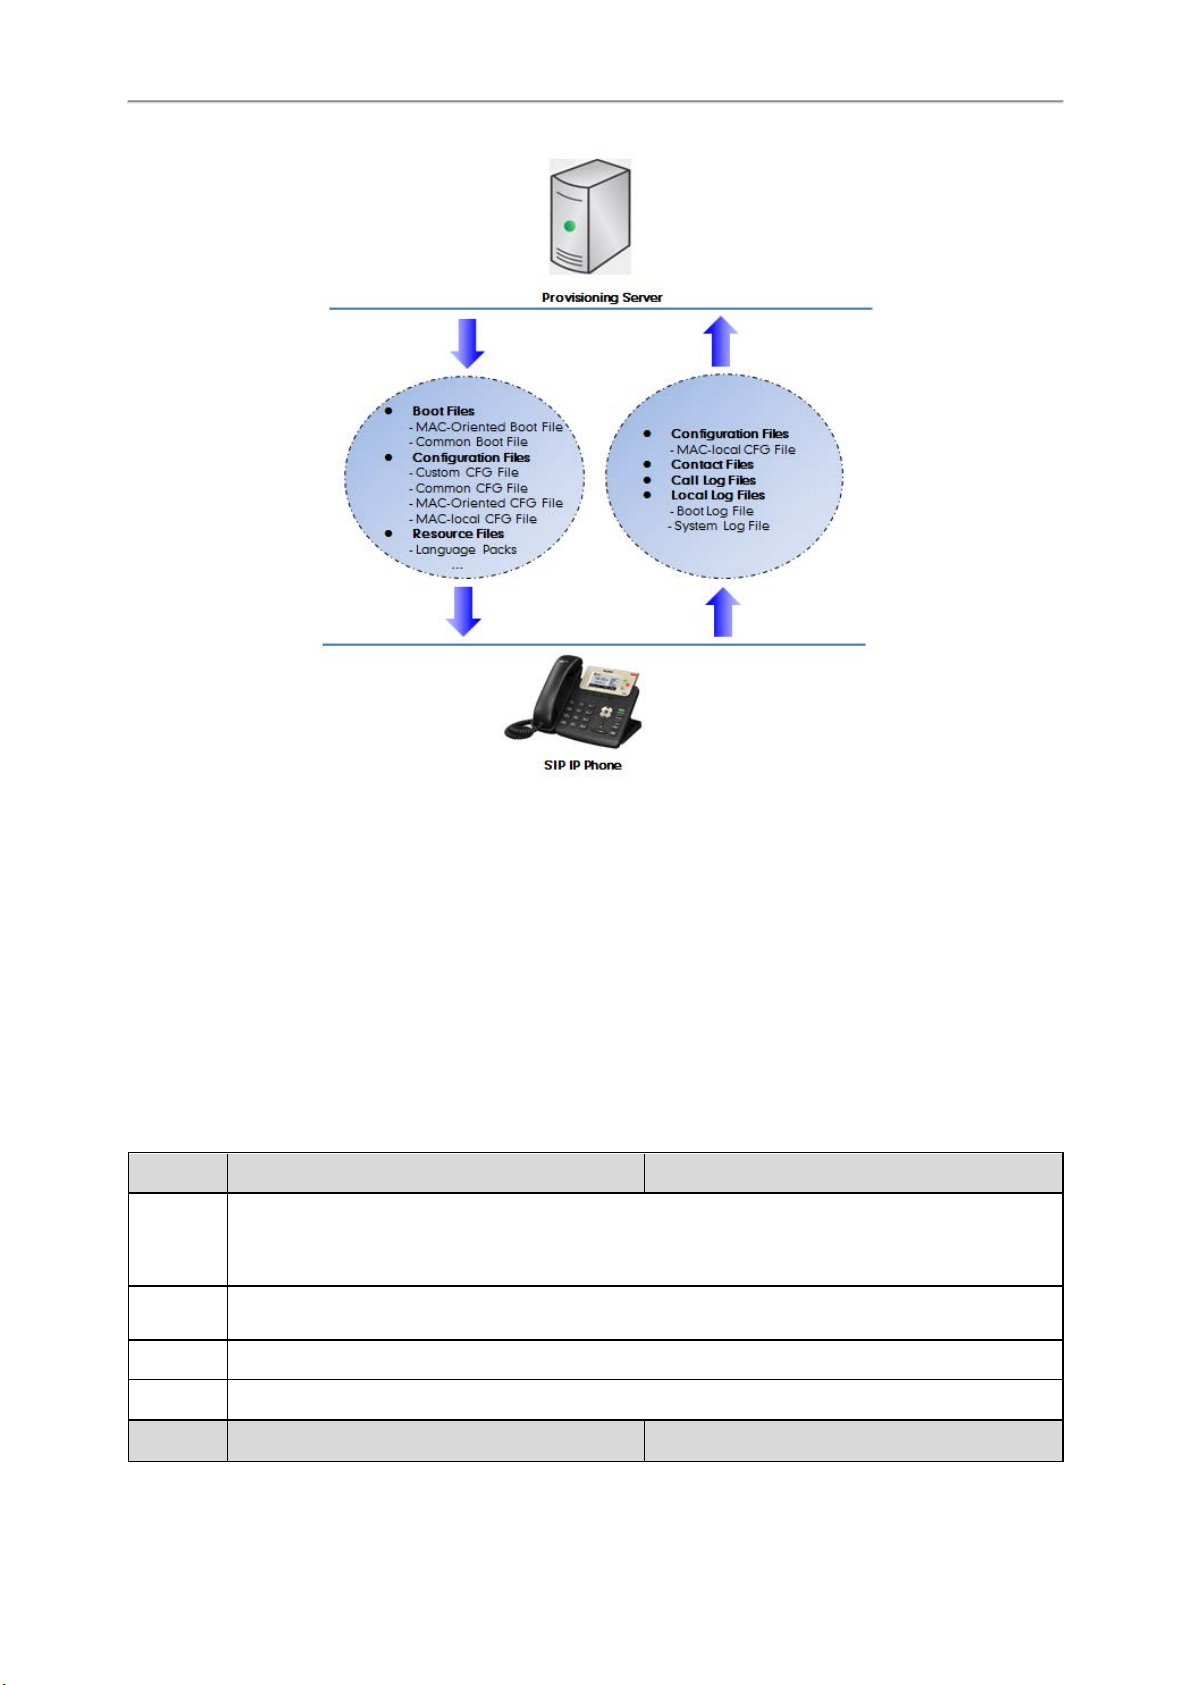
Administrator’s Guide for SIP-T2 Series/T4 Series/T5 Series/CP920 IP Phones
Yealink phones can obtain the provisioning server address during startup. Then the phones first download boot files
and configuration files from the provisioning server and then resolve and update the configurations written in configuration files. This entire process is called auto provisioning. For more information on auto provisioning, refer to
Yealink SIP IP Phones Auto Provisioning Guide.
The phones can be configured to upload log files (log files provide a history of phone events), call log files and contact
files to the provisioning server. You can also configure a directory for each of these three files respectively.
Topics
Auto Provisioning Settings Configuration
User-Triggered Provisioning Settings Configuration
Auto Provisioning Settings Configuration
The following table lists the parameters you can use to configure settings for auto provisioning.
Parameter static.auto_provision.attempt_expired_time <y0000000000xx>.cfg
It configures the timeout (in seconds) to transfer a file via auto provisioning.
Description
Permitted
Values
Default 5
Note: It has a higher priority than the value defined by the parameter “static.network.attempt_expired_
time”.
Integer from 1 to 300
Web UI Settings > Auto Provision > Attempt Expired Time(s)
Parameter
84
static.network.attempt_expired_time
[1]
<y0000000000xx>.cfg
Page 90

It configures the timeout (in seconds) to transfer a file for HTTP/HTTPS connection.
Description
Note: It has a lower priority than the value defined by the parameter “static.auto_provision.attempt_
expired_time”.
Permitted
Values
Integer from 1 to 20
Default 10
Parameter static.auto_provision.attempt_before_failed <y0000000000xx>.cfg
Phone Provisioning
Description
Permitted
Values
Default 3
Parameter
Description
Permitted
Values
Default 5
Parameter
Description
Permitted
Values
It configures the maximum number of attempts to transfer a file before the transfer fails during auto provisioning.
Integer from 1 to 10
static.auto_provision.retry_delay_after_file_transfer_
failed
<y0000000000xx>.cfg
It configures the time (in seconds) to wait after a file transfer fails before retrying the transfer via auto provisioning.
Integer from 0 to 300
static.auto_provision.reboot_force.enable
[1]
<y0000000000xx>.cfg
It enables or disables the phone to reboot after auto provisioning, even if there is no specific configuration requiring a reboot.
Note: It works only for the current auto provisioning process. If you want the phone to reboot after every
auto provisioning process, the parameter must be always contained in the configuration file and set to 1.
If the phone reboots repeatedly after it is set to 1, you can try to set “static.auto_provision.power_on" to 0
(Off).
0-Disabled
1-Enabled
Default Blank
Parameter features.action_uri_force_autop <y0000000000xx>.cfg
It enables or disables the phone to end the call for triggering auto provisioning immediately when receiv-
Description
ing an HTTP or HTTPS GET request with the variable value set to AutoP during a call.
Note: It works only if “features.action_uri.enable” is set to 1 (Enabled).
Permitted
Values
0-Disabled, the phone triggers auto provisioning after the call.
1-Enabled
Default 0
Parameter static.auto_provision.power_on <y0000000000xx>.cfg
Description It triggers the power on feature to on or off.
Permitted
Values
0-Off
1-On, the phone performs auto provisioning when powered on.
85
Page 91

Administrator’s Guide for SIP-T2 Series/T4 Series/T5 Series/CP920 IP Phones
Default 1
Web UI Settings > Auto Provision > Power On
Parameter static.auto_provision.repeat.enable <y0000000000xx>.cfg
Description It triggers the repeatedly feature to on or off.
Permitted
Values
Default 0
Web UI Settings > Auto Provision > Repeatedly
Parameter static.auto_provision.repeat.minutes <y0000000000xx>.cfg
Description
Permitted
Values
Default 1440
Web UI Settings > Auto Provision > Interval(Minutes)
Parameter static.auto_provision.weekly.enable <y0000000000xx>.cfg
Description It triggers the weekly feature to on or off.
Permitted
Values
Default 0
0-Off
1-On
It configures the interval (in minutes) for the phone to perform auto provisioning repeatedly.
Note: It works only if “static.auto_provision.repeat.enable” is set to 1 (On).
Integer from 1 to 43200
0-Off
1-On, the phone performs an auto provisioning process weekly.
Web UI Settings > Auto Provision > Weekly
Parameter static.auto_provision.weekly_upgrade_interval <y0000000000xx>.cfg
It configures the time interval (in weeks) for the phone to perform auto provisioning.
If it is set to 0, the phone performs auto provisioning at the specific day(s) configured by the parameter
“static.auto_provision.weekly.dayofweek” every week.
Description
Permitted
Values
Default 0
Web UI Settings > Auto Provision > Weekly Upgrade Interval(0~12week)
Parameter static.auto_provision.inactivity_time_expire <y0000000000xx>.cfg
Description
If it is set to other values (for example, 3), the phone performs auto provisioning at a random day between
the specific day(s) configured by the parameter “static.auto_provision.weekly.dayofweek” every three
weeks.
Note: It works only if “static.auto_provision.weekly.enable” is set to 1 (On).
Integer from 0 to 12
It configures the delay time (in minutes) to perform auto provisioning when the phone is inactive at regular week.
If it is set to 0, the phone performs auto provisioning at random between a starting time configured by
86
Page 92

the parameter “static.auto_provision.weekly.begin_time” and an ending time configured by the parameter
“static.auto_provision.weekly.end_time”.
If it is set to other values (for example, 60), the phone performs auto provisioning only when it has been
inactivated for 60 minutes (1 hour) between the starting time and ending time.
Note: The phone may perform auto provisioning when you are using the phone during office hour. It
works only if “static.auto_provision.weekly.enable” is set to 1 (On).
Permitted
Values
Default 0
Web UI Settings > Auto Provision > Inactivity Time Expire(0~120min)
Parameter static.auto_provision.weekly.dayofweek <y0000000000xx>.cfg
Integer from 0 to 120
It configures the days of the week for the phone to perform auto provisioning weekly.
Example:
static.auto_provision.weekly.dayofweek = 01
Phone Provisioning
Description
Permitted
Values
Default 0123456
Web UI Settings > Auto Provision > Day of Week
Parameter
Description
Permitted
Values
If “static.auto_provision.weekly_upgrade_interval” is set to 0, it means the phone performs auto provisioning every Sunday and Monday.
If “static.auto_provision.weekly_upgrade_interval” is set to other value (for example, 3), it means the
phone performs auto provisioning by randomly selecting a day from Sunday and Monday every three
weeks.
Note: It works only if “static.auto_provision.weekly.enable” is set to 1 (On).
0,1,2,3,4,5,6 or a combination of these digits
0-Sunday
1-Monday
2-Tuesday
3-Wednesday
4-Thursday
5-Friday
6-Saturday
static.auto_provision.weekly.begin_time
static.auto_provision.weekly.end_time
It configures the starting/ending time of the day for the phone to perform auto provisioning weekly.
Note: It works only if “static.auto_provision.weekly.enable” is set to 1 (On).
Time from 00:00 to 23:59
<y0000000000xx>.cfg
Default 00:00
87
Page 93

Administrator’s Guide for SIP-T2 Series/T4 Series/T5 Series/CP920 IP Phones
Web UI Settings > Auto Provision > Time
Parameter static.auto_provision.flexible.enable <y0000000000xx>.cfg
It triggers the flexible feature to on or off.
Description
Note: The day within the period is based upon the phone's MAC address and does not change with a
reboot, whereas the time within the start and end is calculated again with every reboot.
0-Off
Permitted
Values
Default 0
Web UI Settings > Auto Provision > Flexible Auto Provision
Parameter static.auto_provision.flexible.interval <y0000000000xx>.cfg
Description
Permitted
Values
Default 30
Web UI Settings > Auto Provision > Flexible Interval Days
Parameter static.auto_provision.flexible.begin_time <y0000000000xx>.cfg
Description
Permitted
Values
1-On, the phone performs auto provisioning at random between a starting time configured by the para-
meter "static.auto_provision.flexible.begin_time" and an ending time configured by the parameter "static.auto_provision.flexible.end_time" on a random day within the period configured by the parameter
"static.auto_provision.flexible.interval".
It configures the interval (in days) for the phone to perform auto provisioning.
The auto provisioning occurs on a random day within this period based on the phone's MAC address.
The phone performs auto provisioning on a random day (for example, 18) based on the phone's MAC
address.
Note: It works only if “static.auto_provision.flexible.enable” is set to 1 (On).
Integer from 1 to 1000
It configures the starting time of the day for the phone to perform auto provisioning at random.
Note: It works only if “static.auto_provision.flexible.enable” is set to 1 (On).
Time from 00:00 to 23:59
Default 02:00
Web UI Settings > Auto Provision > Flexible Time
Parameter static.auto_provision.flexible.end_time <y0000000000xx>.cfg
It configures the ending time of the day for the phone to perform auto provisioning at random.
If it is left blank or set to a specific value equal to starting time configured by the parameter “static.auto_
provision.weekly.begin_time”, the phone performs auto provisioning at the starting time.
Description
88
If it is set to a specific value greater than starting time configured by the parameter “static.auto_provision.weekly.begin_time”, the phone performs auto provisioning at random between the starting time
and ending time.
If it is set to a specific value less than starting time configured by the parameter “static.auto_provision.weekly.begin_time”, the phone performs auto provisioning at random between the starting time on
that day and ending time in the next day.
Page 94

Note: It works only if “static.auto_provision.flexible.enable” is set to 1 (On).
Phone Provisioning
Permitted
Values
Default Blank
Web UI Settings > Auto Provision > Flexible Time
Parameter static.auto_provision.prompt.enable <y0000000000xx>.cfg
Description
Permitted
Values
Default 0
Parameter static.auto_provision.connect.keep_alive <y0000000000xx>.cfg
Description It enables or disables the long connection for downloading files via auto provisioning.
Permitted
Values
Default 0
Time from 00:00 to 23:59
It enables or disables the phone to prompt you for the configuration update and the result (if any configuration changes) during auto provisioning.
Note: If the phone performs auto provisioning when receiving a SIP NOTIFY message which contains the
header “Event: check-sync”, the phone will display the prompt message no matter whether the configuration is updated.
0-Disabled
1-Enabled
0-Disabled, the phone uses the short connection for downloading files via auto provisioning
1-Enabled
Parameter static.auto_provision.authentication.expired_time <y0000000000xx>.cfg
Description
Permitted
Values
Default 7200
Parameter static.auto_provision.dns_resolv_nosys <y0000000000xx>.cfg
Description
Permitted
Values
Default 1
Supported
Devices
Parameter static.auto_provision.dns_resolv_nretry <y0000000000xx>.cfg
Description
Permitted
Values
It configures the timeout (in seconds) after which the authentication pop-up box for auto provisioning
disappears.
0-The authentication pop-up box does not disappear from the phone screen automatically.
Integer from 10 to 86400 -The authentication pop-up box automatically disappears from the phone
screen after the designated time.
It enables or disables the phone to resolve the access URL of the provisioning server using download libraries mechanism.
0-Disabled, the phone resolves the access URL of the provisioning server using the system mechanism.
1-Enabled
T42G, T41P, CP920
It configures the retry times when the phone fails to resolve the access URL of the provisioning server.
Note: For each different DNS server, it works only if “static.auto_provision.dns_resolv_nosys" is set to 1
(Enabled).
Integer from 1 to 10
89
Page 95

Administrator’s Guide for SIP-T2 Series/T4 Series/T5 Series/CP920 IP Phones
Default 2
Parameter static.auto_provision.dns_resolv_timeout <y0000000000xx>.cfg
It configures the timeout (in seconds) for the phone to retry to resolve the access URL of the provisioning
server.
Description
Note: For each different DNS server, it works only if “static.auto_provision.dns_resolv_nosys" is set to 1
(Enabled).
Permitted
Values
Integer from 1 to 60
Default 5
[1]
If you change this parameter, the phone will reboot to make the change take effect.
User-Triggered Provisioning Settings Configuration
You can enable the users to trigger phones to perform provisioning by dialing an activation code. This method works
only if there is no registered account on the phone.
The following table lists the parameters you can use to configure settings for user-triggered provisioning.
Parameter
static.autoprovision.X.name
[1][2]
<y0000000000xx>.cfg
Description It configures the code name to trigger auto provisioning.
Permitted
Values
String within 64 characters
Default Blank
Parameter
static.autoprovision.X.code
[1][2]
<y0000000000xx>.cfg
It configures the activation code to trigger auto provisioning.
The activation code can be numeric characters, special characters # * or a combination of them.
Example:
Description
static.autoprovision.1.code = 123
static.autoprovision.2.code = **
static.autoprovision.3.code = *123
Permitted
Values
String
Default Blank
Parameter
Description
Permitted
Values
static.autoprovision.X.url
It configures the access URL of the provisioning server for the phone to perform auto provisioning which
is triggered by an activation code.
URL within 511 characters
[1][2]
<y0000000000xx>.cfg
Default Blank
Parameter
Description
static.autoprovision.X.user
It configures the user name for authentication during auto provisioning which is triggered by an activation code.
90
[1][2]
<y0000000000xx>.cfg
Page 96
Phone Provisioning
Permitted
Values
String within 64 characters
Default Blank
Parameter
Description
Permitted
Values
static.autoprovision.X.password
It configures the password for authentication during auto provisioning which is triggered by an activation code.
String within 32 characters
[1][2]
<y0000000000xx>.cfg
Default Blank
[1]
X is an activation code ID. X=1-50.
[2]
If you change this parameter, the phone will reboot to make the change take effect.
Viewing Configurations Configured via Different Provisioning Methods
On the web user interface, you can click the question mark "?" after each configuration to see its detailed information.
It is only applicable to T57W/T54W/T53W/T53/T48U/T48S/T46U/T46S/T43U/T42S/T41S/T27G/CP920 phones.
From the detailed information, you can do the following:
l Check whether settings you make using a higher priority provisioning method override settings made using a lower
priority provisioning method.
l Reset a configuration to factory setting.
l See the default value of the desired configuration.
The table lists each parameter in the detailed information.
Parameter Description
Description Description of this configuration item
CFG Configuration The parameter in the configuration file
Valid Value The permitted values
Not Applicable: the value is not changed via phone or
web user interface.
Specific value: the value is changed via phone or web
user interface. Click Reset to reset the value.
Not Applicable: the parameter is not changed in the configuration files.
Specific value: the parameter is changed in the configuration files. Click Reset to reset the value.
Configuration Source Values (This
appears only when the parameter
“static.auto_pro-
Web/Local:
(It appears only for a
non-static parameter.)
Config:
(It appears only for a
non-static parameter.)
vision.custom.protect” is set to 1.)
Not Applicable: the parameter is not configured in any
Static:
(It appears only for a
static parameter)
provisioning method.
Specific value: the value is configured in any provisioning method. Click Reset to reset the value.
Default: Default value
91
Page 97

Administrator’s Guide for SIP-T2 Series/T4 Series/T5 Series/CP920 IP Phones
Setting Up a Provisioning Server
You can use a provisioning server to configure your phones. A provisioning server allows for flexibility in upgrading,
maintaining and configuring the phone. Boot files, configuration files, and resource files are normally located on this
server.
Topics
Supported Provisioning Protocols
Supported Provisioning Server Discovery Methods
Configuring a Provisioning Server
Supported Provisioning Protocols
Yealink phones support several transport protocols for provisioning:
l Trivial File Transfer Protocol (TFTP)
l File Transfer Protocol (FTP)
l Hyper Text Transfer Protocol – Secure (HTTPS)
l File Transfer Protocol – Secure (FTPS)
Note
There are two types of FTP methods—active and passive. The phones are not compatible with active FTP.
You can specify the transport protocol in the provisioning server address, for example, http://xxxxxxx. If not specified,
the TFTP protocol is used.
Topic
Provisioning Protocols Configuration
Provisioning Protocols Configuration
The following table lists the parameters you can use to configure provisioning protocols.
Parameter static.auto_provision.server.type <y0000000000xx>.cfg
It configures the protocol the phone uses to connect to the provisioning server.
Description
Permitted
Values
Default TFTP
Parameter
Note: It works only if the protocol type is not defined in the access URL of the provisioning server con-
figured by the parameter "static.auto_provision.server.url".
1-HTTP
2-HTTPS
3-FTP
Other values-TFTP
static.auto_provision.user_agent_mac.enable
[1]
<y0000000000xx>.cfg
Description
Permitted
Values
Default 1
92
It enables or disables the phone's MAC address to be included in the User-Agent header of HTTP/HTTPS
request via auto provisioning.
0-Disabled
1-Enabled
Page 98

Phone Provisioning
[2]
If you change this parameter, the phone will reboot to make the change take effect.
Supported Provisioning Server Discovery Methods
After the phone has established network settings, it must discover a provisioning server to obtain software updates and
configuration settings.
The IP phone supports the following methods to discover the provisioning server address:
l Zero Touch: Zero Touch feature guides you to configure network settings and the provisioning server address via
the phone user interface after startup.
l PnP: PnP feature allows the phones to discover the provisioning server address by broadcasting the PnP SUBSCRIBE
message during startup.
l DHCP: DHCP option can be used to provide the address or URL of the provisioning server to phones. When the IP
phone requests an IP address using the DHCP protocol, the resulting response may contain option 66 (for IPv4)/option 59 (for IPv6) or the custom option (if configured) that contains the provisioning server address.
l Static: You can manually configure the server address via phone user interface or web user interface.
Topics
Zero Touch Provision Configuration
PnP Provision Configuration
DHCP Provision Configuration
Static Provision Configuration
Zero Touch Provision Configuration
The following table lists the parameters you can use to configure the Zero Touch provision.
Parameter static.zero_touch.enable <y0000000000xx>.cfg
Description
Permitted
Values
Default 0
Web UI Settings > Auto Provision > Zero Active
Parameter static.zero_touch.wait_time <y0000000000xx>.cfg
Description It configures the duration time (in seconds) for the phone to display Zero Touch screen during startup.
Permitted
Values
Default 5
Web UI Settings > Auto Provision > Wait Time(1~100s)
Parameter static.zero_touch.network_fail_wait_times <y0000000000xx>.cfg
Description It configures the reconnection times when zero touch module fails to obtain network parameters.
It enables or disables the zero touch for the phone to configure the network parameters and provisioning
server address via the phone user interface during startup.
0-Disabled
1-Enabled
Integer from 1 to 100
Permitted
Values
Default 8
Integer from 1 to 2147483646
93
Page 99
Administrator’s Guide for SIP-T2 Series/T4 Series/T5 Series/CP920 IP Phones
Parameter static.zero_touch.network_fail_delay_times <y0000000000xx>.cfg
Description
Permitted
Values
Default 1000
Parameter static.features.hide_zero_touch_url.enable <y0000000000xx>.cfg
Description It enables or disables the phone to hide the provisioning URL item on the Zero Touch screen.
Permitted
Values
Default 0
It configures the duration time (in milliseconds) of every reconnection when zero touch module fails to
obtain network parameters.
Integer from 1000 to 2147483646
0-Disabled
1-Enabled
PnP Provision Configuration
The following table lists the parameter you can use to configure PnP provision.
Parameter static.auto_provision.pnp_enable <y0000000000xx>.cfg
Description It triggers the Plug and Play (PnP) feature to on or off.
Permitted
Values
0-Off
1-On, the phone broadcasts SIP SUBSCRIBE messages to obtain a provisioning server URL where the
phone can request the configuration from during startup.
Default 1
Web UI Settings > Auto Provision > PNP Active
Parameter static.auto_provision.pnp_check_url.enable <y0000000000xx>.cfg
Description
Permitted
Values
Default 0
Supported
Devices
It enables or disables the phone to match the received provisioning URL with the last one from where the
phone successfully requests the configuration via a PnP provision.
0-Disabled
1-Enabled, the phone performs a PnP provision again only when the provisioning URLs are matched.
All phones except T48G, T46G, T42G, T41P, and T29G
DHCP Provision Configuration
You can select to use IPv4 or IPv6 custom DHCP option according to your network environment. The IPv4 or IPv6 custom DHCP option must be in accordance with the one defined in the DHCP server.
The following table lists the parameters you can use to configure DHCP provision.
Parameter static.auto_provision.dhcp_option.enable <y0000000000xx>.cfg
Description It triggers the DHCP Active feature to on or off.
Permitted
Values
0-Off
1-On, the phone obtains the provisioning server address by detecting DHCP options.
94
Page 100

Default 1
Web UI Settings > Auto Provision > DHCP Active
Color Screen Phones:
Phone Provisioning
Phone UI
Parameter static.auto_provision.dhcp_option.list_user_options <y0000000000xx>.cfg
Description
Permitted
Values
Default Blank
Web UI Settings > Auto Provision > IPv4 Custom Option
Phone UI
Parameter static.auto_provision.dhcp_option.list_user6_options <y0000000000xx>.cfg
Menu > Advanced (default password: admin) > Auto Provision > DHCP Active
Black-and-white Screen Phones:
Menu > Settings > Advanced Settings (default password: admin) > Auto Provision > DHCP Active
It configures the IPv4 custom DHCP option for requesting provisioning server address.
Multiple options are separated by commas.
Note: It works only if “static.auto_provision.dhcp_option.enable” is set to 1 (On).
Integer from 128 to 254
Color Screen Phones:
Menu > Advanced (default password: admin) > Auto Provision > IPv4 Custom Option
Black-and-white Screen Phones:
Menu > Settings > Advanced Settings (default password: admin) > Auto Provision > IPv4 Custom Option
It configures the IPv6 custom DHCP option for requesting provisioning server address.
Description
Permitted
Values
Default Blank
Web UI Settings > Auto Provision > IPv6 Custom Option
Phone UI
Parameter static.auto_provision.url_wildcard.pn <y0000000000xx>.cfg
Description
Permitted
Values
Default For T57W phones: T57W.
Multiple options are separated by commas.
Note: It works only if “static.auto_provision.dhcp_option.enable” is set to 1 (On).
Integer from 135 to 65535, except 143
Color Screen Phones:
Menu > Advanced (default password: admin) > Auto Provision > IPv6 Custom Option
Black-and-white Screen Phones:
Menu > Settings > Advanced Settings (default password: admin) > Auto Provision > IPv6 Custom Option
It configures the characters to replace the wildcard $PN in the received URL of the provisioning server.
Note: The configured characters must be in accordance with the actual directory name of the provisioning server.
String within 32 characters
95
 Loading...