

Page 1

ATTAC
E
T
0
A
TO
AL
Rear Engine
for Single Bag
Mfg. No.
7600101
107.249820
Foranswerstoyourquestionsaboutthisproduct, call:
1-800-935-2967
Briggs & Stratton Yard Power Products
8 am - 4 pm, Monday - Friday
Description
Single Bag Catcher
CAUTION: Read and follow all instructions
7104048 -
Rev.: A
Rev. Date: 01/2010
Page 2

Tableof Contents
Operator Safety.................................................................... 4
GeneralWarnings ................................................................................. 4
SafetyDecals........................................................................................ 4
Assembly............................................................................ 5
Bag Rod installation.............................................................................. 5
FrameAssembly................................................................................... 5
Dust Skirt installation ........................................................................... 5
CoverAssembly.................................................................................... 6
Muffler Shield installation..................................................................... 6
Attach Coverand FrameAssemblyto Tractor....................................... 6
TubeAssembly...................................................................................... 7
Attach BaggerAdapter.......................................................................... 7
Attach Handleto Tube........................................................................... 7
Tubeinstallation.................................................................................... 8
Finalinstallation .................................................................................... 8
Operation............................................................................ 9
PartsList............................................................................ 10
Warranty............................................................................. 11
NOTE. In these instructions, "left" and "right" are referencedfrom the operating
position.
Page 3
OperatorSafety
Readthese safetyruJesandfoiJowthemcJoseJy.Failureto obeytheserules couJdresult in lossof controJof unit,
severepersonal injuryor deathtoyou, or bystanders,or damageto propertyor equipment.The_,triangJe in text
signifiesimportantcautionsor warningswhichmust be followed.
GeneralWarnings
* Knowthe unit's controls and how to stop quickly. READ
THEOPERATOR'SMANUALS.
, Readand obeyall safety decals.
Onlyallow responsible adults, who arefamiliar with the
instructions, to operatethe unit.
Disengagethe PTO.Shutoff the engine andwait for
all moving parts to stop before attaching, adjusting, or
disconnecting any part ofthe collection system.
Checkthe collection systemto make sureit is bolted
tightly to the unit.
DONOToperate the unit without eitherthe entiregrass
catcheror the deflector in place.
Turn off the PTOto disengagethe blades when not
mowing.
DONOTmow in reverseunless absolutely necessary.
Always look down and behind before andwhile travelling
in reverse.
DONOTturn sharply whentravelling alongsidea building
or any object. Slow down before turning.
DONOTcarry passengers.
When collection system is removed from the mower
deck,the deflector must be properly installed.
Collectorbags are subject to deterioration andwear
during normal use. inspectthe bagperiodically for tears,
holes, or weak spots and replacewith a new bagthat
meetsmanufacturer's durability standards.
, Foraddedstability and to preventtipping or loss of
control:
a.Use reducedspeedon uneven ground andwhen
turning corners.
b. Reduceloadson hillsides, it is recommendedthat the
collection system be kept only half full when negotiating
anyslopes. Start mowing on slopeswhen the collection
system is empty.
c. Mow up anddown the face of slopes; neveracross
the face of any slope.
o Never operate on slopes greater than 17.6% (10°).
Safety Decals
Severalsafety labelsare installed on the unit to remind you
of important information while you areoperating your unit.
All DANGER,WARNING, CAUTIONand instructional mes-
sages on your rider, attachments and mower should be
carefully readand obeyed. Personalbodily injury can result
when these instructions are not followed. The safety decals
beloware on your product.
If anydecalsare lost or damaged,replacethem at once.
Seeyour local dealer for replacements.
These labelsare easily applied andwill act asa con-
stant visual reminder to you, and others who may usethe
equipment, to follow the safetyinstructions necessaryfor
safe,effective operation.
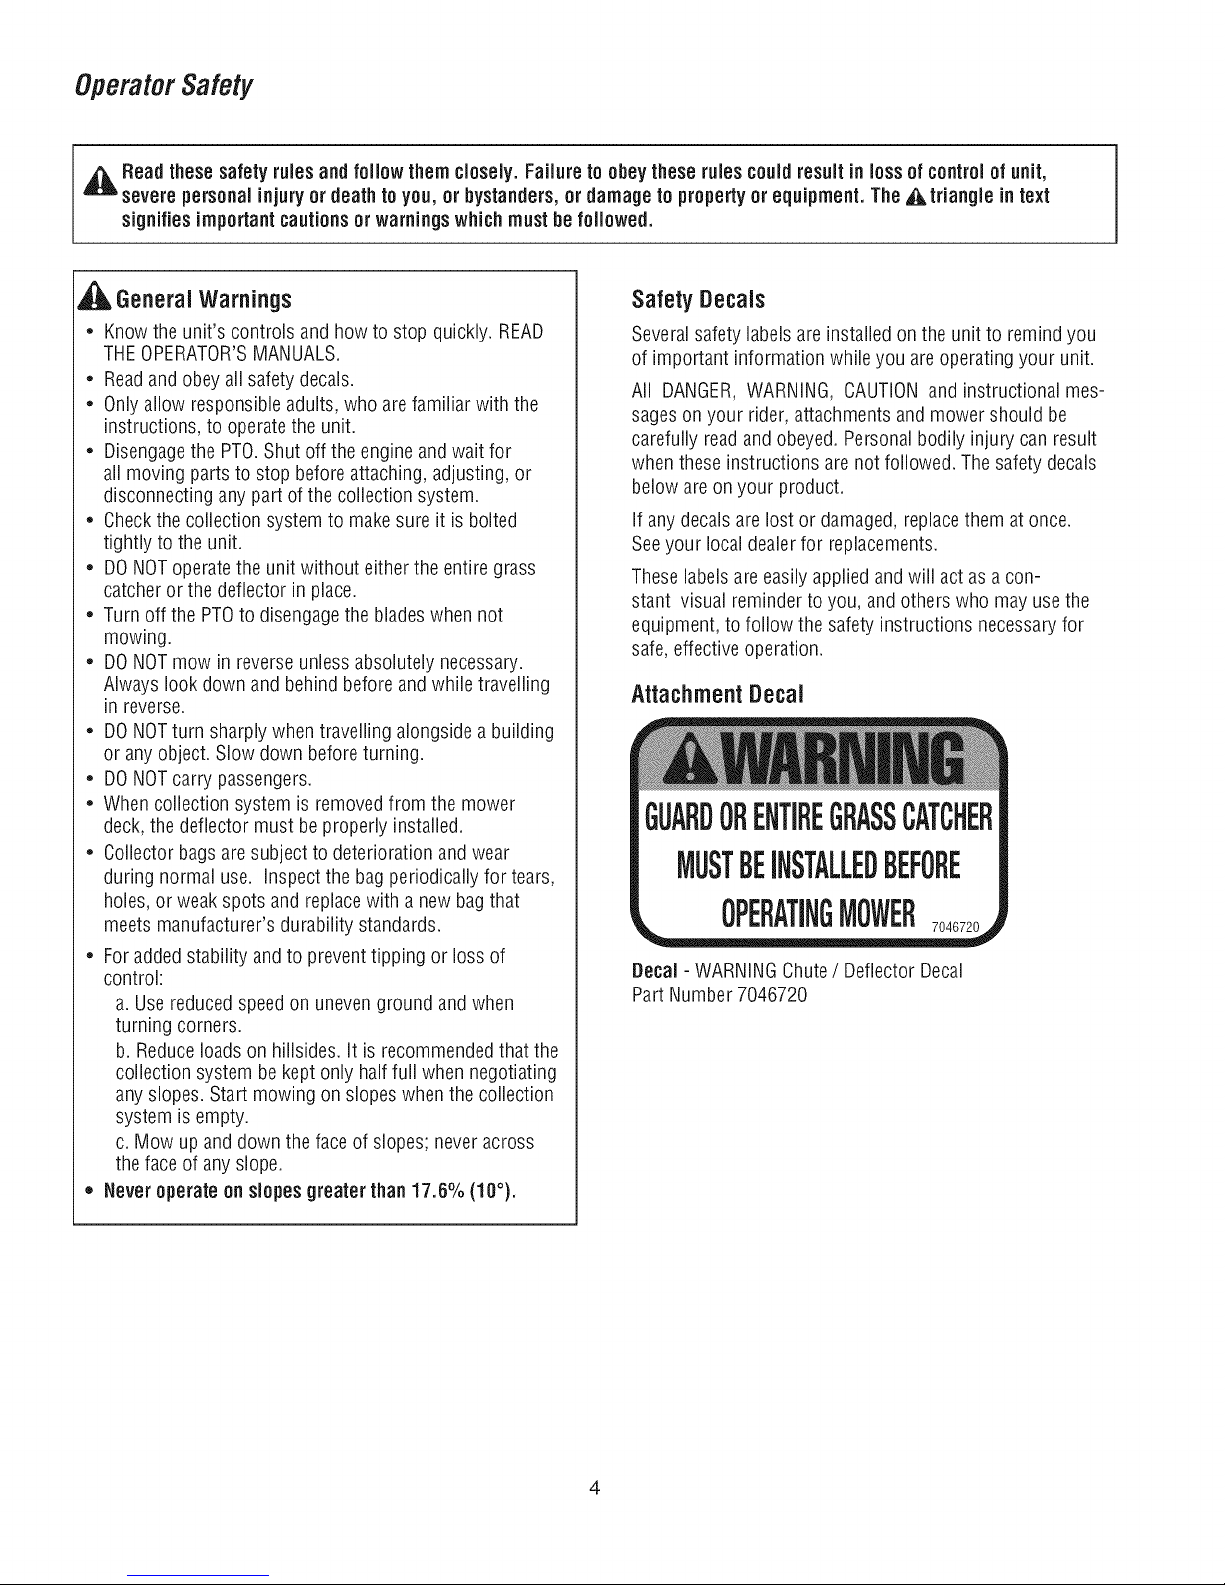
Attachment Decal
Decal- WARNINGChute/ Deflector Decal
PartNumber 7046720
Page 4
Assembly
NOTE:In this manual, "left" and "right" are always defined from
the standpoint of the operator position facing forward from seat.
_WARNING: Beforebeginning anyservicework turn off
the PTO,set the parking brake, turn off the ignition, and
disconnect the spark plug wires).
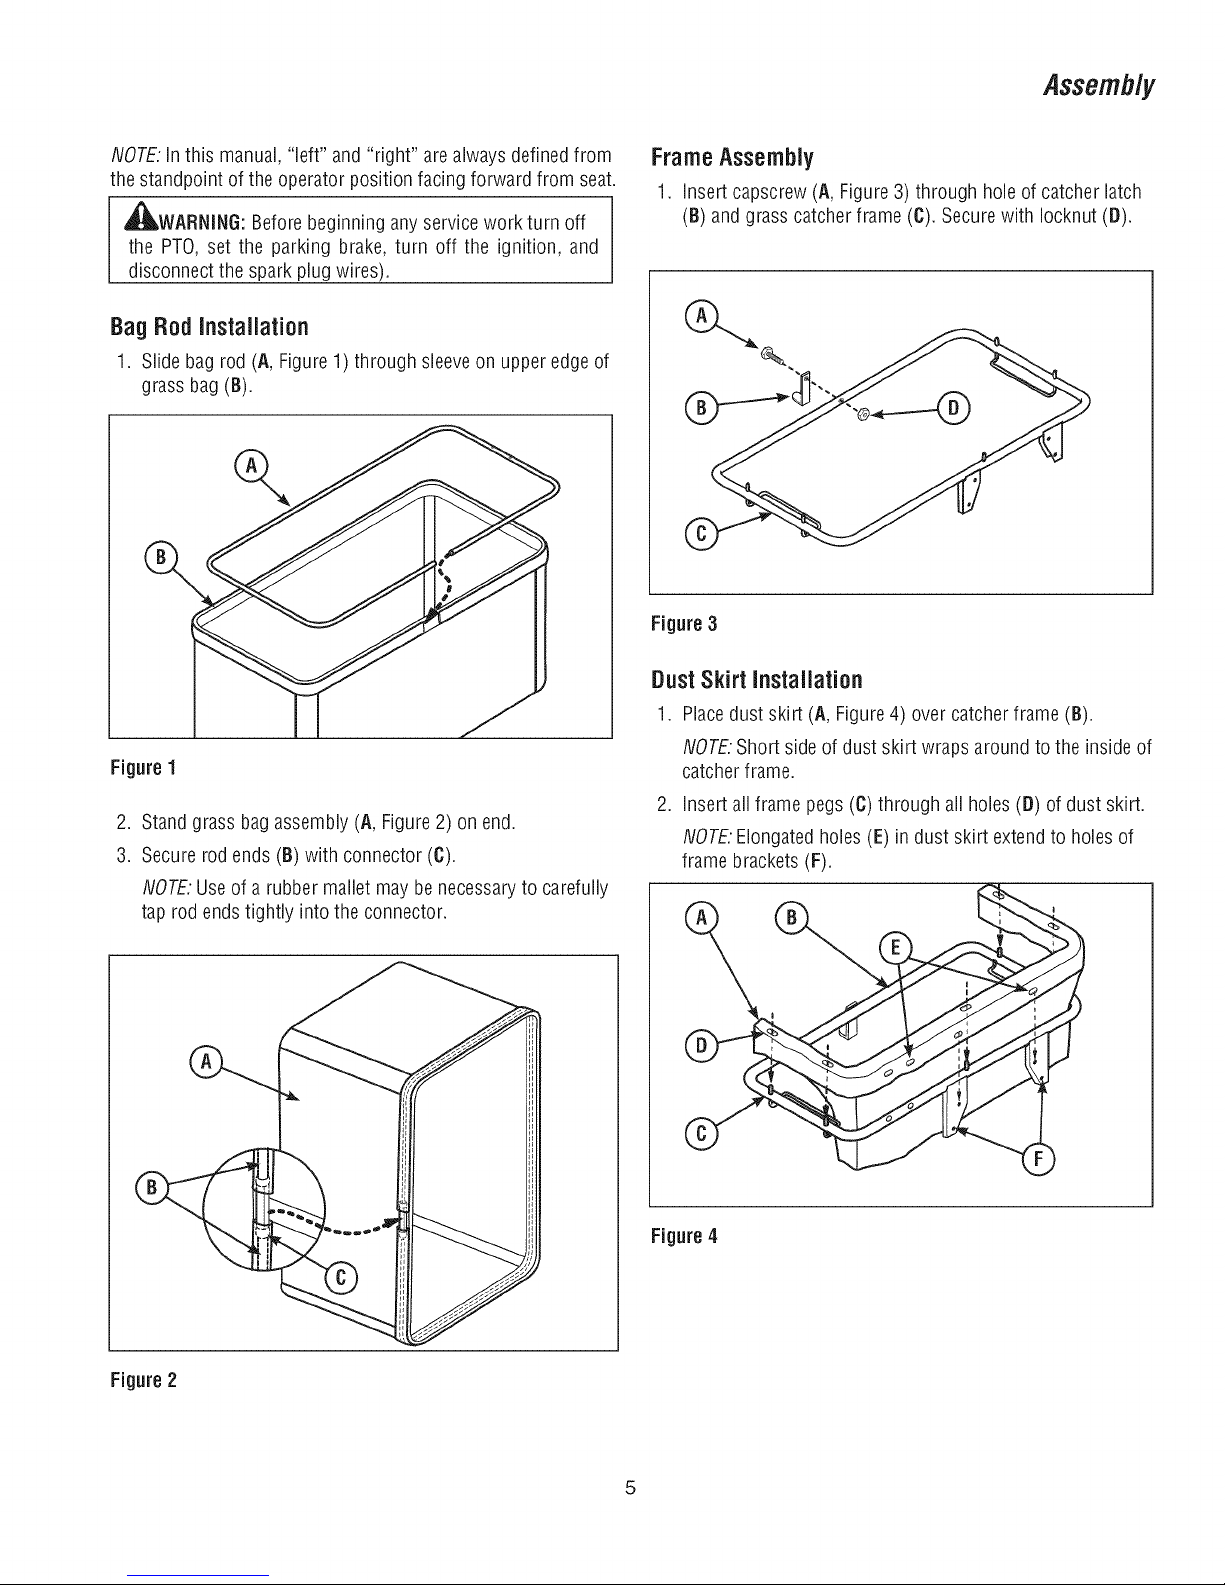
BagRodInstallation
1. Slidebag rod (A, Figure 1) through sleeveon upper edge of
grass bag (B).
%
Figure 1
FrameAssembly
1. insert capscrew (A, Figure3) through hole of catcher latch
(B) and grass catcher frame (C). Securewith Iocknut (D).
Figure 3
DustSkirt Installation
1. Placedust skirt (A, Figure4) over catcherframe (B).
NOTE.Short sideof dust skirt wraps around to the inside of
catcherframe.
.
Standgrass bag assembly (A, Figure2) on end.
3.
Securerod ends (B) with connector (C).
NOTE.Useof a rubber mallet may be necessaryto carefully
tap rod endstightly intothe connector.
Figure 2
2. insert all frame pegs(C)through all holes (D) of dust skirt.
NOTE.Elongatedholes (E) in dust skirt extendto holes of
frame brackets (F).
Figure 4
5
Page 5

Assembly
CoverAssembly
1. Placecover (A,Figure5) overtop of grass catcher
assembly(B) and insert frame pegs(C) through holes(D)
of cover.
2. Usinga 1/2' socket wrench, secureframe pegswith fac-
etedwashers (E).
Figure 5
2. install shield (C, Figure7) to right side rearbumper (B) and
securewith existing screws (A).
Figure 7
Attach Cover/ FrameAssembly to Tractor
1. Postionbaggerframe brackets (A, Figure8) onto bumper
posts (B).
2. insert clevis pins (C)through bottom holeson eachsideof
baggerframe bracketsand secure with hairpins (D).
Muffler Shield Installation
1. Removethe two screws (A, Figure6) securing the right side
rear bumper (B).
Figure 6
Figure 8
Page 6

Assembly
TubeAssembly
1. Placetube latch (A, Figure9) on baggeradapter
assembly(B).
2. insert carriage bolt (C)through top hole (D) andsecure with
washer (E)and nut (F).
Figure 9
Attach BaggerAdapter
1. Removeexisting bolts and wing nuts from deflector chute.
2. Rotatedeflector (A, Figure10) up to expose insideof
baggeradapterhinge (B).
3. Positionadapter(C) and align the lugs (D) with hinge lug
retainers (E).
4. Slidelugs (D, Figure11)into hinge lug retainers(E) to
secure(A) on deflector hinge (B).
5. Secureadapterto the deck with bolt (F) and wing nut (G).
Figure 11
Attach Handleto Tube
1. insert bolts (A, Figure 12) through handle base(B), catcher
tube (C) and handle (D).
2. Securewith locking washers (E) and hexnuts (F).
Figure 10
Figure 12
7
Page 7

Assembly
TubeInstallation
1. insert catcher tube (A, Figure13) in opening of grass
catchercover (B).
Figure 13
2. Slidelower endof tube (A, Figure14) over adapter end (B)
3. Rotatetube towards mower to secure handle hook (C)
under latch (D).
.
insert bolts (A, Figure16) through debris shield (B), holes
of dust skirt and catcherframe.
Note:Debris shield needto be positioned close enough to
catchertube in order to prevent any gap betweentube and
sheild. DONOTsqeezecatchertube.
.
Securedebris sheild with washers (C) and Iocknuts (D).
Note:Tube must slide freely betweencatcher and debris
shield. If thetube does not slidefreely, repeatStep4.
\
|
Figure 14
2. Placedebris shield (A, Figure15) underthe catcher tube
(B) with the offset hole pattern towards the center of the
tractor
Note:if thereare no holes in the dust skirt for mounting the
debrissheiid, CAREFULLYpuncture two holes to accom-
modateassembly.
Figure 16
Final Installation
1. Rotatelatch up(A, Figure17) on catcher frame (B) to a
horizontal position.
2. Slidegrass bagassmbly (C) into brackets (D) catcherframe
Note:Mesh side of catcher bagshould face awayfrom
tractor.
1
Figure 15
Figure 17
Page 8

BeforeOperation
Clearthe lawn of all sticks, stones, wire and other debris
which may becaught or thrown by the mower blades.
Checkgrass condition, if wet, wait until later in the day.
If grass is wet, the grass catcheris likely to become
plugged.
Forefficient bagging, air circulation under the mower
deck,through the chute and into the bag isvery impor-
tant.
Forthis reason, BEFOREYOUBEGINMOWINGyou
should makecertain the underside of the mower and
the underside of the catcherlid are freefrom grass and
debris.
Makesure that there is a snug fit betweenmower deck,
blower housing, tubes, and grass catchercover.
Operation
Mowing with the Catcher
Alwaysoperate with throttle at full speedwhen mowing.
Grassshould becut often, and not too short. If grass istoo
long or lush it may be necessaryto keepground speedto a
minimum or to cut only half the width of the mower to pre-
vent clogging, if grass is long, operatewith mower in high
cutting position for first pass,cutting again in a lower posi-
tion on a second pass.
Bo notopenthe coverwith mowerengaged.
If a large amount of cut grass is spilling out from under
deck,the tube may be plugged or the bagsmay be full--
discontinue mowing, stop the unit, disengagethe PTO,shut
off the engineand then empty the catcheror clear the tube.
_ WARNING:ALWAYSshut off the tractor. Disengage
the PTO,andallow all moving parts to stop BEFORE
disconnecting or clearingtube, or emptying catcher.
Beforeleavingthe operator's position for any reason,
engagethe parking brake,disengage the PTO,stop the
engine and removethe key.
To reducefire hazard,keep the engine, rider and mower
free of grass, leavesand excessgrease.Do not stop
or park rider overdry leaves,grass or combustible
materials.
After Operation
Removeany debrisfrom the screenon the underside of the lid.
The blower housing and tube should be removedfor cleaning.
inspect the grass bagsfor wear or damage.Make surethat
there is a snug fit betweenmower deck, blower housing, tubes,
and grass catchercover.
_1_ CAUTION:Do not leavegrass in bagger containers.
Empty containersafter eachuseand beforestoring.
Failureto do so may result in spontaneous combustion
which could developinto afire.
_IL CAIJTION:Beforeyou begin operating the unit be
certain you havereadall of the safety and operational
information of this instruction sheet,aswell as the
Operator's Manualfor thetractor and anyother
attachments.
NOTE. Neveroperateon slopes greaterthan 17.6% (10°).
9
Page 9

Parts List
Kit Contents:
Level item
1 0010
1 0030
1 0040
1 0050
1 0060
1 0070
Number
7014517
7016108
7019251
7037758
7047973
7057816
Object Description
GRASSTUBE,28-33
SKIRT,Dust
GRASSBAG,Single
ROD,Bag
FRAME, GrassBag
ADAPTERASSEMBLY,Bagger
Quantity
1
1
1
1
1
1
1
2
2
2
2
2
2
2
2
2
2
2
2
2
2
2
1
1
1
1
1
1
0080 7060313
0010 7012556
0020 7029840
0030 7029841
0040 7031725
0050 7031951
0060 7031952
0070 7037745
0080 7090376
0090 7090532
01O0 7091303
0110 7090053
0120 7091503
0130 7091530
0140 7091537
0150 7091576
0090 7063287
01O0 7071677
0110 7090909
0120 7091294
0130 7091705
0160 7501833
HARDWAREBAG
CONNECTOR,1/2 x 3
PALNUT,Washer, Faceted,5/16
CLEVISPiN, 5/16 x 1-11/16
LATCH,Grass Catcher
LATCH,Tube
BASE,TUBEHANDLE,YELLOW
HANDLE,Tube
NUT, Hex,Locking,#10
CAPSCREW,HexHead,Machine,#10 x 1-3/8, G2
BOLT,Carriage,5/16xl, GR5
WASHER,Locking, 1/4 (prev. 7091314)
HAIRPIN,3/32 x 1-1/2
BOLT,Carriage.1/4x 3/4, G5
WlNGNUT,5/16
NUT, Hex,1/4, GR5
SHIELD,Grasscatcher
MUFFLERGUARD,GrassCatcher
CAPSCREW,HexHead,1/4 x 1-1/2, G2
WASHER,Flat,9/32 x 5/8
NUT, Hex,Locking,Tapered, 1/4
GRASSCONTAINERASSEMBLY,Top
1
1
5
2
1
1
1
1
1
1
1
3
2
3
1
3
1
1
2
2
2
1
J0080-10
/0080-00 _ 0100
_oo0o _o _oo0o
U 0000-40
_o./ooeo-2o _ooeo-lso _ ooso-go _zollo
@ ® oo8o-13o
_J0080-110
_Jooeo-12o _ ©
_oo8o-14o _ o¢__o12o
,_0080-80
_0080-30 _)j0080-100
0070
0010
050
10
Page 10

Warranty
LIMITED WARRANTY
Briggs & Stratton Power Products Group, LLC wilt repair and/or replace, free of charge, any part(s) of the equipment that is
defective in material or workmanship or both. Briggs & Stratton Corporation will repair and/or replace, free of charge, any
part(s) of the Briggs and Stratton engine* (if equipped) that is defective in material or workmanship or both. Transportation
charges on product submitted for repair or replacement under this warranty must be borne by purchaser. This warranty is
effective for the time periods and subject to the conditions stated below. For warranty service, find the nearest Authorized
Service Dealer using our dealer tocator at www.BriggsandStratton.com.
There is no other express warranty. Implied warranties, including those of merchantability and fitness for a particular pur-
pose, are limited to one year from purchase or to the extent permitted by taw. Liability for incidental or consequential dam-
ages are excluded to the extent exclusion is permitted by taw.
Some states or countries do not allow limitations on how long an implied warranty lasts, and some states or countries do
not allow the exclusion or limitation of incidental or consequential damages, so the above limitation and exclusion may not
apply to you. This warranty gives you specific legal rights and you may also have other rights which vary from state to state
or country to country.
iI!i_!__ii_i______!!__ii_i______!!__ii_i______!!__ii_i______!!__ii_i______!!__ii_i__iiiiii ii!iiiiiiiiiiii!!iiiiiiiiiiii!!iiiiiiiiiiii!!iiiiiiiiiiili!iii!iii!iii!iii!iii!iii!iii!iii!iii!iii!iii!iiiilli!iiiiiiiii!!iiiiii!iilliii:iiiiiiiii!!iiiiiiiiiiii!!iiiiiiiii!iii: i iiil iiliiiii!!iiiiliiiii!!iiiiliiiii!!iiiiliiiiii iiiiiiiiii iiiii!!iiiiliiiii!!iiiiliiiii!!iiiiliill !ii! _:__i______!!__ii_i______!!__ii_i______!!__ii_i______!!__ii_i______!!__ii_i______!!__ii_i______!!__ii_ii_iiii__i!_iiiii__i!___!___!_______!_________!!__ii_i______!!__ii_i______!!__ii_i______!!__ii_i______!!__ii_i______!!__ii_i______!!__ii_i______!!__ii_i______!!__ii_i______!!__ii_i______!!__ii_i______!!__ii_i______!!__ii_i______!!__ii_i______!!__ii_i______!!__ii_i______!!__ii_i______!!__ii_i______!!__ii_i______!!__ii_i______!!__ii_i______!!__ii_i______!!_!__i!___!_
The warranty period begins on the date of purchase by the first retail consumer or commercial end user, and continues for the
period d time stated above. "Consumer use" means personal residential household use by a retail consumer. "Commercial use"
means all other uses, including use for commercial, income producing or rental purposes. Once product has experienced commer-
cial use, it shall thereafter be considered as commercial use for purposes of this warranty.
No warranty registration is necessary to obtain warranty on Briggs & Stratton products. Save your proof d purchase receipt. If you
do not provide proof of the initial purchase date at the time warranty service is requested, the manufacturing date of the product wilt
be used to determine warranty eligibility.
We welcome warranty repair and apologize to you for being
dealers authorized by Briggs & Stratton or BSPPG, LLC.
Most warranty repairs are handled routinely, but sometimes requests for warranty service may not be appropriate. This warranty
only covers defects in materials or workmanship. It does not cover damage caused by improper use or abuse, improper mainte-
nance or repair, normal wear and tear, or stale or unapproved fuel.
Improper Use and Abuse - The proper, intended use of this product is described in the Operator's Manual. Using the product in
a way not described in the Operator's Manual or using the product after it has been damaged will void your warranty. Warranty is
not allowed if the serial number on the product has been removed or the product has been altered or modified in any way, or if the
product has evidence of abuse such as impact damage, or water/chemical corrosion damage.
Improper Maintenance or Repair - This product must be maintained according to the procedures and schedules provided in the
Operator's Manual, and serviced or repaired using genuine Briggs & Stratton parts. Damage caused by lack d maintenance or use
of non-original parts is not covered by warranty.
Normal Wear - Like all mechanical devices, your unit is subject to wear even when properly maintained. This warranty does not
cover repairs when normal use has exhausted the life of a part or the equipment. Maintenance and wear items such as filters,
belts, cutting blades, and brake pads (engine brake pads are covered) are not covered by warranty due to wear characteristics
alone, unless the cause is due to defects in material or workmanship.
Stale Fuel - In order to function correctly, this product requires fresh fuel that conforms to the criteria specified in the Operator's
Manual. Damage caused by stale fuel (carburetor leaks, clogged fuel tubes, sticking valves, etc) is not covered by warranty.
inconvenienced. Warranty service is available only through servicing
* Applies to Briggs and Stratton engines only. Warranty coverage of non-Briggs and Stratton engines is provided by the engine manufacturer.
11
Page 11

Briggs & Stratton Yard Power Products Group
Copyright © 2010 Briggs & Stratton Corporation
Milwaukee, Wl USA. All Rights Reserved
 Loading...