

3TNV82A
3TNV84(T)・4TNV84(T)
3TNV88・4TNV88
4TNV94L
4TNV98
4TNV98T
4TNV106
4TNV106T

Publication No. M9961-02E050
History of Revision
Manual Name Service Manual for Industrial Diesel Engine
Engine Model: 3TNV, 4TNV series (Direct Injection System)
Number
of
revision
Date of
revision
Reason for
correction
Outline of correction
New edition July 2003
Printed in Japan
M9961-02E050
Correction item
No (page)
Corrected
by

PREFACE
This manual describes the service procedures for the TNV series engines of indirect injection system
that have been certified by the US EPA, California ARB and/or the 97/68/EC Directive for industrial use.
Please use this manual for accurate, quick and safe servicing of the said engine. Since the
explanation in this manual assumes the standard type engine, the specifications and components may
partially be different from the engine installed on individual work equipment (power generator, pump,
compressor, etc.). Please also refer to the service manual for each work equipment for details.
The specifications and components may be subject to change for improvement of the engine quality
without notice. If any modification of the contents described herein becomes necessary, it will be
notified in the form of correction information each time.

SAFETY LABELS
Most accidents are caused by negligence of basic safety rules and precautions. For accident
prevention, it is important to avoid such causes before development to accidents.
Please read this manual carefully before starting repair or maintenance to fully
understand safety precautions and appropriate inspection and maintenance
procedures.
Attempting at a repair or maintenance job without sufficient knowledge may cause an unexpected
accident.
It is impossible to cover every possible danger in repair or maintenance in the manual. Sufficient
consideration for safety is required in addition to the matters marked
safety precautions in a repair or maintenance job not described in this manual, receive instructions
from a knowledgeable leader.
Safety marks used in this manual and their meanings are as follows:
DANGER-indicates an imminently hazardous situation which,
if not avoided, WILL result in death or serious injury.
WARNING-indicates a potentially hazardous situation which, if not
avoided, COULD result in death or serious injury.
CAUTION-indicates a potentially hazardous situation which, if not
avoided, MAY result in minor or moderate injury.
. Especially for
NOTICE-indicates that if not observed, the product performance or quality may not be
guaranteed.

(1) SERVICE AREA
Safety Precautions
Sufficient Ventilation
Inhalation of exhaust fumes and dust particles may be hazardous to
ones health. Running engines welding, sanding, painting, and polishing
tasks should be only done in well ventilated areas.
Safe / Adequate Work Area
The service area should be clean, spacious, level and free from holes
in the floor, to prevent “slip” or “trip and fall” type accidents.
Bright, Safely Illuminated Area
The work area should be well lit or illuminated in a safe manner. For
work in enclosed or dark areas, a “drop cord” should be utilized. The
drop cord must have a wire cage to prevent bulb breakage and
possible ignition of flammable substances.
Safety Equipment
Fire extinguisher(s), first aid kit and eye wash / shower station should
be close at hand (or easily accessible) in case of an emergency.
(2) WORK – WEAR (GARMENTS
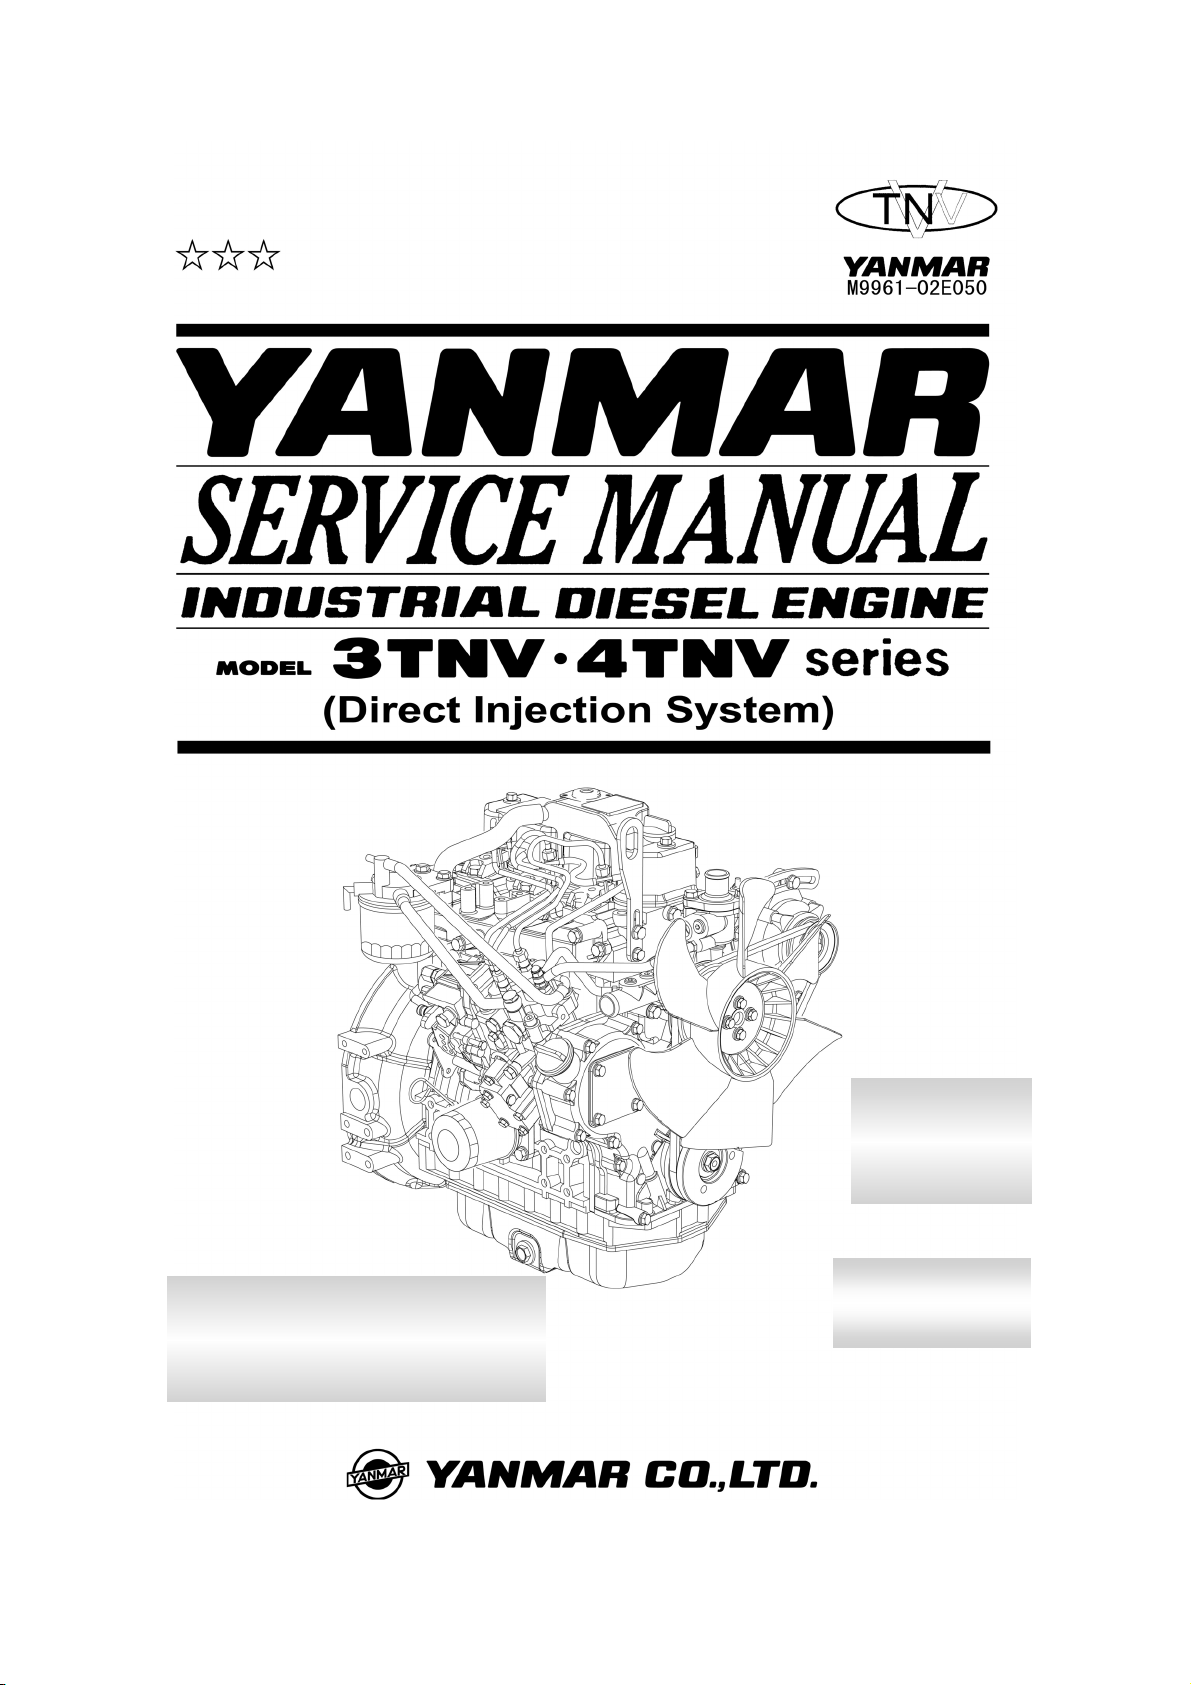
Safe Work Clothing
Appropriate safety wear (gloves, special shoes/boots, eye/ear
protection, head gear, harness’, clothing, etc.) should be used/worn to
match the task at hand. Avoid wearing jewelry, unbuttoned cuffs, ties
or loose fitting clothes around moving machinery. A serious accident
may occur if caught in moving/rotating machinery.
(3) TOOLS
Appropriate Lifting / Holding
When lifting an engine, use only a lifting device (crane, jack, etc.) with
sufficient lifting capacity. Do not overload the device. Use only a chain,
cable, or lifting strap as an attaching device. Do not use rope, serious
injury may result.
To hold or support an engine, secure the engine to a support stand, test
bed or test cart designed to carry the weight of the engine. Do not
overload this device, serious injury may result.
Never run an engine without being properly secured to an engine support
stand, test bed or test cart, serious injury may result.
Appropriate Tools
Always use tools that are designed for the task at hand. Incorrect
usage of tools may result in damage to the engine and or serious
personal injury.
(4) GENUINE PARTS and MATERIALS
Genuine Parts
Always use genuine YANMAR parts or YANMAR recommended parts
and goods. Damage to the engine, shortened engine life and or
personal injury may result.
(5) FASTENER TORQUE
Torqueing Fasteners
Always follow the torque values and procedures as designated in the
service manual. Incorrect values, procedures and or tools may cause
damage to the engine and or personal injury.
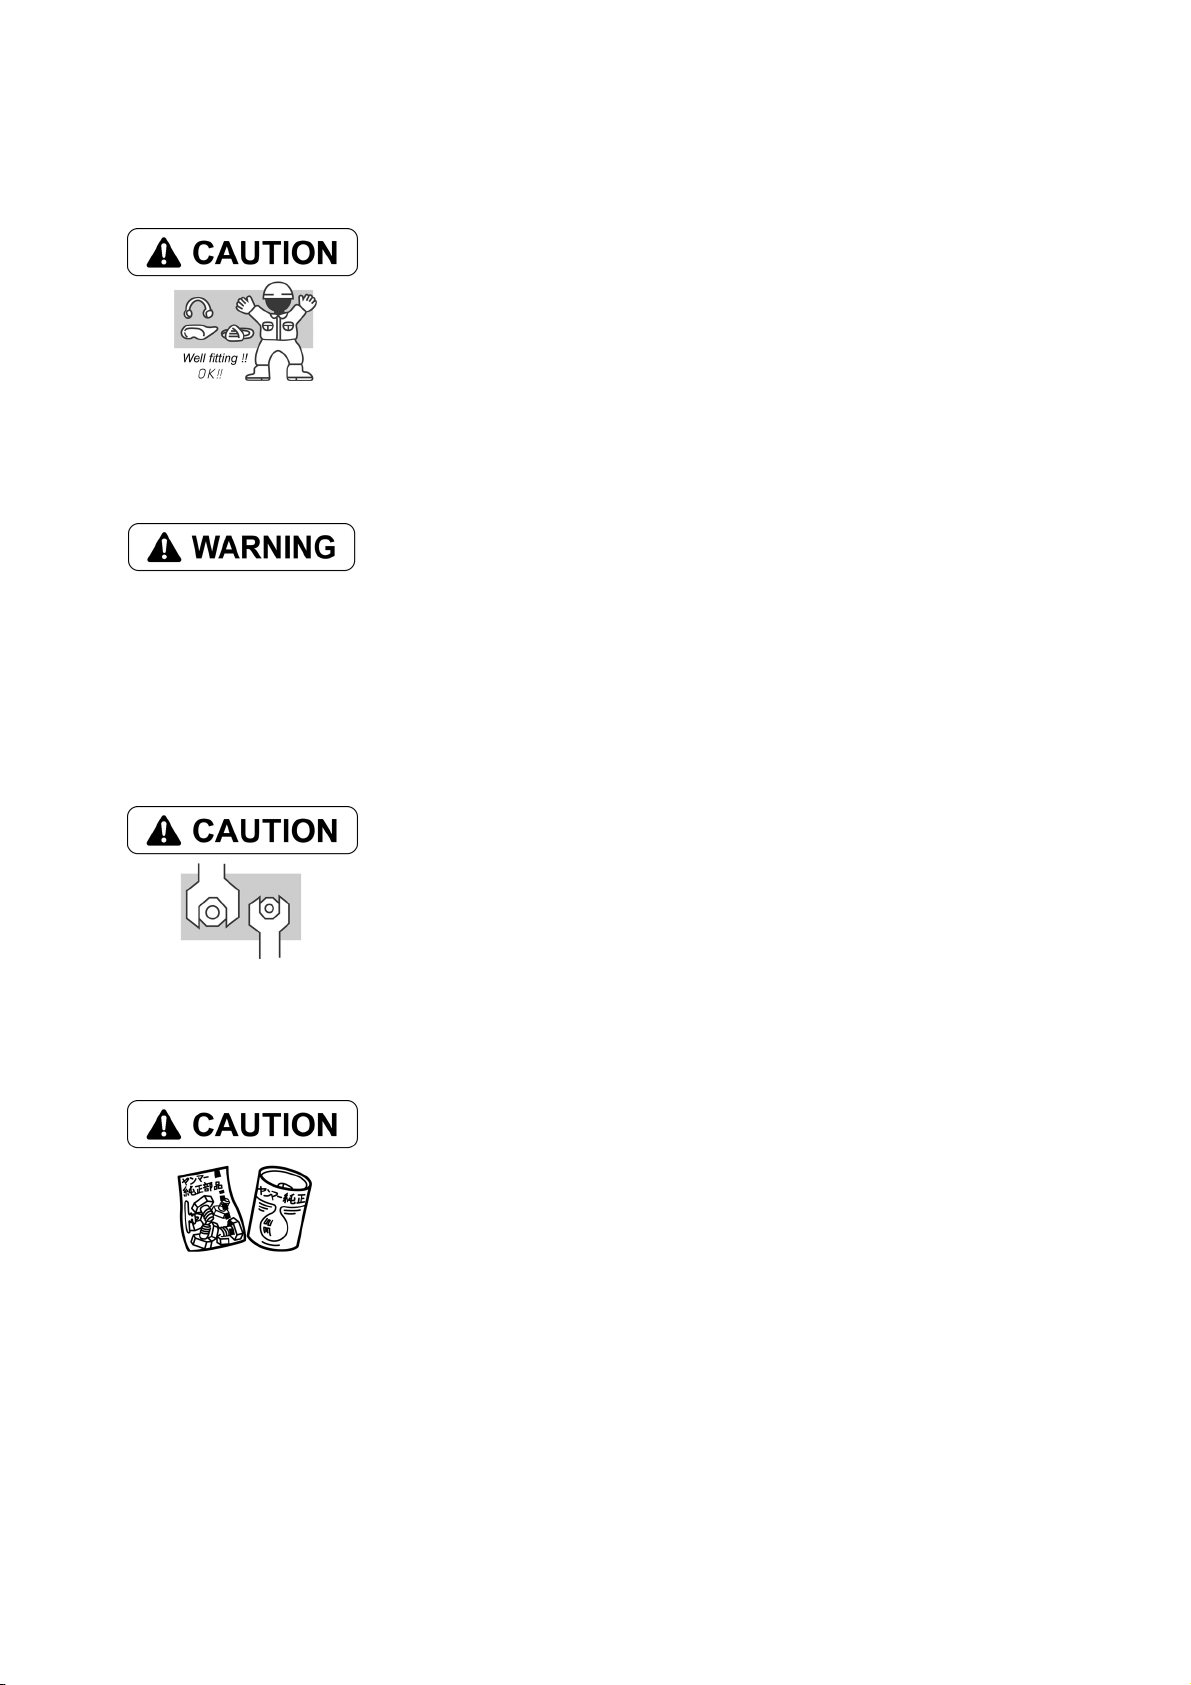
(6) Electrical
Short Circuits
Always disconnect the (-) Negative battery cable before working on the
electrical system. An accidental “short circuit” may cause damage,
fire and or personal injury. Remember to connect the (-) Negative
battery cable (back onto the battery) last.
Fasten the terminals tightly.
Charging Batteries
Charging wet celled batteries produces hydrogen gas. Hydrogen gas is
extremely explosive. Keep sparks, open flame and any other form of
ignition away. Explosion may occur causing severe personal injury.
Battery Electrolyte
Batteries contain sulfuric acid. Do NOT allow it to come in contact with
clothing, skin and or eyes, severe burns will result.
(7) WASTE MANAGEMENT
Observe the following instructions with regard to hazardous waste
disposal. Negligence of these will have a serious impact on
environmental pollution concerns.
1)
Waste fluids such as lube oil, fuel and coolant shall be carefully put
into separate sealed containers and disposed of properly.
2)
Do NOT dispose of waste materials irresponsibly by dumping them
into the sewer, overland or into natural waterways.
3)
Waste materials such as oil, fuel, coolant, solvents, filter elements
and batteries, must be disposed of properly according to local
ordinances. Consult the local authorities or reclamation facility.
(8) FURTHER PRECAUTIONS
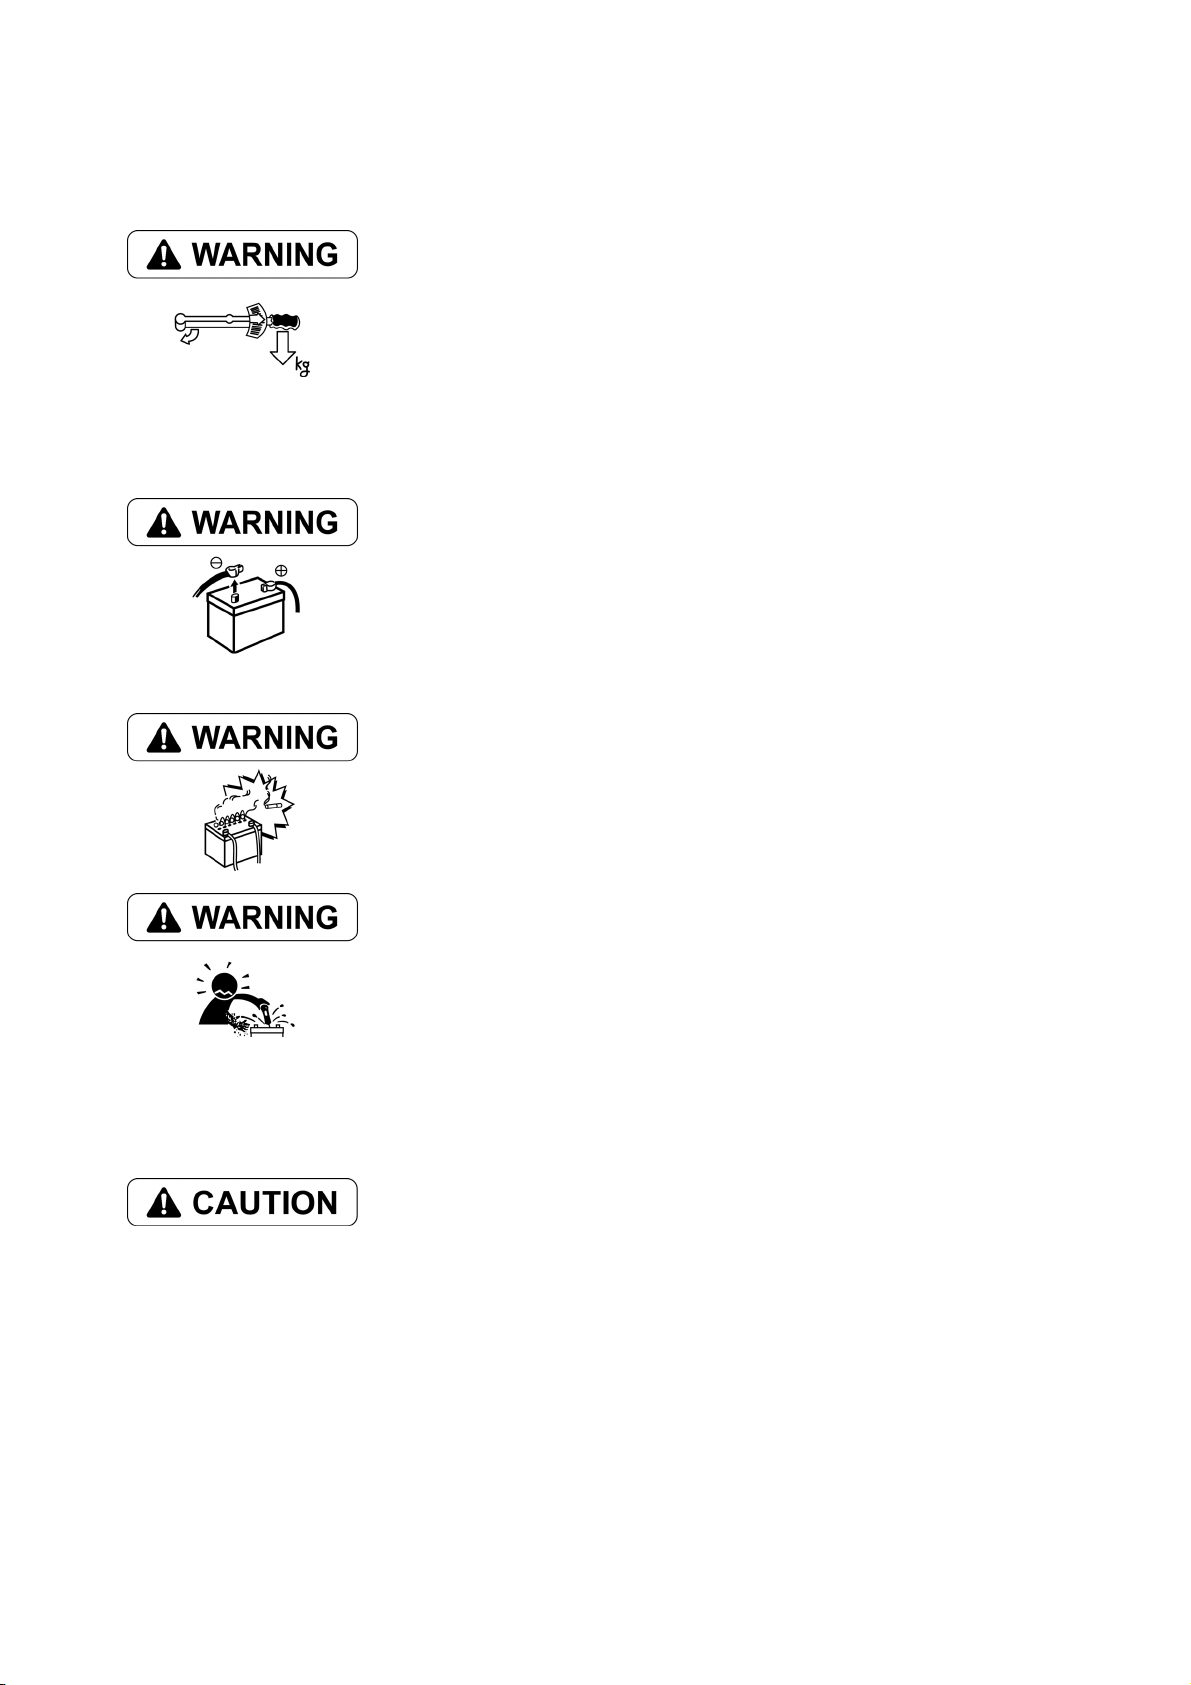
Fueling / Refueling
Keep sparks, open flames or any other form of ignition (match,
cigarette, etc.) away when fueling/refueling the unit. Fire and or an
explosion may result.
Hot Surfaces.
Do NOT touch the engine (or any of its components) during running or
shortly after shutting it down. Scalding / serious burns may result. Allow
the engine to cool down before attempting to approach the unit.
Rotating Parts
Be careful around moving/rotating parts. Loose clothing, jewelry, ties or
tools may become entangled causing damage to the engine and or
severe personal injury.
Preventing burns from scalding
1)
Never open the radiator filler cap shortly after shutting the engine
down.
Steam and hot water will spurt out and seriously burn you. Allow
the engine to cool down before attempt to open the filler cap.
2)
Securely tighten the filler cap after checking the radiator.
Steam can spurt out during engine running, if tightening loose.

Precautions for Service Work
(1) Precautions for Safety
Read the safety precautions given at the beginning of this manual carefully and always mind safety in
work.
(2) Preparation for Service Work
Preparation is necessary for accurate, efficient service work. Check the customer ledger file for the
history of the engine.
Preceding service date
Period/operation hours after preceding service
Problems and actions in preceding service
Replacement parts expected to be required for service
Recording form/check sheet required for service
(3) Preparation before Disassembly
Prepare general tools, special service tools, measuring instruments, oil, grease, nonreusable parts,
and parts expected to be required for replacement.
When disassembling complicated portions, put matchmarks and other marks at places not
adversely affecting the function for easy reassembly.
(4) Precautions in Disassembly
Each time a parts is removed, check the part installed state, deformation, damage, roughening,
surface defect, etc.
Arrange the removed parts orderly with clear distinction between those to be replaced and those to
be used again.
Parts to be used again shall be washed and cleaned sufficiently.
Select especially clean locations and use clean tools for disassembly of hydraulic units such as the
fuel injection pump.
(5) Precautions for Inspection and Measurement
Inspect and measure parts to be used again as required to determine whether they are reusable or not.
(6) Precautions for Reassembly
Reassemble correct parts in correct order according to the specified standards (tightening torques,
and adjustment standards). Apply oil important bolts and nuts before tightening when specified.
Always use genuine parts for replacement.
Always use new oil seals, O-rings, packings and cotter pins.
Apply sealant to packings depending on the place where they are used. Apply of grease to sliding
contact portions, and apply grease to oil seal lips.
(7) Precautions for Adjustment and Check
Use measuring instruments for adjustment to the specified service standards.
How to Read this Manual
(1) Range of Operation Explanation
This manual explains the troubleshooting, installation/removal, replacement, disassemble/reassembly,
inspection, adjustment and adjusting operation procedures for the TNV series engines with direct
injection system.
Refer to the manufacturer’s manual for each of the fuel injection pump, governor, starting motor and
alternator except for their installation.
(2) How to Read the Explanations
An exploded view, sectional views, a system diagram, etc. are shown at the beginning of each
section as required for easy understanding of the mounted states of the components.
For the removal/installation of each part, the procedure is shown with the procedural step No. in the
illustration.
Precautions and key points for disassembly and reassembly of parts are described as points. In
the explanation for each point, detailed operation method, information, standard and precautions
are described.
Description Example
The job contents are described in the disassembly procedure for Nos. not shown in the illustration.
Disassembly procedure
1) Follow steps (1) to (15) of the cylinder head disassembly procedure.
2) Remove the cooling water pump.
3) Remove the crankshaft pulley. (Point 1) Operation point to be explained on a later page.
Operation points
Disassemble: Service point for removal
Reassemble: Service point for installation
Disassemble-Reassemble: Service point required in both removal and installation.

Contents omitted in this manual
Though the following jobs are omitted in the explanation in this manual, they should be conducted
in actual work:
3)
Jacking up and lifting
Cleaning and washing of removed parts as required
4)
Visual inspection
5)
(3) Definition of Terms
[N OTICE]: Instruction whose negligence is very likely to cause an accident. Always observe it.
S tandard: Allowable range for inspection and adjustment.
Limit: The maximum or minimum value that must be satisfied during inspection or adjustment.
(4) Abbreviations
Abbreviation Meaning Abbreviation Meaning
Assy assembly T.D.C. top dead center
Sub-Assy sub-assembly B.D.C. bottom dead center
a.T.D.C after top dead center OS oversize
b.T.D.C before top dead center US undersize
STD Standard Min
IN Intake PS Output (metric horsepower)
EX Exhaust T Bolt/nut tightening torque
-1
revolutions per minute

CONTENTS
1. General ....................................................................................................... 1
1.1 Engine Nomenclature .............................................................................................................. 1
1.2 Specifications........................................................................................................................... 1
1.3 Fuel Oil, Lubricating Oil and Cooling Water........................................................................... 14
1.3.1 Fuel oil....................................................................................................................................14
1.3.2 Lubricating oil .........................................................................................................................15
1.3.3 Cooling water .........................................................................................................................15
1.4 Engine External Views........................................................................................................... 16
1.5 Structural Description............................................................................................................. 17
1.6 Exhaust gas emission regulation........................................................................................... 18
1.6.1 The Emission Standard in USA ..............................................................................................18
1.6.2 Engine identification ...............................................................................................................19
1.6.3 Guarantee Conditions for the EPA Emission Standard...........................................................20
2. Inspection and Adjustment ........................................................................ 22
2.1 Periodic Maintenance Schedule ............................................................................................ 22
2.2 Periodic Inspection and Maintenance Procedure .................................................................. 23
2.2.1 Check before Daily Operation ................................................................................................23
2.2.2 inspection after initial 50 hours operation ...............................................................................25
2.2.3 Inspection every 50 hours ......................................................................................................28
2.2.4 Inspection every 250 hours or 3 months ................................................................................32
2.2.5 Inspection every 500 hours or 6 months ................................................................................35
2.2.6 Inspection every 1,000 hours or one year ..............................................................................37
2.2.7 Inspection every 2000 hours or 2 years .................................................................................46
2.3 Adjusting the no-load maximum or minimum speed.............................................................. 49
2.4 Sensor Inspection.................................................................................................................. 50
2.4.1 Oil pressure switch .................................................................................................................50
2.4.2 Thermo switch ........................................................................................................................50
2.5 Water leak check in cooling water system............................................................................. 50
2.6 Radiator cap inspection ......................................................................................................... 51
2.7 Thermostat Inspection ........................................................................................................... 51
2.8 Adjusting Operation ............................................................................................................... 52
2.9 Long storage.......................................................................................................................... 52
3. TROUBLESHOOTING .............................................................................. 53
3.1 Preparation before troubleshooting ....................................................................................... 53
3.2 Quick Reference Table for Troubleshooting .......................................................................... 54
3.3 Troubleshooting by measuring Compression Pressure......................................................... 57

4. Disassembly, Inspection and Reassembly of Engines .............................. 59
4.1 Complete disassembly and reassembly ................................................................................ 59
4.1.1 Introduction ............................................................................................................................59
4.1.2 Special service tools...............................................................................................................60
4.1.3 Complete disassembly ...........................................................................................................65
4.1.4 Precautions before and during reassembly ............................................................................69
4.1.5 Adjusting operation.................................................................................................................69
4.2 Cylinder Head: Disassembly, Inspection and Reassembly.................................................... 70
4.2.1 Components (2-valve cylinder head)......................................................................................70
4.2.2 Disassembly procedure:.........................................................................................................70
4.2.3 Reassembly procedure: .........................................................................................................71
4.2.4 Servicing points ......................................................................................................................72
4.2.5 Parts Inspection and measurement........................................................................................76
4.2.6 Valve seat correction ..............................................................................................................80
4.2.7 Valve guide replacement ........................................................................................................81
4.2.8 Valve stem seal replacement..................................................................................................82
4.3 Gear Train and Camshaft ...................................................................................................... 83
4.3.1 Components...........................................................................................................................83
4.3.2 Disassembly procedure:.........................................................................................................83
4.3.3 Reassembly procedure: .........................................................................................................83
4.3.4 Servicing points ......................................................................................................................84
4.3.5 Parts inspection and measurement ........................................................................................87
4.3.6 Oil seal replacement (Gear case side) ...................................................................................89
4.3.7 Camshaft bushing replacement..............................................................................................89
4.4 Cylinder Block........................................................................................................................ 90
4.4.1 Components...........................................................................................................................90
4.4.2 Disassembly procedure:.........................................................................................................90
4.4.3 Reassembly procedure: .........................................................................................................90
4.4.4 Servicing points ......................................................................................................................91
4.4.5 Parts inspection and measurement ........................................................................................95
4.4.6 Cylinder bore correction .......................................................................................................106
4.4.7 Piston pin bushing replacement ...........................................................................................107
4.4.8 Oil seal replacement (Flywheel housing side) ......................................................................107

5. LUBRICATION SYSTEM ........................................................................ 108
5.1 Lubrication System Diagram ............................................................................................... 108
5.2 Trochoid Pump Components ............................................................................................... 109
5.3 Disassembly(Reverse the procedure below for assembly) ................................................. 109
5.4 Servicing Points................................................................................................................... 109
5.5 Parts Inspection and Measurement......................................................................................110
5.5.1 Trochoid pump inspection and measurement.......................................................................110
6. COOLING SYSTEM.................................................................................112
6.1 Cooling Water System..........................................................................................................112
6.2 Cooling Water Pump Components .......................................................................................112
6.3 Disassembly (Reverse the procedure below for assembly) .................................................113
6.4 Servicing Points....................................................................................................................113
7. FUEL INJECTION PUMP/GOVERNOR...................................................114
7.1 Introduction ...........................................................................................................................114
7.2 Fuel Injection Pump..............................................................................................................114
7.2.1 Fuel system diagram ............................................................................................................ 114
7.2.2 External view and components.............................................................................................115
7.2.3 Disassembly procedure:.......................................................................................................115
7.2.4 Assembly procedure.............................................................................................................116
7.2.5 Servicing points .................................................................................................................... 116
8. TURBOCHAGER: Disassembly, inspection and reassembly.....................118
8.1 Structure and Functions........................................................................................................118
8.1.1 Main specifications ............................................................................................................... 118
8.1.2 Construction .........................................................................................................................118
8.1.3 Structural and functional outline ...........................................................................................119
8.1.4 Components.........................................................................................................................120
8.2 Service Standards and Tightening Torque........................................................................... 121
8.2.1 Service standards.................................................................................................................121
8.2.2 Tightening torque..................................................................................................................122
8.3 Periodic Inspection Procedure............................................................................................. 123
8.3.1 Periodic inspection intervals.................................................................................................123
8.3.2 Inspection procedure............................................................................................................124
8.3.3 Waste gate valve adjustment procedure ..............................................................................125
8.4 Disassembly Procedure....................................................................................................... 127
8.4.1 Preparation for disassembly.................................................................................................127
8.4.2 Inspection before disassembly .............................................................................................128
8.4.3 Disassembly.........................................................................................................................128

8.5 Washing and Inspection procedure ..................................................................................... 130
8.5.1 Washing ...............................................................................................................................130
8.5.2 Inspection procedure............................................................................................................131
8.6 Reassembly Procedure ....................................................................................................... 134
8.6.1 Preparation for reassembly...................................................................................................134
8.6.2 Reassembly .........................................................................................................................134
8.7 Handling after Disassembly and Reassembly ..................................................................... 137
8.7.1 Instructions for turbocharger installation...............................................................................137
8.8 Troubleshooting................................................................................................................... 138
8.8.1 Excessively exhaust smoke .................................................................................................138
8.8.2 White smoke generation.......................................................................................................138
8.8.3 Sudden oil decrease.............................................................................................................139
8.8.4 Decrease in output ...............................................................................................................139
8.8.5 Poor (slow) response (starting) of turbocharger ...................................................................139
8.8.6 Abnormal sound or vibration.................................................................................................139
9. STARTING MOTOR................................................................................ 140
9.1 For 4TNV94L/ 98 ................................................................................................................. 140
9.1.1 Specifications .......................................................................................................................140
9.1.2 Components.........................................................................................................................141
9.1.3 Troubleshooting....................................................................................................................142
9.1.4 Names of parts and disassembly procedure ........................................................................143
9.1.5 Inspection and Maintenance ................................................................................................147
9.1.6 Service standards.................................................................................................................152
9.1.7 Assembly..............................................................................................................................153
9.1.8 Characteristic test.................................................................................................................155
9.2 For 4TNV106(T) .................................................................................................................. 156
9.2.1 Specifications .......................................................................................................................156
9.2.2 Congiguration drawing .........................................................................................................156
9.2.3 Troubleshooting ....................................................................................................................157
9.2.4 Component names and disassembly procedure ..................................................................158
9.2.5 Disassembly procedure........................................................................................................159
9.2.6 Inspection and maintenance ................................................................................................167
9.2.7 Assembly..............................................................................................................................173
9.2.8 Adjustment ...........................................................................................................................174
9.2.9 Service standards.................................................................................................................175

10. ALTERNATOR....................................................................................... 176
10.1 The 40A Alternator for 3TNV84 and other models............................................................. 176
10.1.1 Components .......................................................................................................................176
10.1.2 Specifications .....................................................................................................................177
10.1.3 Wiring diagram ...................................................................................................................177
10.1.4 Standard output characteristics ..........................................................................................178
10.1.5 Inspection...........................................................................................................................178
10.2 Troubleshooting................................................................................................................. 179
11. ELECTRIC WIRING .............................................................................. 180
11.1 Electric Wiring Diagram ..................................................................................................... 180
11.2 PRECAUTION ON ELECTRIC WIRING ............................................................................ 181
11.2.1 Alternator ............................................................................................................................181
11.2.2 Starter.................................................................................................................................182
11.2.3 Current limiter .....................................................................................................................183
11.2.4 Section area and resistance of electric wire .......................................................................184
12. SERVICE STANDARDS ....................................................................... 185
12.1 Engine Tuning.................................................................................................................... 185
12.2 Engine Body ...................................................................................................................... 186
12.2.1 Cylinder head .....................................................................................................................186
12.2.2 Gear train and camshaft.....................................................................................................189
12.2.3 Cylinder block.....................................................................................................................190
12.3 Lubricating Oil System (Trochoid Pump)........................................................................... 195
12.3.1 Outside clearance of outer rotor .........................................................................................195
12.3.2 Side clearance of outer rotor ..............................................................................................195
12.3.3 Inside clearance of inner rotor ............................................................................................195
12.3.4 Rotor shaft clearance .........................................................................................................195
13. TIGHTENING TORQUE for BOLTS and NUTS .................................... 196
13.1 Tightening Torques for Main Bolts and Nuts...................................................................... 196
13.2 Tightening Torques for Standard Bolts and Nuts ............................................................... 197
1. General
1.1 Engine Nomenclature
1. General
The engine specification class
Classification Load Engine speed Available engine speed (min
CL Constant load Constant speed 1500/1800
VM Variable load Variable speed 2000-3000
The engine specification class (CL or VM) is described in the specifications table.
1.2 Specifications
NOTE:
1) The information described in the engine specifications tables (the next page and after) is for
"standard" engine. To obtain the information for the engine installed in each machine unit, refer
to the manual provided by the equipment manufacturer.
2) Engine rating conditions are as follows (SAE J1349, ISO 3046/1)
Atmospheric condition: Room temp. 25
humidity 30%
Fuel temp: 25
With cooling fan, air cleaner, exhaust silencer (Yanmar standard parts)
After running-in hours. Output allowable deviation:
(Fuel injection pump inlet)
, Atmospheric press. 100 kPa (750mm Hg), Relative
3%
-1
)
1

1. General
(1) 3TNV82A
Engine name Unit 3TNV82A
Engine specification class - CL VM
Type - Vertical, in-line, 4-cycle, water-cooled diesel engine
Combustion chamber - Direct injection
Number of cylinders - 3
Cylinder bore stroke mm mm 82 84
Displacement L 1.331
Revolving
Continuous
rating
speed
Output
Revolving
Rated output
speed
Output
Max. no-load speed ( 25) min
Min
kW
(ps)
Min
kW
(ps)
-1
1500 1800 -
9.9
(13.5)
-1
1500 1800 2000 2200 2400 2500 2600 2800 3000
11.0
(14.9)
-1
1600 1895 2180 2375 2570 2675 2780 2995 3180
12.0
(16.3)
13.2
(17.9)
14.6
(19.9)
16.0
(21.8)
17.5
(23.8)
-
18.2
(24.8)
19.0
(25.8)
20.4
(27.8)
21.9
(29.8)
Ignition order - 1-3-2-1(No.1 cylinder on flywheel side)
Power take off - Flywheel
Direction of rotation - Counterclockwise (viewed from flywheel)
Cooling system - Radiator
Lubrication system - Forced lubrication with trochoid pump
Starting system - Electric
Applicable fuel -
Diesel oil-ISO 8217 DMA, BS 2869 A1 or A2
(Cetane No.45 min.)
Applicable lubricant - API grade class CD or CF
Lubricant capacity
(oil pan) *
Cooling water capacity
(engine only)
Engine Dimensions **
(with flyw Crankshaft
V pulley diameter &
heel housing) *
Engine mass (dry) *,**
(with flywheel housing)
Total L 5.5
Effective L 1.9
L 1.8
Overall
length
Overall
width
Overall
height
mm 553 528
mm 489
mm 565
kg 138 128
Cooling fan (std.) * mm 335 mm O/D, 6 blades pusher type F
Fun V pulley diameter (std.) * mm 120 90 110 110
* Items marked * may differ from the above depending on an engine installed on a machine unit.
** Engine mass and dimensions without radiator
2

(2) 3TNV84
Engine name Unit 3TNV84
Engine specification class - CL VM
Type - Vertical, in-line, 4-cycle, water-cooled diesel engine
Combustion chamber - Direct injection
Number of cylinders - 3
Cylinder bore stroke mm mm 84 90
Displacement L 1.496
Revolving
Continuous
rating
speed
Output
Revolving
Rated output
speed
Output
Max. no-load speed ( 25) min
Min
kW
(ps)
Min
kW
(ps)
-1
1500 1800 -
11.3
(15.3)
-1
1500 1800 2000 2200 2400 2500 2600 2800 3000
12.4
(16.8)
-1
1600 1895 2180 2400 2590 2690 2810 2995 3210
13.5
(18.3)
14.8
(20.1)
16.4
(22.3)
18.1
(24.6)
19.7
(26.8)
-
20.5
(27.9)
21.3
(29.0)
23.0
(31.3)
1. General
24.6
(33.5)
Ignition order - 1-3-2-1(No.1 cylinder on flywheel side)
Power take off - Flywheel
Direction of rotation - Counterclockwise (viewed from flywheel)
Cooling system - Radiator
Lubrication system - Forced lubrication with trochoid pump
Starting system - Electric
Applicable fuel -
Diesel oil-ISO 8217 DMA, BS 2869 A1 or A2
(Cetane No.45 min.)
Applicable lubricant - API grade class CD
Lubricant capacity
(oil pan) *
Cooling water capacity
(engine only)
Engine dimensions **
(with flywheel housing)
Engine mass (dry) *,**
(with flywheel housing)
Total L 6.7
Effective L 2.8
L 2.0
*
Overall
length
Overall
width
Overall
height
mm 589 564
mm 486
mm 622
kg 161 155
Cooling fan (std.) * mm 335 mm O/D, 6 blades pusher type F
Crankshaft V pulley diameter &
Fun V pulley diameter (std.) *
* Items marked * may differ from the above depending on an engine installed on a machine unit.
** Engine mass and dimensions without radiator
mm 120
90 110 110
3
1. General
(3) 3TNV84T
Engine name Unit 3TNV84T
Engine specification class - CL VM
Type - Vertical, in-line, 4-cycle, water-cooled diesel engine
Combustion chamber - Direct injection
Number of cylinders - 3
Cylinder bore stroke mm mm 84 90
Displacement L 1.496
Revolving
Continuous
rating
speed
Output
Revolving
Rated output
speed
Output
Max. no-load speed ( 25) min
Min
kW
(ps)
Min
kW
(ps)
-1
1500 1800 -
14.0
16.5
(19.0)
(22.5)
-1
1500 1800 2000 2200 2400 2500 2600 2800 3000
15.8
18.8
(21.5)
(25.5)
-1
1600 1895 2590 2700 2810 2995 3210
25.0
(34.0)
-
(35.3)
26.0
26.8
(36.5)
29.1
(39.5)
30.9
(42.0)
Ignition order - 1-3-2-1(No.1 cylinder on flywheel side)
Power take off - Flywheel
Direction of rotation - Counterclockwise (viewed from flywheel)
Cooling system - Radiator
Lubrication system - Forced lubrication with trochoid pump
Starting system - Electric
Applicable fuel -
Diesel oil-ISO 8217 DMA, BS 2869 A1 or A2
(cetane No.45 min.)
Applicable lubricant - API grade class CD or CF
Lubricant capacity
(oil pan) *
Cooling water capacity
(engine only)
Engine dimensions **
(with flywheel housing)
Engine mass (dry) *,**
(with flywheel housing)
Total L 6.7
Effective L 2.8
L 2.0
*
Overall
length
Overall
width
Overall
height
mm 589 564
mm 486
mm 622
kg 161 155
Cooling fan (std.) * mm 350 mm O/D, 6 blades pusher type F
Crankshaft V pulley diameter &
Fun V pulley diameter (std.) *
mm 120
90 110 110
* Items marked * may differ from the above depending on an engine installed on a machine unit.
** Engine mass and dimensions without radiator
4
(4) 3TNV88
Engine name Unit 3TNV88
Engine specification class - CL VM
Type - Vertical, in-line, 4-cycle, water-cooled diesel engine
Combustion chamber - Direct injection
Number of cylinders - 3
Cylinder bore stroke
mm
mm
Displacement L 1.642
Revolving
Continuous
rating
speed
Output
Revolving
Rated output
speed
Output
Max. no-load speed ( 25) min
Min
kW
(ps)
Min
kW
(ps)
-1
1500 1800 -
12.3
(16.7)
-1
1500 1800 2000 2200 2400 2500 2600 2800 3000
13.5
(18.4)
-1
1600 1895 2180 2400 2590 2700 2810 2995 3210
14.8
(20.1)
16.3
(22.1)
18.0
24.5)
(27.0)
19.9
88
21.6
(29.4)
90
-
22.6
(30.7)
23.5
(31.9)
25.2
(34.2)
1. General
27.1
(36.8)
Ignition order - 1-3-2-1(No.1 cylinder on flywheel side)
Power take off - Flywheel
Direction of rotation - Counterclockwise (viewed from flywheel)
Cooling system - Radiator
Lubrication system - Forced lubrication with trochoid pump
Starting system - Electric
Applicable fuel -
Diesel oil-ISO 8217 DMA, BS 2869 A1 or A2
(Cetane No.45 min.)
Applicable lubricant - API grade class CD or CF
Lubricant capacity
(oil pan) *
Cooling water capacity
(engine only)
Engine dimensions **
(with flywheel housing)
Engine mass (dry) *,**
(with flywheel housing)
Total L 6.7
Effectiv
e
L 2.8
L 2.0
*
Overall
length
Overall
width
Overall
height
mm 589 564
mm 486
mm 622
kg 155
Cooling fan (std.) * Mm 335 mm O/D, 6 blades pusher type F
Crankshaft V pulley diameter &
Fun V pulley diameter (std.) *
* Items marked * may differ from the above depending on an engine installed on a machine unit.
** Engine mass and dimensions without radiator
Mm 120
90 120 90
5
1. General
(5) 4TNV84
Engine name Unit 4TNV84
Engine specification class - CL VM
Type - Vertical, in-line, 4-cycle, water-cooled diesel engine
Combustion chamber - Direct injection
Number of cylinders - 4
Cylinder bore stroke
mm
mm
Displacement L 1.995
Revolving
Continuous
Rating
speed
Output
Revolving
Rated output
speed
Output
Max. no-load speed ( 25) min
Min
kW
(ps)
Min
kW
(ps)
-1
1500 1800 -
14.9
(20.3)
-1
1500 1800 2000 2200 2400 2500 2600 2800 3000
16.4
(22.3)
-1
1600 1895 2180 2400 2590 2700 2810 2995 3210
17.7
(24.1)
19.5
(26.5)
21.9
(29.8)
(32.8)
24.1
84
26.3
(35.8)
90
-
27.4
(37.3)
28.5
(38.7)
30.7
41.7)
32.9
(44.7)
Ignition order - 1-3-4-2-1(No.1 cylinder on flywheel side)
Power take off - Flywheel
Direction of rotation - Counterclockwise (viewed from flywheel)
Cooling system - Radiator
Lubrication system - Forced lubrication with trochoid pump
Starting system - Electric
Applicable fuel -
Diesel oil-ISO 8217 DMA, BS 2869 A1 or A2
(cetane No.45 min.)
Applicable lubricant - API grade class CD or CF
Lubricant capacity
(oil pan) *
Cooling water capacity
(engine only)
Engine dimensions **
(with flywheel
housing)
Engine mass (dry) *,**
(with flywheel housing)
Total L 7.4
Effective L 3.4
L 2.7
*
Overall
length
Overall
width
Overall
height
mm 683 658
mm 498.5
mm 617
kg 183 170
Cooling fan (std.) * mm 370 mm O/D, 6 blades pusher type F
Crankshaft V pulley diameter &
Fun V pulley diameter (std.)
* Items marked * may differ from the above depending on an engine installed on a machine unit.
** Engine mass and dimensions without radiator
*
mm 120
90 110 110
6
(6) 4TNV84T
Engine name Unit 4TNV84T
Engine specification class - CL VM
Type - Vertical, in-line, 4-cycle, water-cooled diesel engine
Combustion chamber - Direct injection
Number of cylinders - 4
Cylinder bore stroke mm mm 84 90
Displacement L 1.995
Revolving
Continuous
rating
speed
Output
Revolving
Rated output
speed
Output
Max. no-load speed ( 25) min
Min
KW
(ps)
Min
KW
(ps)
-1
1500 1800 -
19.1
(26.0)
-1
1500 1800 2000 2200 2400 2600 2800 3000
21.3
(29.0)
-1
1600 1895 2180 2400 2590 2810 2995 3210
24.3
(33.0)
26.9
(36.5)
27.9
(38.0)
30.5
(41.5)
33.5
(45.5)
-
35.7
(48.5)
(52.5)
38.6
1. General
41.2
(56.0)
Ignition order - 1-3-4-2-1(No.1 cylinder on flywheel side)
Power take off - Flywheel
Direction of rotation - Counterclockwise (viewed from flywheel)
Cooling system - Radiator
Lubrication system - Forced lubrication with trochoid pump
Starting system - Electric
Applicable fuel -
Diesel oil-ISO 8217 DMA, BS 2869 A1 or A2
(Cetane No.45 min.)
Applicable lubricant - API grade class CD or CF
Lubricant capacity
(oil pan) *
Cooling water capacity
(engine only)
Engine
dimensions *,**
Engine mass (dry) *,**
(with flywheel housing)
Total L 7.4
Effective L 3.4
L 3.2
Overall
length
Overall
width
Overall
height
mm 683 649
mm 498.5
mm 713
kg 183 170
Cooling fan (std.) * mm 370 mm O/D, 6 blades pusher type F
Crankshaft V pulley diameter &
Fun V pulley diameter (std.) *
* Items marked * may differ from the above depending on an engine installed on a machine unit.
** Engine mass and dimensions without radiator
mm 120
90 110 110
7

1. General
(7) 4TNV88
Engine name Unit 4TNV88
Engine specification class - CL VM
Type - Vertical, in-line, 4-cycle, water-cooled diesel engine
Combustion chamber - Direct injection
Number of cylinders - 4
Cylinder bore stroke mm mm 88 90
Displacement L 2.190
Revolving
Continuous
rating
speed
Output
Revolving
Rated output
speed
Output
Max. no-load speed ( 25) min
Min
kW
(ps)
Min
kW
(ps)
-1
1500 1800 -
16.4
(22.3)
-1
1500 1800 2000 2200 2400 2500 2600 2800 3000
18.0
(24.5)
-1
1600 1895 2180 2400 2590 2700 2810 2995 3210
19.6
(26.7)
21.6
(29.4)
24.1
(32.7)
26.5
(36.0)
28.8
(39.2)
-
30.1
(40.9)
31.3
(42.5)
33.7
(45.8)
35.4
(48.1)
Ignition order - 1-3-4-2-1(No.1 cylinder on flywheel side)
Power take off - Flywheel
Direction of rotation - Counterclockwise (viewed from flywheel)
Cooling system - Radiator
Lubrication system - Forced lubrication with trochoid pump
Starting system - Electric
Applicable fuel -
Diesel oil-ISO 8217 DMA, BS 2869 A1 or A2
(cetane No.45 min.)
Applicable lubricant - API grade class CD or CF
Lubricant capacity
(oil pan) *
Cooling water capacity
(engine only)
Engine dimensions **
(with wheel housing)
Engine mass (dry) *,**
(with flywheel housing)
Total L 7.4
Effective L 3.4
L 2.7
*
Overall
ength
Overall
width
Overall
height
mm 683 658
mm 498.5
mm 618
kg 183 170
Cooling fan (std.) * mm 370 mm O/D, 6 blades pusher type F
Crankshaft V pulley diameter &
Fun V pulley diameter (std.) *
* Items marked * may differ from the above depending on an engine installed on a machine unit.
** Engine mass and dimensions without radiator
mm 120
90 110 110
8

(8) 4TNV94L
Engine name Unit 4TNV94L
Engine specification class - CL VM
Type - Vertical, in-line, 4-cycle, water-cooled diesel engine
Combustion chamber - Direct injection
Number of cylinders - 4
Cylinder bore stroke mm mm 94 110
Displacement L 3.054
Revolving
Continuous
rating
speed
Output
Revolving
Rated output
speed
Output
Max. no-load speed ( 25) min
Min
kW
(ps)
Min
kW
(ps)
-1
-1
-1
1500 1800 -
26.1
(35.5)
31.3
(42.5)
-
1500 1800 2000 2200 2400 2500
29.1
(39.5)
34.6
(47.0)
35.3
(48.0)
38.2
(52.0)
41.6
(56.5)
1600 1895 2180 2400 2590 2700
1. General
43.0
(58.5)
Ignition order - 1-3-4-2-1(No.1 cylinder on flywheel side)
Power take off - Flywheel
Direction of rotation - Counterclockwise (viewed from flywheel)
Cooling system - Radiator
Lubrication system - Forced lubrication with trochoid pump
Starting system - Electric
Applicable fuel -
Diesel oil-ISO 8217 DMA, BS 2869 A1 or A2
(Cetane No.45 min.)
Applicable lubricant - API grade class CD or CF
Lubricant capacity
(oil pan) *
Cooling water capacity
(engine only)
Engine dimensions **
(with flywheel housing)
Engine mass (dry) *,**
(with flywheel housing)
Total L 10.5
Effective L 4.5
L 4.2
*
Overall
length
Overall
width
Overall
height
mm 719
mm 498
mm 742
kg
(equivalent to SAE#3)
245
(equivalent to SAE#4)
235
Cooling fan (std.) * mm 410 mm O/D, 6 blades pusher type F
Crankshaft V pulley diameter &
Fun V pulley diameter (std.) *
* Items marked * may differ from the above depending on an engine installed on a machine unit.
** Engine mass and dimensions without radiator
mm 130
130
9
1. General
(9) 4TNV98
Engine name Unit 4TNV98
Engine specification class - CL VM
Type - Vertical, in-line, 4-cycle, water-cooled diesel engine
Combustion chamber - Direct injection
Number of cylinders - 4
Cylinder bore stroke mm mm 98 110
Displacement L 3.319
Revolving
Continuous
rating
speed
Output
Revolving
Rated output
speed
Output
Max. no-load speed ( 25) min
Min
kW
(ps)
Min
kW
(ps)
-1
-1
-1
1500 1800 -
30.9
(42.0)
36.8
(50.0)
-
1500 1800 2000 2200 2400 2500
34.6
(47.0
41.2
(56.0)
41.9
(57.0)
45.6
(62.0)
49.3
(67.0)
1600 1895 2180 2400 2590 2700
51.1
(69.5)
Ignition order - 1-3-4-2-1(No.1 cylinder on flywheel side)
Power take off - Flywheel
Direction of rotation - Counterclockwise (viewed from flywheel)
Cooling system - Radiator
Lubrication system - Forced lubrication with trochoid pump
Starting system - Electric
Applicable fuel -
Diesel oil-ISO 8217 DMA, BS 2869 A1 or A2
(Cetane No.45 min.)
Applicable lubricant - API grade class CD or CF
Lubricant capacity
(oil pan) *
Cooling water capacity
(engine only)
Engine dimensions **
(with flywheel housing)
Engine mass (dry) *,**
(with flywheel housing)
Total L 10.5
Effective L 4.5
L 4.2
*
Overall
length
Overall
width
Overall
height
mm 719
mm 498
mm 742
kg
(equivalent to SAE#3)
248
(equivalent to SAE#4)
235
Cooling fan (std.) * mm 410 mm O/D, 6 blades pusher type F
Crankshaft V pulley diameter &
Fun V pulley diameter (std.) *
* Engine oil capacity may differ from the above depending on an engine installed on a machine unit.
** Engine mass and dimensions without radiator
mm 130
130
10

(10) 4TNV98T
Engine name Unit 4TNV98T
Engine specification class - CL VM
Type - Vertical, in-line, 4-cycle, water-cooled diesel engine
Combustion chamber - Direct injection
Number of cylinders - 4
Cylinder bore stroke mm mm 98 110
Displacement L 3.319
Revolving
Continuous
rating
speed
Output
Revolving
Rated output
speed
Output
Max. no-load speed ( 25) min
Min
kW
(ps)
Min
kW
(ps)
-1
1500 1800 -
37.9
(51.5)
-1
1500 1800 2000 2200 2400 2500
41.9
(57.0)
-1
1600 1895 2180 2400 2590 2700
45.6
(62.0)
50.4
(68.5)
50.7
(69.0)
55.5
(75.5)
-
60.3
(82.0)
62.5
(85.0)
1. General
Ignition order - 1-3-4-2-1(No.1 cylinder on flywheel side)
Power take off - Flywheel
Direction of rotation - Counterclockwise (viewed from flywheel)
Cooling system - Radiator
Lubrication system - Forced lubrication with trochoid pump
Starting system - Electric
Applicable fuel -
Diesel oil-ISO 8217 DMA, BS 2869 A1 or A2
(cetane No.45 min.)
Applicable lubricant - API grade class CD or CF
Lubricant capacity
(oil pan) *
Cooling water capacity
(engine only)
Engine dimensions **
(with flywheel housing)
Engine mass (dry) *,**
(with flywheel housing)
Total L 10.5
Effective L 4.5
L 4.2
*
Overall
length
Overall
width
Overall
height
mm 715
mm 575
mm 804
kg
258
(equivalent to SAE#3)
(equivalent to SAE#4)
245
Cooling fan (std.) mm 430 mm O/D, 8 blades suction type
Crankshaft V pulley diameter &
Fun V pulley diameter (std.) *
* Items marked * may differ from the above depending on an engine installed on a machine unit.
** Engine mass and dimensions without radiator
mm 130
130
11
1. General
(11) 4TNV106
Engine name Unit 4TNV106
Engine specification class - CL VM
Type - Vertical, in-line, 4-cycle, water-cooled diesel engine
Combustion chamber - Direct injection
Number of cylinders - 4
Cylinder bore stroke mm mm 106 125
Displacement L 4.412
Revolving
Continuous
rating
speed
Output
Revolving
Rated output
speed
Output
Max. no-load speed ( 25) min
Min
kW
(ps)
Min
kW
(ps)
-1
-1
-1
1500 1800 -
41.2
(56.0)
49.3
(67.0)
-
1500 1800 2000 2200 2400 2500
45.6
(62.0
54.4
(74.0)
56.6
(77.0)
61.4
(83.5)
65.5
(89.0)
1600 1895 2180 2400 2590 2700
67.7
(92.0)
Ignition order - 1-3-4-2-1(No.1 cylinder on flywheel side)
Power take off - Flywheel
Direction of rotation - Counterclockwise (viewed from flywheel)
Cooling system - Radiator
Lubrication system - Forced lubrication with trochoid pump
Starting system - Electric
Applicable fuel -
Diesel oil-ISO 8217 DMA, BS 2869 A1 or A2
(Cetane No.45 min.)
Applicable lubricant - API grade class CD or CF
Lubricant capacity
(oil pan) *
Cooling water capacity
(engine only)
Engine dimensions **
(with flywheel housing)
Engine mass (dry) *, **
(with flywheel housing)
Cooling fan (std.) * mm
Crankshaft V pulley diameter &
Fun V pulley diameter (std.)
* Items marked * may differ from the above depending on an engine installed on a machine unit.
** Engine mass and dimensions without radiator
Total L 14.0
Effective L 9.0 7.5
L 6.0
*
Overall
length
Overall
width
Overall
height
*
mm 808 776
mm 629 629
mm 803 803
kg
(equivalent to SAE#3)
345
500 mm O/D,
7 blades pusher type
mm 150
(equivalent to SAE#3)
7 blades suction type
150
330
500 mm O/D,
12
1. General
(12) 4TNV106T
Engine name Unit 4TNV106T
Engine specification class - CL VM
Type - Vertical, in-line, 4-cycle, water-cooled diesel engine
Combustion chamber - Direct injection
Number of cylinders - 4
Cylinder bore stroke mm mm 106 125
Displacement L 4.412
Revolving
Continuous
rating
speed
Output
Revolving
Rated output
speed
Output
Max. no-load speed ( 25) min
Min
kW
(ps)
Min
kW
(hp)
-1
-1
-1
1500 1800 -
51.5
(70.0)
61.8
(84.0)
-
1500 1800 2000 2200
56.8
(77.2
68.0
(92.5)
69.9
(95.0)
72.0
(97.9)
1600 1895 2180 2400
Ignition order - 1-3-4-2-1(No.1 cylinder on flywheel side)
Power take off - Flywheel
Direction of rotation - Counterclockwise (viewed from flywheel)
Cooling system - Radiator
Lubrication system - Forced lubrication with trochoid pump
Starting system - Electric
Applicable fuel -
Diesel oil-ISO 8217 DMA, BS 2869 A1 or A2
(Cetane No.45 min.)
Applicable lubricant - API grade class CD or CF
Lubricant capacity
(oil pan) *
Cooling water capacity
(engine only)
Engine dimensions **
(with flywheel housing)
Engine mass (dry) *, **
(with flywheel housing)
Cooling fan (std.) * mm
Crankshaft V pulley diameter &
Fun V pulley diameter (std.)
* Items marked * may differ from the above depending on an engine installed on a machine unit.
** Engine mass and dimensions without radiator
Total L 14.0
Effective L 9.0 7.5
L 6.0
*
Overall
length
Overall
width
Overall
height
*
mm 808 776
mm 629 629
mm 866 866
kg
(equivalent to SAE#3)
355
500 mm O/D,
7 blades pusher type
mm 150
(equivalent to SAE#3)
7 blades suction type
150
340
500 mm O/D,
13
1. General
1.3 Fuel Oil, Lubricating Oil and Coolant Water
1.3.1 Fuel oil
IMPORTANT:
Only use the recommended fuel to obtain the best engine performance and prevent damage of parts,
also prevent air pollution.
(1) Selection of fuel oil
Use the following diesel fuels for best engine performance:
BS 2869 A1 or A2
Fuels equivalent to Japanese Industrial Standard, JIS. No. K2204-2
Fuel cetane number should be 45 or greater
(2) Fuel handling
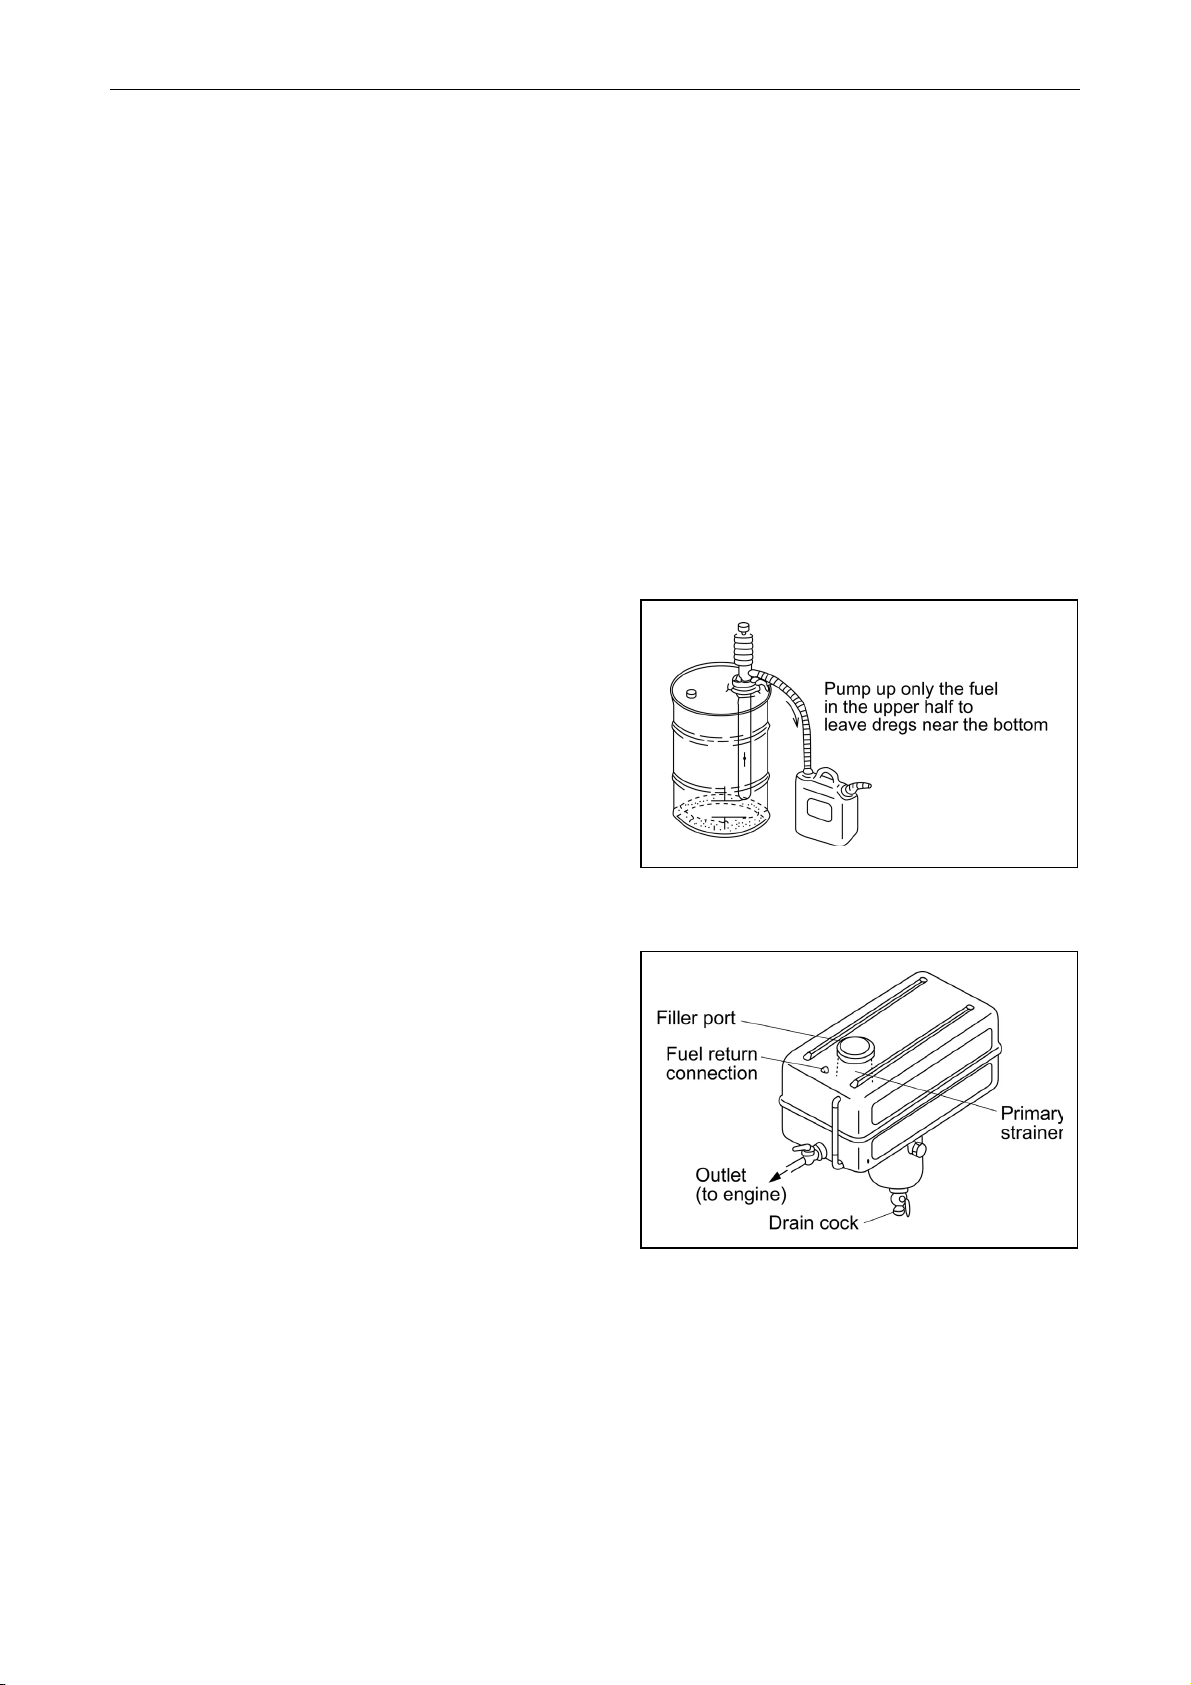
Water and dust in the fuel oil can cause operation
failure. Use containers which are clean inside to
store fuel oil. Store the containers away from
rain water and dust.
Before supplying fuel, let the fuel container rest for
several hours so that water and dust in the fuel
are deposited on the bottom. Pump up only the
clean fuel.
(3) Fuel tank
Be sure to attach a drain cock, precipitation trap and
primary strainer to the fuel tank as shown illustration
right.
14

1.3.2 Lubricating oil
IMPORTANT:
Use of other than the specified engine oil may cause inner parts seizure or early wear, leading to
shorten the engine service life.
(1) Selection of engine lube oil
Use the following engine oil
API classification CD or CF
(Standards of America Petroleum Institute)
SAE viscosity
(Standard of Society of Automotive Engineering)
Engine oil with 10W30 or 15W40 can be used
throughout the year.
(Refer to the right figure.)
(2) Handling of engine oil
Carefully store and handle the oil so as to prevent
dust or dirt entrance. When supplying the oil,
pay attention and clean around the filler port.
Do not mix different types of oil as it may
adversely affect the lubricating performance.
10W-30 or 15W-40
When touching engine oil by hand, the skin of the hand may become
rough. Be careful not to touch oil with your hands without protective
gloves. If touch, wash your hands with soap and water thoroughly.
1. General
1.3.3 Coolant water
Use clean soft water and be sure to add the Long Life Coolant Antifreeze (LLC) in order to prevent rust
built up and freezing. If there is any doubt over the water quality, distilled water or pre-mixed coolant
should be used.
The coolants / antifreezes, which are good performance for example, are shown below.
TEXACO LONG LIFE COOLANT ANTIFREEZE, both standard and pre-mixed.
Product codes 7997 and 7998
HAVOLINE EXTENDED LIFE ANTIFREEZE / COOLANT
Product code 7994
IMPORTANT:
Be sure to add Long Life Coolant Antifreeze(LLC) to soft water. In cold season, the LLC is
especially important. Without LLC, cooling performance will decrease due to scale and rust in the
coolant water line. Without LLC, coolant water will freeze and expand to break the cooling line.
Be sure to use the mixing ratios specified by the LLC manufacturer for your temperature range.
Do not mix different types (brand) of LLC, chemical reactions may make the LLC useless and
engine trouble could result.
Replace the coolant water every once a year.
When handling Long Life Coolant Antifreeze, wear protective rubber
gloves not to touch it. If LLC gets eyes or skin, wash with clean water
at once.
15

1. General
1.4 Engine External Views
16

1.5 Structural Description
1. General
17

1. General
1.6 Exhaust gas emission regulation
The engines in this manual have been certified by the US EPA, California ARB and/or the 97/68/EC
Directive.
California
Proposition 65 Warning
Diesel engine exhaust and some of its constitutions are known to the State of California to cause
cancer, birth defects, and other reproductive harm.
California
Proposition 65 Warning
Battery posts,terminals,and related accessories contain lead and lead compounds,chemicals
known to the State of California to cause cancer and reproductive harm.
1.6.1 The Emission Standard in USA
(1) EPA Nonroad Diesel Engine Emission Standards
g/kW·hr(g/bhp·hr)
Engine Power Tier Model Year NOx HC NMHC + NOx CO PM
kW < 8
(hp < 11)
Tier 1 2000 - - 10.5 (7.8) 8.0 (6.0) 1.0 (0.75)
Tier 2 2005 - - 7.5 (5.6) 8.0 (6.0) 0.80 (0.60)
8 <= kW < 19
(11 <= hp < 25)
19<= kW < 37
(25 <= hp < 50)
37 <= kW < 75
(50 <= hp < 100)
75 <= kW < 130
(100 <= hp < 175)
Note1) The EPA emission regulation under 130kW is mentioned below.
Note2) As for Model year, the year which a regulation is applicable to is shown.
Tier 1 2000 - - 9.5 (7.1) 6.6 (4.9) 0.80 (0.60)
Tier 2 2005 - - 7.5 (5.6) 6.6 (4.9) 0.80 (0.60)
Tier 1 1999 - - 9.5 (7.1) 5.5 (4.1) 0.80 (0.60)
Tier 2 2004 - - 7.5 (5.6) 5.5 (4.1) 0.60 (0.45)
Tier 1 1998 9.2 (6.9) - - - -
Tier 2 2004 - - 7.5 (5.6) 5.0 (3.7)
Tier 3 2008 - - 4.7 (3.5) 5.0 (3.7)
Tier 1 1997 9.2 (6.9) - - - -
Tier 2 2003 - - 6.6 (4.9) 5.0 (3.7)
Tier 3 2007 - - 4.0 (3.0) 5.0 (3.7)
Engine classification
Constant speed engine Not regulated
Variable speed engine 20/15/50 or less
Transient smoke standards % opacity
(acceleration/lug/peak modes)
0.40 (0.30)
0.30 (0.22)
(2) California ARB Emission Regulation
The ARB emission standard is based on that of the EPA.
18

1.6.2 Engine identification
(1) Emission control labels of US EPA
EPA label for constant speed engines EPA label for variable speed engines
(2) Emission control label for both EPA and ARB
1. General
(3) 97/68EC Directive label
19

1. General
1.6.3 Guarantee Conditions for the EPA Emission Standard
The following guarantee conditions are set down in the operation manual. In addition to making sure
that these conditions are met, check for any deterioration that may occur before the required periodic
maintenance times.
(1) Requirement on engine installation condition
(a) Intake air depression
kPa(mmAq)
Initial Permissible
<= 2.94(300) <= 6.23 (635)
(b) Exhaust gas back pressure
kPa (mmAq)
Engine type Initial Permissible
Naturally aspirated engines <= 12.75(1300) <= 15.30(1560)
4TNV98T, 4TNV106T <= 9.81(1000) <= 11.77(1200)
3,4TNV84T <= 4.90(500) <= 5.88(600)
(2) Fuel oil and lubricating oil
(a) Fuel: The diesel fuel oil US No.2 diesel fuel oil.
(b) Lube oil: API grade, class CD or CF
(3) Do not remove the seals restricting injection
quantity and engine speed.
20

1. General
(4) Perform maintenance without fail.
Note: Inspections to be carried out by the user and by the maker are divided and set down in the “List
of Periodic Inspections” and should be checked carefully.
(5) Maintenance period and Quality guarantee period for exhaust emission related parts
The maintenance of the parts related to the exhaust emission must be carried out in the maintenance
period as shown in the below table.
A guarantee period is that either the operation hours or years shown in the table come first in the
condition that the maintenance inspection was carried out based on the “List of Periodic Inspections”.
Maintenance period Quality Guarantee Period
Power Rating
Fuel nozzle cleaning Adjustment, cleaning,
Parts
repairs for fuel nozzle, fuel
pump, turbocharger,
electronic control unit etc.
For nozzle, fuel pump,
turbocharger
37 <= kW < 130 Every 1500 hours
(applied from Tier 2)
19 <= kW < 37
except constant
speed engines >=
3000min-1
KW < 19
And constant speed
engines beyond
3000min-1 under
37kW
Every 1500 hours Every 3000 hours 3000 hours / 5 years
Every 1500 hours Every 3000 hours 1500 hours / 2 years
Every 3000 hours
(applied from Tier 2)
3000 hours / 5 years
21

2. Inspection and Adjustment
2. Inspection and Adjustment
2.1 Periodic Maintenance Schedule
The engine periodic inspection timing is hard to determine as it varies with the application, load status,
qualities of the fuel and lubricating oils used and handling status. General rules are described here.
: User-maintenance : Parts replacement : Shop-inspection
Maintenance period
Classification Item Daily
Whole Visual check around engine
Fuel tank level check and fuel supply
Fuel tank draining
Fuel oil
system
Water separator (Option) draining
Bleeding the fuel system
Water separator cleaning
Fuel filter element replacement
Lube oil level check and replenishment
Lubricating
oil system
Lube oil replacement
Lube oil filter replacement
Coolant water level check and
replenishment
Radiator fin cleaning
Cooling
water
V-belt tension check
system
Coolant water replacement
Coolant/water path flushing and
maintenance
Rubber
house
Governor
Fuel pipe and coolant water pipe
inspection and maintenance
Inspection and adjustment of
governor lever and accelerator
Air cleaner cleaning and element
Air intake
system
replacement
Diaphragm assy inspection
Turbocharger blower cleaning*
Warning lamp & instruments function
Electrical
system
check
Battery electrolyte level check and
battery recharging
Intake/exhaust valve head clearance
Cylinder
head
adjustment
Intake/exhaust valve seat lapping
Fuel injection nozzle pressure inspection * Fuel
injection
pump and
nozzle
EPA allows to maintain the emission related parts every 1,500 or 3,000 hours as shown in 1.6.3 of chapter1. *)
Fuel injection timing adjustment
Fuel injection pump inspection and
adjustment
Every
Every
50
hours
250
hours or
3
months
1st time
and
thereafter
2nd time
2nd time
1st time
and
thereafter
Every
500
hours or
6
months
Every
1000
hours or
one
year
Every
2000
hours or
two
years
(2 years)
*
*
22

2. Inspection and Adjustment
2.2 Periodic Inspection and Maintenance Procedure
2.2.1 Check before Daily Operation
Be sure to check the following points before starting an engine every day.
No. Inspection Item
(1) Visual check around engine
(2) Fuel tank level check and fuel supply
(3) Lube oil level check and replenishment
(4) Coolant water level check and replenishment
(5) Fuel pipe and coolant water pipe inspection and maintenance
(6) Inspection and adjustment of governor lever and accelerator
(7) Warning lamp & instruments function check
(1) Visual check around engine
If any problem is found, do not use before the engine repairs have been completed.
Oil leak from the lubrication system
Fuel leak from the fuel system
Coolant water leak from the cooling water system
Damaged parts
Loosened or lost bolts
Fuel, radiator rubber hoses, V belt cracked, loosened clamp
(2) Fuel tank level check and fuel supply
Check the remaining fuel oil level in the fuel tank and refuel the recommended fuel if necessary. (Refer
to 1.3.(1) )
(3) Lube oil level check and replenishment
(a) Checking oil level
Check the lube oil level with the dipstick, after
adjusting the posture of the machine unit so that an
engine may become a horizontality. Insert the dipstick
fully and check the oil level. The oil shall not be
contaminated heavily and have appropriate viscosity.
No coolant water or diesel fuel shall be mixed.
When lube oil is supplied after the engine running,
check the lube oil level after about 10 minutes pass
after the engine shutdown so that the lube oil inside
ay be retuned the oil pan. m
Standard
The level shall be between the upper and lower
limit lines on the dipstick.
23

2. Inspection and Adjustment
(Unit: liter)
Model Total volume (L) Effective volume (L)
3TNV82A 5.5 1.9
3TNV84(T) 88 6.7 2.8
4TNV84(T) 88 7.4 3.4
4TNV94L 98(T) 10.5 4.5
4TNV106(T) (CL class) 14.0 9.0
4TNV106(T) (VM class) 14.0 7.5
Lube oil capacity may differ from the above volume depending on an engine installed on a machine unit.
(b) Replenishing oil pan with lube oil
If the remaining engine oil level is low, fill the oil pan with the specified engine oil to the specified level
through the filler port.
[NOTICE]
The oil should not be overfilled to exceed the upper limit line. Otherwise a naturally-aspirated
engine may intake lube oil in the combustion chamber during the operation, then white smoke, oil
hummer or urgent rotation may occur, because the blowby gas is reduced in the suction air flow.
In case of turbo-charged engine oil may jet out from the breather or the engine may become faulty.
(4) Coolant water Inspection
Daily inspection of coolant water should be done only by Coolant recovery tank.
Never open the radiator filler cap while the engine and radiator are
still hot. Steam and hot water will spurt out and seriously burn
you. Wait until the radiator is cooled down after the engine has
stopped, wrap the filler cap with a rag piece and turn the cap
slowly to gently release the pressure inside the radiator.
(a) Checking coolant water volume
Check the coolant water level in the Coolant recovery tank. If the water level is close to the LOW mark,
open the Coolant recovery tank cap and replenish the Coolant recovery tank with clean soft water to the
FULL mark.
Standard
The water level of the Coolant recovery tank shall be between the upper and lower limit lines.
(b) Replenishing engine with water
If the Coolant recovery tank water level is lower than the LOW mark, open the radiator cap and check
the coolant water level in the radiator. Replenish the radiator with the coolant water, if the level is low.
Check the coolant water level while the engine is
cool.
Checking when the engine is hot is dangerous.
And the water volume is expanded due to the
heat.
Daily coolant water level check and replenishing
shall be done only at the Coolant recovery tank.
Usually do not open the radiator cap to check or
replenish.
Securely tighten the filler cap after checking the radiator. Steam
can spurt out during operation, if the cap is tightened loosely.
24

2. Inspection and Adjustment
IMPORTANT:
If the coolant water runs short quickly or when the radiator runs short of water with the Coolant
recovery tank level unchanged, water may be leaking or the air tightness may be lost. Increase in
the Coolant recovery tank water level during operation is not abnormal.
The increased water in the Coolant recovery tank returns to the radiator when the engine is cooled
down.
If the water level is normal in the Coolant recovery tank but low in the radiator, check loosened
clamping of the rubber hose between the radiator and Coolant recovery tank or tear in the hose.
Standard
Engine: The radiator shall be filled up.
(Unit: liter)
Model Coolant water volume In an engine
3TNV82A 1.8
3TNV84(T)
3TNV88
4TNV84(T)
4TNV88
4TNV94L
4TNV98(T)
4TNV106(T) 6.0
Engine coolant water capacity may differ from the above
volume depending on an engine installed on a machine unit.
2.0
2.7
4.2
(5) Fuel pipe and coolant water pipe inspection and maintenance
Check the rubber hoses for fuel and coolant water pipes cracked. If the cracked hose is found,
replace it with new one. Check the loosened clamp. If found, tighten it.
(6) Inspection and adjustment of governor lever and accelerator
Make sure the accelerator of the machine unit can be operated smoothly before starting the engine. If
it feels heavy to manipulate, lubricate the accelerator cable joints and pivots. Adjust the accelerator
cable if there is a dislocation or excessive play between the accelerator and the governor lever. Refer
to 3.2.3.
(7) Warning lamp & instruments function check
Before and after starting the engine, check to see that the alarm function normally. Failure of alarm
cannot warn the lack of the engine oil or the coolant water. Make it a rule to check the alarm operation
before and after starting engine every day. Refer to each manual for machine units in details.
2.2.2 inspection after initial 50 hours operation
Be sure to check the following points after initial 50 hours operation, thereafter every 250 hours or 3
months operation.
No. Inspection Item
(1) Lube oil and filter replacement
(2) V-belt tension check
(1) Lube oil and filter replacement (1st time)
When an engine is still hot, be careful with a splash of engine oil which
may cause burns. Replace engine oil after the engine oil becomes warm.
It is most effective to drain the engine oil while the engine is still warm.
25

2. Inspection and Adjustment
In early period of use, the engine oil gets dirty rapidly
because of the initial wear of internal parts. Replace
he engine oil earlier.
t
Lube oil filter should also be replaced when the engine
oil is replaced.
The procedure of lube oil and lube oil filter
replacement is as follows.
(a) Drain engine oil
Prepare a waste oil container collecting waste oil.
Remove the oil filler cap to drain easily while
draining the lube oil.
Loosen the drain plug using a wrench (customer
procured) to drain the lube oil.
Securely tighten the drain plug after draining the
lube oil.
[NOTICE]
Use a socket wrench or a closed wrench when
removing or tightening a drain plug.
Don’t use a spanner because it has the possibility
that the spanner will slip and it will get hurt.
(b) Replacing oil filter
Turn the lube oil filter counter-clockwise using a
filter wrench (customer procured) to remove it.
Clean the mounting face of the oil filter.
Moisten the new oil filter gasket with the engine oil
and install the new engine oil filter manually
turning it clockwise until it comes into contact with
the mounting surface, and tighten it further to 3/4
of a turn with the filter wrench.
Tightening torque: 20
Model Applicable oil filter Part No.
3TNV82A 4TNV98(T) 129150-35151
4TNV106(T) 119005-35100
24N m (2.0 2.4kgf m)
(c) Filling oil and inspection
Fill with new engine oil until it reaches the
specified level.
IMPORTANT:
Do not overfill the oil pan with engine oil.
Be sure to keep the specified level between upper
and lower limit on the dipstick.
Warm up the engine by running for 5 minutes
while checking any oil leakage
Stop the engine after warming up and leave it
stopping for about 10 minute to recheck the
engine oil level with dipstick and replenish the
engine oil. If any oil is spilled, wipe it away with a
clean cloth.
26

(2) V-belt tension check
When there is not enough tension in the V-belt, the
V-belt will slip making it impossible for the alternator to
generate power and cooling water pump and cooling
an will not work causing the engine to overheat.
f
Check and adjust the V-belt tension (deflection) in the
following manner.
[NOTICE]
Be especially careful not to splash engine oil on the
V-belt, because it will cause slipping, stretching and
aging of the belt.
1) Press the V-belt with your thumb [approx.
98N(10kgf)] at the middle of the V-belt span to
check the tension (deflection).
Available positions to check and adjust the V-belt
tension (deflection) are at the A, B or C direction
as shown in the illustration right.
You may choose a position whichever you can
easily carry out the check and adjustment on the
machine unit.
"New V-belt" refers to a V-belt which has been
used less than 5 minutes on a running engine.
"Used V-belt" refers to a V-belt, which has been
used on a running engine for 5 minutes or more.
The specified deflection to be measured at each
position should be as follows.
2. Inspection and Adjustment
Direction A B C
For used V-belt 10 14 7 10 9 13
For new V-belt 8 12 5 8 7 11
2) If necessary, adjust the V-belt tension (deflection).
To adjust the V-belt tension, loosen the set bolt
and move the alternator to tighten the V-belt.
After replacing with a new V-belt and adjusting it,
run the engine for 5 minutes and readjust the
deflection to the value in the table above.
3) After replacing with a new V-belt and adjusting it,
run the engine for 5 minutes and readjust the
deflection to the value in the table above.
4) Visually check the V-belt for cracks, oiliness or
wear. If any, replace the V-belt with new one.
(Unit: mm)
27

2. Inspection and Adjustment
2.2.3 Inspection every 50 hours
Be sure to check the following points every 50 hours operation.
No. Inspection Item
(1) Fuel tank draining
(2) Water separator draining
(3) Bleeding the fuel system
(4) Battery electrolyte level check and battery recharging
(1) Fuel tank draining
1) Prepare a waste oil container.
2) Remove the drain plug of the fuel tank to drain
(water, dust, etc.) from the fuel tank bottom.
3) Drain until fuel with no water and dust flow out.
Then tighten the drain plug firmly.
(2) Water separator draining
Drain off the water separator whenever there is a lot of
drain collected in the water separator at the bottom of
the cup even if not the time for periodic inspection
hour. The cup of the water separator is made from
semi-transparency material and in the cup, the red
colored float ring which rises on the surface of the
drain is installed to visualize the amoun of drain. Also,
the water separator with sensor to detect the drain for
warning device on a controle panel is provided as the
ptional. o
Drain off the water separator in the following manner.
1) Prepare a waste oil container.
2) Close the fuel cock.
3) Loosen the drain cock at the bottom of the water
separator, and drain off any water collected
inside.
4) Tighten the drain cock with hand.
5) Be sure to bleed air in the fuel system.
NOTE:
If no drain drips when the drain cock is opened, loosen the air bleeding bolt on the top of the water
separator by turning counter-clockwise 2
(This may occure in case of the water separator position is higher than the fuel oil level in the fuel tank).
After draining, be sure to tighten the air bleeding bolt.
3 times using screw driver.
28

(3) Bleeding the fuel system
Bleed the fuel system according to the following
procedures. When there is air in the fuel system, the
fuel injection pump will not be able to function.
1) Check the fuel oil level in the fuel tank. Refuel if
insufficient.
2) Open the cock of the water separator.
3) Loosen the air bleeding bolt on the water
separator by turning 2~3 times to the
counter-clockwise using screw driver or spanner.
4) When the fuel coming out is clear and not mixed
with any bubble, tighten the air bleeding bolt.
5) Feed the fuel with the fuel priming pump or
electro-magnetic fuel feed pump.
In case of the engine using the electro-magnetic
fuel feed pump.
Turn the starter switch to the ON position and hold
it in the position for 10~15 seconds to operate the
fuel feed pump.
In case of the engine installed the fuel filter
mounting with the fuel priming pump.
The priming pump is on the top of the fuel filter
mounting. Move the priming pump up and down
to feed fuel until feel your hand slightly heavy.
2. Inspection and Adjustment
(4) Battery electrolyte level check and battery recharging
F ire due to electric short-circuit
Make sure to turn off the battery switch or disconnect the negative
cable (-) before inspecting the electrical system. Failure to do so
could cause short-circuiting and fires.
Always disconnect the (-) Negative battery cable first before
disconnecting the battery cables from battery. An accidental "Short
circuit" may cause damage, fire and or personal injury.
And remember to connect the (-) Negative battery cable (back onto
the battery) LAST.
P roper ventilation of the battery area
Keep the area around the battery well ventilated, paying attention to
keep away any fire source. During operation or charging, hydrogen
gas is generated from the battery and can be easily ignited.
D o not come in contact with battery electrolyte
Pay sufficient attention to avoid your eyes or skin from being in contact
with the fluid. The battery electrolyte is dilute sulfuric acid and causes
burns. Wash it off immediately with a large amount of fresh water if
you get any on you.
29

2. Inspection and Adjustment
Battery structure
(1) Electrolyte level
Check the level of fluid in the battery.
When the amount of fluid nears the lower limit, fill
with battery fluid (available in the market) to the
upper limit. If operation continues with
insufficient battery fluid, the battery life is
shortened, and the battery may overheat and
explode.
Battery fluid tends to evaporate more quickly in
the summer, and the fluid level should be checked
earlier than the specified times.
If the engine cranking speed is so slow that the
engine does not start up, recharge the battery.
If the engine still will not start after charging,
replace the battery.
Remove the battery from the battery mounting of
the machine unit after daily use if letting the
machine unit leave in the place that the ambient
temperature could drop at -15
store the battery in a warm place until the next use
the unit to start the engine easily at low ambient
temperature.
or less. And
(2) Battery charge
Use a battery tester or hydrometer and check the
battery condition. If the battery is discharged,
recharge it.
(a) Measurement with a battery tester
When checking the battery with the batter tester,
connect the red clip of the tester to the battery positive
(+) terminal and black clip to the battery negative (-)
terminal by pinching them securely, and judge the
battery charge level from the indicator position.
Green zone: Normal
Yellow zone: Slightly discharged
Red zone: Defective or much discharged
30

(b) Measurement with hydrometer
When using a hydrometer, the measured
specific gravity must be corrected according to
the temperature at the time of measurement.
The specific gravity of battery electrolyte is
defined with 20 as the standard. Since the
specific gravity increases or decreases by
0.0007 when the temperature varies by 1 ,
correct the value according to the equation
below.
(c) Specific gravity and remaining battery charge
Specific
gravity
(20 )
1.28 0 100
Discharged
quantity
of electricity
(%)
Remaining
charge
(%)
2. Inspection and Adjustment
1.26 10 90
1.24 20 80
1.23 25 75
(3) Terminals
Clean if corroded or soiled.
(4) Mounting bracket
Repair or replace it if corroded.
Retighten if loosened.
(5) Battery appearance
Replace the battery if cracked or deformed.
Clean with fresh water if contaminated.
31

2. Inspection and Adjustment
2.2.4 Inspection every 250 hours or 3 months
Be sure to check the following points every 250 hours or 3 months operation, whichever comes first.
No. Inspection Item
(1) Lube oil and filter replacement
(2) Radiator fin cleaning
(3) V-belt tension check
(4) Inspection and adjustment of governor lever and accelerator
(5) Air cleaner cleaning and element replacement
(1) Lube oil and filter replacement (The second replacement and after)
Replace the engine oil every 250 hours operation from 2nd time and on. Replace the engine oil filter
at the same time. Refer to 2.2.1.(1).
(2) Radiator fin cleaning
B eware of dirt from air blowing
Wear protective equipment such as goggles to protect your eyes when
blowing compressed air. Dust or flying debris can hurt eyes.
Dirt and dust adhering on the radiator fins reduce the
cooling performance, causing overheating. Make it a
rule to check the radiator fins daily and clean as
eeded.
n
Blow off dirt and dust from fins and periphery with
compressed air [0.19MPa (2kgf/cm
to damage the fins with compressed air.
If contaminated heavily, apply detergent,
thoroughly clean and rinse with tap water shower.
IMPORTANT:
Never use high pressure water or air from close by
fins or never attempt to clean using a wire brush.
Radiator fins can be damaged.
(3) V-belt tension check (The second time and after)
Check and adjust the V-belt tension. Refer to 2.2.2(2)
2
) or less] not
32

(4) Inspection and adjustment of governor lever and accelerator
The governor lever and accelerating devices
(accelerating lever, pedal, etc.) of the machine unit are
connected by an accelerating wire or rod. If the wire
becomes stretched or the connections loose, the
deviation in the position may result and make
operation unsafe. Check the wire periodically and
djust if necessary. a
Do not strongly move the accelerating wire or
accelerating pedal. It may deform the governor lever
or stretch the wire to cause irregular engine speed
control.
Checking and adjusting procedure are as follows.
1) Check that the governor lever of the engine
makes uniform contact with the high idling and
low idling limiting bolt when the accelerating
devices is in the high idling speed or low idling
speed position.
2) If either the high or the low idling speed side does
not make contact with the limiting bolt, adjust the
accelerating wire.
Loosen the accelerating wire fixing nut and adjust
the wire to contact with the limitng bolt.
2. Inspection and Adjustment
Never release the limiting bolts. It will impair the
safety and performance of the product and functions
and result in shorter engine life.
(5) Air cleaner cleaning and element replacement
B eware of dirt from air blowing
Wear protective equipment such as goggles to protect your eyes when
blowing compressed air. Dust or flying debris can hurt eyes.
The engine performance is adversely affected when
the air cleaner element is clogged by dust. So
periodical cleaning after disassembly is needed.
1) Undo the clamps on the dust pan and remove the
dust pan.
2) Loosen the wing bolt on the element and pull out
the element.
33

2. Inspection and Adjustment
3) Blow air [0.29
0.49MPa (3.0 5.0kgf/cm2)] from
inside the element to blow dust off as shown in
the illustration right.
Apply the air blowing pressure as low as possible
so as not to damage the element.
If having the air cleaner with double elements,
never remove and clean the inner element.
The aim of installing the inner element is for back
up protecting from intaking dust during engine
running when leaving the outer element to
reinstall after removing it or when damaging the
outer element unexpectedly during engine
running.
4) Replace the element with new one, If the element
is damaged, excessively dirty or oily.
5) Remove the inside dust cover of the dust pan,
and clean inside of the dust pan.
6) Reinstall the element with the wing bolt. (do not
leave the gasket.) Reattach the inside dust
cover to the dust pan and install the dust pan to
the air cleaner case placing the TOP mark
upward.
IMPORTANT:
When the engine is operated in dusty conditions,
clean the element more frequently.
Do not run the engine with removed air cleaner or
element, as this may cause foreigh material to
enter and damage the engine.
34

2. Inspection and Adjustment
2.2.5 Inspection every 500 hours or 6 months
Be sure to check the following points every 500 hours or 6 months operation, whichever comes first.
No. Inspection Item
(1) Water separator cleaning
(2) Fuel filter element replacement
(3) Air cleaner cleaning and element replacement
(1) Water separator cleaning
Periodically wash the water separator element and
inside cup with clean fuel oil.
1) Prepare a waste oil container.
2) Close the fuel cock.
3) Loosen the drain cock and drain.
Refer to 2.2.3.(2)
4) Turn the retaining ring counter-clockwise and
remove the cup.
(Disconnect the coupler of the lead wire for drain
sensor before removing the cup if it is with drain
sensor).
5) Wash the element and inside cup with clean fuel
oil. Replace the element with new one if any
damaged.
Model Applicable element Part No.
3TNV82A
4TNV106(T)
6) Insert the element to the bracket (O-ring) and
after putting the float ring in the cup, install it to
the bracket by tightening the retaining ring
clockwise.
Tightening torque: 15
7) Close the drain cock (connect the coupler if with
drain sensor).
8) Bleed the fuel system. Refer to 2.2.3.(3)
119802-55710
20Nm (1.5 2.0kgf-m)
35

2. Inspection and Adjustment
(2) Fuel filter element replacement
Replace the fuel filter at specified intervals, before it is
clogged with dust to adversely affect the fuel flow.
Also, replace the fuel filter after the engine has fully
been cooled.
1) Close the fuel cock of the water separator.
2) Remove the fuel filter using a filter
wrench(customer procured). When removing
the fuel filter, hold the bottom of the fuel filter with
a piece of rag to prevent the fuel oil from
dropping. If you spill fuel, wipe such spillage
carefully.
3) Clean the filter mounting surface and slightly
apply fuel oil to the gasket of the new fuel filter.
4) Install the new fuel filter manually turning until it
comes into contact with the mounting surface,
and tighten it further to 1/2 of a turn using a filter
wrench.
Tightening torque for 3TNV82A to 4TNV106(T):
24N・m(2.0 2.4kgf・m)
20
Model Applicable fuel filter Part No.
3TNV82A
4TNV88
4TNV98(T)
4TNV106(T)
5) Bleed the fuel system. Refer to 2.2.3.(3)
119802-55800
123907-55800
IMPORTANT:
Be sure to use genuine Yanmar part (super fine
mesh filter). Otherwise, it results in engine damage,
uneven engine performance and shorten engine life.
(3) Air cleaner cleaning and element replacement
Replace the air cleaner element periodically even if it is not damaged or dirty.
When replacing the element, clean inside of the dust pan at the time.
If having the air cleaner with double elements, do not remove the inner element. If the engine output is
still not recover (or the dust indicator still actuates if having the air cleaner with a dust indicator) even
though the outer element has replaced with new one, replace the inner element with new one.
36

2. Inspection and Adjustment
2.2.6 Inspection every 1,000 hours or one year
Be sure to check the following points every 1,000 hours or one year operation, whichever comes first.
No. Inspection Item
(1) Cooling water replacement
(2) Diaphragm assy inspection
(3) Turbocharger blower cleaning*
(4) Intake/exhaust valve clearance adjustment
(5) Fuel injection nozzle pressure inspection
( 1) Cooling water replacement
Cooling water contaminated with rust or water scale
reduces the cooling effect. Even when antifreeze
agent (LLC) is mixed, the cooling water gets
contaminated due to deteriorated ingredients.
Replace the cooling water at least once a year.
Beware of scalding by
ot water h
Wait until the temperature
goes down before draining
the coolant water.
1) Remove the radiator cap.
2) Loosen the drain plug at the lower portion of the
radiator and drain the cooling water.
3) After draining the cooling water, tighten the drain plug.
4) Fill radiator and engine with cooling water.
a)Before filling, check to be sure the drain plug is closed.
b)Remove the radiator cap of the radiator by turnig the radiator cap counter-clockwise about 1/3 of a turn.
c)Pour the cooling water slowly into the radiator up to the lip of the filler port so that air bubbles do not
develop.
d)After supplying the cooling water, surely tighten the radiator cap. To fasten the radiator cap, align the
detents on the back face of the radiator cap with the slot of the filler port and turn clockwise pushing it
Otherwise, hot water may
splash to cause scalding.
downward approx. 1/3 of a turn until contact with each other.
e)Remove the cap of the coolant recovery tank, supply the cooling water to the FULL mark and fasten the
cap.
f)Check the rubber hose connecting the coolant recovery tank to the radiator. Be sure the rubber is
securely connected and there is no looseness or damage. When the rubber hose is not water tight, an
excessive amount of cooling water will be consumed.
37

2. Inspection and Adjustment
g)When filling with the cooling water for the first time or replacing, the air contains in the cooling water
system. So, as the air in the cooling water system is self-bleeded during engine operation, the cooling
water level in the radiator and coolant recovery tank will be lowered. Replenish the cooling water into the
radiator and coolant recovery tank until it reaches the FULL mark of the coolant recovery tank.
Daily check of the cooling water level and refilling can be done by observing the coolant recovery
tank.
The cooling water capacity of the radiator depends on the machine unit. Refer to the operation
manual provided by the equipment manufacturer.
Check the cooling water level when the engine is cold. Cooling water flows to the coolant
recovery tank when the radiator is still hot and makes accurate checks impossible.
Check the radiator and hoses for leakage.
(2) Diaphragm assy inspection
Inspect the diaphragm assy on the rocker arm cover
every 1000 hours or 2 years. Refer to 4.2.4 point 6
for the function of the diaphragm.
1) Loosen screws, and remove a diaphragm assy,
and check whether oil and so on doesn’t enter
between the diaphragm and the cover. If oil and
so on enters into the diaphragm assy, the
diaphragm doesn’t work well.
2) Check the damages of the diaphragm rubber and
the spring. If necessary, replace with new ones.
[NOTICE]
When a diaphragm is damaged, pressure control
inside the crankcase becomes insufficient, and
troubles such as combustion defect and so on
occur.
At lubricating oil replacement or lubricating oil
supply, the amount of lubricating oil isn’t to be
beyond the standard upper limit. If the lubricating
oil quantity is beyond the upper limit or an engine
is operated beyond the allowable maximum angle
of an engine, the amount of oil mist may be
inducted in the combustion chamber and the oil
hammer sometimes may occur.
38

2. Inspection and Adjustment
(
3) Turbocharger blower cleaning*
When engine speed seems sluggish or the exhaust color looks poor, the blades of the
turbocharger-blower may be dirty.
Wash the turbine blower in such a case.
(a) General items
1) As for washing, use washing liquid and clear water.
2) Washing time is the time when about 10% of the boost pressure decreases more than that of
usual operation state as a standard.
3) Disassemble and clean a turbocharger periodically because the whole of the turbocharger can’t be
cleaned in this method.
(b) Washing point
1) A specified quantity of washing liquid/water is poured with a filler (ex. Oil sprayer) from the air inlet
of the blower gradually (about ten seconds) at the normal load (3/4-4/4) of an engine.
And, perform this work at no-load after load running of the engine, if it is difficult to pour the liquid
into the blower at load running.
Specified quantity of washing liquid/water
Turbocharger model RHB31, RHB51
Injection amount, one time 20 cc
It causes an accident when large quantity of washing liquid is poured rapidly into a turbocharger.
2) Pour the same amount of clear water as washing liquid/water into the blower about 3-5 minutes
later after the washing liquid/water injection and wash it.
It causes an accident when large quantity of water is poured rapidly into a turbocharger.
3) Repeat the washing after then minutes when there is no change with the boost pressure or the
exhaust gas temperature after washing.
When there is no change at all even if it repeats 3-4 times, disassemble and maintain the
turbocharger because of the cruel dirt of the blower or other causes.
4) Operate the engine at load for at least 15 minutes after washing, and dry.
39

2. Inspection and Adjustment
(4) Intake/exhaust valve clearance adjustment
Make measurement and adjustment while the engine
is cold.
(a) Valve clearance measurement
1) Remove the rocker arm cover above cylinder
head.
2) Set the No.1 cylinder in the compression TDC
Turn the crankshaft to bring the piston of the
No.1 cylinder to its compression top dead center
while watching the rocker arm motion, timing
scale and the top mark position of the crankshaft
pulley.
(Position where both the intake and exhaust
valves are closed.)
Notes:
The crankshaft shall be turned clockwise as seen
from the radiator side.
The No.1 cylinder position is on the opposite side
of the radiator and the ignition order shall be
1-3-4-2-1 at 180°intervals.
Since the intake and exhaust valve rocker arms
are operated the same and there is a clearance
between the arm and valve generally at the top
dead center, the position can be checked by
means of the play when the arm head is held with
a hand. Also see that the crankshaft pulley top
mark is positioned at zero on the timing scale. If
there is no valve clearance, inspection in the
disassembled state is necessary since the valve
seat may be worn abnormally.
3) Valve clearance measurement
In case of 2-valve cylinder head insert a
thickness gage between the rocker arm and
valve cap, and record the measured valve
clearance.
In case of 4-valve head insert a thickness gage
between the rocker arm and the valve bridge,
and record the measured valve clearance.
(Use it as the data for estimating the wear state.)
4) Adjusting other cylinders
In case of 4-cylinder engines, turn the crankshaft
and make adjustment for the No.3 cylinder.
180
Then adjust the No.4 and No.2 cylinders in this
order.
The cylinder to be adjusted first does not have to
be the No.1 cylinder. Select and adjust the
cylinder where the piston is the nearest to the top
dead center after turning, and make adjustment
for other cylinders in the order of ignition by
turning the crankshaft 180
In case of 3-cylinder engines, turn the crankshaft
and make adjustment for the No.3 cylinder.
240
Then adjust the No.2 cylinder in this order.
each time.
40

2. Inspection and Adjustment
The cylinder to be adjusted first does not have to be the No.1 cylinder. Select and adjust the
cylinder where the piston is the nearest to the top dead center after turning, and make adjustment
for other cylinders in the order of ignition by turning the crankshaft 240
each time.
The adjustment method of reducing the flywheel turning numbers (for reference):
For 3 cylinder engines
Set No.1 cylinder to the compression T.D.C.and adjust the clearance of the
mark of the below
table. Next, turn the flywheel once (the suction / exhaust valve of No.1 cylinder is in the position
of the overlap T.D.C. at this time), and adjust the clearance of the
Ignition order of 3 cylinder engines: 1 3 2
Cylinder No. 1 2 3
Valve Suction Exhaust Suction Exhaust Suction Exhaust
No.1
compression
T.D.C
No.1
overlap
T.D.C
mark.
The first time
The second time
For 4 cylinder engines
Set No.1 cylinder to the compression T.D.C. and adjust the clearance of the
bottom table. Next, turn the flywheel once, and adjust the clearance of the
mark of the
mark.
Ignition order of 3 cylinder engines: 1 3 4 2
Cylinder No. 1 2 3 4
Valve Suction Exhaust Suction Exhaust Suction Exhaust Suction Exhaust
No.1
compression
T.D.C
No.4
compression
T.D.C
(b) Valve clearance inspection and adjustment
1) Loosen adjusting bolts
In case of 2-valve cylinder head loosen the lock
nut and adjusting screw, and check the valve for
any inclination of valve cap, entrance of dirt or
wear.
In case of 4-valve cylinder head loosen the lock
nut and adjusting screw of rocker arm. Be careful
that excessive tension isn't applied to the valve
bridge, and loosen a locknut of valve bridge.
The first
time
The
second
time
[NOTICE]
When loosening a locknut of a valve bridge, loosen
the locknut while fixing the valve bridge with a
wrench so that the valve may not lean.
41

2. Inspection and Adjustment
Push the bridge head so that a valve bridge and
two valve stem heads may contact each other
uniformly, and adjust an adjusting bolt so that a
gap of the valve stem head may become 0.
Tighten a locknut after a valve bridge is fixed with
a wrench.
2) Measuring valve clearance
Insert a 0.2 or 0.3 mm thickness gage between
the rocker arm and valve cap / valve bridge, and
adjust the valve clearance. Tighten the adjusting
screw.
mm
Model Standard valve clearance
3TNV82A 98 0.15 0.25
4TNV106(T) 0.25 0.35
[NOTICE]
When tightening a valve bridge locknut of 4-valve
head, tighten a locknut after fixing a valve bridge
with a wrench so that a bridge may not rotate and a
valve may not lean.
3) Apply oil to the contact surface between adjusting
screw and push rod.
4) Adjusting other cylinders
In case of 4-cylinder engines turn the crankshaft
then and make adjustment for the No.3
180
cylinder. Then adjust the No.4 and No.2
cylinders in this order.
The cylinder to be adjusted first does not have to
be the No.1 cylinder. Select and adjust the
cylinder where the piston is the nearest to the top
dead center after turning, and make adjustment
for other cylinders in the order of ignition by
turning the crankshaft 180
In case of 3-cylinder engines turn the crankshaft
240 then and make adjustment for the No.3
cylinder. Then adjust the No.2 cylinder in this
order.
The cylinder to be adjusted first does not have to
be the No.1 cylinder. Select and adjust the
cylinder where the piston is the nearest to the top
dead center after turning, and make adjustment
for other cylinders in the order of ignition by
turning the crankshaft 240
each time.
each time.
42

(5) Fuel injection nozzle pressure inspection
2. Inspection and Adjustment
Wear protective glasses when testing injection from the fuel injection valve. Never approach the
injection nozzle portion with a hand. The oil jetting out from the nozzle is at a high pressure to cause
loss of sight or injury if coming into careless contact with it.
(a) Injection pressure measurement
Model
3TNV82A TNV88 (CL )
3TNV82A TNV88 (VM )
4TNV94L 4TNV106(T)
Standard
MPa(kgf/cm
19.6-20.6
(200-210)
21.6-22.6
(220-230)
2
)
[NOTICE]
As for the opening pressure of the brand-new fuel
nozzle, about 0.5Mpa(5kgf/cm) declines by the
engine operation for about 5 hours because of the
initial wear-out of a spring etc. Therefore, adjust
0.5MPa(5kgf/cm) higher than the standard value of
the above table when adjusting a new fuel nozzle of
a spare part.
Remove carbon deposit at the nozzle hole thoroughly
before measurement.
1) Connect the fuel injection valve to the high
pressure pipe of the nozzle tester.
2) Operate the nozzle tester lever slowly and read
the pressure at the moment when the fuel
injection from the nozzle starts.
3) If the measured injection pressure is lower than
the standard level, replace the pressure adjusting
shim with a thicker one.
Thickness of pressure adjusting shims
mm
0.13, 0.15, 0.18, 0.4, 0.5, 0.8
The injection pressure is increased by approx. l.9 MPa(l9 kgf/cm
when the adjusting shim thickness is increased by 0.l mm.
Injection pressure adjustment
2
),
43

2. Inspection and Adjustment
[Informative: Fuel injection valve structure]
(b) Spray pattern inspection
After adjustment to the specified valve opening
pressure, use a nozzle tester and check the spray
pattern and seat oil-tightness.
Seat oil tightness check
After injecting a few times, increase the pressure
gradually. Hold the pressure for about 5 seconds
at a little before the valve opening pressure of
1.96 MPa(20kgf/cm
2
), and check to see that oil
does not drip from the tip end of the nozzle.
If extreme oil leak from the overflow joint exists
during injection by the nozzle tester, check after
retightening. If much oil is leaking, replace the
nozzle assembly.
44

Spray and injection states
Operate the nozzle tester lever at a rate of once
or twice a second and check no abnormal
injection.
If normal injection as shown below cannot be
obtained, replace the fuel injection valve.
No extreme difference in angle(
No extreme injection angle difference(
Finely atomized spray
Excellent spray departure
)
)
(c) Nozzle valve sliding test
Wash the nozzle valve in clean fuel oil. Place the
nozzle body vertically and insert the nozzle into the
body to about 1/3 of its length. The valve is normal if
it smoothly falls by its own weight into the body. In
case of a new nozzle, remove the seal peel, and
immerse it in clean diesel oil or the like to clean the
inner and outer surfaces and to thoroughly remove
rust-preventive oil before using the nozzle. Note that
a new nozzle is coated with rust-preventive oil and is
pasted with the seal peel to shut off outer air.
(d) Nozzle punch mark
2. Inspection and Adjustment
45

2. Inspection and Adjustment
θ
θ
2.2.7 Inspection every 2000 hours or 2 years
B e sure to check the following points every 2,000 hours or two years operation, whichever comes first.
No. Inspection Item
(1) Coolant water path flushing and maintenance
(2) Fuel pipe and coolant water pipe inspection and maintenance
(3) Intake/exhaust valve seat lapping
Fuel injection timing adjustment
(4)
Fuel injection pump inspection and adjustment
(1) Coolant water path flushing and maintenance
Rust and water scale will accumulate in the cooling system through many hours of operation. This
lowers the engine cooling effect. Oil coolers (attached to turbocharged engines and some of naturally
aspirated engines) quickly deteriorate the lube oil. The cleaning and maintenance of the following
parts are necessary in accordance with the coolant water replacement.
Cooling system parts: radiator, cooling water pump, thermostat, cylinder block, cylinder head, oil cooler.
(2) Fuel pipe and coolant water pipe inspection and maintenance
Regularly check the rubber hoses of the fuel system and cooling water system. If cracked or degraded,
replace them with new one. Replace the rubber hoses at least every 2 years even if 2,000 hours
doesn’t come.
(3) Intake/exhaust valve seat lapping
The adjustment is necessary to maintain proper contact of the valves and seats. Refer to 4.2.6 in Chapter 4.
(4) Fuel injection timing adjustment / Fuel injection pump inspection and adjustment
The fuel injection timing and the fuel injection pump are adjusted so that engine performance may
become the best condition. As for the inspection and adjustment of the fuel pump, it is based on the
service manual of the MP pump of the separate volume. The fuel injection timing is adjusted by the
following procedure.
As for the engine, which adopts a MP type fuel
(note) is
injection pump, the fuel injection angle
adjusted for the fuel injection timing adjustment,
because the adjusting method of fuel injection timing
ke an inline fuel pump can’t be applied.
li
(cam angle) is the
Note) The fuel injection angle
θ
i
difference from the injection valve opening
angle while the fuel injection pump being driven
by a motor and the angle at the plunger lift
2.5mm of the fuel pump.
And, as for the actual fuel injection angle
the measured value is recorded on the pump
body by each every fuel pump.
The adjustment of fuel injection angle
In case that a fuel pump cover, installed with a gear
case cover and the fuel pump are removed, and
reassembled, the procedure of fuel injection angle
adjustment is as follows. (As for the disassembly of
a fuel injection pump, refer to 7.2.3 in chapter 7.)
θ
i
,
i
i
[NOTICE]
Never loosen four flange bolts, which fasten a pump
flange and a fuel pump drive gear at the time of the
removal of the fuel pump. When it is loosened, the
adjustment of the fuel injection timing becomes very
difficult.
46

2. Inspection and Adjustment
1) Before removing a fuel pump drive gear, make ID
marks on the gearing part of the pump drive gear
and the idle gear with paint and so on.
2) Make the mark-off line to the gear case precisely
in accordance with the position of mark-off line of
the fuel pump.
3) Before removing a fuel pump, put the standard
mark of a sticker for fuel injection angle
adjustment in accordance with the mark-off line
of the fuel pump and paste it on the gear case.
4) Remove a fuel pump, and read the fuel injection
angle recorded in that fuel pump.
5) Read the injection angle recorded on a reassembled fuel pump and calculate the difference from
the injection angle of the disassembled fuel pump. (When re-installation does the same fuel
pump, the angular difference is zero.)
Fuel injection angle difference (cam angle) = (the fuel injection angle of a reassembled fuel pump)
- (the fuel injection angle of a disassembled previous fuel pump)
[NOTICE]
Tell the fuel pump number to Yanmar, and inquire the injection angle of the pump when it is hard to
find out.
6) Put the fuel pump on the gear case temporarily and install the drive gear on the cam shaft with
checking the ID marks, which were put on the fuel pump drive gear and the idle gear at the time of
the disassembling.
Tighten the installation nut of a pump drive gear.
Model
3TNV82A TNV88 78 88 (8 9)
4TNV94L/98/106(T) 113 123 (11.5 12.5)
Tightening torque
Nm(kgf・m)
Lubricating oil application
(thread portion, and seat surface)
Not applied
47

2. Inspection and Adjustment
7) Adjust the injection angle difference, calculated in
the above 5), at 0.25
in the unit in the
installation angle of the fuel pump while reading
the mark (minimum 0.5
and cam angle) of the
adjustment sticker.
[NOTICE]
Push down the fuel pump in the outside direction of
the cylinder block at +1 degree when a injection
angle difference is +1 degree. And, push it down to
the cylinder block side when a difference is –1
degree.
8) Tighten the fuel pump installation nuts.
(Supplementary explanation 1)
The installation angle of the fuel pump is as follows.
Model
3TNV82A TNV88 25
Installation angle
(deg.)
4TNV94L/98/106(T) 13
4TNV106(T) 11.5
(Supplementary explanation 2)
When fuel injection timing is advanced or delayed,
the installation angle of the fuel pump is adjusted.
When fuel injection timing is advanced for example at
2 degrees, loosen the nuts, which fix the fuel pump
on the gear case, and turn the fuel pump body in the
outside direction of the cylinder block at 1 degree,
and tighten the pump installation nuts.
And, when fuel injection timing is delayed, a pump is
turned in that reverse direction.
48

2. Inspection and Adjustment
2.3 Adjusting the no-load maximum or minimum speed
1) After warming the engine up, gradually raise the speed and set it at the no-load maximum
revolution.
2) If the no-load maximum speed is out of the
standard, adjust it by turning the high idle limiting
bolt.
The no-load maximum speed standard is shown
in the specification tables in 1.2 of the chapter
1.
3) Then set the no-load minimum speed by adjusting
the low idle limiting bolt.
No-load minimum speed standards (Unit: min-1)
Engine application
class
CL 1200
VM
Note) The engine speed may differ from the above
standard depending on an engine installed on a
machine unit.
No-load minimum speed
(
25)
800
(1100 for 4TNV106(T) )
49

2. Inspection and Adjustment
2.4 Sensor Inspection
2.4.1 Oil pressure switch
Disconnect the connector from the oil pressure switch.
Keep the voltammeter probes in contact with the
switch terminal and cylinder block while operating the
engine. It is abnormal if circuit is closed.
2.4.2 Thermo switch
Place the thermo switch in a container filled
with antifreeze or oil. Heat it while measuring
the fluid temperature. The switch is normal if
the voltammeter shows continuity when the fluid
temperature is 107 113 deg C.
2.5 Water leak check in cooling water system
Check coolant water leakage from the cooling water
system visually. If any problem is found, Inspect as
follows.
1) Fill coolant water to the normal level in the
radiator, and install the cap tester on the radiator.
2) Operate the manual pump to set the pressure to
0.015MPa (0.9 0.15kgf/cm2). If the cap
0.09
tester pressure gage reading drops then, water is
leaking from the cooling water system. Check
the water leaking point.
50

2.6 Radiator cap inspection
Install the radiator cap on the cap tester. Set the
tester pressure to 0.09
and see that the cap is opened. If the cap does not
open, replace the cap since it is abnormal.
0.015MPa (0.9 0.15kgf/cm2)
2.7 Thermostat Inspection
Place the thermostat in a container filled with water.
Heat it while measuring the water temperature, and
see that the thermostat is actuated at temperature of
following table.
Valve opening
Model
All models 69.5 72.5 8 or more (85deg C)
* Valve opening temperature is carved on the flange.
Temperature
(deg C)*
Full open lift
(Temperature)
(mm)
2. Inspection and Adjustment
51

2. Inspection and Adjustment
2.8 Adjusting Operation
Perform the adjusting operation of a engine as follows after the maintenance job:
1) Supply the fuel oil, lubricating oil and coolant water.
Note:
Check the levels of the lubricating oil and coolant water again after test running (for about 5 minutes)
and add as required.
2) Start the engine, and carry out idling at a low revolution (700 to 900 rpm) for a few minutes.
3) Run in the engine for about five minutes at the rated revolution (no-load). Check any water, fuel
or oil leak and existence of abnormal vibration or noise. Also check the oil pressure, coolant
water temperature and exhaust gas color.
4) Adjust the no-load minimum and maximum revolutions according to the specifications.
5) Perform loaded operation as required.
2.9 Long storage
Observe the following instructions when the engine is to be stored for a long period without operation:
1) Be sure to use clean soft water added Long Life Coolant Antifreeze (LLC) in the cooling water
system and do not drain the coolant before long-term storage.
If drain the cooling water, it will cause to built up rust due to the residual water in the cooling water
system.
2) Remove the mud, dust and oil deposit and clean the outside.
3) Perform the nearest periodic inspection before the storage.
4) Drain or fill the fuel oil fully to prevent condensation in the fuel tank.
5) Disconnect the battery cable from the battery negative (-) terminal.
6) Cover the silencer, air cleaner and electric parts with PVC (Poly Vinyl Chloride) cover to prevent
water and dust from depositing or entrance.
7) Select a well-ventilated location without moisture and dust for storage.
8) Perform recharging once a month during storage to compensate for self-discharge.
52

3. Troubleshooting
3. TROUBLESHOOTING
3.1 Preparation before troubleshooting
If the signs of a trouble appear, it is important to lecture on the countermeasure and treatment before
becoming a big accident not to shorten the engine life.
When the signs of a trouble appear in the engine or a trouble occurs, grasp the trouble conditions fully
by the next point and find out the cause of sincerity according to the troubleshooting. Then repair the
trouble, and prevent the recurrence of the trouble.
1) What’s the occurrence phenomenon or the trouble situation?
2) Investigation of the past records of the engine
Check a client control ledger, and examine the history of the engine.
Investigate the engine model name and the engine number. (Mentioned in the engine label.)
Examine the machine unit name and its number in the same way.
When was the engine maintained last time?
How much period and/or time has it been used after it was maintained last time?
What kind of problem was there on the engine last time, and what kind of maintenance was dane?
3) Hear the occurrence phenomenon from the operator of the engine in detail.
5W1H of the occurrence phenomenon : the investigation of when (when), where (where), who
When did the trouble happen at what kind of time?
Was there anything changed before the trouble?
Did the trouble occur suddenly, or was there what or a sign?
Was there any related phenomenon.
4) After presuming a probable cause based on the above investigation, investigate a cause
.(e.g. Poor exhaust color and starting failure at the same time)
systematically by the next troubleshooting guide, and find out the cause of sincerity.
(who), what (what), why (why) and how (how)
(e.g. Poor exhaust color )
53

3.2 Quick Reference Table for Troubleshooting
The following table summarizes the general trouble symptoms and their causes. If any trouble symptom occurs, take corrective action before it becomes a serious problem so as not to shorten the engine service life.
Black
Poor
exhaust
color
During
work
White
Black
High knocking sound during combustion
Abnormal engine sound
Lap the valve seat. (See 4.2.6 in Chapter4.)
Correct or replace.
Replace the piston ring. (See 4.4.2-5) & 10) in Chapter4.)
Reassemble correctly. (See 4.4.4-point 6 in Chapter4.)
Hunting Lubricating oil
Uneven combustion sound
During idling
During work
Large engine vibration
Difficulty in returning to low speed
Excessive fuel consumption
Excessive consumption
Dilution by fuel oil
Mixture with water
Low L.O. pressure
Cooling
water
Much blow-by gas
Overheat
Air
intake
Low water temperature
Pressure drop
Pressure rise
Exhaust temperature rise
Perform honing and use oversize parts.
(See 4.4.5-1)4) and 4.4.6 in Chapter4.)
Corrective action
Trouble symptom
Cause
Improper clearance of intake/exhaust valve
Compression leakage from valve seat
Seizure of intake/exhaust valve
Blowout from cylinder head gasket
Seized or broken piston ring
Worn piston ring, piston or cylinder
Seized crankpin metal or bearing
Improper arrangement of piston ring joints
Reverse assembly of piston rings
Worn crankpin and journal bearing
Loosened connecting rod bolt Tighten to the specified torque. (See 4.4.4-point 2 in Chapter4.)
Engine system
Foreign matter trapped in combustion chamber
Excessive gear backlash Adjust gear meshing. (See 4.3.4-point 2 in Chapter4.)
Starting failure
Engine starts
but stops
soon.
Exhaust
smoke
Engine does not start.
None
Little
Adjust the valve clearance. (See 2.2.6(4) in Chapter2.)
Repair or replace.
Correct the ring joint positions. (See 4.4.4-point 6 in Chapter4.)
Disassemble and repair.
Insufficient
engine output
Exhaust
color
Much
Ordinary
Replace the gasket. (See 4.2.2-12) in Chapter4.)
Measure and replace. (See 4.4.5-(2) in Chapter4.)
White
3. Troubleshooting
Worn intake/exhaust valve guide
Defective governor
Improper open/close timing of intake/exhaust valves
Fouled blower
Waste gate malfunction
Worn floating bearing
Turbocharger
t. Make adjustmen
Measure and replace. (See 4.2.5-(2) and 4.2.7 in Chapter4.)
Adjust the valve clearance. (See 2.2.6-(4) in Chapter2.)
r. Wash the blowe
Disassemble and inspect.
Disassemble and inspect.
54

Trouble symptom
Cause
Excessive cooling effect of radiator
Insufficient cooling effect of radiator
Insufficient coolant water level
Cracked water jacket Repair or replace.
Starting failure
Engine starts
but stops
soon.
Exhaust
smoke
Engine does not start.
None
Little
Insufficient
engine output
Exhaust
color
Much
Ordinary
White
Poor
exhaust
color
During
work
Black
White
Black
High knocking sound during combustion
Abnormal engine sound
Defective thermostat (kept closed) (See 2.2.7 in Chapter2.)
Hunting Lubricating oil
Uneven combustion sound
During idling
During work
Large engine vibration
Difficulty in returning to low speed
Excessive fuel consumption
Excessive consumption
Dilution by fuel oil
Mixture with water
Low L.O. pressure
Cooling
water
Much blow-by gas
Overheat
intake
Low water temperature
Air
Pressure drop
Pressure rise
Exhaust temperature rise
Defective thermostat (kept opened)(See 2.2.7 in Chapter2.)
or slipping fan belt (See 2.2.2-2) in Chapter2.)
Check water leakage from cooling water system.
(See 2.2.1-4) in Chapter2.)
3. Troubleshooting
Corrective action
Slackened fan belt Adjust the belt tension. (See 2.2.2-2) in Chapter2.)
Defective thermostat
Cooling Water System
Improper properties of lubricating oil
Leakage from lubricating oil piping system Repair.
Insufficient delivery capacity of trochoid pump Check and repair. (See 5.5 in Chapter5.)
Clogged lubricating oil filter Clean or replace.
Defective pressure regulating valve Clean, adjust or replace.
Lubricating System
Insufficient lubricating oil level
Too early timing of fuel injection pump
Too late timing of fuel injection pump
Improper properties of fuel oil
Water entrance in fuel system
Clogged fuel filter
Air entrance in fuel system
Clogged or cracked fuel pipe
Insufficient fuel supply to fuel injection pump
Fuel system
Uneven injection volume of fuel injection pump
Excessive fuel injection volume Check and adjust.
Use proper lubricating oil. (See 1.3.2 in Chapter1.)
Add proper lubricating oil. (See 2.2.1-3) in Chapter2.)
Clean or replace. (See 2.2.5 in Chapter2.)
Perform air bleeding. (See 2.2.3 in Chapter2.)
Clean or replace.
Check the fuel tank cock, fuel filter, fuel pipe, and fuel feed pump.
Check or replace. (See 2.2.7 in Chapter2.)
Perform draining from the fuel filter. (See 2.2.3 and 2.2.5 in Chapter2.)
Check and adjust. (See 2.2.7-4) in Chapter2.)
Use proper fuel oil. (See 1.3.1 in Chapter1.)
Check and adjust.
Check and adjust. (See 2.2.7-4) in Chapter2.)
Poor spray pattern from fuel injection nozzle
Priming failure
Clogged strainer at feed pump inlet
Clean the strainer.
Check and adjust. (See 2.2.6 in Chapter2.)
55
Foreign matter trapped in the valve inside the priming pump.
(Disassemble and clean.)

Trouble symptom
Cause
Clogged air filter
Engine used at high temperatures or at high altitude
Clogged exhaust pipe
Starting failure
Engine starts
but stops
soon.
Exhaust
smoke
Engine does not start.
None
Little
Insufficient
engine output
Exhaust
color
Much
Ordinary
White
exhaust
During
Black
Poor
color
work
White
Hunting Lubricating oil
Black
High knocking sound during combustion
Abnormal engine sound
Uneven combustion sound
During idling
During work
Large engine vibration
Difficulty in returning to low speed
Excessive fuel consumption
Excessive consumption
Dilution by fuel oil
Mixture with water
Low L.O. pressure
Clean. (See 2.2.4 in Chapter2.)
Study output drop and load matching.
Clean.
Cooling
water
Much blow-by gas
Overheat
Air
intake
Low water temperature
Pressure drop
Pressure rise
Exhaust temperature rise
3. Troubleshooting
Corrective action
Air/Exhaust Gas System
Starting motor defect
Alternator defect
Open-circuit in wiring
Battery voltage drop
Electrical System
Repair or replace. (See Chapter8.)
Repair or replace. (See Chapter9.)
Repair. (See Chapter10.)
Inspect and change the battery. (See 2.2.3 in Chapter2.)
56

3. Troubleshooting
3.3 Troubleshooting by measuring Compression Pressure
Compression pressure drop is one of major causes of increasing blowby gas (lubricating oil
contamination or increased lubricating oil consumption as a resultant phenomenon) or starting failure.
The compression pressure is affected by the following factors:
1) Degree of clearance between piston and cylinder
2) Degree of clearance at intake/exhaust valve seat
3) Gas leak from nozzle gasket or cylinder head gasket
In other words, the pressure drops due to increased parts wear and reduced durability resulting from
long use of the engine.
A pressure drop may also be caused by scratched cylinder or piston by dust entrance from the dirty air
cleaner element or worn or broken piston ring. Measure the compression pressure to diagnose
presence of any abnormality in the engine.
(1) Compression pressure measurement method
1) After warming up the engine, remove the fuel
injection pipe and valves from the cylinder to be
measured.
2) Crank the engine before installing the
compression gage adapter.
*1) Perform cranking with the stop handle at the
stop position (no injection state).
*2) See 12.2-18 in Chapter 12 for the compression
gage and compression gage adapter.
3) Install the compression gage and compression
gage adapter at the cylinder to be measured.
*1)Never forget to install a gasket at the tip end of
the adapter.
4) With the engine set to the same state as in 2)*1),
crank the engine by the starter motor until the
compression gage reading is stabilized.
(2) Standard compression pressure
Engine compression pressure list (reference value)
Compression pressure
Engine mode
Standard Limit
3TNV82A 3.16 0.1 (31 1) 2.45 0.1 (25 1)
3/4TNV84 3.24 0.1 (33 1) 2.55 0.1 (26 1)
3/4TNV84T 2.94 0.1 (30 1) 2.45 0.1 (25 1)
TNV88 106(T) 3.43 0.1 (35 1) 2.75 0.1 (28 1)
at 250 min
MPa (kgf/cm2)
Deviation among cylinders
-1
0.2
0.3 (2 3)
MPa (kgf/cm2)
57

(3) Engine speed and compression pressure (for reference)
3. Troubleshooting
(4) Measured value and troubleshooting
When the measured compression pressure is below the limit value, inspect each part by referring to the
table below.
No. Item Cause Corrective action
Air cleaner element Clogged element
1
Valve clearance Excessive or no
2
valve timing Incorrect valve clearance Adjust the valve clearance.
3
Cylinder head gasket Gas leak from gasket Replace the gasket.
4
Intake/exhaust vale
Valve seat
5
Piston
6
Piston ring
Cylinder
Broken element
Defect at element seal
portion
clearance
Gas leak due to worn
valve seat or foreign
matter trapping
Sticking valve
Gas leak due to
scratching or wear
Clean the element.
Replace the element.
Adjust the valve clearance.
(See 3.5 in Chapter 3.)
(See 3.5 in Chapter 3.)
Retighten the cylinder head bolts to the
specified torque.
(See 4.2(2)12) in Chapter 4.)
Lap the valve seat.
(See 4.2(6) in Chapter 4.)
Replace the intake/exhaust valve.
Perform honing and use an oversized part.
(See 4.4(5)-(5-1), (5-4) and (6) in Chapter 4.)
58

4. Disassembly, Inspection and Reassembly of Engines
4. Disassembly, Inspection and Reassembly of Engines
4.1 Complete disassembly and reassembly
4.1.1 Introduction
Make preparation as follows before starting engine inspection and service:
1) Fix the engine on a horizontal base.
Be sure to fix the engine securely to prevent injury or damage to parts due to falling during the work.
2) Remove the cooling water hose, fuel oil pipe, wire harness, control wires etc. connecting the
driven machine and engine, and drain cooling water, lubricating oil and fuel.
3) Clean soil, oil, dust, etc. from the engine by washing with solvent, air, steam, etc. Carefully
operate so as to prevent any foreign matter from entering the engine.
Always wear glasses or other protectors when using compressed air or steam to prevent any foreign
matter from getting in the eyes.
[NOTICE]
Any part which is found defective as a result of inspection or any part whose measured value does
not satisfy the standard or limit shall be replaced.
Any part predicted to dissatisfy the standard or limit before the next service as estimated from the
state of use should be replaced even when the measured value then satisfies the standard or limit.
59

4. Disassembly, Inspection and Reassembly of Engines
4.1.2 Special service tools
(1) Special Tools
No. Tool name Applicable model and tool size Illustration
Valve guide tool
(for extracting valve
guide)
1
Valve guide tool
(for inserting valve
guide)
2
㎜
Model L1 L2 d1 d2
3TNV82A
4TNV94L 98(T)
20 75 6.5 10
4TNV106(T)
4TNV84
3TNV84(T)
20 75 7.5 11
3/4TNV88
4TNV84T 20 75 5.5 9
※Locally manufactured
㎜
Model L1 L2 d1 d2
3TNV82A 12 60 13 19
4TNV84
3TNV84(T)
15 65 14 20
3/4TNV88
4TNV84T 8.5 60 11 17
Connecting rod
bushing replacer
(for removal /
installation of
connecting rod
bushing)
3
Valve spring
compressor
(for removal /
installation of valve
spring)
4
4TNV94L 98(T) 7 60 13 16
4TNV106(T) 13.6 65 13 16
※Locally manufactured
㎜
Model L1 L2 d1 d2
3TNV82A 25 85 23 26
TNV84 88 20 100 26 29
4TNV94L 98 20 100 30 33
4TNV106(T) 20 100 37 40
Allowance:
−
1d
6.0
−
3.0
−
2d
6.0
−
3.0
※Locally manufactured
yanmar code No.
129100-92630
60

4. Disassembly, Inspection and Reassembly of Engines
No. Tool name Applicable model and tool size Illustration
Stem seal inserter
(for inserting stem
seal)
5
㎜
Model d1 d2 d3 L1 L2 L3
3TNV82A 15.2 21 12 15.8 65 4
4TNV84
3TNV84(T)
4TNV88
4TNV84T 12.9 19 11.5 10.0 65 4
4TNE94L 98 15.2 21 12 11.8 65 4
4TNE106(T) 15.2 21 12 15.5 65 4
16.2 22 13.5 18.8 65 4
※ Locally manufactured
Filter wrench
(for removal /
6
installation of L.O.
Available on the market
filter)
Camshaft bushing
tool
(for extracting
camshaft bushing)
㎜
Model L1 L2 d1 d2
TNV82A 88 18 70 45 48
7
Flex-Hone
(For re-honing of
cylinder liner)
8
Piston insertion
tool
(for inserting
9
piston)
Piston ring replacer
(for removal /
10
installation of
piston ring)
Crankshaft pulley
installing tool
11
4TNV94L 98 18 70 50 53
4TNV106(T) 18 70 58 61
3.0
Allowance:
−
1d
6.0
−
3.0
−
2d
6.0
−
※Locally manufactured
Cylinder
Model Parts No.
TNV82A 129400-92420 78 84
TNV88 4TNV94L 129400-92430 83 95
4TNV98 129400-92440 89 101
4TNV106(T) 129400-92450 95 108
bore
(㎜)
Yanmar code No. 95550-002476
※The above piston insertion tool is applicable
to 60-125 mm diameter pistons.
Available on the market
Locally manufactured
(for 4TNV94L)
(Refer to 4.3.6 in detail)
61

4. Disassembly, Inspection and Reassembly of Engines
(2) Measuring instruments
No. Instrument name Application Illustration
Measurements of shaft bending, and strain
and gap of surfaces
1 Dial gage
Measurements of narrow or deep portions
that cannot be measured by dial gage
2 Test indicator
For holding the dial gage when measuring
using a dial gage, standing angles
adjustable
3 Magnetic stand
4 Micrometer
5 Cylinder gage
6 Calipers
7 Depth micrometer
For measuring the outside diameters of
crankshaft, pistons, piston pins, etc.
For measuring the inside diameters of
cylinder liners, rod metal, etc.
For measuring outside diameters, depth,
thickness and width
For measuring of valve sink
8 Square
For measuring valve spring inclination and
straightness of parts
62

4. Disassembly, Inspection and Reassembly of Engines
No. Instrument name Application Illustration
For measuring shaft bend
9 V-block
For tightening nuts and bolts to the
specified torque
10 Torque wrench
For measuring gaps between ring and
ring groove, and shaft joints during
assembly
11 Thickness gage
12 Cap tester
13 Battery coolant tester
14 Nozzle tester
For checking water leakage
For checking concentration of antifreeze
and the battery electrolyte charge status
For measuring injection spray pattern of
fuel injection nozzle and injection
pressure
For measuring temperatures
15 Digital thermometer
63

4. Disassembly, Inspection and Reassembly of Engines
Disa
No. Instrument name Application Illustration
For measuring revolution by
contacting the mortise in the revolving
shaft
Contact type
16 Speedometer
Photoelectric type
17 Circuit tester
18 Compression gage kit
For measuring revolution by sensing
the reflecting mark on the outer
periphery of the revolving shaft
For measuring resistance, voltage
and continuity of electrical circuits
For measuring compression pressure
64

4. Disassembly, Inspection and Reassembly of Engines
4.1.3 Complete disassembly
Peripheral parts such as air cleaner, muffler and radiator differ in installation and types for each
application. Therefore, description in this Chapter is started with the steps to be taken just after the
peripheral parts have been removed.
Step Removal Parts Remarks
1) Thoroughly remove sand, dust, dirt and soil
1
2
from the surface of the engine.
2) Drain cooling water and lubricating oil from
the engine.
1) Remove turbocharger and exhaust manifold.
2) Remove intake manifold and surge tank.
1) Close the fuel cock valve of the fuel tank.
2) Remove high-pressure fuel pipe.
3) Remove fuel return pipe.
4) Loosen the tightening nut on fuel injection
3
4
5
6
nozzle retainer and extract the retainer and
fuel injection nozzle.
*) Fuel injection nozzle for Indirect injection
system is screwed type.
1) Remove rocker arm cover assembly.
1) Remove valve rocker arm shaft assembly.
2) Remove push rod.
1) Remove fan mounting bolt, and then remove
fan.
2) Loosen adjusting bolt for the V-belt adjuster,
and then remove V-belt.
3) Remove alternator.
4) Remove the spacer for cooling fan and
V-pulley.
1) Remove lubricating oil filter assembly.
2) Extract dipstick form the oil dip-stick hole.
7
1) If nozzle seat is left on the cylinder head,
remove the cylinder head before extracting
nozzle seat.
2) To prevent dust from entering fuel injection
nozzle, fuel injection pump and high-pressure
fuel pipe, seal their respective threads with a
tape or the like.
3) Whenever extracting fuel injection nozzle,
replace nozzle protector with a new one.
1) Attach a tag to push rod for each cylinder No.
to put the push rod in order.
2) Remove valve cap from the intake/exhaust
valve head.
3) Note that tappet of the indirect injection
system can be removed at the same time
when push rod is extracted.
4) Attach a tag to tappet for each cylinder No. to
put the tappet in order.
1) Never turn down alternator vigorously toward
the cylinder block. Otherwise, your finger
may be nipped and alternator broken.
1) Disconnect fuel return pipes to.
2) Remove fuel filter.
8
65

4. Disassembly, Inspection and Reassembly of Engines
Step Removal Parts Remarks
1) Disconnect cooling water pipe from the
9
cooling water pump.
2) Remove thermostat assembly.
3) Remove cooling water pump.
1) Remove cylinder head tightening bolt.
2) Remove cylinder head assembly.
3) Remove cylinder head gasket.
1) Lay a cardboard or the like on the floor and
place cylinder head assembly on it so as not
to damage the combustion surface.
2) Order of loosening the cylinder head
tightening bolts.
10
1) Remove crankshaft V-pulley clamping bolt.
2) Using a puller, extract crankshaft V-pulley.
11
1) Remove oil pan mounting bolt under gear
12
13
case.
2) Remove gear case mounting bolt.
3) Remove gear case.
1) Remove the nut from fuel injection pump
drive gear. Extract fuel injection pump drive
gear using a puller.
3) To remove the intake/exhaust valves from
cylinder head assembly, take the following
steps.
a) Using a valve spring compressor (see
Chapter 5, 5-1), compress valve spring and
remove valve cotter.
b) Remove valve retainer and valve spring.
c) Remove intake valve and exhaust valve.
1) Extract crankshaft V-pulley by hitting the bolt
of the puller using a plastic hammer or the
like.
1) Never fail to removes stiffner bolt at the
center of the gear case.
2) When removing the gear case, carefully
protect oil seal from damage.
1) Before removing fuel injection pump, make
sure of the position of the arrow of the pump
body for adjusting fuel injection timing as well
as the position of the scribed line of the gear
case flange. (Applies only to direct injection
system.)
66

4. Disassembly, Inspection and Reassembly of Engines
Step Removal Parts Remarks
1) Remove lubricating oil pump.
14
1) Remove starting motor from flywheel housing
15
16
17
18
sing.
1) Remove flywheel mounting bolt.
2) Remove flywheel.
1) Remove flywheel housing.
2) Remove oil seal case with a screwdriver or
the like by utilizing grooves on both sides of
oil seal case.
1) Remove oil pan and spacer. 1) Put the cylinder block with the attaching
1) Carefully protect the ring gear from damage
mage.
1) Carefully protect the oil seal from damage.
surface of the cylinder head facing down.
2) Carefully protect the combustion surface of
the cylinder block from damage.
3) For indirect injection system, be careful to the
possibility of the tapped to drop off when the
cylinder block is turned upside down,
because the tappet is cylindrical in shape.
1) Remove idle gear shaft, and then remove idle
gear.
2) Remove mounting bolt of thrust bearing
19
through the hole of the camshaft gear.
Remove camshaft assembly.
1) Turn the cylinder block aside and carefully
prevent tappet from jamming on the cam.
2) Preheat camshaft gear and camshaft
assembly to 180°
fitted, before removing them.
200° which are shrink
1) Remove gear case flange.
20
1) Remove lubricating oil strainer.
21
1) Remove crankpin side cap of the connecting
rod.
While turning crankshaft, place piston in the
bottom dead center (BDC).
22
1) Before extracting piston, remove carbon
deposits from the upper wall of the cylinder
using fine sandpaper, while taking care not to
damage the inner surface of the cylinder.
2) Make sure than cap No. of connecting rod
agrees with cylinder No.
3) Take care not to let crankpin metal fall when
removing connecting rod crankpin side cap.
67

4. Disassembly, Inspection and Reassembly of Engines
Step Removal Parts Remarks
1) Remove main bearing cap bolt. While
shaking main bearing cap, remove main
bearing cap together with lower main bearing
metal.
2) Extract crankshaft, taking care not to damage
it.
3) Remove upper main bearing metal.
23
1) Remove piston and connecting rod assembly. 1) To selectively remove a desired piston and
24
2) Remove tappet.
1) Before extracting crankshaft, measure the
side gap around it.
Apply a dial gauge to the end of crankshaft.
Force the crankshaft on both sides in the axial
direction to measure the thrust gap.
Alternatively, insert a thickness gauge directly
between the base thrust metal and the thrust
surface of the crankshaft to measure the gap.
If the limit size is exceeded, replace the thrust
metal with a new one.
Thrust gap (All models)
2) Notice on the removal of thrust metal.
a) When removing thrust metal, ascertain the
position and direction where thrust metal is
installed in relation to the cap.
b) Make sure that the thrust metal groove is
outward in relation to the cap.
connecting rod assembly without extracting
crankshaft, take the steps itemized below:
a) Remove carbon deposits from the upper wall
of the cylinder using fine sandpaper, taking
care not to damage the inner surface of the
cylinder.
b) While turning the crankshaft, with the
connecting rod cap removed, raise the
piston up to the top dead center (TDC).
c) Extract the piston/connecting rod assembly
while tapping the connecting rod at the large
end with the handle of a plastic hammer or the
like.
25
68

4. Disassembly, Inspection and Reassembly of Engines
4.1.4 Precautions before and during reassembly
To reassemble engine components, reverse the procedure of disassembly. However, follow the
precautions below and the precautions from in chapter 4 to in chapter 7 particularly before and during
reassembly.
(1) Cleaning the component
Use particular care to clean the cylinder block, cylinder head, crankshaft, and camshaft. Ensure that
they are free from chips, dust, sand, and other foreign matter.
(2) Parts to be replaced during reassembly
Be sure to replace the following parts with new ones during assembly.
Valve stem seal
Head gasket packing
Nozzle protector and nozzle seat of the fuel injection valve
Various copper packing, O-rings and gasket packing.
4.1.5 Adjusting operation
Make sure to perform adjusting operation after completing reassembly. Refer to section 2.5 in chapter 2
for the operation procedure.
69

4. Disassembly, Inspection and Reassembly of Engines
4.2 Cylinder Head: Disassembly, Inspection and Reassembly
4.2.1 Components (2-valve cylinder head)
4.2.2 Disassembly procedure:
Disassemble in the order of the numbers shown in the illustration.
1) Remove the alternator assy. (Point1)
2) Remove the fan, pulley and V belt.
3) Remove the thermostat case. (Point2)
4) Remove the fuel filter and fuel oil piping. (Point3)
5) Remove the oil level gage assy.
6) Remove the oil filter. (Point4)
7) Remove the fuel injection pipes. (Point5)
8) Remove the intake manifold assy.
9) Remove the exhaust manifold assy.
10) Remove the rocker arm cover Assy.
11) Remove the rocker shaft assy, push rods and valve caps. (Point6)
12) Remove the cylinder head assy and head gasket. (Point7)
13) Remove the fuel injection valves and fuel return pipe. (Point8)
14) Remove the intake/exhaust valves, stem seals and valve springs. (Point9)
15) Remove the rocker arms from the rocker shaft.
70

4. Disassembly, Inspection and Reassembly of Engines
4.2.3 Reassembly procedure:
Reverse order of the disassembly procedure.
71

4. Disassembly, Inspection and Reassembly of Engines
4.2.4 Servicing points
Point1
[Disassemble]
Loosen the mounting bolt while supporting the
alternator.
Do not tilt the alternator toward the cylinder block in
haste since it may damage the alternator or pinch a
finger.
[Reassemble]
The belt deflection shall be checked according to
2.2.2. in Chapter2.
[Reassemble]
Replace the belt with a new one if cracked, worn
or damaged.
Carefully prevent the belt from being smeared
with oil or grease.
Point2
[Reassemble]
Check the thermostat function. (See3.9 in Chapter
3 for the check procedure.)
Pont3
[Reassemble]
Replace the fuel filter element with a new one.
[Disassemble]
Cover the fuel pipe opening with tape to prevent
intrusion of foreign matters.
Point4
[Reassemble]
Replace the oil filter with a new one.
After fully tightening the filter manually, retighten it
with a filter wrench (see 11.1-6 in Chapter 11) by
3/4 turn.
Point5
[Disassemble]
Cover the fuel injection pipe and pump inlets and
outlets with tape or the like to prevent intrusion of
foreign matters.
72

Point6
1) Removing pipe seals of 4 valve head.
[Disassemble]
Take off a rocker arm cover in case of 4 valve
head after removing fuel injection pipes and pipe
seals.
[NOTICE]
Attention is necessary because a fuel nozzle is
caught in a pipe seal and the pipe seal is damaged
when a rocker arm cover is lifted with a pipe seal
sticking to the rocker arm cover.
Insert a minus driver in the slit part of the rocker
arm cover, and remove it when removing a pipe
seal.
[Reassemble]
Replace the used pipe seal with a new one when
removing a pipe seal.
2) Breather system (A reductor to intake air system
of blowby gas)
Emitting blowby gas is harmful to natural
environment. Therefore blowby gas reductor is
adopted to TNV series naturally- aspirated engines
as breather system (Turbocharged engines
emitblowby gas).
The system of model 3/4TNV84 is shown as a
representative of that breather system in the right
figure. Some of the combustion gas passes
through the clearance between the cylinder and the
piston, piston ring, and flows to the crankcase.
This is said as blowby gas. While it passes into
the cylinder head and the rocker arm cover, the
blowby gas mixes with splash oil, and becomes oil
mist-blowby gas mixes with splash oil, and
becomes oil mist-blowby gas ith passing through
the baffle plate inside a rocker arm cover. And it
passes through a diaphragm assy, and a intake
manifold, and is reduced in the combustion
chamber. Pressure inside a crankcase is
controlled by the function of the diaphragm assy,
and suitable amount of blowby gas is reduced in
intake air system.
[Disassemble]
When a rocker arm cover is taken off, check
whether oil or the like enter the diaphragm space
from a small hole on the side of a diaphragm cover
or not without disassembling the diaphragm.
4. Disassembly, Inspection and Reassembly of Engines
73

4. Disassembly, Inspection and Reassembly of Engines
[NOTICE]
1) When a diaphragm is damaged, pressure control inside the crankcase becomes insufficient, and
troubles occur. When the internal pressure of the crankcase decreases too much due to the
damage of a spring, much blowby gas containing oil is reduced in intake air system, and it may
cause the combustion defect by the early dirt of the intake valve or the urgent rotation of the
engine by the oil burning.
When pressure progresses in the crank case too much due to the wrong operation of the
diaphragm and so on, it is considered that oil leakage from the joint of a oil pan, a oil seal and so
on will occur. When a diaphragm is damaged, blowby is discharged from the breathing hole on the
side of diaphragm cover, and not reduced in the intake manifold. Therefore, be careful of the
diaphragm trouble.
2) At lubricating oil replacement or lube oil supply
The amount of lubricating oil isn't to be beyond the standard upper limit (in the engine horizontality,
the upper limit mark of the dip stick). Since the blowby gas reductor is adopted, be careful that the
amount of oil mist may be inducted in the combustion chamber and the oil hammer sometimes
may occur, when the lubricating oil quantity is beyond the upper limit or an engine is operated
beyond the allowable maximum angle of an engine.
[Reassembly]
Replace the diaphragm with new one, when it is damaged.
Point7
[Disassemble]
Keep the removed push rods by attaching tags
showing corresponding cylinder Nos.
[Reassemble]
Always apply oil to the contact portions of the
push rods and clearance adjusting screws.
Point8
[Disassemble]
Loosen the cylinder head bolts in two steps in the
illustrated order.
Place the cylinder head assy on a paper board to
prevent the combustion face from any damage.
[Reassemble]
Remove the head gasket with a new one.
Uniformly install the head bolts manually after
applying oil on the threaded and seat portions
They shall be tightened in two steps in the reverse
of the order for disassembly.
Tightening torque
Nm(kgf m)
TNV82A TNV84-88
30.0
First step
Second step
First step
Second step
34.0
(3.1 3.5)
61.7
65.7
(6.3
6.7)
4TNV94L/98 4TNV106(T)
49.0
58.8
6.0)
(5.0
103.1
(10.5 11.5)
112.9
188.0 197.8
(19.0 20.0)
46.9
41.1
(4.2 4.8)
91.1
85.3
(8.7
9.3)
88.3
98.1
10.0)
(9.0
74

Point9
[Disassemble]
Carefully remove the fuel injection valve so as not
to leave the top end protector from being left
inside the cylinder.
[Reassemble]
Replace the fuel injection valve protector with a
new one.
Point10
[Disassemble]
When removing each intake/exhaust valve from
the cylinder head, use a valve spring compressor
(see 11.1-4 in Chapter 11) and compress the
valve spring and remove the valve cotter.)
Keep each removed intake/exhaust valve after
attaching a tag showing the corresponding
cylinder No.
If cotter burr is seen at the shaft of each
intake/exhaust valve stem, remove it with an
oilstone and extract the valve from the cylinder
head.
[Reassemble]
Replace the stem seal with a new one when an
intake/exhaust valve is disassembled.
Carefully install each valve after oil application so
as not to damage the stem seal.
Different stem seals are provided for the intake
and exhaust valves. Do not confuse them since
those for exhaust valves are marked with yellow
paint.
After assembling the intake/exhaust valve, stem
seal, valve spring, seat, and cotter, tap the head
of the valve stem lightly for settling.
Do not forget to install the valve cap.
4. Disassembly, Inspection and Reassembly of Engines
75

4. Disassembly, Inspection and Reassembly of Engines
4.2.5 Parts Inspection and measurement
(1) Cylinder head
Clean the cylinder head, mainly the combustion
surface, valve seats and intake/exhaust ports, remove
carbon deposit and bonding agent, and check the
surface state.
(a) Appearance check
Check mainly discoloration and crack. If crack is
suspected, perform color check.
(b) Combustion surface distortion
Apply a strait-edge in two diagonal directions and on
four sides of the cylinder head, and measure distortion
with a thickness gage.
mm
Standard Limit
Distortion 0.05 or less 0.15
(c) Valve sink
Measure with the valve inserted to the cylinder head.
mm
Standard Limit
3TNV82A
(2-valve head)
4TNV84
3TNV84(T)
3/4TNV88
(2-valve head)
4TNV84T
4TNV94/98(T)
(4-valve head)
4TNV106(T)
(4-valve head)
Intake 0.35 0.55 0.8
Exhaust 0.30
Intake 0.30
Exhaust 0.30
Intake 0.36 0.56
Exhaust 0.35 0.55 0.8
Intake 0.5 0.7 1.0
Exhaust 0.7
0.50 0.8
0.50 0.8
0.50 0.8
0.8
0.9 1.2
(d) Seat contact
Apply a thin coat of minium on the valve seat. Insert
the valve in the cylinder and push it against the seat to
check seat contact.
Standard: Continuous contact all around
76

(2) Valve guide
Mainly check damage and wear on the inside wall.
pply the service part code when replacing a part.
A
Model Service part code
3TNV82A
(2-valve)
4TNV84
3TNV84(T)
3/4TNV88
(2-valve)
4TNV84T
(4-valve)
4TNV94L
4TNV98(T)
(4-valve)
4TNV106(T)
(4-valve)
Valve stem clearance
Model Part name Place Standard Limit
3TNV82A
(2-valve head)
4TNV84
3TNV84(T)
3/4TNV88
(2-valve head)
4TNV84T
(4-valve head)
4TNV94L
4TNV98(T)
(4-valve head)
4TNV106(T)
(4-valve head)
Suction 124060-11800
Exhaust 119802-11810
Suction 120130-11860
Exhaust
Suc./Exh. 119717-11800
Suc./Exh. 129907-11800
Suction 123907-11800
Exhaust 123907-11810
Intake value
Exhaust value
Intake value
Exhaust value
Intake value
Exhaust value
Intake value
Exhaust value
Intake value
Exhaust value
129150-11810
Guide I.D. 7.000 7.015 7.08
Stem O.D. 6.945 6.960 6.90
Clearance 0.040
Guide I.D. 7.000 7.015 7.08
Stem O.D. 6.940 6.955 6.90
Clearance 0.045
Guide I.D. 8.010 8.025 8.10
Stem O.D. 7.955 7.975 7.90
Clearance 0.035
Guide I.D. 8.015 8.030 8.10
Stem O.D. 7.955 7.970 7.90
Clearance 0.045
Guide I.D. 6.000 6.015 6.08
Stem O.D. 5.960 5.975 5.90
Clearance 0.025
Guide I.D. 6.000 6.015 6.08
Stem O.D. 5.945 5.960 5.90
Clearance 0.040
Guide I.D. 7.000 7.015 7.08
Stem O.D. 6.945 6.960 6.90
Clearance 0.040
Guide I.D. 7.000 7.015 7.08
Stem O.D. 6.940 6.955 6.90
Clearance 0.045
Guide I.D. 7.008 7.020 7.08
Stem O.D. 6.960 6.975 6.92
Clearance 0.033
Guide I.D. 7.008 7.020 7.08
Stem O.D. 6.945 6.960 6.90
Clearance 0.048
4. Disassembly, Inspection and Reassembly of Engines
0.070 0.18
0.075 0.18
0.070 0.18
0.075 0.18
0.055 0.15
0.070 0.17
0.070 0.17
0.075 0.17
0.060 0.16
0.075 0.18
77

4. Disassembly, Inspection and Reassembly of Engines
(3) Intake/exhaust valve
Mainly clean and check damage and wear at the valve stem and seat.
(a) Seat contact: See (1)-(d) above.
(b) Stem outside diameter: See (2) above.
(c) Valve head thickness
mm
Model Part Standard Limit
3TNV82A 88
4TNV84
(2-valve head)
Intake 1.24-1.44 0.8
Exhaust 1.35-1.55 0.8
4TNV84T
(4-valve head)
4TNV94L 98(T)
(4-valve head)
4TNV106(T)
(4-valve head)
Intake 1.00-1.20 0.6
Exhaust 1.00-1.20 0.6
Intake 1.44-1.84 1.0
Exhaust 1.70-2.10 1.0
Intake 1.60-2.00 1.2
Exhaust 1.80-2.20 1.2
(d) Valve stem bend
mm
Limit 0.01
(e) Overall length
Standard Limit
3TNV82A
3/4TNV84 88 Intake/Exhaust
4TNV84T
Intake/Exhaust
Intake/Exhaust
mm
97.2-97.8 97.0
108.7-109.3 108.5
100.0-100.6 99.8
4TNV94L
4TNV98(T)
4TNV106(T)
Intake 102.3-103.1 102.1
Exhaust 102.4-103.2 102.2
Intake 117.3-118.1 117.1
Exhaust 117.1-117.9 116.9
(4) Valve spring
Mainly inspect damage and corrosion.
3TNV82A 44.4
3/4TNV84 88 42.0
4TNV84T 37.4
4TNV94L 98(T) 39.7
4TNV106(T) 50.6
Free length
Standard Limit
43.9
41.5
36.9
39.2
50.1
mm
Inclination
limit
1.4
1.3
1.4
1.5
78

4. Disassembly, Inspection and Reassembly of Engines
(5) Valve rocker arm
Mainly inspect valve head cap contact surface, inside
surface defects and wear.
Slight surface defects shall be corrected with an
oilstone.
mm
Model Items Standard Limit
3TNV82A
3/4TNV84(T)
3/4TNV88
4TNV94L/98(T)
4TNV106(T)
Arm hole
diameter
Shaft O.D. 15.97 15.98 15.94
Clearance 0.016
Arm hole
diameter
Shaft O.D. 18.47 18.49 18.44
Clearance 0.01
16.00
18.50
16.02 16.07
0.054 0.13
18.52 18.57
0.05 0.13
(6) Rocker arm shaft
Mainly inspect seizure and wear at the surface in
sliding
contact with the arm. The rocker shaft
diameter shall be as specified in (5) above.
(7) Push rod
Mainly inspect the surface in contact with the tappet
and adjusting screw. Slight defects shall be
corrected with an oilstone.
Bend limit 0.03mm or less
(8) Valve clearance adjusting screw
Mainly inspect the surface in contact with the push
rod.
Slight defects shall be corrected with an
oilstone.
(9) Rocker arm spring
Mainly inspect surface defects and corrosion.
79

4. Disassembly, Inspection and Reassembly of Engines
4.2.6 Valve seat correction
[NOTICE]
Always check the oil clearance between the valve and valve guide before correcting the valve seat.
If it exceeds the limit, replace the valve or valve guide first to make the clearance satisfy the standard.
After correction, wash the valve and the cylinder head sufficiently with diesel oil to remove all grinding
powder or compound.
1) If the seat surface is slightly roughened: perform
[A] and [B] below.
[A]: Lap the valve and seat with a mixture of
valve compound and engine oil.
[B]: Lap with engine oil only.
2) If the seat is heavily roughened but the width is
almost normal, correct with a seat grinder or seat
cutter first. Then perform lapping [A] and [B].
intake Exhaust
Seat cutter angle 120 90
3) If the seat is heavily roughened and the width is
much enlarged, grind the seat inner surface with a
seat grinder whose center angle is 40°, then
grind the seat outer surface with a grinder whose
center angle is 150°to make the seat width
match the standard. Then perform seat
correction as described in 2), and then carry out
lapping [A] and [B].
Grinding wheel angle
1 2
40 150
80

4. Disassembly, Inspection and Reassembly of Engines
4.2.7 Valve guide replacement
1) Use a valve guide extraction tool(12.1-1 in Chapter 12) and extract the valve guide from the
cylinder head.
2) Put liquid nitrogen or ether (or alcohol) with dry ice added in a container and put the valve guide
for replacement in it for cooling. Then insert it in with a valve guide inserting tool (Refer to No.2
of 4.1.2 in Chapter 4).
Do not touch the cooled valve guide with bare hands to avoid skin damage.
3) Check the inside diameter and finish to the
standard inside diameter as required with a
reamer.
4) Check the projection from the cylinder head.
mm
Model Number of valves Projection
3TNV82A 11.7 12.0
4TNV84
3TNV84(T)
4TNV88
4TNV84T 8.2 8.5
4TNV94L
4TNV98(T)
4TNE106(T)
2 valves
4 valves
15.0
14.7
9.7
10.
13.4 13.6
81

4. Disassembly, Inspection and Reassembly of Engines
4.2.8 Valve stem seal replacement
Always use a new seal after the intake/exhaust valve
is disassembled. Since the one for the exhaust valve
is marked with yellow paint, do not confuse the intake
and exhaust valves.
1) Apply engine oil to the lip.
2) Push with the inserting tool (Refer to No.5 of
4.1.2 in Chapter 4) for installation.
3) Measure and check the projection of valve stem
seal to keep proper clearance between valve
guide and stem seal.
Model Number of valves Projection
3TNV82A 15.7 16.0
4TNV84
3TNV84(T)
4TNV88
4TNV84T 9.9 10.2
4TNV94L
4TNV98(T)
4TNE106(T)
2 valves
4 valves
18.7
11.7
15.4 15.6
mm
19.0
12.0
82

4.3 Gear Train and Camshaft
4.3.1 Components
4. Disassembly, Inspection and Reassembly of Engines
4.3.2 Disassembly procedure:
Disassemble in the order of the numbers in the illustration.
1) Perform steps 1) to 12) of the cylinder head disassembly procedure.
2) Remove the cooling water pump.
3) Remove the crankshaft pulley. (See Point 1 of 4.3.4)
4) Remove the gear case cover. (See Point 2 of 4.3.4)
5) Remove the fuel injection pump. (See Point 3 of 4.3.4)
6) Remove the idle gear assy. (See Point 4 of 4.3.4)
7) Remove the PTO drive gear. (See Point 5 of 4.3.4)
8) Remove the starting motor.
9) Remove the flywheel. (See Point 6 of 4.3.4)
10) Remove the camshaft assy. (See Point 7 of 4.3.4)
11) Remove the gear case. (See Point 8 of 4.3.4)
12) Remove the oil seal from the gear case cover. (See 4.3.6)
4.3.3 Reassembly procedure:
Reverse of the disassembly procedure.
83

4. Disassembly, Inspection and Reassembly of Engines
4.3.4 Servicing points
Point1
[Disassemble]
Remove the crankshaft pulley using a gear puller
after removing the crankshaft pulley set bolt.
When removing the pulley using the gear puller,
use a pad and carefully operate so as not to
damage the thread. Set the gear puller securely
to prevent the pulley from being damaged.
[Reassemble]
Apply lithium grease to the oil seal lips. For the
oil seal with double lips dust seal, further slightly
apply engine oil on the lips so as not to damage
them.
Clean by wiping off any oil on both taper surfaces
using detergent.
Be sure to use the crankshaft pulley installing tool
so as not to damage the oil seal lips. (See 4.3(6)
Oil seal replacement)
When installing the crankshaft pulley, apply lube
oil to the set bolt to tighten and carefully assemble
so as not to damage the oil seal.
N m(kgf-m)
Model Tightening torque
3TNV82A TNV88 112.7 122.7 (11.5 12.5)
4TNV94L/98/106(T) 107.9 127.5 (11.0 13.0)
Point2
[Reassemble]
When installing the gear case, do not forget to
install the two reinforcing bolts at the center.
Measure the backlash of each gear.
mm
3TNV82A
Crankshaft gear,
Camshaft gear,
Fuel injection pump gear,
Idle gear, PTO gear,
4TNV94L-106(T) Standard Limit
Crankshaft gear,
Camshaft gear,
Fuel injection pump gear,
Idle gear, PTO gear,
Balancer gear
(only 4TNV106(T) )
Lubricating oil pump gear 0.09 0.15 0.17
88 Standard Limit
0.07
0.15 0.17
0.08
0.14 0.16
0.12
0.18 0.20
Apply sealant and install the gear case by
correctly positioning the two dowel pins.
84
 Loading...