

Yamaha Audio CDV-W901 User Manual
s
CDV-W901
Natural Sound CD/CDV/LD Player
ENGLISH
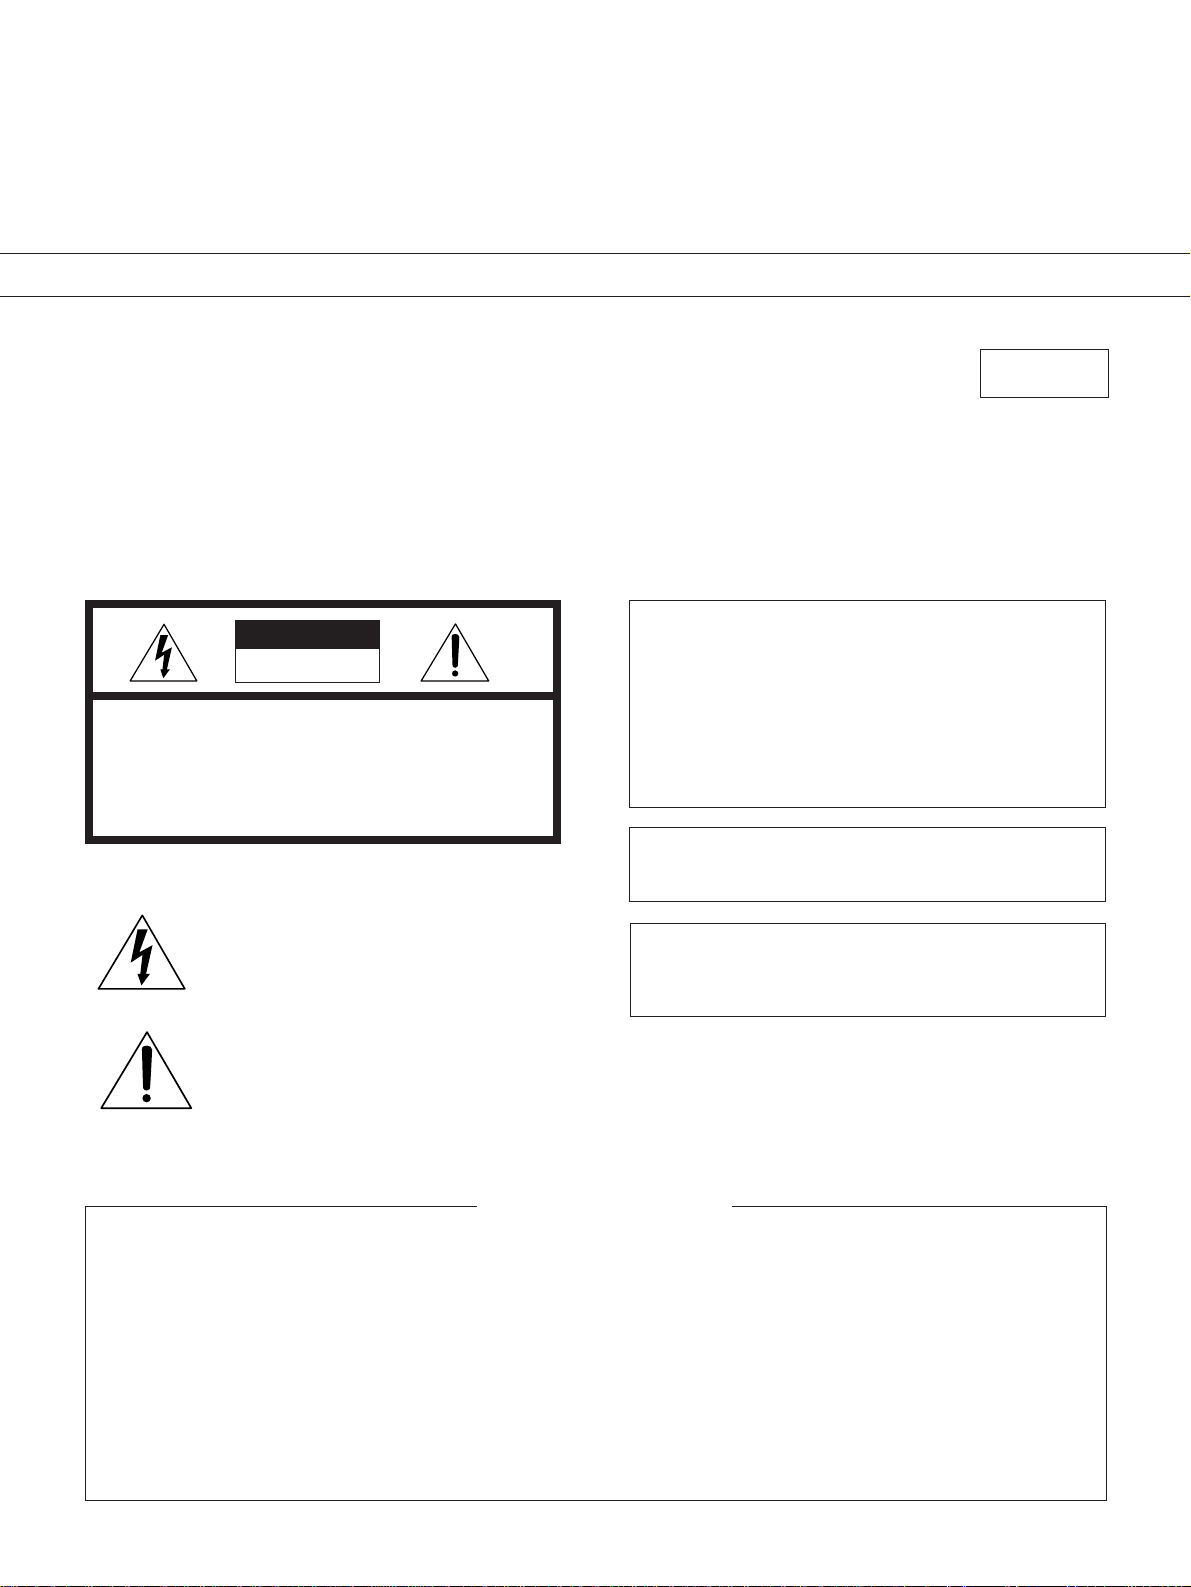
CAUTION
RISK OF ELECTRIC SHOCK
DO NOT OPEN
CAUTION: TO REDUCE THE RISK OF ELECTRIC
SHOCK, DO NOT REMOVE COVER (OR BACK)
NO USER-SERVICEABLE PARTS INSIDE, REFER
SERVICING TO QUALIFIED SERVICE
PERSONNEL.
÷ Explanation of Graphical Symbols
The lightning flash with arrowhead symbol, within an
equilateral triangle, is intended to alert you to the presence
of uninsulated “dangerous voltage” within the product's
enclosure that may be of sufficient magnitude to constitute
a risk of electric shock to persons.
L'
NTSC
OWNER’S MANUAL
IMPORTANT!
Please record the serial number of this unit in the space
below.
Model : CDV-W901
Serial No. :
The serial number is located on the rear of the unit.
Retain this Owner’s Manual in a safe place for future
reference.
WARNING
To reduce the risk of fire or electric shock, do not expose
this unit to rain or moisture.
This unit is designed for your enjoyment in your home.
We cannot be liable for the quality of the unit if you use it
for business use.
So please do not use this unit for business use.
The exclamation point within an equilateral triangle is
intended to alert you to the presence of important
operating and maintenance (servicing) instructions in the
literature accompanying the appliance.
ACCESSORIES .......................................................................... 4
PRECAUTIONS ......................................................................... 5
TYPES OF DISCS WHICH CAN BE PLAYED
WITH THIS UNIT ....................................................................... 6
GLOSSARY ............................................................................... 7
CONNECTIONS ......................................................................... 8
NAMES OF PARTS
Front panel ......................................................................... 10
Display window .................................................................. 10
Remote control unit ........................................................... 11
BASIC OPERATION (PLAYBACK OF A DISC) ........................ 12
MOVIE DISC ENTERTAINMENT ............................................. 14
CONTENTS
SINGING ALONG WITH KARAOKE ENTERTAINMENT .......... 15
APPLIED OPERATIONS .......................................................... 16
QUICK SCANNING OF DISC CONTENTS ............................... 20
RANDOM PLAYBACK (PLAYBACK IN ORDER
SELECTED BY THE PLAYER) ................................................. 20
TO SEARCH FOR A DESIRED FRAME ................................... 21
PROGRAMMED PLAYBACK (PLAYING CHAPTERS /
TRACKS BY CHANGING THEIR ORDER AS REQUIRED) ....... 22
REPEAT PLAYBACK ................................................................ 23
ON-SCREEN DISPLAY ............................................................ 24
TROUBLESHOOTING ............................................................. 25
SPECIFICATIONS .................................................................... 27
1

SAFETY INSTRUCTIONS
1 Read Instructions – All the safety and operating
instructions should be read before the appliance is
operated.
2 Retain Instructions – The safety and operating
instructions should be retained for future reference.
3 Heed Warnings – All warnings on the appliance and in
the operating instructions should be adhered to.
4 Follow Instructions – All operating and use instructions
should be followed.
5 Cleaning – Unplug this video product from the wall
outlet before cleaning. Do not use liquid cleaners or
aerosol cleaners. Use a damp cloth for cleaning.
Exception: A product that is meant for uninterrupted
service and that for some specific reason, such as the
possibility of the loss of an authorization code for a
CATV converter, is not intended to be unplugged by the
user for cleaning or any other purpose, may exclude the
reference to unplugging the appliance in the cleaning
description otherwise required in item 5.
6 Attachments – Do not use attachments not
recommended by the video product manufacturer as
they may cause hazards.
7 Water and Moisture – Do not use this video product
near water – for example, near a bath tub, wash bowl,
kitchen sink, or laundry tub, in a wet basement, or near
a swimming pool, and the like.
8 Accessories – Do not place this video product on an
unstable cart, stand, tripod, bracket, or table. The video
product may fall, causing serious injury to a child or
adult, and serious damage to the appliance. Use only
with a cart, stand, tripod, bracket, or table
recommended by the manufacturer, or sold with the
video product. Any mounting of the appliance should
follow the manufacturer's instructions, and should use a
mounting accessory recommended by the
manufacturer.
8A An appliance and cart combination
should be moved with care. Quick
stops, excessive force, and
uneven surfaces may cause the
appliance and cart combination to
overturn.
9 Ventilation – Slots and openings in the cabinet are
provided for ventilation and to ensure reliable operation
of the video product and to protect it from overheating,
and these openings must not be blocked or covered.
The openings should never be blocked by placing the
video product on a bed, sofa, rug, or other similar
surface. This video product should never be placed
near or over a radiator or heat register. This video
product should not be placed in a built-in installation
such as a bookcase or rack unless proper ventilation is
provided of the manufacturer's instructions have been
adhered to.
10 Power Sources – This video product should be
operated only from the type of power source indicated
on the marking label. If you are not sure of the type of
power supply to your home, consult your appliance
dealer or local power company. For video products
intended to operate from battery power, or other
sources, refer to the operating instructions.
11 Grounding or Polarization – This video product is
equipped with a polarized alternating-current line plug
(a plug having one blade wider than the other). This
plug will fit into the power outlet only one way. This is a
safety feature. If you are unable to insert the plug fully
into the outlet, try reversing the plug. If the plug should
still fail to fit, contact your electrician to replace your
obsolete outlet. Do not defeat the safety purpose of the
polarized plug.
Alternate Warnings – This video product is equipped
with a 3-wire grounding-type plug, a plug having a third
(grounding) pin. This plug will only fit into a groundingtype power outlet. This is a safety feature. If you are
unable to insert the plug into the outlet, contact your
electrician to replace your obsolete outlet. Do not
defeat the safety purpose of the grounding-type plug.
12 Power-Cord Protection – Power-Supply cords should be
routed so that they are not likely to be walked on or
pinched by items placed upon or against them, paying
particular attention to cords at plugs, convenience
receptacles, and the point where they exit from the
appliance.
13 Lightning – For added protection for this video product
receiver during a lightning storm, or when it is left
unattended and unused for long periods of time, unplug
it from the wall outlet and disconnect the antenna or
cable system. This will prevent damage to the video
product due to lightning and power-line surges.
2
14 Power Lines – An outside antenna system should not
be located in the vicinity of overhead power lines or
other electric light or power circuits, or where it can fall
into such power lines or circuits. When installing an
outside antenna system, extreme care should be taken
to keep from touching such power lines or circuits as
contact with them might be fatal.

15 Overloading – Do not overload wall outlets and
extension cords as this can result in a risk of fire or
electric shock.
16 Object and Liquid Entry – Never push objects of any
kind into this video product through openings as they
may touch dangerous voltage points or short-out parts
that could result in a fire or electric shock. Never spill
liquid of any kind on the video product.
FCC INFORMATION (U.S.A.)
1. IMPORTANT NOTICE: DO NOT MODIFY THIS
UNIT!
This product, when installed as indicated in the
instructions contained in this manual, meets FCC
requirements. Modifications not expressly approved
by Yamaha may void your authority, granted by the
FCC, to use the product.
ENGLISH
17 Servicing – Do not attempt to service this video product
yourself as opening or removing covers may expose
you to dangerous voltage or other hazards. Refer all
servicing to qualified service personnel.
18 Damage Requiring Service – Unplug this video product
from the wall outlet and refer servicing to qualified
service personnel under the following conditions:
a.When the power-supply cord or plug is damaged.
b.If liquid has been spilled, or objects have fallen into
the video product.
c.If the video product has been exposed to rain or
water.
d.If the video product does not operate normally by
following the operating instructions. Adjust only those
controls that are covered by the operating instructions
as an improper adjustment of other controls may
result in damage and will often require extensive work
by a qualified technician to restore the video product
to its normal operation.
e.If the video product has been dropped or the cabinet
has been damaged.
f. When the video product exhibits a distinct change in
performance – this indicates a need for service.
19 Replacement Parts – When replacement parts are
required, be sure the service technician has used
replacement parts specified by the manufacturer or
have the same characteristics as the original part.
Unauthorized substitutions may result in fire, electric
shock or other hazards.
20 Safety Check – Upon completion of any service or
repairs to this video product, ask the service technician
to perform safety checks to determine that the video
product is in proper operating condition.
We Want You Listening For A Lifetime
YAMAHA and the Electronic Industries Association's
Consumer Electronics Group want you to get the most out
of your equipment by playing it at a safe level.
One that lets the sound come through loud
and clear without annoying blaring or
distortion – and, most importantly, without
affecting your sensitive hearing. Since
hearing damage from loud sounds is often
undetectable until it is too late, YAMAHA
and the Electronic Industries Association's
Consumer Electronics Group recommend
you avoid prolonged exposure to excessive
volume levels.
We
Want You
LISTENING
For A Lifetime
2. IMPORTANT: When connecting this product to
accessories and/or another product use only high
quality shielded cables. Cable/s supplied with this
product MUST be used. Follow all installation
instructions. Failure to follow instructions could void
your FCC authorization to use this product in the
USA.
3. NOTE: This product has been tested and found to
comply with the requirements listed in FCC
Regulations, Part 15 for Class "B" digital devices.
Compliance with these requirements provides a
reasonable level of assurance that your use of this
product in a residential environment will not result in
harmful interference with other electronic devices.
This equipment generates/uses radio frequencies
and, if not installed and used according to the
instructions found in the users manual, may cause
interference harmful to the operation of other
electronic devices. Compliance with FCC
regulations does not guarantee that interference will
not occur in all installations. If this product is found
to be the source of interference, which can be
determined by turning the unit "OFF" and "ON",
please try to eliminate the problem by using one of
the following measures:
Relocate either this product or the device that is
being affected by the interference.
Utilize power outlets that are on different branch
(circuit breaker or fuse) circuits or install AC line
filter/s.
In the case of radio or TV interference, relocate/
reorient the antenna. If the antenna lead-in is 300
ohm ribbon lead, change the lead-in to coaxial type
cable.
If these corrective measures do not produce
satisfactory results, please contact your local retailer
authorized to distribute this type of product. If you
can not locate the appropriate retailer, please
contact Yamaha Electronics Corp., U.S.A. 6600
Orangethorpe Ave, Buena Park, CA90620
The above statements apply ONLY to those
products distributed by Yamaha Corporation of
America or its subsidiaries.
3
DANGER
The use of optical instrument with this product will
increase eye hazard.
CAUTION
The apparatus is not disconnected from the AC power
source so long as it is connected to the wall outlet,
even if the apparatus itself is turned off.
CAUTION
Use of controls or adjustments or performance of
procedures other than those specified herein may
result in hazardous radiation exposure.
Laser Diode properties
● Material: GaAlAs
● Wavelength: 780 nm
● Emission Duration: Continuous
● Laser Output Power: less than 44.6 µW*
* This out-put value measured at a distance 200 mm
from the objective lens surface on the optical pick-up
block.
ANSI Class: Class 1
● As the laser beam used in this player is harmful to the
eyes, do not attempt to disassemble the cabinet. Refer
servicing to qualified personnel only.
● To avoid electrical shock, do not open the unit. Refer
servicing to qualified personnel only.
This unit has been designed for use with the NTSC
format, which is the television format used in North
America and some other areas. Do not use discs or
a TV made for other television formats (PAL,
SECAM) with this unit.
NOTE:
Please check the copyright laws in your country before
recording from records, compact discs, radio, etc.
Recording of copyrighted material may infringe copyright
laws.
CAUTION (FOR CANADA MODEL)
TO PREVENT ELECTRIC SHOCK , MATCH WIDE
BLADE OF PLUG TO WIDE SLOT AND FULLY INSERT.
ATTENTION (POUR LE MODELE CANADIEN):
POUR ÉVITER LES CHOCS ÉLECTRIQUES,
INTRODUIRE LA LAME LA PLUS LARGE DE LA FICHE
DANS LA BORNE CORRESPONDANTE DE LA PRISE
ET POUSSER JUSQU’AU FOND.
This Class B digital apparatus meets all requirements of
the Canadian Interference-Causing Equipment
Regulations.
Cet appareil numérique de la Classe B respecte toutes
les exigences du Règlement sur le matériel brouilleur du
Canada.
ACCESSORIES
When unpacking the player, first check to make sure that all of the accessories listed below are supplied.
● Remote control unit
● Size "AAA" (IEC R03)
dry cell batteries x 2
4
● Video cord (RCA plug Ô RCA plug)
Use to connect the player to a TV
etc.
● Audio cord
(RCA plug × 2 Ô RCA plug × 2)
Use to connect the player to a TV etc.
PRECAUTIONS
If it becomes necessary to transport or ship this unit in the
future, be sure to first remove the disc (if loaded), and retract the disc table to its closed position. Then turn the
power off, and, after the “OFF” display goes out on the
display, disconnect the power cord.
INSTALLING THE PLAYER
÷ Place the player on a stable platform next to the television
and stereo system to be used with the player.
÷ Do not place heavy objects such as a television or TV
monitor on top of the player.
÷ Do not place the player on top of your TV set or TV monitor. Also, keep the player away from devices such as cassette
decks which are sensitive to magnetic fields.
DO NOT INSTALL THE PLAYER IN THE FOLLOWING LOCATIONS
÷ In a place subject to direct sunlight.
÷ In humid or poorly ventilated places.
÷ In extremely hot or cold places.
÷ In a place subject to vibrations.
÷ In a dusty place.
÷ In a place subject to soot, steam or heat (in a kitchen, etc.)
AVOID SOURCES OF HEAT
Do not put the player on sources of heat, such as an amplifier.
When installing with audio components on a rack, avoid components that generate heat, by placing the player below such components where there is adequate ventilation and not much dust.
Avoid placing the player on surfaces such as shaggy carpets, beds,
and sofas which may block ventilation under the player and cause
damage.
When FM or AM stations are being received, signal noise may be
generated if the player is turned on. Turn off the player when not
in use. Also, if there is signal noise when receiving radio stations
with an indoor antenna, adjust the position or direction of the
antenna.
CONDENSATION
Moisture will form in the operating section of the player if the player is brought from cool surroundings into
a warm room or if the temperature of the room rises
suddenly. When this happens, the player’s performance
will be impaired.
To prevent this, let the player stand in its new surroundings for about an hour before switching it on, or
make sure that the room temperature rises gradually.
Condensation may also form during the summer if the player is
exposed to the breeze from an air conditioner. In such cases,
change the location of the player.
POWER-CORD CAUTION
Handle the power cord by the plug. Do not pull out the plug by
tugging the cord and never touch the power cord when your hands
are wet as this could cause a short circuit or electric shock. Do not
place the unit, a piece of furniture, etc., on the power cord, or
pinch the cord. Never make a knot in the cord or tie it with other
cords. The power cords should be routed such a way that they are
not likely to be stepped on. A damaged power cord can cause fire
or give you an electrical shock. Check the power cord regularly.
When you find it damaged, ask your nearest authorized YAMAHA
service center or your dealer for a replacement.
ENGLISH
CAUTION
Even when the player is in the pause mode, the disc-drive motor is
still revolving. Since leaving the player in this condition can shorten
the lifetime of the motor, do not leave the player in the pause
mode for long periods of time. Also, to prevent the damage to the
screen, do not use the unit for long periods of time under conditions in which the screen display (monitor) continuously displays
characters (for example, power-ON mode, CD PLAY, PAUSE or
DEMO mode).
With LD discs, if playback is paused for about 20 minutes, the
player will automatically enter stop mode.
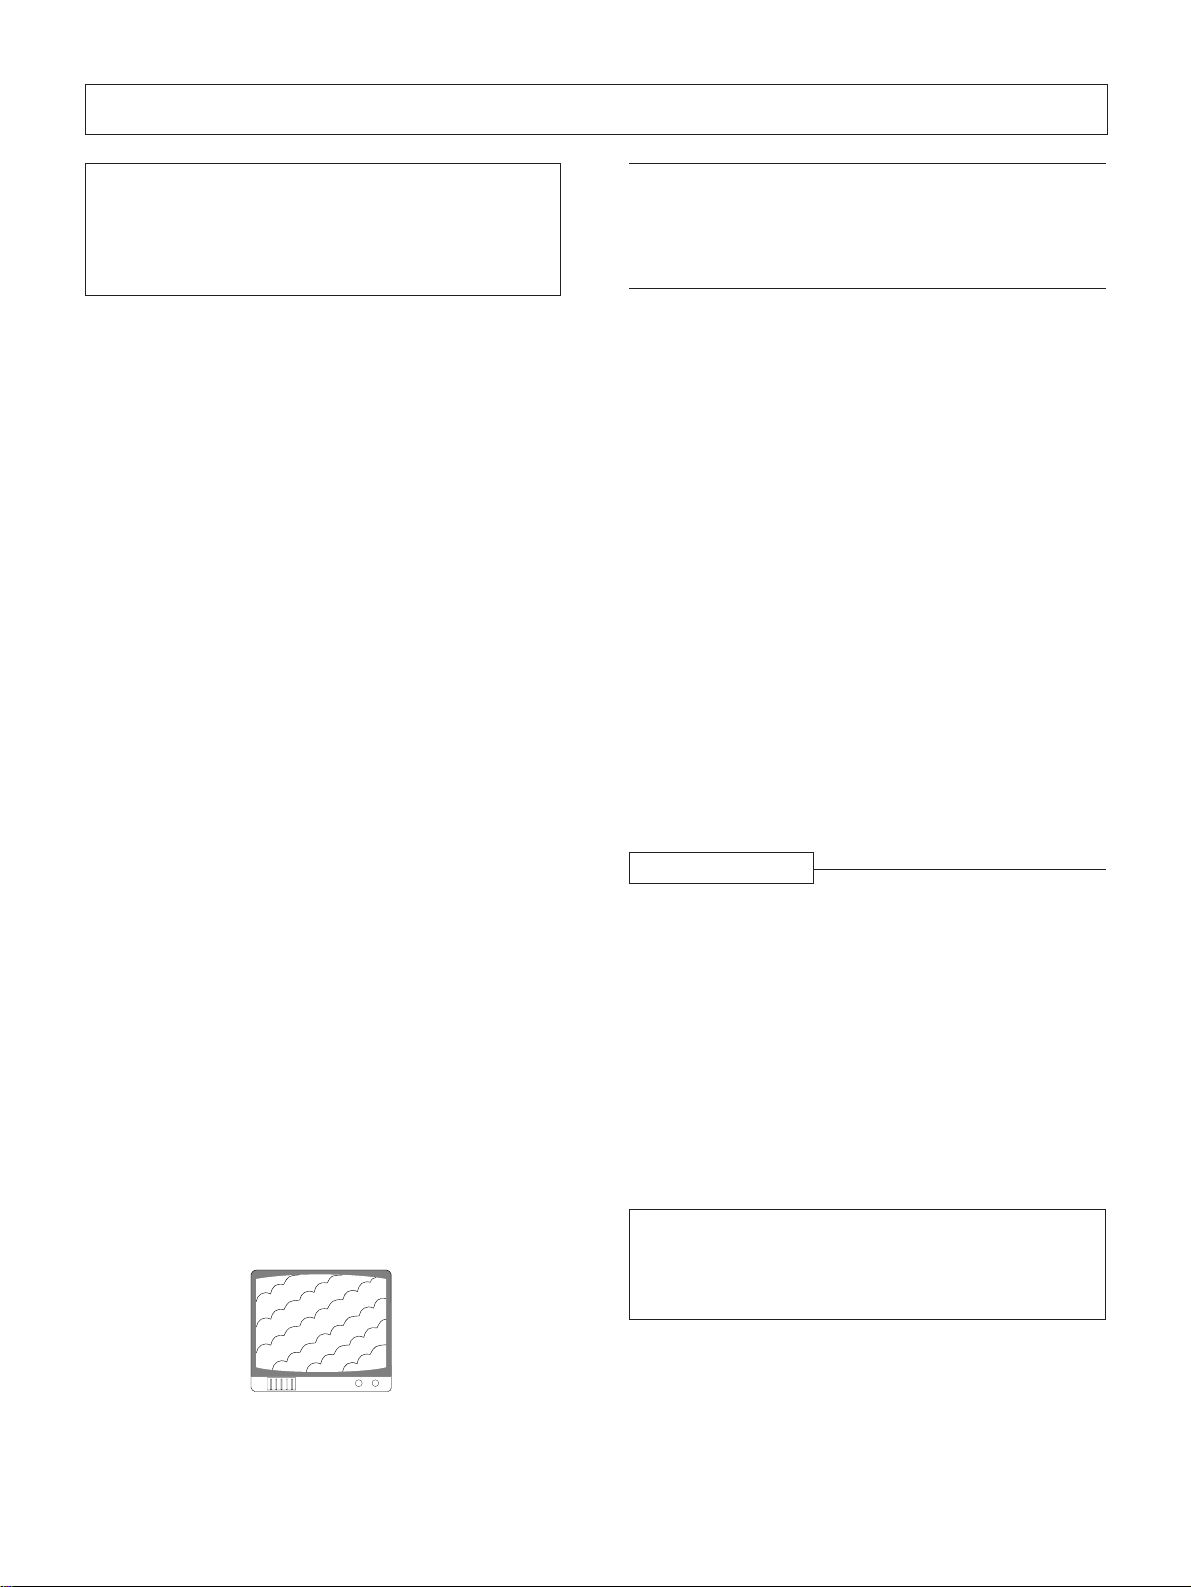
STRIPE PATTERNS APPEARING ON A TV PROGRAM
Stripe patterns may appear during a TV program if the player unit is
turned on, depending on the quality of reception of the TV station. This is neither a malfunction of the television nor the player. If
stripes appear while watching the TV, or when watching the TV for
long periods of time, turn the player off.
CLEANING CARE
Use a soft, dry cloth for cleaning. For stubborn dirt, soak the cloth
in a weak detergent solution; wring well first and wipe. Use a dry
cloth to wipe it dry. Do not use any volatile agents such as
benzine or paint thinner, as they may damage the surface of the
player.
LD/CD lens cleaner
The player's pickup lens should not become dirty in normal use,
but if for some reason it should malfunction due to soiling, ask
your nearest authorized YAMAHA service center. Lens cleaners
for LD/CD players are commercially available, but special care should
be exercised in their use since some may cause damage to the
lens.
Abnormal functioning of this unit may be caused
by lightning, static electricity, or other external inter-ference. To restore normal operation, unplug
the AC power cord and then plug it in again.
Only one disc can be loaded at any one time. Loading
LaserDisc, Compact Disc, 8 cm Compact Disc or Compact Disc with Video on top of one another may result
in a breakdown, or in scratching of the discs. Please
only load one disc at a time.
This player is to be used exclusively with the NTSC color system. Please use NTSC LaserDiscs only. PAL and
SECAM system discs cannot be used with this player.
5
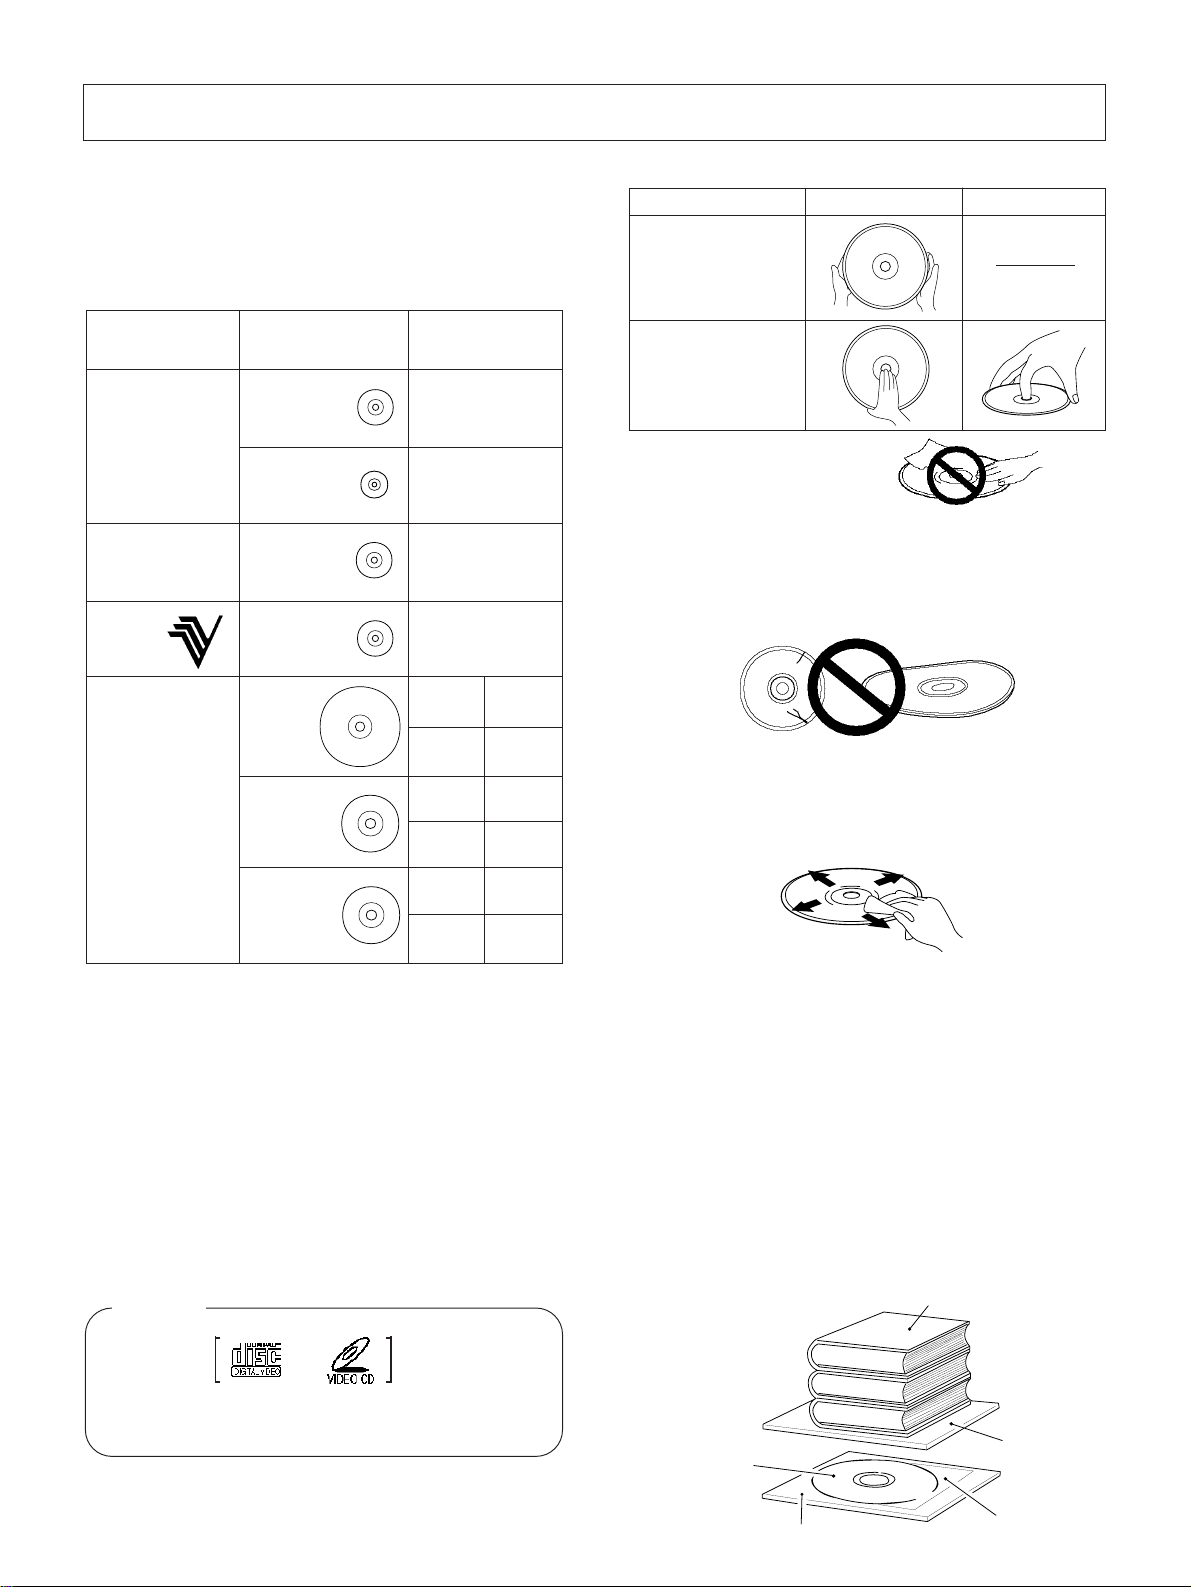
TYPES OF DISCS WHICH CAN BE PLAYED WITH THIS UNIT
This unit is a CD/CDV/LD compatible laserdisc player.
÷ The marks shown in the following table are found on the label
or jacket of each disc.
This player is capable of playing the 7 types of discs listed
below without using an adapter.
÷ To prevent a malfunction, do not use an 8-cm (3 in.) adapter (for
CD) or a 20-cm (8 in.) adapter (for LD).
Types of playable
discs and their marks
CD
'
CDV
Æ
VSD
VIDEO
SINGLE
DISC
LASER DISC
L
;
æ
÷ There are some discs marked with the L mark instead of the
Æ mark.
÷ There are some discs without the æ mark.
Diameter/Playable sides
CD
12 cm (5 in.)/
single-side
CD single
8 cm (3 in.)/
single-side
CDV
**
12 cm (5 in.)/
single-side
VSD
12 cm (5 in.) /
single-side
LD
*
30 cm
(12 in.)/
double-side
LD
*
20 cm (8 in.)/
double-side
LD single
**
20 cm (8 in.)/
single-side
Max. playback time
74 minutes
20 minutes
Digital audio 20 min.
Digital audio
+ Video 5 min.
Digital audio
+ Video 5 min.
CAV
CLV
CAV
CLV
CAV
CLV
1 hour
2 hours
28 min.
40 min.
14 min.
20 min.
How to hold a disc
LD
Holding with two
hands
Hold by two opposite
edges of the disc.
Holding with one
hand
Hold by hooking two
fingers across the
center hole and edge.
Do not attach paper.
Do not touch the disc surfaces.
CD , CDV
Never use a cracked or warped disc.
To avoid danger, never attempt to play a cracked or deformed disc,
or a disc which has been mended using an adhesive agent, etc.
Also do not use an analog record spray or static prevention agent
for these will crack the laserdisc surface.
Care of disc
To maintain high video and audio quality, clean the disc if it gets
dirty clean by wiping the disc surface with a soft cloth. When
wiping, be sure to move the cloth in straight directions from the
center of the disc toward the outer edge. Do not wipe in a circular
direction like you do with analog records.
Wipe along the radii.
÷ Do not use an analog record cleaner, benzine, thinner or static
prevention agent.
* This is the unified symbol mark of LASERDISC (LaserVision
videodisc).
LaserDisc players and discs which bear this symbol and use the
same television system, are mutually compatible.
** A Digital Audio with Multi Audio Disc (CD VIDEO LD) and a CDV
(CD Video CDV) are referred to as CD Video discs. CD Videodiscs are recorded with subcodes, which are the non-audio recordings of TOC (Table of Contents) data such as track numbers, index numbers, etc. However, there are some discs without these marks.
Caution
VIDEO CD
The Video CD is a disc holding up to 74 minutes of digital
video and audio signals, when recorded in the MPEG format.
or
cannot be played
with this player.
6
Storage
After playback, be sure to take out the disc from the player, put
the disc in the jacket or case and store it vertically. To prevent the
discs from warping, do not store jackets or cases at an angle or
stack them horizontally. Also do not store them in a place subject
to direct sunlight or under high temperature and humidity.
÷ If a LaserDisc is deformed, place it in the inner bag, put the bag
between two flat boards, place a weight of 4 to 5 kg (10 lbs) on
the boards and leave them for about a day. This may sometimes reduce the warp or other deformation.
Heavy books (4 to 5 kg (10 lbs))
Flat board
LaserDisc
Inner bag
Flat board

GLOSSARY
LD terms
Chapter number
Just like the numbers assigned to chapters of a book, the
LD disc is divided into several chapters and each of them is
assigned a chapter number. If the chapter numbers are
recorded on the disc, it is possible to perform operations
such as the chapter search which quickly searches the desired chapter.
÷ Some LD discs do not contain recorded chapter num-
bers.
Frame number
A frame number is assigned to every frame on a CAV disc.
This makes possible operations such as the frame search
which searches desired images based on their frame numbers.
Time number
This refers to the elapsed playing time from the beginning
of the disc that is recorded on CLV discs as well as on CAV
discs with a TOC*1. This allows operations such as the
time number search which searches desired images based
on their time numbers.
CDV/CD terms
Track number
The CDV or CD disc is divided into several tracks and each
of them is assigned a track number. With the CDV disc, the
track numbers are recorded across the audio and video
parts. This allows operations such as the track search which
quickly searches the desired track.
TOC (*1)
CD and CDV discs contain non-audio information called TOC
the (Table Of Contents) at the beginning of the disc. As this
name implies, the TOC contains information on the number
of tracks and their playing time just like the table of contents of a book.
÷ Some LD discs are not provided with a TOC section.
÷ The LD with TOC and the CDV belong to the same
category of "optical video disc systems with digital audio".
LD (LaserDisc)
LaserDiscs include a standard play disc (CAV) and an extended play disc (CLV) depending on the signal recording
formats.
CAV
[Standard Play/CAV] or simply [Standard Play] is indicated
on the jacket or label of the disc.
CLV
[Extended Play/CLV] or simply [Extended Play] is indicated
on the jacket or label of the disc.
LaserDisc with digital audio
This type of disc contains the recording of a digital audio
signal in addition to an analog audio signal. It allows you to
enjoy the high-quality video of an LD and digital sound at
the same time.
¬ or :
Multi-audio disc with digital audio
This type of disc contains different audio information in
digital audio and analog audio.
¬ and MULTI AUDIO or :K
The digital and analog audio can be switched over to enjoy
different audio information.
CDV (Compact Disc with Video)
÷ This CD contains the video part. Among the 25-minute
playing time of the CDV, 20 minutes contain a similar
digital audio to an ordinary CD (audio part) and the remaining 5 minutes contain a video plus digital audio (video part).
ENGLISH
CD video system
The CD video system is the unified name given to "optical
video disc systems with digital audio".
The systems belonging to this category include;
÷ CDV disc (CD VIDEO, CDV)
÷ LD with subcode and digital audio
÷ CD/CDV compatible player
÷ CD/CDV/LD compatible player
Æ
7
CONNECTIONS
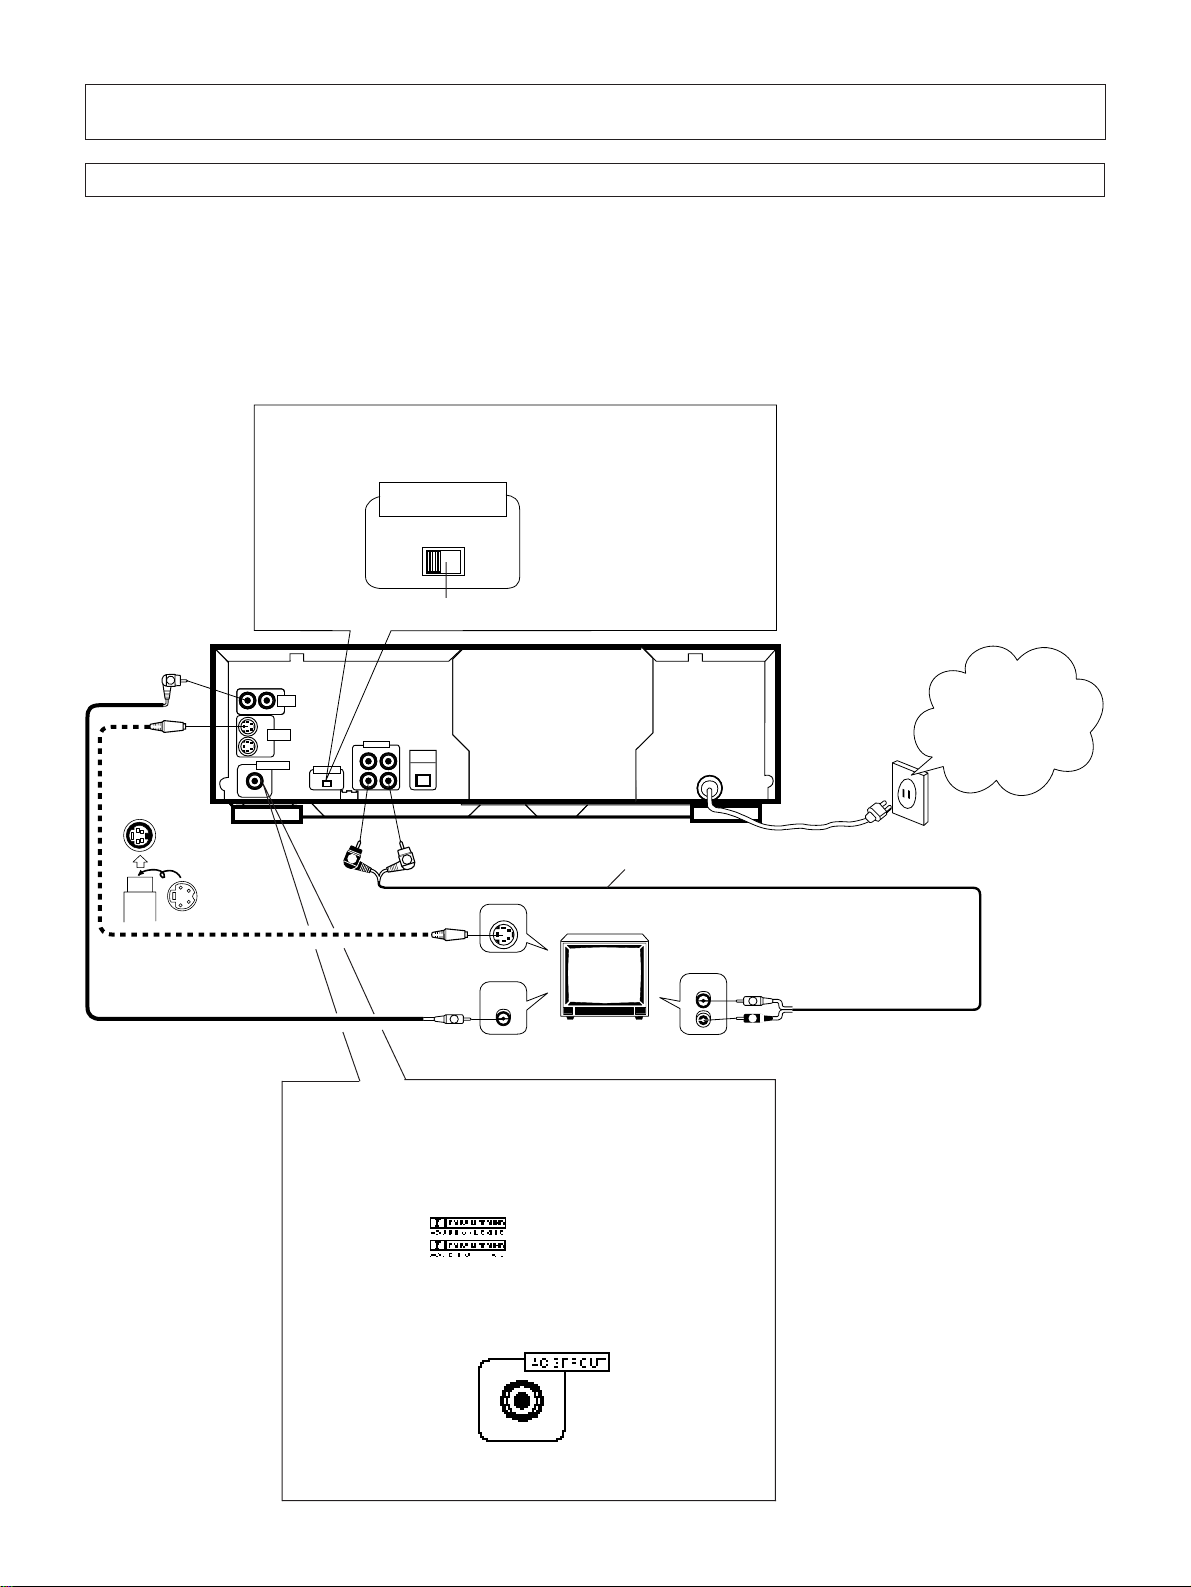
Connection with a TV set equipped with Video/Audio inputs
Connection method (Be sure to plug the cords securely deep into the connectors.)
1
Connect the VIDEO OUT jack of the player to the video input jack of a TV (or a TV monitor).
If the TV set has an S VIDEO input jack, connect it using an S VIDEO cable which is available in audio/video stores.
•
For use of the S VIDEO cable, also read the operating instructions of the TV,
2
Connect the AUDIO OUT jacks of the player to the audio input jacks of the TV.
3
Finally plug the power cord into a household power outlet (which should permanently be supplied with power).
Also read the instruction manual of the TV.
•
7 ATTENUATOR switch
Usually, set this switch to the OFF position.
Set to ON when the audio is distorted during karaoke singing.
ATTENUATOR
OFF ON
Usually OFF
V
12
1
S-VIDEO
OUT
2
AC-3 RF OUT
Check the
positions of
the holes of
the S VIDEO
jack before
insertion.
S VIDEO plug
Commercially-available
S VIDEO cable
Accessory video cord
VIDEO
OUT
AUDIO OUT
2/R 1/L
OPTICAL
DIGITAL OUT
2
ATTENUATOR
1
OFF ON
R
L
S VIDEO
Accessory audio cord
S VIDEO input jack
VIDEO
OUT
V
VIDEO input jack
AUDIO
L
R
AUDIO input jacks (A/V TV)
AC-3 RF OUT terminal:
This terminal is intended for use with Dolby* AC-3 (*1) components
With this terminal, you will be able to connect an AC-3 RF
•
input to amplifiers and surround processors, and playback laser
discs formatted with Dolby AC-3 (*2).
(∗1) Indicated with (For hardware)
(∗2) Indicated with (For software)
You cannot playback currently available laser discs, laser disc
•
players, AV amplifiers, etc., with this terminal.
Do not connect this terminals to the audio input terminal of a
•
normal stereo or AV amplifiers.
Plug into a
household power
outlet after
completing all
connections.
L
R
* "Dolby", "AC-3" and the double-D symbol are trademarks of Dolby
Laboratories Licensing corporation.
8
Connection of an additional stereo amplifier
CONNECTIONS
This connection diagram shows how to connect the audio output to a stereo amplifier while the video output is connected to a TV as shown on
page 8.To reproduce the audio of a Compact Disc or an LaserDisc with improved quality, it is recommended to connect the player to a stereo
amplifier.
Connect the AUDIO OUT jacks to the input jacks labeled LD, CD or AUX, etc. (Never connect to the PHONO input
jacks.)
Also read the operating instructions of your stereo amplifier.
•
Plug into a
household power
outlet after
completing all
connections.
Commercially-available
optical cable
ENGLISH
Accessory audio cord
INSERTING BATTERIES INTO THE REMOTE
CONTROL UNIT
1 Open the battery compartment cover on the back of the re-
mote control unit. Press the tab and open the cover in the
direction of the arrow.
2 Take out the two accessory size "AAA" (IEC R03) dry cell batter-
ies, and insert them into the battery compartment in accordance with the display (ª, ·) inside the compartment.
3 Close the cover of the battery compartment.
Incorrect use of batteries may cause leakage or rupture.
Always be sure to follow these guidelines:
A. Always insert batteries into the battery compartment cor-
rectly matching the positive ª an negative · polarities, as
shown by the display inside the compartment.
B. Never mix new and used batteries.
C. Batteries of the same size may have different voltages, de-
pending on brand. Do not mix different brands of batteries.
Stereo amplifier
1
2
3
9
 Loading...