

Yamaha YMA-CV03Y-00 User Manual
Full HD Waterproof Motorcycle & Watercraft Action Camera
CONTENTS
Main Features
2 Time Lapse Video
13 Buttons and Camera Body
3 Time Stamp on Video
13
Installing Battery
4 Image Resolution Settings
13
Installing MicroSD card
4 Continuous Shot Settings
13
Waterproof Housing
5 FOLDER – System Settings
13
Mounting your Camera
6 Language Setting
13
Remote control
6 Date and Time Settings
14 Screen - Information and Icons
7 Image Flip
14 Main Menu - Navigation
7 Display Frequency Setting
14 Main Menu - Folders
7 Auto Power Off
14 Video Recording – How to
8 Auto Screen Off
15 Image Capture – How to
8 Volume
15 FOLDER - Video Playback
9 Format and Reset
15 FOLDER - Image Viewing
10 Memory Info
15 Deleting Files
10 Camera Version
15 FOLDER – Video Settings
11 Firmware Update
16 Normal Recording
11 Connecting to PC
16 Motion Detection
11 Connecting to Television
17 Set Auto Recording Start Time
11 Battery Charging
18 Auto Record in Vehicle
12 Battery Information
18 Loop Record
12 Camera Specifications
19 Video resolution settings
12 Troubleshooting (Link)
15 Video Sound Record Content
12 Parts Listing
20
IMPORTANT! Never risk your life or the lives of others when making a video. Accidents will
happen so be prepared by becoming familiar with your Yamaha camera before using it. Do not try to
adjust camera settings while riding your bike under any circumstances. Please read this manual
before mounting and using your camera. Save this Users Manual
For support and firmware updates visit: www.ymap.motao.com
Inspect Your Camera: The camera shall be inspected upon receipt and checked for any missing
parts per Complete Parts Listing page 20 (Rear Cover)
Repairs: All camera repairs shall be made by authorized personnel only and in conformance with the
manufacturer’s recommendations or the warranty will be void..
Warranty: This Camera is covered by a limited 6 month warranty effective receipt date
For further warranty information visit www.ymap.motao.com
Page 1

Main Features
480 x 240,1.5” TFT LCD Screen
5.0MP FULL HD CMOS sensor
170° Super wide angle FOV( field of view) under 720P, 127 ° under 1080P 720P
H.264 Compression into MP4 video format
20 Meters ( 60 Feet) Waterproof
RF wireless remote controller (requires manual power on )
Support Timing record, Motion detect record, Auto record and Loop record
Support Timing Capture ( Self-timer) , Continuous capture
Zoom focus available under 720P video record and Picture capture mode
Video resolution Settings:
16: 9 Full HD 1920 x 1080P 30FPS
4: 3 Full HD 1440 x 1080P 30FPS
16: 9 HD 1280 x 720P 60FPS
16: 9 HD 1280 x 720P 30FPS
4: 3 WVGA 848 x 480 60FPS
Picture resolution Settings:
4000 x 3000 12MP
3200 x 2400 8MP
2592 x 1944 5MP
Video & Picture playback
Support 1GB~32GB High speed Micro-SD memory card –
(8 GB RiData Class 10, MicroSD card Included only in Yamaha 2013 promotion package)
High speed USB2.0 interface for Power charge and Data transfer
HDMI、USB and RCA Cable output optional
The camera supports Continuous burst, Motion detection and Time Lapse capture.
For full details on these settings see pages 11 thru 13
Page 2
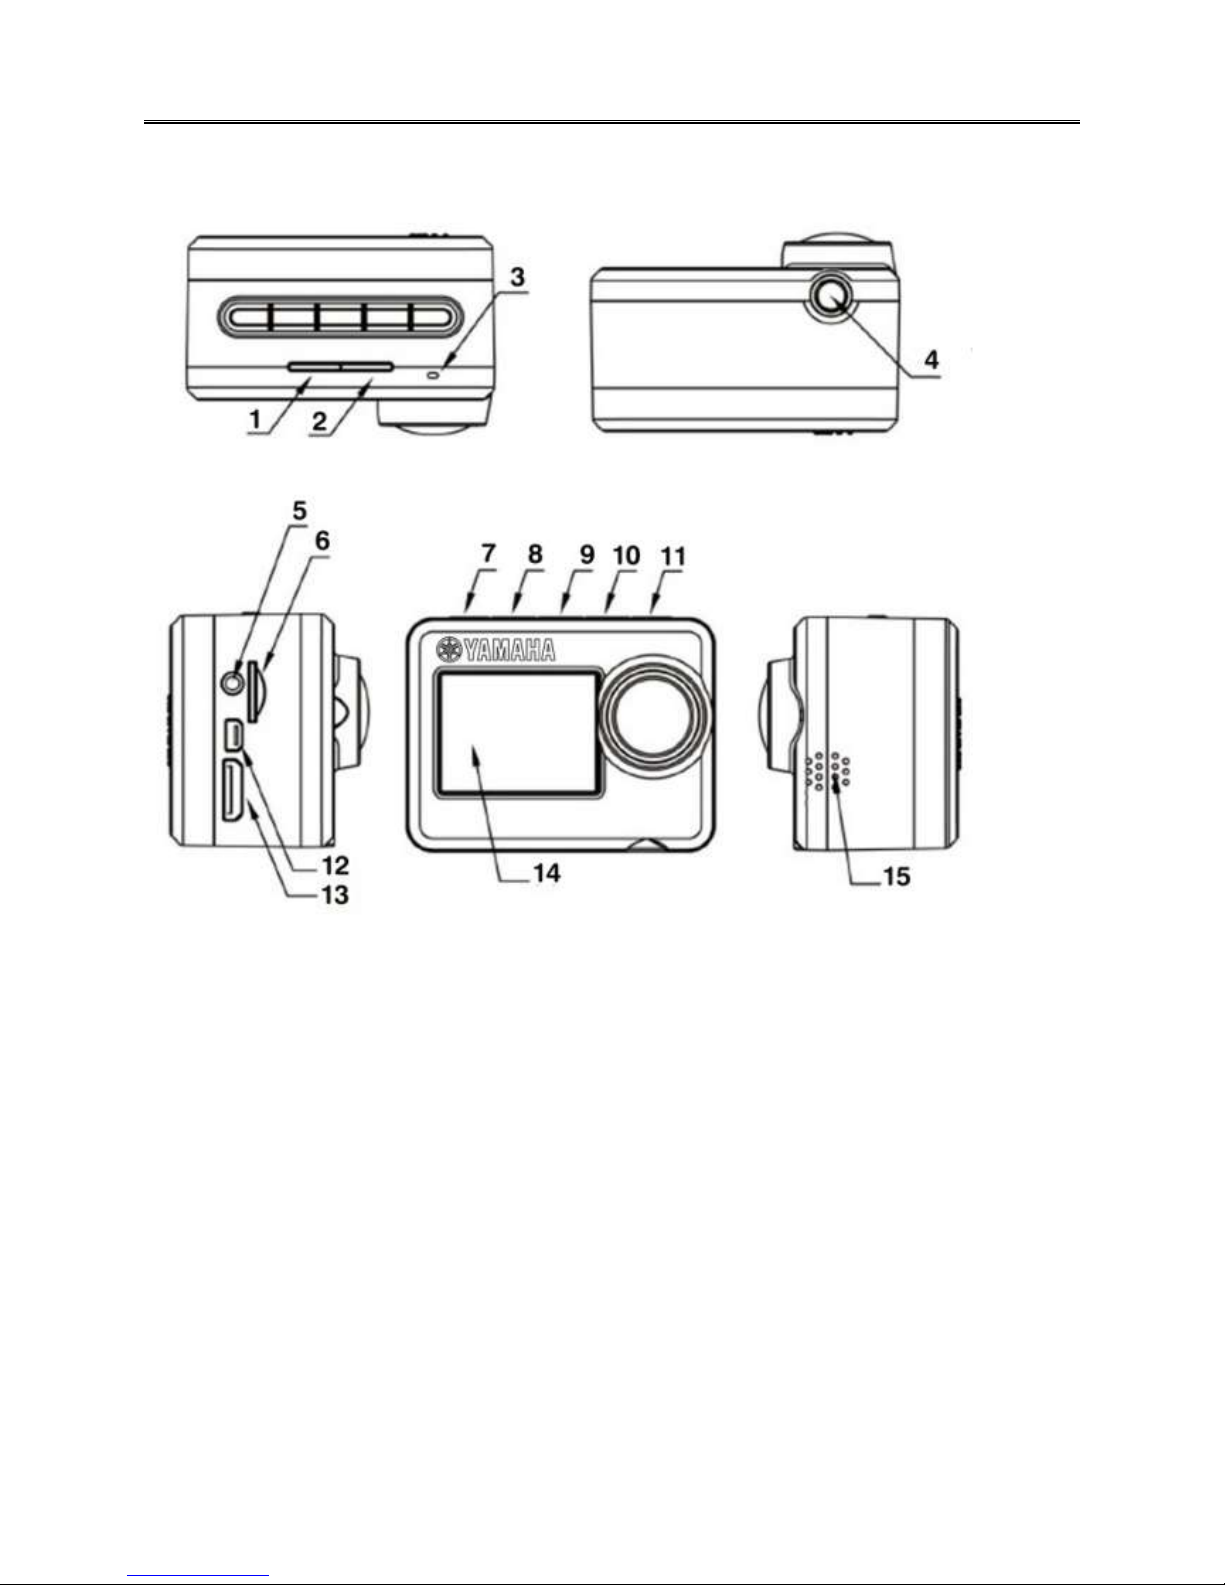
Camera Buttons and Ports
1. Video Record Indicator (red)
2. Power Indicator (red) & Power charge Indicator (green)
3. Microphone (no Icon)
4. Tripod screw hole
5. Audio output
6. TF card slot
7. REC & Confirm button
8. UP & Zoom+
9. Menu button
10. Down & Zoom- / Remote Pair
11. Power ON & Picture Capture
12. USB Port
13. HDMI Port
14. TFT LCD
15. Speaker
Page 3
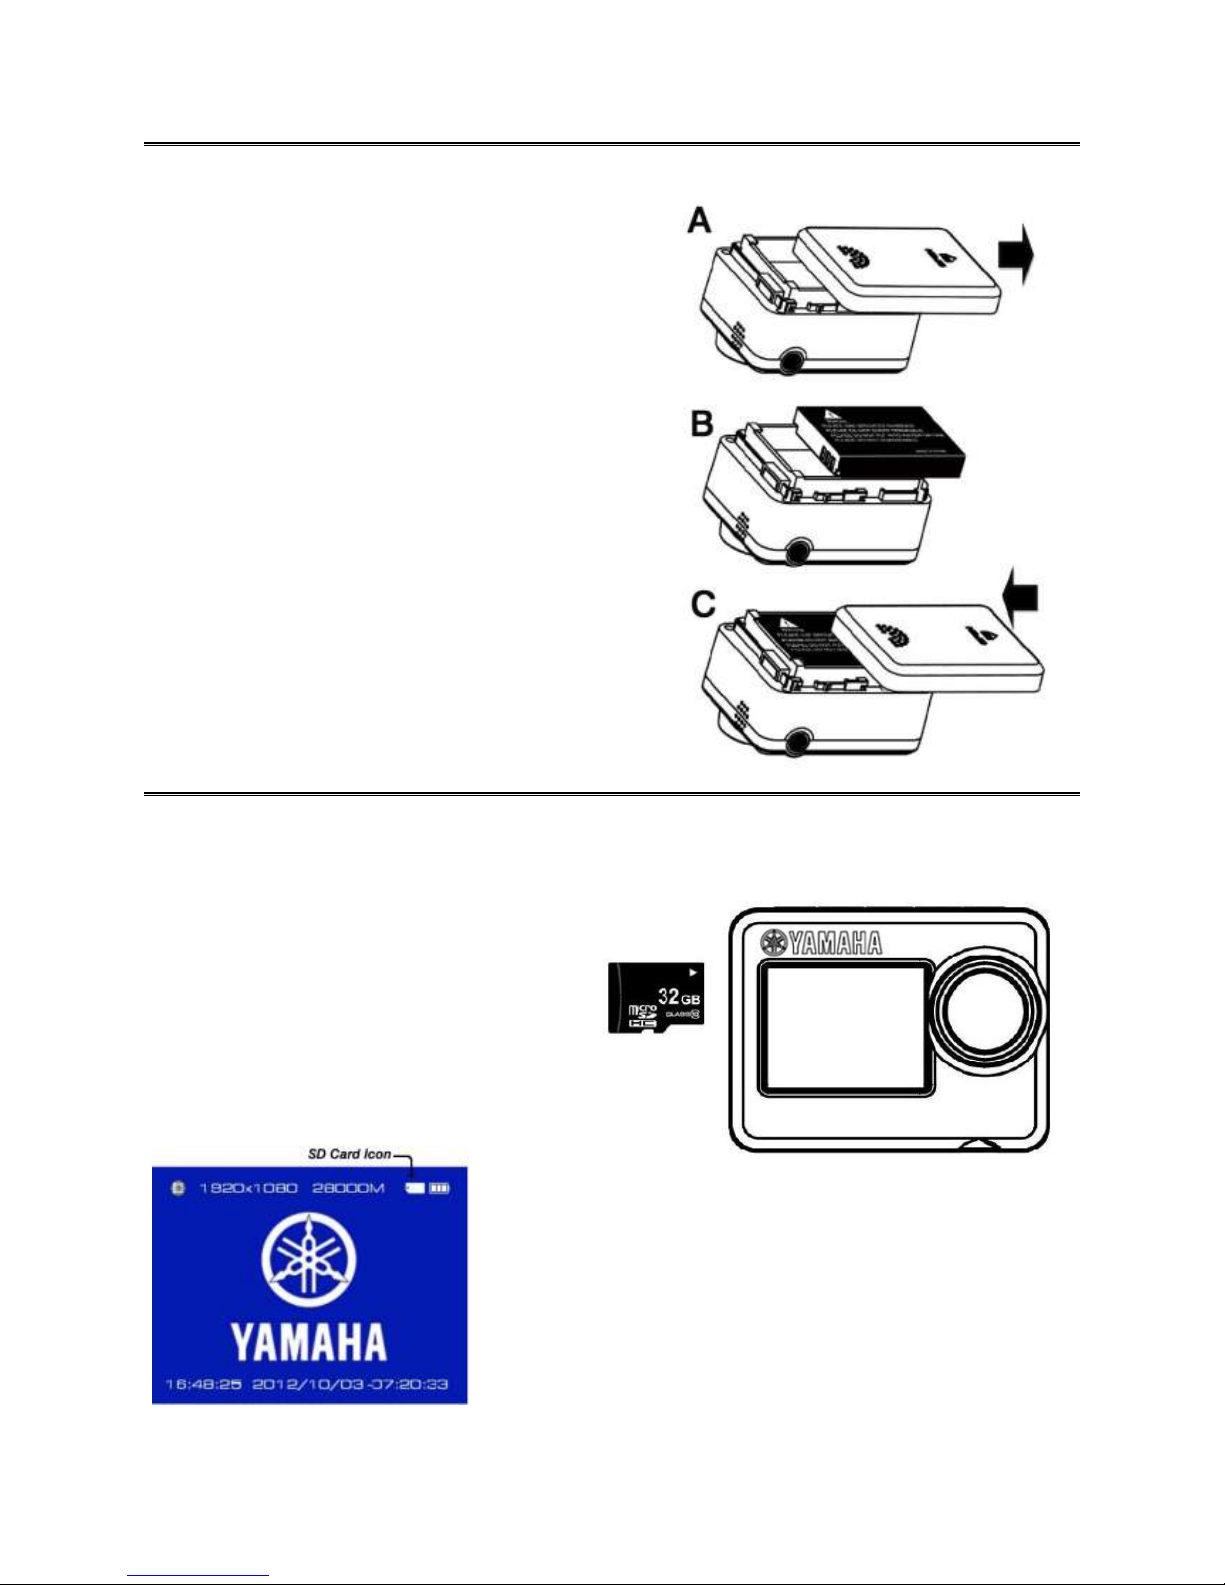
Battery Installation
Install the battery according to the graphics
A - Open the battery cover
B - Install the battery ( Note: label side face up)
C - Close back cover
Inserting Memory Card
The camera does not have built-in memory.
A Micro SD card is required and a class 10
8GB to 32GB is recommended
Install a Micro SD card
according to graphic
After installing the SD card, power on the camera
and an SD card icon will appear in the top right
corner of the screen – this indicates SD card is
correctly installed. If no icon is displayed then an
SD card is not installed or the card is invalid.
Page 4
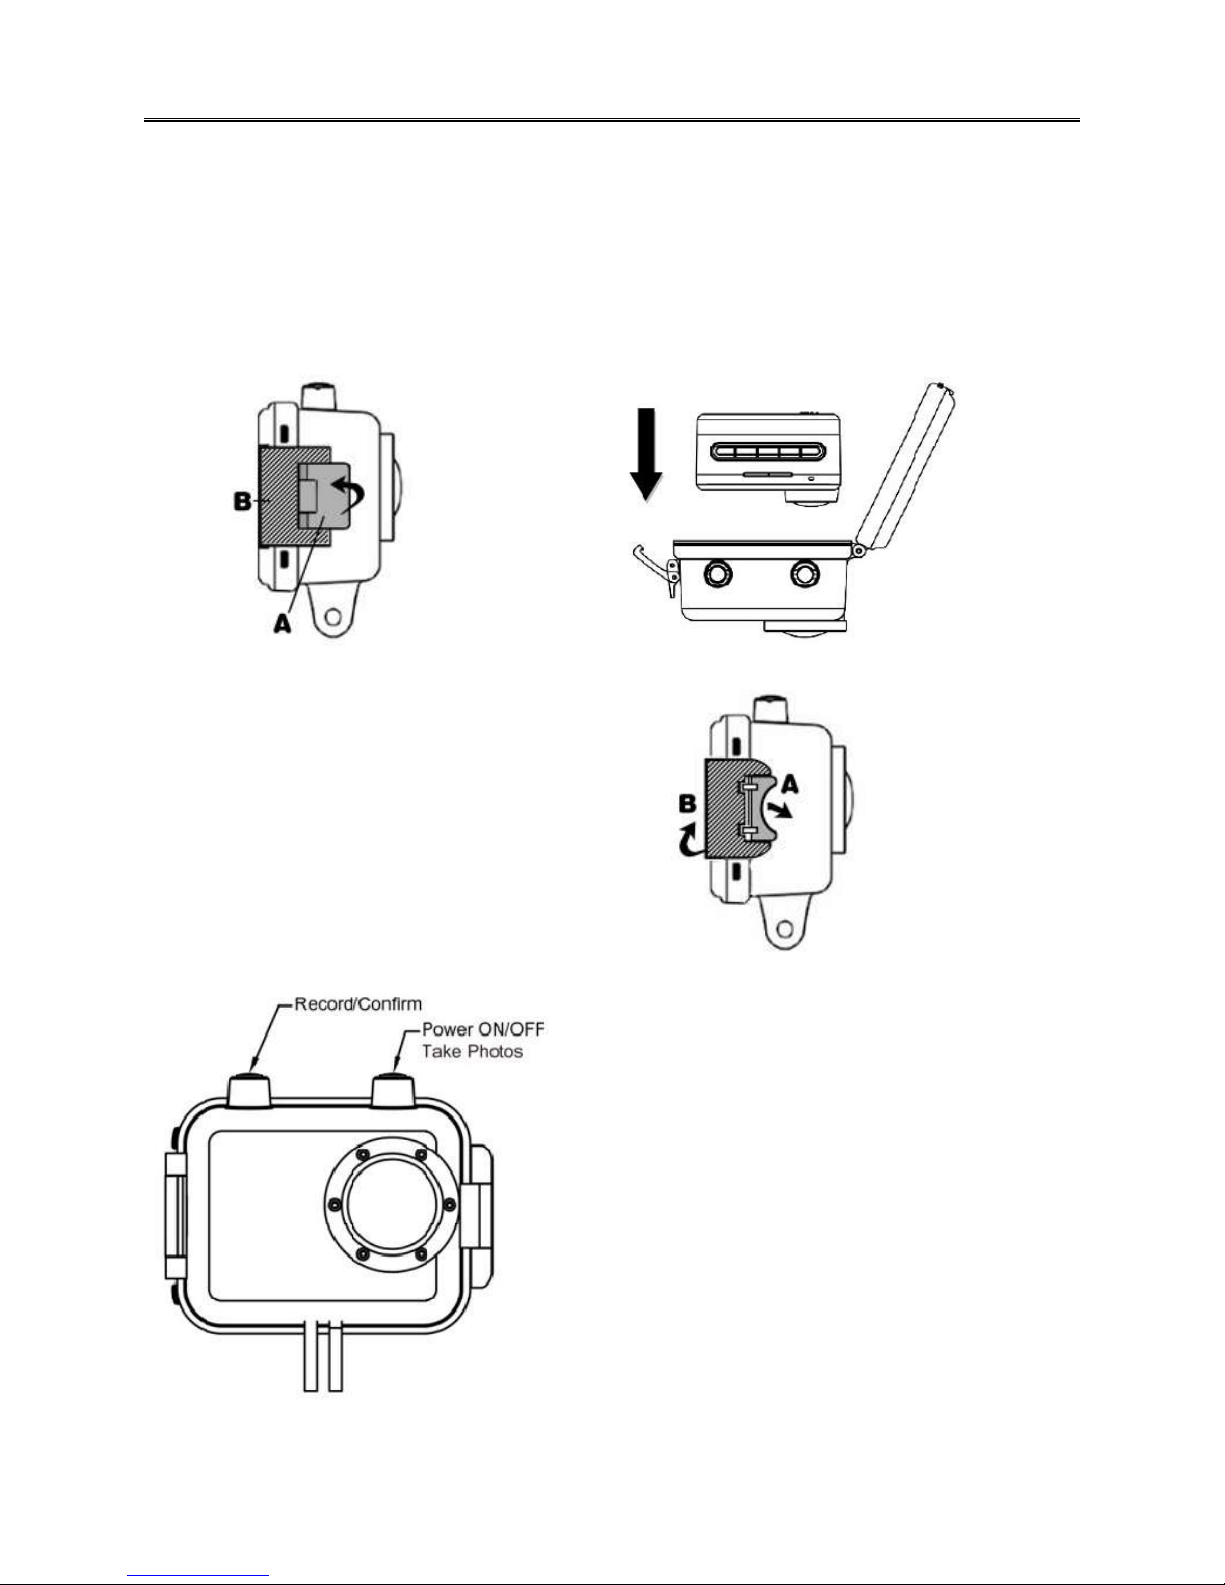
Using the Waterproof Housing
1. Opening The Latch 2. Insert Camera
Per arrow in the graphic below, pull Open hinged rear cover and insert camera
latch "A" outward and the clasp "B" as shown in the graphic below.
will slacken and allow you to pull lock
mechanism away from the rear cover.
3. Close the Cover
Per graphic to the right, First close
the clasp "B" and then press inwards
the latch "A" to lock tight
Two button operation only when camera is
Inside the waterproof housing
Note! The waterproof housing is certified at a
maximum depth of 30 Meters (99 feet). Should an
area of condensation form on the inside the
waterproof housing this will not cause a
problem for the cameras safe function. .
Page 5
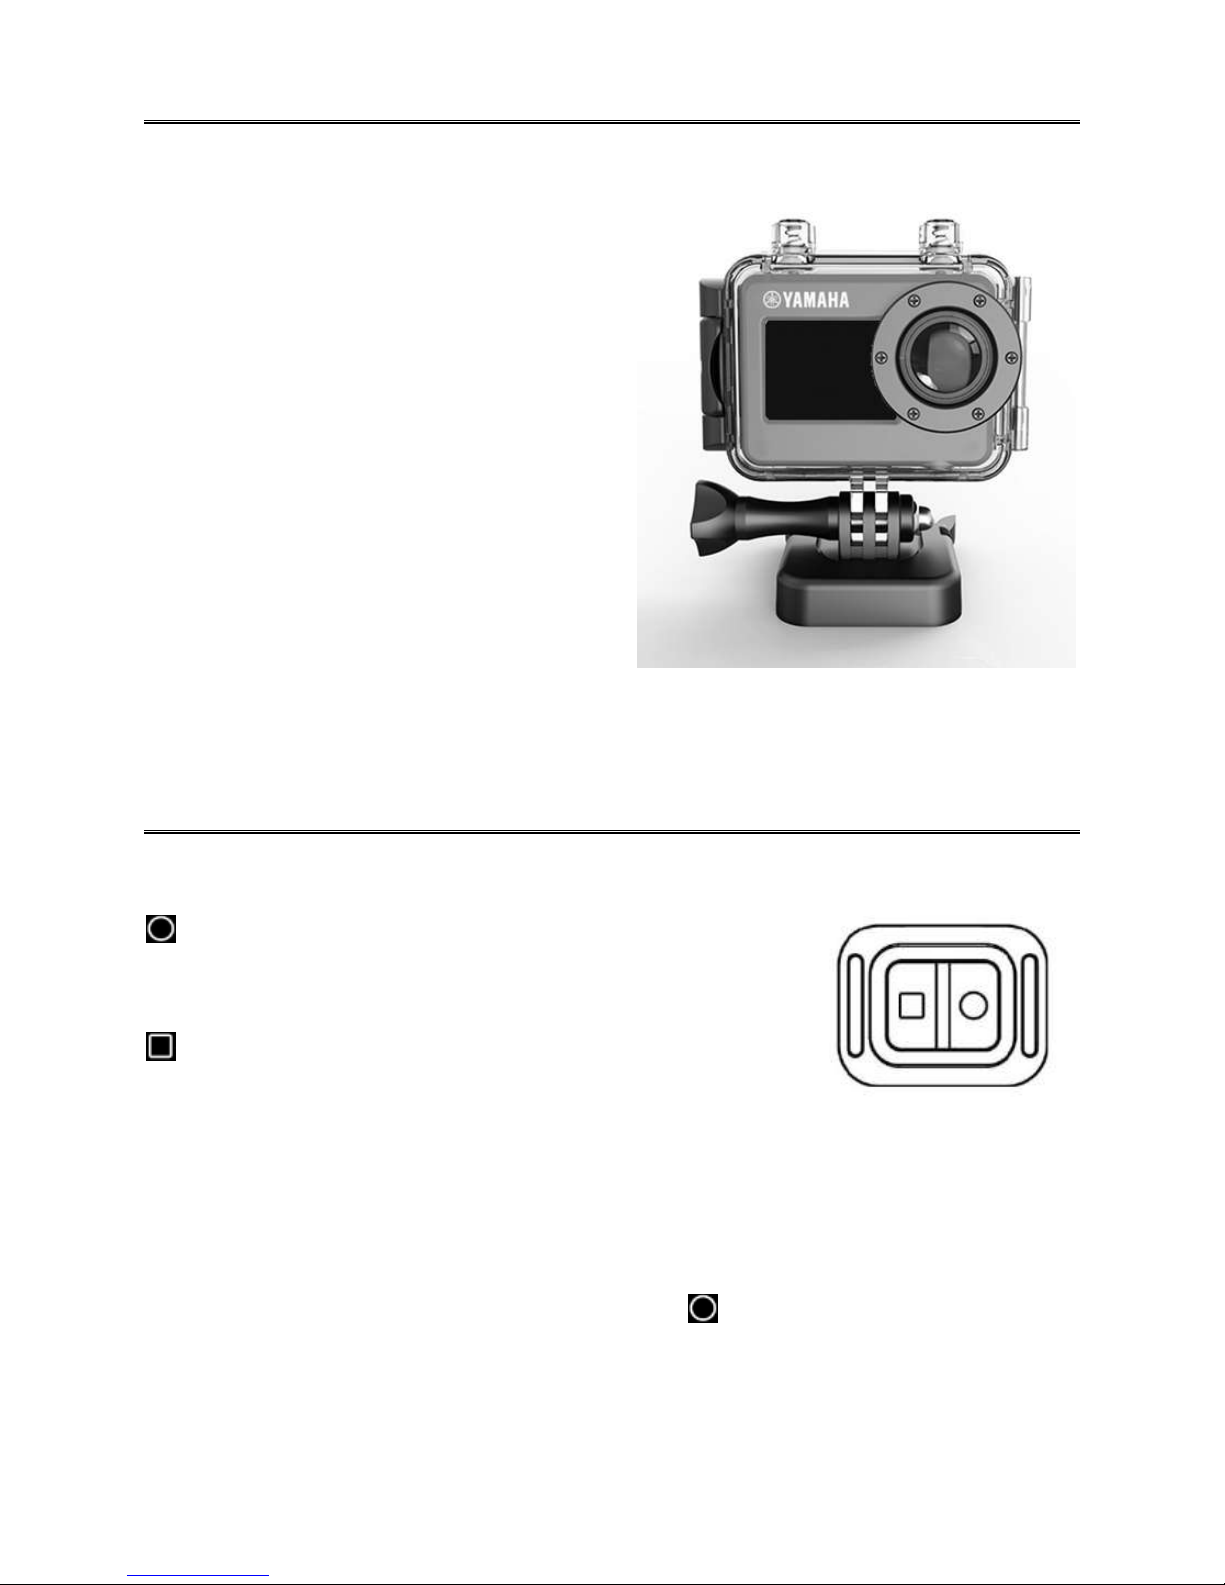
Mounting the Waterproof Housing
To mount, choose the best mount to for the event you
are planning, The Yamaha HD camera kit includes
the following clips, mounts and bases.
Main clip mount which inserts into one of two base
mounts, one for flat surfaces and a curved base with
3M adhesive backing for helmet mounting.
Two tripod mounts are included, one for use with the
waterproof housing and the other is used without the
housing and mounts directly into the cameras built in
tripod socket
Also in the kit are three mounting stem extensions.
See page 20 for complete list.
Note! Your camera mounts are rugged but they are plastic and may break under heavy stress and
certain rough riding conditions therefore it is recommended that you tie a thin tether line to the camera
housing. If the camera should break lose during riding it will remain tethered to the bike. Make sure the
tether does not connect to or near moving parts of the motorcycle..
Remote Controller
START VIDEO RECORD
Remote to start video record only when Camera is Powered ON.
Remote will not start record if camera power button is OFF.
STOP VIDEO RECORD
Remote to stop video record only, will not power OFF camera.
This allows multiple recording starts and stops.
PAIRING A REPLACEMENT REMOTE with CAMERA
Note – The camera and remote have been pre-paired at the factory when manufactured. This feature
is only necessary when a new remote control replaces the factory paired remote
1. Hold down the “<” button on the camera when in power OFF state. Don’t let go.
2. Then press POWER button to turn ON the camera.
3. When camera has powered on immediately press the button (Start Video Record)
and immediately release the “<” button.
4. When pairing the screen will go dark during the process. If pairing is a success the camera will
power ON automatically. If pairing has failed the camera will power OFF automatically.
Page 6
 Loading...