

Page 1
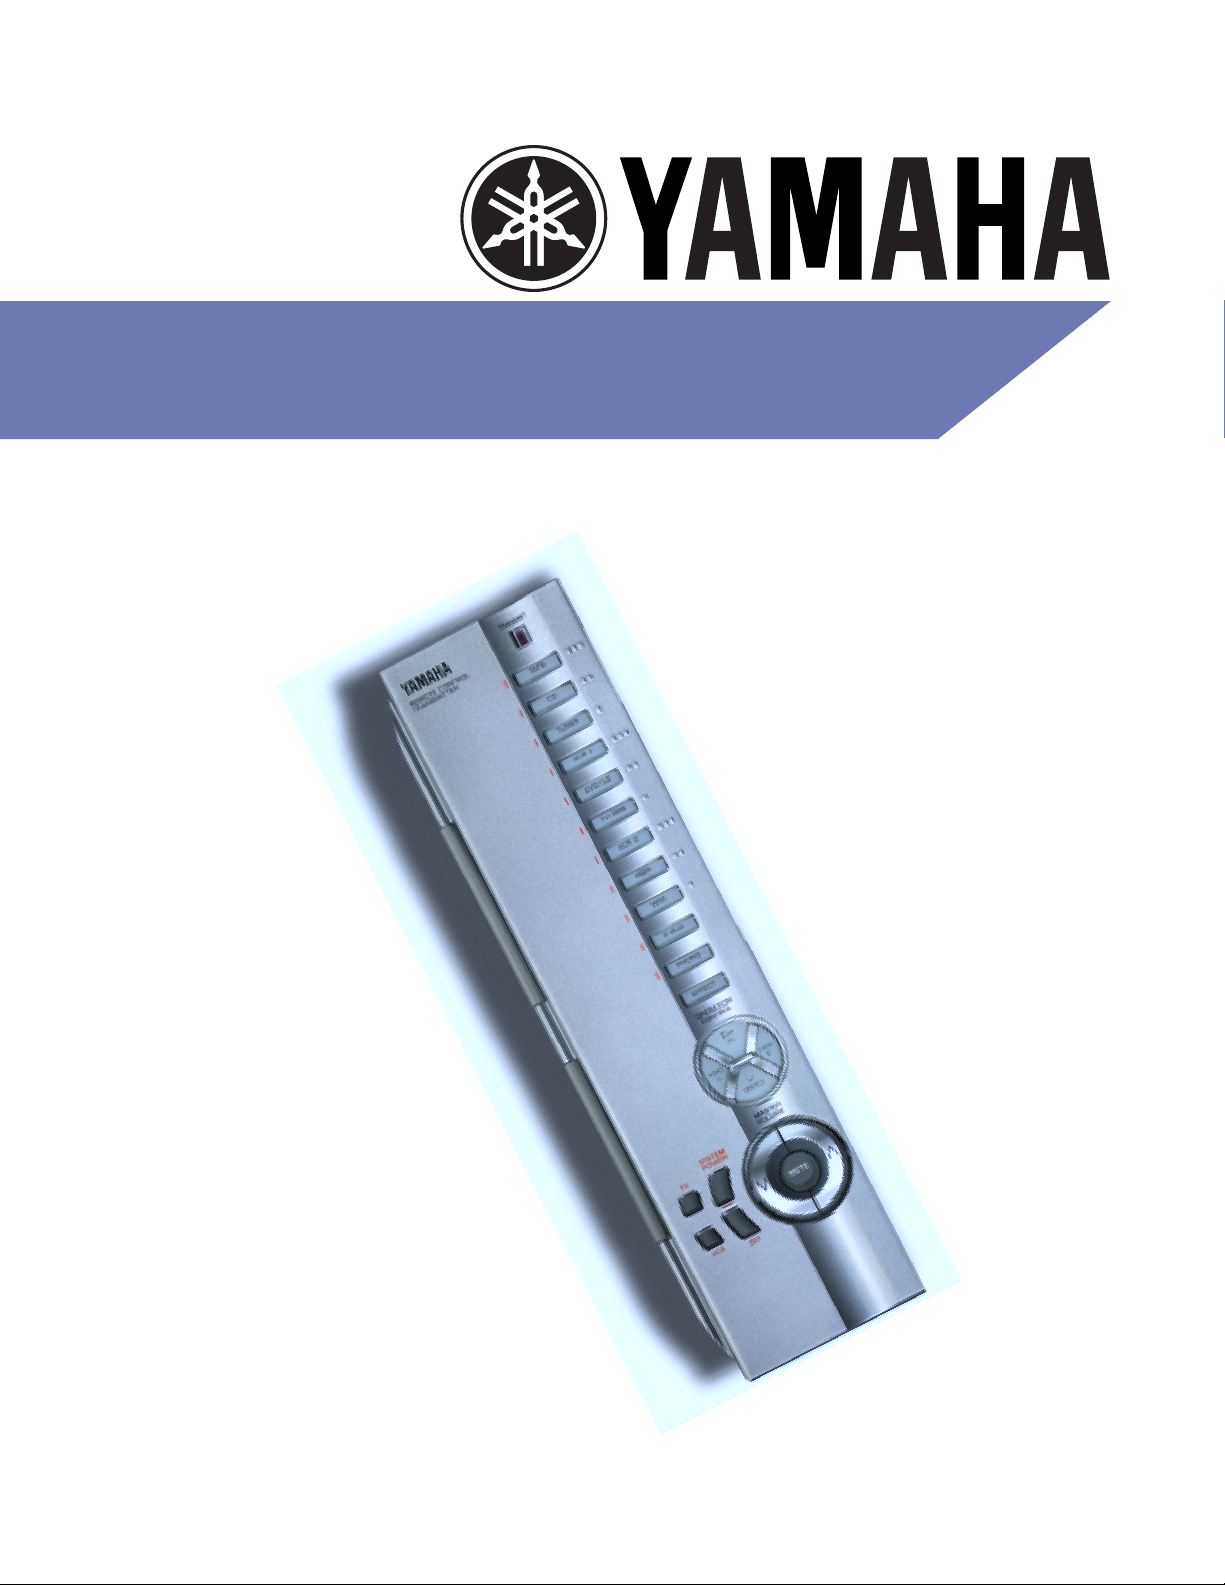
Remote Control
User’s Guide
Page 2

Page 3
Remote Control Guide
•
PROGRAMMING THE REMOTE CONTROL
The new Yamaha remote control offers many factory
preset and programmable features. It includes factory
presets to control your Yamaha receiver and most
Yamaha audio components
To control other brands of components (i.e., TV, VCR, etc.),
you will need to program the remote control to learn the
functions of each of your other components’ remote
controls.
NOTE: The remote control can learn and control most
major brands of audio and video components with remote
control transmitters. For other units, use the original
remote control supplied with the product.
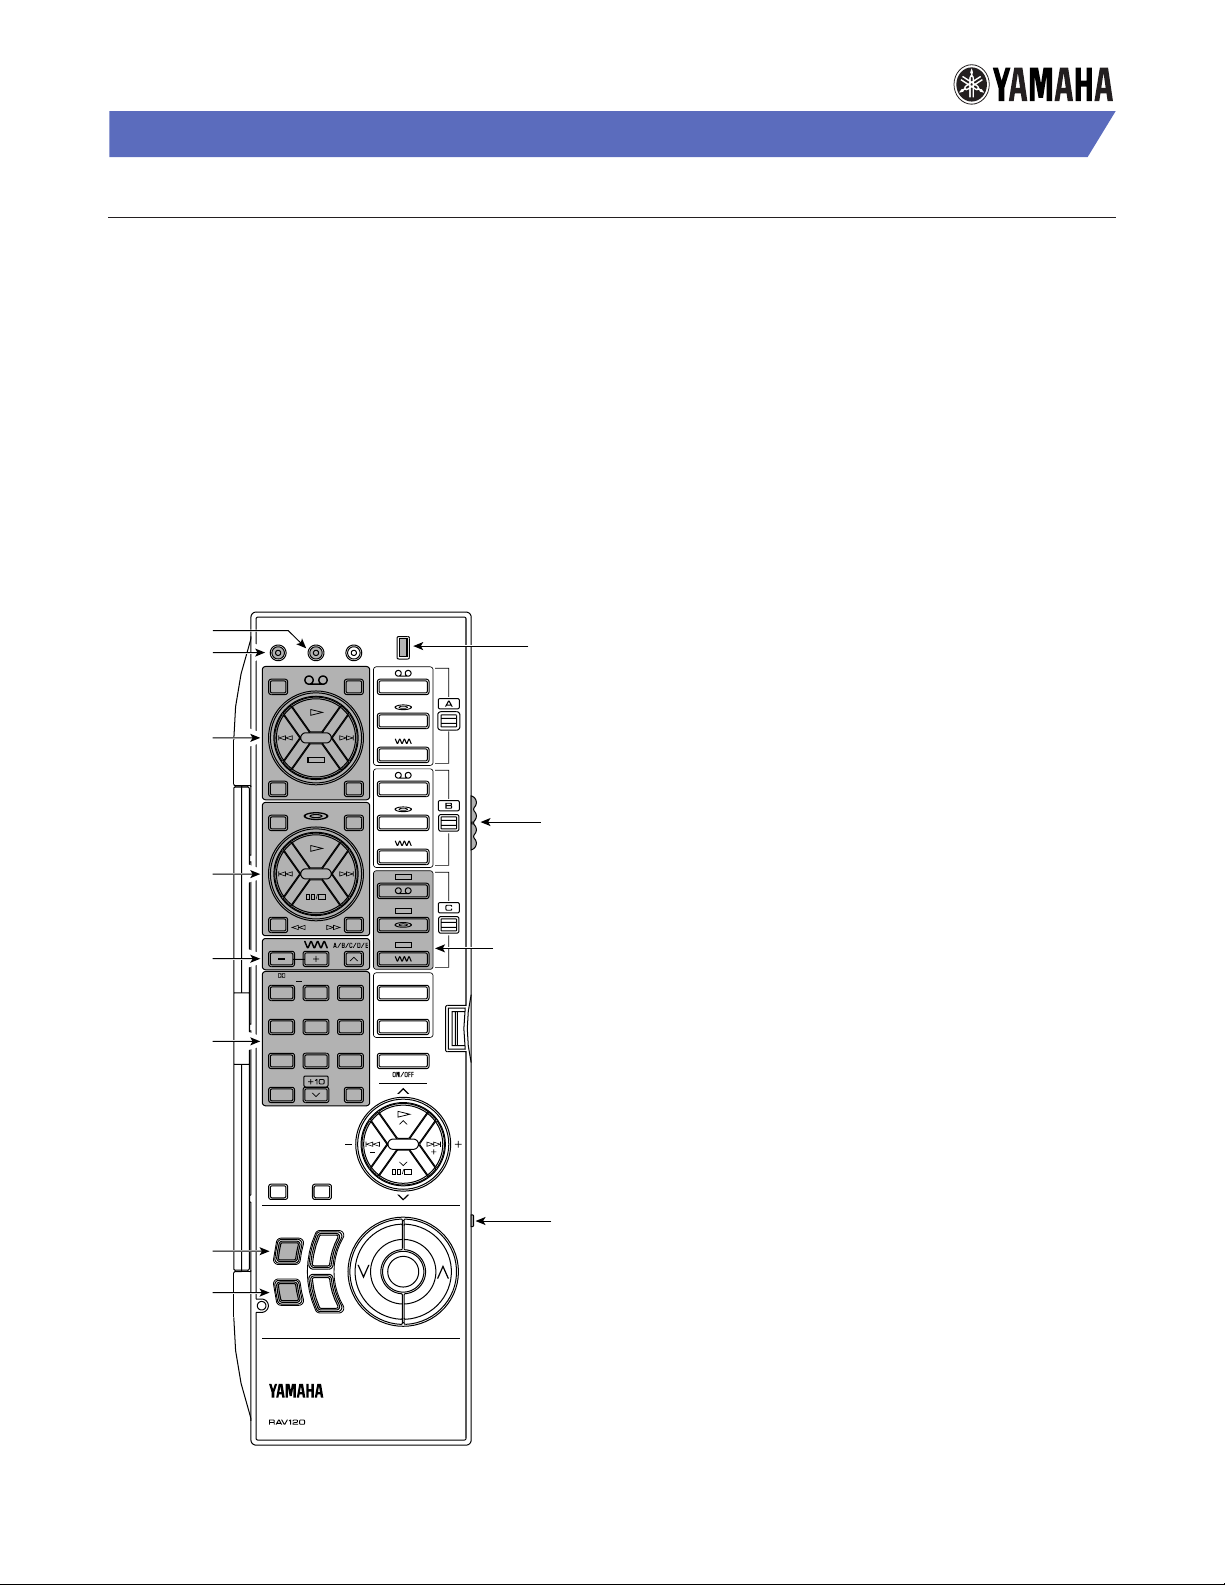
YAMAHA REMOTE LEARNING KEYS
TT
N
I
M
R
S
A
L
⁄E
N
R
For Learning
For Clearing
Learning
Controls For
Tape Decks
or VCRs
Learning
Controls For
CD, LD, or
DVD Players
Learning
Controls For
TV or Tuner
Learning
Controls
For TV
LEARLE
C
REC
PAUSE
A
STO
P
S
P
T
EE
R
ENHANCEDPRO LOGIC
1
MONO
456
K
C
O
R
789
0
IM
T
DELAY
CENTER
SWFR
AA
RNMCR
I
R
D
B
CONCERT
VIDEO
23
M
T
DD
UMOVIE
A
LL
AH
V
⁄
LL
EEE
REAR
A
O
⁄⁄B
A
P
A
T
D
C
U
NE
T
C
V
C
I
D
S
DDDD
V
V
⁄LTB
–
V
A
O
SSSC
II
PHOON
FF
EE
TT
E
E
R
⁄
U
CT
R
S
X
Transmit/
Learn LED
A/B/C
Memory
Switch
Learning
Controls For
Aux. VCR, CD
(or LD or DVD)
Player, and TV
(or Tuner)
HOW THE REMOTE CONTROL WORKS
The remote control can learn the functions of other
remote controls, so one remote will control your home
theater audio and video components.
The shaded areas shown in the illustration on the left
have learning capabilities, using data stored in any of
three different memories:
• A is preprogrammed for Yamaha audio components
• B for video components
• C for additional components, unique functions, or
non-Yamaha audio components
Unshaded buttons will become control buttons, once the
appropriate functions have been programmed into the
remote control.
Use the following sections to set up the remote control
and to program most of the standard VCR and TV
functions. Once you have programmed the remote
control, you can close the lid to conveniently access and
control most of the functions of your audio and video
equipment.
HOW TO SET UP THE REMOTE CONTROL
1. Load the supplied batteries into the remote control.
2. Open the lid of the remote control.
3. Perform the instructions on the next two pages to
program VCR and TV remote-control functions.
Learning
Control For
TV Power
Learning
Control For
VCR Power
SLEEP 2CH/6CH
RRV
M
T
S
T
V
CR
V
C
EMOOOTTT
R
E
M
TT
NLA
I
R
S
SS
Y
T
P
W
OFF
N
R
R
E
E
M
E
E
Remote With Lid Open
MA
OOL
E
U
Macro
Switch
Page 4

Remote Control Guide
•
RECORD/
PAUSE
PLAY
REWIND
STOP
VCR POWER
LOCATIONS OF VCR LEARNING BUTTONS
TT
N
I
M
R
S
A
L
E
N
R
A
O
AA
RNMCR
LEARLE
C
B
A
T
V
CR
T
ENHANCEDPRO LOGIC
T
IM
DELAY
CENTER
REAR
SWFR
I
R
D
B
CONCERT
23
M
UMOVIE
A
LL
AH
V
LL
EEE
SS
Y
M
T
E
E
P
W
OFF
A
C
I
D
S
VIDEO
O
SSSC
II
DD
TT
E
M
A
T
C
U
T
C
V
DDDD
V
V
TB
—
V
A
PHOON
FF
EE
RRV
T
S
E
P
E
D
NE
R
R
L
S
X
U
CT
OOL
U
FAST FORWARD
MA
E
REC
PAUSE
STO
P
S
P
EE
R
1
MONO
456
K
C
O
R
789
0
SLEEP 2CH/6CH
T
V
Slide
Memory
Switch
To B
HOW TO PROGRAM VCR REMOTE FUNCTIONS
To program basic functions of the VCR remote, we
suggest you learn functions into all the shaded buttons
shown in the illustration on the left:
1. On the Yamaha remote control, slide the MEMORY
switch to position B.
2. Aim the VCR remote control transmitter (usually
located at the top) at the top of the Yamaha remote.
Remote With Lid Open
REC
C
LE
A
PAUSE
A
D
I
R
B
T
U
V
NE
C
R
R
C
D
RLE
AA
R
N
M
A
⁄⁄B
T
A
P
E
C
R
O
TT
R
⁄E
L
A
N
A
S
R
M
N
I
2~4"
3. On the Yamaha remote, use a paper clip or mechani-
cal pencil to press LEARN. The TRANSMIT/
LEARN red LED will start to flash.
NOTE: If there is no operation for about 30 seconds
after a button is pressed, the TRANSMIT/LEARN
LED will flash repeatedly. If this occurs, restart from
step 3.
4. On the Yamaha remote, press and release the
button to which you want to assign the function.
The TRANSMIT/LEARN LED will illuminate.
VCR Remote Control
C
EMOOOTTT
N
R
R
E
M
TT
NLA
I
R
R
S
E
Remote With Lid Open
5. On the VCR remote, press and release the button
for the corresponding function. After one second,
the TRANSMIT/LEARN LED will flash slowly.
6. The TRANSMIT/LEARN red LED on the Yamaha
remote control will flash slowly after the function is
learned.
NOTE: If the TRANSMIT/LEARN red LED on the
Yamaha remote flashes rapidly, the function has not
been learned. Repeat steps 5 and 6 to program the
function.
7. Continue programming until you have learned
functions into all of the shaded buttons.
8. Press LEARN.
9. To test programming, press VCR (power) to turn on
the VCR. Then press each button you’ve programmed.
Repeat steps 1 through 8 for any function that does
not respond.
Page 5

Remote Control Guide
TT
R
R
A
A
N
S
M
I
L
E
N
T
A
P
E
C
D
D
T
U
NE
R
R
R
C
V
C
LE
A
RLE
AA
A
REC
PAUSE
A
R
N
M
C
R
O
B
B
I
Remote With Lid Open
TV Remote Control
2~4"
TT
R
R
A
A
N
S
M
I
L
E
N
T
A
P
E
C
D
D
D
T
U
NE
R
R
R
C
V
V
V
DD
D
D
L
TB
S
V
—
A
U
X
PH
OO
N
EE
FF
CT
M
M
MA
S
SS
T
T
T
E
E
E
E
R
R
V
O
O
L
U
C
LE
A
RLE
AA
A
REC
PAUSE
A
R
N
M
C
R
O
B
B
Y
P
W
V
CR
V
OFF
R
R
R
R
E
M
OOO
T
TT
TT
E
E
C
N
N
L
A
S
M
I
I
I
S
C
S
T
O
P
M
O
O
II
ENHANCEDPRO LOGIC
TEST
T
1
23
456
789
0
A
R
DD
SSC
C
UMOVIE
MONO
VIDEO
CONCERT
K
AH
LL
SLEEP 2CH/6CH
T
IM
EEE
DELAY
CENTER
REAR
SWFR
LL
V
Slide
MEMORY
Switch
To B
TV INPUT
CHANNEL UP
TV POWER
Remote With Lid Open
LOCATIONS OF TV LEARNING BUTTONS
VOLUME
DOWN
CHANNEL
KEYPAD
(0~9)
VOLUME
UP
CHANNEL
DOWN
•
ROGRAM
P
O
T
OW
H
TV R
UNCTIONS
F
EMOTE
To program basic functions of the TV remote, we suggest
you learn functions into all the shaded buttons shown in
the illustration on the left:
1. On the Yamaha remote, slide the MEMORY switch
to position B.
2. Aim the TV remote control transmitter (usually
located at the top) at the top of the Yamaha remote.
3. On the Yamaha remote, use a paper clip or mechani-
cal pencil to press LEARN. The TRANSMIT/
LEARN red LED will start to flash.
NOTE: If there is no operation for about 30 seconds
after a button is pressed, the TRANSMIT/LEARN
LED will flash repeatedly. If this occurs, restart from
step 3.
4. On the Yamaha remote, press and release the
button to which you want to assign the function.
The TRANSMIT/LEARN LED will illuminate.
5. On the TV remote, press and release the button for
the corresponding function. After one second, the
TRANSMIT/LEARN LED will flash slowly.
6. The TRANSMIT/LEARN red LED on the Yamaha
remote control will flash slowly after the function is
learned.
NOTE: If the TRANSMIT/LEARN red LED on the
Yamaha remote flashes rapidly, the function has not
been learned. Repeat steps 5 and 6 to program the
function.
7. Continue programming until you have learned
functions into all of the shaded buttons.
8. Press LEARN.
9. To test programming, press TV (power) to turn on the
TV. Then press each button you’ve programmed.
Repeat steps 1 through 8 for any function that does
not respond.
Page 6

Remote Control Guide
R
R
R
R
E
M
OOO
T
TT
TT
E
E
C
N
N
L
A
S
M
I
T
T
RA
N
S
M
I
T
A
PE
C
D
T
U
N
ER
R
V
V
C
1
DD
D
DL⁄
⁄
T
V
V
B
S
C
R
2
VA
U
X
PH
OO
N
E
E
E
FF
C
C
T
OO
OO
R
R
T
T
N
N
P
A
I
L
M
M
AS
TE
E
R
V
O
L
U
M
SS
T
T
E
E
R
O
Y
P
W
V
CR
V
OFF
Operation
Control
Buttons
Master
Volume
Buttons
Macro
Switch
Input
Selector
Buttons
Remote With Lid Closed
Power
Buttons
BASIC OPERATION CONTROLS
•
PERATIONS
O
RESET
-P
ACTORY
F
SING
U
In addition to the programmable VCR and TV functions,
the Yamaha remote control will also perform several
factory-preset operations without additional programming (see the illustration on the left):
1. Close the lid of the Yamaha remote control. Slide
the Macro switch (on the side) to QUICK.
2. Press the SYSTEM POWER button to power up
your Yamaha receiver, VCR, and TV.
NOTE: Since power ON and OFF are controlled by
the same button on most audio and video components,
the (SYSTEM POWER) OFF button may not turn off
your VCR and TV automatically (see "Creating A
Macro" on the next page).
3. Press the VCR button to set the input on the receiver
to VCR and put the VCR into PLAY mode. (Make
sure there is a videocassette in the machine.)
NOTE: You may have to adjust the INPUT on your
TV to see the VCR’s video signal. If you have programmed the TV inputs into the Yamaha remote's
TEST button, simply press it (one or more times)
until you see tape playback.
4. Press the OPERATION CONTROL buttons to
control the last component selected. For example, if
you pressed the VCR button last, the OPERATION
CONTROL buttons will control the VCR.
PERATING
O
LAYER
P
APE
T
OR
CD
AMAHA
Y
A
Most Yamaha CD and tape player functions are already
programmed into the Yamaha remote control.
For example, to operate a Yamaha CD player, perform
the following steps:
1. Turn on the CD player and load a CD.
2. Close the lid of the Yamaha remote control. Slide
the Macro switch (on the side) to QUICK.
3. Press the CD button. The Yamaha receiver will
switch to CD and automatically begin playing the
CD.
4. Try the other OPERATION CONTROL buttons to
advance to the next track, go back a track, or stop
the CD.
NOTE: For remote operation of other CD player
functions (e.g., DISC), open the lid and use the green
controls assigned to that component.
Page 7

Remote Control Guide
•
LOCATIONS OF MACRO CONTROLS
TT
N
I
M
R
S
A
L
⁄E
N
R
A
O
AA
RNMCR
LEARLE
C
⁄⁄B
A
I
R
D
B
A
D
T
CONCERT
ENHANCEDPRO LOGIC
VIDEO
23
M
T
II
DD
UMOVIE
A
LL
AH
K
TT
V
IM
⁄
LL
T
EEE
DELAY
CENTER
REAR
SWFR
SS
Y
M
T
E
E
P
W
T
V
I
S
SSSC
E
C
O
P
A
T
E
D
C
U
NE
T
R
C
V
R
DDDD
⁄
V
V
⁄LTB
S
–
V
A
U
PHOON
FF
EE
CT
RRV
M
MA
T
OOL
S
E
E
U
Step 4
REC
PAUSE
STO
P
S
P
EE
R
1
MONO
456
C
O
R
789
0
SLEEP 2CH/6CH
Step 2
Step 7
Step 9
CREATING A MACRO
A macro is a series of commands assigned to a single
button. Once you have programmed your other components’ remotes into the Yamaha remote control, you can
create macros.
For example, if you frequently turn on the RECEIVER,
VCR, and TV, follow the steps below to create a macro
that will power down these components:
1. Open the lid of the Yamaha remote control.
2. Use a paper clip or mechanical pencil to press the
MACRO selector.
3. Press the OFF button to clear the original factory
macro and assign the new sequence of functions
(i.e., steps 5, 6, and 7) to this button.
4. Press the TV button.
5. Press the VCR button
6. Press the OFF button.
7. Press the MACRO selector to create the macro.
8. Close the lid of the remote control.
9. Slide the Macro switch (on the side) to QUICK.
10. Press OFF to try your macro program. If it doesn’t
work, slide the Macro switch to SLOW (on the side
of the remote).
Step 5
Step 3
Step 6
Step 10
CR
V
OFF
C
EMOOOTTT
N
R
R
E
M
TT
NLA
I
R
R
S
E
Remote With Lid Open
Page 8

®
©1998 YAMAHA ELECTRONICS CORPORATION, USA
6660 Orangethorpe Avenue, Buena Park, CA 90620
PH: (714) 522-9105; FAX: (800) 634-0355
http://www.yamaha.com
 Loading...