

Page 1

Page 2
SPECIAL MESSAGE SECTION
PRODUCT SAFETY MARKINGS: Yamaha electronic
products may have either labels similar to the graphics
shown below or molded/stamped facsimiles of these
graphics on the enclosure. The explanation of these graphics appears on this page. Please observe all cautions indicated on this page and those indicated in the safety instruction section.
CAUTION
RISK OF ELECTRIC SHOCK
DO NOT OPEN
CAUTION: TO REDUCE THE RISK OF ELECTRIC SHOCK.
DO NOT REMOVE COVER (OR BACK).
NO USER-SERVICEABLE PARTS INSIDE.
REFER SERVICING TO QUALIFIED SERVICE PERSONNEL.
The exclamation point with the equilateral triangle is intended to alert the user
to the presence of important operating
and maintenance (servicing) instructions in the literature accompanying the
product.
ENVIRONMENTAL ISSUES: Yamaha strives to produce products that are both user safe and environmentally
friendly. We sincerely believe that our products and the
production methods used to produce them, meet these
goals. In keeping with both the letter and the spirit of the
law, we want you to be aware of the following:
Battery Notice: This product MAY contain a small nonrechargeable battery which (if applicable) is soldered in
place. The average life span of this type of battery is approximately five years. When replacement becomes necessary, contact a qualified service representative to perform
the replacement.
Warning: Do not attempt to recharge, disassemble, or
incinerate this type of battery. Keep all batteries away
from children. Dispose of used batteries promptly and as
regulated by applicable laws. Note: In some areas, the
servicer is required by law to return the defective parts.
However, you do have the option of having the servicer
dispose of these parts for you.
Disposal Notice: Should this product become damaged
beyond repair, or for some reason its useful life is considered to be at an end, please observe all local, state, and
federal regulations that relate to the disposal of products
that contain lead, batteries, plastics, etc.
The lightning flash with arrowhead
symbol within the equilateral triangle is
intended to alert the user to the presence of uninsulated “dangerous voltage” within the product’s enclosure that
may be of sufficient magnitude to constitute a risk of electrical shock.
IMPORTANT NOTICE: All Yamaha electronic products
are tested and approved by an independent safety testing
laboratory in order that you may be sure that when it is
properly installed and used in its normal and customary
manner, all foreseeable risks have been eliminated. DO
NOT modify this unit or commission others to do so unless specifically authorized by Yamaha. Product performance and/or safety standards may be diminished. Claims
filed under the expressed warranty may be denied if the
unit is/has been modified. Implied warranties may also be
affected.
SPECIFICATIONS SUBJECT TO CHANGE: The
information contained in this manual is believed to be
correct at the time of printing. However, Yamaha reserves
the right to change or modify any of the specifications
without notice or obligation to update existing units.
NOTICE: Service charges incurred due to lack of knowledge relating to how a function or effect works (when the
unit is operating as designed) are not covered by the
manufacturer’s warranty, and are therefore the owners
responsibility. Please study this manual carefully and consult your dealer before requesting service.
NAME PLATE LOCATION: The graphic below indicates the location of the name plate. The model number,
serial number, power requirements, etc., are located on
this plate. You should record the model number, serial
number, and the date of purchase in the spaces provided
below and retain this manual as a permanent record of
your purchase.
PERSONAL DIGITAL PIANO MODEL PDP-400
AUX OUT
SPEAKER
AUX IN
OFF
ON
L
R
R
MIDI
IN
OUT
THRU
L/L+R
FOOT SWITCH
DAMPER
Model _____________________________________
92-469-
Serial No.__________________________________
Purchase Date _____________________________
➀
Page 3

Introduction
Thank you for choosing a Yamaha PDP-400. Your PDP-400 is a fine musical instrument that employs advanced
Yamaha music technology. With the proper care, your PDP-400 will give you many years of musical pleasure.
● AWM (Advanced Wave Memory) tone generator system offers a range of 60 rich, realistic voices.
● A maximum of 32-note polyphony permits use of sophisticated playing techniques.
● Piano-like touch response provides extensive expressive control and outstanding playability.
● Dual and split play modes allow 2 voices to be played
simultaneously or individually with the left and right
hands.
● 24 exciting accompaniment styles can be used to
provide rhythm-only accompaniment or fully-orchestrated rhythm, bass, and chord accompaniment. 50
additional accompaniment styles are provided on
floppy disk (Style Disk).
● Full-keyboard ABC (Auto Bass Chord) provides accompaniment as you play across the entire
keyboard.
● 24 Solo Styleplay variations make it simple to produce rich, complex harmonies.
● 10-track performance memory records and plays
back your keyboard performances.
● Internal 3.5" floppy disk drive provides extended Performance Memory capacity and Disk Orchestra playback capability – one blank floppy disk for recording
and one Disk Orchestra Collection disk with corresponding score are provided.
● MIDI compatibility, GM voices, and a range of MIDI
functions make the PDP-400 useful in a range of ad-
vanced MIDI music systems.
In order to make the most of your PDP-400’s performance potential and features, we urge you to read this Own-
er’s Manual thoroughly, and keep it in a safe place for later reference.
Contents
Taking Care of Your PDP-400 ............ 1
The Panel Controls ............................... 2
Preparation.............................................. 4
The Volume Controls ........................... 5
Demonstration Playback..................... 6
Voice Selection ...................................... 7
■ Selecting the 60 Voices ....................... 7
■ Keyboard Percussion .......................... 8
Dual Mode................................................ 9
■ Engaging the Dual Mode ..................... 9
■ Dual-mode Voice Balance ................... 9
Split Mode.............................................. 10
■ Engaging the Split Mode ................... 10
■ Changing the Split Voices ................. 10
■ Changing the Split Point .................... 10
■ Split Balance ..................................... 11
■ Damper Pedal Operation in the Split
Mode ................................................. 11
Digital Reverb Effects ........................ 12
■ Selecting a Reverb Effect .................. 12
■ Reverb Depth Control ........................ 12
The Keyboard & Polyphony ............. 13
Pitch Wheel ........................................... 13
Modulation Wheel ............................... 13
The Pedals............................................. 14
■ Damper Pedal ................................... 14
■ Foot Switch (Multi-function) ............... 14
Pan........................................................... 15
Transposition ....................................... 15
Pitch Control......................................... 16
■ The Pitch Display .............................. 16
Accompaniment................................... 17
■ Style Selection ................................... 17
■ Tempo Control ................................... 17
■ Starting the Accompaniment ............. 18
■ Fill-ins ................................................ 19
■ Stopping the Accompaniment ........... 19
■ Metronome ........................................ 19
Auto Bass Chord (ABC) .................... 20
■ Single-finger Accompaniment ........... 20
■ Fingered Accompaniment ................. 21
■ Full-keyboard ABC ............................ 22
■ Volume Control .................................. 22
■ Changing the ABC Split Point ........... 22
■ Special Modes ................................... 22
Disk Styles ............................................ 23
■ Selecting & Loading Disk Styles ........ 23
■ Using a Loaded Disk Style ................ 24
Solo Styleplay ...................................... 25
■ Using Solo Styleplay ......................... 25
■ Harmonization Variations .................. 25
■ The Foot Switch & Solo Styleplay ..... 25
Disk Orchestra ..................................... 26
■ Automatic Performance ..................... 26
■ Playing Back only Specific Parts ....... 27
■ Volume Control .................................. 28
■
Guided Right- and Left-hand Practice
■ Repeat Functions .............................. 29
■ Other Playback Controls ................... 30
■ DISK ORCHESTRA COLLECTION
.. 28
Disk Copy .......................................... 30
■ Playing Other Types of Music Data ... 30
Performance Memory......................... 31
Easy One-pass Recording & Playback
Multi-track Recording & Playback ..... 32
■ Adding New Tracks ........................... 34
■ Punch-in Recording ........................... 35
■ Playback ............................................ 36
The Chord Sequence Function .......... 37
.31
Disk Control .......................................... 38
■ Formatting a New Disk ...................... 38
■ Copying Songs .................................. 39
■ Deleting a Song ................................. 40
■ Error Messages ................................. 40
Utility Mode 1........................................ 41
U1: Touch Sensitivity ............................ 41
U2: Accompaniment Volume Mode....... 42
U3: Individual Key Tuning ..................... 42
U4: Style Tempo Switching ................... 42
U5: Auto Synchro Start Switching ......... 43
U6: Random All Song Repeat ............... 43
U7: Octave Shift .................................... 43
U8: Mute................................................ 43
U9: Minor Harmonization ...................... 43
Ub: Standard MIDI File Playback Mode 43
Utility Mode 2........................................ 44
u1:
DOC Common Voice Conversion
u2: Save Panel Settings ........................ 45
u3: Load Panel Settings ........................ 45
u4: Save Individual Key Tuning............. 45
u5: Load Individual Key Tuning............. 46
u6: Quantize Song Data ........................ 46
MIDI Functions ..................................... 47
■ Send and Receive Channel Select .... 47
■ Local Control ON/OFF ....................... 48
■ Program Change ON/OFF ................ 48
■ Control Change ON/OFF ................... 48
■ The Multi-Timbre Mode ..................... 49
■ The Split Send Mode ......................... 49
■ MIDI Clock Select .............................. 50
■ Panel Data Send ............................... 50
■ MIDI Transpose Transmit .................. 50
■ The DOC Common Voice Mode ........ 50
The Connectors ................................... 51
Troubleshooting .................................. 52
Options................................................... 52
Index ....................................................... 53
MIDI Data Format.................................... i
Specifications......................................... v
Fingering Chart ..................................... vi
MIDI Implementation Chart................ xi
........ 44
Page 4
Personal Digital Piano PDP-400
○○○○○○○○○○○○○○○○○○○○○○○○○○○○○○○○○○○○○○○○○○○○○○○○○○○○○○○○○○○○○○○○○○○
Owner’s Manual
Bedienungsanleitung
English
Deutsch
Mode d’emploi
Manual de instrucciones
Français
Español
Page 5
Taking Care of Your PDP-400
Your PDP-400 will give you years of playing pleasure if you observe the simple rules given below:
1
1. Avoid Humidity & Heat
Avoid placing the PDP-400 in areas that are subject to excessive humidity or heat. Do not leave the instrument near heaters
or in a car exposed to direct sunlight, for example.
2. Avoid Dust & Moisture
Avoid locations in which the instrument is likely to be exposed
to excessive dust or moisture.
3. Power-off Before Connecting
Connections between the PDP-400 and any other device must
be made with both pieces of equipment turned off.
4. Handle With Care
Never apply excessive force to the controls, connectors or
other parts of your PDP-400, and avoid scratching or bumping
it with hard objects. Further, always turn the POWER switch off
after use.
5. Clean Carefully
Clean the cabinet and keys of your PDP-400 only with a clean,
slightly damp cloth. A neutral cleanser may be used if desired.
Never use abrasive cleansers, waxes, solvents or chemical
dust cloths since these can dull or damage the finish.
6. Never Tamper With the Internal Circuitry
Never open the PDP-400 cabinet and touch or tamper with the
internal circuitry. Tampering with the circuitry can result in electrical shock!
7. Electric Interference
Since the PDP-400 contains digital circuitry, it may cause interference if placed too close to radio or television receivers. If
this occurs, move the instrument further away from the affected
equipment.
8. Check Your Power Supply
Make sure that your local AC mains voltage matches the voltage specified on the name plate on the rear panel. In some
areas a voltage selector may be provided on the rear panel.
Make sure that the voltage selector is set for the voltage in
your area.
9. Name Plate Location
The PDP-400 name plate, including the unit’s serial number, is
located on the rear panel of the main unit.
10.Handling Floppy Disks
Yamaha Disk Orchestra Collection and Style Disk are writeprotected, and therefore cannot be used to save songs. To save
Performance Memory songs from the Performance Memory, a
blank floppy disk should be used (one blank disk is supplied
with the PDP-400).
Taking Care of Your Floppy Disks
■ Do NOT eject the disk during recording or playback, or at
any time when the disk drive lamp is lit. Doing so may damage both the disk and the FDD.
■ Do NOT turn the PDP-400 on or off while the disk is in the
drive.
■ Always eject the disk before turning the PDP-400 off.
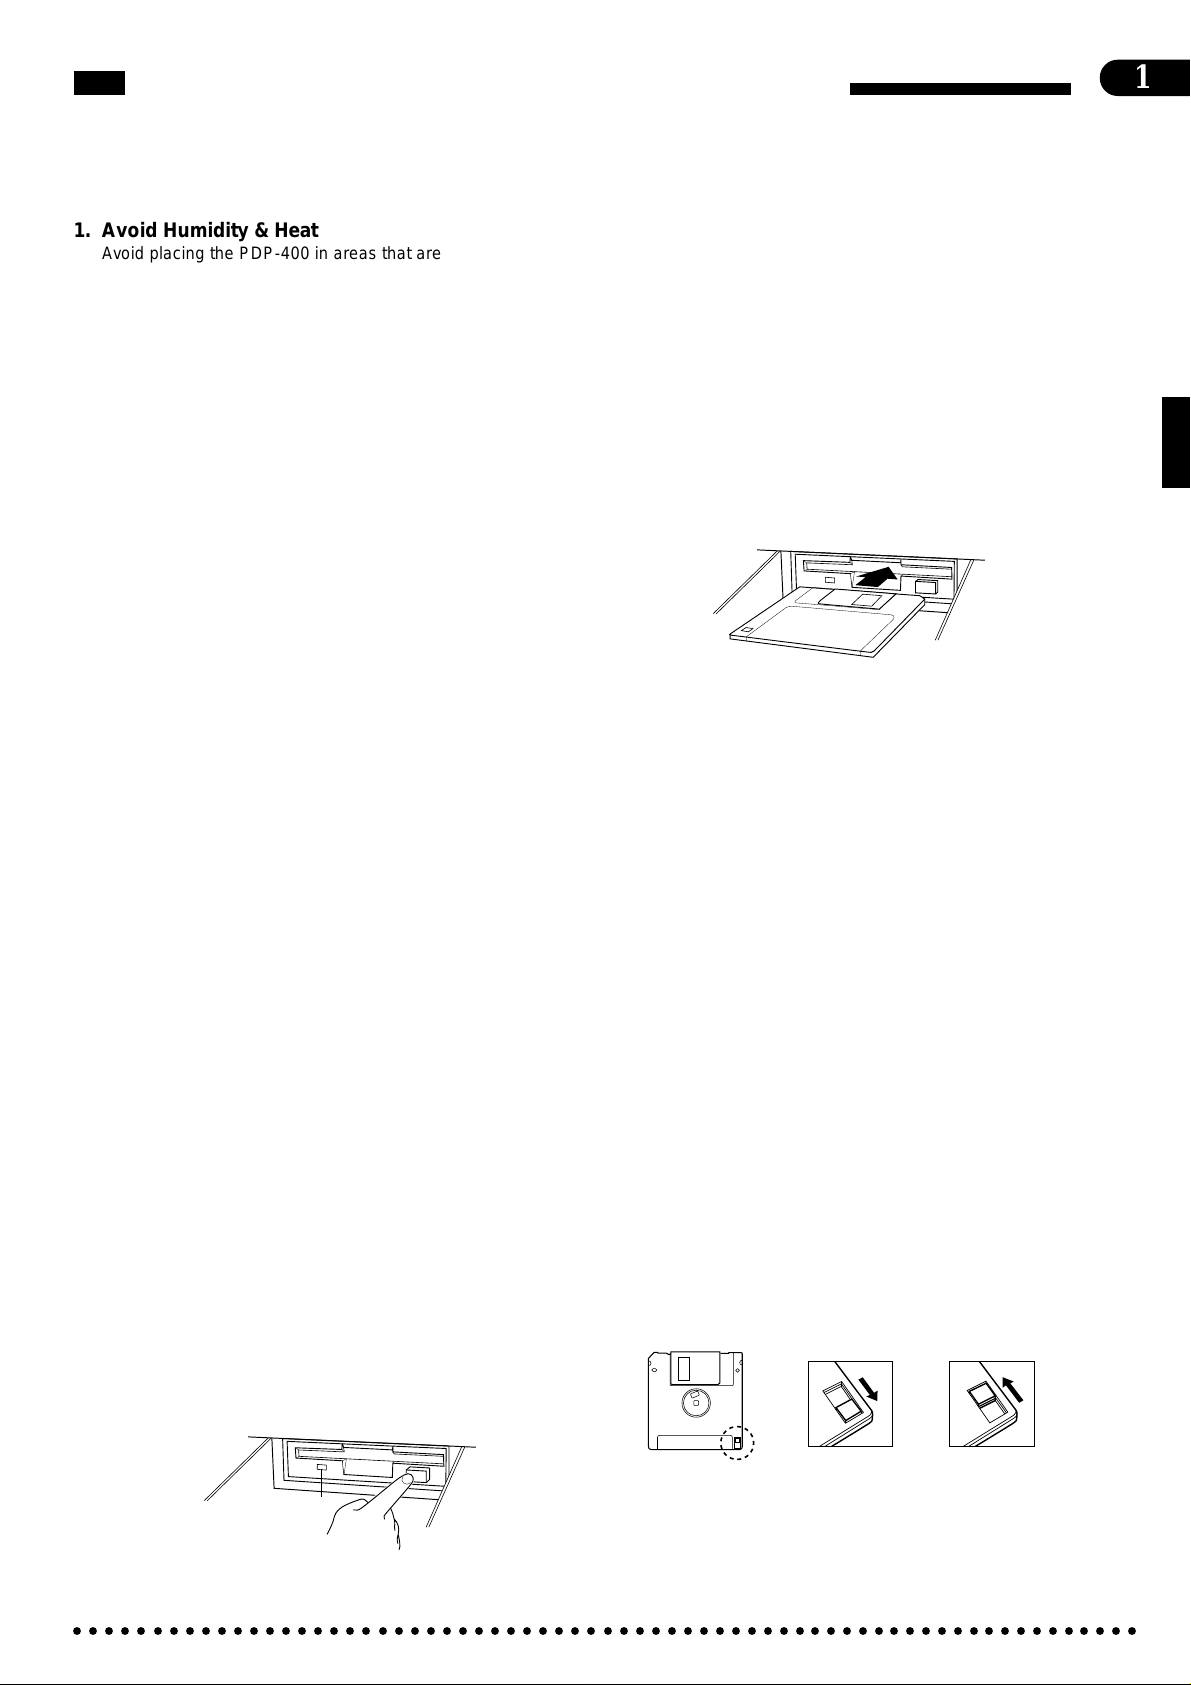
■ When ejecting a floppy disk from the disk drive:
• To eject a floppy disk, press the eject button slowly as far as
it will go. Then when the disk Is fully ejected, remove it by
hand.
• The disk may not be ejected properly if the eject button is
pressed too quickly or if it is not pressed in far enough. (The
eject button may become stuck halfway with the disk extending from the slot by only a few millimeters). If this is the
case, do not attempt to pull out the partially ejected disk.
Doing so may damage the disk drive mechanism and/or the
floppy disk. To remove a partially ejected disk, try pressing
the eject button once again or push the disk back into the
slot, then repeat the eject procedure carefully.
■ Do not insert anything but floppy disks into the disk
drive. Other objects may cause damage to the disk
drive or floppy disk.
■ Use only double-sided double density (2DD) 3.5-inch
floppy disks with the PDP-400.
Precautions Regarding Floppy Disk Use
■ Never open the disk’s shutter. Dirt or dust on the
Internal magnetic surface will cause data errors.
■ Never leave disks near a speaker, TV, or other device that emits a strong magnetic field.
■ Do not store disks in places exposed to direct sunlight or sources of high temperature.
■ Do not place heavy objects such as books on top of
a disk.
■ Avoid getting the disks wet.
■ Be sure to store the disks in environmental condi-
tions as specified below:
• Storage temperature: 4° to 53°C (39° to 127°F).
• Storage humidity: 8 to 90% relative humidity.
• Store in an area free from dust, sand, smoke, etc.
■ Be sure to apply the disk label at the proper position.
When changing the label never cover the old label
with a new label; always remove the old label first.
Head Cleaning
The head of the disk drive unit will get dirty as you use
it eventually causing data errors. If this occurs, clean
the head with a 3.5 inch head cleaning disk (available
from most computer supply stores).
Data Backup
It is recommended that you copy your recorded songs
to another disk for backup (see page 39). If the original
disk is damaged or your song is deleted, the backup
disk can be used instead of the original.
Protecting Your Data (Write Protect Tab)
Write protect tab
open (locked —
Disk drive lamp
○○○○○○○○○○○○○○○○○○○○○○○○○○○○○○○○○○○○○○○○○○○○○○○○○○○○○○○○○○○○○○○○○○○
write protected)
Write protect tab
closed (unlocked —
write enabled)
Page 6
2
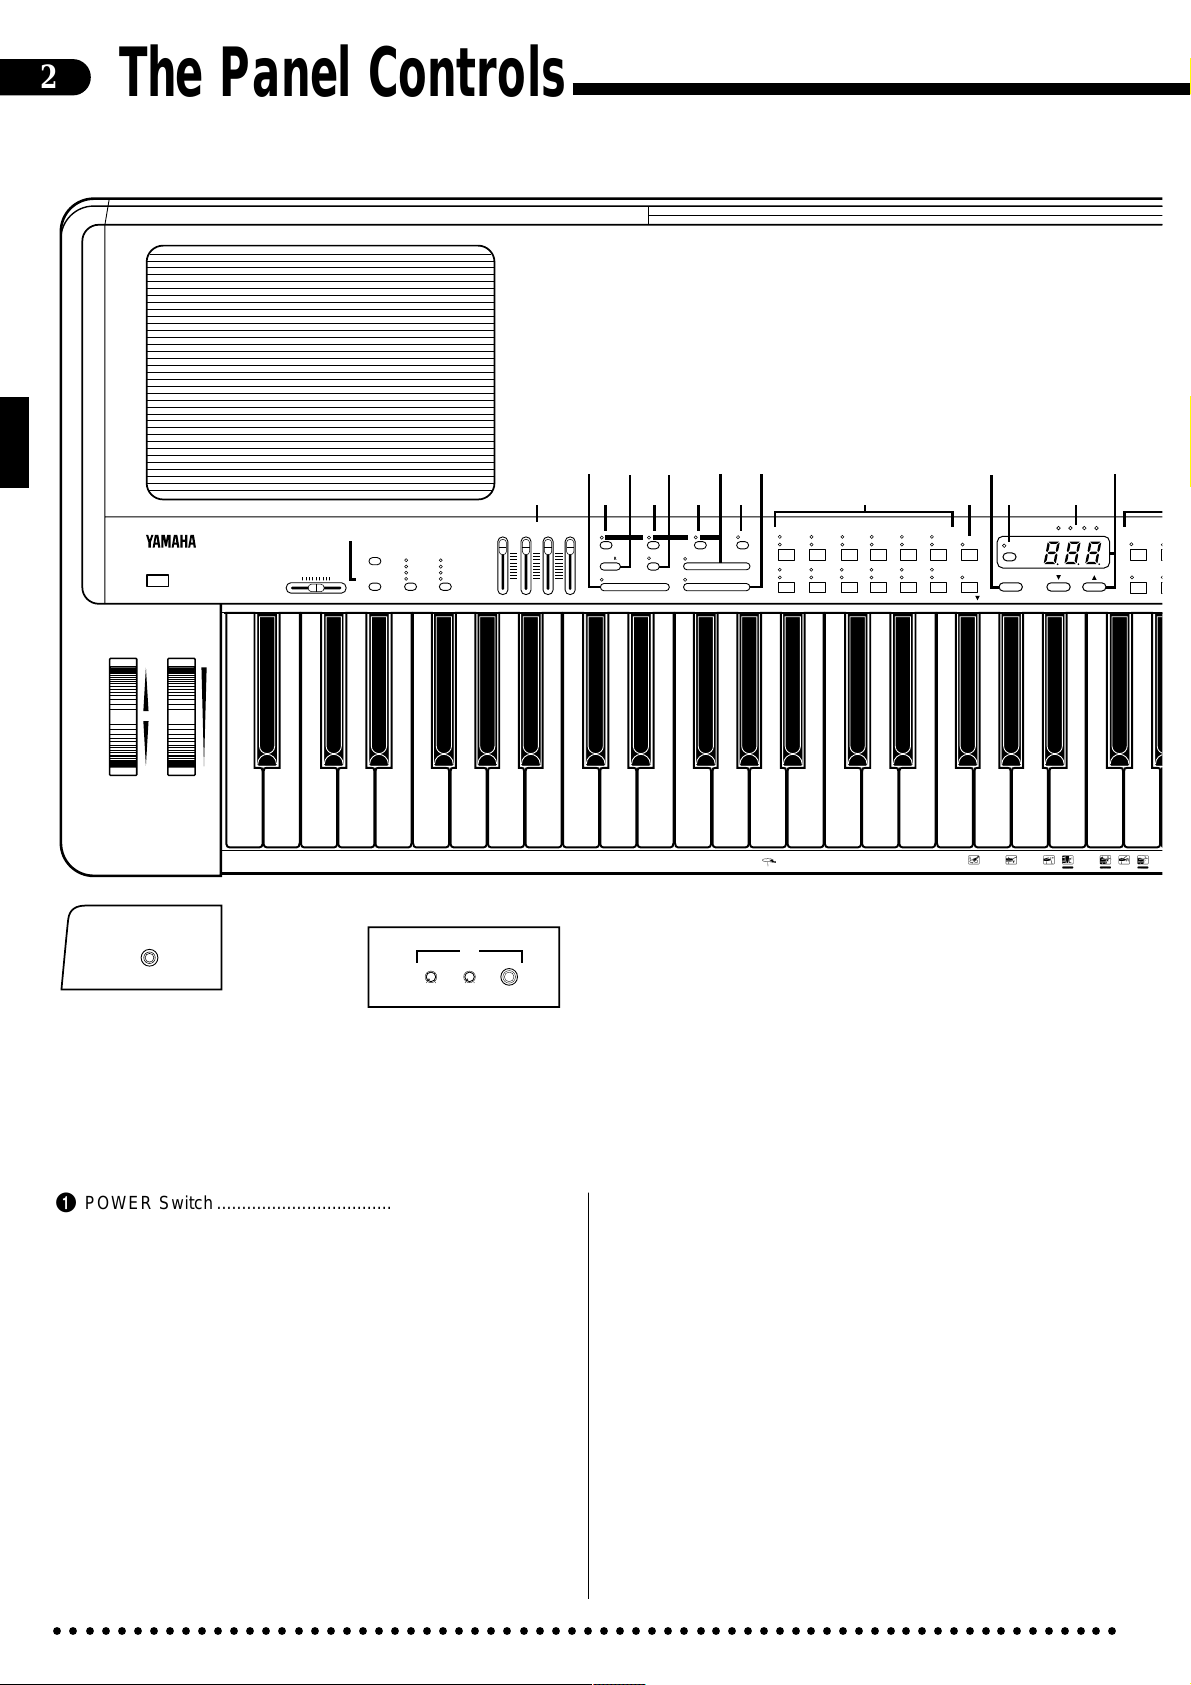
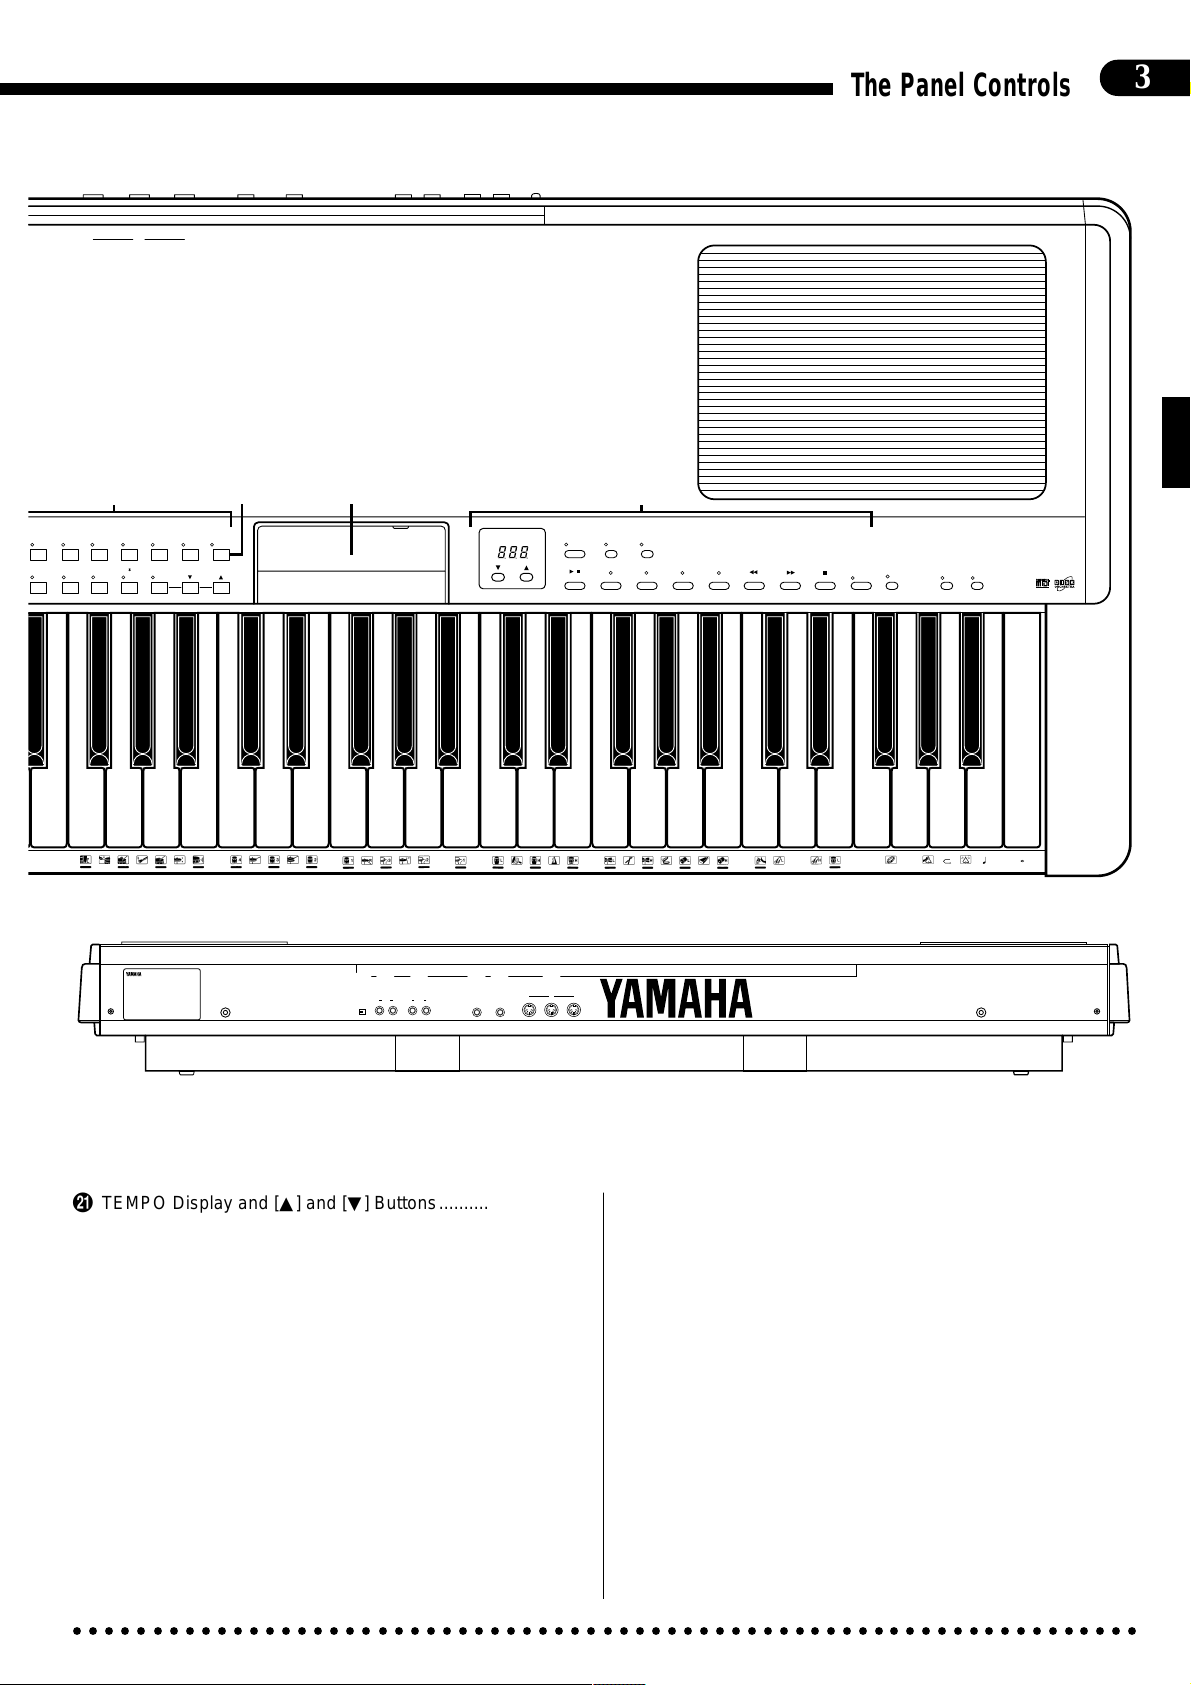
The Panel Controls
POWER
1
pQ
MODULATION
PITCH
UP
MAX
0
MIN
DOWN
W
PHONES
2
MASTER VOLUME
MIN MAX
DEMO
MIDI/
TRANSPOSE
REVERB
%@# $
7890!
AUTO ACCOMPANIMENT
BASS
RHYTHM
5436
FOOT SWITCH
SOFT
ROOM
HALL 1
SOSTENUTO
HALL 2
START/STOP
COSMIC
SOLO STYLEPLAY
CHORD 1
MAX
MAX
MIN
MIN
AUTO BASS CHORD
CHORD 2
MAX
MIN
START/STOP
FILL TO NORMAL
SINGLE FINGERFULL KEYBOARD
SYNCHRO
START
INTRO/ENDING
VARIATIONNORMAL
FILL TO VARIATION
FINGERED
SOLO
STYLEPLAY
^
STYLE
POP
JAZZ
ROCK
SWING
JAZZ
BALLAD
DANCE
POP
POWER
HOUSE
BIG BAND
BOOGIE
wq
&
16BEAT
ROCK’N’
BALLAD
ROLL
16BEAT
16BEAT
POP
SHUFFLE
BOSSA
CHA-CHA
SAMBA
RHUMBA
SLOW
ROCK
ROCK
SHUFFLE
MARCH
POLKA
BLUEGRASS
COUNTRY
SHUFFLE
WALTZ
JAZZ
WALTZ
*
DISK
STYLE 1
DISK
STYLE 2
()
BEAT
METRONOME
TAP TEMPO
VOICE
PIANO
1
8
ORGAN
A-1 B-1 C0 D0 E0 F0 G0 A0 B0 C1 D1 E1 F1 G1 A1 B1 C2 D2 E2 F2 G2 A2 B2 C3 D3
CDEFGAB
E
MIN
MIN
MAX
MAX
REVERB VOL
MIC. VOL MIC.
1 POWER Switch........................................................page 4
2 MASTER VOLUME Control .....................................page 5
3 [DEMO] Button.........................................................page 6
4 [REVERB] Button...................................................page 12
5 [FOOT SWITCH] Button ........................................page 14
6 [MIDI/TRANSPOSE] Button ..... page 5, 15, 29, 34, 41-50
7 AUTO ACCOMPANIMENT Volume Controls.... page 5, 22
8 AUTO BASS CHORD
[FULL KEYBOARD] Button.
page 22
9 AUTO BASS CHORD [SINGLE FINGER] Button.page 20
0 AUTO BASS CHORD [FINGERED] Button ..........page 21
○○○○○○○○○○○○○○○○○○○○○○○○○○○○○○○○○○○○○○○○○○○○○○○○○○○○○○○○○○○○○○○○○○○
! [SOLO STYLEPLAY] Button..................................page 25
@ [START/STOP] Button .................................... page 18, 19
# [SYNCHRO START] Button...................................page 18
$ [INTRO/ENDING] Button ................................ page 18, 19
% [NORMAL/FILL TO NORMAL] Button............ page 18, 19
^ [VARIATION/FILL TO VARIATION] Button ..... page 18, 19
& STYLE Selectors ...................................................page 17
* [DISK STYLE] Buttons ..........................................page 23
( BEAT Display .........................................................page 19
) [METRONOME] Button .........................................page 19
Page 7
OUT
IN
MIDI
e r t y
CLAVINOVA
E.PIANO HARPSI VIBES GUITAR STRINGS SPLIT
TONE
3
2
90
CHOIR
456
UPRIGHT
ELEC
BASS
BASS
DRUMS VOICE 13-60
The Panel Controls
OFF
SONG NUMBER
ON
SPEAKER
DISK ORCHESTRA / PERFORMANCE MEMORY
SONG
SELECT
/
START/STOP
PHRASE
REPEAT
LEFT/2TR ORCH/3-10TR RHYTHM
RIGHT/1TR
GUIDE
F F
REW
ui
DISK CONTROL
CHORD
SEQUENCE
RECPAUSE
COPY
FORMAT
PDP-400
THRU
FOOT SWITCH
DAMPER
7
L/L+R R
AUX OUT——
LR
AUX IN——
3
o
E3 F3 G3 A3 B3 C4 D4 E4 F4 G4 A4 B4 C5 D5 E5 F5 G5 A5 B5 C6 D6 E6 F6 G6 A6 B6 C7
PERSONAL DIGITAL PIANO MODEL PDP-400
q TEMPO Display and [▲] and [▼] Buttons.............page 17
w [TAP] Button...........................................................page 19
e VOICE Selectors......................................................page 7
r [SPLIT] Button .......................................................page 10
Y OIUTR
AUX OUT
SPEAKER
AUX IN
OFF
ON
L
R
L/L+R
R
DAMPER
MIDI
IN
OUT
THRU
FOOT SWITCH
p PITCH Wheel .........................................................page 13
Q MODULATION Wheel............................................page 13
W PHONES Jack .........................................................page 4
E MIC. Jack with MIC. VOL. &
REVERB VOL. Controls.........................................page 51
t 3.5" Floppy Disk Drive ........................page 23, 26, 31, 38
R SPEAKER ON/OFF Switch .....................................page 4
y DISK ORCHESTRA/PERFORMANCE MEMORY
Display and Buttons........................................ page 26, 31
T AUX IN R and L Jacks...........................................page 51
u [CHORD SEQUENCE] Button...............................page 37
i DISK CONTROL Buttons ......................................page 38
o Keyboard ................................................................page 13
Y AUX OUT R and L/L+R Jacks ...............................page 51
U DAMPER Jack .......................................................page 14
I FOOT SWITCH Jack .............................................page 14
O MIDI Connectors ....................................................page 51
○○○○○○○○○○○○○○○○○○○○○○○○○○○○○○○○○○○○○○○○○○○○○○○○○○○○○○○○○○○○○○○○○○○
Page 8
4
Preparation
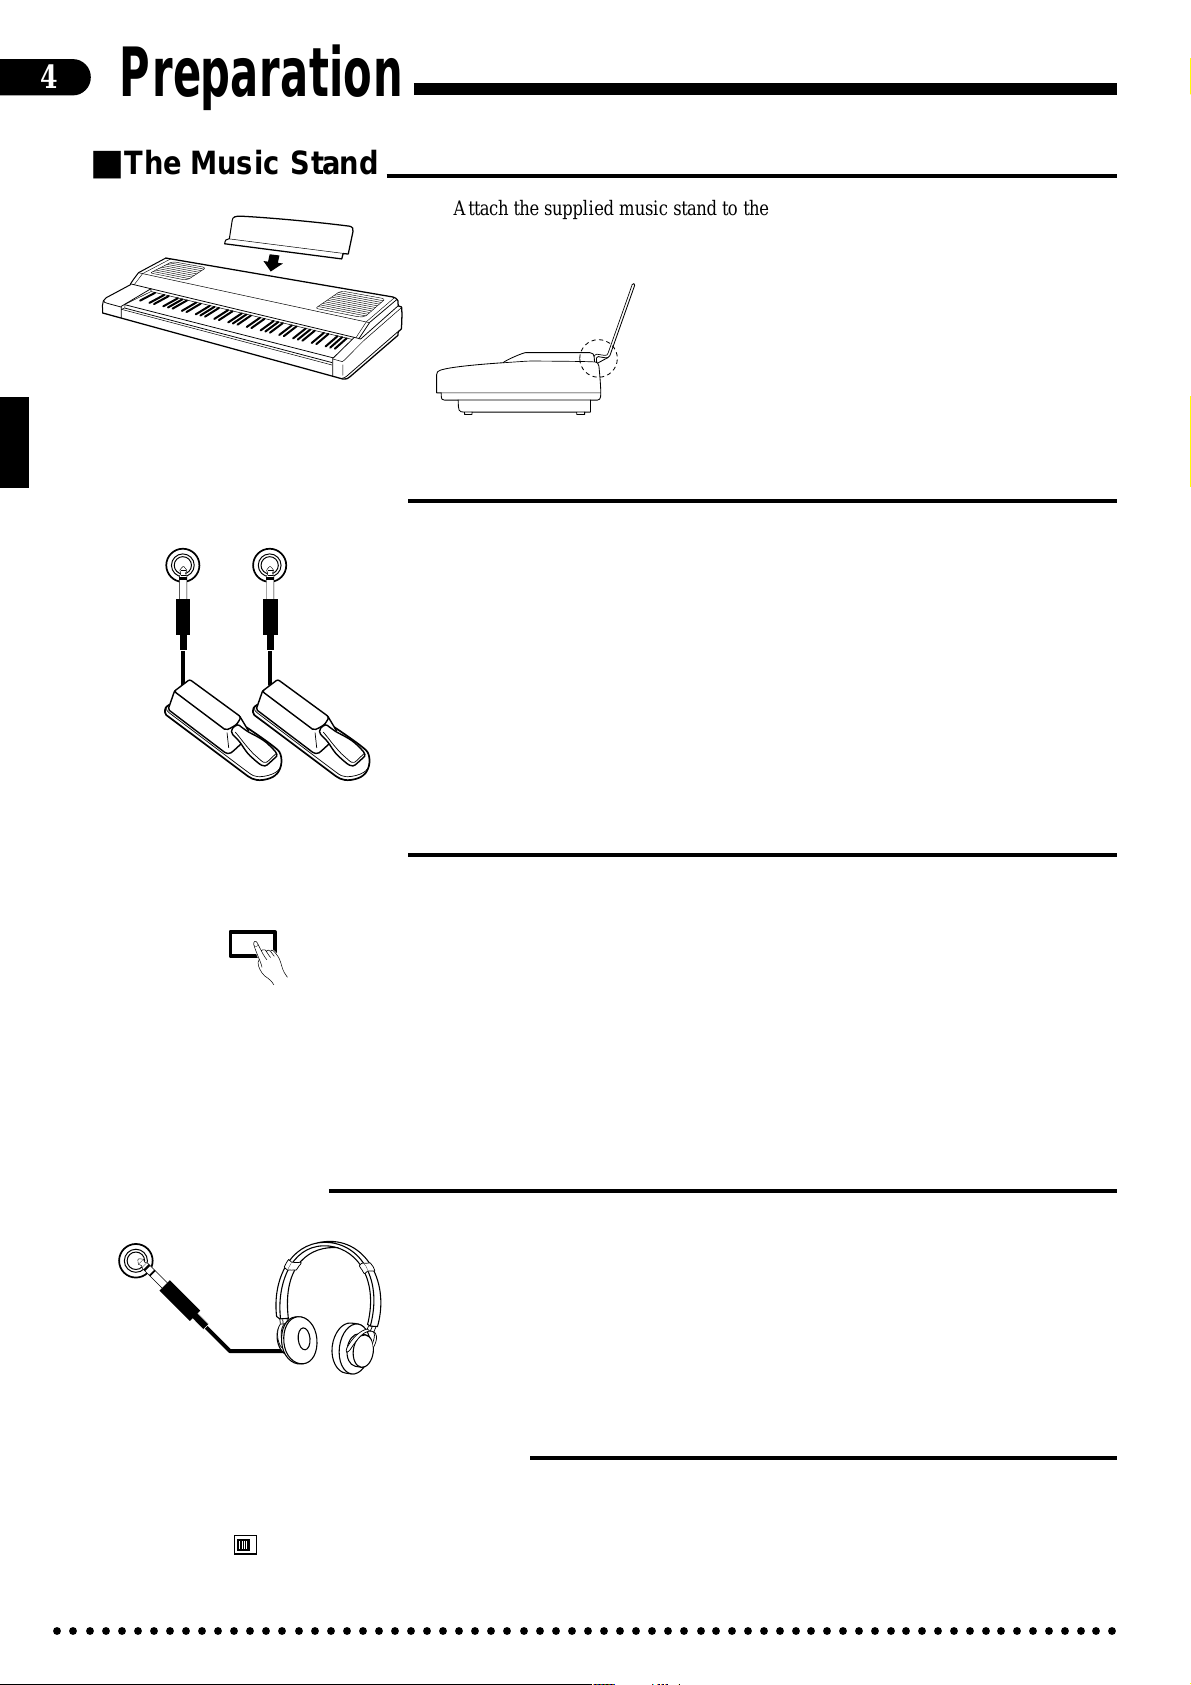
■The Music Stand
■The Foot Switch
Attach the supplied music stand to the PDP-400 by inserting it into the groove
at the rear of the instrument’s top panel.
DAMPER
FOOT SWITCH
■The Power Switch
POWER
The supplied FC4 foot switch should normally be connected to the DAMPER
jack. It (or an optional FC4 or FC5 foot switch) can also be connected to the
FOOT SWITCH jack — see page 14 for details.
In some areas the power cord must be connected to a socket on the rear panel of
the instrument before being plugged into an AC wall outlet. A plug adaptor may
also be provided to match the pin configuration of the AC wall outlets in your area.
Make sure the power cord is properly connected to both the instrument and a convenient AC wall outlet, then press the [POWER] switch located to the left of the
keyboard once to turn the power on. Press the [POWER] switch again to turn the
power off.
When the power is initially turned on, the PIANO voice selector LED will
light, the POP style selector LED will light, and “72” will appear on the TEMPO
display.
■Headphones
A pair of stereo headphones can be plugged in here for private practice or latenight playing. The internal speaker system is automatically shut off when a pair of
PHONES
headphones is plugged into the PHONES jack.
■SPEAKER ON OFF Switch
SPEAKER
OFF
ON
○○○○○○○○○○○○○○○○○○○○○○○○○○○○○○○○○○○○○○○○○○○○○○○○○○○○○○○○○○○○○○○○○○○
If you will be using the PDP-400 with an external sound system connected via
the AUX OUT jacks, the internal amplifier and speaker system can be turned off by
using the rear-panel SPEAKER ON OFF switch.
Page 9
The Volume Controls
5
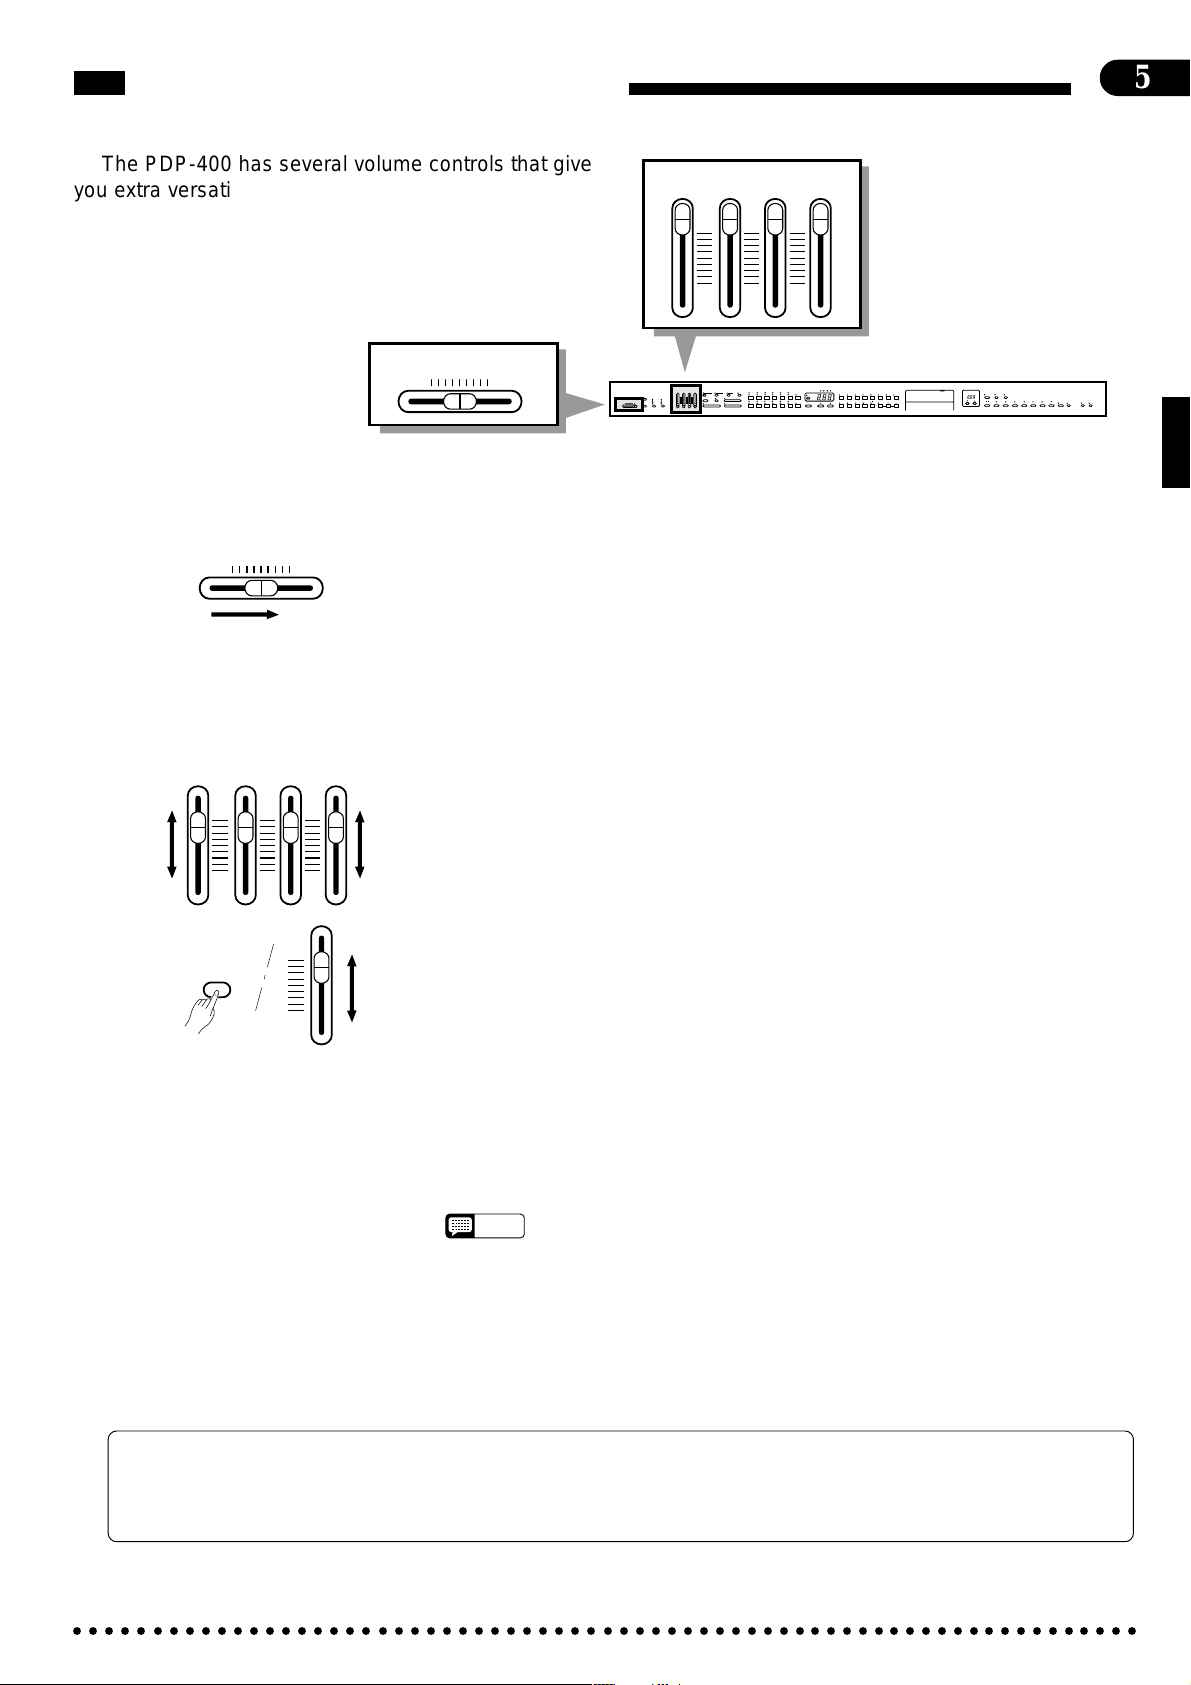
The PDP-400 has several volume controls that give
you extra versatility in creating the required sound.
AUTO ACCOMPANIMENT
BASS
RHYTHM
MAX
MIN
CHORD 1
MAX
MIN
CHORD 2
MAX
MIN
MASTER VOLUME
MIN MAX
AUTO ACCOMPANIMENT
BASS
RHYTHM
CHORD 1
DEMO
REVERB
FOOT SWITCH
MAX
MAX
ROOM
SOFT
HALL 1
SOSTENUTO
MASTER VOLUME
HALL 2
START/STOP
MIDI/
COSMIC
SOLO STYLEPLAY
TRANSPOSE
MIN MAX
MIN
MIN
STYLE
AUTO BASS CHORD
DANCE
SLOW
16BEAT
SINGLE FINGERFULL KEYBOARD FINGERED
SYNCHRO
START
ROCK’N’
SOLO
POP
POP
ROCK
BALLAD
ROLL
STYLEPLAY
16BEAT
16BEAT
ROCK
POWER
JAZZ
POP
SHUFFLE
SHUFFLE
HOUSE
ROCK
INTRO/ENDING
BIG BAND
BOSSA
CHA-CHA
MARCH
SWING
JAZZ
BOOGIE
SAMBA
RHUMBA
POLKA
BALLAD
VARIATION NORMAL
CHORD 2
MAX
START/STOP
MIN
VOICE
BEAT
BLUEGRASS
DISK
COUNTRY
CLAVINOVA
PIANO E.PIANO HARPSI VIBES GUITAR STRINGS SPLIT
STYLE 1
SHUFFLE
METRONOME
TONE
1
234567
WALTZ
8
90
UPRIGHT
TAP TEMPO
ELEC
ORGAN CHOIR
DRUMS VOICE 13-60
BASS
BASS
DISK
JAZZ
STYLE 2
WALTZ
DISK ORCHESTRA / PERFORMANCE MEMORY
SONG NUMBER
PHRASE
SONG
GUIDE
REPEAT
SELECT
/
START/STOP
F F
LEFT/2TR ORCH/3-10TR RHYTHM
RIGHT/1TR
REW
● Master Volume ........................................................................................................................................
The MASTER VOLUME control adjusts the overall volume of sound
MASTER VOLUME
MIN MAX
produced by the PDP-400. It also adjusts headphone volume when a pair of headphones is plugged into the PHONES jack.
Initially set the MASTER VOLUME control about half way between the
“MIN” and “MAX” settings. Then, when you start playing, adjust the control for
the most comfortable listening level.
● Auto Accompaniment ............................................................................................................................
AUTO ACCOMPANIMENT
BASS
RHYTHM
MIDI/
TRANSPOSE
MAX
MIN
CHORD 1
MAX
MIN
CHORD 2
MAX
MIN
BASS
MAX
Separate volume controls are provided for the RHYTHM, CHORD 1,
CHORD 2, and BASS sound. These volume controls let you set up the best
balance between the various accompaniment parts when the AUTO BASS
CHORD (ABC), Disk Orchestra Collection playback, and Performance Memory
features are used, and the RHYTHM volume control can be used to balance the
keyboard and rhythm sound when only rhythm accompaniment is used.
The volume of the keyboard can be independently adjusted by using the BASS
control while holding the [MIDI/TRANSPOSE] button — this is particularly
handy for adjusting the balance when recording the PDP-400 sound.
DISK CONTROL
CHORD
REC
PAUSE
COPY
FORMAT
SEQUENCE
MIN
The Internal Amplifier &
Speaker System
● Other Volume Control Modes
The Auto Accompaniment volume controls can be assigned to other functions
via the “Accompaniment Volume Mode” utility function (page 42). They can be
used to control modulation, pitch bend, and expression; or individual reverb
depth for the rhythm, chord 1, chord 2, and bass parts.
• If any or all of the Auto Accompaniment volume controls are set to their minimum
NOTES
The PDP-400 features a powerful stereo amplifier delivering 20 watts per channel to a highperformance speaker system . The PDP-400 speaker system employs two 13-centimeter
speaker units that deliver exceptionally rich sound with natural response from powerful lows
to shimmering highs.
positions, no sound will be produced by the corresponding parts. The maximum
control positions produce the normal volume levels.
○○○○○○○○○○○○○○○○○○○○○○○○○○○○○○○○○○○○○○○○○○○○○○○○○○○○○○○○○○○○○○○○○○○
Page 10
6
E
U
Demonstration Playback
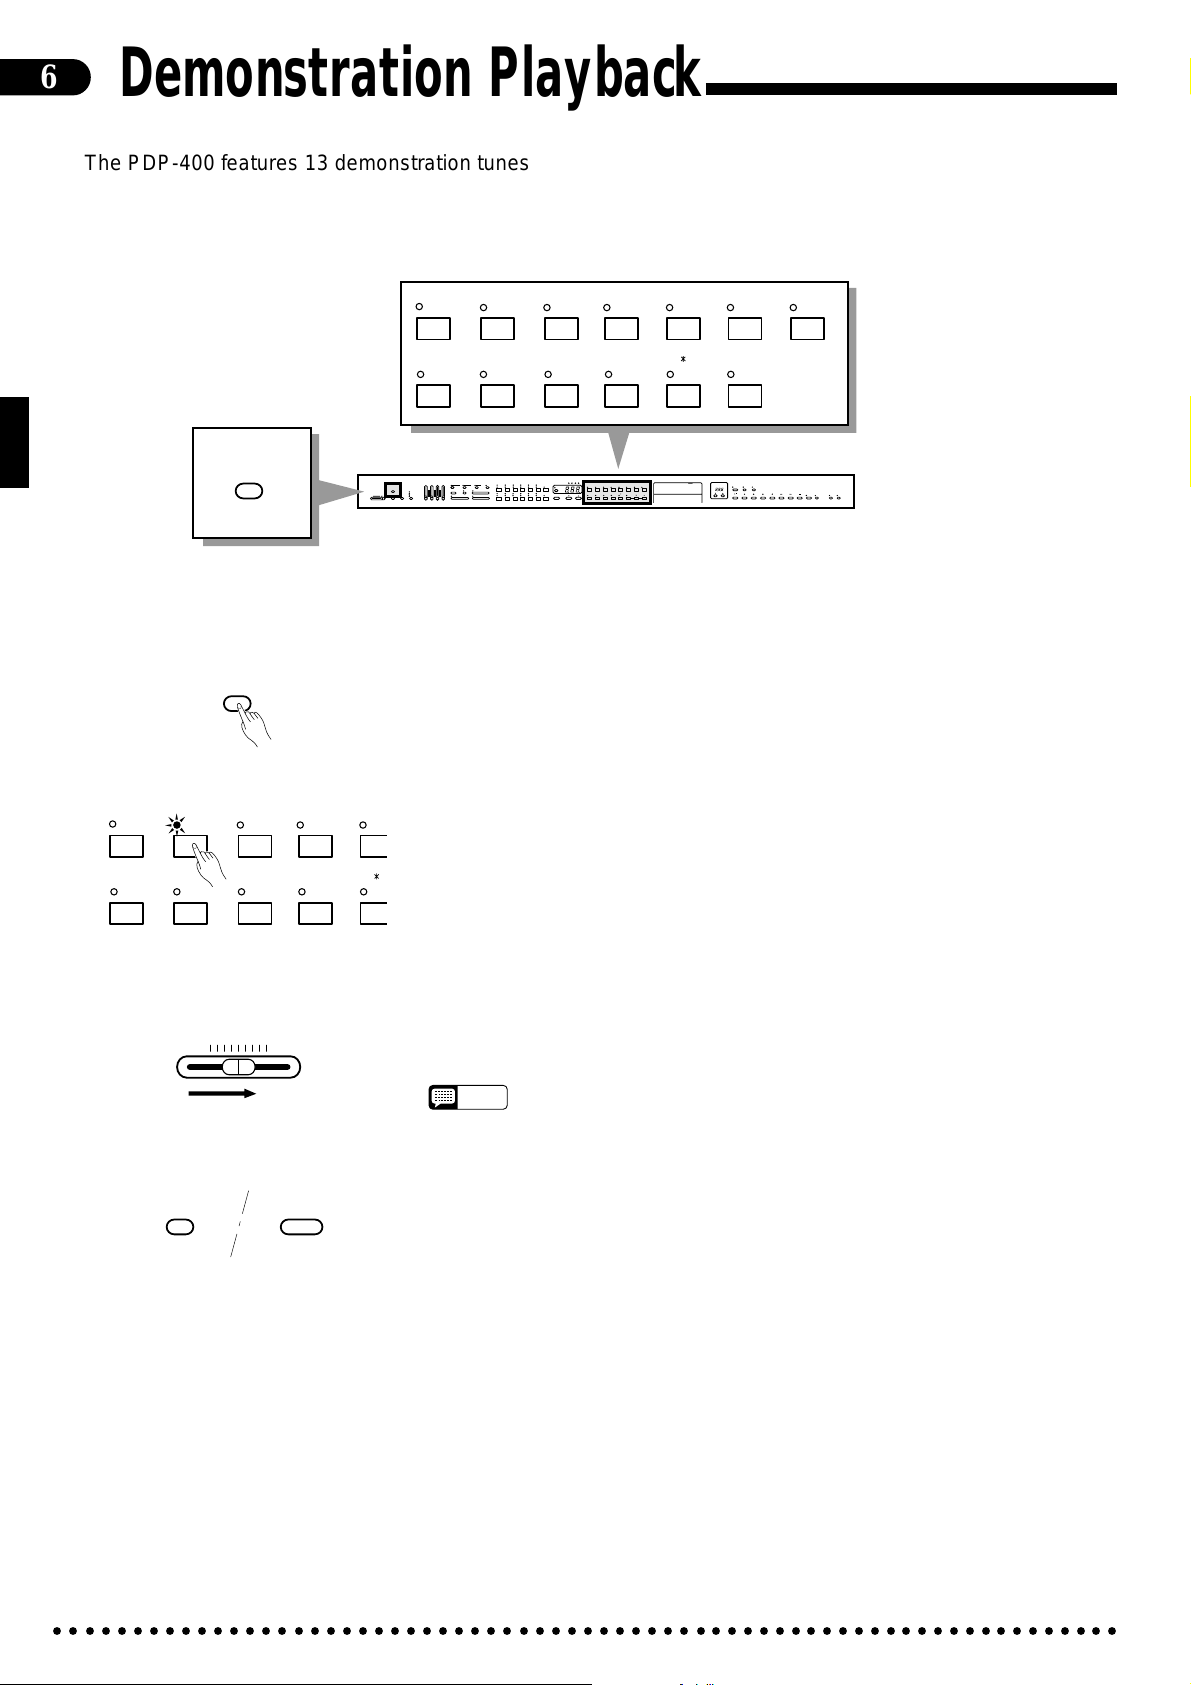
The PDP-400 features 13 demonstration tunes that demonstrate some of its voices.
Here’s how you can select and play the demo tunes.
CLAVINOVA
TONE
GUIDE
LEFT/2TR ORCH/3-10TR RHYTHM
7
DISK CONTROL
CHORD
F F
REC
PAUSE
COPY
FORMAT
REW
SEQUENCE
2
90
STYLE
AUTO BASS CHORD
CHORD 1
CHORD 2
SOLO
POP
SINGLE FINGERFULL KEYBOARD FINGERED
STYLEPLAY
JAZZ
MAX
MIN
ROCK
MAX
SYNCHRO
INTRO/ENDING
START/STOP
START
SWING
JAZZ
BALLAD
VARIATION NORMAL
MIN
3
UPRIGHT
BASS
BLUE-
DANCE
SLOW
16BEAT
ROCK’N’
GRASS
POP
ROCK
BALLAD
ROLL
16BEAT
16BEAT
DISK
COUNTRY
ROCK
POWER
POP
SHUFFLE
STYLE 1
SHUFFLE
SHUFFLE
HOUSE
METRONOME
BIG BAND
BOSSA
CHA-CHA
MARCH
WALTZ
DISK
JAZZ
BOOGIE
SAMBA
RHUMBA
POLKA
TAP TEMPO
STYLE 2
WALTZ
456
ELEC
BASS
VOICE
BEAT
CLAVINOVA
PIANO E.PIANO HARPSI VIBES GUITAR STRINGS SPLIT
TONE
1
234567
8
90
UPRIGHT
ELEC
ORGAN CHOIR
DRUMS VOICE 13-60
BASS
BASS
DRUMS VOICE 13-60
DISK ORCHESTRA / PERFORMANCE MEMORY
SONG NUMBER
PHRASE
SONG
REPEAT
SELECT
/
START/STOP
RIGHT/1TR
DEMO
PIANO E.PIANO HARPSI VIBES GUITAR STRINGS
1
8
ORGAN CHOIR
AUTO ACCOMPANIMENT
BASS
RHYTHM
DEMO
REVERB
FOOT SWITCH
MAX
SOFT
ROOM
HALL 1
SOSTENUTO
MASTER VOLUME
HALL 2
START/STOP
MIDI/
COSMIC
SOLO STYLEPLAY
TRANSPOSE
MIN MAX
MIN
ZPress the [DEMO] button .......................................................................................................................
DEMO
XSelect a Demo Tune ...............................................................................................................................
PIANO E.PIANO HARPSI VIB
1
8
ORGAN CHOIR
CLAVINOVA
TONE
2
90
3
UPRIGHT
BASS
45
ELEC
BASS
DR
The 13 demo tunes are selected via the VOICE selectors — the voice selectors
will flash in sequence when the [DEMO] button is pressed. Press a selector to start
playback of the corresponding tune. You can also select continuous repeat playback
of all demo tunes by pressing the [START/STOP] button. The demo tunes will
play back in sequential or random order, depending on the setting of the “Random
All Song Repeat” utility function described on page 43.
CAdjust the Volume ..................................................................................................................................
MASTER VOLUME
MIN MAX
Use the MASTER VOLUME control to adjust the volume, and play along on
the keyboard if you like.
• The tempo cannot be adjusted during demo playback.
NOTES
VStop Playback .........................................................................................................................................
DEMO
START/STOP
The Demo Tunes
VOICE NAME COMPOSER SONG TITLE
PIANO F. F. Chopin Etude Op.25-1 “Aeolian Harp” or “The Shephered Boy”
CLAVINOVA TONE D. Foster “Water Fountain” from “The Secret of My Success”
HARPSICHORD J. S. Bach Italienisches Konzert (Italian Concerto) BWV 971 3rd movement
GUITAR I. Albeniz Asturias
STRINGS A. Vivaldi The Four Seasons No. 3 “Autumn” 1st movement
ORGAN J. S. Bach Sinfonia from Kantate (Cantata) 29 BWV 29
CHOIR W. A. Mozart Requiem K. 626 No. 6 “Lacrimosa”
* The demonstration pieces listed above are short excerpts from the original compositions.
All other songs are original (© 1994 by Yamaha Corporation).
Demo playback can be stopped temporarily by pressing the [START/STOP]
button. Press the [DEMO] button when you want to stop demo playback and return
to the normal mode.
○○○○○○○○○○○○○○○○○○○○○○○○○○○○○○○○○○○○○○○○○○○○○○○○○○○○○○○○○○○○○○○○○○○
Page 11
Voice Selection
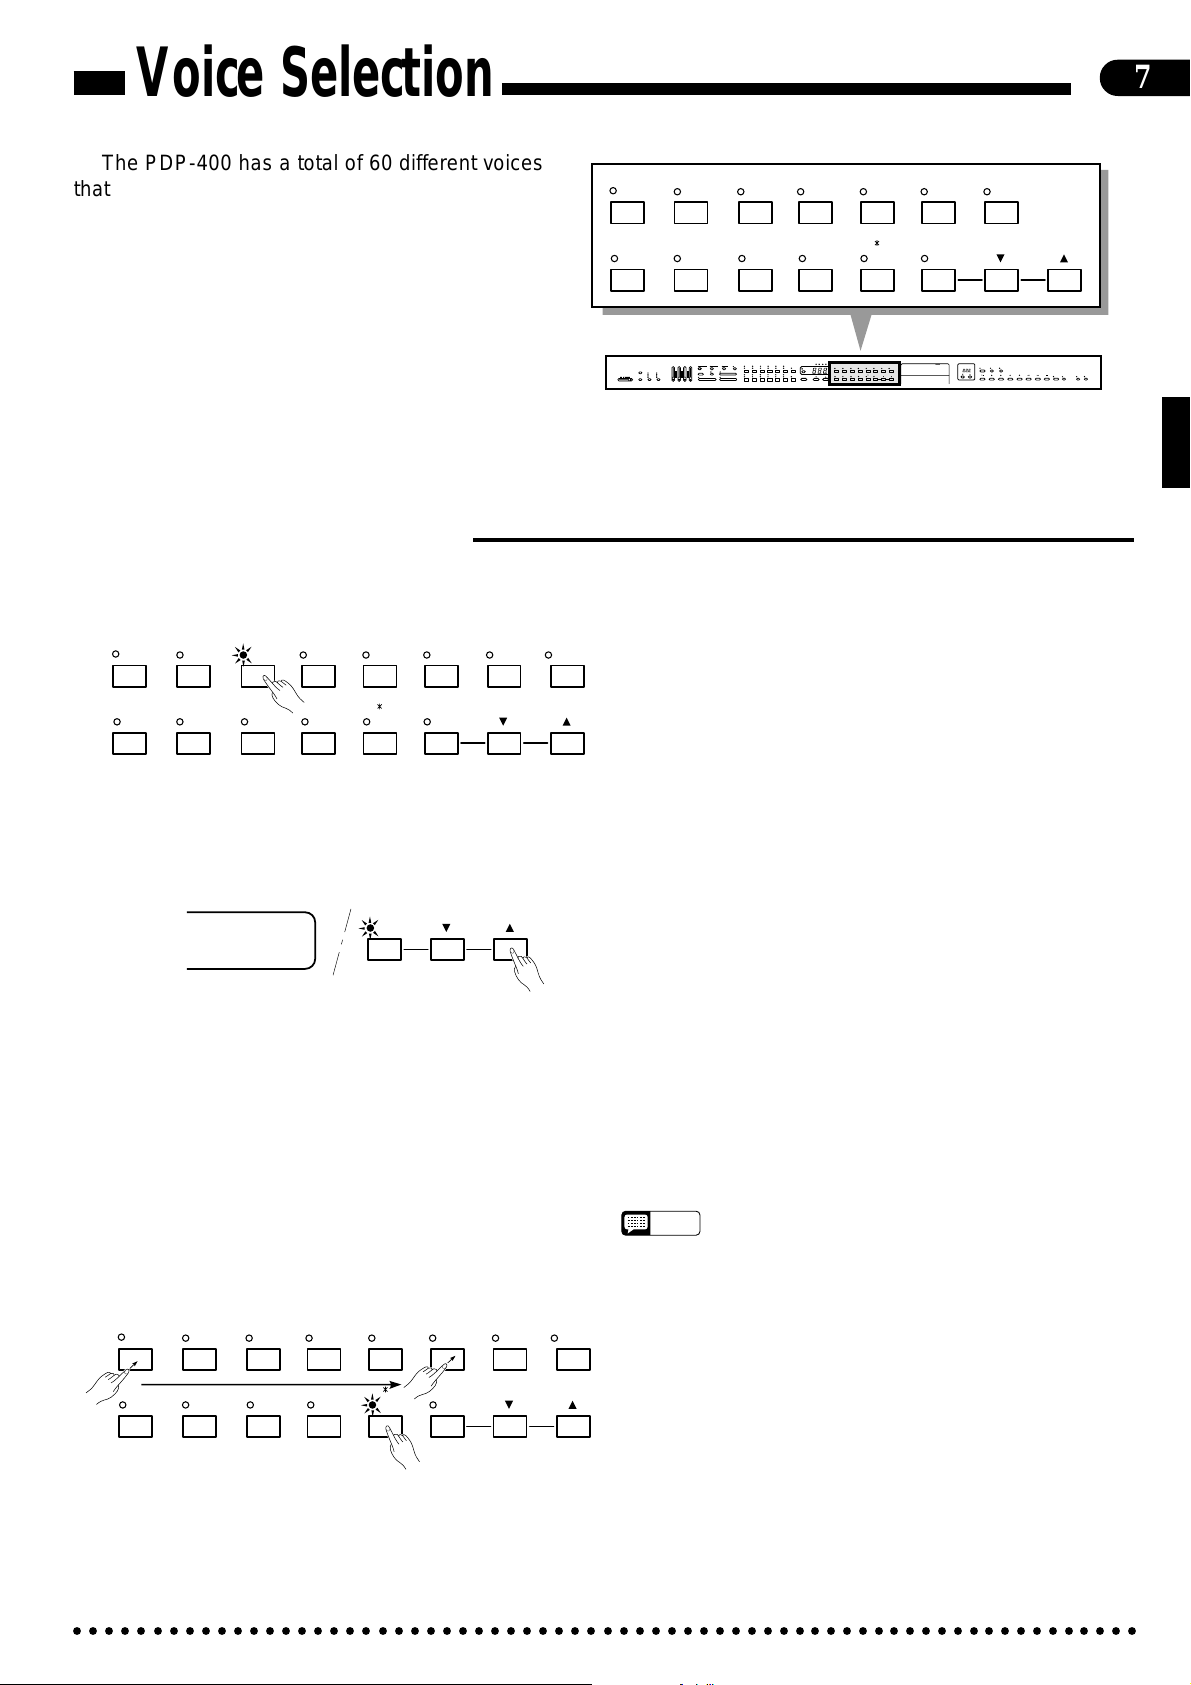
The PDP-400 has a total of 60 different voices
that can be selected in a number of ways. There’s
also a “Keyboard Percussion” mode that let’s you
play a range of drums and percussion instruments
on the keyboard.
PIANO E.PIANO HARPSI VIBES GUITAR STRINGS
1
8
ORGAN CHOIR
CLAVINOVA
TONE
2
90
3
UPRIGHT
BASS
456
ELEC
BASS
DRUMS VOICE 13-60
7
7
AUTO ACCOMPANIMENT
BASS
RHYTHM
CHORD 1
DEMO
REVERB
FOOT SWITCH
MAX
MAX
ROOM
SOFT
HALL 1
SOSTENUTO
MASTER VOLUME
HALL 2
START/STOP
MIDI/
COSMIC
SOLO STYLEPLAY
TRANSPOSE
MIN MAX
MIN
MIN
STYLE
AUTO BASS CHORD
DANCE
SLOW
16BEAT
SINGLE FINGERFULL KEYBOARD FINGERED
SYNCHRO
START
ROCK’N’
SOLO
POP
POP
ROCK
BALLAD
ROLL
STYLEPLAY
16BEAT
16BEAT
ROCK
POWER
JAZZ
POP
SHUFFLE
SHUFFLE
HOUSE
ROCK
INTRO/ENDING
BIG BAND
BOSSA
CHA-CHA
MARCH
SWING
JAZZ
BOOGIE
SAMBA
RHUMBA
POLKA
BALLAD
VARIATION NORMAL
CHORD 2
MAX
START/STOP
MIN
VOICE
BEAT
BLUEGRASS
DISK
COUNTRY
SHUFFLE
WALTZ
JAZZ
WALTZ
CLAVINOVA
PIANO E.PIANO HARPSI VIBES GUITAR STRINGS SPLIT
STYLE 1
METRONOME
TONE
1
234567
8
90
UPRIGHT
TAP TEMPO
ELEC
ORGAN CHOIR
DRUMS VOICE 13-60
BASS
BASS
DISK
STYLE 2
DISK ORCHESTRA / PERFORMANCE MEMORY
SONG NUMBER
PHRASE
SONG
GUIDE
REPEAT
SELECT
/
START/STOP
F F
LEFT/2TR ORCH/3-10TR RHYTHM
RIGHT/1TR
REW
■Selecting the 60 Voices
● Voices 1-12: Direct Panel Selection......................................................................................................
PIANO E.PIANO HARPSI VIBES GUITAR STRINGS SPLIT
1
8
ORGAN CHOIR
CLAVINOVA
TONE
2
90
3
UPRIGHT
BASS
456
ELEC
BASS
DRUMS VOICE 13-60
7
● The VOICE 13-60 [▲] and [▼] Buttons..................................................................................................
VOICE 13-60
14
Of the PDP-400’s 60 voices, 12 are “panel voices” which
can be directly accessed by pressing the corresponding
VOICE selector. When a voice selector is pressed the corresponding indicator will light and the number of the selected
voice will appear on the TEMPO display while the voice
selector is held.
The PIANO voice is automatically selected when the
power is initially turned on.
Use the [▲] and [▼] buttons immediately to the right of
the [VOICE 13-60] button to select a voice number between
13 and 60. Press either button briefly to select the next voice
number in the specified direction, or hold the button for continuous scrolling in the specified direction. The [VOICE 13-
60] indicator will light and the voice number will appear on
the TEMPO display during selection.
DISK CONTROL
CHORD
REC
PAUSE
COPY
FORMAT
SEQUENCE
If a panel voice (1-12) is selected, the last selected voice in
the 13-60 range can be instantly re-selected simply by pressing the [VOICE 13-60] button. The [VOICE 13-60] button
will initially select voice number 13 (BRASS) after the power
is turned on.
• Voice number 13 can be instantly selected by pressing
NOTES
the [▲] and [▼] buttons simultaneously.
● Numeric Selection ..................................................................................................................................
PIANO E.PIANO HARPSI VIBES GUITAR STRINGS SPLIT
ORGAN CHOIR
CLAVINOVA
TONE
1
8
2
90
3
UPRIGHT
BASS
456
ELEC
BASS
DRUMS VOICE 13-60
7
○○○○○○○○○○○○○○○○○○○○○○○○○○○○○○○○○○○○○○○○○○○○○○○○○○○○○○○○○○○○○○○○○○○
Enter the number of the desired voice via the voice selec-
tors (note that each voice selector has a number between 1 and
0 associated with it) while pressing the [DRUMS] selector.
To select voice number 16, for example, press and hold
[DRUMS], press [PIANO/1], then [GUITAR/6], then release
the [DRUMS] button. The voice number will appear on the
TEMPO display while the [DRUMS] button is held. The
[VOICE 13-60] button indicator will light whenever a voice
number between 13 and 60 is selected.
Page 12

8
Voice Selection
Panel Voices (1 — 12)
No. Name
1 PIANO A-1 - C7
2 CLAVINOVA TONE C1 - C7
3 E. PIANO C1 - C6
4 HARPSI C1 - C6
5 VIBES F2 - F5
6 GUITAR E1 - F#4
7 STRINGS C0 - C6
8 ORGAN C0 - C6
9 CHOIR E1 - E5
10 UPRIGHT BASS C0 - F#3
11 ELEC BASS E0 - F#3
12 DRUMS —
Voices 13 — 60
No. Name
13 BRASS F0 - C6
14 POP BRASS F0 - C6
15 TRUMPET F0 - C6
16 MUTE TRUMPET F#2 - A5
17 HORN A#0 - F4
18 SAX A#0 - F#5
Usable Range
Usable Range
No. Name
19 SAX SOFT A#0 - F#5
20 CLARINET D2 - A#5
21 OBOE A#2 - G5
22 FLUTE G2 - F#6
23 ACCORDION F2 - A5
24 HARMONICA C3 - C6
25 STRINGS SOFT C0 - C6
26 VIOLIN C0 - C6
27 VIOLIN HARD C0 - C6
28 FULL ORGAN C0 - C6
29 JAZZ ORGAN 1 C1 - C6
30 SYNTH BRASS C1 - C6
31 SYNTH WOOD C2 - F#6
32 SYNTH STRINGS C0 - C6
33 SYNTH CHOIR E1 - E5
34 PIANO BRIGHT A-1 - C7
35 PIANO SOFT A-1 - C7
36 E. PIANO DX C1 - C6
37 SYNTH CRYSTAL C2 - C6
38 CELESTA C2 - C6
39 MARIMBA C2 - C6
• When the DRUMS voice is selected only the keys with drum or percussion sym-
NOTES
bols printed below them will sound.
• The PIANO voice is automatically selected when the power is initially turned on.
Usable Range
No. Name
40 FOLK GUITAR E1 - A4
41 JAZZ GUITAR 1 E1 - A4
42 JAZZ GUITAR 2 E1 - A4
43 ROCK GUITAR 1 E1 - A4
44 ROCK GUITAR 2 E1 - A4
45 MUTE GUITAR E1 - A4
46 BANJO C3 - A5
47 PIZZICATO C1 - C6
48 HARP C1 - C6
49 U. BASS SOFT C0 - F#3
50 E. BASS SOFT E0 - F#3
51 E. BASS HEAVY E0 - F#3
52 SYNTH BASS E0 - F#3
53
TIMPANI & ORCH. HIT
54 BASSOON A#0 - D4
55
CHAMBER STRINGS
56 JAZZ ORGAN 2 C1 - C6
57 ROCK GUITAR 3 E1 - A4
58 COSMIC 1 G0 - C6
59 COSMIC 2 G0 - C6
60 COSMIC 3 G0 - C6
Usable Range
E0 - C2/G2 - C6
C1 - C6
■Keyboard Percussion
DRUMS
Drum & Percussion Key Assignments
Key Instrument
A1 CYMBAL DAMP
F#2 BRUSH ROLL
G#2 HI-HAT CLOSED HEAVY
A#2 CRASH CYMBAL LIGHT
B2 BASS DRUM LIGHT
C3 SNARE DRUM + RIM HEAVY
C#3 RIDE CYMBAL CUP
D3 SNARE DRUM + RIM LIGHT
F3 BASS DRUM NORMAL
F#3 RIM SHOT
G3 SNARE DRUM HEAVY
G#3 BRUSH SHOT
A3 SNARE DRUM LIGHT
A#3 HI-HAT PEDAL
B3 SNARE DRUM ECHO
C4 TOM 4
C#4 HI-HAT CLOSED NORMAL
When the [DRUMS] voice selector is pressed (its indicator will light), you can
play 44 different drum and percussion instruments on the keyboard. The percussion
instruments played by the various keys are marked by symbols below the keys
(keys with no symbols produce no sound).
• The TRANSPOSE and PITCH functions described on pages 15 and 16 do not
NOTES
Key Instrument
D4 TOM 3
D#4 HI-HAT OPEN
E4 TOM 2
F4 TOM 1
F#4 RIDE CYMBAL NORMAL
G4 ELECTRIC TOM 3
G#4 CRASH CYMBAL NORMAL
A4 ELECTRIC TOM 2
(A#4) (CRASH CYMBAL)
B4 ELECTRIC TOM 1
C5 CONGA LOW
C#5 CABASA
D5 CONGA HIGH
D#5 METRONOME
E5 BONGO HIGH
F5 TIMBALE LOW
affect the DRUMS sound.
Key Instrument
F#5 CLAVES
G5 TIMBALE HIGH
G#5 CASTANETS
A5 CUICA LOW
A#5 COWBELL
B5 CUICA HIGH
C6 HAND CLAP
C#6 AGOGO LOW
D#6 AGOGO HIGH
E6 BONGO LOW
(F6) (CUICA LOW)
F#6 TAMBOURINE
(G6) (CRASH CYMBAL)
G#6 TRIANGLE CLOSED
(A6) (BRUSH ROLL)
A#6 TRIANGLE OPEN
• Cymbals (except G6) can be muted by pressing the A1 key.
• HI-HAT OPEN (D#4) is muted by HI-HAT CLOSED HEAVY (G#2),
HI-HAT CLOSED NORMAL (C#4) and HI-HAT PEDAL (A#3).
• BRUSH ROLL (F#2) is muted by BRUSH SHOT (G#3).
• TRIANGLE OPEN (A#6) is muted by TRIANGLE CLOSED (G#6).
○○○○○○○○○○○○○○○○○○○○○○○○○○○○○○○○○○○○○○○○○○○○○○○○○○○○○○○○○○○○○○○○○○○
• The instruments listed in parentheses ( ) will not sound when
played on the keyboard, but can be recorded using the Performance Memory (page 31) and will sound on playback. These instruments can also be played via MIDI.
Page 13

Dual Mode
E
U
I
R
S
9
The DUAL mode makes it possible to play two
voices simultaneously across the entire range of
the keyboard. This makes it easy to create exceptionally rich, thick tonal textures.
■Engaging the Dual Mode
PIANO E.PIANO HARPSI VIB
ORGAN CHOIR
CLAVINOVA
TONE
1
8
2
90
3
UPRIGHT
BASS
45
ELEC
BASS
DR
To engage the DUAL mode simply press two voice selectors at the same time
— or press one voice selector while holding another. A voice in the 13…60 range
can be “dualed” with the panel voices by pressing the [VOICE 13-60] button and
any other voice selector at the same time (two voices in the 13…60 range cannot be
combined). The [s] and [t] buttons can then be used to select the desired 13…60
voice. The higher voice number will appear on the TEMPO display during selection.
The voice indicators of both selected voices will light when the DUAL mode is
active. To return to the normal single-voice play mode, press any single voice selector.
PIANO E.PIANO HARPSI VIBES GUITAR STRINGS
1
8
ORGAN CHOIR
MASTER VOLUME
MIN MAX
CLAVINOVA
TONE
2
90
AUTO ACCOMPANIMENT
BASS
RHYTHM
CHORD 1
CHORD 2
DEMO
REVERB
FOOT SWITCH
MAX
MAX
MAX
ROOM
SOFT
HALL 1
SOSTENUTO
HALL 2
START/STOP
MIDI/
COSMIC
SOLO STYLEPLAY
TRANSPOSE
MIN
MIN
MIN
3
UPRIGHT
BASS
STYLE
AUTO BASS CHORD
SOLO
POP
SINGLE FINGERFULL KEYBOARD FINGERED
STYLEPLAY
JAZZ
ROCK
SYNCHRO
INTRO/ENDING
START/STOP
START
SWING
JAZZ
BALLAD
VARIATION NORMAL
456
ELEC
BASS
VOICE
BEAT
BLUE-
DANCE
SLOW
16BEAT
ROCK’N’
GRASS
POP
ROCK
BALLAD
ROLL
16BEAT
16BEAT
DISK
ROCK
COUNTRY
POWER
POP
SHUFFLE
SHUFFLE
HOUSE
BIG BAND
BOSSA
CHA-CHA
MARCH
BOOGIE
SAMBA
RHUMBA
POLKA
CLAVINOVA
PIANO E.PIANO HARPSI VIBES GUITAR STRINGS SPLIT
STYLE 1
SHUFFLE
METRONOME
TONE
1
234567
WALTZ
8
90
UPRIGHT
TAP TEMPO
ELEC
ORGAN CHOIR
BASS
BASS
DISK
JAZZ
STYLE 2
WALTZ
DRUMS VOICE 13-60
DRUMS VOICE 13-60
7
DISK ORCHESTRA / PERFORMANCE MEMORY
SONG NUMBER
PHRASE
SONG
GUIDE
REPEAT
SELECT
/
START/STOP
LEFT/2TR ORCH/3-10TR RHYTHM
RIGHT/1TR
DISK CONTROL
CHORD
REC
F F
PAUSE
COPY
FORMAT
REW
SEQUENCE
■Dual-mode V oice Balance
The volume balance between the two voices combined in the DUAL mode can
be adjusted by using the TEMPO [▲] and [▼] buttons while pressing both of the
active voice selectors. The selected balance value (1 … 15) will be shown on the
TEMPO display while the voice selectors and TEMPO [▲] or [▼] buttons are
held.
■ A setting of “1” sets the volume of the lowest-numbered voice to maximum and
the highest-numbered voice to minimum (no sound).
■ A setting of “8” sets both voices to the same volume (this is the default balance
setting, and can be recalled by pressing the TEMPO [▲] and [▼] buttons si-
multaneously).
■ A setting of “15” sets the volume of the highest-numbered voice to maximum
and the lowest-numbered voice to minimum (no sound).
TEMPO
8
PIANO E.P
ORGAN CHOIR
CLAVINOVA
TONE
1
8
2
90
3
UP
BA
• The TEMPO [▲] and [▼] buttons allow two-speed scrolling: press lightly to scroll
NOTES
through the values slowly, or press firmly to scroll rapidly.
• The dual mode cannot be used when the DRUMS voice is selected. Also, the
dual and split modes cannot be used at the same time.
○○○○○○○○○○○○○○○○○○○○○○○○○○○○○○○○○○○○○○○○○○○○○○○○○○○○○○○○○○○○○○○○○○○
Page 14

10
B
R
Split Mode
The split mode lets you play different voices with
the left and right hands — bass with the left and piano with the right, for example. You can assign any
of the PDP-400’s voices to the left and right-hand
sections of the keyboard.
SPLIT
■Engaging the Split Mode
When the [SPLIT] button is pressed and its indicator lights, the keyboard is
split into left- and right-hand sections and different voices can be assigned to each.
The split point is initially set at the F#2 key when the power is turned on, and the
UPRIGHT BASS voice is initially assigned to the left-hand section of the keyboard
(all keys up to and including F#2). The voice that was selected when the SPLIT
mode was engaged is assigned to the right-hand section of the keyboard. The current settings are retained if the SPLIT mode is turned off (press the [SPLIT] button again) and on while the power remains on.
Left-hand section
SPLIT
F#2
▼
C3
Right-hand section
■Changing the Split Voices
AVINOVA
E.PIANO HARPSI VI
NE
3
0
UPRIGHT
OIR
BASS
45
ELEC
BASS
D
SPLIT
The right-hand voice can be changed simply by pressing the appropriate voice
selector.
The left-hand voice can be changed by pressing a voice selector while holding
the [SPLIT] button.
AUTO ACCOMPANIMENT
BASS
RHYTHM
CHORD 1
DEMO
REVERB
FOOT SWITCH
MAX
MAX
SOFT
ROOM
HALL 1
SOSTENUTO
MASTER VOLUME
HALL 2
START/STOP
MIDI/
COSMIC
SOLO STYLEPLAY
TRANSPOSE
MIN MAX
MIN
MIN
• All voices except BASS (voice numbers 10, 11, 49, 50, 51, and 52) and DRUMS
NOTES
(voice number 12) are shifted up one octave when assigned to the lower section
STYLE
AUTO BASS CHORD
DANCE
16BEAT
SINGLE FINGERFULL KEYBOARD FINGERED
SYNCHRO
START
ROCK’N’
SOLO
POP
POP
BALLAD
ROLL
STYLEPLAY
16BEAT
16BEAT
POWER
JAZZ
POP
SHUFFLE
HOUSE
ROCK
INTRO/ENDING
SWING
BIG BAND
BOSSA
CHA-CHA
JAZZ
BOOGIE
SAMBA
RHUMBA
BALLAD
VARIATION NORMAL
CHORD 2
MAX
START/STOP
MIN
VOICE
BEAT
BLUE-
SLOW
GRASS
ROCK
DISK
COUNTRY
ROCK
SHUFFLE
MARCH
POLKA
CLAVINOVA
PIANO E.PIANO HARPSI VIBES GUITAR STRINGS SPLIT
STYLE 1
SHUFFLE
METRONOME
TONE
1
234567
WALTZ
8
90
UPRIGHT
TAP TEMPO
ELEC
ORGAN CHOIR
DRUMS VOICE 13-60
BASS
BASS
DISK
JAZZ
STYLE 2
WALTZ
DISK ORCHESTRA / PERFORMANCE MEMORY
SONG NUMBER
PHRASE
SONG
GUIDE
REPEAT
SELECT
/
START/STOP
RIGHT/1TR
LEFT/2TR ORCH/3-10TR RHYTHM
of the keyboard (this function can be turned on or off via the “Octave Shift” utility
function described on page 43).
DISK CONTROL
CHORD
F F
REC
PAUSE
COPY
FORMAT
REW
SEQUENCE
■Changing the Split P oint
SPLIT
C3
○○○○○○○○○○○○○○○○○○○○○○○○○○○○○○○○○○○○○○○○○○○○○○○○○○○○○○○○○○○○○○○○○○○
The split point can be set at any key by pressing the desired key while holding
the [SPLIT] button. The split point key name will appear on the TEMPO display
while the [SPLIT] button is held.
Example:
A-1 A≠1 C 2 C~2
A-1 A#-1 C2 C#2
The default split point — F#2 — will always be set automatically whenever the
power is initially turned on.
Page 15

■Split Balance
The volume balance between the left-hand and right-hand voices can be ad-
SPLIT
8
TEMPO
justed by using the TEMPO [▲] and [▼] buttons while holding the [SPLIT] but-
ton. The selected balance value (1 … 15) will be shown on the TEMPO display
while the [SPLIT] and TEMPO [s] or [▼] buttons are held.
■ A setting of “1” sets the volume of the left voice to maximum and the right
voice to minimum (no sound).
■ A setting of “8” sets both voices to the same volume (this is the default balance
setting, and can be recalled by pressing the TEMPO [▲] and [▼] buttons simultaneously).
■ A setting of “15” sets the volume of the right voice to maximum and the left
voice to minimum (no sound).
• The TEMPO [▲] and [▼] buttons allow two-speed scrolling: press lightly to scroll
NOTES
through the values slowly, or press firmly to scroll rapidly.
■Damper Pedal Operation in the Split Mode
Split Mode
11
DAMPER
SPLIT
FOOT SWITCH
The damper pedal (the supplied FC4 foot switch connected to the rear-panel
DAMPER jack — see “The Pedals” on page 14) can be assigned to the left voice
only, the right voice only, or to both voices in the split mode.
■ Right Voice Only (default): Press the DAMPER pedal while holding the
[SPLIT] button.
■ Left Voice Only: Press the FOOT SWITCH pedal (an optional FC4 or FC5
foot switch connected to the rear-panel FOOT SWITCH jack) while holding
the [SPLIT] button.
■ Both Voices: Press both the DAMPER and FOOT SWITCH pedals while
holding the [SPLIT] button.
• The dual and split modes cannot be used at the same time.
NOTES
• In the split the soft and sostenuto pedal functions apply to both the left- and righthand voices.
• When the ABC Single Finger mode (page 20) and the split mode are used simultaneously, the left-hand voice will be accompanied by the appropriate ABC chord
voices.
○○○○○○○○○○○○○○○○○○○○○○○○○○○○○○○○○○○○○○○○○○○○○○○○○○○○○○○○○○○○○○○○○○○
Page 16

12
Digital Reverb Effects
The [REVERB] button provides a number of
digital effects that you can use for extra depth and
expressive power.
■Selecting a Reverb Effect
Each time the [REVERB] button is pressed the next effect on the reverb “list”
is selected and the corresponding indicator will light. No effect is selected when no
indicator is lit.
REVERB
ROOM
HALL 1
HALL 2
COSMIC
OFF (No indicator lit)
No effect is produced.
ROOM
This setting adds a reverb effect to the sound that is similar to the type of acoustic
reverberation you would hear in a medium-size room.
REVERB
ROOM
HALL 1
HALL 2
COSMIC
AUTO ACCOMPANIMENT
BASS
RHYTHM
CHORD 1
DEMO
REVERB
FOOT SWITCH
MAX
MAX
SOFT
ROOM
HALL 1
SOSTENUTO
MASTER VOLUME
HALL 2
START/STOP
MIDI/
COSMIC
SOLO STYLEPLAY
TRANSPOSE
MIN MAX
MIN
MIN
STYLE
AUTO BASS CHORD
DANCE
16BEAT
SINGLE FINGERFULL KEYBOARD FINGERED
ROCK’N’
SOLO
POP
POP
BALLAD
ROLL
STYLEPLAY
16BEAT
16BEAT
POWER
JAZZ
POP
SHUFFLE
HOUSE
ROCK
SYNCHRO
INTRO/ENDING
START
SWING
BIG BAND
BOSSA
CHA-CHA
JAZZ
BOOGIE
SAMBA
RHUMBA
BALLAD
VARIATION NORMAL
CHORD 2
MAX
START/STOP
MIN
VOICE
BEAT
BLUE-
SLOW
GRASS
ROCK
DISK
COUNTRY
ROCK
SHUFFLE
SHUFFLE
WALTZ
MARCH
JAZZ
POLKA
WALTZ
CLAVINOVA
PIANO E.PIANO HARPSI VIBES GUITAR STRINGS SPLIT
STYLE 1
METRONOME
TONE
1
234567
8
90
UPRIGHT
TAP TEMPO
ELEC
ORGAN CHOIR
DRUMS VOICE 13-60
BASS
BASS
DISK
STYLE 2
DISK ORCHESTRA / PERFORMANCE MEMORY
SONG NUMBER
PHRASE
SONG
GUIDE
REPEAT
SELECT
/
START/STOP
RIGHT/1TR
LEFT/2TR ORCH/3-10TR RHYTHM
DISK CONTROL
CHORD
F F
REC
PAUSE
COPY
FORMAT
REW
SEQUENCE
■Reverb Depth Control
REVERB
ROOM
HALL 1
HALL 2
COSMIC
8
TEMPO
HALL 1
For a more spacious reverb sound, use the HALL 1 setting. This effect simulates
the natural reverberation of a medium-size concert hall.
HALL 2
HALL 2 simulates the reverb of a very large concert hall.
COSMIC
“COSMIC” is an echo effect in which the sound seems to “bounce” around in the
stereo sound field.
• The ROOM effect is automatically selected when the POWER switch is turned
NOTES
on.
The depth of the selected reverb effect can be increased or decreased by press-
ing the TEMPO [▲] or [▼] button while holding the [REVERB] button. The reverb depth is shown on the TEMPO display while the [REVERB] and [▲] or [▼]
buttons are held. The reverb depth range is from “0” (no effect) to “15” (maximum depth).
• Reverb depth is initially set to “8” when the power is turned on (this setting can be
NOTES
recalled during reverb depth selection by pressing the TEMPO [▲] and [▼] buttons simultaneously).
• The TEMPO [▲] and [▼] buttons allow two-speed scrolling: press lightly to scroll
through the values slowly, or press firmly to scroll rapidly.
○○○○○○○○○○○○○○○○○○○○○○○○○○○○○○○○○○○○○○○○○○○○○○○○○○○○○○○○○○○○○○○○○○○
Page 17

The Keyboard & Polyphony
13
The PDP-400 has “32-note polyphony” which
means you can normally play up to 32 notes at once.
This number varies, however, according to the functions being used.
● The number of available notes is further reduced if the performance memory or a
Disk Orchestra Collection disk is being played at the same time. Further variation
occurs with “1-layer” and “2-layer” voices. The polyphony is halved with 2-layer
voices: voices 56 (JAZZ ORGAN 2), 58 (COSMIC 1), and 60 (COSMIC 3).
The PDP-400 also offers keyboard touch response, so the volume and timbre of
notes played can be controlled according to how “hard” you play the keys. The
amount of variation available depends on the selected voice.
Pitch Wheel
Keyboard only 32 notes.
Keyboard only (dual) 16 notes.
Keyboard + rhythm 24 notes (rhythm uses 8).
Keyboard (dual) + rhythm 12 notes
Keyboard + ABC 12 notes (rhythm 8; ABC 12).
Keyboard (dual) + ABC 6 notes
PITCH
UP
0
DOWN
The PITCH wheel can be used to “bend” the pitch of notes up or down while play-
ing. The PITCH wheel is self-centering, and will automatically return to center position — i.e. normal pitch — when released. The PITCH wheel will affect both voices
in the Dual and Split modes. Pitch-bend data is also transmitted via the MIDI OUT
connector along with the note data. The range of the PITCH wheel is plus or minus
one whole tone.
Modulation Wheel
MODULATION
MAX
MIN
The MODULATION wheel can be used to apply “modulation” in the form of a
vibrato effect to notes played on the keyboard. More modulation is applied as the
wheel is rolled upward. Unlike the self-centering PITCH wheel, the MODULATION
wheel will stay where it is set so you can set any degree of modulation you like and
leave it that way. Please note, however, that when you select a different voice the “normal” modulation level for that voice will initially be recalled regardless of the position
of the MODULATION wheel. The MODULATION wheel will affect both voices in
the Dual and Split modes. Modulation data is also transmitted via the MIDI OUT connector along with the note data.
○○○○○○○○○○○○○○○○○○○○○○○○○○○○○○○○○○○○○○○○○○○○○○○○○○○○○○○○○○○○○○○○○○○
Page 18

14
The Pedals
The PDP-400 allows connection of two pedals which
offer a range of advanced expressive capabilities.
DAMPER
FOOT SWITCH
■Damper Pedal
The supplied FC4 foot switch functions as a damper pedal when connected to
the rear-panel DAMPER jack. The damper pedal functions in the same way as a
damper pedal on an acoustic piano. When the damper pedal is pressed notes played
have a long sustain. Releasing the pedal immediately stops (damps) any sustained
notes.
■Foot Switch (Multi-function)
FOOT SWITCH
SOFT
SOSTENUTO
START/STOP
SOLO STYLEPLAY
An optional FC4 or FC5 foot switch connected to the rear-panel FOOT
SWITCH jack provides a number of functions which can be selected using the
[FOOT SWITCH] button and indicators. Each time the [FOOT SWITCH] button
is pressed the next function on the function “list” is selected and the corresponding
indicator will light.
DEMO
MASTER VOLUME
MIDI/
TRANSPOSE
MIN MAX
FOOT SWITCH
SOFT
SOSTENUTO
START/STOP
SOLO STYLEPLAY
AUTO ACCOMPANIMENT
AUTO BASS CHORD
BASS
RHYTHM
CHORD 1
CHORD 2
REVERB
FOOT SWITCH
MAX
MAX
MAX
START/STOP
SOFT
ROOM
HALL 1
SOSTENUTO
HALL 2
START/STOP
COSMIC
SOLO STYLEPLAY
MIN
MIN
MIN
SINGLE FINGERFULL KEYBOARD FINGERED
SYNCHRO
START
STYLE
DANCE
16BEAT
ROCK’N’
SOLO
POP
POP
BALLAD
ROLL
STYLEPLAY
16BEAT
16BEAT
POWER
JAZZ
POP
SHUFFLE
HOUSE
ROCK
INTRO/ENDING
BIG BAND
BOSSA
CHA-CHA
SWING
JAZZ
BOOGIE
SAMBA
RHUMBA
BALLAD
VARIATION NORMAL
VOICE
BEAT
BLUE-
SLOW
GRASS
ROCK
DISK
COUNTRY
ROCK
SHUFFLE
MARCH
POLKA
CLAVINOVA
PIANO E.PIANO HARPSI VIBES GUITAR STRINGS SPLIT
STYLE 1
SHUFFLE
METRONOME
TONE
1
234567
WALTZ
8
90
UPRIGHT
TAP TEMPO
ELEC
ORGAN CHOIR
DRUMS VOICE 13-60
BASS
BASS
DISK
JAZZ
STYLE 2
WALTZ
DISK ORCHESTRA / PERFORMANCE MEMORY
SONG NUMBER
PHRASE
SONG
GUIDE
REPEAT
SELECT
/
START/STOP
RIGHT/1TR
LEFT/2TR ORCH/3-10TR RHYTHM
DISK CONTROL
CHORD
F F
REC
PAUSE
COPY
FORMAT
REW
SEQUENCE
● Soft...........................................................................................................................................................
Pressing the soft pedal subtly reduces the volume and slightly changes the timbre of notes played. The SOFT function is automatically selected whenever the
POWER switch is turned on.
● Sostenuto ................................................................................................................................................
If you play a note or chord on the keyboard and press the sostenuto pedal while
the note(s) are held, those notes will be sustained as long as the pedal is held (as if
the damper pedal had been pressed) but all subsequently played notes will not be
sustained. This makes it possible to sustain a chord, for example, while other notes
are played “staccato.”
The SOSTENUTO function cannot be selected while the SOLO STYLEPLAY
feature is operating.
● Start/Stop ................................................................................................................................................
The foot switch performs the same function as the panel [START/STOP] but-
tons. For details on the START/STOP function, refer to the “Accompaniment”
section on page 18, 19.
● Solo Styleplay .........................................................................................................................................
For details on the SOLO STYLEPLAY function see “SOLO STYLEPLAY” on
page 25 (the SOLO STYLEPLAY pedal function can only be selected when the
SOLO STYLEPLAY feature is in use).
• The damper, soft, and sostenuto pedal functions do not affect the DRUMS voice.
NOTES
○○○○○○○○○○○○○○○○○○○○○○○○○○○○○○○○○○○○○○○○○○○○○○○○○○○○○○○○○○○○○○○○○○○
Page 19

Pan
15
MIDI/
TRANSPOSE
RHYTHM
MIDI/
TRANSPOSE
MAX
MIN
The pan settings are as follows:
PL6 PL5 PL4 PL3 PL2 PL1 P C Pr1 Pr2 Pr3 Pr4 Pr5 Pr6
Full
Left
(P d)
Center
MASTER VOLUME
MIN MAX
Right
DEMO
MIDI/
TRANSPOSE
Full
AUTO ACCOMPANIMENT
BASS
RHYTHM
CHORD 1
REVERB
FOOT SWITCH
MAX
MAX
SOFT
ROOM
HALL 1
SOSTENUTO
HALL 2
START/STOP
COSMIC
SOLO STYLEPLAY
MIN
MIN
STYLE
AUTO BASS CHORD
DANCE
16BEAT
SINGLE FINGERFULL KEYBOARD FINGERED
ROCK’N’
SOLO
POP
POP
BALLAD
ROLL
STYLEPLAY
16BEAT
16BEAT
POWER
JAZZ
POP
SHUFFLE
HOUSE
ROCK
SYNCHRO
INTRO/ENDING
START
BIG BAND
BOSSA
CHA-CHA
SWING
JAZZ
BOOGIE
SAMBA
RHUMBA
BALLAD
VARIATION NORMAL
CHORD 2
MAX
START/STOP
MIN
VOICE
BEAT
BLUE-
SLOW
GRASS
ROCK
DISK
COUNTRY
ROCK
SHUFFLE
MARCH
POLKA
CLAVINOVA
PIANO E.PIANO HARPSI VIBES GUITAR STRINGS SPLIT
STYLE 1
SHUFFLE
METRONOME
TONE
1
WALTZ
JAZZ
WALTZ
234567
8
90
UPRIGHT
TAP TEMPO
ELEC
ORGAN CHOIR
DRUMS VOICE 13-60
BASS
BASS
DISK
STYLE 2
DISK ORCHESTRA / PERFORMANCE MEMORY
SONG NUMBER
PHRASE
SONG
GUIDE
REPEAT
SELECT
/
START/STOP
RIGHT/1TR
LEFT/2TR ORCH/3-10TR RHYTHM
DISK CONTROL
CHORD
F F
REC
PAUSE
COPY
FORMAT
REW
SEQUENCE
● The pan (stereo) position of the voice played on the key-
board can be adjusted by moving the RHYTHM volume
control while holding the [MIDI/TRANSPOSE] button.
The pan position is shown on the TEMPO display, from
“PL6” for full left at the “MIN” control position, through
“PC” for center, to “Pr6” for full right at the “MAX”
control position. This can be used to produce a broader
ensemble sound with the Performance Memory multitrack
recording feature.
Each voice has a preset pan setting (indicated by “Pd”
on the TEMPO display) which is automatically set when
the power is first turned on.
NOTES
• The “Pd” keyboard scale pan default for some voices places the
treble-register sound to the right and the bass-register sound to the
left. Using a different PAN setting places the entire voice, low and high
notes included, at the same position.
• The DRUMS voice has a preset PAN setting which cannot be changed.
Transposition
The PDP-400’s TRANSPOSE function makes it
possible to shift the pitch of the entire keyboard up or
down in semitone intervals up to a maximum of six
semitones. “Transposing” the pitch of the PDP-400
keyboard makes it easier to play in difficult key signatures, and you can simply match the pitch of the keyboard to the range of a singer or other instrumentalist.
MIDI/
TRANSPOSE
Display Transposition Display Transposition
-6 -6 semitones 0 Normal
-5 -5 semitones 1 +1 semitone
-4 -4 semitones 2 +2 semitones
-3 -3 semitones 3 +3 semitones
-2 -2 semitones 4 +4 semitones
-1 -1 semitone 5 +5 semitones
0 Normal 6 +6 semitones
-2
TEMPO
MIDI/
TRANSPOSE
AUTO ACCOMPANIMENT
BASS
RHYTHM
CHORD 1
DEMO
REVERB
FOOT SWITCH
MAX
MAX
MAX
SOFT
ROOM
HALL 1
SOSTENUTO
MASTER VOLUME
HALL 2
START/STOP
MIDI/
COSMIC
SOLO STYLEPLAY
TRANSPOSE
MIN MAX
MIN
MIN
MIN
STYLE
AUTO BASS CHORD
DANCE
16BEAT
SINGLE FINGERFULL KEYBOARD FINGERED
ROCK’N’
SOLO
POP
POP
BALLAD
ROLL
STYLEPLAY
16BEAT
16BEAT
POWER
JAZZ
POP
SHUFFLE
HOUSE
ROCK
SYNCHRO
INTRO/ENDING
START
SWING
BIG BAND
BOSSA
CHA-CHA
JAZZ
BOOGIE
SAMBA
RHUMBA
BALLAD
VARIATION NORMAL
CHORD 2
START/STOP
VOICE
BEAT
BLUE-
SLOW
GRASS
ROCK
DISK
COUNTRY
ROCK
SHUFFLE
MARCH
POLKA
CLAVINOVA
PIANO E.PIANO HARPSI VIBES GUITAR STRINGS SPLIT
STYLE 1
SHUFFLE
METRONOME
TONE
1
234567
WALTZ
8
90
UPRIGHT
TAP TEMPO
ELEC
ORGAN CHOIR
DRUMS VOICE 13-60
BASS
BASS
DISK
JAZZ
STYLE 2
WALTZ
DISK ORCHESTRA / PERFORMANCE MEMORY
SONG NUMBER
PHRASE
SONG
GUIDE
REPEAT
SELECT
/
START/STOP
RIGHT/1TR
LEFT/2TR ORCH/3-10TR RHYTHM
DISK CONTROL
CHORD
F F
REC
PAUSE
COPY
FORMAT
REW
SEQUENCE
● Use the TEMPO [▲] and [▼] buttons to select the desired
degree of transposition while holding the [MIDI/TRANS-
POSE] button.
The amount of transposition selected is shown on the
TEMPO display as follows:
NOTES
• Press the [▲] and [▼] buttons simultaneously while holding the [MIDI/
TRANSPOSE] button to restore normal keyboard pitch.
• Transpose is always set to Normal when the power is turned on.
• The TRANSPOSE function does not affect the DRUMS sound.
• The TEMPO [▲] and [▼] buttons allow two-speed scrolling: press
lightly to scroll through the values slowly, or press firmly to scroll rapidly.
• Notes below and above the original 88-key range of the PDP-400
sound one octave higher and lower, respectively.
○○○○○○○○○○○○○○○○○○○○○○○○○○○○○○○○○○○○○○○○○○○○○○○○○○○○○○○○○○○○○○○○○○○
Page 20

16
Pitch Control
Pitch control makes it possible to tune the PDP-400 over a ±50-cent range (approximate) in
approximately 1.2-cent or 1-hertz intervals. A hundred “cents” equals one semitone, so the tuning
range provided allows fine tuning of overall pitch over a range of approximately a semitone. Pitch
control is useful for tuning the PDP-400 to match other instruments or recorded music.
● Tuning Up................................................................................................................................................
A-1B
-1
TEMPO
3
C
3
B
ZTo tune up (raise pitch), hold the A-1 and B-1 keys simultaneously (A-1 and B-
1 are the two lowest white keys on the keyboard) and press any key between C3
and B3. Each time a key in this range is pressed the pitch is raised by approximately 1.2 cents, up to a maximum of about 50 cents above standard pitch. To
raise the pitch in 1-hertz increments press the TEMPO [▲] button instead of
the C3-B3 keys. The TEMPO [▼] button can also be used to tune down while
the A-1 and B-1 keys are held.
XRelease the A-1 and B-1 keys.
● Tuning Down...........................................................................................................................................
-1
A#
-1
A
TEMPO
3
C
3
B
ZTo tune down (lower pitch), hold the A-1 and A#-1 keys simultaneously and
press any key between C3 and B3. Each time a key in this range is pressed the
pitch is lowered by approximately 1.2 cents, up to a maximum of about 50 cents
below standard pitch. To lower the pitch in 1-hertz increments press the
TEMPO [▼] button instead of the C3-B3 keys. The TEMPO [▲] button can
also be used to tune up while the A-1 and A#-1 keys are held.
XRelease the A-1 and A#-1 keys.
● To Restore Standard Pitch* ...................................................................................................................
-1
A#
A-1B
3
-1
C
3
B
ZTo restore standard pitch (A3 = 440 Hz), hold the A-1, A#-1, and B-1 keys si-
multaneously and press any key between C3 and B3, or simultaneously press
the TEMPO [▲] and [▼] buttons.
XRelease the A-1, A#-1, and B-1 keys.
TEMPO
* Standard pitch (A3 = 440 Hz) is automatically set whenever the POWER
switch is initially turned on.
• The PITCH function does not affect the DRUMS sound.
NOTES
• The TEMPO [▲] and [▼] buttons allow two-speed scrolling: press lightly to scroll
through the values slowly, or press firmly to scroll rapidly.
■The Pitch Display
Example:
442 442.0...... 442.24
4.42 442.25.... 442.49
44.2 442.5...... 442.74
The approximate pitch of A3 is shown on the TEMPO display in Hertz while
the pitch control function is in operation. The total display range is from
approximately 427 hertz (-50 cents) to 453 hertz (+50 cents).
The dots to the right of each figure in the display are used to provide a general
idea of fractional pitches.
442. 442.75.... 442.99
○○○○○○○○○○○○○○○○○○○○○○○○○○○○○○○○○○○○○○○○○○○○○○○○○○○○○○○○○○○○○○○○○○○
Page 21

Accompaniment
K
F
K
C
W
K
The PDP-400 has 24 “styles” that can be used as a basis for rhythm accompaniment, or fully
orchestrated rhythm, bass, and chord accompaniment (see “Auto Bass Chord” on page 20).
• The Accompaniment Style data is not transmitted via the MIDI OUT connector.
NOTES
17
START/STOP
SYNCHRO
START
INTRO/ENDING
VARIATIONNORMAL
FILL TO NORMAL
FILL TO VARIATION
■Style Selection
POP
JAZZ
ROCK
SWING
JAZZ
BALLAD
DANCE
POP
POWER
HOUSE
BIG BAND
BOOGIE
16BEAT
BALLAD
16BEAT
POP
BOSSA
SAMBA
■Tempo Control
ROCK’N’
ROLL
16BEAT
SHUFFLE
CHA-CHA
RHUMBA
STYLE
AUTO ACCOMPANIMENT
RHYTHM
DEMO
REVERB
FOOT SWITCH
MAX
SOFT
ROOM
HALL 1
SOSTENUTO
MASTER VOLUME
HALL 2
START/STOP
MIDI/
COSMIC
SOLO STYLEPLAY
TRANSPOSE
MIN MAX
MIN
SLO
ROC
lector has two indicators and style names above it. These two styles are selected
ROC
SHU
alternately each time the selector is pressed.
MAR
POL
DANCE
16BEAT
POP
JAZZ
ROCK
SWING
JAZZ
BALLAD
BASS
CHORD 1
CHORD 2
MAX
MAX
MIN
MIN
POP
POWER
HOUSE
BIG BAND
BOOGIE
STYLE
AUTO BASS CHORD
SINGLE FINGERFULL KEYBOARD FINGERED
SYNCHRO
INTRO/ENDING
START/STOP
START
VARIATION NORMAL
BLUE-
DANCE
SLOW
16BEAT
ROCK’N’
SOLO
POP
GRASS
POP
ROCK
BALLAD
ROLL
STYLEPLAY
16BEAT
16BEAT
COUNTRY
ROCK
POWER
JAZZ
POP
SHUFFLE
SHUFFLE
SHUFFLE
HOUSE
ROCK
WALTZ
BIG BAND
BOSSA
CHA-CHA
MARCH
SWING
JAZZ
JAZZ
BOOGIE
SAMBA
RHUMBA
POLKA
BALLAD
WALTZ
BALLAD
16BEAT
POP
BOSSA
SAMBA
DISK
STYLE 1
METRONOME
DISK
TAP TEMPO
STYLE 2
BEAT
ROCK’N’
ROLL
16BEAT
SHUFFLE
CHA-CHA
RHUMBA
VOICE
CLAVINOVA
PIANO E.PIANO HARPSI VIBES GUITAR STRINGS SPLIT
TONE
1
234567
8
90
UPRIGHT
ELEC
ORGAN CHOIR
DRUMS VOICE 13-60
BASS
BASS
The 24 styles are selected using 12 STYLE selectors. Note that each style se-
The POP style is automatically selected when the power is initially turned on.
• There are also two [DISK STYLE] buttons that can be used to select styles
NOTES
loaded from floppy disk (the supplied Style Disk). See the “Disk Styles” section on
SLOW
ROCK
ROCK
SHUFFLE
MARCH
POLKA
BLUEGRASS
COUNTRY
SHUFFLE
WALTZ
JAZZ
WALTZ
DISK ORCHESTRA / PERFORMANCE MEMORY
SONG NUMBER
SONG
SELECT
/
START/STOP
DISK
STYLE 1
DISK
STYLE 2
PHRASE
GUIDE
REPEAT
RIGHT/1TR
LEFT/2TR ORCH/3-10TR RHYTHM
DISK CONTROL
CHORD
F F
REC
PAUSE
COPY
REW
SEQUENCE
BEAT
METRONOME
TAP TEMPO
FORMAT
page 23 for details.
• Use the RHYTHM volume control to adjust the volume of the rhythm sound.
86
TEMPO
Whenever you select a different style, the “suggested” tempo for that style is
also selected, and the tempo is displayed on the TEMPO display in quarter-note
beats per minute (unless the accompaniment is playing, in which case the same
tempo is maintained).
You can change the tempo to any value between 32 and 280 beats per minute,
however, by using the TEMPO [▲] and [▼] buttons. This can be done either before the accompaniment is started or while it is playing. Press either button briefly
to decrement or increment the tempo value by one, or hold the button for continuous decrementing or incrementing. Press lightly for slow, or harder for fast
decrementing or incrementing.
• The suggested tempo for the selected style can be recalled at any time by press-
NOTES
ing both the [▲] and [▼] buttons simultaneously.
Suggested Tempos
Style
POP 72
JAZZ ROCK 116
DANCE POP 132
POWER HOUSE 126
16BEAT BALLAD 72
16BEAT POP 108
ROCK’N’ROLL 160
16BEAT SHUFFLE 90
SLOW ROCK 72
ROCK SHUFFLE 192
BLUEGRASS 120
COUNTRY SHUFFLE
Suggested Tempo
116
Style
Suggested Tempo
SWING 208
JAZZ BALLAD 69
BIG BAND 176
BOOGIE 176
BOSSA 160
SAMBA 106
CHA-CHA 144
RHUMBA 120
MARCH 120
POLKA 120
WALTZ 100
JAZZ WALTZ 160
○○○○○○○○○○○○○○○○○○○○○○○○○○○○○○○○○○○○○○○○○○○○○○○○○○○○○○○○○○○○○○○○○○○
Page 22

18
Accompaniment
■Starting the Accompaniment
There are several ways to start the accompaniment:
● Straight Start...........................................................................................................................................
START/STOP
Press the [START/STOP] button.
Each of the styles also has a variation that can be selected by pressing the [VARIA-
TION/FILL T O VARIATION] button (its LED will light) before pressing the [START/
STOP] button. Normally the [NORMAL/FILL TO NORMAL] button LED will be lit (or
you can select it if the variation is selected), indicating that the normal pattern is selected.
Normal straight start
Variation straight start
NORMAL/FILL TO NORMAL
=
=
VARIATION/FILL TO VARIATION
START/STOP
START/STOP
● Start With an Introduction .....................................................................................................................
INTRO/ENDING
Intro start
Fill start to normal
Fill start to variation
Press the [INTRO/ENDING] button.
If you press the [NORMAL/FILL T O NORMAL] or [VARIATION/FILL TO VARI-
ATION] button while holding the [INTRO/ENDING] button, the rhythm will start with
an appropriate fill and then go to the normal rhythm or variation rhythm, respectively.
(Flashing)
=
INTRO/ENDING
=
INTRO/ENDING
=
INTRO/ENDING
START/STOP
(Flashing)
+
NORMAL/FILL TO NORMAL
(Flashing)
VARIATION/FILL TO VARIATION
+
START/STOP
START/STOP
The selected start mode can be disengaged prior to starting the accompaniment by
pressing the selected button (flashing indicator) a second time.
● Synchronized Start.................................................................................................................................
Any of the start types described above can be synchronized to the first note or chord
SYNCHRO
START
played on the keyboard by first pressing the [SYNCHRO START] button so that its indi-
cator lights. When the keyboard is split or Auto Bass Chord Single Finger or Fingered
mode is used, the first note played on the left-hand section of the keyboard will start the
accompaniment (i.e. keys to the left of and including the split-point key — normally F#2).
Once the synchronized start mode has been selected, use the [NORMAL/FILL T O NOR-
MAL], [VARIATION/FILL TO VARIATION] and/or [INTRO/ENDING] buttons to
select the type of start you want.
The first dot of the BEAT display will flash at the current tempo when a synchronized
start mode has been selected.
SYNCHRO START
Play key
Play key
Play key
+
NORMAL/FILL TO NORMAL
+
VARIATION/FILL TO VARIATION
Play key
Play key
Normal start
Variation start
Intro start
Fill start to normal
Fill start to variation
After pressing
NORMAL/FILL TO NORMAL
=
VARIATION/FILL TO VARIATION
=
=
INTRO/ENDING
=
INTRO/ENDING
=
INTRO/ENDING
The synchronized start mode can be cancelled by pressing the [SYNCHRO START]
button a second time so that its indicator goes out.
• The synchronized start mode is automatically turned on when one of the ABC modes is
NOTES
○○○○○○○○○○○○○○○○○○○○○○○○○○○○○○○○○○○○○○○○○○○○○○○○○○○○○○○○○○○○○○○○○○○
engaged — see page 20 for details.
Page 23

Accompaniment
● Tap start ..................................................................................................................................................
This function lets you set the tempo and start the rhythm in one operation. Sim-
METRONOME
120
TAP TEMPO
1st. Beat
2nd. Beat
3rd. Beat
4th. Beat
ply tap the [TAP] button at the required tempo — 3 times for a 3/4 style and 4
times for a 4/4 style. The rhythm will start from the beginning of the next measure
at the specified tempo.
• The [TAP] button can also be used to change the tempo during rhythm playback.
NOTES
In this case the “tap” click will not sound.
• If you tap the [TAP] button less than the required number of times (i.e. 3 or 4), the
tap tempo function will be cancelled after a few seconds.
● Measure Number
During rhythm playback the current measure number is shown on the TEMPO
display.
● The Beat Display
The four LED dots of the BEAT display provide a visual indication of the se-
lected tempo. The leftmost (red) dot flashes on the first beat of each measure,
the second dot flashes on the second beat, and so on (all dots except the
leftmost dot are green). When a 3/4-time rhythm is selected, only the first three
dots will flash.
19
■Fill-ins
The PDP-400 provides two types of automatic “fill-ins.”
FILL TO NORMAL
VARIATIONNORMAL
FILL TO VARIATION
■ Fill To Normal: Press the [NORMAL/FILL TO NORMAL] button during
playback to produce a fill-in and go to the normal rhythm.
■ Fill To Variation: Press the [VARIATION/FILL TO VARIATION] button
during playback to produce a fill-in and go to the variation pattern.
If you hold one of the FILL buttons, the fill-in will repeat until the end of the
measure in which button is released.
■Stopping the Accompaniment
The accompaniment can be stopped at any time by pressing the [START/
START/STOP
INTRO/ENDING
STOP] button. Press the [INTRO/ENDING] button if you want to go to the
ending pattern and then stop.
• If you started with an intro or fill-in, or using the SYNCHRO mode, these selec-
NOTES
• If the foot switch function is switched to START/STOP operation, it performs the
■Metronome
tions are maintained even after the accompaniment is stopped.
same function as the panel [START/STOP] buttons (press to START, press again
to STOP).
The PDP-400 also offers a metronome function that is ideal for practice.
To start the metronome, simply press the [METRONOME] button so that its
METRONOME
86
indicator lights. The metronome will play at the currently selected tempo whether a
style is playing or not. The metronome volume can be adjusted via the RHYTHM
volume control.
Press the [METRONOME] button again to stop the metronome sound (the
METRONOME indicator will go out). The metronome will also stop automatically if the [START/STOP] button is pressed to stop a style in progress.
• The metronome will not normally sound when a style is playing. If the style is
NOTES
○○○○○○○○○○○○○○○○○○○○○○○○○○○○○○○○○○○○○○○○○○○○○○○○○○○○○○○○○○○○○○○○○○○
started by pressing the [START/STOP] button while the metronome is playing,
however, the metronome will continue to sound along with the style.
Page 24

20
Auto Bass Chord (ABC)
The PDP-400 includes a sophisticated auto-
accompaniment system (Auto Bass Chord —
AUTO BASS CHORD
SINGLE FINGERFULL KEYBOARD
FINGERED
ABC) that can provide automated rhythm, bass
and chord backing in a number of ways.
AUTO ACCOMPANIMENT
BASS
RHYTHM
CHORD 1
DEMO
REVERB
FOOT SWITCH
MAX
MAX
SOFT
ROOM
HALL 1
SOSTENUTO
MASTER VOLUME
HALL 2
START/STOP
MIDI/
COSMIC
SOLO STYLEPLAY
TRANSPOSE
MIN MAX
MIN
MIN
STYLE
AUTO BASS CHORD
DANCE
16BEAT
SINGLE FINGERFULL KEYBOARD FINGERED
SYNCHRO
START
ROCK’N’
SOLO
POP
POP
BALLAD
ROLL
STYLEPLAY
16BEAT
16BEAT
POWER
JAZZ
POP
SHUFFLE
HOUSE
ROCK
INTRO/ENDING
SWING
BIG BAND
BOSSA
CHA-CHA
JAZZ
BOOGIE
SAMBA
RHUMBA
BALLAD
VARIATION NORMAL
CHORD 2
MAX
START/STOP
MIN
VOICE
BEAT
BLUE-
SLOW
GRASS
ROCK
DISK
COUNTRY
ROCK
SHUFFLE
MARCH
POLKA
CLAVINOVA
PIANO E.PIANO HARPSI VIBES GUITAR STRINGS SPLIT
STYLE 1
SHUFFLE
METRONOME
TONE
1
234567
WALTZ
8
90
UPRIGHT
TAP TEMPO
ELEC
ORGAN CHOIR
DRUMS VOICE 13-60
BASS
BASS
DISK
JAZZ
STYLE 2
WALTZ
DISK ORCHESTRA / PERFORMANCE MEMORY
SONG NUMBER
PHRASE
SONG
GUIDE
REPEAT
SELECT
/
START/STOP
F F
REC
PAUSE
RIGHT/1TR
LEFT/2TR ORCH/3-10TR RHYTHM
REW
■Single-finger Accompaniment
SINGLE FINGER accompaniment makes it simple to produce accompaniment using major, seventh, minor and minor-
seventh chords by pressing a minimum number of keys in the ABC section of the keyboard. The automatic accompaniment
consists of rhythm, bass and chords.
ZSelect SINGLE FINGER ..........................................................................................................................
SINGLE FINGER
XSelect a Style ..........................................................................................................................................
Press the [SINGLE FINGER] button to select the SINGLE FINGER mode
(the SINGLE FINGER indicator will light).
DISK CONTROL
CHORD
COPY
FORMAT
SEQUENCE
Select the desired accompaniment using the style selectors (see “Style Selec-
tion” on page 17).
CSet the Tempo.........................................................................................................................................
Use the TEMPO [▲] and [▼] buttons to set the desired accompaniment tempo
if necessary (see “Tempo Control” on page 17).
VPlay ..........................................................................................................................................................
Pressing any key on the ABC section of the keyboard (up to the split point —
normally the F#2 key) will cause the automatic chord and bass accompaniment to
C
Cm
C
Cm
7
7
begin (synchro start is automatically selected in the ABC mode). If you press a “C”
key, for example, a C-major accompaniment will be played. Press another key in
the ABC section of the keyboard to select a new chord. The key you press will
always determine the “root” of the chord played (i.e. “C” for a C chord) .
• Automatic synchro start switching can be enabled or disabled via the utility 1
NOTES
mode “Auto Synchro Start Switching” function, described on page 43.
● Playing Minor, Seventh, and Minor-seventh Chords in the Single-
finger Mode
• For a minor chord, press the root key and a black key to its left.
• For a seventh chord, press the root key and a white key to its left.
• For a minor-seventh chord, press the root key and both a white and black key
to its left.
BStop the Accompaniment ......................................................................................................................
Press the [START/STOP] or [INTRO/ENDING] button to stop the accompani-
START/STOP
INTRO/ENDING
○○○○○○○○○○○○○○○○○○○○○○○○○○○○○○○○○○○○○○○○○○○○○○○○○○○○○○○○○○○○○○○○○○○
ment.
• Press the [SINGLE FINGER] button so that its indicator goes out when you want
NOTES
to exit from the SINGLE FINGER mode.
Page 25

Auto Bass Chord (ABC)
■Fingered Accompaniment
The FINGERED mode is ideal if you already know how to play chords on a keyboard, since it allows you to supply
your own chords for the Auto Accompaniment feature.
ZSelect FINGERED ...................................................................................................................................
FINGERED
XSelect a Style ..........................................................................................................................................
CSet the Tempo.........................................................................................................................................
VPlay ..........................................................................................................................................................
Press the [FINGERED] button to select the FINGERED mode (the FIN-
GERED indicator will light).
Select an accompaniment style using the style selectors (see “Style Selection”
on page 17).
Use the TEMPO [▲] and [▼] buttons to set the desired accompaniment tempo
if necessary (see “Tempo Control” on page 17 for more details).
As soon as you play any chord (up to 4 notes) on the lower keyboard (up to the
split point — normally the F#2 key), the PDP-400 will automatically begin to play
the chord along with the selected rhythm and an appropriate bass line (synchro start
is automatically selected in the ABC mode*).
21
* Automatic synchro start switching can be enabled or disabled via the utility 1 mode “Auto
Synchro Start Switching” function, described on page 43.
The PDP-400 will accept the following chord 20 types:
• Major [M]
• Minor [m]
• Major seventh [M7]
• Sixth [6]
• Seventh [7]
• Minor sixth [m6]
• Minor seventh [m7]
• Minor major seventh [mM7]
• Minor seventh flatted fifth [m7-5]
• Minor flatted fifth [m-5]
• Major flatted fifth [M-5]
• Seventh flatted fifth [7-5]
• Major seventh flatted fifth [M7-5]
• Seventh suspended fourth [7sus4]
• Suspended fourth [sus4]
• Augmented [aug]
• Seventh sharp fifth [7+5]
• Major seventh sharp fifth [M7+5]
• Diminished [dim]
• Half diminished
(minor major seventh flatted fifth) [mM7-5]
● The [INTRO/ENDING], [NORMAL/FILL TO NORMAL], and [VARIA-
TION/FILL T O VARIATION] buttons can be used in the ABC mode to create
pattern variations in the same way that they are used with rhythm patterns (refer
to the “Accompaniment” section on page 18, 19 for details).
NORMAL/FILL TO NORMAL
Normal start
Variation start
Intro start
Fill start to normal
Fill start to variation
=
VARIATION/FILL TO VARIATION
=
=
INTRO/ENDING
=
INTRO/ENDING
=
INTRO/ENDING
+
NORMAL/FILL TO NORMAL
+
VARIATION/FILL TO VARIATION
Lower key
NOTES
• The automatic accompaniment will sometimes not
change when related chords are played in sequence
(e.g. some minor chords followed by the minor
seventh).
Lower key
Lower key
Lower key
Lower key
BStop the Accompaniment ......................................................................................................................
Press the [START/STOP] or [INTRO/ENDING] button to stop the accompani-
START/STOP
○○○○○○○○○○○○○○○○○○○○○○○○○○○○○○○○○○○○○○○○○○○○○○○○○○○○○○○○○○○○○○○○○○○
INTRO/ENDING
ment.
• Press the [FINGERED] button so that its indicator goes out when you want to exit
NOTES
from the FINGERED mode.
Page 26

22
Auto Bass Chord (ABC)
■Full-keyboard ABC
● Full-keyboard ABC
FULL KEYBOARD
● Conventional Full-
keyboard ABC
SINGLE FINGERFULL KEYBOARD FINGERED
■Volume Control
AUTO ACCOMPANIMENT
BASS
RHYTHM
MIDI/
TRANSPOSE
CHORD 1
CHORD 2
MAX
MAX
MAX
MIN
MIN
MIN
BASS
MAX
MIN
When this advanced auto-accompaniment mode is engaged (press the [FULL KEY-
BOARD] button so that its indicator lights) the PDP-400 will automatically create ap-
propriate accompaniment while you play just about anything, anywhere on the keyboard:
chords, a bass line, arpeggiated chords, a melody line. You don’t have to worry about
specifying the accompaniment chords. Although Full-keyboard ABC is designed to work
with many songs, some arrangements may not be suitable for use with this feature. Try
playing a few simple songs in the Full-keyboard ABC mode to get a feel for its capabilities.
• Chord detection occurs at approximately 8th-note intervals. Extremely short chords —
NOTES
less than an 8th note in length — may therefore not be detected.
The Conventional Full-keyboard ABC mode can be engaged by pressing the [SIN-
GLE FINGER] and [FINGERED] buttons simultaneously (both indicators will light).
In this mode the split point is de-activated and notes played anywhere on the keyboard
are detected and used to determine the harmonization of the accompaniment. In the Conventional Full-keyboard ABC mode, chord detection is possible when at least three notes
are played anywhere on the keyboard.
• The Dual or SPLIT mode can be used with Full-keyboard ABC.
NOTES
• The Full-keyboard and Conventional Full-keyboard ABC modes will be disengaged and
the Fingered mode will be engaged if Solo Styleplay is turned on.
• Solo Styleplay will automatically be turned off whenever the Full-keyboard or Conventional Full-keyboard ABC mode is engaged.
• Press the [FULL KEYBOARD] button so that its indicator goes out when you want to exit
from the FULL-KEYBOARD ABC mode. To exit from the Conventional Full-keyboard
ABC mode press the [SINGLE FINGER] or [FINGERED] button twice.
The RHYTHM, CHORD 1, CHORD 2, and BASS volume controls can be used to
adjust the volume of the corresponding accompaniment parts when using ABC. In general, CHORD 1 controls rhythmic chords while CHORD 2 controls more decorative
chords (arpeggios, etc.). The volume of the keyboard can be independently controlled by
using the BASS volume control while holding the [MIDI/TRANSPOSE] button.
• Some styles may not use all four parts: RHYTHM, CHORD 1, CHORD 2, and BASS.
NOTES
• Usually the CHORD 1 and CHORD 2 parts will not play simultaneously in the Fullkeyboard ABC mode to prevent possible conflict with the melody. The sound of the
silent part can be restored by changing the setting of the corresponding volume control
— CHORD 1 or CHORD 2.
■Changing the ABC Split Point
SINGLE FINGER
C3
The ABC split point can be set at any key by pressing the desired key while holding
the [SINGLE FINGER] or [FINGERED] button.
The default split point — F#2 — will always be set automatically whenever the
power is initially turned on.
■Special Modes
● Mute
● Minor Harmonization
○○○○○○○○○○○○○○○○○○○○○○○○○○○○○○○○○○○○○○○○○○○○○○○○○○○○○○○○○○○○○○○○○○○
Some accompaniment notes may be automatically muted if they interfere musically
with what is being played by the right hand. This mute function can be enabled or disabled via the Utility mode “Mute” function described on page 43. The mute function is
normally enabled (default).
When playing a 7th chord in a minor key, the ABC system will automatically shift a 9th
note down to the octave, and a 6th note to the 5th when the “Minor Harmonization” utility
function described on page 43 is turned on. The default setting for this function is off.
• Minor Harmonization will not function in the Full-keyboard ABC mode.
NOTES
Page 27

Disk Styles
A “Style Disk” is supplied with the PDP-400, providing an extra 50 ABC accompaniment styles. Any
two of these patterns can be loaded into the PDP400’s memory at a time. The [DISK STYLE 1] and
[DISK STYLE 2] buttons select the loaded disk
styles in the same way as the STYLE selectors
select the internal styles.
• If no disk styles are loaded as described below, the
NOTES
[DISK STYLE 1] and [DISK STYLE 2] buttons select
pre-programmed disk styles contained in internal
AUTO ACCOMPANIMENT
AUTO BASS CHORD
BASS
RHYTHM
CHORD 1
CHORD 2
DEMO
REVERB
ROOM
HALL 1
MASTER VOLUME
HALL 2
MIDI/
COSMIC
TRANSPOSE
MIN MAX
SINGLE FINGERFULL KEYBOARD FINGERED
FOOT SWITCH
MAX
MAX
MAX
SYNCHRO
INTRO/ENDING
START/STOP
START
SOFT
SOSTENUTO
START/STOP
SOLO STYLEPLAY
VARIATION NORMAL
MIN
MIN
MIN
ROM memory. These are the default styles selected
by the [DISK STYLE 1] and [DISK STYLE 2] buttons
whenever the power is initially turned on.
■Selecting & Loading Disk Styles
ZInsert the Style Disk ...............................................................................................................................
Insert the Style Disk into the disk drive with the sliding door on the disk facing
the drive slot and the label side facing upward. The disk should click into place and
the disk lamp will light briefly while the PDP-400 reads and identifies the disk.
DISK
STYLE 1
SONG NUMBER
888
DISK
STYLE 2
STYLE
DANCE
16BEAT
ROCK’N’
SOLO
POP
POP
BALLAD
ROLL
STYLEPLAY
16BEAT
16BEAT
POWER
JAZZ
POP
SHUFFLE
HOUSE
ROCK
BIG BAND
BOSSA
CHA-CHA
SWING
JAZZ
BOOGIE
SAMBA
RHUMBA
BALLAD
VOICE
BEAT
BLUE-
SLOW
GRASS
ROCK
DISK
ROCK
COUNTRY
CLAVINOVA
PIANO E.PIANO HARPSI VIBES GUITAR STRINGS SPLIT
STYLE 1
SHUFFLE
SHUFFLE
METRONOME
TONE
1
WALTZ
MARCH
JAZZ
POLKA
WALTZ
234567
8
90
UPRIGHT
TAP TEMPO
ELEC
ORGAN CHOIR
DRUMS VOICE 13-60
BASS
BASS
DISK
STYLE 2
DISK ORCHESTRA / PERFORMANCE MEMORY
SONG NUMBER
PHRASE
SONG
GUIDE
REPEAT
SELECT
/
START/STOP
LEFT/2TR ORCH/3-10TR RHYTHM
RIGHT/1TR
REW
23
DISK CONTROL
CHORD
REC
F F
PAUSE
COPY
FORMAT
SEQUENCE
XMake Sure the [SONG SELECT] Indicator Is Lit ..................................................................................
SONG
SELECT
The [SONG SELECT] indicator will light automatically when the disk is
ready. If a disk is already loaded and the [SONG SELECT] indicator is not lit,
press the [SONG SELECT] button so that it lights. When this is done the [DISK
STYLE 1] and [DISK STYLE 2] button indicators will flash alternately, and the
single-finger ABC mode and synchronized start mode will be engaged (any other
ABC mode will remain active if it was selected before the disk was loaded).
CSelect a Style ..........................................................................................................................................
Use the [▲] and [▼] buttons below the SONG NUMBER display to select the
SONG NUMBER
desired style number. The selected style number will appear on the SONG
NUMBER display — “A1” for example. You can “preview” the selected style by
A2
playing on the left-hand section of the keyboard (single-finger or fingered). Pattern
playback will stop if a different pattern number is selected.
• If a tempo is set prior to loading the style, that tempo becomes the default for the
NOTES
loaded style.
VLoad the Style .........................................................................................................................................
DISK
STYLE 1
DISK
STYLE 2
Press the [DISK STYLE 1] or [DISK STYLE 2] button to load the selected
pattern into that button. The [DISK STYLE 1] or [DISK STYLE 2] indicator will
light, and the [SONG SELECT] indicator will go out.
BRepeat......................................................................................................................................................
Repeat steps X through V to select and load a second pattern into the other
[DISK STYLE] button if you like.
NEject the Disk When Done .....................................................................................................................
When you’ve finished with the Style Disk, press the disk drive EJECT button
to remove it.
○○○○○○○○○○○○○○○○○○○○○○○○○○○○○○○○○○○○○○○○○○○○○○○○○○○○○○○○○○○○○○○○○○○
Page 28

24
Disk Styles
Disk Style List
Group No. Name
ROCK 5 COUNTRY ROCK
DANCE POP
1 HARD ROCK
2 ROCK’N’ROLL 2
3 ROCKABILLY
460’S ROCK
6 RHYTHM & BLUES
7 SOUL ROCK
8 ROCK BALLAD
9 GOSPEL
10 GOSPEL BALLAD
11 8BEAT
12 FOLK
POP
JAZZ 24 RAGTIME
13 LULLABY
14 16BEAT BALLAD
15 16BEAT SHUFFLE 2
16 16BEAT SHUFFLE 3
17 8BEAT DANCE
18 16BEAT DISCO
19 HOUSE POP
20 TECHNO POP
21 BOOGIE 2
22 STRIDE PIANO
23 DIXIELAND
25 OLD TIME SWING
26 CONTEMPORARY JAZZ
27 BIG BAND 2
Group No. Name
28 BOSSA 2
29 POP BOSSA
LATIN
STANDARD 36 FOXTROT
WALTZ
WORLD
30 SAMBA
31 TANGO
32 MAMBO
33 LATIN POP
34 BROADWAY
35 SHOWTIME
37 SLOW FOX
38 MARCH 6/8
39 WALTZ 2
40 VIENNESE WALTZ
41 SWING WALTZ
42 LATIN WALTZ
43 CHANSON
44 BOLERO
45 BLUEGRASS 2
46 COUNTRY SHUFFLE 2
47 JAPANESE BALLAD
48 SEVILLIANAS
49 CARIBBEAN
50 REGGAE
■Using a Loaded Disk Style
DISK
STYLE 1
DISK
STYLE 2
SONG NUMBER
A2
After you’ve loaded the desired Disk Styles, the [DISK STYLE 1] and [DISK
STYLE 2] buttons can be used in exactly the same way as the other STYLE but-
tons to select the loaded patterns for ABC accompaniment (see “Auto Bass Chord
(ABC)” beginning on page 20).
The number of the Disk Style selected by the [DISK STYLE 1] or [DISK
STYLE 2] button will be shown on the SONG NUMBER display.
○○○○○○○○○○○○○○○○○○○○○○○○○○○○○○○○○○○○○○○○○○○○○○○○○○○○○○○○○○○○○○○○○○○
Page 29

Solo Styleplay
This sophisticated feature not only provides automatic rhythm, bass and chord accompaniment, but it
also adds appropriate harmony notes (two or three
harmonized notes) to a melody you play on the upper
keyboard.
SOLO
STYLEPLAY
25
AUTO ACCOMPANIMENT
BASS
RHYTHM
CHORD 1
DEMO
REVERB
FOOT SWITCH
MAX
MAX
SOFT
ROOM
HALL 1
SOSTENUTO
MASTER VOLUME
HALL 2
START/STOP
MIDI/
COSMIC
SOLO STYLEPLAY
TRANSPOSE
MIN MAX
MIN
MIN
STYLE
AUTO BASS CHORD
DANCE
16BEAT
SINGLE FINGERFULL KEYBOARD FINGERED
SYNCHRO
START
ROCK’N’
SOLO
POP
POP
BALLAD
ROLL
STYLEPLAY
16BEAT
16BEAT
POWER
JAZZ
POP
SHUFFLE
HOUSE
ROCK
INTRO/ENDING
SWING
BIG BAND
BOSSA
CHA-CHA
JAZZ
BOOGIE
SAMBA
RHUMBA
BALLAD
VARIATION NORMAL
CHORD 2
MAX
START/STOP
MIN
VOICE
BEAT
BLUE-
SLOW
GRASS
ROCK
DISK
COUNTRY
ROCK
SHUFFLE
SHUFFLE
WALTZ
MARCH
JAZZ
POLKA
WALTZ
CLAVINOVA
PIANO E.PIANO HARPSI VIBES GUITAR STRINGS SPLIT
STYLE 1
METRONOME
TONE
1
234567
8
90
UPRIGHT
TAP TEMPO
ELEC
ORGAN CHOIR
DRUMS VOICE 13-60
BASS
BASS
DISK
STYLE 2
DISK ORCHESTRA / PERFORMANCE MEMORY
SONG NUMBER
PHRASE
SONG
GUIDE
REPEAT
SELECT
/
START/STOP
RIGHT/1TR
LEFT/2TR ORCH/3-10TR RHYTHM
REW
■Using Solo Styleplay
ZTurn Solo Styleplay ON..........................................................................................................................
Press the [SOLO STYLEPLAY] button to turn the SOLO STYLEPLAY mode
SOLO
STYLEPLAY
XSelect a Style ..........................................................................................................................................
CSet the Tempo.........................................................................................................................................
VPlay ..........................................................................................................................................................
BStop the Accompaniment ......................................................................................................................
on. The SINGLE FINGER mode is automatically selected when SOLO
STYLEPLAY is turned on, unless the FINGERED mode is already selected. If a
FULL KEYBOARD mode is selected, the FINGERED mode will automatically
be selected since Solo Styleplay cannot be used with the FULL KEYBOARD
modes.
Select an accompaniment style using the style selectors (see “Style Selection”
on page 17). An appropriate voice for the selected style will automatically be selected, but you can also select any other voice after selecting the style.
Set the desired tempo if necessary using the TEMPO [▲] and [▼] buttons (see
“Tempo Control” on page 17).
Play the required chords (SINGLE FINGER or FINGERED) on the ABC
section of the keyboard while playing a melody line on the upper keyboard (for
some styles, only one note can be played at a time on the right-hand section of the
keyboard in the Solo Styleplay mode).
Press [START/STOP] or [INTRO/ENDING] to stop the accompaniment.
DISK CONTROL
CHORD
F F
REC
COPYPAUSE
FORMAT
SEQUENCE
NTurn Solo Styleplay OFF........................................................................................................................
Press the [SOLO STYLEPLAY] button again to turn the function off.
■Harmonization V ariations
SOLO
STYLEPLAY
POP
JAZZ
ROCK
SWING
JAZZ
BALLAD
DANCE
POP
POWER
HOUSE
BIG BAND
BOOGIE
16BEAT
BALLAD
16BEAT
POP
BOSSA
SAMBA
It is possible to apply the harmonization type and voice from a different style to
the selected style by pressing the style selector corresponding to the harmonization
type you want to use (except for the [DISK STYLE 1/2] selector) while holding the
[SOLO STYLEPLAY] button — the selected STYLE button indicator will flash
while the [SOLO STYLEPLAY] button is held. This makes it possible, for exam-
ple, to use the solo styleplay harmonization type and voice from the 16 BEAT
BALLAD style when actually playing in the POP style.
■The Foot Switch & Solo Styleplay
FOOT SWITCH
SOFT
SOSTENUTO
START/STOP
SOLO STYLEPLAY
○○○○○○○○○○○○○○○○○○○○○○○○○○○○○○○○○○○○○○○○○○○○○○○○○○○○○○○○○○○○○○○○○○○
If the FOOT SWITCH function is set to SOLO STYLEPLAY after the
SOLO STYLEPLAY mode is selected, harmonization of notes played on the right-
hand section of the keyboard only occurs while the FOOT SWITCH pedal is
pressed. This allows you to combine normal ABC type performance with SOLO
STYLEPLAY as required.
The FOOT SWITCH SOSTENUTO function can not be selected while SOLO
STYLEPLAY is on.
• The SOLO STYLEPLAY mode will be disengaged if the ABC FINGERED or
NOTES
SINGLE FINGER mode is turned off or the FULL KEYBOARD ABC mode is
turned on.
Page 30

26
Disk Orchestra
Using Yamaha Disk Orchestra disks (one is supplied with the PDP-400, others are available from Yamaha),
the PDP-400 will let you enjoy listening to automated performances, or function as your “private music tutor,”
allowing you to practice various par ts of a piece while the others are played automatically. You can also play “in
ensemble” with the complete Disk Orchestra arrangement.
• The Disk Orchestra Collection playback data is not transmitted via the MIDI OUT
NOTES
connector.
SONG NUMBER
SONG
SELECT
/
START/STOP
AUTO ACCOMPANIMENT
AUTO BASS CHORD
BASS
RHYTHM
CHORD 1
CHORD 2
DEMO
REVERB
ROOM
HALL 1
MASTER VOLUME
HALL 2
MIDI/
COSMIC
TRANSPOSE
MIN MAX
SINGLE FINGERFULL KEYBOARD FINGERED
FOOT SWITCH
MAX
MAX
MAX
SYNCHRO
START/STOP
START
SOFT
SOSTENUTO
START/STOP
SOLO STYLEPLAY
MIN
MIN
MIN
PHRASE
REPEAT
RIGHT/1TR
STYLE
BLUE-
DANCE
SLOW
16BEAT
ROCK’N’
SOLO
POP
GRASS
POP
ROCK
BALLAD
ROLL
STYLEPLAY
16BEAT
16BEAT
COUNTRY
ROCK
POWER
JAZZ
POP
SHUFFLE
SHUFFLE
SHUFFLE
HOUSE
ROCK
INTRO/ENDING
BIG BAND
BOSSA
CHA-CHA
MARCH
SWING
WALTZ
JAZZ
JAZZ
BOOGIE
SAMBA
RHUMBA
POLKA
BALLAD
VARIATION NORMAL
WALTZ
GUIDE
LEFT/2TR ORCH/3-10TR RHYTHM
VOICE
BEAT
DISK
CLAVINOVA
PIANO E.PIANO HARPSI VIBES GUITAR STRINGS SPLIT
STYLE 1
METRONOME
TONE
1
234567
8
90
UPRIGHT
TAP TEMPO
ELEC
ORGAN CHOIR
DRUMS VOICE 13-60
BASS
BASS
DISK
STYLE 2
REW
DISK ORCHESTRA / PERFORMANCE MEMORY
SONG NUMBER
PHRASE
SONG
GUIDE
REPEAT
SELECT
/
START/STOP
RIGHT/1TR
LEFT/2TR ORCH/3-10TR RHYTHM
DISK CONTROL
CHORD
F F
REC
PAUSE
COPY
REW
SEQUENCE
F F
FORMAT
PAUSE
■Automatic Performance
ZInsert a Disk Orchestra Disk..................................................................................................................
Insert the DISK ORCHESTRA disk into the disk drive with the sliding door
facing the drive slot and the label side facing upward. The disk should click into
place and the disk lamp will light briefly while the PDP-400 reads and identifies
the disk.
• If a disk is already loaded and the [SONG SELECT] indicator is out, press the
DISK ORCHESTRA / PERFORMANCE MEMORY
NOTES
XSelect a Song Number ...........................................................................................................................
When the disk is inserted the [SONG SELECT], [RIGHT/1TR], [LEFT/
SONG NUMBER
2
2TR], [ORCH/3-10TR], and [RHYTHM] indicators will light if the corresponding tracks contain performance data, and the selected song number will be shown
on the SONG NUMBER display. Use the [▲] and [▼] buttons below the display
to select the desired song number. Select “ALL” if you want all songs on the disk
to be played and repeated until playback is stopped.
[SONG SELECT] button so that the indicator lights before proceeding.
• You can also start sequential repeat playback by using the [▲] and [▼] buttons to
NOTES
select the song number from which playback is to begin, and then pressing the
[START/STOP] button while holding the [MIDI/TRANSPOSE] button.
• The songs can be made to play back and repeat either in sequence or in random
order when “
ALL
” is selected or when starting playback by pressing the [START/
STOP] button while holding the [MIDI/TRANSPOSE] button, and playback is
started, depending on the setting of the “Random All Song Repeat” utility function
(page 43).
CStart Playback.........................................................................................................................................
Start playback of the selected song by pressing either the DISK ORCHES-
/
START/STOP
START/STOP
○○○○○○○○○○○○○○○○○○○○○○○○○○○○○○○○○○○○○○○○○○○○○○○○○○○○○○○○○○○○○○○○○○○
TRA/PERFORMANCE MEMORY [START/STOP] button or the ABC
[START/STOP] button. Unless “ALL” is selected, the selected song will play
through to the end and playback will stop automatically. The current measure
number will be shown on the TEMPO display during playback, and the voice indicator used for the RIGHT/1TR and LEFT/2TR parts will light. The voice can be
changed as required via the VOICE selectors.
Playback can be stopped at any time by pressing the DISK ORCHESTRA/
PERFORMANCE MEMORY or ABC [START/STOP] button.
Page 31

Disk Orchestra
• Please note that playback cannot be started while the PDP-400 is searching the
NOTES
VEject the Disk When Done .....................................................................................................................
When you’ve finished with the currently loaded disk, simply press the disk
drive EJECT button to remove it.
disk for a selected song.
• With some songs the displayed measure numbers may not match those marked
on the score.
• Some songs start after a click count-in.
• The playback tempo can be changed freely as required. The preset tempo for the
selected song can be recalled at any time by pressing the TEMPO [▲] and [▼]
buttons simultaneously.
• During “
• Some Disk Orchestra software does not produce a tempo display (e.g. free-
ALL
” playback three dots will appear along the bottom of the currently-
playing song number.
tempo phrases, etc.). In this case, three lit bars appear along the bottom of the
TEMPO display and the numbers shown on the display will not match the actual
measure numbers of the song.
27
CAUTION
NEVER eject a disk or turn the power off while:
1. The disk drive lamp is on.
2. The DISK ORCHESTRA function is playing.
■Playing Back only Specific Parts
The [RIGHT/1TR], [LEFT/2TR], [ORCH/3-10TR], and [RHYTHM] buttons
RIGHT/1TR LEFT/2TR ORCH/3-10TR RHYTHM
57 10
B5 C6 D6 E6 F6
98643
can be used to select playback of specific parts. The [LEFT/2TR] button turns the
left-hand part on or off, the [RIGHT/1TR] button turns the right-hand part on or
off, the [ORCH/3-10TR] button turns the ORCHESTRA parts on or off, and the
[RHYTHM] button turns the rhythm part on or off. When a part is on, the corresponding LED indicator lights. You can, for example, turn off the right and/or lefthand parts so you can practice them on the keyboard.
● Turning Individual Orchestra Parts On or Off
Normally the [ORCH/3-10TR] buttons turns all the orchestra parts (tracks 3
through 10) on or off at once. You can, however, turn these parts on or off individually by pressing the keys shown in the illustration to the left while holding
the [ORCH/3-10TR] button:
Press the key once to display the status of the corresponding track on the SONG
NUMBER display, and a second to turn the track on or off. The status of the
track is indicated by a dot to the right of the rightmost digit:
t10.
.......
No dot .............No data
Flashing dot ....Playback off
Lit dot .............. Playback on
○○○○○○○○○○○○○○○○○○○○○○○○○○○○○○○○○○○○○○○○○○○○○○○○○○○○○○○○○○○○○○○○○○○
Page 32

28
Disk Orchestra
■Volume Control
RHYTHM Drum and Percussion parts
(track 15).
BASS Bass part (track 3).
CHORD 1 Other backing parts except
Bass (track 4-10).
CHORD 2 Main left- and right-hand parts
(track 1 & 2).
During DISK ORCHESTRA playback use the RHYTHM volume control
to adjust the volume of the drum and percussion parts, the CHORD 2 volume
control adjusts the volume of the main left- and right-hand parts, the CHORD
1 volume control adjusts the volume of all other parts except the bass, and the
BASS control adjusts the volume of the bass part.
• When a different song is selected the volume settings will correspond to
NOTES
those in the song data, regardless of the positions of the volume controls.
■Guided Right- and Left-hand Practice
With this feature, the PDP-400 waits for you to play the appropriate keys
before playing ahead, so you can learn to play the piece at your own pace.
Press the [GUIDE] button so that its indicator lights to turn the guide mode
on. The settings of the [RIGHT/1TR] and [LEFT/2TR] buttons will then determine whether the guide function operates for the left-hand part only, the righthand part only, or both the right- and left-hand parts, as listed to the left.
When you press the [START/STOP] button to begin playback, the introduc-
tion will play automatically but then the PDP-400 will stop and wait for you to
play the next key(s). As you play the appropriate keys, the piece will continue,
pausing until you play the right keys each time.
As with automated performance, the song will stop automatically when the
end is reached, or it can be stopped at any time by pressing the [START/STOP]
button.
After turning on...
Left- and right-hand guide =
Right-hand guide only
Left-hand guide only =
=
GUIDE
RIGHT/1TR LEFT/2TR
or
RIGHT/1TR LEFT/2TR
RIGHT/1TR LEFT/2TR
RIGHT/1TR LEFT/2TR
• Disk Orchestra playback tempo can be set to any desired value after a song
NOTES
has been selected by using the TEMPO [▲] and [▼] buttons.
• The [PAUSE], [REW] and [FF] buttons will not operate when the guide function is in use.
● Guide Modes ...........................................................................................................................................
The PDP-400 has two guide modes which can be selected as follows:
-1
A
GUIDE
-1
B
GUIDE
● Normal Wait:
This mode is automatically selected when the power is turned on. It can also
be selected by pressing the A-1 key (the lowest key) while holding the
[GUIDE] button.
In the normal wait mode the PDP-400 will wait until the appropriate key or
chord is played before proceeding to the next note.
● Delayed Wait:
This mode can be selected by pressing the B-1 key (the second-to-lowest
white key) while holding the [GUIDE] button.
In the delayed wait mode the PDP-400 will play ahead for 8 quarter-note
beats (two measures in 4/4 time) and then wait until the appropriate key or
chord is played.
○○○○○○○○○○○○○○○○○○○○○○○○○○○○○○○○○○○○○○○○○○○○○○○○○○○○○○○○○○○○○○○○○○○
Page 33

Disk Orchestra
■Repeat Functions
● Phrase Repeat
Use this function if you want to practice a specific phrase within a song, as indicated by the phrase marks on the
Disk Orchestra Collection score.
ZSelect a Song ..........................................................................................................................................
SONG NUMBER
2
XTurn Phrase Repeat ON and Select a Phrase Number........................................................................
Press the [SONG SELECT] button so that its indicator lights and select the
desired song by using the [▲] and [▼] buttons below the SONG NUMBER display.
29
SONG NUMBER
P81
PHRASE
REPEAT
Press the [PHRASE REPEAT] button (its LED indicator will light). When this
is done the SONG NUMBER display will function as the phrase number display.
Use the [▲] and [▼] buttons below the display to select the desired phrase number
(refer to the DISK ORCHESTRA COLLECTION book that comes with the DISK
ORCHESTRA COLLECTION disk).
CSelect a Part to Practice.........................................................................................................................
RIGHT/1TR LEFT/2TR ORCH/3-10TR RHYTHM
Use the [RIGHT/1TR], [LEFT/2TR], [ORCH/3-10TR], and [RHYTHM]
buttons to turn playback of the various parts on or off, as required.
VStart Playback.........................................................................................................................................
/
START/STOP
Press the [START/STOP] button to begin playback of the selected phrase.
Phrase playback will repeat until the [START/STOP] button is pressed a second
time.
• The count-in may not sound with some songs — e.g. those that do not include a
NOTES
rhythm track.
● A-B Repeat
This function allows you to specify any section of a DISK ORCHESTRA song for continuous repeat playback.
MIDI/
TRANSPOSE
PHRASE
REPEAT
PHRASE
REPEAT
+
While the song is playing, hold the [MIDI/TRANSPOSE] and press the
[PHRASE REPEAT] button once at the beginning of the section to be repeated
(the “A” point) and again at the end of the section to be repeated (the “B” point).
Repeat playback will begin automatically from the A point as soon as the B point
“A” point “B” point
has been specified. The programmed A and B points are retained until a different
song number or mode is selected, and the A-B phrase can be selected again for
repeat playback after playback has been stopped by following the Phrase Repeat
SONG NUMBER
A8b
○○○○○○○○○○○○○○○○○○○○○○○○○○○○○○○○○○○○○○○○○○○○○○○○○○○○○○○○○○○○○○○○○○○
procedure described above and selecting “A-b” instead of a phrase number in step
X.
• The specified A-B repeat points will be erased when a new song number is se-
NOTES
lected.
Page 34

30
Disk Orchestra
■Other Playback Controls
● Pause .......................................................................................................................................................
PAUSE
● Rewind and Fast Forward......................................................................................................................
REW
F F
● Pedal Pause/Next Phrase.......................................................................................................................
FOOT SWITCH
SOFT
SOSTENUTO
START/STOP
SOLO STYLEPLAY
Press the [oPAUSE] button to temporarily stop DISK ORCHESTRA playback.
Press the [oPAUSE] button again (or the [START/STOP] button) to resume play-
back from the same point.
During DISK ORCHESTRA operation the [r REW] and [f FF] buttons func-
tion as follows:
■ While playback is stopped or paused the [r REW] and [f FF] buttons can be
used to step backward or forward through the song a measure at a time. Either button can also be held for continuous stepping in the specified direction.
■ During playback the [r REW] and [f FF] buttons allow you to move rapidly in
the specified direction for as long as the button is held. No sound is produced during [r REW] operation.
• Using the [rREW] button may cause the voice, tempo, and/or volume to change.
NOTES
• The [oPAUSE], [rREW] and [fFF] buttons do not function while a guide mode is
engaged.
If the FOOT SWITCH pedal is set for START/STOP operation using the [FOOT
SWITCH] button, it functions as a pause/next phrase control during DISK ORCHES-
TRA playback: press once to pause, and again to continue from the beginning of the
next phrase (refer to the DISK ORCHESTRA COLLECTION book that comes with
the DISK ORCHESTRA COLLECTION disk for phrase locations).
• The pedal pause/next phrase function will not operate if the guide, phrase repeat, or
NOTES
all songs repeat modes are active.
■DISK ORCHESTRA COLLECTION Disk Copy
The [ORCH/3-10TR] and [RHYTHM] parts of songs from DISK ORCHESTRA COLLECTION disks — the disk
supplied with the PDP-400 and others available from Yamaha — can be copied to separate disks by following the
“Copying Disk Orchestra Disks” instructions given on page 39 of the “Disk Control” section. Data copied in this way
can be played back and manipulated via the Performance Memory (page 31) — you can, for example, record your own
[RIGHT/1TR] and [LEFT/2TR] parts.
• Disk Orchestra Collection phrase marks are not copied.
NOTES
■Playing Other Types of Music Data
In addition to Disk Orchestra Collection disks, the PDP-400 can also play back Yamaha Disklavier PianoSoft™ disks, disks
containing Yamaha ESEQ format sequence data, and disks containing songs recorded in Standard MIDI File format (format 0 only).
It is possible to change the track 1/2 voice by using the panel voice selectors during playback of Disk Orchestra Collection
and Disklavier PianoSoft disks. In this case the playback voice will become the same as the voice played via the keyboard. The
playback voice cannot be changed when playing back other type of disks (the keyboard voice can be changed).
The phrase repeat function described above can only be used with Disk Orchestra Collection disks. A-B repeat can be used
with any type of data. The guide function can only be used with ESEQ files.
The [ORCH/3-10TR] part select button can also be used with all types of data: with files other than General MIDI files it
turns tracks 3 through 14 on or off, and with General MIDI Files it turns tracks 3 through 9 and 11 through 16 on or off. The
[RHYTHM] button can be used to turn track 15 on and off with file types other than General MIDI (with General MIDI files the
[RHYTHM] button turns track 10 on and off). With any type of file the individual tracks (1 through 16) can be turned on and off
as described on page 27 — tracks 11 through 16 are controlled by keys G6 through C7, respectively.
When playing files other than General MIDI files the Auto Accompaniment volume controls affect the following tracks (the
volume of General MIDI format tracks cannot be controlled):
BASS Track 3
CHORD 2 Tracks 1 & 2
CHORD 1 Tracks 4 … 14
RHYTHM Track 15
○○○○○○○○○○○○○○○○○○○○○○○○○○○○○○○○○○○○○○○○○○○○○○○○○○○○○○○○○○○○○○○○○○○
When playing General MIDI Files the PDP-400’s internal tone generator is auto-
matically switched to the GM System Level 1 voice allocation.
Page 35

Performance Memory
The PDP-400 features a built-in “sequencer” which can be used to independently record up to ten separate
parts of a single musical composition, plus a rhythm track. Each part is recorded on one of the Performance
Memory “tracks” accessed via the [RIGHT/1TR], [LEFT/2TR], [ORCH/3-10TR], and [RHYTHM] buttons. The
music data that you record is stored on a 3.5" floppy disk loaded into the PDP-400’s disk drive unit. Up to approximately 60 songs can be recorded on a single disk, depending on the amount of data contained in each
song. Before you can record, however, you must “format” a new disk, as described on page 38.
• The Performance Memory playback data is not transmitted via the MIDI OUT connector.
NOTES
31
SONG NUMBER
SONG
SELECT
/
START/STOP
MASTER VOLUME
MIN MAX
PHRASE
REPEAT
RIGHT/1TR
AUTO ACCOMPANIMENT
AUTO BASS CHORD
BASS
RHYTHM
CHORD 1
CHORD 2
DEMO
REVERB
FOOT SWITCH
MAX
MAX
MAX
START/STOP
SOFT
ROOM
HALL 1
SOSTENUTO
HALL 2
START/STOP
MIDI/
COSMIC
SOLO STYLEPLAY
TRANSPOSE
MIN
MIN
MIN
GUIDE
LEFT/2TR ORCH/3-10TR RHYTHM
SINGLE FINGERFULL KEYBOARD FINGERED
SYNCHRO
START
STYLE
DANCE
16BEAT
ROCK’N’
SOLO
POP
POP
BALLAD
ROLL
STYLEPLAY
16BEAT
16BEAT
POWER
JAZZ
POP
SHUFFLE
HOUSE
ROCK
INTRO/ENDING
SWING
BIG BAND
BOSSA
CHA-CHA
JAZZ
BOOGIE
SAMBA
RHUMBA
BALLAD
VARIATION NORMAL
VOICE
BEAT
BLUE-
SLOW
GRASS
ROCK
DISK
COUNTRY
ROCK
SHUFFLE
MARCH
POLKA
CLAVINOVA
PIANO E.PIANO HARPSI VIBES GUITAR STRINGS SPLIT
STYLE 1
SHUFFLE
METRONOME
TONE
1
234567
WALTZ
8
90
DISK
JAZZ
ORGAN CHOIR
TAP TEMPO
STYLE 2
WALTZ
CHORD
REW
DISK ORCHESTRA / PERFORMANCE MEMORY
SONG NUMBER
SONG
SELECT
UPRIGHT
ELEC
DRUMS VOICE 13-60
BASS
BASS
/
START/STOP
RIGHT/1TR
F F
PHRASE
GUIDE
REPEAT
LEFT/2TR ORCH/3-10TR RHYTHM
DISK CONTROL
CHORD
REC
F F
PAUSE
COPY
FORMAT
REW
SEQUENCE
RECPAUSE
SEQUENCE
Easy One-pass Recording & Playback
ZInsert a Formatted Disk..........................................................................................................................
If you haven’t already done so, make sure that a properly formatted disk is loaded
into the PDP-400 disk drive (see page 38), and that the disk’s write protect tab is set to
the “write” position (tab closed).
DISK ORCHESTRA / PERFORMANCE MEMORY
• If you insert an unformatted disk, “
NOTES
Please format the disk before proceeding.
• If a disk is already loaded and the [SONG SELECT] indicator is out, press the [SONG
SELECT] button so that the indicator lights before proceeding.
For
” will appear on the SONG NUMBER display.
XSelect a Song Number ...........................................................................................................................
Select a SONG NUMBER between 1 and 60 for the piece you are about to record
SONG NUMBER
1
(up to 60 different songs, each with a different song number, can be recorded on a
single disk). Make sure the song number you select has not already been used for a
song previously recorded on the disk you are using.
• If the [RIGHT/1TR], [LEFT/2TR], [ORCH/3-10TR], or [RHYTHM] button indicator
NOTES
glows green when a song number is selected, the corresponding track of the selected
song already contains recorded data. Before recording over a song that contains
previous data, we recommend that you delete the entire song as described in “Delet-
ing a Song” on page 40.
CSelect a Voice .........................................................................................................................................
Use the VOICE selectors to select the voice you want to record with. You can try
out the selected voice on the keyboard before proceeding.
VEngage the Record Ready Mode...........................................................................................................
REC
SONG NUMBER
680
Press the [REC] button so that its indicator lights. The [RIGHT/1TR] indicator
should also glow red at this point, indicating that you are ready to record on track 1.
● Remaining Disk Space Display
When you release the [REC] button the amount of disk space available for recording will appear on the SONG NUMBER display (in approximate kilobytes). With
an empty disk you should have about 700 kilobytes of space for recording (room
enough for about 50,000 notes if no other PDP-400 functions are used). If no space
is available for recording, “FUL” will appear on the display.
○○○○○○○○○○○○○○○○○○○○○○○○○○○○○○○○○○○○○○○○○○○○○○○○○○○○○○○○○○○○○○○○○○○
 Loading...