

Page 1

TOOLS for n/Cubase AI4
TOOLS for n/Cubase AI4
EnglishDeutschFrançaisEspañol
EN
DE
FR
ES
Page 2

About the Disks Included in the Package..................................... 3
Operating System (OS)................................................................. 3
CD/DVD-ROM Installation Procedure ........................................... 3
Disk Contents................................................................................ 4
For Windows Users......................................................................... 5
System Requirements for Software............................................... 5
About the Cubase AI4 DVD-ROM................................................. 6
Installation ................................................................................. 6
About the TOOLS for n CD-ROM.................................................. 6
Installation (Windows XP) ......................................................... 7
Installation (Windows Vista) .................................................... 10
Confirming the installation ....................................................... 12
Changing settings after installation ......................................... 13
Uninstalling the Software......................................................... 15
Hints when using audio data ................................................... 16
Troubleshooting....................................................................... 16
English
SPECIAL NOTICES
Yamaha makes no representations or warranties with regard to any problems while attempting to copy the disks or software and
cannot be held responsible for the results of attempts to copy the data.
Contents
For Macintosh Users..................................................................... 17
System Requirements for Software............................................. 17
About the Cubase AI4 DVD-ROM ............................................... 17
Installation................................................................................ 17
About the TOOLS for n CD-ROM ................................................ 18
Installing the software.............................................................. 18
Confirming the installation ....................................................... 20
Changing settings after installation.......................................... 21
Uninstalling the Software......................................................... 21
TOOLS for n LICENSE AGREEMENT .......................................... 22
Cubase AI4 LICENSE AGREEMENT ............................................ 23
• The software included in the TOOLS for n CD-ROM and this Installation Guide are the exclusive copyrights of Yamaha Corporation.
• The software included in the Cubase AI4 DVD-ROM and the copyrights thereof are under exclusive ownership by Steinberg Media
Technologies GmbH.
Note that Yamaha does not offer technical support for the DAW software in the DVD-ROM.
• Use of the software and this manual is governed by the license agreement which the purchaser fully agrees to upon breaking the
seal of the software packaging. (Please read carefully the Software License Agreement on page 22 to page 24 of this manual before
installing the software.)
• Copying of the software or reproduction of this manual in whole or in part by any means is expressly forbidden without the written
consent of the manufacturer.
•Yamaha makes no representations or warranties with regard to the use of the software and documentation and cannot be held
responsible for the results of the use of this manual and the software.
• These disks are NOT for audio/visual purpose. Do not attempt to play the disks on a CD/DVD player. Doing so may result in
irreparable damage to your audio CD/DVD player.
• The software included in the TOOLS for n CD-ROM may be revised and updated without prior notice. Make sure to check and
download the latest version of the software from the following site.
http://www.yamahasynth.com/download/
•For information about the minimum system requirements and latest information of Cubase AI4, check the web site below.
http://www.yamahasynth.com/
• Future upgrades of application and system software and any changes in specifications and functions will be announced separately.
• The screen displays as illustrated in this manual are for instructional purposes, and may appear somewhat different from the
screens which appear on your computer.
Copying of the commercially available musical data including but not limited to MIDI data and/or audio data is strictly prohibited except
for your personal use.
• Windows is the registered trademark of Microsoft
®
Corporation.
• Apple, Mac and Macintosh are trademarks of Apple Inc., registered in the U.S. and other countries.
• FireWire and the FireWire symbol are trademarks of Apple, Inc., registered in the U.S. and other countries. The FireWire logo is a
trademark of Apple, Inc.
The company names and product names in this Installation Guide are the trademarks or registered trademarks of their respective
companies.
TOOLS for n/Cubase AI4 Installation Guide
2
Page 3
About the Disks Included in the Package
Operating System (OS)
The software on these disks is for the Windows and Macintosh operating system. Refer to page 5 (for Windows) or page 17 (for Macintosh) to install the
software.
CD/DVD-ROM Installation Procedure
Before breaking the seal of the disk’s packaging, please read carefully the “Software License Agreement for TOOLS for n” and “Software License
Agreement for Cubase AI4” on page 22 to page 24 of this guide.
1 Verify that your system meets the operating requirements of the software.
Windows: ...................page 5
Macintosh: ..................page 17
2 Install Cubase AI4.
Windows: ...................page 6
Macintosh: ..................page 17
3 Install TOOLS for n.
Windows: ...................page 6
Macintosh: ..................page 18
4 Start up the software.
For subsequent operations, refer to the owner’s manual for the n8/n12 and Cubase AI4 (online help/PDF manual).
NOTE
• To view PDF files, you must install Adobe Reader on your computer.
If you do not have Adobe Reader, you can download the application from the Adobe website at the following URL:
http://www.adobe.com
Quick solutions/Reference materials
• Changing the driver settings
Windows: ...................page 13
Macintosh: ..................page 21
• Uninstalling or re-installing the driver
Windows: ...................page 15
Macintosh: ..................page 21
• Resolving communication problems with the n8/n12
Refer to the section “Troubleshooting” in the n8/n12 Owner’s Manual.
English
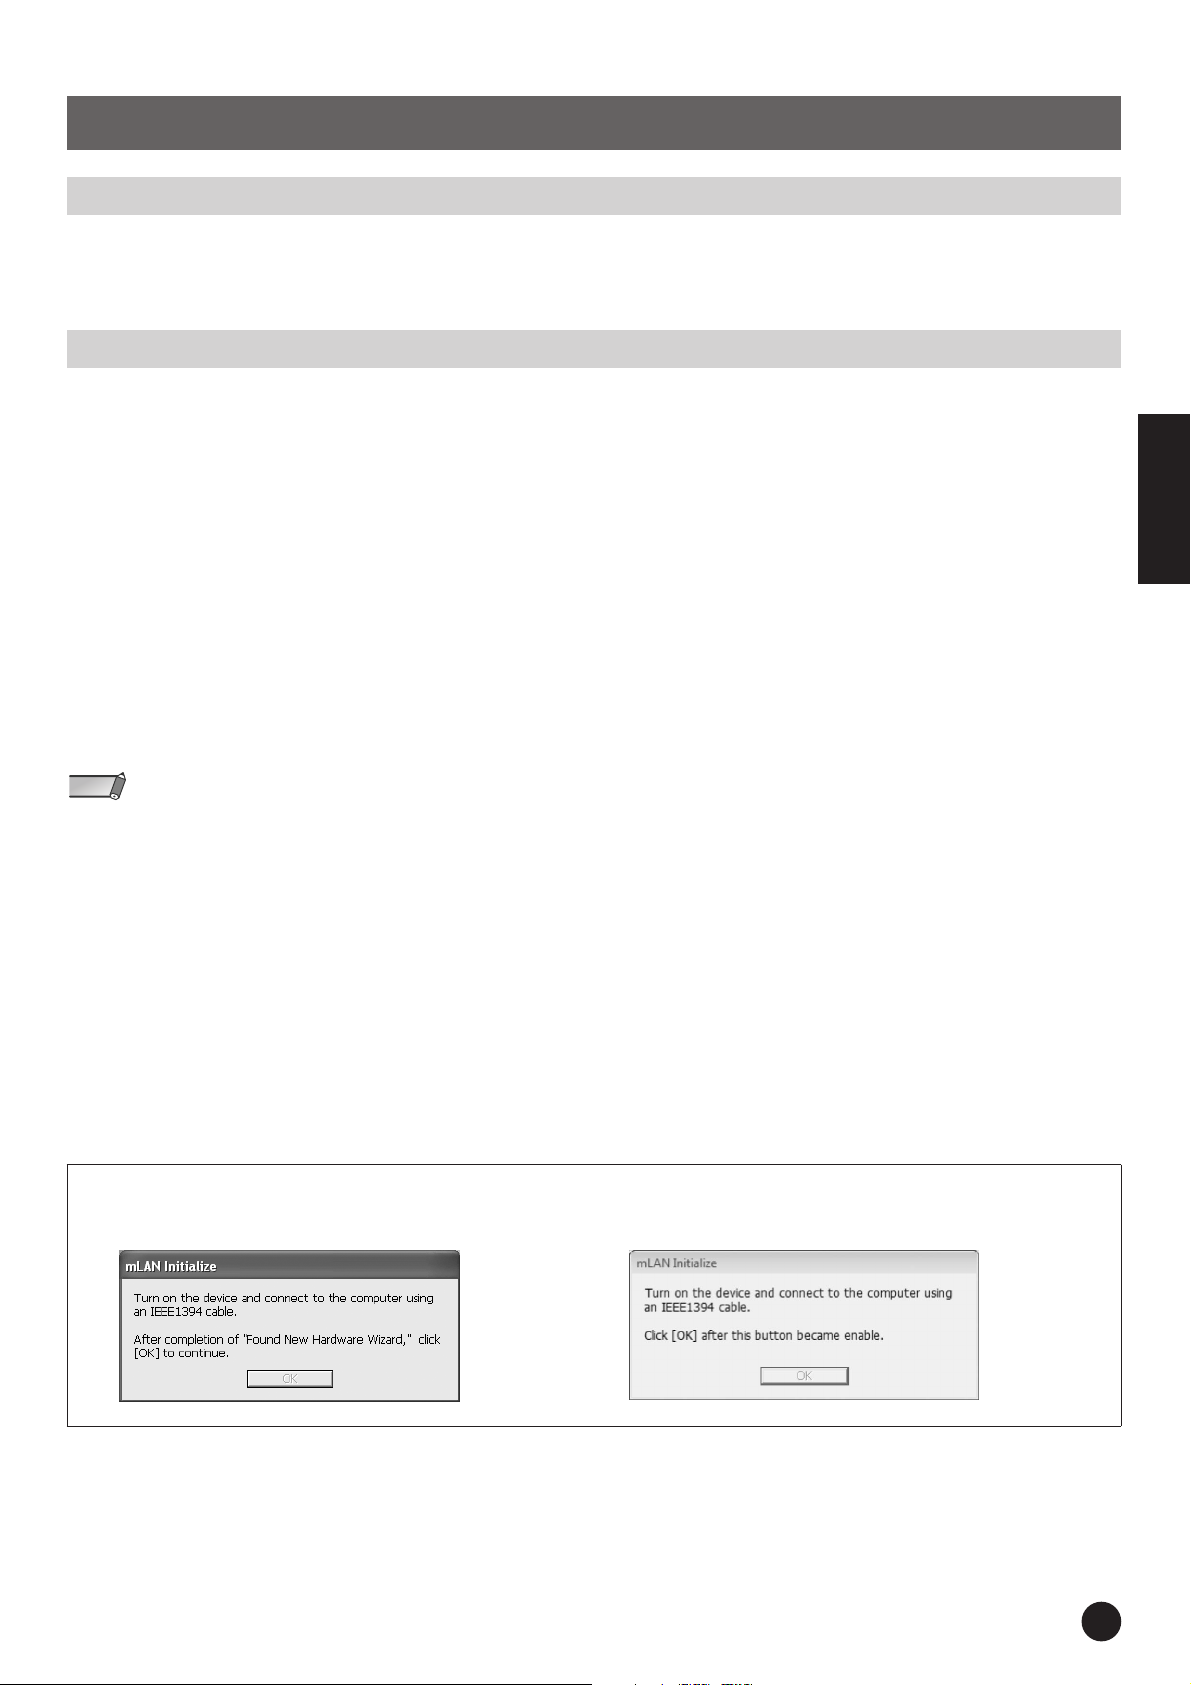
• Do not turn on the power to the n8/n12 during installation until the computer displays the following message.
Windows XP: Windows Vista:
TOOLS for n/Cubase AI4 Installation Guide
3
Page 4
Disk Contents
The disks contain the following software and data.
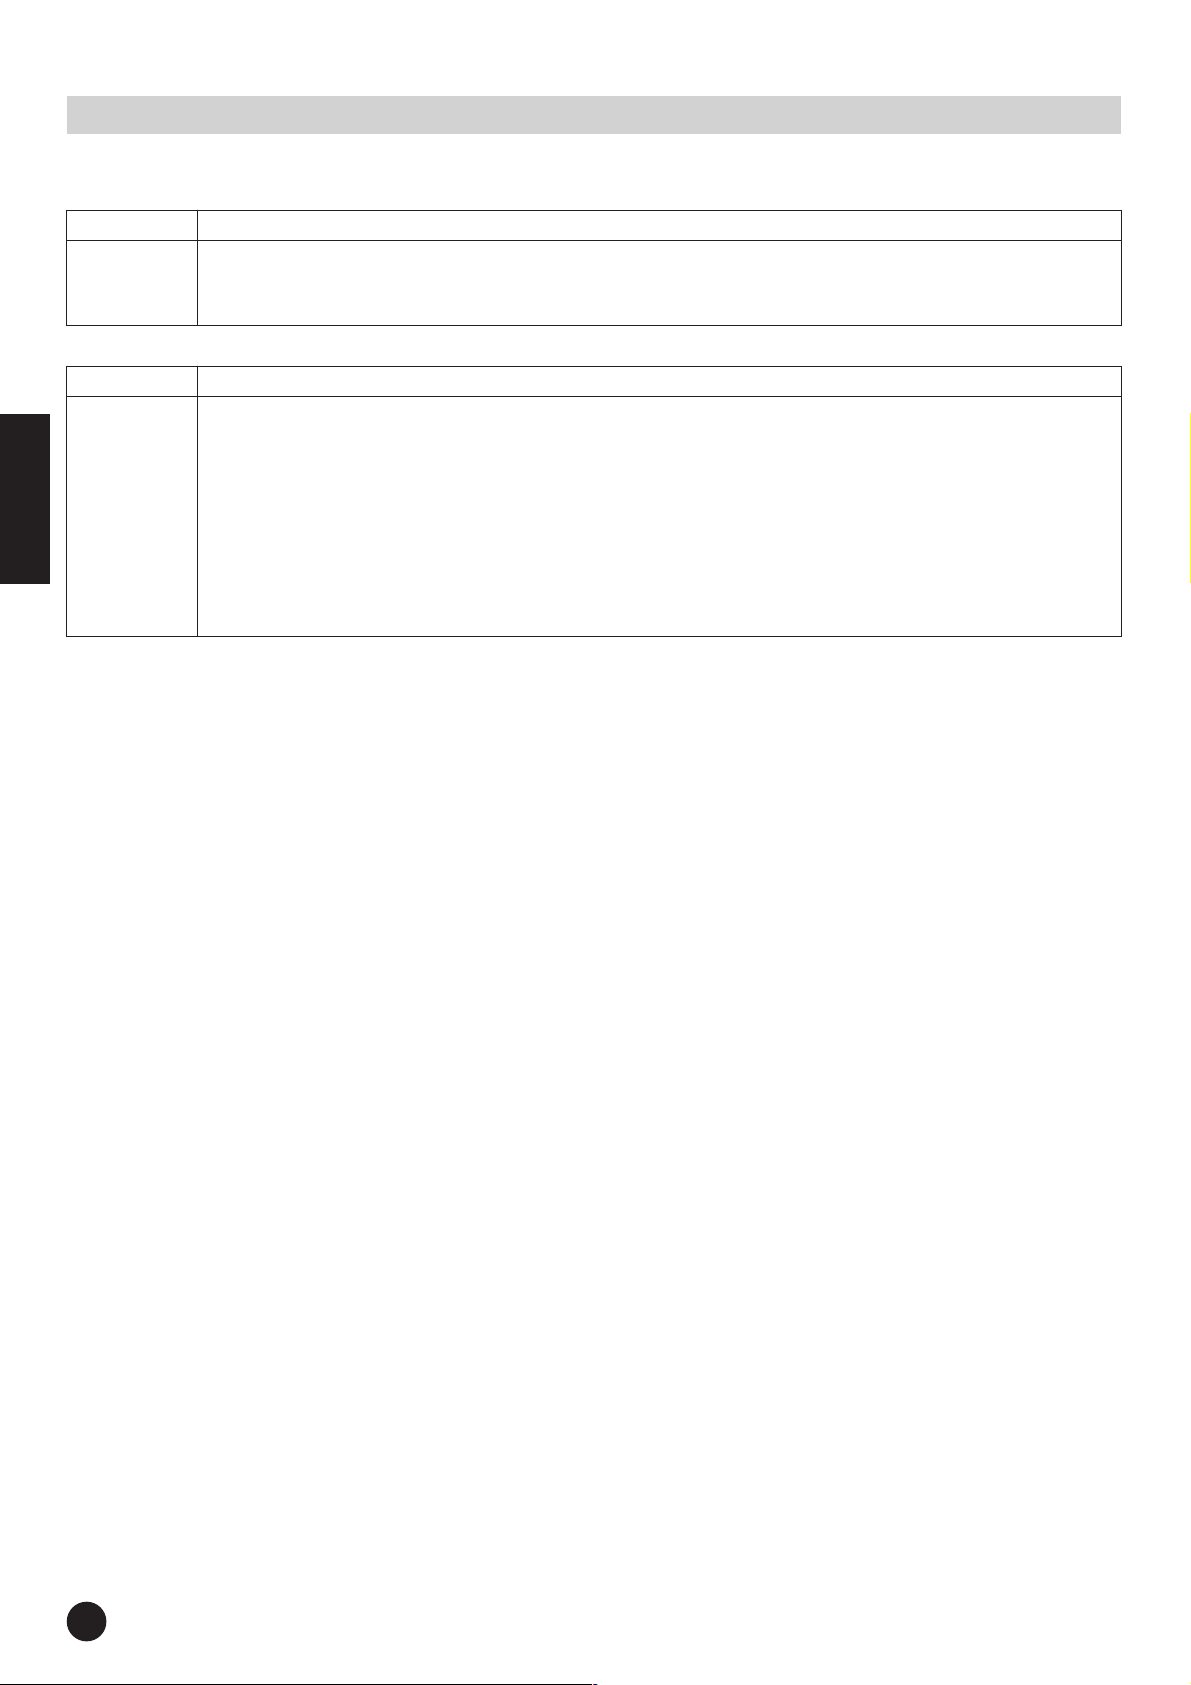
● TOOLS for n
Software Name Contents
TOOLS for n consists of two software components: AI Driver and Extensions for Steinberg DAW.
TOOLS for n
● Cubase AI4
Software Name Contents
Cubase AI4
English
The AI Driver is based on mLAN technology. It enables you to connect a single n8 or n12 to a computer.
Extensions for Steinberg DAW is a software component that enables you to use the n8/n12 with Cubase 4, Cubase Studio 4 and Cubase AI4.
The TOOLS for n Installer installs these two software components.
Cubase AI4 is a special version developed for Yamaha products, based on Steinberg Cubase 4, which is very popular among a wide range of users.
Cubase AI4 features an Advanced Integration function that integrates various hardware devices, including the Yamaha n series, and provides an
integrated operational environment.
Cubase AI4 also features the following content data that is carefully selected from the Yamaha MOTIF ES series, Yamaha’s synthesizer flagship
models:
• MIDI Drum Style: Twenty project files of rhythm patterns that cover a wide range of genres, such as R&B and rock
(Windows) \Cubase AI 4 for Windows\Additional Content\Yamaha Content\Drum Styles
(Macintosh) /Cubase AI 4 for MacOS X/Additional Content/Yamaha Content/Drum Styles
•AUDIO LOOP: More than 480 audio loop files that contain ready-to-use rhythm loops
(Windows) \Cubase AI 4 for Windows\Additional Content\Yamaha Content\Loops
(Macintosh) /Cubase AI 4 for MacOS X/Additional Content/Yamaha Content/Loops
• DEMO SONG: \Demo Project\Start Aeye.cpr
For Windows Vista Users:
The included Cubase AI4 (version 4.0.1) does not support Windows Vista (as of October 2007).
A new version compatible with Windows Vista will be made available for downloading from the website. See the following URL for the latest information.
http://www.yamahasynth.com/
TOOLS for n/Cubase AI4 Installation Guide
4
Page 5
For Windows Users
System Requirements for Software
The system requirements below are necessary for using the n8/n12 by connecting it to a computer, or for using the included DAW.
NOTE
• The system requirements below may differ slightly depending on the particular operating system.
• For details on minimum requirements for other DAW software, refer to the respective owner’s manual.
For Windows Users
● n8/n12 (TOOLS for n)
Windows XP Professional SP2/XP Home Edition SP2
Computer: Intel Pentium or Celeron family processor, with an
S400 (400 Mbps) IEEE1394 (i.LINK) terminal (*1).
Hard Disk: Free disk space of 100 MB or more; high-speed
hard disk
• Recommended system requirements (*2)
Computer: 2.2 GHz or higher; Intel Pentium 4 processor
Available Memory: 512 MB or more
• Minimum system requirements (*2)
Computer: Intel Pentium 1.4 GHz or Intel Celeron 1.7 GHz
(or higher)
Available Memory: 512 MB or more
Windows Vista (32-bit)
See the website below for system requirements.
http://www.yamahasynth.com/download/
*1 The computer must have an IEEE 1394 (i.LINK) connector. If there is no
connector, install an IEEE 1394 interface card (PCI or PC).
*2 The system requirements listed here apply when playing the audio/MIDI
data described below on a typical DAW. This may differ depending on the
particular DAW you are using.
Recommended system requirements
Frequency/resolution: 44.1 kHz/24 bit
Audio playback tracks: 15
Audio recording tracks: 2
MIDI playback tracks: 16
MIDI Remote Control/Automation
Send effects (plug-in): 3
Insert effects (plug-in): 9
Plug-in synthesizer: 2
Latency: 5 msec or less
● Cubase AI4
Windows XP Professional/XP Home Edition
Computer:
Available Memory: 512 MB or more
Display Resolution: 1280 x 800 or more - full color
Audio Interface: ASIO, or Windows DirectX compatible (ASIO com-
Hard Disk: Free disk space of 1 GB or more; high-speed hard
NOTE
•A DVD drive is required for installation.
• To activate your software license, install the application while the computer is connected to the Internet.
Pentium 4 1.4 GHz/Athlon 1.4 GHz or better processor
patible device is recommended)
disk
English
Minimum system requirements
Frequency/resolution: 44.1 kHz/24 bit
Audio playback tracks: 15
MIDI Remote Control/Automation
Send effects (plug-in): 3
Insert effects (plug-in): 9
Plug-in synthesizer: none
Latency: about 50 msec
NOTE
• When using a laptop or notebook computer, a built-in IEEE 1394 terminal may not
be available. If this is the case, install an appropriate PC interface card.
TOOLS for n/Cubase AI4 Installation Guide
5
Page 6
For Windows Users
About the Cubase AI4 DVD-ROM
Installation
Important!
Since the End-User Software License Agreement (EUSLA)
shown on your PC-display in your installing the “DAW”
software is replaced by the agreement on page 23, you
should disregard the EUSLA. Read the Cubase AI4 License
Agreement on page 23 carefully, and install the software if
you agree to it.
Install Cubase AI4 before you install TOOLS for n. Project templates for
the n8/n12 will be installed in the Cubase AI4 installation destination.
1 Start the computer and log on to the Administrator account.
2 Insert the Cubase AI4 DVD-ROM into the DVD-ROM drive.
3 Open the DVD-ROM, then double-click the file “CubaseAI4.msi.”
English
Follow the instructions on the screen to install Cubase AI4.
NOTE
• Make sure to install Cubase AI4 under the “Administrator” account.
• When installing Cubase AI4, you will need a working internet connection to register
your Cubase AI4. Make sure to fill in all required fields for user registration. If you do
not register the product, you will be unable to use the application after a limited period
of time expires.
• If you are using Cubase 4 or Cubase Studio 4, install either application before you
install TOOLS for n. The n8/n12 project templates will be installed in the application
installation destination.
About software support
Support for the included DAW is provided by Steinberg on its website at the
following address.
http://www.steinberg.net
You can visit the Steinberg site also via the Help menu of the included DAW
software. (The Help menu also includes the PDF manual and other information on the software.)
About the TOOLS for n CD-ROM
CAUTION
• Keep in mind that noise may be generated when installing or uninstalling the TOOLS for n. Before performing either of these operations, make sure to lower the output level of each device.
If you have already installed n Driver, AI Driver or mLAN Driver/mLAN Tools on your computer:
You must uninstall the driver software. During the installation of TOOLS for n, a software maintenance window appears. Follow the instructions in the window to remove the software. The installation of TOOLS for n will then resume.
For more information on removing the software, refer to page 15.
If you are using mLAN devices that features S200 data transfer rate standard:
(Check the rear panel of your particular device, or refer to the specifications in the owner’s manual.)
You must uninstall the old version of mLAN Tools beforehand. For more information on uninstalling the software, refer to the owner’s manual for the corresponding device.
Check beforehand the drive name (D:, E:, etc.) corresponding to the CD-ROM you are using. The drive name is indicated under the CD-ROM icon of [My
computer]. (The root directory of the CD-ROM drive is indicated as D:\, E:\, etc.)
TOOLS for n consists of two software components: AI Driver and Extensions for Steinberg DAW. AI Driver is required to connect the n8/n12 to a
computer. Extensions for Steinberg DAW is a software component that enables you to use the n8/n12 along with Cubase 4, Cubase Studio 4 or Cubase AI4.
The TOOLS for n Installer installs these two software components. Refer to page 7 for Windows XP or page 10 for Windows Vista.
NOTE
• For explanations of the error messages, see page 16.
TOOLS for n/Cubase AI4 Installation Guide
6
Page 7
Installation (Windows XP)
For Windows Users
Preparing to install
1 Make sure that the power to the n8/n12 is turned off.
2 Disconnect all MIDI cables that connect MIDI devices to MIDI IN/
OUT jacks on the n8/n12.
3 Using an IEEE1394 cable, connect the n8/n12 directly to the
computer (without using a hub), and disconnect all other IEEE
1394 devices from the computer.
4 Start the computer and log on to the Administrator account.
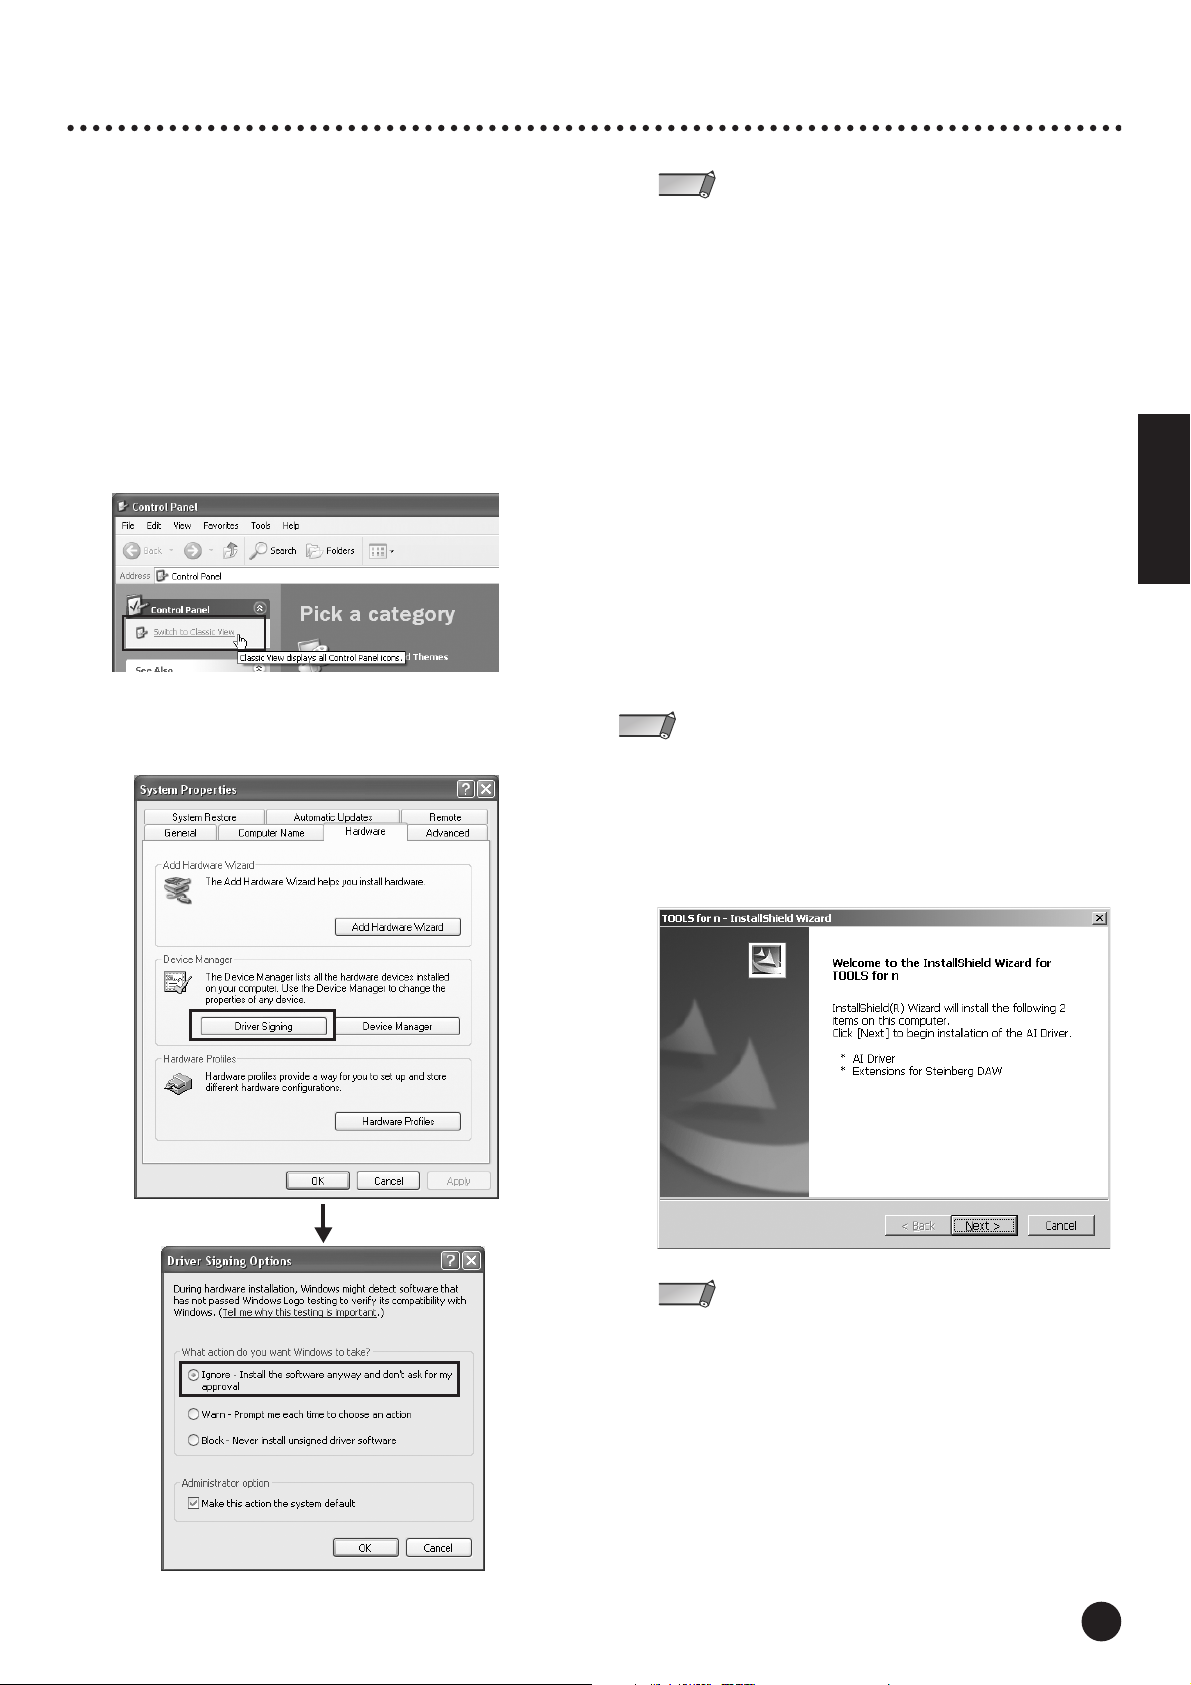
5 Select [Start] (→ [Settings]) → [Control Panel]. If the control
panel appears as shown below, click “Switch to Classic View” in
the upper left of the window.
All control panels and icons will be displayed.
6 Go to [System] → [Hardware] → [Driver Signing] → [Driver
Signing Options], and select the radio button to the left of
“Ignore - Install the software anyway and don’t ask for my
approval” and click [OK].
NOTE
• After completing the installation, make sure to restore the original setting if
necessary.
7 Check that no “!” or “x” marks appear next to “IEEE 1394 Bus
host controllers” in ([System]
ager].
If one of these marks is shown, the IEEE 1394/i.LINK connection
cannot be used. Refer to the owner’s manual of your computer for
details.
→ [Hardware] →) [Device Man-
8 Close the Device Manager window, System Properties window
and Control Panel by clicking the [OK] button or the Close button
([X]) of the windows.
9 Exit any open applications and close all open windows.
10 Insert the TOOLS for n CD-ROM into the CD-ROM drive.
Starting up the Installer
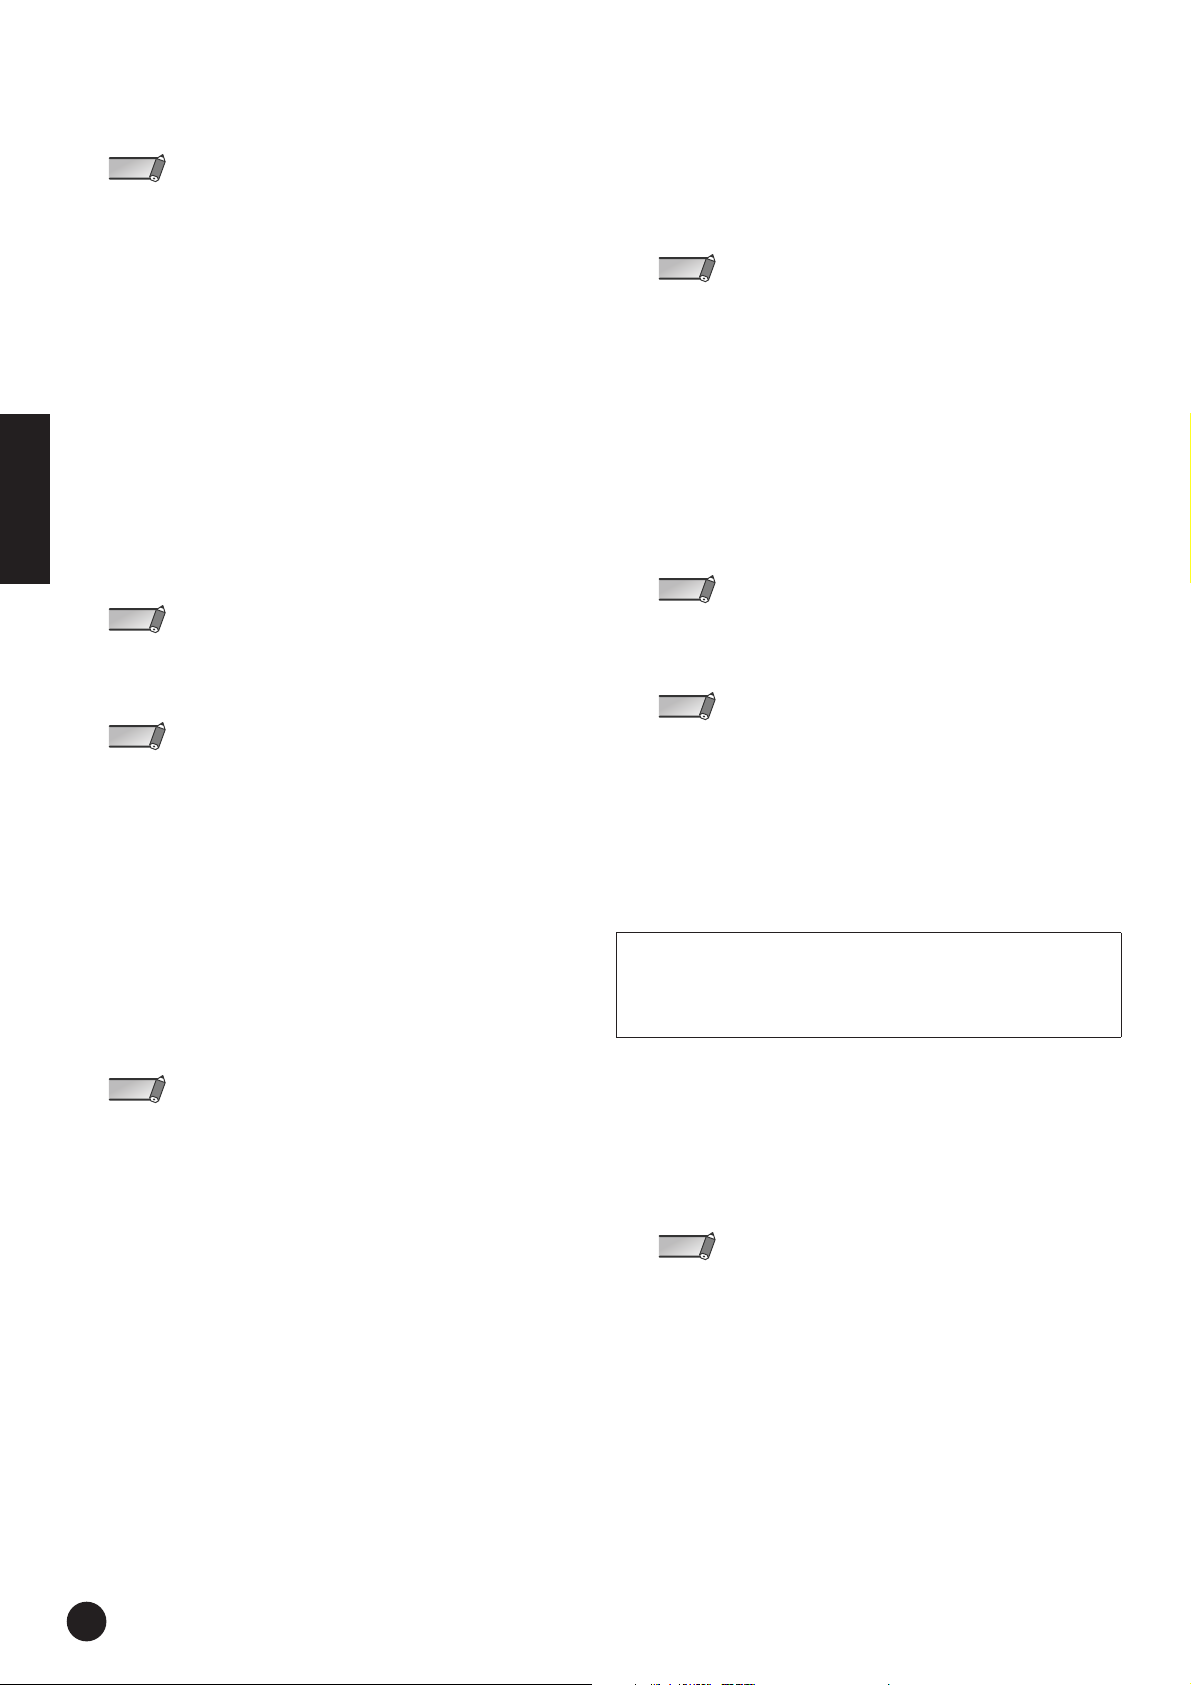
The installer will install the following two software components to
your computer.
• AI Driver
• Extensions for Steinberg DAW
NOTE
• Use the Cancel button or Close button to quit the installation. Quitting by using the
[Ctrl]+[Alt]+[Delete] buttons or by turning off the power while installation is in process
can result in problems since the installation is terminated without performing a proper
uninstall.
English
11 Open the CD-ROM, then double-click the file “setup.exe.”
A “Welcome to the InstallShield Wizard for TOOLS for n” window
appears.
NOTE
• You can choose to install either AI Driver or Extensions for Steinberg DAW. To
install only AI Driver, double-click “setup.exe” in the “Driver_” folder. To install
only Extensions for Steinberg DAW, double-click “setup.exe” in the
“Extensions_” folder.
TOOLS for n/Cubase AI4 Installation Guide
7
Page 8
For Windows Users
Installing AI Driver
This section explains how to install mLAN Tools 2.0 and AI Driver.
NOTE
• If n Driver, AI Driver or mLAN Driver/mLAN Tools has already been installed
on your computer, a software maintenance window appears. Follow the
instructions in the window to remove the software and install the new software.
For information on removing the software, refer to page 15.
12 Click [Next]. A few confirmation messages appear. If there are no
problems, click [OK] to close the dialogs.
The “Welcome to the InstallShield Wizard for Yamaha AI Driver”
window appears.
13 Click [Next].
The first screen in the procedure to install mLAN Tools appears.
14 Click [Next].
The “Choose Destination Location” window appears.
15 Confirm or select the desired drive and folder name for installing
mLAN Tools, then click [Next].
English
The destination directory is automatically set; however, if you wish
to change it, click the [Browse] button and select the desired folder
(drive:\folder name).
NOTE
• In general, there is no need to change the destination directory.
16 Confirm the drive and folder name and click [Next] to start instal-
lation.
NOTE
• If a message “The software you are installing has not passed Windows Logo
Testing” appears, click [Continue Anyway]. You do not need to abort the installation. (This applies to the entire installation procedure.) If the message does
not appear, proceed to the next step.
17 When installation is finished, a “Completed” message appears.
Click [Finish].
The first screen of the window for installing AI Driver appears.
18 Click [Next].
The “Choose Destination Location” window appears.
19 Set the drive and folder name for installing AI Driver.
The destination directory is automatically set; however, if you wish
to change it, click the [Browse] button and select the desired folder
(drive:\folder name).
Installing Extensions for Steinberg DAW
After the installation of AI Driver is complete, the first screen in the
procedure to install Extensions for Steinberg DAW appears.
21 Click [Next].
The “Welcome to the InstallShield Wizard for Yamaha Extensions
for Steinberg DAW” window appears.
NOTE
• If the same version of Extensions for Steinberg DAW has already been
installed in your computer, the completion of the maintenance window
appears. In this case, click [Finish].
• If a newer version of Extensions for Steinberg DAW has already been installed
in your computer, a dialog box appears indicating that the newer software has
already been installed. In this case, you do not need to install the software.
Click [OK] in the dialog box.
• If an older version of Extensions for Steinberg DAW has been installed in your
computer, the software should be updated. (The procedure is the same as for
installing it from scratch.)
22 Click [Next]. On the “Setup Type” window, check [Complete],
then click [Next].
The “Ready to Install the Program” window appears.
NOTE
• You can select Extensions for Steinberg DAW to be installed by selecting
[Custom] on the “Setup Type” window.
23 Click [Install] to start the installation.
NOTE
• To cancel the installation procedure, click [Cancel].
24 A message appears indicating that the installation is complete.
Click [Finish].
25 A message appears indicating that TOOLS for n has been
installed.
Confirm that the radio button to the left of “Yes, I want to restart
the computer now.” is selected, then click [Finish] to restart the
computer.
When canceling the installation
If you’ve cancelled an installation before it is complete, the software may
not have been installed properly. To install the software properly, resume
the procedure from Step 11.
NOTE
• In general, there is no need to change the destination directory.
20 Confirm the drive and folder name and click [Next] to start instal-
lation.
TOOLS for n/Cubase AI4 Installation Guide
8
AI Driver initial settings
After you restart the computer, complete the AI Driver initial settings.
26 A dialog box in the upper left corner of the screen prompts you
to turn on the power to the device. Connect the n8/n12 to the
computer, then turn on the power to the n8/n12.
The “Found New Hardware Wizard” window is displayed.
NOTE
•A dialog box may appear asking you whether you wish to connect to Windows
Update. In this case, select the radio button to the left of “Not at this time,” then
click [Next].
27 Select the radio button next to “Install the software automatically
[Recommended],” then click [Next].
28 A message appears indicating that the installation is complete.
Click [Finish], then click [OK] in the dialog box (that prompted
you to turn on the power to the device) indicated in Step 26.
Page 9

For Windows Users
29 The following message appears in the upper left corner of the
screen: “The driver initialization will be executed.” Click [OK].
NOTE
• During Steps 30 and 31, and Steps 33 and 34, a window appears indicating
that you are now making the initial settings for each device. This window also
indicates the number of times the “Found New Hardware Wizard” will be displayed during the procedure. Unless you wish to cancel installation, do not
close this window.
Example:
Bus driver initial settings
30 The “Found New Hardware Wizard” window appears. Select the
radio button next to “Install the software automatically [Recommended],” then click [Next].
Audio/MIDI driver settings
33 The “Found New Hardware Wizard” appears. Select the radio but-
ton next to “Install the software automatically [Recommended],”
then click [Next].
English
NOTE
•A dialog box may appear asking you whether you wish to connect to Windows
Update. In this case, select the radio button to the left of “Not at this time,” then
click [Next].
NOTE
•A dialog box may appear asking you whether you wish to connect to Windows
Update. In this case, select the radio button to the left of “Not at this time,” then
click [Next].
31 When the installation is complete, a message indicating that
installation is complete appears. Click [Finish].
32 Repeat Steps 30 and 31 until the window (indicating that you
are making the initial bus driver settings) closes.
34 When the installation is complete, a message indicating that
installation is complete appears. Click [Finish].
35 Repeat Steps 33 and 34 until the window (indicating that you
are making the Audio/MIDI driver initial settings) closes.
Establishing a connection
36 AI Driver is activated, and Connection Manager starts to estab-
lish a connection. The process of making AI Driver initial settings is complete.
NOTE
• After the initial settings have been made, you can physically connect the n8/
n12 to your computer even while the n8/n12 power is on.
• To allow the n8/n12 to be used along with the computer, AI Driver must be
enabled (see page 12).When you connect the n8/n12 to the computer, Connection Manager automatically makes all connection settings. During this process, the driver icon (see page 12) flashes. Wait until the icon stops flashing
and stays lit.
• When you connect the n8/n12 to the computer for the first time or you connect
the different device than you have used before, the same message as the one
shown in Step
the process of establishing a connection.
36 appears indicating that the n8/n12 and the computer are in
CAUTION
• The flashing driver icon means that Connection Manager is checking an
IEEE 1394 device that is connected to the computer. While the icon is
flashing, do not turn on or off the power to the connected IEEE 1394
devices or connect/disconnect any IEEE 1394 cables.
Next, see page 12 to confirm the installation.
TOOLS for n/Cubase AI4 Installation Guide
9
Page 10

For Windows Users
Installation (Windows Vista)
Preparing to install
1 Make sure that the power to the n8/n12 is turned off.
2 Disconnect all MIDI cables that connect MIDI devices to MIDI IN/
OUT jacks on the n8/n12.
3 Using an IEEE1394 cable, connect the n8/n12 directly to the
computer (without using a hub), and disconnect all other
IEEE1394 devices from the computer.
4 Start the computer and log on to the Administrator account.
5 Select [Start] (→ [Settings]) → [Control Panel]. If the control
panel appears as shown below, click “Classic View” in the upper
left of the window.
All control panels and icons will be displayed.
English
6 Double-click the Device Manager icon.
NOTE
• If the “User Account Control” window appears, click [Continue].
Starting up the Installer
The installer will install the following two software components to your
computer
• AI Driver
• Extensions for Steinberg DAW
NOTE
• Use the Cancel button or Close button to quit the installation. Quitting by using the
[Ctrl] + [Alt] + [Delete] buttons or by turning off the power while installation is in process can result in problems since the installation is terminated without performing a
proper uninstall.
11 Open the CD-ROM, then double-click the file “setup.exe.”
The “Welcome to the InstallShield Wizard for TOOLS for n”
window appears.
7 Check that no “!” or “x” marks appear next to “IEEE1394 Bus
host controllers.”
If one of these marks is shown, the IEEE1394/i.LINK connection
cannot be used. Refer to the owner’s manual of your computer for
details.
8 Click the Close button ([x]) at the top right of the Device Manager
window, then click the Close button ([x]) at the top right of the
Control Panel window to close it.
9 Exit any open applications and close all open windows.
10 Insert the TOOLS for n CD-ROM into the CD-ROM drive.
NOTE
• If the “User Account Control” window appears, click [Continue].
• You can choose to install either AI Driver or Extensions for Steinberg DAW. To
install only AI Driver, double-click “setup.exe” in the “Driver_” folder. To install
only Extensions for Steinberg DAW, double-click “setup.exe” in the
“Extensions_” folder.
Installing AI Driver
This section explains how to install mLAN Tools 2.0 and AI Driver.
NOTE
• If n Driver, AI Driver, or mLAN Driver/mLAN Tools has already been installed
on your computer, a software maintenance window appears. Follow the
instructions in the window to remove the software and install the new software.
For more information on removing the software, refer to page 15.
12 Click [Next]. A confirmation message appears. If there are no
problems, click [OK] to close the dialog box.
When preparations for installation are finished, the “Welcome to
the InstallShield Wizard for Yamaha AI Driver” window appears.
13 Click [Next].
The first screen in the procedure to install mLAN Tools appears.
14 Click [Next].
The “Choose Destination Location” window appears.
15 Confirm or select the desired drive and folder name for installing
mLAN Tools, then click [Next].
The destination directory is automatically set; however, if you wish
to change it, click the [Browse] button and select the desired folder
(drive:\folder name).
TOOLS for n/Cubase AI4 Installation Guide
10
NOTE
• In general, there is no need to change the destination directory.
Page 11

For Windows Users
CAUTION
16 Confirm the drive and folder name and click [Next] to start instal-
lation.
17 When installation is finished, a “Completed” message appears.
Click [Finish].
The first screen of the window for installing AI Driver appears.
NOTE
• If the “Windows Security” window appears, confirm that the publisher is
“YAMAHA CORPORATION,” then click [Install].
18 Click [Next].
The “Choose Destination Location” window appears.
19 Set the destination drive and folder name for installing AI Driver.
The destination directory is automatically set; however, if you wish
to change it, click the [Browse] button and select the desired folder
(drive:\folder name).
NOTE
• In general, there is no need to change the destination directory.
25 Make sure that the radio button to the left of “Yes, I want to
restart my computer now.” is selected, then click [Finish] to
restart the computer.
When canceling the installation
If you’ve cancelled an installation before it is complete, the software may
not have been installed properly. To install the software properly, resume
the procedure from Step 11.
AI Driver initial settings
After you restart the computer, complete the AI Driver initial settings.
26 A dialog box in the upper left corner of the screen prompts you
to turn on the power to the device. Connect the n8/n12 to the
computer, then turn on the power to the device.
27 Click [OK] in the same dialog box (that prompted you to turn on
the power to the device).
28 The following message appears in the upper left corner of the
screen: “The driver initialization will be executed.”
Click [OK].
NOTE
• If the “User Account Control” window appears, click [Allow].
29 Initial setup of AI Driver is automatically started. Wait until the
initial setup is completed. During this process, a window indicating the current status is shown at the upper left corner of the
screen.
English
20 Confirm the drive and folder name and click [Next] to start instal-
lation.
Installing Extensions for Steinberg DAW
After the installation of AI Driver is complete, the first screen in the
procedure to install Extensions for Steinberg DAW appears.
21 Click [Next].
The “Welcome to the InstallShield Wizard for Yamaha Extensions
for Steinberg DAW” window appears.
NOTE
• If the same version of Extensions for Steinberg DAW has already been
installed in your computer, the completion of the maintenance window
appears. In this case, click [Finish].
• If a newer version of Extensions for Steinberg DAW has already been installed
in your computer, a dialog box appears indicating that the newer software has
already been installed. In this case, you do not need to install the software.
Click [OK] in the dialog box.
• If an older version of Extensions for Steinberg DAW has been installed in your
computer, the software should be updated. (The procedure is the same as for
installing it from scratch.)
22 Click [Next]. On the “Setup Type” window, check [Complete],
then click [Next].
The “Ready to Install the Program” window appears.
NOTE
• You can select Extensions for Steinberg DAW to be installed by selecting
[Custom] on the “Setup Type” window.
23 Click [Install] to start the installation.
Establishing a connection
30 AI Driver is activated, and Connection Manager starts to estab-
lish a connection.
The process of making AI Driver initial settings is complete.
NOTE
• After the initial settings have been made, you can physically connect the n8/n12 to
your computer even while the n8/n12 power is on.
• To allow the n8/n12 to be used along with the computer, AI Driver must be enabled
(see page 12). When you connect the n8/n12 to the computer, Connection Manager
automatically makes all connection settings. During this process, the driver icon (see
page 12) flashes. Wait until the icon stops flashing and stays lit.
• When you connect the n8/n12 to the computer for the first time or you connect a different device than you have used before, the same message as the one shown in
30 appears indicating that the n8/n12 and the computer are in the process of
Step
establishing a connection.
NOTE
• If the “Windows Security” window appears, confirm that the publisher is
“YAMAHA CORPORATION,” then click [Install].
24 A message appears indicating that the installation is complete.
Click [Finish].
• The flashing driver icon means that Connection Manager is checking an
IEEE1394 device that is connected to the computer. While the icon is
flashing, do not turn on or off the power to the connected IEEE1394
devices or connect/disconnect any IEEE1394 cables.
TOOLS for n/Cubase AI4 Installation Guide
11
Page 12

For Windows Users
Confirming the installation
Taskbar Notification area
If the installation is successful, an AI Driver icon is added to the task bar.
To call up the menu, right-click on the icon.
NOTE
• When AI Driver is disabled, the driver icon is white. When AI Driver is enabled, the
driver icon is blue. To use the n8/n12 along with a computer, you must enable AI
Driver. While Connection Manager is checking an IEEE 1394 device that is connected
to the computer, the driver icon flashes.
English
Driver icon
RESET ALL ............ Reverts all settings to default.
Auto On.................... Enables AI Driver when the computer is started. By
default, Auto On is set to on.
ON............................. Enables AI Driver.
OFF........................... Disables AI Driver. This setting reduces the CPU
load when the n8/n12 is not in use.
Driver Setup ............ Starts Driver Setup (see page 13).
Sample Rate............. Specifies the sampling frequency (see page 13).
EXIT......................... Disables AI Driver, then removes the AI Driver icon
from the task bar. To display the driver icon on the
task bar again, from the Start menu, select [All
Programs] → [Start Up]
Auto On is set to on, AI Driver is automatically
enabled.
NOTE
• The default setting of Auto On for AI Driver is on, which allows the computer to automatically enable AI Driver at startup.
• You can use Driver Setup to check whether data is being properly transmitted and
received.
→ [mLAN Manager]. If
Device Manager (Operating System)
■ Windows XP:
1 Select [Control Panel] from the Start menu.
2 Double-click on the System icon to call up the System Properties
window.
3 Select the Hardware tab and click [Device Manager].
4 Click on the [+] mark next to “Sound, video and game control-
lers,” and confirm that “Yamaha n series” and “Yamaha mLanBus” are listed.
■ Windows Vista:
1 Select [Control Panel] from the Start menu.
2 Double-click the Device Manager icon.
NOTE
• If the “User Account Control” window appears, click [Continue].
3 Click on the [+] mark next to “Sound, Video and game control-
lers” and confirm that “Yamaha n series” and “Yamaha mLanBus” are listed.
TOOLS for n/Cubase AI4 Installation Guide
12
Page 13

Changing settings after installation
For Windows Users
NOTE
• If AI Driver is being used by an application (such as a DAW), you cannot change the
Sample Rate and Driver Setup settings. To change the settings, first quit the application. If an error message appears indicating that you cannot change a setting, refer to
“Cannot change the AI Driver settings” on page 16.
Sample Rate
(Right-click the driver icon on the task bar ➝ Sample Rate)
This dialog box enables you to set the sampling frequency.
Click the down arrow in the Sample Rate field, then select the desired
sampling frequency. Click [OK] to apply the selection and close the dialog
box.
By clicking [Apply], your selection will be applied and the dialog box will
remain open. While you are changing the sampling frequency, a window
appears indicating that the setting is being changed, and the n8/n12
[COMP] indicator flashes (see page 14 in the Owner’s Manual).
Driver Setup
(Right-click the driver icon on the task bar ➝ Driver Setup)
This dialog box enables you to set up communication with the n8/n12, and
to check data reception and transmission.
q
w
e WDM Sample Bit
This parameter enables you to specify the audio data bit resolution for the
WDM driver.
r Status
This field indicates the status of the audio/MIDI data transmitted from the
n8/n12 to the computer. It also displays an error message in the event that
a transmission error occurs.
Blue ............. Data is being properly transmitted.
Yellow ......... Only one type of data (audio or MIDI) is being received.
Red .............. Error in reception.
Gray............. No reception.
NOTE
• If an application, such as a DAW, is not using the AI Driver’s audio or MIDI data, this
field will not display an indication of correct status. Refer to this field when your application is running and using the AI Driver’s audio or MIDI data.
t Information
Click this button to display the Information window (see the next page),
which displays the current status of audio and MIDI data reception (from
the n8/n12 to the computer).
y Set
Clicking this button actually applies the settings made in this dialog box.
Changes to the settings do not take effect unless [Set] is clicked.
u Revert
If you’ve made changes to the settings (but not yet clicked [Set]), clicking
this button restores the settings made the last time [Set] was clicked. Once
you click [Set], [Revert] cannot be used.
i EXIT
Clicking this button closes the dialog box.
English
e
r
t
ui
q 1394 Adapter Card ID
This field displays the ID of an IEEE 1394 (i.LINK) interface card
installed in the computer. If multiple interfaces have been installed in the
computer, select the interface that is used to connect the n8/n12. The field
will not display the ID of any interfaces that are not recognized by AI
Driver.
NOTE
• The correct name of the manufacturer or vendor may not be displayed depending on
the particular interface you are using.
• If multiple interfaces have been installed in the computer, the interface that is used to
connect the n8/n12 when you make the initial settings for AI Driver will be selected
(see page 8 for Windows XP or see page 11 for Windows Vista). If you want to use
another interface, first select the desired 1394 Adapter Card ID in the Driver Setup,
then reconnect the IEEE 1394 cable. After connecting the n8/n12 to the computer,
disable AI Driver, then enable AI Driver again. To enable/disable AI Driver, right-click
the driver icon on the task bar and select ON/OFF. Connection Manager will then reestablish a connection.
w Required CPU
Determines the computer’s required processing power (the amount of
processing load applied to the computer by the AI Driver).
You can also control the processing load by adjusting the latency in “ASIO
Control Panel” (see next page).
y
TOOLS for n/Cubase AI4 Installation Guide
13
Page 14

For Windows Users
About the “Information” window
This window indicates the audio and MIDI data reception status (from the
n8/n12 to computer).
R1, R2
This indicates the data reception status. “R1” corresponds to MIDI
reception while “R2” corresponds to audio reception. The number
of tabs shown differs depending on your particular computer
configuration.
Receive Status
English
These fields display a symbol that indicates that data is being received.
The symbol “o” indicates that data in the corresponding format is being
received. For example, the symbol “oooooooo” in the “Audio” field
indicates that eight audio data has been received. The “Unknown” field
displays symbols if data in unknown formats are received.
These fields remain blank if no data is received.
If an error occurs during reception, a red warning message flashes. In this
case, check the status of the n8/n12.
Icon
Blue ......Reception is normal.
Red....... Error in reception.
Gray......No reception.
● Latency of AI Driver
Audio latency
Audio latency is determined by the “Preferred Buffer Size” setting in the
“ASIO Control Panel.”
The audio latency value is shown in the “ASIO Control Panel” (see
below).
MIDI latency
For information on the MIDI latency, refer to the “releasenotes_e.pdf” file
included in the TOOLS for n CD-ROM.
● ASIO Control Panel
When using the ASIO Driver, open the ASIO Control Panel associated
with the driver settings of the DAW software (the specific menu depends
on the software you are using) and set the Preferred Buffer Size as
needed. When you open the ASIO Control Panel, the following dialog
box appears.
NOTE
• Also, when using the WDM driver, adjust as necessary the latency value of the
WDM driver (which corresponds to the latency of the ASIO driver in this chart)
within the driver settings of the DAW software.
• The initial setting of the Preferred Buffer Size of the ASIO driver is the smallest
value.
q
w
e
Latency and Required CPU
A particular computer configuration (i.e., processing speed and memory
size) may affect the computer’s ability to properly record and play back
audio data in your DAW, resulting in noise or other audio problems.
In most cases, you can solve these problems by adjusting the latency
(delay time). (See “Latency.”)
However depending on the performance of your computer and on how it
is being used (i.e., whether other applications are being used simultaneously, etc.), you may still experience noise or sound interruption even
after increasing the latency. In this case, change the “Required CPU”
setting to “Medium Performance” or “Low Performance” to lighten the
processing load on your computer, and then adjust the latency once
again. (See “Preferred Buffer Size.”)
• Lower latency values result in shorter delay times and work better for
real-time recording and playback.
• Higher latency values result in longer delay times, but allow for use
of more audio channels and plug-in effects (thus reducing the computer’s momentary processing load).
Conversely, if you experience no noise or interruptions even with the
“Preferred Buffer Size” setting set to the minimum, you can minimize the
overall latency by setting Required CPU to “High Performance” and then
adjusting the latency once again.
r t
q Preferred Buffer Size
This parameter enables you to specify the size of the buffer inside the
ASIO driver.
w Sample Size
This parameter enables you to specify the bit resolution for audio data
transmission and reception.
e Latency
This field indicates the audio latency value. Audio latency is
determined by the “Preferred Buffer Size ( )” setting.
q
r OK
Click to enable the settings and close the dialog box.
t Cancel
Click to close the dialog box without changing the settings.
TOOLS for n/Cubase AI4 Installation Guide
14
Page 15

Uninstalling the Software
For Windows Users
To uninstall TOOLS for n, you must remove the following two
software components:
• AI Driver
• Extensions for Steinberg DAW
Removing AI Driver
1 Insert the TOOLS for n CD-ROM into the CD-ROM drive of your
computer.
2 Open the “Driver_” folder, then double-click “setup.exe.”
The maintenance window appears.
NOTE
• If you are using Windows Vista, the “User Account Control” window may
appear. Click [Continue]. The maintenance window will appear.
• If the driver has not been installed, AI Driver Installer starts.
9 Confirmation regarding removal of the file appears. Click [OK].
The maintenance operation starts.
10 A window appears indicating that the maintenance operation is
complete. Click [Finish].
11 A dialog box indicating that “Software removal has been com-
pleted” appears. Click [OK].
The uninstallation of AI Driver is complete.
NOTE
• You can also uninstall the software by using “Add or Remove Programs” or
“Programs and Features” in the Windows Control Panel. In the same manner
as described below for removing Extensions for Steinberg DAW, remove the
following two software programs in the listed order.
(Be sure to remove software 1, then software 2.)
1) Yamaha AI Driver
2) mLAN Tools 2.0
Removing Extensions for Steinberg DAW
■ Windows XP:
1 From the Start menu, select ([Settings] →) [Control Panel] →
[Add or Remove Programs] to display the Add or Remove Programs panel.
2 Click “Change or Remove Programs” located in the upper left,
then select “Yamaha Extensions for Steinberg DAW” from the list
in the right pane.
English
3 Select the radio button to the left of “Remove,” then click [Next].
4 A message “Remove Yamaha AI Driver” appears. Click [Next].
5 “Welcome...” window appears. Check the radio button to the left
of “Remove,” then click [Next].
6 Confirmation regarding removal of the file appears. Click [OK].
The maintenance operation starts.
7 The window appears indicating that the maintenance operation
is complete. Click [Finish].
3 To uninstall the software, click [Remove].
A dialog box appears. Follow the instructions to remove the software.
■ Windows Vista:
1 From the Start menu, select ([Settings] →) [Control Panel] →
[Programs and Features] to display the “Uninstall or change a
program” window.
2 Select “Extensions for Steinberg DAW” from the list.
3 Click [Uninstall].
If the “User Account Control” window appears, click [Continue].
A dialog box appears. Follow the instructions to remove the
software.
8 The message “Remove mLAN Tools 2.0” appears. click [Next].
TOOLS for n/Cubase AI4 Installation Guide
15
Page 16

For Windows Users
Hints when using audio data
For optimum use of the audio functions, we recommend you make the following settings. These settings minimize possible audio problems, such as drop
outs, glitches and noise.
• Set the DMA mode (high-speed transfer mode) of the
hard disk to on
Windows XP
Select [Control Panel] → [System] → [Hardware] → [Device Manager]
→ “IDE ATA/ATAPI controllers,” then double-click “Primary IDE
Channel” and “Secondary IDE Channel,” open [Advanced Settings].
Set “Transfer Mode” in the “Device” section to “DMA if available.”
Windows Vista
Select [Control Panel] → [Device Manager] (→ [Continue] in the “User
Account Control” window) → “IDE ATA/ATAPI controllers,” then dou-
ble-click “ATA Channel 0” and open [Advanced Settings]. Check
(enable) “Enable DMA” in the “Device Properties” section.
• Set Processor Scheduling to “Background services”
Windows XP
English
Select [Control Panel] → [System] → [Advanced] → [Settings] in the
“Performance” section → [Advanced] and select the radio button to the
left of “Background services” in the “Processor scheduling” section.
Windows Vista
Select [Control Panel] → [System] → [Advanced system settings] in
the upper left of the window (→ [Continue] in the “User Account Con-
trol” window) → [Advanced] → [Settings] in the “Performance” section → [Advanced] and select the radio button to the left of
“Background services” in the “Processor scheduling” section.
• Set the Visual Effects options to “best performance”
Windows XP
Select [Control Panel] → [System] → [Advanced] → [Settings] in the
“Performance” section → [Visual Effects] and select the radio button to
the left of “Adjust for best performance.”
Windows Vista
Select [Control Panel] → [System] → [Advanced system settings] in
the upper left of the window (→ [Continue] in the “User Account Con-
trol” window) → [Advanced] → [Settings] in the “Performance” section → [Visual Effects] and select the radio button to the left of “Adjust
for best performance.”
• Set Remote Assistance to off
Windows XP
Select [Control Panel] → [System] → [Remote] and un-check “Allow
Remote Assistance invitations....”
Windows Vista
Select [Control Panel] → [System] → [Remote settings] in the upper
left of the window (→ [Continue] in the “User Account Control” window) → [Remote] and un-check “Allow Remote Assistance connec-
tions....”
• Enable the Classic Start menu
Right-click on an empty space on the task bar and select [Properties] →
[Start Menu], then select the radio button to the left of “Classic Start
menu.”
• Disable transition effects
Windows XP
Select [Control Panel] → [Display] → [Appearance] → [Effects...], and
un-check (disable) “Use the following transition effect for menus and
tooltips.”
Windows Vista
Select [Control Panel] → [Ease of Access Center] → “Make it easier to
focus on tasks,” then check (enable) “Turn off all unnecessary animations (when possible)” in the “Adjust time limits and flashing visuals”
section.
• Disable EIST (SpeedStep)
Refer to “Troubleshooting” in the n8/n12 Owner’s Manual.
Troubleshooting
■ If an error message appears:
• If you see one of the following messages, right-click the driver icon on
the task bar and select “ON” (see page 12) to enable AI Driver:
“From the mLAN Manager menu, select ON.”
“Execute mLAN Start.”
“Start mLAN”
• If a message “Execute mLAN Stop” appears, right-click the driver
icon on the task bar and select “OFF” (see page 12) to disable AI
Driver.
• If other error messages appear, follow the instructions on the screen.
■ Cannot change the AI Driver settings
You cannot change the Sample Rate/Driver Setup settings while AI
Driver is being used by another application such as a DAW. If a message appears indicating the setting cannot be changed, first quit the
application, then try again.
■ Cannot uninstall (remove) AI Driver
Right-click the driver icon on the task bar to display the pop-up menu,
disable [Auto On] in the menu, and restart the computer. Then, try to
uninstall the driver again.
■ No sound, incorrect sound
Please refer to the “Troubleshooting” section in the Owner’s Manual.
TOOLS for n/Cubase AI4 Installation Guide
16
Page 17

For Macintosh Users
System Requirements for Software
The system requirements below are necessary for using the n8/n12 by connecting it to a computer, or for using the included DAW.
NOTE
• The system requirements below may differ slightly depending on the particular operating system.
• For details on minimum requirements for other DAW software, refer to the respective owner’s manual.
For Macintosh Users
● n8/n12 (TOOLS for n)
OS: Mac OS X 10.4 or later
Hard Disk: Free disk space of 100 MB or more; high-speed
hard disk
• Recommended system requirements (*1)
Computer: G5 1.8 GHz Dual or CoreSolo 1.5 GHz or higher
Available Memory: 1 GB or more
• Minimum system requirements (*1)
Computer: G4 1 GHz or higher
Available Memory: 512 MB or more
*1 The recommended/minimum system requirements listed here apply when
playing the audio/MIDI data described below on a typical DAW. This may
differ depending on the particular DAW you are using.
Recommended system requirements
Frequency/resolution: 44.1 kHz/24 bit
Audio playback tracks: 15
Audio recording tracks: 2
MIDI playback tracks: 16
MIDI Remote Control/Automation
Send effects (plug-in): 3
Insert effects (plug-in): 9
Plug-in synthesizer: 2
Latency: 5 msec or less
Minimum system requirements
Frequency/resolution: 44.1 kHz/24 bit
Audio playback tracks: 15
MIDI Remote Control/Automation
Send effects (plug-in): 3
Insert effects (plug-in): 9
Plug-in synthesizer: none
Latency: about 50 msec
● Cubase AI4
OS: Mac OS X 10.4 or later
Computer: PowerPC G4 1 GHz/Core Solo 1.5 GHz or higher
Available Memory: 512 MB or more
Display Resolution: 1280x800 or more
Audio Interface: Core Audio compatible
Hard Disk: Free disk space of 1 GB or more; high-speed hard
disk
NOTE
•A DVD-ROM drive is required for installation.
• To activate your software license, install the application while the computer is connected to the internet.
English
About the Cubase AI4 DVD-ROM
Installation
Important!
Since the End-User Software License Agreement (EUSLA)
shown on your PC display in your installing the “DAW”
software is replaced by the agreement on page 23, you
should disregard the EUSLA. Read the Cubase AI4 License
Agreement on page 23 carefully, and install the software if
you agree to it.
Install Cubase AI4 before you install TOOLS for n. Project templates for
the n8/n12 will be installed in the Cubase AI4 installation destination.
1 Start the computer and log in to the Administrator account.
2 Insert the Cubase AI4 DVD-ROM into the DVD-ROM drive.
3 Open the DVD-ROM, then double-click the file “Cubase
AI 4.mpkg” from “Cubase AI 4 for MacOS X.”
Follow the instructions on the screen to install Cubase AI4.
NOTE
• Make sure to install Cubase AI4 under the “Administrator” account.
• When installing Cubase AI4, you will need a working internet connection to register
your Cubase AI4. Make sure to fill in all required fields for user registration. If you do
not register the product, you will be unable to use the application after a limited period
of time expires.
• If you are using Cubase 4 or Cubase Studio 4, install either application before you
install TOOLS for n. The n8/n12 project templates will be installed in the application
installation destination.
About software support
Support for the included DAW is provided by Steinberg on its website at the
following address.
http://www.steinberg.net
You can visit the Steinberg site also via the Help menu of the included DAW
software. (The Help menu also includes the PDF manual and other information on the software.)
TOOLS for n/Cubase AI4 Installation Guide
17
Page 18

For Macintosh Users
About the TOOLS for n CD-ROM
CAUTION
• Keep in mind that noise may be generated when installing or uninstalling TOOLS for n. Before performing either of these operations, make sure to lower the output
level of each device.
If you have already installed AI Driver or mLAN Tools on your computer:
AI Driver or mLAN Tools already installed on your computer will be deleted when installing TOOLS for n.
TOOLS for n consists of two software components: AI Driver and Extensions for Steinberg DAW. AI Driver is required to connect the n8/n12 to a
computer. Extensions for Steinberg DAW is a software component that enables you to use the n8/n12 along with Cubase 4, Cubase Studio 4 or Cubase AI4.
The TOOLS for n Installer installs these two software components.
NOTE
• If an error message appears, follow the on-screen instructions.
Installing the software
English
Preparing to install
1 Make sure that the power to the n8/n12 is turned off.
2 Disconnect all MIDI cables that connect MIDI devices to MIDI IN/
OUT jacks on the n8/n12.
3 Using an IEEE 1394 cable, connect the n8/n12 directly to the
computer (without using a hub), and disconnect all other IEEE
1394 devices from the computer.
4 Start the computer and log in to the Administrator account.
5 Exit any open applications and close all open windows.
6 Insert the TOOLS for n CD-ROM into the CD-ROM drive.
Starting up the Installer
7 Open the CD-ROM, then double-click the file “TOOLS for
n.mpkg.”
8 A dialog box appears asking if you want to install the software.
Click [Continue].
The “Welcome to the TOOLS for n Installer” window appears.
10 Click [Continue].
The “Installation Type” window appears.
NOTE
• You can select Extensions for Steinberg DAW to be installed by selecting
[Custom] on the “Installation Type” window.
11 Click [Install].
The “Authenticate” window appears.
12 Enter the Administrator name and the password, then click [OK].
A message appears prompting you to restart the computer after the
installation.
13 Click [Continue Installation].
The “Install” window appears indicating the installation progress.
When the installation is complete, the “Finish Up” window
appears.
NOTE
• Installation cannot be canceled after clicking [Continue Installation].
14 Click [Restart] to restart the computer.
When canceling the installation
If you’ve cancelled an installation before it is complete, the software may
not have been installed properly. To install the software properly, resume
the procedure from Step 7.
9 Click [Continue].
The “Select a Destination” window appears.
NOTE
• Only the boot disk can be selected for the installer.
TOOLS for n/Cubase AI4 Installation Guide
18
Page 19

Establishing a connection
15 After you restart the computer, the following window appears.
Click [OK].
NOTE
• This window appears every time when Connection Manager starts. If you do
not want this window to appear, click the check box to the left of “Do not ask
this again,” then click [OK].
16 Turn on the power to the n8/n12.
AI Driver is activated, and Connection Manager starts to establish a
connection. The process of making AI Driver connection settings is
complete.
For Macintosh Users
English
NOTE
• After the initial settings have been made, you can physically connect the n8/
n12 to your computer even while the n8/n12 power is on.
• To use the n8/n12 along with the computer, Connection Manager must be
enabled (see page 20). When you connect the n8/n12 to the computer, Connection Manager automatically makes all connection settings. During this process, the driver icon ( ) (see page 20) flashes. Wait until the icon stops
flashing and stays lit.
• When you connect the n8/n12 to the computer for the first time or you connect
a different device than you have used before, the same message as the one
shown in Step
the process of establishing a connection.
16 appears indicating that the n8/n12 and the computer are in
CAUTION
• The flashing driver icon means that Connection Manager is checking an IEEE
1394 device that is connected to the computer. Do NOT turn off or on the power
to any connected IEEE 1394 device, or disconnect or connect any IEEE 1394
cable while the driver icon is flashing.
TOOLS for n/Cubase AI4 Installation Guide
19
Page 20

For Macintosh Users
Confirming the installation
Status menu
If the installation is successful, an AI Driver icon is added to the status
menu. To call up the menu, click on the icon ( ).
NOTE
• When Connection Manager is disabled, the driver icon is white. When Connection
Manager is enabled, the driver icon is blue. To use the n8/n12 along with a computer,
you must enable Connection Manager. While Connection Manager is checking an
IEEE 1394 device that is connected to the computer, the driver icon flashes.
Driver icon
• Connection Manager
Enables/disables Connection Manager.
English
• Sample Rate…
Specifies the sampling frequency.
• EXIT
Exit AI Driver, then removes the driver icon from the status menu. To
display the driver icon on the status menu again, from the hard disk to
which OS X is installed (usually Macintosh HD) click [Applications]
→ [mLAN Tools], then double-click [mLAN Manager]. Connection
Manager will start in the same condition (enabled/disabled) when the
icon is removed.
NOTE
• The default setting of Connection Manager for AI Driver is “ON.”
Audio MIDI Setup (Audio Devices)
1 From the hard disk to which the OS is installed (usually Macin-
tosh HD), click [Applications] → [Utilities], then double-click
[Audio MIDI Setup].
The “Audio MIDI Setup” window appears.
Audio MIDI Setup (MIDI Devices)
1 From the hard disk to which the OS is installed (usually Macin-
tosh HD), click [Applications] → [Utilities], then double-click
[Audio MIDI Setup].
The “Audio MIDI Setup” window appears.
2 Click [MIDI Devices], then confirm that the MIDI driver is shown
as “mLAN Network.”
3 Double-click the [mLAN Network] icon.
The “mLAN Network Properties” window appears.
4 Click [Ports], and confirm the n8/n12 MIDI ports.
The MIDI ports are shown in the following sequence: output, input,
output. If you are using the n12, the ports are shown as “n12:1,
n12:1, n12:2, n12:2” and if you are using the n8, they are shown as
“n8:1, n8:1, n8:2, n8:2.”
2 Click [Audio Devices], then select “mLAN Network” from the
pull-down menu in [Properties For].
The current audio settings are shown in the [Audio Input] and
[Audio Output] fields.
NOTE
• By selecting “mLAN Network” for [Default Output] in System Settings, you can
output audio signals of the system sounds and audio player software (e.g.,
iTunes, etc.) from the n8/n12.
• The sampling frequency cannot be changed from the “Audio Devices” window.
Change the sampling frequency from the Sample Rate window (page 21).
TOOLS for n/Cubase AI4 Installation Guide
20
Page 21

Changing settings after installation
For Macintosh Users
NOTE
• If you perform the following operations while AI Driver is being used by an application
(such as a DAW), the application may not work properly. Quit the application, then
perform the following operations.
- Turning Connection Manager on/off
- Turning the n8/n12 on/off
- Plugging/unplugging the IEEE 1394 cable
Sample Rate
(Click the driver icon on the status menu → Sample Rate)
This dialog box enables you to set the sampling frequency.
Click the arrows in the Sample Rate box, then select the desired sampling
frequency. Click [OK] to apply the selection and close the dialog box. By
clicking [Apply], your selection will be applied and the dialog box will
remain open. While you are changing the sampling frequency, a window
appears indicating that the setting is being changed, and the n8/n12
[COMP] indicator flashes (see page 14 in the Owner’s Manual).
Setting the audio driver buffer size
Audio signals may not be played back or recorded properly because of
noise being produced while using DAW software. In most cases, you can
solve these problems by adjusting the audio buffer size (Audio Buffer
Size). The buffer size can be adjusted on the audio driver setup window.
While the higher buffer size reduces load to the computer CPU but produces latency (time lag) during recording/playback, the smaller buffer
size may result in noise or the sound cutting off.
Make sure to set the buffer size to an appropriate value depending on
the performance of your computer, the number of audio/MIDI tracks
being recorded/played back on the DAW software, the number of plug-in
software, and so on.
English
Uninstalling the Software
To uninstall TOOLS for n, you must remove the following two software
components:
• AI Driver
• Extensions for Steinberg DAW
Removing AI Driver
Remove the following folders and files from the boot disk (usually
Macintosh HD).
/Applications/mLAN Tools/
/System/Library/Extensions/Yamaha1394AudioDriver.kext
/System/Library/Extensions/YamahaOGTAsync.kext
/System/Library/Frameworks/mLANEnablerFramework.framework
/System/Library/Frameworks/mLANQt.framework
/Library/Application Support/mLAN/
/Library/Audio/MIDI Drivers /Yamaha1394MIDI.plugin
/Library/Prefrences/com.yamaha.mLAN Manager.plist
/User/(Account name)*/Library/Preferences/com.yamaha.mLAN Manager.plist
/User/(Account name)*/mLAN/
* “(Account name)” indicates the account name when AI Driver is
installed.
Removing Extensions for Steinberg DAW
1 Select [Library] → [Application Support] → [Steinberg] → [com-
ponents], then delete the files named “yamaha_xxx.bundle”
(“xxx” indicates a specific model name, etc.).
2 Open the [Applications] folder, then click the “Cubase AI4” icon
while holding down the [control] key.
3 Select “Show Package Contents” from the context menu called
up in step 2.
NOTE
• When using Cubase 4 or Cubase Studio 4, click the corresponding icon to call
up the context menu.
4 Select [Contents] → [templates], then delete the files named
“yamaha_xxx.cpr” (“xxx” indicates specific model name, etc.).
This completes the uninstallation of TOOLS for n.
TOOLS for n/Cubase AI4 Installation Guide
21
Page 22

ATTENTION
TOOLS for n LICENSE AGREEMENT
PLEASE READ THIS SOFTWARE LICENSE AGREEMENT (“AGREEMENT”) CAREFULLY BEFORE USING THIS SOFTWARE. YOU ARE ONLY
PERMITTED TO USE THIS SOFTWARE PURSUANT TO THE TERMS AND CONDITIONS OF THIS AGREEMENT. THIS AGREEMENT IS
BETWEEN YOU (AS AN INDIVIDUAL OR LEGAL ENTITY) AND YAMAHA CORPORATION (“YAMAHA”).
BY BREAKING THE SEAL OF THIS PACKAGE YOU ARE AGREEING TO BE BOUND BY THE TERMS OF THIS LICENSE. IF YOU DO NOT AGREE
WITH THE TERMS, DO NOT INSTALL, COPY, OR OTHERWISE USE THIS SOFTWARE.
1. GRANT OF LICENSE AND COPYRIGHT
Yamaha hereby grants you the right to use one copy of the software
program(s) and data (“SOFTWARE”) accompanying this Agreement.
The term SOFTWARE shall encompass any updates to the
accompanying software and data. The SOFTWARE is owned by
Yamaha and/or Yamaha’s licensor(s), and is protected by relevant
copyright laws and all applicable treaty provisions. While you are
English
entitled to claim ownership of the data created with the use of
SOFTWARE, the SOFTWARE will continue to be protected under
relevant copyrights.
• You may use the SOFTWARE on a single computer.
• You may make one copy of the SOFTWARE in machine-readable
form for backup purposes only, if the SOFTWARE is on media where
such backup copy is permitted. On the backup copy, you must
reproduce Yamaha’s copyright notice and any other proprietary
legends that were on the original copy of the SOFTWARE.
• You may permanently transfer to a third party all your rights in the
SOFTWARE, provided that you do not retain any copies and the
recipient reads and agrees to the terms of this Agreement.
2. RESTRICTIONS
• You may not engage in reverse engineering, disassembly,
decompilation or otherwise deriving a source code form of the
SOFTWARE by any method whatsoever.
• You may not reproduce, modify, change, rent, lease, or distribute the
SOFTWARE in whole or in part, or create derivative works of the
SOFTWARE.
• You may not electronically transmit the SOFTWARE from one
computer to another or share the SOFTWARE in a network with other
computers.
• You may not use the SOFTWARE to distribute illegal data or data
that violates public policy.
• You may not initiate services based on the use of the SOFTWARE
without permission by Yamaha Corporation.
Copyrighted data, including but not limited to MIDI data for songs,
obtained by means of the SOFTWARE, are subject to the following
restrictions which you must observe.
• Data received by means of the SOFTWARE may not be used for any
commercial purposes without permission of the copyright owner.
• Data received by means of the SOFTWARE may not be duplicated,
transferred, or distributed, or played back or performed for listeners in
public without permission of the copyright owner.
• The encryption of data received by means of the SOFTWARE may
not be removed nor may the electronic watermark be modified
without permission of the copyright owner.
3. TERMINATION
This Agreement becomes effective on the day that you receive the
SOFTWARE and remains effective until terminated. If any copyright law
or provisions of this Agreement is violated, the Agreement shall
terminate automatically and immediately without notice from Yamaha.
Upon such termination, you must immediately destroy the licensed
SOFTWARE, any accompanying written documents and all copies
thereof.
4. LIMITED WARRANTY ON MEDIA
As to SOFTWARE sold on tangible media, Yamaha warrants that the
tangible media on which the SOFTWARE is recorded will be free from
defects in materials and workmanship under normal use for a period of
fourteen (14) days from the date of receipt, as evidenced by a copy of
the receipt. Yamaha’s entire liability and your exclusive remedy will be
replacement of the defective media if it is returned to Yamaha or an
authorized Yamaha dealer within fourteen days with a copy of the
receipt. Yamaha is not responsible for replacing media damaged by
accident, abuse or misapplication. TO THE FULLEST EXTENT
PERMITTED BY LAW, YAMAHA EXPRESSLY DISCLAIMS ANY
IMPLIED WARRANTIES ON THE TANGIBLE MEDIA, INCLUDING THE
IMPLIED WARRANTIES OF MERCHANTABILITY AND FITNESS FOR
A PARTICULAR PURPOSE.
5. DISCLAIMER OF WARRANTY ON SOFTWARE
You expressly acknowledge and agree that use of the SOFTWARE is at
your sole risk. The SOFTWARE and related documentation are
provided “AS IS” and without warranty of any kind.
NOTWITHSTANDING ANY OTHER PROVISION OF THIS
AGREEMENT, YAMAHA EXPRESSLY DISCLAIMS ALL WARRANTIES
AS TO THE SOFTWARE, EXPRESS, AND IMPLIED, INCLUDING BUT
NOT LIMITED TO THE IMPLIED WARRANTIES OF
MERCHANTABILITY, FITNESS FOR A PARTICULAR PURPOSE AND
NON-INFRINGEMENT OF THIRD PARTY RIGHTS. SPECIFICALLY,
BUT WITHOUT LIMITING THE FOREGOING, YAMAHA DOES NOT
WARRANT THAT THE SOFTWARE WILL MEET YOUR
REQUIREMENTS, THAT THE OPERATION OF THE SOFTWARE WILL
BE UNINTERRUPTED OR ERROR-FREE, OR THAT DEFECTS IN
THE SOFTWARE WILL BE CORRECTED.
6. LIMITATION OF LIABILITY
YAMAHA’S ENTIRE OBLIGATION HEREUNDER SHALL BE TO
PERMIT USE OF THE SOFTWARE UNDER THE TERMS HEREOF. IN
NO EVENT SHALL YAMAHA BE LIABLE TO YOU OR ANY OTHER
PERSON FOR ANY DAMAGES, INCLUDING, WITHOUT LIMITATION,
ANY DIRECT, INDIRECT, INCIDENTAL OR CONSEQUENTIAL
DAMAGES, EXPENSES, LOST PROFITS, LOST DATA OR OTHER
DAMAGES ARISING OUT OF THE USE, MISUSE OR INABILITY TO
USE THE SOFTWARE, EVEN IF YAMAHA OR AN AUTHORIZED
DEALER HAS BEEN ADVISED OF THE POSSIBILITY OF SUCH
DAMAGES. In no event shall Yamaha’s total liability to you for all
damages, losses and causes of action (whether in contract, tort or
otherwise) exceed the amount paid for the SOFTWARE.
TOOLS for n/Cubase AI4 Installation Guide
22
Page 23

7. THIRD PARTY SOFTWARE
Third party software and data (“THIRD PARTY SOFTWARE”) may be
attached to the SOFTWARE. If, in the written materials or the electronic
data accompanying the Software, Yamaha identifies any software and
data as THIRD PARTY SOFTWARE, you acknowledge and agree that
you must abide by the provisions of any Agreement provided with the
THIRD PARTY SOFTWARE and that the party providing the THIRD
PA RTY SOFTWARE is responsible for any warranty or liability related to
or arising from the THIRD PARTY SOFTWARE. Yamaha is not
responsible in any way for the THIRD PARTY SOFTWARE or your use
thereof.
•Yamaha provides no express warranties as to the THIRD PARTY
SOFTWARE. IN ADDITION, YAMAHA EXPRESSLY DISCLAIMS
ALL IMPLIED WARRANTIES, INCLUDING BUT NOT LIMITED TO
THE IMPLIED WARRANTIES OF MERCHANTABILITY AND
FITNESS FOR A PARTICULAR PURPOSE, as to the THIRD PARTY
SOFTWARE.
•Yamaha shall not provide you with any service or maintenance as to
the THIRD PARTY SOFTWARE.
•Yamaha is not liable to you or any other person for any damages,
including, without limitation, any direct, indirect, incidental or
consequential damages, expenses, lost profits, lost data or other
damages arising out of the use, misuse or inability to use the THIRD
PA RTY SOFTWARE.
8. GENERAL
This Agreement shall be interpreted according to and governed by
Japanese law without reference to principles of conflict of laws. Any
dispute or procedure shall be heard before the Tokyo District Court in
Japan. If for any reason a court of competent jurisdiction finds any
portion of this Agreement to be unenforceable, the remainder of this
Agreement shall continue in full force and effect.
9. COMPLETE AGREEMENT
This Agreement constitutes the entire agreement between the parties
with respect to use of the SOFTWARE and any accompanying written
materials and supersedes all prior or contemporaneous understandings
or agreements, written or oral, regarding the subject matter of this
Agreement. No amendment or revision of this Agreement will be
binding unless in writing and signed by a fully authorized representative
of Yamaha.
English
ATTENTION
Cubase AI4 LICENSE AGREEMENT
PLEASE READ THIS SOFTWARE LICENSE AGREEMENT (“AGREEMENT”) CAREFULLY BEFORE USING THIS SOFTWARE. YOU ARE ONLY
PERMITTED TO USE THIS SOFTWARE PURSUANT TO THE TERMS AND CONDITIONS OF THIS AGREEMENT. THIS AGREEMENT IS
BETWEEN YOU (AS AN INDIVIDUAL OR LEGAL ENTITY) AND YAMAHA CORPORATION (“YAMAHA”).
BY BREAKING THE SEAL OF THIS PACKAGE YOU ARE AGREEING TO BE BOUND BY THE TERMS OF THIS LICENSE. IF YOU DO NOT AGREE
WITH THE TERMS, DO NOT INSTALL, COPY, OR OTHERWISE USE THIS SOFTWARE.
THIS AGREEMENT PROVIDES YOUR USE-CONDITIONS ABOUT THE “DAW” SOFTWARE OF STEINBERG MEDIA TECHNOLOGIES
GMBH(“STEINBERG”) WHICH IS BUNDLED WITH THIS PRODUCT. SINCE THE END-USER SOFTWARE LICENSE AGREEMENT (EUSLA)
SHOWN ON YOUR PC-DISPLAY IN YOUR INSTALLING THE “DAW” SOFTWARE IS REPLACED BY THIS AGREEMENT, YOU SHOULD
DISREGARD THE EUSLA. THAT IS, IN THE INSTALLING PROCESS, YOU SHOULD SELECT “AGREE” WITH THE EUSLA, WITHOUT YOUR
JUDGMENT THERETO, SO AS TO PROCEED TO THE NEXT PAGE.
1. GRANT OF LICENSE AND COPYRIGHT
Yamaha hereby grants you the right to use one copy of the software
program(s) and data (“SOFTWARE”) accompanying this Agreement.
The term SOFTWARE shall encompass any updates to the
accompanying software and data. The SOFTWARE is owned by
STEINBERG, and is protected by relevant copyright laws and all
applicable treaty provisions. Yamaha has acquired the sublicense right
to license you to use the SOFTWARE. While you are entitled to claim
ownership of the data created with the use of SOFTWARE, the
SOFTWARE will continue to be protected under relevant copyrights.
• You may use the SOFTWARE on a single computer.
• You may make one copy of the SOFTWARE in machine-readable
form for backup purposes only, if the SOFTWARE is on media where
such backup copy is permitted. On the backup copy, you must
reproduce Yamaha’s copyright notice and any other proprietary
legends that were on the original copy of the SOFTWARE.
• You may permanently transfer to a third party all your rights in the
SOFTWARE only when you transfer this product together, provided
that you do not retain any copies and the recipient reads and agrees
to the terms of this Agreement.
2. RESTRICTIONS
• You may not engage in reverse engineering, disassembly,
decompilation or otherwise deriving a source code form of the
SOFTWARE by any method whatsoever.
• You may not reproduce, modify, change, rent, lease, or distribute the
SOFTWARE in whole or in part, or create derivative works of the
SOFTWARE.
• You may not electronically transmit the SOFTWARE from one
computer to another or share the SOFTWARE in a network with other
computers.
• You may not use the SOFTWARE to distribute illegal data or data
that violates public policy.
• You may not initiate services based on the use of the SOFTWARE
without permission by Yamaha Corporation.
Copyrighted data, including but not limited to MIDI data for songs,
obtained by means of the SOFTWARE, are subject to the following
restrictions which you must observe.
• Data received by means of the SOFTWARE may not be used for any
commercial purposes without permission of the copyright owner.
TOOLS for n/Cubase AI4 Installation Guide
23
Page 24

• Data received by means of the SOFTWARE may not be duplicated,
transferred, or distributed, or played back or performed for listeners in
public without permission of the copyright owner.
• The encryption of data received by means of the SOFTWARE may
not be removed nor may the electronic watermark be modified
without permission of the copyright owner.
3. TERMINATION
This Agreement becomes effective on the day that you receive the
SOFTWARE and remains effective until terminated. If any copyright law
or provisions of this Agreement is violated, the Agreement shall
terminate automatically and immediately without notice from Yamaha.
Upon such termination, you must immediately destroy the licensed
SOFTWARE, any accompanying written documents and all copies
thereof.
4. LIMITED WARRANTY ON MEDIA
As to SOFTWARE sold on tangible media, Yamaha warrants that the
tangible media on which the SOFTWARE is recorded will be free from
defects in materials and workmanship under normal use for a period of
English
fourteen (14) days from the date of receipt, as evidenced by a copy of
the receipt. Yamaha’s entire liability and your exclusive remedy will be
replacement of the defective media if it is returned to Yamaha or an
authorized Yamaha dealer within fourteen days with a copy of the
receipt. Yamaha is not responsible for replacing media damaged by
accident, abuse or misapplication. TO THE FULLEST EXTENT
PERMITTED BY LAW, YAMAHA EXPRESSLY DISCLAIMS ANY
IMPLIED WARRANTIES ON THE TANGIBLE MEDIA, INCLUDING THE
IMPLIED WARRANTIES OF MERCHANTABILITY AND FITNESS FOR
A PARTICULAR PURPOSE.
7. GENERAL
This Agreement shall be interpreted according to and governed by
Japanese law without reference to principles of conflict of laws. Any
dispute or procedure shall be heard before the Tokyo District Court in
Japan. If for any reason a court of competent jurisdiction finds any
portion of this Agreement to be unenforceable, the remainder of this
Agreement shall continue in full force and effect.
8. COMPLETE AGREEMENT
This Agreement constitutes the entire agreement between the parties
with respect to use of the SOFTWARE and any accompanying written
materials and supersedes all prior or contemporaneous understandings
or agreements, written or oral, regarding the subject matter of this
Agreement. No amendment or revision of this Agreement will be
binding unless in writing and signed by a fully authorized representative
of Yamaha.
5. DISCLAIMER OF WARRANTY ON SOFTWARE
You expressly acknowledge and agree that use of the SOFTWARE is at
your sole risk. The SOFTWARE and related documentation are
provided “AS IS” and without warranty of any kind.
NOTWITHSTANDING ANY OTHER PROVISION OF THIS
AGREEMENT, YAMAHA EXPRESSLY DISCLAIMS ALL WARRANTIES
AS TO THE SOFTWARE, EXPRESS, AND IMPLIED, INCLUDING BUT
NOT LIMITED TO THE IMPLIED WARRANTIES OF
MERCHANTABILITY, FITNESS FOR A PARTICULAR PURPOSE AND
NON-INFRINGEMENT OF THIRD PARTY RIGHTS. SPECIFICALLY,
BUT WITHOUT LIMITING THE FOREGOING, YAMAHA DOES NOT
WARRANT THAT THE SOFTWARE WILL MEET YOUR
REQUIREMENTS, THAT THE OPERATION OF THE SOFTWARE WILL
BE UNINTERRUPTED OR ERROR-FREE, OR THAT DEFECTS IN
THE SOFTWARE WILL BE CORRECTED.
6. LIMITATION OF LIABILITY
YAMAHA’S ENTIRE OBLIGATION HEREUNDER SHALL BE TO
PERMIT USE OF THE SOFTWARE UNDER THE TERMS HEREOF. IN
NO EVENT SHALL YAMAHA BE LIABLE TO YOU OR ANY OTHER
PERSON FOR ANY DAMAGES, INCLUDING, WITHOUT LIMITATION,
ANY DIRECT, INDIRECT, INCIDENTAL OR CONSEQUENTIAL
DAMAGES, EXPENSES, LOST PROFITS, LOST DATA OR OTHER
DAMAGES ARISING OUT OF THE USE, MISUSE OR INABILITY TO
USE THE SOFTWARE, EVEN IF YAMAHA OR AN AUTHORIZED
DEALER HAS BEEN ADVISED OF THE POSSIBILITY OF SUCH
DAMAGES. In no event shall Yamaha’s total liability to you for all
damages, losses and causes of action (whether in contract, tort or
otherwise) exceed the amount paid for the SOFTWARE.
TOOLS for n/Cubase AI4 Installation Guide
24
Page 25

English
TOOLS for n/Cubase AI4 Installation Guide
25
Page 26

WJ86050
U.R.G., Pro Audio & Digital Musical Instrument Division, Yamaha Corporation
© 2007 Yamaha Corporation
701APCR?.?-02B0 Printed in Indonesia
 Loading...