

Yamaha HIFI PACK 2 User Manual
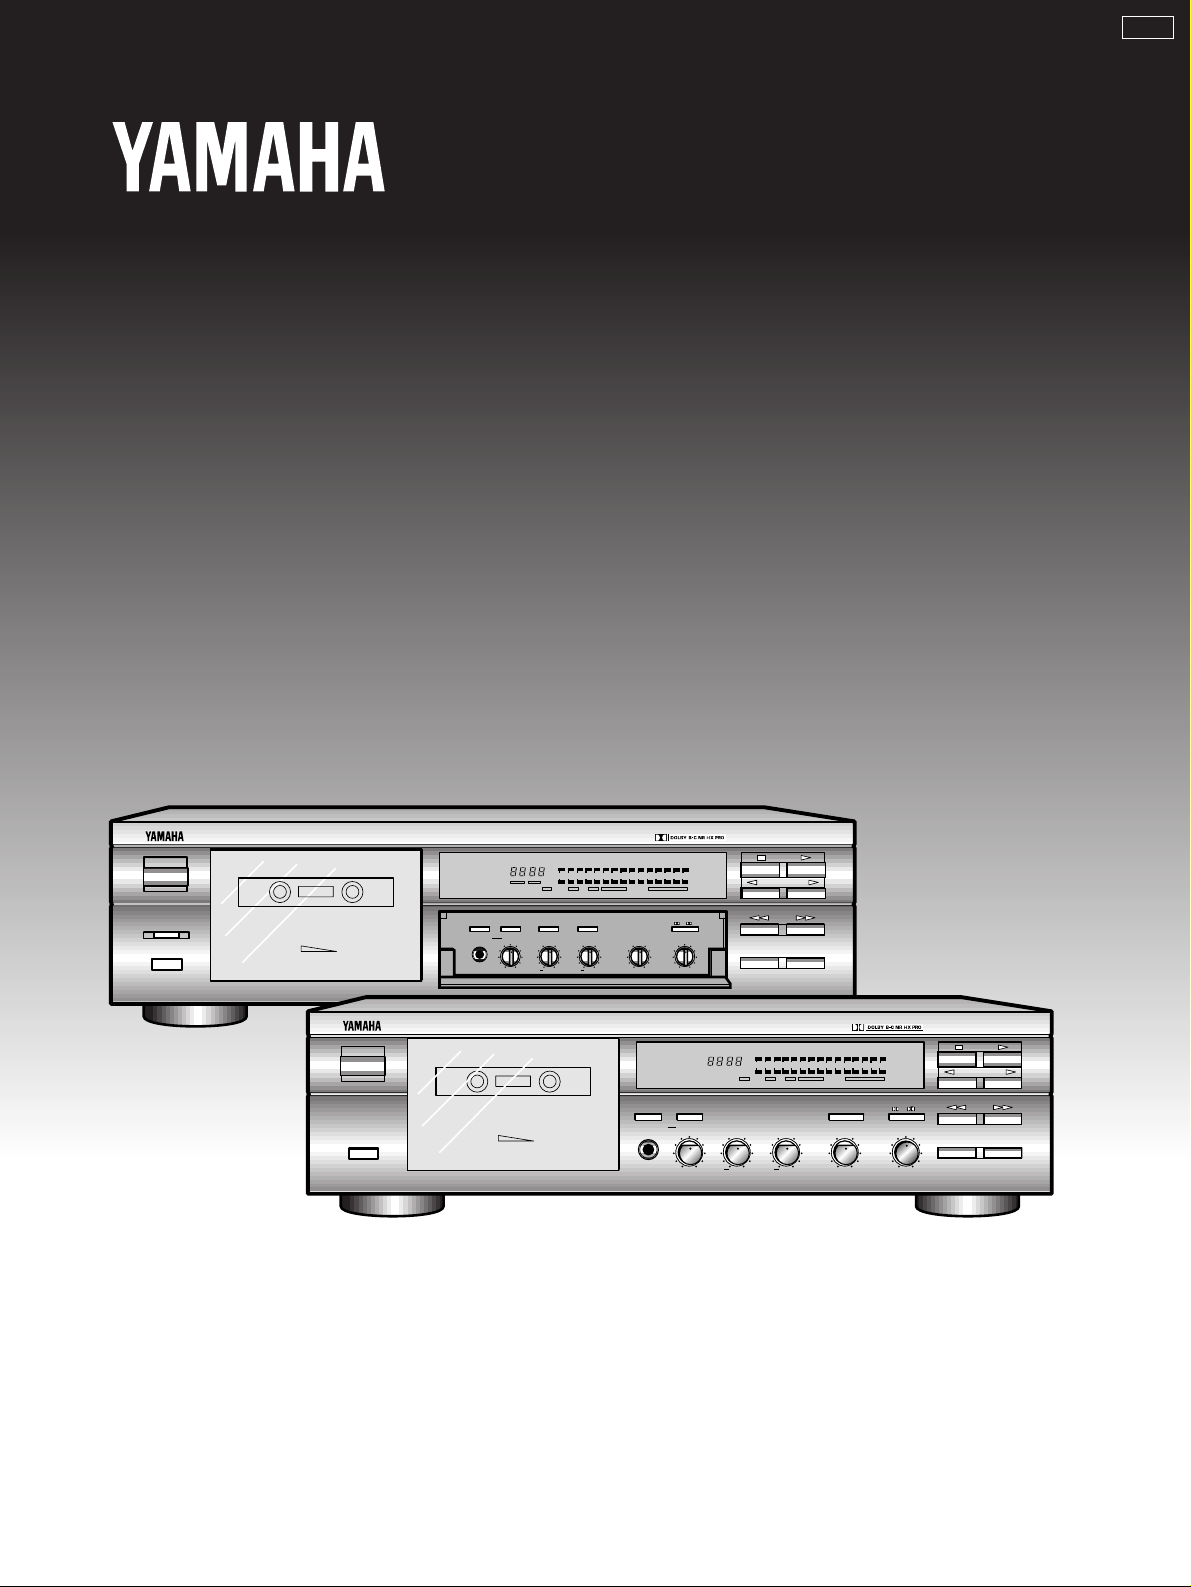
KX-493/KX-393
Natural Sound Stereo Cassette Deck
Platine à cassette stéréo de la série “Natural Sound”
“Natural Sound” Stereo-Kassettengerät
Natural Sound stereokassettdäck
B G R
Registratore a cassette stereo a suono naturale
Magnetófono estéreo de sonido natural
Stereo-cassettedeck voor een “natuurlijk geluid”
NATURAL SOUND STEREO CASSETTE DECK KX-493
STANDBY/ON
INTRO SCAN
0
LR
DOLBY NR
OFF/ B/ C/MPX
REC
MIN MAX
COUNTER
LEVELBALANCE
MEMORYRESET
LEVELPHONES
REC/PAUSE MUTE/SEARCH
AUTO TAPE
PLAY TRIMBIAS ADJUST
00
++MIN MAX
TUNING
0
LR
DOLBY NR
OFF/ B/ C/MPX
REC LEVELBALANCE
MIN MAX
TIMER
OFFREC PLAY
EJECT
YAMAHA GF Head
Cassette Stabilizer
NATURAL SOUND STEREO CASSETTE DECK KX-393
STANDBY/ON
EJECT
COUNTER
REPEAT
MEMORYRESET
MIN MAX
YAMAHA GF Head
Cassette Stabilizer
AUTO TAPE
TUNINGOFF/0-M/FULL
PLAY TRIMBIAS ADJUSTLEVELPHONES
00
++
INTRO SCAN
REC/PAUSE MUTE/SEARCH
OWNER’S MANUAL
MODE D’EMPLOI
BEDIENUNGSANLEITUNG
BRUKSANVISNING
MANUALE DELL’UTENTE
MANUAL DE INSTRUCCIONES
GEBRUIKSAANWIJZING

Thank you for purchasing this YAMAHA stereo cassette deck.
CAUTION: READ THIS BEFORE OPERATING YOUR UNIT.
1. This unit is a sophisticated stereo cassette deck. To
ensure proper operation for the best possible
performance, please read this manual carefully.
2. Choose the installation location of your unit carefully.
Avoid placing it in direct sunlight or close to source of
heat. Also avoid locations subject to vibration and
excessive dust, heat, cold or moisture. Keep it away
from sources of hum such as transformers or motors.
3. Do not open the cabinet as this may result in damage
to the deck or electrical shock. If a foreign object
should get into the deck, contact your local dealer.
4. When removing the power plug from the wall outlet,
always pull directly on the plug; never pull the cord
itself.
5. Do not apply excessive force when operating
switches and knobs.
6. When moving the deck, be sure to first pull out the
power plug and remove all cords connecting the deck
to other equipments.
7. Do not attempt to clean this unit with chemical
solvents as this may damage the finish. Use a clean,
dry cloth.
NOTE:
Please check the copyright laws in your country to
record from records, compact discs, radio, etc.
Recording of copyright material may infringe
copyright laws.
WARNING
TO REDUCE THE RISK OF FIRE OR ELECTRIC
SHOCK, DO NOT EXPOSE THIS APPLIANCE TO RAIN
OR MOISTURE.
This unit is not disconnected from the AC power
source as long as it is connected to the wall outlet,
even if this unit itself is turned off. This state is called
the standby mode. In this state, this unit is designed
to consume a very small quantity of power.
For U.K. customers
If the socket outlets in the home are not suitable for the
plug supplied with this appliance, it should be cut off and
an appropriate 3 pin plug fitted. For details, refer to the
instructions described below.
Note: The plug severed from the mains lead must be
destroyed, as a plug with bared flexible cord is hazardous
if engaged in a live socket outlet.
8. Never allow metallic items (e.g. screwdrivers, tools,
etc.) to come near the record/playback head
assembly. Doing so may not only scratch or damage
the head’s mirror-smooth finish, but also change the
magnetic characteristics of the heads, causing a
deterioration in reproduction quality.
9. Although the record/playback head used in this unit is
a high quality head with outstanding reproduction
characteristics, it can become dirty through the use of
old tapes or from dust accumulation over time.
This can have a serious effect on reproduction quality.
Clean the heads regularly with one of the commonly
available head cleaners or with cleaning solutions as
explained later in this manual.
10. Be sure to read the “TROUBLESHOOTING” section of
this manual for advice on common operating errors
before concluding that your unit is faulty.
11. Keep this manual in a safe place for future reference.
12. Voltage Selector (General Model only)
The voltage selector on the rear panel of this unit
must be set for your local mains voltage BEFORE
plugging in the AC mains supply. (Voltage selector
adjustable between 110/120/220/240 V AC.)
IMPORTANT
THE WIRES IN MAINS LEAD ARE COLOURED IN
ACCORDANCE WITH THE FOLLOWING CODE:
Blue: NEUTRAL
Brown: LIVE
As the colours of the wires in the mains lead of this
apparatus may not correspond with the coloured
markings identifying the terminals in your plug,
proceed as follows: The wire which is coloured BLUE
must be connected to the terminal which is marked
with the letter N or coloured BLACK. The wire which is
coloured BROWN must be connected to the terminal
which is marked with the letter L or coloured RED.
Making sure that neither core is connected to the
earth terminal of the three pin plug.
FOR CANADIAN CUSTOMERS
TO PREVENT ELECTRIC SHOCK, MATCH WIDE
BLADE OF PLUG TO WIDE SLOT AND FULLY
INSERT.
THIS CLASS B DIGITAL APPARATUS MEETS ALL
REQUIREMENTS OF THE CANADIAN
INTERFERENCE-CAUSING EQUIPMENT
REGULATIONS.
2

This owner’s manual covers YAMAHA cassette deck models KX-493 and KX-393. Please check which model
you have purchased and read the sections that apply to your particular model. There may be some
unnecessary items, so please skip them accordingly.
TABLE OF CONTENTS
FEATURES.......................................................................... 3
CONNECTIONS.................................................................. 3
PLAYBACK ......................................................................... 4
SELECTION SEARCH ..................................................... 6
INTRO SCAN................................................................... 6
MEMORY STOP OPERATION ......................................... 7
REPEAT PLAYBACK (KX-493 only)................................ 7
RECORDING ...................................................................... 8
REC MUTE OPERATION .............................................. 11
0-STOP OPERATION .................................................... 11
REC RETURN OPERATION .......................................... 11
FEATURES
÷ Dolby HX Pro Dynamic Bias Servo
÷ Dolby B/C Noise Reduction
÷ Secure Holding Damper Cassette Stabilizer allows you
to reduce unwanted vibration and modulation noise
÷ Fine Adjustment of Recording Characteristics with Auto
Tape Tuning and Bias Adjust Control
÷ 160 kHz High Recording Bias prevents cross
modulation beat distortion that can occur between the
recording bias and the recording signal’s high
frequency content (KX-493 only)
TIMER RECORDING/PLAYBACK (KX-493 only)............. 12
Timer recording ............................................................ 12
Timer playback ............................................................. 12
CASSETTE TAPES............................................................ 13
OPENING AND CLOSING THE SUB PANEL
(KX-493 only).................................................................... 14
OPTIONAL REMOTE CONTROL TRANSMITTER............ 14
MAINTENANCE ................................................................ 14
TROUBLESHOOTING ...................................................... 15
SPECIFICATIONS............................................................. 16
÷ Play Trim Control for improved playback compatibility
with other decks
÷ 0-M/FULL Repeat Playback (KX-493 only), Selection
Search and Bi-Directional Intro Scan
÷ Recording Mute function
ENGLISH
L
R
LINE OUT
LINE IN
PLAY
REC
TAPE PBREC OUT
L
R
Amplifier or receiver
CONNECTIONS
(U.S.A. model)
To an AC outlet
REAR PANEL CONNECTIONS
Make sure that power to both the deck and your amplifier/receiver are turned off
before making any connections.
÷ The White plug on the paired connecting cables corresponds to the Left channel and
the Red plug corresponds to the Right channel. Make sure that the left and right channel
connections are properly made, and that the plugs are inserted firmly.
÷ The LINE OUT/PLAY jacks on the deck should be connected to the TAPE PB (Playback/
Input) jacks on your amplifier/receiver, and the LINE IN/REC jacks on the deck should
be connected to the REC OUT (Rec/Output) jacks on your amplifier/receiver.
÷ Connect the power cord to an AC wall outlet or to an AC outlet on the rear panel of your
amplifier/receiver (if provided).
3
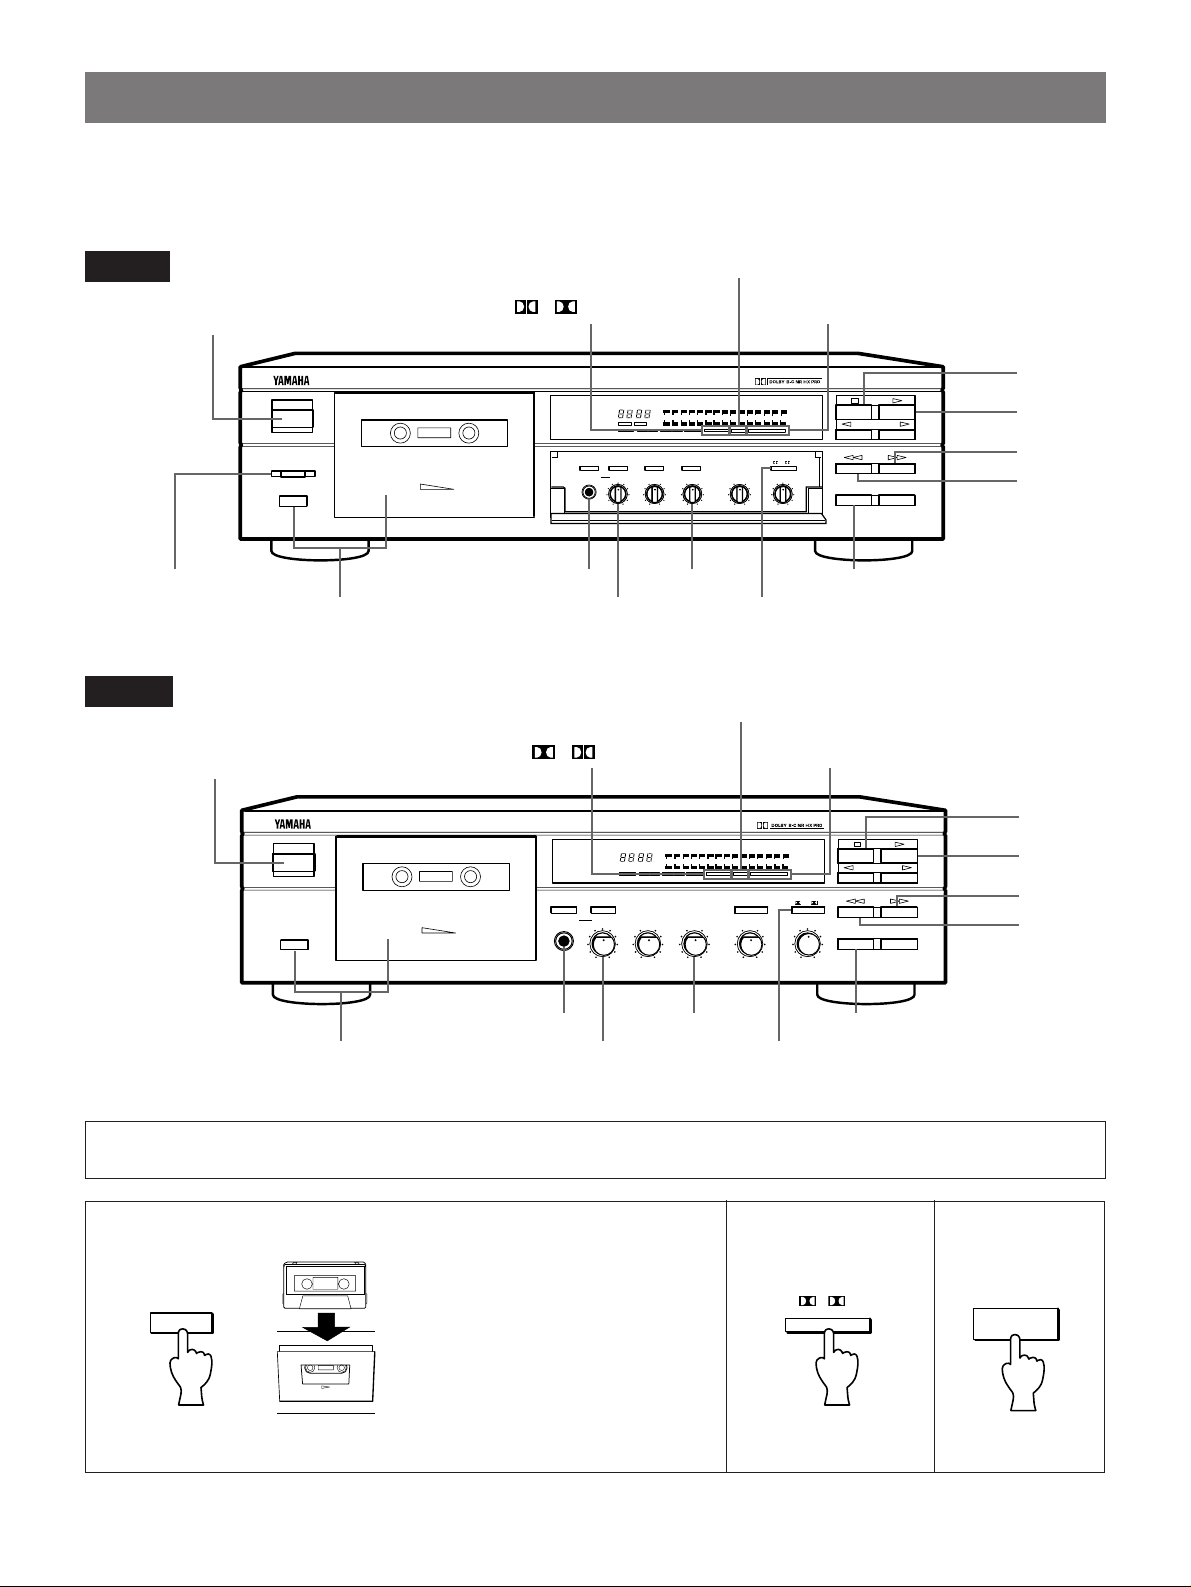
PLAYBACK
NATURAL SOUND STEREO CASSETTE DECK KX-493
YAMAHA GF Head
Cassette Stabilizer
EJECT
INTRO SCAN
REC/PAUSE MUTE/SEARCH
STANDBY/ON
DOLBY NR
OFF/ B/ C/MPX
COUNTER
MEMORYRESET
REC
LEVELBALANCE
MIN MAX
LR
0
–+–+
MIN MAX
PLAY TRIMBIAS ADJUSTLEVELPHONES
00
REPEAT
TUNINGOFF/0-M/FULL
AUTO TAPE
TIMER
OFFREC PLAY
1 2
3
&
REC/PAUSEPLAY TRIM
PHONES LEVEL
PHONES
STANDBY/ON
⁄
!
TIMER
Preparation for playback
÷ Be sure to set the TIMER switch to the OFF position (KX-493 only), then turn on the STANDBY/ON switch.
÷ Set your amplifier or receiver to cassette deck function mode.
KX-493
KX-393
STANDBY/ON
NATURAL SOUND STEREO CASSETTE DECK KX-393
STANDBY/ON
EJECT
YAMAHA GF Head
Cassette Stabilizer
MPX FILTER indicator
B/ C indicators
B/ C indicators
COUNTER
MEMORYRESET
When a tape is loaded, the corresponding
tape type indicator lights.
MPX FILTER indicator
When a tape is loaded, the corresponding
tape type indicator lights.
DOLBY NR
AUTO TAPE
TUNING
OFF/ B/ C/MPX
PLAY TRIMBIAS ADJUSTLEVELPHONES
00
–+–+MIN MAX
0
LR
REC LEVELBALANCE
MIN MAX
INTRO SCAN
REC/PAUSE MUTE/SEARCH
&
3
⁄
!
4
PHONES
REC/PAUSEPLAY TRIM
PHONES LEVEL
1 2
Press STANDBY/ON to turn this unit on. Press again to set it to the standby mode.
Please note that this unit is designed to consume a very small quantity of power when set to the standby mode.
1
EJECT
Insert the cassette with the
exposed tape side facing down and
the side to be played facing you.
To close the compartment, push in
the compartment door until it locks
shut.
2
OFF/ B/ C/MPX
See next page.
DOLBY NR
3
‹

To stop playback:
Press the & button.
To fast forward the tape:
Press the ⁄ button.
PLAY TRIM control adjustment
When the level of high frequencies is too boosted or
absent while playing a tape recorded on another cassette
deck, adjust the high frequency response with the PLAY
TRIM control.
ENGLISH
To fast rewind the tape:
Press the ! button.
To adjust the volume level:
Use the volume control of the amplifier or receiver.
To use headphones for private listening:
Insert the headphones plug into the PHONES jack.
To adjust the headphones level:
Use the PHONES LEVEL control.
DOLBY NR button setting (in step 2)
DOLBY NR (OFF/ B/ C/MPX) button
Be sure to set the DOLBY NR (OFF/ B/ C/MPX)
button according to the system used for recording. Each
time this button is pressed, Dolby NR switches as follows:
3
B(MPX OFF) For a tape recorded with DOLBY B NR
Only the B indicator lights.
∞
C(MPX OFF) For a tape recorded with DOLBY C NR
Only the C indicator lights.
∞
B MPX ON (available only for recording)
∞
C MPX ON (available only for recording)
∞
OFF For a tape recorded with DOLBY NR
OFF
No indicator lights.
Note: The MPX filter settings are explained on page 9.
When high frequencies are
too boosted, attenuate the
high frequencies.
KX-493
PLAY TRIM
00
KX-393
PLAY TRIM
0 0
10 dB
100
10kHz
1k
When high frequencies are
absent, boost the high
frequencies.
PLAY TRIM
PLAY TRIM
1 High frequency sound is
1
2
3
too boosted.
2 Flat.
3 High frequency sound is
absent.
Noise Reduction Responce
20 100 1k
10 dB
10 dB
10k
NR-OFF
B-NR
C-NR
20k Hz
5

NATURAL SOUND STEREO CASSETTE DECK
STANDBY/ON
EJECT
YAMAHA GF Head
Cassette Stabilizer
INTRO indicator
INTRO SCAN
REC/PAUSE MUTE/SEARCH
‹
⁄
!
@
INTRO SCAN
MUTE/SEARCH
#
SELECTION SEARCH - To play back a desired selection by searching for the
beginning of the selection
To search for the next selection
⁄ MUTE/SEARCH
+
The ! or ⁄ button and the MUTE/SEARCH button should be pressed simultaneously.
To search for the beginning of the current
selection
! MUTE/SEARCH
+
To search for the selection located
before the current selection
When the beginning of the current
selection is played:
! MUTE/SEARCH
+
INTRO SCAN - To play back the beginning of each selection automatically
To play back each selection in the reverse
direction:
@ INTRO SCAN
The INTRO @
indicator lights
during reverse
intro scan.
To play back each selection in the forward
direction:
INTRO SCAN #
The INTRO #
indicator lights
during forward
intro scan.
To resume normal playback when the
desired selection is found:
‹
3
5
Notes on Selection search and Intro scan
÷ The blank interval between selections must be at least 4 seconds.
÷ Selection search and Intro scan may not operate properly with tapes recorded with a low record level or with
excessive noise.
6
 Loading...