

Page 1
OWNER’S MANUAL
MODE D’EMPLOI
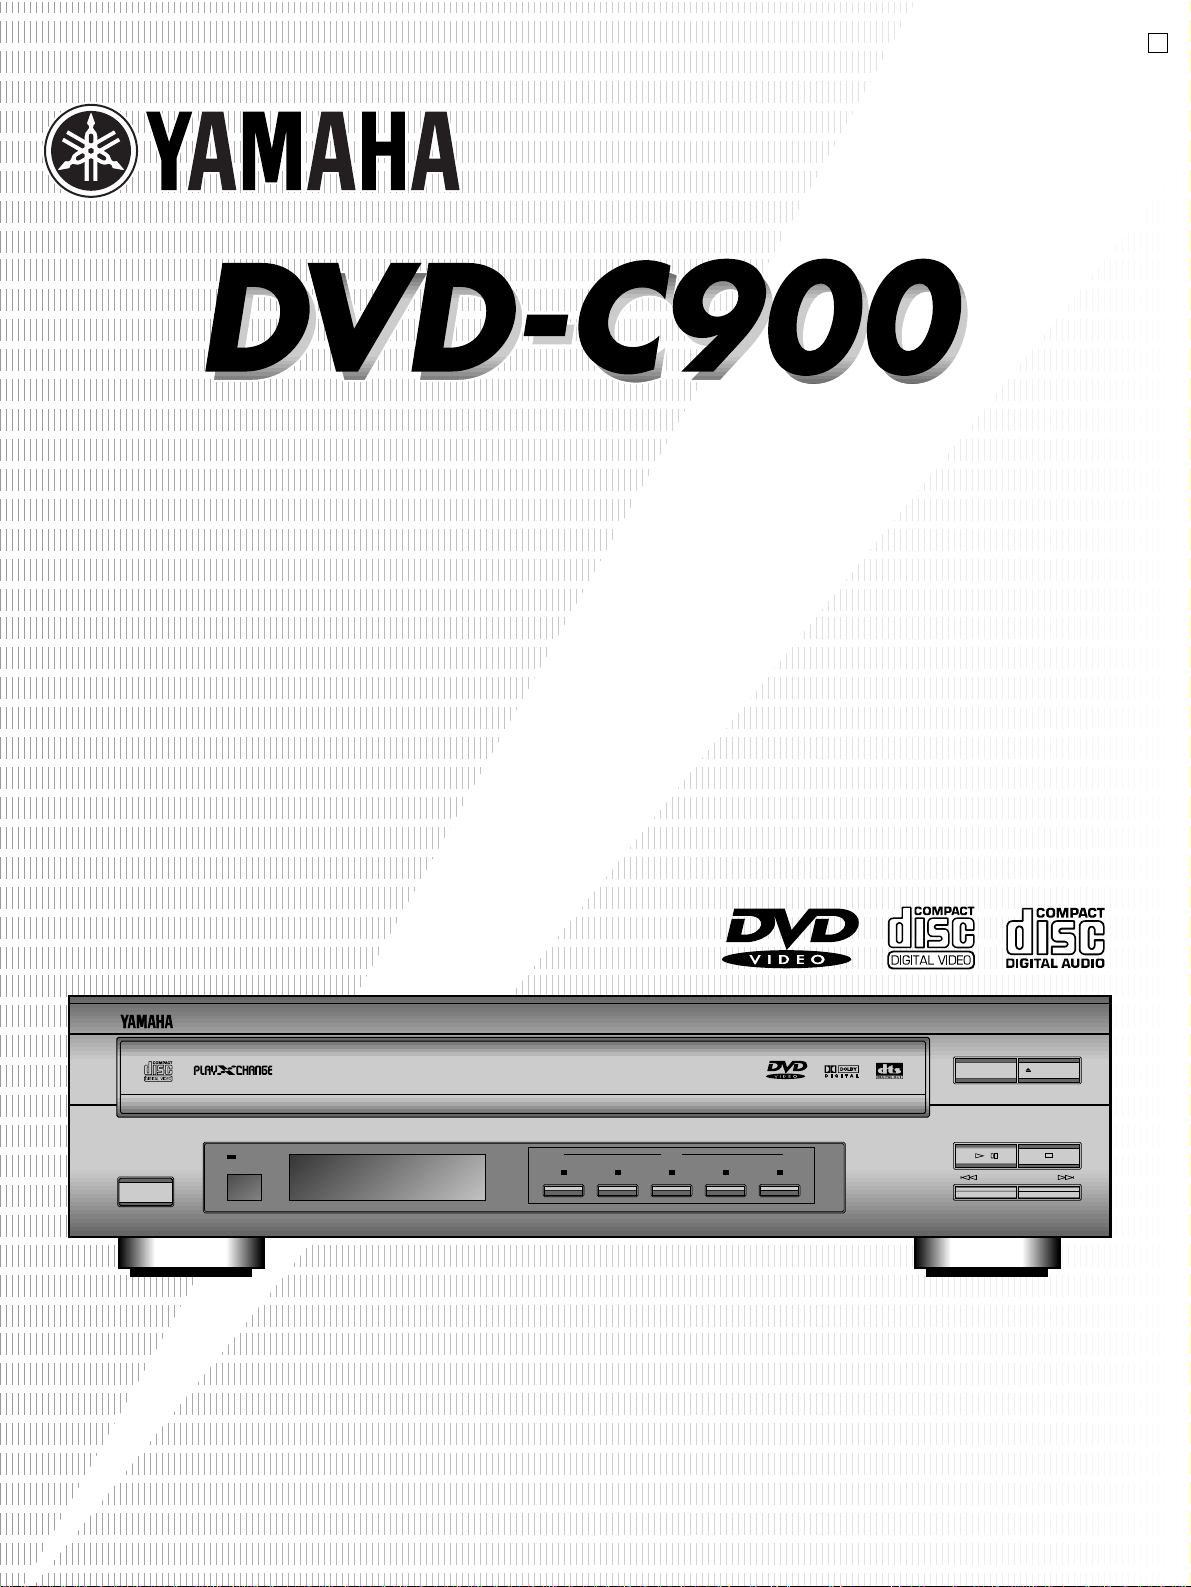
NATURAL SOUND DVD PLAYER
LECTEUR DVD
U
NATURAL SOUND DVD PLAYER DVD-C900
POWER
PLAYXCHANGE
OPEN/CLOSE
SKIP/
SEARCH
/
DVD/VIDEO CD/CD
AUTO
DISPLAY OFF
12345
DISC
Page 2
1 Read Instructions – All the safety and operating instructions
should be read before the appliance is operated.
2 Retain Instructions – The safety and operating instructions
should be retained for future reference.
3 Heed Warnings – All warnings on the appliance and in the
operating instructions should be adhered to.
4 Follow Instructions – All operating and use instructions should
be followed.
5 Cleaning — Unplug this video product from the wall outlet
before cleaning. Do not use liquid cleaners or aerosol
cleaners. Use a damp cloth for cleaning.
Exception: A product that is meant for uninterrupted service
and that for some specific reason, such as the possibility of
the loss of an authorization code for a CATV converter, is not
intended to be unplugged by the user for cleaning or any
other purpose, may exclude the reference to unplugging the
appliance in the cleaning description otherwise required in
item 5.
6 Attachments — Do not use attachments not recommended by
the video product manufacturer as they may cause hazards.
7 Water and Moisture – Do not use this video product near
water – for example, near a bathtub, washbowl, kitchen sink,
laundry tub, in a wet basement, or near a swimming pool, and
the like.
8 Accessories — Do not place this video product on an unstable
cart, stand, tripod, bracket, or table. The video product may
fall, causing serious injury to a child or adult, and serious
damage to the appliance. Use only with a cart, stand, tripod,
bracket, or table recommended by the manufacturer, or sold
with the video product. Any mounting of the appliance should
follow the manufacturer’s instructions, and should use a
mounting accessory recommended
by the manufacturer.
8A An appliance and cart combination
should be moved with care. Quick
stops, excessive force, and uneven
surfaces may cause the appliance
and cart combination to overturn.
9 Ventilation — Slots and openings in the cabinet are provided
for ventilation and to ensure reliable operation of the video
product and to protect it from overheating, and these
openings must not be blocked or covered. The openings
should never be blocked by placing the video product on a
bed, sofa, rug, or other similar surface. This video product
should never be placed near or over a radiator or heat
register. This video product should not be placed in a built-in
installation such as a bookcase or rack unless proper
ventilation is provided or the manufacturer’s instructions have
been adhered to.
10 Power Sources — This video product should be operated only
from the type of power source indicated on the marking label.
If you are not sure of the type of power supply to your home,
consult your appliance dealer or local power company. For
video products intended to operate from battery power, or
other sources, refer to the operating instructions.
11 Grounding or Polarization — This video product is equipped
with a polarized alternating-current line plug (a plug having
one blade wider than the other). This plug will fit into the
power outlet only one way. This is a safety feature. If you are
unable to insert the plug fully into the outlet, try reversing the
plug. If the plug should still fail to fit, contact your electrician to
replace your obsolete outlet. Do not defeat the safety purpose
of the polarized plug.
Alternate Warnings —This video product is equipped with a 3wire grounding-type plug, a plug having a third (grounding)
pin. This plug will only fit into a grounding-type power outlet.
This is a safety feature. If you are unable to insert the plug
into the outlet, contact your electrician to replace your
obsolete outlet. Do not defeat the safety purpose of the
grounding-type plug.
12 Power-Cord Protection – Power-supply cords should be
routed so that they are not likely to be walked on or pinched
by items placed upon or against them, paying particular
attention to cords at plugs, convenience receptacles, and the
point where they exit from the appliance.
SAFETY INSTRUCTIONS
RISK OF ELECTRIC SHOCK
DO NOT OPEN
CAUTION: TO REDUCE THE RISK OF
ELECTRIC SHOCK, DO NOT REMOVE
COVER (OR BACK). NO USER-SERVICEABLE
PARTS INSIDE. REFER SERVICING TO
QUALIFIED SERVICE PERSONNEL.
The lightning flash with arrowhead
symbol, within an equilateral triangle,
is intended to alert you to the
presence of uninsulated “dangerous
voltage” within the product’s
enclosure that may be of sufficient
magnitude to constitute a risk of
electric shock to persons.
The exclamation point within an
equilateral triangle is intended to alert
you to the presence of important
operating and maintenance
(servicing) instructions in the
literature accompanying the
appliance.
•
Explanation of Graphical Symbols
CAUTION
WARNING
TO REDUCE THE RISK OF FIRE OR ELECTRIC
SHOCK, DO NOT EXPOSE THIS UNIT TO RAIN
OR MOISTURE.
IMPORTANT
Please record the serial number of your unit
in the space below.
Model:
Serial No.:
The serial number is located on the rear of
the unit.
Retain this Owner’s Manual in a safe place
for future reference.
Page 3
English
1. IMPORTANT NOTICE : DO NOT MODIFY THIS UNIT!
This product, when installed as indicated in the
instructions contained in this manual, meets FCC
requirements. Modifications not expressly approved by
Yamaha may void your authority, granted by the FCC, to
use the product.
2. IMPORTANT : When connecting this product to
accessories and/or another product use only high quality
shielded cables. Cable/s supplied with this product
MUST be used. Follow all installation instructions.
Failure to follow instructions could void your FCC
authorization to use this product in the USA.
3. NOTE : This product has been tested and found to
comply with the requirements listed in FCC Regulations,
Part 15 for Class “B” digital devices. Compliance with
these requirements provides a reasonable level of
assurance that your use of this product in a residential
environment will not result in harmful interference with
other electronic devices.
This equipment generates/uses radio frequencies and, if
not installed and used according to the instructions
found in the users manual, may cause interference
harmful to the operation of other electronic devices.
Compliance with FCC regulations does not guarantee that
interference will not occur in all installations. If this product
is found to be the source of interference, which can be
determined by turning the unit “OFF” and “ON”, please try
to eliminate the problem by using one of the following
measures:
Relocate either this product or the device that is being
affected by the interference.
Utilize power outlets that are on different branch (circuit
breaker or fuse) circuits or install AC line filter/s.
In the case of radio or TV interference, relocate/reorient the
antenna. If the antenna lead-in is 300 ohm ribbon lead,
change the lead-in to coaxial type cable.
If these corrective measures do not produce satisfactory
results, please contact the local retailer authorized to
distribute this type of product. If you can not locate the
appropriate retailer, please contact Yamaha Electronics
Corp., U.S.A. 6660 Orangethorpe Ave, Buena Park, CA
90620.
The above statements apply ONLY to those products
distributed by Yamaha Corporation of America or its
subsidiaries.
FCC INFORMATION (for US customers only)
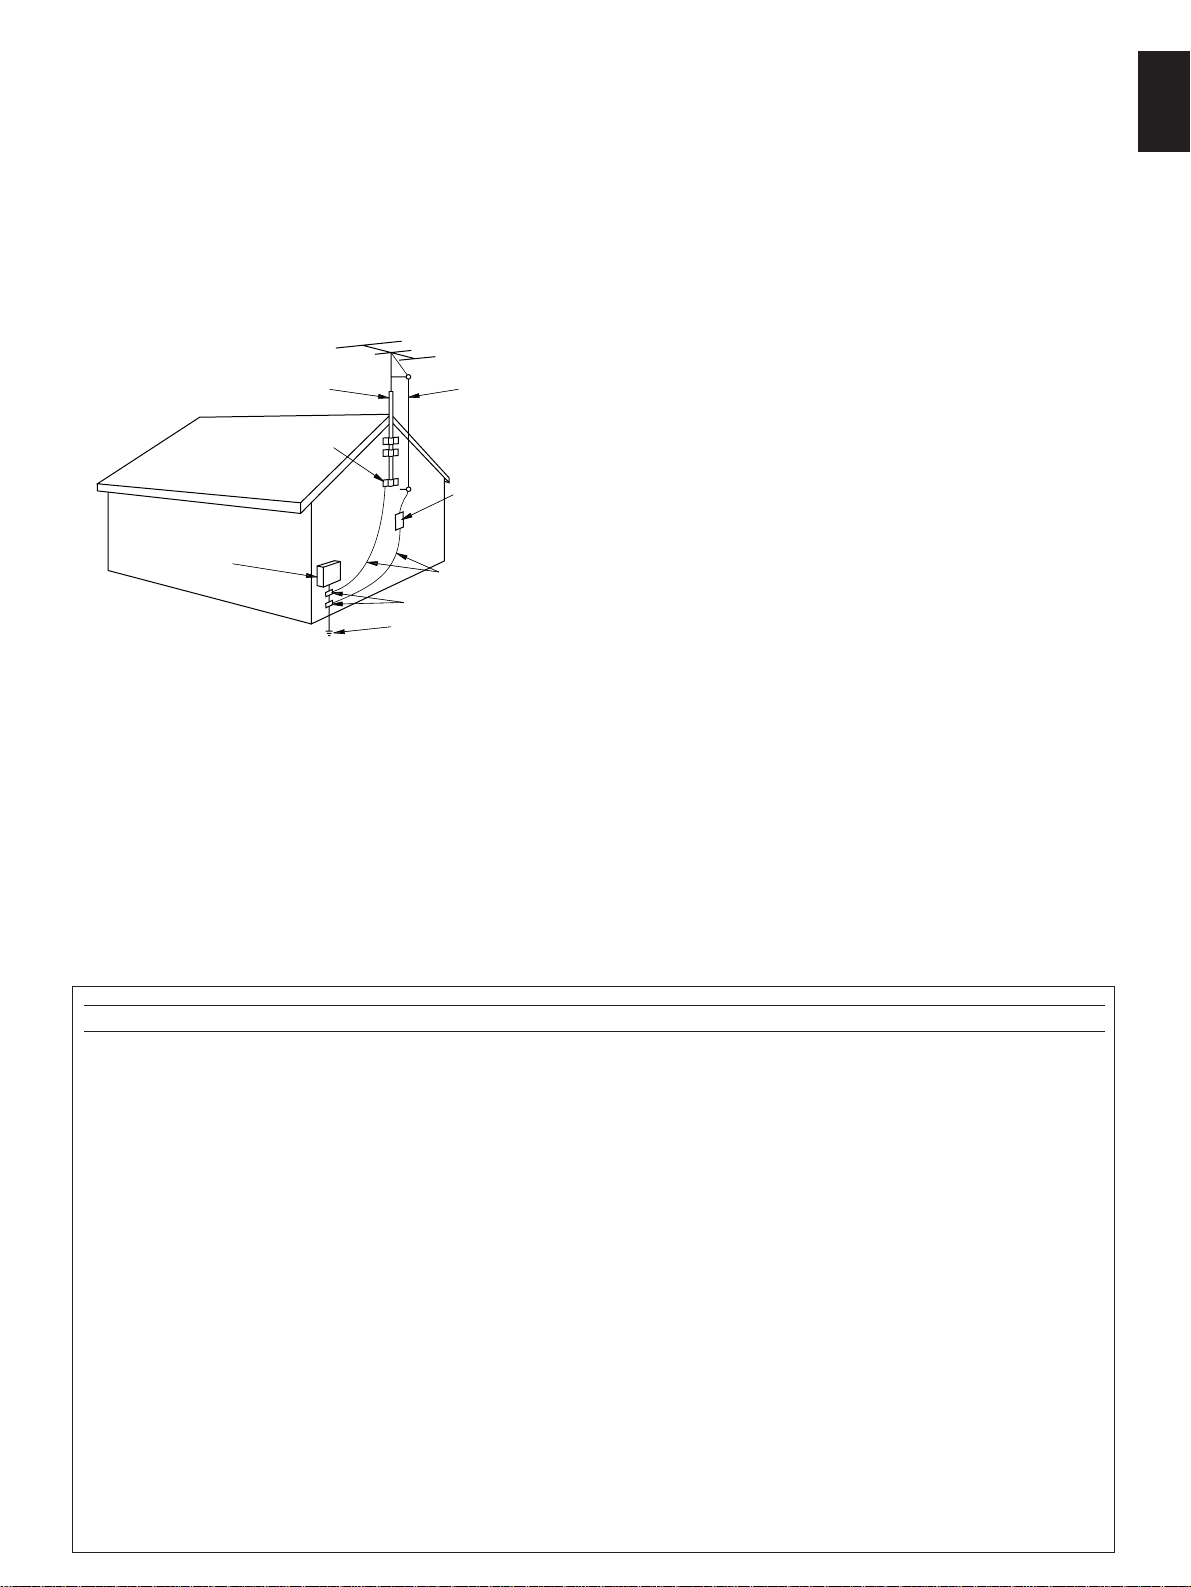
13 Outdoor Antenna Grounding — If an outside antenna or cable
system is connected to the video product, be sure the
antenna or cable system is grounded so as to provide some
protection against voltage surges and built-up static charges.
Article 810 of the National Electrical Code, ANSI/NFPA No.
70, provides information with regard to proper grounding of
the mast and supporting structure, grounding of the lead-in
wire to an antenna discharge unit, size of grounding
conductors, location of antenna-discharge unit, connection to
grounding electrodes, and requirements for the grounding
electrode. See the figure below.
14 Lightning — For added protection for this video product
receiver during a lightning storm, or when it is left unattended
and unused for long periods of time, unplug it from the wall
outlet and disconnect the antenna or cable system. This will
prevent damage to the video product due to lightning and
power-line surges.
15 Power Lines — An outside antenna system should not be
located in the vicinity of overhead power lines or other electric
light or power circuits, or where it can fall into such power
lines or circuits. When installing an outside antenna system,
extreme care should be taken to keep from touching such
power lines or circuits as contact with them might be fatal.
16 Overloading — Do not overload wall outlets and extension
cords as this can result in a risk of fire or electric shock.
17 Object and Liquid Entry — Never push objects of any kind
into this video product through openings as they may touch
dangerous voltage points or short-out parts that could result
in a fire or electric shock. Never spill liquid of any kind on the
video product.
18 Servicing — Do not attempt to service this video product
yourself as opening or removing covers may expose you to
dangerous voltage or other hazards. Refer all servicing to
qualified service personnel.
19 Damage Requiring Service — Unplug this video product from
the wall outlet and refer servicing to qualified service
personnel under the following conditions:
a. When the power-supply cord or plug is damaged.
b. If liquid has been spilled, or objects have fallen into the
video product.
c. If the video product has been exposed to rain or water.
d. If the video product does not operate normally by following
the operating instructions. Adjust only those controls that
are covered by the operating instructions as an improper
adjustment of other controls may result in damage and will
often require extensive work by a qualified technician to
restore the video product to its normal operation.
e. If the video product has been dropped or the cabinet has
been damaged.
f. When the video product exhibits a distinct change in
performance — this indicates a need for service.
20 Replacement Parts — When replacement parts are required,
be sure the service technician has used replacement parts
specified by the manufacturer or have the same
characteristics as the original part. Unauthorized substitutions
may result in fire, electric shock or other hazards.
21 Safety Check — Upon completion of any service or repairs to
this video product, ask the service technician to perform
safety checks to determine that the video product is in proper
operating condition.
EXAMPLE OF ANTENNA GROUNDING
MAST
GROUND
CLAMP
ANTENNA
LEAD IN
WIRE
ANTENNA
DISCHARGE UNIT
(NEC SECTION 810–20)
GROUNDING CONDUCTORS
(NEC SECTION 810–21)
GROUND CLAMPS
POWER SERVICE GROUNDING
ELECTRODE SYSTEM
(NEC ART 250. PART H)
ELECTRIC
SERVICE
EQUIPMENT
NEC – NATIONAL ELECTRICAL CODE
Page 4

Thank you for selecting this YAMAHA DVD player
CONTENTS
SAFETY INSTRUCTIONS ......Inside of the front cover
Features ....................................................................1
Caution ......................................................................2
Getting started ..........................................................4
Unpacking ..............................................................................4
Installing batteries in the remote controller ............................5
Notes about the remote controller ..........................................5
Names of parts and their functions ........................6
Connections .............................................................9
Speaker setup ........................................................................9
n Speaker configuration .....................................................9
n Placing speakers .............................................................9
Audio connections ................................................................10
n Connecting to an AV amplifier (or receiver) equipped with
a Dolby Digital, MPEG or DTS decoder, or connecting to
a Dolby Digital, MPEG or DTS decoder ........................10
n Connecting to an AV amplifier (or receiver) equipped
with 6 channel input terminals
<For China and General models only>.........................12
n Connecting to a stereo amplifier that has neither
6 channel audio signal input terminals nor Dolby Digital
decoder ..........................................................................13
Video connections ................................................................14
n Connecting to an amplifier equipped with an RCA type
video signal input terminal (including an S-video input
terminal) .........................................................................14
n Connecting to a TV equipped with component
video input terminals ......................................................15
Basic operation ......................................................16
Basic playback .....................................................................16
Playing back a preferred scene or track ...............................19
n Beginning playback from a preferred chapter (or track)
.......................................................................................19
n Skipping to a preferred chapter (or track) on the disc
(Skip search)..................................................................19
n Beginning playback from a preferred title (for DVDs)
or index number (for Video CDs/CDs)............................20
n Beginning playback from a preferred time point
on the disc......................................................................21
Other ways of playback ........................................................22
n To advance or reverse playback rapidly
(Rapid search)................................................................22
n To still picture (or suspend playback).............................22
n Frame advance [ and only].................................22
n To advance or reverse playback in a preferred speed
(Multi-speed playback) [ and only]......................23
n Operations unique for a Video CD in the Playback
Control mode [ only].................................................25
n Changing the audio output mode (to enjoy using a
multisound disc etc.) [ and only].........................26
Displaying various information ............................27
Switching the time display.....................................................27
On Screen Display ...............................................................29
Advanced operation ...............................................32
Repeat play ..........................................................................32
Repeat play between specified two points (A-B repeat play)
..............................................................................................33
Program play ........................................................................34
Random play ........................................................................37
Changing subtitle language [ only]..................................38
Changing audio sound track language [ only].................39
Using a title menu [ only].................................................40
Using a DVD menu [ only]...............................................41
Viewing from another angle [ only]..................................42
Initial settings (on the SET UP menu) ..................43
Items ....................................................................................43
Common procedure for setting change ................................44
Item description and setting change ....................................45
DVD Settings
1
TV Type .........................................................................45
2
Display Mode .................................................................46
3
Menu Language ............................................................47
4
Subtitle Language .........................................................48
5
Audio Language ............................................................49
6
Rating Level ..................................................................50
VCD Settings
1
Playback Control ...........................................................52
Display Settings
1
Guide Display ................................................................53
2
OSD Language ..............................................................54
3
Background Screen .......................................................55
4
Screen Saver .................................................................56
5
FL Dimmer .....................................................................57
6
Signal System Conversion [ and only]
<For China and General models only> ........................58
Audio Settings
1
Digital Output .................................................................59
2
Dynamic Range Control
<For China and General models only> ........................61
3
Speaker [ only]
<For China and General models only> ........................62
Appendix .................................................................64
Troubleshooting ...................................................................64
Definition of terms.................................................................66
Language code list ...............................................................67
Region management information .........................................68
Notes about handling discs ..................................................68
Specifications .......................................................................69
DVD
VCD
DVD
DVD
DVD
DVD
DVD
DVDCDVCD
VCD
VCD
DVD
VCD
DVD
Page 5
1
English
●
5-Disc Carousel Auto-Changer (for
Playing DVDs, Video CDs and Compact
Discs)
●
Full Opening Disc Table for Changing
5 Discs at a Time
●
Compatible with Almost of All Utility
Functions of DVD Discs
●
PLAYXCHANGE; Disc Changing
Capability while Playing Another
●
Program Play
●
Random Play
●
Single Track/Full Disc Repeat Play and
A-B Repeat Play for Repeating a Section
between Two Specified Points
●
Multi-Speed Playback Capability
●
On Screen Display Function (Displays
This Unit’s Operation Status and Disc
Information on the TV Monitor)
●
SET UP Menu Which Provides You with
Various Changeable or Adjustable Items
for Using This Unit in the Most Suitable
Condition
●
1 OPTICAL and 1 COAXIAL Digital
Terminals to Output Digital Audio Signals
Encoded with Dolby Digital, DTS, MPEG
or Linear PCM
●
S VIDEO and COMPONENT VIDEO
Outputs for High-Quality Picture
Reproduction
●
Remote Control Capability
China and General models only
●
Built-in Dolby Digital Decoder to Provide
You with High-quality 5.1-channel
Surround Sound of Sources Encoded
with Dolby Digital
Features
About the symbols used in this manual
A section whose title has one of the following symbols is
applicable only to the disc represented by the symbol.
.............DVD
.............Video CD
.............CD
* A section with no symbol is applicable to all discs.
DVD
VCD
CD
Manufactured under license from Dolby Laboratories.
“Dolby” and the double-D symbol are trademarks of Dolby
Laboratories. Confidential Unpublished Works.
1992–1997 Dolby Laboratories, Inc. All rights reserved.
Page 6
2
1 To ensure the finest performance, please read this manual
carefully. Keep it in a safe place for future reference.
2 The voltage to be used must be the same as that specified
on this unit. Using this unit with a higher voltage than that
which is specified is dangerous and may result in a fire or
other type of accident causing damage. YAMAHA will not
be held responsible for any damage resulting from use of
this unit with a voltage other than that which is specified.
3 Install your unit in a cool, dry, clean place – away from
windows, heat sources, and too much vibration, dust,
moisture or cold. Avoid sources of hum (transformers,
motors). To prevent fire or electrical shock, do not expose
to rain or water.
4 This unit should not be placed on appliances, such as
amplifiers, that produce heat, or placed in a cabinet that
impedes the flow of air. This may result in a failure in this
unit. Install this unit in a well ventilated place. In addition, do
not place objects on this unit.
5 The generated digital signals may interfere with other
equipment such as tuners or receivers. Move the system
farther away from such equipment if interference is
observed.
6 Sudden temperature changes and storage or operation in
an extremely humid environment may cause condensation
inside the cabinet.
Condensation can cause the unit to malfunction.
To eliminate condensation, leave the power on with no disc
in the unit until normal playback becomes possible (about 1
hour).
7 Do not operate the unit upside-down. It may overheat,
possibly causing damage.
8 Never open the cabinet. If a foreign object drops into the
unit, contact your dealer.
9 To prevent lightning damage, unplug the power cord and
remove the antenna cable during electrical storms.
10Do not attempt to clean the unit with chemical solvents; this
might damage the finish. Use a clean, dry cloth.
11Do not use force on switches, knobs or cords. When
moving the set, first turn the unit off. Then gently
disconnect the power plug and the cords connecting to
other equipment. Never pull the cord itself.
12Always set the volume control on the amplifier to minimum
before starting a disc play: increase the volume gradually to
an appropriate level after play has started.
13Be sure to read the “TROUBLESHOOTING” section on
common operating errors before concluding that your unit is
faulty.
This unit can play discs of the following types only.
Video CDs are classified into two types, version 1.1 and 2.0. This unit can play not only discs of version 1.1, but also version
2.0 on which a Playback Control can be made.
Never attempt to play back a disc other than above with this unit because it may cause a damage to this unit and/or other units
connected to this unit.
Examples of disc types which this unit cannot play back:
CD-R, CD-EXTRA, CD-ROM, CD-G, PHOTO CD, DVD-ROM, VSD, CDV, etc.
Note
DVDs and Video CDs can only utilize the features with which they were designed by the software creators. Depending
on the contents of each disc, some operations described in this manual may become inoperative. Be sure to refer to
the instruction for each respective disc.
Type of disc
DVD
Video CD
CD
Mark printed
on the disc
Type of signal
recorded
Sound
+
Picture (Movie)
Sound
+
Picture (Movie)
Sound only
Size (Dimension)
12 cm
8 cm (Single type)
12 cm
8 cm (Single type)
12 cm
8 cm (Single type)
Maximum possible
play time
Approx. 4 hours (One side only)
Approx. 8 hours (Both sides)
Approx. 80 minutes (One side only)
Approx. 160 minutes (Both sides)
74 minutes
20 minutes
74 minutes
20 minutes
Caution: Read this before operating your unit.
Page 7
3
English
Caution
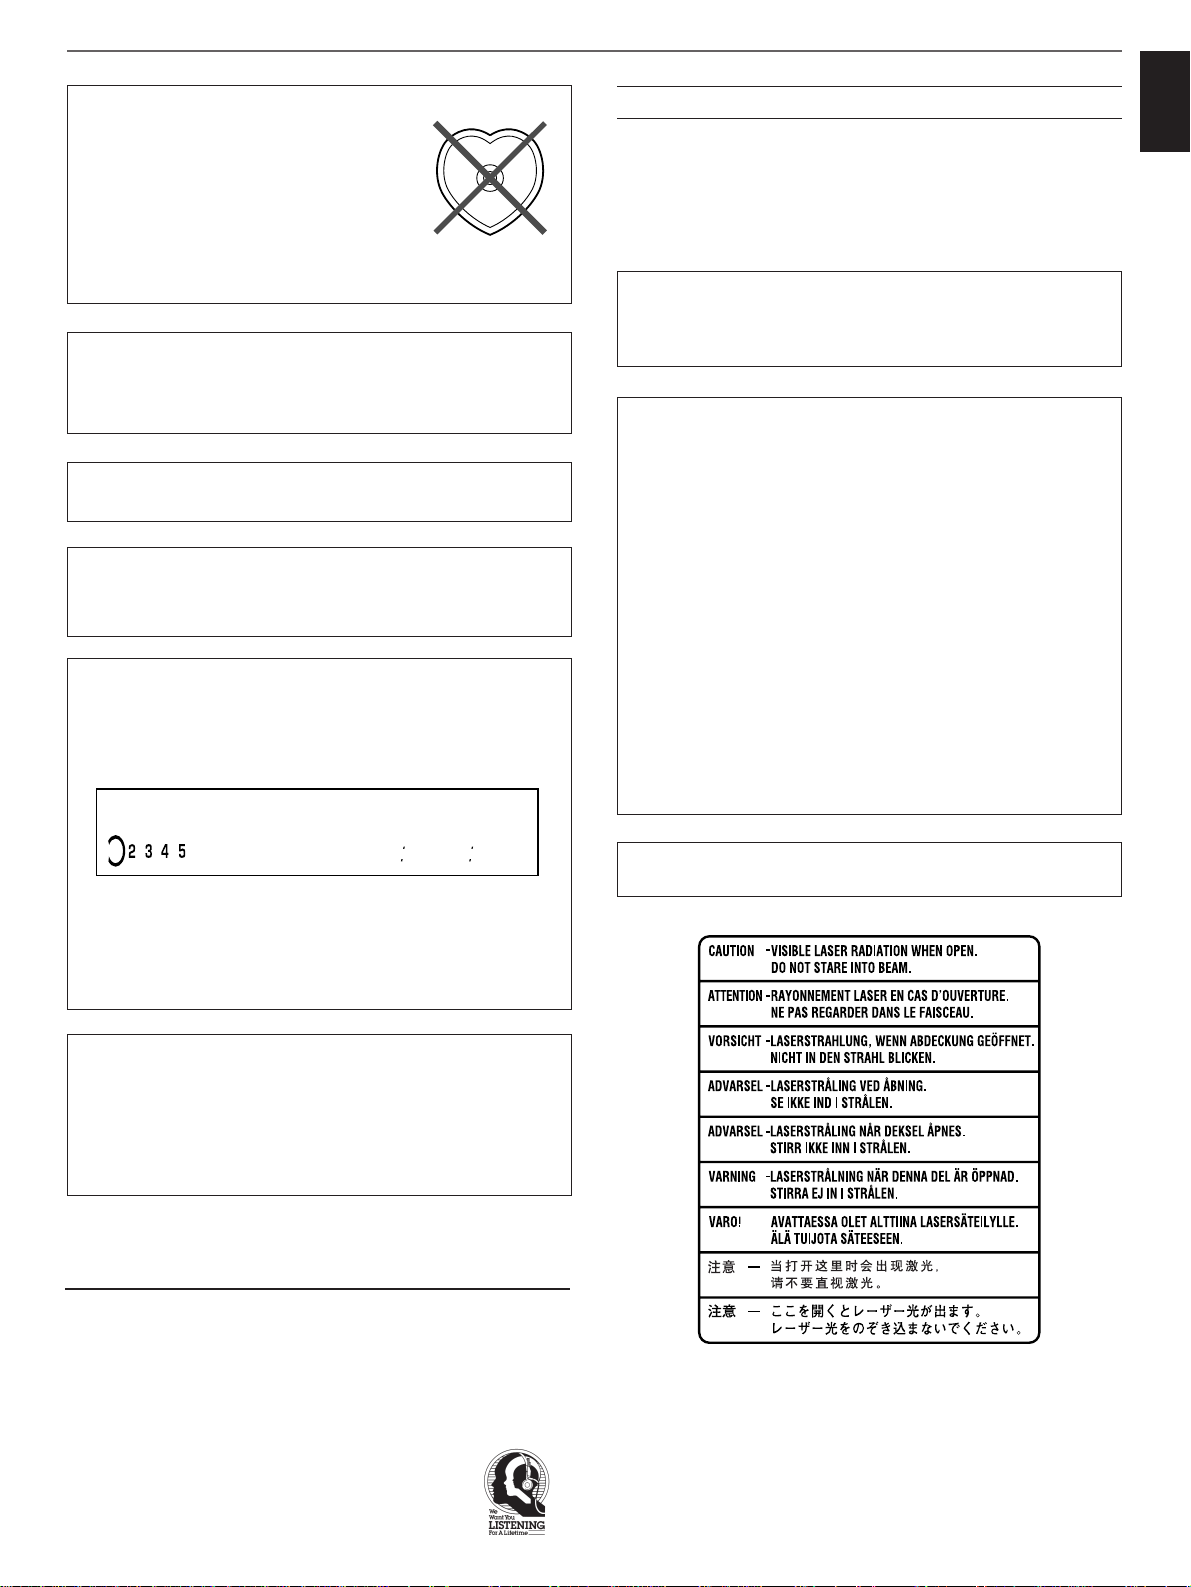
To prevent a malfunction of this unit:
● Do not use any nonstandard shaped
disc (heart etc.) available on the
market, because it may damage the
unit.
● Do not use a disc with tape, seals, or paste on it, because
damage to the unit may result.
Some nonstandard discs are available on the market though
they look the same as the standard ones. This unit may not
be able to play back such discs in the ways described on this
owner’s manual.
This unit is designed for home use only. Do not use this
unit for business purposes.
Be sure to place this unit on a level surface. If not so, this
unit will fail to work normally at the PLAYXCHANGE operation
and cause damage to the disc(s) and this unit itself.
Caution for moving this unit
● When moving this unit, first remove all discs from the disc
table and close the table by pressing the OPEN/CLOSE
button, and then switch off the power after you confirm
that the front panel display indicates as follows.
Never switch off the power if the front panel display is not
pictured as above, otherwise the unit will break down
during moving because the internal mechanism is not
locked.
● Be sure not to lift or tip the unit with discs remaining in it.
FOR CANADIAN CUSTOMERS
TO PREVENT ELECTRIC SHOCK, MATCH WIDE BLADE
OF PLUG TO WIDE SLOT AND FULLY INSERT.
THIS CLASS B DIGITAL APPARATUS MEETS ALL
REQUIREMENTS OF THE CANADIAN INTERFERENCECAUSING EQUIPMENT REGULATIONS.
WARNING
To reduce the risk of fire or electric shock, do not expose this
unit to rain or moisture.
To avoid electrical shock, do not open the cabinet. Refer
servicing to qualified personnel only.
DANGER
Invisible laser radiation when open and interlock failed or
defeated.
Avoid direct exposure to beam.
CAUTION
DVD/VIDEO CD/CD PLAYER IS A CLASS 1 LASER
PRODUCT. HOWEVER THIS DVD/VIDEO CD/CD
PLAYER USES A VISIBLE LASER BEAM WHICH
COULD CAUSE HAZARDOUS RADIATION EXPOSURE
IF DIRECTED. BE SURE TO OPERATE THE DVD/VIDEO
CD/CD PLAYER CORRECTLY AS INSTRUCTED.
WHEN THIS DVD/VIDEO CD/CD PLAYER IS PLUGGED
TO THE WALL OUTLET, DO NOT PLACE YOUR EYES
CLOSE TO THE OPENING OF THE DISC TRAY AND
OTHER OPENINGS TO LOOK INTO THE INSIDE OF
THIS PLAYER.
USE OF CONTROLS OR ADJUSTMENTS OR
PERFORMANCE OF PROCEDURES OTHER THAN
THOSE SPECIFIED HEREIN MAY RESULT IN
HAZARDOUS RADIATION EXPOSURE.
DO NOT OPEN COVERS AND DO NOT REPAIR
YOURSELF. REFER SERVICING TO QUALIFIED
PERSONNEL.
Laser component in this product is capable of emitting
radiation exceeding the limit for Class 1.
DISC
1
(Inside of product)
YAMAHA and the Electronic Industries Association’s
Consumer Electronics Group want you to get the most out of
your equipment by playing it at a safe level. One that lets the
sound come through loud and clear without annoying blaring or
distortion – and, most importantly, without affecting your
sensitive hearing.
Since hearing damage from loud sounds is often
undetectable until it is too late, YAMAHA and the
Electronic Industries Association’s Consumer
Electronics Group recommend you to avoid
prolonged exposure from excessive volume levels.
We Want You Listening For A Lifetime
Page 8
4
Unpacking
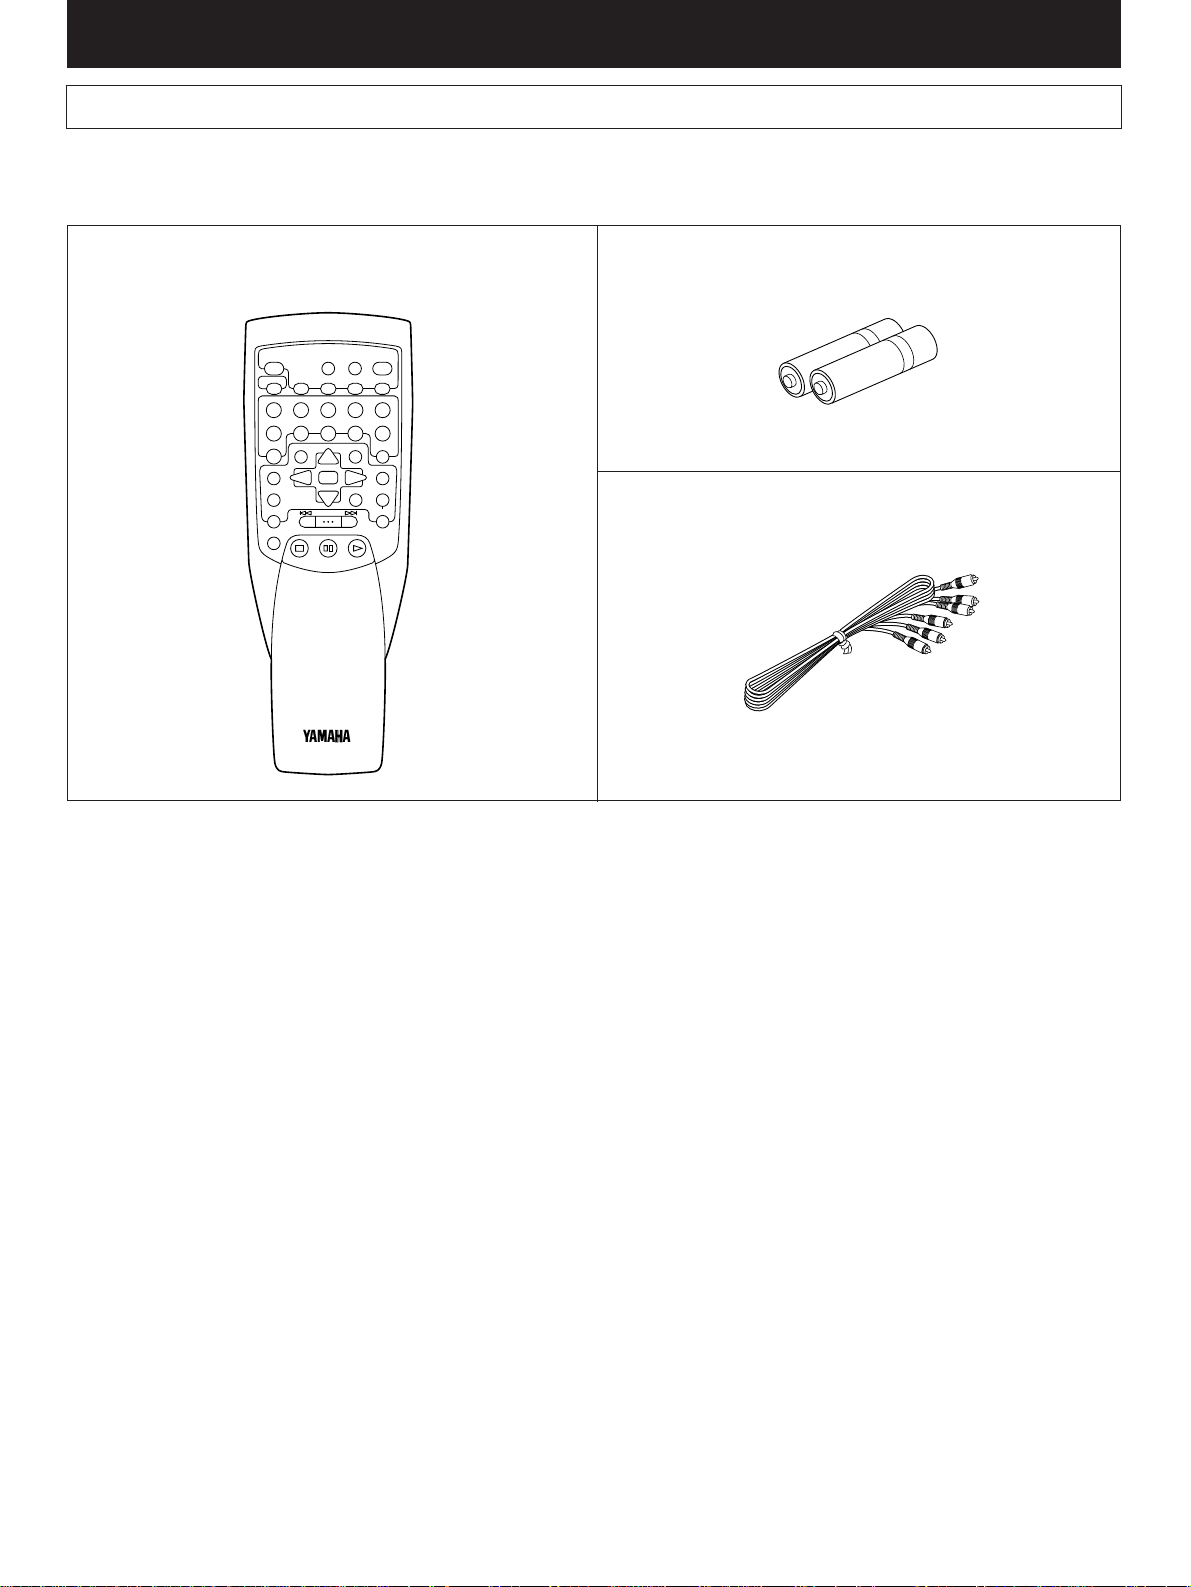
Carefully take this unit and accessories out of the box. You should find the unit itself and the following accessories.
Remote controller Batteries (size AA, R6, UM-3)
Audio/Video connection cord
12345
6
+10
7890
A-BS/FCANCEL
ANGLE
SELECT
TITLE AUDIO
MENU
SUBTITLE
SET UP
ON SCREEN
OFF/ON
MULTI SPEED
RETURN
TITLE/INDEX
REPEAT
DISC SKIP
PROG
RANDOM
DISC MODE
TIME
OPEN
/
CLOSE
STOP
STILL/PAUSE
SKIP/SEARCH
PLAY
Getting started
Page 9
5
English
Getting started
Installing batteries in the remote controller
Since the remote controller will be used for many of this unit’s
control operations, you should begin by installing the supplied
batteries.
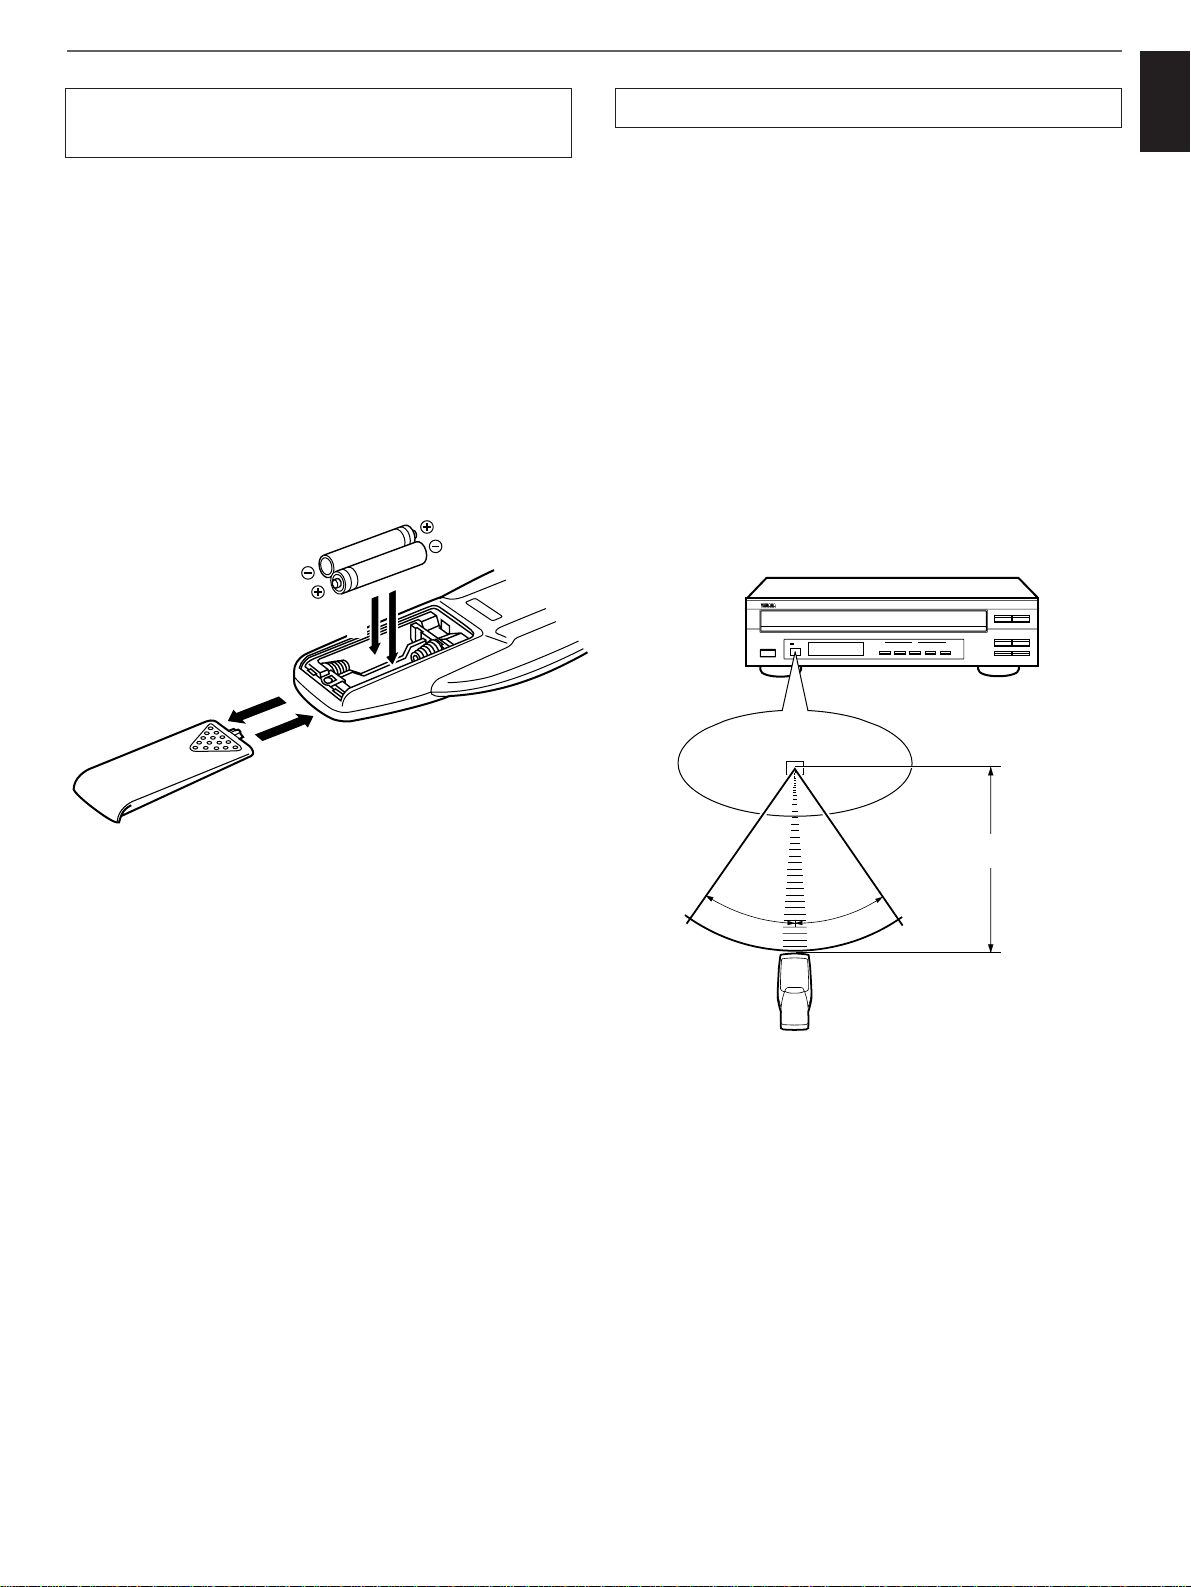
1. Turn the remote controller over and slide the battery
compartment cover in the direction of the arrow.
2. Insert the batteries (R6, AA, UM-3 type) according to the
polarity markings on the inside of the battery compartment.
3. Close the battery compartment cover.
Notes about the remote controller
Battery replacement
If you find that the remote controller must be used closer to the
main unit, the batteries are weak. Replace both batteries with
new ones.
Notes
●
Use only AA, R6, UM-3 batteries.
●
Be sure the polarities are correct. (See the illustration
inside the battery compartment.)
●
Remove the batteries if the remote controller is not used for
an extended period of time.
●
If batteries leak, dispose of them immediately. Avoid
touching the leaked material and contact with clothing, etc.
Clean the battery compartment thoroughly before installing
new batteries.
Remote controller operation range
Notes
●
The area between the remote controller and the main unit
must be clear of large obstacles.
●
Do not expose the remote control sensor to strong lighting,
in particular, an inverter type fluorescent lamp. Otherwise,
the remote controller may not work properly. If necessary,
position the main unit away from direct lighting.
Remote control
sensor
Within apprxoimately
6 m (19.7 feet)
2
1
DISC
3
30°
30°
Page 10
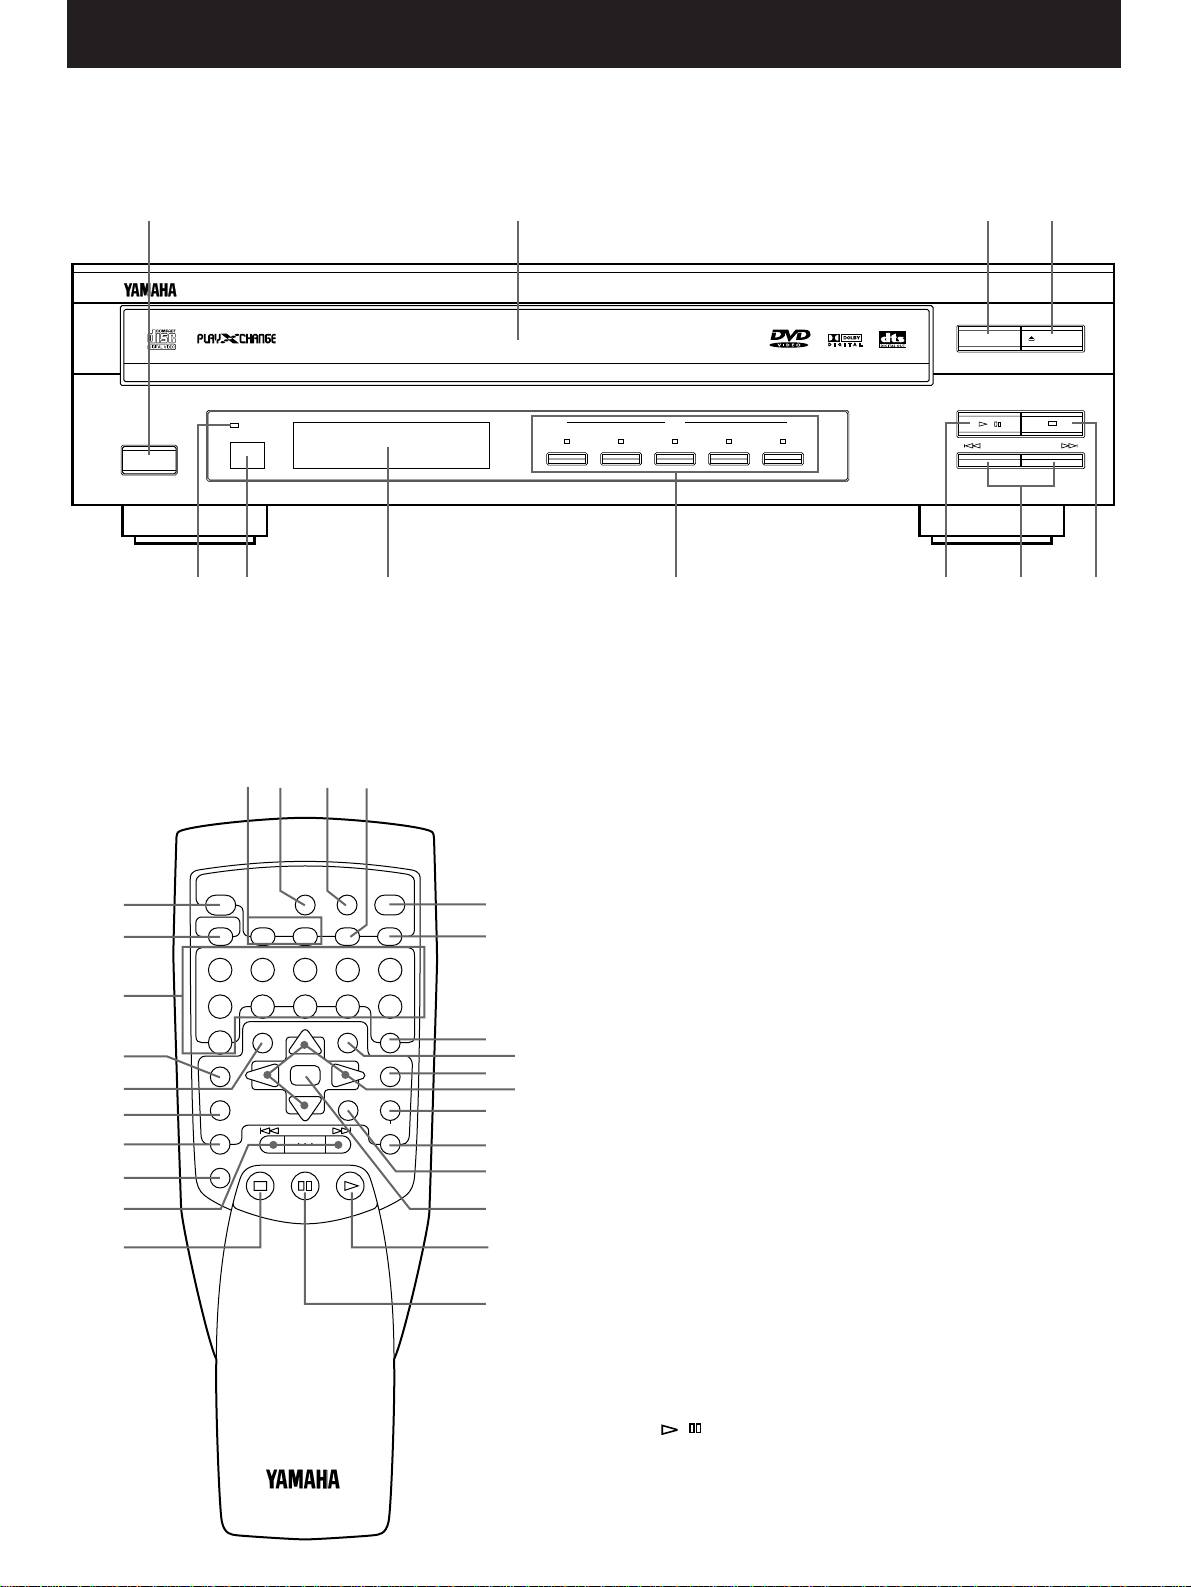
6
Front panel
1 POWER switch (p. 16, 17)
Press this switch to turn on the power. Press this switch again
to turn off the power.
2 Disc table (p. 16)
Up to 5 discs can be loaded on the disc table. Five disc-setting
positions on the disc table are numbered from 1 to 5.
3 PLAYXCHANGE button (p. 18)
Press this button to open and close the disc table while playing
a disc. This function enables you to exchange discs other than
the one being played.
4 OPEN/CLOSE button (p. 16)
Opens and closes the disc table.
5 AUTO DISPLAY OFF Indicator (p. 57)
Lights up when “5 FL Dimmer” on the SET UP menu is set to
“OFF”.
6 Remote control sensor
Receives signals from the remote controller.
7 Display panel
See page 8.
8 DISC (1, 2, 3, 4, 5) buttons and indicators
(p. 16, 18, 34)
Pressing a button selects the corresponding number of disc.
The illumination of an indicator shows that the corresponding
number of tray has a disc which this unit can play back.
9 / (PLAY/PAUSE) button
(p. 16, 21, 22, 32, 34, 36, 37)
Pressing this button starts playback. If this button is pressed
during playback, playback is suspended or a picture is kept
still, and if this button is pressed again, normal playback
resumes.
Remote controller
See the pages in parenthesis for details regarding operation.
NATURAL SOUND DVD PLAYER DVD-C900
POWER
AUTO
DISPLAY OFF
12345
DISC
PLAYXCHANGE
OPEN/CLOSE
SKIP/
SEARCH
/
DVD/VIDEO CD/CD
12 34
A098765
12345
6
+10
7890
A-BS/FCANCEL
ANGLE
SELECT
TITLE AUDIO
MENU
SUBTITLE
SET UP
ON SCREEN
OFF/ON
MULTI SPEED
RETURN
TITLE/INDEX
REPEAT
DISC SKIP
PROG
RANDOM
DISC MODE
TIME
OPEN
/
CLOSE
STOP
STILL/PAUSE
SKIP/SEARCH
PLAY
J
B4
N
O
P
R
Q
X
W
V
U
T
S
C
D
F
G
H
I
0
A
E
KLM
Names of parts and their functions
Page 11
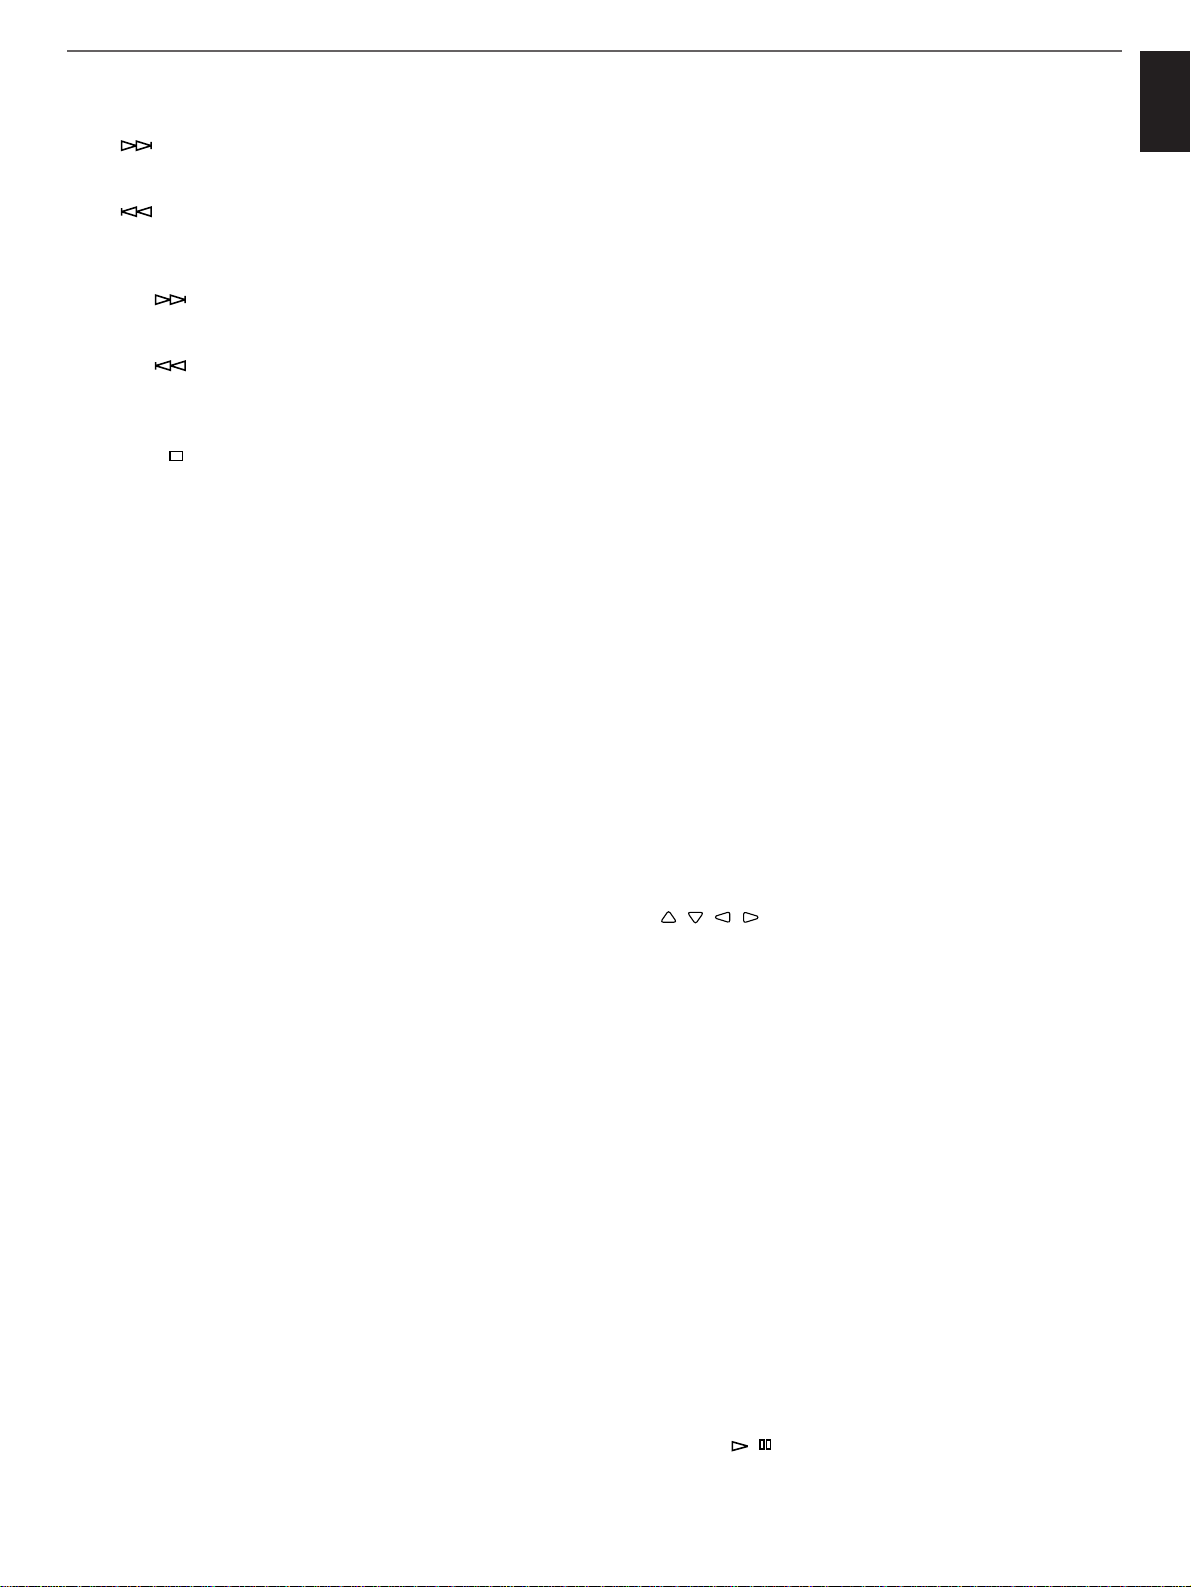
7
English
Names of parts and their functions
0 SKIP/SEARCH buttons (p. 19, 22, 24, 25)
SKIP :
Press this button to locate the beginning of the next
chapter or next track.
SKIP :
Press this button to locate the beginning of the
currently playing chapter or track, or the previous
chapter or track.
SEARCH :
Press and hold this button to advance the playback
rapidly.
SEARCH :
Press and hold this button to reverse the playback
rapidly.
A STOP ( ) button (p. 17, 36, 37)
Stops playback.
B DISC SKIP button (p. 16, 34, 37)
Whenever this button is pressed, the selected disc changes.
C CANCEL button (p. 36)
Used to cancel some specific mode or setting of this unit. See
the pages for operating methods for details.
D Numeric buttons
(p. 17–21, 24, 34, 36, 40, 41, 44, 47, 50)
Used to select a title number, chapter number, track number,
etc.
E TITLE button (p. 40)
Press this button to display the title menu of a DVD disc on
the monitor screen. For a disc which has no title menu,
pressing this button is ineffective. For Video CDs and CDs,
pressing this button is ineffective.
F ANGLE button (p. 42)
Whenever pressed, the viewing angle of the picture changes.
This button is effective only for scenes (on a DVD) which have
some angles of view.
G MENU button (p. 41)
Press this button to display the DVD menu of a DVD disc on
the monitor screen. For a disc which has no DVD menu,
pressing this button is ineffective.
H SET UP button (p. 44)
Press this button to display the SET UP menu on the monitor
screen.
I ON SCREEN button (p. 29)
Press this button to turn on and off the OSD (On Screen
Display) screen on the TV monitor. It gives you information
about the current status of this unit and the selected disc.
J S/F REPEAT button (p. 32)
Whenever you press this button, repeat play mode changes.
The selected mode is shown on the front panel display for
single or full repeat. This button also allows you to turn off the
mode.
A/B REPEAT button (p. 33)
Makes this unit repeatedly play a section between 2 points (A
and B) you designate on the disc.
K DISC MODE button (p. 16, 37)
Changes the disc play mode between the single-disc play
mode and the all-disc play mode. In the single-disc play
mode, only a selected disc is played back. In the all-disc play
mode, all discs on the disc table are played back sequentially.
L TIME button (p. 27, 28, 34, 35)
Switches the time display mode.
M RANDOM button (p. 37)
Press this button to play back titles or tracks on a designated
disc or all discs on the disc table in a random order.
N PROG button (p. 34)
Used for programming titles, tracks or a mixture of them in
your desired order.
O TITLE/INDEX button (p. 20, 21)
Whenever you press this button, search mode changes. The
selected mode is shown on the monitor screen for title (or
index) search or time search. This button also allows you to
turn off the mode.
P RETURN button (p. 17, 25, 44, 62)
Press this button to show the previous menu on the monitor
screen.
Q AUDIO button
For DVDs (p. 39)
Changes the audio sound track language if the selected DVD
has two or more audio sound track languages.
For Video CDs and CDs (p. 26)
Changes the output mode of the audio signal output terminals.
Every time this button is pressed, the output mode changes to
“left channel only”, “right channel only”, “left and right
channels”, and repeated.
R /// (p. 17, 23, 40, 41, 44–62)
Move cursors or change selections on the monitor screen.
S SUBTITLE button (p. 38)
Changes the subtitle language if the selected DVD has two or
more subtitle languages.
T (SUBTITLE) OFF/ON button (p. 38)
Turns on and off the showing of subtitles on the monitor
screen.
U MULTI SPEED button (p. 23)
Makes this unit enter into the multi-speed mode during
playback. When this unit is stopped, pressing this button is
ineffective.
V SELECT button (p. 17, 40, 41, 44–62)
Activates the selected menu item or input value.
W PLAY button (p. 16, 21, 22, 32, 34, 36, 37)
Starts playback.
X STILL/PAUSE button (p. 21, 22)
Suspends playback temporarily or keep a picture still. Press
the PLAY or
/ button to return to the standard speed
playback.
Page 12
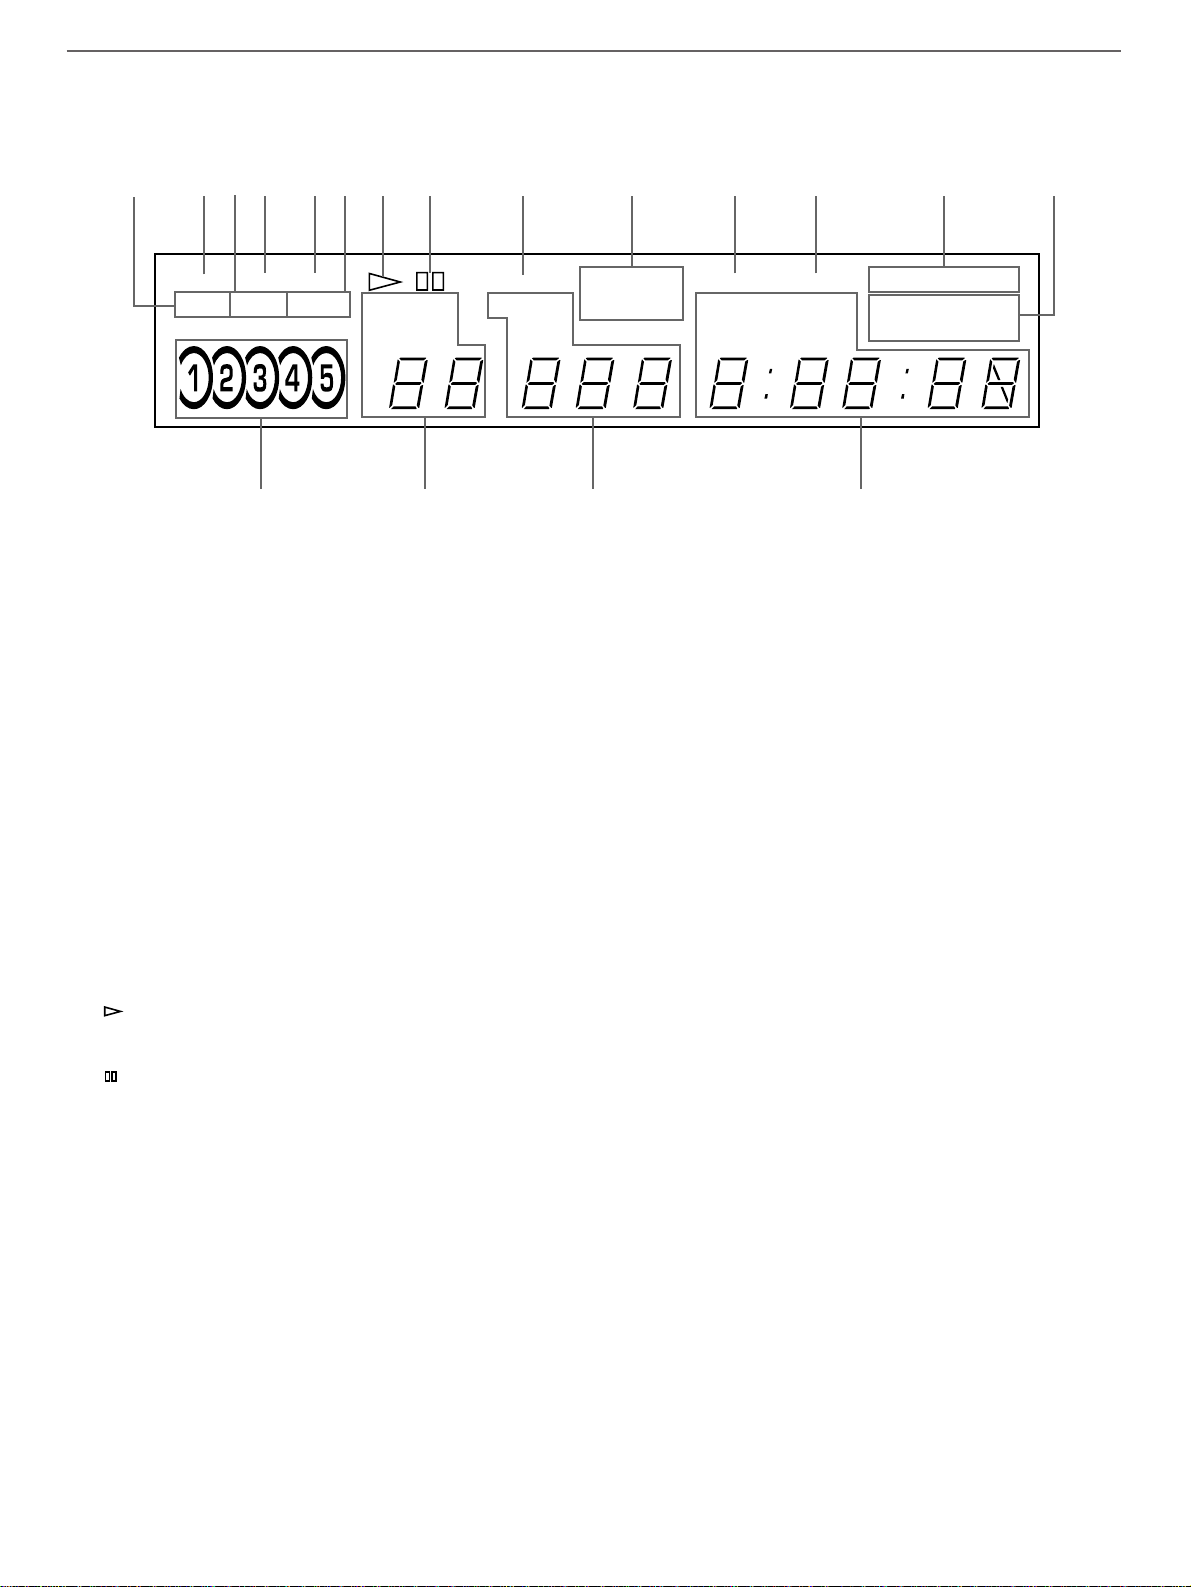
8
Names of parts and their functions
Front panel display
1 PBC
Lights up when this unit is in the Playback Control mode for
playing a Video CD, version 2.0.
2 DVD
Lights up when the selected disc is a DVD.
3 PGM
Lights up when this unit is in the program play mode.
4 VCD
Lights up when the selected disc is a Video CD.
5 CD
Lights up when the selected disc is a compact disc.
6 RDM
Lights up when this unit is in the random play mode.
7
Lights up during playback.
8
Lights up while playback is paused.
9 PCM
Lights up when a source recorded in Linear PCM is played
back.
0 DOLBY DIGITAL
Lights up when a source encoded with Dolby Digital is played
back.
A MPEG
Lights up when a source encoded with MPEG 1 or MPEG 2 is
played back.
B DTS
Lights up when a source encoded with DTS is played back.
C DISC 1
Lights up when this unit is in the single-disc play mode.
DISC 5
Lights up when this unit is in the all-disc play mode.
D REP S
Lights up when this unit is in the single-repeat play mode.
REP F
Lights up when this unit is in the full-repeat play mode.
REP A B
Lights up or flashes when this unit is in the A-B repeat play
mode.
E Tray numbers with discs only light up.
The circle enclosing the currently selected tray number lights
up.
F TITLE
Lights up with the selected title number.
TRACK
Lights up with the selected track number.
G CHP
Lights up with the selected chapter number.
INDEX
Lights up with the selected index number.
H Shows a playing time, for example the elapsed time of a
playing chapter and the remaining time (REMAIN) of a
playing chapter.
DVD VCD CD
PBCPGMRDM
TRACK
TITLE
PCM
INDEX
CHP
DTS
TIME
DISC
REP
1
S
A
5
F
B
MPEG
TOTAL
REMAIN
DOLBY
DIGITAL
234 56 7 89 0 AB C D
EF G H
1
Page 13
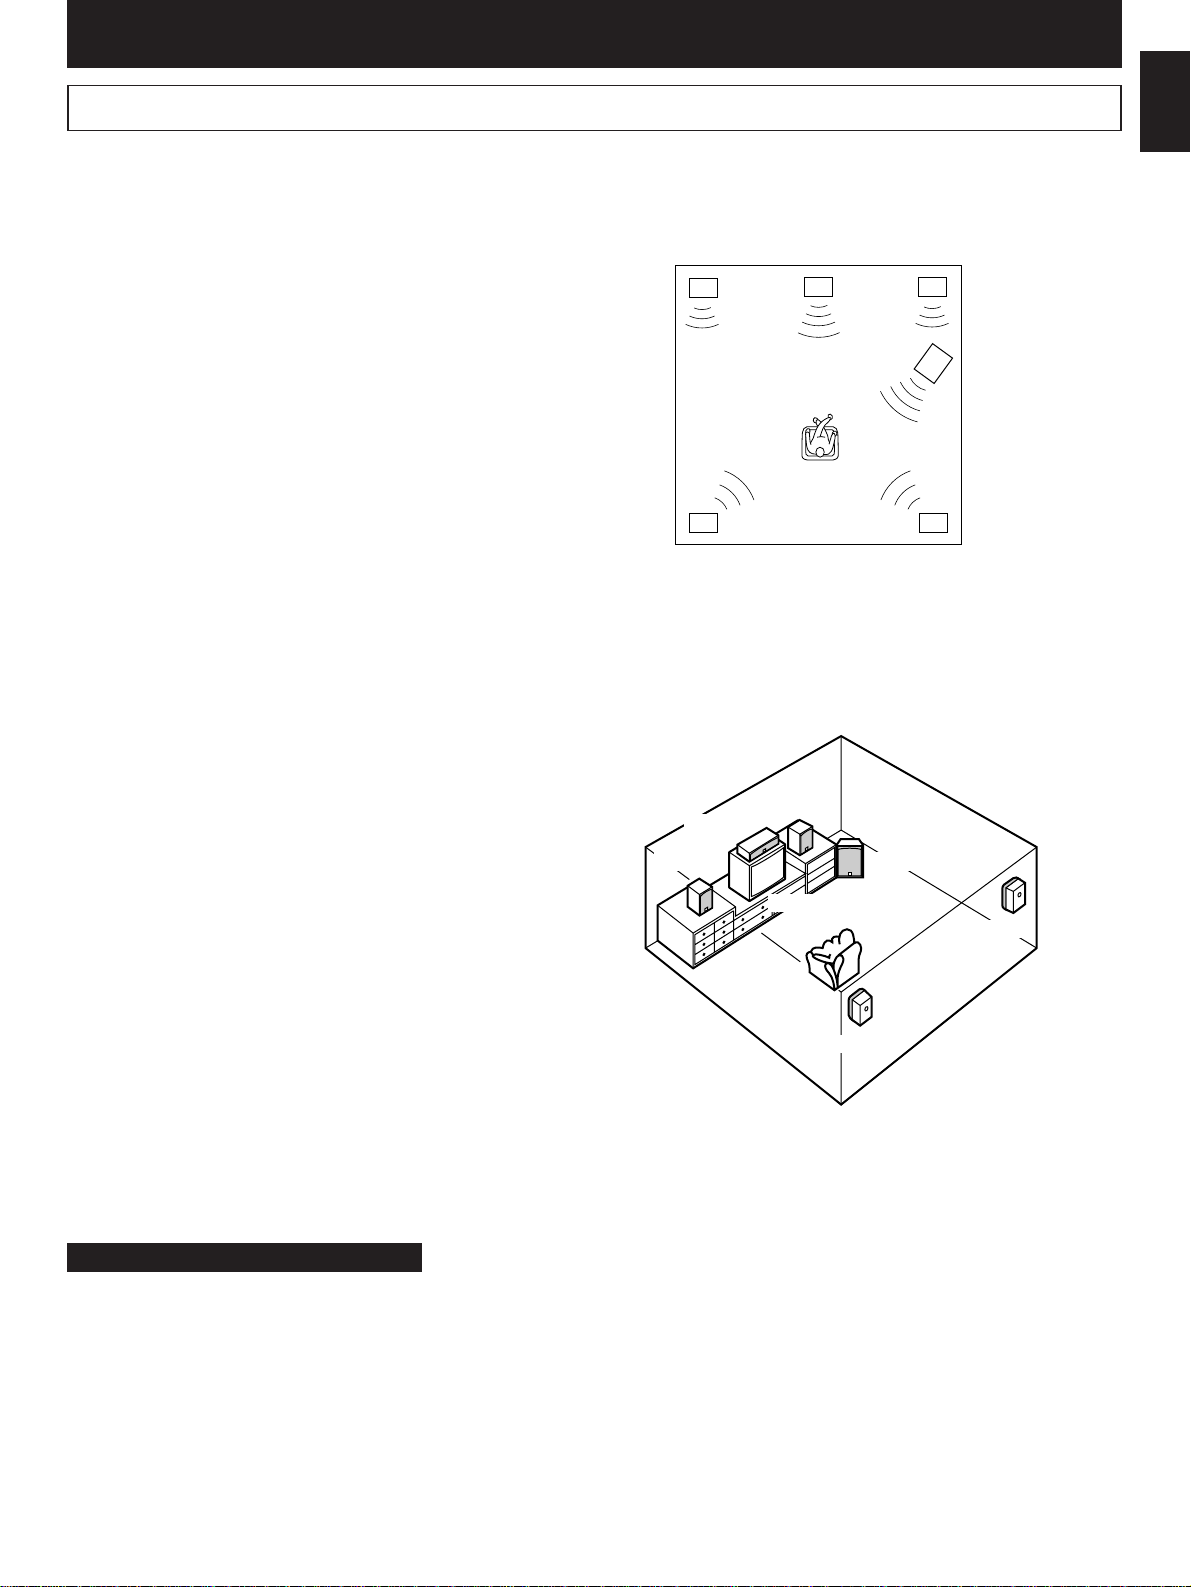
9
English
Speaker setup
We recommend you to set up a multi-speaker system to enjoy the 5.1 channel surround sound of sources encoded with Dolby
Digital, MPEG or DTS.
m Speaker configuration
The most recommended speaker configuration is the 6 speaker
configuration: 2 main speakers, 2 effect speakers, a center
speaker and a subwoofer.
The main speakers are used for the main source sound. The
effect speakers are used for the effect and surround sounds,
and the center speaker is for the center sounds (dialog etc.).
The subwoofer is for reinforcing low frequencies on your audio
system and low frequency effect sounds of the subwooferchannel.
For China and General models only
This unit is designed to output signals of 5.1 channels
efficiently according to your speaker system if you cannot set
up a full 6 speaker configuration. It depends on the setting of “3
Speaker” on the SET UP menu. Refer to pages 62 to 63 for
details. However, this setting is effective only on audio signals
output from the 6CH DISCRETE terminals.
m Placing speakers
Main speakers: On both sides of the TV and almost the
same height as the TV.
Effect speakers: Behind your listening position, facing
slightly inward. Nearly 1.8 m (approx. 6
feet) up from the floor.
Center speaker: Precisely between the main speakers.
(To avoid interference with TV sets, use a
magnetically shielded speaker.)
Subwoofer: The position of the subwoofer is not so
critical because low bass tones are not
highly directional.
Main L Center Main R
Effect L Effect R
Subwoofer
TV set
Subwoofer
Effect L
Effect R
Main L
Main R
Center
Connections
Page 14

10
COAXIAL INOPTICAL
IN
1
MIXED 2CH
VIDEO
COMPONENT VIDEO
VIDEO OUT
S VIDEO
Y
P
BPR
1
2
DIGITAL
VIDEO OUT SELECT
VIDEO/
S VIDEO
COMPONENT
VIDEO OUT
MPEG
/
DTS
COAXIAL OPTICAL
PCM/ DIGITAL
AUDIO OUT
REMOTE
CONTROL
OUT IN
Connections
When you connect this unit to an AV amplifier or receiver
equipped with a Dolby Digital, MPEG or DTS decoder, connect
this unit’s OPTICAL (or COAXIAL) terminal to the amplifier’s
optical (or coaxial) digital signal input terminal.
* If the amplifier and Dolby Digital (or MPEG or DTS) decoder
are separated, connect this unit’s OPTICAL (or COAXIAL)
terminal to the decoder’s optical (or coaxial) digital signal
input terminal.
* When you use the Dolby Digital, MPEG or DTS decoder, be
sure to use “1 Digital Output” on the SET UP menu of this
unit to select the “Disc Original” mode for “Dolby Digital”,
“MPEG” or “DTS”. (Refer to page 59 for details.)
Also, connect this unit’s MIXED 2CH AUDIO OUT terminals to
the amplifier’s analog signal input terminals regardless of
making the digital terminal connection. This is necessary for
playing back a source in 2 channel stereo or with Dolby Pro
Logic decoded.
A digital terminal connection is necessary between this
unit and the amplifier (or decoder) for sending the
playback signals of a source encoded with Dolby Digital,
MPEG or DTS to the amplifier (or decoder). This
connection allows you to enjoy a theater-like surround
sound in your home.
Caution: Plug in this unit and other components after all connections are completed.
All connections must be correct, observing the color coding of terminals between this unit and other components.
Audio connections
m Connecting to an AV amplifier (or receiver) equipped with a Dolby Digital,
MPEG or DTS decoder, or connecting to a Dolby Digital, MPEG or DTS
decoder
Connection cord
(not included)
Main
speaker
(Left)
Center
speaker
Main
speaker
(Right)
Subwoofer
To AC
outlet
Rear (surround) speaker
(Left)
Rear (surround) speaker
(Right)
or
Optical fiber cable
(not included)
Connection cord
(included)
Refer to pages 14-15 for VIDEO
OUT terminal connections.
Refer to pages 14-15 for VIDEO
OUT terminal connections.
AV amplifier or receiver equipped with
a Dolby Digital, MPEG or DTS decoder
Analog audio
input terminals
This unit (U.S.A. model)
Page 15
11
English
Connections
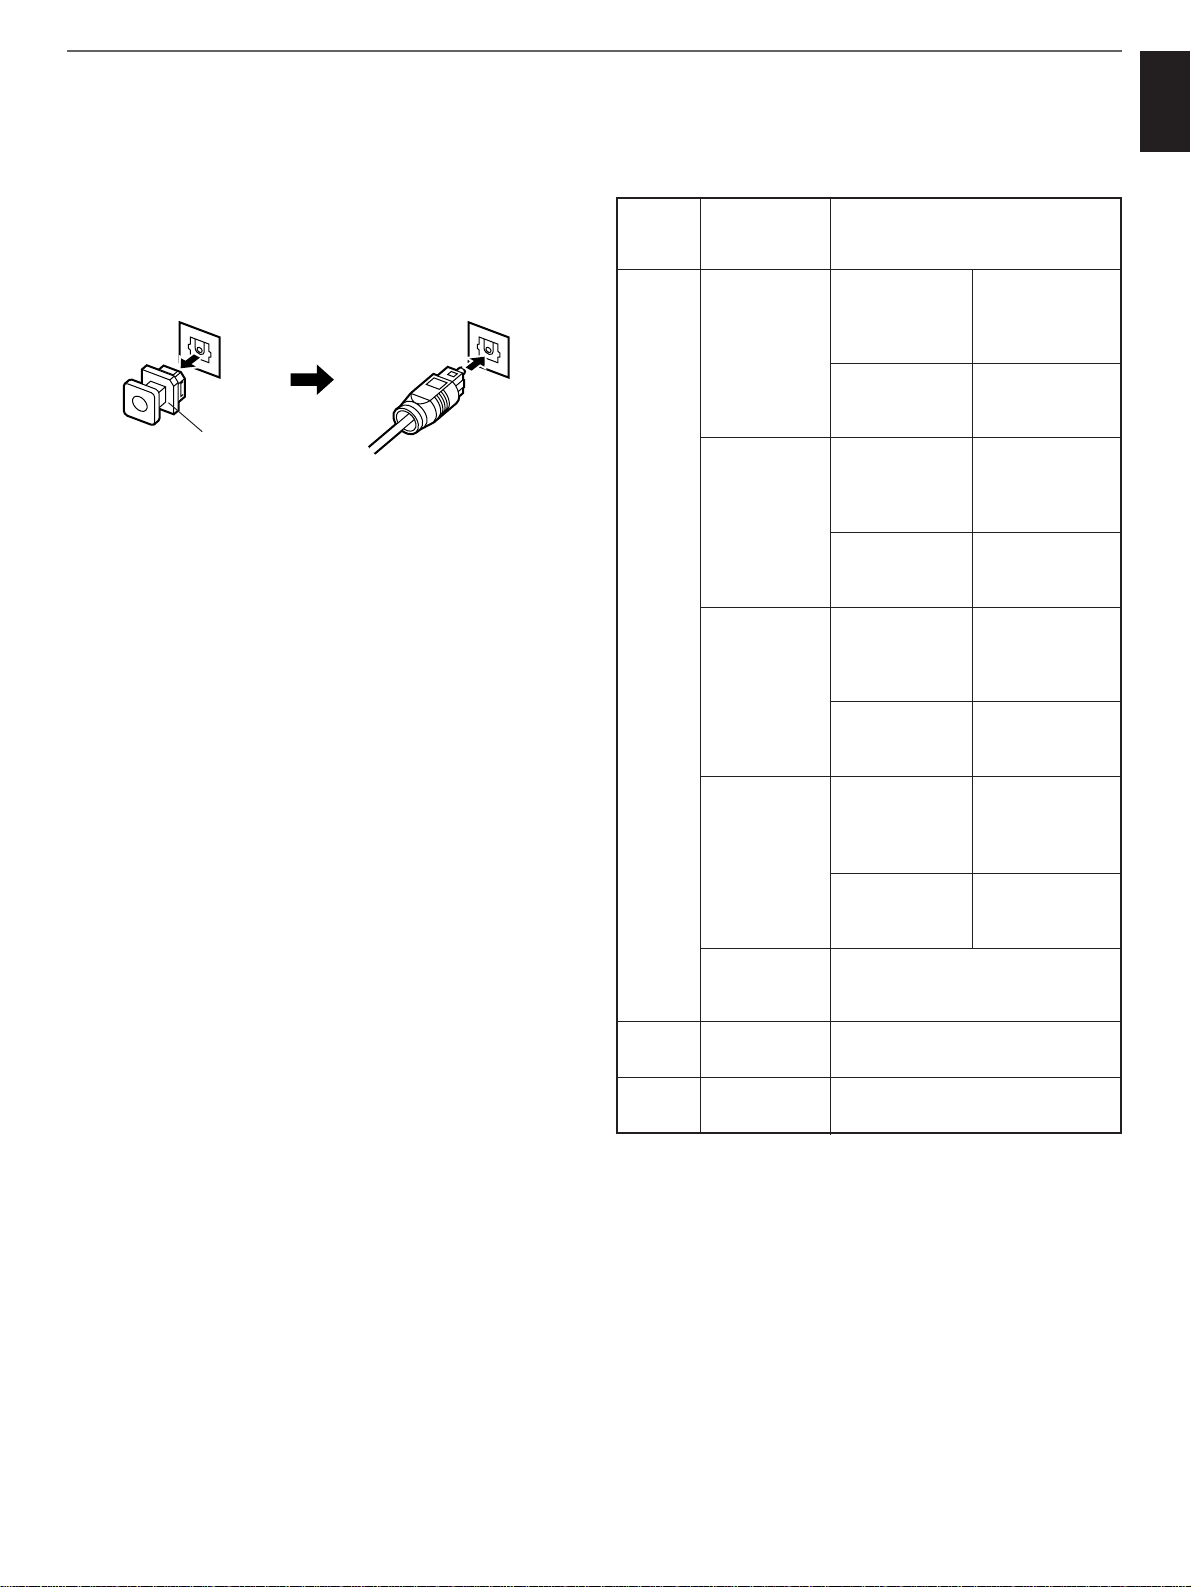
Notes on connecting to this unit’s OPTICAL terminal
●
Before using this terminal, remove the terminal’s cover by
pulling it.
●
Make the connection from this terminal to the optical input
terminal of an amplifier by using a commercially available
optical fiber cable.
* Use an optical fiber cable that conforms to EIAJ
standards. Other cables might not function correctly.
●
Be sure to attach the terminal’s cover when this terminal is
not being used, in order to protect the terminal from dust.
When you connect this unit’s OPTICAL or COAXIAL
terminal to the optical or coaxial digital input
terminal of the amplifier which does not include a
Dolby Digital, MPEG or DTS decoder
Use “1 Digital Output” on the SET UP menu to select the
“PCM” mode for “Dolby Digital” and “MPEG”, and select the
“OFF” mode for “DTS”. (Refer to page 59 for details.)
Digital signal output from this unit
For a DVD disc only, the format of digital signal output from this
unit can be selected by the setting of “1 Digital Output” on the
SET UP menu. (See page 59.)
For your reference:
●
Linear PCM is a signal recording format used in CDs. While
CDs are recorded in 44.1 kHz/16 bit, DVDs are recorded in
48 kHz/16 bit up to 96 kHz/24 bit.
●
If you have a Dolby Pro Logic Surround decoder or your AV
amplifier includes a Dolby Pro Logic Surround decoder, you
will obtain the full benefit of Dolby Pro Logic from the same
DVD movies that provide full 5.1-channel Dolby Digital
sound tracks, as well as from titles with the Dolby Surround
mark.
●
Digital signal for linear PCM (48 kHz 20/24 bit) will be
converted into 48 kHz 16 bit and will be output if a DVD you
play back is formatted with code scramble system
(copyright-protection).
Disc
format
Audio
format
Digital signal output from the
OPTICAL and COAXIAL
terminals of this unit
DVD
Dolby Digital
When “Disc
Original” is
selected on “1
Digital Output”
Dolby Digital
bitstream
(2–5.1ch)
PCM (2 ch)
(48 kHz/16 bit)
VideoCDMPEG 1
audio
PCM (2 ch)
(44.1 kHz/16 bit)
CD Linear PCM PCM (2 ch)
(44.1 kHz/16 bit)
Linear PCM
(48 kHz
16/20/24 bit)
Linear PCM (2 ch)
(48 kHz 16/20/24 bit)
Linear PCM
(96 kHz)
MPEG
(2 or 1)
audio
MPEG (2 or 1)
audio
bitstream
PCM (2 ch)
(48 kHz/16 bit)
When “PCM” is
selected on “1
Digital Output”
When “Disc
Original” is
selected on “1
Digital Output”
When “PCM” is
selected on “1
Digital Output”
DTS
DTS bitstream
No output
When “Disc
Original” is
selected on “1
Digital Output”
When “OFF” is
selected on “1
Digital Output”
Linear PCM
(2 ch) (48 kHz)
No output
When “48kHz
PCM” is
selected on “1
Digital Output”
When “OFF” is
selected on “1
Digital Output”
Terminal’s cover
Page 16
12
Connections
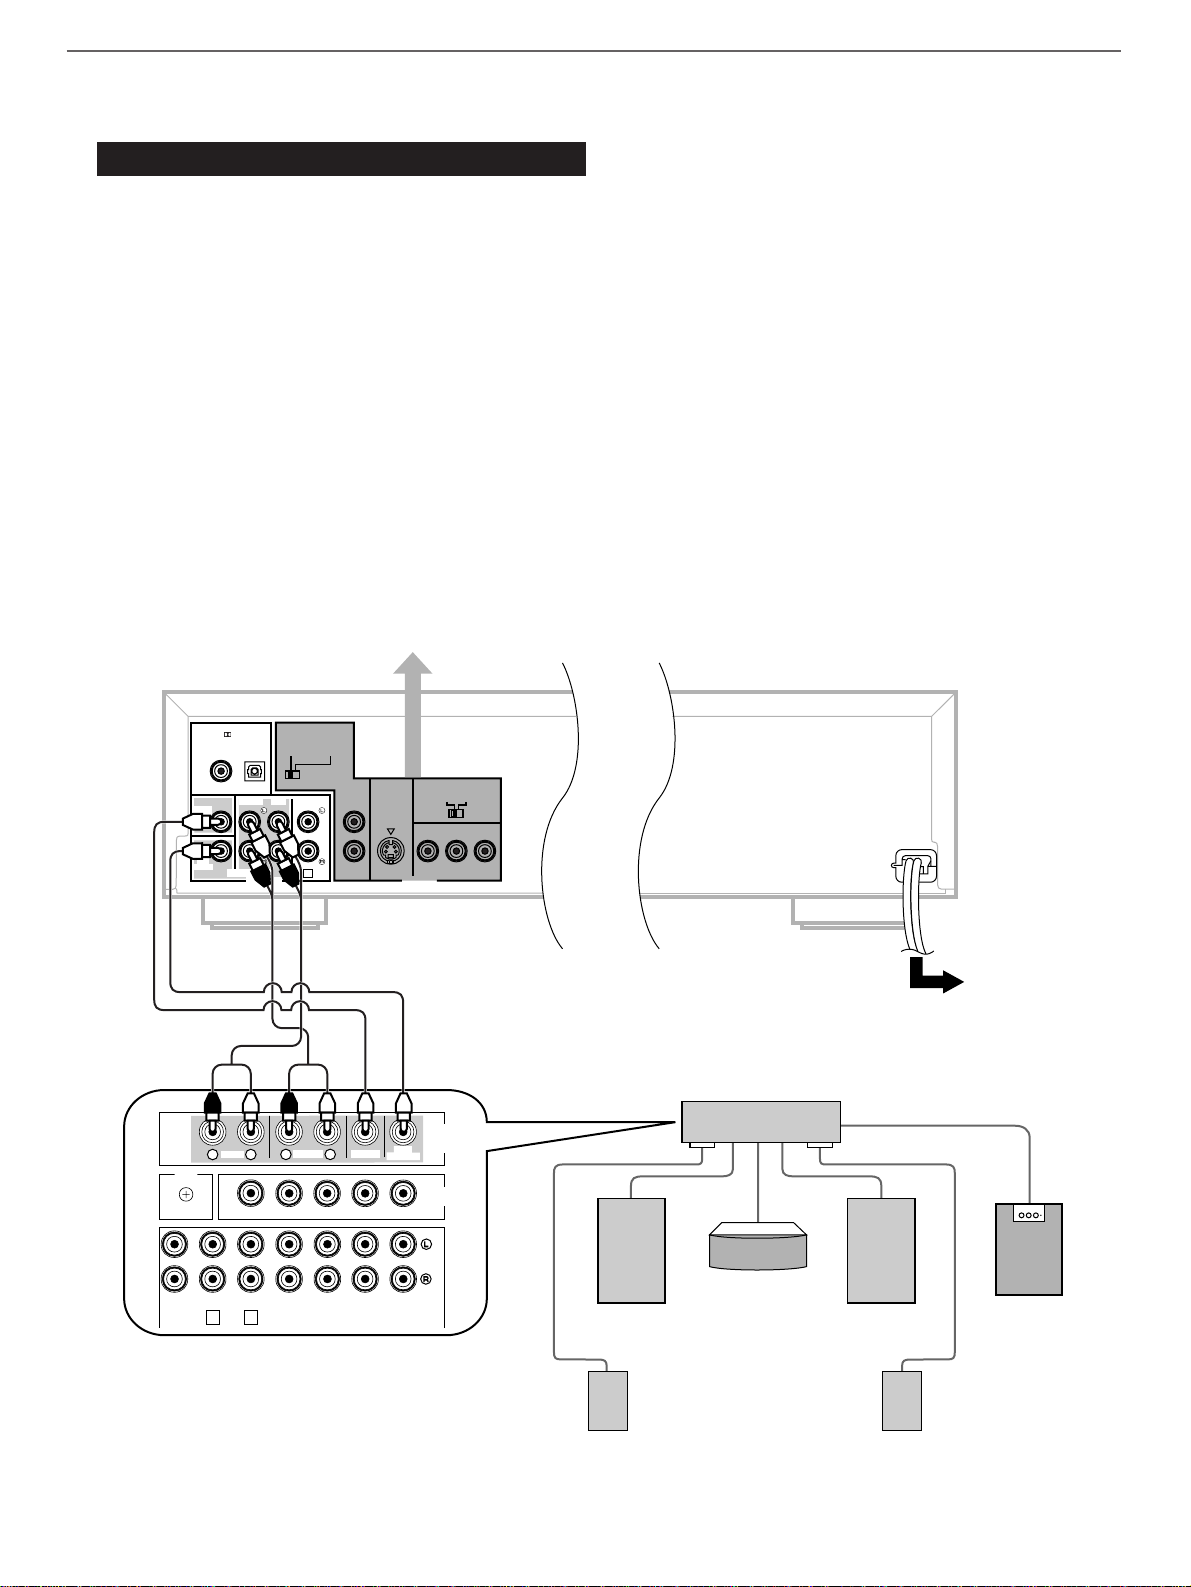
This unit includes a Dolby Digital decoder. This enables the
playback of DVDs encoded with Dolby Digital without the need
for an external Dolby Digital decoder. When this unit is
connected to an AV amplifier with 6 channel input terminals,
you can enjoy theater-like surround sounds in your home when
playing back discs encoded with Dolby Digital.
Notes
•
After connections are completed, change the settings of “3
Speaker” on the SET UP menu according to your speaker
system. (See page 62.)
•
When you play back a disc recorded in 2 channel stereo, the
signals are output from the 6CH DISCRETE MAIN terminals
only.
•
You can also connect the OPTICAL or COAXIAL DIGITAL
AUDIO OUT terminal to the amplifier if the amplifier has the
corresponding digital input terminal(s).
If either of those terminals is connected to the amplifier
which does not include a Dolby Digital, MPEG or DTS
decoder, use “1 Digital Output” on the SET UP menu to
select the “PCM” mode for “Dolby Digital” and “MPEG”, and
select the “OFF” mode for “DTS”. (Refer to page 59 for
details.)
m Connecting to an AV amplifier (or receiver) equipped with 6 channel input
terminals
For China and General models only
1
MAIN
MIXED 2CH
VIDEO
COMPONENT VIDEO
VIDEO OUT
MODE SELECT
PAL NTSC
S VIDEO
Y
P
BPR
1
2
SUB
WOOFER
CENTER
SURROUND
6CH DISCRETE
DIGITAL
VIDEO OUT SELECT
VIDEO/
S VIDEO
COMPONENT
VIDEO OUT
MPEG
/
DTS
COAXIAL
OPTICAL
PCM/ DIGITAL
AUDIO OUT
GND
MONITOR OUT
DVD/LD TV/DBS
IN OUT
VCR
IN OUT
VCR
PHONO
DVD/LD TV/DBS
TAPEPBREC
OUT
3 4
DVD/LD
TV/DBS
MAIN
R L
SURROUND
R L
CENTER
SUB
WOOFER
6CH
DISCRETE
INPUT
VIDEO
SIGNAL
TAPE
/MD
This unit (General model)
To AC outlet
AV amplifier or receiver equipped
with 6 channel input terminals
Main speaker
(Left)
Center speaker
Main speaker
(Right)
Subwoofer
Rear (surround) speaker
(Left)
Rear (surround) speaker
(Right)
Refer to pages 14-15 for VIDEO
OUT terminal connections.
Page 17
13
English
DVD
1
MIXED 2CH
VIDEO
COMPONENT VIDEO
VIDEO OUT
S VIDEO
Y
P
BPR
1
2
DIGITAL
VIDEO OUT SELECT
VIDEO/
S VIDEO
COMPONENT
VIDEO OUT
MPEG
/
DTS
COAXIAL OPTICAL
PCM/ DIGITAL
AUDIO OUT
REMOTE
CONTROL
OUT IN
Amplifier
Connections
m
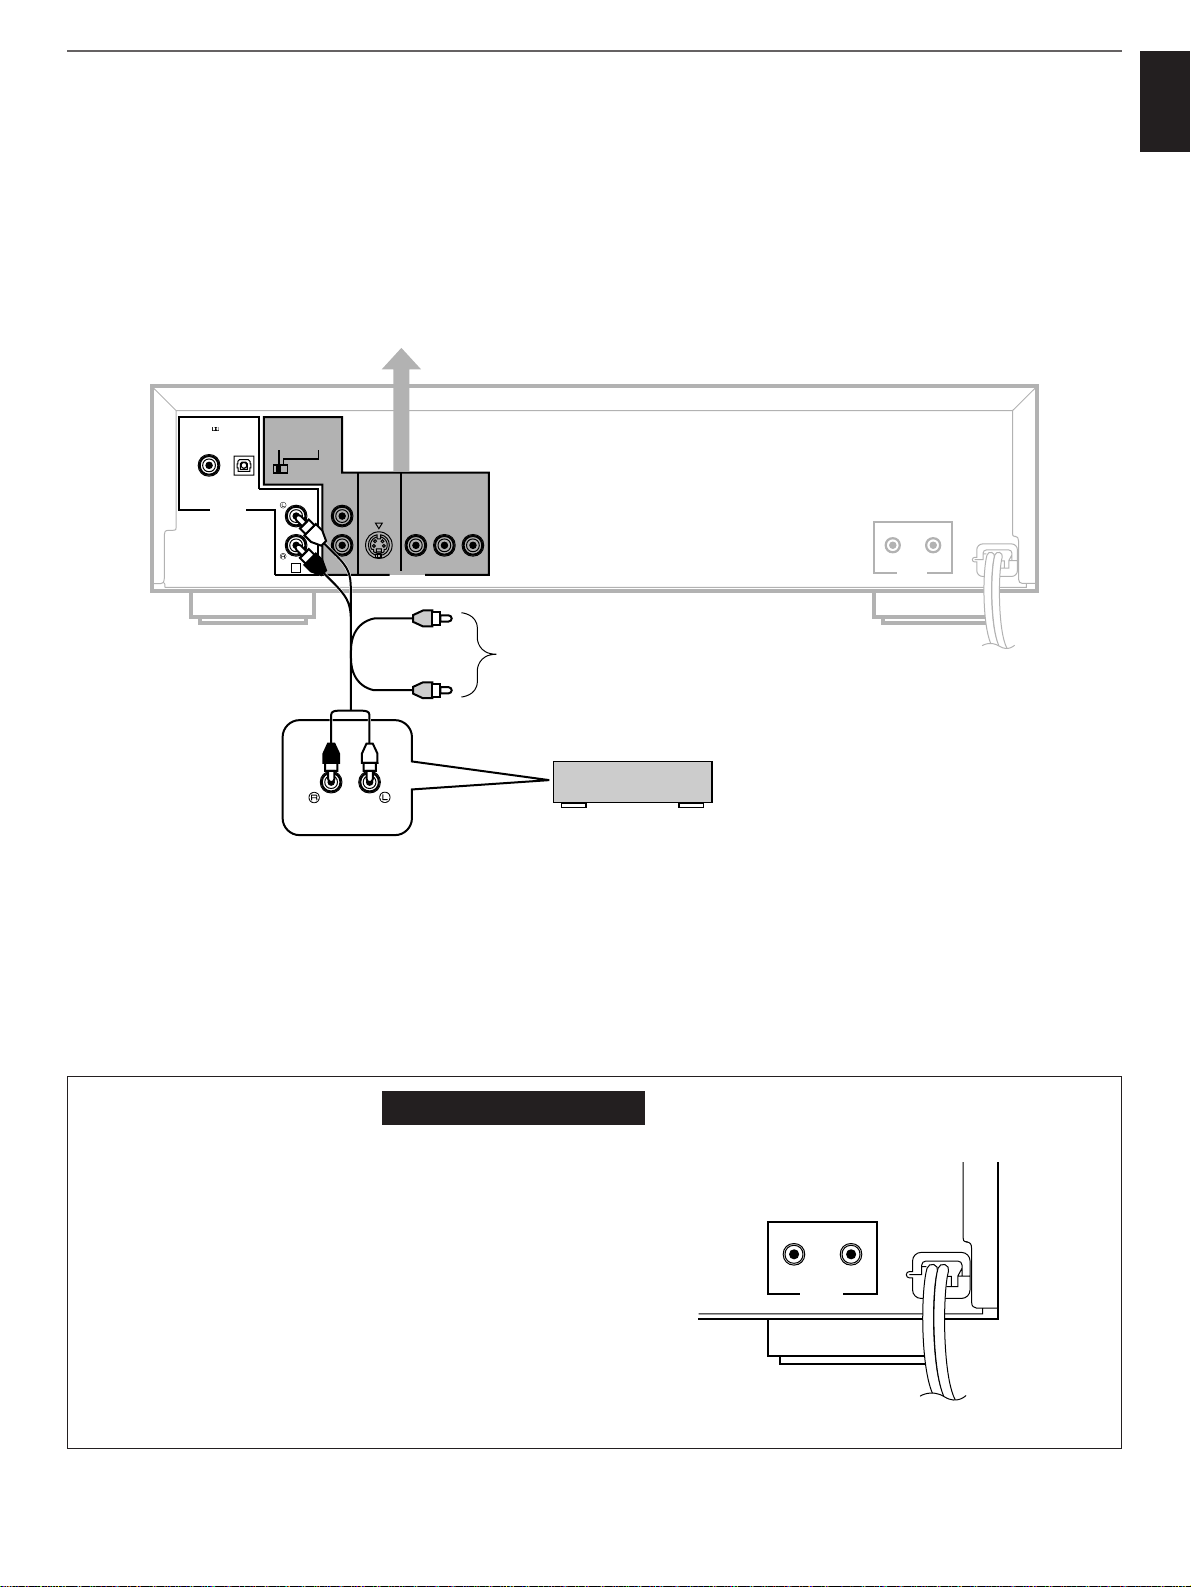
Connecting to a stereo amplifier that has neither 6 channel audio signal
input terminals nor Dolby Digital decoder
Connect this unit’s MIXED 2CH AUDIO OUT terminals to the amplifier’s audio signal input terminal printed as “DVD”, “VIDEO”,
“AUX”, etc.
6 channel audio signals encoded with Dolby Digital are mixed down into 2 channels and output from the MIXED 2CH AUDIO OUT
terminals.
Note
If you have no stereo amplifier available, you can connect this unit’s MIXED 2CH AUDIO OUT terminals to your TV’s audio signal
input terminals (if your TV is equipped with RCA type audio signal input terminals).
Refer to pages 14-15 for VIDEO
OUT terminal connections.
Refer to pages 14-15 for VIDEO
OUT terminal connections.
This unit (U.S.A. model)
For Custom Installer
For U.S.A. model only
REMOTE CONTROL (IN, OUT) terminals
These terminals are used for custom installation system.
When this unit is connected to the components for custom
installation system, you can operate this unit with the
system remote control.
Connect the REMOTE CONTROL IN terminal of this unit to
the output terminal of the central controller for custom
installation system.
By connecting the REMOTE CONTROL OUT terminal of
this unit to the REMOTE CONTROL IN terminal of the other
component, you can also operate it with the system remote
control. In this way, up to 6 components can be connected
in series.
REMOTE
CONTROL
OUT IN
Connection cord
(included)
Page 18
14
Connections
Video connections
m
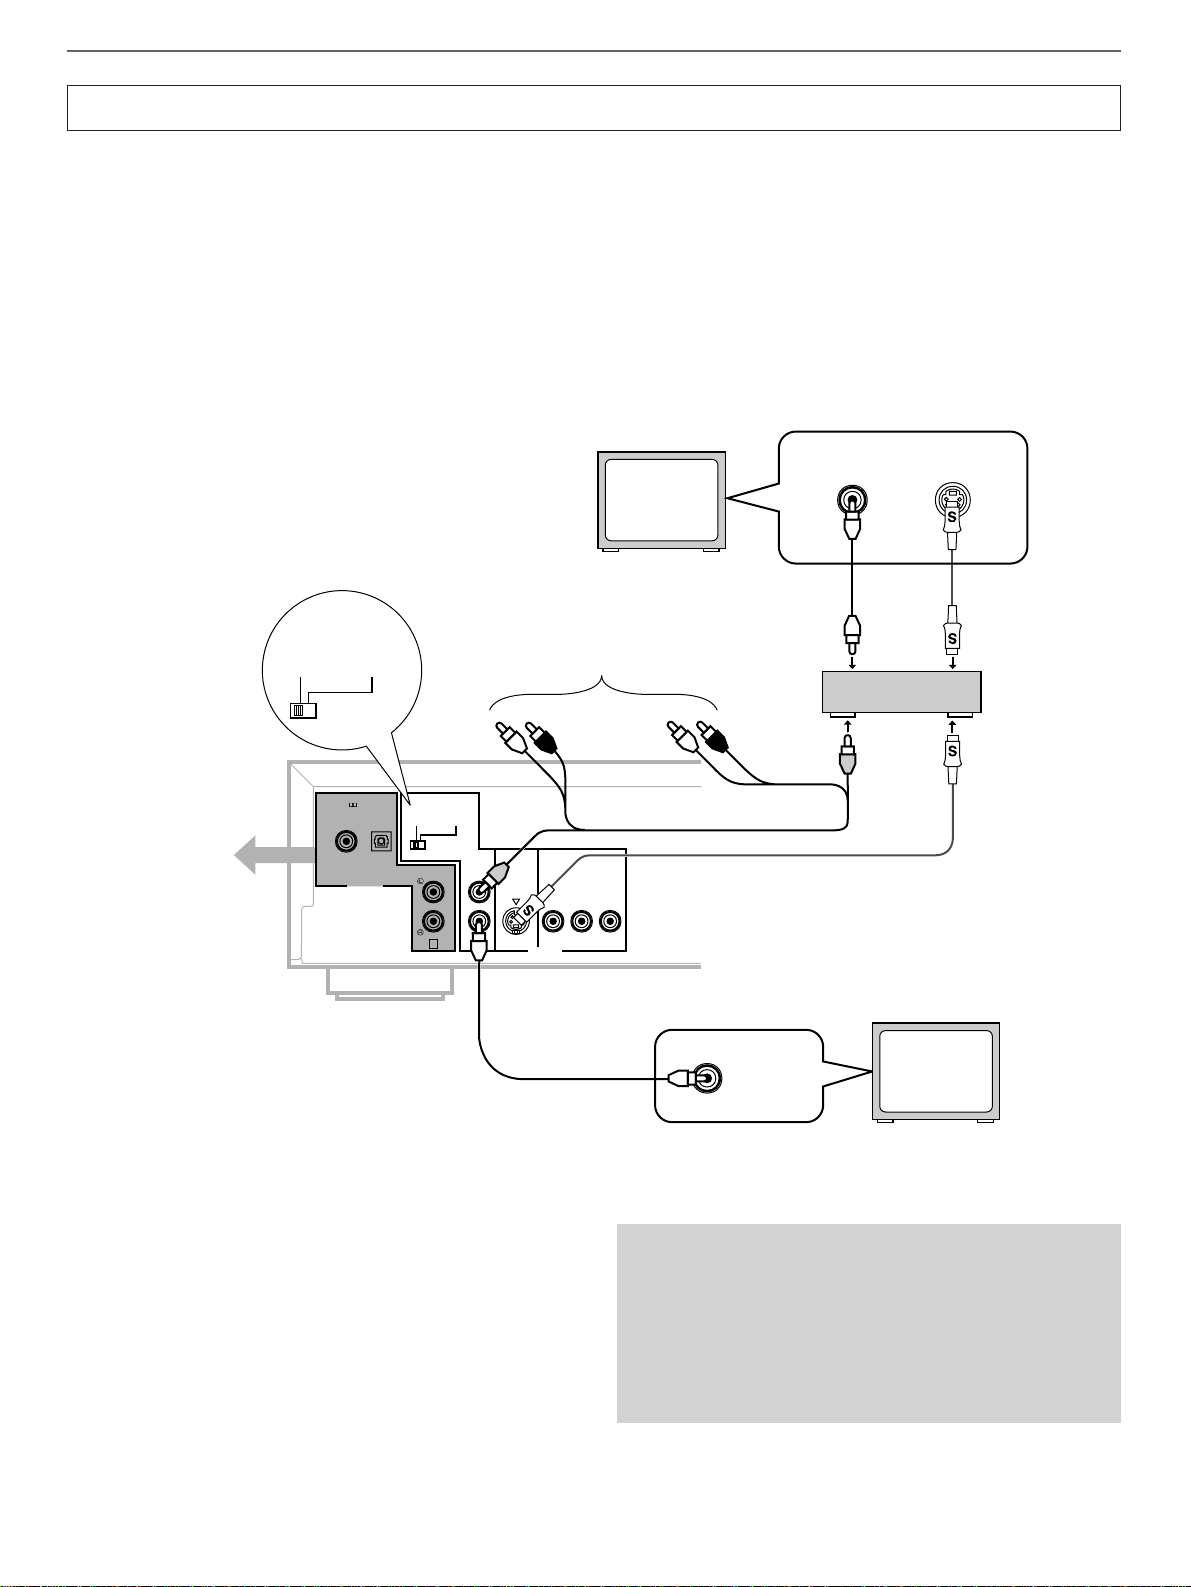
Connecting to an amplifier equipped with an RCA type video signal input
terminal (including an S-video input terminal)
Connect this unit’s VIDEO 1 (or 2) terminal to the amplifier’s RCA type video signal input terminal (labeled “DVD/LD” etc.).
If your amplifier has an S-video input terminal, you can connect this unit’s S VIDEO terminal to the amplifier’s S-video input terminal
by using a commercially available S-connector cable.
When the connection is made in one of these ways, be sure to set the VIDEO OUT SELECT switch to the “VIDEO/S VIDEO”
side.
This unit has two VIDEO terminals. The other terminal can be connected to another amplifier or TV.
Notes
● If your TV has an RCA type video signal input terminal
(including an S-video input terminal), this unit can be
connected to the TV directly.
● Do not connect this unit to the TV through a video cassette
recorder. Otherwise, the picture may not be played back
normally with some DVDs. This is because the copyright
protection circuit built-in this unit operates.
•
Be sure to change the setting of the VIDEO OUT
SELECT switch only when this unit is turned off or the
power cord of this unit is disconnected from the AC
outlet.
S VIDEO terminal
This unit provides you with a S VIDEO terminal in addition to
standard type VIDEO terminals.
The S VIDEO terminal transmits video signals separated into
luminance (Y) signals and color (C) signals. High quality
pictures are obtained from this terminal. In comparison with
the S VIDEO terminal, standard type VIDEO terminals
transmit “composite” video signals.
1
MIXED 2CH
VIDEO
COMPONENT VIDEO
S VIDEO
Y
P
BPR
1
2
DIGITAL
VIDEO OUT SELECT
VIDEO/
S VIDEO
COMPONENT
VIDEO OUT
MPEG
/
DTS
COAXIAL OPTICAL
PCM/ DIGITAL
AUDIO OUT
VIDEO OUT
VIDEO IN
VIDEO IN
S-VIDEO IN
S VIDEO
MONITOR
OUT
VIDEO
MONITOR
OUT
VIDEO IN S VIDEO IN
VIDEO OUT SELECT
VIDEO/
S VIDEO
COMPONENT
VIDEO OUT
or
S-video cable (not included)
TV monitor
Amplifier
TV monitor
Refer to pages 10-13
for AUDIO OUT
terminal connections.
Refer to pages 10-13
for AUDIO OUT
terminal connections.
This unit (U.S.A. model)
Connection cord
(not included)
Connection cord (included)
Page 19
15
English
1
MIXED 2CH
VIDEO
COMPONENT VIDEO
S VIDEO
Y
P
BPR
Y
P
B PR
1
2
DIGITAL
VIDEO OUT SELECT
VIDEO/
S VIDEO
COMPONENT
VIDEO OUT
MPEG
/
DTS
COAXIAL OPTICAL
PCM/ DIGITAL
AUDIO OUT
VIDEO OUT
VIDEO OUT SELECT
VIDEO/
S VIDEO
COMPONENT
VIDEO OUT
Connections
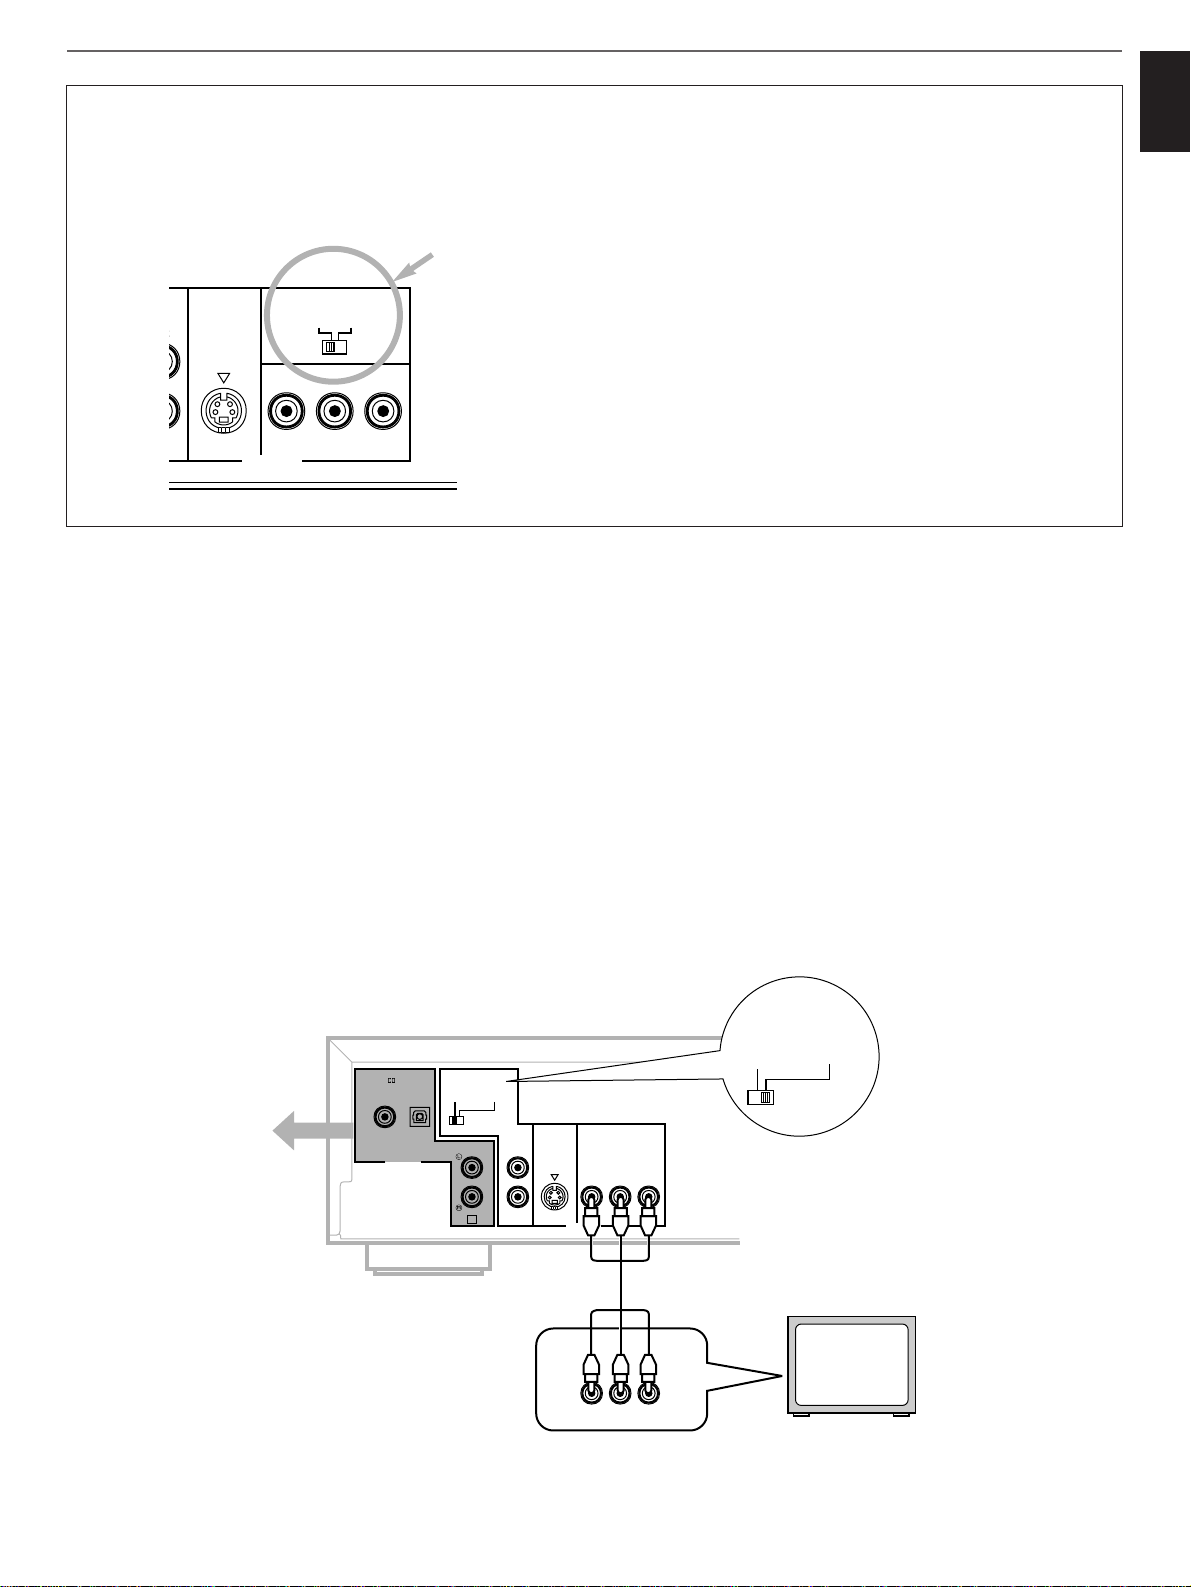
m
Connecting to a TV equipped with component video input terminals
You can connect this unit’s COMPONENT VIDEO OUT
terminals to your TV or projector, if your TV or projector has
component video signal input terminals.
The COMPONENT VIDEO OUT terminals output three types of
chrominance signals separately. By this connection, you can
enjoy high quality pictures with vivid colors.
If you make this connection, be sure to set the VIDEO OUT
SELECT switch to the “COMPONENT VIDEO OUT”
position.
Note
Do not connect this unit’s COMPONENT VIDEO OUT
terminals to component video input terminals special for HD
(High-Definition) TV.
Video connection
cords (not included)
This unit is designed for use with the NTSC and PAL
television formats. Set this switch to the position for the
format your TV monitor employs.
PAL: Set to this position if your TV monitor employs the
PAL format.
NTSC: Set to this position if your TV monitor employs the
NTSC format.
Notes
•
Be sure to change the setting of this switch only when
this unit is turned off or the power cord of this unit is
disconnected from the AC outlet.
•
If “6 Signal System Conversion” on the SET UP menu is set
to “Disc”, the setting of this switch becomes ineffective when
a DVD or Video CD disc is played back. The format
employed on the disc currently played back is automatically
selected.
MODE SELECT (PAL/NTSC) switch <China and General models only>
COMPONENT VIDEO
VIDEO OUT
MODE SELECT
PAL NTSC
S VIDEO
Y
P
BPR
TV monitor
Refer to pages 10-13
for AUDIO OUT
terminal connections.
This unit (U.S.A. model)
Page 20

16
The On-Screen Display language of your model has been
factory preset as follows:
U.S.A. and General models: English
China model: Chinese
If you would like to change the On-Screen Display language to
another language, please refer to “OSD Language” on the
SET UP menu on page 54.
Preparations
•
If you play back a DVD or a Video CD, turn the TV on and
make some setting changes on the TV if necessary.
•
Turn on the power of your stereo system if this unit is
connected to the stereo system.
Basic playback
1 Press POWER to turn on the power.
2 Press OPEN/CLOSE to open the disc table.
3 Place discs on the trays, label side upward.
* Up to five discs can be loaded on the trays.
The trays are numbered 1 to 5.
* 8 cm (3”) discs can be played back without an adaptor.
4 Press OPEN/CLOSE to close the disc table.
* The disc on the tray 1 is ready to be played back.
Playback may begin automatically depending on some
DVDs.
* If no disc is loaded on the disc tray 1, select another
disc by following step 6.
5 If necessary, change the disc play mode (to “DISC
1” or “DISC 5”) by pressing DISC MODE on the
remote controller confirming it on the front panel
display.
When “DISC 1” is illuminated: Only a designated disc
is played back.
When “DISC 5” is illuminated: All discs on the disc
table are played back sequentially.
6 If you want to select another disc, press DISC
SKIP on the remote controller once or more, or
press DISC (1, 2, 3, 4 or 5) on the front panel.
7 Press PLAY on the remote controller
or / on the front panel to begin playback.
* Playback begins.
* You can skip this step if the disc is already played
back automatically.
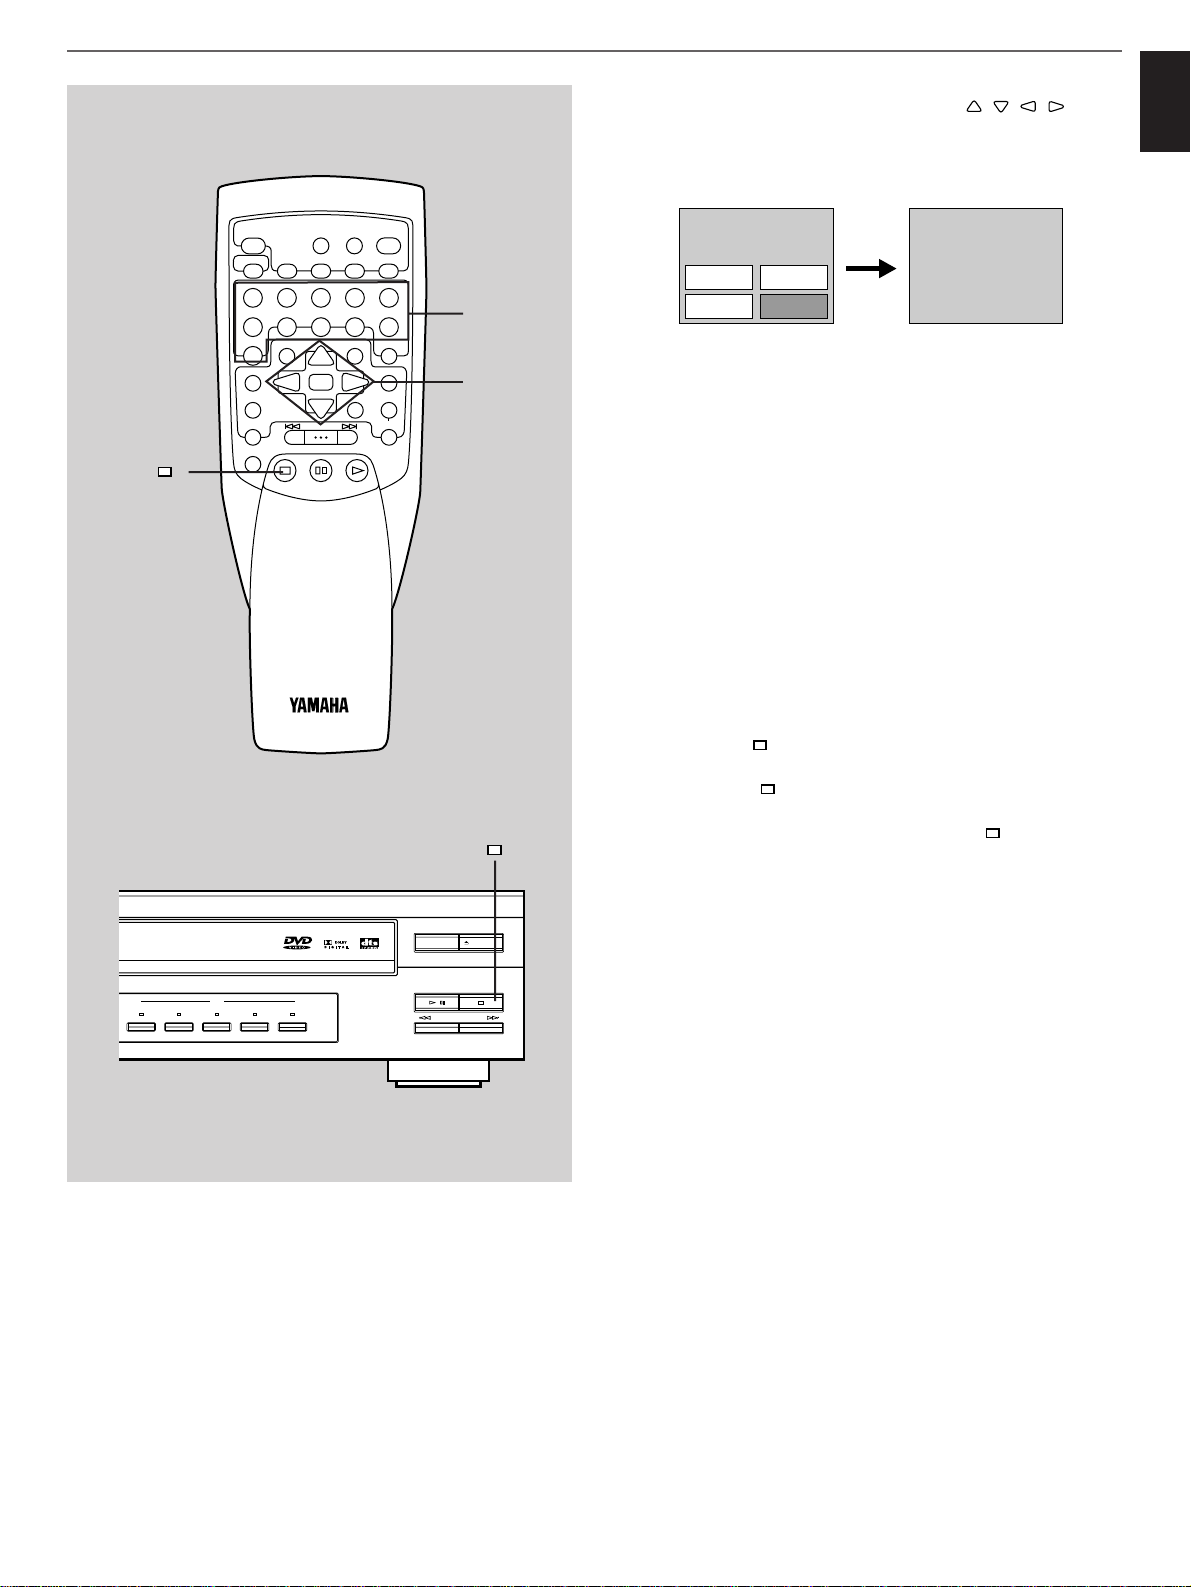
When a screen menu appears on the monitor
screen, go on to step 8.
In case of DVDs with menu or Video CDs with Playback
Control, a screen menu appears on the monitor screen.
Example)
Basic operation
5
6
2, 4
7
6
2, 4
1
7
3
DISC SKIP
+10
TITLE AUDIO
MENU
SET UP
ON SCREEN
DISC MODE
A-BS/FCANCEL
REPEAT
12345
6
7890
ANGLE
SELECT
SKIP/SEARCH
STOP
STILL/PAUSE
OPEN
TIME
CLOSE
PROG
RANDOM
RETURN
TITLE/INDEX
SUBTITLE
MULTI SPEED
OFF/ON
PLAY
/
NATURAL SOUND DVD PLAYER DVD-C900
AUTO
DISPLAY OFF
POWER
CD/CD
12345
DISC
DVD/VIDEO CD/CD
PLAYXCHANGE
/
SKIP/
SEARCH
12
OPEN/CLOSE
TITLE MENU
1 Sights
2 Hotels
3 Foods
4
Souvenirs
Page 21
17
Basic operation
English
8 Select the preferred item by using / / / and
then press SELECT, or select the item simply by
pressing the corresponding numeric button(s).
* Refer to page 18 for how to use the numeric buttons.
Playback of the selected
item begins.
Note
For Video CDs, only the numeric buttons can be used to
select the preferred item.
To stop playback and return to the screen menu
•
For DVDs
Press TITLE, MENU or RETURN.
(The button to be used differs depending on the disc
used.)
•
For Video CDs
Press RETURN.
To stop playback
Press STOP ( ).
* When playback is stopped, the unit memorizes the point
where STOP ( ) was pressed (Playback Resumption).
Press PLAY again, and playback will resume from this
point. When the table is opened or STOP ( ) is pressed
again, the memory will be cleared.
The Playback Resumption works only with discs for which
playing time appears on the front panel display during
playback.
This feature will not be cleared when the power is turned
off.
Note
There may be a case that the Playback Resumption does
not work depending on a part of the disc played back.
Souvenirs
1 Sights
TITLE MENU
3 Foods
4
Souvenirs
2 Hotels
8
8
STOP ( )
DISC SKIP
TITLE AUDIO
MENU
SET UP
ON SCREEN
DISC MODE
A-BS/FCANCEL
REPEAT
12345
6
7890
+10
ANGLE
SELECT
SKIP/SEARCH
STOP
STILL/PAUSE
OPEN
TIME
CLOSE
PROG
RANDOM
RETURN
TITLE/INDEX
SUBTITLE
MULTI SPEED
OFF/ON
PLAY
/
CD/CD
12345
DISC
PLAYXCHANGE
/
SKIP/
SEARCH
OPEN/CLOSE
Page 22

Direct playback
•
Pressing DISC (1, 2, 3, 4 or 5) on the front panel will select
the disc directly (even if the disc table is open), and
playback will begin automatically.
•
Even if the disc table is open, pressing PLAY will close the
disc table and begin playback of the disc 1.
PLAYXCHANGE
During playback, you can open the disc table by pressing
PLAYXCHANGE without interrupting playback. While
PLAYXCHANGE is working, pressing DISC SKIP has no
effect.
Note
You can load or replace discs on the trays when the disc
table is opening, however, never load a disc on the tray
hidden inside the unit. In doing so, the disc and the unit
may be damaged, because the tray already has a disc
which is being played back.
Automatic playback-starting function (for DVDs only)
If you load a disc which includes the information for automatic
playback-starting, playback starts automatically without an
operation of starting playback.
How to use the numeric buttons to select a number
(Example)
•
To select number 8.
Press “8”.
•
To select number 10
Press “+10” and “0” in succession.
•
To select number 15
Press “+10” and “5” in succession.
•
To select number 26.
Press “+10” twice, then press “6”.
Notes
•
There may be a case that appears on the monitor
screen when a button is pressed. It means that the
corresponding operation is prohibited by this unit or the disc
currently played back.
•
For DVDs and Video CDs:
The disc continues to rotate while the menu is displayed on
the monitor screen even after the playback of an item is
finished. If no further selection is to be played back, be sure
to press STOP ( ) to clear the menu.
Precautions
•
Subjecting the unit to shock or vibration can cause
mistracking.
•
Do not pull open the disc table forcibly with your hands.
•
Do not push the disc table while it is moving.
•
The temperature range for playing back discs is
recommended to be 5°C (41°F) – 35°C (95°F).
18
Basic operation
Front panel display information at basic playback
1 Type of the selected disc
2 Lights up the tray numbers with discs only.
3 “ ” lights up during playback and “ ” lights up when the
playback is paused.
4 Audio format of the played disc
5 Disc play mode
6 Encloses the tray number of the selected disc.
7 Shows the selected title (or track) number.
8 Shows the selected chapter (or index) number.
9 Shows the time displays. (Refer to “Switching the time
display” on pages 27 to 28.)
DVD VCD CD
PBCPGMRDM
TITLE
CHP
TIME
DISC
5
DOLBY
DIGITAL
1
678 9
23 4 5
Page 23
19
English
Basic operation
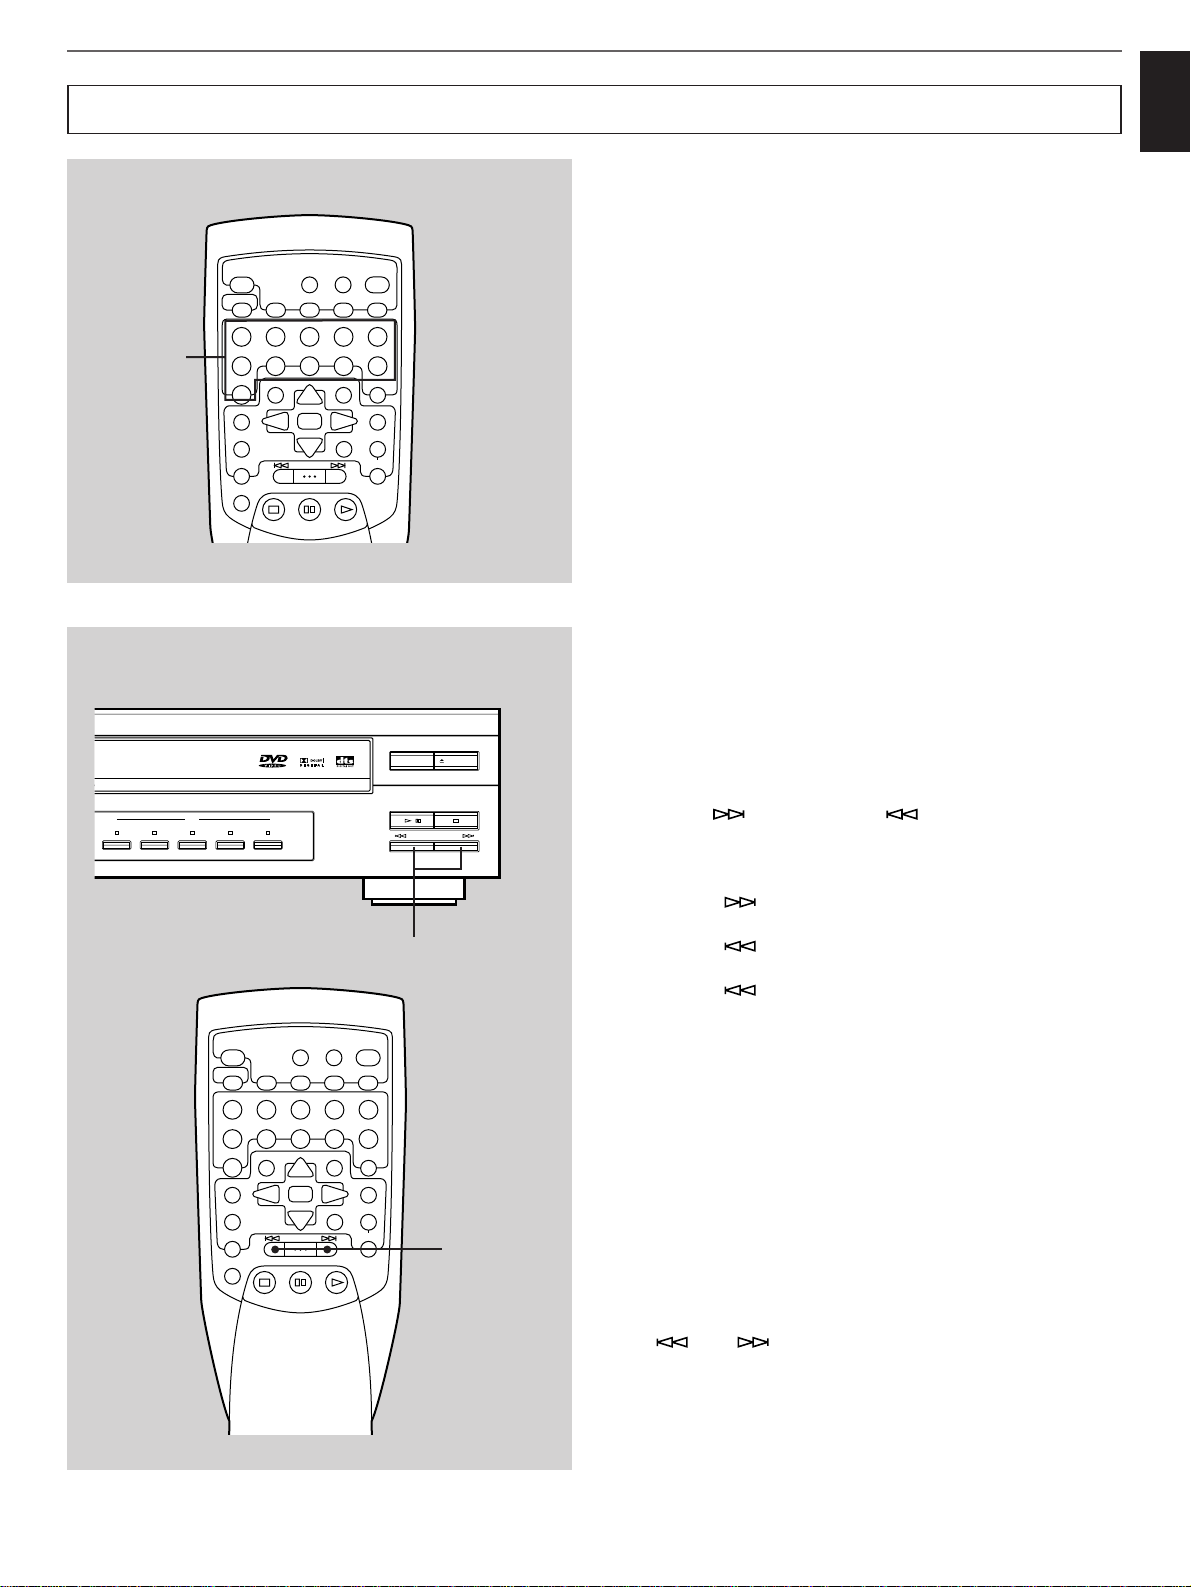
m Beginning playback from a
preferred chapter (or track)
You can select and play back a preferred chapter (for a DVD)
or track (for a Video CD or CD) simply by entering its number
with the numeric buttons.
* Refer to page 18 for how to use the numeric buttons.
Note
For Video CDs only:
This operation is ineffective when this unit is in the Playback
Control mode.
For DVDs only:
Pressing “+10” may be ineffective when a title is changing. In
this case, press CANCEL and try again.
Numeric
buttons
m Skipping to a preferred chapter
(or track) on the disc (Skip search)
The beginning of any chapter (for DVDs) or track (for Video
CDs or CDs) can be found easily.
1 Select a disc and begin playback.
2 Press to advance or to reverse through
the title (or disc).
Press once for each chapter (or track) to be
advanced or reversed.
• Press once to advance to the next chapter (or
track).
• Press once to return to the start of the current
chapter (or track).
• Press once at the beginning of the current chapter
(or track) to return to the chapter (or track) before the
current chapter (or track).
Notes
• This function can also be performed while this unit is
stopped. Press PLAY when your desired chapter (or track)
number appears on the front panel display. Playback will
begin from the beginning of the chapter (or track).
• This function will be performed forward or backward from
any point on the title (or disc). However, it will not move
forward during playback of the final chapter (or track).
• For Video CDs only:
* This operation is ineffective when this unit is in the
Playback Control mode.
* and are used in the Playback Control mode as
the functions of “PREV” and “NEXT” respectively.
12345
6
+10
7890
A-BS/FCANCEL
ANGLE
SELECT
TITLE AUDIO
MENU
SUBTITLE
SET UP
ON SCREEN
OFF/ON
MULTI SPEED
RETURN
TITLE/INDEX
REPEAT
DISC SKIP
PROG
RANDOM
DISC MODE
TIME
OPEN
/
CLOSE
STOP
STILL/PAUSE
SKIP/SEARCH
PLAY
2
2
Playing back a preferred scene or track
DISC SKIP
+10
TITLE AUDIO
MENU
SET UP
ON SCREEN
DISC MODE
A-BS/FCANCEL
REPEAT
12345
6
7890
ANGLE
SELECT
SKIP/SEARCH
STOP
STILL/PAUSE
OPEN
TIME
CLOSE
PROG
RANDOM
RETURN
TITLE/INDEX
SUBTITLE
MULTI SPEED
OFF/ON
PLAY
/
CD/CD
DISC
12345
PLAYXCHANGE
OPEN/CLOSE
/
SKIP/
SEARCH
Page 24
20
Basic operation
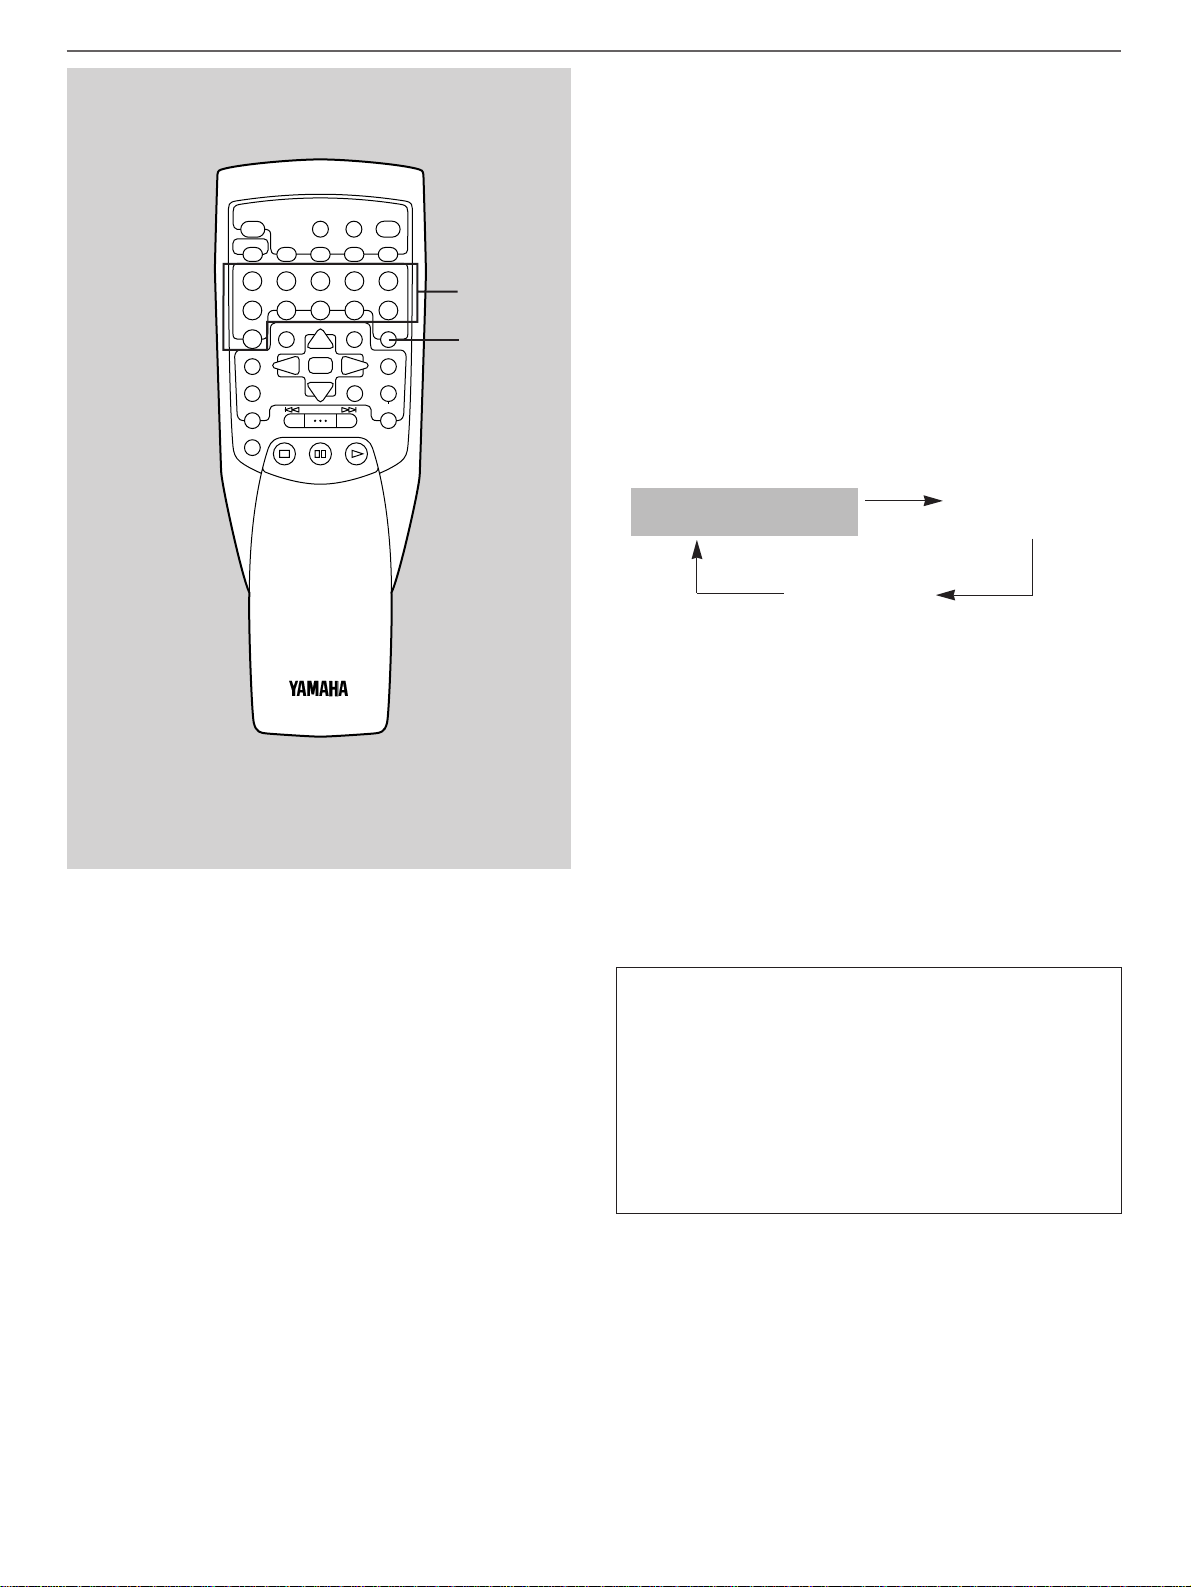
m Beginning playback from a
preferred title (for DVDs) or index
number (for Video CDs/CDs)
For DVDs:
You can select any preferred title on the disc.
For Video CDs/CDs:
You can select any index number if the disc has index
numbers.
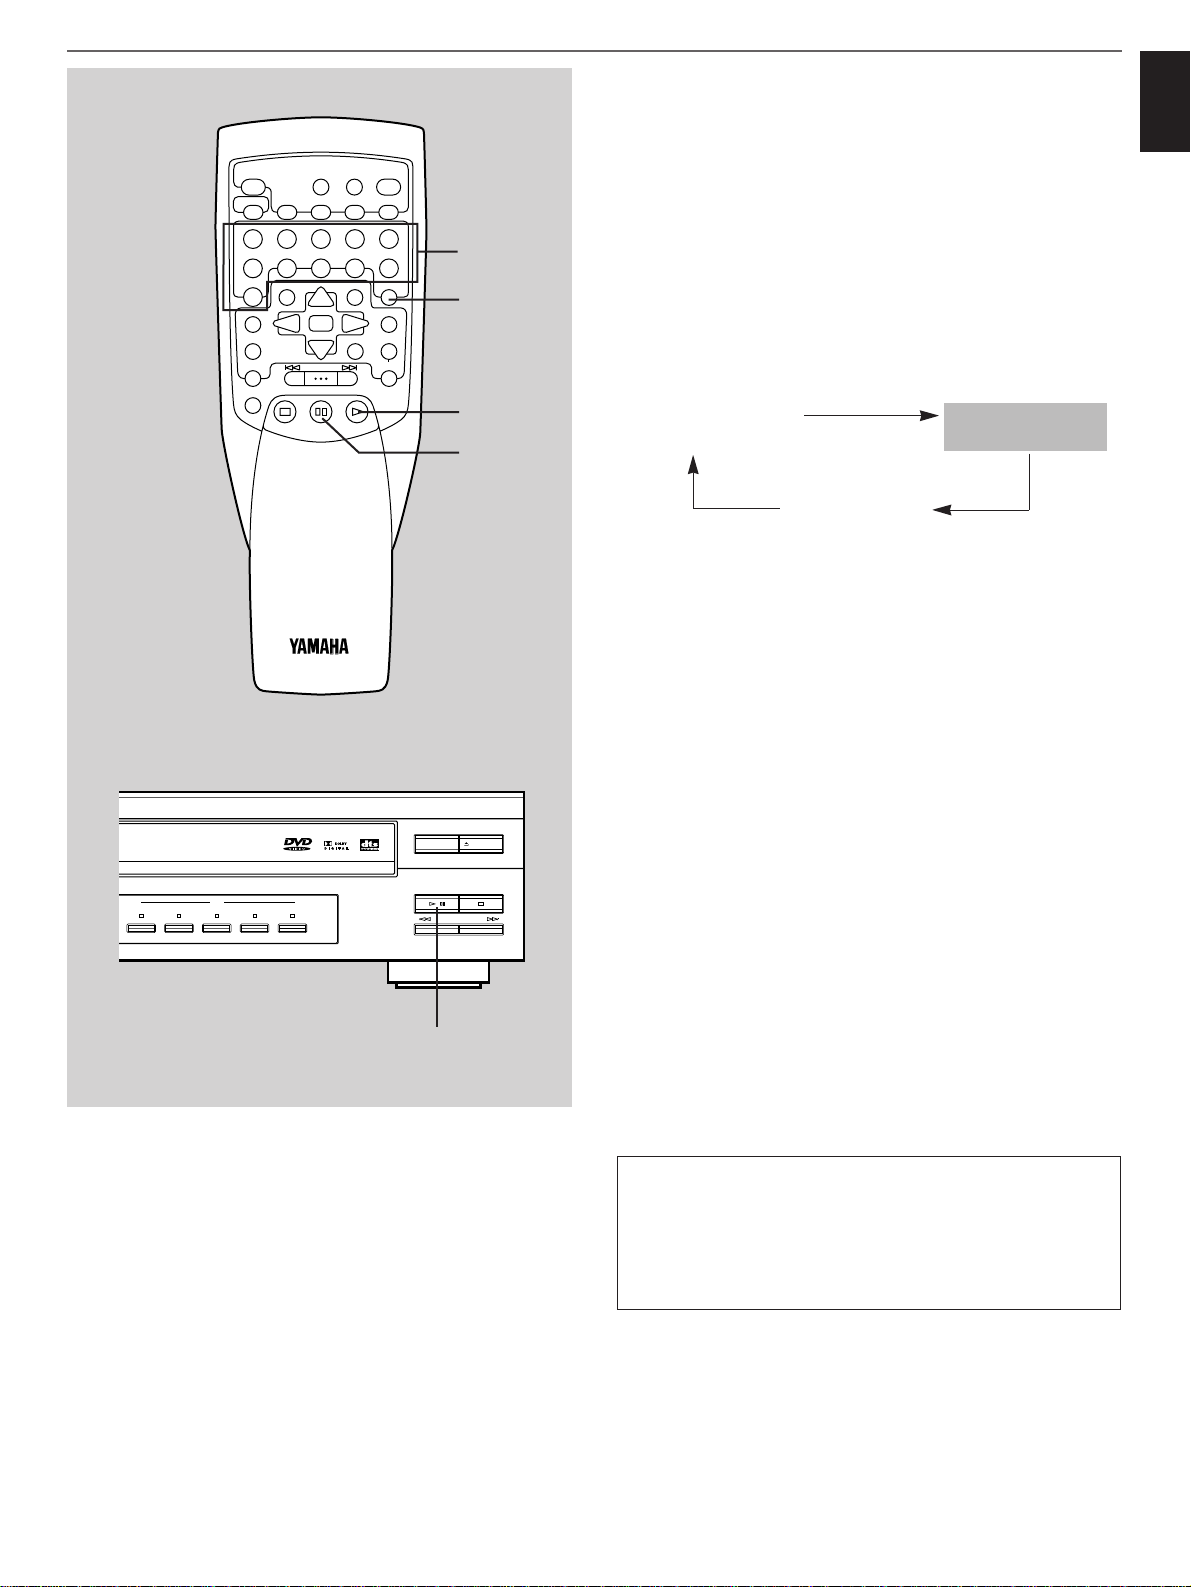
1 Press TITLE/INDEX to select the title (index) search
mode.
* “TITLE
_ _
” (or “INDEX
_ _ _
”) appears on the monitor
screen.
* Every time TITLE/INDEX is pressed, the search mode
changes as follows.
2 Enter the preferred title (or index) number with the
numeric button(s).
*
Playback begins from the selected number.
Note
For DVDs only:
Depending on the disc used, it may not be possible to perform
this search operation.
How to use the numeric buttons to select a number
(Example)
•
To select number 8.
Press “8”.
•
To select number 10
Press “+10” and “0” in succession.
•
To select number 15
Press “+10” and “5” in succession.
•
To select number 26.
Press “+10” twice, then press “6”.
1
2
Title (index) search
[TITLE
_ _
(INDEX
_ _ _
)]
Time search
[TIME _ :
_ _ : _ _
]
The search mode
is turned off.
DISC SKIP
+10
TITLE AUDIO
MENU
SET UP
ON SCREEN
DISC MODE
A-BS/FCANCEL
REPEAT
12345
6
7890
ANGLE
SELECT
SKIP/SEARCH
STOP
STILL/PAUSE
OPEN
TIME
CLOSE
PROG
RANDOM
RETURN
TITLE/INDEX
SUBTITLE
MULTI SPEED
OFF/ON
PLAY
/
Page 25
DISC SKIP
21
English
Basic operation
m Beginning playback from a
preferred time point on the title (or
disc)
You can locate a preferred time point on the title (or disc) by
designating the time, and begin playback from the point or
suspend playback at the point.
1 Press TITLE/INDEX once or more to select the time
search mode.
* “TIME _ :
_ _ : _ _
” appears on the monitor screen.
* Every time TITLE/INDEX is pressed, the search mode
changes as follows.
2 Enter the preferred time with the numeric button(s).
3 Press PLAY to begin playback from the time point.
Press STILL/PAUSE to suspend playback at the
time point.
Notes
•
If the time longer than the total play time of the title (or disc)
is entered, the operation will be canceled.
•
For DVDs only:
* Depending on the disc used, it may not be possible to
perform this search operation.
* Depending on the disc used, playback may not begin from
the specified time point even when the operation have
been performed correctly.
* This search operation may be ineffective when a title is
changing. In this case, press CANCEL and try again.
•
For Video CDs only:
This search operation cannot be made when this unit is in
the Playback Control mode.
How to use the numeric buttons to enter the time
(Example)
•
To enter 45 minutes and 23 seconds
Press “4”, “5”, “2” and “3” sequentially.
•
To enter 2 hours, 15 minutes and 10 seconds
Press “2”, “1”, “5”, “1” and “0” sequentially.
3
1
3
2
3
Title (index) search
[TITLE
_ _
(INDEX
_ _ _
)]
Time search
[TIME _ :
_ _ : _ _
]
The search mode
is turned off.
TITLE AUDIO
MENU
SET UP
ON SCREEN
DISC MODE
A-BS/FCANCEL
REPEAT
12345
6
7890
+10
ANGLE
SELECT
SKIP/SEARCH
STOP
STILL/PAUSE
OPEN
TIME
CLOSE
PROG
RANDOM
RETURN
TITLE/INDEX
SUBTITLE
MULTI SPEED
OFF/ON
PLAY
/
CD/CD
12345
DISC
PLAYXCHANGE
/
SKIP/
SEARCH
OPEN/CLOSE
Page 26
22
Basic operation
m To advance or reverse playback
rapidly (Rapid search)
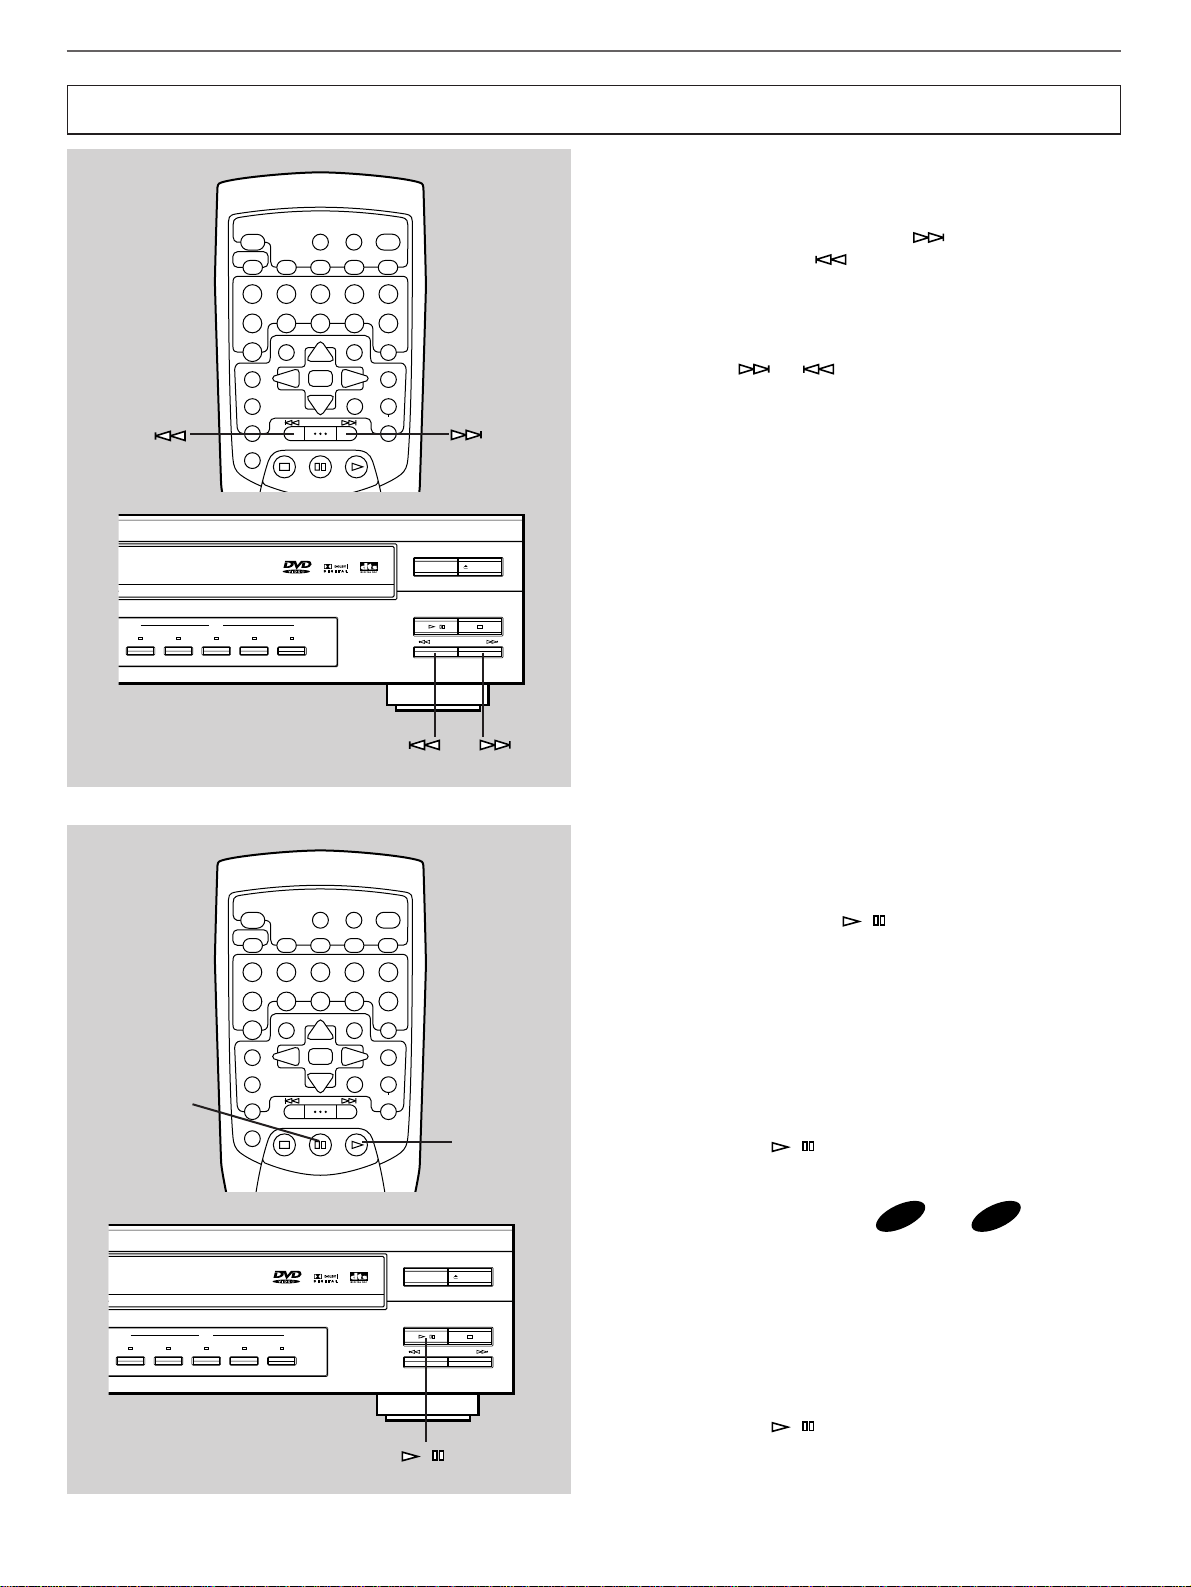
During playback, press and hold to advance
playback rapidly, and to reverse playback rapidly.
Notes
• The rapid search can also be performed while playback is
paused.
• When using or :
Be careful not to release the button just after it is pressed,
otherwise the play is skipped to the beginning of the next
chapter (or track) or returned to the beginning of the current
chapter (or track).
•
For Video CDs and CDs only:
The sound can be heard (although slightly garbled) during
the rapid search in either direction. This is convenient for
locating a precise position within the disc, or for reviewing
the contents quickly. However, no sound will be heard if the
rapid search is performed while playback is paused.
m To still picture (or suspend
playback)
Press STILL/PAUSE (or / ) during playback.
•
For DVDs/Video CDs:
This unit turns into the still picture mode.
* This operation is ineffective when playing back a still
picture which is originally contained in the disc.
•
For CDs:
This unit turns into the pause mode.
To restore normal playback
Press PLAY (or / ).
m Frame advance [ and only]
Press STILL/PAUSE repeatedly in the still picture
mode.
Picture is advanced by one frame every time the button is
pressed.
To restore normal playback
Press PLAY (or / ).
VCD
DVD
PLAY
STILL/PAUSE
/
Other ways of playback
DISC SKIP
+10
TITLE AUDIO
MENU
SET UP
ON SCREEN
CD/CD
12345
DISC
DISC MODE
TIME
A-BS/FCANCEL
REPEAT
RANDOM
12345
6
7890
ANGLE
STOP
RETURN
SELECT
MULTI SPEED
SKIP/SEARCH
STILL/PAUSE
PLAY
OPEN
/
CLOSE
PROG
TITLE/INDEX
SUBTITLE
OFF/ON
PLAYXCHANGE
/
SKIP/
SEARCH
OPEN/CLOSE
CD/CD
12345
DISC
DISC SKIP
+10
TITLE AUDIO
MENU
SET UP
ON SCREEN
DISC MODE
A-BS/FCANCEL
REPEAT
12345
6
7890
ANGLE
SELECT
SKIP/SEARCH
STOP
STILL/PAUSE
OPEN
TIME
CLOSE
PROG
RANDOM
RETURN
TITLE/INDEX
SUBTITLE
MULTI SPEED
OFF/ON
PLAY
/
PLAYXCHANGE
/
SKIP/
OPEN/CLOSE
SEARCH
Page 27

m To advance or reverse playback in
a preferred speed (Multi-speed
playback) [
and only]
You can change the playback speed in 6 steps (slowly or
rapidly).
1 Press MULTI SPEED during playback.
* This unit turns into the still picture mode.
2 If you want to reverse playback, press .
3 Press or once or more to select the desired
speed.
* Every time a button is pressed, the speed changes as
follows:
For DVDs
•
When playback is advanced
FAST 2 (The fastest advance)
FAST 1 (Fast advance)
(Standard speed)
SLOW 2 (Slow advance)
SLOW 1 (The slowest advance)
(Still)
•
When playback is reversed
FAST 2 (The fastest reverse)
FAST 1 (Fast reverse)
SLOW 1 (Slow reverse)
(Still)
For Video CDs
•
When playback is advanced
FAST 2 (The fastest advance)
FAST 1 (Fast advance)
(Standard speed)
SLOW 2 (Slow advance)
SLOW 1 (The slowest advance)
(Still)
•
When playback is reversed
FAST 2 (The fastest reverse)
FAST 1 (Fast reverse)
(Still)
Note
In the still mode, pressing advances and
reverses playback by one frame.
VCD
DVD
23
English
Basic operation
3
1
2
DISC SKIP
TITLE AUDIO
MENU
SET UP
ON SCREEN
DISC MODE
A-BS/FCANCEL
REPEAT
12345
6
7890
+10
ANGLE
SELECT
SKIP/SEARCH
STOP
STILL/PAUSE
OPEN
TIME
CLOSE
PROG
RANDOM
RETURN
TITLE/INDEX
SUBTITLE
MULTI SPEED
OFF/ON
PLAY
/
Page 28
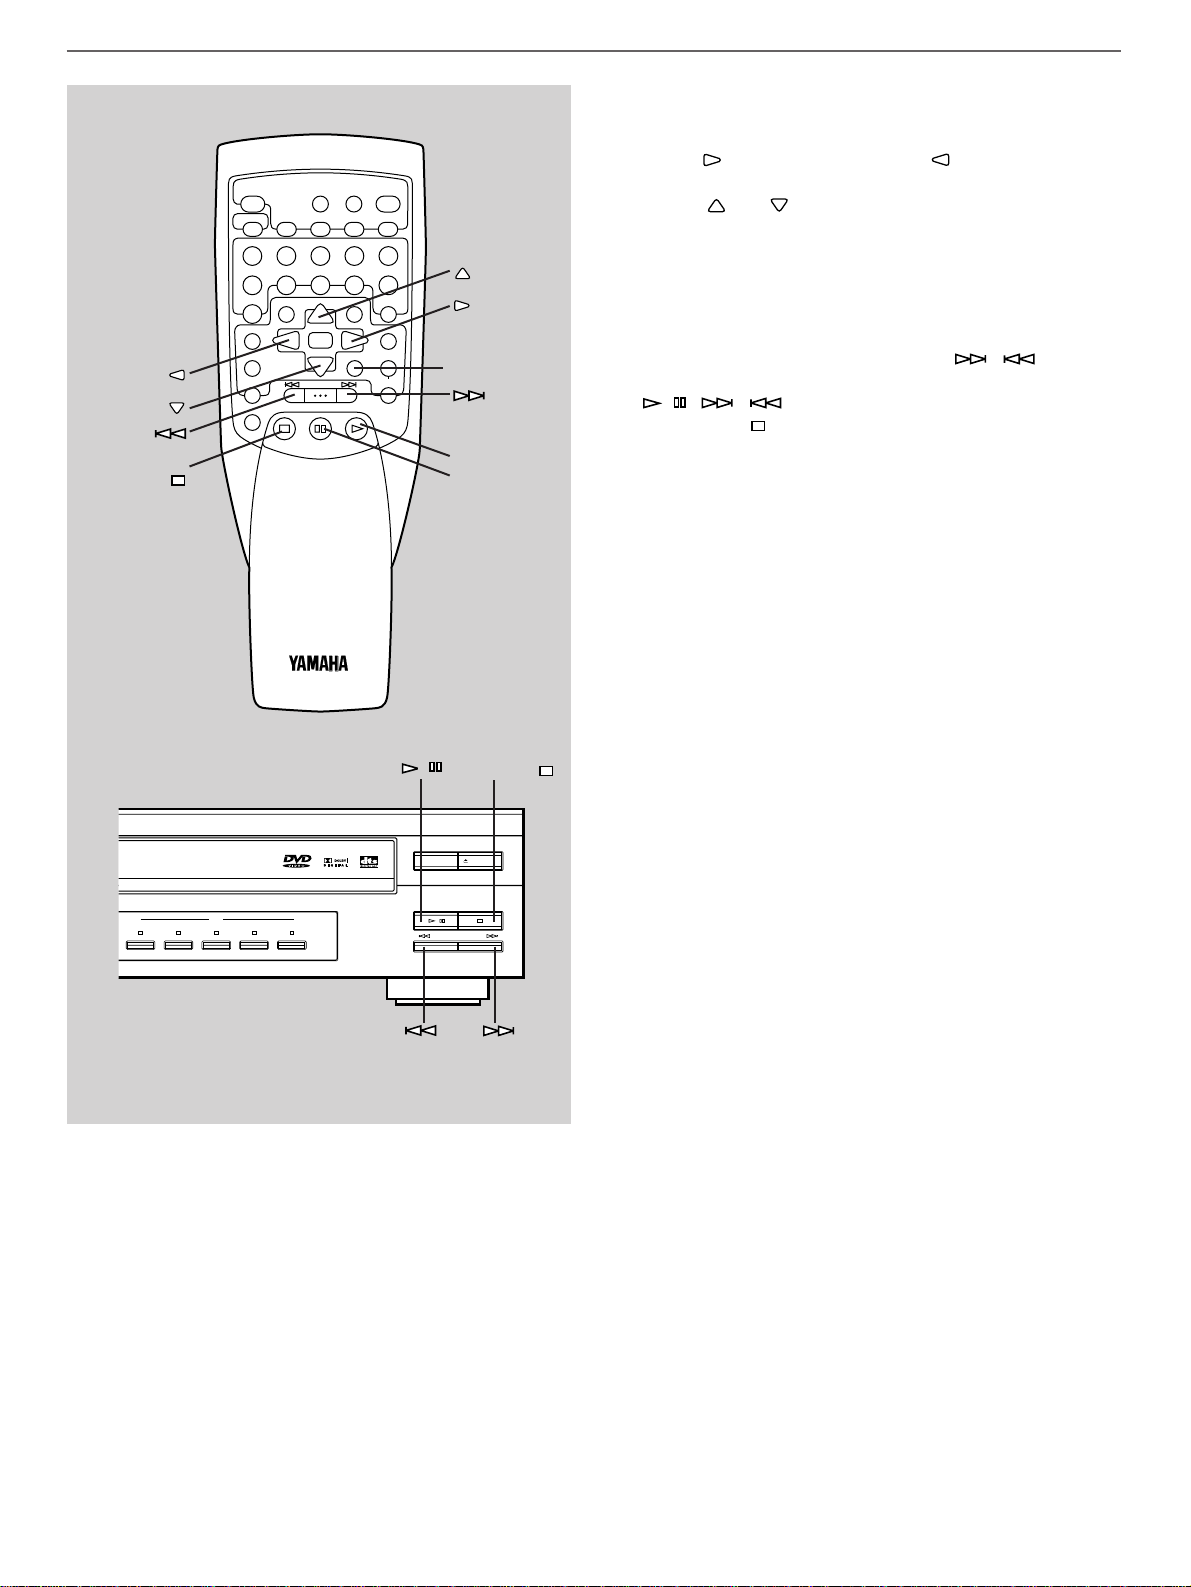
24
Basic operation
If you want to change the playback direction during
playback in a slow or rapid speed
1. Press to advance playback, or to reverse
playback.
2. Press or to select the desired speed.
To cancel the multi-speed playback mode.
Press one of the following buttons.
•
On the remote controller:
PLAY, MULTI SPEED, STILL/PAUSE,,
•
On the front panel:
/ , ,
•
Press STOP ( ).
Notes
•
No sound will be heard during this operation.
•
For Video CDs, reverse playback cannot be made in slow
speed and also by one frame.
STILL/PAUSE
PLAY
MULTI SPEED
/
STOP ( )
STOP ( )
DISC SKIP
+10
TITLE AUDIO
MENU
SET UP
ON SCREEN
DISC MODE
A-BS/FCANCEL
REPEAT
12345
6
7890
ANGLE
SELECT
SKIP/SEARCH
STOP
STILL/PAUSE
OPEN
TIME
CLOSE
PROG
RANDOM
RETURN
TITLE/INDEX
SUBTITLE
MULTI SPEED
OFF/ON
PLAY
/
CD/CD
12345
DISC
PLAYXCHANGE
/
SKIP/
OPEN/CLOSE
SEARCH
Page 29
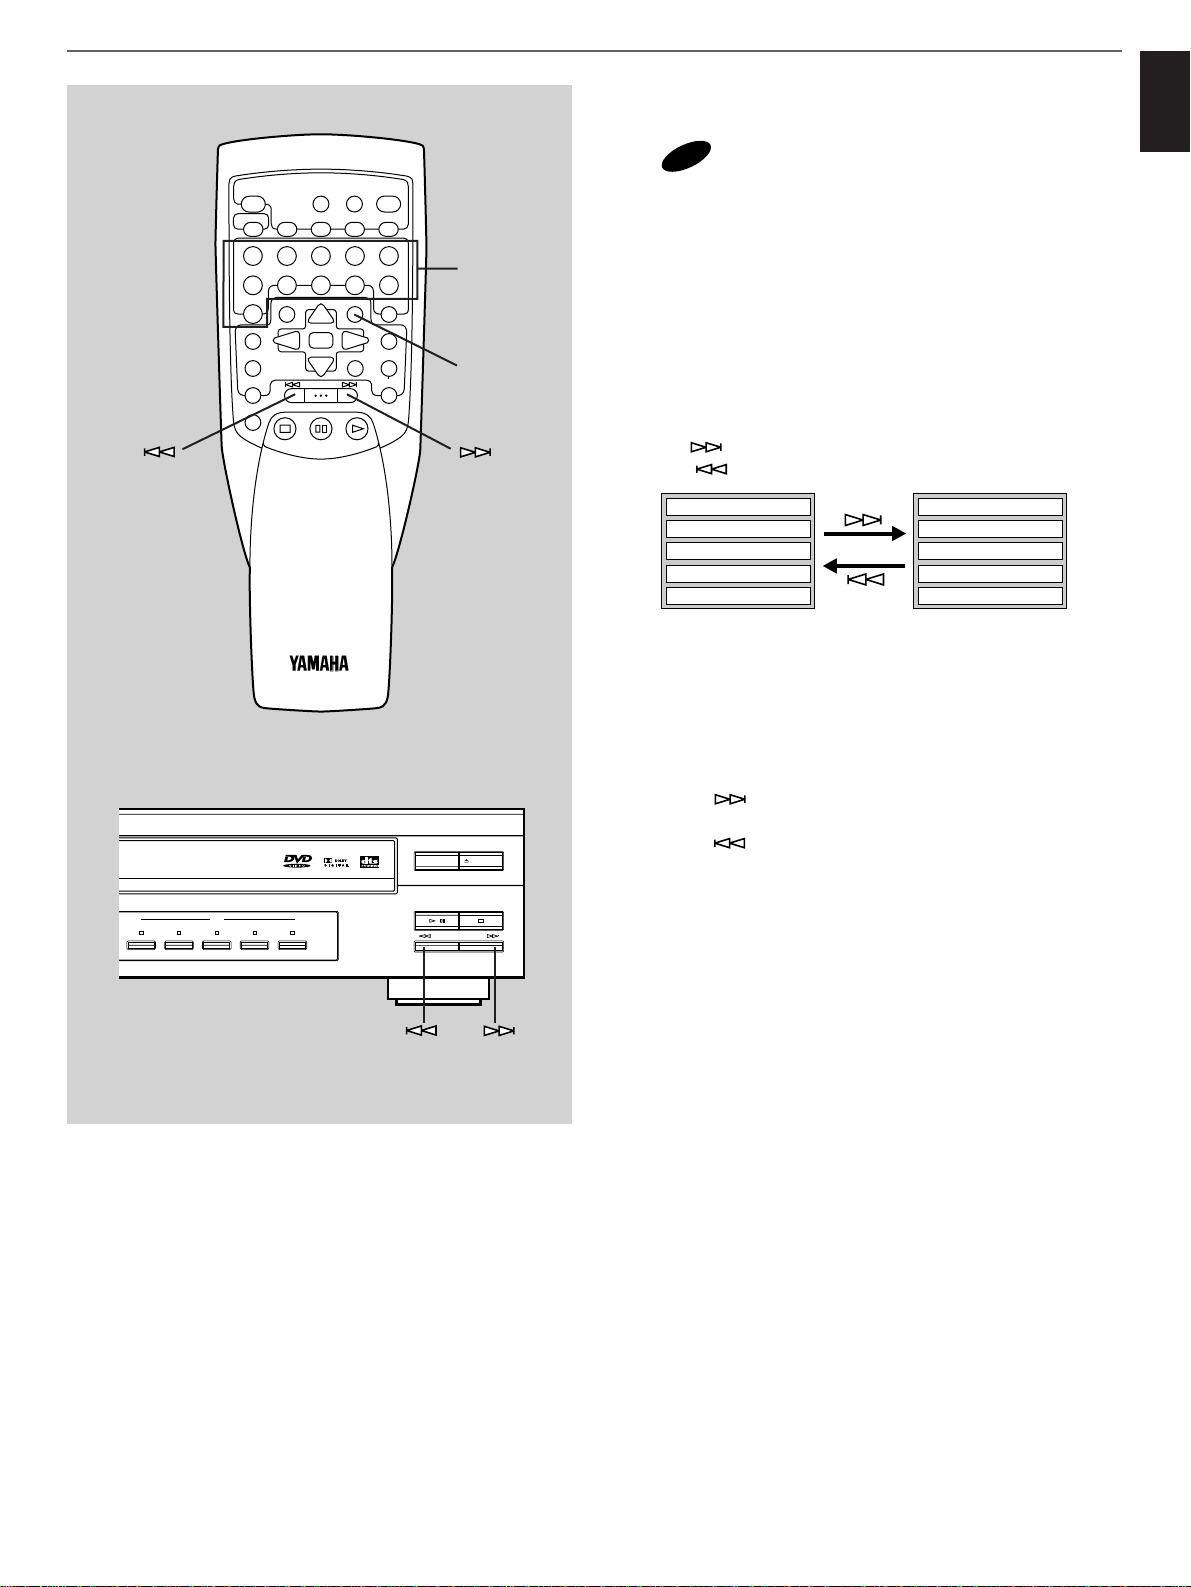
25
English
Basic operation
m Operations unique for a Video CD
in the Playback Control mode
[
only]
If “PBC” is illuminated on the front panel display when a Video
CD is played back, this unit is in the Playback Control mode. In
this mode, a screen menu appears on the monitor screen after
the playback begins.
To select the preferred item on a screen menu
Press the corresponding numeric button(s). The
Playback of the item begins.
* Refer to page 18 for how to use the numeric buttons.
If the disc has two or more menus;
Press to go on to the next menu.
(Press to return to the previous menu.)
* For some discs, the next screen menu may appear before
beginning playback. In that case, select the preferred item
again.
To skip to the preferred item (or screen menu)
during playback (or being paused)
•
Pressing locates the beginning of the next item or the
next screen menu.
•
Pressing locates the beginning of the previous item or
the previous screen menu.
To return to the previous screen menu
Press RETURN.
* To return to the first screen menu, press RETURN
repeatedly until the first menu appears.
Note
Disc play in the Playback Control mode depends on the data
of the disc used. So, depending on the contents of disc, the
above operating method may not be applied to the disc.
Be sure to refer to the instruction manual for the disc.
To enjoy Video CDs with the Playback Control
turned off
•
Change the setting of “1 Playback Control” on the SET UP
menu to “OFF”. Refer to page 52 for details.
Video CDs can be played back in normal playback mode.
•
When playback is stopped in the Playback Control mode,
making a track search operation cancels the Playback
Control mode.
VCD
DISC SKIP
Numeric
buttons
RETURN
TITLE AUDIO
MENU
SET UP
ON SCREEN
DISC MODE
A-BS/FCANCEL
REPEAT
12345
6
7890
+10
ANGLE
SELECT
SKIP/SEARCH
STOP
STILL/PAUSE
OPEN
TIME
CLOSE
PROG
RANDOM
RETURN
TITLE/INDEX
SUBTITLE
MULTI SPEED
OFF/ON
PLAY
/
CD/CD
12345
DISC
PLAYXCHANGE
/
SKIP/
SEARCH
OPEN/CLOSE
1 New York
2 Los Angeles
3 London
4 Paris
5 Roma
6 Montreal
7 Hong Kong
8 Peking
9 Sydney
10 Tokyo
Page 30
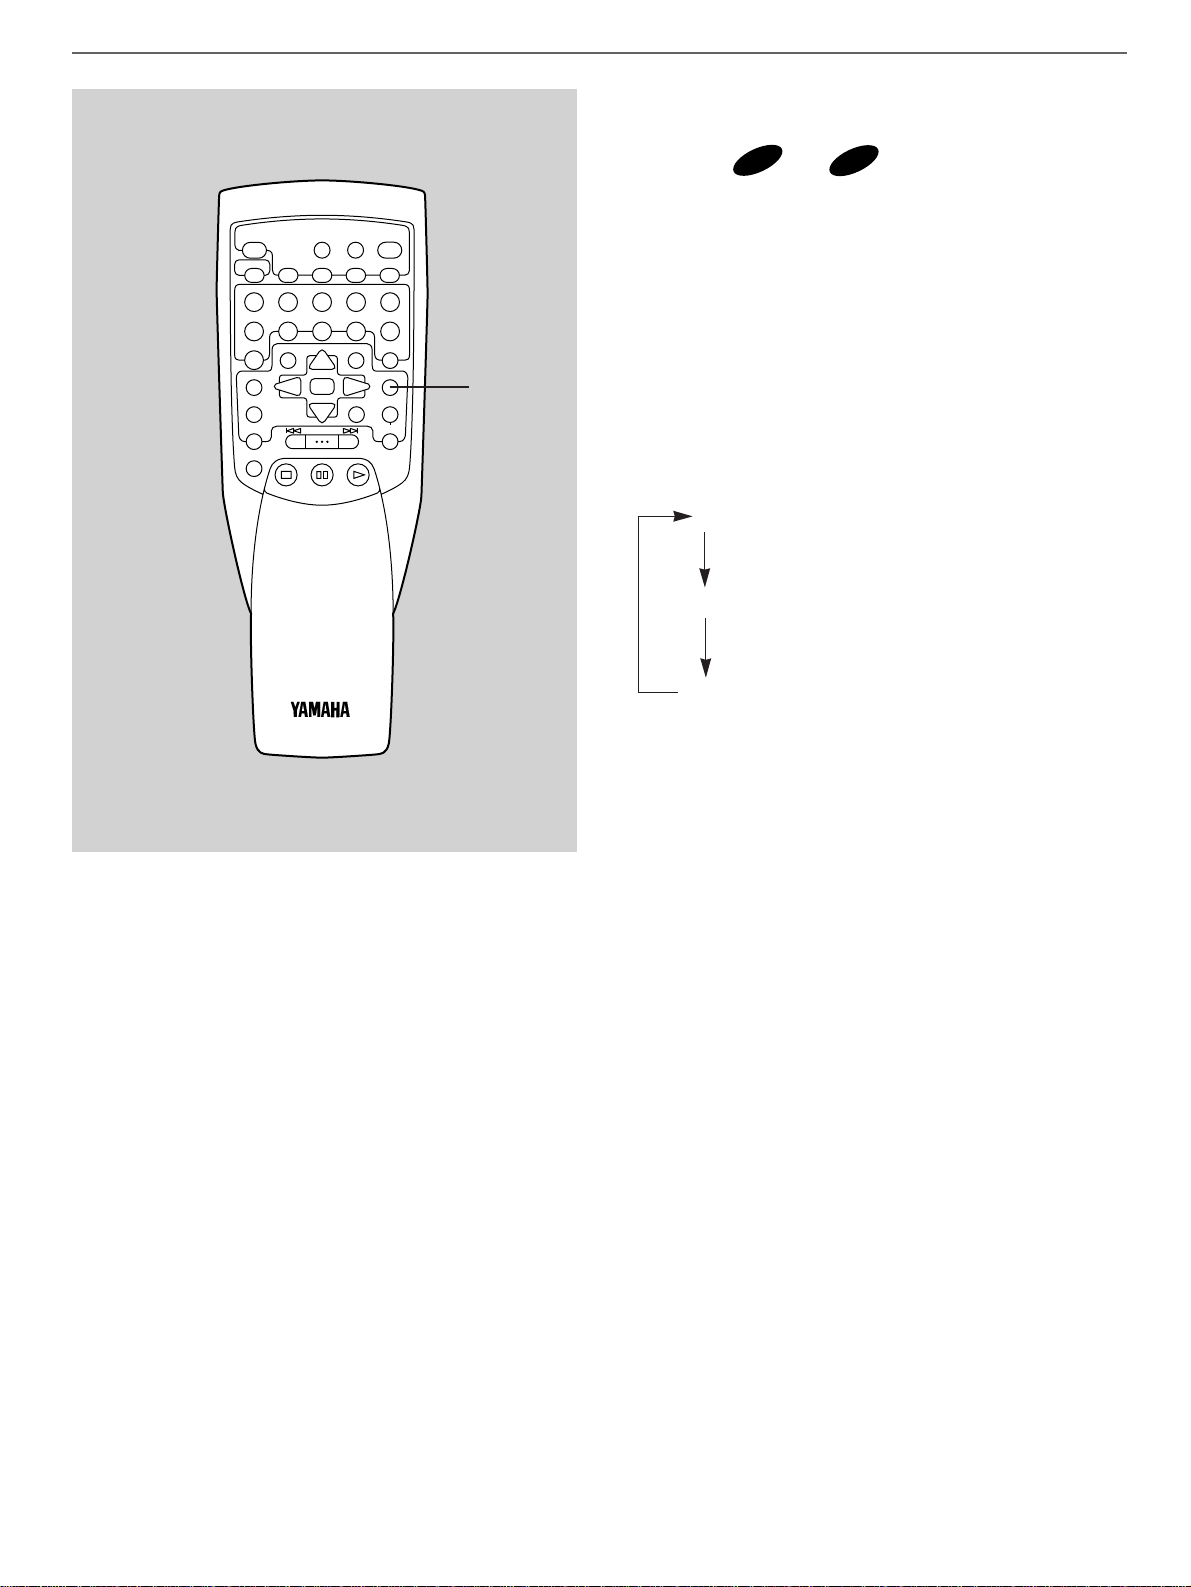
26
m Changing the audio output mode
(to enjoy using a multisound disc
etc.) [
and only]
You can change the output mode of the MIXED 2CH left and
right audio output terminals of this unit. This operation is useful
when playing back a multisound karaoke disc etc.
*
<For China and General models only>
This setting also applies to the 6CH DISCRETE MAIN left
and right audio output terminals.
Press AUDIO once or more.
* Every time AUDIO is pressed, the output mode changes.
The current output mode is displayed on the monitor screen
and the mode changes among “L”, “R” and “Stereo”.
L Outputs sound signals of the left channel
only from both left and right terminals.
R Outputs sound signals of the right channel
only from both left and right terminals.
Stereo Outputs sound signals of the left channel
from the left terminal, and outputs sound
signals of the right channel from the right
terminal.
Factory default setting: Stereo
Notes
●
This operation also applies to the output mode of the
OPTICAL and COAXIAL DIGITAL output terminals of this
unit.
●
This operation is only effective when playing back a Video
CD or CD.
●
The output mode is always returned to “Stereo” when you
turn on this unit.
CD
VCD
Basic operation
AUDIO
DISC SKIP
+10
TITLE AUDIO
MENU
SET UP
ON SCREEN
DISC MODE
A-BS/FCANCEL
REPEAT
12345
6
7890
ANGLE
SELECT
SKIP/SEARCH
STOP
STILL/PAUSE
OPEN
TIME
CLOSE
PROG
RANDOM
RETURN
TITLE/INDEX
SUBTITLE
MULTI SPEED
OFF/ON
PLAY
/
Page 31

27
English
Switching the time display
Every time TIME is pressed, the front panel display
changes as described below.
For DVDs:
[Example]
When the second chapter of the first title is being played back.
(Refer to the illustration on the left.)
➀ The elapsed play time for the chapter being played back
will be displayed.
* 8 seconds have passed from the beginning of the
second chapter.
➁ The remaining play time for the current chapter will be
displayed.
* 10 minutes and 58 seconds remain to the end of the
second chapter.
➂ The elapsed play time of the title being played back will be
displayed.
(If the unit is in the program play mode, the total elapsed
play time of the programmed selections will be displayed.)
* 1 hour, 23 minutes and 45 seconds have passed from
the beginning of the title.
➃ The remaining play time for the current title will be
displayed. (If the unit is in the program play mode, the total
remaining play time of programmed selections will be
displayed.)
* 1 hour and 41 seconds remain to the end of the title.
Note
During random play, only the elapsed play time and remaining
play time of the current title will be displayed.
12345
6
+10
7890
A-BS/FCANCEL
ANGLE
SELECT
TITLE AUDIO
MENU
SUBTITLE
SET UP
OFF/ON
MULTI SPEED
RETURN
TITLE/INDEX
REPEAT
DISC SKIP
PROG
RANDOM
DISC MODE
TIME
OPEN
/
CLOSE
SKIP/SEARCH
TIME
Displaying various information
1
DVD VCD CD
PBC RDM
2
DVD VCD CD
PBC RDM
3
DVD VCD CD
PBC RDM
4
DVD VCD CD
PBC RDM
TITLE
TITLE
TITLE
TITLE
PCM
PCM
PCM
PCM
CHP
CHP
CHP
CHP
REMAIN
TOTAL
TOTAL
REMAIN
TIME
TIME
TIME
TIME
DISC
DISC
DISC
DISC
1
1
1
1
Page 32

28
Displaying various information
For Video CDs/CDs:
[Example]
When the second track is being played back. (Refer to the
illustration on the left.)
➀ The elapsed play time for the track being played back will
be displayed.
* 8 seconds have passed from the beginning of the
second track.
➁ The remaining play time for the current track will be
displayed.
* 2 minutes and 58 seconds remain to the end of the
second track.
➂ The elapsed play time of the disc being played back will be
displayed.
(If the unit is in the program play mode, the total elapsed
play time of the programmed selections will be displayed.)
* 45 minutes and 23 seconds have passed from the
beginning of the disc 2.
➃ The remaining play time for the current disc will be
displayed. (If the unit is in the program play mode, the total
remaining play time of programmed selections will be
displayed.)
* 41 minutes remain to the end of the disc 2.
Notes
● During random play, only the elapsed play time and
remaining play time of the current track will be displayed.
● When the selected Video CD is in the Playback Control
mode (“PBC” is illuminated on the display), only the elapsed
play time of the current track will be displayed.
TIME
1
VCD CD
PBC RDM
2
VCD CD
PBC RDM
3
VCD CD
PBC RDM
4
VCD CD
PBC RDM
TRACK
TRACK
TRACK
TRACK
PCM
INDEX
PCM
INDEX
PCM
INDEX
PCM
INDEX
REMAIN
TOTAL
TOTAL
REMAIN
TIME
TIME
TIME
TIME
DISC
DISC
DISC
DISC
1
1
1
1
DISC SKIP
TITLE AUDIO
MENU
SET UP
DISC MODE
A-BS/FCANCEL
REPEAT
12345
6
7890
+10
ANGLE
SELECT
SKIP/SEARCH
OPEN
TIME
CLOSE
PROG
RANDOM
RETURN
TITLE/INDEX
SUBTITLE
MULTI SPEED
OFF/ON
/
Page 33
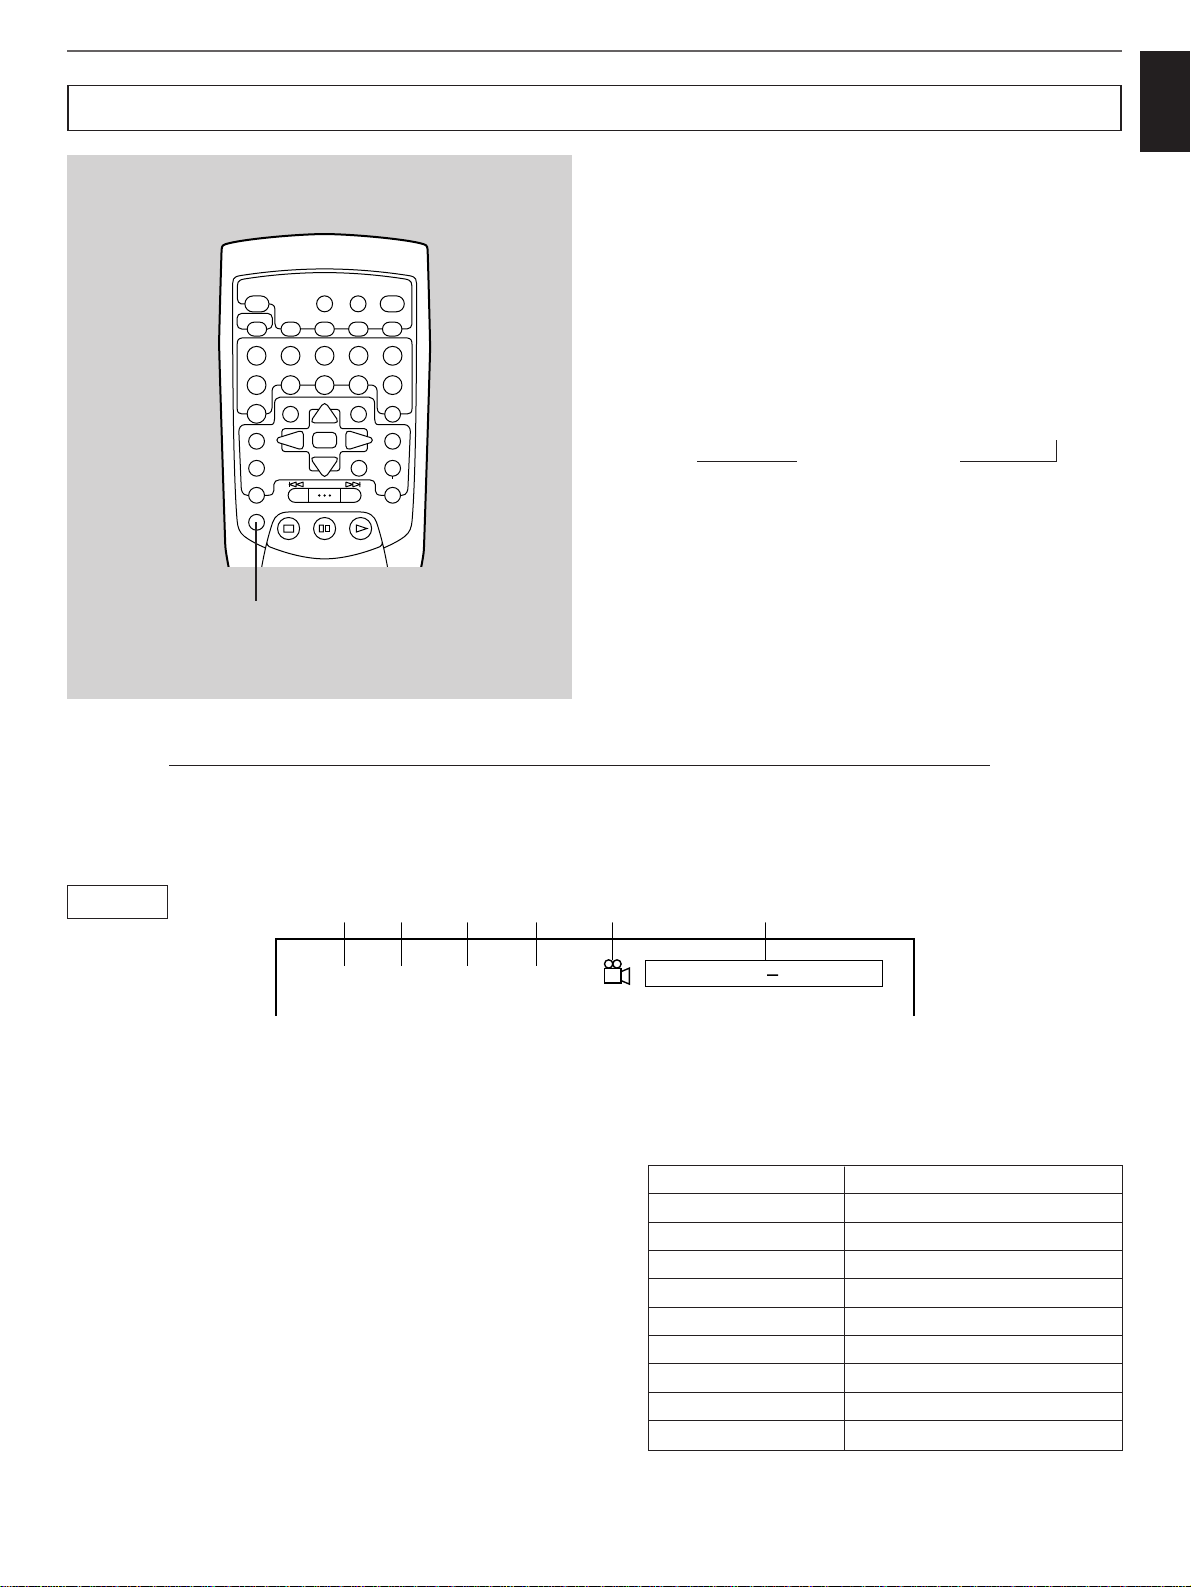
29
English
This unit features the OSD (On Screen Display) function to
show various information about the current status of this unit
and the selected disc on the monitor screen.
To call the OSD screen
Press ON SCREEN.
* Every time this button is pressed, the display type changes
as shown below.
Type 1 Type 1 and 2 Type 1 and 3
OSD is canceled.
Notes
● The OSD screen cannot be called when the monitor shows
the program sequence setting mode.
● This unit may not identify some information on the disc
depending on the disc or the mode of this unit. Such
information is shown by “–” or a blank.
→→
→
→
Displaying various information
On Screen Display
1 The currently selected disc number
2 The type of the current disc (DVD, VCD or CD)
3 The current title number or track number
4 The current chapter number (C00) or index number (I00)
5 The angle icon is shown during playing back a scene of a
DVD source which includes two or more angles of view.
6 Time display
The time display mode selected by pressing TIME is
shown.
ON SCREEN
DVD PROGRAMD3 T99 C 99 1 : 2 3 : 4 5
1 2 3 4 5 6
Type 1
CHAPTER 0:00:00
The current chapter’s elapsed time
CHAPTER – 0:00:00
The current chapter’s remaining time
TRACK 0:00:00
The current
track’s elapsed time
TRACK – 0:00:00
The current
track’s remaining time
TITLE 0:00:00
The current
title’s elapsed time
TITLE – 0:00:00
The current
title’s remaining time
DISC 0:00:00
The current
disc’s elapsed time
DISC – 0:00:00
The current
disc’s remaining time
PROGRAM 0:00:00 Program’s elapsed time
PROGRAM – 0:00:00 Program’s remaining time
Display description
DISC SKIP
12345
6
7890
+10
ANGLE
TITLE AUDIO
MENU
SET UP
STOP
ON SCREEN
DISC MODE
A-BS/FCANCEL
REPEAT
RANDOM
RETURN
SELECT
MULTI SPEED
SKIP/SEARCH
STILL/PAUSE
TIME
PLAY
OPEN
/
CLOSE
PROG
TITLE/INDEX
SUBTITLE
OFF/ON
Page 34

30
1 The total playing time of the current disc.
2 Shows whether the analog AUDIO OUT terminals output
signals (Output) or not (Muted).
3 The audio format A and the format of the digital signals B
output to the OPTICAL and COAXIAL DIGITAL AUDIO
OUT terminals
4 The output mode of the left and right channels is shown.
Stereo........Left and right channels
L.................Left channel only
R................Right channel only
5 For Video CDs only:
The version of the current video CD (2.0 or 1.1)
6 For Video CDs only:
Shows whether the Playback Control is ON or OFF.
For Video CDs/CDs
Disc Total Time 1 : 11 : 23
Analog Audio Output Output
VCD Version 2.0
Digital Audio Output PCM
L/R Mode Stereo
Playback Control ON
44.1 kHz 16 bit
1
2
AB
3
4
5
6
Displaying various information
1 The total playing time of the current title.
2 Shows whether the analog AUDIO OUT terminals output
signals (Output) or not (Muted).
3 The audio format A and the format of the digital signals
B output to the OPTICAL and COAXIAL DIGITAL AUDIO
OUT terminals
4 The current audio language and its number
5 The audio format of the source
6 The current subtitle language and its number, and the
setting of subtitle (ON or OFF)
7 The current angle number is shown during playing back a
scene of a DVD source which includes two or more angles
of view.
* If the scene has only one angle of view, “--” is shown.
For DVDs
Title Total Time 1 : 2 3 : 4 5
Analog Audio Output Output
Audio Format Dolby Digital 5.1 ch
OFF
Digital Audio Output PCM
Audio Language 1 English
Subtitle Language
Angle
2 English
2
48 kHz 16 bit
1
2
AB
3
4
5
6
7
Type 2
Page 35

31
English
The types of discs on the disc table are shown for each tray number.
*1: Shows that this unit has not identified the type of the disc on the tray 2
because the disc had never been selected before.
Displaying various information
Disc 1 DVD
Disc 2 Unidentified
Disc 5 CD
Disc 3 VCD
Disc 4 No Disc
*
1
Type 3
Page 36

32
Repeat play
Advanced operation
All discs, an entire disc, a single title or track, a sequence of
programmed selections, or a sequence of random play
selections can be continuously repeated.
*
Depending on some discs, the designated repeat play may not
be performed
1 Press S/F REPEAT once or more to select the
desired repeat play mode (REP S or REP F).
2 Press PLAY.
Repeat play modes
SINGLE REPEAT (REP S)
A single title or track is played back repeatedly.
* This is also available in the program play mode and the
random play mode. (If the repeat play mode is switched off,
the program play mode or the random play mode will be
resumed.)
FULL REPEAT (REP F)
When “DISC 1” is illuminated on the front panel display:
A designated disc is played back repeatedly.
* In the random play mode, the selected disc is repeatedly
played back, but the order of titles or tracks is different every
time.
When “DISC 5” is illuminated on the front panel display:
All discs on the disc table are played back repeatedly.
* In the random play mode, the random play is performed
among all discs and repeated with a different order of titles or
tracks every time.
Note
In the program play mode, a sequence of programmed titles or
tracks is played back repeatedly.
To cancel the repeat play
Press S/F REPEAT once or more so that “REP (S, F)”
goes off from the front panel display.
REP
S
REP
F
(off)
2
2
1
DISC SKIP
+10
TITLE AUDIO
MENU
SET UP
ON SCREEN
DISC MODE
A-BS/FCANCEL
REPEAT
12345
6
7890
ANGLE
SELECT
SKIP/SEARCH
STOP
STILL/PAUSE
OPEN
TIME
CLOSE
PROG
RANDOM
RETURN
TITLE/INDEX
SUBTITLE
MULTI SPEED
OFF/ON
PLAY
/
CD/CD
12345
DISC
PLAYXCHANGE
/
SKIP/
SEARCH
OPEN/CLOSE
Page 37
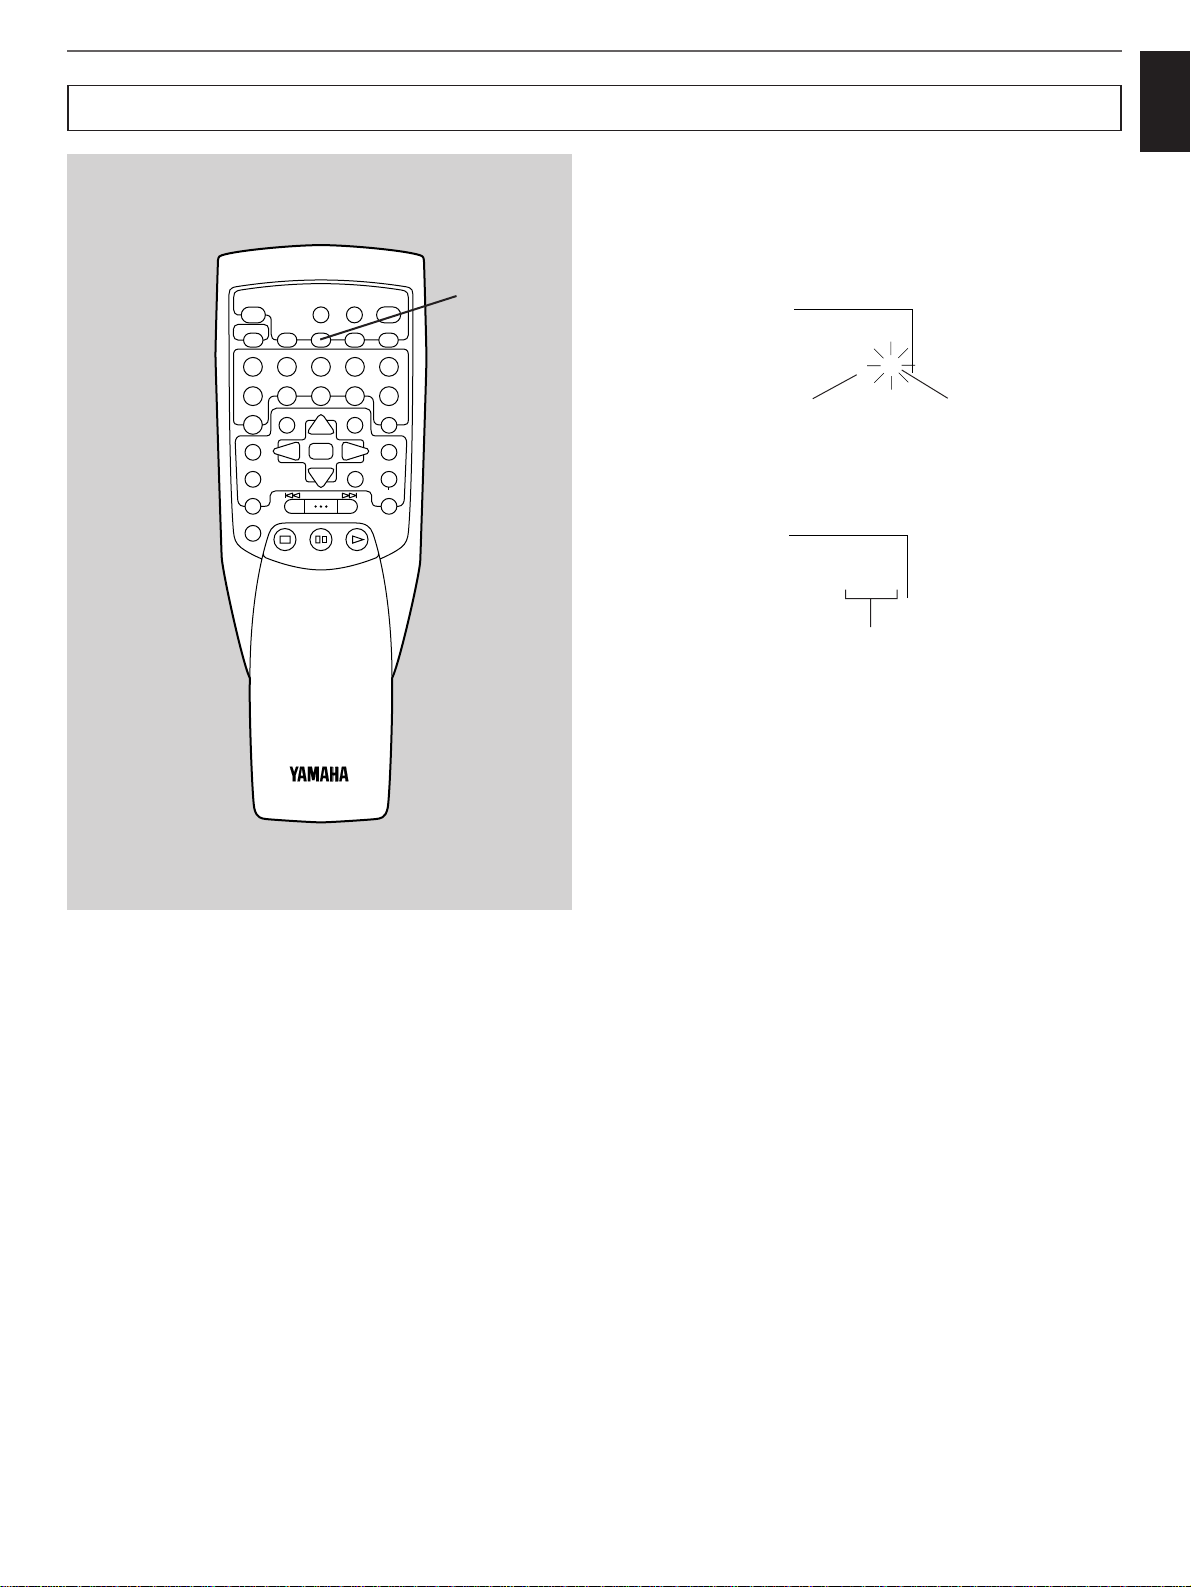
33
English
The section between two points you specify on a disc is
repeatedly played back.
1 During playback, press A-B at the point where you
want to begin the repeat play.
2 Press A-B again at the point where you want to end
the repeat play.
To cancel the A-B repeat play mode
Press A-B again.
* Pressing some other buttons may cancel the A-B repeat play
mode.
Notes
• In the program play mode, the A-B repeat play can be made
within a programmed title or track.
• For DVDs;
The A-B repeat play is effective only while playing back a
moving picture. On some titles, the A-B repeat play may not
work.
• For Video CDs;
When this unit is in the Playback Control mode, the A-B
repeat play is effective only while playing back a moving
picture.
Flashes.Lights up.
Lights up.
Advanced operation
REP
AB
REP
AB
1, 2
Repeat play between specified two points (A-B repeat play)
OPEN
DISC SKIP
TITLE AUDIO
MENU
SET UP
ON SCREEN
DISC MODE
TIME
CLOSE
A-BS/FCANCEL
REPEAT
12345
6
7890
+10
ANGLE
SELECT
SKIP/SEARCH
STOP
STILL/PAUSE
PROG
RANDOM
RETURN
TITLE/INDEX
SUBTITLE
MULTI SPEED
OFF/ON
PLAY
/
Page 38
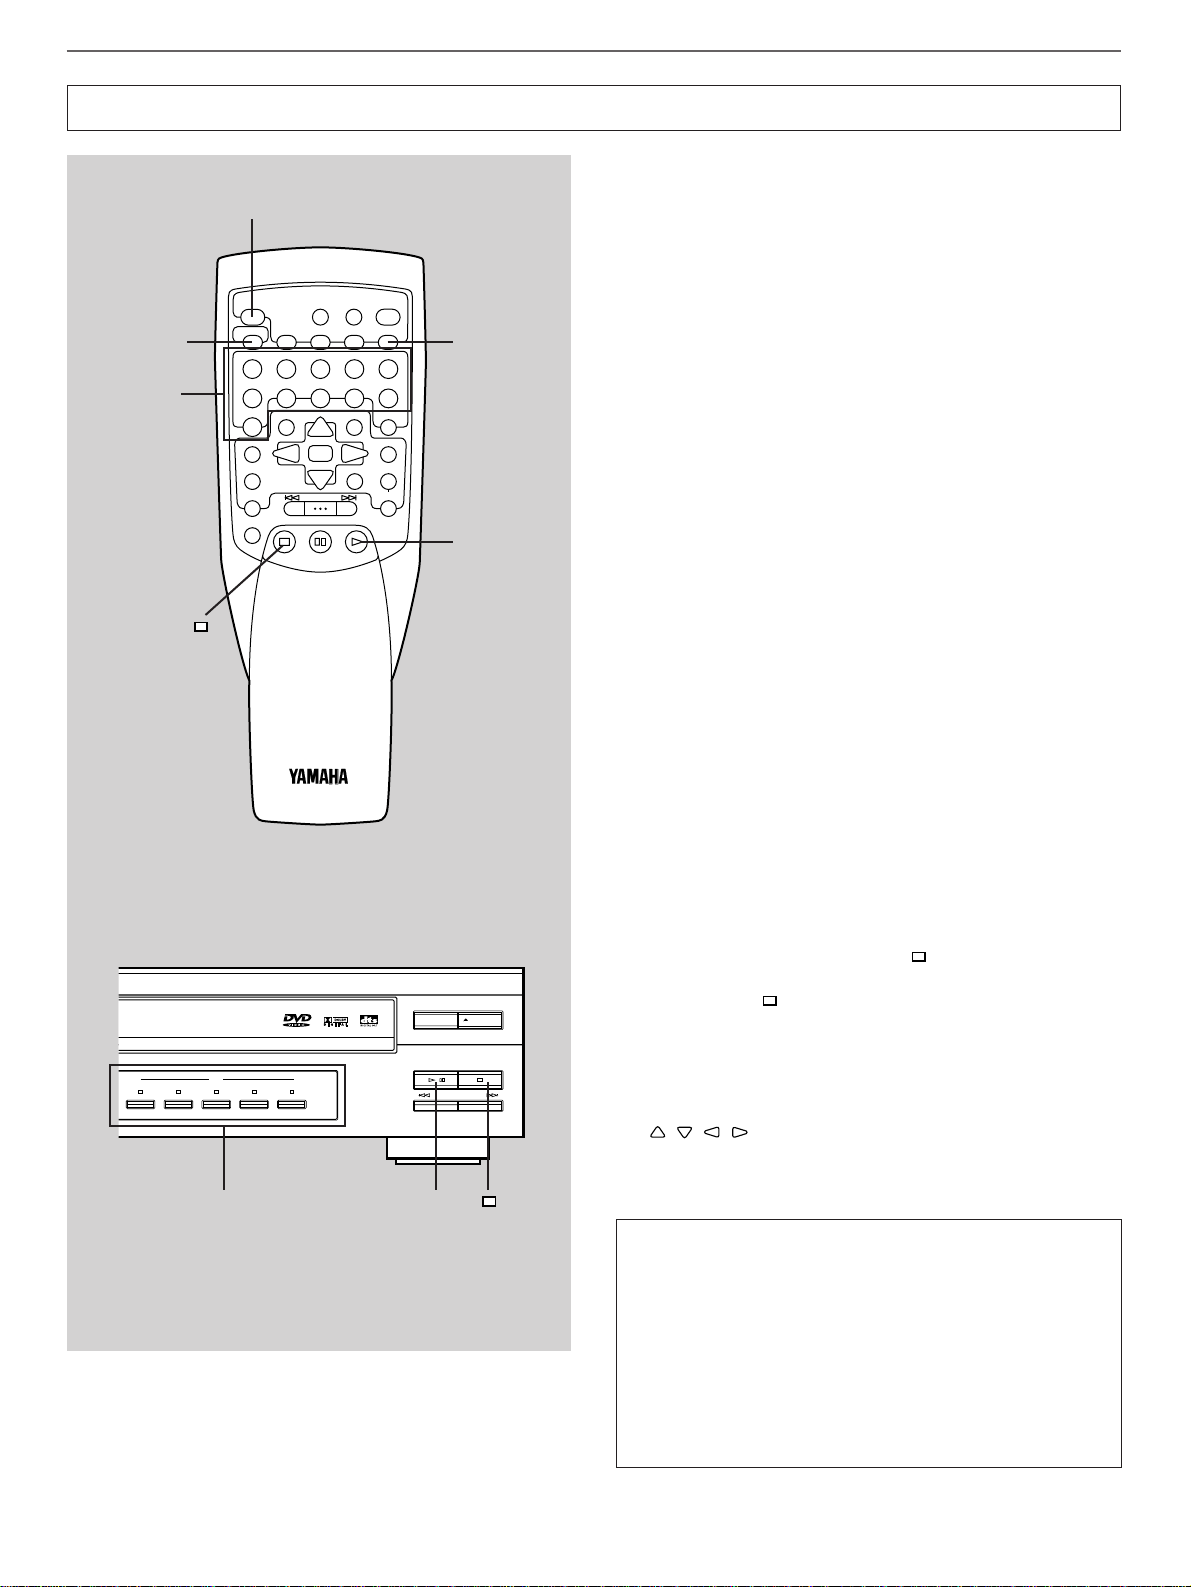
34
Advanced operation
You can program desired titles of DVDs and tracks of Video
CDs/CDs on the disc table in any desired order. Any title or
track can be programmed as one selection.
Up to 40 selections can be programmed in a sequence.
1 Press PROG when this unit is stopped.
* “PGM” and “P-01” will light up on the front panel display.
2 If necessary, select the desired disc by pressing
DISC SKIP (or DISC 1–5).
3 Use the numeric buttons to select the preferred title
or track number.
* The selected title (or track) number, the total play time
of the programmed titles (or tracks) etc. can be checked
on the monitor screen and the front panel display.
4 Repeat steps 2 and 3 for any other title or track. Up
to 40 selections can be programmed.
5 Press PLAY to start playback of the programmed
selections.
When playback of all the programmed selections is
completed
This unit stops with the program play mode uncanceled.
• Press PROG to cancel the program play mode.
• Press PLAY to begin playing back the same programmed
selections again.
To delete a title or track already programmed
1. If during playback, press STOP ( ).
* If during programming, skip to step 4.
2. Press STOP ( ) again.
* The program play mode is canceled.
3. Press PROG.
* The list of the program data is shown on the monitor
screen. (Refer to page 35 for details.)
4. Select the title or track you want to delete by pressing
/// .
5. Press CANCEL.
How to use the numeric buttons to select a number
(Example)
•
To select number 8.
Press “8”.
•
To select number 10
Press “+10” and “0” in succession.
•
To select number 15
Press “+10” and “5” in succession.
•
To select number 26.
Press “+10” twice, then press “6”.
2
3
1
5
52
Program play
CANCEL
STOP ( )
DISC SKIP
12345
6
+10
TITLE AUDIO
MENU
SET UP
ON SCREEN
DISC MODE
A-BS/FCANCEL
REPEAT
7890
ANGLE
SELECT
SKIP/SEARCH
STOP
STILL/PAUSE
OPEN
TIME
CLOSE
PROG
RANDOM
RETURN
TITLE/INDEX
SUBTITLE
MULTI SPEED
OFF/ON
PLAY
/
CD/CD
12345
DISC
PLAYXCHANGE
/
SKIP/
SEARCH
OPEN/CLOSE
Page 39

35
English
Advanced operation
Notes
• You can program a whole disc by pressing “0”, instead of
one title or one track. At that time, “AL” flashes on the front
panel display.
• If you program a track of a Video CD (ver. 2.0), the Playback
Control is canceled during the program play.
• Programming is possible only when this unit is stopped.
• There may be some cases that this unit cannot display the
total time of the programmed selections.
• Skip search can be performed during playback.
* Pressing once locates the beginning of the title (or
track) of the next program sequence number.
* Pressing once locates the beginning of the current
title (or track), and pressing twice locates the
beginning of the title (or track) of the previous program
sequence number.
• If you program a title or track which does not exist or
unavailable on the disc, or you program a title or track on an
unavailable disc, the title or track will be skipped during
program play.
• If a button which does not work in the program play mode is
pressed, appears on the monitor screen and the
operation is invalid.
DVD VCD CD
PBCPGMRDM
TRACK
TITLE
DISC
1
TOTAL
TIME
DISC
1
TOTAL
Display information during programming
Every time you program a title or track, the total playing time is shown for about one second in place of the program sequence
number.
Front panel display
Monitor screen
Selected title or track number
Lights up either indicator depending
on the type of the selected disc.
Program sequence numberSelected disc number Total playing time
Program Sequence
1 - 1
1 - 2
1 - 3
1 - 4
1 - 5
1 - 6
2 - 3
2 - 4
2 - 5
2 - 6
4 -AL
2 - 8
2 - 9
2 - 10
3 - 5
-
-
-
-
-
-
-
-
-
-
-
-
-
-
-
-
-
-
-
-
-
-
-
-
-
Quit
No. 1 Total Time 1 : 2 3 : 4 5
Play DeletePROG PLAY CANCEL
4321 5 6
1 Disc number of the selected title or
track.
2 Title or track number
3 “AL” is displayed when “0” is entered to
select all titles or tracks on the disc as
one selection.
4 Program sequence number of the
currently selected title or track.
5 Only “–” is displayed for a program
sequence number to which no selection
is programmed.
6 Total play time of the programmed
selections
Page 40
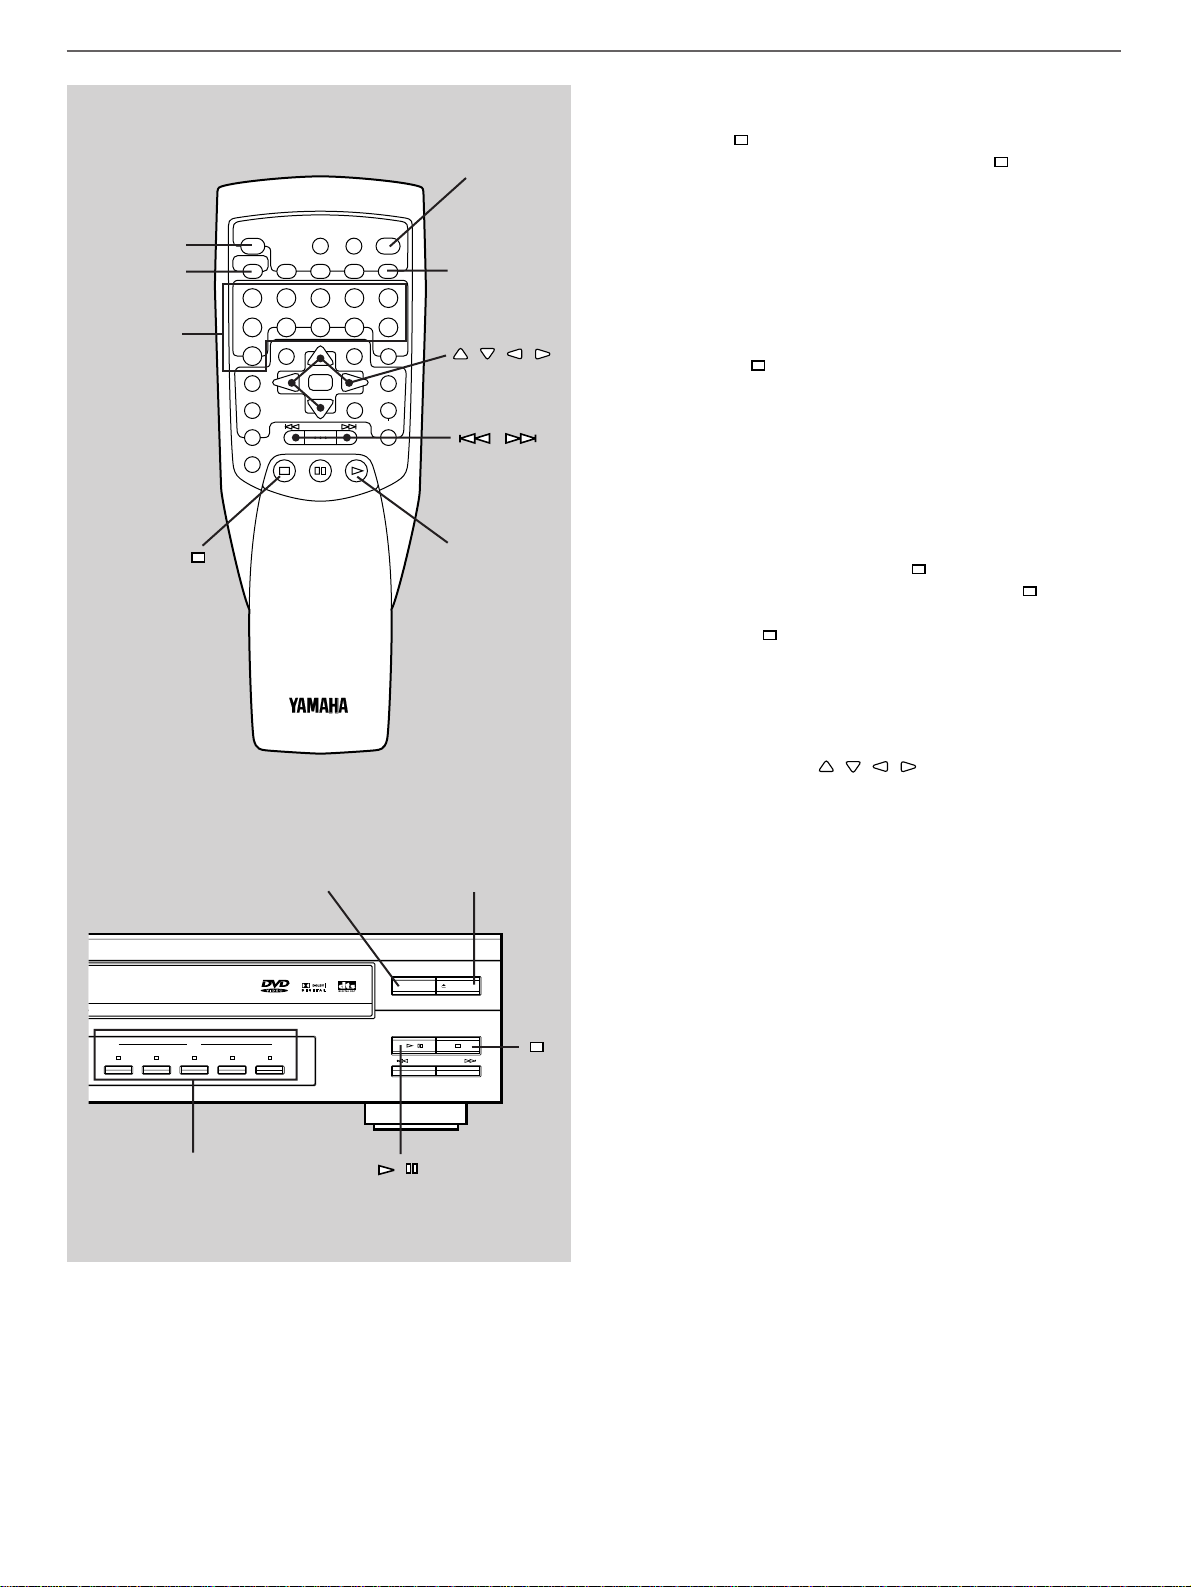
36
O
To stop program play
Press STOP ( ).
* This unit memorizes the point where STOP ( ) was
pressed (Playback Resumption).
Press PLAY to resume playback from that point.
To cancel the program play mode (and restore the
normal play mode)
There are several methods. The following are some of them.
• Press STOP ( ) or PROG when the program play is
stopped with the point to resume playback memorized.
• Press DISC SKIP or DISC (1–5).
Note: These operations will not delete the program data.
Press PROG again to restore the program play mode.
To check and correct program data
1. If during playback, press STOP ( ).
* This unit memorizes the point where STOP ( ) was
pressed.
2. Press STOP ( ) again.
* The program play mode is canceled.
3. Press PROG.
* The list of the program data is shown on the monitor
screen. (Refer to page 35 for details.)
4. If you want to correct an already programmed selection,
select it by pressing
/// .
5. Select a new title (or track) you want to reprogram.
* Select the disc number by using DISC SKIP or DISC
(1–5) and select the title (or track) number by using the
numeric buttons.
* The already programmed title (or track) will be cleared
from the memory and the new one will be programmed.
6. If you correct more selections, repeat step 5.
7. When the check or correction is finished, press PLAY.
To clear all program data
• Open the disc table by pressing OPEN/CLOSE or
PLAYXCHANGE.
• Follow steps 1 to 3 of “To check and correct program data”
described above, and then press and hold CANCEL for
more than 3 seconds.
/ (PLAY)
/
CANCEL
DISC SKIP
Numeric
buttons
PROG
OPEN/CLOSE
PLAYSTOP ( )
Advanced operation
///
PLAYXCHANGE
DISC (1–5)
OPEN/CLOSE
DISC SKIP
+10
TITLE AUDIO
MENU
SET UP
ON SCREEN
OPEN
TIME
CLOSE
PROG
RANDOM
RETURN
TITLE/INDEX
SUBTITLE
MULTI SPEED
OFF/ON
PLAY
/
DISC MODE
A-BS/FCANCEL
REPEAT
12345
6
7890
ANGLE
SELECT
SKIP/SEARCH
STOP
STILL/PAUSE
PLAYXCHANGE
CD/CD
OPEN/CLOSE
12345
DISC
/
SKIP/
SEARCH
Page 41

37
English
Advanced operation
Titles or tracks of a designated disc or all discs on the disc
table are played back in a random order.
1 If necessary, switch the disc play mode (to “DISC 1”
or “DISC 5”) by pressing DISC MODE confirming it
on the front panel display.
When “DISC 1” is illuminated: Titles or tracks of the
selected disc are played back in a random order.
When “DISC 5” is illuminated: Titles and tracks of all
discs on the disc table are played back in a random
order.
* If “DISC 1” is selected, select the desired disc by
pressing DISC SKIP or DISC (1–5).
2 Press RANDOM to begin the random play.
* The “RDM” indicator lights up.
When playback of all the random selections is completed
This unit stops and returns to the normal playback mode.
To stop random play
1. Press STOP ( ).
* This unit memorizes the point where STOP ( ) was
pressed (Playback Resumption).
Press PLAY, and playback will resume from that point.
2. Press STOP ( ) again. The random play mode is
canceled.
To cancel the random play mode (and restore the
normal play mode)
There are several methods as described below.
● Press RANDOM.
● Press STOP ( ) while the random play is stopped with
the point to resume playback memorized.
● Press OPEN/CLOSE.
● Perform the title (or track) or time search operation.
* When the search is successfully executed, the random
play mode will be canceled.
Notes
● This feature will not function in the program play mode.
● If a track of a Video CD (ver. 2.0) is selected, the Playback
Control mode is canceled.
● Skip search, rapid advance and rapid reverse operations
can be performed during random play (or while random
play is paused) within the range of the random selections.
● Pressing PLAYXCHANGE will not disturb the random play
mode if the disc play mode is in “DISC 1”.
In “DISC 5” mode, however, pressing PLAYXCHANGE will
clear the random selections from discs other than the
currently selected disc. If the disc table is closed, the
random play continues with the selections from those discs
renewed.
1
1
2
PLAY
STOP ( )
/ (PLAY)
Random play
1
DISC SKIP
12345
6
+10
TITLE AUDIO
MENU
SET UP
ON SCREEN
DISC MODE
A-BS/FCANCEL
REPEAT
7890
ANGLE
SELECT
SKIP/SEARCH
STOP
STILL/PAUSE
OPEN
TIME
CLOSE
PROG
RANDOM
RETURN
TITLE/INDEX
SUBTITLE
MULTI SPEED
OFF/ON
PLAY
/
CD/CD
12345
DISC
PLAYXCHANGE
OPEN/CLOSE
/
SKIP/
SEARCH
Page 42
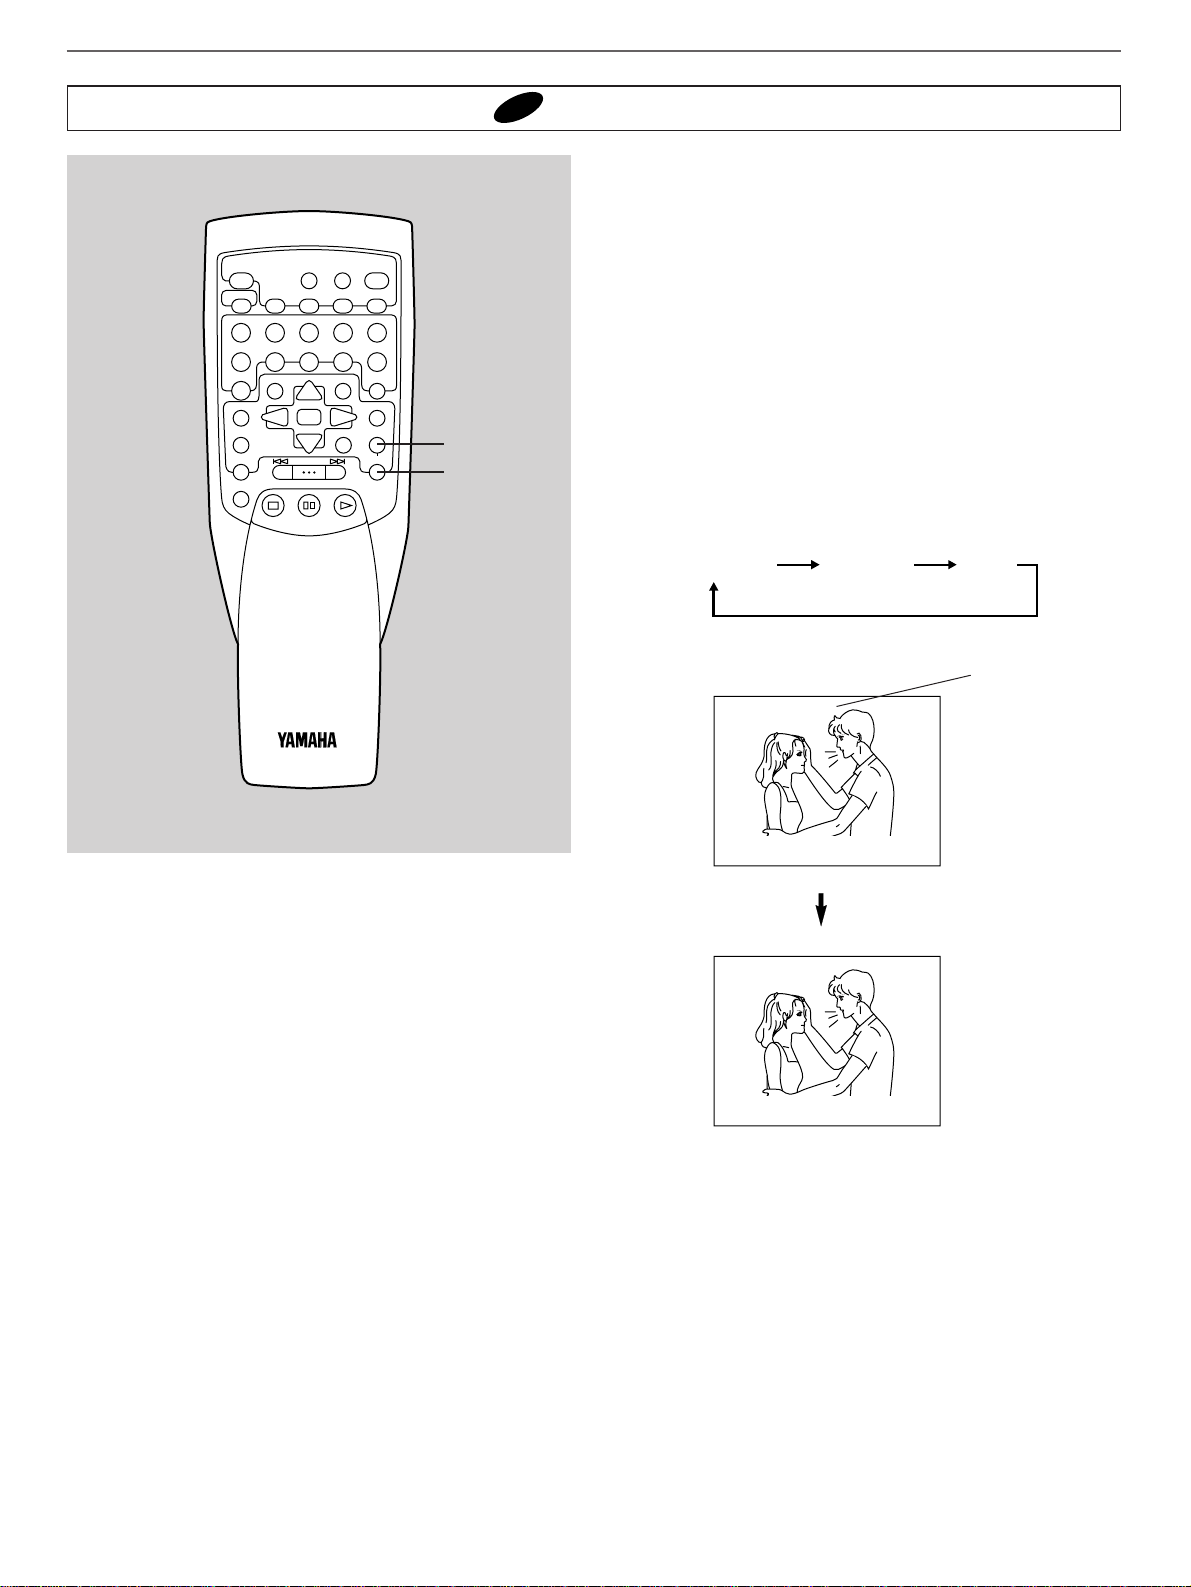
38
Advanced operation
When you play back a disc on which subtitles are recorded,
you can turn on or off displaying subtitles on the monitor
screen as you prefer.
Moreover, if subtitles are recorded in two or more languages
on the disc, you can select the preferred subtitle language.
To turn on/off the display of subtitles
Every time ON/OFF is pressed, the display of subtitles
turns on and off alternately.
To change the subtitle language
Press SUBTITLE during playback repeatedly until the
preferred language is displayed.
(Example)
Notes
● Subtitles cannot be displayed on the monitor screen if
subtitles are not recorded on the disc being played back.
● Some discs are recorded with subtitles which cannot be
turned off.
● Depending on some discs, the subtitle language cannot be
changed though two or more languages are recorded on the
disc.
● Recorded subtitle languages differ with disc. Refer to the
jacket of the disc for the information about subtitle
languages etc.
Changing subtitle language [ only]
DVD
12345
6
+10
7890
A-BS/FCANCEL
ANGLE
SELECT
TITLE AUDIO
MENU
SUBTITLE
SET UP
ON SCREEN
OFF/ON
MULTI SPEED
RETURN
TITLE/INDEX
REPEAT
DISC SKIP
PROG
RANDOM
DISC MODE
TIME
OPEN
/
CLOSE
STOP
STILL/PAUSE
SKIP/SEARCH
PLAY
SUBTITLE
ON/OFF
I love you.
Je t’aime
English French
......
SUBTITLE 1 English ON
SUBTITLE 2 French ON
Shows the
number of the
subtitle
language being
selected for
about 3
seconds.
Page 43
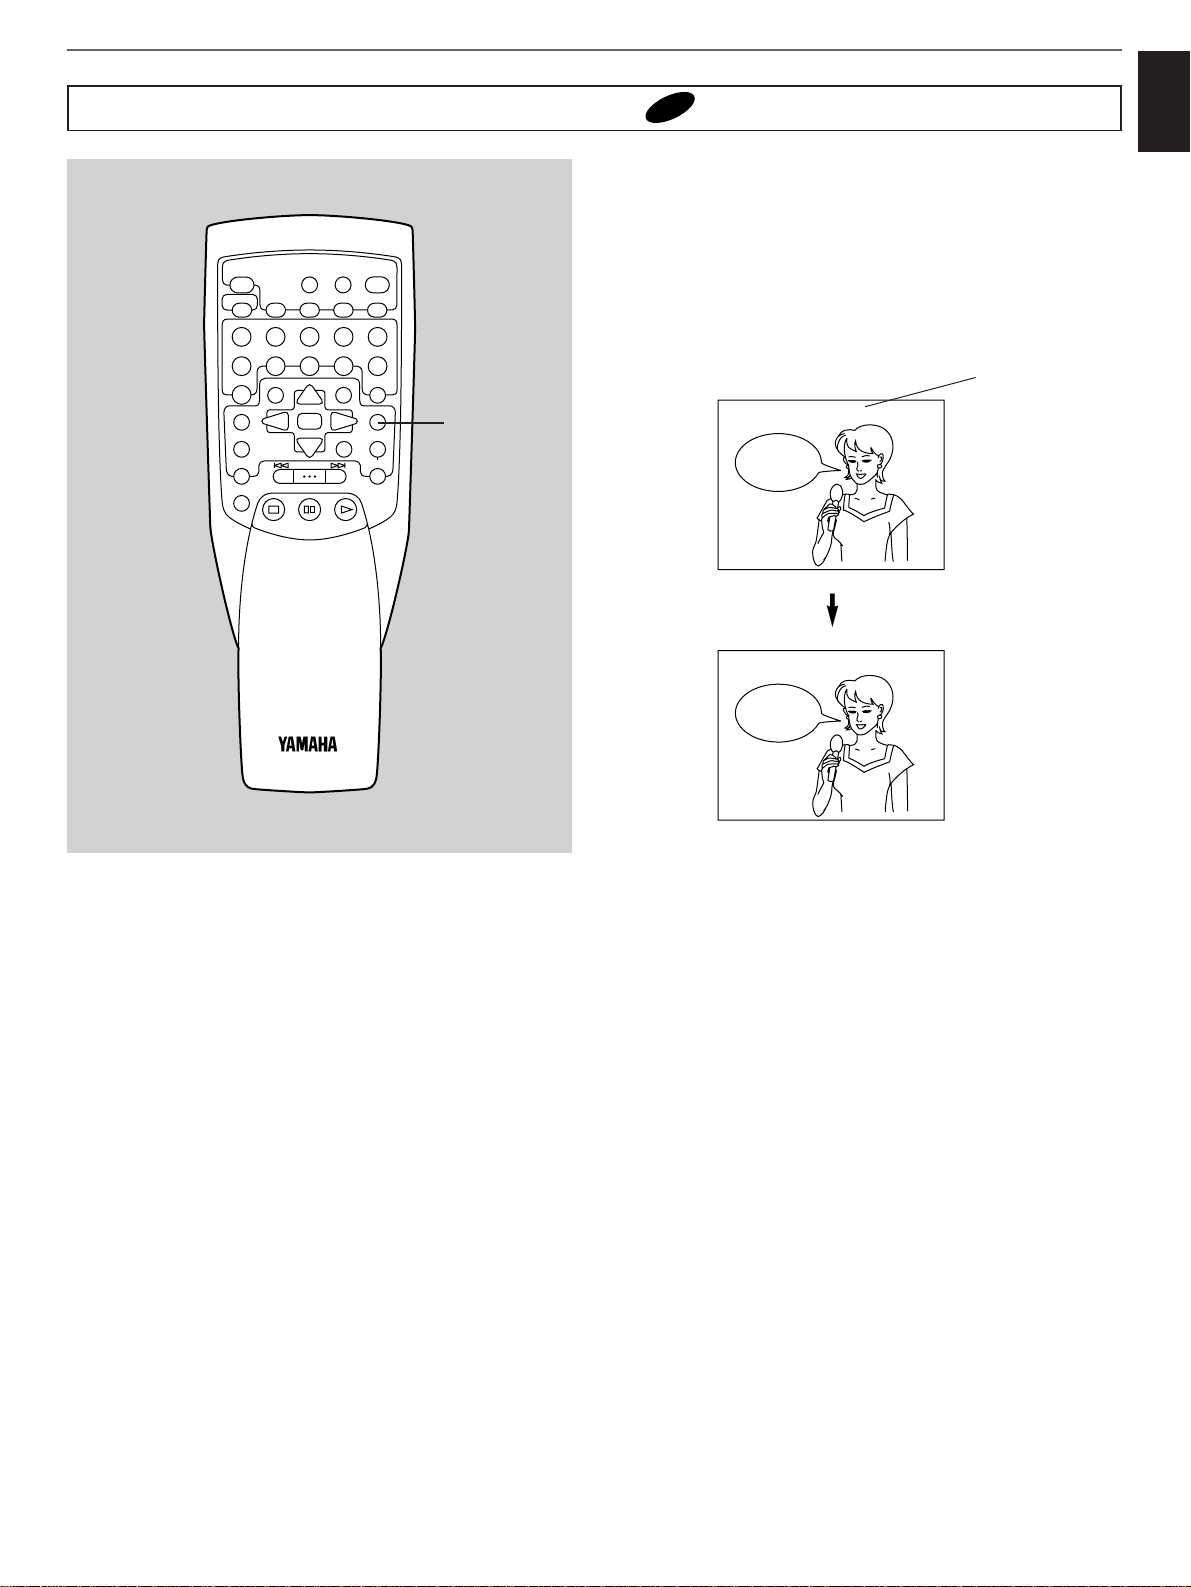
39
English
Advanced operation
When you play back a disc on which two or more audio sound
track languages are recorded, you can select the desired audio
sound track language.
Press AUDIO during playback repeatedly until the
preferred language is selected.
(Example)
Notes
● Depending on some discs, the audio sound track language
cannot be changed though two or more languages are
recorded on the disc.
● Recorded audio sound track languages differ with discs.
Refer to the jacket of the disc for the information about audio
sound track languages etc.
Changing audio sound track language [ only]
DVD
AUDIO
Hello
Bon jour
AUDIO 1 English DolbyDigital
AUDIO 2 French DolbyDigital
Shows the
number of the
audio sound
track language
being selected
for about 3
seconds.
OPEN
DISC SKIP
+10
TITLE AUDIO
MENU
SET UP
ON SCREEN
DISC MODE
A-BS/FCANCEL
REPEAT
12345
6
7890
ANGLE
SELECT
SKIP/SEARCH
STOP
STILL/PAUSE
TIME
CLOSE
PROG
RANDOM
RETURN
TITLE/INDEX
SUBTITLE
MULTI SPEED
OFF/ON
PLAY
/
Page 44

40
Advanced operation
Some discs with movies, for example, may be available with
two or more titles. If the disc has a title menu recorded on it,
you can select the preferred movie title.
(The details of operation differ depending on the disc used.)
1 Press TITLE during playback.
* A list of the titles on the disc is displayed on the monitor
screen.
2 Select the preferred title by pressing ///,
and then press SELECT [or simply by pressing the
numeric button(s)].
To clear the title menu
Press TITLE again.
* Playback resumes from the scene when TITLE was first
pressed.
(Example)
Using a title menu [ only]
DVD
2
1
1 Sights
TITLE MENU
3 Foods
4
Souvenirs
2 Hotels
Souvenirs
1 Sights
TITLE MENU
3 Foods
4
Souvenirs
2 Hotels
Playback begins
from the selected
title.
OPEN
TIME
CLOSE
PROG
RANDOM
RETURN
TITLE/INDEX
SUBTITLE
MULTI SPEED
OFF/ON
PLAY
/
DISC SKIP
+10
TITLE AUDIO
MENU
SET UP
ON SCREEN
DISC MODE
A-BS/FCANCEL
REPEAT
12345
6
7890
ANGLE
SELECT
SKIP/SEARCH
STOP
STILL/PAUSE
Page 45
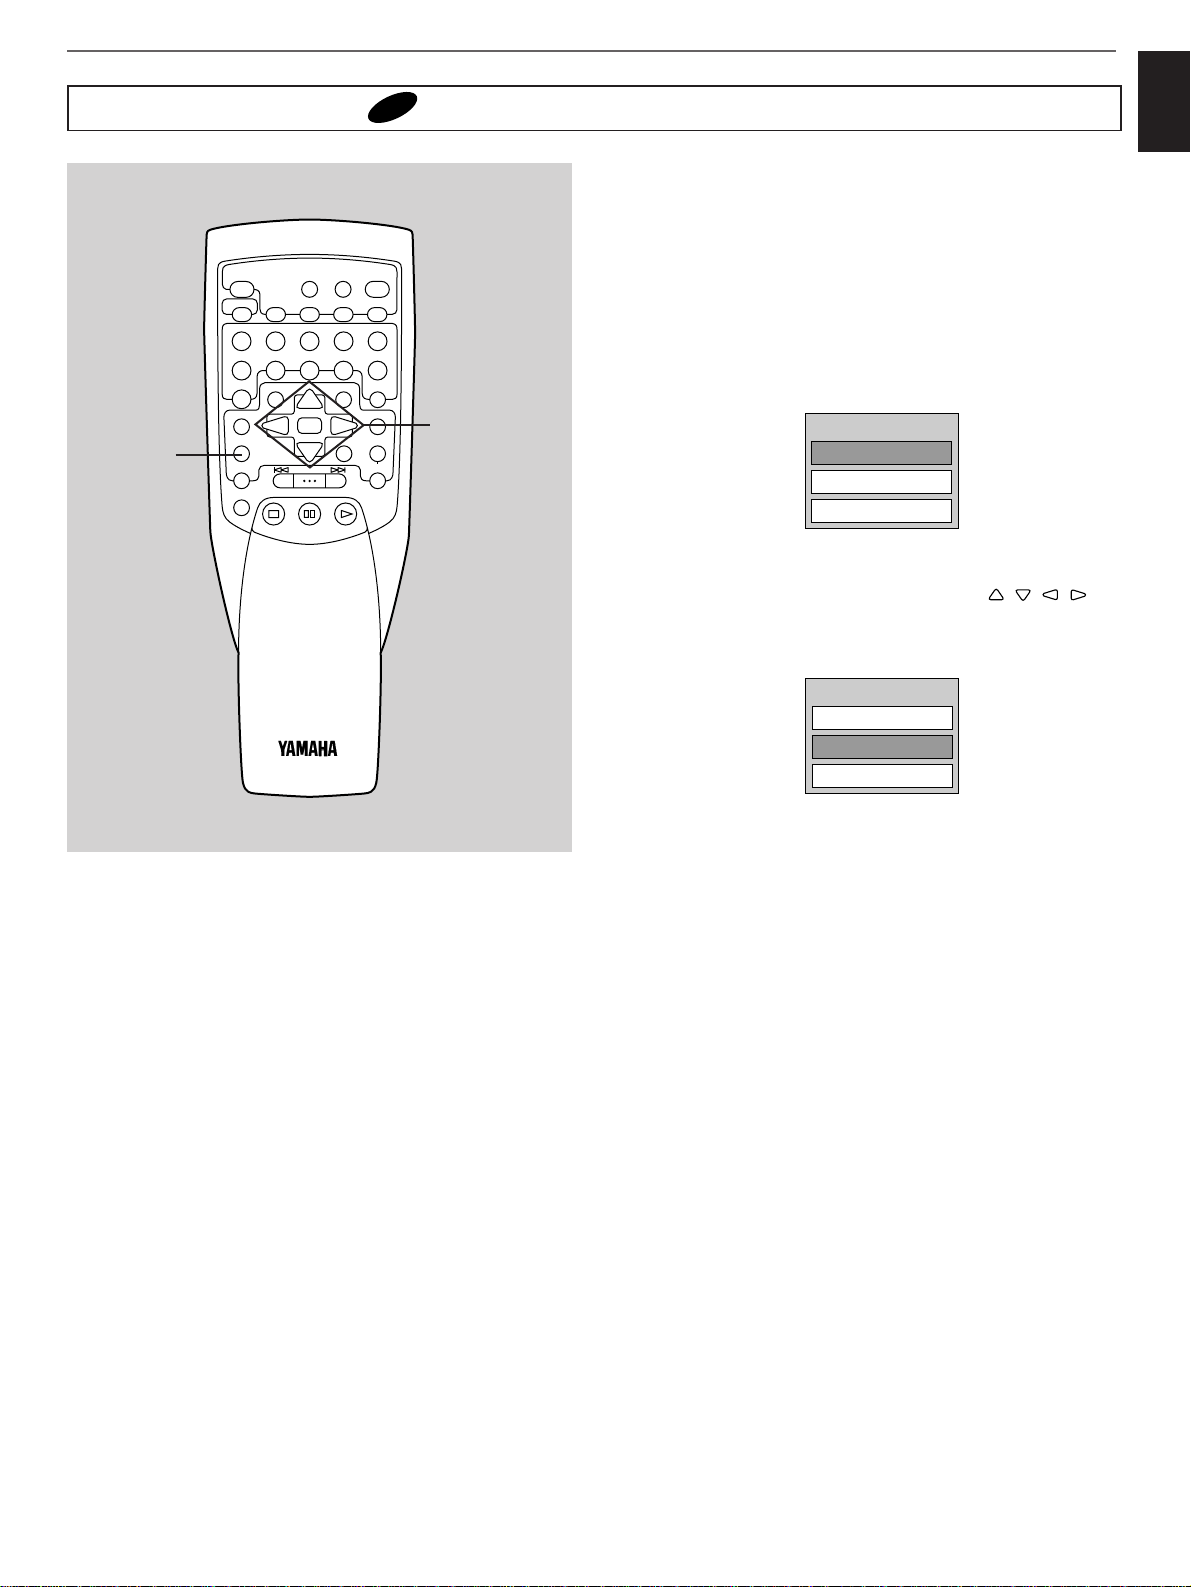
41
English
Some DVDs have unique menus called DVD menus. For
example, DVDs programmed with complex contents provide
guide menus, and those recorded with various languages
provide menus for audio and subtitle languages. DVD menu’s
contents and operation differ depending on the disc used. The
following explains basic operation when this feature is used.
1 Press MENU during playback.
* The DVD menu available on the disc is displayed on the
monitor screen.
2 Select the preferred item by pressing ///,
and then press SELECT [or simply by pressing the
numeric button(s)].
Playback begins from the selected item.
When the menu continues onto another screen.
Repeat step 2.
To clear the menu
Press MENU again.
* Playback resumes from the scene when MENU was first
pressed.
(Example)
Advanced operation
Using a DVD menu [ only]
DVD
2
1
3. ANGLE
2. AUDIO
1. SUBTITLE
DVD MENU
3. ANGLE
2. AUDIO
1. SUBTITLE
DVD MENU
OPEN
TIME
CLOSE
PROG
RANDOM
RETURN
TITLE/INDEX
SUBTITLE
MULTI SPEED
OFF/ON
PLAY
/
DISC SKIP
+10
TITLE AUDIO
MENU
SET UP
ON SCREEN
DISC MODE
A-BS/FCANCEL
REPEAT
12345
6
7890
ANGLE
SELECT
SKIP/SEARCH
STOP
STILL/PAUSE
Page 46
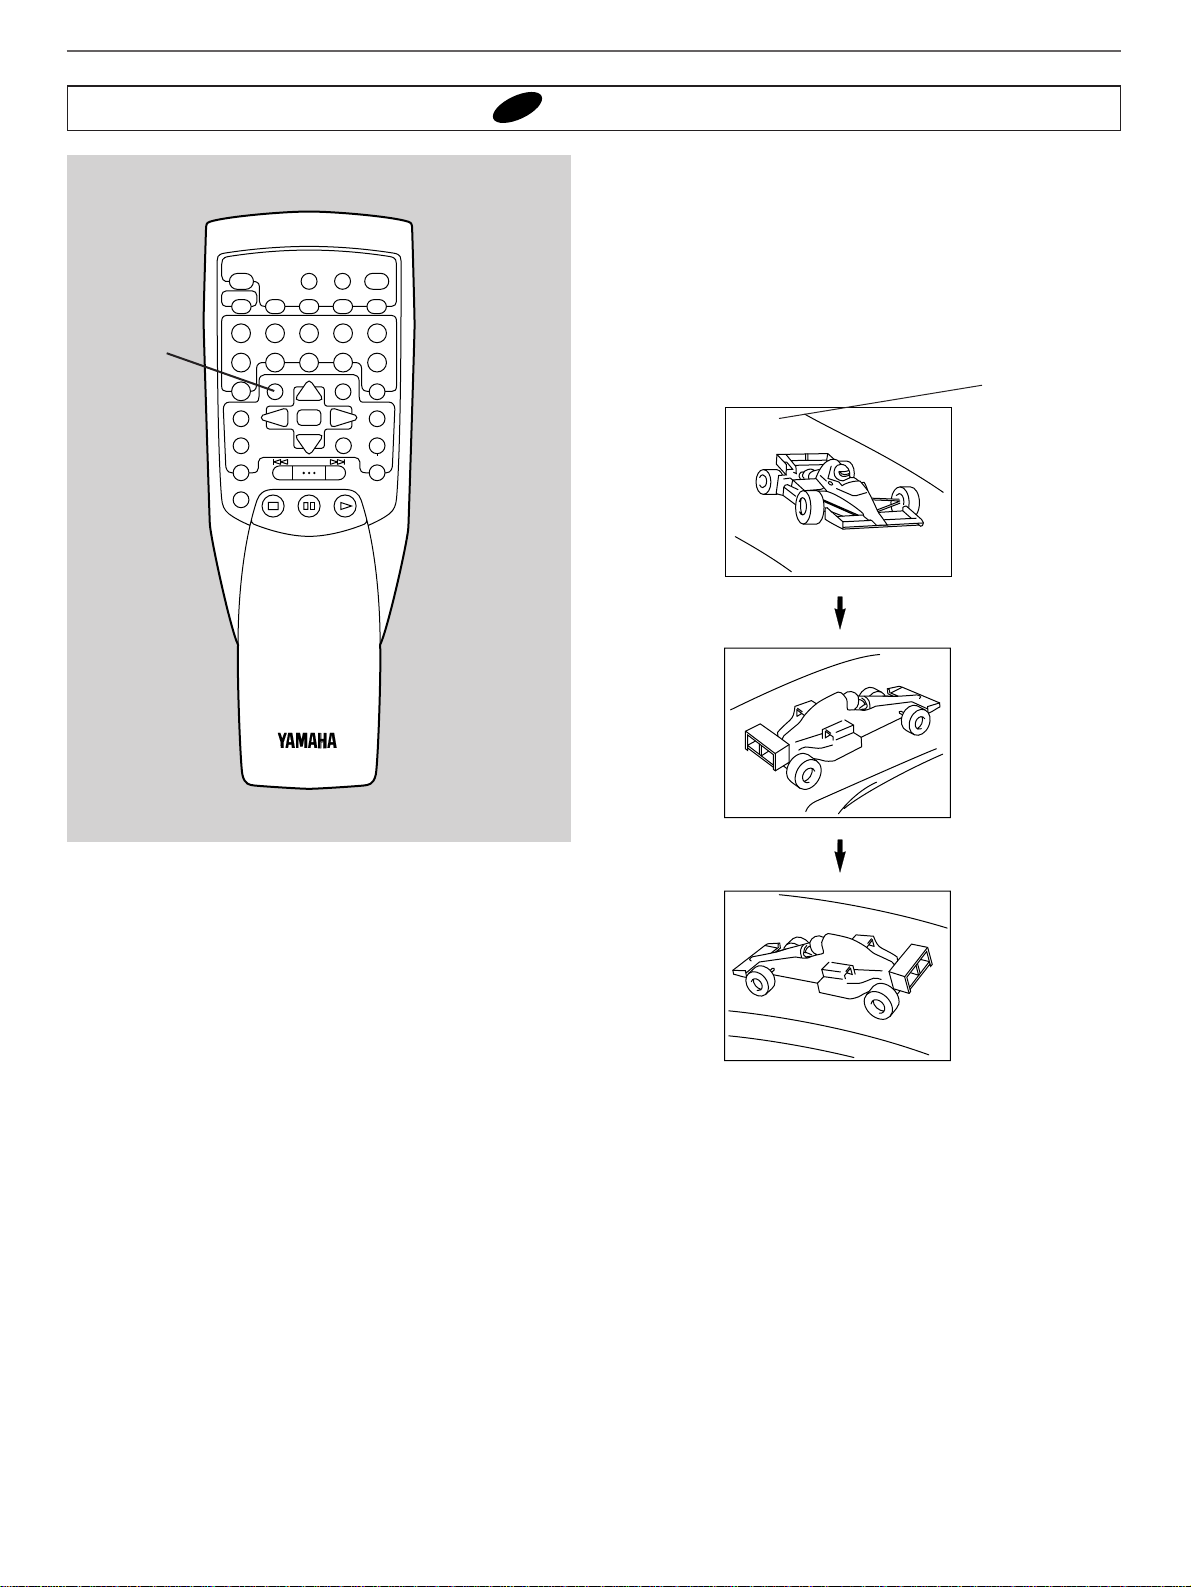
42
Advanced operation
Some DVDs may contain scenes which have been shot from
two or more angles simultaneously. For these discs, the same
scene can be viewed from each of these different angles using
the ANGLE button. (The recorded angles differ depending on
the disc used.)
Press ANGLE during playback repeatedly until the
preferred angle is selected.
(Example)
Notes
● This function works only for discs which have scenes shot
from two or more angles.
● Scenes recorded in two or more angles, the number of
angles etc. differ with discs.
Viewing from another angle [ only]
DVD
ANGLE
ANGLE 1
ANGLE 2
ANGLE 3
Shows the
number of the
angle currently
selected.
OPEN
TIME
CLOSE
PROG
RANDOM
RETURN
TITLE/INDEX
SUBTITLE
MULTI SPEED
OFF/ON
PLAY
/
DISC SKIP
+10
TITLE AUDIO
MENU
SET UP
ON SCREEN
DISC MODE
A-BS/FCANCEL
REPEAT
12345
6
7890
ANGLE
SELECT
SKIP/SEARCH
STOP
STILL/PAUSE
Page 47
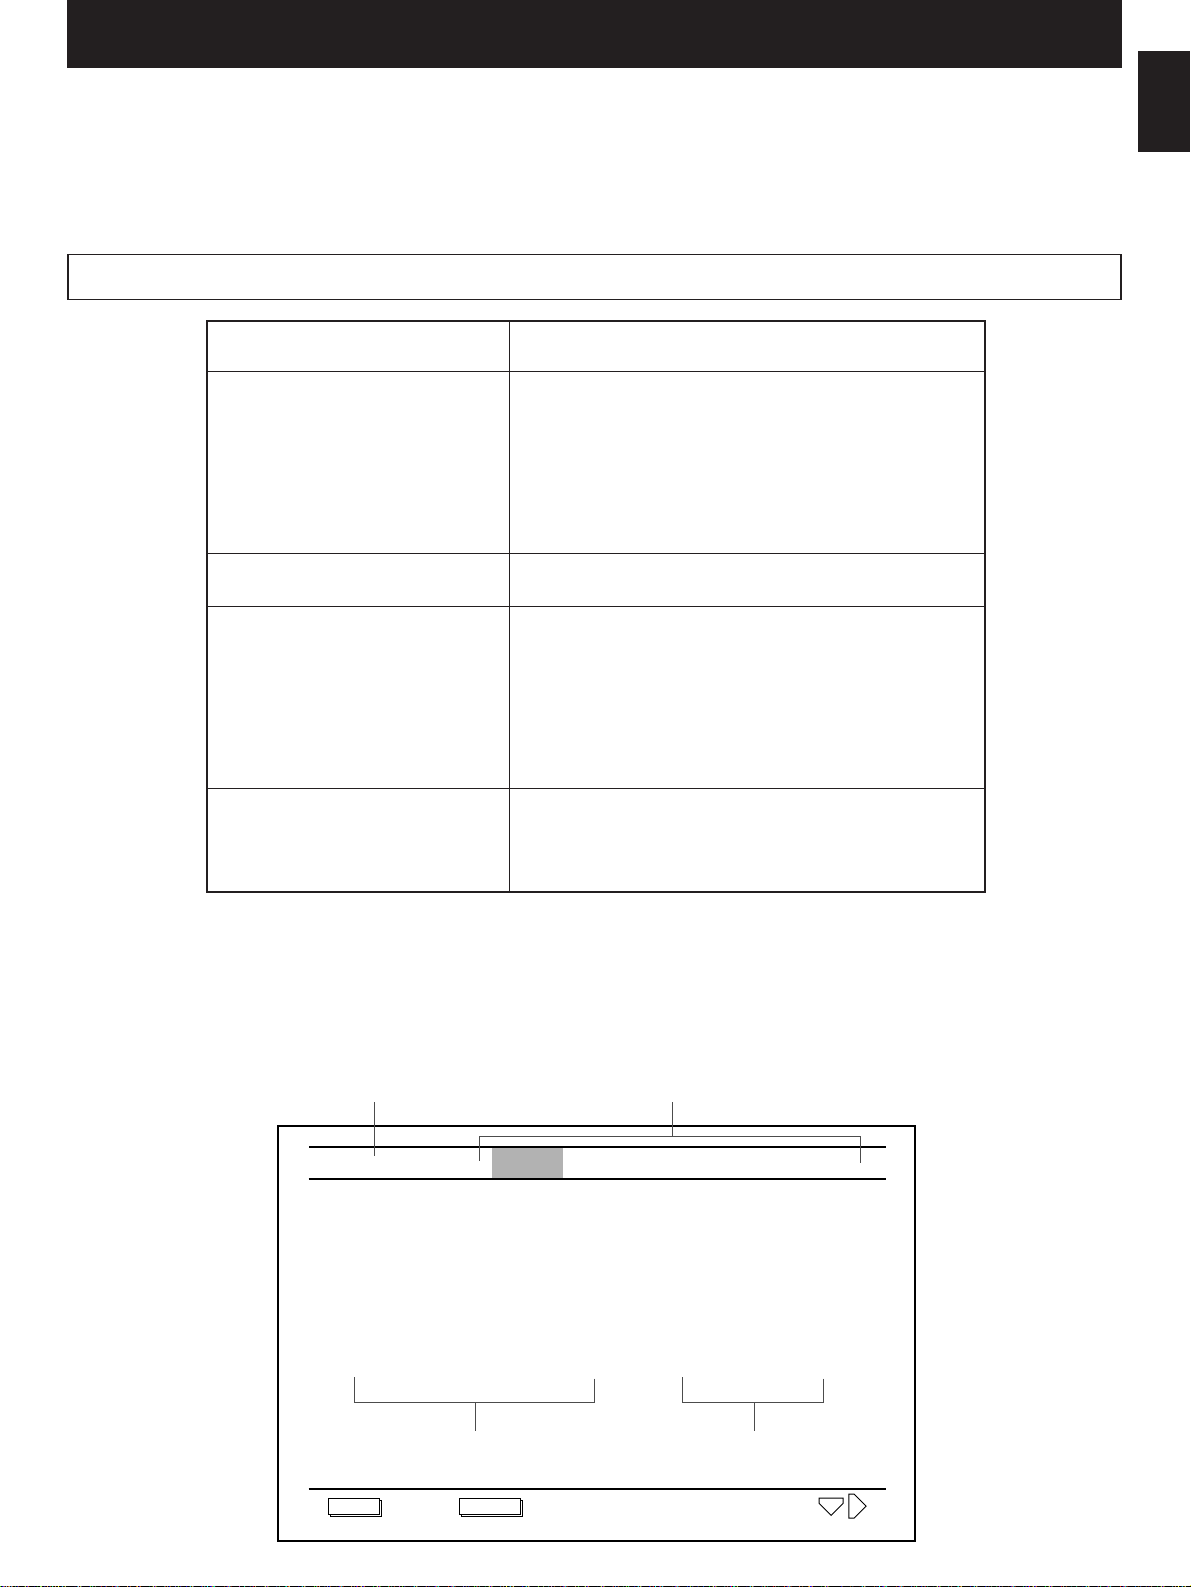
43
English
DVD
TV Type Normal 4:31
Display Mode Letter Box2
Menu Language English3
Subtitle Language Auto
Quit
4
Audio Language English5
Rating Level OFF6
VCD Settings Display Audio
Set
DVD
SETUP SELECT
This unit provides you with the following items to determine the initial status of this unit.
When you first use this unit, check the factory default settings of all the items. If the settings of some items are not suitable for using
this unit in your Audio/Video system, change the settings of them.
Once the settings are changed, this unit can always be operated under the same conditions.
The settings will be retained in the memory until the settings are changed even if the power is turned off.
Initial settings (on the SET UP menu)
*1: Provided only for China and General models.
SET UP groups
* The currently selected SET UP group is highlighted.
The currently selected SET UP
group is shown here.
Items
Item
1 TV type
2 Display Mode
3 Menu Language
4 Subtitle Language
5 Audio Language
6 Rating Level
1 Playback Control
1 Guide Display
2 OSD Language
3 Background Screen
4 Screen Saver
5 FL Dimmer
6 Signal System Conversion*
1
1 Digital Output
2 Dynamic Range Control*
1
3 Speaker*
1
SET UP group
DVD Settings
VCD Settings
Display Settings
Audio Settings
SET UP menu on the monitor screen
Check and change the settings on the monitor screen.
The current settings
Items
Page 48
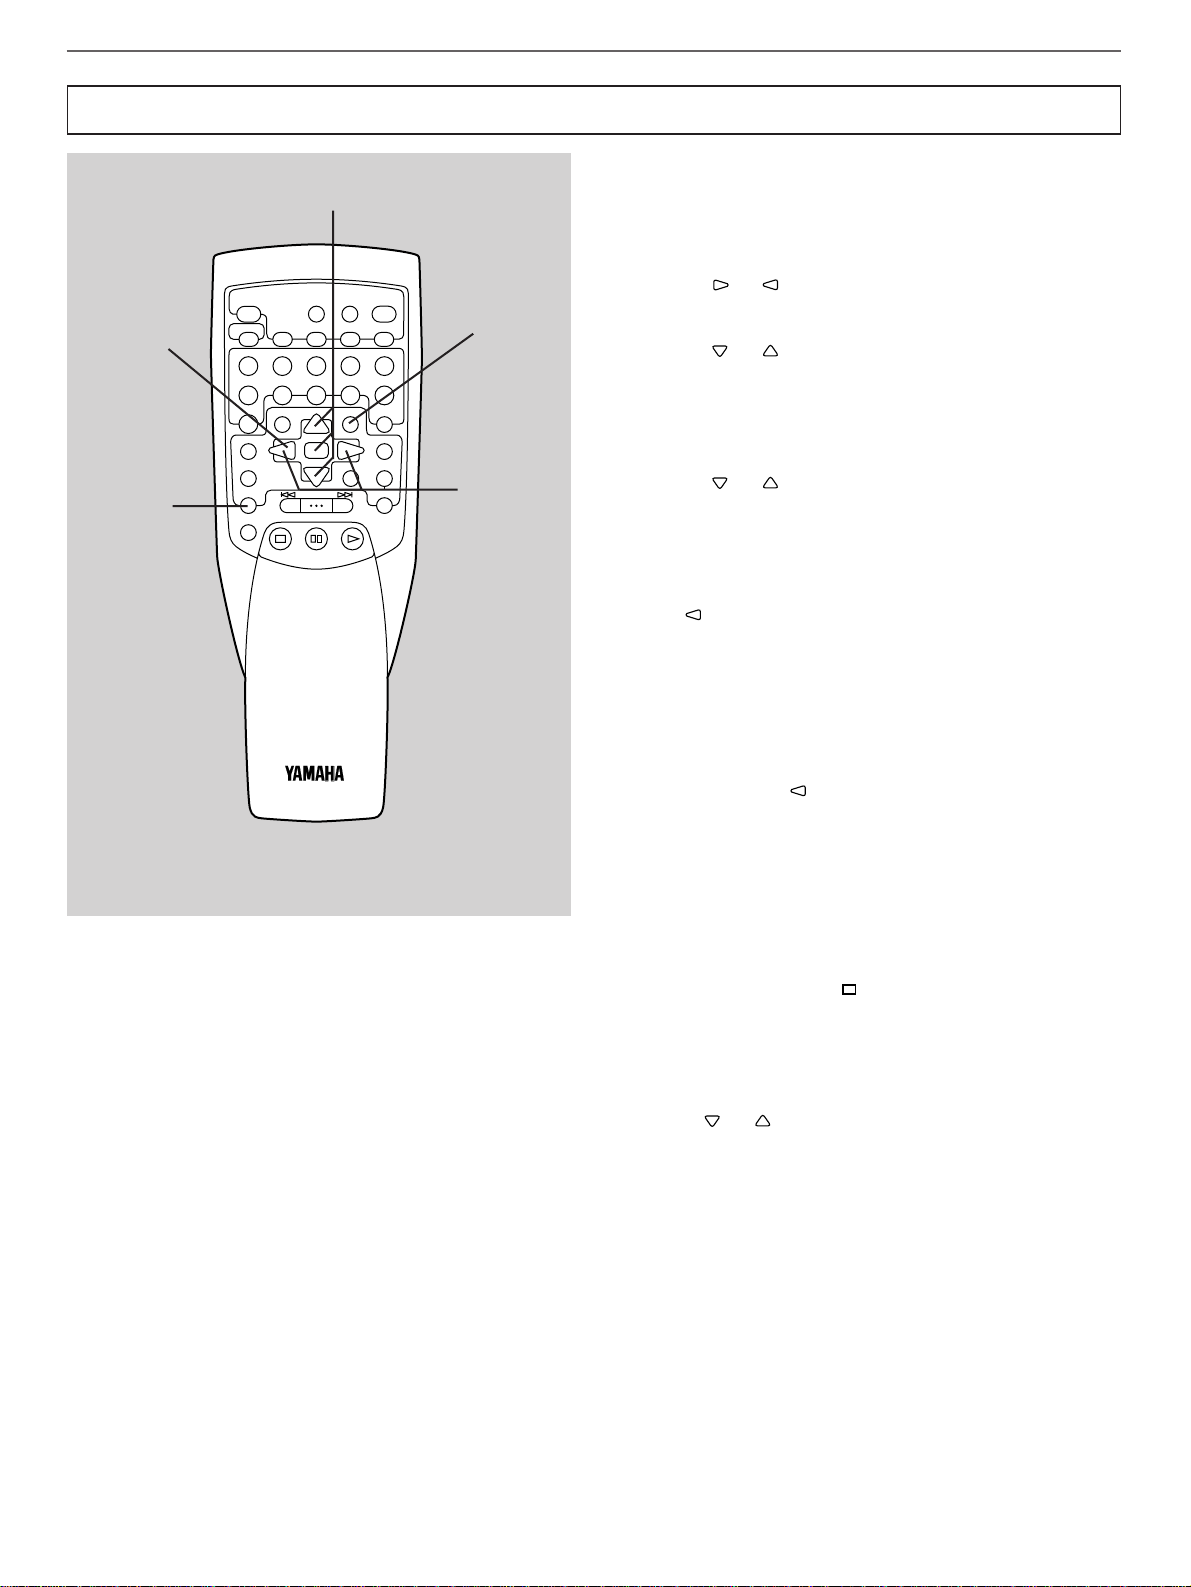
44
Initial settings (on the SET UP menu)
1 Turn on this unit and the TV monitor, and load discs.
2 Press SET UP when this unit is stopped.
* The SET UP menu appears on the monitor screen.
3 Press or to select the preferred SET UP
group.
4 Press or to select the preferred item, and then
press SELECT.
*
The display on the monitor screen changes to the mode
for setting change.
*
The current selection is indicated by “*” at the head.
5 Press or to change the selection, and then
press SELECT.
* Some items require additional steps. (See the
respective pages.)
6 When the setting change is finished, press RETURN
(or ) once or more to return to the previous
display.
7 Repeat steps 3 to 6 for other items.
To return to the previous display
Press RETURN or .
To clear the SET UP menu
Press SET UP.
To restore the factory default settings for all items
While holding CANCEL on the remote controller
pressed, press and hold on the front panel for more
than 5 seconds.
For your reference:
The numeric buttons can also be used for a setting change
instead of
or . In this case, pressing SELECT is not
necessary.
Note
If the SET UP menu is displayed during playback, you may not
be able to change settings on some items. To change them,
stop this unit.
12345
6
+10
7890
A-BS/FCANCEL
ANGLE
SELECT
TITLE AUDIO
MENU
SUBTITLE
SET UP
ON SCREEN
OFF/ON
MULTI SPEED
RETURN
TITLE/INDEX
REPEAT
DISC SKIP
PROG
RANDOM
DISC MODE
TIME
OPEN
/
CLOSE
STOP
STILL/PAUSE
SKIP/SEARCH
PLAY
Common procedure for setting change
2
3
6
6
4, 5
Page 49

45
English
Initial settings (on the SET UP menu)
DVD Settings
The items in this group are only applicable when playing back
a DVD.
1 TV Type
Select the appropriate screen type according to your TV
monitor; conventional size screen (Normal 4:3) or wide-screen
(Wide 16:9).
1 When the SET UP group “DVD Settings” is selected,
press or to select “1 TV Type” and then press
SELECT.
2 Press or to select the preferred type (1 or 2)
and then press SELECT.
1 Normal 4:3 Select this type when a conventional
TV monitor is connected.
* When this type is selected, the
setting of the next item “2 Display
Mode” also becomes important.
(Refer to the next page.)
2 Wide 16:9 Select this type when a wide-screen
TV monitor is connected.
* A video source of wide-screen type
is played in full size. (The TV must
also be set to the full size display
mode.)
Factory default setting: Normal 4:3
Item description and setting change
1, 2
DVD
TV Type Normal 4:31
Display Mode Letter Box2
Menu Language English3
Subtitle Language Auto4
Audio Language English5
Rating Level OFF6
VCD Settings Display AudioDVD
DVD
Normal 4:31
Wide 16:92
Settings TV Type
OPEN
DISC SKIP
+10
TITLE AUDIO
MENU
SET UP
ON SCREEN
DISC MODE
A-BS/FCANCEL
REPEAT
12345
6
7890
ANGLE
SELECT
SKIP/SEARCH
STOP
STILL/PAUSE
TIME
CLOSE
PROG
RANDOM
RETURN
TITLE/INDEX
SUBTITLE
MULTI SPEED
OFF/ON
PLAY
/
Page 50

46
2 Display Mode
If “Normal 4:3” is selected on the item “1 TV Type”, select the
display mode (Letter box or Pan & Scan) for a video source of
wide screen type.
1 When the SET UP group “DVD Settings” is selected,
press or to select “2 Display Mode” and then
press SELECT.
2 Press or to select the preferred mode (1 or 2),
and then press SELECT.
1 Letter Box A video source is played back in the
letter box style. (Black bands appear
at the top and bottom of the screen.)
2 Pan Scan A video source formatted in the Pan
& Scan style is played back in that
style. (The left and right edges are cut
off.)
* A video source not formatted in the
Pan & Scan style will be played back
in the letter box style.
Factory default setting: Letter Box
Initial settings (on the SET UP menu)
1, 2
DVD
TV Type Normal 4:31
Display Mode Letter Box2
Menu Language English3
Subtitle Language Auto4
Audio Language English5
Rating Level OFF6
VCD Display Audio
Settings DVD
DVD
Letter Box1
Pan Scan2
Settings Display Mode
DISC SKIP
+10
TITLE AUDIO
MENU
SET UP
ON SCREEN
DISC MODE
A-BS/FCANCEL
REPEAT
12345
6
7890
ANGLE
SELECT
SKIP/SEARCH
STOP
STILL/PAUSE
OPEN
TIME
CLOSE
PROG
RANDOM
RETURN
TITLE/INDEX
SUBTITLE
MULTI SPEED
OFF/ON
PLAY
/
Page 51
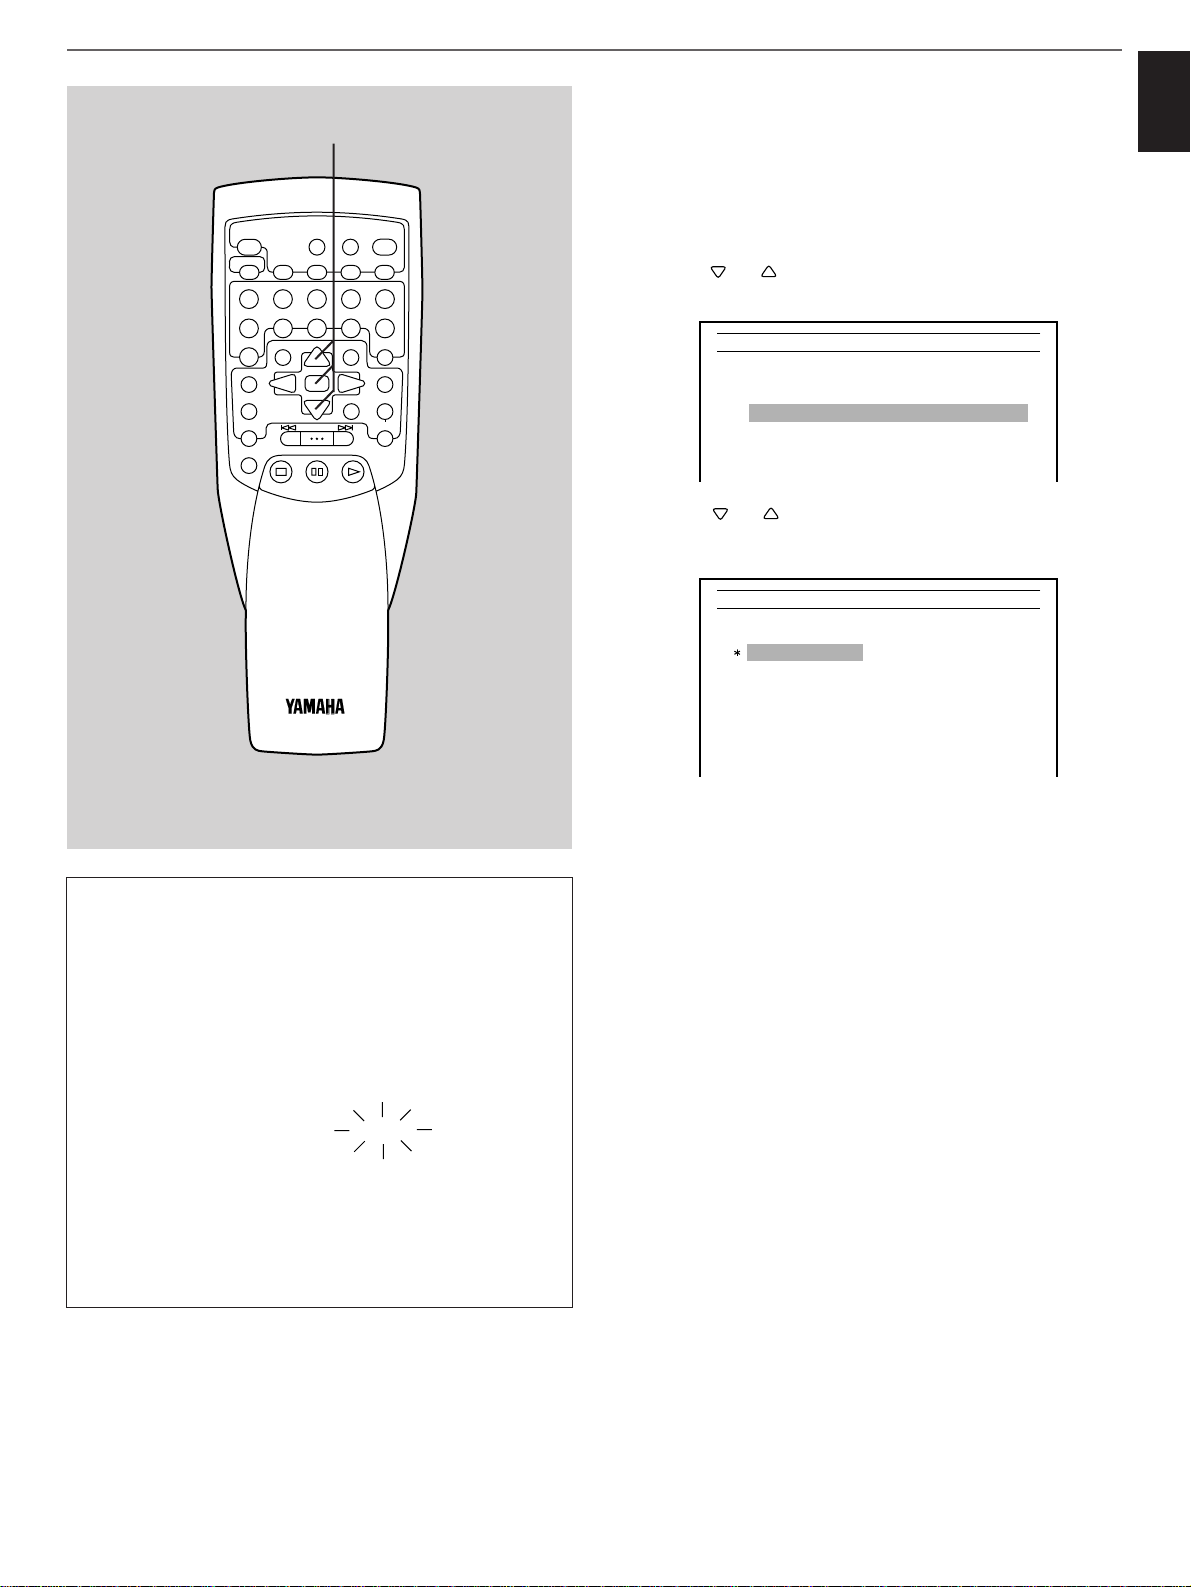
47
English
3 Menu Language
Select the language which is used to show title menus or DVD
menus when playing back a DVD.
1 When the SET UP group “DVD Settings” is selected,
press or to select “3 Menu Language” and
then press SELECT.
2 Press or to select the preferred language and
then press SELECT.
Factory default setting
U.S.A. and General models: English
China model: Chinese
Note
If you play back a disc which does not have the selected
language, the priority language on the disc is used.
Initial settings (on the SET UP menu)
DVD
TV Type Normal 4:31
Display Mode Letter Box2
Menu Language English3
Subtitle Language Auto4
Audio Language English5
Rating Level OFF 6
VCD Settings Display Audio
DVD
DVD
Disc1 Others9
English2
Japanese3
Chinese4
Spanish5
French6
German7
Italian8
Settings Menu Language
1, 2
1 Disc:
2 English
3 Japanese
4 Chinese
5 Spanish
6 French
7 German
8 Italian
9 Others:
The priority language on the disc.
Another language can be selected by
entering the code number for the
language. (See the left for details.)
Entering a language code number
1
After you select “Others”, press SELECT.
*“Language Code” appears on the monitor screen.
2 Enter a 4-digit number by using the numeric buttons.
(Refer to “Language code list” on page 67 for the
number of the desired language.
(Example: “8084”)
3 Press SELECT.
Note: In step 1, if a language code is already set, it is
shown as “Others 6565 (for example)”. If you wish to
change the code number, follow steps 2 and 3.
Language Code 8 0 8 4
DISC SKIP
+10
TITLE AUDIO
MENU
SET UP
ON SCREEN
DISC MODE
A-BS/FCANCEL
REPEAT
12345
6
7890
ANGLE
SELECT
SKIP/SEARCH
STOP
STILL/PAUSE
OPEN
TIME
CLOSE
PROG
RANDOM
RETURN
TITLE/INDEX
SUBTITLE
MULTI SPEED
OFF/ON
PLAY
/
Page 52
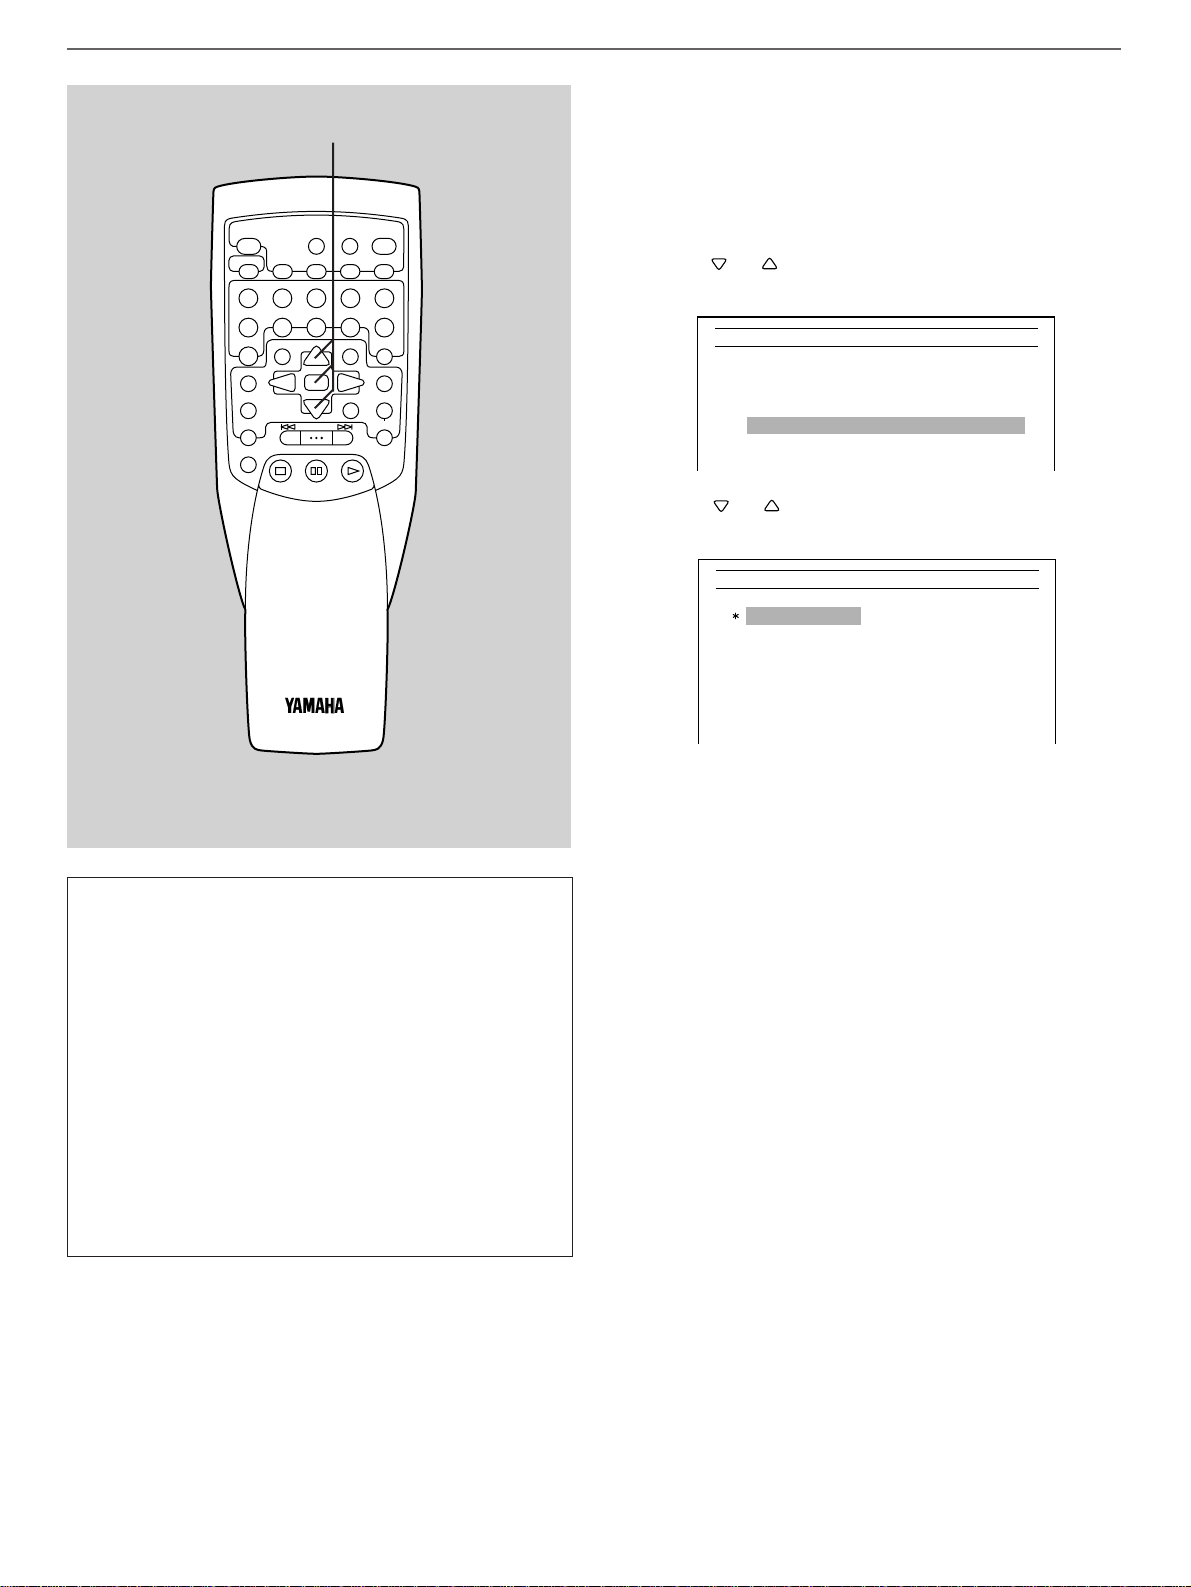
48
4 Subtitle Language
Select the language which is used to show subtitles when
playing back a DVD.
1 When the SET UP group “DVD Settings” is selected,
press or to select “4 Subtitle Language” and
then press SELECT.
2 Press or to select the preferred language and
then press SELECT.
Factory default setting: Auto
Notes
● If you play back a disc which does not have the selected
language, the priority language on the disc is used.
● You can also change the subtitle language, or turn off or on
subtitles by using SUBTITLE and OFF/ON only while playing
back a disc on which two or more subtitle languages are
recorded. (Refer to page 38 for details.)
1, 2
Initial settings (on the SET UP menu)
DVD
TV Type Normal 4:31
Display Mode Letter Box2
Menu Language English3
Subtitle Language Auto4
Audio Language English5
Rating Level OFF6
VCD Settings Display Audio
DVD
DVD
Auto1 Italian9
Others10
OFF2
English3
Japanese4
Chinese5
Spanish6
French7
German8
Settings Subtitle Language
1 Auto:
2 OFF:
3 English
4 Japanese
5 Chinese
6 Spanish
7 French
8 German
9 Italian
10 Others:
The language is automatically selected
according to the setting on the item “5
Audio Language” (on page 49).
(See the left for details.)
Subtitles are not displayed.
Another language can be selected by
entering the code number for the
language. (Refer to “Entering a language
code number” on page 47 for details.)
When “1 Auto” is selected in step 2, the subtitle
language is automatically selected as follows.
● When the disc is played back with the audio language
selected on the item “5 Audio Language” (on page 49),
the subtitles of the same language are selected and the
display of them is turned off.
● When the disc is not played back with the audio language
selected on the item “5 Audio Language” (on page 49)
because the language is not recorded on the disc:
* If the disc has the subtitles of the same language, the
subtitles are displayed.
* If the disc does not have the subtitles of the same
language, the subtitles are displayed with the priority
language on the disc.
OPEN
DISC SKIP
+10
TITLE AUDIO
MENU
SET UP
ON SCREEN
DISC MODE
A-BS/FCANCEL
REPEAT
12345
6
7890
ANGLE
SELECT
SKIP/SEARCH
STOP
STILL/PAUSE
TIME
CLOSE
PROG
RANDOM
RETURN
TITLE/INDEX
SUBTITLE
MULTI SPEED
OFF/ON
PLAY
/
Page 53

49
English
5 Audio Language
Select the language which is used for audio sound track when
playing back a DVD.
1 When the SET UP group “DVD Settings” is selected,
press or to select “5 Audio Language” and
then press SELECT.
2 Press or to select the preferred language, and
then press SELECT.
Factory default setting
U.S.A. and General models: English
China model: Chinese
Notes
● If you play back a disc which does not have the selected
language, the priority language on the disc is used.
● You can also change the audio sound track language by
using AUDIO only while playing back a disc on which two or
more audio sound track languages are recorded. (Refer to
page 39 for details.)
Initial settings (on the SET UP menu)
DVD
TV Type Normal 4:31
Display Mode Letter Box2
Menu Language English3
Subtitle Language Auto4
Audio Language English5
Rating Level OFF6
VCD Settings Display AudioDVD
DVD
1
Italian
Others
2
English
3
Japanese
4
Chinese
5
Spanish
6
French
7
German
8
Settings Audio Language
1, 2
1 English
2 Japanese
3 Chinese
4 Spanish
5 French
6 German
7 Italian
8 Others:
Another language can be selected by
entering the code number for the
language. (Refer to “Entering a language
code number” on page 47 for details.)
DISC SKIP
+10
TITLE AUDIO
MENU
SET UP
ON SCREEN
DISC MODE
A-BS/FCANCEL
REPEAT
12345
6
7890
ANGLE
SELECT
SKIP/SEARCH
STOP
STILL/PAUSE
OPEN
TIME
CLOSE
PROG
RANDOM
RETURN
TITLE/INDEX
SUBTITLE
MULTI SPEED
OFF/ON
PLAY
/
Page 54

50
6 Rating Level
Some DVDs are encoded with restriction of playback for
scenes unsuitable for children. The level of restriction (rating
level) differs depending on the contents of discs. On this item,
you can set the rating level to the desired level. When you play
back a DVD encoded with the rating level, only the picture
which conforms to the level set on this item is played back.
The level you set on this item is locked and unchangeable
without entering the password you designate. This is for
preventing the level from being changed by someone other
than you.
1 When the SET UP group “DVD Settings” is selected,
press or to select “6 Rating Level”, and then
press SELECT.
2 Enter a 4-digit number as the password by using the
numeric button(s), and then press SELECT.
(Example: “4343”)
Note
Do not forget your password.
In the future, if you want to change the rating level, you
must enter the password correctly in this step, otherwise
you cannot go on to the next step.
* In this case, the password you enter is shown as “
****
”.
Initial settings (on the SET UP menu)
1, 2
1
DVD
TV Type Normal 4:31
Display Mode Letter Box2
Menu Language English3
Subtitle Language Auto4
Audio Language English5
Rating Level OFF6
VCD Settings Display Audio
DVD
To set Rating Level, choose an entry password.
Password
––––
Password 4343
2
OPEN
TIME
CLOSE
PROG
RANDOM
RETURN
TITLE/INDEX
SUBTITLE
MULTI SPEED
OFF/ON
PLAY
/
DISC SKIP
+10
TITLE AUDIO
MENU
SET UP
ON SCREEN
DISC MODE
A-BS/FCANCEL
REPEAT
12345
6
7890
ANGLE
SELECT
SKIP/SEARCH
STOP
STILL/PAUSE
Page 55
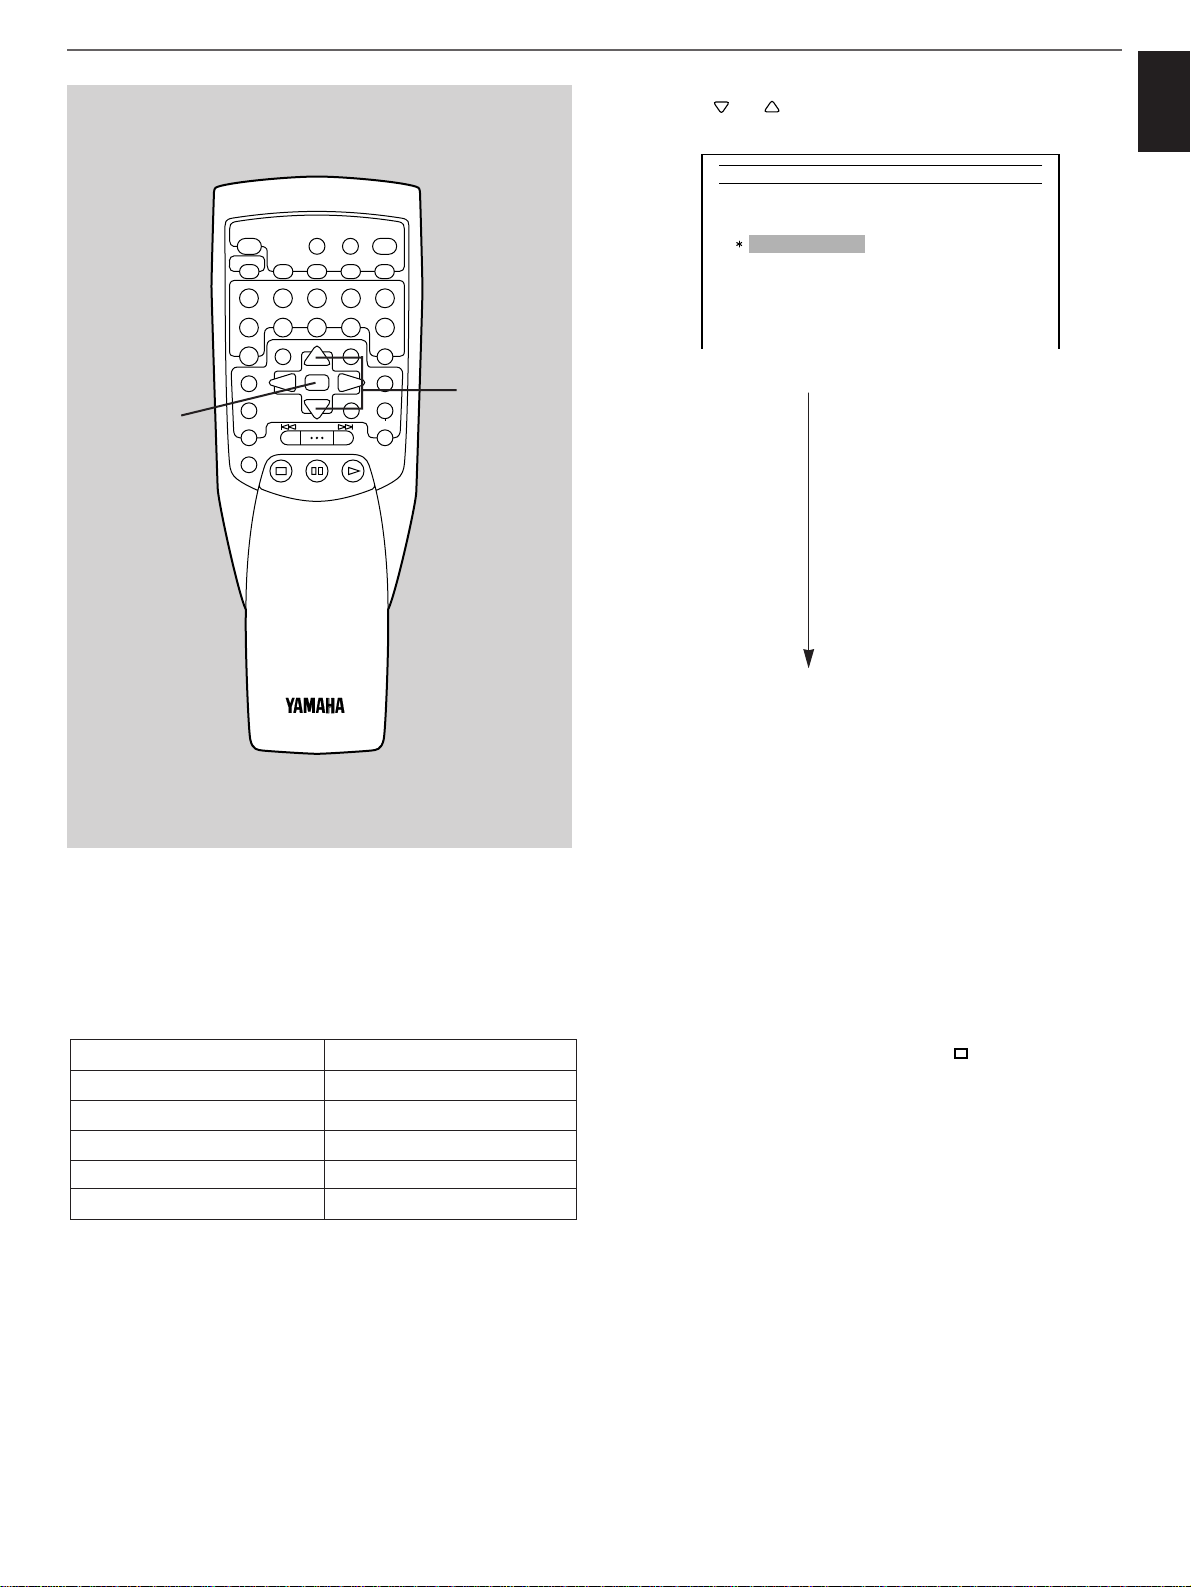
51
English
3 Press or to select the preferred level, and then
press SELECT.
Factory default setting: OFF
4 Press SELECT.
To change the rating level
Follow the procedure above. However, it cannot be changed
unless the password you designated is not entered correctly in
Step 2.
To clear the password and unlock this item
Holding CANCEL pressed, press STOP ( ) 3 times
continuously.
Notes
●
In the following cases, the display on the monitor screen
changes to allow you to change the level temporarily for
playing back the currently selected disc.
*
The selected disc cannot be played back in the current
rating level.
*
The selected disc demands to change the level.
●
For discs encoded with no rating level information, the rating
level set on this item has no effect.
Initial settings (on the SET UP menu)
DVD
Level 11 OFF9
Level 22
Level 33
Level 44
Level 55
Level 66
Level 77
Level 88
Settings Rating Level
1 Level 1
2 Level 2
3 Level 3
4 Level 4
5 Level 5
6 Level 6
7 Level 7
8 Level 8
9 OFF
Restriction is the severest.
Restriction becomes easier.
Restriction is the easiest.
All DVDs can be played back.
3, 4
3
Note for US customers
The restrictions applied to movies in U.S.A. correspond to the
following rating levels.
Restriction Rating level
G Level 1
PG Level 3
PG-13 Level 4
R Level 6
NC-17 Level 7
DISC SKIP
+10
TITLE AUDIO
MENU
SET UP
ON SCREEN
DISC MODE
A-BS/FCANCEL
REPEAT
12345
6
7890
ANGLE
SELECT
SKIP/SEARCH
STOP
STILL/PAUSE
OPEN
TIME
CLOSE
PROG
RANDOM
RETURN
TITLE/INDEX
SUBTITLE
MULTI SPEED
OFF/ON
PLAY
/
Page 56

52
VCD Settings
The item in this group is only effective when playing back a
Video CD.
1 Playback Control
Select whether the Playback Control works or not when
playing back a Video-CD, ver. 2.0.
1 When the SET UP group “VCD Settings” is selected,
press or to select “1 Playback Control”, and
then press SELECT.
2 Press or to select ON or OFF, and then press
SELECT.
1 ON The Playback Control works when a Video-
CD, ver. 2.0 is played back.
2 OFF The Playback Control does not work even
when a Video-CD, ver. 2.0 is played back.
Factory default setting: ON
Initial settings (on the SET UP menu)
1, 2
VCD
Playback Control ON1
VCD Settings Display AudioDVD
VCD
ON1
OFF 2
Settings Playback Control
DISC SKIP
+10
TITLE AUDIO
MENU
SET UP
ON SCREEN
DISC MODE
A-BS/FCANCEL
REPEAT
12345
6
7890
ANGLE
SELECT
SKIP/SEARCH
STOP
STILL/PAUSE
OPEN
TIME
CLOSE
PROG
RANDOM
RETURN
TITLE/INDEX
SUBTITLE
MULTI SPEED
OFF/ON
PLAY
/
Page 57
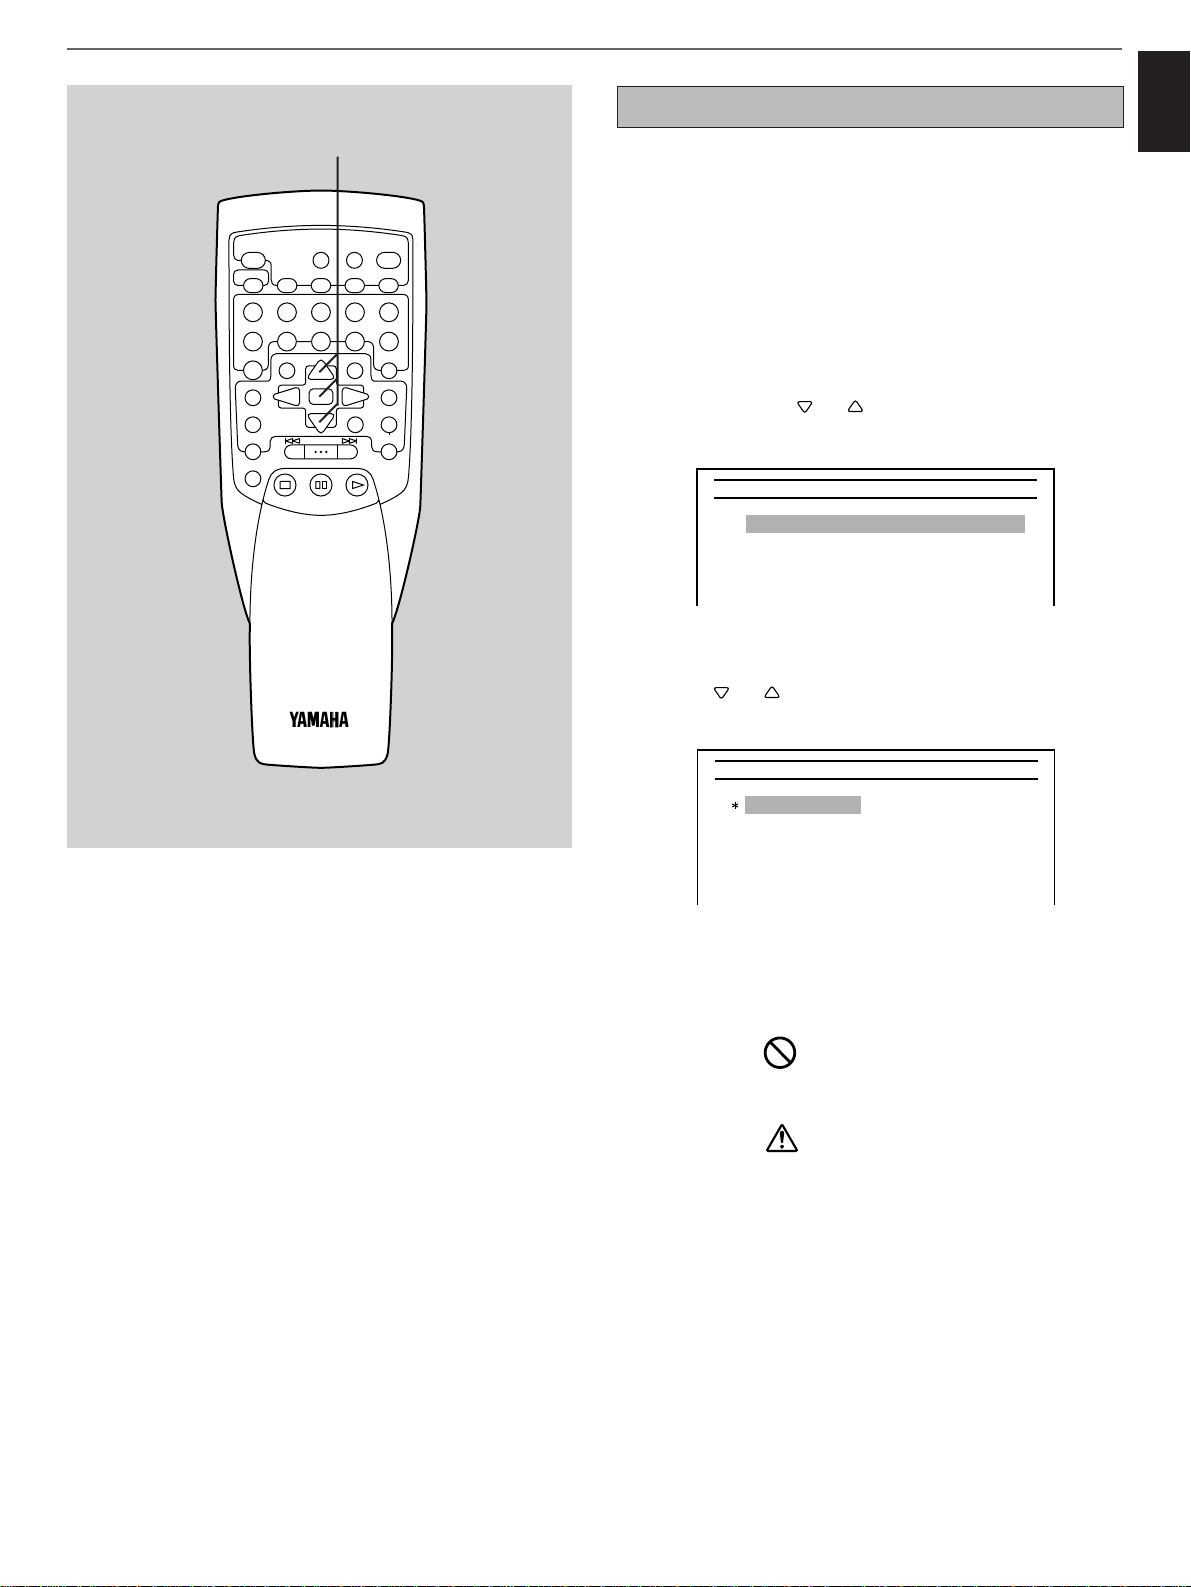
53
English
1, 2
Display Settings
The items in this group controls the ways of displaying
information on the monitor screen and the front panel display.
1 Guide Display
Select whether or not the monitor screen shows the operation
guide information or other messages.
1 When the SET UP group “Display Settings” is
selected, press or to select “1 Guide Display”,
and then press SELECT.
2 Press or to select the preferred mode, and
then press SELECT.
1 ON Select this to show the operation guide
information and other messages.
2 Brief Select this to show the following icons only.
: Means that the current operation is
prohibited by the disc or this unit, so
the operation is invalid.
: Means “Warning”.
3 OFF Select this to show no operation guide
information and no message on the monitor
screen.
Factory default setting: ON
Initial settings (on the SET UP menu)
Display VCD Settings Display AudioDVD
Guide Display ON1
OSD Language English2
Background Screen Picture 13
Screen Saver ON4
FL Dimmer Normal5
Display
ON1
Brief2
OFF3
Settings Guide Display
DISC SKIP
TITLE AUDIO
MENU
SET UP
ON SCREEN
DISC MODE
A-BS/FCANCEL
REPEAT
12345
6
7890
+10
ANGLE
SELECT
SKIP/SEARCH
STOP
STILL/PAUSE
OPEN
TIME
CLOSE
PROG
RANDOM
RETURN
TITLE/INDEX
SUBTITLE
MULTI SPEED
OFF/ON
PLAY
/
Page 58
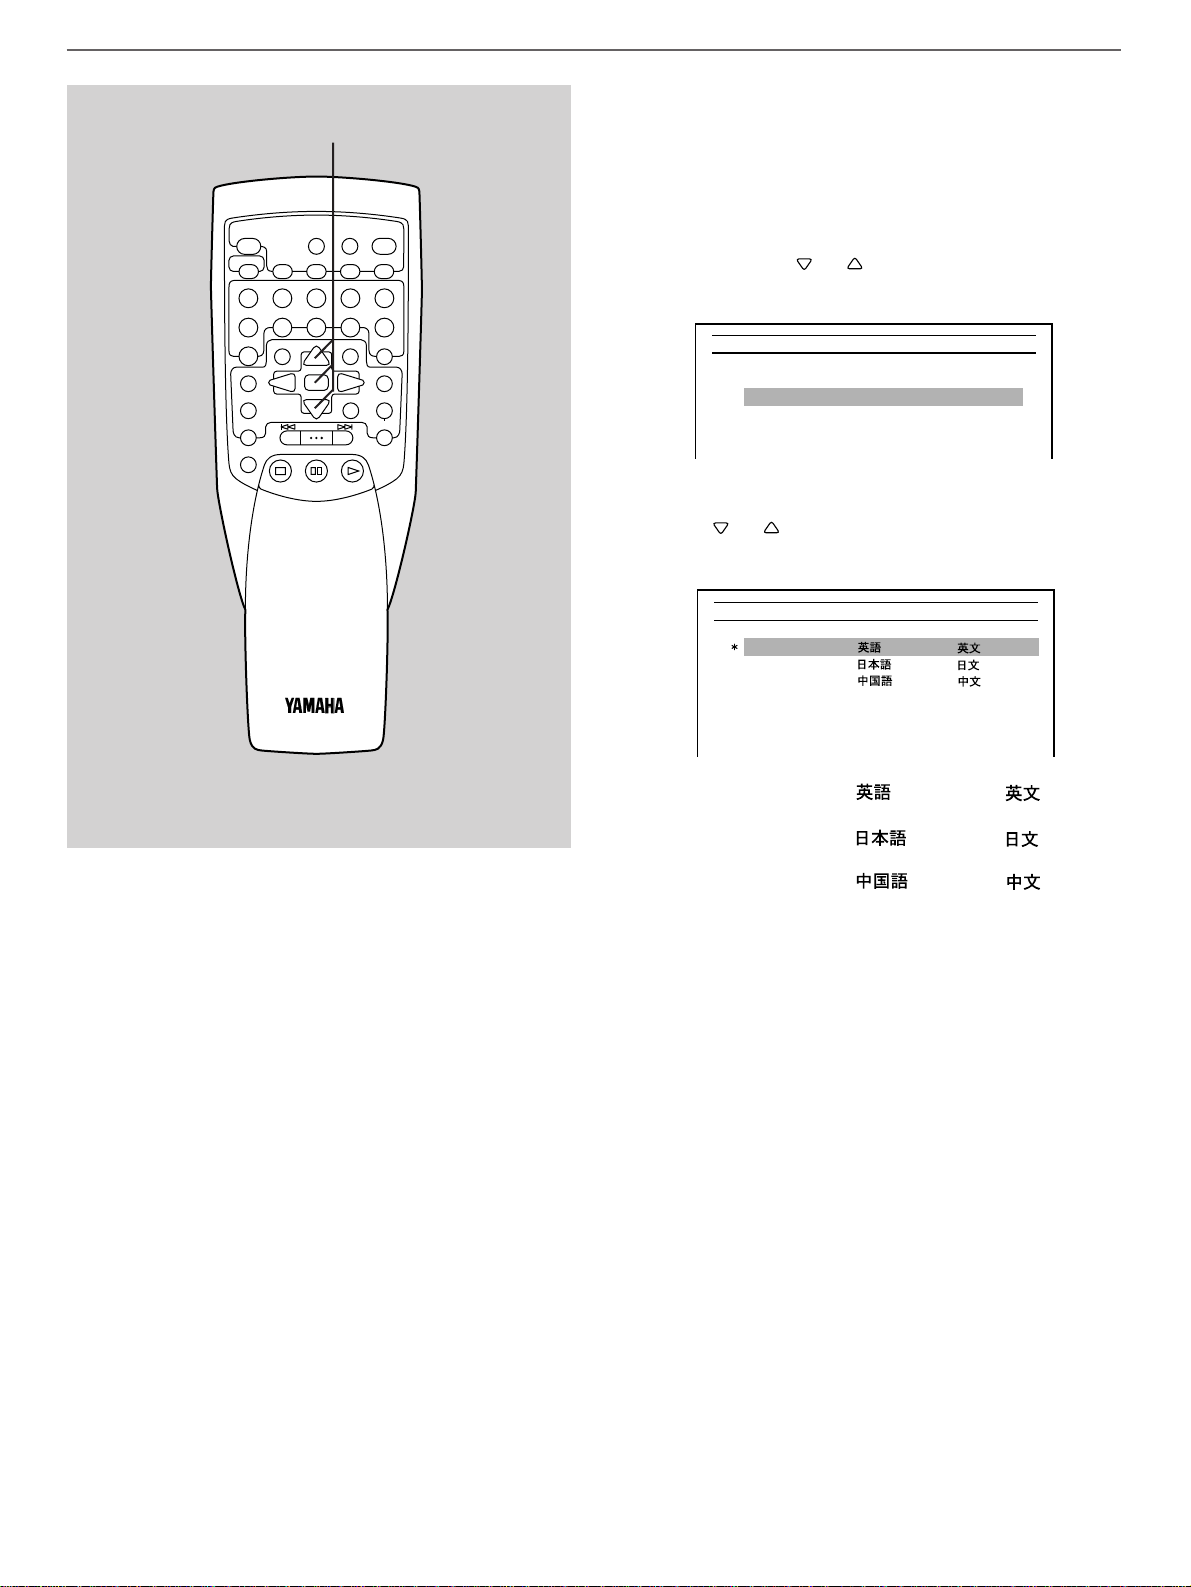
54
2 OSD Language
Select the language for displaying the OSD (On Screen
Display) information.
1 When the SET UP group “Display Settings” is
selected, press or to select “2 OSD
Language”, and then press SELECT.
2 Press or to select the preferred language, and
then press SELECT.
1 English
2 Japanese
3 Chinese
Factory default setting
U.S.A. and General models: English
China model: Chinese
Initial settings (on the SET UP menu)
1, 2
Display VCD Settings Display AudioDVD
Guide Display ON1
OSD Language English2
Background Screen Picture 13
Screen Saver ON4
FL Dimmer Normal5
Display
English1
Japanese2
Chinese3
Settings OSD Language
OPEN
DISC SKIP
+10
TITLE AUDIO
MENU
SET UP
ON SCREEN
DISC MODE
A-BS/FCANCEL
REPEAT
12345
6
7890
ANGLE
SELECT
SKIP/SEARCH
STOP
STILL/PAUSE
TIME
CLOSE
PROG
RANDOM
RETURN
TITLE/INDEX
SUBTITLE
MULTI SPEED
OFF/ON
PLAY
/
Page 59

55
English
3 Background Screen
Select a background image or color to be shown on the
monitor screen when no video source is reproduced on the
monitor.
1 When the SET UP group “Display Settings” is
selected, press or to select “3 Background
Screen” and then press SELECT.
2 Press or to select the preferred type, and then
press SELECT.
1 Picture 1 Wallpaper type 1
2 Picture 2 Wallpaper type 2
3 Blue Blue background
4 Black Black background
Factory default setting: Picture 1
1, 2
Initial settings (on the SET UP menu)
Display VCD Settings Display AudioDVD
Guide Display ON1
OSD Language English2
Background Screen Picture 13
Screen Saver ON4
FL Dimmer Normal5
Display
Picture 11
Picture 22
Blue3
Black4
Settings Background Screen
DISC SKIP
+10
TITLE AUDIO
MENU
SET UP
ON SCREEN
DISC MODE
A-BS/FCANCEL
REPEAT
12345
6
7890
ANGLE
SELECT
SKIP/SEARCH
STOP
STILL/PAUSE
OPEN
TIME
CLOSE
PROG
RANDOM
RETURN
TITLE/INDEX
SUBTITLE
MULTI SPEED
OFF/ON
PLAY
/
Page 60
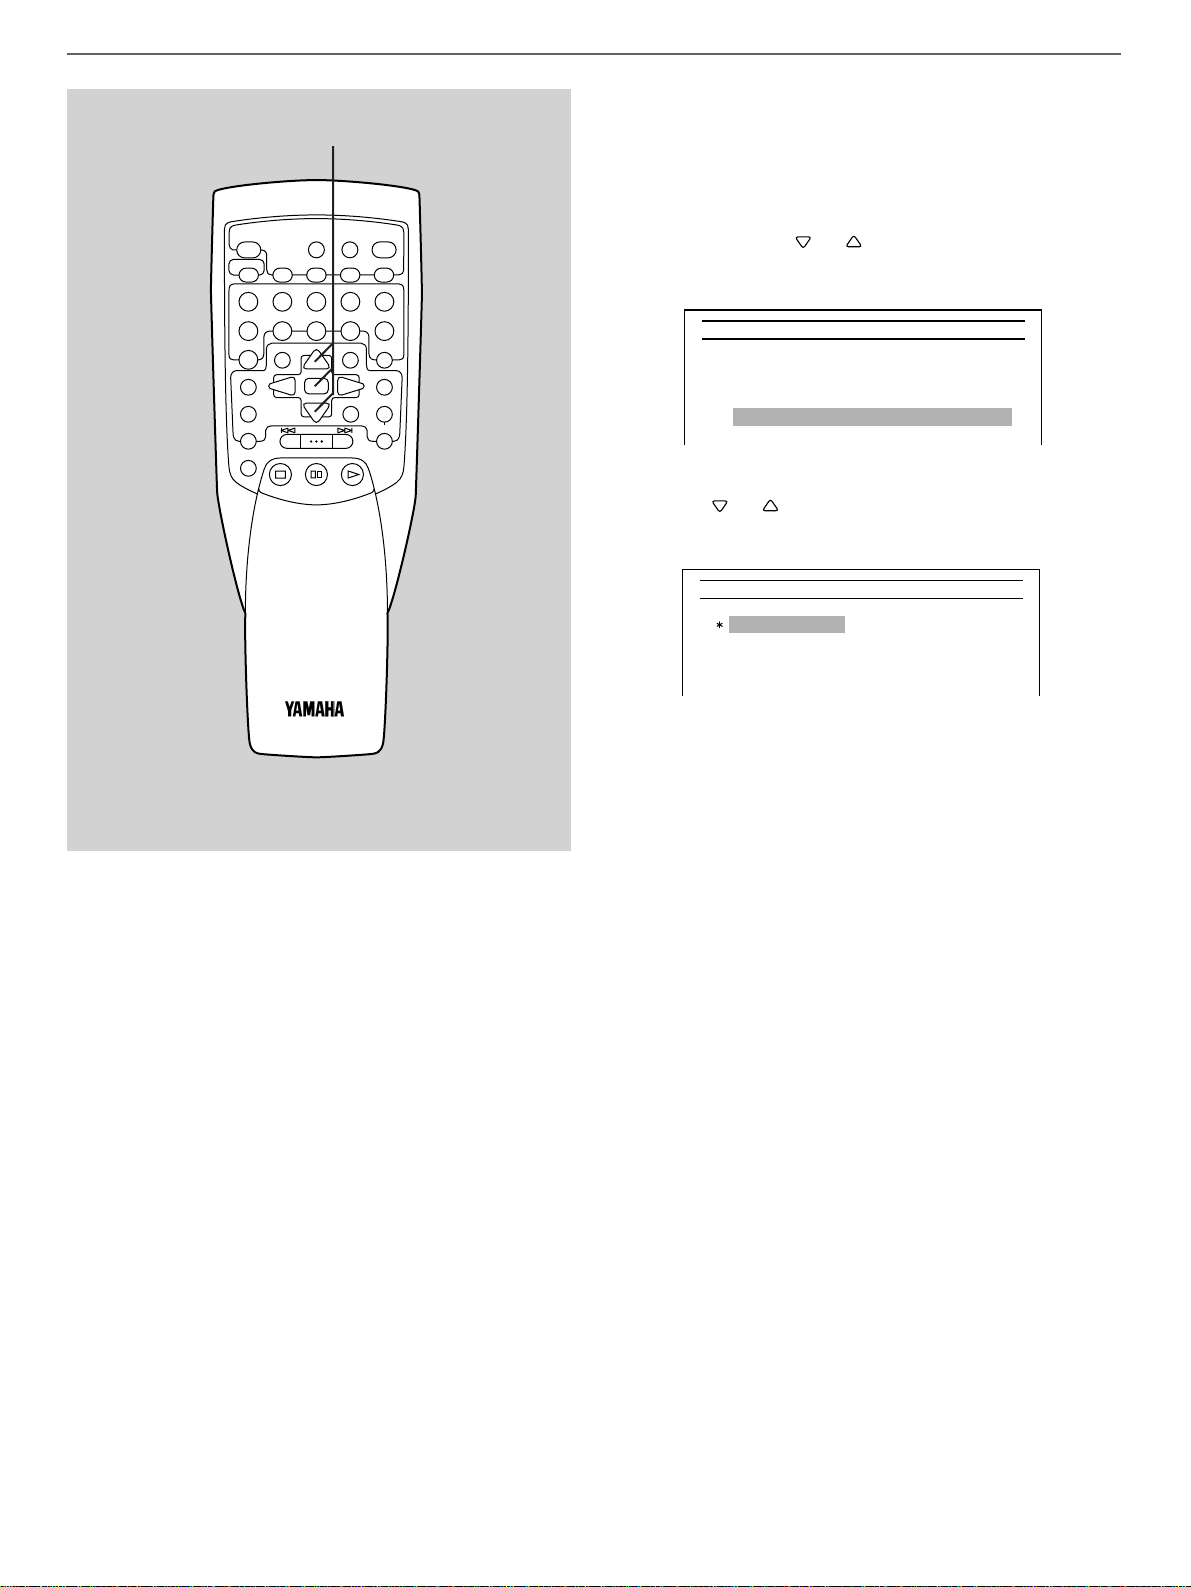
56
4 Screen Saver
You can select whether to use the built-in screen saver or not.
1 When the SET UP group “Display Settings” is
selected, press or to select “4 Screen Saver”,
and then press SELECT.
2 Press or to select ON or OFF, and then press
SELECT.
1 ON The screen saver will activate automatically
after five minutes laps with this unit stopped.
2 OFF The screen saver will not activate in any
status of this unit.
Factory default setting: ON
Note
When the screen saver is working on the TV monitor, pressing
any button on the front panel or remote controller cancels the
operation of the screen saver.
A button pressed in this case will not execute its original
function.
Initial settings (on the SET UP menu)
1, 2
Display VCD Settings Display AudioDVD
Guide Display ON1
OSD Language English2
Background Screen Picture 13
Screen Saver ON4
FL Dimmer Normal5
Display
ON1
OFF2
Settings Screen Saver
DISC SKIP
+10
TITLE AUDIO
MENU
SET UP
ON SCREEN
DISC MODE
A-BS/FCANCEL
REPEAT
12345
6
7890
ANGLE
SELECT
SKIP/SEARCH
STOP
STILL/PAUSE
OPEN
TIME
CLOSE
PROG
RANDOM
RETURN
TITLE/INDEX
SUBTITLE
MULTI SPEED
OFF/ON
PLAY
/
Page 61
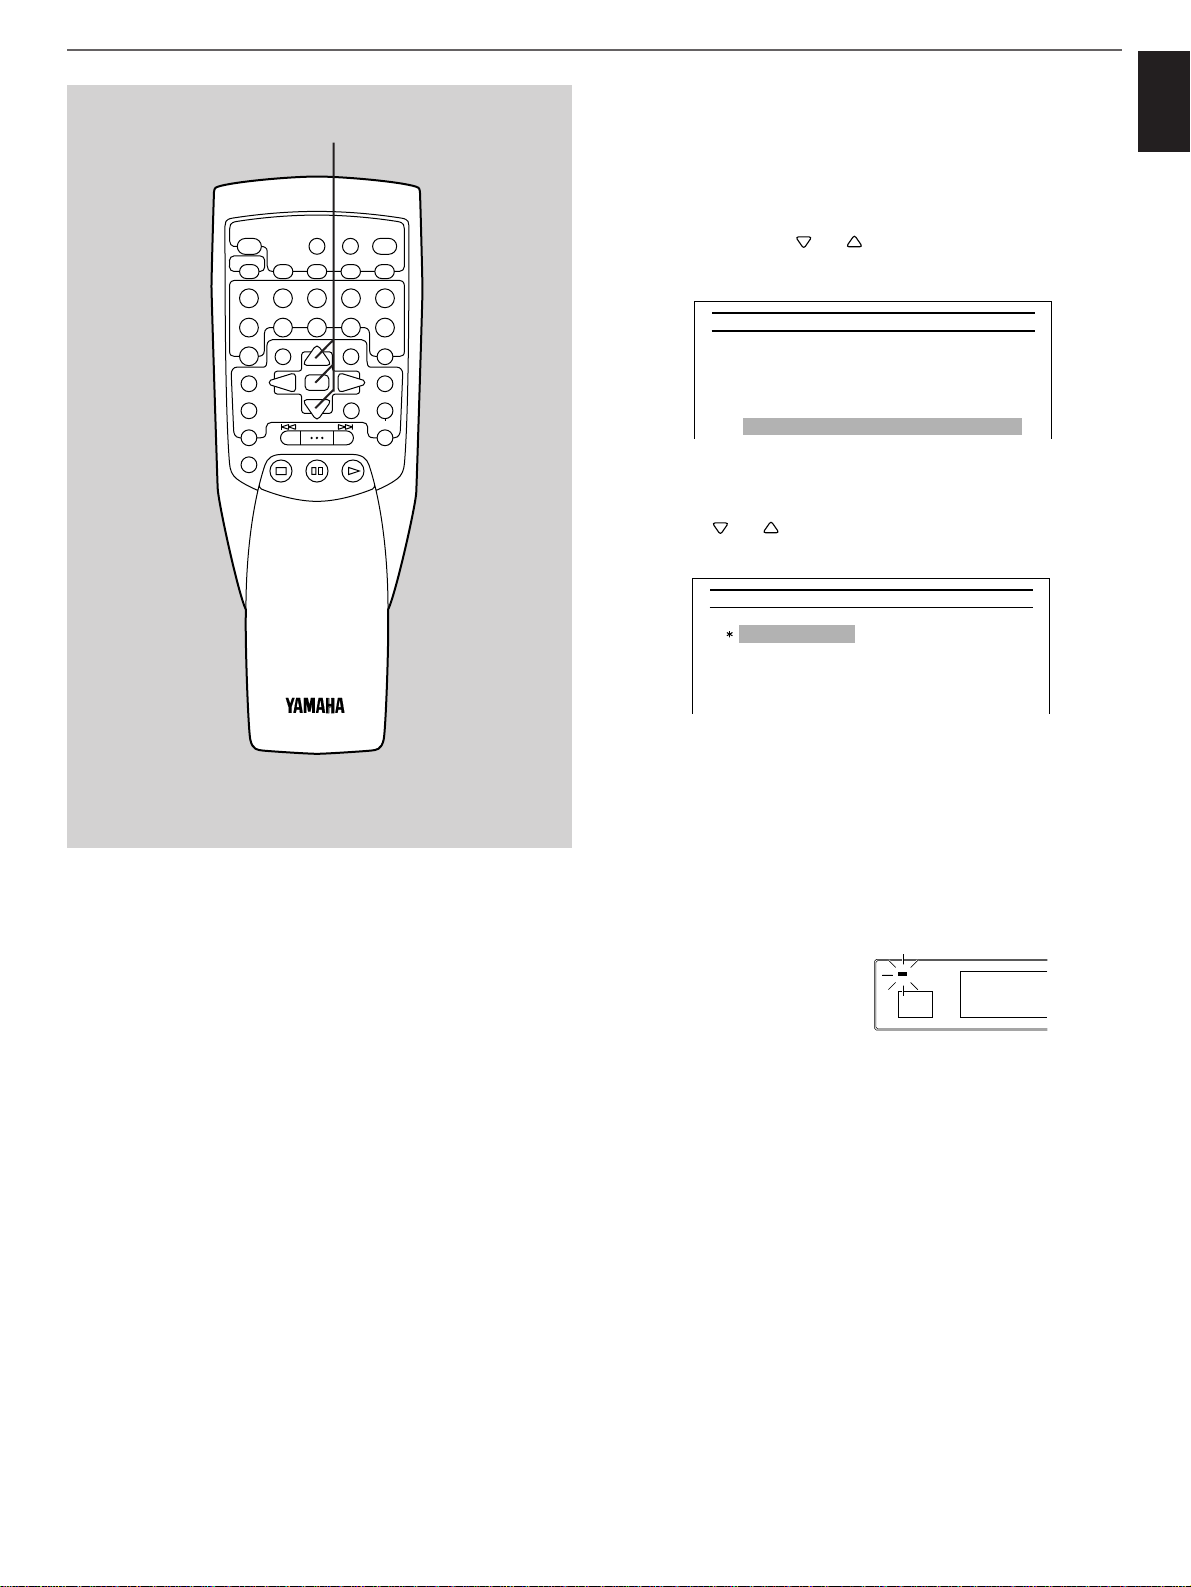
57
English
5 FL Dimmer
Select the brightness of the front panel display.
1 When the SET UP group “Display Settings” is
selected, press or to select “5 FL Dimmer”,
and then press SELECT.
2 Press or to select the preferred mode, and
then press SELECT.
1 Normal Normal brightness
2 Dim Dim
3 OFF No illumination while playing back a disc.
Dim when this unit is not playing back a
disc.
* The AUTO DISPLAY OFF indicator on
the front panel lights up.
Factory default setting: Normal
Initial settings (on the SET UP menu)
1, 2
AUTO
DISPLAY OFF
Display VCD Settings Display AudioDVD
Guide Display ON1
OSD Language English2
Background Screen Picture 13
Screen Saver ON4
FL Dimmer Normal5
Display
Normal1
Dim2
OFF3
Settings FL Dimmer
DISC SKIP
+10
TITLE AUDIO
MENU
SET UP
ON SCREEN
DISC MODE
A-BS/FCANCEL
REPEAT
12345
6
7890
ANGLE
SELECT
SKIP/SEARCH
STOP
STILL/PAUSE
OPEN
TIME
CLOSE
PROG
RANDOM
RETURN
TITLE/INDEX
SUBTITLE
MULTI SPEED
OFF/ON
PLAY
/
Page 62
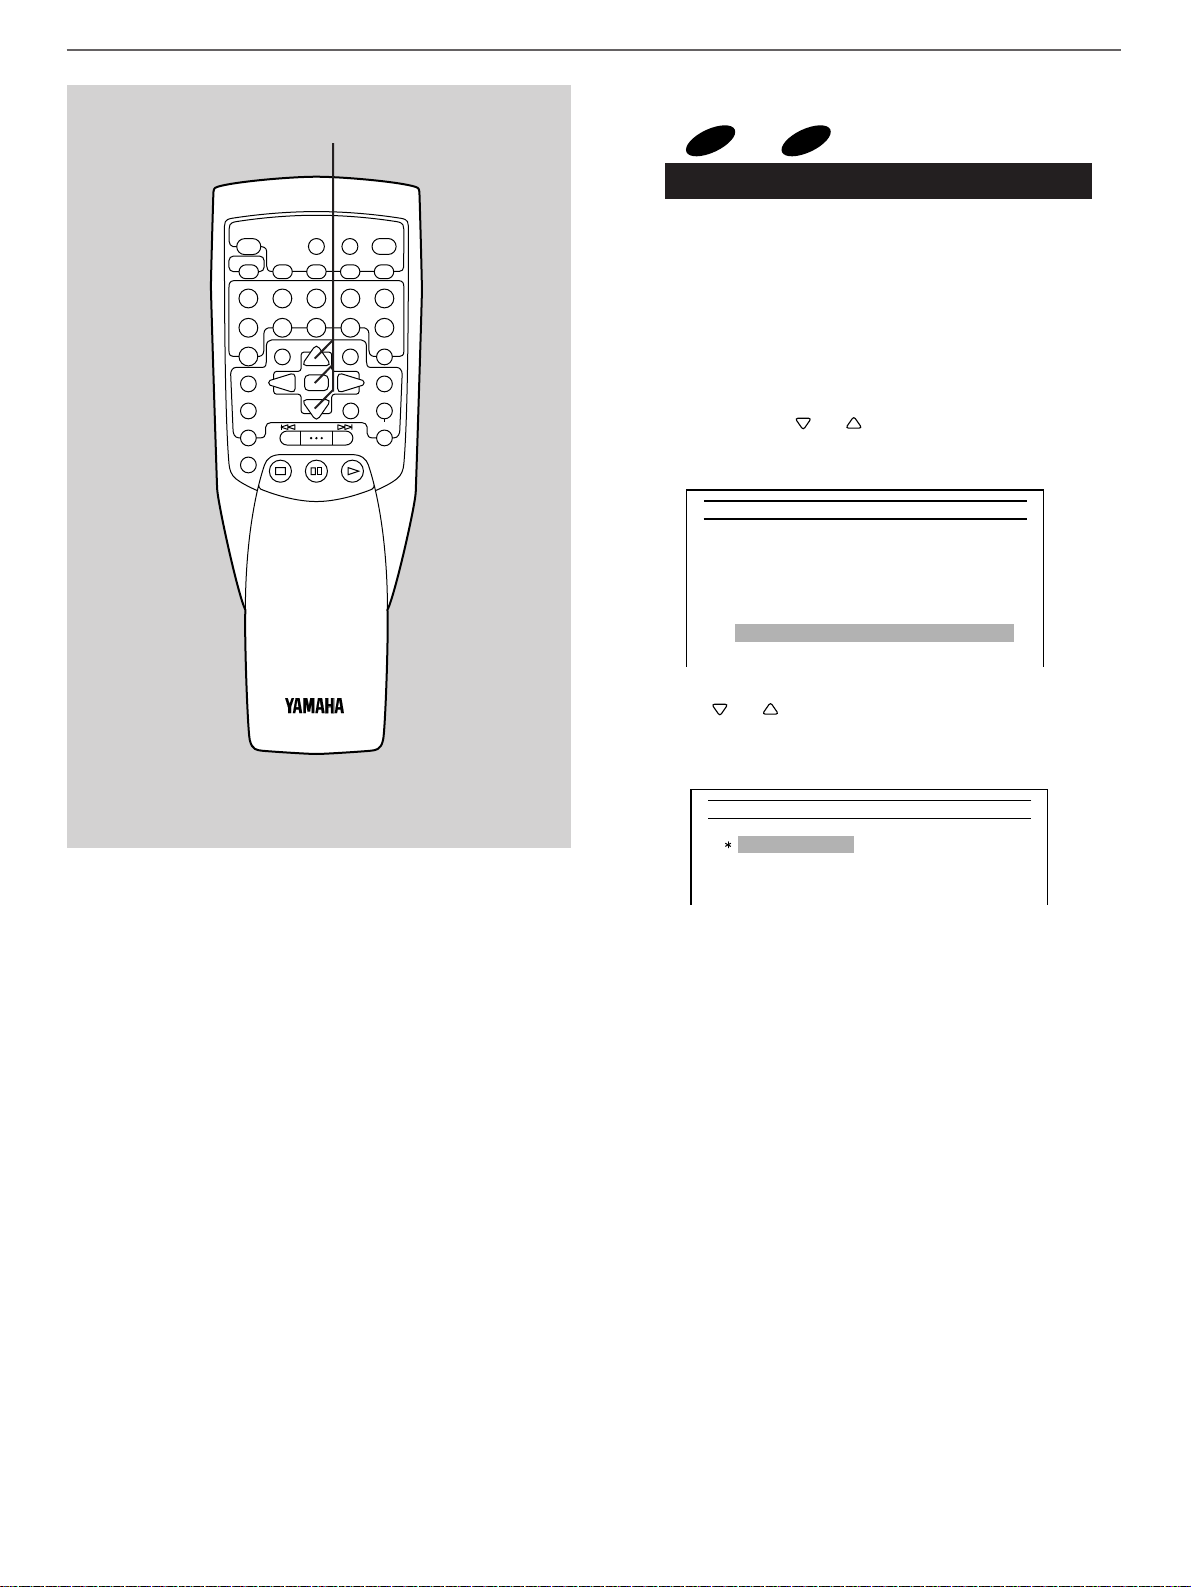
58
6 Signal System Conversion
[ and only]
(for China and General models only)
This unit is designed for use with the NTSC and PAL televison
formats. You have already selected the format your TV
monitor employs with the MODE SELECT (PAL/NTSC) switch
on the rear panel.
However, if you prefer, you can change the setting so that this
unit outputs video signals in the same format with the disc
being played back.
1 When the SET UP group “Display Settings” is
selected, press or to select “6 Signal System
Conversion”, and then press SELECT.
2 Press or to select the preferred format, and
then press SELECT.
1 Switch Generally select this.
Video signals are output from this unit in the
format selected with the MODE SELECT
(PAL/NTSC) switch on the rear of this unit.
(Refer to page 15.)
2 Disc Select this if your TV monitor employs both
PAL and NTSC formats.
* This unit outputs signals in the same
format with the disc currently played back.
Factory default setting: Switch
VCD
DVD
Initial settings (on the SET UP menu)
1, 2
Display VCD Settings Display AudioDVD
Guide Display ON1
OSD Language English2
Background Screen Picture 13
Screen Saver ON4
FL Dimmer Normal5
Signal System Conversion Switch6
Display
Switch1
Disc2
Settings Signal System Conversion
OPEN
DISC SKIP
+10
TITLE AUDIO
MENU
SET UP
ON SCREEN
DISC MODE
A-BS/FCANCEL
REPEAT
12345
6
7890
ANGLE
SELECT
SKIP/SEARCH
STOP
STILL/PAUSE
TIME
CLOSE
PROG
RANDOM
RETURN
TITLE/INDEX
SUBTITLE
MULTI SPEED
OFF/ON
PLAY
/
Page 63
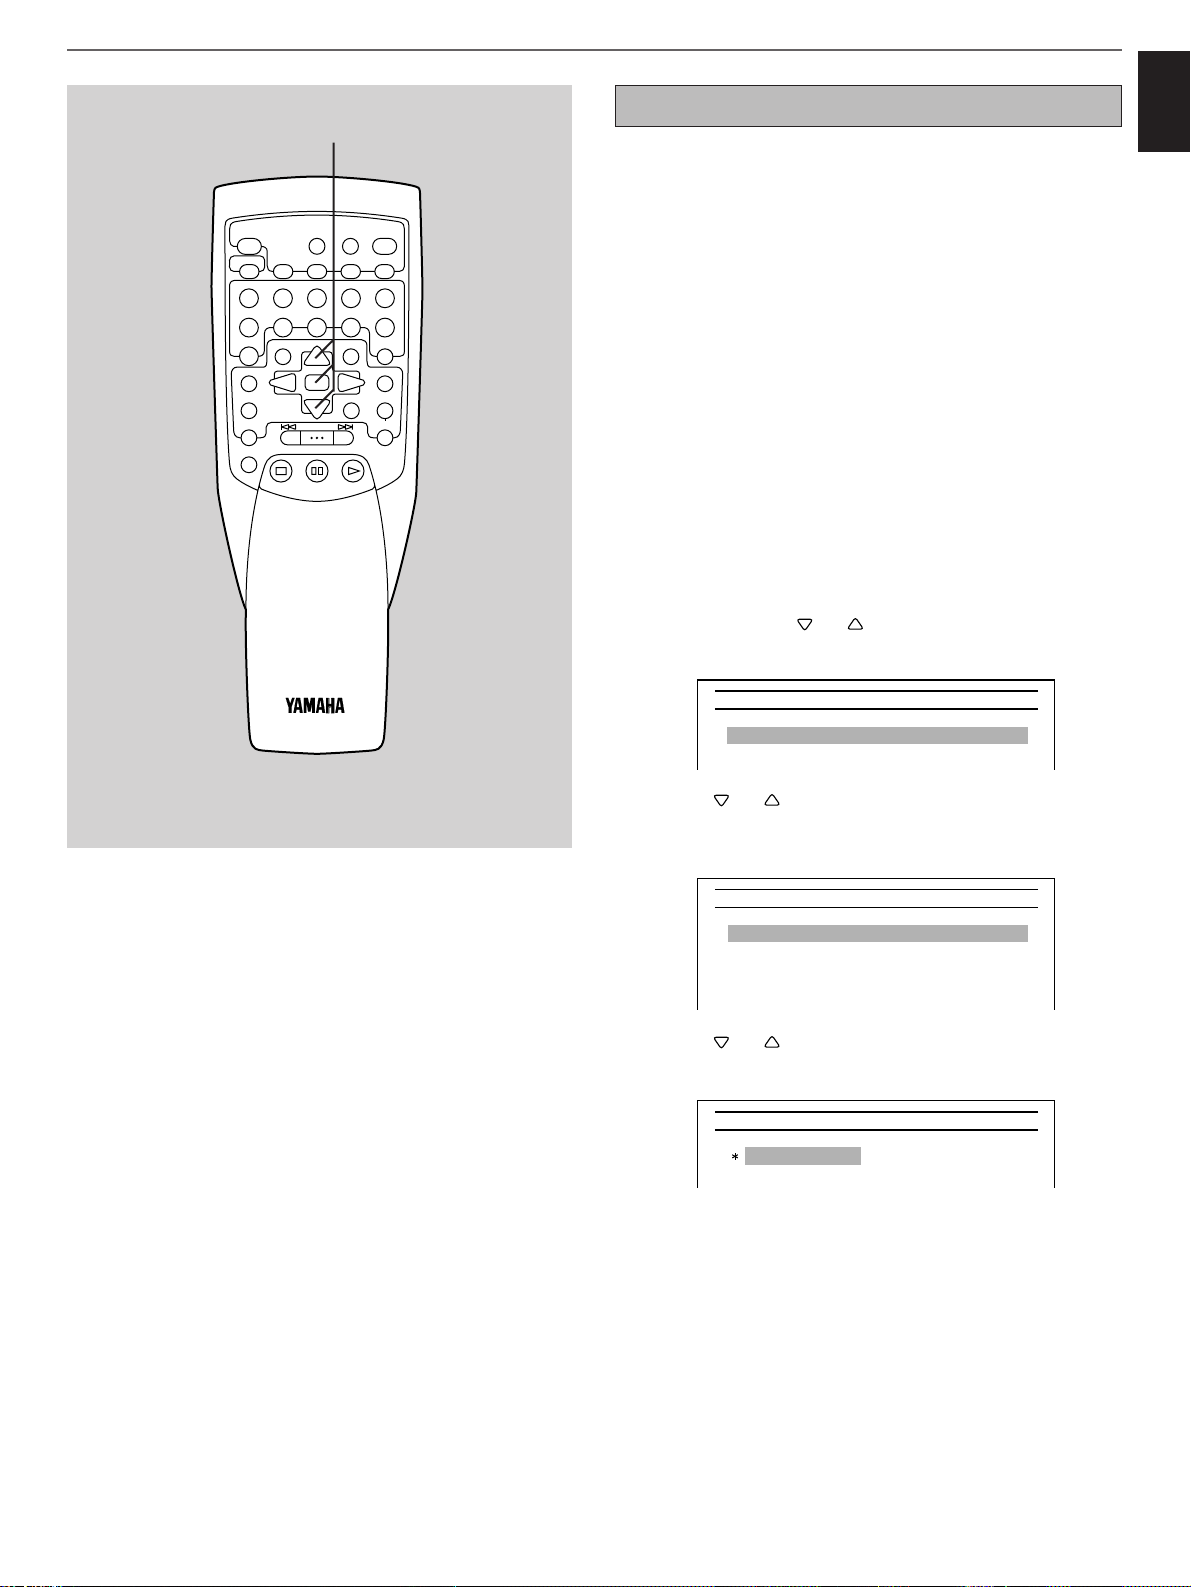
59
English
Audio Settings
The items in this group control audio signals output from the
AUDIO OUT terminals on the rear of this unit.
Note: The item No. 2 “Dynamic Range Control” and No. 3
“Speaker” are available for China and General models only.
1 Digital Output
On this item, you can select the format of digital signal to be
output from the OPTICAL and COAXIAL DIGITAL output
terminals of this unit for respective formats recorded on DVD
discs.
Depending on the format of digital signal, you can make this
unit convert the disc’s original format of digital signal into PCM
(48 kHz) format for outputting signals, or you can make this
unit output no signal from the OPTICAL and COAXIAL
DIGITAL output terminals of this unit.
1 When the SET UP group “Audio Settings” is
selected, press or to select “1 Digital Output”,
and then press SELECT.
2 Press or to select the format of digital signal
for which you will change the current setting, and
then press SELECT.
3 Press or to select the preferred mode, and
then press SELECT.
Note
The settings on this item are only applicable when playing
back a DVD.
Initial settings (on the SET UP menu)
1, 2, 3
Audio VCD Settings Display AudioDVD
Digital Output1
Audio Settings Digital Output
96kHz LPCM 48kHz PCM1
Dolby Digital Disc Original2
DTS Disc Original3
MPEG PCM4
Audio
48kHz PCM1
OFF2
Settings 96kHz LPCM
DISC SKIP
+10
TITLE AUDIO
MENU
SET UP
ON SCREEN
DISC MODE
A-BS/FCANCEL
REPEAT
12345
6
7890
ANGLE
SELECT
SKIP/SEARCH
STOP
STILL/PAUSE
OPEN
TIME
CLOSE
PROG
RANDOM
RETURN
TITLE/INDEX
SUBTITLE
MULTI SPEED
OFF/ON
PLAY
/
Page 64
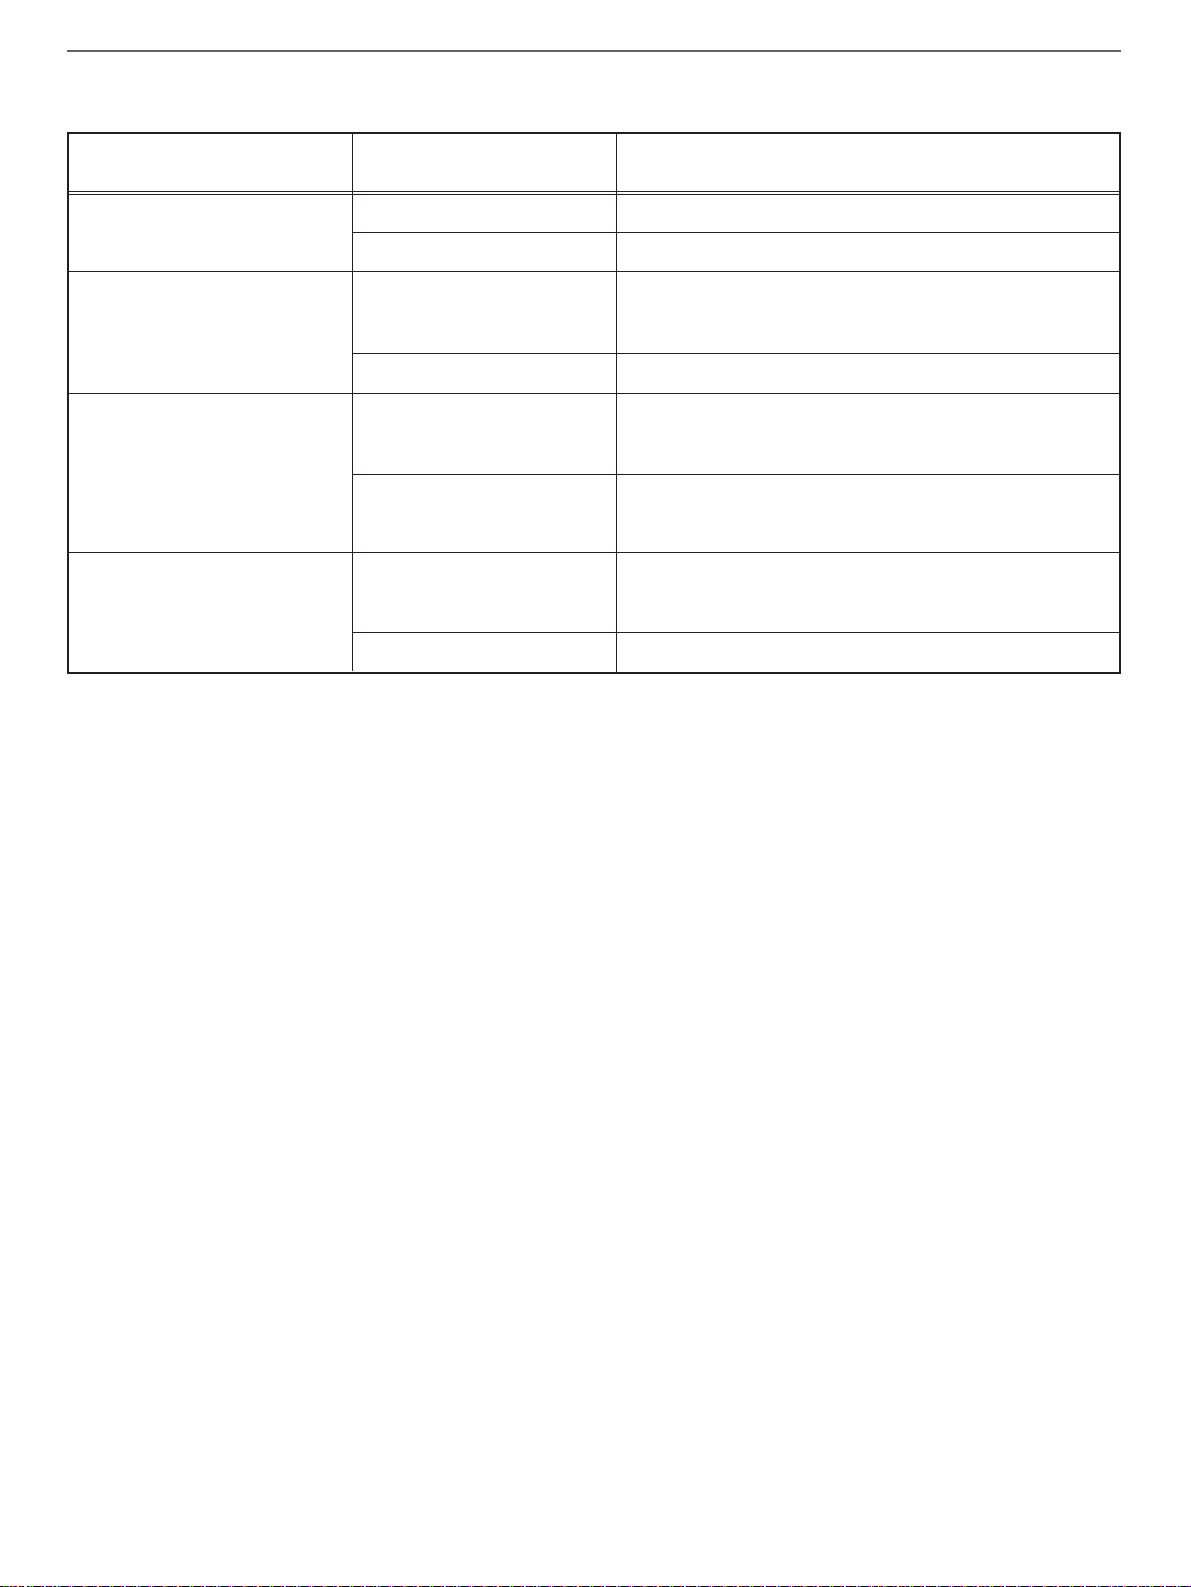
Initial settings (on the SET UP menu)
60
Format recorded on the disc
1 96kHz LPCM
[Linear PCM (96 kHz)]
2 Dolby Digital
3 DTS
4 MPEG (2 or 1)
Format of signals output from the OPTICAL and
COAXIAL DIGITAL terminals
PCM (2 ch) (48 kHz)
No output
Dolby Digital bitstream
(In this mode, the analog audio output terminals
output no signal.)
PCM (2 ch) (48 kHz/16 bit)
DTS bitstream
(In this mode, the analog audio output terminals
output no signal.)
No output
(In this mode, the analog audio output terminals
output no signal.)
MPEG (2 or 1) bitstream
(In this mode, the analog audio output terminals
output no signal.)
PCM (2 ch) (48 kHz/16 bit)
Selectable modes
1 48kHz PCM
2 OFF
1 Disc Original
2 PCM
1 Disc Original
2 OFF
1 Disc Original
2 PCM
Selectable modes for respective formats of digital signals recorded on DVDs
Factory default setting
1 96kHz LPCM: 48kHz PCM
2 Dolby Digital: Disc Original
3 DTS: Disc Original
4 MPEG: PCM
Page 65

61
English
2 Dynamic Range Control
(for China and General models only)
If you prefer, you can reduce dynamic range of sound source
encoded with Dolby Digital. Dynamic range can be reduced in
two steps with this unit.
Notes
●
The settings on this item are only applicable when playing
back a DVD encoded with Dolby Digital.
●
The settings on this item are only effective when the “PCM”
mode is selected for “Dolby Digital” of the item “1 Digital
Output” on pages 59 and 60.
1 When the SET UP group “Audio Settings” is
selected, press or to select “2 Dynamic Range
Control”, and then press SELECT.
2 Press or to select the preferred mode, and
then press SELECT.
1 Maximum
A source is played back in the original sound
track’s wide dynamic range providing you with
powerful sounds like a movie theater.
Selecting this mode will be more ideal if you can
listen to a source in a high output level in a room
specially soundproofed for audio/video enjoyment.
2 Standard
A source is played back in the “compressed”
dynamic range of the source suitable for low level
listening.
3 Minimum
Dynamic range is more reduced than in the
“Standard” position. Selecting this mode will be
effective when you must listen to a source in an
extremely low level.
* In this mode, it may happen that sound is output
faintly or not output normally depending on a
source. In that case, select “Maximum” or
“Standard”.
Factory default setting: Maximum
Initial settings (on the SET UP menu)
1, 2
Audio VCD Settings Display AudioDVD
Digital Output1
Dynamic Range Control Maximum2
Speaker3
Audio
Maximum1
Standard2
Minimum3
Settings Dynamic Range Control
Dynamic range
“Dynamic range” is the difference between the maximum
level and the minimum level of sounds. Sounds on a movie
originally designed for movie theaters feature very wide
dynamic range.
Dolby Digital technology can bring the original sound track
into a home audio format with this wide dynamic range
unchanged.
Powerful sounds of extremely wide dynamic range are not
always suitable for home use. Depending upon the
condition of your listening environment, it may not be
possible to increase the sound output level as high as a
movie theater. However, in a level suitable for listening in
your room, the low level parts of source sound cannot be
heard well because they will be lost among noises in your
environment.
Dolby Digital technology also made it possible to reduce an
original sound track’s dynamic range for a home audio
format by “compressing” the data of sound.
DISC SKIP
+10
TITLE AUDIO
MENU
SET UP
ON SCREEN
DISC MODE
A-BS/FCANCEL
REPEAT
12345
6
7890
ANGLE
SELECT
SKIP/SEARCH
STOP
STILL/PAUSE
OPEN
TIME
CLOSE
PROG
RANDOM
RETURN
TITLE/INDEX
SUBTITLE
MULTI SPEED
OFF/ON
PLAY
/
Page 66
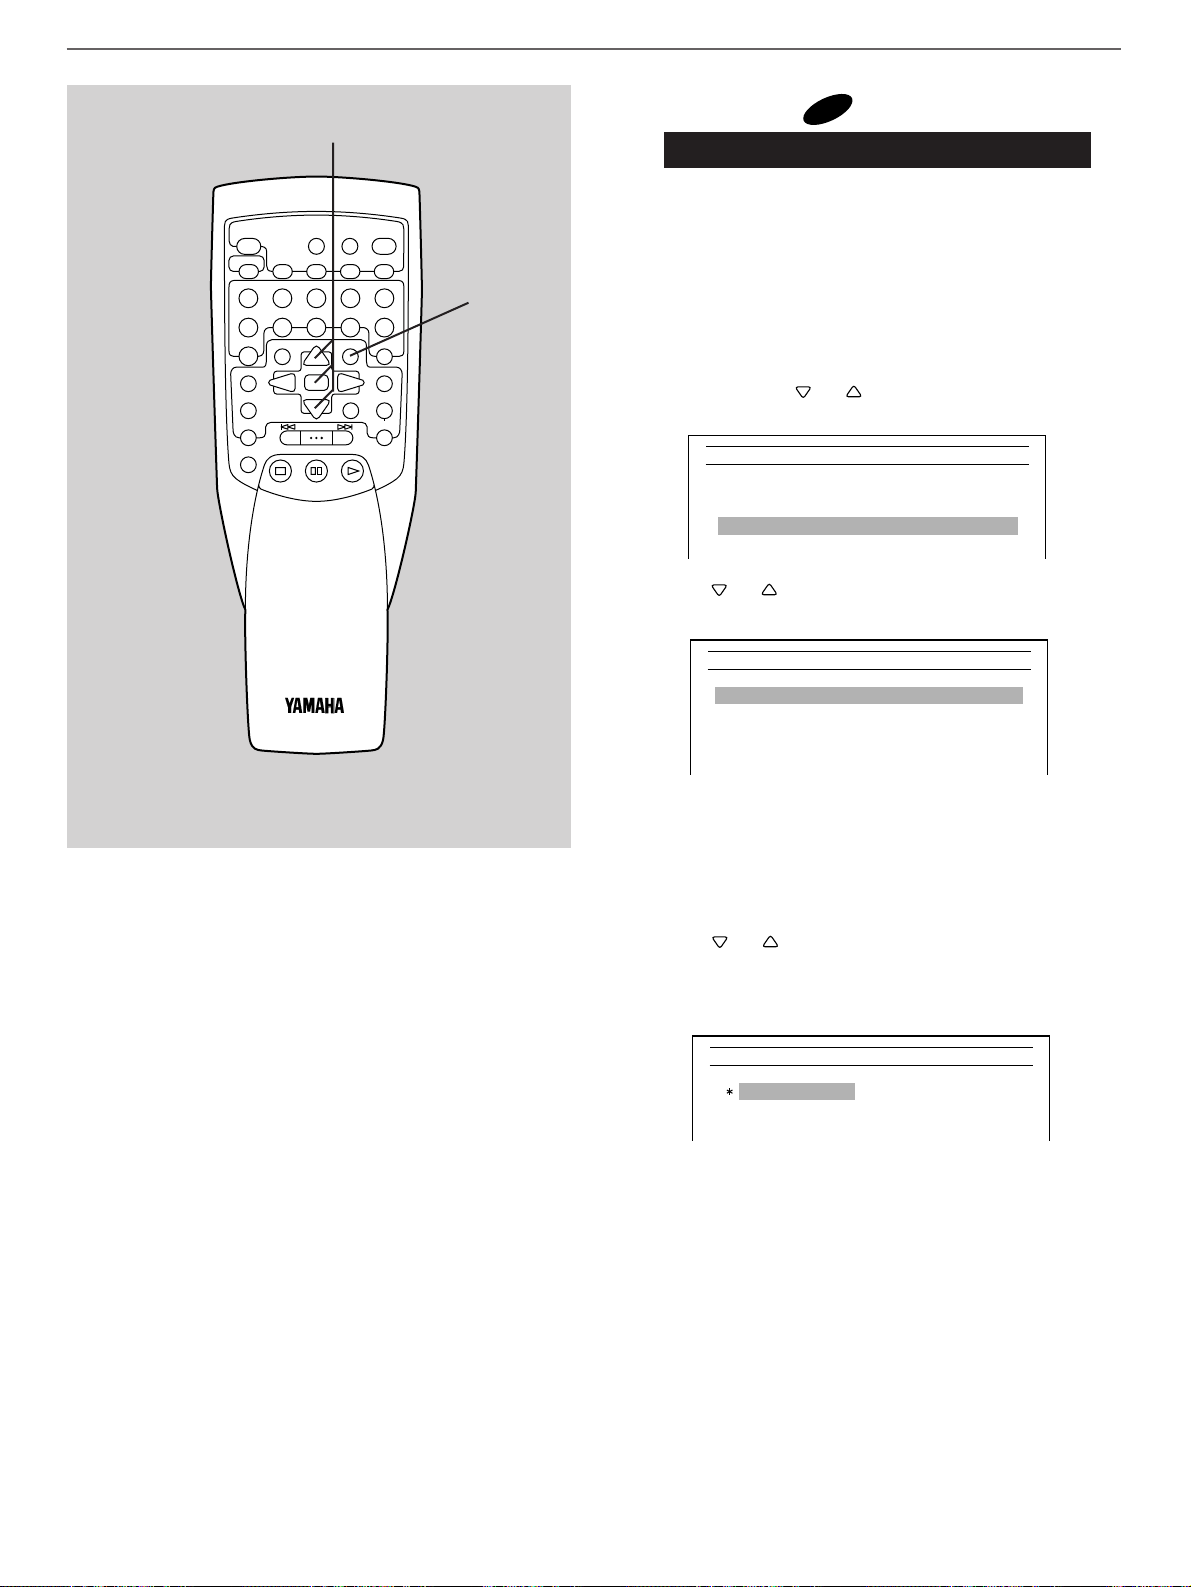
62
3 Speaker [ only]
(for China and General models only)
Make this unit memorize what types of speakers are used in
your speaker system. In doing so, this unit automatically
decides the most efficient output mode of the 6CH DISCRETE
terminals to maximize the performance of your speaker
system.
1 When the SET UP group “Audio Settings” is
selected, press or to select “3 Speaker”, and
then press SELECT.
2 Press or to select the speaker(s) whose setting
you want to change, and then press SELECT.
1 Main Speaker
2 Center Speaker
3 Surround Speaker
4 Subwoofer
3 Press or to select the proper mode, and then
press SELECT.
(In case of “1 Main Speaker”)
1 Large
2 Small
* Refer to the table on the next page for details about the
selectable modes for respective speaker(s).
4 Press RETURN to return to the previous display
mode.
5 Repeat steps 2 to 4 to change the setting for other
speaker(s).
DVD
Initial settings (on the SET UP menu)
1, 2, 3
4
Audio VCD Settings Display AudioDVD
Digital Output1
Dynamic Range Control Maximum2
Speaker3
Audio
Main Speaker1
Center Speaker2
Surround Speaker3
Subwoofer
Large
Small
Small
Yes4
Settings Speaker
Audio
Large1
Small2
Settings Main Speaker
DISC SKIP
+10
TITLE AUDIO
MENU
SET UP
ON SCREEN
DISC MODE
A-BS/FCANCEL
REPEAT
12345
6
7890
ANGLE
SELECT
SKIP/SEARCH
STOP
STILL/PAUSE
OPEN
TIME
CLOSE
PROG
RANDOM
RETURN
TITLE/INDEX
SUBTITLE
MULTI SPEED
OFF/ON
PLAY
/
Page 67
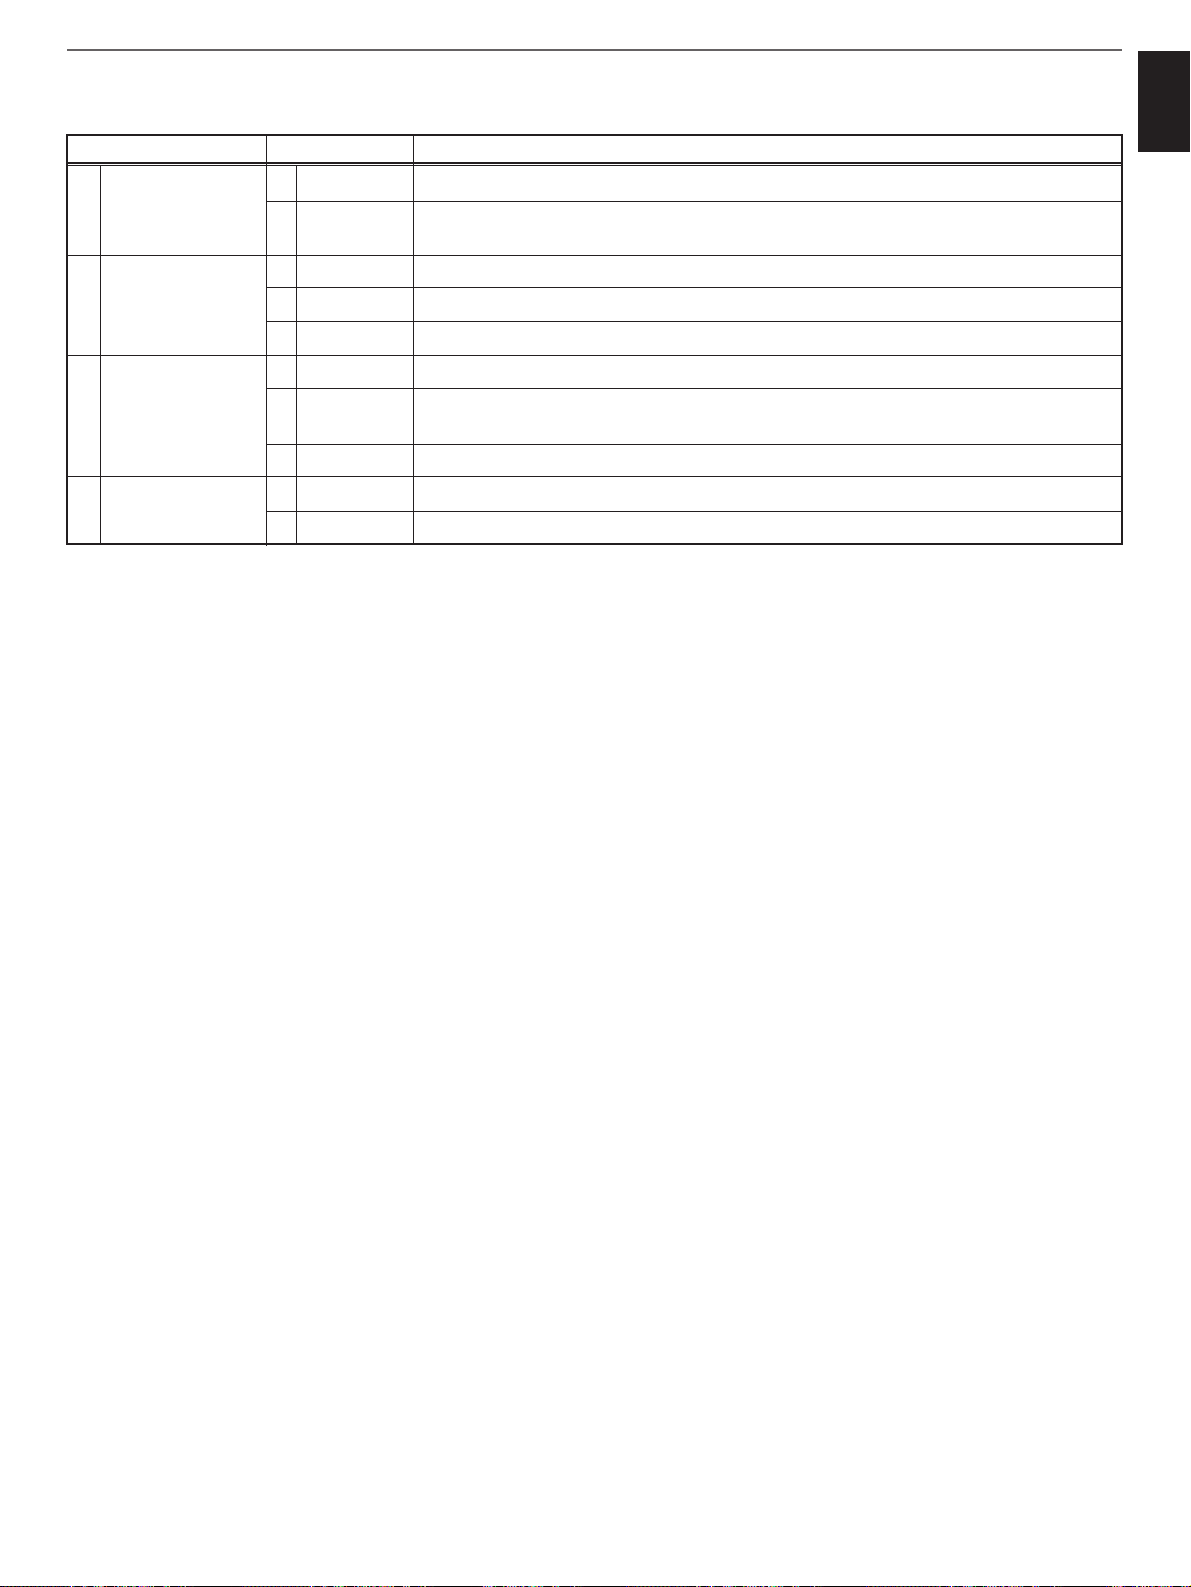
63
English
Initial settings (on the SET UP menu)
Selectable modes for respective speakers
Speaker(s)
1 Main Speaker
2 Center Speaker
3 Surround Speaker
4 Subwoofer
Mode
1 Large
2 Small
1 Large
2 Small
3 None
1 Large
2 Small
3 None
1 Yes
2No
Description
Select this mode if your main speakers have a high ability for bass reproduction.
Select this mode if your main speakers do not have a high ability for bass
reproduction.
Select this mode if your center speaker has a high ability for bass reproduction.
Select this mode if you use a center speaker that is smaller than the main speakers.
Select this mode if you do not have a center speaker.
Select this mode if your surround speakers have a high ability for bass reproduction.
Select this mode if your surround speakers do not have a high ability for bass
reproduction.
Select this mode if you do not have surround speakers.
Select this mode if your system includes a subwoofer.
Select this mode if your system does not include a subwoofer.
Factory default setting
1 Main Speaker: Large
2 Center Speaker: Small
3 Surround Speaker: Small
4 Subwoofer: Yes
Notes
●
The settings on this item are only applicable when playing
back a DVD encoded with Dolby Digital.
●
The settings on this item are only effective when the “PCM”
mode is selected for “Dolby Digital” of the item “1 Digital
Output” on pages 59 and 60.
Page 68

64
Appendix
Problem
This unit does not turn on when the
POWER switch is pressed.
This unit does not work normally.
The disc table does not close completely.
Play does not begin.
Play is delayed, or begins at the wrong
place.
No sound.
Sound “skips”.
Sound “hums”.
Noise from a nearby tuner.
Noise from inside of the disc table.
The remote controller does not work.
Cause
The power cord is not connected or not
completely connected.
There is an influence of strong external noise
(lightning, excessive static electricity, etc.) or
a misoperation on this unit while using this
unit.
A foreign object is obstructing the table.
The disc is damaged.
There is moisture on the laser pickup.
The disc has been loaded upside down.
The disc is dirty.
The disc may be scratched or damaged.
Improper output cable connections.
Improper amplifier operation.
This unit is being subjected to vibrations or
impacts.
The disc is dirty.
Improper cable connections.
The tuner is too close to this unit.
A warped disc may be loaded.
The batteries of this remote controller are too
weak.
Direct sunlight or lighting (of an inverter type
of fluorescent lamp etc.) is striking the remote
control sensor of the main unit.
What to Do
Securely connect the power cord.
Turn off this unit and disconnect the AC power
cord from the AC outlet. After about 30
seconds have passed, connect the power and
operate this unit again.
Carefully check the disc table and remove the
foreign object.
Check the disc carefully; replace it if
necessary.
Wait 20 to 30 minutes after switching the unit
ON before trying to play a disc.
Reload the disc with the label side up.
Clean the disc.
Check the disc carefully; replace it if
necessary.
Connect the cables properly. If the problem
persists, the cables may be defective.
Set the amplifier controls to the correct input
selection.
Relocate this unit.
Clean the disc.
Securely connect the audio cables. If the
problem persists, the cables may be
defective.
Move the tuner and this unit farther apart.
Replace the disc.
Replace the batteries with new ones.
Reposition the main unit.
Troubleshooting
Refer to the chart below when this unit does not function properly. If the problem you are experiencing is not listed below or if the
instruction below does not help, disconnect the power cord and contact your authorized YAMAHA dealer or service center.
Common
Page 69
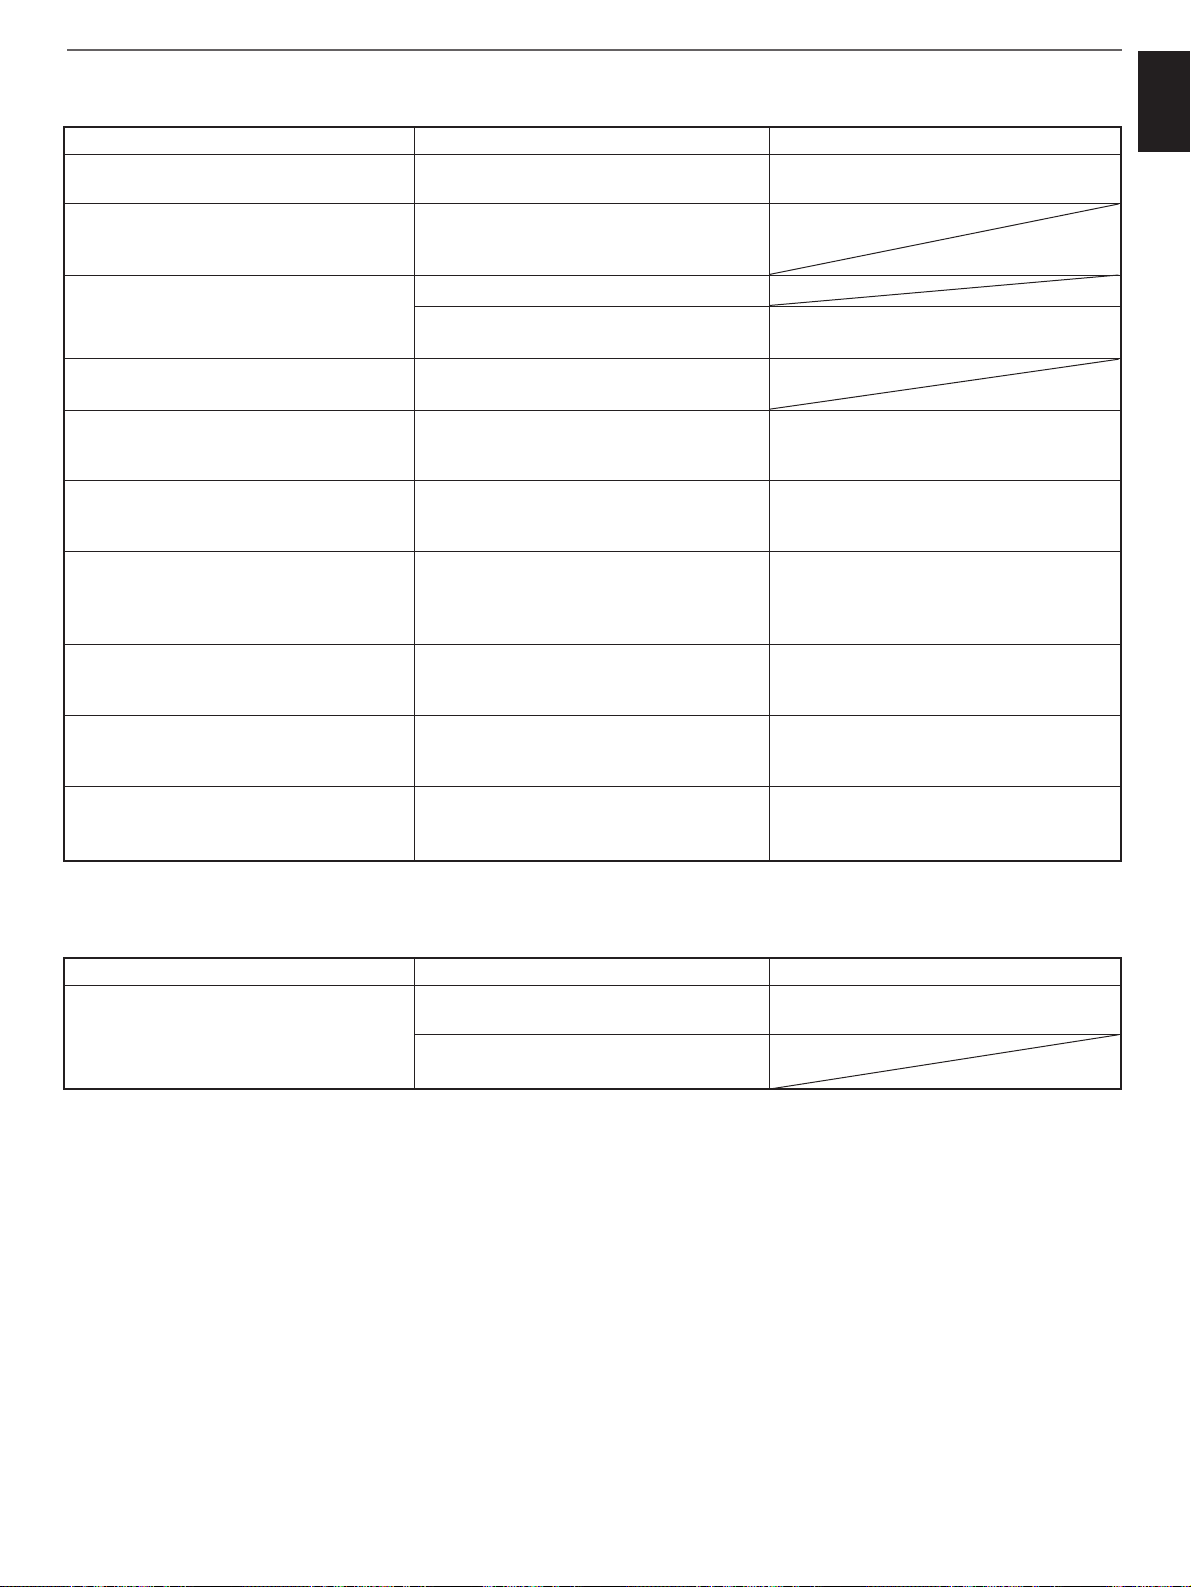
65
English
Appendix
Problem
The screen type (4:3 or 16:9) does not
match your TV monitor.
Audio sound track and/or subtitle
language is not the one selected on the
SET UP menu.
No subtitles.
Angle cannot be changed.
Playback is not possible.
Picture is lightened and darkened
alternately.
No sound when digital signals from this
unit is selected as the input source on the
amplifier (or receiver).
A loud hissing noise is heard when playing
back a disc encoded with DTS.
A loud hissing noise is heard when playing
back a disc encoded with MPEG.
No sound when playing back a disc
encoded with DTS.
Cause
The setting of “TV Type” on the SET UP menu
is not proper.
If the audio sound track and/or subtitle
language you selected does not exist on the
disc, the priority language on the disc is used.
The disc does not have subtitles.
The display of subtitles is turned off.
The scene (or the entire disc) currently played
back has only one angle of view.
The rating level you set is lower than the level
of the disc.
A disc recoded with copyright protection is
played back when this unit is connected to the
TV by way of a video cassette recorder.
The setting of “Digital Output” on the SET UP
menu is not suitable for the digital terminal
connections between this unit and the
amplifier (or receiver).
This unit is not connected to a DTS decoder
or an amplifier (or receiver) equipped with a
DTS decoder.
This unit is not connected to a MPEG decoder
or an amplifier (or receiver) equipped with a
MPEG decoder.
Only analog terminal connections are made
between this unit and the amplifier (or
receiver).
What to Do
Make a proper setting on “TV Type”. (See
page 45.)
Press the SUBTITLE OFF/ON button to turn
on the display of subtitles.
Change the setting of “Rating Level” on the
SET UP menu to a higher level. (See pages
50 to 51.)
Connect this unit to the TV directly or by way
of an AV amplifier (or receiver).
Change the setting of “Digital Output” on the
SET UP menu to the suitable setting. (See
page 59.)
Use “Digital Output” on the SET UP menu to
select the “OFF” mode for “DTS”.
Use “Digital Output” on the SET UP menu to
select the “PCM” mode for “MPEG”.
No sound signals are output from the analog
audio signal output terminals of this unit when
playing back a disc encoded with DTS.
Problem
No menu appears.
Cause
The setting of “Playback Control” on the SET
UP menu is set to “OFF”.
The disc does not have a playback control
function.
What to Do
Change the setting of “Playback Control” on
the SET UP menu to “ON”. (See page 52.)
For DVDs only
For Video CDs only
Page 70

66
Appendix
Title
“Title” is a unit to divide the contents on a DVD disc. Normally,
one title is assigned to one movie. When a disc has two or
more titles, they are numbered in sequence as title 1, title 2,
etc.
Chapter
A title on a DVD is subdivided into smaller divisions. They are
refered as “chapters” and numbered in sequence. They are
useful for quick location of the desired scene on a movie etc.
Track
Tunes (or pictures) recorded on a CD or Video CD are refered
as “tracks”. Tracks are numbered in sequence as track 1, track
2, etc. They are useful for quick search for the desired tune (or
picture).
Index
Some track on a Video CD or CD is subdivided into smaller
divisions (such as, for example, the movements within
classical symphonies) for easier location of those parts.
They are refered as “indexes” and numbered in sequence.
Dolby Digital
Dolby Digital is a digital audio format which mainly provides
high-quality multi-channel audio for sound tracks of movies. It
provides us up to independent 6 channels compatible with the
6 speaker configuration: Left main, right main, center, left
surround, right surround and subwoofer. It stores a large
volume of digital sound signals (as data) into a laserdisc, DVD,
etc. with a high level data-compression technology.
DTS
DTS (Digital Theater Systems) is also a multi-channel digital
audio format. It provides us up to 6 channels. DTS encodes
high-quality, 20-bit audio onto laserdiscs, compact discs and
DVDs with less data-compression.
Linear PCM
A basic digital audio format used in CDs. It is based on Pulse
Code Modulation (PCM), an analog-to-digital conversion
technology. No compression is applied to the data.
MPEG 1 audio
A digital audio format mainly used in Video CDs. It is based on
the MPEG (Moving Picture Expert Group) 1 format, a data
compression technology.
MPEG 2 audio
A digital audio format mainly used in Europe, Australia, etc. It
provides us high-quality multi-channel audio up to 8 channels
in the same way as Dolby Digital and DTS. It is based on the
MPEG 2 format, a data compression technology improved
more than MPEG 1.
Playback control
This function is recorded on a Video CD, version 2.0. Pictures,
music and information you want to play back can be selected
on a screen menu shown on the TV monitor.
Definition of terms
Page 71
67
English
Appendix
Language code list
Enter the appropriate code number for “Menu Language”, “Subtitle Language” and/or “Audio Language” on the SET UP menu.
(See pages 47 to 49.)
Code
6565
6566
6570
6577
6582
6583
6589
6590
6665
6669
6671
6672
6673
6678
6679
6682
6765
6779
6783
6789
6865
6869
6890
6976
6978
6979
6983
6984
6985
7065
7073
7074
7079
7082
Code
7089
7165
7168
7176
7178
7185
7265
7273
7282
7285
7289
7365
7375
7378
7383
7384
7387
7465
7473
7487
7565
7575
7576
7577
7578
7579
7583
7585
7589
7665
7678
7679
7684
7686
Code
7771
7773
7775
7776
7778
7779
7782
7783
7784
7789
7865
7869
7876
7879
7967
7977
7982
8065
8076
8083
8084
8185
8277
8278
8279
8285
8287
8365
8368
8731
8372
8373
8375
8376
Code
8377
8378
8379
8381
8382
8383
8384
8385
8386
8387
8465
8469
8471
8472
8473
8475
8476
8478
8479
8482
8483
8484
8487
8575
8582
8590
8673
8679
8779
8872
8979
9072
9085
Language Name
Afar
Abkhazian
Afrikaans
Amharic
Arabic
Assamese
Aymara
Azerbaijani
Bashkir
Byelorussian
Bulgarian
Bihari
Bislama
Bengali; Bangla
Tibetan
Breton
Catalan
Corsican
Czech
Welsh
Danish
German
Bhutani
Greek
English
Esperanto
Spanish
Estonian
Basque
Persian
Finnish
Fiji
Faeroese
French
Language Name
Frisian
Irish
Scots Gaelic
Galician
Guarani
Gujarati
Hausa
Hindi
Croatian
Hungarian
Armenian
Interlingua
Inupiaq
Indonesian
Icelandic
Italian
Hebrew
Japanese
Yiddish
Javanese
Georgian
Kazakh
Greenlandic
Cambodian
Kannada
Korean
Kashmiri
Kurdish
Kirghiz
Latin
Lingala
Laotian
Lithuanian
Latvian, Lettish
Language Name
Malagasy
Maori
Macedonian
Malayalam
Mongolian
Moldavian
Marathi
Malay
Maltese
Burmese
Nauru
Nepali
Dutch
Norwegian
Occitan
(Afan) Oromo
Oriya
Punjabi
Polish
Pashto, Pushto
Portuguese
Quechua
Rhaeto-Romance
Kirundi
Romanian
Russian
Kinyarwanda
Sanskrit
Sindhi
Sango
Serbo-Croatian
Singhalese
Slovak
Slovenian
Language Name
Samoan
Shona
Somali
Albanian
Serbian
Siswati
Sesotho
Sudanese
Swedish
Swahili
Tamil
Telugu
Tajik
Thai
Tigrinya
Turkmen
Tagalog
Setswana
Tonga
Turkish
Tsonga
Tatar
Twi
Ukrainian
Urdu
Uzbek
Vietnamese
Volapuk
Wolof
Xhosa
Yoruba
Chinese
Zulu
Page 72

Model
U.S.A. model
China model
General model
Region number of this
player
68
Region Management Information (for DVDs only)
This DVD/Video CD/CD combi-player is designed and manufactured to conform to the Region Management Information that is
recorded on a DVD disc. If the Region number of the DVD disc does not correspond to the Region number of this player, this player
cannot play back the disc.
Appendix
Region number or mark of discs which
this player can play back
•
To remove a disc from its storage case, open the case and
then press down at the center; with a finger through the
center hole and the outer edges held as shown in the
illustration, lift the disc out carefully.
•
Always handle the disc with care so that its surface is not
scratched.
•
Discs are not subjected to wear during play, but damage to
the disc surface when the disc is being handled can
adversely affect the disc’s play.
•
Discs are not affected by small particles of dust or
fingerprints on their playing surface, but even so they should
be kept clean. Wipe by using a clean, dry cloth. Do not wipe
with a circular motion; wipe straight outward from the center.
•
Do not try to clean the disc’s surface by using any type of
disc cleaner, record spray, anti-static spray or liquid, or any
other chemical-based liquid, because such substances might
irreparably damage the disc’s surface.
•
Do not expose discs to direct sunlight, high temperature or
high humidity for a long period of time, because these might
warp or otherwise damage the disc.
No!
Notes about handling discs
or a mark which includes
the region number
“1”.
,
6
ALL
or a mark which includes
the region number
“6”.
,
3
ALL
or a mark which includes
the region number
“3”.
,
1
6
3
ALL
1
Page 73
69
English
Appendix
Specifications
AUDIO SECTION
Frequency response
DVD (48 kHz Sampling) ................................. 2 Hz to 22 kHz
DVD (96 kHz Sampling) ................................. 2 Hz to 44 kHz
CD, Video CD.................................................. 2 Hz to 20 kHz
Harmonic distortion + noise (1 kHz) .............. 0.002% or less
S/N ratio......................................... 115 dB or more (Weighted)
Dynamic range
DVD (48 kHz, 24 bit)...................................... 104 dB or more
CD, Video CD................................................. 100 dB or more
Output level (1 kHz, 0 dB) ......................................... 2 50.3V
VIDEO SECTION
VIDEO output ............................................... 1 Vp-p (75 ohms)
S VIDEO output
Y output ...................................................... 1 Vp-p (75 ohms)
C output
U.S.A. model ..................................... 0.286 Vp-p (75 ohms)
China and General models.................. 0.3 Vp-p (75 ohms)
COMPONENT VIDEO output
Y output ...................................................... 1 Vp-p (75 ohms)
Pb output
U.S.A. model ..................................... 0.648 Vp-p (75 ohms)
China and General models.................. 0.7 Vp-p (75 ohms)
Pr output
U.S.A. model ..................................... 0.648 Vp-p (75 ohms)
China and General models.................. 0.7 Vp-p (75 ohms)
GENERAL
Power requirements
U.S.A. model .................................................... 120V, 60 Hz
China model ......................................................220V, 50 Hz
General model .................................. 110 to 240V, 50/60 Hz
Power consumption ........................................................ 30W
Dimensions (W x H x D)
(Without side panels) ......................... 435 x 116 x 404 mm
(17-1/8” x 4-9/16” x 15-7/8”)
(With side panels) ............................... 473 x 116 x 404 mm
(18-5/8” x 4-9/16” x 15-7/8”)
Weight
(Without side panels) ....................... 6.2 kg (13 lbs. 10 oz.)
(With side panels) ............................. 7.2 kg (15 lbs. 13 oz.)
Accessories ................................ Audio/video connection cord
Remote controller
Batteries (size AA, R6, UM-3)
Please note that all specifications are subject to change
without notice.
This product incorporates copyright protection technology that is protected by method claims of certain U.S. patents and other
intellectual property rights owned by Macrovision Corporation and other rights owners. Use of this copyright protection
technology must be authorized by Macrovision Corporation, and is intended for home and other limited viewing uses only unless
otherwise authorized by Macrovision Corporation. Reverse engineering or disassembly is prohibited.
Page 74

YAMAHA ELECTRONICS CORPORATION, USA 6660 ORANGETHORPE AVE., BUENA PARK, CALIF. 90620, U.S.A.
YAMAHA CANADA MUSIC LTD. 135 MILNER AVE., SCARBOROUGH, ONTARIO M1S 3R1, CANADA
YAMAHA ELECTRONIK EUROPA G.m.b.H. SIEMENSSTR. 22-34, 25462 RELLINGEN BEI HAMBURG, F.R. OF GERMANY
YAMAHA ELECTRONIQUE FRANCE S.A. RUE AMBROISE CROIZAT BP70 CROISSY-BEAUBOURG 77312 MARNE-LA-VALLEE CEDEX02, FRANCE
YAMAHA ELECTRONICS (UK) LTD. YAMAHA HOUSE, 200 RICKMANSWORTH ROAD WATFORD, HERTS WD1 7JS, ENGLAND
YAMAHA SCANDINAVIA A.B. J A WETTERGRENS GATA 1, BOX 30053, 400 43 VÄSTRA FRÖLUNDA, SWEDEN
YAMAHA MUSIC AUSTRALIA PTY, LTD. 17-33 MARKET ST., SOUTH MELBOURNE, 3205 VIC., AUSTRALIA
Printed in Japan
V267970-1
 Loading...