

Your Xyron Pro1250 is designed to permanently apply an adhesive or clear film to the
front and/or back of any substrate that is run through the machine. The lamination film
and adhesive are not designed to be removed without substantial damage to the laminated
substrate or mounting surface. This process is NOT recommended for any precious or single
source documents. Always test before use – may not be compatible with some surfaces.
The system is designed to be used with one of the following replacement cartridges:
DL1201-150 Two-Sided Lamination – General Use – 150'
SL1201-150 Single-Sided Lamination – General Use – 150'
LAT1201-100 One Side Laminate / One Side Adhesive Application – High Tack – 100'
LAT1206-100 One Side Laminate / One Side Adhesive Application – Repositionable – 100'
AT1201-100 Adhesive Application – High Tack – 100'
AT1202-100 Adhesive Application – Low Tack – 100'
AT1205-100 Adhesive Application – Acid Free – 100'
AT1206-100 Adhesive Application – Repositionable – 100'
Consult your authorized Xyron dealer for information on other supplies.
Please follow the attached directions carefully.
Adhesive Application &
Laminating System
USER’S GUIDE
®
EDNord - Istedgade 37A - 9000 Aalborg - Telefon 9633 3500
Pro 1250
Adhesive Application and Laminating System
Understanding the
Xyron Pro1250’s Parts & Functions
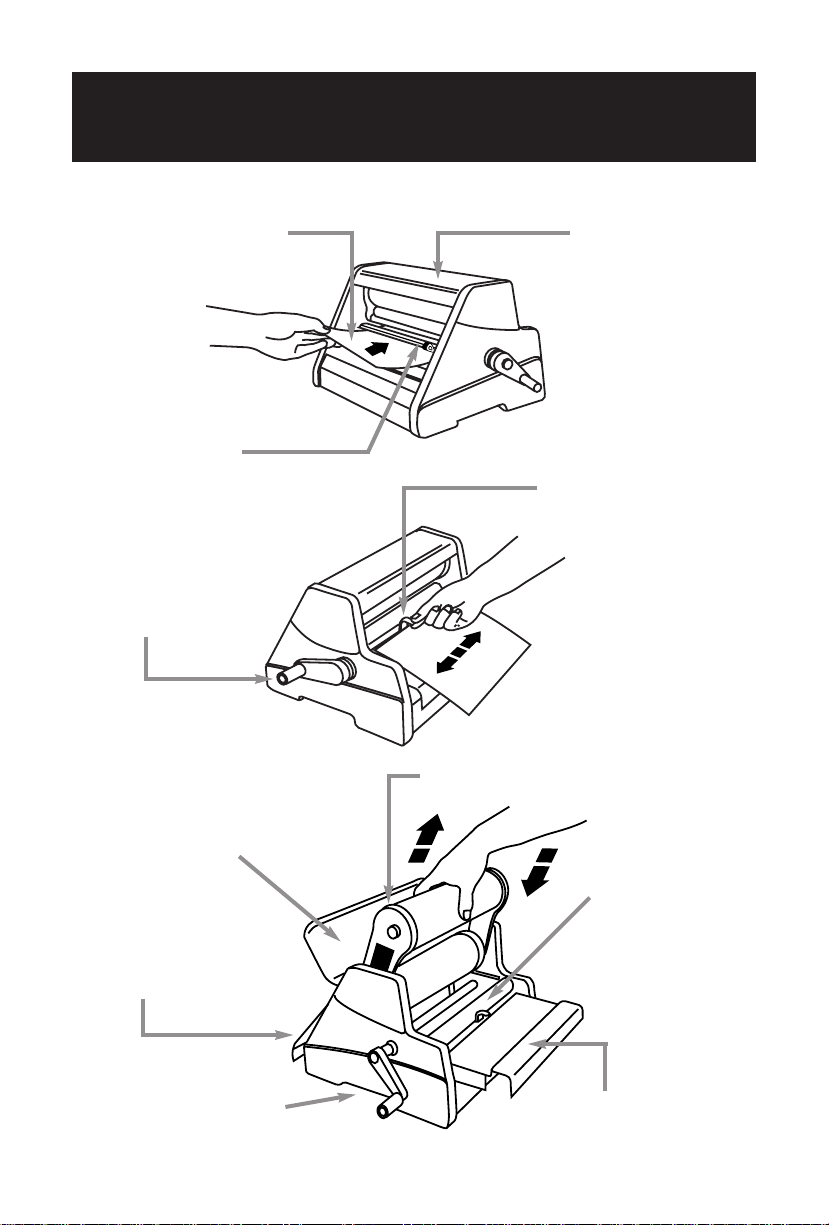
Input Tray
Used to guide items into
the machine. Leading edge
of documents should slide
underneath paddle for
best results.
Top Cover
Opens up for cartridge
replacement (see label
when open).
Paddle
Used to provide back
tension on delicate or
long items to ensure
wrinkle-free results.
Crank Handle
Used to advance cartridge
supplies and item when
rotated clockwise.
Cut Blade
Used to cut items after they
have exited machine. To use,
press downward and slide
to the right or left.
Top Cover
Shown open for cartridge
removal/installation.
Input Tray
Shown extended
for cartridge
removal/installation.
Replaceable Supply Cartridge
(see various types in Refill Cartridge section)
Upper Cut Bar
and Upper Roller
Assembly
Slides out when
output tray
is extended.
Output Tray
Shown extended for cartridge
removal/installation.
Lifting Points
Areas located on
both sides of machine
used for lifting.
EDNord - Istedgade 37A - 9000 Aalborg - Telefon 9633 3500
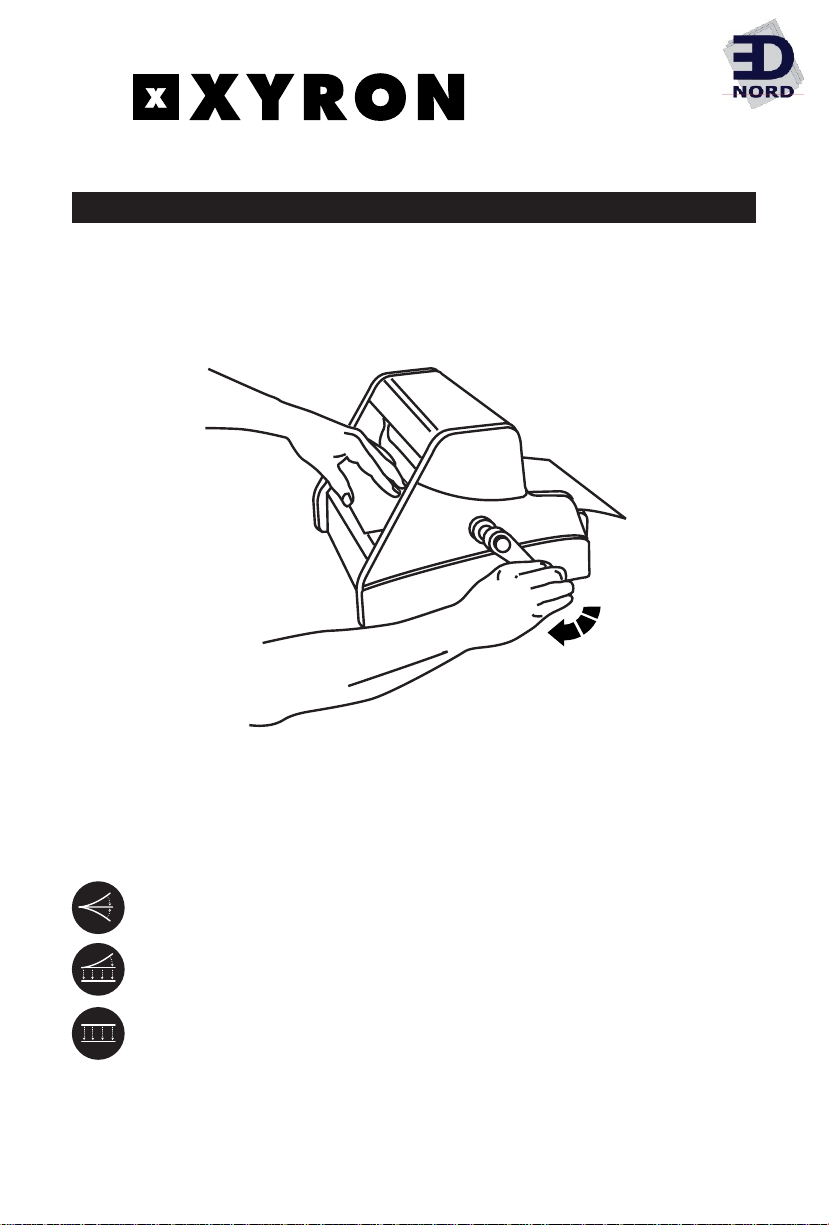
Remove the Xyron Pro1250 and crank handle from the packaging. Install the crank handle
by carefully threading it clockwise into the threaded opening in the side plate until snug.
Setting Up
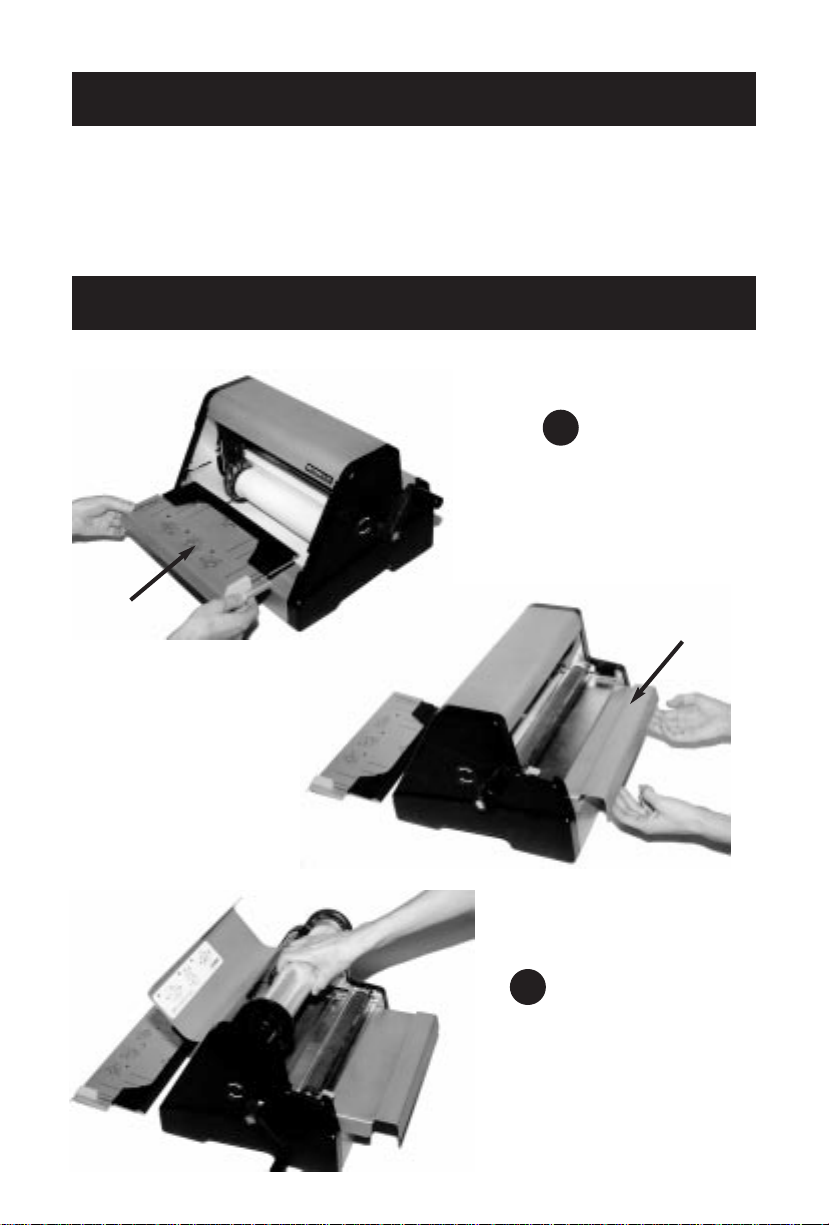
Cartridge Replacement
Input
Tray
Output Tray
Slide input tray
out away from
machine. With both
hands, lift and slide
output tray away
from machine.
1
With top cover open,
lift out used cartridge.
Install new cartridge completely
and ensure film rests evenly
on lower roller.
Make certain
the cartridge label faces the
side of the machine with the
crank handle.
2
EDNord - Istedgade 37A - 9000 Aalborg - Telefon 9633 3500

Cartridge Replacement
Grasp
the film
and pull the
film forward
2 to 4 inches
(4 to 6 cm).
3
Place the
film under
the metal bar
with the orange
blade holder
and under the
top black roller.
Using both
hands as
shown, slide the
output tray towards
machine completely.
Push down to ensure
the tray is seated.
4
5
EDNord - Istedgade 37A - 9000 Aalborg - Telefon 9633 3500

Cartridge Replacement
If You Have Additional Questions, Contact the Xyron Technical Hotline:
800-793-3523 in the U.S.A. and +45-7594-5866 in Europe
E-mail address in the U.S.A.: comments@xyron.com
E-mail address in Europe: europe@xyron.com
Also, check out our website at www.xyron.com
Turn the handle in
the direction of the
arrow (clockwise). The
film should advance
below the orange blade
holder. Continue cranking
until film is aligned and
wrinkle-free.
Press down
on orange
blade holder and
then slide in either
direction to trim
excess film. Close
top cover.
Slide
input
tray back
into machine
completely.
8
7
6
EDNord - Istedgade 37A - 9000 Aalborg - Telefon 9633 3500

Basic Operation
Gently guide the document
forward while turning the crank
handle clockwise.
TIP: To save a later
trimming operation, trim off any excess
material on the leading edge of the
output (with cut blade) before advancing
completely through the dispenser.
Trim to desired length using the
cut blade at the roller exit. Apply
downward pressure on the orange
blade holder and slide to the left or
right. When applying adhesive, remove
the protective clear film on top to
eliminate excess adhesive from around
your item. Remove white liner when
you’re ready to adhere to your item.
Before inserting your
document, turn crank handle
clockwise one revolution to ensure
film is wrinkle-free. Insert and align
document on feed tray. Extend the
document underneath the paddle
on the feed tray and completely
into the cartridge opening until it
touches the film/adhesive.
1
2
3
EDNord - Istedgade 37A - 9000 Aalborg - Telefon 9633 3500

Feet (m)
Product No. Description Per Roll
DL1201-150 Two-Sided Lamination – General Use 150' (45.8 m)
SL1201-150 Single-Sided Lamination – General Use 150' (45.8 m)
LAT1201-100 One Side Laminate / One Side Adhesive Application – High Tack 100' (30.5 m)
LAT1206-100 One Side Laminate / One Side Adhesive Application – Repositionable 100' (30.5 m)
AT1201-100 Adhesive Application – High Tack 100' (30.5 m)
AT1202-100 Adhesive Application – Low Tack 100' (30.5 m)
AT1205-100 Adhesive Application – Acid Free 100' (30.5 m)
AT1206-100 Adhesive Application – Repositionable 100' (30.5 m)
How to Do Two-Sided Lamination
Verify that a front and back lamination cartridge
(designated DL1200 series on the cartridge
label)
is installed. Follow steps 1, 2 & 3 under Basic Operation.
How to Do Single-Sided Lamination
Verify that a front-side lamination cartridge
(designated SL1200 series on the cartridge label)
is installed. Place item on tray with side to be laminated face up. Follow steps 1, 2 & 3
under Basic Operation.
How to Apply Adhesive to One Side of an Item
Verify that an adhesive transfer cartridge
(designated AT1200 series on the cartridge label)
is installed. Place the side of the document to which you want adhesive applied face down
on the tray. Follow steps 1, 2 & 3 under Basic Operation. Peel away and discard clear
plastic protective film. When ready, peel away the white paper liner
from the backside of document and mount your item.
How to Do Front-Side Lamination with Back-Side Adhesive Application
Verify that a laminating/back side adhesive cartridge
(designated LAT1200 series on the
cartridge label)
is installed. Place the side of the document to which you want adhesive
applied face down on the tray. The side facing up should be the side you want laminated.
Follow steps 1, 2 & 3 under Basic Operation. Peel away the white paper liner from the
backside of document prior to mounting.
TIP: To save a later trimming operation, turn the crank to advance the document until the
leading edge is aligned with the upper blade bar supporting the cut blade. Trim excess
material from the leading edge of the document. Continue to crank document through
machine and trim when finished.
Basic Operation
Refill Cartridges
EDNord - Istedgade 37A - 9000 Aalborg - Telefon 9633 3500

Top and bottom Cartridge is not Reinstall the cartridge making certain
laminating films are squarely seated. cartridge is seated. Make certain
not aligned. output tray is completely pushed
forward and down.
Cut blade does not cut Adhesive build-up on Using caution, apply adhesive
smoothly. cutting mechanism. cleaner to all surfaces of top
blade bar and blade.*
Film does not exit Material is curled or Remove material and clean
dispenser between upper adhesive has been trans- adhesive from rollers if necessary.
and lower blade bars. ferred to the nip roller Reposition material between
causing the film to stick blade bars.*
Film wrinkles don’t Adhesive build-up on Apply adhesive cleaner to
go away as crank is idler bars. remove build-up on idler bars.*
turned clockwise.
Material does not No pressure between Ensure output tray is completely
laminate or apply upper and lower pushed forward and down.
adhesive well. nip rollers.
Laminate will not Material is not positioned Reinstall cartridge making sure the
advance when crank between rollers or laminate output tray is completely pushed
handle is turned. is adhered to input tray. forward and down. Slide input tray
Output tray not seated. outward to release film and turn handle
to assure laminate is wrinkle-free.
Slide input tray back into machine.
Document wrinkles or Adhesive build-up on front Remove adhesive from front edge
exits machine crooked. edge of input tray or output of input tray. Make certain output
tray is not completely tray is completely pushed forward
pushed forward and down. and down.
Xyron Technical Hotline
1-800-793-3523 – USA
+45-7594-5866 – Europe
*Use Cleaning Kit Xyron #990 for adhesive removal.
THE PURCHASE OR ACQUISITION OF THIS PRODUCT DOES NOT CONFER THE RIGHT OR
LICENSE TO USE THE MACHINE AND CARTRIDGES IN THE RETROREFLECTIVE FIELD OR TO
MAKE OR SELL MACHINES OR CARTRIDGES FOR USE IN THE RETROREFLECTIVE FIELD.
Xyron, Inc. warrants that the Xyron Pro1250 is free from defects in material and workmanship for
a period of one (1) year from the date of purchase. Xyron, Inc. will repair or replace a defective
product or part without charge provided it is returned to the address below, freight prepaid with
proof of purchase. If the product is damaged by neglect or misuse, the warranty is null and void.
Xyron Inc.
15820 N. 84th Street, Scottsdale, AZ 85260
Xyron Europe A/S
Karetma Gervej 27, Fredericia, 7000, Denmark
Troubleshooting
Symptom Cause Solution
www.xyron.com
PART #1445.01
EDNord - Istedgade 37A - 9000 Aalborg - Telefon 9633 3500
 Loading...