

Page 1

NuStreams-P6GW
User’s Manual
USM Ver 1.0
Page 2

Foreword
Copyright
Copyright © 2011 Xtramus Technologies, all rights reserved. The information contained in this document is the property of Xtramus
Technologies. No part of this publication shall be reproduced, stored in a retrieval system, or transmitted, in any form or by any
means, without the prior written permission of Xtramus Technologies.
Disclaimer
The information contained in this document is subject to change without notice and does not represent a commitment on the part of
Xtramus Technologies. The information in this document is believed to be accurate and reliable. However, Xtramus Technologies
assumes no responsibility or liability for any errors or inaccuracies that may appear in the document.
Trademarks
NuStreams-P6GW, NuSet-MiniPG, NuSet-MiniPG-Config, NuSet-MiniPG-ST and NuSet-MiniPG-UG are trademarks or
registered trademarks of Xtramus Technologies. All other trademarks and registered trademarks are the property of their
respective owners.
Warranty
Xtramus Technologies warrants for the hardware provided along with this document under proper usage and conditions in normal
environment; any improper operation or in irregular environment may possibl y cause this product NOT function well. For detailed
terms, please contact your local dealer.
Contact Information
Xtramus Technologies
E-mail: sales@xtramus.com
Website: www.xtramus.com
Tel: +886-2-8227-6611
Fax: +886-2-8227-6622
XTRAMUS TECHNOLOGIES®
2
E-mail: sales@xtramus.com
Website: www.Xtramus.com
Page 3

Revision History
Date Version History
2011/10/14 Ver 1.0 First draft version
XTRAMUS TECHNOLOGIES®
3
E-mail: sales@xtramus.com
Website: www.Xtramus.com
Page 4

Table of Contents
Foreword..........................................................................................................................................2
Revision History..............................................................................................................................3
1. NuStreams-P6GW Overview.......................................................................................................6
1.1. NuStreams-P6GW General Description ............................................................................6
1.2. Key Features of NuStreams-P6GW...................................................................................7
1.3. NuPAD Overview ................................................................................................................7
2. NuStreams-P6GW Function Overview.......................................................................................8
2.1. NuStreams-P6GW Interface Ports.....................................................................................8
2.2. NuStreams-P6GW Front Panel – LCD & LEDs.................................................................9
2.3. NuStreams-P6GW Front Panel – LED Status.................................................................10
2.4. NuStreams-P6GW Front Panel – Buttons.......................................................................12
3. Hardware Installation of NuStreams-P6GW............................................................................13
3.1. Installation for Residential Gateway (Broadband Router) Test....................................13
3.2. Installation for Switch Test ..............................................................................................14
3.3. Installation for Residential Gateway (Broadband Router) + Switch Test....................15
3.4. Installation for WLAN (Wireless LAN) Testing ...............................................................16
4. Making Settings with Front Panel Buttons & LCD .................................................................17
4.1. NuStreams-P6GW Buttons Overview .............................................................................17
4.2. NuStreams-P6GW LCD Overview....................................................................................18
4.3. NuStreams-P6GW Front Panel Functions – Basic Controls.........................................19
4.4. NuStreams-P6GW Front Panel Functions – Test Setting..............................................21
4.5. NuStreams-P6GW Front Panel Functions – Test Log...................................................23
4.6. NuStreams-P6GW Front Panel Functions – System Setting........................................24
4.7. NuStreams-P6GW Front Panel Functions – System Information ................................25
5. NuSet-MiniPG.............................................................................................................................26
5.1. Installing/Uninstalling NuSet-MiniPG..............................................................................27
5.2. NuSet-MiniPG Overview...................................................................................................31
5.2.1. Starting NuSet-MiniPG................................................................................................31
5.2.2. NuSet-MiniPG Overview..............................................................................................32
5.3. NuSet-MiniPG-Config Functions.....................................................................................33
5.3.1. NuSet-MiniPG-Config Functions Overview...............................................................33
5.3.2. NuSet-MiniPG-Config Function – Menu Bar..............................................................34
5.3.2.1. Menu Bar – File.....................................................................................................34
5.3.2.2. Menu Bar – Task ...................................................................................................35
5.3.2.3. Menu Bar – Log.....................................................................................................35
5.3.2.4. Menu Bar – Service...............................................................................................36
5.3.2.5. Menu Bar – Languages ........................................................................................36
5.3.2.6. Menu Bar – Help....................................................................................................36
5.3.3. NuSet-MiniPG-Config Function – Quick Launch Buttons........................................37
5.3.3.1. Quick Launch Buttons – Reconnect...................................................................37
5.3.3.2. Quick Launch Buttons – Load & Save................................................................37
5.3.3.3. Quick Launch Buttons – Get Task/Apply All......................................................38
5.3.3.4. Quick Launch Buttons – Get Log/Clear Log/Log Folder...................................38
5.3.4. NuSet-MiniPG-Config Function – Info/Run Select List ............................................39
5.3.5. Configuring Tasks with NuSet-MiniPG-Config..........................................................41
5.3.5.1. NuSet-MiniPG-Config Task Setting – Router .....................................................42
5.3.5.2. NuSet-MiniPG-Config Task Setting – Switch .....................................................44
5.3.5.3. NuSet-MiniPG-Config Task Setting – Router + Switch......................................46
5.4. NuSet-MiniPG-ST Functions............................................................................................48
5.4.1. NuSet-MiniPG-ST Functions Overview......................................................................48
5.4.2. NuSet-MiniPG-ST Function – Menu Bar ....................................................................50
5.4.2.1. Menu Bar – File.....................................................................................................50
5.4.2.2. Menu Bar – Config................................................................................................50
5.4.2.3. Menu Bar – Report................................................................................................51
XTRAMUS TECHNOLOGIES®
4
E-mail: sales@xtramus.com
Website: www.Xtramus.com
Page 5

5.4.2.4. Menu Bar – Languages ........................................................................................52
5.4.2.5. Menu Bar – Help....................................................................................................52
5.4.3. NuSet-MiniPG-ST Function – Quick Launch Buttons ..............................................53
5.4.3.1. Quick Launch Buttons – Reconnect...................................................................53
5.4.3.2. Quick Launch Buttons – Port Select...................................................................53
5.4.3.3. Quick Launch Buttons – Port Config..................................................................54
5.4.3.4. Quick Launch Buttons – WLAN Config..............................................................55
5.4.3.5. Quick Launch Buttons – Counter........................................................................56
5.4.4. NuSet-MiniPG-ST Function – Info/Port Select List...................................................57
5.4.5. NuSet-MiniPG-ST Function – Control Buttons .........................................................58
5.4.6. Counter Report ............................................................................................................59
5.4.6.1. Control Buttons ....................................................................................................60
5.4.6.2. Main Display Screen.............................................................................................60
5.4.6.3. Port/Packet Setting Options................................................................................61
5.5. NuSet-MiniPG-UG Functions...........................................................................................64
5.5.1. NuSet-MiniPG-UG Functions Overview.....................................................................64
5.5.2. NuSet-MiniPG-UG Function – Menu Bar....................................................................65
5.5.2.1. Menu Bar – File.....................................................................................................65
5.5.2.2. Menu Bar – Upgrade.............................................................................................65
5.5.2.3. Menu Bar – Languages ........................................................................................72
5.5.2.4. Menu Bar – Help....................................................................................................72
5.5.3. NuSet-MiniPG-UG Function – Quick Launch Buttons..............................................73
5.5.3.1. Quick Launch Buttons – Reconnect...................................................................73
5.5.3.2. Quick Launch Buttons – Firmware Upgrade......................................................73
5.5.3.3. Quick Launch Buttons – FPGA Upgrade............................................................73
5.5.3.4. Quick Launch Buttons – NuPAD Firmware Upgrade.........................................73
5.5.3.4. Quick Launch Buttons – License Upgrade ........................................................74
5.5.4. NuSet-MiniPG-UG Function – Info Select List ..........................................................74
6. Controlling Tests with NuPAD..................................................................................................75
6.1. NuPAD Functions Overview ............................................................................................75
6.2. Connecting NuPAD with NuSTreams-P6GW..................................................................76
6.3. Starting DUT Tests with NuPAD ......................................................................................77
XTRAMUS TECHNOLOGIES®
5
E-mail: sales@xtramus.com
Website: www.Xtramus.com
Page 6

1. NuStreams-P6GW Overview
1.1. NuStreams-P6GW General Description
NuStreams-P6GW is a four-port stand-alone Switch /Residential
Gateway (Broadband Router) test device for testing switches and
broadband routers (along with their switch ports) at wirespeed with
its 4 Switch Ports, 1 WAN Port and Wireless Module. Also,
NuStreams-P6GW can be connected to PC for accessing its simple
and easy-to-use configuration utility.
Each of NuStreams-P6GW’s 3 RUNs contains 4 Tasks. These
Tasks allow users to simultaneously perform tests in 10M Full/Half,
100M Full/Half and 1000M Full with a single button. This innovative design can greatly reduce the time
consumed when performing product tests.
With 3 different Test Types (Router, Switch, and Router + Switch) available, NuStreams-P6GW can
perform tests on switch/router, or combining each of these test subjects under “Router + Switch” Test
Type, and test a broadband router’s WAN/LAN performance at the same time.
NuStreams-P6GW supports bi-direction LAN/WAN test packets with 253 IP addresses. Each IP has its
own settings and transmitting/receiving counters, including independent statistics and calculations for
latency and Serial Number. Also, both DUT and NuStreams-P6GW’s IP addresses can be any IP of 256
IP addresses from Class C.
Embedded with a Wireless Module that complies with IEEE802.11n Draft 2.0, NuStreams-P6GW can
connect to DUT wirelessly and perform wireless throughput tests.
NuStreams-P6GW comes with its own utility software. NuSet-MiniPG allows users to set DUT test
criteria, upgrading NuStreams-P6GW firmware/FPGA, and accessing detail test logs/statistics for further
analysis.
With the ability to provide high reliable test results and the best cost/performance ratio,
NuStreams-P6GW is the best solutions available for router and switch tests.
XTRAMUS TECHNOLOGIES®
6
E-mail: sales@xtramus.com
Website: www.Xtramus.com
Page 7

1.2. Key Features of NuStreams-P6GW
• Compact, lightweight, and portable 4-port test device for testing network switches and routers
• Flexible WAN port connection for router tests:
¾ Static IP
¾ DHCP (Dynamic Host Configuration Protocol)
¾ PPPoE (Point-to-Point Protocol over Ethernet)
• Embedded with IEEE802.11n Draft 2.0 wireless module, thus allowing performing wireless throughput
tests
• Supporting bi-direction LAN/WAN test packets with 253 IP addresses. Each IP has its own settings and
transmitting/receiving counters, including independent statistics and calculations for latency, Serial
Number, and VLAN Tags
• Both DUT and NuStreams-P6GW’s IP addresses can be any IP of 256 IP addresses from Class C
• Supports and can receive packet in PPP LCP, IPCP PAP formats
• Tests are performed automatically in a step-by-step manner, which makes NuStreams-P6GW a more
productive solution than traditional PC-based solutions
• NuStreams-P6GW’ s hardware information, such as FPGA/Firmware version and system temperature, is
available and can be checked on its LCD screen
• LCD screen for displaying test results and related statistics
1.3. NuPAD Overview
Built to be light and easy-to-handle, NuStreams-P6GW is
designed to meet the needs of production lines. However,
considering the buttons on NuStreams-P6GW might be too
small to operate, an optional keypad NuPAD is available to
solve this inconvenience.
NuPAD is an optional keypad with intuitive platforms and
easy-to-use buttons, and can be connected to
NuStreams-P6GW in mass production line.
Although possessing no configuration functions, the lighter and
smaller NuPAD provides 3 big, durable buttons (RUN 1~3) for users to operate the test procedure easily
without touching configuration buttons on the top panel of NuStreams-P6GW.
NuPAD Key Features
• Simple, easy to operate, performing tests fast
• Easy for maintenance. If NuPAD malfunctions, there’s no need to fix/replace the NuStreams-P6GW
that’s connected to it
• Intuitive Buttons for production crews to verify test results fast
XTRAMUS TECHNOLOGIES®
7
E-mail: sales@xtramus.com
Website: www.Xtramus.com
Page 8

2. NuStreams-P6GW Function Overview
2.1. NuStreams-P6GW Interface Ports
Description
38400 bps RJ45 Console Port for connecting NuStreams-P6GW and NuPAD
A
Standard Type B USB Receptacle Port
B
10/100/1000 Mbps Ethernet RJ45 WAN Port
C
8-Pin Mini-DIN Receptacle Diagnostic Port
D
DC 12 V Power Jack
E
IEEE802.11n Wireless Antenna Port for 2dBi Antenna
F
10/100/1000 Mbps Ethernet RJ45 Switch/WAN Port
G
10/100/1000 Mbps Ethernet RJ45 Switch/LAN Ports × 4
H
XTRAMUS TECHNOLOGIES®
8
E-mail: sales@xtramus.com
Website: www.Xtramus.com
Page 9

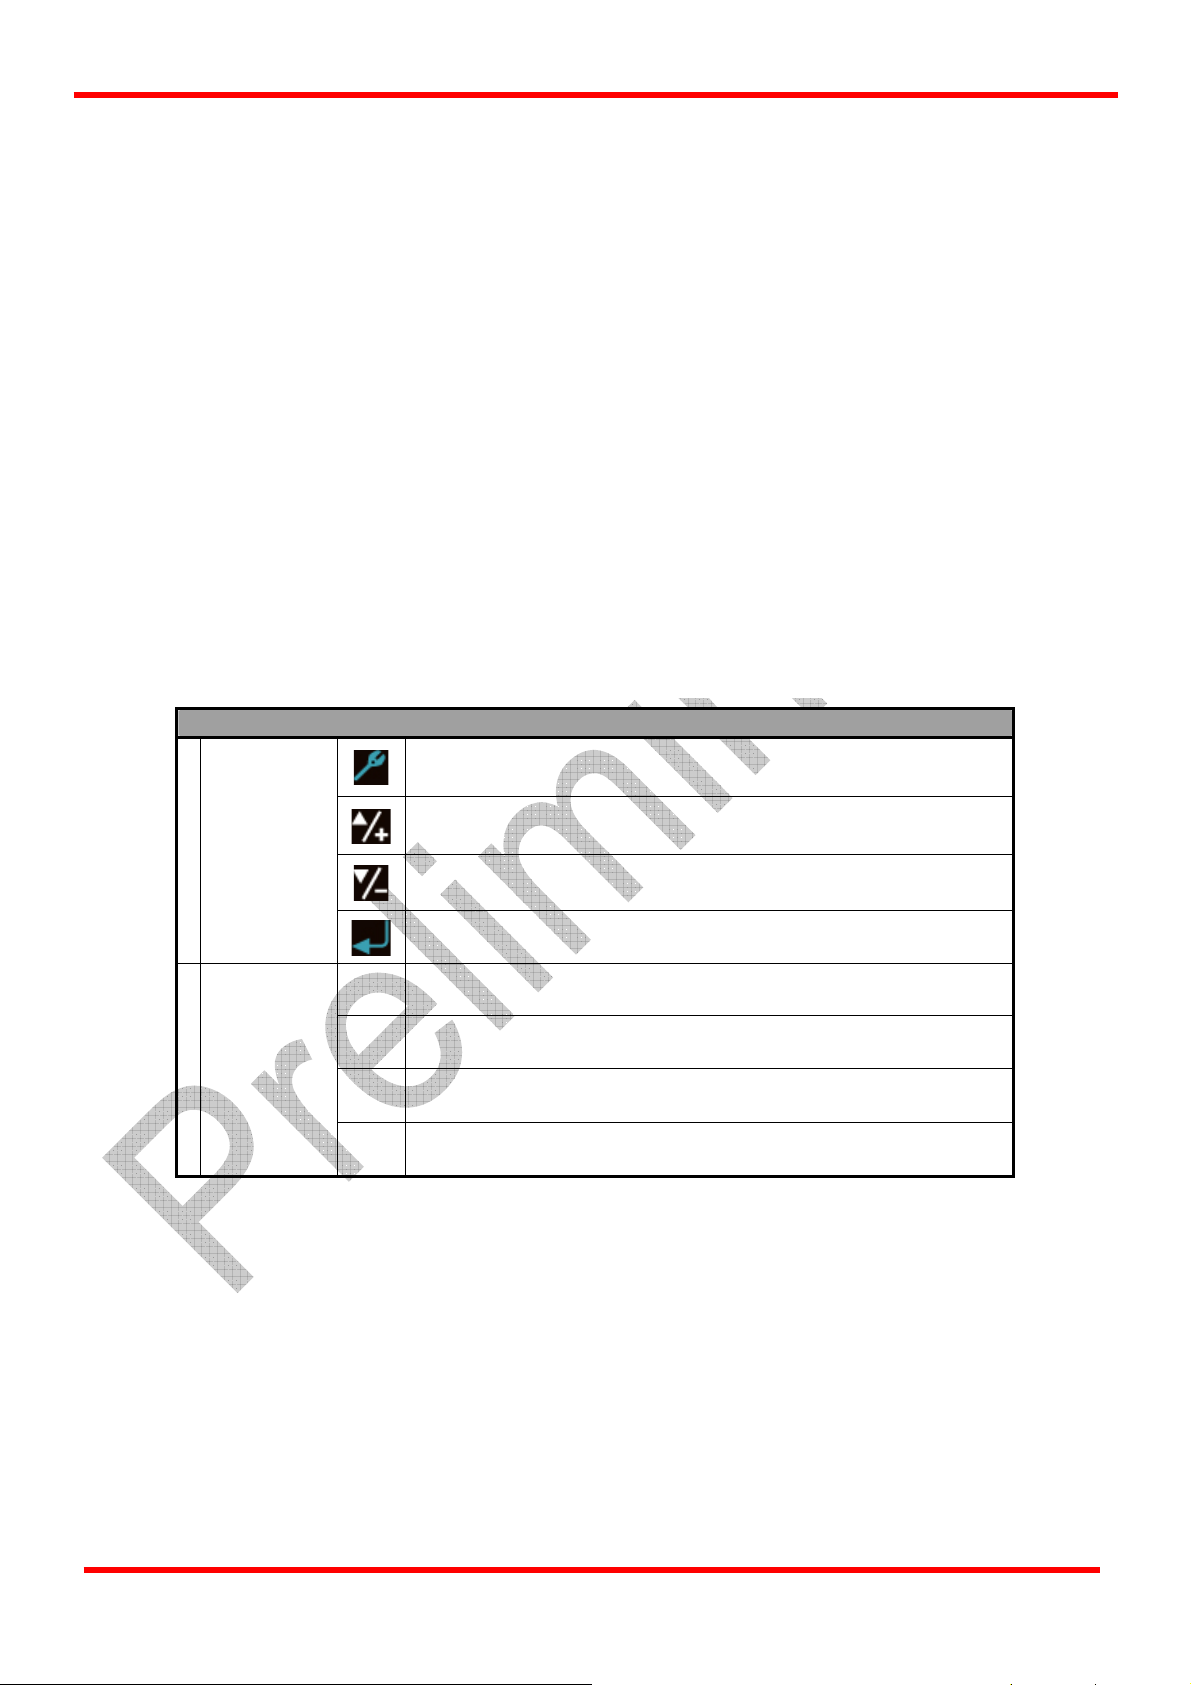
2.2. NuStreams-P6GW Front Panel – LCD & LEDs
LCD & LEDs Descriptions
• Test Start Time
• Packets Received
Throughput (packets/second) base on pre-defined allowable tolerance
• Power • SYS • USB
• b(IEEEE802.11b) • a(IEEEE802.11a) • g(IEEEE802.11g) • n(IEEEE802.11n)
• Static IP • DHCP • PPPoE
• Pass: DUT Test Pass • Fail: DUT Test Fail
• Pause: Current running test paused • Run 1/2/3: Test Task of Run 1/2/3 is
NuStreams-P6GW is set to test Broadband Router.
NuStreams-P6GW is set to test Switch. LED 2~5 indicates the number of ports
used.
Test starts from Step 1 to Step 4
1. Link Status Test
3. Test Starts
• Reserve • Link/ACT • Error
LCD A
B System Status
C
D WAN Type
E Test Status
F
LEDs
G
H
LCD Display
Screen
WLAN
Connection
Test Hotkey
Status
Router
(LAN
Switch (SW
2~5)
Test Step
I
J
Status
LAN Ports
(1~5) Status
↔ WAN)
• Test End Time
• Error Packets
2. Auto Negotiation Connection Test
4. Test Finished
• Packets Transmitted
• Test Fail/Pass
running
XTRAMUS TECHNOLOGIES®
9
E-mail: sales@xtramus.com
Website: www.Xtramus.com
Page 10

2.3. NuStreams-P6GW Front Panel – LED Status
The table down below contains NuStreams-P6GW’s front panel LED status and their meanings.
LED Status Description
System
B
C
Status
WLAN
Connection
D WAN Type
E Test Status
Test
F
Hotkey
Status
Power
SYS
USB
b
a
g
n
Static IP
DHCP
PPPoE
Pass
Fail
Pause
Run 1
Run 2
Run 3
Green ON NuStreams-P6GW is on
Green OFF NuStreams-P6GW’s CPU system down
Green ON NuStreams-P6GW CPU system initializing
Green
Blinking
NuStreams-P6GW’s CPU system active and running
Yellow ON NuStreams-P6GW is not starting properly
Yellow Green
Blinking
Green ON
NuStreams-P6GW is upgrading firmware
NuStreams-P6GW is connecting to PC via USB
cable
Green On The connection is set to b(IEEEE802.11b)
Green On
Green On
Green On
The connection is set to a(IEEEE802.11a)
The connection is set to g(IEEEE802.11g)
The connection is set to n(IEEEE802.11n)
Green ON DUT WAN connection is set to Static-IP
Green ON DUT WAN connection is set to DHCP
Green ON DUT WAN connection is set to PPPoE
Green ON DUT test passed
Red ON DUT test failed
Yellow ON The current running test is paused
Green ON All Tasks stored in Run 1 are running
Green ON All Tasks stored in Run 2 are running
Green ON All Tasks stored in Run 3 are running
XTRAMUS TECHNOLOGIES®
10
E-mail: sales@xtramus.com
Website: www.Xtramus.com
Page 11

LED Status Description
G
H
I
Router
(LAN
Switch
(SW2~5)
Test Step
Status
↔ WAN)
Step 1
Step 2
Step 3
Step 4
Green ON NuStreams-P6GW is set to test Broadband Router
Green ON
NuStreams-P6GW is set to test Switch. LED 2~5
indicates the number of ports used
Green ON Link Status Test
Green ON Auto-Negotiation connection test
Green ON Starting DUT tests
Green ON Test complete, generating test results and report
Green ON LAN Port is preserved for test
Green ON LAN Port is connected to DUT
Green
Blinking
NuStreams-P6GW is sending test packets via LAN
Port
Yellow ON Error occurred during test
J
LAN Port
Status
(1~5)
Reserve
Link/ACT
Error
XTRAMUS TECHNOLOGIES®
11
E-mail: sales@xtramus.com
Website: www.Xtramus.com
Page 12
2.4. NuStreams-P6GW Front Panel – Buttons
Buttons Descriptions
Configuration
K
Buttons
||
Pause
►
Operation
L
Buttons
Run1
►
Run2
►
Run3
Enter the Main Menu(*) or return to the previous Menu
Move the select cursor up
Move the select cursor down
Execute the selected selection
Pause the current running test
St art all Tasks set in Run 1. Up to 4 Tasks can be configured in
Run 1 hotkey. Press this button to test ALL TASKS AT ONCE.
nd
2
hotkey that works as Run 1
rd
hotkey that works as Run 1
3
*Menu will be displayed on the LCD screen.
XTRAMUS TECHNOLOGIES®
12
E-mail: sales@xtramus.com
Website: www.Xtramus.com
Page 13

3. Hardware Installation of NuStreams-P6GW
NuStreams-P6GW can perform tests on Residential Gateway (Broadband Router), Switch, or
Residential Gateway + Switch. Each test has its own different test options and parameters.
To perform tests on different DUTs mentioned above, you have to connect your NuStreams-P6GW
differently. Please see the installation structure mentioned in this chapter for more detail information.
3.1. Installation for Residential Gateway (Broadband Router) Test
While performing tests on Residential Gateway (Broadband Router), both WAN and LAN ports of the
DUT must be connected to NuS treams-P6GW with CAT-5 UTP cables as shown in the figure down below:
If NuStreams-P6GW’s WAN/LAN Ports and DUT’s ports are connected via CAT-5 UTP cables correctly,
the Link/ACT LEDs located on NuStreams-P6GW’s LAN Port Status LED will be ON accordingly.
XTRAMUS TECHNOLOGIES®
13
E-mail: sales@xtramus.com
Website: www.Xtramus.com
Page 14

3.2. Installation for Switch Test
While performing tests on Switch, DUT LAN ports must be connected to NuStreams-P6GW with CAT-5
UTP cables or/and the DUT must detects the NuStreams-P6GW’s signal from its Wireless Module as
shown in the figure down below:
If both NuStreams-P6GW’s Switch Port 1~5 and DUT’s ports are connected via CAT-5 UTP cables
correctly, the Link/ACT LEDs 1~5 located on NuStreams-P6GW’s LAN Port Status LED will be ON
accordingly. If both Nustreams-P6GW and DUT are connected via Wireless connection, the last
Link/ACT LED (WLAN) will be ON accordingly.
XTRAMUS TECHNOLOGIES®
14
E-mail: sales@xtramus.com
Website: www.Xtramus.com
Page 15

3.3. Installation for Residential Gateway (Broadband Router) + Switch Test
While performing tests on Residential Gateway (Broadband Router) + Switch, both WAN and LAN
ports of the DUT must be connected to NuStreams-P6GW with CAT-5 UTP cables as the installation
structure when performing tests on Residential Gateway (Broadband Router) as shown in the figure
down below:
Test options for Residential Gateway (Residential Router) + Switch and Residential Gateway
(Residential Router) are very similar, with minor differences listed in the table down below:
DUT Type Residential Gateway + Switch Residential Gateway
LAN Port Select
Flow Control
✓ ✘
✓ ✘
If NuStreams-P6GW’s WAN/LAN Ports and DUT’s ports are connected via CAT-5 UTP cables correctly,
the Link/ACT LEDs located on NuStreams-P6GW’s LAN Port Status LED will be ON accordingly.
XTRAMUS TECHNOLOGIES®
15
E-mail: sales@xtramus.com
Website: www.Xtramus.com
Page 16

3.4. Installation for WLAN (Wireless LAN) Testing
As mentioned previously, NuStreams-P6GW complies with IEEE802.11n Draft 2.0 and can connect to
DUT wirelessly and perform wireless throughput tests. However, in order to perform wireless tests, you
have to connect NuStreams-P5G’s Switch Port 5 to one of DUT’s LAN Port as shown in the figure down
below:
For more detailed information regarding to connect NuStreams-P6GW and your DUT wirelessly, please
refer to “5.3.5. Configuring Tasks with NuSet-MiniPG-Config” and “5.4.3.4. Quick Launch Buttons –
WLAN Config”.
XTRAMUS TECHNOLOGIES®
16
E-mail: sales@xtramus.com
Website: www.Xtramus.com
Page 17
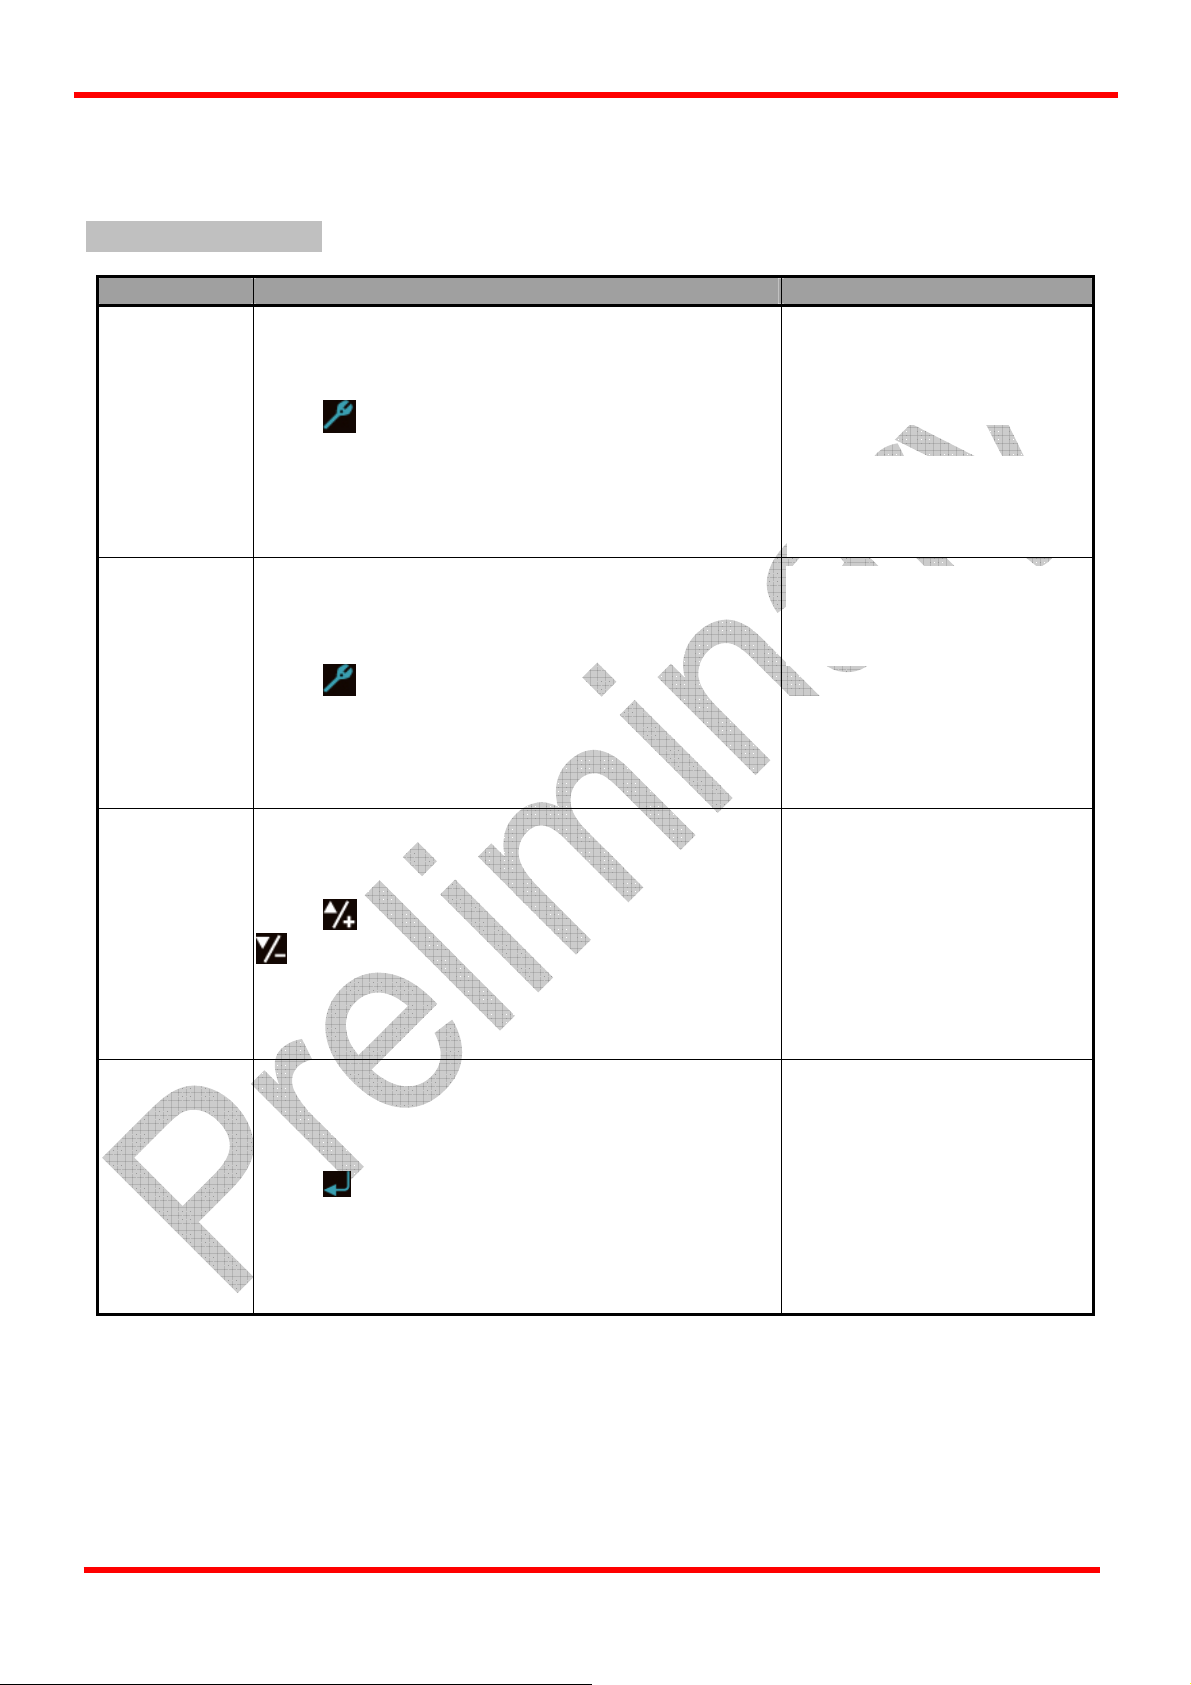
4. Making Settings with Front Panel Buttons & LCD
All parameters for DUT tests can be configured via control buttons located on the front panel. Also,
configuring, testing, and system information are displayed and can be viewed on the LCD screen as well.
Before performing any tests, NuStreams-P5G should be connected to DUT properly according to DUT’s
type. Please refer to 3. Hardware Installation of NuStreams-P6GW for more detail information.
4.1. NuStreams-P6GW Buttons Overview
With NuStreams-P6GW’s control buttons located on its front panel, all test parameters and system
configurations can be set via these buttons.
Buttons Descriptions
Enter the Main Menu(*) or return to the previous Menu
Configuration
K
Buttons
Operation
L
Buttons
XTRAMUS TECHNOLOGIES®
Move the select cursor up
Move the select cursor down
Execute the selected selection
||
Pause
Run1
Run2
Run3
Pause the current running test
►
St art all Tasks set in Run 1. Up to 4 Tasks can be configured in
Run 1 hotkey. Press this button to test ALL TASKS AT ONCE.
►
nd
hotkey that works as Run 1
2
►
rd
hotkey that works as Run 1
3
*Menu and setting options will be displayed on the LCD screen.
17
E-mail: sales@xtramus.com
Website: www.Xtramus.com
Page 18

g
g
V
g
g
g
f
4.2. NuStreams-P6GW LCD Overview
All configuration options and system information can be viewed via NuStreams-P6GW’s LCD screen. All
options and their functions contained in the menu are listed down below:
Layer 1 Menu Layer 2 Menu
Modify Run 1
Test Settin
Test Lo
System Settin
Modify Run 2
Modify Run 3
Load Default
iew Lo
ClearLo
Store Log On/Off
Full Warning On/Off
Buzzer On/Of
Password
Date/Time
Load Default
System Information
Layer 1 Menu Layer 2 Menu Description
Test Setting
Modify Run
1~3
You can configure test parameters for Run 1~3 under this menu.
Each Run can hold up to 4 Tasks
Load Default Restore all parameters stored in Run 1~3 to default value
View Log View test logs generated after the tests are complete
Clear Log Delete all logs stored in NuStreams-P6GW
Test Log
Store Log Test reports will be stored automatically if this function is enable
Full Warning System will issue warnings when log storage memory is running out
Buzzer If enabled, system will buzz whenever a button is pressed
Password You can set new password for the system under this menu
System Setting
Date/Time System date and time can be configured under this menu
Load Default Restore all system settings to default value
System Information
N/A Display detailed system information
XTRAMUS TECHNOLOGIES®
18
E-mail: sales@xtramus.com
Website: www.Xtramus.com
Page 19
4.3. NuStreams-P6GW Front Panel Functions – Basic Controls
The table down below shows NuStreams-P6GW’s basic controls.
Basic Setting Controls
Function Control Button Action LCD Display
Entering Main
Menu
Back to
Previous
Menu
Moving
Selection
Cursor
Press
button to enter NuStreams-P6GW’s main
menu.
Press
Press
button to go back to the previous menu.
to move the selection cursor up, or press
to move the selection cursor down.
↓
↓
↓
Entering
Selected
Press
Option
XTRAMUS TECHNOLOGIES®
button to enter the menu option you chose.
19
↓
E-mail: sales@xtramus.com
Website: www.Xtramus.com
Page 20
Basic Test Performing Controls
Function Control Button Action LCD Display
Press ► Run1 button to start all Tasks set in Run 1,
press ► Run2 button to start all Tasks set in Run 2,
and press ► Run3 button to start all Tasks set in Run
Start All T asks
3.
Set in Run 1~3
All Tasks set in the Run will be performed at the same
time after pressing ► Run1, ► Run2, or ► Run3
button.
↓
Pause
Stop All
Running Tests
& Exit
Press || Pause button to pause the current running
test. Press || Pause button to resume.
Press
button to stop all running tests and exit.
↓
XTRAMUS TECHNOLOGIES®
20
E-mail: sales@xtramus.com
Website: www.Xtramus.com
Page 21

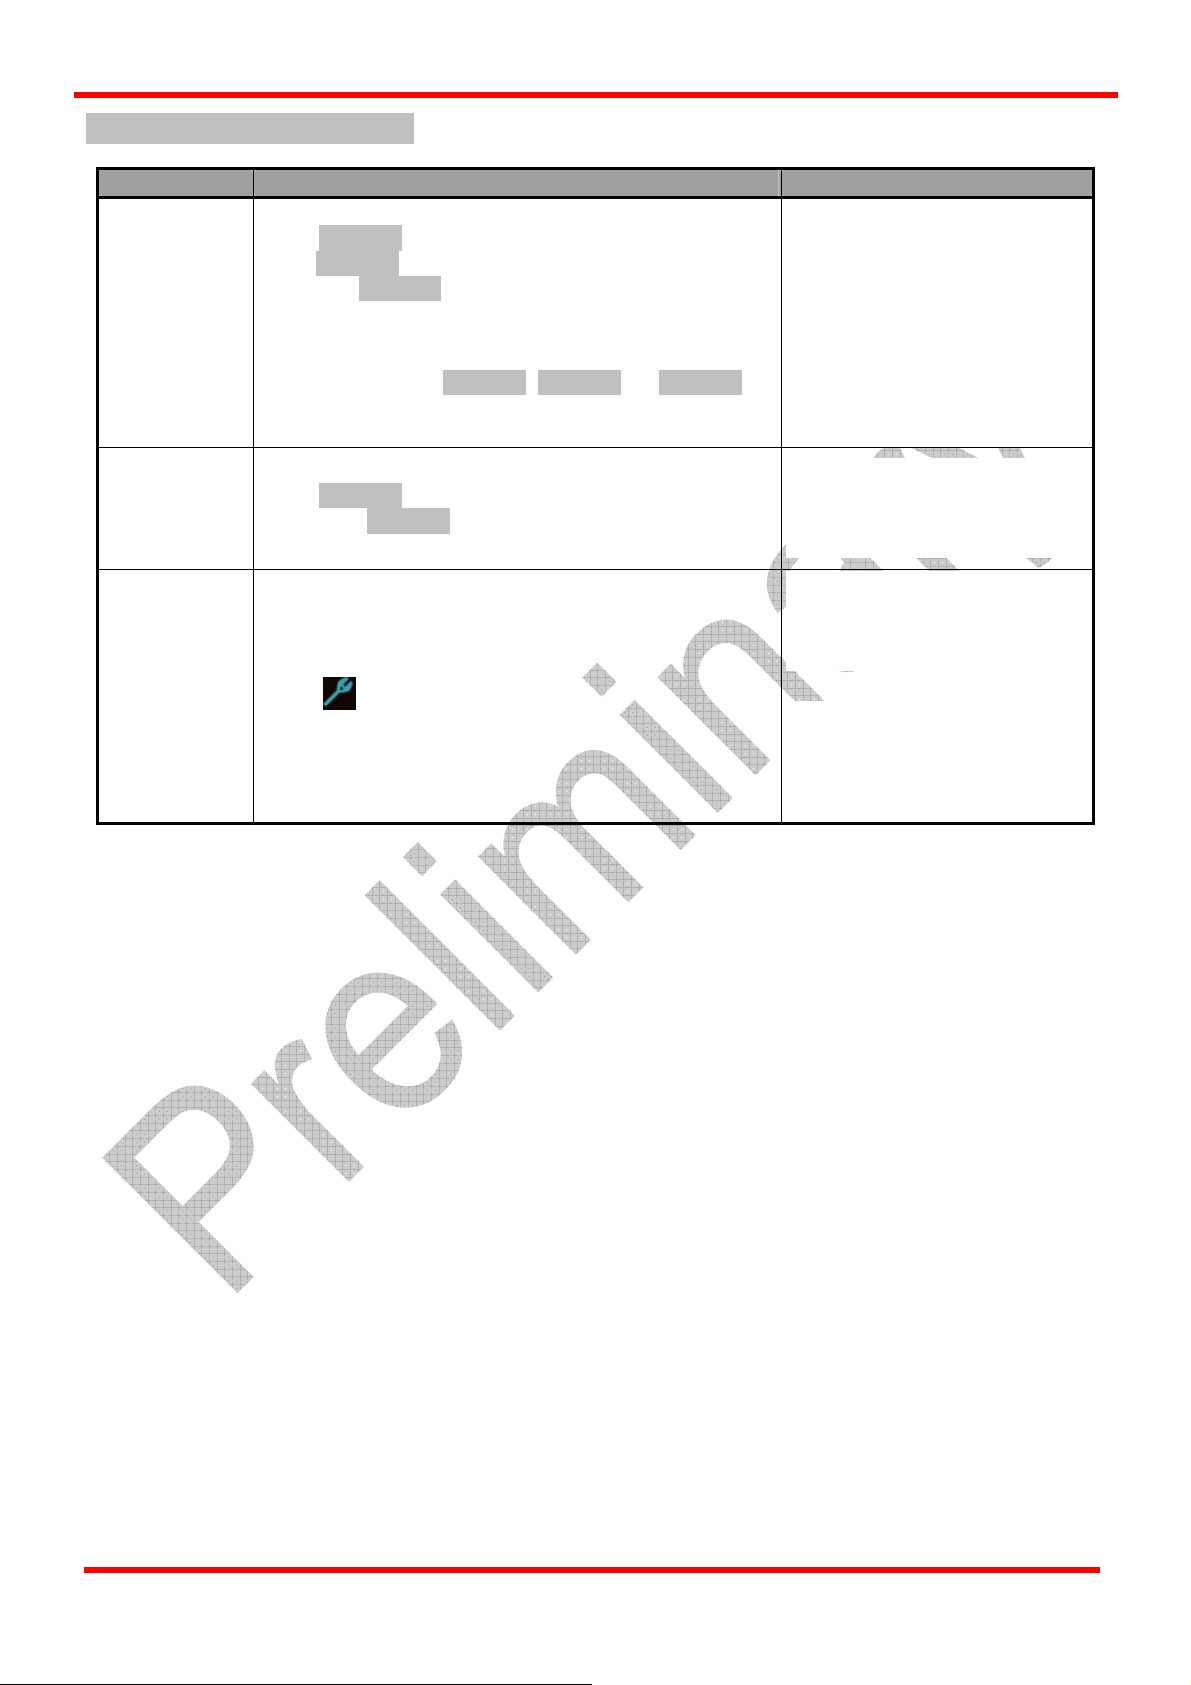
4.4. NuStreams-P6GW Front Panel Functions – Test Setting
Function Control Button Action LCD Display
Entering Test
Setting Menu
Insert/Delete
Tasks
Move the cursor > to “Test Setting”, and press
button. NuStreams-P6GW will prompt you to input the
system password. The default password is
. Press button after inputting the
password to enter the test setting menu.
You can also insert or delete Tasks.
To add a new task to the current Run, choose “insert”
from “Run List” menu, and press
button. A new
task with default parameters will be added to that
Run.
To remove an existing task of the current Run,
choose “delete” from “Run List” menu, and press
button. The existing task you chose will be deleted.
Each “Run” can contain up to 4 Tasks, while each
Task is an independent test that can contain different
test parameters.
↓
↓
You can reset all settings stored in all 3 Runs and
load the default test configurations here.
To load default test configurations, choose “Load
Load Default
Default” from “Run List” menu, and press
NuStreams-P6GW will confirm if you really want to
reset all test settings to default values. Press
button to confirm, or press
XTRAMUS TECHNOLOGIES®
button.
button to cancel.
21
↓
E-mail: sales@xtramus.com
Website: www.Xtramus.com
Page 22

Function Control Button Action LCD Display
Modifying
Test
Parameters
Press
would like to modify. Press
or buttons to choose which “Run” you
button to start
configuring the selected “Run”. Choose “Modify” and
press
to start configuring parameters for the Task
you’ve chosen.
Press
or buttons to choose which
parameter you would like to configure, and press
button to start configuring. Change parameter values
with
or buttons, and press button to
apply the changes.
Press
button again to save the settings you’ve
made to the Task and go back to Run List menu.
NuStreams-P6GW supports 3 test modes: Router,
Switch, and Router + Switch. For detail test setting
options, please refer to “5.3.5. Configuring Tasks
with NuSet-MiniPG-Config”.
↓
↓
XTRAMUS TECHNOLOGIES®
22
E-mail: sales@xtramus.com
Website: www.Xtramus.com
Page 23
4.5. NuStreams-P6GW Front Panel Functions – Test Log
Function Control Button Action LCD Display
Entering Test
Log Menu
View Log
Delete Log
Log Auto-Save
Move the cursor > to “Test Log”, and press
button.
Choose “View Log” from “Test Log” menu list, and
press
button.
Choose “Clear Log” from “Test Log” menu list, and
press
button.
System will ask if you really want to delete all logs
stored in NuStreams-P6GW. Press
or
to cancel.
to confirm,
Choose “Store Log” from “Test Log” menu list, and
press
changed to “→” icon. Using
button. The select cursor “>” will be
or buttons to
set Log Auto-Save function On or Off, and press
button to apply the changes. System will save all
test logs automatically if this function is ON.
Choose “Full Warning” from “Test Log” menu list,
and press button. The select cursor “>” will be
↓
↓
Warning when
Memory Full
changed to “→” icon. Using
set Memory Full Warning function On or Off, and
press
alert you when its log storing memory is about to
full if this function is ON.
XTRAMUS TECHNOLOGIES®
or buttons to
button to apply the changes. System will
23
↓
E-mail: sales@xtramus.com
Website: www.Xtramus.com
Page 24
4.6. NuStreams-P6GW Front Panel Functions – System Setting
Function Control Button Action LCD Display
Move the cursor > to “System Setting”, and press
Entering
System Setting
Menu
button. NuStreeams-P6GW will prompt you to
input the system password. The default password
. Press button after inputting
is
the password to enter the test setting menu.
Choose “Buzzer” from “System Setting” menu list,
and press
button. The select cursor “>” will be
↓
Buzzer
Password
On/Off
Setting New
Password
changed to “→” icon. Pressing
to set Buzzer function On or Off, and press
or buttons
button to apply the changes. System will make a
buzz sound whenever you press a button if this
function is ON.
Choose “Password” from “System Setting” menu
list, and press
button.
You can set the Password function On/Off by
selecting Password: On/Off. Using ▲/+ or ▼/-
buttons to set Password function On or Off.
Choose “Password” from “System Setting” menu
list, and press
button.
You can change system password (Default
Password:
) under Setting
Password menu.
Password is a set of 4-button combination with
, ►Run1, ►Run2, and ►Run3 buttons.
↓
↓
,
↓
Please input your old password under “ORG: “, and
input your new password under “New: “.
Choose “Date/Time” from “System Setting” menu
list, and press
System
Date/Time
You can adjust system date and time by pressing
changes you’ve made.
XTRAMUS TECHNOLOGIES®
button.
or buttons, and button to apply the
24
↓
E-mail: sales@xtramus.com
Website: www.Xtramus.com
Page 25

Function Control Button Action LCD Display
Choose “Load Default” from “System Setting”
menu list, and press
button.
Load System
Default Value
System will ask if you really want to set all system
settings to default. Press
to confirm, or to
cancel.
4.7. NuStreams-P6GW Front Panel Functions – System Information
Function Control Button Action LCD Display
↓
Entering
System
Information
View System
Information
Move the cursor > to “System Information”, and
press
button.
You can browser NuStreams-P6GW’s system
information by pressing
or buttons.
XTRAMUS TECHNOLOGIES®
25
E-mail: sales@xtramus.com
Website: www.Xtramus.com
Page 26

5. NuSet-MiniPG
NuSet-MiniPG is a GUI (Graphic User Interface) configuration software that runs under
Microsoft Windows environment.
By connecting NuStreams-P6GW with PC to its USB Port with a USB cable, users can
configure test parameters, download testing logs, and upgrade firmware/license. The figure down below is
an example for connecting NuStreams-P6GW to PC via an USB cable.
All test parameters can be configured with NuSet-MiniPG, including all the configurations that can be set
by buttons located on NuStreams-P6GW’s panels.
Please note that NuSet-MiniPG and NuStreams-P6GW’s hardware driver must be installed on PC first.
After installing NuSet-MiniPG, NuStreams-P6GW’s driver will be installed automatically.
NuSet-MiniPG contains five different utilities with different functions as listed in the table down below:
Utility Description
NuSet-MiniPG-Config
NuSet-MiniPG-ST
NuSet-MiniPG-RT
NuSet-MiniPG-RST
NuSet-MiniPG-UG
Utility designed for setting test criteria and accessing test results/statistics.
Utility designed for testing network switch
Utility designed for testing residential gateway (router)
Utility designed for testing network switch and residential gateway (router)
Utility designed for upgrading NuStreams-P6GW and NuPAD’s firmware,
FPGA and hardware license.
Also, please note that your PC, NuStreams-P6GW’s firmware and FPGA should meet the system
requirements listed down below before installing NuSet-MiniPG.
OS Windows 2000/Windows XP Windows Vista/Windows 7
RAM
CPU
HDD
Firmware
FPGA
*Note: Large amount of data will be generated while running NuSet-MiniPG. It is recommended to
preserve enough available Hard-Disk space to store these data.
512MB RAM 1GB RAM
Pentium 1.3GHz or Higher
10 GB Available Space
Version 0.9b012 or higher
Version 0.1b009 or higher
This user’s manual will be focusing on NuSet-MiniPG-Config, NuSet-MiniPG-UG, and NuSet-MiniPG-ST
only. The NuSet-MiniPG-RT and NuSet-MiniPG-RST are still not available.
XTRAMUS TECHNOLOGIES®
26
E-mail: sales@xtramus.com
Website: www.Xtramus.com
Page 27

5.1. Installing/Uninstalling NuSet-MiniPG
Please follow the steps down below to install NuSet-MiniPG.
Installing NuSet-MiniPG
1. Double-click NuSet-MiniPG installation
2. InstallShield Wizard is starting to install
program and start the installation
process*.
NuSet-MiniPG. If you would like to cancel
installation, click “Cancel”.
3. Click “Next” to continue installation.
*Note: Due to different Operating Systems or system settings, warning messages might pop up when
installing NuSet-MiniPG or driver for your device. When this occurs, please choose the options on
these pop-up warning messages that allow you to continue installing NuSet-MiniPG or device driver.
XTRAMUS TECHNOLOGIES®
27
E-mail: sales@xtramus.com
Website: www.Xtramus.com
Page 28

Installing NuSet-MiniPG
4. Click “I accept the terms in the license
agreement”, and click “Next” to continue.
5. Click the Change… button to install the
program to another folder, or click
Next
button to install the program into the
default destination folder, and then
continue next step. Click
Back button to
go back to the previous step to modify.
6. NuSet-MiniPG InstallShield Wizard will
start installing momentarily. Click
button to start installation.
Install
XTRAMUS TECHNOLOGIES®
28
E-mail: sales@xtramus.com
Website: www.Xtramus.com
Page 29

Installing NuSet-MiniPG
7. InstallShield Wizard is installing
NuSet-MiniPG.
8. NuSet-MiniPG installation completes.
Click
Finish button to exit.
XTRAMUS TECHNOLOGIES®
29
E-mail: sales@xtramus.com
Website: www.Xtramus.com
Page 30

To uninstall NuSet-MiniPG, you can:
Uninstalling NuSet-MiniPG
• Click Start Æ Programs Æ Xtramus Æ
NuSet-MiniPG Æ Uninstall
NuSet-MiniPG.
• Go to the Control Panel, choose
NuSet-MiniPG from installed program
list, and click “Remove” to uninstall.
Please note that all of NuSet-MiniPG’s components will be uninstalled.
XTRAMUS TECHNOLOGIES®
30
E-mail: sales@xtramus.com
Website: www.Xtramus.com
Page 31

5.2. NuSet-MiniPG Overview
5.2.1. Starting NuSet-MiniPG
Before starting NuSet-MiniPG, please be sure that your NuStreamsP6GW is properly connected to your
PC. The figure down below is an example for connecting NuStreams-P6GW to PC via an USB cable.
You can start NuSet-MiniPG by:
Starting NuSet-MiniPG
¾ Double-click NuSet-MiniPG icon
located on your PC’s desktop
¾
Click Start Æ Programs Æ
Xtramus Æ NuSet-MiniPG Æ
NuSet-MiniPG.
If your PC is not connected with NuStreams-P6GW, you can still run both NuSet-MiniPG-Config and
NuSet-Mini-UG under Demo Mode. Almost all functions are available under Demo Mode. However,
please note that Demo Mode is for system demo purposes only, and does not serve any testing
purposes at all.
XTRAMUS TECHNOLOGIES®
31
E-mail: sales@xtramus.com
Website: www.Xtramus.com
Page 32

5.2.2. NuSet-MiniPG Overview
After starting NuSet-MiniPG as mentioned in “5.2.1. Starting NuSet-MiniPG”, a NuSet-MiniPG Option
Menu will pop up as shown in the figure down below:
Utility Description
A NuSet-MiniPG-Config
B NuSet-MiniPG-ST
NuSet-MiniPG-RT Utility designed for testing residential gateway (router)
C
NuSet-MiniPG-RST
D
E NuSet-MiniPG-UG
Exit
*Only ONE utility can run at the same time, and NuSet-MiniPG can only work with ONE device.
Utility designed for setting test criteria and accessing test
results/statistics.
Utility designed for testing network switch
Utility designed for testing network switch and residential gateway
(router)
Utility designed for upgrading NuStreams-P6GW and NuPAD’s firmware,
FPGA and hardware license.
Close NuSet-MiniPG.
You have to install different utilities in order to access different test modes listed on the NuSet-MiniPG
Option Menu. Test modes without the proper utilities installed will be displayed as gray in color and
cannot be accessed from the NuSet-MiniPG Option Menu.
When clicking an accessible option from NuSet-MiniPG
Option Menu, a Device Selection window will pop up, and
prompt you to choose the device that will be used for testing.
Please choose Nustreams-P6GW from the scroll-down menu,
and click OK.
Note: Please note that this user’s manual will be focusing on NuSet-MiniPG-Config, NuSet-MiniPG-UG,
and NuSet-MiniPG-ST only. The NuSet-MiniPG-RT and NuSet-MiniPG-RST are still not available.
XTRAMUS TECHNOLOGIES®
32
E-mail: sales@xtramus.com
Website: www.Xtramus.com
Page 33

5.3. NuSet-MiniPG-Config Functions
5.3.1. NuSet-MiniPG-Config Functions Overview
If you choose Configuration for Hotkeys Operation from
NuSet-MiniPG Option Menu, NuSet-MiniPG-Config’s main window
will pop up as shown below:
Function Descriptions
A Menu Bar
Quick Launch
B
Buttons
C Info/Run Select List
Main Display
D
E
XTRAMUS TECHNOLOGIES®
Window
USB Connection
Status
The Menu Bar allows you to access configuration files from your PC and
NuStreams-P6GW, manage test logs, and perform system maintenance.
With a simple click of these Quick Launch Buttons, you can access
configuration files from your PC/NuStreams-P6GW and managing test
logs.
This section contains a selectable list of NuStreams-P6GW’s detailed
system information and Test List.
This section displays detailed system information or all test p arameters you
can configure for each Task in Run 1~3.
This icon shows the connection status between your PC and
NuStreams-P6GW.
33
E-mail: sales@xtramus.com
Website: www.Xtramus.com
Page 34

5.3.2. NuSet-MiniPG-Config Function – Menu Bar
The Menu Bar includes configuration options such as File, Task, Log, Service, Language, and Help.
5.3.2.1. Menu Bar – File
File
Load Default
Config. Profile
The system will load the default test settings for Run 1~3. All test parameters in
Run 1~3 will be set to default value. However , loading test settings won’t be saved
to NuStreams-P6GW until applied.
You can choose to load test settings either from Existing Files, or Pre-defined
Files for Network Products.
• Existing Files: NuSet-MiniPG-Config will load test settings which you saved
previously.
• Pre-defined Files for Network Products: NuSet-MiniPG-Config will load
test setting samples for network products pre-defined by Xtramus. All these
test settings are stored in “Default Config Profile” folder located under
NuSet-MiniPG-Config’s installation folder. These test settings are named by
Load Config.
the format of A_B_C_D_E_F, which means:
Profile From
¾ A: Name of the testing device. In here
¾ B: Type of the DUT (Chip or Model)
¾ C: Name of the Manufacturer
¾ D: DUT Model Name
¾ E: DUT Version
¾ F: Testing WAN type.
Save
Configuration
Save As…
Exit
Please note that loading test settings won’t be saved to NuStreams-P6GW until
applied.
You can save all parameter changes through Run
1~3 you made to your PC. If you haven’t saved the
changes previously, a Select Run window will pop up
and ask you which test setting (Run) you would like
to save.
The “Save As…” function is similar to the “Save Configuration”. The only
difference is that you can save test settings (Run) with different file names.
Exit NuSet-MiniPG-Config.
XTRAMUS TECHNOLOGIES®
34
E-mail: sales@xtramus.com
Website: www.Xtramus.com
Page 35

5.3.2.2. Menu Bar – Task
Task
This function allows NuSet-MiniPG-Config to access all test settings (Run) from
Get Task
NuStreams-P6GW and show those settings in both Info/Run Select List and
Main Display Window.
As mentioned in sections above, each Run can hold up to 4 different Tasks. Y ou
Add Task
can add new Tasks to each Run with this function. To add a new Task, click the
Run you would like to add the new Task to from Info/Run Select List, then click
Task → Add Task on the Menu Bar.
You can delete an existing Task with this function. To delete an existing task,
Delete Task
click the Task you would like to delete from Info/Run Select List, and click Task
→ Delete Task on the Menu Bar.
Apply All
*Please note that the connection (of USB cable) between PC and NuStreams- P6GW must be connected at all
time while getting/setting tasks.
Apply and save all changes you’ve made to NuStreams-P6GW.
5.3.2.3. Menu Bar – Log
Log
Accessing test logs from
NuStreams-P6GW’s memory and sa ve these
logs to a specific folder on your PC. After
retrieving test logs from NuStreams-P6GW,
Get Log
the log folder will pop up. Also, a message
window contains detail information about
system log file memory buffer will pop up.
Click YES if you want to clear all stored logs
or click NO to cancel.
Clear Log
Log Saving
Settings
Log Folder
Set Log Folder
Clear all test logs stored in NuStreams-P6GW’s memory.
Log saving settings can be configured
here:
• Save Log to Device: If this
function is ON, all test logs will be
saved in its log file memory buffer.
• Warning when Log storage
space is full: System will issue a
warning if the log file memory buffer
is about to full.
Show the file folder where test logs are stored.
Change where you would like to save test logs retrieved from
NuStreams-P6GW. You can create new folders for log-saving as well.
XTRAMUS TECHNOLOGIES®
35
E-mail: sales@xtramus.com
Website: www.Xtramus.com
Page 36

5.3.2.4. Menu Bar – Service
Service
If NuStreams- P6GW’s password has been changed, you could reset it to
System Setting
default (
) by “Clear Device Password” function.
A “Clear De vice Password” window
will pop up when you choose this
function from Menu Bar. Input “admin”
in the “Password” column and click
“OK”. The password will be cleared and
set to the default
.
You can change NuSet-MiniPG’s
password (default: admin) by click the
“Modify” button on “Clear Device
Password” window. A “Modify
Password” window will pop up.
Input NuSet-MiniPG’s old password
under “Old Password” column, and
type in the new password under both
“New Password” and “Confirm
Password” columns.
If you forget NuSet-MiniPG’s password, please uninstall NuSet-MiniPG, and
re-install it again. NuSet-MiniPG’s password will be set to “admin” after
re-installation.
5.3.2.5. Menu Bar – Languages
Languages
English
Simplified Chinese
NuSet-MiniPG-Config has 2 different languages for its UI available. You can
set the language of UI to either English or Simplified Chinese.
5.3.2.6. Menu Bar – Help
Help
Xtramus Web
Access Xtramus Website (www.xtramus.com).
A “System Requirements” window will pop
up and show the requirements for your PC
and the FPGA/Firmware of
NuStreams-P6GW.
System Requirements
¾ OK: Click this button to exit the
“System Requirements” pop-up
window.
About
NuSet-MiniPG-Config
XTRAMUS TECHNOLOGIES®
An “About” window will pop up and show detailed system information.
36
E-mail: sales@xtramus.com
Website: www.Xtramus.com
Page 37

5.3.3. NuSet-MiniPG-Config Function – Quick Launch Buttons
These Quick Launch Buttons allow you to reconnect NuStreams-P6GW, access test setting files from
your PC or NuStreams-P6GW, or managing test log files.
5.3.3.1. Quick Launch Buttons – Reconnect
Reconnect
If the USB connection between your PC and NuStreams-P6GW is down, a
“Disconnected” icon
will be shown in “USB Connection
Status”.
Reconnect
Press Reconnect button
to
re-establish the connection between your PC
and NuStreams-P6GW. If the connection has
been established successfully, a message
window will pop up, and the “USB
Connection Status” will be shown as
“Connected”
.
5.3.3.2. Quick Launch Buttons – Load & Save
Load & Save
The Load and Save buttons allow you to load or save test settings from/to
your PC, identical to “Load Config. Profile From Existing Files” and “Save
Configuration” functions available in the Menu Bar mentioned in 5.3.1.1.
Menu Bar – File.
To load test setting files stored in your PC,
click “Load” button, select which Run (or
All 3 Runs) to apply the settings, and
choose the path which the test setting file
Load & Save
are located.
To save test setting on your PC, click
“Save” button, select which Run (or All 3
Runs) to save, and choose where you
would like to save the test settings.
XTRAMUS TECHNOLOGIES®
Test setting files for each Run (Run 1~3) are named in the format of
“*.run”, while test setting files for all runs are named in the format of
“*.all”.
37
E-mail: sales@xtramus.com
Website: www.Xtramus.com
Page 38

5.3.3.3. Quick Launch Buttons – Get Task/Apply All
Get Task/Apply All
By clicking Get Task button, you can load test settings from
NuStreams-P6GW, display all settings in Info/Run Select List and Main
Display Window.
On the other hand, Apply All button allows you to apply all the changes
you’ve made to all Runs and save these settings to your NuStreams-P6GW.
To load test settings from
NuStreams- P6GW, click “Get Task”
Get Task/Apply All
button. Settings will be displayed in
Info/Run Select List and Main
Display Window.
To apply all the changes you’ve
made with the utility software and
save these settings to
NuStreams-P6GW, click “Apply All”.
Please note that the USB cable connection between PC and NuStreamsP6GW must be connected at all time while getting/setting tasks.
5.3.3.4. Quick Launch Buttons – Get Log/Clear Log/Log Folder
Get Log/Clear Log/Log Folder
Get Log and Clear Log buttons allow you to obtain test logs from
NuStreams-P6GW or clear all test logs stored in NuStreams-P6GW, just like
the “Get Device Log” and “Clear Device Log” on the Menu Bar.
To get all test logs from NuStreamsP6GW, click “Get Log” button. A
window with NuStreams-P6GW log
Get Log/Clear Log
memory space and log folder screen
will pop up. Click Yes to clear all test
logs in NuStreams-P6GW, or click No
to leave these test logs be.
To clear all test logs stored in
NuStreams –P6GW’s log memory, click
“Clear Log” button, and click Yes.
Log Folder
XTRAMUS TECHNOLOGIES®
Click “Log Folder” button to open the
folder where all test logs are stored on
your PC. All log folders are named with
the test date, and all logs are named
with the test date and time.
38
E-mail: sales@xtramus.com
Website: www.Xtramus.com
Page 39

5.3.4. NuSet-MiniPG-Config Function – Info/Run Select List
The Info/Run Select List contains a list of selectable options. When selected, the Main Display
Window will show the corresponding information/Run setting.
System Information
To show NuStreams-P6GW’s detailed system information, click “System Information” on the
Info/Run Select List. A detailed System Information will display on the Main Display Window
located in the right side of the Info/Run Select List.
The System Information displayed on Main Display Window shows NuStreams-P6GW and
NuPAD’s detail information and status.
• Refresh: Update the latest system information and status, press this button.
XTRAMUS TECHNOLOGIES®
39
E-mail: sales@xtramus.com
Website: www.Xtramus.com
Page 40

Test List
To access test settings stored in NuStreams-P6GW, please click button located on the
Quick Launch Buttons section so NuSet-MiniPG-Config can access and display all Runs stored
in NuStreams-P6GW.
Please note that the USB connection between PC and NuStreams- P6GW must be connected at
all time while getting/setting tasks.
All test settings stored in NuStreams-P6GW will be displayed under Test List. All parameters in
each Task can be viewed or changed by the detailed configuration window displayed on the Main
Display Window.
By right clicking a Task on Test List, you can Add
Task, Delete Task, Apply All, Copy, or Paste Tasks.
• Add Task: Add a Task with default test setting
values to the current Run. Up to 4 Tasks can be
added in one Run.
• Delete Task: Delete the current Task.
• Apply All: Apply all test settings and save these
settings to NuStreams-P6GW.
• Copy: Copy current Task.
• Paste: Paste the Task you copied to the current
Run.
Also, by clicking Run 1~3 listed on Test List, you can
change the title of each Run on the Main Display
Window.
XTRAMUS TECHNOLOGIES®
40
E-mail: sales@xtramus.com
Website: www.Xtramus.com
Page 41

5.3.5. Configuring Tasks with NuSet-MiniPG-Config
After acquiring all the Tasks stored in NuStreams-P6GW, click the specific Task you would like to
configure on the Info/Run Select List to configure/view all parameters of that Task in Main Display
Window as shown in the figure down below:
Before configuring test parameters in each Task, please select the DUT Test Type first. The test
parameters listed in the Main Display Window will change according to the DUT Test Type you chose.
NuStreams-P6GW utility has 3 different test types:
• Router: Testing Broadband Router including its WAN abilities.
• Switch: Testing Switch and its switch functions.
• Router + Switch: Testing Broadband Router as well as its
switch functions.
XTRAMUS TECHNOLOGIES®
41
E-mail: sales@xtramus.com
Website: www.Xtramus.com
Page 42

5.3.5.1. NuSet-MiniPG-Config Task Setting – Router
DUT – Router
Test Type/DUT Description
• DUT: Choose “Router” from this scroll-down menu to start configuring router tests.
• Get DUT Description: Enable this function to acquire DUT information during test and output it to test logs.
WLAN Setting
• WLAN: You can enable/disable the WLAN function
here.
• Attenuation (dB): You can modify the strength of
transmission wave here.
• WLAN Rate(Mbps): You can modify WLAN transfer
rate by Mbps.
• Password: This field must be filled with the password
for WAP setting of the DUT. *
Media Type
• Media Type: You can set the connection speed her e
with the scroll-down menu.
• Link Wait (Minimum): NuStreams-P6GW will attempt
to establish connection with the DUT and wait for the
minimum time (seconds). NuStreams-P6GW will keep
waiting until the minimum time is met even the DUT has
already responded.
• Link Down Time: The connection link between DUT
and NuStreams-P6GW will be forced to terminate when
this function is enabled.
• Link Wait (Time Out): NuStreams-P6GW will attempt
to establish connection with the DUT and wait for a
period of time until time out (second), and
NuStreams-P6GW will not attempt to establish
connection anymore.
XTRAMUS TECHNOLOGIES®
42
Website: www.Xtramus.com
E-mail: sales@xtramus.com
Page 43

Connection Setting
•
WAN Link Type: Choose the WAN connection type for
DUT testing. Three WAN Link Types are available:
DHCP, Static IP, and PPPoE. The WAN Link Type s
here must be the same with the setting of the DUT.
•
Connection Wait Timeout: This function sets the
duration of time for a
with DHCP server.
• Ts’
Check Vender ID: Enable this function to check DU
MAC address and see if they
designated MAC address.
• If Check Vender ID is enabled, please input the vender’s designated MAC address here for
Vendor MAC:
comparisons.
ttempting to establish connection
match DUT vender’s
•
DUT WAN Static IP: If the WAN Link Type is set as
Static IP, please
et
the DUT here.
•
WAN Gateway IP: If the WAN Link Type is set as
Static IP, please in
in the DUT here.
• CP Process if Valid: Disable or enable DHCP
Skip DH
server.
input the static IP address you set in
put the gateway IP address you set
VLAN Setting
• LAN VLAN Tag: Add VLAN tags to all LAN packets. • LAN VLAN ID: VLAN ID for LAN.
• WAN VLAN Tag: Add VLAN tags to all WAN packets • WAN VLAN ID: VLAN ID for WAN.
T est Traffic
• Packet Length: Length of testing packets. •
Delay Time After Learning: When enabled,
NuStreams-P6GW will halt for the set am
after performing network learning.
• Test Time: The duration of time for DUT test. • Delay Before Report: W hen enabled,
NuStreams-P6GW will halt for the set amount of time
before report.
• Test Delay: When enabled, NuStreams-P6GW will h
for the set amount of time before starting DUT test.
• Flow Control: W
transmitting rate w
hen Flow Control is enabled, the
ill drop if traffic overflow occurs.
alt
• WAN to LAN Utilization (%): The traffic flow ratio from
WAN to LAN, presented in percentage (1~100).
• o fromLAN to WAN Utilization (%): The traffic flow rati
LAN to WAN, presented in percentage (1~100).
Pass/Fail Criteria
• Loss Tolerance (pkts): The acceptable number of lost
n data transmitting during tests (0~9999).
• rance (pkts): The acceptable number of
Excess Tole
exc packets in data transmitting during tests packets i
ess
(0~9999).
Apply Run
• Click this button to apply al l the settings you’ve made and save the settings to NuStreams-P6GW.
* Note: It is recommended to perform WLAN tests in a shielding room.
Note: When WLAN is enabled, NuStreams-P6GW will attempt to connect with the first WAP
(Wireless Access Point) that appears in it*s SSID list. If that WAP is encrypted, NuStreams-P6GW
will apply the password you input here.
ount of time
XTRAMUS TECHNOLOGIES®
43
E-mail: sales@xtramus.com
Website: www.Xtramus.com
Page 44

5.3.5.2. NuSet-MiniPG-Config Task Setting – Switch
DUT – Switch
Test Type/DUT Description
• DUT: Choose “Switch” from this scroll-down menu to start configuring switch tests.
WLAN Setting*
• WLAN: You can turn on or off the WLAN function here.
• Attenuation(dB): You can modify the strength of
transmission wave here.
• WLAN Rate(Mbps): You can modify WLAN transfer
rate by Mbps.
• Password: This field must be filled with the password
for WAP setting of the DUT. *
Media Type
• Testing Ports: Please connect the DUT with
NuStreams-P6GW’s Switch Ports with Cat-5 cables
according to the Testing LAN Ports you set here.
• Link Wait (Minimum): NuStreams-P6GW will attempt
to establish connection with the DUT and wait for the
minimum time (seconds). NuStreams-P6GW will keep
waiting until the minimum time is met even the DUT has
onded. already resp
• Media Type: You can set the connection speed her e
with the scroll-down menu.
• Link Wait (Time Out): NuStreams-P6GW will attempt
to establish connection with the DUT and wait for a
period of time until time out (second), and
NuStreams-P6GW will not attempt to establish
connection anymore.
VLAN Setting
• VLAN Tag: Add VLAN tags to all packets. • VLAN ID: VLAN ID.
XTRAMUS TECHNOLOGIES®
44
E-mail: sales@xtramus.com
Website: www.Xtramus.com
Page 45

T est Traffic
• Packet Length: The length of test packets (from
64~1518 Bytes) transmitting by NuStreams-P6GW.
• Learning Time: NuStreams-P6GW will start sending
learning packets to the DUT. The DUT will record the
MAC addresses of these packets, and learn the routing
to NuStreams-P6GW.
• Delay Time After Learning: When enabled,
NuStreams-P6GW will halt for the set amount of time
after performing network learning.
• Delay Before Report: When enabled,
NuStreams-P6GW will halt for the set amount of time
before report.
• Test Time: The duration of time for DUT test. • Test Utilization (%): The traffic flow ratio of the entire
network, presented in percentage (1~100).
• Flow Control: When Flow Control is enabled, the transmitting rate will drop if traffic overflow occurs.
Pass/Fail Criteria
• Loss Tolerance (pkts): The acceptable number of lost
packets in data transmitting during tests (0~9999).
• Excess To lerance (pkts): The acceptable number of
excess packets in data transmitting during tests
(0~9999).
Apply Run
• Click this button to apply al l the settings you’ve made and save the settings to NuStreams-P6GW.
* Note: It is recommended to perform WLAN tests in a shielding room.
* Note: When WLAN is enabled, NuStreams-P6GW will attempt to connect with the first WAP
(Wireless Access Point) that appears in its SSID list. If that WAP is encrypted, NuStreams-P6GW
will apply the password you input here.
XTRAMUS TECHNOLOGIES®
45
E-mail: sales@xtramus.com
Website: www.Xtramus.com
Page 46

5.3.5.3. NuSet-MiniPG-Config Task Setting – Router + Switch
DUT: Router + Switch
Test Type/DUT Description
• DUT: Choose “Router + Switch” from this scroll-down menu to start configuring tests for both routers and switches.
• Get DUT Description: Enable this function to acquire DUT information during test and output it to test logs.
WLAN Setting*
• WLAN: You can turn on or off the WLAN function here.
• Attenuation(dB): You can modify the strength of
transmission wave here.
• WLAN Rate(Mbps): You can modify WLAN transfer
rate by Mbps.
• Password: This field must be filled with the password
for WAP setting of the DUT. *
XTRAMUS TECHNOLOGIES®
46
E-mail: sales@xtramus.com
Website: www.Xtramus.com
Page 47

Media Type
• Media Type: You can set the connection speed her e
with the scroll-down menu.
• Link Wait (Minimum): NuStreams-P6GW will attempt
to establish connection with the DUT and wait for the
minimum time (seconds). NuStreams-P6GW will keep
waiting until the minimum time is met even the DUT has
already responded.
• Link Down Time: The connection link between DUT
and NuStreams-P6GW will be forced to terminate when
this function is enabled.
• Link Wait (Time Out): NuStreams-P6GW will attempt
to establish connection with the DUT and wait for a
period of time until time out (second), and
NuStreams-P6GW will not attempt to establish
connection anymore.
• Testing LAN Ports: Please connect the DUT with NuStreams-P6GW’s Switch Ports with Cat-5 cables according
to the Testing LAN Ports you set here.
Connection Setting
• WAN Link Type: Choose the WAN connection type for
DUT testing. Three WAN Link Types are available:
DHCP, Static IP, and PPPoE. The WAN Link Type set
here must be the same with the setting of the DUT.
• Connection Wait Timeout: This function sets the
duration of time for attempting to establish connection
with DHCP server.
• Check Vender ID: Enable this function to check DUTs’
MAC address and see if they match DUT vender’s
designated MAC address.
• DUT WAN Static IP: If the WAN Link Type is set as
Static IP, please input the static IP address you set in
the DUT here.
• WAN Gateway IP: If the WAN Link Type is set as
Static IP, please input the gateway IP address you set
in the DUT here.
• Skip DHCP Process if Valid: Disable or enable DHCP
server.
• Vendor MAC: If Check Vender ID is enabled, please input the vender’s designated MAC address here for
comparisons.
VLAN Setting
• LAN VLAN Tag: Add VLAN tags to all LAN packets. • LAN VLAN ID: VLAN ID for LAN.
• WAN VLAN Tag: Add VLAN tags to all WAN packets • WAN VLAN ID: VLAN ID for WAN.
T est Traffic
• Packet Length: Length of testing packets. • Delay Time After Learning: When enabled,
NuStreams-P6GW will halt for the set amount of time
after performing network learning.
• Test Time: The duration of time for DUT test. • Delay Before Report: W hen enabled,
NuStreams-P6GW will halt for the set amount of time
before report.
• Learning Time: The time for the Nustreams-P6GW to
learn the information received from DUT.
• Test Delay: When enabled, NuStreams-P6GW will halt
•
Flow Control: When Flow Control is enabled, the
transmitting rate w
ill drop if traffic overflow occurs.
• Switch Utilization (%): The traffic flow for Switch
transmission rate, presented in percentage (1~100).
• WAN to LAN Utilization (%): The traffic flow ratio from
for the set amount of time before starting DUT test.
WAN to LAN, presented in percentage (1~100).
• o from
LAN to WAN Utilization (%): The traffic flow rati
LAN to WAN, presented in percentage (1~100).
Pass/Fail Criteria
• st
Loss Tolerance (pkts): The acceptable number of lo Excess Tolerance (pkts): The acceptable numbe
packets in data transmitting during tests (0~9999).
• r of
excess pac
(0~9999).
kets in data transmitting during tests
Apply Run
• Click this button to apply al l the settings you’ve made and save the settings to NuStreams-P6GW.
* Note: It is recommended to perform WLAN tests in a shielding room.
Note: When WLAN is enabled, NuStreams-P6GW will attempt to connect with the first WAP
(Wireless Access Point) that appears in i*ts SSID list. If that WAP is encrypted, NuStreams-P6GW
will apply the password you input here.
XTRAMUS TECHNOLOGIES®
47
E-mail: sales@xtramus.com
Website: www.Xtramus.com
Page 48

5.4. NuSet-MiniPG-ST Functions
5.4.1. NuSet-MiniPG-ST Functions Overview
If you choose Network Switch Test from NuSet-MiniPG Option
Menu, NuSet-MiniPG-ST’s main window will pop up as shown below:
A Port Select window will pop up as shown in the
figure on the right hand. To access
NuSet-MiniPG-ST and performing network switch
tests, you have to select which switch port you
would like to apply for performing tests first.
Click the check-box for the switch ports you would
like to apply for the test (Switch Port 1~6, where
Switch Port 6 also serves as WLAN Port), and
click the Apply button to apply all settings you’ve
made.
XTRAMUS TECHNOLOGIES®
48
E-mail: sales@xtramus.com
Website: www.Xtramus.com
Page 49

Function Descriptions
A Menu Bar
Quick Launch
B
Buttons
C Info/Port Select List
Control Buttons &
D
Test Running Status
Icon
Main Display
E
F
Window
USB Connection
Status
The Menu Bar allows you to select test ports, access configuration files
from your PC and view counter reports.
With a simple click of these Quick Launch Buttons, you can select test
ports, access configuration files from your PC and view counter reports.
This section contains a selectable list of NuStreams-P6GW’s detailed
system information and port list.
The Control Buttons allow you to start/stop tests, and the Test Running
Status Icon indicates if the test is running.
This section displays detailed system information including all ports you’ve
selected.
This icon shows the connection status between your PC and
NuStreams-P6GW.
XTRAMUS TECHNOLOGIES®
49
E-mail: sales@xtramus.com
Website: www.Xtramus.com
Page 50

5.4.2. NuSet-MiniPG-ST Function – Menu Bar
The Menu Bar includes configuration options such as File, Config, Report, Language, and Help.
5.4.2.1. Menu Bar – File
File
Load Default
Configuration
Load Existing
Configuration
Save
Configuration
Configuration
Save As
Exit
The system will load the default test settings for switch tests.
NuSet-MiniPG-ST will load test settings which you saved previously.
You can save all settings you’ve made for all ports to your PC.
The “Configuration Save As” function is similar to the “Save Configuration”.
The only difference is that you can save settings with different file names.
Exit NuSet-MiniPG-ST.
5.4.2.2. Menu Bar – Config
Config
Port Select
As mentioned in 5.4.1.
NuSet-MiniPG-ST Functions
Overview, if you choose Port
Select from the Menu Bar, a
Port Select window will pop up
as shown in the figure on the
right hand. To access
NuSet-MiniPG-ST and
performing network switch
tests, you have to select which
switch port you would like to
apply for performing tests first.
Click the check-box for the
switch ports you would like to
apply for the test (Port 1~6,
where Switch Port 6 serves as WLAN Port), and click the Apply button to apply all
settings you’ve made.
¾ Apply: Apply all the settings you’ve made and exit.
¾ Cancel: Cancel all the settings you’ve made and exit.
XTRAMUS TECHNOLOGIES®
50
E-mail: sales@xtramus.com
Website: www.Xtramus.com
Page 51

Config
Port
Configuration
When you choose Port Configuration from the Menu Bar, a Port Configuration
window will pop up, allowing you to set configuration parameters for all the ports
you’ve selected.
You can set the Media Type or enabling Flow Control function here on the Port
Configuration pop-up window.
Media Type
You can set the connection rate for all
selected ports with the Media Type
menu tab.
¾ Auto All: Set all ports to auto
-negotiation.
¾ Force 10M Full: All ports will be
set to 10M full-duplex.
¾ Force 100M Full: All ports will be
set to 100M full-duplex.
¾ Apply: Save all the settings you’ve
made without exiting.
¾ OK: Save all the settings you’ve
made and exit.
Flow Control
5.4.2.3. Menu Bar – Report
Report
When you choose Counter Report from the
Menu Bar, the Counter Report will be
displayed on NuSet-MiniPG-ST’s Main
Counter
Report
Display Window as shown in the figure on
the right.
You can enable/disable Flow Control
here with the Flow Control menu tab.
¾ ON: Enable Flow Control.
¾ OFF: Disable Flow Control.
¾ Apply: Save all the settings you’ve
made without exiting.
¾ OK: Save all the settings you’ve
made and exit.
For more detailed information regarding to
Counter Report, please refer to 5.4.6.
Counter Report.
XTRAMUS TECHNOLOGIES®
51
E-mail: sales@xtramus.com
Website: www.Xtramus.com
Page 52

5.4.2.4. Menu Bar – Languages
Languages
English
Simplified Chinese
NuSet-MiniPG-ST has 2 different languages for its UI available. You can set
the language of UI to either English or Simplified Chinese.
5.4.2.5. Menu Bar – Help
Help
Xtramus Web
Access Xtramus Website (www.xtramus.com).
A “System Requirements” window will pop
up and show the requirements for your PC
and the FPGA/Firmware of
NuStreams-P6GW.
System Requirements
¾ OK: Click this button to exit the
“System Requirements” pop-up
window.
About
NuSet-MiniPG-ST
An “About” window will pop up and show detailed system information.
XTRAMUS TECHNOLOGIES®
52
E-mail: sales@xtramus.com
Website: www.Xtramus.com
Page 53

5.4.3. NuSet-MiniPG-ST Function – Quick Launch Buttons
These Quick Launch Buttons allow you to reconnect NuStreams-P6GW, select test ports, access
configuration files from your PC and view counter reports.
5.4.3.1. Quick Launch Buttons – Reconnect
Reconnect
If the connection between your PC and NuStreams-P6GW is down, a
Reconnect
“Disconnected” icon
Press Reconnect button
will be shown in “USB Connection Status”.
to re-establish the
connection between your PC and NuStreams-P6GW. If
the connection has been established successfully, a
message window will pop up, and the “USB
Connection Status” will be shown as
“Connected”
.
5.4.3.2. Quick Launch Buttons – Port Select
Port Select
As mentioned in 5.4.1.
NuSet-MiniPG-ST Functions
Overview, if you choose Port
Select from the Menu Bar, a Port
Select window will pop up as
shown in the figure on the right
hand. To access
NuSet-MiniPG-ST and performing
network switch tests, you have to
Port Select
select which switch port you would
like to apply for performing tests
first.
Click the check-box for the switch
ports you would like to apply for
the test (Port 1~6, where Switch
Port 6 serves as WLAN Port), and click the Apply button to apply all settings you’ve
made.
¾ Apply: Apply all the settings you’ve made and exit.
¾ Cancel: Cancel all the settings you’ve made and exit.
XTRAMUS TECHNOLOGIES®
53
E-mail: sales@xtramus.com
Website: www.Xtramus.com
Page 54

A
5.4.3.3. Quick Launch Buttons – Port Config
Port Config
When you press the Port Configuration button, a Port Configuration window will pop
up, allowing you to set configuration parameters for all the ports you’ve selected.
You can set the Media Type or enabling Flow Control function here on the Port
Configuration pop-up window.
Media Type
Port Config
Flow Control
You can set the connection rate for all
selected ports with the Media Type
menu tab.
¾ Auto All: Set all ports to auto
-negotiation.
¾ Force 10M Full:
ll ports will be set
to 10M full-duplex.
¾ Force 100M Full: All ports will be
set to 100M full-duplex.
¾ Apply: Save all the settings you’ve
made without exiting.
¾ OK: Save all the settings you’ve
made and exit.
You can enable/disable Flow Control
here with the Flow Control menu tab.
¾ ON: Enable Flow Control.
¾ OFF: Disable Flow Control.
¾ Apply: Save all the settings you’ve
made without exiting.
¾ OK: Save all the settings you’ve
made and exit.
XTRAMUS TECHNOLOGIES®
54
E-mail: sales@xtramus.com
Website: www.Xtramus.com
Page 55

5.4.3.4. Quick Launch Buttons – WLAN Config
WLAN Config
When you press the WLAN Configuration button, a WLAN Config window will pop up,
allowing you to set configuration parameter for WLAN port.
You can choose the WAP (Wireless Access Point) you would like to connect to by clicking
the Setting button or modify the Attenuation (dB) and WLAN Rate (Mbps) values here.
WLAN Config
Settings
WLAN
Config
You can set the Attenuation (dB)
and WLAN Rate (Mbps) value in this
window.
¾ Setting: Choose the ESSID.
¾ Attenuation (dB): Set the
gradual loss of the radio wave
during transmission.
¾ WLAN Rate (Mbps): Set the flow
rate for the radio wave
transmission.
¾ Apply: Save all the setting
you’ve made without exiting.
¾ OK: Save all the setting you’ve
made and exit.
When you press the Setting button on the
WLAN Config window, a WLAN Setting
window will pop up, allowing you to view
all available WAPs (Wireless Access
Point) and connect to the specific WAP for
WLAN tests.
¾
Refresh: Press this button to
refresh the WLAN station list.
¾ No.: The number of the ESSID.
¾ ESSID: ESSID stands for Extended
Service Set Identifier, an ID for
identifying different WAP. Also, you
can view detail information (MAC
Address, Protocol, ESSID, Quality,
and Encryption) about that WAP if you
move your mouse to the specific
ESSID.
¾ Quality: WAP’s signal quality.
¾ Operate: You can connect/disconnect
to WAP by clicking the buttons here. If
the WAP you chose is encrypted, a
WLAN Password window will pop up,
allowing you to input the password for
that WAP.
¾ OK: Save all the setting you’ve made
and exit.
XTRAMUS TECHNOLOGIES®
55
E-mail: sales@xtramus.com
Website: www.Xtramus.com
Page 56

5.4.3.5. Quick Launch Buttons – Counter
Counter
When you press the Counter Report button, the
Counter Report will be displayed on
Counter
NuSet-MiniPG-ST’s Main Display Window as
shown in the figure on the right.
For more detailed information regarding to Counter
Report, please refer to 5.4.6. Counter Report.
XTRAMUS TECHNOLOGIES®
56
E-mail: sales@xtramus.com
Website: www.Xtramus.com
Page 57

5.4.4. NuSet-MiniPG-ST Function – Info/Port Select List
The Info/Port Select List allows you to view system information, as well as all information regarding to
the ports you’ve selected.
System Information
To show NuStreams-P6GW’s detailed system information, click “System Information” on the
Info/Run Select List. A detailed System Information will display on the Main Display Window
located in the right side of the Info/Run Select List.
The System Information displayed on Main Display Window shows NuStreams-P6GW and
NuPAD’s detail information and status.
¾ Refresh: Update the latest system information and status, press this button.
XTRAMUS TECHNOLOGIES®
57
E-mail: sales@xtramus.com
Website: www.Xtramus.com
Page 58

5.4.5. NuSet-MiniPG-ST Function – Control Buttons
The Control Buttons allow you to start/stop tests, and the Test Running Status Icon indicates if
there’s a test running.
Control Buttons
Start test
Stop test
Test Running Status Icon
No test is underway
Test is running
XTRAMUS TECHNOLOGIES®
58
E-mail: sales@xtramus.com
Website: www.Xtramus.com
Page 59

5.4.6. Counter Report
You can view test counter reports or set switch port parameters here. There are two ways to access
Counter Report:
Accessing Chart
• Click Counter Report located on Report in the Menu Bar.
• Click the Counter button located on Quick Launch Buttons.
Counter Report
A Control Buttons
B Main Display Screen
Port/Packet Setting
C
D Elapsed Time
E Apply/Cancel
XTRAMUS TECHNOLOGIES®
Options
These two buttons allow you to save the counter report or
all the settings you’ve made here on Counter Report.
This field displays the counter report of all ports.
You can make configurations for all the ports you’ve
selected here in this field, as well as packet contents.
This field displays the elapsed time of performing test.
You can press Apply to apply all the changes you’ve made
here, or press Cancel to cancel all the changes you’ve
made.
59
E-mail: sales@xtramus.com
Website: www.Xtramus.com
Page 60

5.4.6.1. Control Buttons
Control Buttons
The Save Report button allows you to save the current counter reports to Microsoft Excel ®
format files.
The Save Report button allows you to save the current settings to your PC.
The Clear button allows you to clear all statistics displayed in the Main Display Screen.
The Hide button allows you to hide some of the TX/Rx statistics, as well as fold all tree style
tab statistics in the Main Display Screen.
The Show button allows you to show all TX/Rx statistics, as well as unfold all tree style tab
statistics in the Main Display Screen.
5.4.6.2. Main Display Screen
Main Display Screen
The Main Display Screen displays counter report statistics of all ports you’ve selected for test.
XTRAMUS TECHNOLOGIES®
60
E-mail: sales@xtramus.com
Website: www.Xtramus.com
Page 61

5.4.6.3. Port/Packet Setting Options
You can make configurations for all the ports you’ve selected here in this field, as well as packet
contents here.
Test Mode
The Test Mode allows you to set how packets will be transmitted through
ports you’ve selected. There are two modes available here:
¾ Rotate: In Rotate test mode, packets will be sent from port to port in
a loop while the last port will be connected to the first port.
¾ Pair: In Pair test mode, two ports will be paired and packets will be
sent from the source port to the destination port. Please note that if
you would like to set the test mode as Pair, the number of the ports
you’ve selected must be an even number.
When the test mode is set as Pair,
NuSet-MiniPG-ST will pair ports
automatically. If you would like to
pair the selected ports manually, please press the Setting button as
shown in the figure on the right hand. A Pair Setting window will pop up.
Please follow the steps down below to pair ports manually.
1. Please press the << button on
the Pair Setting pop-up window
to remove port pair setting made
by NuSet-Mini-PG-ST
automatically.
2. Please select a port that will be
assigned as the source port from
the Source Ports field.
XTRAMUS TECHNOLOGIES®
61
E-mail: sales@xtramus.com
Website: www.Xtramus.com
Page 62

Test Mode
(Continued)
3. Please select a port that will be
assigned as the destination port
from the Destination Ports field.
4. Press the > button to add the
pair you’ve made to the Pair
Ports field. If you would like to
remove a port pair setting, please
press the < button instead. If you
would like to remove all port pair
settings, please press the <<
button.
Learning Setting
VLAN Setting
5. Please repeat step 2~4 until all
ports are paired, then press the
OK button to save all the settings
you’ve made.
You can enable or disable network learning function here in this field.
You can enable or disable VLAN
functions for all the ports you’ve
selected. When VLAN function is
enabled, you can press the Setting
button to set the VID manually.
A VLAN Set ting window will pop up,
allowing you to input VID (VLAN ID)
manually for each port. After inputting
VID for all the ports, please press the
OK button to save all the changes
you’ve made and exit VLAN Setting
pop-up window.
XTRAMUS TECHNOLOGIES®
62
E-mail: sales@xtramus.com
Website: www.Xtramus.com
Page 63

Packet Setting
Transmitting Setting
You can set packet properties here in this field.
¾ Length: You can set the packet length here with the length
scroll-down menu. The packet length available here include
128, 256, 512, 1024, 1518, and Random.
¾ Payload: This scroll-down menu allows you to set packet
contents to Random, 16’0 16’1, 32’0 32’1, 55AA, 5555AAAA,
All 1 or All 0.
¾ Utilization: You can set the utilization rate (in percentage) here
in this field.
You can set the duration for packet transmission here in the
Transmitting Setting field.
¾ By Time: NuSet-MiniPG-ST will send packets for the set
amount of time.
¾ By Packet: NuSet-MiniPG-ST will send the set amount of
packets.
XTRAMUS TECHNOLOGIES®
63
E-mail: sales@xtramus.com
Website: www.Xtramus.com
Page 64

5.5. NuSet-MiniPG-UG Functions
5.5.1. NuSet-MiniPG-UG Functions Overview
If you choose System Upgrade from NuSet-MiniPG Option Menu,
NuSet-MiniPG-UG’s main window will pop up as shown below:
Function Descriptions
A Menu Bar
Quick Launch
B
Buttons
C Info Select List
D
E
Main Display
Window
USB Connection
Status
XTRAMUS TECHNOLOGIES®
The Menu Bar allows you to update NuStreams-P6GW/NuPAD’s
firmware, FPGA and NuSet-MiniPG license.
With a simple click of these Quick Launch Buttons, you can reconnect to
disconnected NuStreams-P6GW and updating firmware, FPGA and
license.
This section displays NuStreams-P6GW’s information.
This section displays detailed system information.
This icon shows the connection status between your PC and
NuStreams-P6GW.
64
E-mail: sales@xtramus.com
Website: www.Xtramus.com
Page 65

5.5.2. NuSet-MiniPG-UG Function – Menu Bar
The Menu Bar includes configuration options such as File, Upgrade, Language, and Help.
5.5.2.1. Menu Bar – File
File
Exit
Exit NuSet-MiniPG-UG.
5.5.2.2. Menu Bar – Upgrade
Upgrade
Before upgrading NuStreams-P6GW’s firmware/FPGA, please be sure that
NuStreams–P6GW and your PC are connected via USB cable all the time.
The following demonstrations will show you how to upgrade NuS treams-P6GW’ s
firmware. Processes for upgrading NuStreams-P6GW’s FPGA are quite the
same and can be related.
1. To start upgrading NuStreams-P6GW’s firmware, click Upgrade →
Firmware Upgrade on NuSet-MiniPG-UG’s Menu Bar as shown in the figure
down below.
Firmware/FPGA
Upgrade
2. A message window will pop up, reminding you that all NuStreams-P6GW’s
settings will be reset to default after firmware upgrading. Please click Yes to
continue. Please note that all test logs stored in NuStreams-P6GW will be
erased as well.
3. Select where NuStreams-P6GW’s firmware file (in the format of “*.bin”) is
stored in your PC, then click “Open”.
XTRAMUS TECHNOLOGIES®
65
E-mail: sales@xtramus.com
Website: www.Xtramus.com
Page 66

Upgrade
4. Click Yes to start upgrading firmware.
5. NuStreams-P6GW utility will start uploading firmware from your PC to
NuStreams-P6GW.
It might take several minutes uploading firmware. Please note that the
connection between NuStreams-P6GW and your PC shall remain connected at
all time, and please be sure that the NuStreams-P6GW and your PC’s power
remain ON during the process.
Firmware/FPGA
Upgrade
(Contd.)
6. NuStreams-P6GW’s LCD will display messages as shown in the figure down
below during firmware upgrading.
7. Firmware upgrading complete! Click OK to finish.
8. NuStreams-P6GW will reboot and its LCD will display messages as shown in
the figure down below while rebooting.
XTRAMUS TECHNOLOGIES®
9. The connection between NuStreams-P6GW and your PC will be severed after
firmware upgrading. Please click the Reconnect button
on
NuStreams-P6GW’s Quick Launch Button in order to re-establish the
connection between your PC and NuStreams-P6GW.
66
E-mail: sales@xtramus.com
Website: www.Xtramus.com
Page 67

Upgrade
Before upgrading NuPAD’s firmware, please connect NuPAD,
NuStreams-P6GW, and your PC properly as shown below. The following
sections will demonstrate how to upgrade NuPAD’s firmware with
NuStreams-P6GW.
Installation for Upgrading NuPAD
1. Connect NuPAD with NuStreams-P6GW’s Console Port via a CAT-5
Straight- through cable as shown in the figure down below.
NuPAD
Firmware
Upgrade
2. Connect NuStreams-P6GW’s USB Port with your PC via a USB cable as
shown in the figure down below.
XTRAMUS TECHNOLOGIES®
After connecting NuPAD, NuStreams-P6GW, and your PC according the
descriptions shown above, please start upgrading NuPAD’s firmware according
to steps shown on the following page.
67
E-mail: sales@xtramus.com
Website: www.Xtramus.com
Page 68

Upgrade
1. To start upgrading NuStreams-P6GW’s firmware, click Upgrade → NuPAD
Firmware Upgrade on NuSet-MiniPG-UG’s Menu Bar as shown in the figure
down below.
2. Select NuPAD’s firmware (in the format of “*.bin”) stored in your PC, then click
“Open”.
NuPAD
Firmware
Upgrade
(Contd.)
3. Click Yes to start upgrading firmware.
4. NuSet-MiniPG-UG will start the NuPAD firmware upgrading process. Please
note that during the upgrading process, NuPAD, NuStreams-P6GW, and your
PC must be power on and connected properly at all time.
XTRAMUS TECHNOLOGIES®
68
E-mail: sales@xtramus.com
Website: www.Xtramus.com
Page 69

Upgrade
NuPAD
Firmware
Upgrade
(Contd.)
5. During the firmware uploading process, NuPAD’s LCD screen will show the
firmware upgrading process as shown in the figures down below.
↓
↓
6. During the firmware uploading process, NuPAD’s LCD screen will display
messages as figure shown down below.
7. Firmware upgrading completes. Please click OK to continue.
8. When the firmware completes uploading, NuPAD’s LCD will display messages
as figure shown down below.
9. NuPAD will reboot and try to re-connect with NuStreams-P6GW after
upgrading its firmware. Please remove the USB cable between your PC and
NuStreams-P6GW when NuPAD is connecting to NuStreams-P6GW.
XTRAMUS TECHNOLOGIES®
69
E-mail: sales@xtramus.com
Website: www.Xtramus.com
Page 70

Upgrade
Before upgrading NuStreams-P6GW’s license, please be sure that
NuStreams–P6GW and your PC are connected via USB cable all the time.
The following sections will demonstrate how to upgrade NuStreams-P6GW’s
license.
1. To start upgrading NuStreams-P6GW’s license, click Upgrade → License
Upgrade on NuSet-MiniPG-UG’s Menu Bar as shown in the figure down below.
2. A License Update window will pop up, showing licenses for NuSet-MiniPG
and NuStreams-P6GW. Please click the Load button located on the upper-left
part to start updating license.
License
Upgrade
3. Select the license file (in the format of “*.PMW”) stored in your PC, then click
“Open”.
XTRAMUS TECHNOLOGIES®
70
E-mail: sales@xtramus.com
Website: www.Xtramus.com
Page 71

Upgrade
4. A message window will pop up and remind you that the PMW file has been
loaded. Please click OK to continue.
5. Please note that the PMW file you’ve chosen hasn’t been upgraded yet. Click
the Upgrade button located on License Update window’s bottom-right part
to finish upgrading your license.
License
Upgrade
(Contd.)
XTRAMUS TECHNOLOGIES®
If you have any problems with your NuStreams-P6GW/NuSet-MiniPG’s licenses,
please contact Xtramus Technologies with the following contact information:
E-mail: sales@xtramus.com
Tel: +886-2-8227-6611 Fax: +886-2-8227-6622
71
E-mail: sales@xtramus.com
Website: www.Xtramus.com
Page 72

5.5.2.3. Menu Bar – Languages
Languages
English
Simplified Chinese
NuSet-MiniPG-Config has 2 different languages for its UI available. You can
set the language of UI to either English or Simplified Chinese.
5.5.2.4. Menu Bar – Help
Help
Xtramus Web
System Requirements
Access Xtramus Website (www.xtramus.com).
A “System Requirements” window will pop
up and show the requirements for your PC
and the FPGA/Firmware of
NuStreams-P6GW.
¾ OK: Click this button to exit the
“System Requirements” pop-up
window.
About
NuSet-MiniPG-UG
An “About” window will pop up and show detailed system information.
XTRAMUS TECHNOLOGIES®
72
E-mail: sales@xtramus.com
Website: www.Xtramus.com
Page 73

5.5.3. NuSet-MiniPG-UG Function – Quick Launch Buttons
These Quick Launch Buttons allow you to reconnect NuStreams-P6GW, upgrading NuStreams-P6GW’s
firmware/FPGA, upgrading NuPAD’s firmware, and upgrading NuSet-MiniPG/NuStreams-P6GW’s
license.
5.5.3.1. Quick Launch Buttons – Reconnect
Reconnect
If the USB connection between your PC and NuStreams-P6GW is down, a
“Disconnected” icon
will be shown in “USB Connection
Status”.
Reconnect
Press Reconnect button
to
re-establish the connection between your PC
and NuStreams-P6GW. If the connection has
been established successfully, a message
window will pop up, and the “USB
Connection Status” will be shown as
“Connected”
.
5.5.3.2. Quick Launch Buttons – Firmware Upgrade
Firmware Upgrade
Firmware Upgrade
The Firmware Upgrade button allows you to upgrade NuStreams-P6GW’s
firmware. For more detailed descriptions, please refer to the
“Firmware/FPGA Upgrade” section in “5.5.2.2. Menu Bar – Upgrade”.
5.5.3.3. Quick Launch Buttons – FPGA Upgrade
FPGA Upgrade
FPGA Upgrade
The FPGA Upgrade button allows you to upgrade NuStreams-P6GW’s
FPGA. For more detailed descriptions, please refer to the “Firmware/FPGA
Upgrade” section in “5.5.2.2. Menu Bar – Upgrade”.
5.5.3.4. Quick Launch Buttons – NuPAD Firmware Upgrade
NuPAD Firmware Upgrade
NuPAD Firmware
Upgrade
The NuPAD Firmware Upgrade button allows you to upgrade NuPAD’s
firmware. For more detailed descriptions, please refer to the “NuPAD
Firmware Upgrade” section in “5.5.2.2. Menu Bar – Upgrade”.
XTRAMUS TECHNOLOGIES®
73
E-mail: sales@xtramus.com
Website: www.Xtramus.com
Page 74

5.5.3.4. Quick Launch Buttons – License Upgrade
License Upgrade
License Upgrade
The License Upgrade button allows you to upgrade NuSet-MiniPG or
NuStreams-P6GW’s license. For more detailed descriptions, please refer to
the “License Upgrade” section in “5.5.2.2. Menu Bar – Upgrade”.
5.5.4. NuSet-MiniPG-UG Function – Info Select List
The Info Select List contains a list of select able options. When selected, the Main Display W indow will
show NuStreams-P6GW’s system information.
To show NuStreams-P6GW’s detailed system information, click “System Information” on the Info
Select List. A detailed System Information will display on the Main Display W indow located in the right
side of the Info Select List as shown in the figure down below.
The System Information displayed on Main Display Window shows NuStreams-P6GW and NuPAD’s
detailed information and status.
• Refresh: Update the latest system information and status, press this button.
XTRAMUS TECHNOLOGIES®
74
E-mail: sales@xtramus.com
Website: www.Xtramus.com
Page 75

6. Controlling Tests with NuPAD
NuPAD is an assistant extension keypad, especially designed for running
tests at mass production line.
With all test parameters set and stored in NuStreams-P6GW, NuPAD
allows users to perform tests without changing pre-set parameters.
6.1. NuPAD Functions Overview
Description
A Connection Port
B LCD Screen
C Control Buttons
D/E System LEDs
Connecting NuPAD with NuStreams-P6GW’s Console Port.
Displaying system information, status, and test results.
¾ || Pause: Press this button to pause the current running test.
Press this button again to resume the test.
¾ ■ Stop: Press this button to stop the current running test.
¾ ► Run: Press this button to start test.
¾ Sys/Link/Alarm: Showing NuPAD running status.
¾ Power: When NuPAD is connected to NuStreams-P6GW’s
Console Port, the Green Power LED will be ON.
¾ Pass/Fail: If the test passed, the Pass/Fail Green LED will be
ON; if the test failed, the Pass/Fail Amber LED will be ON.
¾ Step 1~4: Showing the progress of the test.
XTRAMUS TECHNOLOGIES®
75
E-mail: sales@xtramus.com
Website: www.Xtramus.com
Page 76

6.2. Connecting NuPAD with NuSTreams-P6GW
Before using NuPAD as NuStreams-P6GW’s assistant extension keypad, you have to connect
NuPAD’s Connection Port with NuStreams-P6GW’s Console Port with a CAT-5 straight-through
cable first. The figure down below is an installation example of connecting NuStreams-P6GW and
NuPAD.
After connecting NuStreams-P6GW with CAT-5 straight-through cable, NuPAD will start establishing
connection with NuStreams-P6GW, and its LCD will display system status as shown down below.
1. NuPAD is powering up.
2. Showing NuPAD’s hardware and firmware version.
3. NuPAD is starting connecting with
NuStreams-P6GW. During this process, NuPAD’s
buzzer will be beeping.
4. Connection established, and NuPAD’s buzzer stops
beeping. If NuPAD’s buzzer keeps beeping and the
connection between NuStreams-P6GW and NuPAD
can’t be established, please power off both
NuStreams-P6GW and NuPAD, power them on, and
try again.
Please note that NuStreams-P6GW cannot be connected to your PC and its LCD should be on the
Main Display menu when connecting NuStreams-P6GW with NuPAD for controlling DUT tests.
XTRAMUS TECHNOLOGIES®
76
E-mail: sales@xtramus.com
Website: www.Xtramus.com
Page 77

6.3. Starting DUT Tests with NuPAD
NuPAD has 3 buttons on its front panel: “|| Pause”, “■ Stop”, and “
► Run”. After connecting NuPAD
with NuStreams-P6GW with Cat-5 cable, you can start/pause/stop DUT tests with these 3 buttons.
Please see the table down below for a detailed description about these buttons’ functions.
Function Button Description
Press “► Run” to start all Tasks
Start Testing All
Tasks in Current Run
► Run
in the current Run. The current
Run (Run 1~3) about to be
tested will be displayed on the
upper-right part of LCD.
To change the current Run (Run 1~3), press both “|| Pause” and
“■Stop” buttons at the same time. If NuPAD is current in Run 1,
pressing both “|| Pause” and “■Stop” buttons at the same time will
switch the current Run from Run 1 to Run 2.
Press “|| Pause” button once to pause the current running test.
Press “|| Pause” button again to resume the test.
Press “■Stop” button once to stop the current running test.
Switching Current
Run
Pause Current
Running Test
Stop Current
Running Test
|| Pause
+
■Stop
|| Pause
■Stop
XTRAMUS TECHNOLOGIES®
77
E-mail: sales@xtramus.com
Website: www.Xtramus.com
Page 78

Note: Information and specifications contained in this document are subject to change without notice. Note: Information and specifications contained in this document are subject to change without notice.
XTRAMUS TECHNOLOGIES®
XTRAMUS TECHNOLOGIES®
All products and company names are trademarks of their respective corporations. All products and company names are trademarks of their respective corporations.
Copyright © 2011 Xtramus Technologies, all rights reserved. Copyright © 2011 Xtramus Technologies, all rights reserved.
Do not reproduce, redistribute or repost without written permission from Xtramus. Do not reproduce, redistribute or repost without written permission from Xtramus.
Doc # USM_NuStreams-P6GW_V1.0_ENG_Preliminary_20111014 Doc # USM_NuStreams-P6GW_V1.0_ENG_Preliminary_20111014
E-mail: sales@xtramus.com
78
78
E-mail: sales@xtramus.com
Website: www.Xtramus.com
Website: www.Xtramus.com
 Loading...