

Page 1
Scan to PC Desktop
Scan to PC Desktop
Professional v9
Professional v9
Orientation Guide
Orientation Guide
Personalize your Xerox network
scanning and your PDF workflow
Xerox Corporation – Scan to PC Desktop Professional v9 – Orientation Guide 1
Page 2

Information about this Orientation Guide
Information about this Orientation Guide
The purpose of the Scan to PC Desktop Professional v9 Customer Orientation Guide is to
provide Xerox Customers with information about how they can use the Scan to PC Desktop
Professional v9 software to make themselves more productive with the documents that they
have scanned from their Xerox device and with all of their digital documents on their PC.
This training is focused on providing information about key features of this software that
business users most often use to make them more productive. It does not go over every
item in every drop-down menu, but focuses on business workflows and practices that you
need to be productive with the documents in your office.
This training is not organized by product, but instead it is divided into topics. To clarify
which product you are working with in each topic, we have included product logos showing
the specific products that are used in that particular topic.
On the Table of Contents Page, the following symbols are used to provide more
information about some topics:
† Topics that are new or enhanced in Scan to PC Desktop Professional v9
* Topics in the “Advanced Topics” section that are also included in the Customer
Orientation Guide Training CD
Xerox Corporation – Scan to PC Desktop Professional v9 – Orientation Guide 2
Page 3

End User Training Webinar Agenda
End User Training Webinar Agenda
• Introducing Scan to PC Desktop Professional v9
• Software Features
• Scanning Documents to your Desktop PC
• Working with Scanned and Digital Documents on the PaperPort Desktop
• Working with PDF Files
• Digital Archiving with Text Searchable PDF Files
• Working with Forms
• Additional Training and Support Resources
Xerox Corporation – Scan to PC Desktop Professional v9 – Orientation Guide 3
Page 4

Table of Contents
Table of Contents
Notes: Advanced Topics will not be covered in Nuance’s web-based Scan to PC Desktop End User
Training Sessions unless specifically requested two days in advance of the scheduled training.
All topics in the Software Features section are also included in the Customer Orientation Guide
Training CD. Additionally topics in the “Advanced Topics” section that have a * are also included in
the Customer Orientation Guide Training CD.
† Topics that are new or enhanced in Scan to PC Desktop Professional v9
* Topics in the “Advanced Topics” section that are also included in the Customer Orientation Guide
Training CD
Introducing Scan to PC Desktop Professional v9…………………………………………………..…6
Software Features…………………………………………………………………………………..……….9
- Scanning Documents to your Desktop PC………………………………………………………….10
- Scanning at the Xerox MFP……………………………….……………………………………..10
- Restarting Image Retriever………………………….……...……………………………………11
- Working with Scanned and Digital Documents on the PaperPort Desktop…………………...…12
- PaperPort Desktop………………………….…………………………………………………….12
- PaperPort Folder View…………………….……………….…………………...…….………….12
- Adding Additional Folders to Folder View…………………….……..……………….…………13
- Folder Notes †…………………….……………………………………………………………….13
- Moving Documents into Work Processes…………………….………..……………………….14
- Moving a Document into a Different Folder…………………….…….…….....…….…….14
- PaperPort SendTo Bar - Information…………………….……………………...…...…….14
- PaperPort SendTo Bar – Email Links…………………….……………………...…...……14
- Working with PDF Files…………………….…………………………………………………………15
- Business Document File Types…………………….……………………………………………15
- Flavors of PDF Files…………………….…………………...…………...………………………16
- Creating PDF Files…………………….………………………………………………………….17
- Scan from a Xerox MFP…………………….…………………………………….…………17
- Combine Different File Types into one PDF File…………………….……………………17
- Create PDF files from Inside of MS Word and MS Excel…………………….….…...….17
- Advanced PDF Creation from any Application…………………….………..…………….18
Xerox Corporation – Scan to PC Desktop Professional v9 – Orientation Guide 4
Page 5

- Editing PDF Files…………………….…………………………………………………...…….19
- Rearrange and Add Pages to a PDF File…………………….……………………….…19
- Stacking and Unstacking PDF files…………………….……………..…………….……19
- PDF Image Cleanup with PaperPort SET Tools…………………….…………….……20
- Annotate PDF Files…………………….…………………………….…………….………21
- Edit PDF Normal Files in PDF Converter Professional………………….…..…………22
- Edit Any PDF File Using OCR…………..……………………………………….……….22
- Securing PDF Files……..…………………………………………………..………….………23
- Digital Archiving with Text Searchable PDF Files……..……………………..…………….……24
- Working with Forms…..……………………..………………….……………………..……………25
Additional Training and Support Resources…..………………..…………………..………………26
Advanced Training Topics…..……………………..………………..…………………………………28
- Advanced OCR Topics…..……………………..………………..……….…………………..……29
- Manual Zoning for More Accurate OCR for Complex Documents *………………………29
*
- Automatic OCR – OmniPage Batch Manager…………………………………………….…30
- Creating Audio Documents from Paper and Digital Documents…………………..………32
- Advanced PDF Topics……………………………………………………..……………………….33
- Change the File Association for PDF files †…………………………………………………33
- Batch Conversion to PDF using the PDF Create! Assistant……………………………….33
- Adding Bookmarks to PDF Files †……………………………………………………………34
- Redacting PDF Files * †…………………………………………...…………………………..35
- Adding Page Numbers to PDF Files †…………………………….…………………………36
- Advanced PaperPort Topics……………………………………………………………………….37
- Creating a Signature Stamp *…..……………………..………………..…………………….37
- All-in-One Search…..……………………..………………..……………...……..……………39
- Changing Folder Colors in Folder View *…..…………………………………..……………41
- Image Retriever Settings *…………………………………………………………………………42
Xerox Corporation – Scan to PC Desktop Professional v9 – Orientation Guide 5
Page 6

Introducing Scan to PC Desktop
Introducing Scan to PC Desktop
Professional v9
Professional v9
Xerox Corporation – Scan to PC Desktop Professional v9 – Orientation Guide 6
Page 7
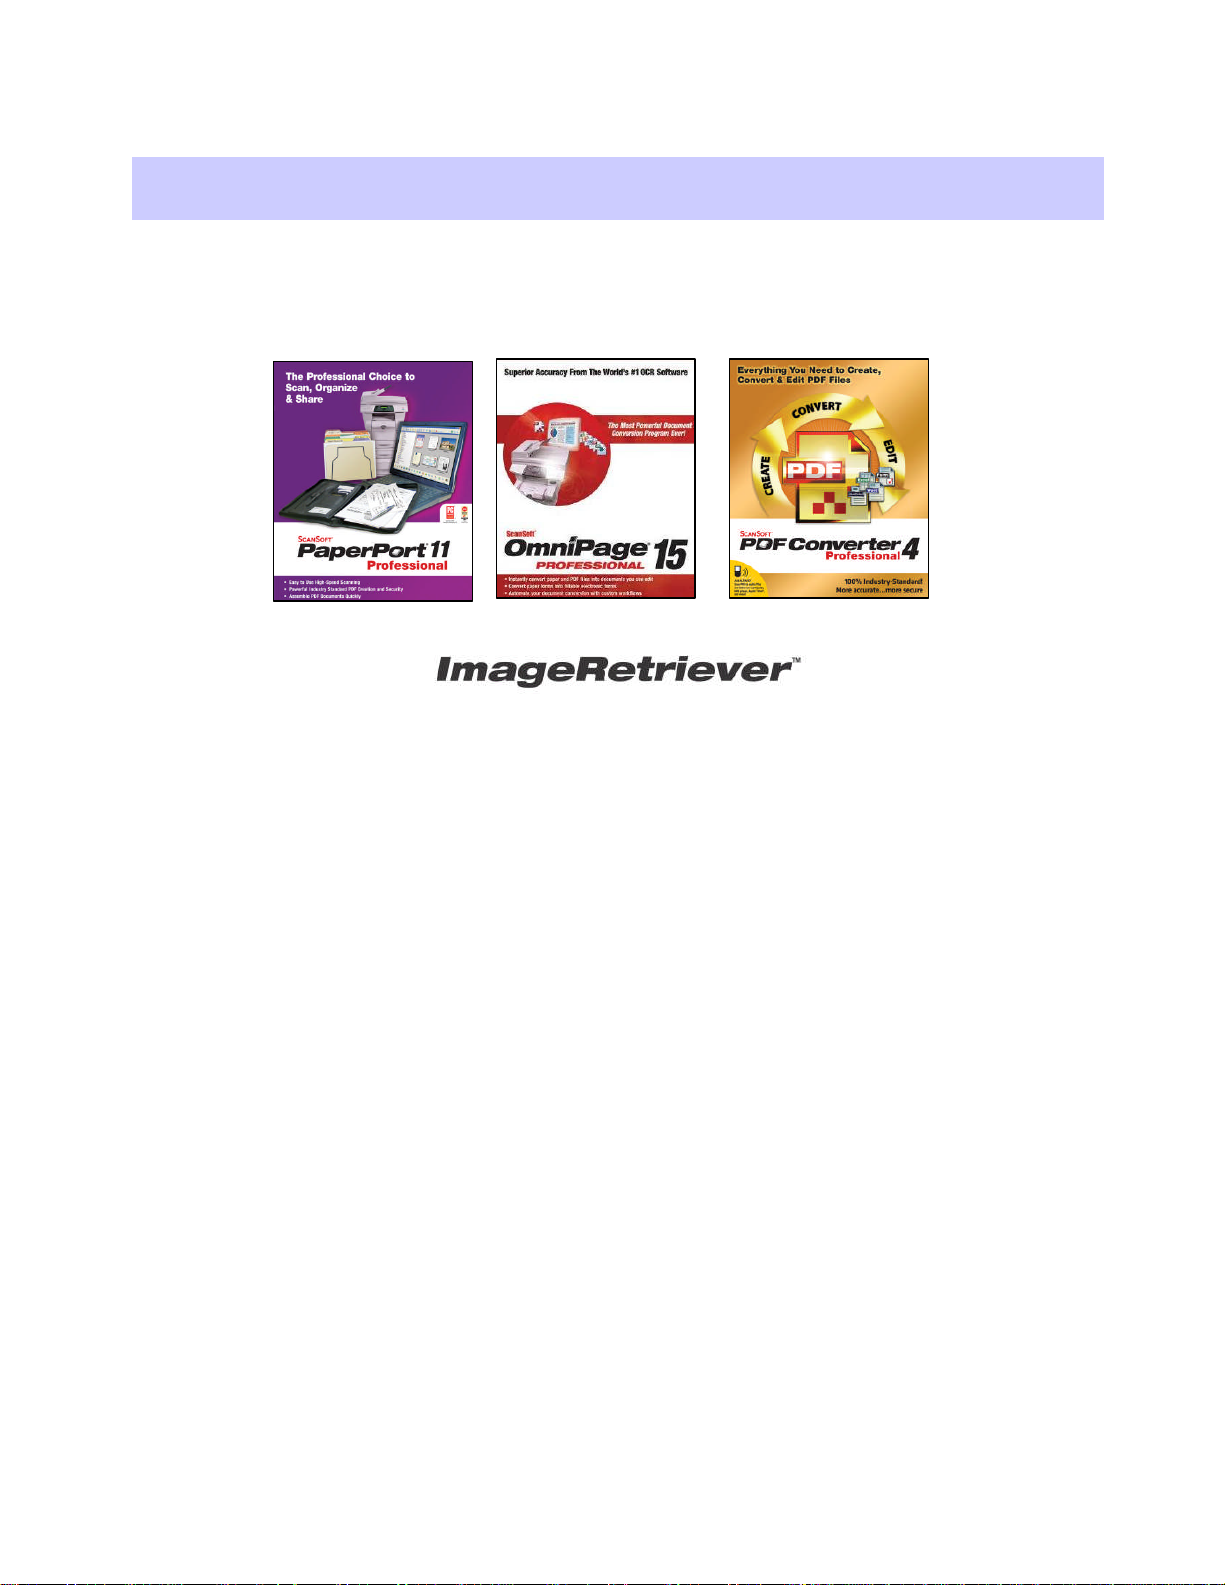
Introducing Scan to PC Desktop Professional v9
Introducing Scan to PC Desktop Professional v9
• A complete network to desktop office scanning solution
• Automatic device to desktop scanned image file delivery
• Secure PDF workflow from start to finish of all scanning applications
• Professional OCR for digital archiving, document and forms conversion
Each program is installed on your desktop PC. This software does not run on the server.
Xerox Corporation – Scan to PC Desktop Professional v9 – Orientation Guide 7
Page 8
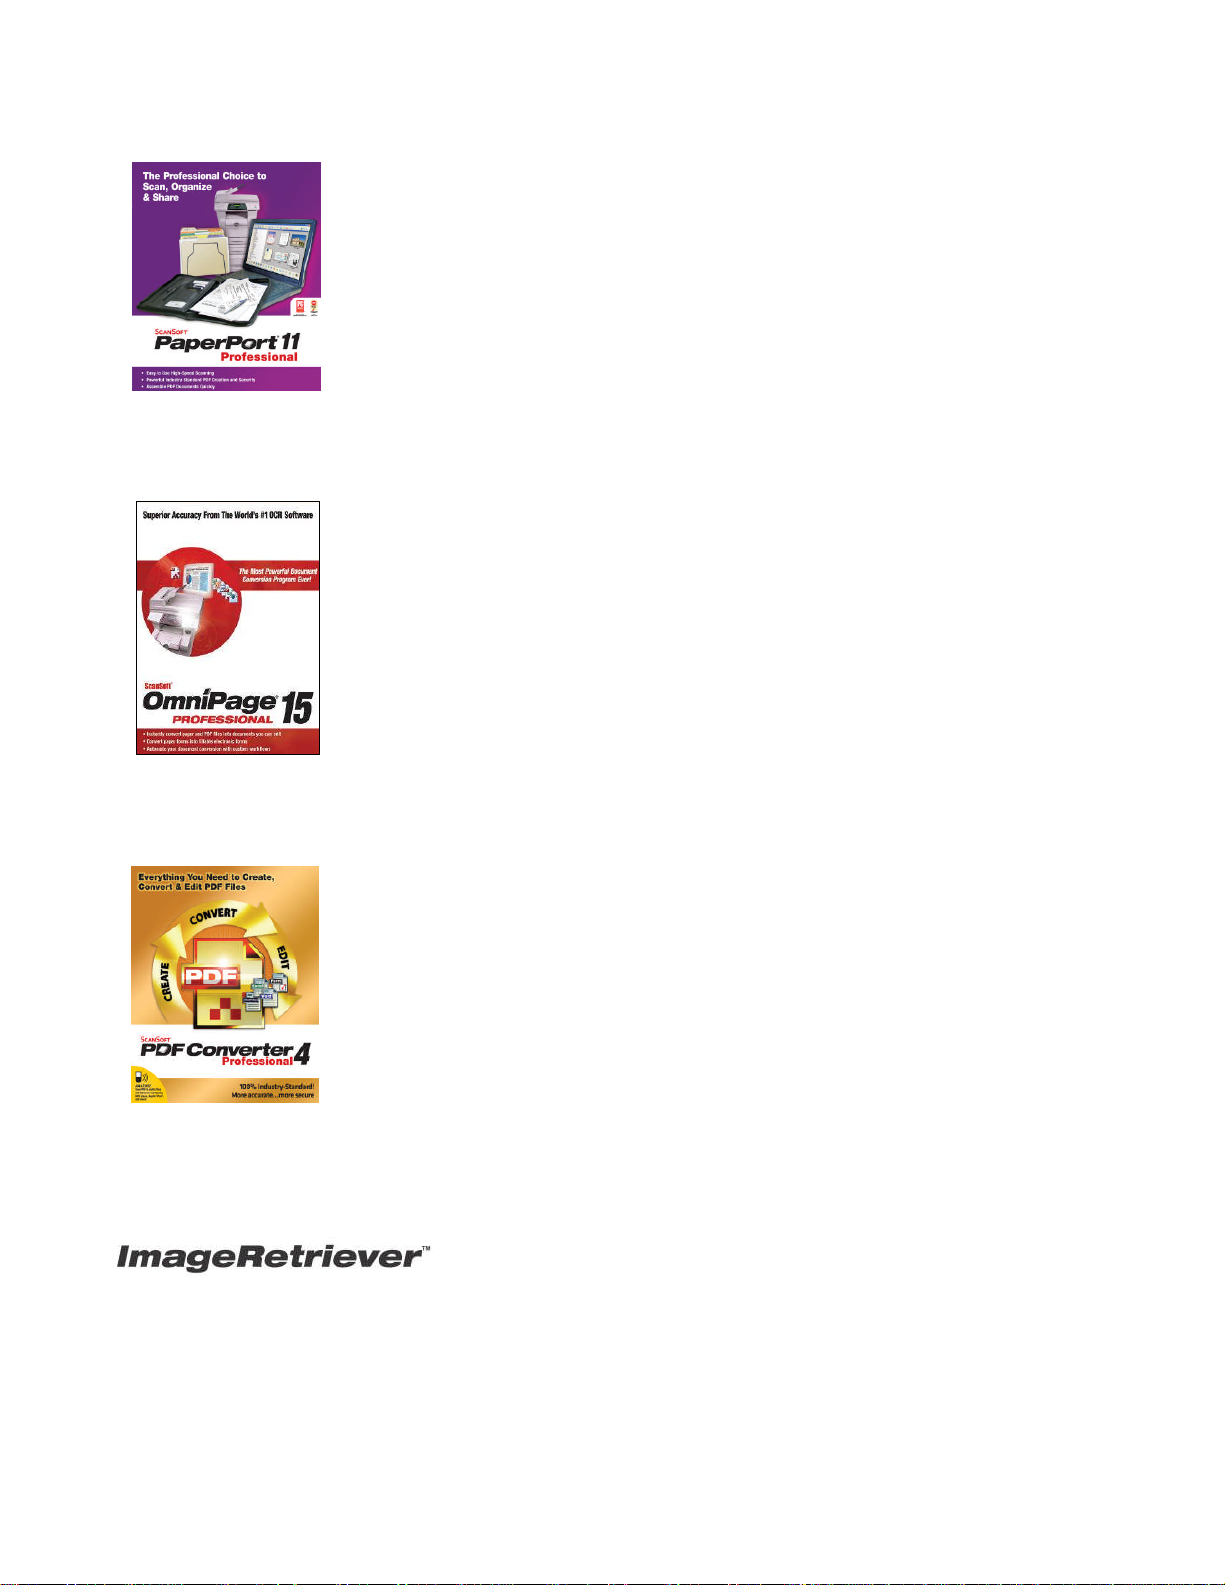
Quickly turn paper into organized digital documents
Provide a better way to organize documents on your desktop
Easily create secure PDFs from Windows applications
Simply assemble scanned and digital documents
Ensure you never misplace a document or PDF file again
Instantly convert paper into useable Microsoft Office documents
Turn PDF files into editable documents while retaining their layout
Create unlimited searchable PDF files for digital archives
Paper to digital forms conversion with Logical Forms Recognition
Automatically process scanned images from Xerox MFP
Create industry-standard PDF instantly from any application
Protect PDF documents with password and permission controls
Paper to digital forms conversion to fill out and edit PDF forms
Directly edit within PDF files including text, comments and markups
Precise Conversion of PDF into Word, Excel and WordPerfect
Automated delivery of scanned images direct to the end user
desktop with Image Retriever Professional
Monitoring & Automated Delivery from Network Folders or E Mail
Inbox
Xerox Corporation – Scan to PC Desktop Professional v9 – Orientation Guide 8
Page 9

Software Features
Software Features
Xerox Corporation – Scan to PC Desktop Professional v9 – Orientation Guide 9
Page 10
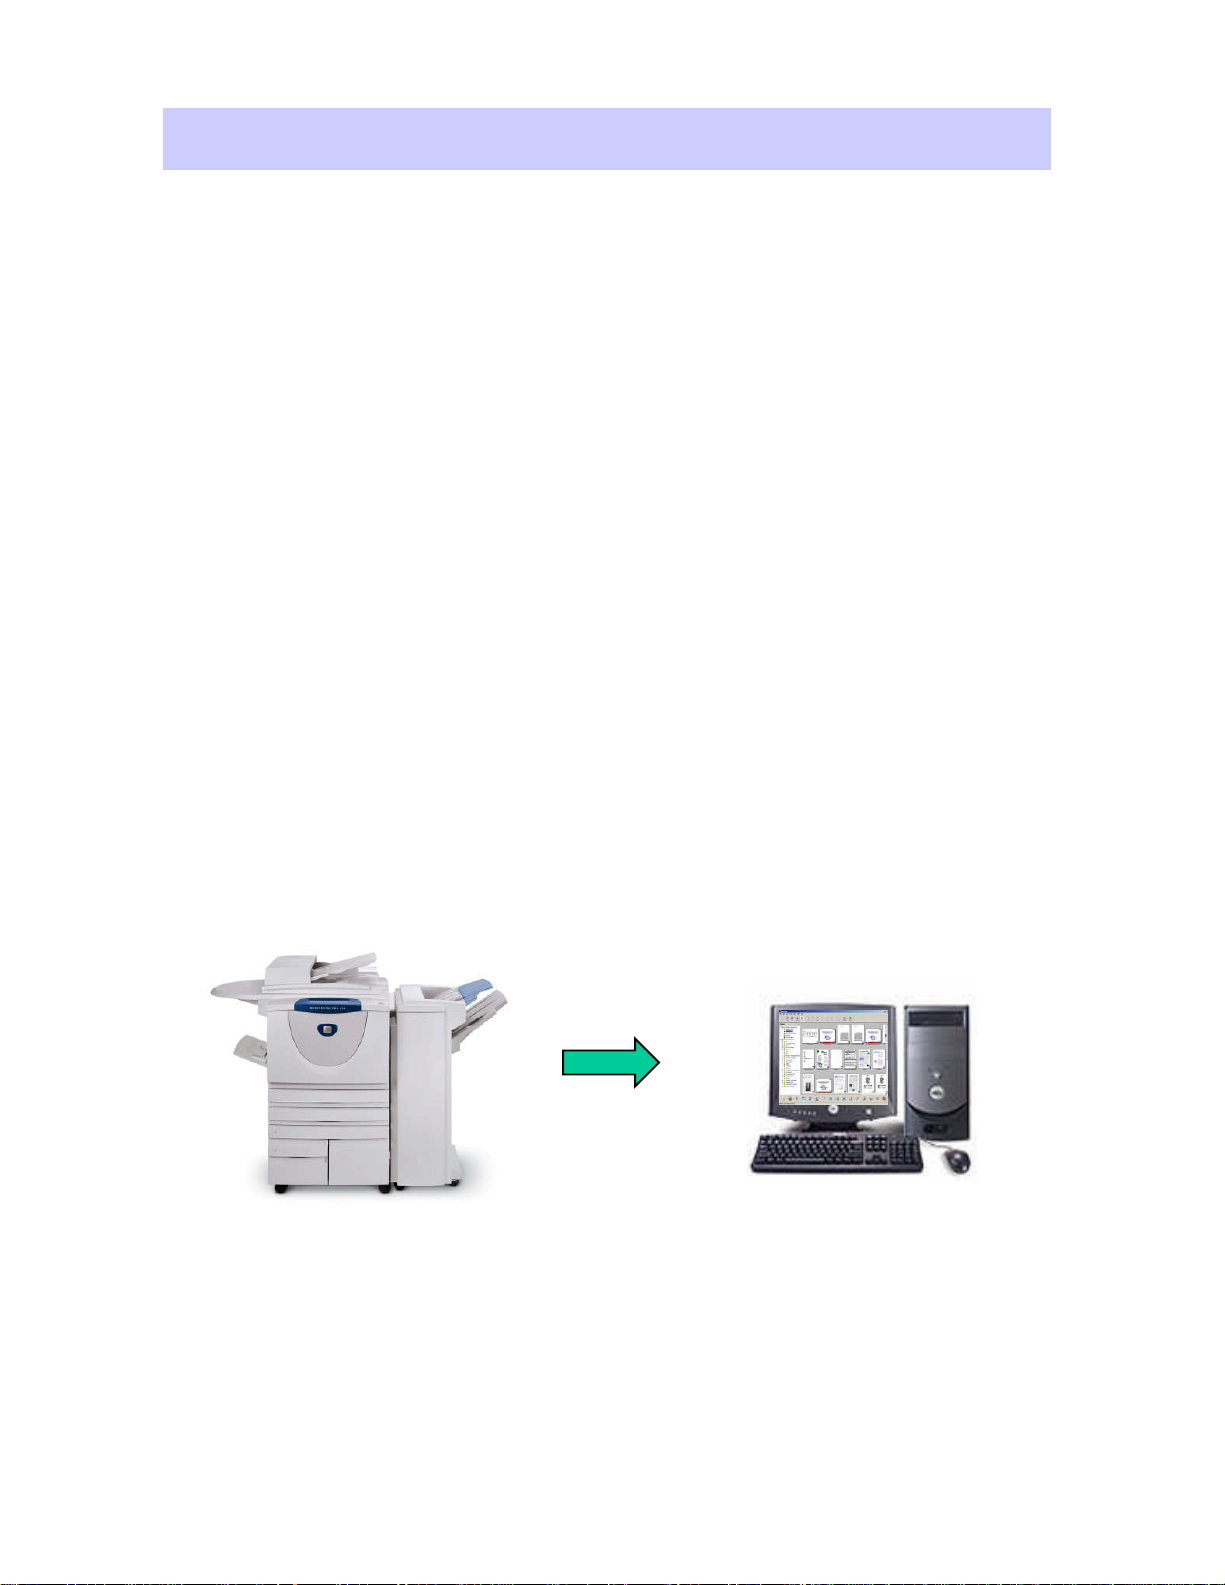
Scanning Documents to your Desktop PC
Scanning Documents to your Desktop PC
Scanning at the Xerox MFP
Your Xerox Analyst has already trained you on how to scan a document using the steps listed
below.
The PaperPort Image Retriever tool included with Scan to PC Desktop completely automates the
scanning process so that each new scanned image is there waiting for you on your PaperPort
desktop by the time you physically return to your office from scanning at the MFP.
To scan a document back to your PC:
1. Load the paper into the document feeder on the Xerox MFP.
2. Select “Network Scanning” from the control screen.
3. Select your template from the list
OR
Use the scan-to-email feature to email the scanned images to yourself as an email
attachment.
4. Press the green Start button. Walk back to your PC and Image Retriever will deliver the
scanned image back to your PC and save it onto the PaperPort Desktop. The PaperPort
Desktop will be open and your scanned image will be on the PaperPort Desktop with a red box
around it.
Xerox Corporation – Scan to PC Desktop Professional v9 – Orientation Guide 10
Page 11
Restarting Image Retriever
If Image Retriever is already running on your PC, you will see the Image Retriever icon in your Systray
in the lower right corner of your Windows Desktop near the clock.
Image Retriever Settings are usually configured by your IT Department. More information about Image
Retriever Settings is in the “Advanced Topics” section of this Orientation Guide.
If your PC loses its connection to the network, you may have to restart Image Retriever. To restart Image
Retriever:
1. Go to Start > All Programs > ScanSoft PaperPort Pro 11 > Image Retriever.
2. The Image Retriever icon will appear in System Tray in the lower right corner of your
Windows Desktop near the clock.
Xerox Corporation – Scan to PC Desktop Professional v9 – Orientation Guide 11
Page 12
Working with Scanned and Digital
Working with Scanned and Digital
Documents on the PaperPort Desktop
Documents on the PaperPort Desktop
PaperPort Desktop
After scanning a document from the Xerox device, when you return to your PC, PaperPort will be open,
and you will see your scanned image on the PaperPort Desktop with a red box around it.
Scanned Image
PaperPort Desktop
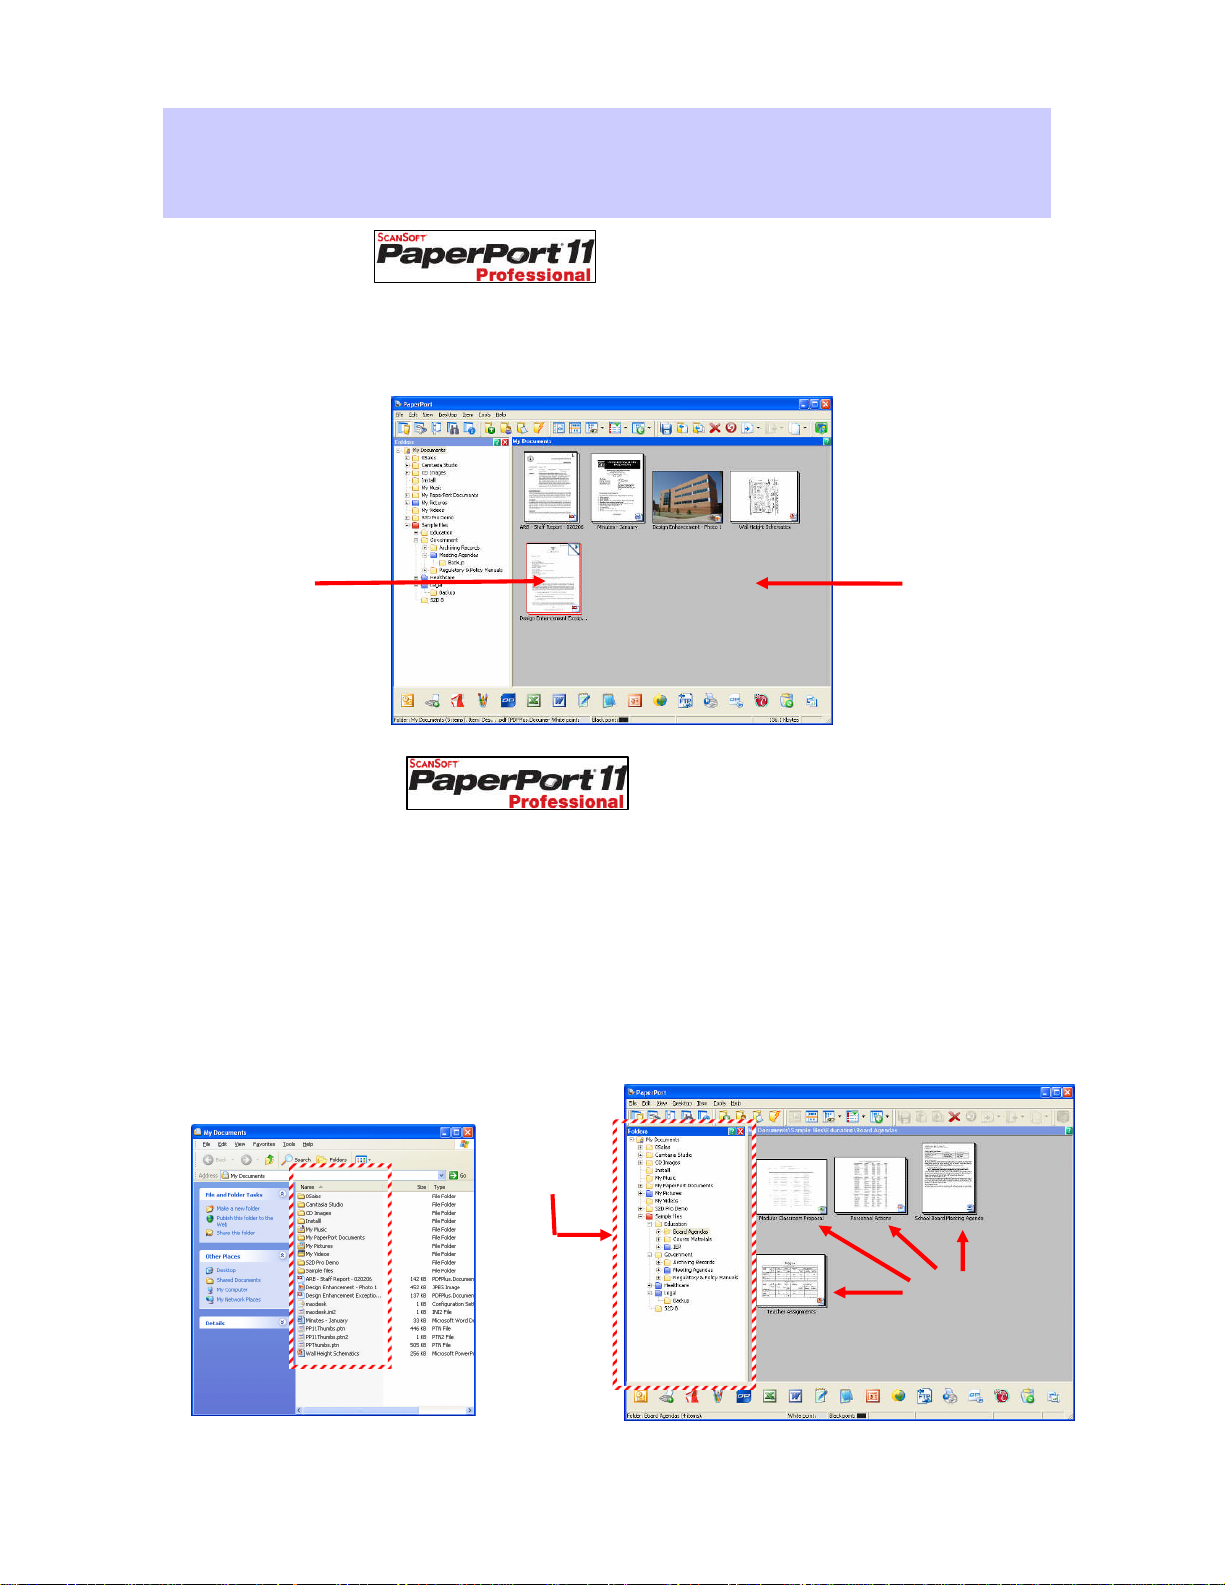
PaperPort Folder View
PaperPort automatically displays your My Documents folder and all of that folders sub-folders in
PaperPort’s Folder View. This is the same My Documents folder structure that you see through Windows
Explorer.
When you click on a folder in PaperPort’s Folder View, the documents and images in this folder are
displayed on the PaperPort Desktop as Thumbnails. These Thumbnails show you a view of what the
document actually looks like, making it very easy for you to visually manage all of the documents on your
PC, including Microsoft Office, PDF, and images. Icons showing you the file type are visible in the lower
right corner of the Thumbnail.
Windows Explorer
Folder View
Thumbnails
Xerox Corporation – Scan to PC Desktop Professional v9 – Orientation Guide 12
Page 13
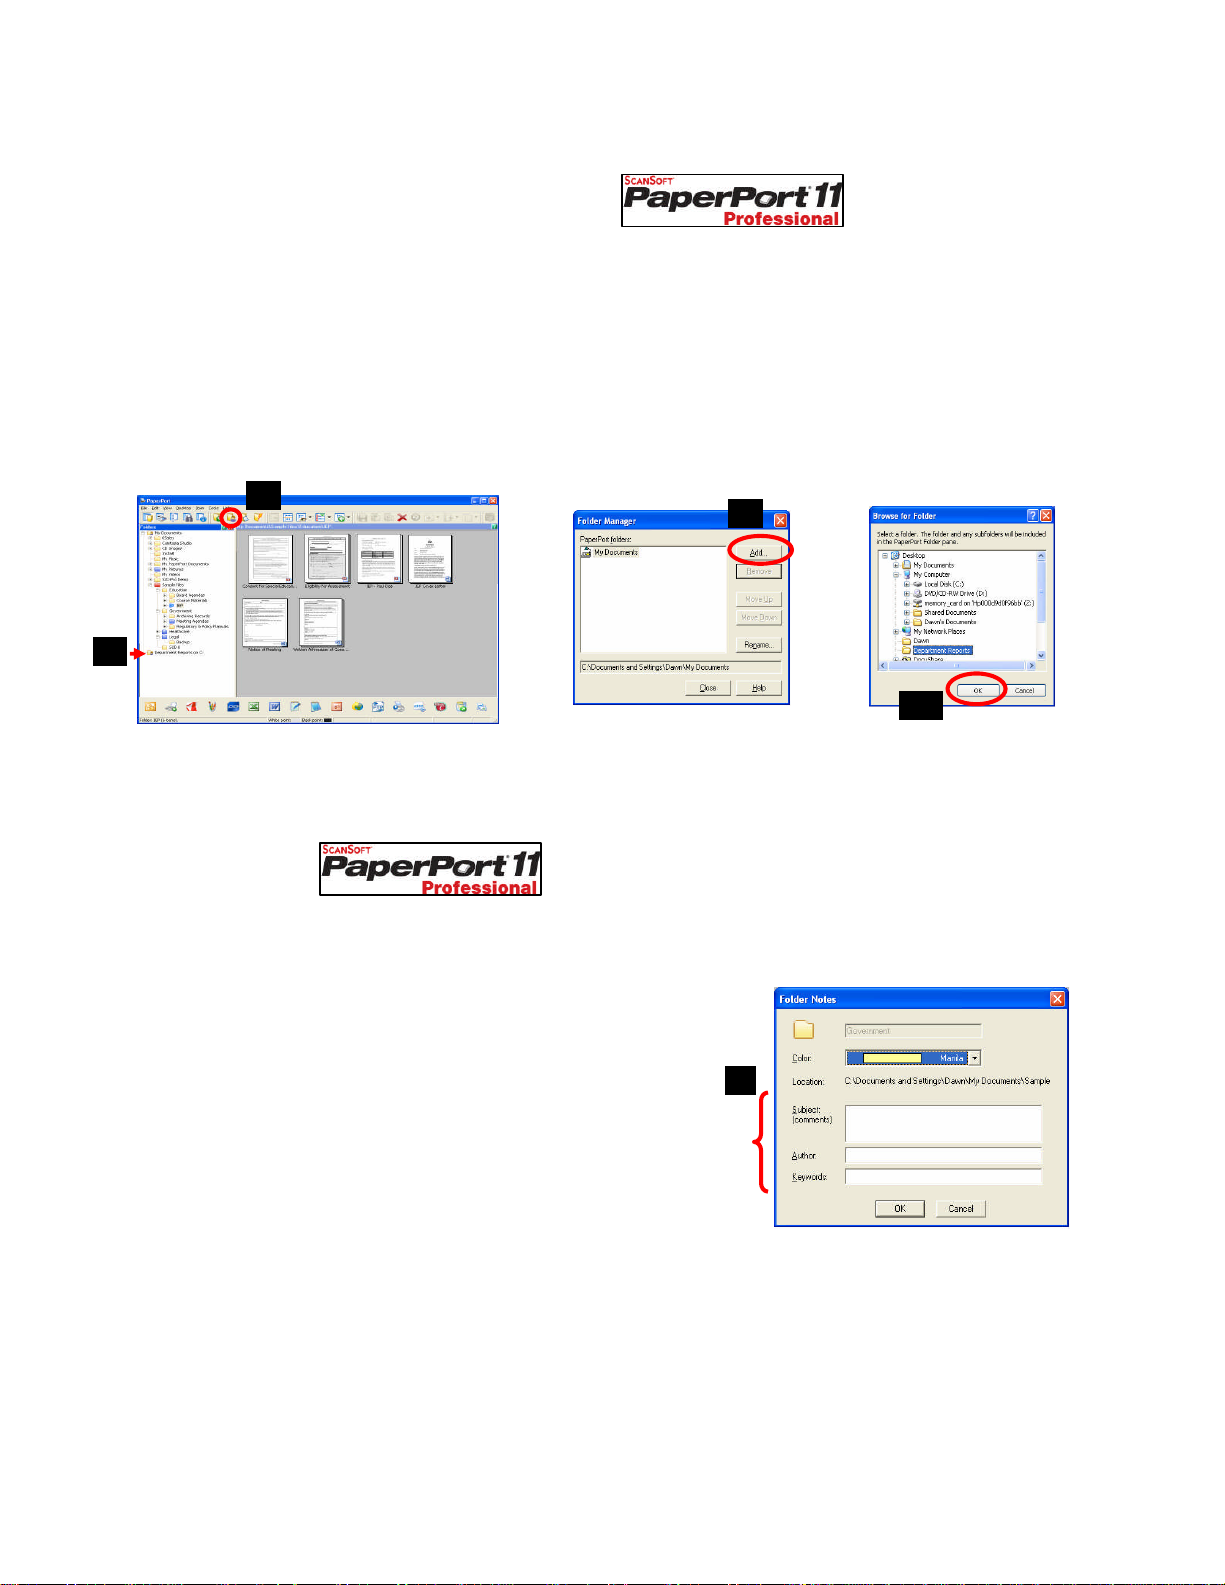
Adding Additional Folders to Folder View
By default, the My Documents folder is added to the PaperPort’s Folder View. To add additional
folders to Folder View:
1. Click on the “Folder Manager” button.
2. Click on “Add”.
3. Browse to the folder that you want to add (local or network) and click on “OK”.
4. Click on “Close” to close the Folder Manager window.
5. Your newly added folder will appear at the bottom of Folder View.
1
5
2
3
Folder Notes †
Folder Notes allow you to automatically specify metadata (keywords, author, etc.) to all new PDF files
that arrive via Image Retriever into a particular folder in PaperPort’s Folder View. If a PDF item is put
into a folder any other way, Folder Notes will note be applied to it. To add Folder Notes to a folder:
1. In PaperPort’s Folder View, right click on a Folder and select
“Folder Notes”.
2
2. Add text to the Subject, Author, and/or Keywords fields.
3. Click on “OK” to close the “Folder Notes” window.
4. Now when Image Retriever delivers PDF files to that folder, the
Subject, Author, and/or Keywords will be added to that PDF file
automatically.
† Topics that are new or enhanced in Scan to PC Desktop Professional v9
Xerox Corporation – Scan to PC Desktop Professional v9 – Orientation Guide 13
Page 14

Moving Documents into Work Processes
Moving a Document into a Different Folder
To move a document into a different
folder, simply drag and drop it from
the PaperPort Desktop into a different
folder.
PaperPort SendTo Bar - Information
The PaperPort SendTo Bar allows you to quickly and easily move documents from the PaperPort
Desktop into other applications on your PC.
When PaperPort is installed, it automatically detects which programs that you have on your PC and
automatically adds text and imaging programs to the SendTo Bar. For example if you have Corel
Word Perfect installed on your PC rather than Microsoft Word, the PaperPort will create a link to
Word Perfect, but will not create a link to Word.
PaperPort SendTo Bar – Email Links
The PaperPort SendTo Bar allows you to quickly and easily email documents from the PaperPort
Desktop using several popular email programs, such as Microsoft Outlook and Lotus Notes by
following these steps:
1. Drag a document from the PaperPort
Desktop down to the email link.
2. A new email message will appear with the
document already attached.
3. Simply type in the email address and click
on “Send”.
4. You have now sent the document as an
email attachment.
1
2
Xerox Corporation – Scan to PC Desktop Professional v9 – Orientation Guide 14
Page 15

Working with PDF Files
Working with PDF Files
Business Document File Types
Today, most offices have 75% - 90% of their information stored in one of these three document
formats: Paper, PDF, and Microsoft Office. This training session will help you learn how to move
information between these three document formats.
Business users have three needs for PDF: Create, Edit, and Secure PDF files. This training
session will show you how to meet all of these needs, without having to purchase the full Adobe
Acrobat software.
Xerox Corporation – Scan to PC Desktop Professional v9 – Orientation Guide 15
Page 16

Flavors of PDF Files
There are three main types or “flavors” of PDF files that can be created using Scan to PC Desktop
Professional v9 with a Xerox MFP:
• Image Only PDF
The PDF file looks exactly like the original paper document. The
PDF file is only viewable and is not searchable. These PDF files
can be cleaned up and annotated in PaperPort (additional
information is available on Pages 20 – 21).
It can be created by scanning as a PDF from a Xerox MFP.
• Text Searchable PDF (PDF with image on text)
This is a multi-layered document. The “top” layer is an image layer
and the “bottom” layer is a layer of text. The layer of text is what
makes this PDF searchable. When this file is viewed in the free
Adobe Reader, you are looking at the image layer, so the PDF looks
exactly like the original paper document.
PDFs that are scanned from a Xerox device are Image Only PDFs and
are not yet searchable. A Text Searchable PDF can be created on the
PaperPort Desktop by right clicking on an Image Only PDF and
selecting Save As > PDF Searchable Image. Anotheroption is to
OCR (Optical Character Recognition) a document using OmniPage
and select “PDF with image on text” as the file type.
Text Searchable PDF is the best file format for digital archiving
because every word inside the document is searchable. They can be
searched upon using almost any document management software,
including DocuShare, SharePoint, iManage, and Documentum. Also,
they can be searched upon using the Search feature in Windows
Explorer.
Image Layer
Image
Only
OCR
using
Omni
Page
Image
Only
Text Layer
Text
Searchable
• PDF Normal
Most often, it is created from a PDF that originated as a text
document. This file is viewable and searchable. It can be edited
in PDF Converter Professional and Adobe Acrobat.
It can be created by printing from a text document (Word, Excel,
Word Perfect, etc.) using the ScanSoft PDF Create printer
driver.
Xerox Corporation – Scan to PC Desktop Professional v9 – Orientation Guide 16
ScanSoft
PDF
Create
Normal
Page 17

Creating PDF Files
There are many ways to create PDF files using Scan to PC Desktop Professional v9 with a Xerox MFP.
Instructions for some of these ways are below:
• Scan from a Xerox MFP
Please refer to Page 10 for instructions for how to scan a PDF file to your desktop.
• Combine Different File Types into one PDF File
1. On the PaperPort Desktop, hold
down the Ctrl key and click on the
documents that you want to
combine together. These could be
documents of different file types.
For example, you could select a
MS Word and MS Excel file.
2. Right click and select “Combine
Items into PDF”.
3. PaperPort will make a PDF file
copy of each file and will
automatically stack the PDF file
copies together into a PDF file on
the PaperPort Desktop.
2
• Basic PDF file Creation from Inside of MS Word and MS Excel
PDF Converter Professional 4 adds shortcut buttons to the toolbars in MS Word and MS Excel.
1
1. From inside of Word, click
on the button in the
toolbar.
2. Browse to the location of
where you want to save
your PDF file.
3. Click on “Save” and your
PDF file will be saved to
the location that you
selected.
Xerox Corporation – Scan to PC Desktop Professional v9 – Orientation Guide 17
3
Page 18

• Advanced PDF Creation from any Application
PDF Converter Professional 4 includes the ScanSoft PDF Create! print driver that enables you to print
a PDF file from any application.
1. From within the desired application, go to File > Print and then select “ScanSoft PDF Create!” as your
printer.
2. Select OK and you will be prompted to select where you want your PDF files saved.
3. You can also click on the “Properties” button and click on the “PDF Settings” tab to access more
advanced features, such as version, compression level, and security.
4. By clicking on the “Advanced” button next to the “Security” drop-down menu, you can select your
desired security options so that you can automatically print a secure PDF file. More information about
PDF Security is on Page 23.
1
2
3
4
Xerox Corporation – Scan to PC Desktop Professional v9 – Orientation Guide 18
Page 19

Editing PDF Files
• Rearrange and Add Pages to a PDF File
On the PaperPort Desktop, the Page Thumbnails pane displays the page thumbnails of a selected PDF
file in Desktop View. Within Thumbnail View you can rearrange pages within a PDF files and add pages
into the PDF.
1. On the PaperPort Desktop, click once
on the PDF file to select it.
2. Go to View > Page Thumbnails. The
left pane will change to the Thumbnail
View and each page of the PDF file will
be displayed.
3. Within Thumbnail View, use your mouse
to drag and drop the pages to rearrange
the pages in the PDF file.
4. Also, you can drag documents in any
format from the PaperPort Desktop into
Thumbnail View. A PDF file copy of that
document will be created and the newly
created PDF file will be automatically
inserted into the location in the PDF file
that you selected.
2
3
4
• Stacking and Unstacking PDF files
You can combine, or stack, individual PDFs into multipage PDFs. PDF file thumbnails can be copied,
stacked, and unstacked just as you would with physical paper documents
To stack, or combine, two PDF files one on top of the other to create a new document, you can either:
A. Select one PDF and then drag that image with the mouse on top of the other PDF file.
B. Select both images you want to combine by holding down the Ctrl key and using the mouse to click on
each of the PDF files that you want to combine together. Then click on the “Stack” button on the
Command Bar.
In both cases, the result will be a combined new PDF file with multiple pages.
To unstack pages in the PDF file, right click on the PDF file and select Unstack > All Pages or Current Page.
B
A
Xerox Corporation – Scan to PC Desktop Professional v9 – Orientation Guide 19
Page 20

• PDF Image Cleanup with PaperPort SET Tools
PaperPort includes SET (Scanner Enhancement Technology) Tools which allow you to do some basic
image cleanup of your scanned images and PDF files. PaperPort Professional 11 provides the ability for
you to use the SET Tools on any PDF file. If you have a PDF where SET tools are not available,
PaperPort will ask you if you want to automatically convert to a PDF that can be edited with the SET
Tools.
To access the SET Tools to cleanup a PDF file:
1. On the PaperPort Desktop, right click on the PDF file and select “View” to open the PDF file in
PaperPort’s Page View.
2. Use the SET Tools on the right toolbar to cleanup your image.
Select Area – select an area of an item. You
can then cut, copy, or paste that area.
Rotate Right – you can repeatedly rotate
items 90 degrees.
Auto Straighten – automatically makes lines of
text horizontal.
Straighten – manually straighten pictures and
text pages.
Auto Enhance – performs automatic image
improvement.
Enhance – offers variation of your image to
choose from and lets you change brightness,
contrast, tint, etc.
Sharpen – improves blurred areas or entire
images.
Remove Red Eye – removes the “red eye”
effect from a selected part of a photo.
Crop – deletes everything outside a rectangle
that you draw on the image.
Erase – deletes unwanted parts of your
image much like a rubber eraser.
Remove Stray Dots – removes stray dots or
“speckles” from a page. This tool only works
with black and white images.
Improve Lines – darkens lines and
connects broken lines in a table or form.
This makes lines appear darker and
straighter. This tool only works with black
and white images.
Erase edges – clear shadows and spots from
page edges.
Set Black and White Points – lets you define
the darkest and the lightest points for
enhancement.
Apply current White and Black Points –
once you have achieved the best white-black
combination, click this tool to apply these
values to the current page.
Xerox Corporation – Scan to PC Desktop Professional v9 – Orientation Guide 20
Page 21

• Annotate PDF Files
PaperPort includes the ability to annotate or “mark-up” PDF files. These features work with any flavor of
PDF file.
To access the AnnotationTools to mark-up a PDF file:
1. On the PaperPort Desktop, right click on the PDF file and select
“View” to open the PDF file in PaperPort’s Page View.
2. Use the Annotation Tools on the left toolbar to mark-up your
image.
Select Annotation – Click to select, move, or resize annotations on a page.
Note – Creates a resizable note much like a sticky note you can write on and then
stick on paper documents.
Text – Click to add a line of text with a transparent background.
Highlighter – Use to highlight any part of a page for emphasis, like the markings
you make with a highlighter marker on paper.
Pencil – Use to draw any mark, shape, or line on a page.
Arrow or Line – Use to draw straight lines, with or without arrowheads, to point to
specific items or text.
Stamp – Use to paste a graphic or bitmap file onto a page, much like you can
stamp an image on a paper document. PaperPort comes with several samples
you can use, or you can create and incorporate other bitmaps as annotations on
your items.
Xerox Corporation – Scan to PC Desktop Professional v9 – Orientation Guide 21
Page 22

• Edit PDF Normal Files in PDF Converter Professional
PDF Converter Professional 4 provides the ability to edit PDF Normal files. You can edit the text and
images within these files.
Note: To edit other flavors of PDF files, see the section “Edit any PDF File Using OCR” on the bottom
half of this page for information about using OCR to convert PDF files to text file types for editing.
To edit a PDF file using PDF Converter Professional:
1. Go to Start > All Programs > ScanSoft PDF
Professional 4 > PDF Converter Professional to
open the PDF Converter Professional application.
2. Go to File > Open.
3. Browse to the location of the PDF file that you
want to edit and then click on “Open”. The PDF
file will be opened in PDF Converter
Professional.
4. Click on the “Touchup Text Tool” or “Touchup
Object Tool” button to select it.
5. Use your mouse to edit the text or image within
the document.
• Edit Any PDF File Using OCR
From the PaperPort Desktop, you can utilize the power of the OmniPage OCR program to convert
any PDF file into an editable file format, such as Word, Excel, or Word Perfect.
OCR or Optical Character Recognition is the process of converting a scanned image or a PDF file
into editable text, such as MS Word, MS Excel, or Word Perfect.
To OCR a PDF file and convert it to MS Word:
1. Drag the PDF file from the PaperPort Desktop down to the Word link. The Word link is automatically
configured to use the OmniPage Professional OCR engine to do an automatic OCR.
2. The “OCR Proofreader” appears, allowing you to proofread the document before it is converted to
Word. Correct any suspect words.
3. The document is automatically opened as a fully editable MS Word document.
2
1
3
Xerox Corporation – Scan to PC Desktop Professional v9 – Orientation Guide 22
Page 23

Securing PDF Files
In PaperPort Professional, you can adjust the security level of your PDF files. There are two types of
passwords in the program. The open password restricts document accessibility: you can only open it by
supplying the password when prompted. The permissions password allows users to define how the
document may be used. If it is not specified, further use of the file is possible without any restrictions.
To add PDF Security from the PaperPort Desktop:
1. Right click on the PDF and select “PDF
Security”.
2. From the “PDF Security” window, check the
options to control opening, printing, or
editing the PDF file.
A. To require the user to enter a
password before they can view the PDF
in the free Adobe Reader or another
PDF viewing or editing application,
check the option for “Ask for a
password…” and enter a password into
the field below it.
B. To disable the ability to print the
PDF, check the option for “Use a
permissions password…” and select
“None” from the “Printing allowed” dropdown menu.
C. To disable the ability to edit or
change the PDF, check the option for
“Use a permissions password…” and
select “None” from the “Changes
allowed” drop-down menu.
D.Check or uncheck additional security
options, depending on your needs for
this document.
3. Click on “OK” to activate your security
settings for the PDF file.
A
B
C
D
Xerox Corporation – Scan to PC Desktop Professional v9 – Orientation Guide 23
Page 24

Digital Archiving with Text Searchable PDF Files
Digital Archiving with Text Searchable PDF Files
In the “Flavors of PDF” section of this document on Page 16, information was provided regarding why Text
Searchable PDF is the best file format for digital archiving. The reason is that every word inside a Text
Searchable PDF is searchable. These files are searchable, but you can still view the image layer of the
PDF, which looks exactly like the original scanned image.
They can be searched upon using almost any document management software, including DocuShare,
SharePoint, iManage, and Documentum. Also, they can be searched upon using the Search feature in
Windows Explorer.
Scan to PC Desktop Professional provides several ways to create PDF files. For day-forward digital
archiving, you can create Text Searchable PDF files directly on the PaperPort Desktop.
To create Text Searchable PDF files from the PaperPort Desktop:
1. Right click on the PDF file and select “Save As”.
2. From the “Save as type” drop-down menu, select “PDF Searchable Image” as the file type.
3. Click on “Save”. PaperPort automatically engages OmniPage in the background and OmniPage does a
background OCR and makes every word inside of the PDF file searchable.
4. A Text Searchable PDF file copy of the document is saved onto the PaperPort Desktop.
5. You can then drag the Text Searchable PDF file down to a link to your Enterprise Content Management
System, such as Xerox DocuShare and Microsoft SharePoint.
6. You can also download a PaperPort ODMA or PaperPort WebDav link that will allow you to drag
documents from the PaperPort Desktop to one of these links and then upload that document into an
Enterprise Content Management system that supports one of those standards. This link is available for
download at http://www.nuance.com/paperport/links
1
2
5
3
Xerox Corporation – Scan to PC Desktop Professional v9 – Orientation Guide 24
Page 25

Working with Forms
Working with Forms
Creating a Fillable PDF Form
PDF Converter Professional provides you with the ability to convert a blank scanned PDF form or a
blank PDF form that has been downloaded from the Internet into a form that can be filled-in by
anyone using the free Adobe Reader.
1. Open PDF Converter Professional by going to
Start > All Programs > ScanSoft PDF
Professional 4 > PDF Converter Professional.
2. Go to File > Open and browse where your PDF
form is located.
3. Go to Tools > Form Typer. Form Typer will
automatically detect which areas of the form are
underlines, checkboxes, and radio buttons and it
will make those sections fillable.
4. To save the fillable PDF form, go to File > Save
As and specify the file name and location where
you want to save the fillable PDF form and click
on “Save”. A fillable version of the form will be
saved to the location that you specified.
5. Now, anyone can open this fillable PDF form
using the free Adobe Reader and they can tab
and type and fill-in the form.
3
4
6. Please note that if the person filling-in the form
does not have a PDF printer driver, such as PDF
Create! or Adobe Acrobat, installed on their PC,
they will not be able to save the data that is
typed into the form. The completed form would
have to be printed to hard copy.
7. Because you have PDF Converter Professional
installed on your PC, you will be able to save the
data typed into the form by following these steps:
A. From inside of Adobe Reader, go to File >
Print.
B. From the “Name” drop-down menu, select
“ScanSoft PDF Create!” as the printer
driver.
C. Click on “OK”.
D. A PDF file copy of your completed form will
be created.
Xerox Corporation – Scan to PC Desktop Professional v9 – Orientation Guide 25
6
5
7
Page 26

Additional Training and
Additional Training and
Support Resources
Support Resources
Xerox Corporation – Scan to PC Desktop Professional v9 – Orientation Guide 26
Page 27

Customer Orientation Guide
After the training session, this Guide serves as a reference to remind you how to complete many
common tasks using Scan to PC Desktop Professional.
Customer Orientation Guide Training CD
Based on the Customer Orientation Guide, this Training CD provides video demonstrations of all
of the topics covered in the Webinar Training Session as well as some additional topics. For a
complete list of topics covered in this Training CD, please refer to the Table of Contents at the
beginning of this Customer Orientation Guide.
Help Files
Each Scan to PC Desktop software program contains extensive Help files that contain detailed
explanations of all of the features and functions of each product. The Help files are accessible
by opening the software program and then selecting the Help menu at the top of the window.
User Guides
Each Scan to PC Desktop software program has a user guide to provide assistance with some
features of each program. These guides are available on the Scan to PC Desktop Professional
v9 CD in the following locations:
PaperPort: PP11PRO/Docs/English/Getting Started Guide.pdf
OmniPage: OP15PRO/Guides/Guide ENG.pdf
PDF Converter: PDFCONV4PRO/Docs/PDF Pro 4 Quick Reference Guide-eng.pdf
Image Retriever: IR7PRO/Docs/ImageRetriever_Eng.pdf
Tech Support Knowledge Base
Find answers to many technical questions for all our software programs.
http://knowledgebase.nuance.com
Technical Support
Customer Support for the Scan to PC Desktop solution is provided directly by Xerox at no charge to you
for the term of your Xerox Agreement.
For all technical support questions related to the Scan to PC Desktop solution, simply call the Xerox
Welcome Centre at 1-800-822-2979. The automated voice will ask for a serial number. The Xerox
Welcome Centre will then lead you to a live Xerox Customer Support Representative. You should
instruct the Xerox Customer Support Representative that you have a question regarding the Scan to PC
Desktop solution and that Xerox 2nd Level support is required. Xerox 1st Level is for general service calls
to repair equipment.
Xerox 2nd Level and if required, Xerox 3rd Level Customer Support, will work to answer your questions
regarding the Scan to PC Desktop solution. If the question cannot be answered or the issue is not
resolved, Xerox Customer Support will contact Nuance 3rd Level Support for problem resolution.
You should not contact Nuance Customer Support directly to request assistance. All contact should
remain direct through the Xerox Customer Support organization.
Xerox Corporation – Scan to PC Desktop Professional v9 – Orientation Guide 27
Page 28

Advanced Training Topics
Advanced Training Topics
Please note that “Advanced Training Topics” are not included in the
End User Training Webinar unless the Nuance Trainer is notified at
least two days in advance of the scheduled training session. If you
choose to include an Advanced Training Topic in your End User
Training Webinar, you must choose which of the other topics in the
End User Training Webinar are less important to your business and
can be skipped in order to have enough time to cover all topics.
If you have participated in an End User Training Webinar for a
previous version of Scan to PC Desktop, you may want to consider
substituting some Advanced Training Topics for some of the topics in
the End User Training Webinar that you are already familiar with.
Xerox Corporation – Scan to PC Desktop Professional v9 – Orientation Guide 28
Page 29

Advanced OCR Topics
Advanced OCR Topics
Manual Zoning for More Accurate OCR for Complex Documents
OmniPage has additional options that allow improved recognition for complex documents.
1. Drag the image or PDF file that you
want to convert down to the OmniPage
link on the PaperPort SendTo Bar.
OmniPage Pro will automatically launch
and load your image file into OmniPage.
2. Click on the 2-Automatic button in the
OmniPage Toolbox. OmniPage will
automatically zone the document and
recognize it.
3. If OmniPage did not properly recognize
some parts of the document, you can
adjust the zones.
4. Use the tools in the Image Panel to
adjust the size or change the type of
Text, Graphics, Table, and Form zones.
5. When you have finished modifying the
zones, click on the 2-Automatic button
to re-recognize the document.
6. Select “Yes” to re-recognize the
document.
7. Click on the 3-Save to File button in the
OmniPage Toolbox.
2
3
4
7
8. From the “Save to File” window, select
the “Look In” location, File Name, and
Files of type (MS Word, or one of 30+
file formats) from the Save As window.
Ensure that the “Save and Launch” box
is also checked.
9. Click on “OK” to save the document and
open it in MS Word.
Xerox Corporation – Scan to PC Desktop Professional v9 – Orientation Guide 29
Page 30

Automatic OCR – OmniPage Batch Manager
OmniPage Pro 15 includes a full batch manager for automated
processing of files. One of the most common processes is detailed
below.
Batch Conversion to Text Searchable PDF
Using the Xerox MFP and OmniPage Pro 15, you can scan multiple documents into a network
folder and then schedule OmniPage to convert all these scanned images to fully text searchable
PDF files automatically at a pre-determined point in time.
1. Go to Start > All Programs > ScanSoft
OmniPage 15.0 > OmniPage Batch
Manager.
2. The Batch Manager tool will launch.
Go to File > Create Job. From the Job
Wizard window, click on "Normal Job",
name the job, and click on "Next".
3. On the Start & Stop window, select "
Recurrent..." in the Start Time drop
down menu, and check the " Delete
Input Files" checkbox. Click Next.
4. On the Job Recurrence window,
select the Start Time and your
preferred Recurrence Pattern. Click
Next.
5. Select "Fresh Start". Click Next.
6. There are a number of options
available for the input files. In most
cases, these files will have been
scanned to a local or a network folder.
In that case, select "Load Files".
Otherwise, choose the appropriate
input location for your files. Click Next.
4
Xerox Corporation – Scan to PC Desktop Professional v9 – Orientation Guide 30
Page 31

7.Click on the Browse button, then
click Advanced. Browse to the folder
where the files are located. Click the
Add Folders button, then OK.
8.In the “Create New Document”
section, check “For Each Image
File”. Click Next.
9.Select “Recognize Images”. Click
Next.
10.Set the appropriate languages and
dictionaries for the documents to be
processed. Click Next.
11.In this step, the save location is
selected. Choose the appropriate
location for the files. The most
common option is to select “Save”.
Click Next.
12.From the File Type menu, select
“PDF with Image on Text”. Form
naming options, select “Use input file
names”. Select the entire list under
the Input column at the base of the
window and click the “Specify
Output Folder button. Browse to the
appropriate folder and click OK.
Click Next.
7
8
12
12
13.Select “Finish Workflow”. Click
Finish.
Xerox Corporation – Scan to PC Desktop Professional v9 – Orientation Guide 31
Page 32

Creating Audio Documents from Paper and Digital Documents
OmniPage features RealSpeak Text-To-Speech for converting documents into audio files.
1. Select the image file you want to convert
from the PaperPort Desktop with a single
mouse click and drag it down to the
OmniPage Pro 15 icon on the PaperPort
SendTo Bar. OmniPage Pro will
automatically launch and load your image
file into the application.
2. Click on the 2-Automatic button in the
Omnipage Toolbox. OmniPage will
automatically zone the document and
recognize it.
3. Select “Wave Audio Converter” as the
output format under Files of Type.
4. Click the Options button to specify the
speed and voice to be used for creating
the audio file. Please note that selecting
a voice using a language other than that
of the original document will not cause
translation of the file to occur. The audio
creating by mixing the text and the voice
languages would sound like gibberish to a
native speaker of the voice language.
2
5. Select the Look In location and File Name
4
from the Save As window. Ensure that
the Save and Launch radio button is also
checked.
6. Click on “OK” to save the document and
open it in your default WAV player.
Xerox Corporation – Scan to PC Desktop Professional v9 – Orientation Guide 32
Page 33

Advanced PDF Topics
Advanced PDF Topics
Change the File Association for PDF files †
When the Scan to PC Desktop Professional software is installed on your PC, the file association for
PDF files automatically changes to PDF Converter Professional. Therefore, when you open a PDF
file, it opens in PDF Converter Professional.
To change the file association of the PDF files on your PC to Adobe Reader, or your preferred PDF
viewing program, follow these steps:
1. On the Windows Desktop, right click on a PDF file and
select Open With > Choose Program.
2. From the “Programs” list, select “Adobe Reader”.
3. Check the option for “Always use the selected program
to open this kind of file”.
4. Click on “OK”.
5. When you open PDF files, they will now automatically
be opened in Adobe Reader.
Batch Conversion to PDF using the PDF Create! Assistant
Using the PDF Create! Assistant, you can automatically combine different file types into either a single
PDF file or automatically create a PDF file for each individual file.
1. Open the PDF Create! Assistant by going to Start > All Programs > ScanSoft PDF Professional 4 >
PDF Create! Assistant.
2. Click on “Add” and browse out and select the documents that you want to convert into PDF files.
3. From the drop-down menu, select to “Create One PDF per file” or to “Combine into one PDF
document”.
4. Click on the “Start converting…” button
5. You will be prompted to select where you want your PDF files saved. Browse to the location where
you want your PDF files to be saved and click on “Save”.
6. The “Print Info” window will provide information about the conversion process. Click on “Close” when
the process has completed.
7. Your PDF files will be saved into the location that you specified in Step 5.
2
3
4
6
6
† Topics that are new or enhanced in Scan to PC Desktop Professional v9
Xerox Corporation – Scan to PC Desktop Professional v9 – Orientation Guide 33
Page 34

Adding Bookmarks to PDF Files †
4
5
6
1. Go to Start > All Programs > ScanSoft PDF
Converter Professional 4 > PDF Converter
Professional.
2. Go to File > Open and browse to the location of
the PDF file to which you want to add bookmarks.
3. Go to View > Navigation Panels > Bookmarks.
4. Click on the “New Bookmark” button
5. In the field that appears, type the name of the
bookmark and then press “Enter” on the
keyboard.
6. Click on the “Select Text” or “Select Image”
button. Note that you must use the “Select Image”
option if you are working with an Image Only PDF
file.
7
7. Use your mouse to select the area that you want
to bookmark.
8. Ensure that the name of the bookmark is still
highlighted in the “Bookmarks” panel and click on
Options > Set Destination.
9. When asked if you want to set the destination to
the current location, click on “OK”.
10. Now when you click on the icon next to the name
of the bookmark in the Bookmark pane, you will
automatically be brought to the section of the
document that you selected as the destination in
Step 7.
8
10
9
† Topics that are new or enhanced in Scan to PC Desktop Professional v9
Xerox Corporation – Scan to PC Desktop Professional v9 – Orientation Guide 34
Page 35

Redacting PDF Files * †
Redaction is the removal of content prior to release or publication. Redaction is often referred to as the
“blacking out” of confidential text in a document to be produced, and has many applications in
government, the court system and many regulated industries. PDF Converter Professional integrates
precise redaction into the highlight, strikethrough and underline annotation tools found within the PDF
Converter Professional application. Note that this feature is only available for PDF Normal and Text
Searchable PDF files.
HR – Quickly remove sensitive personnel or salary information from documents.
Legal – Ensure that protected Client information stays private.
Government – Safely and permanently remove top secret information from electronic documents.
1. Go to Start > All Programs > ScanSoft PDF
Converter Professional 4 > PDF Converter
Professional.
2. Go to File > Open and browse to the location of
the PDF file to which you want to redact.
3. Go to Tools > Comment and use the Highlight,
Cross-Out, and Strikethrough tools to markup the
document.
4. Go to Document > Redact Markup.
5. From the “Redact Markup” window, select
whether you want the sections that are marked
with Highlights, Strikeouts, or Underlines to be
Redacted. You can also choose to enter
Exemption Codes. Click on “Redact Markup”.
6. The marked sections in the PDF file will be
redacted.
7. When you save this document, a redacted and
non-redacted copy will be saved. The redacted
file name is saved as r_filename.pdf
3
5
6
† Topics that are new or enhanced in Scan to PC Desktop Professional v9
* Topics in the “Advanced Topics” section that are also included in the Customer Orientation Guide
Training CD
Xerox Corporation – Scan to PC Desktop Professional v9 – Orientation Guide 35
Page 36

Adding Page Numbers to PDF Files †
Automatically add page numbers to each page in an
existing PDF file.
1. Go to Start > All Programs > ScanSoft PDF
Converter Professional 4 > PDF Converter
Professional.
2. Go to File > Open and browse to the location of
the PDF file to which you want to add page
numbers.
3. Go to View > Organizer Panels > Watermarks.
The “Watermarks pane will appear.
4. From the “Watermarks” pane, double click on
“Page Number”.
5. From the “Page Range” section, select “All
Pages”.
6. From the “Subset” drop-down menu, select “All
pages in range”.
4
5
7. Click on “OK”.
8. A page number will be added to the bottom of
every page in the PDF file.
6
7
† Topics that are new or enhanced in Scan to PC Desktop Professional v9
Xerox Corporation – Scan to PC Desktop Professional v9 – Orientation Guide 36
Page 37

Advanced PaperPort Topics
Advanced PaperPort Topics
Creating a Signature Stamp
Creating a Signature Stamp is any easy way to quickly stamp a copy of your signature onto a document.
This is a great tool for cover letters or for other documents that do not need to have a legally binding
signature.
Please note that creating a Signature Stamp is not the same thing as adding a Digital Signature to a PDF
file. For more information about Digital Signatures, use the Help menu in PDF Converter Professional.
To Create Your Signature:
NOTE: You only need to complete these
steps once.
1. Write your signature onto a blank white
piece of paper.
2. Scan in the page with your signature
through your Xerox device.
3. When you return to your PC in your
office, you will see that PaperPort has
opened and your scanned page with
your signature is available on the
PaperPort Desktop as a PDF file.
4. On the PaperPort Desktop, right click on
the PDF file and select “View” to open it
in PaperPort’s Page View.
6
3
5
5. In “Page View”, click once on the “Select
Area” tool to select it.
6. Using your mouse, draw a box around
the area of the page that contains your
signature.
7. Click on the “Crop” button. Everything
from the page will be deleted except for
your signature.
8. Go to File > Save As.
9. From the “Save as type” drop-down
menu, select “Windows Bitmap
(*.bmp)”.
10. In the “File name” field, type signature
and then click on “Save”. Go to File >
Exit.
11. You will now see a copy of your signature
saved onto the PaperPort Desktop as a
Bitmap file.
7
11
Xerox Corporation – Scan to PC Desktop Professional v9 – Orientation Guide 37
Page 38

To Stamp Your Signature onto a PDF or Image file:
1. On the PaperPort Desktop, right click on the PDF or Image file and select “View” to
open it in PaperPort’s Page View.
2. In “Page View” click once on the “Stamp” tool to select it.
3. Using your mouse, click on the document in the location where you would like to
stamp your Signature.
4. From the “Open” window, browse to the location of where you saved your
signature.BMP file.
5. Click once on the signature.BMP file to select it and click on “Open”.
6. Your Signature will be stamped onto the document at the location that you
selected.
7. To adjust the size of your signature or move your signature to another location on
the page, click once on the “Select Annotation” tool to select it. Use your mouse to
drag and drop your signature to the location of your choice.
8. To return to the PaperPort Desktop, go to File > Exit. When asked if you want to
save changes, click on “Yes”.
9. You have now stamped your signature onto a PDF or image file.
5
2
Xerox Corporation – Scan to PC Desktop Professional v9 – Orientation Guide 38
7
Page 39

All-in-One Search
With PaperPort Professional 11, you can organize and index all of your scanned image files and text based
documents. Using PaperPort's All-in-One Search tool, finding the file that you need is as simple as knowing a
word or phrase from the file for which you are searching. Documents and images must be added to the All-inOne Search Index before they can be searched upon.
To Add One Document at a Time to the All-in-One Search Index:
1. Right click on the image file you want to add to your PaperPort’s All-in-One Search index and select
“Add to All-in-One Search” from the drop-down menu list.
2. PaperPort will automatically add the text in the file to the PaperPort All-in-One Search database for
text files, image files, and PDF files.
To Add All of the Documents and Images in a Folder to the All-in-One Search Index:
Note: The first time that you update the All-in-One Search Index, it may take a long time to
complete. All future updates will only documents and images that have been changed or edited
since the last index.
• Right click on the folder you want to add to your PaperPort’s All-in-One Search index and select
“Add to All-in-One Search” from the drop-down menu list.
• PaperPort will automatically add the text in the file to the PaperPort All-in-One Search database
for text files, image files, and PDF files. The length of time that it will take to complete the All-inOne Search Index depends on the number and size of the documents and images contained
within that folder.
To Add all of the Documents and Images in All of the Folders Displayed in PaperPort’s Folder
View to the All-in-One Search Index:
Note: The first time that you update the
All-in-One Search Index, it may take a
long time to complete. All future
updates will only documents and
images that have been changed or
edited since the last index.
• Go to Tools > All-in-One Search…
• Click on “Update Index”. PaperPort will
automatically add the text in the file to
the PaperPort All-in-One Search
2
3
database for text files, image files, and
PDF files. The length of time that it will
take to complete the All-in-One Search
Index depends on the number and size
of the documents and images contained
within all of your folders.
• As an alternative, you can click on
“Index Manager” and use its tools to
schedule an automatic update of your
All-in-One Search Index. For more
information about the Index Manager,
refer to the PaperPort Help menu.
Xerox Corporation – Scan to PC Desktop Professional v9 – Orientation Guide 39
Page 40

Searching for Documents and Images:
1. To find files in any folder (local or network) mapped to your PaperPort Desktop, you need only
know a word or phrase contained within the file.
2. Click on the “All-in-One Search” button on the PaperPort Command Bar to initiate a text
sensitive or keyword search.
3. In the “Containing indexed text” field, type in the word or phrase from the file for which you
are searching. Ensure that the “Use All-in-One Index” and “Exact Match” options are
selected.
4. Then click on the “Search” button in the Search pane.
5. All-in-One Search will search all documents and images that have been added to the All-inOne Search Index and will return to you a list, ranked by relevance, of all files containing
your search criteria.
6. Double click on the file from the search results list and you will be taken to the thumbnail
view of that file on your PaperPort Desktop.
2
3
4
5
Xerox Corporation – Scan to PC Desktop Professional v9 – Orientation Guide 40
Page 41

Changing Folder Colors in Folder View
Changing the color of folders in PaperPort’s Folder View makes it easy for you to make frequently used
folders stand out so you can access them quickly.
1. From the PaperPort Desktop, in the “Folders”, right click on the folder.
2. Select “Folder Color”.
3. From the “Set Folder Color” window, select the color of your choice, then click on “OK”.
4. The folder will now be displayed as a different color in the “Folders” Pane.
Xerox Corporation – Scan to PC Desktop Professional v9 – Orientation Guide 41
Page 42

Image Retriever Settings
Image Retriever Settings
Image Retriever Settings *
1. If Image Retriever is already running on your PC, you will see the Image Retriever icon in
your Systray in the lower right corner of your Windows Desktop near the clock.
2. If it is not running on your PC, go to Start > All Programs > ScanSoft PaperPort 11 > Image
Retriever. The Image Retriever icon will appear in System Tray in the lower right corner of
your Windows Desktop near the clock.
Adjusting Image Retriever Settings
1. Double click on the Image Retriever
icon in the Systray. From the Image
Retriever Settings window, select the
desired settings for the Image
Retriever tool.
2. From the Watch Settings, select if
you would like Image Retriever to
monitor your email inbox, a network
folder, or both.
3. Select the interval with which you
would like Image Retriever to
monitor your selected folder.
• As an alternative, you can select
“Never” from the “Interval for
Checking” drop-down menu.
• If you select “Never, you can
click on the “Get Now” button to
manually retrieve your images.
4. Select how you want PaperPort to
behave after documents are
retrieved.
5. Select OK to close the window.
* Topics in the “Advanced Topics” section that are also included in the Customer Orientation Guide
Training CD
2
3
4
Xerox Corporation – Scan to PC Desktop Professional v9 – Orientation Guide 42
 Loading...