


Felsöknings-
®
Phaser
F ä rgskrivare
7300
guide

Copyright © 2002, Xerox Corporation. Med ensamrätt. Rättigheterna för opublicerat material skyddas av de upphovsrättslagar
som gäller i USA. Innehållet i den här publikationen får inte reproduceras i någon form utan tillåtelse från Xerox Corporation.
Upphovsrätten innefattar allt material och all information som är upphovsrättsskyddad enligt lag eller i enlighet med detta avtal.
Detta avser också, utan begränsningar, det material som genereras av programvaran och som visas på bildskärmen, såsom format,
mallar, ikoner, skärmbilder, utseende osv.
®
XEROX
PhaserShare
, The Document Company®, det stiliserade X-et, CentreWare®, DocuPrint®, Made For Each Other®, Phaser®,
®
, TekColor®-ikonen och WorkSet® är registrerade varumärken som tillhör Xerox Corporation. infoSMART™,
PhaserPort™, PhaserPrint™, PhaserSMART™, PhaserSym™, PhaserTools™ och namnet TekColor™ är varumärken som
tillhör Xerox Corporation.
®
, Acrobat®, Acrobat® Reader®, Illustrator®, PageMaker®, Photoshop®, PostScript®, ATM®, Adobe Garamond®,
Adobe
®
, Carta®, Mythos®, Quake® och Tekton® är registrerade varumärken och Adobe Jenson™, Adobe Brilliant Screens™
Birch
technology och IntelliSelect™ är varumärken som tillhör Adobe Systems Incorporated eller deras dotterbolag som kan vara
registrerade i vissa områden.
®
, LaserWriter®, LocalTalk®, Macintosh®, Mac® OS, AppleTalk®, TrueType2®, Apple Chancery®, Chicago®, Geneva®,
Apple
®
Monaco
och New York® är registrerade varumärken och QuickDraw™ är ett varumärke som tillhör Apple Computer
Incorporated.
Marigold™ och Oxford™ är varumärken som tillhör AlphaOmega Typography.
Avery™ är ett varumärke som tillhör Avery Dennison Corporation.
®
och HP-GL® är registrerade varumärken som tillhör Hewlett-Packard Corporation.
PCL
Hoefler Text är utformat av Hoefler Type Foundry.
®
ITC Avant Guard Gothic
ITC Zapf Dingbats
, ITC Bookman®, ITC Lubalin Graph®, ITC Mona Lisa®, ITC Symbol®, ITC Zapf Chancery® och
®
är registrerade varumärken som tillhör International Typeface Corporation.
Bernhard Modern™, Clarendon™, Coronet™, Helvetica™, New Century Schoolbook™, Optima™, Palatino™, Stempel
Garamond™, Times™ och Univers™ är varumärken som tillhör Linotype-Hell AG och/eller dess dotterbolag.
®
MS-DOS
Wingdings™ i TrueType
och Windows® är registrerade varumärken som tillhör Microsoft Corporation.
®
-format är en produkt som tillhör Microsoft Corporation. WingDings är ett varumärke som tillhör
Microsoft Corporation och TrueType är ett registrerat varumärke som tillhör Apple Computer, Inc.
Albertus™, Arial™, Gill Sans™, Joanna™ och Times New Roman™ är varumärken som tillhör Monotype Corporation.
®
Antique Olive
är ett registrerat varumärke som tillhör M. Olive.
Eurostile™ är ett varumärke som tillhör Nebiolo.
®
och NetWare® är registrerade varumärken som tillhör Novell, Incorporated.
Novell
®
och Sun Microsystems® är registrerade varumärken som tillhör Sun Microsystems, Incorporated. SPARC® är ett registrerat
Sun
varumärke som tillhör SPARC International, Incorporated. SPARCstation™ är ett varumärke som tillhör SPARC International,
Incorporated, exklusivt licensierat till Sun Microsystems, Incorporated.
®
är ett registrerat varumärke i USA och andra länder, licensierat exklusivt genom X/Open Company Limited.
UNIX
Xerox Corporation är E
Namnet och logotypen E
NERGY STAR
NERGY STAR
®
-partner, och den här produkten uppfyller E
är märken som är registrerade i USA.
NERGY STAR
-riktlinjerna för energispardrift.
Den här produkten använder kod för SHA-1 skriven av John Halleck och används med tillstånd av honom.
Produkten innehåller en implementering av LZW som är licensierat under amerikanskt patent 4 558 302.
Andra märken är varumärken eller registrerade varumärken som tillhör de företag till vilka de är knutna.
®
PANTONE
-färger som genereras av färgskrivaren Phaser 7300 är processimuleringar av tre och/eller fyra färger och stämmer
eventuellt inte överens med de färgstandarder som har fastställts av PANTONE. Använd aktuella PANTONE-färgreferenser för
korrekta färger.
PANTONE:s färgsimuleringar kan endast erhållas för den här produkten om du använder godkända programvarupaket som
licensierats av Pantone. Kontakta Pantone, Inc. för en aktuell lista över kvalificerade licenshavare.

Innehåll
Resurser. . . . . . . . . . . . . . . . . . . . . . . . . . . . . . . . . . . . . . . . . . . . . . . . . . . . .1
Kalibrering . . . . . . . . . . . . . . . . . . . . . . . . . . . . . . . . . . . . . . . . . . . . . . . . . . .2
Diagnostisera utskriftskvalitet. . . . . . . . . . . . . . . . . . . . . . . . . . . . . . . . . . .3
Pappersstopp . . . . . . . . . . . . . . . . . . . . . . . . . . . . . . . . . . . . . . . . . . . . . . . .4
Förhindra pappersstopp . . . . . . . . . . . . . . . . . . . . . . . . . . . . . . . . . . . . . . . . . . . . . . . . 4
Vad orsakar pappersstopp? . . . . . . . . . . . . . . . . . . . . . . . . . . . . . . . . . . . . . . . . . . . . . 5
Stopp vid lucka A . . . . . . . . . . . . . . . . . . . . . . . . . . . . . . . . . . . . . . . . . . . . . . . . . . . . . . 5
Stopp i duplexenheten. . . . . . . . . . . . . . . . . . . . . . . . . . . . . . . . . . . . . . . . . . . . . . . . . . 6
Stopp i flerfunktionsfacket . . . . . . . . . . . . . . . . . . . . . . . . . . . . . . . . . . . . . . . . . . . . . . 7
Stopp i den övre luckan. . . . . . . . . . . . . . . . . . . . . . . . . . . . . . . . . . . . . . . . . . . . . . . . . 8
Stopp i facket . . . . . . . . . . . . . . . . . . . . . . . . . . . . . . . . . . . . . . . . . . . . . . . . . . . . . . . . 11
Regelbundet skrivarunderhåll . . . . . . . . . . . . . . . . . . . . . . . . . . . . . . . . . .13
Rengöring av skrivaren . . . . . . . . . . . . . . . . . . . . . . . . . . . . . . . . . . . . . . . . . . . . . . . . 13
Rengöringssats. . . . . . . . . . . . . . . . . . . . . . . . . . . . . . . . . . . . . . . . . . . . . .14
Ersättning av värmeenheten . . . . . . . . . . . . . . . . . . . . . . . . . . . . . . . . . . .15
Ersättning av bildenhet . . . . . . . . . . . . . . . . . . . . . . . . . . . . . . . . . . . . . . .17
Ersättning av tonerkassett. . . . . . . . . . . . . . . . . . . . . . . . . . . . . . . . . . . . .20
Ersättning av överföringsenhet. . . . . . . . . . . . . . . . . . . . . . . . . . . . . . . . .22
Instruktioner för ompaketering . . . . . . . . . . . . . . . . . . . . . . . . . . . . . . . . .24
Index. . . . . . . . . . . . . . . . . . . . . . . . . . . . . . . . . . . . . . . . . . . . . . . . . . . . . . .26
Copyright © 2002 Xerox Corporation. Med ensamrätt. i

Phaser® 7300 färgskrivare
Resurser
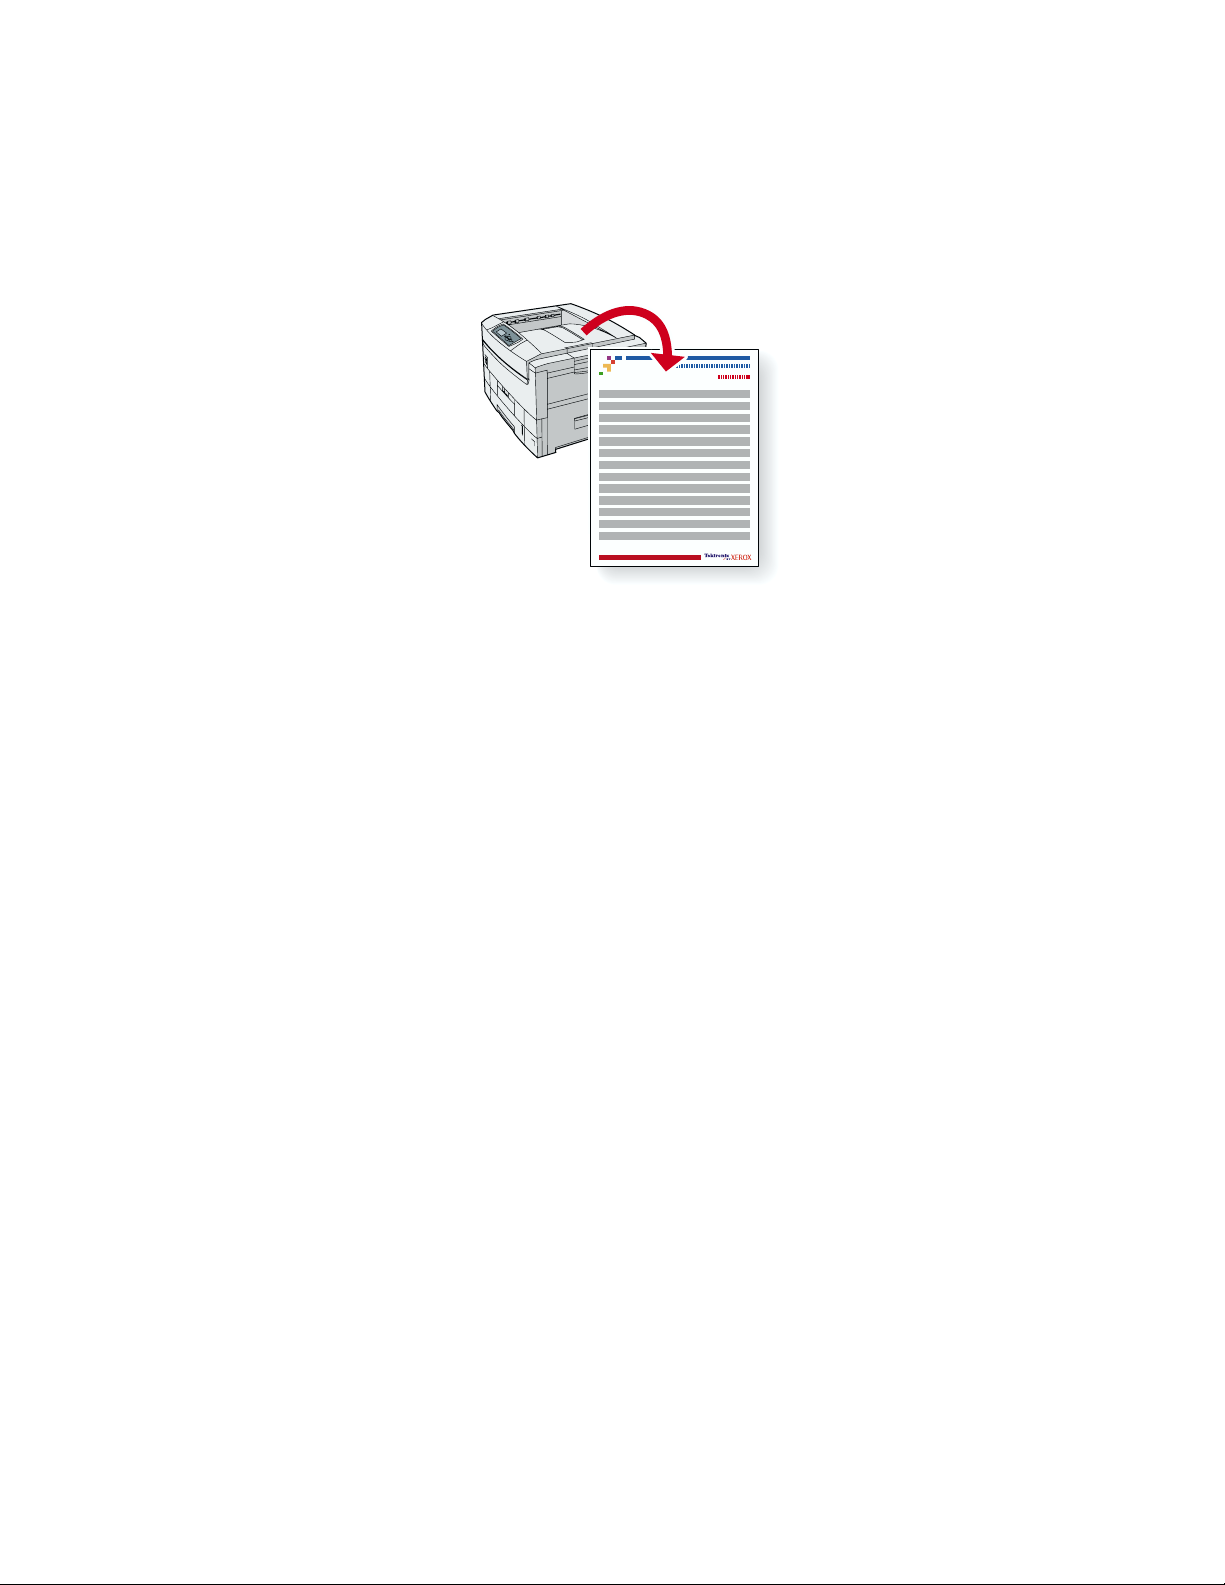
En stor mängd information lagras i din skrivare som utskrivbara sidor. Följande sidor är exempel på
utskrivbara sidor för det här ämnet.
7300-58
Alla utskrivbara sidor har det här formatet, med färgfält både överst och underst på sidan. Skriv ut de
här sidorna via skrivarens frontpanel.
Få åtkomst till utskrivbara sidor
Få åtkomst till de här sidorna från Meny för utskrivbara sidor:
1. På frontpanelen bläddrar du till Meny för utskrivbara sidor med tangenterna Ned-pil
eller Upp-pil och tryck på tangenten OK.
2. Bläddra till önskad utskrivbar sida (t.ex. Hjälpsidor) med tangenterna Ned-pil eller
Upp-pil och tryck på tangenten OK.
Menykarta
Om du vill ha en komplett lista över utskrivbara sidor skriver du ut menykartan:
1. Markera Menyer på frontpanelen och tryck på tangenten OK.
2. Markera Skriv ut menykarta och tryck på tangenten OK.
Copyright © 2002 Xerox Corporation. Med ensamrätt. 1

PHASER® 7300 COLOR PRINTER
Help Guide
Resources
CentreWare® Internet Services (IS)
Printer management tool that helps System Administrators:
• Configure and manage multi-vendor printers.
• Provide remote diagnostics and troubleshooting for printer problems.
• Monitor printer and consumable status.
• Hotlink to software updates and Technical Support.
CentreWare IS uses TCP/IP to communicate directly with the printer's embedded web server and runs on any
computer with a web browser.
To launch CentreWare IS, enter your printer's IP address in a web browser (xxx.xxx.xxx.xxx). The IP address is
listed on your front panel. To view the IP Address on the front panel, highlight Printer Identification and press OK.
For detailed information on CentreWare IS software, refer to its online help.
PhaserSMARTTM (English Only)
Automated printer diagnostics and troubleshooting through the web and your web browser.
Launch CentreWare IS: From a web browser, enter your printer's IP address. Select Support. Select the
Technical Support link to access PhaserSMART.
For Windows: From your Phaser printer driver properties, select the Troubleshooting tab. Select the
PhaserSMART Technical Support web link.
infoSMART
This is the same troubleshooting knowledge base used by Xerox Customer Support. Provides solutions for
printer issues, such as error codes, print quality, media jams, software installation, networking, and more.
www.xerox.com/officeprinting/infoSMART
TM
(English Only)
Interactive Documentation CD-ROM
Detailed printer information in the form of topics, instructions, and videos. Information includes printer setup,
networking, loading trays/paper, driver and printer features, troubleshooting, and support.
Front panel
The front panel offers a suite of tools along with information pages to help solve print-quality, paper feed,
supplies, and printer administration problems.
Page 1 of 3
Button
You can press the Information button at any time to get additional information about the message displayed
on the front panel.
Printable pages
To print a Menu Map, navigate the front panel and its menu items:
1. Select Menus and press OK.
2. Select Print Menu Map and press OK.
Driver help
If you are using Windows 95/98, Windows 2000/XP, or Windows NT, install the driver from your printer's software CD-ROM
and access the printer driver to:
• Link to relevant web sites from the Troubleshooting tab.
• View information about the printer features on the driver tabs by clicking the Help button on the tab.
• View troubleshooting information by clicking a Help button, then selecting the Troubleshooting Guide.
Troubleshooting
Paper jams
PhaserSMART
After you launch PhaserSMART, select the Troubleshooting Guide to help identify your printer's problem. If your
printer detects a jam error, PhaserSMART will point you to a specific solution. Otherwise, select Media Jams for
PhaserSMART to lead you to the best solution.
Interactive Documentation CD-ROM
For paper jams and error messages, see the Troubleshooting section.
Driver help
In the Troubleshooting Guide, refer to Error Messages for Paper Jams.
Print-quality problems
Ensure the paper type selected in the front panel matches the paper loaded in the trays and the Multi-Purpose Tray (MPT).
Tray settings can be found by selecting Printer Setup Menu and then Tray Setup Menu.
The following table provides a list of printable pages that are accessible from the Support Menu and
Improve Print Quality?:
Condition Printable page
For additional paper tips: Print Paper Tips Page
To troubleshoot print-quality symptoms: Print Diagnostic Pages
To correct colors: Print-Quality Tips Page
Page 2 of 3

PhaserSMART
After you launch PhaserSMART, select the Troubleshooting Guide to help identify your printer's problem. Starting with
Print/Image Quality Issues, PhaserSMART will walk you through a decision tree to resolve print-quality problems.
Interactive Documentation CD-ROM
For print-quality problems, see the Troubleshooting section.
Networking problems
Printable pages
To obtain information on printer options, configurations and settings:
1. On the front panel, highlight Printable Pages and press OK.
2. Scroll to Print Configuration Pages and press OK.
To obtain information on network, parallel and USB connections and setting:
1. On the front panel, highlight Menus and press OK.
2. Scroll to Connection Setup Menu and press OK.
3. Scroll to Print Connection Setup Page and press OK.
Interactive Documentation CD-ROM
For network setup and troubleshooting, see the Networking section.
Replacing consumables
Interactive Documentation CD-ROM
Refer to the Support section for instructions and videos that walk you through the replacement of consumables.
Instruction Sheets
Each consumable comes with instructions included in the original packaging.
Web links
To link to product and supplies information, download printer
drivers, view documents, and access support information:
To access the troubleshooting knowledge base
used by Xerox Customer Support staff:
To link to a color resource for tools and information, such as
interactive tutorials, color printing templates, helpful tips, and
customized features to meet your individual needs:
To view technical support information:
To order Xerox supplies:
www.xerox.com/officeprinting
www.xerox.com/officeprinting/infoSMART
www.colorconnection.xerox.com
www.xerox.com/officeprinting/7300support
www.xerox.com/officeprinting/7300supplies
To find your local sales and support center:
Page 3 of 3
www.xerox.com/officeprinting/contacts
Phaser® 7300 färgskrivare
Kalibrering
En stor mängd information lagras i din skrivare som utskrivbara sidor. Följande sidor är exempel på
utskrivbara sidor för det här ämnet.
7300-58
Alla utskrivbara sidor har det här formatet, med färgfält både överst och underst på sidan. Skriv ut de
här sidorna via skrivarens frontpanel.
Få åtkomst till utskrivbara sidor
Så här kommer du åt de här sidorna från Hjälpmenyn:
1. På frontpanelen bläddrar du till Hjälpmenyn med tangenterna Ned-pil eller Upp-pil och
trycker på OK-tangenten.
2. Bläddra till Vill du förbättra utskriftskvaliteten? med tangenterna Ned-pil
eller Upp-pil och tryck på OK-tangenten.
3. Bläddra till Menyn Kalibrera färger eller Menyn Kalibrera marginaler med
tangenterna Ned-pil eller Upp-pil och tryck på tangenten OK.
4. Bläddra till önskad sida (t. ex. Självstudier för färgkalibrering eller Kalibrera
marginaler) med tangenterna Ned-pil eller Upp-pil och tryck på OK-tangenten.
Menykarta
Om du vill ha en komplett lista över utskrivbara sidor skriver du ut menykartan:
1. Markera Menyer på frontpanelen och tryck på OK-tangenten.
2. Markera Skriv ut menykarta och tryck på OK-tangenten.
Copyright © 2002 Xerox Corporation. Med ensamrätt. 2
0
123
456
7
8
91011
12
13
14
151617
18
19
20
212223
24
25
26
27
28
29
303132
33
34
35
36
37
38
3940
41
42
43
44
45
46
47
48 49
50
51
52
53
54
PHASER® 7300 COLOR PRINTER
Color Calibration Tutorial
Overview
Color calibration procedures adjust the printer for optimal color output. Color settings may need adjustment upon initial
printer set-up or when toners and imaging units are replaced. There are two procedures: Lighten/Darken Colors and
Balance Colors. If the overall image appears either too light or dark, use the Lighten/Darken Colors procedure. If a finer
adjustment of the primary colors (cyan, magenta and yellow) is needed, continue with the Balance Colors procedure.
Lighten/Darken Colors
The Lighten/Darken Colors procedure uniformly increases or decreases each primary color (cyan, magenta and yellow
and black) to produce a lighter or darker image.
Procedure:
1. Select Lighten/Darken Colors from the Calibrate Colors Menu and press OK. Use the printed Color Reference Page
to evaluate the lightness/darkness of the image. The printer's current Lighten/Darken Value is listed on the page.
2. Use the Up Arrow and Down Arrow keys to change the value from -5 (lightest) to 5 (darkest) and press OK.
3. The Color Reference Page automatically prints using the new lighten/darken value. Repeat this procedure until you
achieve the desired result.
4. To finish the procedure select one of the following:
Accept Changes and Continue: Saves the new value and returns to the Calibrate Colors Menu.
Accept Changes and Exit: Saves the new value and returns to the Main Menu.
Discard Changes and Exit: Returns to the Main Menu without saving.
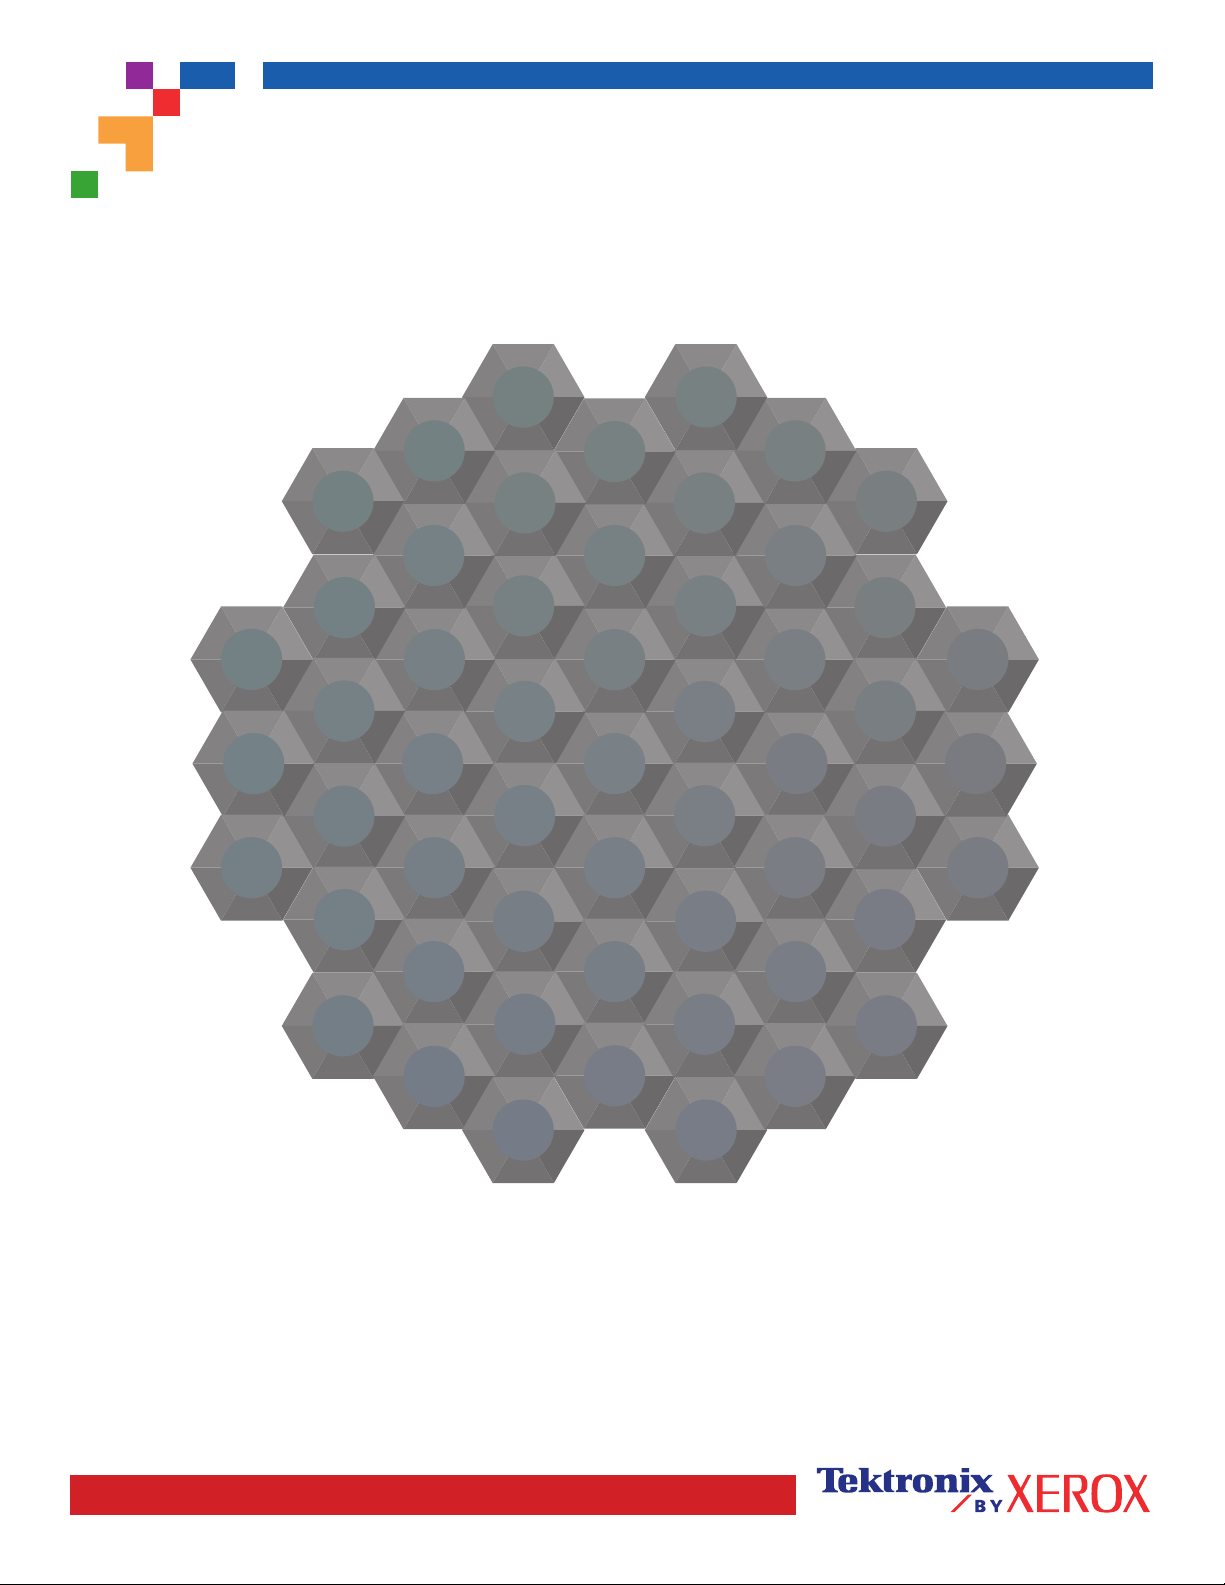
Balance Colors
The Balance Colors procedure sets the balance between the primary colors (cyan, magenta and yellow) to simulate black.
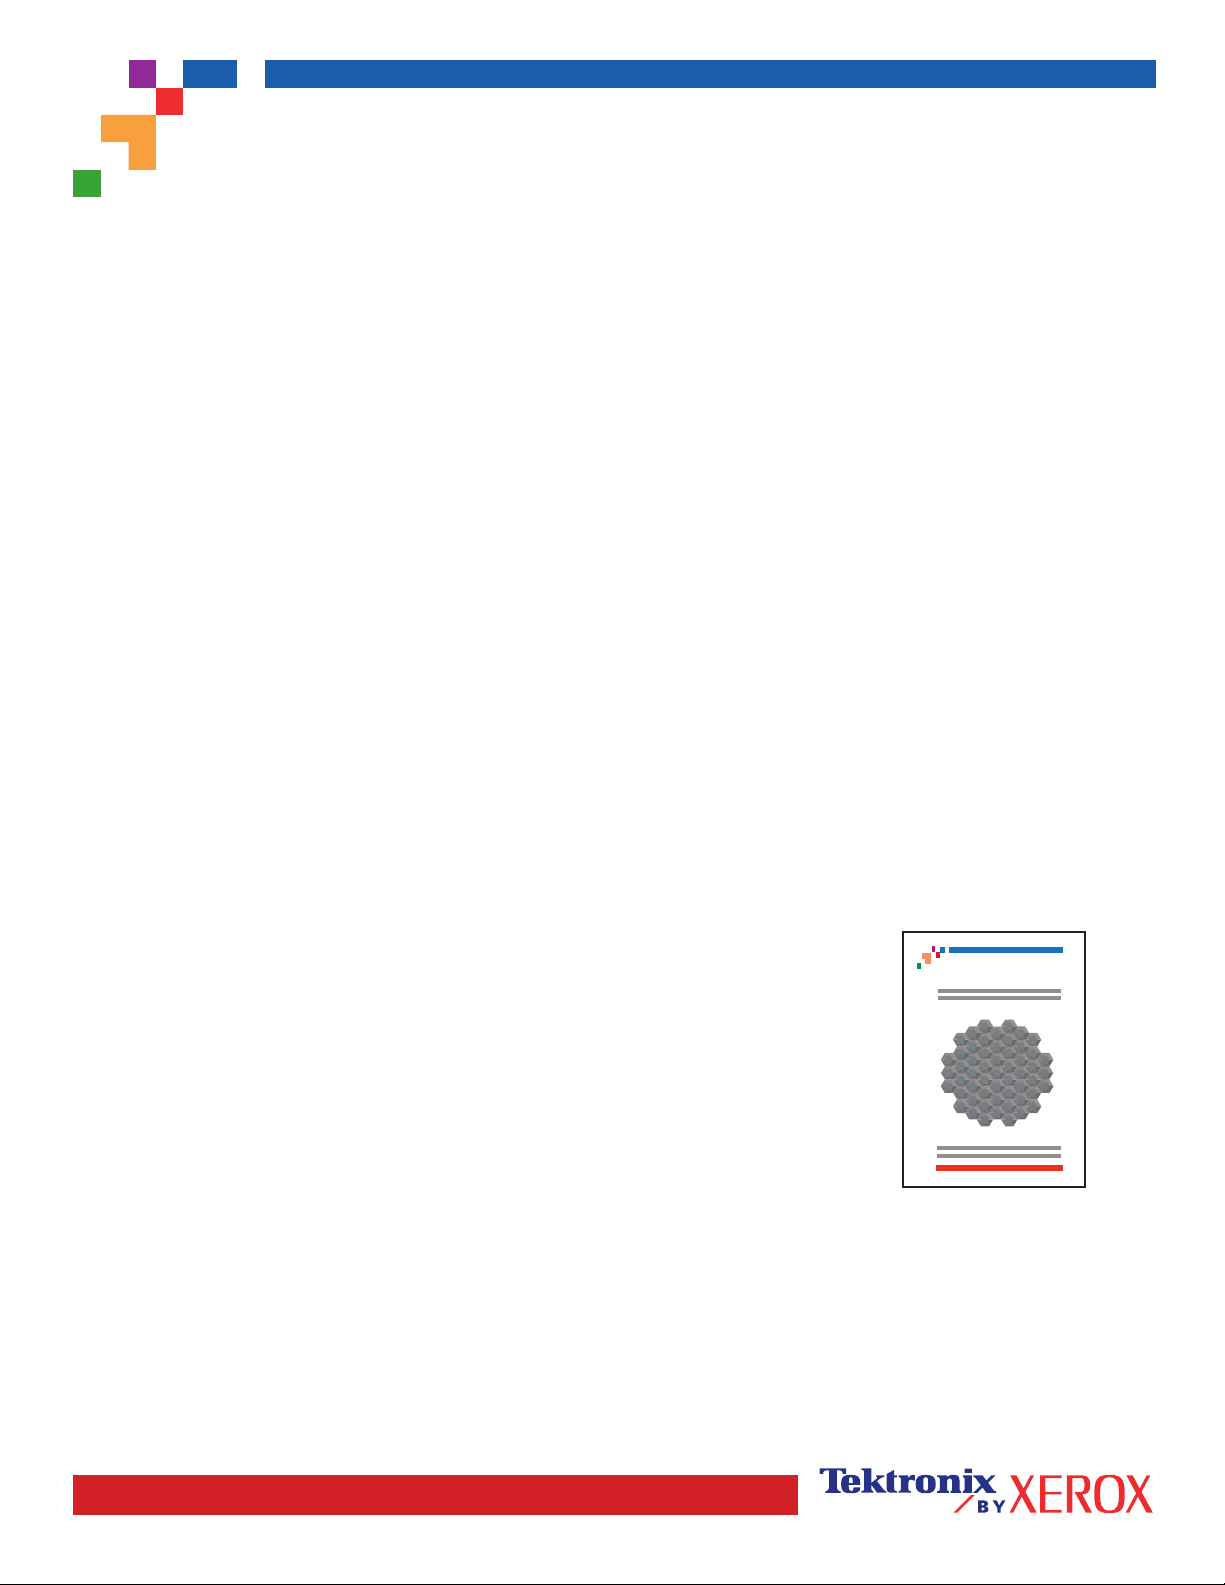
Each of the color balance pages (like the page illustrated on the right) contains a
large cluster of circles, numbered from 0 to 54, that vary in hue.
The center circle (0) should match or appear to blend with some portion of its
surrounding hexagonal gray ring. The circle can show a color shift if one or more
of the colors are printing with a different density. For example, if cyan is printing
lighter than normal, the circle will appear redder.
Procedure:
1. Select Balance Colors from the Calibrate Colors Menu. The Light Color Balance page prints automatically.
2. Follow the steps on the Light Color Balance page until the desired adjustment is achieved.
3. Follow the steps on the Dark Color Balance page until the desired adjustment is achieved.
Phaser 7300 Color Printer
Light Color Balance Adjustment
Page 1 of 1
PHASER® 7300 COLOR PRINTER
0
1
2
3
4
5
6
7
8
9
10
11
12
13
14
15
16
17
18
19
20
21
22
23
24
25
26
27
28
29
30
31
32
33
34
35
36
37
38
3940
41
42
43
44
45
46
47
48 49
50
51
52
53
54
Light Color Balance
Step 1. Hold this print at arm's length and find the numbered circle (0 to 54) that appears to blend with some portion of
the surrounding gray. Select Set Circle Number from the printer's front panel. Use the Up Arrow and Down Arrow keys
to select that circle's number and press OK.
More
Yellow
More
Green
More
Cyan
More
Red
More
Magenta
More
Blue
Step 2. The Light Color Balance page automatically prints showing the result of the adjustment. The color balance is set
properly when Circle 0 most closely matches some portion of its surrounding gray. If it does not, repeat Step 1.
Step 3. Select one of the following:
Accept Changes and Continue: Saves the new value, prints the Color Reference Page and proceeds to the Dark
Color Balance adjustment.
Discard Changes and Exit: Returns to the Main Menu without saving the adjustment.
Page 1 of 1
PHASER® 7300 COLOR PRINTER
Dark Color Balance
Step 1. Hold this print at arm's length and find the numbered circle (0 to 54) that appears to blend with some portion of
the surrounding gray. Select Set Circle Number from the printer's front panel. Use the Up Arrow and Down Arrow keys
to select that circle's number and press OK.
More
Yellow
3940
More
Green
More
Cyan
43
45
44
42
26
27
46
25
28
24
13
29
41
12
14
23
11
15
30
22
21
38
37
More
10
9
2
3
0
4
5
1
6
17
20
19
8
36
7
35
18
34
Red
54
53
52
More
16
32
33
51
Magenta
47
48 49
31
50
More
Blue
Step 2. The Dark Color Balance page automatically prints showing the result of the adjustment. The color balance is set
properly when Circle 0 most closely matches some portion of its surrounding gray ring. If it does not, repeat Step 1.
Step 3. Select one of the following:
Accept Changes and Continue: Saves the new value, prints the Color Reference Page and proceeds to the
Calibrate Colors Menu.
Accept Changes and Exit: Saves the new value, prints the Color Reference Page and returns to the Main Menu.
Discard Changes and Exit: Returns to the Main Menu without saving the adjustment.
Page 1 of 1
PHASER® 7300 COLOR PRINTER
Calibrate for Margins (Long-Edge Feed)
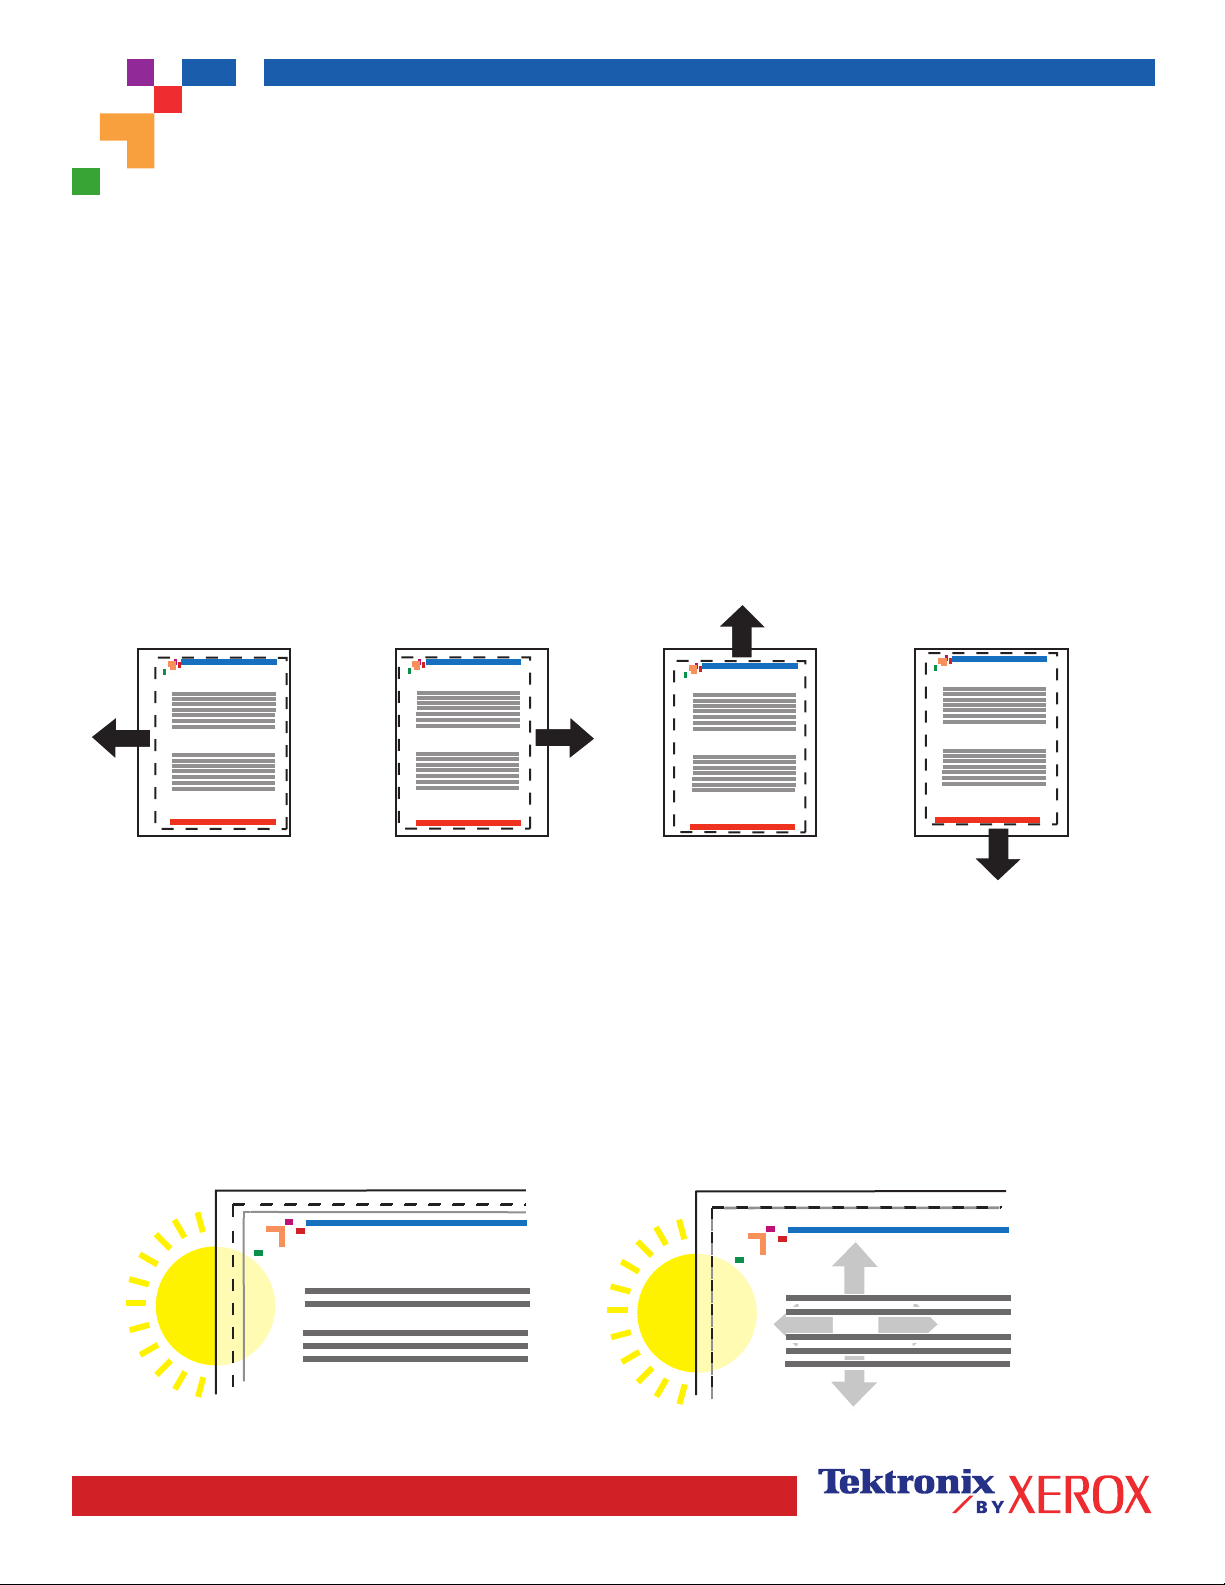
The Calibrate Margins Menu allows you to adjust the printer's imaging area relative to the edges of the paper. The
imaging area is shown as a dashed rectangle; the printer will not print outside this rectangle.
Step 1. Adjust Side 1 Margins. To move the dashed rectangle to the position you want it on the page:
1. From the printer's front panel Support Menu, scroll to Improve Print Quality? and press OK.
2. Scroll to Calibrate Margins Menu and press OK. Select Print Calibrate Margins Page and press OK to print this page.
3. To move the dashed rectangle you see on the page printed to the position you want, use the front panel menu
items Adjust Side 1 "A" Margin and Adjust Side 1 "B" Margin as illustrated below.
4. Reprint this page to verify the adjustment.
You can adjust the settings from -40 to +40 units. The thickness of the rectangle's dashed lines is 1 unit. 12 units move
the rectangle 1 mm. The maximum distance the rectangle can be moved (-40 to +40) is 6.7 mm.
B+
Phaser 7700 Color Printer
Calibrate Margins
Phaser 7700 Color Printer
Calibrate Margins
A- A+
Phaser 7700 Color Printer
Calibrate Margins
Phaser 7700 Color Printer
Calibrate Margins
B-
Decrease Adjust Side 1 "A"
Margin setting to move left.
Increase Adjust Side 1 "A"
Margin setting to move right.
Increase Adjust Side 1 "B"
Margin setting to move up.
Decrease Adjust Side 1 "B"
Margin setting to move down.
Step 2. If the printer has the duplex option, adjust Side 2 Margins.
1. With Side 1 facing you, hold the print up to a strong light. Note the shadow of the solid lines printed on Side 2.
2. Use the front panel menu items Adjust Side 2 "A" Margin and Adjust Side 2 "B" Margin to move the Side 2 solid
lines until they align with the Side 1 rectangle. Reprint to verify your adjustment.
Phaser 7300
Cal
B
-
A
-
B
Phaser 7300
+
A
Cal
+
Page 1 of 1

PHASER® 7300 COLOR PRINTER
Calibrate for Margins (Short-Edge Feed)
The Calibrate Margins Menu allows you to adjust the printer's imaging area relative to the edges of the paper. The
imaging area is shown as a dashed rectangle; the printer will not print outside this rectangle.
Step 1. Adjust Side 1 Margins. To move the dashed rectangle to the postion you want it on the page:
1. From the printer's front panel Support Menu, scroll to Improve Print Quality? and press OK.
2. Scroll to the Calibrate Margins Menu and press OK. Select Print Calibrate Margins Page and press OK to print this
page.
3. To move the dashed rectangle you see on the page printed to the position you want, use the front panel menu
items Adjust Side 1 "A" Margin and Adjust Side 1 "B" Margin as illustrated below.
4. Reprint this page to verify the adjustment.
You can adjust the settings from -40 to +40 units. The thickness of the rectangle's dashed lines is 1 unit. 12 units move
the rectangle 1 mm. The maximum distance the rectangle can be moved (-40 to +40) is 6.7 mm.
A+
Phaser 7700 Color Printer
Calibrate Margins
Phaser 7700 Color Printer
Calibrate Margins
Phaser 7700 Color Printer
Calibrate Margins
B- B+
Phaser 7700 Color Printer
Calibrate Margins
A-
Increase Adjust Side 1 "A"
Margin setting to move up.
Decrease Adjust Side 1 "A"
Margin setting to move down.
Decrease Adjust Side 1 "B"
Margin setting to move left.
Increase Adjust Side 1 "B"
Margin setting to move right.
Step 2. If the printer has the duplex option, adjust Side 2 Margins.
1. With Side 1 facing you, hold the print up to a strong light. Note the shadow of the solid lines printed on Side 2.
2. Use the front panel menu items Adjust Side 2 "A" Margin and Adjust Side 2 "B" Margin to move the Side 2 solid
lines until they align with the Side 1 rectangle. Reprint to verify your adjustment.
Phaser 7300
Cal
+
A
-
B
-
A
B
Phaser 7300
Cal
+
Page 1 of 1

Phaser® 7300 färgskrivare
Diagnostisera utskriftskvalitet
En stor mängd information lagras i din skrivare som utskrivbara sidor. Följande sidor är exempel på
utskrivbara sidor för det här ämnet.
7300-58
Alla utskrivbara sidor har det här formatet, med färgfält både överst och underst på sidan. Skriv ut de
här sidorna via skrivarens frontpanel.
Få åtkomst till utskrivbara sidor
Få åtkomst till de här sidorna från Meny för utskrivbara sidor:
1. På frontpanelen bläddrar du till Meny för utskrivbara sidor med tangenterna Ned-pil
eller Upp-piloch trycker på tangenten OK.
2. Bläddra till önskad utskrivbar sida (t.ex. Diagnostisera utskriftskvalitet) med
tangenterna Ned-pil eller Upp-pil och tryck på tangenten OK.
Menykarta
Om du vill ha en komplett lista över utskrivbara sidor skriver du ut menykartan:
1. Markera Menyer på frontpanelen och tryck på OK-tangenten.
2. Markera Skriv ut menykarta och tryck på OK-tangenten.
Copyright © 2002 Xerox Corporation. Med ensamrätt. 3

PHASER® 7300 COLOR PRINTER
Diagnosing Print Quality
Review the five test pages printed with this page: The pages consist of cyan, yellow, magenta, and black; and another
page with all four colors. Use the information below to help solve your print-quality problems.
Note: The examples shown are Long-Edge Feed (LEF). If you print Short-Edge Feed (SEF), the examples below are
rotated 90 degrees. The images shown are for reference only. Not all pages represented are printed.
Problem
Light Lines in One Color
Thin, light or white lines appear in only one color.
Dark Lines in One Color
Thin, dark lines appear in only one color when
a light color is faded or blended with black.
Solution
1. Open the top cover.
a. Clean the four LED bars (a) using
the cleaning pad supplied with
each new toner cartridge.
b. Check the Imaging Unit and re-
move any foreign material if found.
Caution: Do not leave the top cover open for more than 10 minutes
without covering the Imaging Unit as damage could result. Use the
dark bag that came with the Imaging Unit or dark paper as a cover.
2. If the problem persists after cleaning the LED bars,
do the following:
a. Check the toner for the problem color. Replace the
toner if low.
b. Lift out the Imaging Unit, for the problem color, keeping
the toner cartridge installed.
c. With the Imaging Unit in an upright
position (to avoid toner spills), lift it
high enough to visually inspect the
shiny green surface underneath.
a
Printing Is Too Light or
Too Dark in All Colors
Page 1 of 3
d. If the shiny green surface has scratches or damage that
align with the defect of the print, replace the Imaging Unit.
Note: Some slight scratching is normal.
Caution: Do not touch the shiny green surface of the Imaging Unit.
Set the Imaging Unit on a hard flat surface only as scratching or
damage can occur causing more print-quality problems.
1. Try a different Color Matching mode. From the printer's front
panel Support Menu select Improve Print Quality?, then
select Print-Quality Tips Page and press OK.
Note: The TekColor Correction set to Automatic provides
the best results for most documents.
2. Adjust the light or darkness levels. From the printer's front
panel Support Menu, select Improve Print Quality? then
select Calibrate Colors Menu, then select Print Tutorial
Page. Follow the procedure Lighten/Darken Colors.

Problem
Solution
Dark Lines/Smudges or Streaks
All Colors
Black and/or colored areas appear on the page
in all colors and/or in non-print areas.
Repeating Defects
Marks or voids recur uniformly in only one color.
1. From the printer's front panel Support Menu select Improve
Print Quality?, then select Print Paper Tips Page and press
OK.
2. Ensure the paper you are using is the correct type for the
printer and is properly loaded.
3. Ensure the paper loaded in the tray matches the paper type
selected on the printer's front panel and in the computer's
printer driver.
4. Open the top cover and make sure the orange fuser restraint
pin is removed and the green lever on the back side of the
fuser is in the locked position.
5. From the printer's front panel Support Menu select Improve
Print Quality?, then select Remove Print Smears and press
OK. Five cleaning pages will run through the printer.
6. If the problem continues, replace the Imaging Unit in the
color of the smudges.
1. Replace the corresponding Imaging Unit if defects
occur every:
44 mm (1.73 in.)
50 mm (1.97 in.)
94 mm (3.70 in.)
58 mm (2.29 in.)
Marks of any color or voids recur uniformly in all colors
and/or in non-printed areas.
Image Offset
Toner appears to have been pulled off the page
and placed about 143 mm across the page from
where it should be.
Page 2 of 3
2. Replace the Transfer Belt if defects occur every:
3. If the defect occurs every:
143 mm (5.62 in.)
a. From the printer's front panel Support Menu select
Improve Print Quality?, then select Remove Print
Smears and press OK.
b. If the problem continues, replace the Fuser.
1. From the printer's front panel Support Menu select Improve
Print Quality?, then select Print Paper Tips Page and
press OK.
2. Ensure the paper you are using is the correct type for the
printer and is correctly loaded in tray.
3. If the problem persists:
a. From the printer's front panel Printer Setup Menu
select Tray Setup Menu and press OK. Select the
tray you are printing from (i.e., MPT, Tray 1, etc).
b. Select Set Paper Type and then select Special.
c. Use the Back button to return to the Tray Setup
Menu and select Special Paper Setup Menu.
d. Scroll to a lighter paper type and press OK.

Problem
Solution
Incomplete Fusing
Toner appears to be pulled off print, or is easy
to rub off.
1. Open the top cover and make sure the orange fuser
restraint pin is removed and the green lever on the back
side of the Fuser is in the locked positon.
2. Turn the printer off and then on.
3. From the printer's front panel Support Menu select Improve
Print Quality?, then select Print Paper Tips Page and press
OK.
4. Ensure the paper you are using is the correct type for the
printer and is properly loaded.
5. Ensure the paper loaded in the tray matches the paper
type selected on the printer's front panel and in the
computer's printer driver.
6. If the problem persists: .
a. From the printer's front panel Printer Setup Menu select
Tray Setup Menu and press OK. Select the tray you are
printing from (i.e., MPT, Tray 1, etc).
b. Select Set Paper Type and then select Special.
c. Use the Back button to return to the Tray Setup Menu
and select Special Paper Setup Menu.
d. Scroll to a heavier paper type and press OK.
Color Misregistration
Color has shifted outside of the designated
area or has been superimposed over another
color area.
1. Turn the printer off and open the top cover.
a. Visually inspect the four LED bars for any foreign
material.
b. Visually inspect the Imaging Units and remove any
foreign material if found.
2. Close the top cover.
3. Turn the printer on. The printer will
perform an automatic registration alignment.
Caution: Do not leave the top cover open for more than
10 minutes without covering the Imaging Unit as damage
could result. Use the dark bag that came with the Imaging
Unit or dark paper as a cover.
a
See www.xerox.com/officeprinting/infoSMART on the world wide web for more on-line support information.
Page 3 of 3

Phaser® 7300 färgskrivare
Pappersstopp
Förutom information om hur du förhindrar stopp och vad som orsakar pappersstopp, innehåller det här
avsnittet instruktioner om hur du rensar följande pappersstopp.
Stopp vid lucka A — se sida 5.
■
Stopp i duplexenheten — se sida 6.
■
Stopp i flerfunktionsfacket — se sida 7.
■
Stopp i den övre luckan — se sida 8.
■
Stopp i facket — se sida 11.
■
När ett pappersstopp uppstår visas ett meddelande på skrivarens frontpanel om var pappersstoppet är
och information om hur du tar bort det.
Var försiktig
Rör inte färgen på papper som fastnat, eftersom färg som inte har hunnit fixeras lätt kan färga
av sig.
Det finns filmer som visar hur stopp rensas. Filmerna finns på
cd-romskivan Interaktiv dokumentation och på Xerox webbsida:
www.xerox.com/officeprinting/7300support/
Förhindra pappersstopp
Minska risken att papper och OH-film fastnar genom att endast använda Xerox-papper, Xerox
■
Phaser-etiketter och Xerox Phaser 35 OH-film. Se avsnittet Tillbehör i Hjälpguiden på cd-skivan
Interaktiv dokumentation eller gå till Xerox webbsida:
http://www.xerox.com/officeprinting/7300supplies
Bläddra igenom papperet innan du fyller facken eller flerfunktionsfacket.
■
Du kan läsa mer om pappersstorlekar som stöds i avsnittet Papper som stöds i Fack- och
■
pappersguiden på cd-romskivan Interaktiv dokumentation.
Instruktioner om hur du sätter i papper på rätt sätt finns i avsnittet Ladda papper i Fack- och
■
pappersguidenpå cd-romskivan Interaktiv dokumentation.
Använd rent, oskadat papper.
■
Använd papper från nyöppnade förpackningar.
■
Fyll inte på mer papper än vad som anges i facket.
■
om du vill beställa tillbehör.
Copyright © 2002 Xerox Corporation. Med ensamrätt. 4

Pappersstopp
Vad orsakar pappersstopp?
Pappersstopp uppstår oftast i följande situationer:
En felaktig papperstyp valdes i skrivardrivrutinen.
■
Papperet uppfyller inte specifikationerna
■
Den pappersstorlek som laddats kan inte användas i pappersfacket.
■
Papperet är fuktigt, böjt eller vikt.
■
Papperet har inte lagts i på rätt sätt.
■
Sidostyrskenorna och de bakre styrskenorna är inte korrekt inställda för papperet.
■
Facket är överfullt, mer papper har lagts i än vad som anges i facket.
■
Stopp vid lucka A
Utför de här stegen för att rensa stoppet. Instruktioner om hur du rensar stopp finns inuti skrivaren.
1. Öppna luckan märkt A på skrivarens högra sida.
7300-01
Varning!
Var försiktig när du rensar stopp. Vissa komponenter bakom den högra luckan kan vara heta.
Phaser® 7300 färgskrivare 5

2. Ta bort papper eller OH-film som fastnat.
3. Stäng den högra luckan.
Stopp i duplexenheten
Pappersstopp
7300-57
Utför de här stegen för att rensa stoppet. Instruktioner om hur du rensar stopp finns inuti skrivaren.
1. Öppna duplexenheten:
a. Fäll ned skrivarens mittersta frontlucka för att komma åt det gröna handtaget till
duplexenheten.
b. Ta ett stadigt tag i det gröna handtaget och dra ut duplexenheten ur skrivaren. Då öppnas
även Fack 1 under som stöder duplexenheten.
7300-02
Phaser® 7300 färgskrivare 6

Pappersstopp
2. Lyft på duplexenhetens lock.
7300-56
3. Ta bort papperet som sitter fast.
4. Ersätt duplexenhetens lock.
5. Använd båda händerna för att trycka tillbaka duplexenheten (och Fack 1) in i skrivaren.
Stopp i flerfunktionsfacket
1. Ta bort papperet som fastnat från flerfunktionsfacket på skrivarens högra sida.
7300-03
2. Om det behövs, lägg i papper i flerfunktionsfacket. Mer information finns i avsnittet
i
Fack- och pappersguiden
på cd-romskivan Interaktiv dokumentation.
Ladda papper
Phaser® 7300 färgskrivare 7

Pappersstopp
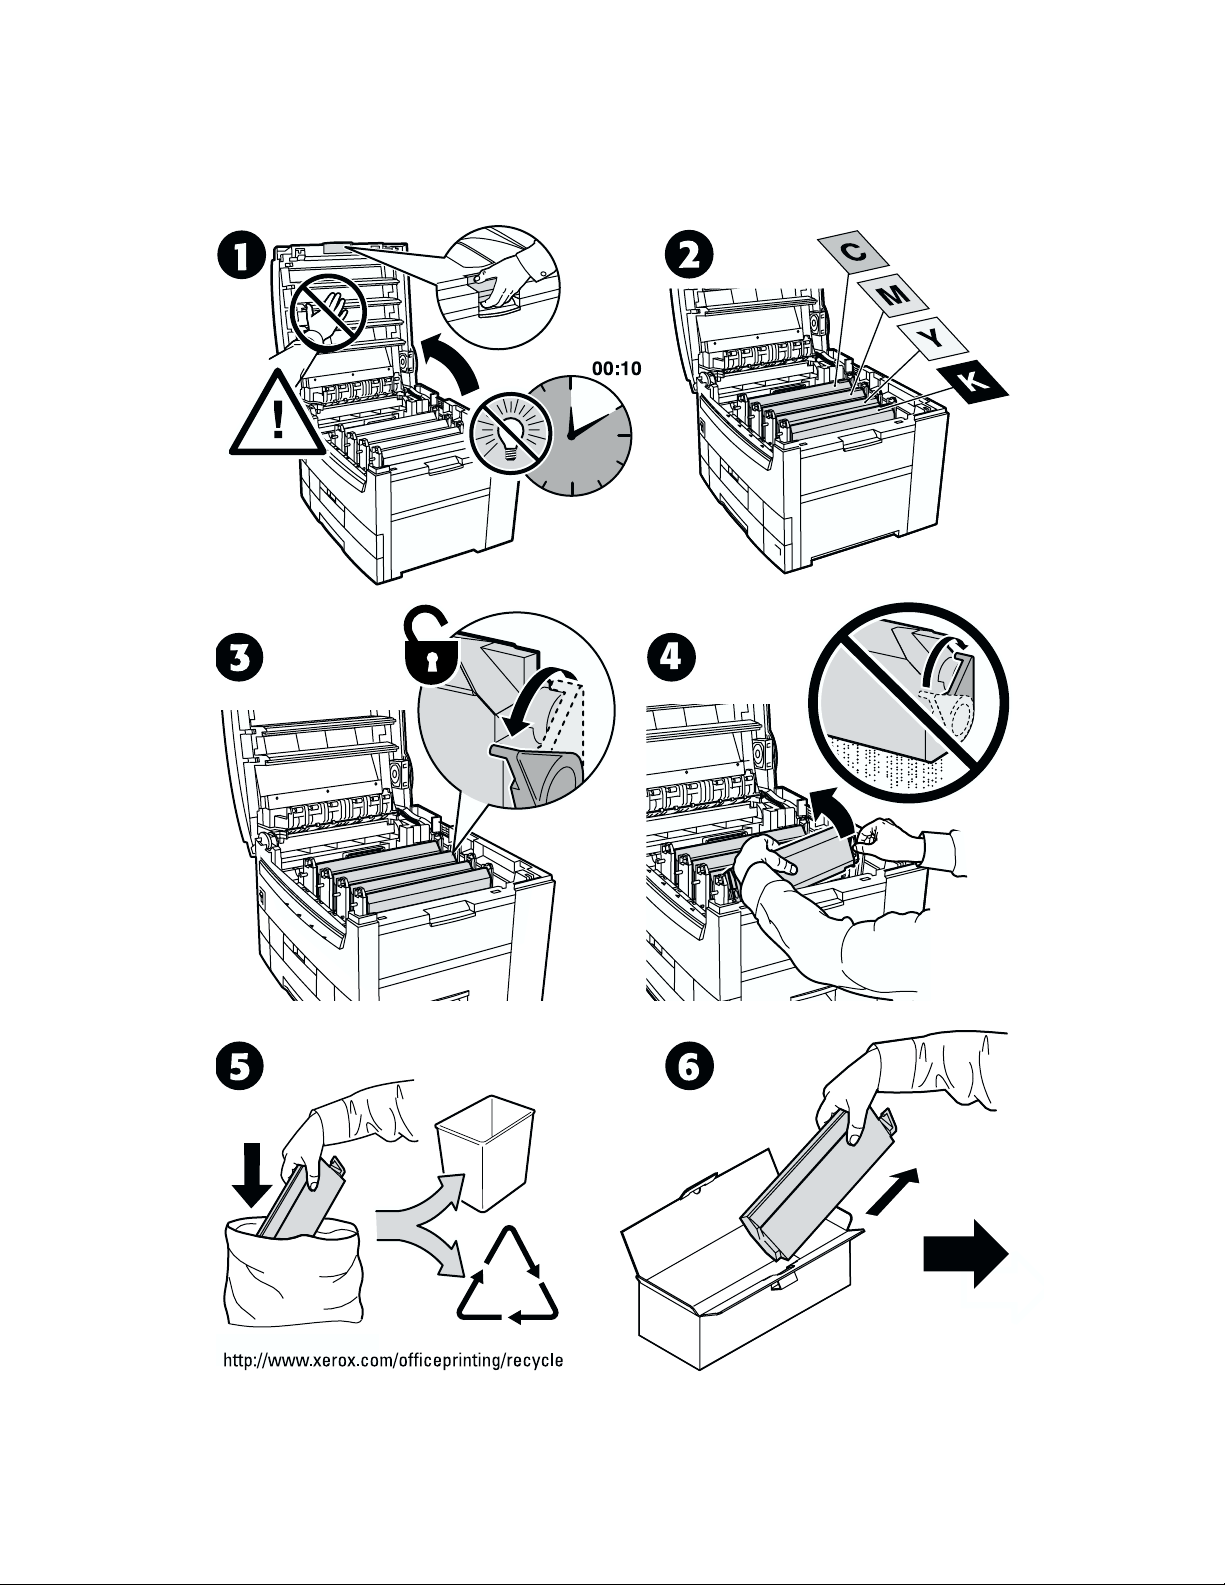
Stopp i den övre luckan
Utför de här stegen för att rensa stoppet. Instruktioner om hur du rensar stopp finns inuti skrivaren.
1. Använd spärren på skrivarens högra sida för att öppna den övre luckan.
Var försiktig
Undvik att vidröra eller hantera lysdioderna.
2. Lyft ut varje tonerkassett/bildenhet.
7300-04
7300-05
Phaser® 7300 färgskrivare 8

Pappersstopp
3. Placera varje tonerkassett/bildenhet på ett platt underlag. Täck över bildenheterna med mörkt
papper eller påsen de kom i.
Var försiktig
Var försiktig så att du inte placerar dem på kanten av ett bord eller en ojämn yta. Ta inte på
bildenhetens gröna film eftersom det kan skada filmen. Undvik att exponera tonerkassetten/
bildenheten för ljus i mer än 10 minuter eftersom det kan skada dem.
7300-06
4. Om det är ett pappersstopp i överföringsenhetens område tar du bort det.
7300-08
Phaser® 7300 färgskrivare 9

Pappersstopp
5. Om det är ett pappersstopp i området för värmeenheten tar du bort värmeenheten för att bättra
komma åt papperet som sitter fast. Rotera utlösningsspakarna på värmeenheten och dra ut
papperet.
7300-91
6. Sätt tillbaka värmeenheten.
7300-92
Varning!
Rör inte skrivarens värmevalsar. De kan vara heta och orsaka skador.
7. När du byter ut tonerkassetter/bildenheter var noga med att placera dem på rätt plats.
7300-10
Phaser® 7300 färgskrivare 10

Pappersstopp
8. Lyft försiktigt ner den övre luckan.
7300-11
Stopp i facket
Utför de här stegen för att rensa stoppet. Instruktioner om hur du rensar stopp finns inuti skrivaren.
1. På skrivarens högra sida öppnar du den lucka som anges på skrivarens frontpanel.
7300-01
Varning!
Var försiktig när du rensar stopp. Vissa komponenter bakom den högra luckan kan vara heta.
Phaser® 7300 färgskrivare 11

2. Ta bort papper som sitter fast.
3. Stäng luckan som du öppnade i steg 1.
4. Dra ut det fack som anges på frontpanelen.
Pappersstopp
7300-57
7300-13
5. Ta bort papper som sitter fast.
6. Kontrollera att papperet är placerat korrekt i facket och att styrskenorna ligger an mot papperet.
7. Tryck tillbaka facket in i skrivaren.
Obs!
Genom att följa de här stegen tas felet bort och skrivaren ska återuppta utskriften även om du
inte hittar något papper som fastnat.
Phaser® 7300 färgskrivare 12

Phaser® 7300 färgskrivare
Regelbundet skrivarunderhåll
Din skrivare behöver mer underhåll än bara periodisk rengöring av lysdioderna och ersättning av
följande kundersättningsbara förbrukningsvaror (CRCs):
Tonerkassetter (svart, cyan, magenta och gul)
■
Bildenheter (svart, cyan, magenta och gul)
■
Överföringsenhet
■
Värmeenhet
■
Rengör lysdioderna varje gång du byter tonerkassett. I Ersättningstonerkassettens förpackning finns
instruktioner för rengöring.
Obs!
Beställ nya tillbehör när varningsmeddelandet nästan slut visas på frontpanelen. Du
måste byta ut en förbrukningsvara när meddelandet slut eller ersätt visas. Det finns
installationsinstruktioner i varje objekts förpackning.
Var försiktig
Utsätt inte skrivaren och tillbehören för direkt solljus. Det kan resultera i blekta bilder, ljusa
områden eller mörka band. Placera inte skrivaren i närheten av ventilation eller dammig
utrustning.
Rengöring av skrivaren
Du kan torka av skrivarens utsida med en fuktad trasa.
Obs!
Stäng av skrivaren innan du rengör baksidan.
Var försiktig
Använd inte rengöringsmedel eller lösningsmedel när du rengör skrivaren.
Copyright © 2002 Xerox Corporation. Med ensamrätt. 13

Rengöringssats
4x
Rengöringssats
00:10
Phaser® 7300 färgskrivare 14

Ersättning av värmeenheten
Ersättning av värmeenheten
00:10
Phaser® 7300 färgskrivare 15

Ersättning av värmeenheten
Phaser® 7300 färgskrivare 16

Ersättning av bildenhet
00:10
Ersättning av bildenhet
1
2
Phaser® 7300 färgskrivare 17

Ersättning av bildenhet
6
Remove Packing Material
8
Retirez le matériel d'emballage
Rimuovere il materiale d'imballaggio
Verpackungsmaterial entfernen
Retire el material de embalaje
Remova o material de embalagem
Verwijder verpakkingsmateriaal
Ta bort förpackningsmaterial
7
8.1 8.2
8.3 8.4
9 10
Phaser® 7300 färgskrivare 18

Ersättning av bildenhet
4
x
1
1
4x
4x
2
2
Phaser® 7300 färgskrivare 19
Ersättning av tonerkassett
00:10
Ersättning av tonerkassett
4
Phaser® 7300 färgskrivare 20

Ersättning av tonerkassett
7
4 x
7.1
7.2
8
1
2
1
109
2
Phaser® 7300 färgskrivare 21

Ersättning av överföringsenhet
Ersättning av överföringsenhet
00:10
1
2
2
1
00:10
3
1
2
Phaser® 7300 färgskrivare 22

Ersättning av överföringsenhet
Phaser® 7300 färgskrivare 23

Phaser® 7300 färgskrivare
Instruktioner för ompaketering
00:10
1
Copyright © 2002 Xerox Corporation. Med ensamrätt. 24

6.1 6.2
Instruktioner för ompaketering
7.1
7.3 7.4
7.2
68 kg
149 lbs.
1
2
3
Phaser® 7300 färgskrivare 25

Index
B
bildenhet
ersättning 17
D
diagnostisera utskriftskvalitet 3
duplexenhet
stopp 6
F
fack
stopp 11
felaktig inmatning i facket 11
Flerfunktionsfack
stopp 7
förhindra pappersstopp 4
I
instruktioner för ompaketering 24
instruktionssidor
Ersätta en bildenhet 17
Ersätta överföringsenheten 22
Ersättning av tonerkassett 20
Ersättning av värmeenhet 15
Instruktioner för ompaketering 24
Rengöringssats 14
R
rengöringssats 14
rensa pappersstopp 4
resurser 1
S
skrivarrengöring 14
stopp i den övre luckan 8
stopp i duplexenheten 6
stopp i facket 11
stopp i flerfunktionsfacket 7
stopp vid lucka A 5
T
tonerkassett
ersättning 20
U
utskrivbara sidor 1
Balans – ljusa färger 2
Balans – mörka färger 2
Diagnostisera utskriftskvalitet 3
Färgkalibrering, vägledning 2
Hjälpguide 1
Kalibrera marginaler 2
V
K
kalibrering 2
Kundersättningsbara förbrukningsvaror
(CRCs) 13
värmeenhet
ersättning 15
Ö
L
Lucka A
stopp 5
överföringsenhet
ersättning 22
övre lucka
stopp 8
P
pappersstopp
förhindra 4
rensa 4
Copyright © 2002 Xerox Corporation. Med ensamrätt. 26
 Loading...