

Page 1
Phaser® 7400
color printer
Service
Manual
Book 2: Options
Page 2

Page 3

®
W
Phaser
7400
Color Printer
Service Manual
Book 2: Options
arning
The following servicing instructions are for use by qualified service
personnel only. To avoid personal injury, do not perform any servicing other
than that contained in the operating instructions, unless you are qualified to
do so.
First Printing: August 2005
071-0876-00
Page 4

Copyright © 2005 Xerox Corporation. All Rights Reserved. Unpublished rights reserved under the
copyright laws of the United States. Contents of this publication may not be reproduced in any form
without permission of Xerox Corporation.
Copyright protection claimed includes all forms of matters of copyrightable materials and information now
allowed by statutory or judicial law or hereinafter granted, including without limitation, material generated
from the software programs which are displayed on the screen such as styles, templates, icons, screen
displays, looks, etc.
XEROX
Other
®
, The Document Company®, the digital X®, CentreWare®, infoSMART®, Made For Each
®
, PagePack™, Phaser®, PhaserSMART®, and Walk-Up™ are trademarks of Xerox Corporation in
the United States and/or other countries.
Acrobat
PostScript
IntelliSelect
®
, Adobe® Reader®, Adobe Type Manager®, ATM™, Illustrator®, PageMaker®, Photoshop®,
®
, Adobe Brilliant® Screens, Adobe Garamond®, Adobe Jenson™, Birch®, Carta®,
®
, Mythos®, Quake®, and Tekton® are trademarks of Adobe Systems Incorporated in the
United States and/or other countries.
®
Apple
Chancery
, AppleTalk®, EtherTalk®, LaserWriter®, LocalTalk®, Macintosh®, Mac OS®, TrueType®, Apple
®
, Chicago®, Geneva®, Monaco®, New York® , and QuickDraw® are trademarks of Apple
Computer, Inc. in the United States and/or other countries.
®
HP-GL
, HP-UX®, and PCL®are trademarks of Hewlett-Packard Corporation in the United States and/or
other countries.
®
and AIX® are trademarks of International Business Machines Corporation in the United States and/
IBM
or other countries.
®
Windows
, Windows NT®, Windows Server™, and Wingdings® are trademarks of Microsoft Corporation
in the United States and/or other countries.
®
Novell
Services
, NetWare®, NDPS®, NDS®, Novell Directory Services® , IPX™, and Novell Distributed Print
™
are trademarks of Novell, Incorporated in the United States and/or other countries.
SM
, Sun Microsystems™, and Solaris® are trademarks of Sun Microsystems, Incorporated in the United
Sun
States and/or other countries.
®
SWOP
UNIX
is a trademark of SWOP, Inc.
®
is a trademark in the United States and other countries, licensed exclusively through X/Open
Company Limited.
As an E
S
PANTONE
NERGY STAR
TAR guidelines for energy efficiency. The ENERGY STAR name and logo are registered U.S. marks.
®
Colors generated may not match PANTONE-identified standards. Consult current PANTONE
Publications for accurate color. PANTONE
®
partner, Xerox Corporation has determined that this product meets the ENERGY
®
and other Pantone, Inc. trademarks are the property of
Pantone, Inc. © Pantone, Inc., 2000.
1-ii Phaser 7400 Color Printer Options Service Manual
Page 5

Service Terms
W
Manual Terms
Various terms are used throughout this manual to either provide additional
information on a specific topic or to warn of possible danger present during a
procedure or action. Be aware of all symbols and terms when they are used, and
always read NOTE, CAUTION, and WARNING statements.
Common Acronyms:
The following list defines the acronyms that may be found in this manual.
ADC: Automatic Density Control MCU: Engine Control Board
BTR: Bias Transfer Roller NCS: Non-Contact Sensor
CRUM: Customer Replaceable Unit
Monitor
CTD: Toner Density Control PL: Corresponds to the FRU Parts List.
ESD: Electrostatic Discharge ROS: Laser Scanning Unit
IDT: Intermediate Transfer Unit RTC: Charge Roller
Note
A note indicates an operating or maintenance procedure, practice or condition
that is necessary to efficiently accomplish a task.
A note can provide additional information related to a specific subject or add a
comment on the results achieved through a previous action.
Caution
A caution indicates an operating or maintenance procedure, practice or condition
that, if not strictly observed, results in damage to, or destruction of, equipment.
arning
A warning indicates an operating or maintenance procedure, practice or
condition that, if not strictly observed, results in injury or loss of life.
PHD: Imaging Unit
Product Terms
Caution: A personal injury hazard exists that may not be apparent. For example, a
panel may cover the hazardous area.
Danger: A personal injury hazard exists in the area where you see the sign.
Phaser 7400 Color Printer Options Service Manual iii
Page 6
Symbols Marked on the Product
DANGER high voltage.
Protective ground (earth) symbol.
Hot surface on or in the printer. Use caution to avoid personal
injury.
0
30 min.
The surface is hot while the printer is running. After turning off
the power, wait 30 minutes.
Avoid pinching fingers in the printer. Use caution to avoid
personal injury.
Use caution (or draws attention to a particular component).
Refer to the manual(s) for information.
iv Phaser 7400 Color Printer Options Service Manual
Page 7

Power Safety Precautions
W
Power Source
For 115 VAC printers, do not apply more than 135 volts RMS between the supply
conductors or between either supply conductor and ground. For 230 VAC printers, do
not apply more than 254 volts RMS between the supply conductors or between either
supply conductor and ground. Use only the specified power cord and connector. This
manual assumes that the reader is a qualified service technician.
Plug the three-wire power cord (with grounding prong) into a grounded AC outlet
only. If necessary, contact a licensed electrician to install a properly grounded outlet.
If the product loses its ground connection, contact with conductive parts may cause an
electrical shock. A protective ground connection by way of the grounding conductor
in the power cord is essential for safe operation.
Disconnecting Power
arning
Turning the power off using the power switch does not completely de-energize
the printer. You must also disconnect the power cord from the printer’s AC inlet.
Disconnect the power cord by pulling the plug, not the cord.
Disconnect the power cord in the following cases:
■ if the power cord or plug is frayed or otherwise damaged,
■ if any liquid or foreign material is spilled into the product,
■ if the printer is exposed to any excess moisture,
■ if the printer is dropped or damaged,
■ if you suspect that the product needs servicing or repair,
■ whenever you clean the product.
Phaser 7400 Color Printer Options Service Manual v
Page 8

Electrostatic Discharge (ESD) Precautions
Some semiconductor components, and the respective sub-assemblies that contain
them, are vulnerable to damage by Electrostatic discharge (ESD). These components
include Integrated Circuits (ICs), Large-Scale Integrated circuits (LSIs), field-effect
transistors and other semiconductor chip components. The following techniques will
reduce the occurrence of component damage caused by static electricity.
Be sure the power is off to the chassis or circuit board, and observe all other safety
precautions.
■ Immediately before handling any semiconductor components assemblies, drain
the electrostatic charge from your body. This can be accomplished by touching an
earth ground source or by wearing a wrist strap device connected to an earth
ground source. Wearing a wrist strap will also prevent accumulation of additional
bodily static charges. Be sure to remove the wrist strap before applying power to
the unit under test to avoid potential shock.
■ After removing a static sensitive assembly from its anti-static bag, place it on a
grounded conductive surface. If the anti-static bag is conductive, you may ground
the bag and use it as a conductive surface.
■ Do not use freon-propelled chemicals. These can generate electrical charges
sufficient to damage some devices.
■ Do not remove a replacement component or electrical sub-assembly from its
protective package until you are ready to install it.
■ Immediately before removing the protective material from the leads of a
replacement device, touch the protective material to the chassis or circuit
assembly into which the device will be installed.
■ Minimize body motions when handling unpacked replacement devices. Motion
such as your clothes brushing together, or lifting a foot from a carpeted floor can
generate enough static electricity to damage an electro-statically sensitive device
■ Handle IC’s and EPROM’s carefully to avoid bending pins.
■ Pay attention to the direction of parts when mounting or inserting them on
Printed Circuit Boards.
vi Phaser 7400 Color Printer Options Service Manual
Page 9

Service Safety Summary
General Guidelines
For qualified service personnel only: Refer also to the preceding Power Safety
Precautions.
Avoid servicing alone: Do not perform internal service or adjustment of this
product unless another person capable of rendering first aid or resuscitation is present.
Use care when servicing with power: Dangerous voltages may exist at several
points in this product. To avoid personal injury, do not touch exposed connections and
components while power is on. Disconnect power before removing the power supply
shield or replacing components.
Do not wear jewelry: Remove jewelry prior to servicing. Rings, necklaces and
other metallic objects could come into contact with dangerous voltages and currents.
Warning Labels
Read and obey all posted warning labels. Throughout the printer, warning labels are
displayed on potentially dangerous components. As you service the printer, check to
make certain that all warning labels remain in place.
Safety Interlocks
Make sure all covers are in place and all interlock switches are functioning correctly
after you have completed a printer service call. If you bypass an interlock switch
during a service call, use extreme caution when working on or around the printer.
Phaser 7400 Color Printer Options Service Manual vii
Page 10
Servicing Electrical Components
W
W
Before starting any service procedure, switch off the printer power and unplug the
power cord from the wall outlet. If you must service the printer with power applied,
be aware of the potential for electrical shock.
arning
Do not touch any electrical component unless you are instructed to do so by a
service procedure.
S7300-02
Servicing Mechanical Components
When servicing mechanical components within the printer, manually rotate drive
assemblies, rollers, and gears.
arning
Do not try to manually rotate or manually stop the drive assemblies while any
printer motor is running.
S7300-03
viii Phaser 7400 Color Printer Options Service Manual
Page 11

Regulatory Specifications
Xerox has tested this product to electromagnetic emission and immunity standards.
These standards are designed to mitigate interference caused or received by this
product in a typical office environment.
United States (FCC Regulations)
This equipment has been tested and found to comply with the limits for a Class A
digital device, pursuant to Part 15 of the FCC Rules. These limits are designed to
provide reasonable protection against harmful interference when the equipment is
operated in a commercial environment. This equipment generates, uses, and can
radiate radio frequency energy. If it is not installed and used in accordance with these
instructions, it may cause harmful interference to radio communications. Operation
of this equipment in a residential area is likely to cause harmful interference in which
case the user will be required to correct the interference at his/her own expense.
If this equipment does cause harmful interference to radio or television reception,
which can be determined by turning the equipment off and on, the user is encouraged
to try to correct the interference by one or more of the following measures:
■ Reorient or relocate the receiver.
■ Increase the separation between the equipment and receiver.
■ Connect the equipment into an outlet on a circuit different from that to which the
receiver is connected.
■ Consult the dealer or an experienced radio/television technician for help.
Any changes or modifications not expressly approved by Xerox could void the user's
authority to operate the equipment. To ensure compliance with Part 15 of the FCC
rules, use shielded interface cables.
Canada (Regulations)
This Class A digital apparatus complies with Canadian ICES-003.
Cet appareil numérique de la classe A est conforme à la norme NMB-003 du Canada.
Phaser 7400 Color Printer Options Service Manual ix
Page 12

European Union
W
arning
This is a class A product. In a domestic environment this product may cause
radio interference in which case the user may be required to take adequate
measures.
Xerox Corporation declares, under our sole responsibility, that the product to which
this declaration relates is in conformity with the following standards and other
normative documents:
Low Voltage Directive 73/23/EEC as amended
EN 60950:2000
EN 60825-1:1994+A1:2001+A2:2002
Electromagnetic Compatibility Directive 89/336/EEC as amended
EN 55022:1998 +A1:2000 +A2:2003
EN 55024:1998 +A1:2000 +A2:2003
EN 61000-3-2:2000
EN 61000-3-3:1995 +A1:2001
Radio & Telecommunications Terminal Equipment Directive 1999/5/EC as amended
EN 300 330-2 V1.1.1
EN 300 440-2 V1.1.1
EN 300 489-3 V1.3.1
This product, if used properly in accordance with the user's instructions, is neither
dangerous for the consumer nor for the environment.
A signed copy of the Declaration of Conformity for this product can be obtained from
Xerox.
x Phaser 7400 Color Printer Options Service Manual
Page 13

Manual Organization
The Xerox Phaser 7400 Color Printer Service Manual is the primary document used
for repairing, maintaining, and troubleshooting the printer. The manual is organized
into two books. This volume, Book 2, Phaser 7400 Options includes an overview of
option theory, option FRU replacement procedures, parts lists, and wiring diagrams.
Use this volume after you’ve isolated a problem internal to a specific option or when a
problem arises at the engine/option interface. Use Book 1 for diagnostic and
troubleshooting procedures for the printer and all its options.
Use Book 2 as a reference when servicing printer options. Book 2 includes
information important for the repair or replacement of option components. Use the
troubleshooting procedures in Book 1 to diagnose and isolated the problem.
Book 2 contains these sections:
Introductory, Safety, and Regulatory Information: This section contains
important safety information, regulatory requirements, and information about this
manual.
Section 1 - General Information: This section contains an overview of the
options available, configuration, specifications, and consumables.
Section 2 - Theory of Operation: This section contains functional information
on each option.
Section 3 - General Troubleshooting: This section provides troubleshooting
methods for situations where no error indicator is available.
Section 4 - Adjustments and Calibrations: This section provides procedures
for the adjustment of print engine components.
Section 5 - Service Parts Disassembly:
procedures for parts listed in the option’s Field Replaceable Units (FRUs) Parts List.
A replacement procedure is included when necessary.
Section 6 - Parts Lists: This section contains exploded views of the option FRUs
as well as FRU part numbers.
Section 7 - Wiring Diagrams: This section contains option plug/jack locations
and wiring diagrams.
This section contains removal
Phaser 7400 Color Printer Options Service Manual xi
Page 14

Book 1 - Print Engine
Use Book 1 as your primary resource for understanding the operational characteristics
of the print engine. Book 1 describes printer specifications, theory and includes
information important to the diagnosis and repair of problems occurring in the print
engine and attached options. Book 1 also provides detailed print engine replacement
procedures, parts lists, and wiring diagrams.
Book 1 contains these sections:
Introductory, Safety and Regulatory Information: This section contains
important safety information, regulatory requirements, and information about this
manual.
Section 1 - General Information: This section contains an overview of the
printer’s operation, configuration, specifications, and consumables.
Section 2 - Theory of Operation: This section contains detailed functional
information on print engine components.
Section 3 - Error Codes and Messages: This section describes the resident
diagnostics available to assist the troubleshooting process. These diagnostics include
error codes and messages and Service Usage Profile data stored in the printer. This
section provides complete troubleshooting information for the print engine and all
options.
Section 4 - General Troubleshooting: Troubleshooting discussions cover the
operation of Power On Self Test (POST), Service Diagnostics, In addition, this
section includes troubleshooting methods for situations where no error indicator is
available.
Section 5 - Print-Quality Troubleshooting: This section focuses on techniques
to correct image quality problems associated with printer output.
Section 6 - Adjustments and Calibrations: This section provides procedures
for the adjustment of print engine components.
Section 7 - Cleaning and Maintenance: This section provides periodic cleaning
procedures for the printer.
Section 8 - FRU Disassembly:
parts listed in the print engine’s Field Replaceable Units (FRUs) Parts List. A
replacement procedure is included when necessary.
Section 9 - Parts Lists: This section contains exploded views of the print engine
FRUs as well as part numbers for items available as FRUs. Part numbers for printer
options and accessories are also included.
Section 10 - Wiring Diagrams: This section contains the plug/jack locations and
the wiring diagrams for the print engine.
This section contains removal procedures for
Appendix A - Menu Maps: This section provides an illustration of the front-panel
menu as well as a listing of the Service Diagnostics tests available.
xii Phaser 7400 Color Printer Options Service Manual
Page 15

Contents
Service Terms . . . . . . . . . . . . . . . . . . . . . . . . . . . . . . . . . . . . . . . . . . . . . . iii
Symbols Marked on the Product . . . . . . . . . . . . . . . . . . . . . . . . . . . . . . . . iv
Power Safety Precautions . . . . . . . . . . . . . . . . . . . . . . . . . . . . . . . . . . . . . .v
Electrostatic Discharge (ESD) Precautions. . . . . . . . . . . . . . . . . . . . . . . . . vi
Service Safety Summary . . . . . . . . . . . . . . . . . . . . . . . . . . . . . . . . . . . . . .vii
Regulatory Specifications. . . . . . . . . . . . . . . . . . . . . . . . . . . . . . . . . . . . . . ix
Manual Organization . . . . . . . . . . . . . . . . . . . . . . . . . . . . . . . . . . . . . . . . . xi
1 General Information
Printer Introduction and Overview . . . . . . . . . . . . . . . . . . . . . . . . . . . . . . 1-2
Printer Configurations . . . . . . . . . . . . . . . . . . . . . . . . . . . . . . . . . . . . . . . 1-3
Parts of the Finisher and Paper Trays. . . . . . . . . . . . . . . . . . . . . . 1-4
Printer Options. . . . . . . . . . . . . . . . . . . . . . . . . . . . . . . . . . . . . . . . . . . . . 1-5
Finisher. . . . . . . . . . . . . . . . . . . . . . . . . . . . . . . . . . . . . . . . . . . . . 1-5
Duplex Unit. . . . . . . . . . . . . . . . . . . . . . . . . . . . . . . . . . . . . . . . . . 1-6
550-Sheet Feeder . . . . . . . . . . . . . . . . . . . . . . . . . . . . . . . . . . . . . 1-6
1650-Sheet Feeder . . . . . . . . . . . . . . . . . . . . . . . . . . . . . . . . . . . . 1-7
Specifications. . . . . . . . . . . . . . . . . . . . . . . . . . . . . . . . . . . . . . . . . . . . . . 1-7
Consumable Life Specifications . . . . . . . . . . . . . . . . . . . . . . . . . . 1-7
Finisher Electrical Specifications. . . . . . . . . . . . . . . . . . . . . . . . . . 1-7
Physical Dimensions and Clearances . . . . . . . . . . . . . . . . . . . . . . 1-8
Finisher Functional Specifications. . . . . . . . . . . . . . . . . . . . . . . . . 1-8
Finisher Environmental Specifications . . . . . . . . . . . . . . . . . . . . 1-10
2 Theory of Operation
Options Operational Overview . . . . . . . . . . . . . . . . . . . . . . . . . . . . . . . . . 2-2
Finisher Overview. . . . . . . . . . . . . . . . . . . . . . . . . . . . . . . . . . . . . . . . . . . 2-3
Punch Unit . . . . . . . . . . . . . . . . . . . . . . . . . . . . . . . . . . . . . . . . . . 2-4
Staple Unit . . . . . . . . . . . . . . . . . . . . . . . . . . . . . . . . . . . . . . . . . . 2-6
Saddle Unit. . . . . . . . . . . . . . . . . . . . . . . . . . . . . . . . . . . . . . . . . . 2-8
Inverter Unit . . . . . . . . . . . . . . . . . . . . . . . . . . . . . . . . . . . . . . . . 2-10
Printer Options. . . . . . . . . . . . . . . . . . . . . . . . . . . . . . . . . . . . . . . . . . . . 2-11
Duplex Unit. . . . . . . . . . . . . . . . . . . . . . . . . . . . . . . . . . . . . . . . . 2-11
550-Sheet Feeder . . . . . . . . . . . . . . . . . . . . . . . . . . . . . . . . . . . . 2-11
1650-Sheet Feeder . . . . . . . . . . . . . . . . . . . . . . . . . . . . . . . . . . . 2-12
Finishing Process Summary. . . . . . . . . . . . . . . . . . . . . . . . . . . . . . . . . . 2-13
Inverting . . . . . . . . . . . . . . . . . . . . . . . . . . . . . . . . . . . . . . . . . . . 2-14
Punching . . . . . . . . . . . . . . . . . . . . . . . . . . . . . . . . . . . . . . . . . . 2-14
Folding . . . . . . . . . . . . . . . . . . . . . . . . . . . . . . . . . . . . . . . . . . . . 2-18
Stacking . . . . . . . . . . . . . . . . . . . . . . . . . . . . . . . . . . . . . . . . . . . 2-19
Stapling . . . . . . . . . . . . . . . . . . . . . . . . . . . . . . . . . . . . . . . . . . . 2-23
Delivery. . . . . . . . . . . . . . . . . . . . . . . . . . . . . . . . . . . . . . . . . . . . 2-24
Table of Contents xiii
Page 16

Sensors. . . . . . . . . . . . . . . . . . . . . . . . . . . . . . . . . . . . . . . . . . . . . . . . . 2-25
Finisher Paper Path Sensors . . . . . . . . . . . . . . . . . . . . . . . . . . . 2-27
Inverter Sensors . . . . . . . . . . . . . . . . . . . . . . . . . . . . . . . . . . . . 2-30
Duplex Sensors . . . . . . . . . . . . . . . . . . . . . . . . . . . . . . . . . . . . . 2-31
Optional Tray Sensors . . . . . . . . . . . . . . . . . . . . . . . . . . . . . . . . 2-32
Motors, Rollers, Solenoids, and Clutches . . . . . . . . . . . . . . . . . . . . . . . 2-33
Finisher Motors . . . . . . . . . . . . . . . . . . . . . . . . . . . . . . . . . . . . . 2-33
Inverter Solenoids and Motors. . . . . . . . . . . . . . . . . . . . . . . . . . 2-35
Duplex Solenoids, Rollers, and Motors . . . . . . . . . . . . . . . . . . . 2-36
Optional Tray Motors, Rollers, and Clutches . . . . . . . . . . . . . . . 2-37
Detecting Jams . . . . . . . . . . . . . . . . . . . . . . . . . . . . . . . . . . . . . . . . . . . 2-40
Finisher/Punch Power Supply . . . . . . . . . . . . . . . . . . . . . . . . . . . . . . . . 2-41
Finisher Power Supply Protection . . . . . . . . . . . . . . . . . . . . . . . 2-42
Punch Unit Power Supply Protection. . . . . . . . . . . . . . . . . . . . . 2-42
3 General Troubleshooting
Introduction. . . . . . . . . . . . . . . . . . . . . . . . . . . . . . . . . . . . . . . . . . . . . . . 3-2
Using Service Diagnostics . . . . . . . . . . . . . . . . . . . . . . . . . . . . . . 3-2
Servicing Instructions . . . . . . . . . . . . . . . . . . . . . . . . . . . . . . . . . . . . . . . 3-3
Jam Locator. . . . . . . . . . . . . . . . . . . . . . . . . . . . . . . . . . . . . . . . . 3-4
Jam Detection Chart . . . . . . . . . . . . . . . . . . . . . . . . . . . . . . . . . . 3-5
Error Message Summary. . . . . . . . . . . . . . . . . . . . . . . . . . . . . . . 3-6
Using the Troubleshooting Procedures . . . . . . . . . . . . . . . . . . . 3-11
Measurement Techniques . . . . . . . . . . . . . . . . . . . . . . . . . . . . . 3-12
Troubleshooting the Finisher. . . . . . . . . . . . . . . . . . . . . . . . . . . . . . . . . 3-13
Jam at Door C for Tray [3][4][5][6]. . . . . . . . . . . . . . . . . . . . . . 3-13
Jam at Door D Open Door D to Clear. . . . . . . . . . . . . . . . . . . . . 3-16
Jam in Duplex Unit. . . . . . . . . . . . . . . . . . . . . . . . . . . . . . . . . . . 3-17
Jam at Duplex Entrance . . . . . . . . . . . . . . . . . . . . . . . . . . . . . . . 3-18
Jam at Finisher Punch Unit . . . . . . . . . . . . . . . . . . . . . . . . . . . . 3-20
Jam at Finisher Door H . . . . . . . . . . . . . . . . . . . . . . . . . . . . . . . 3-21
Jam at Finisher Upper Output Tray . . . . . . . . . . . . . . . . . . . . . . 3-22
Jam at Finisher Saddle Stapler. . . . . . . . . . . . . . . . . . . . . . . . . . 3-23
Jam at Finisher Upper Output Tray . . . . . . . . . . . . . . . . . . . . . . 3-24
Jam at Finisher Stapler . . . . . . . . . . . . . . . . . . . . . . . . . . . . . . . 3-25
Jam at Finisher Door G . . . . . . . . . . . . . . . . . . . . . . . . . . . . . . . 3-26
Jam at Finisher Saddle Stapler. . . . . . . . . . . . . . . . . . . . . . . . . . 3-27
Jam at Finisher Upper Output Tray . . . . . . . . . . . . . . . . . . . . . . 3-28
Jam Inside Finisher . . . . . . . . . . . . . . . . . . . . . . . . . . . . . . . . . . 3-29
Jam at Finisher Entrance . . . . . . . . . . . . . . . . . . . . . . . . . . . . . . 3-30
Finisher Output Tray Jammed . . . . . . . . . . . . . . . . . . . . . . . . . . 3-31
Close Right Door C for Tray [3][4][5][6] . . . . . . . . . . . . . . . . . . 3-33
Close Left Door D. . . . . . . . . . . . . . . . . . . . . . . . . . . . . . . . . . . . 3-34
Close Finisher Door F. . . . . . . . . . . . . . . . . . . . . . . . . . . . . . . . . 3-35
Close Finisher Door H . . . . . . . . . . . . . . . . . . . . . . . . . . . . . . . . 3-36
Close Finisher Door J. . . . . . . . . . . . . . . . . . . . . . . . . . . . . . . . . 3-37
xiv Phaser 7400 Color Printer Options Service Manual
Page 17

Clear Tray [2][3][4][5][6] Riser Plate. . . . . . . . . . . . . . . . . . . . . 3-38
Out of Paper Load Tray [2][3][4][5][6] with [size][type] . . . . . . 3-39
Finisher Lower Output Tray is Full, Unload Paper. . . . . . . . . . . . 3-40
Finisher Upper Output Tray is Full, Unload Paper . . . . . . . . . . . . 3-41
Wrong Paper Size; Load Tray [3][4][5][6] with [size][type]. . . . 3-42
Wrong Paper Type Load Tray [3][4][5][6] with [size][type]. . . . 3-43
Paper Not Available Load Tray [3][4][5][6] with [size][type] . . . 3-44
Duplex Interface Failure . . . . . . . . . . . . . . . . . . . . . . . . . . . . . . . 3-45
Tray [3][4][5][6] Interface Failure. . . . . . . . . . . . . . . . . . . . . . . . 3-46
Inverter Unit Interface Failure . . . . . . . . . . . . . . . . . . . . . . . . . . . 3-47
Unsupported Duplex Unit ROM. . . . . . . . . . . . . . . . . . . . . . . . . . 3-48
Unsupported Tray [3][4][5][6] ROM . . . . . . . . . . . . . . . . . . . . . 3-49
Unsupported Inverter Unit ROM . . . . . . . . . . . . . . . . . . . . . . . . . 3-50
Unsupported Finisher Unit ROM. . . . . . . . . . . . . . . . . . . . . . . . . 3-51
Finisher Fold Position Sensor Failure . . . . . . . . . . . . . . . . . . . . . 3-52
Finisher Paddle Failure . . . . . . . . . . . . . . . . . . . . . . . . . . . . . . . . 3-53
Finisher Stapler Swing Motor Failure . . . . . . . . . . . . . . . . . . . . . 3-54
Finisher Stack Handling Motor Failure . . . . . . . . . . . . . . . . . . . . 3-55
Finisher Staple Motor Failure . . . . . . . . . . . . . . . . . . . . . . . . . . . 3-56
Finisher Jog Motor Failure . . . . . . . . . . . . . . . . . . . . . . . . . . . . . 3-57
Finisher Lift Motor Failure. . . . . . . . . . . . . . . . . . . . . . . . . . . . . . 3-58
Finisher Exit Failure. . . . . . . . . . . . . . . . . . . . . . . . . . . . . . . . . . . 3-60
Finisher Punch Backup RAM Failure. . . . . . . . . . . . . . . . . . . . . . 3-61
Finisher Punch Communications Failure. . . . . . . . . . . . . . . . . . . 3-62
Finisher Punch Unit Transfer Motor Failure . . . . . . . . . . . . . . . . 3-63
Finisher Punch Motor Failure . . . . . . . . . . . . . . . . . . . . . . . . . . . 3-64
Finisher Backup RAM Failure . . . . . . . . . . . . . . . . . . . . . . . . . . . 3-65
Finisher Punch Dust Sensor Failure . . . . . . . . . . . . . . . . . . . . . . 3-66
Printer Error - Contact Service; report fault [n] . . . . . . . . . . . . . . . . . . . 3-68
Finisher Punch Unit Counter at End of Life . . . . . . . . . . . . . . . . . 3-68
Finisher Staple Unit Counter at End of Life . . . . . . . . . . . . . . . . . 3-69
Finisher Interface Error. . . . . . . . . . . . . . . . . . . . . . . . . . . . . . . . 3-70
Inverter Power Supply Failure. . . . . . . . . . . . . . . . . . . . . . . . . . . 3-71
Tray [3][4][5][6] Firmware Error . . . . . . . . . . . . . . . . . . . . . . . . 3-72
Duplex Unit Firmware Error . . . . . . . . . . . . . . . . . . . . . . . . . . . . 3-73
Finisher Inverter Firmware Error. . . . . . . . . . . . . . . . . . . . . . . . . 3-74
Tray [3][4][5][6] Flash Memory Failure . . . . . . . . . . . . . . . . . . . 3-75
Duplex Unit Flash Memory Failure . . . . . . . . . . . . . . . . . . . . . . . 3-76
Finisher Inverter Flash Memory Failure. . . . . . . . . . . . . . . . . . . . 3-77
Tray [3][4][5][6] Lift Motor Failure. . . . . . . . . . . . . . . . . . . . . . . 3-78
Duplex Unit Fan Failure. . . . . . . . . . . . . . . . . . . . . . . . . . . . . . . . 3-80
+24V Not Available to the Duplex Unit . . . . . . . . . . . . . . . . . . . . 3-81
+24 V Not Available to Tray [3][4][5][6]. . . . . . . . . . . . . . . . . . . 3-83
Duplex Unit Clock Frequency Error. . . . . . . . . . . . . . . . . . . . . . . 3-84
Finisher Inverter Clock Frequency Error . . . . . . . . . . . . . . . . . . . 3-85
Tray [3][4][5][6] Feeder Board Clock Frequency Error. . . . . . . . 3-86
Table of Contents xv
Page 18

No Paper in Tray [2][3][4][5][6] . . . . . . . . . . . . . . . . . . . . . . . . 3-87
Staple Cartridge Is Empty . . . . . . . . . . . . . . . . . . . . . . . . . . . . . 3-88
Punch Waste Box is Full or Missing. . . . . . . . . . . . . . . . . . . . . . 3-89
Finisher Away From Base. . . . . . . . . . . . . . . . . . . . . . . . . . . . . . 3-90
Finisher Away From Printer . . . . . . . . . . . . . . . . . . . . . . . . . . . . 3-91
4 Adjustments and Calibrations
Punch Unit Adjustments . . . . . . . . . . . . . . . . . . . . . . . . . . . . . . . . . . . . . 4-2
Registering Punch Holes . . . . . . . . . . . . . . . . . . . . . . . . . . . . . . . 4-2
Adjusting Sensor Output After Sensor Replacement . . . . . . . . . . 4-4
Adjusting Sensor Output After EE-PROM Replacement . . . . . . . . 4-5
Stapler Unit Adjustments. . . . . . . . . . . . . . . . . . . . . . . . . . . . . . . . . . . . . 4-6
Adjusting the Saddle Stitch Double Stapling Position . . . . . . . . . 4-6
Adjusting the Stapler Phase. . . . . . . . . . . . . . . . . . . . . . . . . . . . . 4-7
Saddle Unit Adjustments. . . . . . . . . . . . . . . . . . . . . . . . . . . . . . . . . . . . 4-17
Adjusting the Folding Position . . . . . . . . . . . . . . . . . . . . . . . . . . 4-17
Adjusting the Phase of the Saddle Unit Gear . . . . . . . . . . . . . . . 4-18
5 Service Parts Disassembly
Overview . . . . . . . . . . . . . . . . . . . . . . . . . . . . . . . . . . . . . . . . . . . . . . . . . 5-2
General Notes on Disassembly . . . . . . . . . . . . . . . . . . . . . . . . . . . . . . . . 5-2
Preparation . . . . . . . . . . . . . . . . . . . . . . . . . . . . . . . . . . . . . . . . . 5-2
Notations in the disassembly text . . . . . . . . . . . . . . . . . . . . . . . . 5-3
Fastener Types. . . . . . . . . . . . . . . . . . . . . . . . . . . . . . . . . . . . . . . 5-3
Standard Orientation . . . . . . . . . . . . . . . . . . . . . . . . . . . . . . . . . . 5-4
Finisher Disassembly. . . . . . . . . . . . . . . . . . . . . . . . . . . . . . . . . . . . . . . . 5-5
Removing Inverter Base Unit from Finisher . . . . . . . . . . . . . . . . . 5-5
Undocking Inverter from Printer . . . . . . . . . . . . . . . . . . . . . . . . . 5-6
Trays and Covers. . . . . . . . . . . . . . . . . . . . . . . . . . . . . . . . . . . . . . . . . . . 5-7
Paper Exit Tray. . . . . . . . . . . . . . . . . . . . . . . . . . . . . . . . . . . . . . . 5-7
Front Door (Door J). . . . . . . . . . . . . . . . . . . . . . . . . . . . . . . . . . . 5-8
Right Side Door (Door G) . . . . . . . . . . . . . . . . . . . . . . . . . . . . . 5-10
Rear Cover. . . . . . . . . . . . . . . . . . . . . . . . . . . . . . . . . . . . . . . . . 5-11
Upper Cover (Door H) . . . . . . . . . . . . . . . . . . . . . . . . . . . . . . . . 5-13
Processing Tray Upper Cover . . . . . . . . . . . . . . . . . . . . . . . . . . 5-15
Inverter Front Covers. . . . . . . . . . . . . . . . . . . . . . . . . . . . . . . . . 5-17
Inverter Rear Covers . . . . . . . . . . . . . . . . . . . . . . . . . . . . . . . . . 5-19
Inverter Left Side Door (Door F) . . . . . . . . . . . . . . . . . . . . . . . . 5-21
Inverter Right Side Door (Door I). . . . . . . . . . . . . . . . . . . . . . . . 5-22
Inverter Top Cover. . . . . . . . . . . . . . . . . . . . . . . . . . . . . . . . . . . 5-23
Units . . . . . . . . . . . . . . . . . . . . . . . . . . . . . . . . . . . . . . . . . . . . . . . . . . . 5-24
Punch Unit. . . . . . . . . . . . . . . . . . . . . . . . . . . . . . . . . . . . . . . . . 5-24
Staple Unit . . . . . . . . . . . . . . . . . . . . . . . . . . . . . . . . . . . . . . . . . 5-29
Staple/Fold Drive Unit . . . . . . . . . . . . . . . . . . . . . . . . . . . . . . . . 5-30
Saddle Unit . . . . . . . . . . . . . . . . . . . . . . . . . . . . . . . . . . . . . . . . 5-34
Assemblies . . . . . . . . . . . . . . . . . . . . . . . . . . . . . . . . . . . . . . . . . . . . . . 5-37
xvi Phaser 7400 Color Printer Options Service Manual
Page 19

Upper Right Cover Assembly . . . . . . . . . . . . . . . . . . . . . . . . . . . 5-37
Processing Tray Assembly . . . . . . . . . . . . . . . . . . . . . . . . . . . . . 5-38
Paddle Assembly . . . . . . . . . . . . . . . . . . . . . . . . . . . . . . . . . . . . 5-43
Boards . . . . . . . . . . . . . . . . . . . . . . . . . . . . . . . . . . . . . . . . . . . . . . . . . . 5-46
Finisher Controller Board . . . . . . . . . . . . . . . . . . . . . . . . . . . . . . 5-46
Home Position Board . . . . . . . . . . . . . . . . . . . . . . . . . . . . . . . . . 5-47
Punch Control Board . . . . . . . . . . . . . . . . . . . . . . . . . . . . . . . . . 5-50
Photo Sensor Board . . . . . . . . . . . . . . . . . . . . . . . . . . . . . . . . . . 5-51
Punch LED Board . . . . . . . . . . . . . . . . . . . . . . . . . . . . . . . . . . . . 5-53
Waste Full LED Board. . . . . . . . . . . . . . . . . . . . . . . . . . . . . . . . . 5-54
Inverter Controller Board . . . . . . . . . . . . . . . . . . . . . . . . . . . . . . 5-55
Inverter Power Supply Board . . . . . . . . . . . . . . . . . . . . . . . . . . . 5-56
Motors, Clutches, and Solenoids . . . . . . . . . . . . . . . . . . . . . . . . . . . . . . 5-57
Punch Motor. . . . . . . . . . . . . . . . . . . . . . . . . . . . . . . . . . . . . . . . 5-57
Finisher Punch Transfer Motor. . . . . . . . . . . . . . . . . . . . . . . . . . 5-58
Lift Motor . . . . . . . . . . . . . . . . . . . . . . . . . . . . . . . . . . . . . . . . . . 5-59
Staple/Fold Motor. . . . . . . . . . . . . . . . . . . . . . . . . . . . . . . . . . . . 5-60
Slide Motor. . . . . . . . . . . . . . . . . . . . . . . . . . . . . . . . . . . . . . . . . 5-61
Feed Motor . . . . . . . . . . . . . . . . . . . . . . . . . . . . . . . . . . . . . . . . . 5-62
Paddle Motor . . . . . . . . . . . . . . . . . . . . . . . . . . . . . . . . . . . . . . . 5-63
Delivery Motor . . . . . . . . . . . . . . . . . . . . . . . . . . . . . . . . . . . . . . 5-64
Alignment (Front and Rear) Motors . . . . . . . . . . . . . . . . . . . . . . 5-65
Binding Clutch . . . . . . . . . . . . . . . . . . . . . . . . . . . . . . . . . . . . . . 5-66
Inverter Upper Roller Motor . . . . . . . . . . . . . . . . . . . . . . . . . . . . 5-67
Inverter Lower Roller Motor . . . . . . . . . . . . . . . . . . . . . . . . . . . . 5-68
Inverter Feeder Clutch. . . . . . . . . . . . . . . . . . . . . . . . . . . . . . . . . 5-69
Inverter Upper Roller Solenoid . . . . . . . . . . . . . . . . . . . . . . . . . . 5-70
Inverter Lower Roller Solenoid . . . . . . . . . . . . . . . . . . . . . . . . . . 5-71
Finisher Sensors and Switches . . . . . . . . . . . . . . . . . . . . . . . . . . . . . . . 5-72
Joint Switch . . . . . . . . . . . . . . . . . . . . . . . . . . . . . . . . . . . . . . . . 5-73
Front Door Switch and Sensor . . . . . . . . . . . . . . . . . . . . . . . . . . 5-74
Inlet Sensor . . . . . . . . . . . . . . . . . . . . . . . . . . . . . . . . . . . . . . . . 5-75
Tray Paper Sensor . . . . . . . . . . . . . . . . . . . . . . . . . . . . . . . . . . . 5-76
Paper Surface Sensor. . . . . . . . . . . . . . . . . . . . . . . . . . . . . . . . . 5-77
Upper Cover Sensor . . . . . . . . . . . . . . . . . . . . . . . . . . . . . . . . . . 5-78
Shift Limit Sensors. . . . . . . . . . . . . . . . . . . . . . . . . . . . . . . . . . . 5-79
Lift Motor Clock Sensor . . . . . . . . . . . . . . . . . . . . . . . . . . . . . . . 5-80
Stack Full Sensor . . . . . . . . . . . . . . . . . . . . . . . . . . . . . . . . . . . . 5-81
Processing Tray Sensor . . . . . . . . . . . . . . . . . . . . . . . . . . . . . . . 5-82
Aligning Plate Home Position Sensors . . . . . . . . . . . . . . . . . . . . 5-83
Stack Feed Roller Home Position Sensor . . . . . . . . . . . . . . . . . . 5-85
Waste Full Sensor. . . . . . . . . . . . . . . . . . . . . . . . . . . . . . . . . . . . 5-87
Swing Guide Home Position Sensor. . . . . . . . . . . . . . . . . . . . . . 5-89
Delivery Belt Home Position Sensor. . . . . . . . . . . . . . . . . . . . . . 5-90
Paddle Home Position Sensor . . . . . . . . . . . . . . . . . . . . . . . . . . 5-91
Stapler Safety Interlock Switch. . . . . . . . . . . . . . . . . . . . . . . . . . 5-92
Table of Contents xvii
Page 20

Staple/Fold Clock Sensor. . . . . . . . . . . . . . . . . . . . . . . . . . . . . . 5-93
Folding Home Position Sensor. . . . . . . . . . . . . . . . . . . . . . . . . . 5-94
Folding Position Sensor. . . . . . . . . . . . . . . . . . . . . . . . . . . . . . . 5-96
Bind Tray Sensor . . . . . . . . . . . . . . . . . . . . . . . . . . . . . . . . . . . . 5-98
Inverter Sensors and Switches . . . . . . . . . . . . . . . . . . . . . . . . . . . . . . . 5-99
Inverter Docking Sensor . . . . . . . . . . . . . . . . . . . . . . . . . . . . . 5-100
Inverter Door (Door F) Open Interlock Switch . . . . . . . . . . . . . 5-101
Inverter Upper Paper-Present Sensor . . . . . . . . . . . . . . . . . . . 5-102
Inverter Lower Paper-Present Sensor . . . . . . . . . . . . . . . . . . . 5-104
Inverter Paper-in Sensor . . . . . . . . . . . . . . . . . . . . . . . . . . . . . 5-106
Guides and Rollers . . . . . . . . . . . . . . . . . . . . . . . . . . . . . . . . . . . . . . . 5-107
Side Guide . . . . . . . . . . . . . . . . . . . . . . . . . . . . . . . . . . . . . . . . 5-107
Feed Roller. . . . . . . . . . . . . . . . . . . . . . . . . . . . . . . . . . . . . . . . 5-109
Upper Stack Delivery Roller . . . . . . . . . . . . . . . . . . . . . . . . . . . 5-112
Paddle . . . . . . . . . . . . . . . . . . . . . . . . . . . . . . . . . . . . . . . . . . . 5-115
Lower Stack Delivery Roller Belt . . . . . . . . . . . . . . . . . . . . . . . 5-117
Duplex Unit Disassembly. . . . . . . . . . . . . . . . . . . . . . . . . . . . . . . . . . . 5-122
Front Cover Assembly . . . . . . . . . . . . . . . . . . . . . . . . . . . . . . . 5-122
Bottom Cover Plate . . . . . . . . . . . . . . . . . . . . . . . . . . . . . . . . . 5-124
Side Rails. . . . . . . . . . . . . . . . . . . . . . . . . . . . . . . . . . . . . . . . . 5-126
Paper Guides . . . . . . . . . . . . . . . . . . . . . . . . . . . . . . . . . . . . . . 5-127
Duplex Motor Assembly. . . . . . . . . . . . . . . . . . . . . . . . . . . . . . 5-128
Diverter Solenoid . . . . . . . . . . . . . . . . . . . . . . . . . . . . . . . . . . . 5-129
Duplex Unit Sensors and Switches . . . . . . . . . . . . . . . . . . . . . 5-130
Duplex Fan. . . . . . . . . . . . . . . . . . . . . . . . . . . . . . . . . . . . . . . . 5-131
Interconnect Connector . . . . . . . . . . . . . . . . . . . . . . . . . . . . . . 5-132
Paper Tray Disassembly . . . . . . . . . . . . . . . . . . . . . . . . . . . . . . . . . . . 5-133
Options Connector. . . . . . . . . . . . . . . . . . . . . . . . . . . . . . . . . . 5-133
Tray Covers and Tray Door (Door C) . . . . . . . . . . . . . . . . . . . . 5-134
Tray Feeder . . . . . . . . . . . . . . . . . . . . . . . . . . . . . . . . . . . . . . . 5-136
Registration Motor. . . . . . . . . . . . . . . . . . . . . . . . . . . . . . . . . . 5-137
Feed Motor. . . . . . . . . . . . . . . . . . . . . . . . . . . . . . . . . . . . . . . . 5-138
Lift Motor. . . . . . . . . . . . . . . . . . . . . . . . . . . . . . . . . . . . . . . . . 5-139
Registration Clutch . . . . . . . . . . . . . . . . . . . . . . . . . . . . . . . . . 5-140
Door C Detect Sensor . . . . . . . . . . . . . . . . . . . . . . . . . . . . . . . 5-141
No Paper Sensor . . . . . . . . . . . . . . . . . . . . . . . . . . . . . . . . . . . 5-142
Registration Sensor #2 . . . . . . . . . . . . . . . . . . . . . . . . . . . . . . 5-143
Feed-Out Sensor #2. . . . . . . . . . . . . . . . . . . . . . . . . . . . . . . . . 5-146
Feeder Board . . . . . . . . . . . . . . . . . . . . . . . . . . . . . . . . . . . . . . 5-148
Tray Feed Rollers. . . . . . . . . . . . . . . . . . . . . . . . . . . . . . . . . . . 5-150
xviii Phaser 7400 Color Printer Options Service Manual
Page 21

6 Parts List
Using the Parts List . . . . . . . . . . . . . . . . . . . . . . . . . . . . . . . . . . . . . . . . . 6-2
Finisher Parts. . . . . . . . . . . . . . . . . . . . . . . . . . . . . . . . . . . . . . . . . . . . . . 6-3
Duplex Unit Parts. . . . . . . . . . . . . . . . . . . . . . . . . . . . . . . . . . . . . . . . . . 6-38
Optional Paper Tray Parts . . . . . . . . . . . . . . . . . . . . . . . . . . . . . . . . . . . 6-40
Finisher Unit Assembly Diagram. . . . . . . . . . . . . . . . . . . . . . . . . . 6-4
Parts List 1.1 Finisher Unit Assembly Parts List. . . . . . . . . . . . . . 6-5
Finisher External Parts Diagram . . . . . . . . . . . . . . . . . . . . . . . . . . 6-6
Parts List 1.2 Finisher External Parts List . . . . . . . . . . . . . . . . . . . 6-7
Finisher Internal Parts Diagram (1 of 2) . . . . . . . . . . . . . . . . . . . . 6-9
Finisher Internal Parts Diagram (2 of 2) . . . . . . . . . . . . . . . . . . . 6-10
Parts List 1.3 Finisher Internal Parts List . . . . . . . . . . . . . . . . . . 6-11
Stack (Lift) Motor Drive Assembly Parts Diagram . . . . . . . . . . . 6-12
Parts List 1.4 Stack (Lift) Motor Drive Assembly Parts List . . . . 6-13
(Staple/Fold) Drive Assembly Parts Diagram . . . . . . . . . . . . . . . 6-14
Parts List 1.5 (Staple/Fold) Drive Assembly Parts List . . . . . . . . 6-15
Bundle Support Cover Assembly Parts Diagram. . . . . . . . . . . . . 6-16
Parts List 1.6 Bundle Support Cover Parts List. . . . . . . . . . . . . . 6-17
Dispose Assembly (Processing Tray) Parts Diagram . . . . . . . . . 6-18
Parts List 1.7 Dispose Assembly (Processing Tray) Parts List. . 6-19
Paper Feeder (Paddle) Assembly Parts Diagram. . . . . . . . . . . . . 6-20
Parts List 1.8 Paper Feeder (Paddle) Assembly Parts List . . . . . 6-21
Puncher Assembly Parts Diagram . . . . . . . . . . . . . . . . . . . . . . . 6-22
Parts List 1.9 Puncher Assembly Parts List . . . . . . . . . . . . . . . . 6-23
Punch Total Assembly Diagram . . . . . . . . . . . . . . . . . . . . . . . . . 6-24
Parts List 1.10 Punch Total Assembly Parts List . . . . . . . . . . . . 6-25
Staple Unit Diagram (1 of 2). . . . . . . . . . . . . . . . . . . . . . . . . . . . 6-27
Staple Unit Diagram (2 of 2). . . . . . . . . . . . . . . . . . . . . . . . . . . . 6-28
Parts List 1.11 Staple Unit Parts List . . . . . . . . . . . . . . . . . . . . . 6-29
Fold Unit Diagram (1 of 3) . . . . . . . . . . . . . . . . . . . . . . . . . . . . . 6-30
Fold Unit Diagram (2 of 3) . . . . . . . . . . . . . . . . . . . . . . . . . . . . . 6-31
Fold Unit Diagram (3 of 3) . . . . . . . . . . . . . . . . . . . . . . . . . . . . . 6-32
Parts List 1.12 Fold Unit Parts List . . . . . . . . . . . . . . . . . . . . . . . 6-33
Inverter Parts Diagram (1 of 3). . . . . . . . . . . . . . . . . . . . . . . . . . 6-34
Inverter Parts Diagram (2 of 3). . . . . . . . . . . . . . . . . . . . . . . . . . 6-35
Inverter Parts Diagram (3 of 3). . . . . . . . . . . . . . . . . . . . . . . . . . 6-36
Parts List 1.13 Inverter Parts List. . . . . . . . . . . . . . . . . . . . . . . . 6-37
Duplex Unit Parts Diagram . . . . . . . . . . . . . . . . . . . . . . . . . . . . . 6-38
Parts List 1.14 Duplex Unit Parts List. . . . . . . . . . . . . . . . . . . . . 6-39
Optional Tray Parts Diagram (1 of 2) . . . . . . . . . . . . . . . . . . . . . 6-41
Optional Tray Parts Diagram (2 of 2) . . . . . . . . . . . . . . . . . . . . . 6-42
Parts List 1.15 Optional Tray Parts List . . . . . . . . . . . . . . . . . . . 6-43
Table of Contents xix
Page 22

7 Wiring Diagrams
Plug/Jack Locator Diagrams . . . . . . . . . . . . . . . . . . . . . . . . . . . . . . . . . . 7-2
Print Options Plug/Jack Designators . . . . . . . . . . . . . . . . . . . . . . 7-2
Finisher Wiring Diagrams . . . . . . . . . . . . . . . . . . . . . . . . . . . . . . . . . . . 7-16
Finisher/Punch Power Supply Wiring Diagram . . . . . . . . . . . . . 7-16
Finisher Controller to Printer Wiring . . . . . . . . . . . . . . . . . . . . . 7-17
Finisher Controller to Sensors (1 of 3). . . . . . . . . . . . . . . . . . . . 7-18
Finisher Controller to Sensors (2 of 3). . . . . . . . . . . . . . . . . . . . 7-19
Finisher Controller to Sensors (3 of 3). . . . . . . . . . . . . . . . . . . . 7-20
Finisher Controller to Motors. . . . . . . . . . . . . . . . . . . . . . . . . . . 7-21
Finisher Controller to Switches . . . . . . . . . . . . . . . . . . . . . . . . . 7-22
Finisher Controller to Stapler Sensors and Motors . . . . . . . . . . 7-23
Finisher Controller to Punch Controller . . . . . . . . . . . . . . . . . . . 7-24
Punch Controller to Sensors and Motors. . . . . . . . . . . . . . . . . . 7-25
Inverter Sensors Wiring Diagram. . . . . . . . . . . . . . . . . . . . . . . . 7-26
Inverter Motors, Solenoids, and Clutch Wiring Diagram . . . . . . 7-27
Duplex Unit Wiring Diagrams . . . . . . . . . . . . . . . . . . . . . . . . . . . . . . . . 7-28
Duplex Unit Sensors and Interconnect Wiring . . . . . . . . . . . . . . 7-28
Duplex Unit Motors and Solenoids . . . . . . . . . . . . . . . . . . . . . . 7-29
Optional Tray Wiring Diagrams . . . . . . . . . . . . . . . . . . . . . . . . . . . . . . . 7-30
Paper Tray Sensors and Interconnect Wiring. . . . . . . . . . . . . . . 7-30
Paper Tray Motors, Clutches, and Interconnect Wiring . . . . . . . 7-31
Index
xx Phaser 7400 Color Printer Service Manual
Page 23

General
Information
In this chapter...
■ Printer Introduction and Overview
■ Printer Configurations
■ Printer Options
■ Specifications
Section
1
Page 24
Printer Introduction and Overview
The Xerox Phaser 7400 Color Printer Service Manual is the primary document used
to repair, maintain, and troubleshoot this printer. For manual updates, Service
Bulletins, knowledge base, etc., see
technical support, contact your assigned Xerox Technical Support for this product.
www.xerox.com/office/7400support. For further
s7400-301
The Xerox Phaser 7400 Color Printer is a single pass, electrophotographic design,
using light emitting diodes (LED) for image exposure. The Phaser 7400 supports
PostScript 3 and PCL5c page description languages. Print performance for A4 paper
is 40 pages per minute (ppm) monochrome, 36 ppm for full color in 1-sided or
2-sided modes. Resolutions of up to 600 x 1200 dots per inch (dpi), 32-level grayscale
print is applicable at 600x600 dpi. The base configuration (Phaser 7400N) features
USB 2.0 and 10/100baseT Ethernet Ports, 256 MB of memory, a 250-sheet multipurpose Tray 1 (MPT), a 550-sheet input tray (Tray 2), a 500-sheet face-down Top
Output Tray, and a 250-sheet face-up Side Output Tray.
Phaser 7400 printer options add memory, paper capacity and functionality. For
configurations not originally equipped, an internal Hard Drive is available for font
storage, storing print files, job collation, proof, personal, and secure print support. A
selection of RAM memory upgrades are available to raise the installed quantity to the
1 GB maximum. A 1650-Sheet High-Capacity Feeder (HCF) is available with three,
550-sheet universal trays. A 550-Sheet Feeder (Tray 3) Lower Tray Assembly (LTA)
is also available. On the output side, a 1000-Sheet Finisher provides punching,
stapling, saddle stitching, and offset stacking, which raises the output total to 1750
sheets. A Duplex Unit is available to add automatic, 2-sided printing for supported
paper sizes from all trays.
1-2 Phaser 7400 Color Printer Options Service Manual
Page 25

Printer Configurations
The Phaser 7400 Color Printer is available in five configurations. The main
differences are standard memory, optional high-capacity feeders, duplexing (2-sided
printing) capabilities, networking, Finisher capabilities, and internal Hard Drive. The
following table lists the available configurations.
Printer Configuration
Features
7400N 7400DN 7400DT 7400DX 7400DXF
Max Print Speed (ppm)
color / monochrome
Hard Drive for Secure,
Proof, Personal, and
Saved Print Jobs
Standard Memory* 256 MB 256 MB 512 MB 512 MB 512 MB
USB Port Ye s Ye s Ye s Ye s Ye s
10/100 Ethernet Port Ye s Ye s Ye s Ye s Ye s
RAM Collation Ye s Ye s Ye s Ye s Ye s
Duplex Unit Optional Ye s Ye s Ye s Ye s
PostScript / PCL Fonts Ye s Ye s Ye s Ye s Ye s
Resolutions (dpi):
Standard
Enhanced
Photo
Tray 1 (MPT)** Ye s Ye s Ye s Ye s Ye s
Optional Trays ** Optional Optional 1 x 550 3 x 550 4 x 550
36/40 36/40 36/40 36/40 36/40
Optional Optional Ye s Ye s Ye s
600x600x1
1200x600x1
600x600x5
600x600x1
200x600x1
600x600x5
600x600x1
1200x600x1
600x600x5
600x600x1
1200x600x1
600x600x5
600x600x1
1200x600x1
600x600x5
550-Sheet Feeder** Optional Optional Ye s Optional Ye s
1650-Sheet Feeder** Optional Optional Optional Ye s Ye s
1000-Sheet Finisher*** Optional Optional Optional Optional Ye s
* All configurations have two memory slots supporting 256 MB and 512 MB cards, up
to a maximum of 1 GB.
** Trays 1 and 2 are standard on all configurations. All configurations support
additional paper trays in the following combinations:
One 550-Sheet Feeder (Tray 3)
One 1650-Sheet Feeder (Trays 3, 4, and 5 or 4, 5, and 6)
One 550-Sheet Feeder (Tray 3) and one 1650-Sheet Feeder (Trays 4, 5, and 6)
*** Requires a total of 4 optional trays for fitment.
General Information 1-3
Page 26
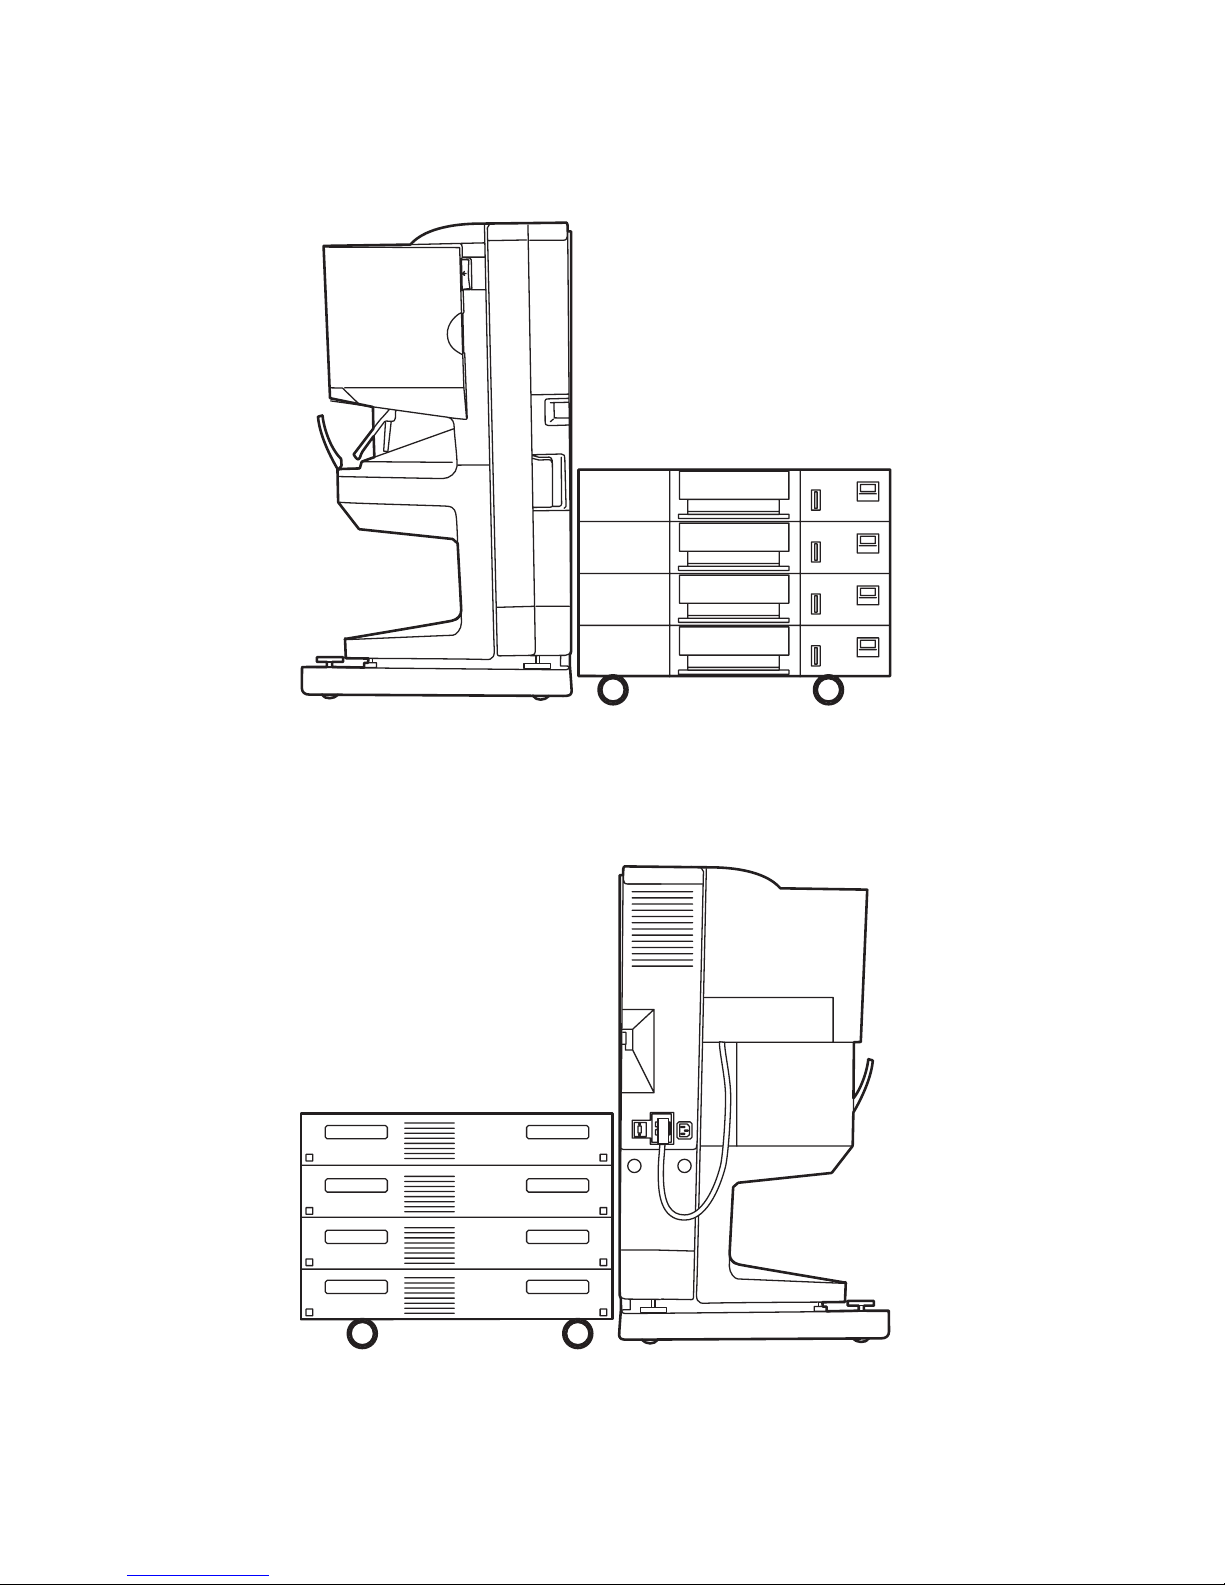
Parts of the Finisher and Paper Trays
Front View
Rear View
s7400-552
1-4 Phaser 7400 Color Printer Options Service Manual
s7400-533
Page 27
Printer Options
Phaser 7400 Color Printer options include:
■ 1,000-Sheet Finisher (with hole punch, staple, saddle-stitch, and inverter)
■ 550-Sheet Feeder (LTA)
■ 1650-Sheet Feeder (HCF)
■ Duplex Unit
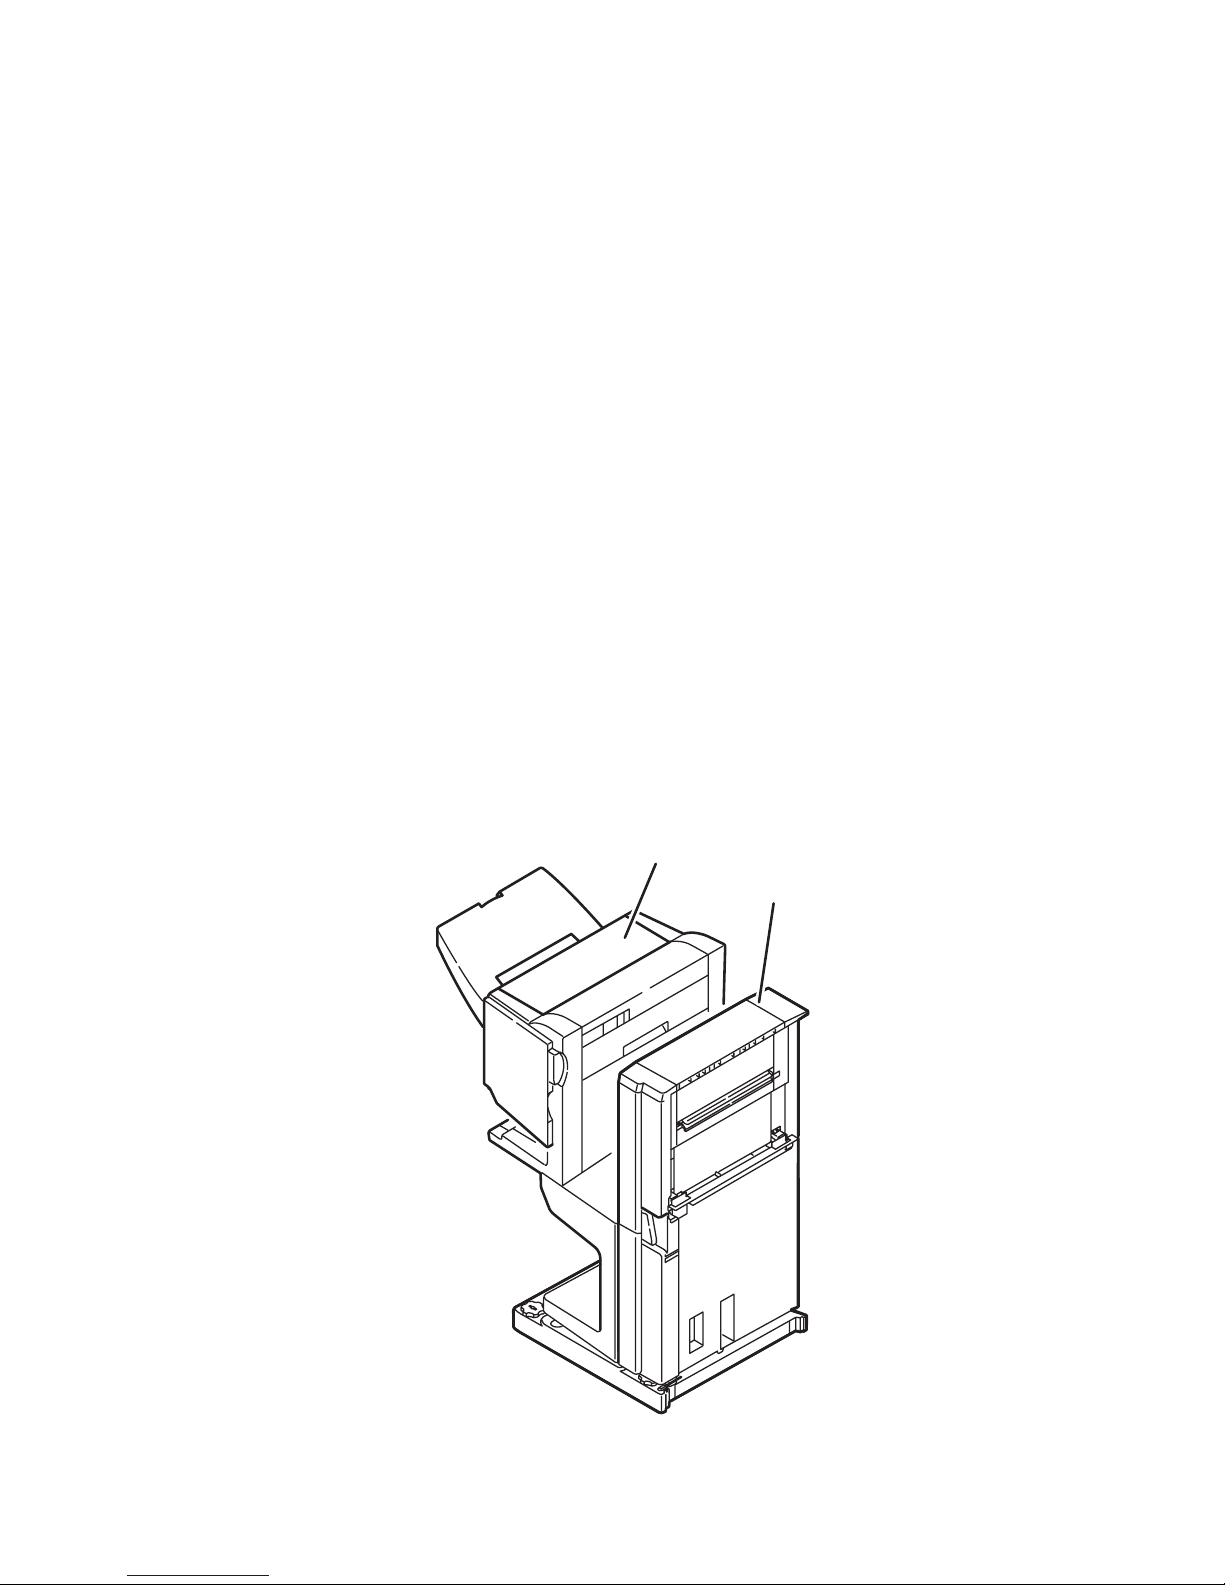
Finisher
The Finisher increases the output capacity of the printer by 1,000 sheets. Printer
output is directed to the Finisher by way of the side exit. Depending on the job
specifications, as paper enters the Finisher it is punched, stapled, offset and stacked.
The Finisher has two cables; one to hook up to the printer, and another to connect to
the Inverter. The Finisher also includes its own power supply.
The Finisher includes a separate Inverter unit to position paper from the printer before
the paper reaches the finisher unit for final stacking.
Finisher
Inverter
General Information 1-5
s7400-306
Page 28
Duplex Unit
The Duplex Unit adds two-sided printing. The Duplex Unit attaches into the left side
above Tray 2 using two latches.
s7400-305
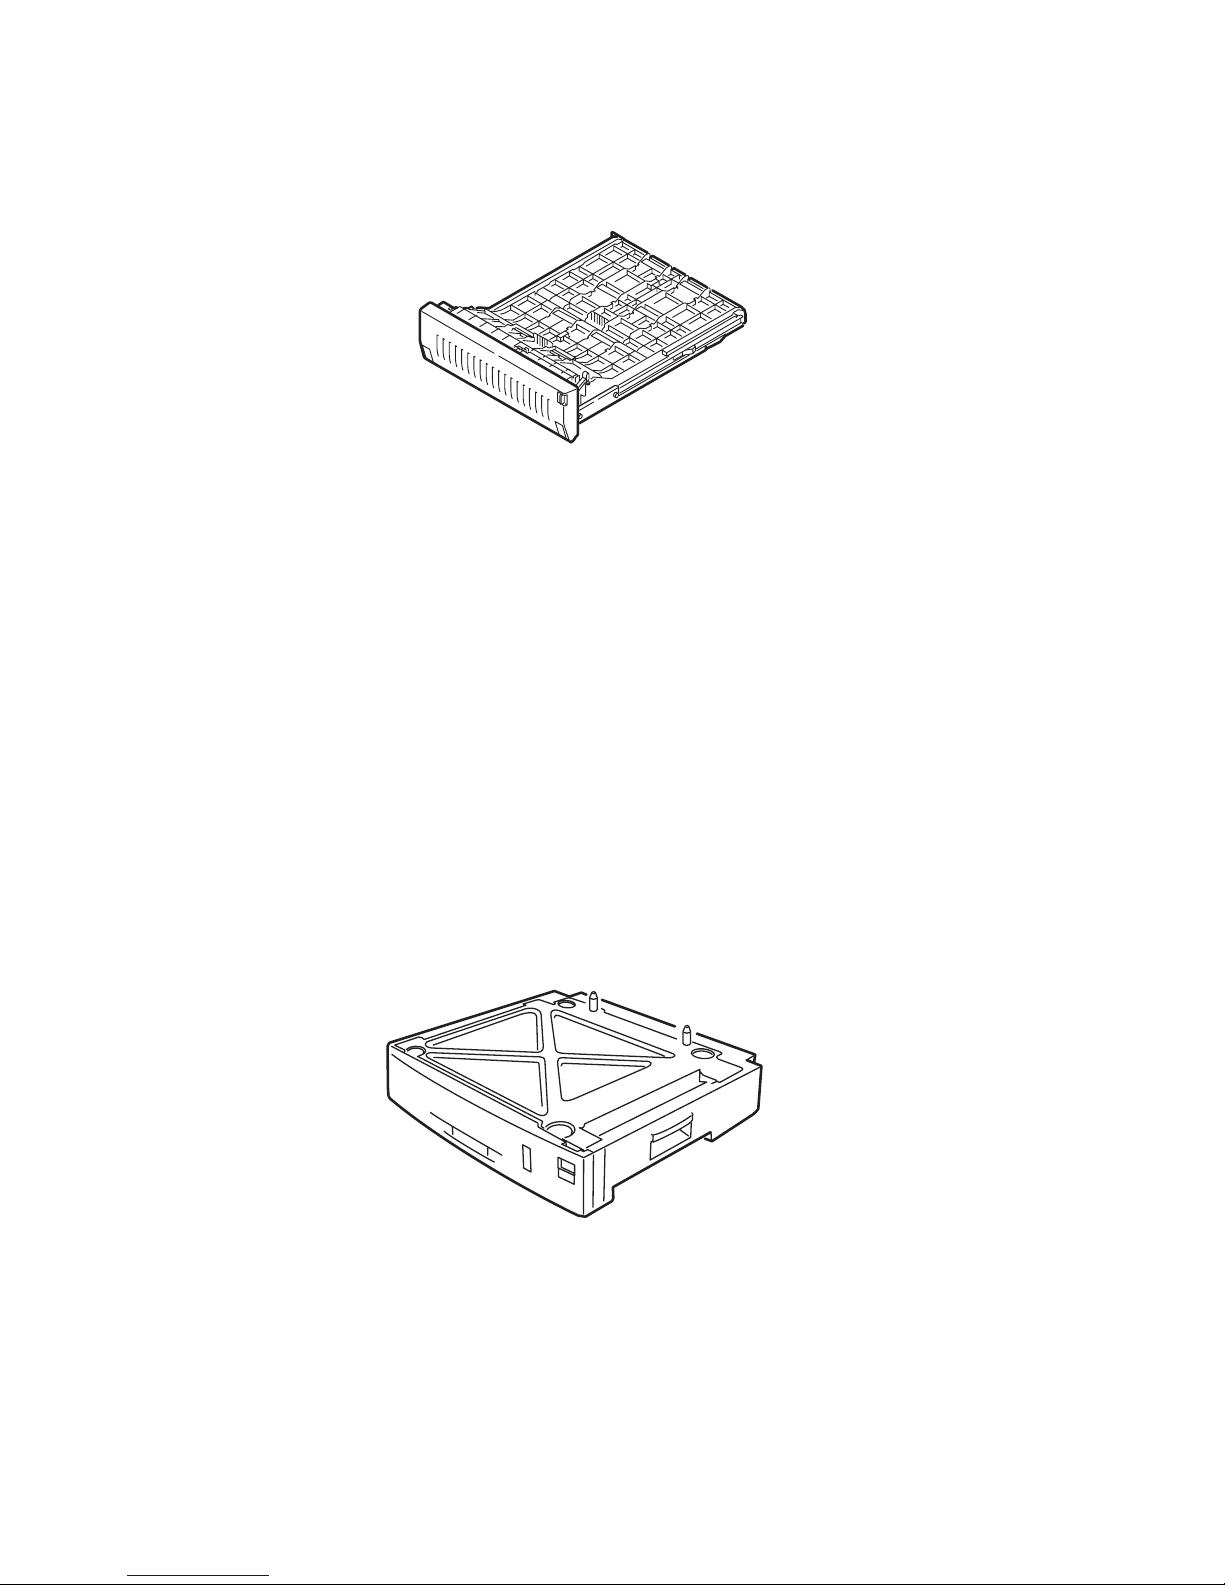
550-Sheet Feeder
The 550-Sheet Feeder increases the input capacity of the printer. The feeder attaches
below Tray 2 with four screws. When used in combination with the 1650-Sheet
Feeder, the 550-Sheet Feeder is installed between the printer and 1650-Sheet Feeder.
Up to four optional 550-Sheet Feeders per printer, totaling six universal trays (Trays
2~6), is allowed. However, when the 1650-Sheet Feeder (HCF) is installed, only one
additional 550-Sheet Feeder is allowed between the HCF and the printer. Electrical
connection to the printer is made by a single interface connector.
1-6 Phaser 7400 Color Printer Options Service Manual
s7400-001
Page 29
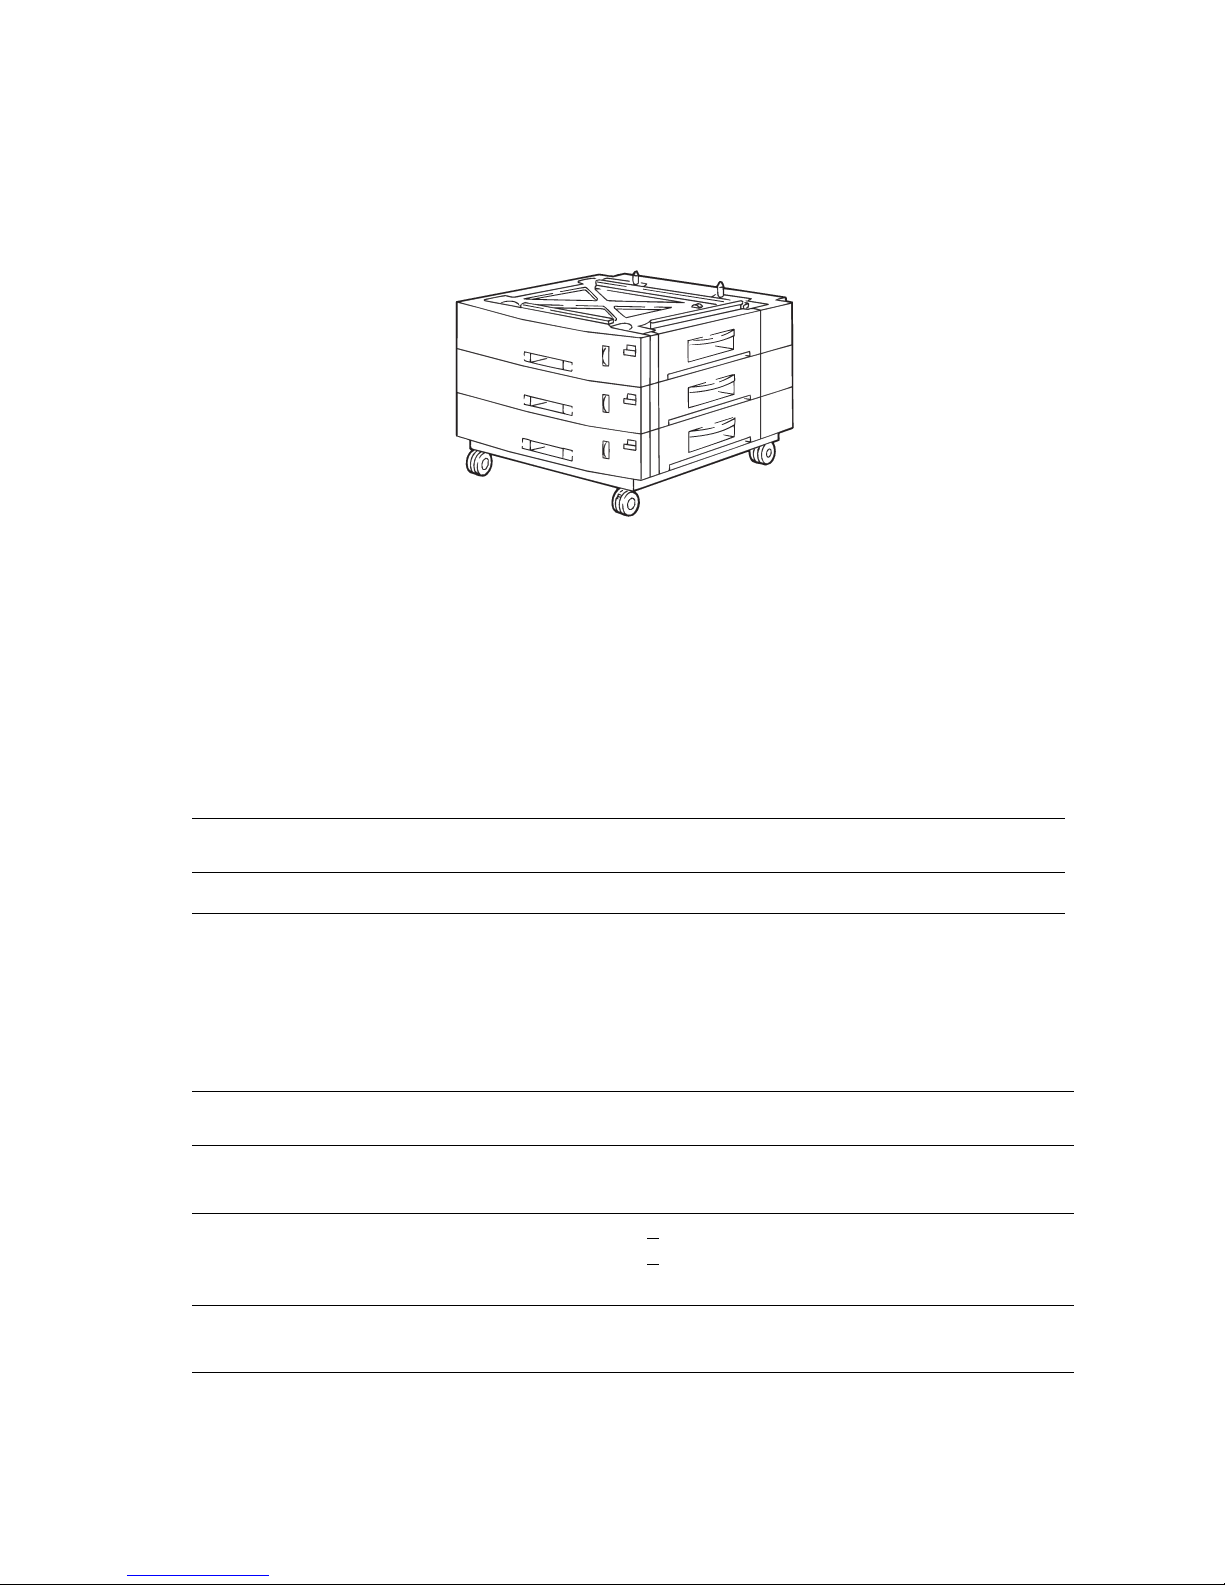
1650-Sheet Feeder
The 1650-Sheet Feeder adds three, 550-sheet trays. Control signals reach the sheet
feeder by a single connection. The sheet feeder is secured both to the print engine and
the 550-Sheet Feeder.
s7400-003
Specifications
Consumable Life Specifications
Maintenance Items
Staple Cartridge‘ 5000 staples x3 AR-SC2
Size Product name
Finisher Electrical Specifications
Characteristic Specification
Primary line
voltages
Primary line
voltage
frequency range
110-127 V Printer - 12 amp circuit
220-240 V Printer - 6 amp circuit
100-120 V Printer - 50/60 Hz + 2 Hz
220-240 V Printer - 50/60 Hz + 2 Hz
Power
consumption
60 watts
(finishing)
General Information 1-7
12 Watts
(standby)
Page 30

Physical Dimensions and Clearances
Finisher (including stand) Value
Height: 1016 mm (40.0 in.)
Width: 813 mm (32 in.)
Depth: 595 mm (23.6in.)
Weight: Approximately 55 kg (122 lb.) Finisher only
1650-Sheet Feeder Value
Height: 401 mm (15.8 in.) Optional Paper Tray Assembly
Width: 597 mm (23.5 in.)
Depth: 599 mm (23.6 in.)
Weight: Approximately 53.6 kg (117 lb.)
550-Sheet Feeder Value
Height: 109 mm (4.3 in.) Optional Paper Tray Assembly
Width: 597 mm (23.5 in.)
Depth: 599 mm (23.6 in.)
Weight: 16 kg (36 lb.)
Surface Value
Tilt tolerance: Within 50 mm side to side.
Finisher Functional Specifications
Functional Specifications
Characteristic Specification
Transport Speed 34 - 45 PPM
Transport Reference Center Reference
Tray Typ e
(number of trays)
Upper Tray Lift-up/down offset tray
Lower tray Book tray for saddle stitch
Non-staple
1,000 sheets (Small size)
500 sheets (Large size)
Capacity of paper exit
and load
Staple sort
Max
Large size
Small size
1-8 Phaser 7400 Color Printer Options Service Manual
30 sheets
1,000 sheets (Small size)
500 sheets: (Large size)
A3, B4, 11” x 17”, 8.5” x 11”
A4R, B5, B5R, A5R, 8.5 x
11 R and Executive
Page 31

Functional Specifications (Continued)
Characteristic Specification
50 sheets
Quantity of paper to
be stapled
25 sheets
Stapling Two positions
One at the back
One in the front
Paper exit direction Face down
Paper Exit Paper size A3, B4, A4, A4R, B5, B5R, A5R, 11" x 17", 8.5" x 14", 8.5" x 13", 8.5" x
11", 8.5" x 11"R, 5.5" x 8.5"R Executive
Offset function Provided (output paper size (except for A5R, 5.5 x 8.5
Recommended paper
and weight
Normal paper
Index paper
Cover paper
Small size, 128 g/m2 x 48
Large size, 128 g/m2 x 25
Large size, 128 g/m2 x 25
A3, B4, 11” x 17”, 8.5” x 14”, 8.5 x 13, A4,
8.5 x 11 R and Executive
A3, B4, A4, A4R, B5
11 x 17, 8.5 x 14, 8.5 x 13, 8.5 x 11, 8.5 x
11R, Executive
60 - 12g/m2 (16 - 34 lbs)
176 g/m2 (47 lbs)
200 - 205 g/m2 (54-55 lb.)
Staple supply Staple cartridge replacement
Staple empty
detection
Staple detection
Cartridge empty
detection
Staple jam detection provided
Stapling type Center stapling (center fold)
Stapling position 1200 mm pitch from the paper center
Paper size
(for saddle stitch)
Weight of paper
(for saddle stitch)
Book tray stacking
type
Quantity of paper to
be stapled
A3, A4R, B4, 11 x 17, 8.5 x 11R
64 - 80 g/m2
(Cover: 64 - 128 g/m2
Fixed
10 sets (6 - 10 pages)
20 sets (1 - 5 pages)
provided
provided
General Information 1-9
Page 32

Finisher Environmental Specifications
Characteristic Specification
Temperature
Operating
Storage
Transport
10 to 32o C (50 to 89.6o F)
0 to 4 oC (32 to 109.4o F)
-10 to 43o C (-14 to 109.4o F)
Humidity (RH)
Operating
Storage
Transport
Altitude
Operating
Non-operating
Relative Humidity (50 - 70% to assure the best print-quality)
20 - 80%
10 - 95%
10 - 95%
0 to 2500 meters (8,000 ft.) at 25o C
0 to 6000 meters (20,000 ft.)
1-10 Phaser 7400 Color Printer Options Service Manual
Page 33

Theory of
Operation
In this chapter...
■ Operational Overview
■ Finisher Overview
■ Printer Options
■ Finishing Process Summary
■ Sensors
■ Motors, Rollers, Solenoids, and Clutches
■ Detecting Jams
■ Power Supplies
Section
2
Page 34

Options Operational Overview
The Phaser 7400 Color Printer Options package consists of:
Finisher:
■ Punch Unit - Provides various punch hole (2, 3, and 4 hole) options.
■ Staple Unit - Staples stacked paper for various media type and size.
■ Saddle Unit - Delivers and folds stacked paper.
■ Inverter - Physically inverts the paper for stacking or folding.
Print Options:
■ 550-Sheet Feeder - Represents one physical tray with 550-sheet output.
■ 1650-Sheet Feeder - Represents a 3-tray combined output of 1650 sheets.
■ Duplex Unit- Provides printing for both sides of selected media.
2-2 Phaser 7400 Color Printer Options Service Manual
Page 35

Finisher Overview
The Finisher increases the output capacity of the printer by 1,000 sheets. Printer
output is directed to the Finisher by way of the side exit. Depending on the job
specifications, as paper enters the Finisher it can be inverted, punched, stapled, offset
and stacked. Power is supplied from the printer’s AC Accessory Panel.
The Finisher consists of the following major assemblies:
■ Punch Unit - Provides various punch hole (2, 3, and 4 hole) options.
■ Staple Unit - Staples stacked paper for various media type and size.
■ Saddle Unit - Delivers and folds stacked paper.
■ Inverter - Physically inverts the paper for stacking or folding.
Paper Exit Tray
Staple Unit
Binding and
Saddle Stitch Tray
Saddle Unit
Punch Unit
Inverter
550 Sheet Tray
1650 Sheet Tray
Theory of Operation 2-3
s7400-709
Page 36

Punch Unit
The Punch Unit punches holes in sheets coming from the printer. It provides for
2-hole, 3-hole, and 4-hole punching. The unit installs into the pickup assembly of the
finisher. Since the punch unit is not equipped with a paper feeding mechanism, the
sheets from the printer move through the punch unit and feed system of the finisher. If
the punch feature has been selected, when the trailing edge of a sheet from the printer
reaches the punch unit, the sheet stops while the punch shaft rotates to punch a hole
along the trailing edge. This operation is controlled through various commands from
the Finisher Controller Board and the Punch Controller Board.
Punch Drive System
Horizontal Registration
Drive System
Finisher Unit Control System
Punch Controller PCB
s7400-151
2-4 Phaser 7400 Color Printer Options Service Manual
Page 37

The Punch Unit consists of a die and hole punch (punch blade), which is driven by a a
DC motor. The unit attaches to the eccentric cam of the punch shaft. A punch home
position sensor detects the home position of the punch shaft to ensure that the punch
motor stops exactly at its home position, the punch motor stops in relation to the
count of clock pulses from the Punch Motor Clock Sensor. When the punch shaft
rotates 180 degrees from its home position, it initiates a single punch operation.
Punch Unit Components
Component Function
Punch mechanism When sensor detects proper paper position, the punch blade
punches holes in with paper stack following 180 degree rotation
of the punch shaft.
Punch Controller Board Receives instructions from the printer and converts them to
control all punch unit operations.
Horizontal Registration
System
Photo sensors Five LED’s mount over the inlet paper path to detect the leading
Detects the home position of the punch slide unit to move it to
the appropriate position of the selected paper size.
and trailing edges of the paper.
Theory of Operation 2-5
Page 38

Staple Unit
The Staple Unit receives instructions from the printer through the Finisher Controller
Board to initiate staple operation and deliver up to 50 sheets of paper (depending on
the paper size) to the finisher staple subassembly. The unit mounts in the Finisher
and, depending on the media selection, provides front stapling, rear stapling, dual
stapling, and saddle stitching (center stapling with fold).
Staple Driver
Staple Clincher
Stapler Frame Shafts
The stapling position depends on the staple mode and paper size. After power-on, the
Finisher Controller Board drives the Finisher Slide Motor to place the Staple Unit in
the home position. The stapler starts moving toward the front of the stapler frame and
stops when the Slide Home Position Sensor detects the home position.
2-6 Phaser 7400 Color Printer Options Service Manual
s7400-201
Page 39

The slide motor is then driven a specified number of pulses until the stapler reaches
the rear standby position at the back of the machine. At this point, the unit enters the
standby state.
Stapler
(Deliver Direction)
Paper Stack
Light-Shielding Plate
Slide Home Position Sensor
Slide Motor
s7400-132
Staple Unit Components
Component Function
Staple/Fold Motor Rotates the cam in the appropriate direction for the stapling
process.
Stapler sensors Detects the absence of and/or the position of the stapling
mechanism and motors.
Finisher Slide Motor Moves the Stapler Unit to the appropriate location on the paper
stack for stapling.
Theory of Operation 2-7
Page 40

Saddle Unit
The Saddle Unit stitches (center staples) up to 50 sheets (middle 2-point), then folds
the stack in two in the Finisher. The Finisher Controller Board receives commands
from the printer to control the following operations:
a. Paper feed in - After alignment on the processing tray, the feed drive system
inserts a stack of sheets between the stack delivery rollers. As the stack
delivery rollers rotate, the stack is fed toward the saddle unit.
b. Stitching - When the center of the paper stack (stitching position) reaches
the stapler's staple position, the unit staples the paper stack. When only one
sheet is fed from the printer, the next step (stack feed) occurs without
performing the stitching operation.
c. Stack Feed - The stack feed rollers feed the paper stack to the stack folding
and delivery position where the center of the stack (stitched position) is level
with the paper-pushing plate and paper-folding roller.
d. Folding/Delivery - The paper pushing plate pushes the center of the paper
stack inward to feed it toward the paper fold rollers. The paper fold rollers
and bind delivery rollers then deliver the paper stack to the bind tray (e).
a) Paper Feed-In
e) Bind Tray
b) Stitching
c) Stack Feed
d) Folding/Delivery
s7400-141
2-8 Phaser 7400 Color Printer Options Service Manual
Page 41

Paper Fold System
The paper fold mechanism consists of a guide plate, paper fold rollers, and a paper
pushing plate. The Staple/Fold Motor drives the guide plate, paper-fold rollers, and
paper-pushing plate. A combination of gears and cams transfer the drive force while
the Staple/Fold Motor Sensor monitors the operation.
Until the paper stack reaches the folding position, the guide plate covers the paper
fold rollers to act as a paper path through which the paper stack feeds into the Saddle
Unit, preventing the paper stack from touching the rollers. A Folding Home Position
Sensor detects the positions of the paper-fold rollers and paper-pushing plate.
The bind delivery rollers deliver and folds the paper stack with the paper fold rollers.
The Staple/Fold Motor drives the bind delivery rollers. A Bind Tray Sensor on the
bind tray can then detect the presence of the paper stack.
Sensor Flag
Folding Home
Position Sensor
Cam
Paper Stack
Paper Fold
Roller (Upper)
Paper Fold Roller (Lower)
Saddle Unit Components
Paper Pushing Plate
s7400-148
Component Function
Stack feed rollers Rotates to feed the stacking mechanism.
Paper pushing plate Pushes the center of the paper stack toward the feed rollers.
Stapling mechanism Performs stitching (term for center punching).
Swing guide Places the paper stack between the delivery rollers.
Theory of Operation 2-9
Page 42

Inverter Unit
The Inverter Unit receives paper from the printer and physically inverts the paper for
stacking or folding. The Inverter is a self-enclosed unit which connects on a common
base with the Finisher itself. The entire Finisher/Inverter can then physically connect
to the printer and tray units with a sliding mount.
The Inverter receives instructions from the printer and/or Finisher Controller Board.
Through various sensors, switches, solenoids, and motors, it moves the selected
media through the paper path to invert and position the paper for stacking or folding.
s7400-710
Inverter Unit Components
Component Function
Inverter controller board Receives commands from the printer and controls all elements
of Inverter operation.
Sensors and switches Detects the position of the paper through all phases of the
inversion process.
Solenoids and clutch Receives commands from the Inverter controller board to
determine the paper path (invert or not).
Delivery motors Physically moves the media through the designated paper path.
2-10 Phaser 7400 Color Printer Options Service Manual
Page 43

Printer Options
Duplex Unit
The Duplex Unit adds two-sided printing. The Duplex Unit attaches to the left side
above Tray 1 using two twist locks. Installation of the Duplex Unit requires that the
Exit 2 Module also be added to provide reverse drive. Electrical connection to the
printer is made by an interface cable.
s7400-305
550-Sheet Feeder
The 550-Sheet Feeder increases the input capacity of the printer. The feeder attaches
below Tray 2 with four screws. When used in combination with the 1650-Sheet
Feeder, the 550-Sheet Feeder is installed between the printer and 1650-Sheet Feeder.
Up to four optional 550-Sheet Feeders per printer can be installed, totaling six
universal trays (Trays 2~6). However, when the 1650-Sheet Feeder (HCF) is
installed, only one additional 550-Sheet Feeder is allowed between the HCF and the
printer. Electrical connection to the printer is made by a single interface connector.
s7400-001
Theory of Operation 2-11
Page 44

1650-Sheet Feeder
The 1650-Sheet Feeder combines three, 550-sheet trays. Control signals reach the
1650-sheet feeder through a single connection. The sheet feeder is secured to the print
engine or 550-Sheet Feeder with four screws located under the front and rear edges of
the tray.
s7400-003
2-12 Phaser 7400 Color Printer Options Service Manual
Page 45

Finishing Process Summary
The following illustration shows the various printing processes and process decisions
that the finishing components handle on command from the printer.
On Command from Printer
Print Engine
Finisher
N
2 Hole
Duplex?
N
Invert?
Y
N
Punch?
Y
3 Hole 4 Hole
Y
Duplexer Processing
Paper Inverted
Punch
Process
Accumulator Tray
Staple
Process
Rear Staple
Front Staple
Booklet?
N
Process
Exit Tray
Y
Stack
Simple Stacking
Job Offset Stacking
Booklet
Process
Center Staple
Folding Process
Booklet Stacking
Bind Tray
s7400-546
Theory of Operation 2-13
Page 46

The finishing processes include six major functions:
1. Inverting
2. Folding
3. Punching
4. Stacking
5. Stapling
6. Delivery
Inverting
The sole purpose of the inverter function is to position the paper for stacking or
folding. On command from the printer, The Inverter receives paper from a printer or a
Duplex Unit for inversion, if needed, and sent on to the Finisher.
The Inverter receives commands from the printer to receive and position entering
media. A Paper-in sensor detects the presence of paper. If the paper is not to be
inverted, it merely transfers to the Finisher. If the paper is to be inverted or prepared
for stacking or folding, a solenoid is energized to divert the paper into the inversion
path. Sensors in the upper and lower paper paths detect the leading and trailing edges
of the selected media. At the end of the paper path, the paper is then sent on to the
Finisher.
Punching
The Punch Unit is located in the pickup assembly of the Finisher. It is designed to
punch 2-holes, 3-holes, or 4-holes in sheets sent from the printer. When the trailing
edge of a sheet reaches the Punch Unit, the inlet roller of the Finisher assembly stops
the sheet long enough to punch a hole along the trailing edge of the sheet. The Punch
Unit is available in two unit types to accommodate the country of installation: 2- and
3-hole (punch Unit-K1), or 4-hole (Unit-G1 or H1).
The Punch Motor stops in relation to the count of the clock pulses from the Punch
Motor Clock Sensor. When the punch shaft rotates 180 degrees from its home
position, it initiates a single punching operation.
The 2-hole and 4-hole types punch a hole when the punch shaft rotates 180 degrees
from the home position, causing the punch to make a single rotation. The 2 and 3-hole
type punches a hole, but the circumference of the punch shaft is divided into two
(one-half for the 2-hole punch and one-half for the 3-hole punch).
The Punch Motor, Punch Unit, and sensors comprise the Punch Slide Unit, which
moves to the front/rear to accommodate the selected paper size.The Finisher Punch
Transfer Motor is a stepping motor that drives the movement to the front or rear.
2-14 Phaser 7400 Color Printer Options Service Manual
Page 47

■ 4-Hole Type - The punching operation for the first sheet ends when the punch
shaft rotates 180 degrees and the Punch Home Position Sensor activates. The
punching operation for the second sheet ends when the punch shaft rotates 180
degrees in reverse and the Punch Home Position Sensor activates.
Punch Shaft At Rest
(Home Position)
Punch Shaft At Rest
(Home Position)
Punch Shaft CCW
Rotation By 90
(Hole Made)
Punch Shaft CCW
Rotation By 90
(Hole Made)
Punch Shaft CCW
Rotation By 180
(End Of Punching Operation)
Punch Shaft CCW
Rotation By 180
(End Of Punching Operation)
s7400-153
Theory of Operation 2-15
Page 48

■ 2-Hole, 3-Hole Type - To make two holes, the punching operation for the first
sheet ends when the punch shaft rotates 180 degrees (half-circumference) and the
Punch Home Position Sensor activates. At this time, the 3-hole punch rotates
once on a half-circumference of the punch shaft. The punching operation for the
second sheet ends when the punch shaft rotates 180 degrees counterclockwise
and the Punch Home Position Sensor activates (half-circumference). At this time,
the 3-hole punch then releases itself from the punch process on the other half
circumference of the punch shaft.
Punch Shaft At Rest
(Home Position)
Punch Shaft CCW
Rotation By 90
(Punch At Upper Limit)
Punch Shaft CCW
Rotation By 180
(Punch Back To Initial Position)
s7400-154
Finisher Punch Transfer Operation
The Finisher Punch Transfer Motor provides horizontal registration for the punch
slide unit. The Finisher Punch Transfer Home Position Sensor detects the home
position of the punch slide unit. The punch slide unit detects the trailing edge of
sheets with the trailing edge sensor (LED5, PT5) and the horizontal registration
sensors (LED1 through 4, SREG1 through 4). This action moves the unit to the
desired position matching the trailing edge of each sheet (in relation to the size of the
sheet).
The horizontal registration operation takes place as follows:
1. When the trailing edge sensor (LED5, PT5) detects the leading edge of a sheet
from the printer, the Finisher Punch Transfer Motor begins to move the punch
slide unit toward the front.
2. When the horizontal registration sensor (LED1 through 4 for the appropriate the
paper size from the printer) detects the leading edge of the sheet, the Finisher
Punch Transfer Motor moves to the specified position then stops the slide unit.
3. When the trailing edge sensor (LED5, PT5) detects the trailing edge of the sheet,
the drive of the Feed Motor stops, also stopping the sheet. Then, the Finisher
Punch Motor energizes to punch holes in the sheet.
2-16 Phaser 7400 Color Printer Options Service Manual
Page 49

4. When the punching operation ends, the Feed Motor moves the paper through the
rest of the paper path. The Finisher Punch Transfer Motor then rotates in reverse
to return the slide unit to home.
5. For each sheet that arrives in succession, the Punch Slide Unit returns to its home
position and repeat steps 1 through 4 (the following illustration shows the top
view of the Punch Slide Unit in the Finisher).
Punch Slide Unit
Horizontal Registration Motor (M2P)
Trailing Edge Sensor
(LED5, PT5)
Direction Of Paper Delivery
Paper
Horizontal Registration Sensor 1 (LED1, PT1);
Used To Detect The Edge Of Sheets Of
A3, A4, LTR, 279X432 (11"x17")
Horizontal Registration Sensor 2 (LED2, PT2);
Used To Detect The Edge Of Sheets Of
B4, B5, LTRR, LGL.
Horizontal Registration Sensor 3 (LED3, PT3);
Used To Detect The Edge Of Sheets Of A4R.
Horizontal Registration Sensor 4 (LED4, PT4);
Used To Detect The Edge Of Sheets Of B5R.
Theory of Operation 2-17
Punch
s7400-155
Page 50

Folding
Finisher paper fold rollers and a paper pushing plate are the main assemblies for the
paper folding process when creating a booklet. Concurrent with the start of the stack
feed roller rotation, the paper pushing plate pushes the middle of the paper stack into
the gap between the paper fold rollers. When the paper stack is fed about 10 mm into
the rotating paper fold rollers, the paper pushing plate returns to the home position.
The paper stack is then delivered to the Bind Tray using the paper fold rollers and
bind delivery rollers.
Because of the large area size of the rollers, the paper stack is fed without paper
creases. The large size of the area also allows the paper stack to fold while being fed.
Paper Stack
Outlet
Folds/Feeds a Paper Stack
Feeds a Paper Stack
Inlet
Paper push plate
s7400-150
2-18 Phaser 7400 Color Printer Options Service Manual
Page 51

Stacking
There are two types of stacking presented to the delivery tray:
■ Simple Stacking - The unit pulls in the sheet to the processing tray and then
delivers it to the delivery tray.
Theory of Operation 2-19
s7400-122
Page 52

■ Job offset - The machine places the sheet into the processing tray. It then moves
the sheet to the front or the rear using the aligning plate. When it has deposited a
specific number of sheets, it delivers them as a stacked set.)
Results Of Offset Delivery (4 Jobs)
3rd Set
1st Set
(Direction Of Delivery)
2-20 Phaser 7400 Color Printer Options Service Manual
4th Set
2nd Set
s7400-123
Page 53

When the number of sheets stacked on the processing tray reaches a specified value,
r
the sheets are delivered in stack form. Even if the unit never reaches a specified value,
stacked sheets are temporarily delivered when 25 sheets of large-size paper (300 mm
or longer) or 50 sheets of small-size paper (299 mm or shorter) have been stacked.
The finisher also uses a Tray Paper Sensor to detect the presence or absence of paper
in the stack tray. It also includes a Full Stack Sensor to detect overstacking.
Shift Upper
Limit Sensor
Shift Lower
Tray Paper Sensor
Limit Sensor
Paper Surface Senso
Edge
Shift Motor
Clock Sensor
Delivery Tray
Full Stack Sensor
Shift Motor
s7400-140
Stacking in Booklet Mode
In the Booklet stitching format, the stack feed system feeds up to 50 sheets of stitched
paper stack to the folding position. When stitching is complete, the Feed Motor
rotates until the upper stack feed roller begins to descend. After the paper stack is
inserted between the stack feed rollers, the Bind Clutch activates and rotates the Feed
Motor in the forward direction, feeding the paper stack to the middle position for
folding. The feed amount is equivalent to the number of pulses necessary to drive the
Feed Motor until the paper stack is ready for folding.
Theory of Operation 2-21
Page 54

Feed Amount
Stack Feed Roller (Lower)
Stack Feed Roller (Upper)
2-22 Phaser 7400 Color Printer Options Service Manual
s7400-147
Page 55

Stapling
After stacking and alignment of paper on the processing tray is complete, the finisher
controller board moves the stapler for stapling according to the specified stapling
position. When the controller specifies rear 1-point stapling, the stapler does not
move; it staples while in the standby position. If a different stapling option is selected,
the stapler moves forward and the processing tray stopper leans to the forward
position.
The Finisher Slide Motor moves the stapler unit. The Slide Home Position Sensor
detects when the unit reaches its home position. The stapler waits at the back end of
the stack irrespective of the staple mode and paper size
Paper Stack
.
Swing Guide
Stack Delivery
Roller (Upper)
Processing Tray
Stopper
Delivery Tray
Stapler
Stack Delivery
Roller (Lower)
s7400-133
The position of the stapler depends on the staple mode:
■ Front 1-point stapling - The stapler moves to the front stapling position of the
paper for stapling and then returns to the standby position.
■ Rear 1-point stapling - The stapler moves to the opposite end (rear) of it’s travel
length for stapling and then returns to the standby position.
■ Middle 2-point stapling - The stapler moves to the rear stapling position first,
then to the front stapling position, and then returns to the standby position.
The Staple Empty Sensor detects the presence of a staple cartridge in the machine as
well as the presence of staples in the cartridge. A Staple Top Position Sensor
determines when to push staples up to the top of the staple cartridge.
Theory of Operation 2-23
Page 56

Delivery
The Finisher Unit includes a Delivery Tray, and the Saddle Unit includes a Bind Tray.
The Bind Tray is a fixed unit where all folded paper stacks are delivered. The Bind
Tray includes a Bind Tray Sensor to detect the presence of paper. The delivery tray in
the finisher unit moves up and down using a Lift Motor.
The Paper Surface Sensor detects the home position of the delivery tray. If paper is
already stacked on the delivery tray, the home position is sensed on the top surface of
the stacked paper. When the paper coming from the processing tray stacks on the
Delivery Tray, the Lift Motor receives a specified number of pulses, which causes the
Delivery Tray to lower to the home position. The Lift Motor Clock Sensor detects
when the tray reaches the home (lowest) position.
The Shift Upper Limit Sensor detects the upper limit of the Delivery Tray. In an upper
limit condition, the Finisher Controller Board stops sending commands that lift the
Lift Motor. Conversely, the Shift Lower Limit Sensor detects the lower limit of the
Delivery Tray. In a lower limit condition, the controller board stops the Lift Motor.
Delivery after Stapling
When stapling completes, the Finisher Controller Board drives the Delivery Motor in
the forward direction to feed the paper stack. When the Delivery Belt Home Position
Sensor reaches the OFF position, the delivery stack is full.
The Slide Motor is then driven to return the Stapler Unit back to the standby position,
which initiates the Delivery Motor drive. Then, the paper stack is delivered to the
tray.
Paper Stack
Swing Guide
Delivery Tray
Stapler
2-24 Phaser 7400 Color Printer Options Service Manual
Delivery Belt
Stack Delivery
Roller (Lower)
s7400-135
Page 57

Sensors
The Finisher/Inverter, Duplex Unit, and paper trays contain sensors of various types
that perform a variety of functions. One group of sensors track the progress of the
paper along the paper path and detects if a paper jam occurs. Other sensors stop
printer activity if a door is open (interlock), detect the presence and size of media in
the trays, and monitor the fusing temperature.
Photo Sensors
Two types of photo sensors are used, photo-reflective and photo-receptive. Photoreflective sensors use light reflected back from an object to detect its presence. Photoreceptive sensors use an actuator or the object itself to block the light path to detect an
object or condition.
Photo-reflective sensors have the light emitter and light receiver aligned on a single
surface. Output of the photo-receptor is High (> +4.5 V) when light is being reflected
back and Low (< +.3 V) when it isn’t. Photo-receptive sensors consist of a LED in
one arm of a U-shaped holder, and a photo-transistor in the other arm. When the
sensing area is vacant, nothing is between the arms of the sensor, light falls on the
photo-receptor sending the signal High. If the light is interrupted, the photo-transistor
goes Low.
Hooks
Hook
Sensor Bracket
s7400-310
Theory of Operation 2-25
Page 58

Microswitches
Microswitches are used primarily as paper size sensors and cover interlocks. They are
in a normally open state, and close when actuated. A bank of microswitches detect
paper size in the universal trays. Microswitches also employ hooks or catches for
retention in the bracket or frame.
s7400-311
2-26 Phaser 7400 Color Printer Options Service Manual
Page 59

Finisher Paper Path Sensors
The following illustration identifies the various sensors located in the Finisher. Error
reporting is dependent on these sensors as the paper moves through the paper path.
Stapler Safety Interlock Switch
Shift Lower Limit Sensor
Upper Cover Sensor
Joint Switch
Shift Clock Sensor
Front Alignment Plate
Home Position Sensor
Staple/Fold
Clock Sensor
Staple-Out
Sensor
Staple Slide Home Sensor
Stacking Roller
Home Position Sensor
Rear Alignment Plate
Home Sensor
Full Stack Sensor
Bind Tray Sensor
Front Door Switch
Front Door Switch and Sensor
Shift Upper Limit Sensor
Paddle Home
Position Sensor
Inlet Sensor
Waste Full Sensor
Delivery Belt
Home Position
Sensor
Tray Paper Sensor
Paper Surface Sensor
Theory of Operation 2-27
Processing Tray Sensor
Stack Feed
Roller Home
Position Sensor
Binding Clutch
Folding Home Position
Sensor
s7400-542
Page 60

Sensor Function
Sensor Function
Joint Switch Prevents the power supply from placing hazardous voltages in
accessible areas when the Finisher is undocks from the Printer.
Front Door Switch Prevents the power supply from placing hazardous voltages in
accessible areas when the Front Door (Door J) is removed.
Front Door Sensor Detects when the Front Door is open or removed.
Inlet Sensor Detects the presence of media in the finisher paper path.
Tray Paper Sensor Detects when the paper tray is removed from the Finisher.
Paper Surface Sensor Detects media in the home position of the delivery tray.
Upper Cover (Door H)
Sensor
Shift (Upper) Limit Sensor Detects the upper limit of the delivery tray stack.
Shift (Lower) Limit Sensor Detects the lower limit of the delivery tray stack.
Lift Motor Clock Sensor Detects clock pulses for the stacking operation.
Full Stack Sensor Detects overstacking of media in the delivery tray.
Processing Tray Sensor Detects the processing stack within the delivery path.
Aligning Plate (Front)
Home Position Sensor
Aligning Plate (Rear)
Home Position Sensor
Stack Feed Roller Home
Position Sensor
Waster Full Sensor Detects the full condition of the punch waste unit.
Swing Guide Home
Position Sensor
Detects when the Upper Cover (Door H) is open or removed
Aligns one side of the selected paper with the entrance into the
paper path.
Aligns one side of the selected paper with the entrance into the
paper path.
Detects the initial home position of the stack feed rollers.
Detects the home position for the Swing Guide.
Delivery Belt Home
Position Sensor
Paddle Home Position
Sensor
Stapler Safety Interlock
Switch
Staple/Fold Cock Sensor Counts timing pulses during staple and fold operations.
2-28 Phaser 7400 Color Printer Options Service Manual
Detects the end location of the delivery rollers.
Detects when it is necessary to drive the paddle and feed the
next sheet of paper.
Protects current overloads in case of a staple jam.
Page 61

Sensor Function (Continued)
Sensor Function
Folding Home Position
Sensor
Bind Tray Sensor Detects when paper is present in the Saddle Unit’s bind tray.
Folding Position Sensor Detects the leading edge of the paper stack.
Detects the positions of the paper fold rollers and the paper
pushing plate.
Note
The punch assembly includes up to five light-receiving transistors (photosensor
board) mounted over the inlet paper path of the Punch Unit. The same number of
LEDs are mounted under the path, as well. The front-most sensor (LED5, PT5)
detects the trailing edge of each sheet. The remaining four LEDs (LED1 through
LED4, PT1 through PT4) are horizontal registration sensors which detect the rear
position of sheets when punching holes.
Theory of Operation 2-29
Page 62

Inverter Sensors
The following illustration shows the general location of the Inverter sensors. The
topics in this section describe the disassembly for each sensor.
Inverter Paper-in Sensor
Inverter Upper
Paper-present Sensor
Inverter Lower
Paper-present Sensor
.
Inverter Door Open
Interlock Switch
Inverter Docking
Sensor
Sensor Function
Sensor Function
Inverter Docking Sensor Detects when the Inverter interconnects with the Printer.
Inverter Door Open
Interlock Switch
2-30 Phaser 7400 Color Printer Options Service Manual
s7400-611
Detects when the Inverter Door (F) is open.
Page 63

Sensor Function (Continued)
Sensor Function
Inverter Upper PaperPresent Sensor
Inverter Lower PaperPresent Sensor
Inverter Paper-in Sensor Detects the presence of media in the Inverter.
Detects the leading edge of the selected paper size.
Detects the trailing edge of the selected paper size.
Duplex Sensors
The Duplex Unit receives media diverted to the Side Exit by the Exit Gate. The media
is detected by the Duplex Entrance Sensor and drawn into the Duplex Unit. The
media is inverted and exits the Duplex Unit just above Registration Roller #2. Media
moves through the Duplex Unit as follows:
1. After Side 2 is printed, the Exit Gate Solenoid switches the Exit Gate to its side
output position. This directs the sheet downwards toward the Duplex Unit.
2. As the sheet reaches the Duplex Entrance Sensor, roller 1 turns, drawing the
media into the lower portion of the Duplex Unit
3. After the trailing edge of the media clears the Duplex Entrance Sensor, and with
the Duplex Reverse Sensor High, the Entrance Roller is reversed and the Duplex
Solenoid is activated to position the Duplex Gate to direct the inverted media into
the upper portion of the Duplex Unit.
4. The Duplex Rollers transport the media out of the Duplex Unit and into the
printer where Side 1 is printed. This portion of the duplex path is monitored by
the Front and Rear Duplex Sensors.
Duplex Rear Sensor
Paper End Sensor
Duplex Entrance Sensor
Duplex Reverse
Sensor
Duplex Front Sensor
s7400-676
Theory of Operation 2-31
Page 64

Duplex sensors include:
■ Duplex Entrance Sensor
Detects the leading edge of the media and signals the Duplex Motor to begin
rotation in the forward direction.
■ Duplex Reverse Sensor
Detects media in the lower portion of the Duplex Unit and signals the Duplex
Motor to reverse rotation.
■ Duplex Front and Rear Sensors
Monitor media transport through the upper portion of the Duplex Unit.
Optional Tray Sensors
The paper supply and path for the optional trays involve these sensors (see page 5-133
for detailed illustrations and sensor location):
■ Door C Detect Sensor
Detects presence of media in the tray based on the position of the Actuator.
■ Registration Sensor
This sensor detects media as it arrives at the Registration Rollers.
■ Feed-Out Sensor
This sensor detects the media as it leaves the Tray 3 Feed Rollers.
■ No Paper Sensor
The actuator lowers as print media is used in the tray. When the actuator lowers
to a pre-determined position, it blocks the sensor to trigger a low paper status.
2-32 Phaser 7400 Color Printer Options Service Manual
Page 65

Motors, Rollers, Solenoids, and Clutches
Finisher Motors
Paddle Motor
Feed Motor
Sliding Motor
Rear Alignment Motor
Front Alignment Motor
Shift Motor
Delivery Motor
Staple/Fold Motor
[1]
s7400-543
Theory of Operation 2-33
Page 66

Punch Unit Solenoids and Motors
Punching Motor Clock Sensor
Sensor
Motor
PI3P
Punching Home
Position Sensor
PI1P
PI2P
Horizontal Registration
Home Position Sensor
M1
Feed Motor
Punch Dust Full
LED Circuit Board
[5]
PWB
[2]
[3]
LED Circuit Board
M2
Punching Controller
Board
[1]
[4]
Punch Dust Full
Photo Sensor
Circuit board
Photo Sensor
Circuit board
2-34 Phaser 7400 Color Printer Options Service Manual
s7400-544
Page 67

Inverter Solenoids and Motors
The Inverter motors move the rollers to move the media throughout the paper path.
The Feeder Clutch, on command from the printer, engages the motors. The Inverter
Solenoids, also on command from the printer, energize the upper and lower paper
rollers.
Upper Roller Solenoid
Feeder Clutch
Upper Roller Motor
Lower Roller Motor
Lower Roller Solenoid
Theory of Operation 2-35
s7400-679
Page 68

Duplex Solenoids, Rollers, and Motors
The Duplex Unit receives media diverted to the Side Exit by the Exit Gate. The media
is detected by the Duplex Entrance Sensor and drawn into the Duplex Unit. The
media is inverted and exits the Duplex Unit just above Registration Roller #2. Media
moves through the Duplex Unit using the following solenoids, rollers, and motors:
■ Duplex Solenoid - Activates the Duplex Gate directing media to the Duplex
Transport Rollers.
■ Duplex Entrance Roller - Drive the media into the Duplex Unit.
■ Duplex Transport Rollers - Transport the media through the Duplex Unit and
drive the sheet into the primary paper path.
■ Duplex Motors - One motor drives the Duplex Entrance Roller, the other drives
the Transport Rollers using a series of belts.
Duplex Solenoid
Motor A
Motor B
2-36 Phaser 7400 Color Printer Options Service Manual
s7400-678
Page 69

Optional Tray Motors, Rollers, and Clutches
The following describes the paper path as it is fed from the optional Tray 3. Trays 4
through 6 function in the same manner. Media moves along the paper path as follows:
1. Paper loaded in the tray is detected by the Paper Size Switches.
2. The tray’s Lift Motor rotates lifting the sheet to the pre-feed position detected by
the Level Sensor.
3. The Feed Motor turns (CCW) driving the Feed and Pick rollers to feed the sheet
from the tray into the Registration Roller.
4. The Feed-Out Sensor #3 detects the media as it leaves the Feed Rollers.
5. As the trailing edge of each sheet passes the Feed-Out Sensor #3, the Lift Motor
lifts the next sheet to pre-feed position.
6. The Feed Motor rotates until the leading edge is against the Registration Roller
#3 inducing a deskew buckle. Registration Sensor #3 goes High to indicate the
sheet’s position.
7. The sheet moves towards the Transfer Unit when the Registration Clutch #3 is
engaged driving the Registration Roller #3 and Transport Rollers.
8. As the sheet reaches the Registration Roller #2, it is again aligned and detected
by the Registration Sensor #2.
9. When the Registration Sensor #2 goes High, the Registration Clutch #2 is
activated to move the sheet through the Registration Roller #2 to the Registration
Roller #1.
10. As the sheet reaches the Registration Roller #1, it is detected by the Registration
Sensor #1.
11. When the Registration Sensor #1 goes High, the Registration Clutch #1 is
activated to move the sheet through the Registration Roller #1 to the Transfer
Unit.
12. The sheet is detected by the Transfer Unit Entrance Sensor and the Transfer Unit
Motor rotates to drive the sheet under the Imaging Units.
Theory of Operation 2-37
Page 70

Feed Roller
Pick Roller
Registration Clutch #2
Registration Motor
Registration Clutch #3
Feed-Out
Sensor #3
Registration Roller #2
Registration
Sensor #2
Tray 2
Registration Roller #3
Tray 3
Registration
Sensor #3
Feed Motor
The paper supply and path for the optional trays involve these motors, rollers, and
clutches:
2-38 Phaser 7400 Color Printer Options Service Manual
Retard Roller
Registration Motor
s7400-027
Page 71

■ Registration Motor
This motor drives the Registration Rollers to pull media from the tray into the
paper path.
■ Registration Clutch
This clutch transfers Registration Motor drive to the Registration Roller.
■ Registration Roller
This roller aligns the leading edge of the sheet to correct any skew.
■ Lift Motor
This motor lifts the tray’s base plate raising the media to the pre-feed position.
■ Feed Motor
This motor drives the Feed Rollers to pick paper from the tray and position it at
the Registration Roller.
Theory of Operation 2-39
Page 72

Detecting Jams
The microprocessor (CPU) on the Finisher Controller Board checks for jams in the
Finisher and other optional units. The CPU identifies a jam in reference to the
presence or absence of paper at a specific sensor. In general, the Jam will be
generated because of sensors from one or more of the following door locations (see
illustration below).
Door H
Door F
Door J
Door G
Door I
Door C
s7400-696
When a jam is detected, the Finisher Controller Board communicates the nature of the
jam to the printer in the form of a jam code from one or more specific locations. The
jam code descriptions are found when viewing the service mode of the Phaser 7400
printer. Refer to Section 3 for troubleshooting information.
2-40 Phaser 7400 Color Printer Options Service Manual
Page 73

Finisher/Punch Power Supply
When the printer is powered ON and connected to the finisher, it supplies the Finisher
Controller Board with two channels of 24 VDC: one for the motors and clutches, and
the other for conversion into 5 VDC in the regulator IC (IC1) of the Finisher
Controller Board. The 5 VDC supplies power to sensors and ICs on the printed circuit
boards. If the system configuration includes a punch unit (option), power is also
supplied to the Punch Controller Board.
Front Door
Joint Switch (JS)
Switch
(FDSW)
Stapler Safety
Switch (SSS)
Host
Machine
24VP
24VL
Circuit Breaker (CB1)
Finisher
Controller PCB
Regulator IC
(IC1)
24 V
24 V
24 V
5 V
5 V
Punch Controller PCB
(Puncher Unit)
Motor
Motor
Clutch
Sensor
Logic System
Finisher
Controller PCB
Theory of Operation 2-41
24 V
5 V
Punch Controller PCB
24 V
5 V
5 V
Motors
Sensors
Logic System
s7400-157
Page 74

Finisher Power Supply Protection
A circuit breaker (CB1) is available to protect the 24 VDC system that drives the
motors against overcurrent conditions. The 24 VDC system drives the feed motor,
paddle motor, and delivery motor.
Punch Unit Power Supply Protection
After the printer is powered ON, the Finisher Controller Board supplies the punch
unit with 24 VDC and 5 VDC power. The 24 VDC power drives the motors, while the
5 VDC power supplies the associated sensors and ICs on the Punch Controller Board.
The 24VDC power to the motors is removed if the joint switch (MS2) or the Front
Door (Door J) switch (MS1) of the Finisher is open.
2-42 Phaser 7400 Color Printer Options Service Manual
Page 75

General
Troubleshooting
In this chapter...
■ Power On Self Test (POST)
■ Service Diagnostics
■ Error Message Table
■ Troubleshooting the Options
Section
3
Page 76

Introduction
This section covers the startup, Service Diagnostics, and power supply operations of
the Finisher, Inverter, Duplex Unit, and Paper Tray options to aid in troubleshooting
problems.
Troubleshooting procedures isolate a problem to a specific component or
subassembly. If you go through the procedures and are still unable to solve the
problem, re-read the “Theory of Operation” section for the problem area to
understand how that section of the option functions.
Using Service Diagnostics
Service Diagnostics provides tests for most electro-mechanical components. Service
Diagnostics also contains test procedures. If confronted with an error that requires
more than a cursory investigation to clear or when directed by a troubleshooting
procedure, use Service Diagnostics to exercise selected sub-assemblies of parts in the
vicinity of the reported error.
The system monitors sensors located throughout all attached options. Sensor signals
are used to monitor paper handling and mechanical activity along the entire paper
path. As a sheet travels along the paper path, sensors change state temporarily to
indicate the sheet’s presence. If the pattern of sensor state changes differs from the
expected timing for a particular paper size and path, the sensor where the timing
difference occurs identifies the error to report.
However, having the error message information doesn’t necessarily pinpoint the
problem. Sensor signals locate where, but often cannot identify why. Motors, belts,
gears, solenoids, and numerous other parts are involved in paper transport. The
Service Diagnostics’ suite of tests and utilities are the best tools available to pinpoint
the root cause behind the reported error.
3-2 Phaser 7400 Color Printer Options Service Manual
Page 77

Servicing Instructions
The service checklist below is an overview of the path a service technician should
take when servicing the printer and printer optional equipment.
Step 1 - Identify the Problem
1. Verify the reported problem does exist. Verify failure symptoms/behavior/noises with
customer/end user.
2. Check for any error codes and write them down.
3. Print normal customer prints and service test prints.
4. Make note of any print quality problems in the test prints.
5. Make note of any mechanical or electrical abnormalities present.
6. Make note of any unusual noise or smell coming from the printer.
7. Print a Status page, if the printer is able to print.
8. View the fault history under the Service Tools Menu.
9. Verify the AC input power supply is within proper specifications.
Step 2 - Inspect and Clean the Printer
1. Switch Off printer power.
2. Disconnect the AC power cord from the wall outlet.
3. Verify the power cord is serviceable.
4. Remove the Imaging Unit and protect it from light.
5. Inspect the printer interior and remove any foreign matter, dust or loose toner.
■ Do not use solvents or chemical cleaners to clean the printer interior.
■ Do not use any type of oil or lubricant on printer parts unless directed to do so.
■ Do not use canned air to clean spilled toner or dust from the printer.
■ Use only an approved toner vacuum.
6. Clean all rubber rollers with a lint-free cloth, dampened slightly with cold water.
7. Inspect the interior of the printer for damaged wires, loose connections, toner
leakage, and damaged or obviously worn parts.
8. Replace damaged or empty Toner Cartridges with new, customer-supplied ones.
Step 3 - Find the Cause of the Problem
1. Read and understand the theory of how the printer operates.
2. Use the troubleshooting procedures to find the cause of the problem.
3. Use Service Diagnostics to check printer and optional components.
4. Use the wiring diagrams and plug/jack locator to locate test points.
5. Take voltage readings at various test points as instructed in the appropriate
troubleshooting procedure.
6. Use the “Test Prints” described on page 5-4, to isolate problems to the Engine or the
Image Processor Board.
Step 4 - Correct the Problem
1. Use the Parts List to locate a part number.
2. Use the Disassembly Procedures to replace the part.
Step 5 - Final Check
Test the printer to be sure you have corrected the initial problem and verify there are no
additional problems present.
General Troubleshooting 3-3
Page 78

Jam Locator
The following illustrates the Door designators that key the jam location error codes
and messages. Refer to this diagram when questions arise regarding the area of the
jam.
Door H
Door F
Door J
Door G
Door I
Door C
s7400-696
3-4 Phaser 7400 Color Printer Options Service Manual
Page 79

Jam Detection Chart
Jam 04
Jam 10
Jam 02
Jam 03
Jam 01
Inverter Eject Jam
Inverter Feed Jam
Inverter
Front Stack
Inverter Route Jam
Inverter Reverse
Stack Area Jam
Jam 05Jam 07
Jam 08 Jam 09
s7400-563
General Troubleshooting 3-5
Page 80

Error Message Summary
The Error Message Summary table below lists possible errors, along with the
corresponding code, and page reference for the corrective procedure for the finisher,
Duplex Unit, and paper trays. The Error column lists the error code for fatal or jam
errors that appears in the Help text displayed by pressing the Help(?) button, listed on
the printer’s Status page, or logged by the Service Usage Profile. The Control Panel
Message column shows the message as is appears on the printer’s display when the
error occurs during normal operation. The Page column provides the page reference
to the corrective procedure. Use this table to identify the proper procedure to clear the
reported error.
Note
When Printer error - Contact service; report fault [nnn] is displayed, [nnn] is
replaced by a code. These codes, along with a brief description, appear in this
table under Fatal Errors. Appendix A includes a complete list of codes arranged
in alphanumeric order.
Error Control Panel Message Page
Jam Errors
D1 Jam at Door D Open Door D to Clear 3-16
D2 Jam in Duplex Unit Pull out Duplex Unit to Clear 3-17
TC3 Jam at Duplex Entrance Open Top Cover to Clear 3-18
FN1 Jam at Finisher Punch Unit Open Door H to Clear 3-20
FN2 Jam at Finisher Door H Open Door H to Clear 3-21
FN4 Jam at Finisher Upper Output Tray Remove paper from Finisher 3-22
FN5 Jam at Finisher Saddle Stapler Open Door G to Clear 3-23
FN6 Jam at Finisher Upper Output Tray Open Door H to Clear 3-24
FN7 Jam at Finisher Stapler Open Door G to Clear 3-25
FN8 Jam at Finisher Door G Open Door G to Clear 3-26
FN9 Jam at Finisher Saddle Stapler Open Door G to Clear 3-27
FN10 Jam at Finisher Upper Output Tray Remove paper from Finisher Output 3-28
IN1~IN4,
IN6, IN7
Jam Inside Finisher Open Door F and Door I to Clear 3-29
IN5, IN8 Jam at Finisher Entrance Separate Finisher Base from Printer 3-30
FT Finisher Output Tray Jammed Remove Obstruction to Clear 3-31
Door and Cover Errors
_ Close Right Door C for Tray [3][4][5][6] 3-33
3-6 Phaser 7400 Color Printer Options Service Manual
Page 81

Error Control Panel Message Page
_ Close Door D 3-34
_ Close Finisher Door F 3-35
_ Close Finisher Door H 3-36
_ Close Finisher Door J 3-37
Tray and Media Errors
_ Clear Tray [3][4][5][6] Riser Plate 3-38
_ Out of Paper Load Tray [3][4][5][6] with [size] [type] 3-39
_ Finisher Lower Output Tray is Full, Unload Paper 3-41
_ Finisher Upper Output Tray is Full, Unload Paper 3-41
_ Remove Paper from Tray [2][3][4][5][6] 3-41
Media Mismatch Errors
_ Wrong Paper Size Load Tray [3][4][5][6] with [size] [type] 3-42
_ Paper Not Available Load Tray [3][4][5][6] with [size] [type] 3-44
General Troubleshooting 3-7
Page 82

Error Control Panel Message Page
Fatal Errors
U12 Duplex Interface Failure 3-45
U14 Tray 3 Interface Failure 3-46
U13 Tray 4 Interface Failure 3-46
U16 Tray 5 Interface Failure 3-46
U17 Tray 6 Interface Failure 3-46
U51 Inverter Unit Interface Failure 3-47
U34 Unsupported Duplex Unit ROM 3-48
U35 Unsupported Tray 3 ROM 3-49
U36 Unsupported Tray 4 ROM 3-49
U37 Unsupported Tray 5 ROM 3-49
U38 Unsupported Tray 6 ROM 3-49
U50 Unsupported Inverter Unit ROM 3-50
U55 Unsupported Finisher Unit ROM 3-51
F131 Finisher Folder Sensor Failure 3-52
F103 Finisher Paddle Failure 3-53
F106 Finisher Stapler Swing Motor Failure 3-54
F111 Finisher Stapler Stack Handling Motor Failure 3-55
F110 Finisher Staple Motor Failure 3-54
F93 Finisher Jog Motor Failure 3-56
F115 Finisher Tray Lift Motor Failure 3-58
F116 Finisher Exit Failure 3-60
F138 Finisher Punch Backup RAM Failure 3-61
F132 Finisher Punch Communications Failure 3-62
F181 Finisher Punch Transfer Motor Failure 3-63
F134 Finisher Punch Motor Failure 3-64
F137 Finisher Backup RAM Failure 3-65
F139 Finisher Punch Dust Sensor Failure 3-66
Printer error - Contact service; report fault [nnn]
Where [nnn] is one of the codes described below.
F141 Finisher Punch Unit counter at end of life. The Punch count exceeds life limit. 3-68
F142 Finisher Staple Unit counter at end of life. The Staple count exceeds life limit. 3-69
F186 Finisher interface error. Communications lost with Finisher. 3-70
3-8 Phaser 7400 Color Printer Options Service Manual
Page 83

Error Control Panel Message Page
I97 Inverter Power Supply Error. 3-71
221 Tray 3 Firmware Error. Firmware error in Tray 3 Flash Memory. 3-72
222 Tray 4 Firmware Error. Firmware error in Tray 4 Flash Memory. 3-72
223 Tray 5 Firmware Error. Firmware error in Tray 5 Flash Memory. 3-72
224 Tray 6 Firmware Error. Firmware error in Tray 6 Flash Memory. 3-72
225 Duplex Unit Firmware Error. Firmware error in Duplex Unit Flash Memory. 3-73
227 Finisher Inverter Firmware Error. Firmware error in Inverter Flash Memory. 3-74
242 Tray 3 Flash Memory Failure. Hardware error in the Tray 3 Flash Memory device. 3-75
243 Tray 4 Flash Memory Failure. Hardware error in the Tray 4 Flash Memory device. 3-75
244 Tray 5 Flash Memory Failure. Hardware error in the Tray 5 Flash Memory device. 3-75
245 Tray 6 Flash Memory Failure. Hardware error in the Tray 6 Flash Memory device. 3-75
246 Duplex Unit Flash Memory Failure. Hardware error in the Flash Memory device. 3-76
248 Finisher Inverter Flash Memory Error. Inverter Flash Memory device error. 3-77
911 The Tray 3 Lift Motor has failed. 3-78
912 The Tray 4 Lift Motor has failed. 3-78
913 The Tray 5 Lift Motor has failed. 3-78
914 The Tray 6 Lift Motor has failed. 3-78
918 The Duplex Unit Fan has failed. 3-80
919 +24 V not available to the Duplex Unit. 3-81
Printer error - Contact service; report fault [nnn]” (Continued)
Where [nnn] is one of the codes described below.
924 +24 V not available to Tray 3. 3-83
925 +24 V not available to Tray 4. 3-83+
926 +24 V not available to Tray 5. 3-83
927 +24 V not available to Tray 6. 3-83
931 The Duplex Unit CPU clock frequency is inaccurate. 3-84
932 The Inverter CPU clock frequency is inaccurate. 3-85
933 The Tray 3 Feeder Board clock frequency is inaccurate. 3-86
934 The Tray 4 Feeder Board clock frequency is inaccurate. 3-86
935 The Tray 5 Feeder Board clock frequency is inaccurate. 3-86
936 The Tray 6 Feeder Board clock frequency is inaccurate. 3-86
Warning Messages
_ No Paper in Tray [3][4][5][6] 3-87
General Troubleshooting 3-9
Page 84

Error Control Panel Message Page
_ Staple Cartridge Is Empty 3-88
_ Punch Waste Box is Full or Missing 3-89
_ Finisher Away From Base 3-90
_ Finisher Away From Printer 3-91
3-10 Phaser 7400 Color Printer Options Service Manual
Page 85

Using the Troubleshooting Procedures
1. Applicable Status Code(s) lists the error message(s) addressed by each
troubleshooting procedure.
2.
Applicable Parts and Wiring and Plug/Jack References assist you in locating
information available for a particular part or procedure.
3. Follow each
Step in a troubleshooting procedure sequentially in the order given
until the problem is fixed or resolved.
4. The
Actions and Questions box instructs you to perform a certain action or
procedure. Also included are precautions and/or additional procedures you must
follow to isolate the problem.
5. When a procedure instructs you to test a component using Service Diagnostics,
see "Fault Isolation" on page 4-6 for the detailed steps and functions for testing
parts, assemblies, or subsystems of the printer.
6. Some actions are followed by a question. If your response to the question is
then follow the instructions for a
No, then follow the instructions for a No reply.
Yes reply. If your response to the question is
Yes,
7. Note that two types of photo sensors are used: photo-reflective and photo-
receptive. Photo-reflective sensors use light reflected back from an object to
detect its presence or absence. Photo-receptive sensors use an actuator or the
object itself to block the light path to detect an object or condition.
8. Troubleshooting procedures frequently ask you to take voltage readings or test
for continuity or resistance at certain test points. The
References
table provides pointers to the diagrams that provide this information.
Wiring and Plug/Jack
9. Troubleshooting procedures often ask you to replace a printer component. When
instructed to replace a non-spared component and that component is part of a
parent assembly, replace the entire parent assembly.
General Troubleshooting 3-11
Page 86

Measurement Techniques
1. Unless indicated otherwise, the instruction “switch On printer power” means for
you to switch On printer power and let the printer proceed through Power On
Self Test (POST) to a ‘Ready’ condition.
2. Conventions used in this manual to represent connectors
PlugJack
s7400-314
3. When instructed to take voltage, continuity or resistance readings on wiring
harness, proceed as follows; Check P/J 232–1 to P/J 210–5 by placing the red
probe (+) of your meter on pin 1 of P/J 232, and place the black probe (–) of your
meter on pin 5 of P/J 210.
4. When you are instructed to take resistance readings between “P/J 232 <=>
P/J 210” (without specified pin numbers), check all pins. When you are
instructed to run a test, run the Service Diagnostics test associated with the
component being examined.
5. When you are instructed to take a voltage reading, the black probe (–) is
generally connected to a pin that is either RTN (Return) or SG (Signal Ground).
You can substitute any RTN pin or test point in the printer, and you can use FG
(frame ground) in place of any SG pin or test point.
6. Before measuring voltages make sure the printer is switched On, the Imaging
Unit and the paper trays are in place, and the interlock switch is actuated, unless a
troubleshooting procedure instructs otherwise.
7. All voltage values given in the troubleshooting procedures are approximate
values. The main purpose of voltage readings is to determine whether or not a
component is receiving the correct voltage value from the power supply and if
gating (a voltage drop) occurs during component actuation. Gating signals may
be nothing more than a pulse, resulting in a momentary drop in voltage that may
be difficult or impossible to read on the average multi-meter.
8. When a troubleshooting procedure instructs you to replace a non-spared
component and that component is part of a parent assembly, you should replace
the entire parent assembly.
9. Ensure that you are using a supported media size and type.
10. Power and signal grounds are connected to the frame ground. All circuit
troubleshooting can be performed using the metal frame (chassis) as the
grounding point.
3-12 Phaser 7400 Color Printer Options Service Manual
Page 87

Troubleshooting the Finisher
Jam at Door C for Tray [3][4][5][6]
Media reached the Feed-Out Sensor, but did not arrive at the Transfer Unit Entrance
Sensor on time. This error represents a misfeed jam for media fed from an optional
tray.
Applicable Status Codes:
Code C3: Jam at Door C for Tray 3
Code C4: Jam at Door C for Tray 4
Code C5: Jam at Door C for Tray 5
Code C6: Jam at Door C for Tray 6
Initial Actions:
■ Try picking paper from a different tray.
■ Ensure the tray is installed properly and the paper guides are set correctly.
■ Remove any obstructions or debris in the paper path.
■ Cycle printer power.
■ If the problem persists, follow the procedure below.
Troubleshooting Reference Table
Applicable Parts Wiring and Plug/Jack References
■ Feed Rollers
■ Feeder Assembly
■ Option Control Board
■ Feeder Board
■ Print Engine Map 3 (page 10-6)
■ Print Engine Map 5 (page 10-8)
■ Print Engine Map 11 (page 10-14)
■ Print Engine Motor Driver Board (6/6) (page 10-36)
■ Options Map 5, Paper Tray Controller Board
■ Options Paper Tray Sensors and Interconnect Wiring
General Troubleshooting 3-13
Page 88

Troubleshooting Procedure Table
Step Actions and Questions Yes No
Check the following for evidence of fault,
1
dirt, debris, or damage:
■ Door C
■ Feed Rollers
■ Registration Rollers
■ Transport Rollers
■ Sensor Actuators
Is there any damage or debris?
Check the Option connection.
2
Is the Option connection to the Printer
damaged or disconnected?
Check the Option Harness continuity.
3
Disconnect OPTIF from the Engine Control
Board and the Option connector.
Is the harness conductive?
Test the tray sensors.
4
Run the Service Diagnostics Tray Switches
test for the appropriate tray.
Do the sensors function correctly?
Check the sensor harness continuity.
5
Is the harness conductive?
Clean or replace
the appropriate
parts.
Reconnect or
replace the cable.
Go to Step 4. Replace the Option
Go to Step 6. Go to Step 5.
Replace the
sensor. If the error
persists, replace
the Feeder Board.
Go to Step 2.
Go to Step 3.
harness.
Replace the
harness.
Test the Feeder Motors.
6
Run the Service Diagnostics Motor tests.
Do the motors function correctly?
Check the motor harness continuity.
7
Is the harness conductive?
Test the Registration Clutch.
8
Run the Service Diagnostics Clutch test.
Does the clutch function correctly?
Check the CL1 harness continuity.
9
Is the harness conductive?
Check for +24 V at the Motor Driver
10
Board’s OPTRY24 connector.
1. Close the Interlock Switches.
2. Disconnect OPTRY24.
Is there +24 V at OPTRY24-1 and -2 <=>
ground?
Go to step 8. Go to Step 7.
Replace the motor.
If the error persists,
Go to Step 10.
Go to step 11. Go to step 9.
Replace the clutch.
If the error persists,
go to Step 10.
Replace the
affected Option
Control Board.
Replace the
harness.
Replace the
harness.
Go to Step 11.
3-14 Phaser 7400 Color Printer Options Service Manual
Page 89

Troubleshooting Procedure Table (Continued)
Step Actions and Questions Yes No
Check OPTRY24 Harness continuity.
11
Disconnect the OPTRY24 Harness.
Is the OPTRY24 Harness conductive?
Check the Registration Assembly.
12
Is there a gap between the rollers?
Check the DRV1 harness continuity.
13
Is the harness conductive?
Go to Step 13. Replace the
OPTRY24
Harness.
Replace the
Registration
Assembly
page 8-84).
(
Replace the Motor
Driver Board
(
page 8-141). If the
error persists,
replace the Engine
Control Board
page 8-112)
(
Go to Step 13.
Replace the
harness.
General Troubleshooting 3-15
Page 90

Jam at Door D Open Door D to Clear
Media reached Duplex Reverse Sensor, but did not leave the Duplex Unit on time.
This error represents a misfeed jam inside the Duplex Unit.
Applicable Status Code:
Code D1: Jam at Door D
Initial Actions:
■ Ensure that the Duplex Unit is free of obstructions and fully seated.
■ Cycle printer power.
■ If the problem persists, follow the procedure below.
Troubleshooting Reference Table
Applicable Parts Wiring and Plug/Jack References
■ Duplex Unit ■ Options Map 4, Duplex Unit Controller Board
■ Options Duplex Unit Sensors and Interconnect Wiring
Troubleshooting Procedure Table
Step Actions and Questions Yes No
Check the following for evidence of fault or
1
damage:
■ Duplex Unit Entrance Roller
■ Duplex Unit Connector
■ Duplex Unit
Is there any damage or debris?
Test the Duplex Entrance, Reverse, Front,
2
and Rear actuators and sensors using
Service Diagnostics.
Do the sensors and actuators function
correctly?
Test the Duplex Motors using Service
3
Diagnostics.
Do the motors function correctly?
Replace any
damaged parts.
Go to Step 3. Replace the
Go to Step 4. Replace the
Go to Step 2.
Duplex Unit
page 5-122).
(
Duplex Unit
(
page 5-122).
Inspect the DUPLEX harness. If defective,
4
replace the wiring harness.
Is the harness properly seated and free
from defects?
3-16 Phaser 7400 Color Printer Options Service Manual
Replace the Motor
Driver Board (see
Book 1).
Replace the
Duplex Unit
page 5-122).
(
Page 91

Jam in Duplex Unit
Media reached Duplex Reverse Sensor, but did not leave the Duplex Unit on time.
This error represents a misfeed jam inside the Duplex Unit.
Applicable Status Code:
Code D2: Jam in Duplex Unit
Initial Actions:
■ Cycle printer power.
■ If the problem persists, follow the procedure below.
Troubleshooting Reference Table
Applicable Parts Wiring and Plug/Jack References
■ Duplex Unit ■ Options Map 4, Duplex Unit Controller Board
■ Options Duplex Unit Sensors and Interconnect Wiring
Troubleshooting Procedure Table
Step Actions and Questions Yes No
Ensure the correct weight and type of
1
paper is loaded in the tray.
Does the media meet specifications?
Check for and remove any dirt, debris or
2
obstructions in the paper path around the
Duplex Unit.
Did this correct the problem?
Clean and check the Duplex Unit rollers.
3
Do the rollers move freely and are free of
dirt or debris?
Test the Duplex Entrance, Reverse, Front,
4
and Rear actuators and sensors using
Service Diagnostics.
Do the sensors function correctly?
Test the Duplex Motors.
5
Do the motors function correctly?
Go to Step 2. Run several test
Complete Go to Step 3.
Go to Step 4. Replace the Duplex
Go to Step 5. Replace the Duplex
Go to Step 6. Replace the Duplex
prints.
If a jam persists, go
to Step 2.
page 5-122).
Unit (
page 5-122).
Unit (
page 5-122).
Unit (
Inspect the DUPLEX harness. If defective,
6
replace the wiring harness.
Is the harness properly seated and free
from defects?
General Troubleshooting 3-17
Replace the Motor
Driver Board (see
Book 1).
Replace the Duplex
page 5-122).
Unit (
Page 92

Jam at Duplex Entrance
Media reached the Fuser Exit Sensor, but did not reach the Duplex Entrance Sensor
on time. This error represents a jam at the Duplex entrance or in the Exit Assembly.
Applicable Status Code:
Code TC3: Jam at Duplex Entrance
Initial Actions:
■ Check for obstructions or debris in the output paper path.
■ Reseat the Duplex Unit.
■ Cycle printer power.
■ If the problem persists, follow the procedure below.
Troubleshooting Reference Table
Applicable Parts Wiring and Plug/Jack References
■ Duplex Unit
■ Duplex Entrance Sensor
■ Exit Assembly (see Book 1)
■ Fuser Motor, (see Book 1)
■ Motor Driver (see Book 1)
■ Print Engine Map 5 (see Book 1)
■ Options Map 4, Duplex Unit Controller Board.
■ Options Duplex Unit Sensors and Interconnect
Wiring
Troubleshooting Procedure Table
Step Actions and Questions Yes No
Check the following for evidence of fault or
1
damage:
■ Duplex Unit
■ Exit Gate
■ Exit Assembly
■ Duplex Gate
Are there any defects?
Test the Duplex Entrance Sensor.
2
Run the Service Diagnostics Duplex
Entrance (IN1) Sensor test.
Does the sensor function correctly?
Replace any
damaged parts.
Go to Step 4. Replace the Duplex
Go to Step 2.
Entrance Sensor, if
the error persists,
go to Step 3.
Check DUPLEX Harness continuity.
3
Is the DUPLEX Harness conductive?
Print a test print in Duplex mode
4
Does the sheet reverse in the printer?
3-18 Phaser 7400 Color Printer Options Service Manual
Go to Step 4. Replace the
DUPLEX Harness.
Go to Step 6. Replace the Duplex
Unit. If the error
persists, go to
5.
Step
Page 93

Troubleshooting Procedure Table (Continued)
Step Actions and Questions Yes No
Check for +24 V to the Duplex Motors.
5
Disconnect DUPLEX on the Motor Driver
Board.
Is there +24 V at DUPLEX-6 <=> ground?
Test the Fuser Motor.
6
Run the Service Diagnostics Fuser Motor
test.
Does the Fuser Motor function correctly?
Check for +24 V to the Fuser Motor.
7
Disconnect DCHEAT on the Motor Driver
Board.
Is there +24 V at DCHEAT-3 <=> ground?
Test the Exit Gate Solenoid.
8
Run the Service Diagnostics Exit Gate
Solenoid test.
Does the solenoid function correctly.
Check for +24 V to the solenoid.
9
1. Actuate the interlock switches.
2. Disconnect SOLENOID from the Rear
Sensor Board.
Is there +24 V across SOLENOID-1 <=>
ground?
Go to Step 6. Go to Step 10.
Go to Step 8. Go to Step 7.
Replace the Fuser
Motor (see Book 1).
Replace the Exit
Assembly (see
Book 1).
Replace the
solenoid
(
page 5-129).
Go to Step 10.
Go to Step 9.
Replace the Rear
Sensor Board (See
Book 1).
Check Motor Driver Board POW24
10
connector for 24 V.
1. Disconnect POW24.
Is there +24 V across POW24-1 <=>
POW24-2?
Check for 24 V at the LVPS
11
1. Disconnect CN2 on the LVPS.
Is there +24 V across pins 1 and 2?
Check the DRV0 and DRV1 ribbon cables
12
that connect the Motor Driver Board to the
Engine Control Board.
Are these cables connected and
undamaged?
Replace the Motor
Driver Board (see
Book 1).
Replace the
POW24 Harness.
Replace the Engine
Control Board (See
Book 1).
Go to Step 11.
Replace the LVPS
(See Book 1).
Replace the DRV0
and DRV1
Harnesses.
General Troubleshooting 3-19
Page 94

Jam at Finisher Punch Unit
Media did not clear the Finisher Entrance Sensor on time. This error represents a jam
at the Finisher entrance.
Applicable Status Code:
Code FN1: Jam at Finisher Punch
Initial Actions:
■ Check for obstructions or debris in the paper path.
■ Cycle printer power.
■ If the problem persists, follow the procedure below.
Troubleshooting Reference Table
Applicable Parts Wiring and Plug/Jack References
■ Punch Unit
■ Finisher Entrance Sensor
■ Finisher Transport Rollers
■ Options Map 2, Punch Unit Controller Board
■ Options Map 8, Finisher Sensor Locator (2/2)
■ Options Punch Unit Sensors and Motors
■ Options Finisher Controller to Sensors (2/3)
Troubleshooting Procedure Table
Step Actions and Questions Yes No
Check the following for evidence of fault or
1
damage:
■ Punch Unit
■ Transport Rollers
■ Exit Rollers
Are there any defects or misalignment?
Test the Finisher Entrance Sensor.
2
Run the Service Diagnostics Finisher
Entrance Sensor test.
Does the sensor function correctly?
Check the Entrance Sensor signal at the
3
Finisher Control Board.
Actuate the Entrance Sensor.
Does the voltage across CN16-12 <=>
ground change when the sensor is
actuated?
Replace any
damaged parts.
Replace the Engine
Control Board (see
Book 1).
Replace the
Finisher Control
Board (
page 5-46).
Go to Step 2.
Replace the
sensor. If the error
persists, go to
3.
Step
Replace the
harness.
3-20 Phaser 7400 Color Printer Options Service Manual
Page 95

Jam at Finisher Door H
Media reached the Finisher Entrance Sensor, but did not clear the Inverter on time.
This error represents a jam in the Finisher Inverter.
Applicable Status Code:
Code FN2: Jam at Finisher Door H
Initial Actions:
■ Check for obstructions or debris in the paper path.
■ Cycle printer power.
■ If the problem persists, follow the procedure below.
Troubleshooting Reference Table
Applicable Parts Wiring and Plug/Jack References
■ Inverter
■ Finisher Entrance Sensor
■ Finisher Inverter Rollers
■ Options Map 7, Finisher Sensor Locator (1/2)
■ Options Map 8, Finisher Sensor Locator (2/2)
■ Options Map 9, Inverter Sensor Locator
■ Options Finisher Controller to Sensors (2/3)
Troubleshooting Procedure Table
Step Actions and Questions Yes No
Check the following for evidence of fault or
1
damage:
■ Inverter
■ Inverter Rollers
■ Finisher Transport Rollers
Are there any defects or misalignment?
Test the Finisher Entrance Sensor.
2
Run the Service Diagnostics Finisher
Entrance Sensor test.
Does the sensor function correctly?
Check the Entrance Sensor signal at the
3
Finisher Control Board.
Actuate the Entrance Sensor.
Does the voltage across CN16-12 <=>
ground change when the sensor is
actuated?
Replace any
damaged parts.
Replace the Engine
Control Board (see
Book 1).
Replace the
Finisher Control
Board (
page 5-46).
Go to Step 2.
Replace the
sensor. If the error
persists, go to
3.
Step
Replace the
harness.
General Troubleshooting 3-21
Page 96

Jam at Finisher Upper Output Tray
Media remains in the upper output path. This error represents a jam in the Finisher.
Applicable Status Code:
Code FN4: Jam at Finisher Upper Output Tray
Initial Actions:
■ Check for obstructions or debris in the paper path.
■ Cycle printer power.
■ If the problem persists, follow the procedure below.
Troubleshooting Reference Table
Applicable Parts Wiring and Plug/Jack References
■ Compiler Tray
■ Front and Rear Alignment Guides
■ Transport Rollers
■ Options Map 8, Finisher Sensor Locator (2/2)
■ Options Finisher Controller to Sensors (1/3)
Troubleshooting Procedure Table
Step Actions and Questions Yes No
Check the following for evidence of fault or
1
damage:
■ Compiler Tray
■ Front and Rear Alignment Guides
■ Transport Rollers
Are there any defects or misalignment?
Test the Processing Tray Sensor.
2
Run the Service Diagnostics sensor test.
Does the sensor function correctly?
Check the Processing Tray Sensor signal.
3
Actuate the sensor at the Finisher Control
Board.
Does the voltage across CN5-9 <=>
ground change when the sensor is
actuated?
Replace any
damaged parts.
Replace the Engine
Control Board (see
Book 1).
Replace the
Finisher Control
Board (
page 5-46).
Go to Step 2.
Replace the
sensor. If the error
persists, go to
3.
Step
Replace the
harness.
3-22 Phaser 7400 Color Printer Options Service Manual
Page 97

Jam at Finisher Saddle Stapler
Media remains in the buffer area. This error represents a jam in the Finisher.
Applicable Status Code:
Code FN5: Jam at Finisher Saddle Stapler
Initial Actions:
■ Check for obstructions or debris in the paper path.
■ Cycle printer power.
■ If the problem persists, follow the procedure below.
Troubleshooting Reference Table
Applicable Parts Wiring and Plug/Jack References
■ Compiler Tray
■ Front and Rear Alignment Guides
■ Transport Rollers
■ Stapler
■ Options Map 7, Finisher Sensor Locator (1/2)
■ Options Map 8, Finisher Sensor Locator (2/2)
■ Options Finisher Controller to Sensors (1/3)
■ Options Finisher Controller to Sensors (2/3)
Troubleshooting Procedure Table
Step Actions and Questions Yes No
Check the following for evidence of fault or
1
damage:
■ Compiler Tray
■ Front and Rear Alignment Guides
■ Transport Rollers
■ Stapler
Are there any defects or misalignment?
Test the Folding Position Sensor.
2
Run the Service Diagnostics Folding
Position Sensor test.
Do the sensor function correctly?
Replace any
damaged parts.
Replace the Engine
Control Board (see
Book 1).
Go to Step 2.
Replace the
sensor. If the error
persists, go to
3.
Step
Check the Folding Position Sensor signal at
3
the Finisher Control Board.
Actuate the sensor.
Does the voltage across CN16-2 <=>
ground change when the sensor is
actuated?
General Troubleshooting 3-23
Replace the
Finisher Control
Board (
page 5-46).
Replace the
harness.
Page 98

Jam at Finisher Upper Output Tray
Media remains in the Finisher offset rollers. This error represents a jam in the Finisher
upper output path.
Applicable Status Code:
Code FN6: Jam at Finisher Upper Output Tray
Initial Actions:
■ Cycle printer power.
■ If the problem persists, follow the procedure below.
Troubleshooting Reference Table
Applicable Parts Wiring and Plug/Jack References
■ Compiler Tray
■ Front and Rear Alignment Guides
■ Transport Rollers
■ Stapler
■ Options Map 7, Finisher Sensor Locator (1/2)
■ Options Map 8, Finisher Sensor Locator (2/2)
■ Options Finisher Controller to Sensors (1/3)
■ Options Finisher Controller to Sensors (2/3)
Troubleshooting Procedure Table
Step Actions and Questions Yes No
Check the following for evidence of fault or
1
damage:
■ Compiler Tray
■ Front and Rear Alignment Guides
■ Transport Rollers
■ Stapler
Are there any defects or misalignment?
Test the Processing Tray Sensor.
2
Run the Service Diagnostics sensor test.
Does the sensor function correctly?
Replace any
damaged parts.
Replace the Engine
Control Board (see
Book 1).
Go to Step 2.
Replace the
sensor. If the error
persists, go to
3.
Step
Check the Processing Tray Sensor signal
3
at the Finisher Control Board.
Actuate the sensor.
Does the voltage across CN5-3 <=>
ground change when the sensor is
actuated?
3-24 Phaser 7400 Color Printer Options Service Manual
Replace the
Finisher Control
Board(
page 5-46).
Replace the
harness.
Page 99

Jam at Finisher Stapler
Media remains in the Compiler Tray. This error represents a jam in the Finisher staple
path.
Applicable Status Code:
Code FN7: Jam at Finisher Stapler
Initial Actions:
■ Cycle printer power.
■ If the problem persists, follow the procedure below.
Troubleshooting Reference Table
Applicable Parts Wiring and Plug/Jack References
■ Compiler Tray
■ Front and Rear Alignment Guides
■ Transport Rollers
■ Stapler
■ Options Map 7, Finisher Sensor Locator (1/2)
■ Options Map 8, Finisher Sensor Locator (2/2)
■ Options Finisher Controller to Sensors (1/3)
■ Options Finisher Controller to Sensors (2/3)
Troubleshooting Procedure Table
Step Actions and Questions Yes No
Check the following for evidence of fault or
1
damage:
■ Compiler Tray
■ Front and Rear Alignment Guides
■ Transport Rollers
■ Stapler
Are there any defects or misalignment?
Test the Bind Tray Sensor.
2
Run the Service Diagnostics sensor test.
Does the sensor function correctly?
Replace any
damaged parts.
Replace the Engine
Control Board (see
Book 1).
Go to Step 2.
Replace the
sensor. If the error
persists, go to
3.
Step
Check the Processing Tray Sensor signal
3
at the Finisher Control Board.
Actuate the sensor.
Does the voltage across CN15-3 <=>
ground change when the sensor is
actuated?
General Troubleshooting 3-25
Replace the
Finisher Control
Board (
page 5-46).
Replace the
harness.
Page 100

Jam at Finisher Door G
Jam detected in the saddle stitch path.
Applicable Status Code:
Code FN8: Jam at Finisher Door G
Initial Actions:
■ Cycle printer power.
■ If the problem persists, follow the procedure below.
Troubleshooting Reference Table
Applicable Parts Wiring and Plug/Jack References
■ Compiler Tray
■ Front and Rear Alignment Guides
■ Transport Rollers
■ Stapler
■ Options Map 7, Finisher Sensor Locator (1/2)
■ Options Map 8, Finisher Sensor Locator (2/2)
■ Options Finisher Controller to Sensors (1/3)
■ Options Finisher Controller to Sensors (2/3)
Troubleshooting Procedure Table
Step Actions and Questions Yes No
Check the following for evidence of fault or
1
damage:
■ Compiler Tray
■ Front and Rear Alignment Guides
■ Transport Rollers
■ Stapler
Are there any defects or misalignment?
Test the Bind Tray Sensor.
2
Run the Service Diagnostics sensor test.
Does the sensor function correctly?
Replace any
damaged parts.
Replace the Engine
Control Board (see
Book 1).
Go to Step 2.
Replace the
sensor. If the error
persists, go to
3.
Step
Check the Processing Tray Sensor signal
3
at the Finisher Control Board.
Actuate the sensor.
Does the voltage across CN15-3 <=>
ground change when the sensor is
actuated?
3-26 Phaser 7400 Color Printer Options Service Manual
Replace the
Finisher Control
Board (
page 5-46).
Replace the
harness.
 Loading...