

Page 1
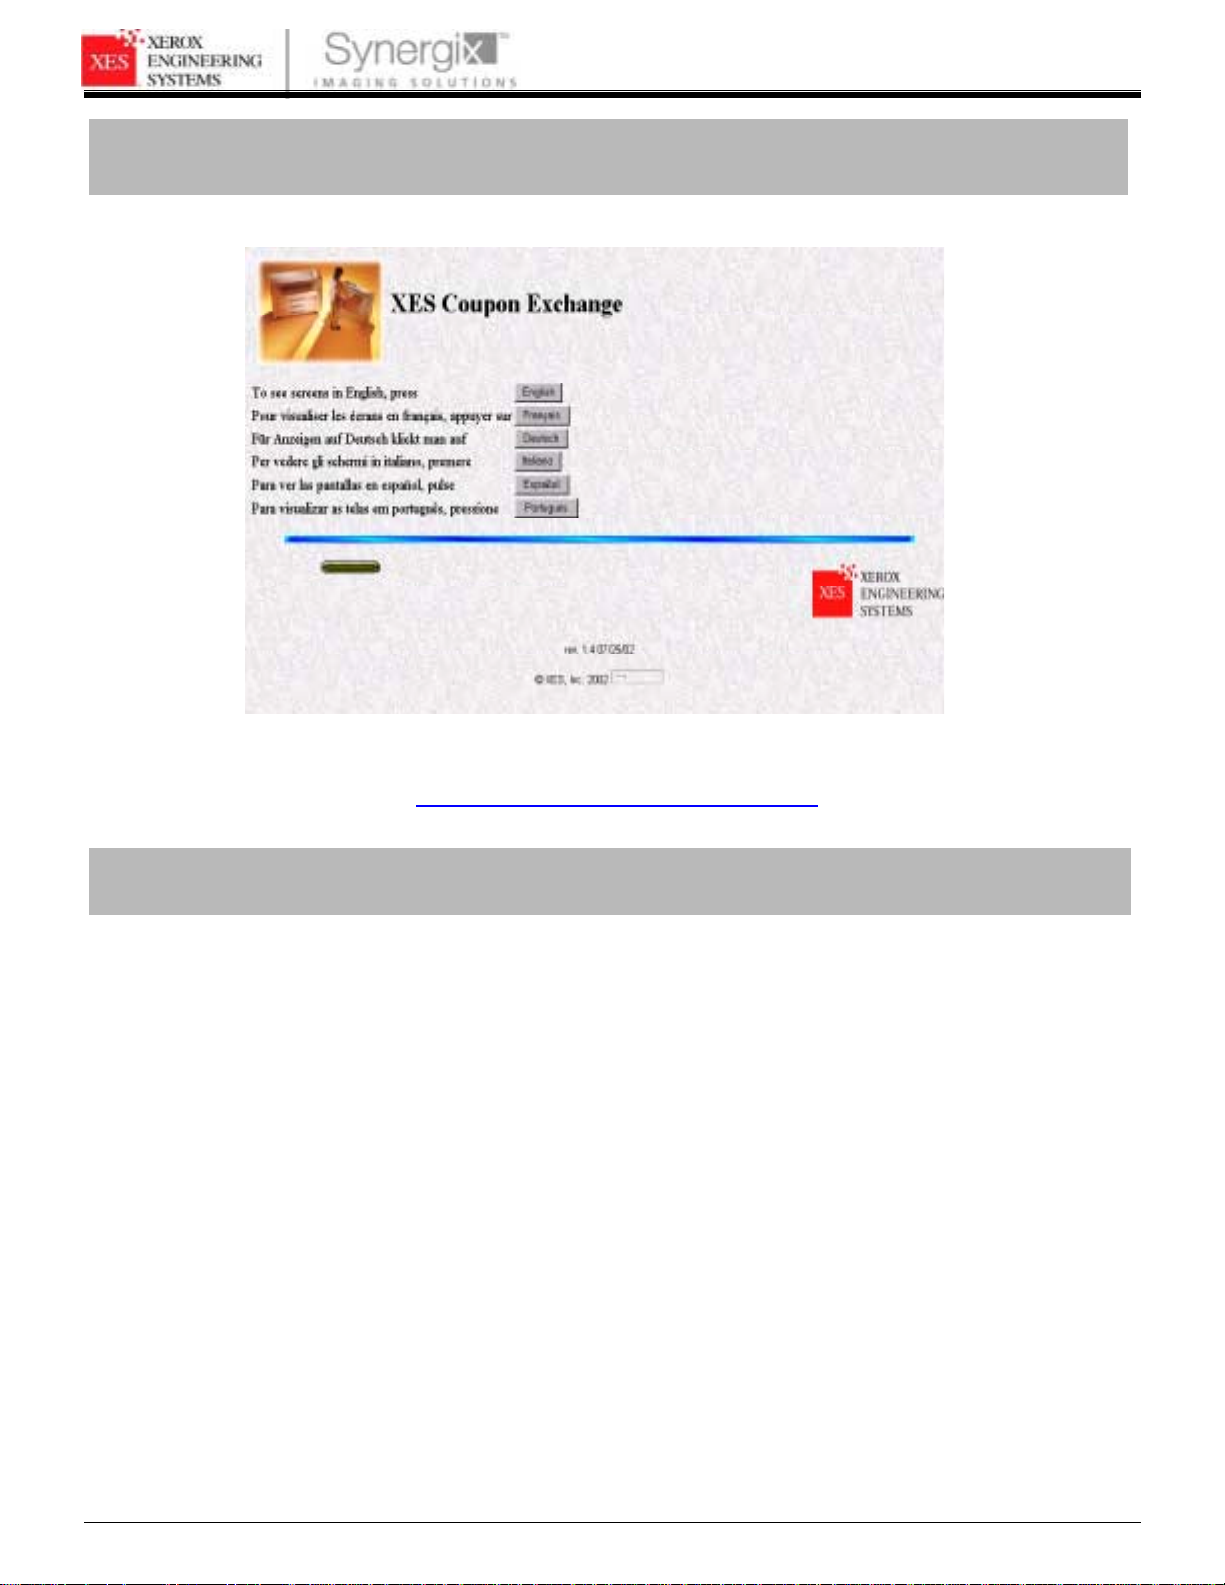
Coupon Exchange
XES FEATURE KEY INSTRUCTIONS
http://www.xes.com/keys/httpHome/keys.html
Select a language button.
Table of Contents
Coupon Exchange................................................................................................................................................... 1
Table of Contents .................................................................................................................................................... 1
General Information................................................................................................................................................. 2
Redeem a Coupon for a Feature Key (With Internet Access and AccXES System Software Versions 8.0 or Greater)
................................................................................................................................................................................. 4
Redeem a Coupon for a Feature Key (With Internet Access and AccXES System Software Versions Prior to Version
8.0)........................................................................................................................................................................... 7
Redeem a Coupon for a Feature Key (Without Internet Access)............................................................................ 9
Get a Single Replacement Key (AccXES Software Versions 8.0 or Greater)......................................................... 10
Get a Single Replacement Key (AccXES Software Versions Prior to Version 8.0)................................................ 11
Re-enabling Of Features When The IOT HW (Hardware) and/or Advanced Network HW Address Has Changed12
Replace All Feature Keys After Software Upgrade................................................................................................. 13
Uninstall a Feature Key........................................................................................................................................... 14
Moving a Feature Key to another AccXES System (Software Versions 8.0 or Greater) ........................................ 16
Enabling a Feature Key (Optional Features)........................................................................................................... 17
701P39462 12/02 Page 1
Page 2

XES FEATURE KEY INSTRUCTIONS
General Information
AccXES Software Version 9.0
With the introduction of AccXES System software version 9.0 the following changes have been introduced:
• Feature Key support for two new printers, the Synergix Print System 510dp and the Synergix Print System
721p.
• New optional Feature Keys, see Table 1. The Drawer Enablement and Speed Enhancements 7D and
10D/Minute features are unique to the Synergix Print System 510dp Printer.
Helpful Hints
When downloading a Feature Key it may be helpful to open two browsers, one for the WebPMT to your AccXES
System and one for the XES Coupon Exchange web site. With the two browsers open you may move between the two
sites as required until the Feature Key download is complete. Once the download is complete you can maximize the
WebPMT and upload the Feature Key files to the Controller.
When downloading multiple Feature Keys, download all the keys before rebooting the AccXES System. This allows
you to download all the keys using the same KIK number. If you reboot, a new KIK number will be created and you will
have to obtain the new KIK number. Then use the procedure in the section entitled “Get a Single Replacement Key
(AccXES Software Versions 8.0 or Greater)” to download the additional keys.
701P39462 12/02 Page 2
Page 3

XES FEATURE KEY INSTRUCTIONS
Table 1 lists the available features and the information you will need to download them from the Coupon Redemption
web site. Have this information readily available when you log on to the web site.
TABLE 1. Available Features and the Required Download Information
Feature Advanced
Scan To Net
Job Accounting
Postscript
V8.0 Activation
Speed Enhancement
Turbo II - AccXES
Speed Enhancement
Turbo III - AccXES
Color Enablement -
AccXES
Color Enablement -
XEScan
Scan to Print
Versatec Raster Formats
VCGL Format
CGM Format
Speed Enhancement
Turbo II - XEScan
Speed Enhancement
Turbo III - XESc an
Speed Enhancement - IOT
7D/Minute
Speed Enhancement - IOT
10D/Minute
Speed Enhancement
Upgrade- IOT 5D to
10D/Minute
Drawer Enablement - IOT
2 Drawer
Drawer Enablement - IOT
3 Drawer
Drawer Enablement
Upgrade - IOT 1 to 3
Drawer
Network
Hardware
Address
XX
XX
XX
XX
XX
XX
XX
Scanner
Hardware
Address
Machine ID
(Printer)
Serial Number
Scanner Serial
Number
IOT (Printer)
Hardware
Address
XX
XX
XX
XX
XX
XX
XX
510dp ID
510dp ID
510dp ID
510dp ID
510dp ID
510dp ID
X
X
X
X
X
X
Before reading further, first look at the Table of Contents of this document to locate which section has the Feature
Key Instructions that you need to follow. The section titles correspond to the selections on the
http://www.xes.com/keys/httpHome/keys.html website, with which you will be interacting.
701P39462 12/02 Page 3
Page 4
XES FEATURE KEY INSTRUCTIONS
V
ddress
y
Redeem a Coupon for a Feature Key (With Internet Access and
AccXES System Software Versions 8.0 or Greater)
For AccXES Systems firmware versions prior to 8.0, follow all
the instructions beginning on Page 7.
Firmware
ersion
Scanner Hardware
Address
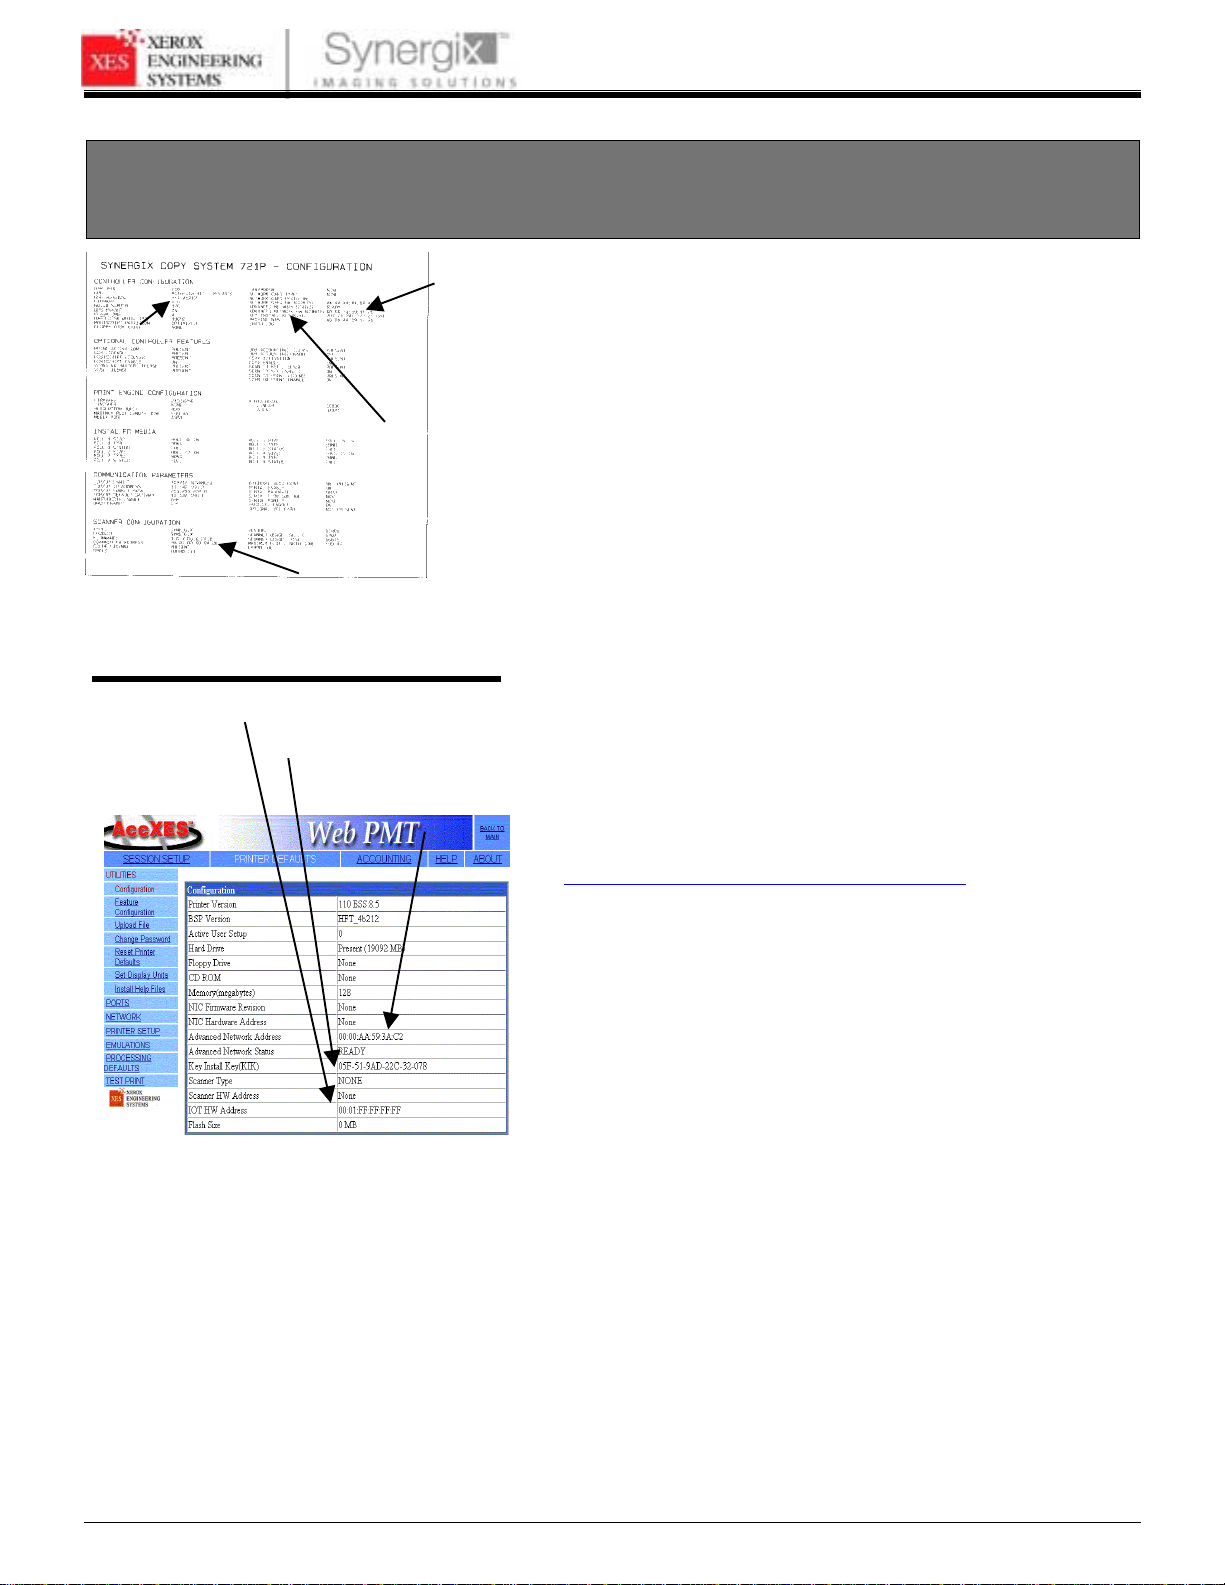
Figure 1. Printer Configuration Test Print
Scanner & IOT
Hardware
Addresses
Key Install
Key (KIK)
Advanced Network
Hardware Address
Advanced
Network HW
A
Key Install Ke
(KIK)
1. Locate the 16 character coupon ID on the label of the diskette
included in this kit. The coupon ID represents your Proof of
Purchase of the Feature for your system and MUST NOT be
misplaced.
2. Log on to the WebPMT and leave it open. Make a print of the
Printer Configuration Test Print, “Minimal” (Figure 1) or access
the PRINTER DEFAULTS, UTILITIES, Configuration screen on
the WebPMT (Figure 2) and identify the:
• IOT HW (Hardware) Address, the Scanner HW Address
(00:00:AA :xx:xx:xx or 26:01:xx:xx:xx:xx), or Advanced
Network HW Address (00:00:aa:xx:xx:xx) where each xx
denotes a pair of characters) from Test Print or WebPMT,
Printer Defaults.
• Key Install Key (KIK).
3. Using the Test Print, confirm that the firmware version in your
printer is 8.0 or greater. If not, go to the section in this
document entitled “Key Redemption With Internet Access and
AccXES System Software Versions Prior to Version 8.0.”
4. Using your Internet browser, access
http://www.xes.com/keys/httpHome/keys.html.
Figure 2 . WebPMT, Configuration Page
5. Select a language (English, French, German, Italian, Spanish,
or Portuguese).
6. Click on “Redeem a Coupon for a Feature Key (AccXES v8.0 or
later, or XEScan v1.1 or later)” then click “Continue.”
7. Enter the following information then click “Continue”
• Coupon ID (obtained from certificate or disk label in this
kit)
• Feature
• Key Install Key (KIK)
701P39462 12/02 Page 4
Page 5

XES FEATURE KEY INSTRUCTIONS
Note: Refer to Table 1 to determine which address and serial
number is required.
8. Enter the:
• Plotter (Printer) model.
• IOT HW (Hardware) HW Address, Scanner HW Address,
or Advanced Network HW Address from Test Print (See
Figure 1.)
• Scanner Serial Number (locate on the rear of the
Scanner), Machine ID (located on the printer connector
panel), or Controller Serial Number (located on the rear of
Controller) then click “Continue”.
9. Enter the IOT HW (Hardware) Address, Scanner Hardware
Address, or Advanced Network HW Address a second time and
click “Confirm.”
10. Fill in the requested name and addressing information and click
“Continue.”
11. After submitting the information, verify that all information on
the Summary Page is correct. Then click on the “Download
Feature Key (file)” button. A “File Download” dialog box will
appear, click “Save”. A “Save As” window will open. Choose
the location (Save In:) to save the file, and change the file
name if you desire. Click “Save” to save the file to your hard
drive location or to the diskette that came in this kit. Close the
“Download Complete” window.
Read the note on the web page regarding using the “Redeem
Another Coupon” button.
Note: You may want to rename the file to a meaningful name, but
do not change the file extension (.plt, .xky). Changing the file name
will not affect the system’s ability to read the file.
12. Upload the key file(s) to the Controller using the Web PMT.
• Open the WebPMT on you workstation. Navigate to
PRINTER DEFAULTS > UTILITIES > Upload File. If
required, reference the WebPMT User Guide, Printer
Defaults, Upload File section for more information.
• Browse to where you saved the Feature Key file in Step 11
and click on the Upload button to upload the file.
Note: The AccXES Client Tools, Document Submit Tool can also
be used (Reference the AccXES Client Tools User Guide). Send
the key file(s) the same as you would send a print job. The
Controller will recognize the file extension and load the key(s).
701P39462 12/02 Page 5
Page 6

XES FEATURE KEY INSTRUCTIONS
13. After waiting 60 seconds, reboot your entire system to enable
the feature key. Wait for the system to complete the
initialization. It will then be ready to accept prints.
Note: If required, reference the XES Synergix
8825/8830/8850/8855/510dp/721p Digital Solutions User Guide,
Powering Off the Digital Solution or the Colorgrafx X2 User Guide,
for powering off instructions.
14. Verify that the Optional License(s) is/are present.
a. Print a Printer Configuration Test Print (Minimal), or on the
WebPMT click PRINTER DEFAULTS > UTILITIES >
CONFIGURATION > Feature Configuration.
b. Verify that the feature is enabled:
TEST PRINT (see Figure 1)
• Color license and Speed are located under the SCANNER
CONFIGURATION section .
• Check under the OPTIONAL CONTROLLER FEATURES.
“Present” should appear opposite each feature license that
was installe d.
WebPMT (see Figure 6)
• Go to PRINTER DEFAULTS > UTILITIES > Feature
Configuration.
• “Present” should appear opposite each feature license
that was installed.
15. Place the Test Print, along with a record of your Coupon ID, in
the service logbook located in the door panel of your printer.
16. Store the feature key diskette in a safe place, together with
your other drivers and firmware diskettes and CD’s.
17. Refer to section in this document entitled “Enabling a Feature
Key (Optional Feature)” to enable the feature to be used.
701P39462 12/02 Page 6
Page 7

XES FEATURE KEY INSTRUCTIONS
Redeem a Coupon for a Feature Key (With Internet Access and AccXES
System Software Versions Prior to Version 8.0)
Firmware
Version
Figure 3. Printer Configuration Test Print
Advanced Network
Hardware Address
Scanner
Hardware
Address
For AccXES Systems firmware versions prior to 8.0, do the
following.
1. Locate the 16 character coupon ID on the label of the diskette
included in this kit. The coupon ID represents your Proof of
Purchase of the Feature for your system and MUST NOT be
misplaced.
2. Log on to the WebPMT and leave it open. Make a print of the
Printer Configuration Test Print, “Minimal” (Figure 3) or access
the Printer Defaults screen on the WebPMT (Figure 4) and
identify the:
• Advanced Network HW Address or the Scanner HW
Address (00:00:AA :xx:xx:xx or 26:01:xx:xx:xx:xx), where
each xx denotes a pair of characters) from Test Print or
WebPMT, Printer Defaults.
3. Using the Test Print, confirm that the firmware version in your
printer is prior to 8.0. If not, refer to the Controller Setup
Manual, “Over The Wire Firmware Upgrading” instructions.
4. Using your Internet browser, access
http://www./keys/httpHome/keys.html.
Advanced
Network
Hardware
Address
Figure 4 . WebPMT, Configuration Page
5. Select a language (English, French, German, Italian, Spanish,
or Portuguese).
6. For releases prior to version 8.0, click on “Redeem a Coupon
for a Feature Key (AccXES versions prior to 8.0, or XEScan
v1.1)” and click “Continue.”
7. Enter the following information and click “Continue”
• Coupon ID (obtained from certificate or disk label in this kit)
• Feature
Note: Refer to Table 1 to determine which address and serial
number is required.
8. Enter the:
• Plotter model
• Advanced Network HW (Hardware) Address or Scanner
HW Address from the Test Print or WebPMT, Printer
Defaults. (See Figures 3 and 4.)
• Scanner Serial Number (located on the back of the Scanner
or Controller Serial Number (located on the rear of
Controller) then click “Continue”.
701P39462 12/02 Page 7
Page 8

XES FEATURE KEY INSTRUCTIONS
9. Enter the Advanced Network HW Address or Scanner
Hardware Address a second time and click “Confirm.”
10. Fill in the requested name and addressing information and click
“Continue.”
11. After submitting the information, verify that all information on
the Summary Page is correct then click on the “Download
Feature Key (file)” button. A “File Download” dialog box will
appear, click ”Save”. A “Save As” window will open. Choose
the location (Save In:) to save the file, and change the file
name if you desire. Click “Save” to save the file to your hard
drive location or to the diskette that came in this kit. Close the
“Download Complete” window.
Note: You may want to rename the file to a meaningful name, but
do not change the file extension (.plt, .xky). Changing the file name
will not affect the system’s ability to read the file.
12. Upload the key file(s) to the Controller using the Web PMT.
• Open the WebPMT on your workstation
• Navigate to PRINTER DEFAULTS > UTILITIES > Upload
File.
• Browse to where you saved the Feature Key file in Step 11
and click on the Upload button to upload the file.
Note: The AccXES Client Tools, Document Submit Tool can also
be used (Reference the AccXES Client Tools User Guide). Send
the key file(s) the same as you would send a print job. The
Controller will recognize the file extension and load the key(s).
13. After waiting 60 seconds, reboot your entire system to enable
the feature key. Wait for the system to complete the reboot and
is ready to accept prints.
Note: If required, reference the XES Synergix
8825/8830/8850/8855 Digital Solutions User Guide, Powering Off
the Digital Solution or Colorgrafx X2 User Guide, for reboot
instructions.
701P39462 12/02 Page 8
Page 9

XES FEATURE KEY INSTRUCTIONS
14. Verify that the Optional License(s) is/are present.
a. Print a Printer Configuration Test Print (Minimal) (Figure 3) or
on the WebPMT click PRINTER DEFAULTS, UTILITIES,
Configuration to open the Configuration screen (Figure 4)
b. Verify that the feature is enabled:
TEST PRINT (See Figure 3.)
• Color license is located under the SC ANN ER
CONFIGURATION.
• Check under the second column of the CONTROLLER
CONFIGURATION for OPTIONAL LICENSES. “Present”
should appear opposite the feature license that was
installed.
WebPMT (See Figure 4)
Select PRINTER DEFAULTS > UTILITIES > Configuration.
“Present” should appear opposite the feature license that was
installed.
15. Place the Test Print, along with a record of your Coupon ID, in
the service logbook located in the door panel of your printer.
16. Store the feature key diskette in a safe place, together with
your other drivers and software diskettes and CD’s.
17. Refer to the section entitled “Enabling a Feature Key (Optional
Feature),” at the end of this document, to enable the feature to
be used.
Redeem a Coupon for a Feature Key (Without Internet Access)
1. In the United States only, call Customer First at 1 877-XESDNCS. If you are outside the United States, please contact
your support representative for feature key instructions.
2. When you receive a diskette or e-mail containing the
appropriate file, follow the “Key Redemption With Internet
Access” procedure to enable the purchased feature.
701P39462 12/02 Page 9
Page 10

XES FEATURE KEY INSTRUCTIONS
Get a Single Replacement Key (AccXES Software Versions 8.0 or
Greater)
If you lose your feature key and need a replacement or have rebooted the
AccXES System creating a new KIK number after redeeming a coupon,
perform the following steps:
Note: The steps below assume that your IOT HW (Hardware) Address, the
Scanner HW Address, or Advanced Network HW Address has NOT changed (as
shown on the Printer Configuration Test Print or in the System Description
Applications.)
With Internet Access…
1. Log on to the WebPMT and make a print of the Printer Configuration Test
Print, “Minimal” (Figure 1) or access the PRINTER DEFAULTS > UTILITIES >
CONFIGURATION (Figure 5) and identify the:
• Firmware version is 8.0 or greater. If not, go to the section in this
document entitled “Single Key Replacement, AccXES Software Versions
Prior to Version 8.0”.
• Key Install Key (KIK).
2. Using your Internet browser, access
http://www.xes.com/keys/httpHome/keys.html.
3. Select a language (English, French, German, Italian, Spanish, or
Portuguese).
4. Click on “Get a single replacement key (AccXES v8.0 or later, or XEScan v1.1
or later)” and click “Continue”.
5. Enter the:
• Coupon ID (obtained from the certificate or disk label in this kit)
• KIK number then click “Continue”.
6. A “File Download” dialog box will appear, click Save. A “Save As” window will
open. Choose the location (Save In:) to save the file, and change the file
name if you desire. Click Save to save the file to your hard drive location or to
the diskette that came in this kit. Close the “Download Complete” window.
Note: You may want to rename the file to a meaningful name, but do not change
the file extension (.plt, .xky). Ch anging the file name will not affect the system’s
ability to read the file.
7. Repeat steps 12 - 16 (see pages 5-6) to complete this procedure.
Without Internet Access….
1. In the United States only, call Customer First at 1 877-XES-DNCS. If you are
outside the United States, please contact your support representative for
feature key instructions.
2. Repeat steps 12 - 17 (see pages 5-6) to complete this procedure.
701P39462 12/02 Page 10
Page 11

XES FEATURE KEY INSTRUCTIONS
Get a Single Replacement Key (AccXES Software Versions Prior to
Version 8.0)
If you lose your feature key and need a replacement perform the following
steps:
Note: The steps below assume that your IOT HW (Hardware) Address, the
Scanner HW Address or Advanced Network HW Address has NOT changed (as
shown on the Printer Configuration Test Print or in the System Description
Applications.
With Internet Access…
1. Log on to the WebPMT and make a print of the Printer Configuration Test
Print, “Minimal” (Figure 3) or access the Printer Defaults screen on the
WebPMT (Figure 4) and verify that the:
• Firmware version is prior to 8.0.
2. Using your Internet browser, access
http://www.xes.com/keys/httpHome/keys.html.
3. Select a language (English, French, German, Italian, Spanish, or
Portuguese).
4. Click on “Get a single replacement Key (AccXES versions prior to v8.0 or
XEScan version 1.1) and click “Continue.”
5. Enter the Coupon ID (obtained from the certificate or disk label in this kit) then
click “Continue”.
6. A “File Download” dialog box will appear, click Save. A “Save As” window will
open. Choose the location (Save In:) to save the file, and change the file
name if you desire. Click Save to save the file to your hard drive location or to
the diskette that came in this kit. Close the “Download Complete” window.
Note: You may want to rename the file to a meaningful name, but do not change
the file extension (.plt, .xky). Ch anging the file name will not affect the system’s
ability to read the file.
7. Repeat steps 12 - 16 (see pages 5-6) to complete this procedure.
Without Internet Access….
1. In the United States only, call Customer First at 1 877-XES-DNCS. If you are
outside the United States, please contact your support representative for
feature key instructions.
2. Repeat steps 12 - 17 (see pages 5-6) to complete this procedure.
701P39462 12/02 Page 11
Page 12

XES FEATURE KEY INSTRUCTIONS
Re-enabling Of Features When The IOT HW (Hardware) and/or
Advanced Network HW Address Has Changed
If your Advanced Network HW Address, as shown on the Printer
Configuration Test Print has changed, you must perform the following
steps:
1. In the United States only, call Customer First at 1 877-XES-DNCS. If you are
outside the United States, please contact your support representative for
feature key instructions.
2. Refer to Redeem a Coupon for a Feature Key (With Internet Access and
AccXES System Software Versions 8.0 or Greater)
701P39462 12/02 Page 12
Page 13

XES FEATURE KEY INSTRUCTIONS
Replace All Feature Keys After Software Upgrade
After upgrading the firmware all feature keys may or may not be disabled
depending on the configuration of your AccXES System. To enable the keys,
you must perform the following steps:
Note: You must have Internet access to replace Feature Keys.
1. Using your Internet browser, access
http://www.xes.com/keys/httpHome/keys.html, then click the appropriate
language button.
2. Click on “Replace all keys after software upgrade” and click “Continue.”
Note: Refer to Table 1 to determine which address and serial number is required.
3. Enter the:
• Scanner HW Address, IOT HW (Hardware) Address, or Key Install Key
number from the Test Print or WebPMT, Printer Defaults.
• Click “Continue”.
4. A “File Download” dialog box will appear, clicks Save. A “Save As” window will
open. Choose the location (Save In:) to save the file, and change the file name
if you desire. Click Save to save the “replacement.plt” file to your hard drive
location or to the diskette that came in this kit. Close the “Download Complete”
window.
5. Upload the “replacement.plt” to the Controller using the Web PMT.
• Open the WebPMT.
• Navigate to PRINTER DEFAULTS > UTILITIES > Upload File.
• Browse to where you saved the “replacement.plt” file in Step 4 and upload
the file.
Note: The AccXES Client Tools, Document Submit Tool can also be used
(Reference the AccXES Client Tools User Guide)). Send the key file(s) the same
as you would send a print job. The Controller will recognize the file extension and
load the key(s)
6. After waiting 60 seconds, reboot your entire system to enable the feature key.
Wait for the system to complete the reboot and is ready to accept prints.
Note: If required, reference the XES Synergix 8825/8830/8850/8855/510dp/721p
Digital Solutions User Guide, Powering Off the Digital Solution or the Colorgrafx X2
User Guide, for reboot instructions.
7. Print another Printer Configuration Test Print “Minimal” to verify that the
feature(s) is/are enabled. (See Figure 1).
Check under the OPTIONAL CONTROLLER FEATURES section. “Present”
should appear opposite each feature license that was installed. The color
license is located under the SCANNER CONFIGURATION.
701P39462 12/02 Page 13
Page 14

8. Place the Test Print, along with a record of your Coupon ID, in the service
logbook located in the door panel of your printer.
9. Store the feature key diskette in a safe place, together with your other drivers
and firmware diskettes and CD’s.
10. Refer to Enabling a Feature Key (Optional Feature) in this document to enable
the feature to be used.
Uninstall a Feature Key
To remove Feature Key(s) or move a key to another AccXES System, you
must perform the following steps:
Note: You must have Internet access to uninstall Feature Key(s).
1. Using your Internet browser, access
http://www.xes.com/keys/httpHome/keys.html, then click the appropriate
language button.
Note: The “Proceed to re-enable your coupon” button is only used if you have
to temporarily discontinue the download after Step 1. To continue the
download click this button to resume at Step 2.
XES FEATURE KEY INSTRUCTIONS
2. Click on “Uninstall a Feature Key (step 1—get download file)” and click
“Continue.”
Note: Refer to Table 1 to determine which address and serial number is required.
3. Enter the following information and then click “Continue”.
• Coupon ID (obtained from certificate or disk label in this kit)
• Scanner, IOT HW (Hardware), or Advanced Network HW Address from
Test Print or WebPMT, Printer Defaults.
• Scanner Serial Number (located on the rear of the Scanner), Machine ID
(located on the connector panel), or Controller Serial Number (located on
the rear of Controller).
• Key Install Key (KIK)
• Select feature description.
4. Click the “Download Feature Key (file)” button.
701P39462 12/02 Page 14
Page 15

XES FEATURE KEY INSTRUCTIONS
5. A “File Download” dialog box will appear, click “Save”. A “Save As” window
will open. Choose the location (Save In:) to save the file, and change the file
name if you desire. Click “Save” to save the file to your hard drive location or to
the diskette that came in this kit. Close the “Download Complete” window.
Multiple features can be downloaded using the same KIK. Repeat Steps 1 through
5 for each Feature to be removed before continuing to Step 6. A new KIK number
is created each time the AccXES System is rebooted. If you reboot, the new KIK
will have to be used in Step 3.
Note: You may want to rename the file to a meaningful name, but do not change
the file extension (.plt, .xky). Ch anging the file name will not affect the system’s
ability to read the file.
6. Upload the Uninstall Feature key file to the Controller using the Web PMT.
• Open the WebPMT on your workstation
• Navigate to PRINTER DEFAULTS > UTILITIES > Upload File.
• Browse to where you saved the Feature Key file in Step 5 and click on the
Upload button to upload the file.
Note: The AccXES Client Tools, Document Submit Tool can also be used
(Reference the AccXES Client Tools User Guide). Send the key file(s) the same as
you would send a print job. The Controller will recognize the file extension and load
the key(s).
7. After waiting 60 seconds, reboot your entire system to disable the feature key.
Wait for the system to complete the reboot and automatically print out the
FEATURE RECEIPT page.
8. IMPORTANT: Locate and write down the Key Uninstall Verification (KUV) on
the Feature Receipt for the feature that was uninstalled.
Note: If required, reference the XES Synergix 8825/8830/8850/8855/510dp/721p
Digital Solutions User Guide, Powering Off the Digital Solution or Colorgrafx X2
User Guide, for reboot instructions.
9. Click the “Proceed to re-enable your coupon” button”
10. Enter the Key Uninstall Verification (KUV) number from the Printer
Configuration Test Print and click the “Continue” button.
11. This will re-enable the Feature Coupon to be used again on another AccXES
System. (Refer to the next page of this document to move the Feature to
another AccXES System.)
701P39462 12/02 Page 15
Page 16

XES FEATURE KEY INSTRUCTIONS
Moving a Feature Key to another AccXES System (Software
Versions 8.0 or Greater)
To move a Feature from one AccXES System to another, perform the
following steps.
NOTE This procedure cannot be done on AccXES System software versions prior
to version 8.0.
1. On the AccXES System that is to have a Feature removed, perform the
“Uninstall a Feature Key” procedure to remove the Feature(s).
2. For each feature(s) that is to be uploaded on the new AccXES System, follow
the instructions in the section of this document entitled “Redeem a Coupon for
a Feature Key (With Internet Access and AccXES System Software Versions
8.0 or Greater)”. You will be using the re-enabled Coupon ID(s).
701P39462 12/02 Page 16
Page 17

XES FEATURE KEY INSTRUCTIONS
R
Enabling a Feature Key (Optional Features)
To enable a Feature perform the following steps.
Note: You must enter a password on the WebPMT Session Setup window to
enable the features.
1. Verify that the Optional License(s) is/are present.
a. Print a Printer Configuration Test Print (Minimal) (see Figure 5) or on the
WebPMT click PRINTER DEFAULTS > UTILITIES > Feature Configuration.
(See Figure 6.)
b. Verify that the feature is enabled:
TEST PRINT
• Color license is located under the SCANNER CONFIGURATION.
• Check in the OPTIONAL CONTROLLER FEATURES section.
“Present” should appear opposite the feature license that was
installed.
WebPMT
• Select PRINTER DEFAULTS > UTILITIES > CONFIGURATION >
Feature Configuration. “Present” should appear opposite the feature
license that was installed.
Optional Feature
Licenses
2. Enable the Features using the WebPMT.
• Accounting Feature: Click on ACCOUNTING. In the Accounting Mode
box, click “Enable”. For information on using Accounting, refer to the
AccXES Account Manager Tool Administrator User Guide.
• Copy Enable and Scan To Net Enable: Click PRINTER DEFAULTS >
PRINTER SETUP. “DDS enable” needs to be selected. If not, select it,
wait 1 minute, and reboot the entire system.
• Click on UTILITIES > CONFIGURATION >Feature Configuration. Look at
the “State” column to verify that the Feature is enabled.
COLO
LICENSE
Figure 5. Printer Configuration 9.0 Test
Print
701P39462 12/02 Page 17
Figure 6 . Feature Configuration Page
Listing 9.0 Feature Licenses
 Loading...