


Version 2.0
May 2009
®
Xerox
700 Digital Color Press
System Administration Guide

©
2009 Xerox Corporation. All rights reserved. Xerox, Xerox Canada Ltd, Xerox Limited, and the
sphere of connectivity design are trademarks of Xerox Corporation in the United States and/or
other countries.
Changes are periodically made to this document. Changes, technical inaccuracies, and
typographic errors will be corrected in subsequent editions.

Table of Contents
1. Product overview. . . . . . . . . . . . . . . . . . . . . . . . . . . . . . . . . . . . . . . . . . 1-1
Customer documentation updates . . . . . . . . . . . . . . . . . . . . . . . . . . . . . . . . . . . . . . . . . 1-1
Power on/off . . . . . . . . . . . . . . . . . . . . . . . . . . . . . . . . . . . . . . . . . . . . . . . . . . . . . . . . . . . . . . 1-1
Powering on . . . . . . . . . . . . . . . . . . . . . . . . . . . . . . . . . . . . . . . . . . . . . . . . . . . . . . . . . . 1-1
Powering off . . . . . . . . . . . . . . . . . . . . . . . . . . . . . . . . . . . . . . . . . . . . . . . . . . . . . . . . . . 1-2
Entering the System Administrator Mode . . . . . . . . . . . . . . . . . . . . . . . . . . . . . . . . . . . 1-3
Exiting the System Administrator Mode . . . . . . . . . . . . . . . . . . . . . . . . . . . . . . . . . . . . 1-3
Power Saver Mode . . . . . . . . . . . . . . . . . . . . . . . . . . . . . . . . . . . . . . . . . . . . . . . . . . . . . . . . .1-3
Low Power Mode . . . . . . . . . . . . . . . . . . . . . . . . . . . . . . . . . . . . . . . . . . . . . . . . . . . . . . 1-3
Sleep Mode . . . . . . . . . . . . . . . . . . . . . . . . . . . . . . . . . . . . . . . . . . . . . . . . . . . . . . . . . . . 1-3
Changing the Power Saver Mode time interval . . . . . . . . . . . . . . . . . . . . . . . . . . 1-4
Exiting the Energy Saver Mode . . . . . . . . . . . . . . . . . . . . . . . . . . . . . . . . . . . . . . . . . 1-5
2. System Settings. . . . . . . . . . . . . . . . . . . . . . . . . . . . . . . . . . . . . . . . . . . 2-1
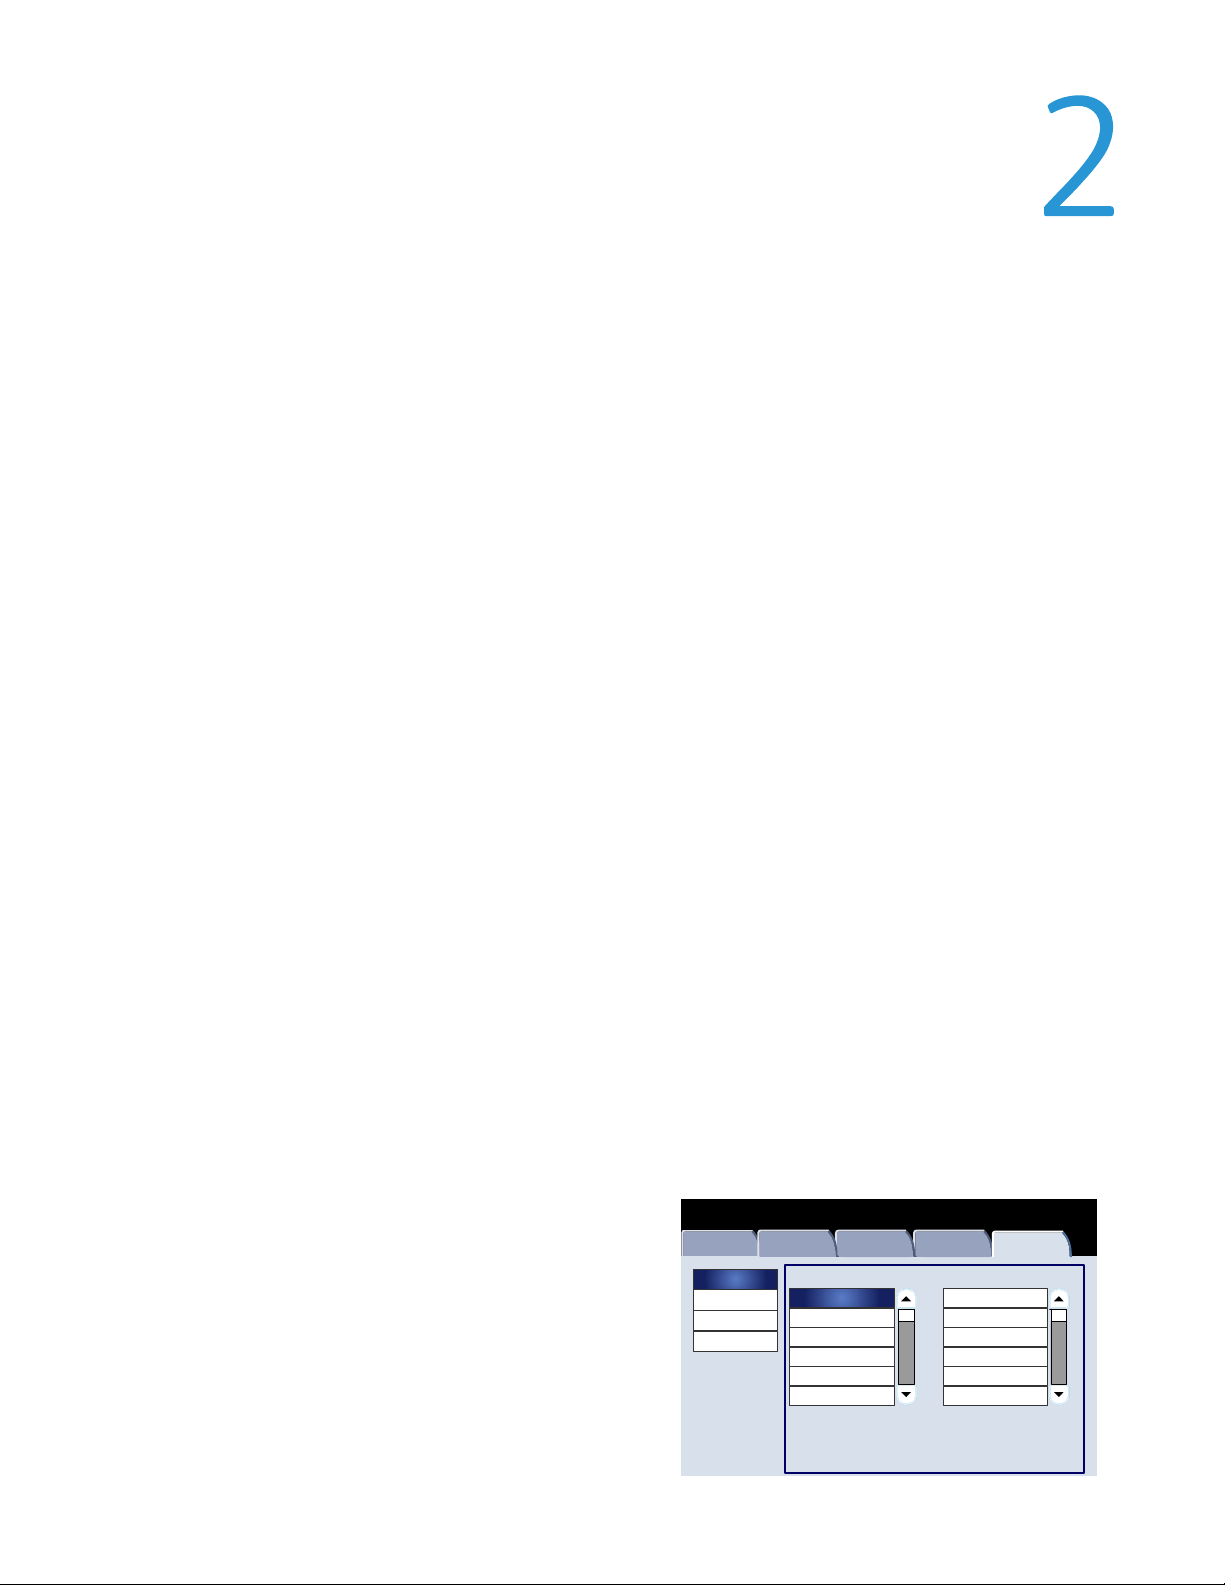
Accessing the System Administrator Menu. . . . . . . . . . . . . . . . . . . . . . . . . . . . . . . . . . 2-1
Overview . . . . . . . . . . . . . . . . . . . . . . . . . . . . . . . . . . . . . . . . . . . . . . . . . . . . . . . . . . . . . . . . . . 2-1
Common Service Settings . . . . . . . . . . . . . . . . . . . . . . . . . . . . . . . . . . . . . . . . . . . . . 2-1
Copy Service Settings . . . . . . . . . . . . . . . . . . . . . . . . . . . . . . . . . . . . . . . . . . . . . . . . . . 2-2
Scan Service Settings . . . . . . . . . . . . . . . . . . . . . . . . . . . . . . . . . . . . . . . . . . . . . . . . . . 2-2
Network Controller Settings . . . . . . . . . . . . . . . . . . . . . . . . . . . . . . . . . . . . . . . . . . . . 2-2
Common Service Settings . . . . . . . . . . . . . . . . . . . . . . . . . . . . . . . . . . . . . . . . . . . . . . . . . . 2-3
Machine Clock/Timers . . . . . . . . . . . . . . . . . . . . . . . . . . . . . . . . . . . . . . . . . . . . . . . . . 2-3
Audio Tones . . . . . . . . . . . . . . . . . . . . . . . . . . . . . . . . . . . . . . . . . . . . . . . . . . . . . . . . . . 2-5
Screen/Button Settings . . . . . . . . . . . . . . . . . . . . . . . . . . . . . . . . . . . . . . . . . . . . . . . . 2-8
Paper Tray Settings . . . . . . . . . . . . . . . . . . . . . . . . . . . . . . . . . . . . . . . . . . . . . . . . . . 2-10
Custom Paper Settings . . . . . . . . . . . . . . . . . . . . . . . . . . . . . . . . . . . . . . . . . . . 2-11
Adjust Paper Curl . . . . . . . . . . . . . . . . . . . . . . . . . . . . . . . . . . . . . . . . . . . . 2-12
Adjust Air Assist Values. . . . . . . . . . . . . . . . . . . . . . . . . . . . . . . . . . . . . . . 2-13
Paper Tray Attributes . . . . . . . . . . . . . . . . . . . . . . . . . . . . . . . . . . . . . . . . . . . . 2-15
Adjust Paper Curl . . . . . . . . . . . . . . . . . . . . . . . . . . . . . . . . . . . . . . . . . . . . 2-16
Adjust Air Assist Values. . . . . . . . . . . . . . . . . . . . . . . . . . . . . . . . . . . . . . . 2-17
Custom Paper Color Settings . . . . . . . . . . . . . . . . . . . . . . . . . . . . . . . . . . . . . 2-19
Paper Tray Attributes on Setup Screen . . . . . . . . . . . . . . . . . . . . . . . . . . . . 2-20
Paper Tray Attributes During Loading. . . . . . . . . . . . . . . . . . . . . . . . . . . . . 2-21
Paper Tray Priority . . . . . . . . . . . . . . . . . . . . . . . . . . . . . . . . . . . . . . . . . . . . . . . 2-22
Tray 5 (Bypass) - Paper Size Defaults . . . . . . . . . . . . . . . . . . . . . . . . . . . . . 2-23
Auto Tray Switching Control. . . . . . . . . . . . . . . . . . . . . . . . . . . . . . . . . . . . . . 2-24
Image Quality Adjustment . . . . . . . . . . . . . . . . . . . . . . . . . . . . . . . . . . . . . . . . . . . 2-26
Image Quality . . . . . . . . . . . . . . . . . . . . . . . . . . . . . . . . . . . . . . . . . . . . . . . . . . . 2-27
Calibration . . . . . . . . . . . . . . . . . . . . . . . . . . . . . . . . . . . . . . . . . . . . . . . . . . . . . . 2-29
Reports . . . . . . . . . . . . . . . . . . . . . . . . . . . . . . . . . . . . . . . . . . . . . . . . . . . . . . . . . . . . . . 2-30
Maintenance . . . . . . . . . . . . . . . . . . . . . . . . . . . . . . . . . . . . . . . . . . . . . . . . . . . . . . . . 2-32
Alignment Adjustment Settings . . . . . . . . . . . . . . . . . . . . . . . . . . . . . . . . . . 2-34
Alignment Adjustment . . . . . . . . . . . . . . . . . . . . . . . . . . . . . . . . . . . . . . . . . . . 2-35
Skew . . . . . . . . . . . . . . . . . . . . . . . . . . . . . . . . . . . . . . . . . . . . . . . . . . . . . . . . 2-37
System Administration Guide i

Table of Contents Xerox 700 Digital Color Press
Scale . . . . . . . . . . . . . . . . . . . . . . . . . . . . . . . . . . . . . . . . . . . . . . . . . . . . . . . . . 2-39
Print Positions of Side 1 and Side 2 . . . . . . . . . . . . . . . . . . . . . . . . . . . . 2-41
Adjust Paper Curl . . . . . . . . . . . . . . . . . . . . . . . . . . . . . . . . . . . . . . . . . . . . . . . . . 2-43
Finisher Adjustment/Adjust Fold Position . . . . . . . . . . . . . . . . . . . . . . . . . . 2-44
Single Fold Position Adjustment . . . . . . . . . . . . . . . . . . . . . . . . . . . . . . . 2-46
Booklet Position Adjustment . . . . . . . . . . . . . . . . . . . . . . . . . . . . . . . . . . 2-47
C Fold Position Adjustment . . . . . . . . . . . . . . . . . . . . . . . . . . . . . . . . . . . 2-48
Z Fold Position Adjustment. . . . . . . . . . . . . . . . . . . . . . . . . . . . . . . . . . . . 2-49
Z Fold Half Sheet Position Adjustment . . . . . . . . . . . . . . . . . . . . . . . . . 2-50
Watermark . . . . . . . . . . . . . . . . . . . . . . . . . . . . . . . . . . . . . . . . . . . . . . . . . . . . . . . . . . 2-51
Other Settings . . . . . . . . . . . . . . . . . . . . . . . . . . . . . . . . . . . . . . . . . . . . . . . . . . . . . . . 2-53
Copy Service Settings . . . . . . . . . . . . . . . . . . . . . . . . . . . . . . . . . . . . . . . . . . . . . . . . . . . . .2-54
Preset Buttons . . . . . . . . . . . . . . . . . . . . . . . . . . . . . . . . . . . . . . . . . . . . . . . . . . . . . . . 2-54
Copy Defaults . . . . . . . . . . . . . . . . . . . . . . . . . . . . . . . . . . . . . . . . . . . . . . . . . . . . . . . 2-55
Copy Control . . . . . . . . . . . . . . . . . . . . . . . . . . . . . . . . . . . . . . . . . . . . . . . . . . . . . . . . . 2-56
Original Size Defaults . . . . . . . . . . . . . . . . . . . . . . . . . . . . . . . . . . . . . . . . . . . . . . . . 2-59
Reduce/Enlarge Presets . . . . . . . . . . . . . . . . . . . . . . . . . . . . . . . . . . . . . . . . . . . . . . . 2-60
Custom Colors . . . . . . . . . . . . . . . . . . . . . . . . . . . . . . . . . . . . . . . . . . . . . . . . . . . . . . . 2-61
Scan Service Settings . . . . . . . . . . . . . . . . . . . . . . . . . . . . . . . . . . . . . . . . . . . . . . . . . . . . .2-62
Original Size Defaults . . . . . . . . . . . . . . . . . . . . . . . . . . . . . . . . . . . . . . . . . . . . . . . . 2-62
Output Size Defaults . . . . . . . . . . . . . . . . . . . . . . . . . . . . . . . . . . . . . . . . . . . . . . . . . 2-63
Reduce/Enlarge Presets . . . . . . . . . . . . . . . . . . . . . . . . . . . . . . . . . . . . . . . . . . . . . . . 2-64
Other Settings . . . . . . . . . . . . . . . . . . . . . . . . . . . . . . . . . . . . . . . . . . . . . . . . . . . . . . . 2-65
Creating Job Templates . . . . . . . . . . . . . . . . . . . . . . . . . . . . . . . . . . . . . . . . . . . . . . 2-67
Network Controller Settings . . . . . . . . . . . . . . . . . . . . . . . . . . . . . . . . . . . . . . . . . . . . . . .2-68
3. Setup and Calibration . . . . . . . . . . . . . . . . . . . . . . . . . . . . . . . . . . . . . .3-1
Setup . . . . . . . . . . . . . . . . . . . . . . . . . . . . . . . . . . . . . . . . . . . . . . . . . . . . . . . . . . . . . . . . . . . . . 3-1
Stored Programming . . . . . . . . . . . . . . . . . . . . . . . . . . . . . . . . . . . . . . . . . . . . . . . . . . 3-2
Create Jobe Flow Sheet . . . . . . . . . . . . . . . . . . . . . . . . . . . . . . . . . . . . . . . . . . . . . . . 3-3
Create Job Flow Sheet Keyboard . . . . . . . . . . . . . . . . . . . . . . . . . . . . . . . . . . . . . . . 3-4
Paper Tray Attributes . . . . . . . . . . . . . . . . . . . . . . . . . . . . . . . . . . . . . . . . . . . . . . . . . . 3-5
Calibration . . . . . . . . . . . . . . . . . . . . . . . . . . . . . . . . . . . . . . . . . . . . . . . . . . . . . . . . . . . . . . . . 3-6
4. Authentication and Accounting . . . . . . . . . . . . . . . . . . . . . . . . . . . . .4-1
Overview . . . . . . . . . . . . . . . . . . . . . . . . . . . . . . . . . . . . . . . . . . . . . . . . . . . . . . . . . . . . . . . . . . 4-1
Accounting. . . . . . . . . . . . . . . . . . . . . . . . . . . . . . . . . . . . . . . . . . . . . . . . . . . . . . . . . . . . . . . . 4-2
Overview . . . . . . . . . . . . . . . . . . . . . . . . . . . . . . . . . . . . . . . . . . . . . . . . . . . . . . . . . . . . . 4-2
Creating/Viewing User Accounts . . . . . . . . . . . . . . . . . . . . . . . . . . . . . . . . . . . . . . . 4-3
Create/View User Accounts . . . . . . . . . . . . . . . . . . . . . . . . . . . . . . . . . . . . . . . . 4-3
Reset User Accounts . . . . . . . . . . . . . . . . . . . . . . . . . . . . . . . . . . . . . . . . . . . . . . . 4-5
System Administrator Meter (Copy Jobs) . . . . . . . . . . . . . . . . . . . . . . . . . . . 4-6
Accounting Type . . . . . . . . . . . . . . . . . . . . . . . . . . . . . . . . . . . . . . . . . . . . . . . . . . 4-7
Auto Reset of User Billing Information. . . . . . . . . . . . . . . . . . . . . . . . . . . . . . 4-8
Copy Activity Report . . . . . . . . . . . . . . . . . . . . . . . . . . . . . . . . . . . . . . . . . . . . . . . 4-9
Authentication/Security Settings . . . . . . . . . . . . . . . . . . . . . . . . . . . . . . . . . . . . . . . . . .4-10
System Administrator Settings . . . . . . . . . . . . . . . . . . . . . . . . . . . . . . . . . . . . . . . . 4-11
System Adminstrator Login ID . . . . . . . . . . . . . . . . . . . . . . . . . . . . . . . . . . . . 4-11
System Adminstrator Passcode. . . . . . . . . . . . . . . . . . . . . . . . . . . . . . . . . . . . 4-12
Types of Authentication . . . . . . . . . . . . . . . . . . . . . . . . . . . . . . . . . . . . . . . . . . . . . . 4-13
Authentication Controlled Users . . . . . . . . . . . . . . . . . . . . . . . . . . . . . . . . . . . . . . 4-14
Authentication . . . . . . . . . . . . . . . . . . . . . . . . . . . . . . . . . . . . . . . . . . . . . . . . . . . . . . . 4-15
ii System Administration Guide

Xerox 700 Digital Color Press Table of Contents
Login Type . . . . . . . . . . . . . . . . . . . . . . . . . . . . . . . . . . . . . . . . . . . . . . . . . . . . . . 4-15
Access Control . . . . . . . . . . . . . . . . . . . . . . . . . . . . . . . . . . . . . . . . . . . . . . . . . . . 4-16
Create/View User Accounts . . . . . . . . . . . . . . . . . . . . . . . . . . . . . . . . . . . . . . 4-18
Reset User Accounts . . . . . . . . . . . . . . . . . . . . . . . . . . . . . . . . . . . . . . . . . . . . . 4-19
Create Authentication Groups . . . . . . . . . . . . . . . . . . . . . . . . . . . . . . . . . . . . 4-20
User Details Setup . . . . . . . . . . . . . . . . . . . . . . . . . . . . . . . . . . . . . . . . . . . . . . . 4-21
Maximum Login Attempts . . . . . . . . . . . . . . . . . . . . . . . . . . . . . . . . . . . . . . . 4-22
Passcode Policy . . . . . . . . . . . . . . . . . . . . . . . . . . . . . . . . . . . . . . . . . . . . . . . . . . 4-23
Allow User to Disable Active Settings . . . . . . . . . . . . . . . . . . . . . . . . . . . . . . . . . . 4-24
Job Status Default . . . . . . . . . . . . . . . . . . . . . . . . . . . . . . . . . . . . . . . . . . . . . . . . . . . 4-25
Active Jobs View . . . . . . . . . . . . . . . . . . . . . . . . . . . . . . . . . . . . . . . . . . . . . . . . . 4-25
Completed Jobs View . . . . . . . . . . . . . . . . . . . . . . . . . . . . . . . . . . . . . . . . . . . . 4-26
Overwrite Hard Disk . . . . . . . . . . . . . . . . . . . . . . . . . . . . . . . . . . . . . . . . . . . . . . . . . . 4-27
Number of Overwrites. . . . . . . . . . . . . . . . . . . . . . . . . . . . . . . . . . . . . . . . . . . . 4-27
Schedule Image Overwrite . . . . . . . . . . . . . . . . . . . . . . . . . . . . . . . . . . . . . . . 4-28
System Administration Guide iii

Table of Contents Xerox 700 Digital Color Press
iv System Administration Guide

Product Overview
Note
The User Interface (UI) screens shown in this guide may or may not reflect the screens displayed on your system. The
UI screens vary from system to system and from marketplace to marketplace. Therefore, the UI screens in this guide
are a representation of the type of screens that may be seen on your particular system.
Customer documentation updates
You can get the latest customer documentation updates for your product by going to www.xerox.com. Be sure to
periodically check this website for the latest information for your product.
Power on/off
Switch the power on before operating the machine. The machine will take about 5 minutes to warm up before you can
start making copies after the power is switched on.
Turn the machine off at the end of the day or when it is not in use for a long period of time. Use the Power Saving
feature when the machine is not in use for a while to reduce power consumption.
Note
If the power is off, all functions of the machine will stop.
Powering on
Open the cover and press the power switch to the [|] position to turn the power on.
Note
The “Please wait...” message indicates that the machine is warming up. The machine cannot be used while it is warming
up.
System Administration Guide 1-1

Product Overview Xerox 700 Digital Color Press
Powering off
Note
Switching the machine power off may cause loss of data being processed.
1. Before turning the power off, make sure that all copy or print jobs have completely finished. Also, make sure that
the Online indicator is not lit.
Note
Never turn the power off in the following instances:
While data is being received
While data is being sent (FTP/SMB/e-mail)
While jobs are being printed.
While jobs are being copied
While a scan is being executed
While data is being imported from computer
2. Press the power switch to turn your machine off.
Tip
Power off processing is performed internally on the machine for a while after the power switch is turned off. Therefore,
do not unplug the power cord from the power outlet immediately after turning the power switch off.
Note
Before you turn the power back on after turning it off, first make sure that the display has gone out.
1-2
System Administration Guide

Entering the System Administrator Mode
g
1.
Press the Log In/Out button on the control panel.
2.
Use the numeric keypad to enter the System Administrator ID, then touch Enter.
Note
The default ID is 11111.
3.
Press the Machine Status button on the control panel.
4.
Touch the Tools tab.
5. Select the appropriate Mode, Group, and Feature.
Product OverviewXerox 700 Digital Color Press
Exitin
1.
Press the Log In/Out button on the control panel.
2.
When the Logout screen appears, touch Logout.
the System Administrator Mode
Power Saver Mode
The machine is installed with a Power Saver feature that will automatically cut off the electricity to the machine if no
copy or print data is received for a certain duration.
The Power Saver feature has two modes, a Low Power mode and Sleep mode. The machine enters the Low Power mode
after the preset time has elapsed if the machine is left unused for a fixed period of time.
The machine then enters the Sleep mode if a further preset time elapses.
Low Power Mode
In this mode, the power to the UI and fuser unit is lowered to save power. The display goes out, and the Power Saver
button on the Control Panel lights. To use the machine, press the Power Saver button. The Power Saver button goes out
to indicate that the Power Saver feature is canceled.
Sleep Mode
In this mode, the power is lowered more than in the Low Power mode. The display goes out, and the Power Saver
button on the Control Panel lights. To use the machine, press the Power Saver button. The Power Saver button goes out
to indicate that the Power Saver feature is canceled.
System Administration Guide 1-3

Product Overview
Xerox 700 Digital Color Press
Changing the Power Saver Mode time interval
To activate the Power Saver feature, set the Sleep Mode button to Enabled, and set the Low Power Mode and the Sleep
Mode time intervals as follows:
Note
The amount of time that passes before the machine enters Low Power Mode and Sleep Mode can be specified in 1
minute increments, from 1 to 240 minutes for each mode.
1. Enter the System Administrator Mode.
2.
Press the Machine Status button on the control panel.
3.
Touch the Tools tab.
4.
Touch System Settings, then touch Common Service Settings.
5.
Touch Machine Clock / Timers.
6.
Touch Power Saver/Energy Saver Timers, then touch Change Settings.
7. Using the up/down arrow buttons, configure a power saver mode migration time from 1 to 240 minutes, in 1
minute increments.
a.
From Last Operation to Low Power Mode: Set the time to move to the Low Power Mode after the last
operation.
Note
The default for From Last Operation to Low Power Mode is 15 minutes.
b.
From Last Operation to Sleep Mode: Set the time to move to the Sleep Mode after the last operation.
Note
The default for From Last Operation to Sleep Mode is 60 minutes. Configure the From Last Operation to
Sleep Mode time to be longer than the From Last Operation to Low Power Mode time.
8.
Touch Save.
9.
Touch Close.
10. Exit the System Administrator Mode.
1-4
System Administration Guide

you to make copies and
mails, faxes, and storing
documents in electronic
Exiting the Energy Saver Mode
The Energy Saver mode is exited in the following instances:
By pressing the Energy Saver button
Receiving Print Data
Press the Energy Saver button.
Xerox 700 Digital Color Press
Copy
Network
Scanning
Applications
This product will allow
perform a number of
other operations which
may include sending E-
forms, depending on
what Services it is
equipped with.
Press any button to
select a service.
Web
Product OverviewXerox 700 Digital Color Press
System Administration Guide 1-5

Product Overview Xerox 700 Digital Color Press
1-6
System Administration Guide
System Settings
The System Administrator Tools enable system administrators to set-up, customize, and maintain the machine. Some
of the settings in these options are critical to the operation of the machine. The tools are password protected so that
they cannot be accidentally changed or corrupted.
Note
The User Interface (UI) screens shown in this guide may or may not reflect the screens displayed on your copier/printer.
The UI screens vary from system to system and from marketplace to marketplace. Therefore, the screens provided in
this guide are a representation of the type of screens that may be seen on your particular system.
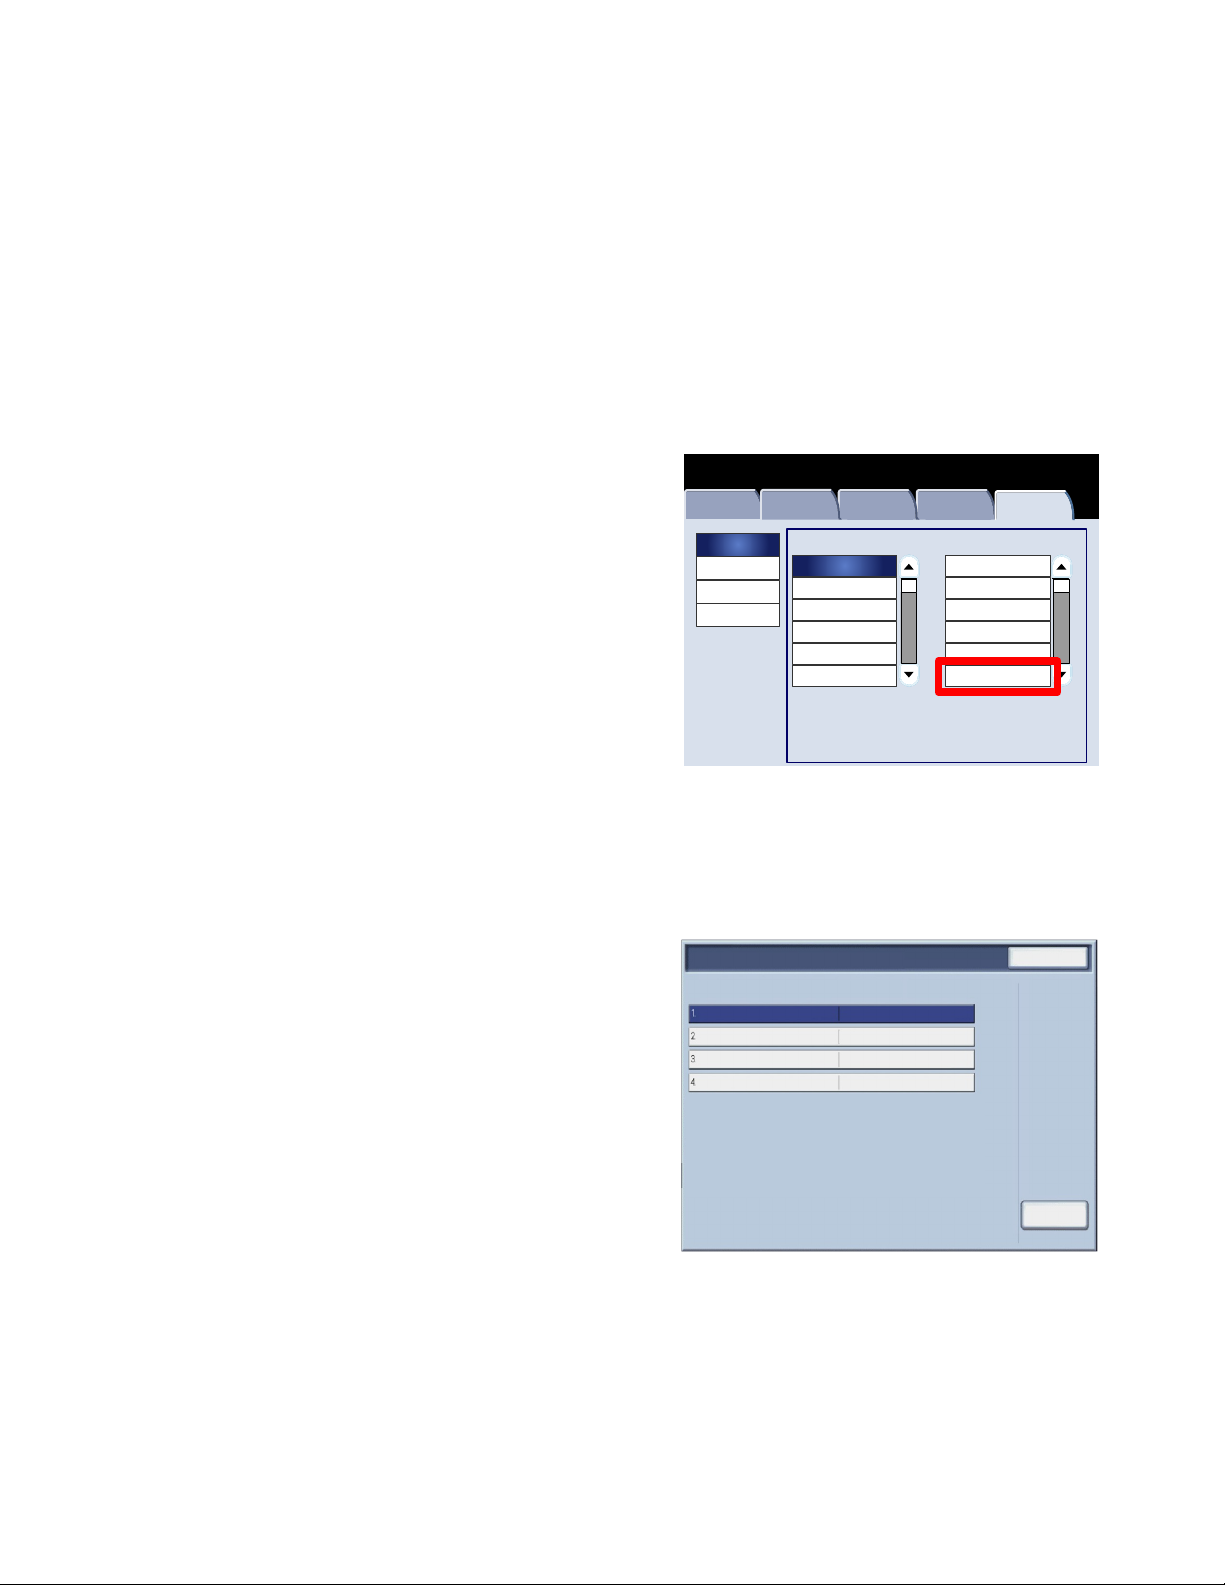
Accessing the System Administrator Menu
1.
Select the Machine Status button.
2.
Enter the System Administrator's Login ID in the field provided.
3.
Touch Enter on the touch screen.
4.
Press the Machine Status button on the control panel.
5.
Touch the Tools tab.
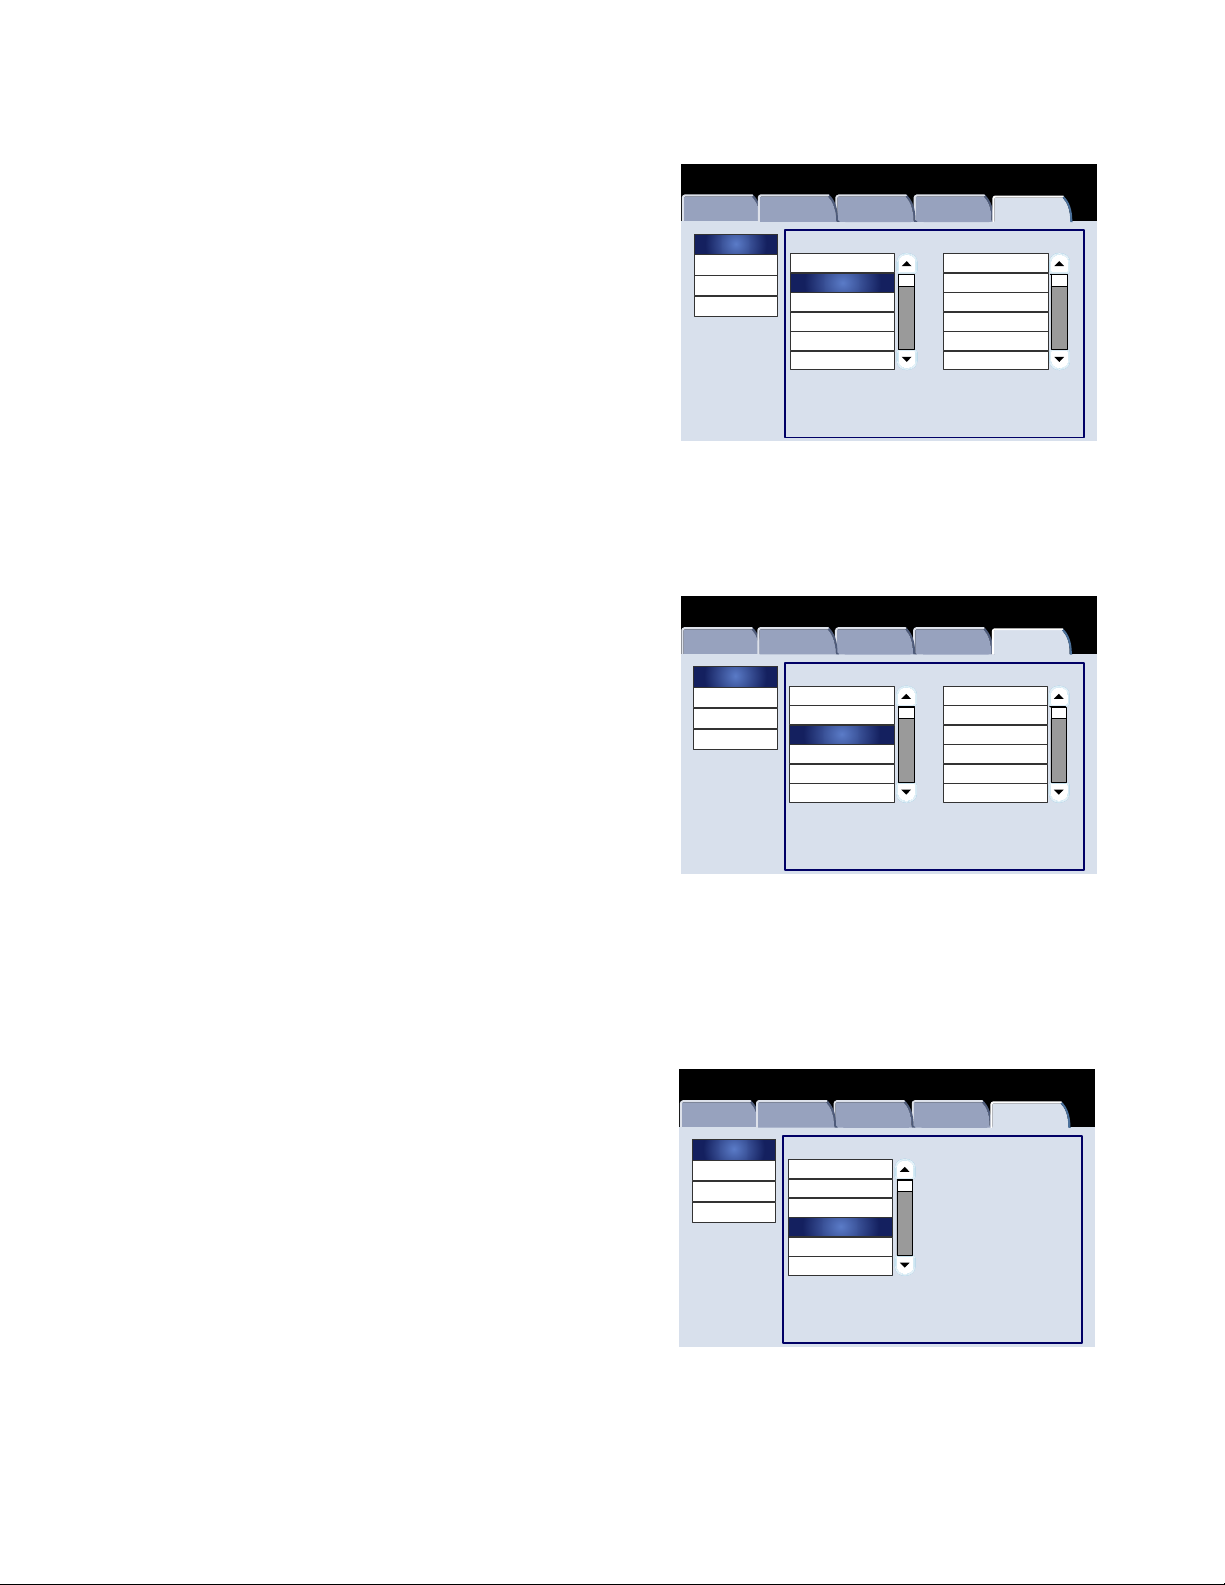
Overview
Common Service Settings
These settings relate to the machine itself.
Machine Stat us
Machine
Information
System Settings
Setup and Calibration
Accounting
Authentication/Security
Settings
Faults Supplies Billing Information
Group
Common Servi ce Settings
Copy Servi ce Settings
Scan Service Settings
Network Controller Settings
Features
Machine Clock/Timers
Audio Tones
Screen/Button Settings
Paper Tra y Settings
Image Quality Adjustments
Reports
Tools
System Administration Guide 2-1
System Settings Xerox 700 Digital Color Press
Copy Service Settings
You can set the copy feature defaults, copy operation control,
button functions, and so on.
Scan Service Settings
You can set the scanner feature defaults, button functions, and
other items.
Machine Stat us
Machine
Information
System Settings
Setup and Calibration
Accounting
Authentication/Security
Settings
Machine Stat us
Machine
Information
System Settings
Setup and Calibration
Accounting
Authentication/Security
Settings
Faults Supplies Billing Informatio n
Group
Common Servi ce Settings
Copy Servi ce Settings
Scan Service Settings
Network Controller Settings
Faults Supplies Billing Information
Group
Common Servi ce Settings
Copy Servi ce Settings
Scan Service Settings
Network Controller Settings
Features
Preset Buttons
Copy Default s
Copy Control
Original Size Defaults
Reduce/Enlarg e Pres ets
Custom Colo rs
Features
Original Size Defaults
Output Size De faults
Reduce/Enlarg e Pres ets
Other Sett ings
Tools
Tools
Network Controller Settings
You can set the ports, protocols, etc.
2-2
Machine Stat us
Machine
Information
System Settings
Setup and Calibration
Accounting
Authentication/Security
Settings
Faults Supplies Billing Information
Group
Common Servi ce Settings
Copy Servi ce Settings
Scan Service Settings
Network Controller Settings
System Administration Guide
Tools

System SettingsXerox 700 Digital Color Press
Items
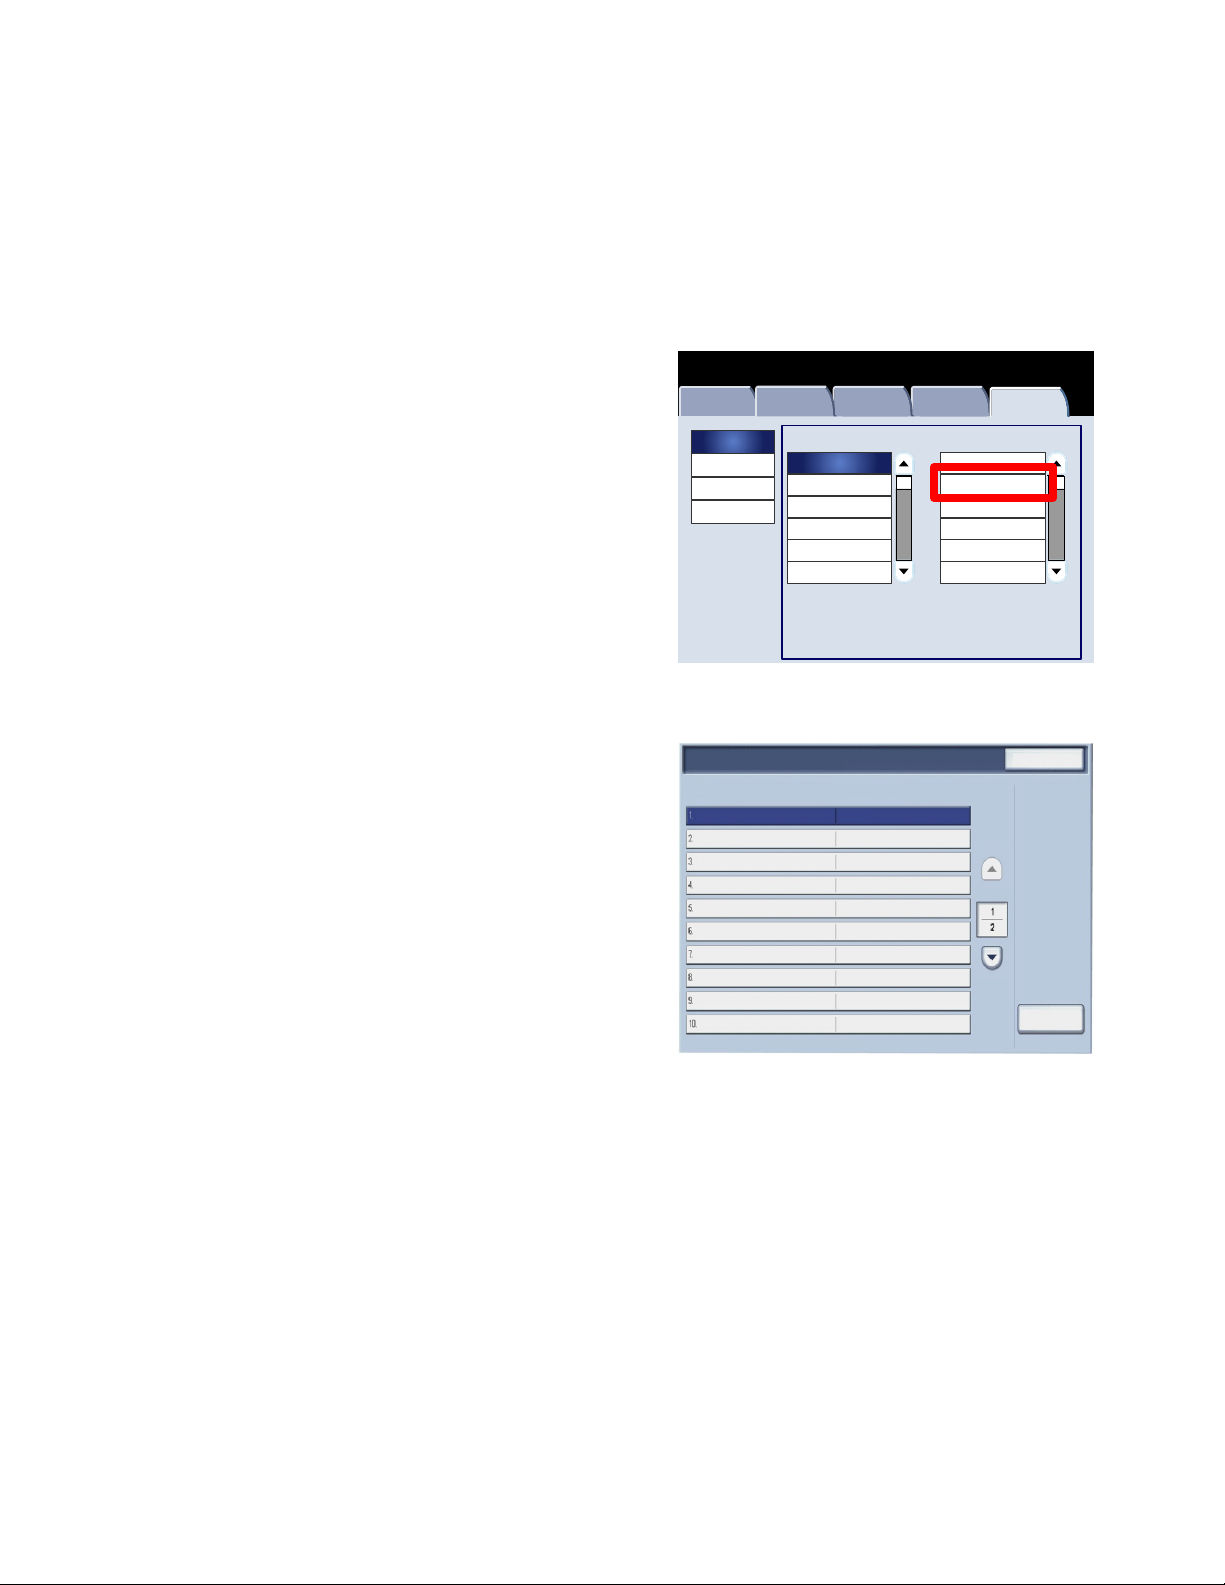
Common Service Settings
Machine Clock/Timers
You can use the Machine Clock / Timers screen to set the clock time, or the timer interval until power saving or reset
features take effect.
Access the screen as follows:
1. Enter the System Administration mode.
2.
Touch the Tools tab.
3.
Touch System Settings.
4.
Touch Common Service settings.
Touch Machine Clock / Timers.
5.
Machine Status
Machine
Information
System Settings
Setup and Calibration
Accounting
Authentication/Security
Settings
Faults Supplies Billing
Group
Common Service Setti ngs
Copy Service Se ttings
Scan Service Settings
Network Controll er Settings
Information
Tools
Features
Machine Clock/Timers
Audio Tones
Screen/Button Settings
Paper Tray Settings
Image Quality Adjustments
Reports
6.
Select the item to be set or changed.
7.
Touch Change Settings.
8.
Follow the screen instructions to change the settings.
Touch Save.
9.
10.
Touch Close.
11.
Exit the System Administration Mode.
Machine Clock/Timers
Time
Auto Clear
Auto Job Release
Printer Lockout Duration
Power Saver
Time Zone
Daylight Savings
Close
Date
Current Settings
2006/5/2
12:00:00
Change Settings
System Administration Guide 2-3

System Settings Xerox 700 Digital Color Press
A brief description of each of the available settings follows:
Date
Sets the date in the in the system clock of the machine. The date set here is printed on lists and reports.
Time
Sets the time in the system clock of the machine, using 12-hour or 24-hour representation. The time set here is
printed on lists and reports.
Auto Clear
If the specified time period elapses with no operation, the machine automatically returns to the initial screen.
Auto Job Release
If an error occurs during a copy or scan job, this setting specifies the time that elapses until the current job is
automatically cleared.
Printer Lockout Duration
Sets the time from the start to the end of printer lockout. If you select Off, no printer lockout occurs.
Power Saver/Energy Saver Timers
Allows the amount of time specified to elapse before the machine enters Low Power Mode or Sleep Mode.
Time Zone
Sets the time difference from Greenwich Mean Time (GMT).
Daylight Savings
With this feature enabled, the machine automatically adjusts the current time when the summer time starts and
ends.
2-4
System Administration Guide
System SettingsXerox 700 Digital Color Press
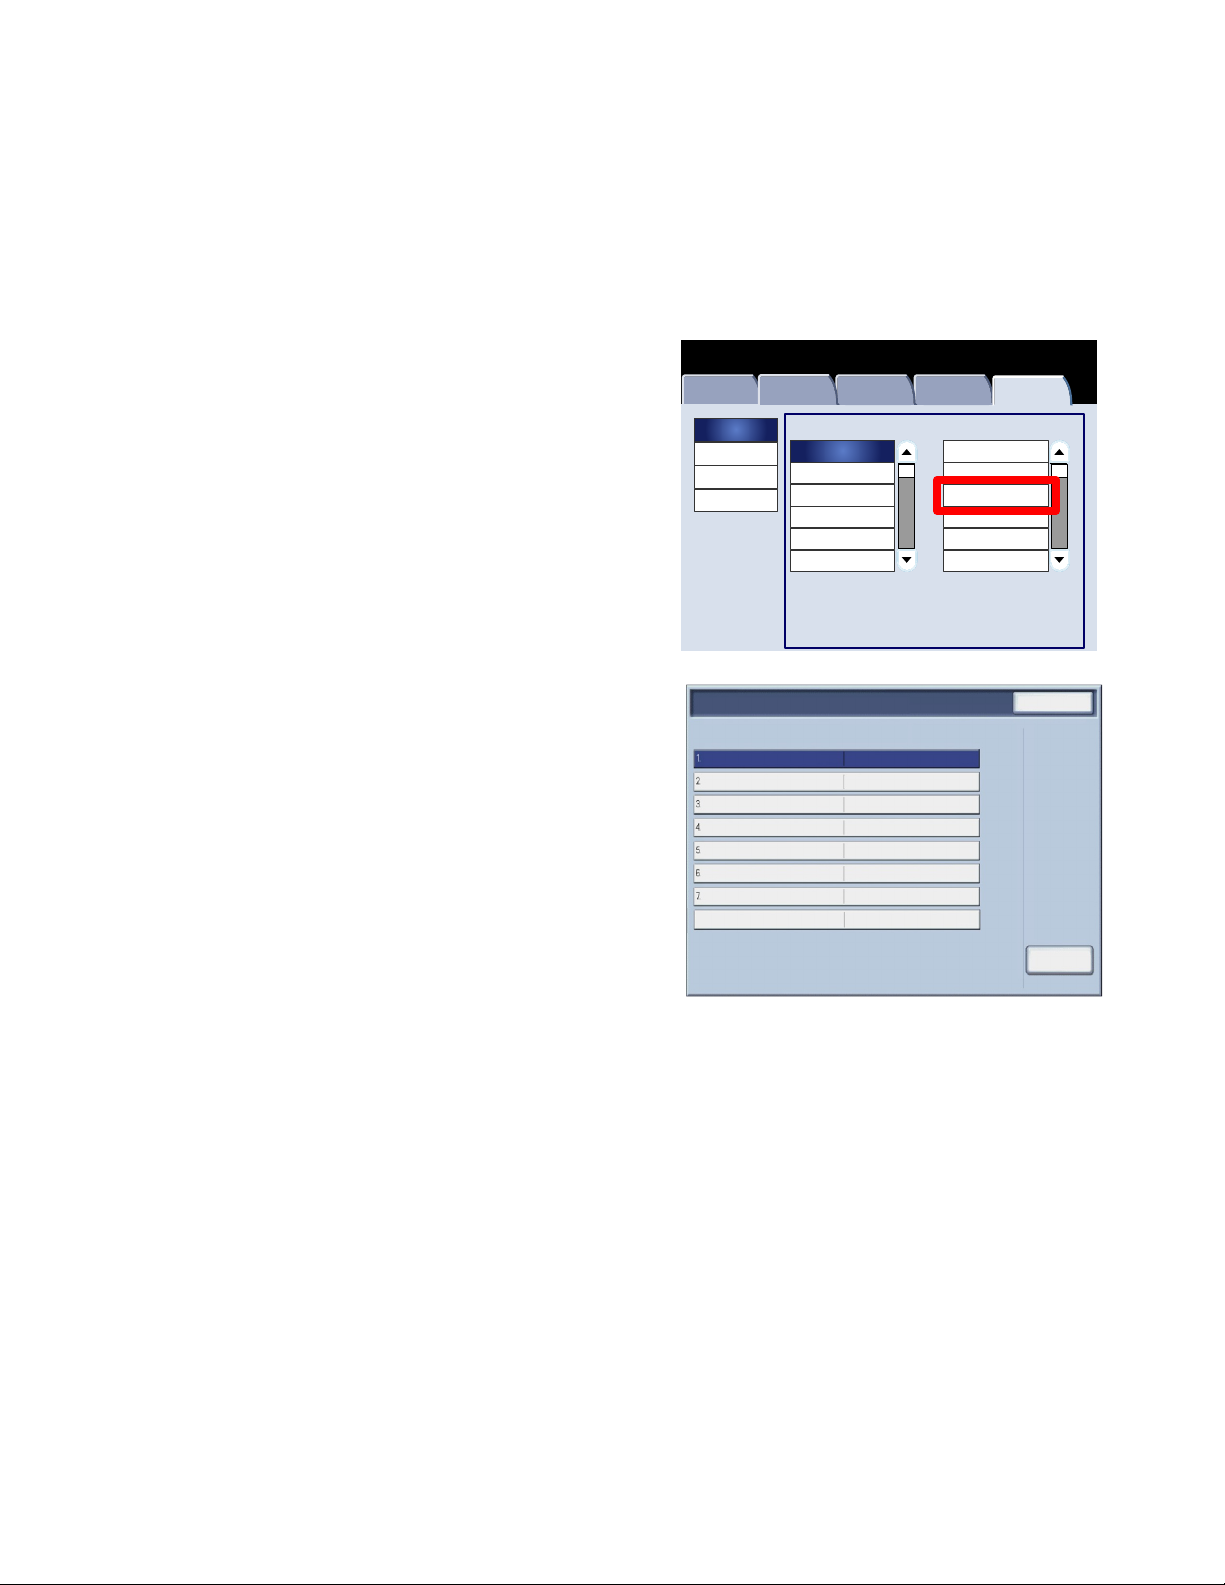
Items
Audio Tones
The Audio Tones screen allows you to select whether or not to sound an alarm, for example when a job ends or there is
a fault.
Access the screen as follows:
1. Enter the System Administration mode.
2.
Touch the Tools tab.
3.
Touch System Settings.
4.
Touch Common Service settings.
Touch Audio Tones.
5.
6.
Select the item to be set or changed.
7.
Touch Change Settings.
8.
Follow the screen instructions to change the settings.
Touch Save.
9.
Machine Status
Machine
Information
System Settings
Setup and Calibration
Accounting
Authentication/Security
Settings
Audio Tones
Control Panel Alert Tone
Base Tone
Machine Ready Tone
Copy Job Complete Tone 1
Copy Job Complete Tone 2
Fault Tone
Auto Clear Alert Tone
Alert Tone
Control Panel Select Tone
Faults Supplies Billing
Group
Common Service Setti ngs
Copy Service Se ttings
Scan Service Settings
Network Controll er Settings
Current Settings
Control Panel Select Tone
Off
Off
Off
Off
Off
Off
Off
Off
Off
Off
Information
Features
Machine Clock/Timers
Audio Tones
Screen/Button Settings
Paper Tray Settings
Image Quality Adjustments
Reports
Tools
Close
Change Settings
10.
Touch Close.
11.
Exit the System Administration Mode.
System Administration Guide 2-5

System Settings Xerox 700 Digital Color Press
A brief description of each of the available settings follows:
Control Panel Select Tone
Select the volume level that sounds when a button displayed on the screen is correctly selected. Select from Loud,
Normal, and Soft. To disable the sound, select Off.
Control Panel Alert Tone
Select the volume level that sounds when a non-functioning (or grayed-out) button is selected or when an error
occurs. Select from Loud, Normal, and Soft. To disable the sound, select Off.
Base Tone
For a button that toggles (the setting changes each time it is pressed), select the volume level that sounds when
the button is in its initial (first) position. This is the sound made when the Interrupt button is released. Select from
Loud, Normal, and Soft. To disable the sound, select Off.
Machine Ready Tone
Set the volume level that sounds when the machine is ready to copy or print or after the machine powers on. Select
from Loud, Normal, and Soft. To disable the sound, select Off.
Copy Job Complete Tone 1
Select the volume level that sounds when the machine successfully completes the copy cycle. Select from Loud,
Normal, and Soft. To disable the sound, select Off.
Copy Job Complete Tone 2
Select the volume level that sounds when the machine successfully completes the copy cycle. Select from Loud,
Normal, and Soft. To disable the sound, select Off.
2-6
System Administration Guide

System SettingsXerox 700 Digital Color Press
Non-Copy Job Complete Tone
Select the volume level that sounds when the machine completes a job other than a copy job. Select from Loud,
Normal, and Soft. To disable the sound, select Off.
Fault Tone
Select the volume level that sounds when there is an error termination. Select from Loud, Normal, and Soft. To
disable the sound, select Off.
Auto Clear Alert Tone
Select the volume level that sounds when the automatic clear feature is enabled. Select from Loud, Normal, and
Soft. To disable the sound, select Off.
Stored Programming Tone
Select the volume level that sounds when the Stored Programming feature is enabled. Select from Loud, Normal,
and Soft. To disable the sound, select Off.
Alert Tone
Select the volume level that sounds when a fault, such as a paper jam occurs, and the fault is left unattended.
Select from Loud, Normal, and Soft. To disable the sound, select Off.
Out of Paper Warning Tone
Select the volume level that sounds when there is no paper in the paper tray and the job is left unattended. Select
from Loud, Normal, and Soft. To disable the sound, select Off.
Low Toner Alert Tone
Select the volume level that sounds when it is time to replace the drum toner cartridge. Select from Loud, Normal,
and Low. To disable the sound, select Off.
System Administration Guide 2-7
System Settings Xerox 700 Digital Color Press
Screen/Button Se t t ings
Screen/Button Settings
The Screen / Button Settings screen allows you to set the initial screen display when the power is turned on.
Follow the screen instructions to change the settings.
1. Enter the System Administration mode.
2.
Touch the Tools tab.
3.
Touch System Settings.
4.
Touch Common Service settings.
Touch Screen / Button Settings.
5.
6.
Select the item to be set or changed.
7.
Touch Change Settings.
8.
Follow the screen instructions to change the settings.
Machine Status
Machine
Information
System Settings
Setup and Calibration
Accounting
Authentication/Security
Settings
Service Screen After Auto Clear
Auto Display of Login Screen
All Services
All Services Screen Defau l t
Job Type on Job Status Screen
Default Language
8
Faults Supplies Billing
Group
Common Service Setti ngs
Copy Service Se ttings
Scan Service Settings
Network Controll er Settings
Items
Screen Defaults
Service Screen Default Copy
Current Settings
All Services
Copy
Off
-
All Services
All Jobs
English
Information
Features
Machine Clock/Timers
Audio Tones
Screen/Button Settings
Paper Tray Settings
Image Quality Adjustments
Reports
Tools
Close
Create/Delete
Touch Save.
9.
10.
Touch Close.
11.
Exit the System Administration Mode.
2-8
System Administration Guide

System SettingsXerox 700 Digital Color Press
A brief description of each of the available settings follows:
Screen Defaults
Allows you to assign the screen default when the machine powers on (Services, Job Status, or Machine Status).
Service Screen Default
Allows you to assign the Service Screen default (Copy/Network Scanning/All Services/etc.).
Service Screen After Auto Clear
Allows you to assign the Service Screen after auto clear (choose between the last selection screen or the All Services
screen).
Auto Display of Login Screen
Allows you to display the login screen automatically.
All Services
From this screen, you can select the specific buttons and their layout as they will appear on the All Services screen
when the All Services button on the control panel is pressed.
All Services - Screen Default
From this screen, you can select whether or not the All Services Screen displays a functional description of the
button selected.
Job Type on Job Status screen
Allows you to select the job types that you want displayed on the Completed Jobs tab of the Job Status screen
when the Job Status button on the control panel is pressed.
Default Language
Allows you to specify the default language that appears on the User Interface.
System Administration Guide 2-9
System Settings Xerox 700 Digital Color Press
Attributes on Setup
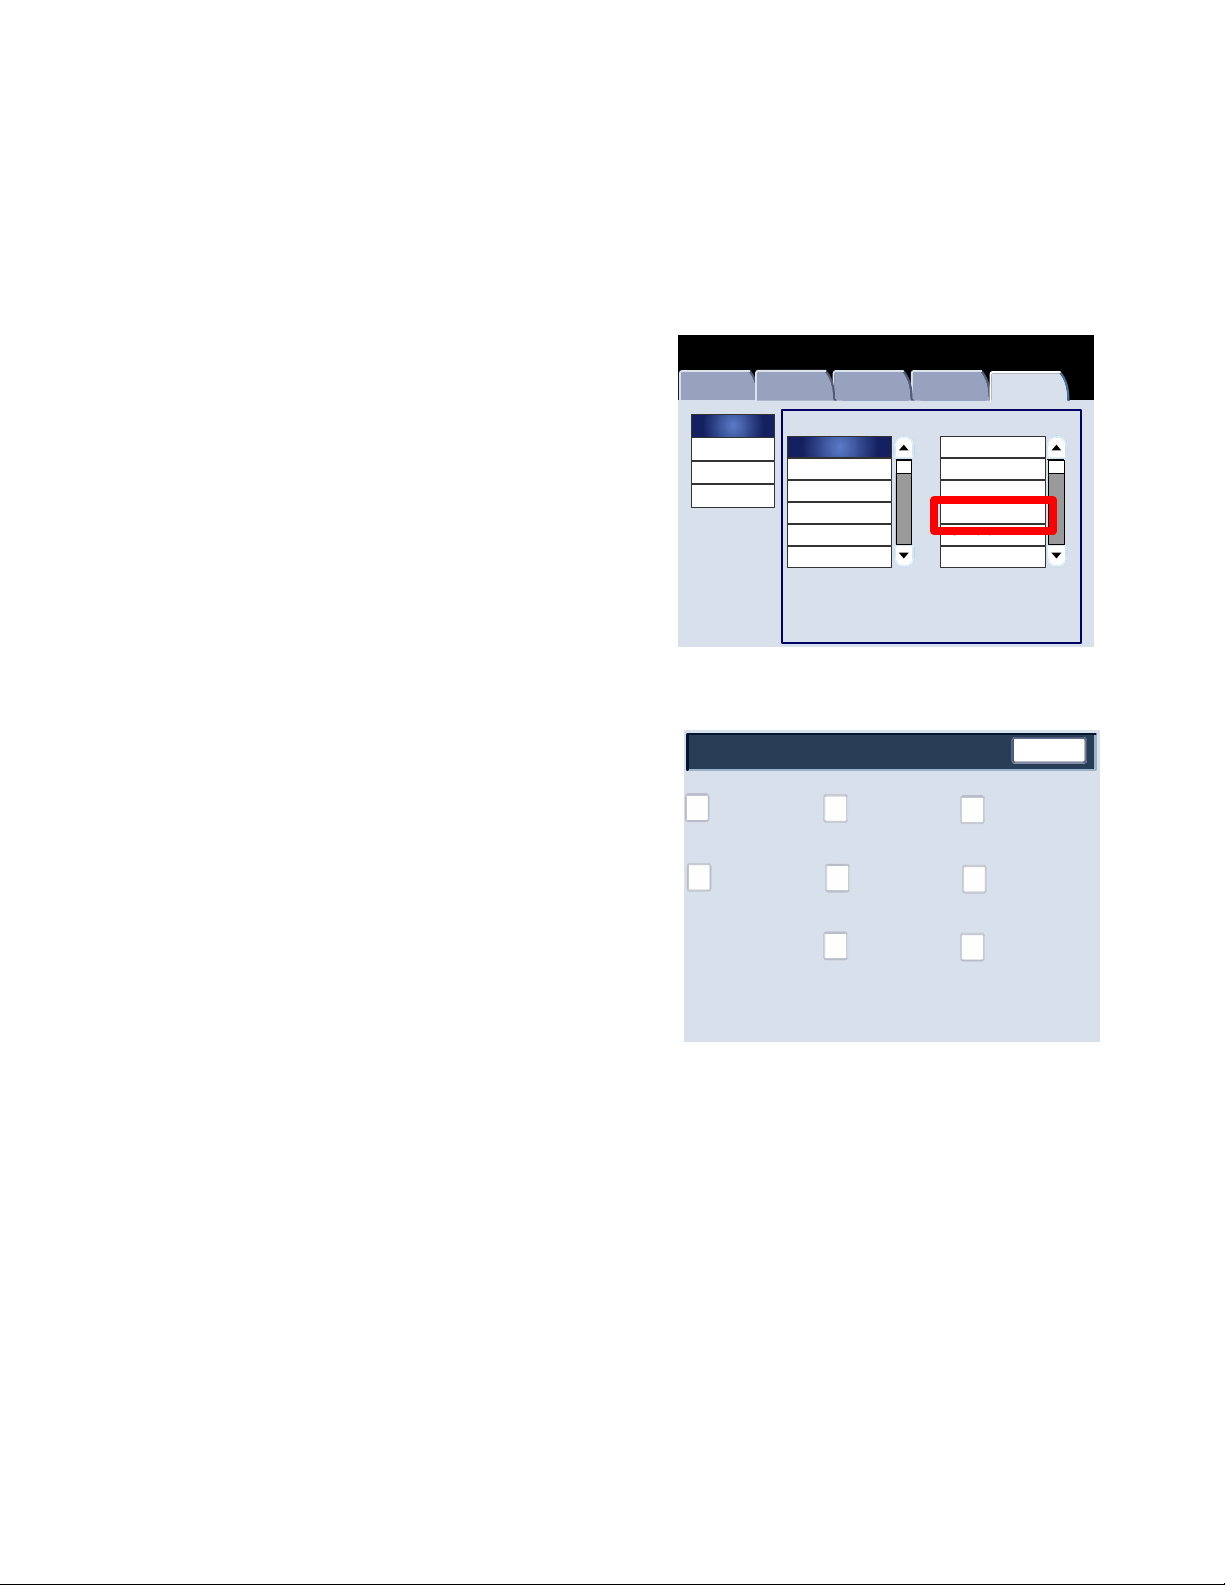
Paper Tray Settings
The Paper Tray Settings screen allows you to set the items relating to the paper and trays, including the types of paper
loaded in each tray, the priority order of the trays, the priority order of the paper types, custom paper information, etc.
Follow the screen instructions to change the settings.
1. Enter the System Administration mode.
2.
Touch the Tools tab.
3.
Touch System Settings.
4.
Touch Common Service settings.
Touch Paper Tray Settings.
5.
6.
Select the item to be set or changed.
7.
Touch Change Settings.
Machine Status
Machine
Information
System Settings
Setup and Calibration
Accounting
Authentication/Security
Settings
Faults Supplies Billing
Paper Tray Settings
Custom Paper
Settings
Paper Tray
Group
Common Service Setti ngs
Copy Service Se ttings
Scan Service Settings
Network Controll er Settings
Information
Paper Tray
Attributes
Paper Tray
Attributes During
Loading
Features
Machine Clock/Timers
Audio Tones
Screen/Button Settings
Paper Tray Settings
Image Quality Adjustments
Reports
Custom Paper
Color Settings
Paper Tray Priority
Tools
Close
8.
Follow the screen instructions to change the settings.
Touch Save.
9.
10.
Touch Close.
11.
Exit the System Administration Mode.
2-10
Tray 5 (Bypass) Paper Size
Auto Tray
Switching Control
System Administration Guide

System SettingsXerox 700 Digital Color Press
Paper Tray Settings
Custom Paper Settings
You can set a custom name for paper loaded in the machine. A maximum of twelve characters can be entered for each
custom paper name.
1.
From the Paper Tray Settings screen, select Custom Paper Settings. The Custom Paper screen opens.
2.
Select the item to be set or changed, and select Change Settings.
3.
Select Name, and touch Change Settings.
4. Enter the desired name for Custom Paper 1.
5.
Select Save to save the name and return to the previous screen.
6.
Select the item to be set or changed, and select Change Settings.
7. Follow the screen instructions to change the settings.
8.
Touch Save.
9.
Touch Save.
10.
Touch Close.
11. Exit the System Administrator Mode.
System Administration Guide 2-11

System Settings Xerox 700 Digital Color Press
Attributes on Setup
Custom Paper Sett ings
Items
1. Custom Paper 1
Items
Items
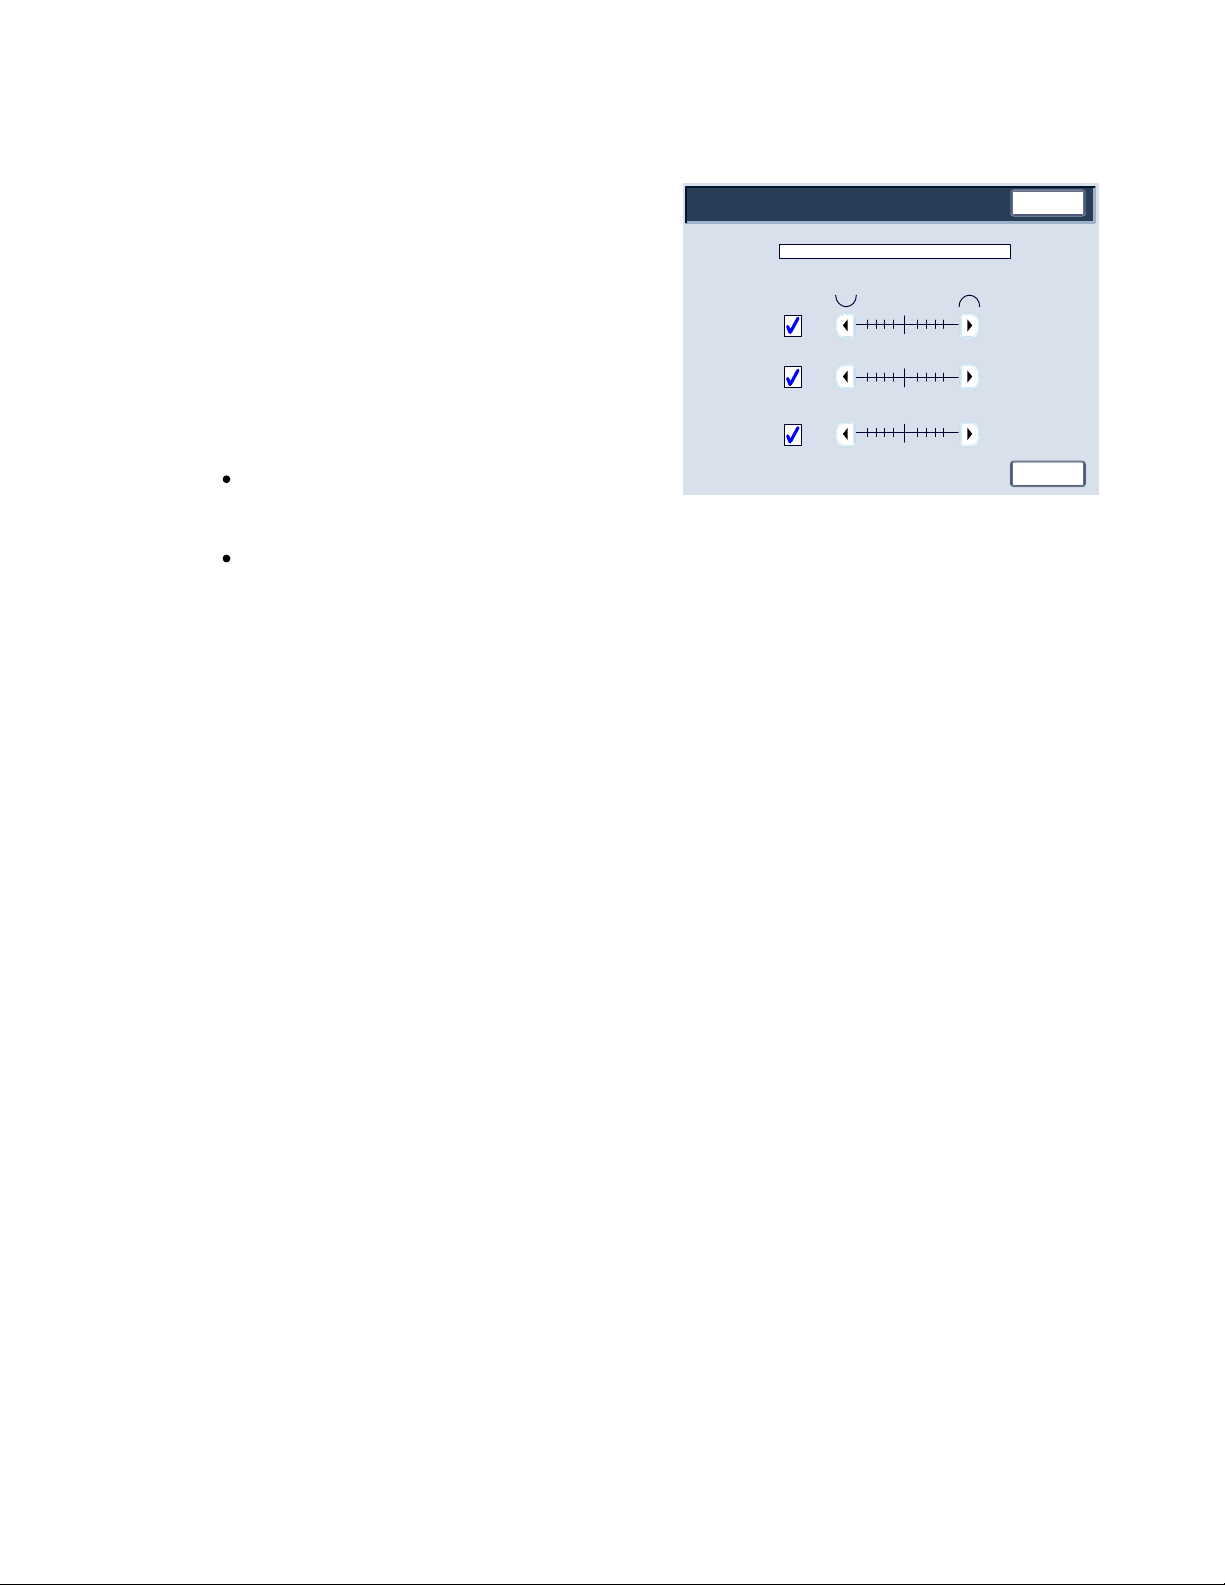
Adjust Paper Curl
1.
From the Paper Tray Settings screen, select Custom Paper
Settings. The Custom Paper screen opens.
2.
Select the item to be set or changed, and select Change
Settings.
3.
Select Name, and touch Change Settings.
4. Enter the desired name for Custom Paper 1.
5.
Select Save to save the name and return to the previous
screen.
Touch Adjust Paper Curl.
6.
7.
Touch Change Settings.
Select the appropriate Adjust Paper Curl option:
8.
Paper Tray Settings
Custom Paper
Settings
Paper Tray
1. Custom Paper 1
Paper Tray
Attributes
Paper Tray
Attributes During
Loading
Tray 5 (Bypass) Paper Size
Current Settings
(No Name)
(Not in Use)
(Not in Use)
(Not in Use)
(Not in Use)
(Not in Use)
(Not in Use)
(Not in Use)
(Not in Use)
(Not in Use)
Close
Custom Paper
Color Settings
Paper Tray Priority
Auto Tray
Switching Control
Close
Change Settings
If paper curl is a problem, use one of the preset paper
a.
types, such as Type A, B, or C. One of these settings
usually eliminates the problem. These profiles settings
cover a broad range of paper variables, image
coverage, and environmental factors.
For example:
If the System Default is not correcting curl, •
select Decurler Paper Type A.
If Decurler Paper Type A is not correcting curl, •
select Decurler Paper Type B.
If Decurler Paper Type B is not correcting curl, •
select Decurler Paper Type C.
If Types A, B, or C are not correcting the paper curl,
b.
select one of the custom paper curl options Type 1-10,
select Change Settings, and continue to the next step.
Name
1.
Paper Type / Paper Weight
2.
3.
Alignment Adjustment
Adjust Paper Curl
4.
Adjust Air Assist Values
5.
6.
Other Settings
7.
Other Settings
8.
Other Settings
9.
Other Settings
Adjust Paper Curl
4.
1.
Default
2.
Type A
3.
Type B
4.
Type C
5.
Type 1
6.
Type 2
7.
Type 3
8.
Type 4
9.
Type 5
Type 6
10.
Current Settings
(No Name)
Uncoated
Default
Default
Auto
Auto
0.0 mm
None
Auto
Current Settings
-
-
-
-
(Not in Use)
(Not in Use)
(Not in Use)
(Not in Use)
(Not in Use)
(Not in Use)
Cancel
Save
Sample Print
Change Settings
Close
Delete
Page
1
2
Change Settings
2-12
System Administration Guide
1 Sided - Face
Sample Printout
Auto
Auto
Auto01
4
4
1
4
Assign your desired parameters to the custom paper curl
9.
Type (1-10) option:
a.
Touch the Name field.
Use the touch screen keyboard to enter a name.
b.
Touch Save.
c.
Select the appropriate settings for 1 Sided-Face Up, 1
d.
Sided-Face Down, and 2 Sided output.
You can select Auto, or use the arrow buttons to
select the correct amount of curl.
To check the results, use the Sample Printout button.
e.
Touch Save.
Touch Close.
10.
Adjust Paper Curl
Name
1 Sided - Face Up
Down
2 Sided
321
321
321
234
234
0
01234
System SettingsXerox 700 Digital Color Press
Close
Auto
Auto
Auto
Exit the System Administrator Mode.
11.
Adjust Air Assist Values
Note
The Air Assist Values option is available only if your machine has an optional Oversized High Capacity Feeder (OHCF),
1-drawer or 2-drawer, attached to it. The Air Assist Values option allows you to optimize and control the
environmental conditions in the OHCF paper tray(s), thereby ensuring optimum print capability.
1.
From the Paper Tray Settings screen, select Custom Paper
Settings. The Custom Paper screen opens.
2.
Select the item to be set or changed, and select Change
Settings.
3.
Select Name, and touch Change Settings.
4. Enter the desired name for Custom Paper 1.
5.
Select Save to save the name and return to the previous
screen.
System Administration Guide 2-13

System Settings Xerox 700 Digital Color Press
j
Select the Adjust Air Assist Values option and select the
6.
Change Settings button.
Adjust Air Assist Values
5.
Auto
Cancel
Custom Table 3
Save
7.
From the Adjust Air Assist Values screen, select the desired
option which will best suit your environment and print/copy
obs:
Auto: This is the default setting. With this option the
paper tray blowers automatically adjust using settings
that are optimized for Xerox papers.
Standard Table:Select this setting when the Auto option
does provide the OHCF with optimum feed capability.
This setting uses a preprogrammed look-up table that uses
the best-known set of values for the paper that is
programmed for the OHCF.
Multi-Feed Handling Table: Select this option if you want the paper tray blower automatic settings to
incrementally adjust in order to reduce multifeeds.
Misfeed Handling Table: Select this option if you want the paper tray blower automatic settings to
incrementally adjust in order to reduce misfeeds.
Standard Table
Multi-Feed Handling Table
Misfeed Handling Table
Custom Table 1
Custom Table 2
Custom Table 4
Force OFF
Custom Table 1, 2, 3, 4: With these four options, the paper tray blowers are controlled by parameters that are
set by your Service Representative.
Force OFF: Select this option if you want the paper tray blowers always switched off; in this mode, the blowers
are not automatically controlled. This mode is reserved for special media.
8.
Touch Save.
9.
Touch Confirm.
10.
Touch Close.
11. Exit the System Administration Mode.
2-14
System Administration Guide

Attributes on Setup
Paper Tray Settings
Paper Tray Attributes
System SettingsXerox 700 Digital Color Press
Use the options on this screen to configure settings for Paper Size,
Paper Type, Paper Weight, Paper Color, Paper Curl, and Alignment
for the paper tray you selected.
1.
From the Paper Tray Settings screen, select Paper Tray
Attributes.
2. Select the appropriate paper tray.
3.
Touch Change Settings.
4.
Touch Change Settings.
Paper Tray Settings
Custom Paper
Settings
Paper Tray
Paper Tray
Attributes
Paper Tray
Attributes During
Loading
Tray 5 (Bypass) Paper Size
Close
Custom Paper
Color Settings
Paper Tray Priority
Auto Tray
Switching Control
5.
Follow the screen instructions to change the Paper Size, Paper Type and Weight, Paper Color, Paper Curl, and
Alignment Adjustment settings.
6.
Touch Save.
7.
Touch Confirm.
8.
Touch Close.
9. Exit the System Administration Mode.
System Administration Guide 2-15

System Settings Xerox 700 Digital Color Press
Attributes on Setup
Items
Adjust Paper Curl
1.
From the Paper Tray Settings screen, select Paper Tray
Attributes.
2. Select the appropriate paper tray.
3.
Touch Change Settings.
4.
Touch Change Settings.
5.
Touch Adjust Paper Curl.
6.
Select the appropriate Adjust Paper Curl option:
If paper curl is a problem, use one of the preset
a.
paper types, such as Type A, B, or C. One of these
settings usually eliminates the problem. These
profiles settings cover a broad range of paper
variables, image coverage, and environmental
factors.
For example:
If the System Default is not correcting curl, •
select Decurler Paper Type A.
If Decurler Paper Type A is not correcting •
curl, select Decurler Paper Type B.
If Decurler Paper Type B is not correcting •
curl, select Decurler Paper Type C.
Paper Tray Settings
Custom Paper
Settings
Paper Tray
Adjust Paper Curl
4.
1.
Default
2.
Type A
3.
Type B
4.
Type C
5.
Type 1
6.
Type 2
7.
Type 3
8.
Type 4
9.
Type 5
10.
Type 6
Paper Tray
Attributes
Paper Tray
Attributes During
Loading
Tray 5 (Bypass) Paper Size
Current Settings
-
-
-
-
(Not in Use)
(Not in Use)
(Not in Use)
(Not in Use)
(Not in Use)
(Not in Use)
Close
Custom Paper
Color Settings
Paper Tray Priority
Auto Tray
Switching Control
Close
Delete
Page
1
2
Change Settings
2-16
If Types A, B, or C are not correcting the paper curl,
b.
select one of the custom paper curl options Type 110, select Change Settings, and continue to the next
step.
System Administration Guide
System SettingsXerox 700 Digital Color Press
1 Sided - Face
Sample Printout
Auto
Auto
Auto01
4
1
4
1
4
Assign your desired parameters to the custom paper curl
7.
Type (1-10) option:
a.
Touch the Name field.
Use the touch screen keyboard to enter a name.
b.
Touch Save.
c.
Select the appropriate settings for 1 Sided-Face Up, 1
d.
Sided-Face Down, and 2 Sided output.
You can select Auto, or use the arrow buttons to
select the correct amount of curl.
To check the results, use the Sample Printout button.
e.
Touch Save.
Touch Close.
8.
Exit the System Administrator Mode.
9.
Adjust Paper Curl
Name
1 Sided - Face Up
Down
2 Sided
321
321
321
Close
234
234
0
0
234
Auto
Auto
Auto
Adjust Air Assist Values
Note
The Air Assist Values option is available only if your machine has an optional Oversized High Capacity Feeder (OHCF),
1-drawer or 2-drawer, attached to it. The Air Assist Values option allows you to optimize and control the
environmental conditions in the OHCF paper tray(s), thereby ensuring optimum print capability.
1.
From the Paper Tray Settings screen, select Paper Tray
Attributes.
2. Select the appropriate paper tray.
3.
Touch Change Settings.
4.
Touch Change Settings.
System Administration Guide 2-17
System Settings Xerox 700 Digital Color Press
j
Select the Adjust Air Assist Values option and select the
5.
Change Settings button.
6.
From the Adjust Air Assist Values screen, select the desired
option which will best suit your environment and print/copy
obs:
Adjust Air Assist Values
5.
Auto
Standard Table
Multi-Feed Handling Table
Cancel
Custom Table 3
Custom Table 4
Force OFF
Save
Auto: This is the default setting. With this option the
paper tray blowers automatically adjust using settings
that are optimized for Xerox papers.
Misfeed Handling Table
Custom Table 1
Custom Table 2
Standard Table:Select this setting when the Auto option
does provide the OHCF with optimum feed capability.
This setting uses a preprogrammed look-up table that uses
the best-known set of values for the paper that is
programmed for the OHCF.
Multi-Feed Handling Table: Select this option if you want the paper tray blower automatic settings to
incrementally adjust in order to reduce multifeeds.
Misfeed Handling Table: Select this option if you want the paper tray blower automatic settings to
incrementally adjust in order to reduce misfeeds.
Custom Table 1, 2, 3, 4: With these four options, the paper tray blowers are controlled by parameters that are
set by your Service Representative.
Force OFF: Select this option if you want the paper tray blowers always switched off; in this mode, the blowers
are not automatically controlled. This mode is reserved for special media.
7.
Touch Save.
8.
Touch Confirm.
9.
Touch Close.
10. Exit the System Administration Mode.
2-18
System Administration Guide

System SettingsXerox 700 Digital Color Press
Paper Tray Settings
Custom Paper Color Settings
You can set a custom color for paper loaded in the machine. A maximum of twelve characters can be entered for each
custom color paper name.
1.
From the Paper Tray Settings screen, select Custom Paper Color Settings. The Custom Paper Color screen opens.
2.
Select the item to be set or changed, and select Change Settings.
3.
The Keyboard screen opens.
4.
Enter the desired name for Custom Paper Color 1.
5.
Select Save to save the name and return to the previous screen.
6.
If desired, repeat Steps 1-5 for other custom paper colors.
7.
Select Close to return to the Paper Tray Settings screen.
System Administration Guide 2-19

System Settings Xerox 700 Digital Color Press
Paper Tray Settings
Paper Tray Attributes on Setup Screen
The selection made on this screen determines whether or not the Paper Tray Attributes option is displayed on the
Setup Menu.
1.
From the Paper Tray Settings screen, select Paper Tray Attributes on Setup Screen.
2.
Select Disabled or Enabled.
If Disabled is selected, then the Setup Menu does not display the Paper Tray Attributes option.
If Enabled is selected, then the Setup Menu displays the Paper Tray Attributes option.
3.
Touch Save.
4.
Touch Close.
5. Exit the System Administrator Mode.
2-20
System Administration Guide

System SettingsXerox 700 Digital Color Press
Paper Tray Settings
Paper Tray Attributes During Loading
This tool determines whether or not the Paper Tray Attributes screen is displayed on the User Interface when a paper
tray is opened and closed.
1.
From the Paper Tray Settings screen, select Paper Tray Attributes During Loading.
2.
Select Off or On.
If Off is selected, then the UI does not display the paper tray attributes while you are loading paper in the tray.
If On is selected, the UI displays the paper tray attributes as you are loading paper into the tray.
3.
Touch Save.
4.
Touch Close.
5. Exit the System Administrator Mode.
System Administration Guide 2-21

System Settings Xerox 700 Digital Color Press
Paper Tray Settings
Paper Tray Priority
This tool allows you to set the paper tray priority sequence for automatic tray selection. Automatic tray selection occurs
when a tray containing the appropriate paper is automatically selected by the machine for copying or printing.
1.
From the Paper Tray Settings screen, select Paper Tray Priority.
2.
Touch Change Settings.
3. Select a Priority setting and assign a specific tray to that priority setting.
Note
Only one tray can be set to each priority.
4.
Touch Save.
5.
Touch Close.
6. Exit the System Administrator Mode.
2-22
System Administration Guide

System SettingsXerox 700 Digital Color Press
Paper Tray Settings
Tray 5 (Bypass) - Paper Size Defaults
This feature allows you to assign specific paper sizes to Tray 5. This will facilitate easier copying when using Tray 5
(Bypass). You can assign a maximum of twenty paper sizes to the Tray 5 (Bypass) size selections, which are listed 1-20.
Note
If a nonstandard size paper is frequently used for copying, set this feature to accommodate that paper size. This avoids
repeatedly selecting the paper dimensions each time you use that nonstandard paper for copying.
1.
From the Paper Tray Settings screen, select Tray 5 (Bypass) Paper Size Defaults.
2.
Select the item to be set or changed, and select Change Settings.
3. Select the paper series.
If Custom Size is selected, go to Step 5.
4. Select a specific paper size.
5.
If Custom Size is selected, set the numeric values using the arrow buttons.
6.
Select Save to save your selections and return to the previous screen.
7. Repeat steps 1-6, as required, for Tray 5 paper sizes.
8.
Select Close to return to the Paper Tray Settings screen.
System Administration Guide 2-23

System Settings Xerox 700 Digital Color Press
Paper Tray Settings
Auto Tray Switching Control
Choose the auto tray switching method and how to copy mixed size documents.
1.
From the Paper Tray Settings screen, select Auto Tray Switching Control.
2.
Select the item to be set or changed, and select Change Settings.
3. Set the method of auto tray switching.
Always Enable
Regardless of which paper tray is selected, depending on circumstances, the machine automatically selects a tray
containing appropriate paper.
Enable during Auto Paper Select
When the paper selection is Auto only, the machine automatically selects a tray containing appropriate paper.
Enable for Same Paper Type/Color
When the paper selection is Auto only, the machine automatically selects a tray containing the same paper type and
color.
2-24
System Administration Guide

4.
When completed, select Save.
5.
Select Targeted Type and Weight.
6. Follow the screen instructions to change the settings.
7.
Select Targeted Paper Color.
8. Follow the screen instructions to change the settings.
System SettingsXerox 700 Digital Color Press
9.
Select Close to return to the Paper Tray Settings screen.
System Administration Guide 2-25

System Settings Xerox 700 Digital Color Press
Image Quality Adjustment
Image Quality Adjustment
This feature allows administrators to change settings for the Image Quality and Calibration adjustments.
Follow the screen instructions to change the settings.
1. Enter the System Administration mode.
2.
Touch the Tools tab.
3.
Touch System Settings.
4.
Touch Common Service settings.
Touch Image Quality Adjustment.
5.
6.
Select the item to be set or changed.
Machine Status
Machine
Information
System Settings
Setup and Calibration
Accounting
Authentication/Security
Settings
Image Quality
Faults Supplies Billing
Group
Common Service Setti ngs
Copy Service Se ttings
Scan Service Settings
Network Controll er Settings
Calibration
Information
Tools
Features
Machine Clock/Timers
Audio Tones
Screen/Button Settings
Paper Tray Settings
Image Quality Adjustments
Reports
Close
2-26
System Administration Guide

System SettingsXerox 700 Digital Color Press
Image Quality Adjustment
Image Quality
The Image Quality screen allows you to select the image quality processing method that is used when the machine is
scanning an original.
Follow the screen instructions to change the settings.
1. Enter the System Administration mode.
Machine Status
2.
Touch the Tools tab.
3.
Touch System Settings.
4.
Touch Common Service settings.
Machine
Information
System Settings
Setup and Calibration
Accounting
Authentication/Security
Settings
Faults Supplies Billing
Group
Common Service Setti ngs
Copy Service Se ttings
Scan Service Settings
Network Controll er Settings
Information
Tools
Features
Machine Clock/Timers
Audio Tones
Screen/Button Settings
Paper Tray Settings
Image Quality Adjustment
Reports
Touch Image Quality Adjustment.
5.
6.
Touch Image Quality.
7.
Select the item to be set or changed.
8.
Touch Change Settings.
Follow the screen instructions to change the settings.
9.
Touch Save.
10.
Exit the System Administration Mode.
11.
Image Quality
Items
Photo and Text Recogn ition
Output Color Recognition
Photo Reproduc t ion Level
Background Suppression (Color Copy)
Background Suppression (Black Copy)
Background Suppression (Scan Jobs)
Image Enhancemen t
Close
Current Settings
Off
Off
Off
Off
Off
Off
Off
Change Settings
System Administration Guide 2-27

System Settings Xerox 700 Digital Color Press
A brief description of each of the available settings follows:
Photo and Text Recognition
This feature allows the System Administrator to set the default level for Photo and Text Recognition. (The Photo and
Text function is used with the Original Type (Image Quality) feature when copying jobs.)
Output Color Recognition
Allows you to change the recognition settings used when Auto Detect is selected on the Output Color area of the Copy
tab. You can choose between More Black and White, Black and White, Normal, Color, and More Color.
Photo Reproduction Level
Allows you to change the reproduction setting used when Auto is selected on the Original Type screen. You can choose
between More Text, Normal, and More Photo.
Background Suppression (Color Copy)
Allows you to change the Background Suppression setting used when Auto Suppression is selected on the Image
Enhancement screen. You can choose between High Quality and High Speed.
Background Suppression (Black Copy)
Allows you to change the Background Suppression setting used when Auto Suppression is selected on the Image
Enhancement screen. You can choose between High Quality and High Speed.
Background Suppression (Scan Jobs)
Allows you to change the Background Suppression setting used when Auto Suppression is selected on the Image
Enhancement screen. You can choose between High Quality and High Speed.
Image Enhancement
Allows you to select whether or not to carry out image enhancement. If you select On, copy data is smoothed, to give a
smoother appearance. If Off is selected, the machine will not perform image enhancement.
2-28
System Administration Guide

System SettingsXerox 700 Digital Color Press
Calibration
Image Quality Adjustment
Image Quality Adjustment
Calibration
When you select Calibration, you will have the opportunity to move through a series of steps to optimize the quality of
copied jobs. The machine will print a calibration pattern for you to place on the platen glass. The machine will scan
the calibration pattern, and automatically make adjustments as required.
Follow the screen instructions to change the settings.
1. Enter the System Administration mode.
2.
Touch the Tools tab.
3.
Touch System Settings.
4.
Touch Common Service settings.
Touch Image Quality Adjustment.
5.
6.
Touch Calibration.
7.
Select the appropriate Screen Type, Paper Supply, and
Target.
Machine Status
Machine
Information
System Settings
Setup and Calibration
Accounting
Authentication/Security
Settings
Image Quality
Faults Supplies Billing
Group
Common Service Setti ngs
Copy Service Se ttings
Scan Service Settings
Network Controll er Settings
Calibration
Information
Tools
Features
Machine Clock/Timers
Audio Tones
Screen/Button Settings
Paper Tray Settings
Image Quality Adjustment
Reports
Close
8.
9.
10.
System Administration Guide 2-29
Touch Start.
Follow the screen instructions.
Exit the System Administration Mode.
Screen Type
Copy Job
Print Job 1
Print Job 2
Paper Supply
Tray 3
8.5x11"
Plain Paper
White
Start
Close
Target
Copy Jobs Only
System Settings Xerox 700 Digital Color Press
Reports
The Reports screen allows you to change settings for a variety of printable reports.
Access the screen as follows:
1. Enter the System Administration mode.
2.
Touch the Tools tab.
3.
Touch System Settings.
4.
Touch Common Service settings.
Touch Reports.
5.
6.
Select the item to be set or changed.
7.
Touch Change Settings.
8.
Follow the screen instructions to change the settings.
Machine Status
Machine
Information
System Settings
Setup and Calibration
Accounting
Authentication/Security
Settings
Reports
Scan File Transp or t Report
2 Sided Report
Faults Supplies Billing
Group
Common Service Setti ngs
Copy Service Se ttings
Scan Service Settings
Network Controll er Settings
Items
Print Reports Button
Job History Report Off
Current Settings
Enabled
Off
Off
Information
Features
Tools
Machine Clock/Timers
Audio Tones
Screen/Button Settings
Paper Tray Settings
Image Quality Adjustment
Reports
Close
Touch Save.
9.
Touch Close.
10.
Exit the System Administration Mode.
11.
2-30
Job Status Default
8
All Incompleted Jobs
Change Settings
System Administration Guide

System SettingsXerox 700 Digital Color Press
A brief description of each of the available settings follows:
Print Reports Button
When enabled, the Print Reports button appears on the Machine Information tab without entering the System
Administator's Login ID.
Job History Report
You can select whether or not to automatically print a Job History Report after a total of fifty jobs have been
processed.
Scan File Transport Report
You can select No Report, Print Report, or Print When Delivery Fails.
2 Sided Report
When printing a report, select whether to print 1 sided or 2 sided.
System Administration Guide 2-31

System Settings Xerox 700 Digital Color Press
Maintenance
The Maintenance screen allows you to initialize the hard disk of the machine and delete all data stored on the
machine.
Follow the screen instructions to change the settings.
1. Enter the System Administration mode.
2.
Touch the Tools tab.
3.
Touch System Settings.
4.
Touch Common Service settings.
Touch Maintenance.
5.
6.
Select the item to be set or changed.
7.
Touch Change Settings.
8.
Follow the screen instructions to change the settings.
Machine Status
Machine
Information
System Settings
Setup and Calibration
Accounting
Authentication/Security
Settings
Maintenance
Initialize Hard Disk
Alignment
Adjustment
Faults Supplies Billing
Group
Common Service Setti ngs
Copy Service Se ttings
Scan Service Settings
Network Controll er Settings
Delete All Data
Adjust Paper Curl
Finisher
Adjustment
Information
Tools
Features
Paper Tray Settings
Image Quality Adjustments
Reports
Maintenance
Watermark
Other Settings
Close
Software Options
NVM Read/Write
Touch Save.
9.
Exit the System Administration Mode.
10.
2-32
System Administration Guide

System SettingsXerox 700 Digital Color Press
A brief description of each of the available settings follows:
Initialize Hard Disk
This procedure initializes the hard disk. The data erased by formatting includes additional fonts, ESC/P, HP-GL/2, and
SMB folder.
Delete All Data
This setting allows you to select Delete Job or Run Job when the machine memory is full.
Software Options
Use the Keyboard to type passcodes for the Software Options and select Reboot. Up to 5 passcodes can be typed.
Alignment Adjustment Settings
The Alignment Adjustment Settings screen allows you to configure the default settings for each of the Alignment
Adjustment options.
Adjust Paper Curl
Use the options shown on the touch screen to change the Paper Curl settings as needed.
NVM Read/Write
Your Xerox service representative uses this feature to change certain system settings. It also may occasionally be used
by system administrators.
System Administration Guide 2-33

System Settings Xerox 700 Digital Color Press
Maintenance
Alignment Adjustment Settings
Adjustments can be made to the image based on the
alignment output of a document. Various adjustments can
Maintenance
Close
be modified such as: image position, magnification, and
skew. This can be achieved through the use of the twenty
Initialize Hard Disk
Delete All Data
Software Options
default adjustment types. In addition, a specific paper tray
can be assigned to a specific adjustment type.
Alignment
Adjustment
Adjust Paper Curl
Finisher
Adjustment
NVM Read/Write
Note
It is recommended that you read through the entire Alignment Adjustment Settings section before performing any
actual alignment adjustments.
2-34
System Administration Guide

Alignment Adjustment
Items
Tray 8 (
Alignment Adjustment
1. Load paper in a tray.
2.
Press the Log In/Out button, and enter the system
administrator mode.
3.
Select the Tools tab followed by the System Settings
tab.
System SettingsXerox 700 Digital Color Press
4.
Select the Common Service Settings followed by the
Maintenance Settings.
Select Alignment Adjustment Settings.
5.
Select the alignment adjustment type you want to
6.
set or adjust, and touch Change Settings.
Maintenance
Initialize Hard Disk
Alignment
Adjustment
Alignment Adjustment Settings
Tray 1
Tray 2
Tray 3
Tray 5
Tray 6
Delete All Data
Adjust Paper Curl
Finisher
Adjustment
Current Settings
-
AliTp1
Default
AliTp2
AliTp3
Default
AliTp4
(Not in Use)
(Not in Use)
(Not in Use)
Close
Software Options
NVM Read/Write
Close
Change Settings
System Administration Guide 2-35

System Settings Xerox 700 Digital Color Press
Items
8.5x11"
7.
Select Name, and touch Change Settings.
8.
Assign a type name, and touch Save.
Note
Type 22.
X Print Position
Y Print Position
X%
Y%
Skew
Z Fold
Z Fold Half Sheet
A3 -
B4 -
Z Fold Half Sheet
Z Fold Half Sheet
11x17"
Name
Current Settings
(No Name)
1:0.0mm 2:0.0mm
1:1.0mm 2:0.03mm
1:0.0% 2:1.0%
1:0.5% 2:0.0%
1:0.0mm 2:0.3mm
Default
Default
Default
Default
Using a name such as “A4 Plain” is recommended - this allows
you to know the exact content of the paper type.
9.
Touch Sample Printout.
10.
Select the paper tray in which you loaded paper in Step 1, and then select 1-Sided or 2-Sided followed by the
desired number of sheets via the Number of Sheets option.
Cancel
Save
Sample Printout
Change Settings
11.
Press the Start button.
12.
Touch Confirm.
13.
Touch Close.
Check the sample output, and adjust the position if misalignment has occurred.
14.
15.
After you finish making adjustments, print another output sample by touching Sample Printout and verify the
adjustment results.
16.
Make adjustments again if necessary and touch Save.
17.
Touch Close.
2-36
System Administration Guide

System SettingsXerox 700 Digital Color Press
A
Skew
1. Adjust image skew (squareness) in 0.1 mm increments for Side 1 and 2. Maximum adjustment is 1.2 mm.
Use the following equation to obtain the squareness offset amount (where “A” represents the length of the lead
registration which faces the back of the machine, and “B” represents the length of the lead registration which faces the
front of the machine):
Squareness offset amount = (A - B) × 400 ÷ 277 (when A3 paper is placed horizontally)
(A - B) × 190 ÷ 277 (when A4 paper is placed vertically)
Side 1
Side 2
Back of the Machine
Paper Feed Direction
Front of the Machine
B
System Administration Guide 2-37

System Settings Xerox 700 Digital Color Press
2.
Select Squareness, and touch Change Settings.
3.
Enter a value with the squareness offset amount measured in Step 1 added as the current setting value of Side 1
and Side 2.
Note
Entering a positive or negative value adjusts the squareness as shown below.
Touch Save.
4.
2-38
System Administration Guide

System SettingsXerox 700 Digital Color Press
Scale
1. Check the sample output, and measure the scale offset amount that occurred.
X direction scale offset amount = image reference length in the X direction - image actual measurement length in the X
direction
Y direction scale offset amount = image reference length in the Y direction - image actual measurement length in the Y
direction
Side 1
Side 2
Back of the Machine
Paper Feed Direction
Measure the scale offset in the X direction
Measure the scale
offset in the Y
direction
System Administration Guide 2-39

System Settings Xerox 700 Digital Color Press
2.
Select X% or Y%, and touch Change Settings.
3.
Enter the offset amount of the X direction scale you measured in Step 1 for Side 1 and Side 2 of X%.
Enter the offset amount of the Y direction scale you measured in Step 1 for Side 1 and Side 2 of Y%.
4.
Note
If the scale offset amount is positive, enter a negative value in the adjustment value field. If negative, enter a positive
value.
Touch Save.
5.
2-40
System Administration Guide

System SettingsXerox 700 Digital Color Press
Print Positions of Side 1 and Side 2
Adjust the position of the image in the lead edge and side edge direction in relation to the paper feed direction by 0.1
mm increments for each of side (sides 1 and 2). You can adjust up to 2.0 mm.
1. Check the sample output, and measure the print position offset amount that occurred.
X direction scale offset amount = image reference length in the X direction - image actual measurement length in the X
direction
X Print Position
Y Print Position
Side 1
Specify a positive value when you want to move the position of the
image in the opposite direction to the paper feed direction, and a
negative value when you want to move the position of the image in
the paper feed direction.
Specify a positive value when you want to move the position of the
image toward the back of the machine, and a negative value when you
want to move the position of the image toward the front of the
machine.
Back of the Machine
Difference Y
Paper Feed Direction
Side 2
Front of the Machine
Difference X
System Administration Guide 2-41

System Settings Xerox 700 Digital Color Press
2.
Select X Print Position or Y Print Position, and touch Change Settings.
3.
Enter the value obtained by the difference X measured in Step 1 added as the current setting value of Side 1 and
Side 2 of X Print Position.
Enter the value obtained by the difference Y measured in Step 1 added as the current setting value of Side 1 and
4.
Side 2 of Y Print Position.
Touch Save.
5.
2-42
System Administration Guide

System SettingsXerox 700 Digital Color Press
1 Sided - Face
Sample Printout
Auto
Auto
Auto01
4
1
4
1
4
Maintenance
Adjust Paper Curl
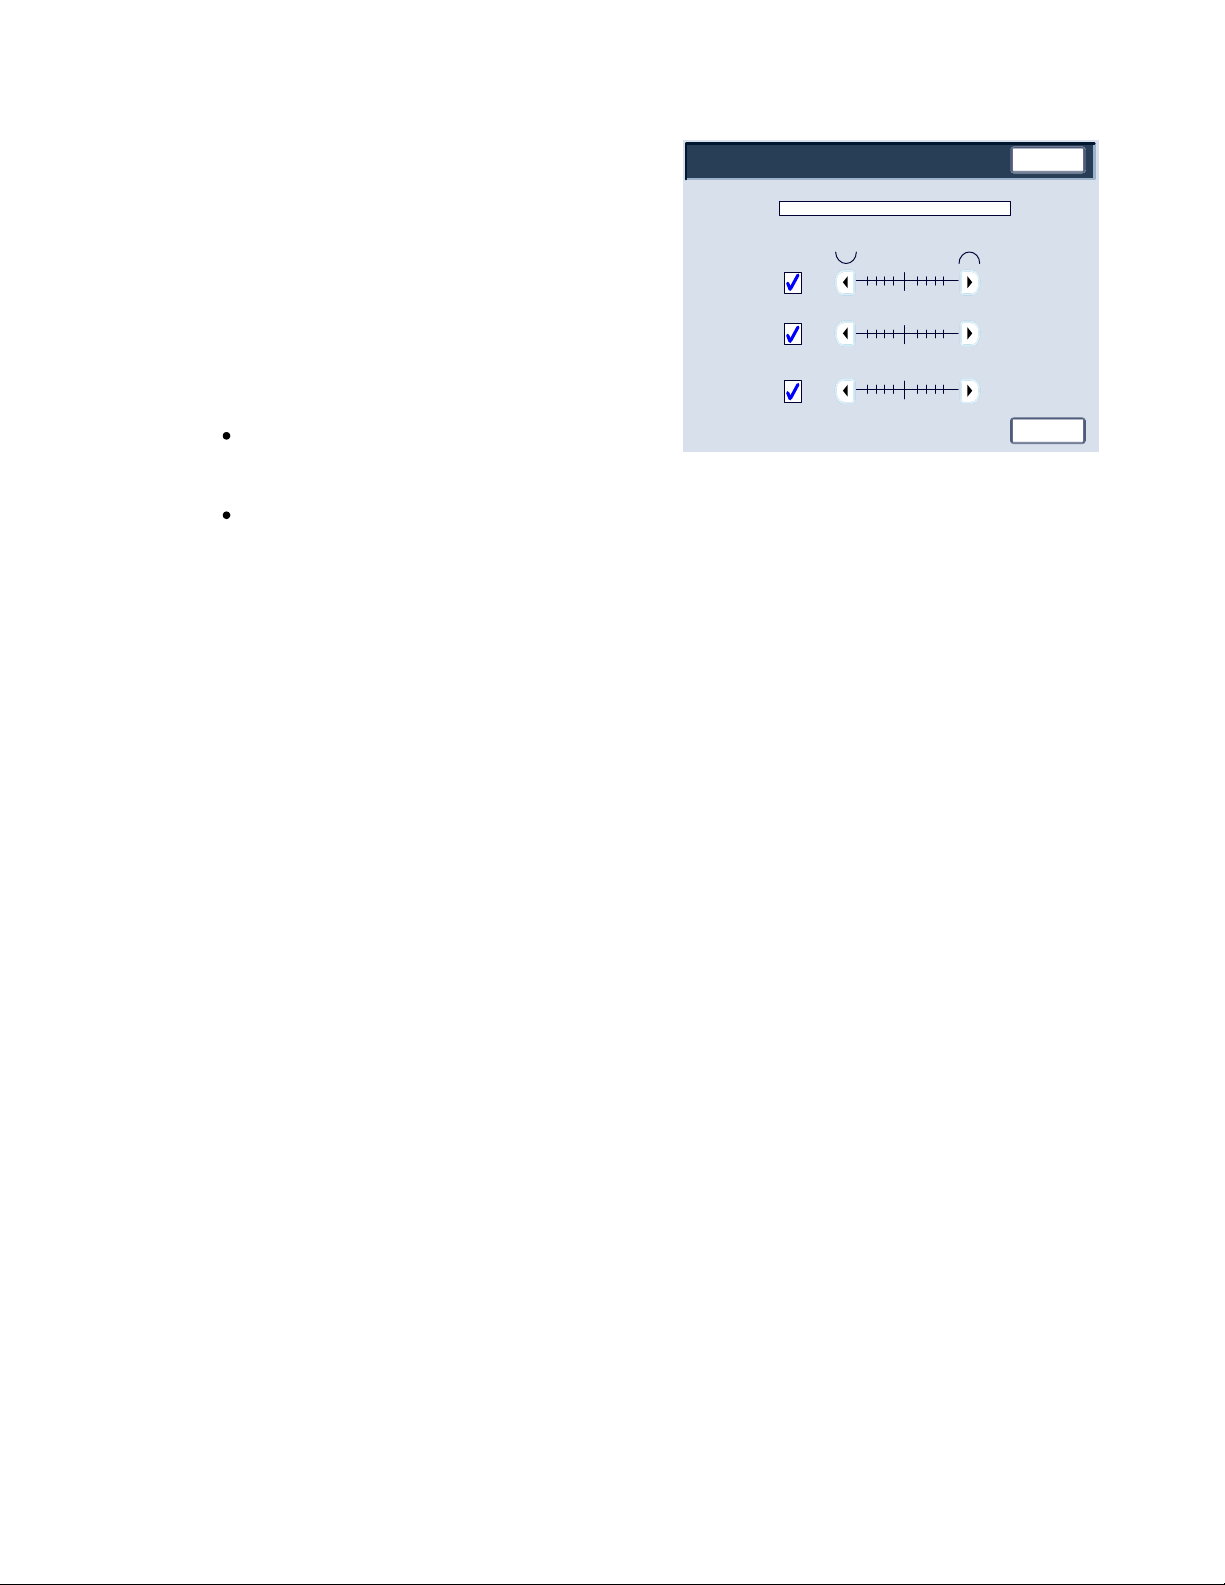
The Adjust Paper Decurler screen allows you to configure the default settings for each of the Paper Curl options.
Access the screen as follows:
Enter the System Administration mode.
1.
Touch the Tools tab.
2.
Touch System Settings.
3.
Touch Common Service settings.
4.
Touch Maintenance.
5.
Touch Adjust Paper Curl.
6.
Select the item to be set or changed.
7.
Touch Change Settings.
8.
9.
Touch the Name field.
10.
Use the touch screen keyboard to enter a name.
11.
Touch Save.
Maintenance
Initialize Hard Disk
Alignment
Adjustment
Adjust Paper Curl
Name
1 Sided - Face Up
Delete All Data
Adjust Paper Curl
Finisher
Adjustment
234
321
Close
Software Options
NVM Read/Write
Close
Auto
234
321
321
0
0
234
Auto
Auto
12.
Select the appropriate settings for 1 Sided-Face Up, 1
Sided-Face Down, and 2 Sided output.
You can select Auto, or use the arrow buttons to select
Down
2 Sided
the correct amount of curl.
To check the results, use the Sample Printout button.
Touch Save.
13.
14.
Touch Close.
System Administration Guide 2-43

System Settings Xerox 700 Digital Color Press
Maintenance
Finisher Adjustment/Adjust Fold Position
This section describes the procedure for adjusting the fold position. You can adjust the fold position for various paper
types, as well as set adjustment values to any of 10 default types. You can assign a set type to each tray.
In addition, you can adjust the fold positions for single fold, booklet, C fold, Z fold, Z fold half sheet.
Fold Position Adjustment
Enter the System Administration mode.
1.
Touch the Tools tab.
2.
Touch System Settings.
3.
Touch Common Service settings.
4.
Touch Maintenance.
5.
Select Finisher Adjustment.
6.
Maintenance
Initialize Hard Disk
Alignment
Adjustment
Delete All Data
Adjust Paper Curl
Finisher
Adjustment
Close
Software Options
NVM Read/Write
2-44
System Administration Guide

Items
8.5x11"
8.5x11"
Select Adjust Fold Position.
7.
Select the paper fold position type you want to set or
8.
adjust, and touch Change Settings.
System SettingsXerox 700 Digital Color Press
9.
Select Name, and touch Change Settings.
10.
Enter the desired type name, and touch Save.
11.
Select the fold type, and touch Change Settings.
Select the desired settings, and touch Sample Printout.
12.
Select the tray in which you loaded paper, and press the
13.
Start button.
14.
Measure the fold position via the output sample, and
adjust the fold position accordingly.
15.
Make adjustments to the items if necessary.
Type 22.
Single Fold
Booklet Folding
C Fold
A4 -
A4 -
Z Fold
Z Fold Half Sheet
A3 -
B4 -
Z Fold Half Sheet
11x17"
C Fold
Z Fold
Z Fold Half Sheet
Name
Current Settings
(No Name)
Default
Default
Default
Default
Default
Default
Default
Default
Default
Close
Change Settings
After you finish making adjustments, print another
16.
output sample with Sample Printout and check the
adjustment results.
17.
Make adjustments accordingly. If necessary, repeat Steps
12 - 14.
System Administration Guide 2-45

System Settings Xerox 700 Digital Color Press
Single Fold Position Adjustment
1.
Select Single Fold, and touch Change Settings.
2.
Specify Sheets to be folded, and touch Sample Printout.
3.
Select the tray in which you loaded paper, and press the Start button.
An output sample is printed.
4.
Touch Close.
5. Check the output sample printout, and measure the offset amount.
6.
Select Long at Left or Long at Right.
7.
Enter the measurement value you obtained in Step 5 in Values A Before Adjustment.
8.
Touch Adjust.
9.
Touch Sample Printout again to print an output sample printout, and check the adjustment results.
10. Make adjustments again if necessary. (Steps 6 - 8)
11.
2-46
Touch Save.
System Administration Guide

Booklet Position Adjustment
1.
Select Booklet, and touch Change Settings.
2.
Touch Sample Printout.
3.
Select the tray in which you loaded paper, select 2-SheetStack, and press the Start button.
An output sample is printed.
4.
Select the tray in which you loaded paper, select 15-Sheet Stack, and press the Start button.
System SettingsXerox 700 Digital Color Press
An output sample is printed.
5.
Touch Close.
6. Check the output sample, and measure the position offset amount for 2-sheet stack and 15-sheet stack.
7.
Touch Booklet Fold State (2 Sheets).
8. Select the state of the fold and staple position of the output paper, and enter the 2-sheet stack offset amount
you measured in Step 6 in Values A and B Before Adjustment.
9.
Touch Save.
10.
Set Booklet Fold State (15 Sheets) in the same way.
11.
Touch Sample Printout again to print an output sample, and check the adjustment results.
12. Make adjustments again if necessary. (Steps 7 - 10)
13.
Touch Save.
System Administration Guide 2-47

System Settings Xerox 700 Digital Color Press
C Fold Position Adjustment
1.
Select C Fold-A4 or C Fold-8.5x11”, and touch Change Settings.
2.
Touch Sample Printout.
3.
Select the tray in which you loaded paper, and press the Start button.
An output sample is printed.
4.
Touch Close.
5. Check the output sample, and measure the A and B fold position movement amounts.
6.
Enter the measurement value you obtained in the previous step in Values A and B Before Adjustment, and the
final value you want after adjustment in Desired Values A and B.
7.
Touch Sample Printout again to print an output sample, and check the adjustment results.
8. Make adjustments again if necessary. (Step 6)
9.
Touch Save.
2-48
System Administration Guide

Z Fold Position Adjustment
1.
Select Z Fold-A4 or Z Fold-8.5x11”, and touch Change Settings.
2.
Touch Sample Printout.
3.
Select the tray in which you loaded paper, and press the Start button.
An output sample is printed.
4.
Touch Save.
System SettingsXerox 700 Digital Color Press
5. Check the output sample, and measure the A and B fold position movement amounts.
6.
Enter the measurement value you obtained in the previous step in Values A and B Before Adjustment, and the
final value you want after adjustment in Desired Values A and B.
7.
Touch Sample Printout again to print an output sample, and check the adjustment results.
8. Make adjustments again if necessary. (Step 6)
9.
Touch Save.
System Administration Guide 2-49

System Settings Xerox 700 Digital Color Press
Z Fold Half Sheet Position Adjustment
1.
Select Z Fold Half Sheet- A3, Z Fold Half Sheet- B4, Z Fold Half Sheet-11x17”, or Z Fold Half Sheet - 8K, and
touch Change Settings.
2.
Touch Sample Printout.
3.
Select the tray in which you loaded paper, and press the Start button.
An output sample is printed.
4.
Touch Save.
5. Check the output sample, and measure the A and B fold position movement amounts.
6.
Enter the measurement value you obtained in the previous step in Values A and B Before Adjustment, and the
final value you want after adjustment in Desired Values A and B.
7.
Touch Sample Printout again to print an output sample, and check the adjustment results.
8. Make adjustments again if necessary. (Step 6)
9.
Touch Save.
2-50
System Administration Guide

Items
Watermark
The Watermark screen allows you to configure the default settings for each of the Watermark options.
Access the screen as follows:
System SettingsXerox 700 Digital Color Press
Enter the System Administration mode.
1.
Touch the Tools tab.
2.
Touch System Settings.
3.
4.
Touch Common Service settings.
Touch Watermark.
5.
Select the item to be set or changed.
6.
Touch Change Settings.
7.
Follow the screen instructions to change the settings.
8.
Machine Status
Machine
Information
System Settings
Setup and Calibration
Accounting
Authentication/Security
Settings
Watermark
Default Watermark Effect
Default Watermark
Font Size
Background Pattern
Font Color
Density
Watermark/Background Contrast
Force Waterm ark
Custom Watermark
Faults Supplies Billing
Group
Common Service Setti ngs
Copy Service Se ttings
Scan Service Settings
Network Controll er Settings
Current Settings
Date Format
Off
Off
Off
Off
Off
Off
Off
Off
Off
Off
Information
Features
Paper Tray Settings
Image Quality Adjustments
Reports
Maintenance
Watermark
Other Settings
Tools
Close
Change Settings
Touch Save.
9.
Touch Close.
10.
Exit the System Administration Mode.
11.
System Administration Guide 2-51

System Settings Xerox 700 Digital Color Press
p
y
A brief descri
tion of each of the available settings follows:
Date Format
Sets the default date format that as it appears on the Annotation and Watermark screens in the Output Format tab
(Copy feature). When selected, the default date format is printed on the copy output when On is selected for the
Annotation/Date feature or when the Date option in the Watermark feature is selected.
Default Watermark Effect
Allows the default setting for Text Effect to be specified. this default value appears on the Watermark screen in the
Output Format tab (Copy feature). This setting determines how the background text (watermark) appears on the
printed output. Text Effect selections include Off, Embossed, and Outline.
Font Size
You can select from four possibilities: 48 point, 64 point, 80 point or a custom size of 24 to 80 point.
Background Pattern
Allows you to select the background pattern to be used for watermark option on the Output Format tab. Select from
eight patterns: wave, circle, stripes, chain, beam, rhombic, sunflower, and fan.
Font Color
Allows you to select the font color for printing the background watermark text. You can choose between Black,
Magenta, or Cyan.
Density
Allows you to select the density for printing the background watermark text. You can select from three levels: Lighter,
Normal, or Darker.
Watermark/Background Contrast
Allows you to select the text/background contrast for printing watermark information. You can select from contrast
levels 1 to 9.
Force Watermark
Select On to force all copy jobs to print with a watermark. Select Off if you do not want all copy jobs printed with a
watermark.
Custom Watermark
Allows
ou to create your own watermark.
2-52
System Administration Guide

System SettingsXerox 700 Digital Color Press
Items
Other Settings
The Other Settings screen allows administrators to review and edit a variety of common settings for the machine.
Access the screen as follows:
Enter the System Administration mode.
1.
Touch the Tools tab.
2.
Touch System Settings.
3.
Touch Common Service settings.
4.
Touch Other Settings.
5.
Select the item to be set or changed.
6.
Touch Change Settings.
7.
Follow the screen instructions to change the settings.
8.
Touch Save.
9.
Machine Status
Machine
Information
System Settings
Setup and Calibration
Accounting
Authentication/Security
Settings
Other Settings
Paper Size Settings
Millimeters / Inches
Keyboard Input Restriction
Operation of Up / Down Buttons
Display Consumables Screen
Data Encryption
Encryption Key for Confidential Data
Service Representative Restricted Operation
Faults Supplies Billing
Default Print Paper Size
Software Download
Group
Common Service Setti ngs
Copy Service Se ttings
Scan Service Settings
Network Controll er Settings
Current Settings
Off
Off
Off
Off
Off
Off
Off
Off
Off
Off
Information
Features
Paper Tray Settings
Image Quality Adjustments
Reports
Maintenance
Watermark
Other Settings
Tools
Close
Change Settings
Touch Close.
10.
Exit the System Administration Mode.
11.
System Administration Guide 2-53

System Settings Xerox 700 Digital Color Press
Items
Copy Service Settings
Preset Buttons
The Preset Buttons screen allows administrators to set the values for the Reduce/Enlarge, Image Shift, and Edge Erase
preset buttons on the User Interface.
Follow the screen instructions to change the settings.
Enter the System Administration mode.
1.
Touch the Tools tab.
2.
Touch System Settings.
3.
Machine Status
Machine
Information
System Settings
Setup and Calibration
Accounting
Authentication/Security
Settings
Faults Supplies Billing
Group
Common Service Setti ngs
Copy Service Se ttings
Scan Service Settings
Network Controll er Settings
Information
Tools
Features
Preset Buttons
Copy Defaults
Copy Control
Original Size Defaults
Reduce/Enlarge Pres ets
Custom Colors
Touch Copy Service Settings.
4.
Touch Preset Buttons.
5.
Select the item to be set or changed.
6.
Touch Change Settings.
7.
Follow the screen instructions to change the settings.
8.
Touch Save.
9.
Exit the System Administration Mode.
10.
Preset Buttons
Paper Supply - Button 2
Paper Supply - Button 3
Paper Supply - Button 4
Paper Supply - Button 5
Reduce/Enlarge - Button 3
Reduce/Enlarge - Button 4
Reduce/Enlarge - Button 5
Image Shift Preset 1
Image Shift Preset 2
Image Shift Preset 3
Current Settings
64%
114%
150%
1 mm
2 mm
3 mm
Close
Tray 1
Tray 2
Tray 3
Tray 6
Change Settings
2-54
System Administration Guide

System SettingsXerox 700 Digital Color Press
Items
py
Copy Defaults
The Copy Defaults screen allows administrators to view and change the settings for a variety of copying default values,
such as Paper Supply, Reduce/Enlarge, Output Color, and Original Type defaults.
The specific defaults that can be changed are:
Paper Supply, Reduce/Enlarge, Output Color, Single Color, Dual Color, Original Type, Lighten/Darken, Contrast,
Sharpness, Saturation, Background Suppression, Color Balance, Color Shift, 2 Sided Copying, Mixed Size Originals, Edge
Erase, Image Shift, Image Rotation, Annotations, Bates Stamp, Tab Margin Shift, Booklet Creation, Covers, and
Separators.
The Copy Defaults screen allows administrators to view and change the settings for a variety of copying default values,
such as Paper Supply, Reduce/Enlarge, Output Color, and Original Type defaults.
Enter the System Administration mode.
1.
Touch the Tools tab.
2.
Touch System Settings.
3.
Touch Copy Service Settings.
4.
Touch Co
5.
Select the item to be set or changed.
6.
Touch Change Settings.
7.
Follow the screen instructions to change the settings.
8.
Touch Save.
9.
Touch Close.
10.
Defaults.
Machine Status
Machine
Information
System Settings
Setup and Calibration
Accounting
Authentication/Security
Settings
Copy Defaults
Reduce / Enlarge
Output Color
Single Color
Source Color
Target Area Color
Non-Target Area Color
Original Type
Original Type - Auto (Black)
Original Type - Auto (Non-Black)
Faults Supplies Billing
Group
Common Service Setti ngs
Copy Service Se ttings
Scan Service Settings
Network Controll er Settings
Current Settings
Paper Supply
Off
Off
Off
Off
Off
Off
Off
Off
Off
Information
Off
Tools
Features
Preset Buttons
Copy Defaults
Copy Control
Original Size Defaults
Reduce/Enlarge Pres ets
Custom Colors
Close
Change Settings
Exit the System Administration Mode.
11.
System Administration Guide 2-55

System Settings Xerox 700 Digital Color Press
Items
Copy Control
The Copy Control screen allows administrators to view and change the settings for a variety of Copy options.
Access the screen as follows:
Enter the System Administration mode.
1.
Touch the Tools tab.
2.
Touch System Settings.
3.
Machine Status
Machine
Information
System Settings
Setup and Calibration
Accounting
Authentication/Security
Settings
Faults Supplies Billing
Group
Common Service Setti ngs
Copy Service Se ttings
Scan Service Settings
Network Controll er Settings
Information
Tools
Features
Preset Buttons
Copy Defaults
Copy Control
Original Size Defaults
Reduce/Enlarge Pres ets
Custom Colors
Touch Copy Service Settings.
4.
Touch Copy Control.
5.
Select the item to be set or changed.
6.
Touch Change Settings.
7.
Follow the screen instructions to change the settings.
8.
Touch Save.
9.
Touch Close.
10.
Copy Control
Memory Full Procedure
Maximum Stored Pages
Auto Paper Off
Mixed Size Originals
Fine Tune 100%
Background Suppresssion (Photo and Text)
Background Suppression Level (Text)
Photo and Text
Original Type
Output Orientation - Reverse Order
Current Settings
Close
Off
Off
Off
Off
Off
Off
Off
Off
Off
Off
Change Settings
2-56
System Administration Guide

A brief description of each of the available settings follows:
Memory Full Procedure
This setting allows you to select Delete Job or Run Job when the machine memory is full.
Maximum Stored Pages
This setting allows you to choose between 1 and 999 for the maximum stored pages value.
System SettingsXerox 700 Digital Color Press
Auto Paper Off
Select the default tray that will be used when the Auto feature (on the Copy tab) is canceled because the Autoor the
Independent X-Yfeature (on the Reduce/ Enlarge screen) is selected.
Mixed Size Originals
Select the default setting that affects the 2-sided originals. Select either Copy to New Sheet or Copy to Side 2.
Fine Tune 100%
The fine-tune value is applied to documents that are placed on the Document Glass for copying and 100is selected. Set
the value in the X/Y direction within the range 98 to 102in 0.1increments.
Background Suppresssion (Photo and Text)
This option allows you to specify whether the Background Suppression level is Normal or Higher for the Photo and
Text feature.
System Administration Guide 2-57

System Settings Xerox 700 Digital Color Press
Background Suppression Level (Text)
This option allows you to specify whether the Background Suppression level is Normal or Higher for the Text feature.
Photo and Text / Printed Original
This option allows you to specify whether the Printed Original option is for Normal, Inkjet, or Highlighted for the Photo
and Text feature.
Original Type - See Through Paper
This option allows you to specify whether the See Through Paper option is enabled or disabled for the Original Type
feature.
Face Up/Down Output
This option allows you to specify whether the Face Up/Down feature should be set to Reverse Order.
Annotations
This option allows you to specify whether the Annotation Comments can be edited by users or not.
Bates Stamping
This option allows you to specify whether the Bates Stamping Prefixes can be edited by users or not.
2-58
System Administration Guide

System SettingsXerox 700 Digital Color Press
Items
Original Size Defaults
The Original Size Defaults screen allows administrators to save time for users who scan non-standard size originals. The
defaults set here are displayed on the Original Size screen within the Layout Adjustment tab.
Follow the screen instructions to change the settings.
Enter the System Administration mode.
1.
Touch the Tools tab.
2.
Touch System Settings.
3.
Machine Status
Machine
Information
System Settings
Setup and Calibration
Accounting
Authentication/Security
Settings
Faults Supplies Billing
Group
Common Service Setti ngs
Copy Service Se ttings
Scan Service Settings
Network Controll er Settings
Information
Tools
Features
Preset Buttons
Copy Defaults
Copy Control
Original Size Defaults
Reduce/Enlarge Pres ets
Custom Colors
Touch Copy Service Settings.
4.
Touch Original Size Defaults.
5.
Select the item to be set or changed.
6.
Touch Change Settings.
7.
Follow the screen instructions to change the settings.
8.
Touch Save.
9.
Touch Close.
10.
Original Size Defaults
Original Size 1
Original Size 2
Original Size 3
Original Size 4
Original Size 5
Original Size 6
Original Size 6
Original Size 8
Original Size 9
Original Size 10
Current Settings
8.5 x 11"
A4
11 x 17"
A3
5 x 8"
A5
17 x 22"
A2
4.13 x 5.83"
A6
Close
Change Settings
Exit the System Administration Mode.
11.
System Administration Guide 2-59

System Settings Xerox 700 Digital Color Press
Items
Reduce/Enlarge Presets
The Reduce/Enlarge Presets screen allows administrators to set up to 12 default reduction or enlargement ratios that
are displayed on the Copy tab of the User Interface.
Access the screen as follows:
Enter the System Administration mode.
1.
Touch the Tools tab.
2.
Touch System Settings.
3.
Machine Status
Machine
Information
System Settings
Setup and Calibration
Accounting
Authentication/Security
Settings
Faults Supplies Billing
Group
Common Service Setti ngs
Copy Service Se ttings
Scan Service Settings
Network Controll er Settings
Information
Tools
Features
Preset Buttons
Copy Defaults
Copy Control
Original Size Defaults
Reduce/Enlarge Pres ets
Custom Colors
Touch Copy Service Settings.
4.
Touch Reduce/Enlarge Presets.
5.
Select the item to be set or changed.
6.
Touch Change Settings.
7.
Follow the screen instructions to change the settings.
8.
Touch Save.
9.
Touch Close.
10.
Reduce/Enlarge Presets
R/E Preset 1
R/E Preset 2
R/E Preset 3
R/E Preset 4
R/E Preset 5
R/E Preset 6
R/E Preset 7
R/E Preset 8
R/E Preset 9
R/E Preset 10
Close
Current Settings
Change Settings
Exit the System Administration Mode.
11.
2-60
System Administration Guide
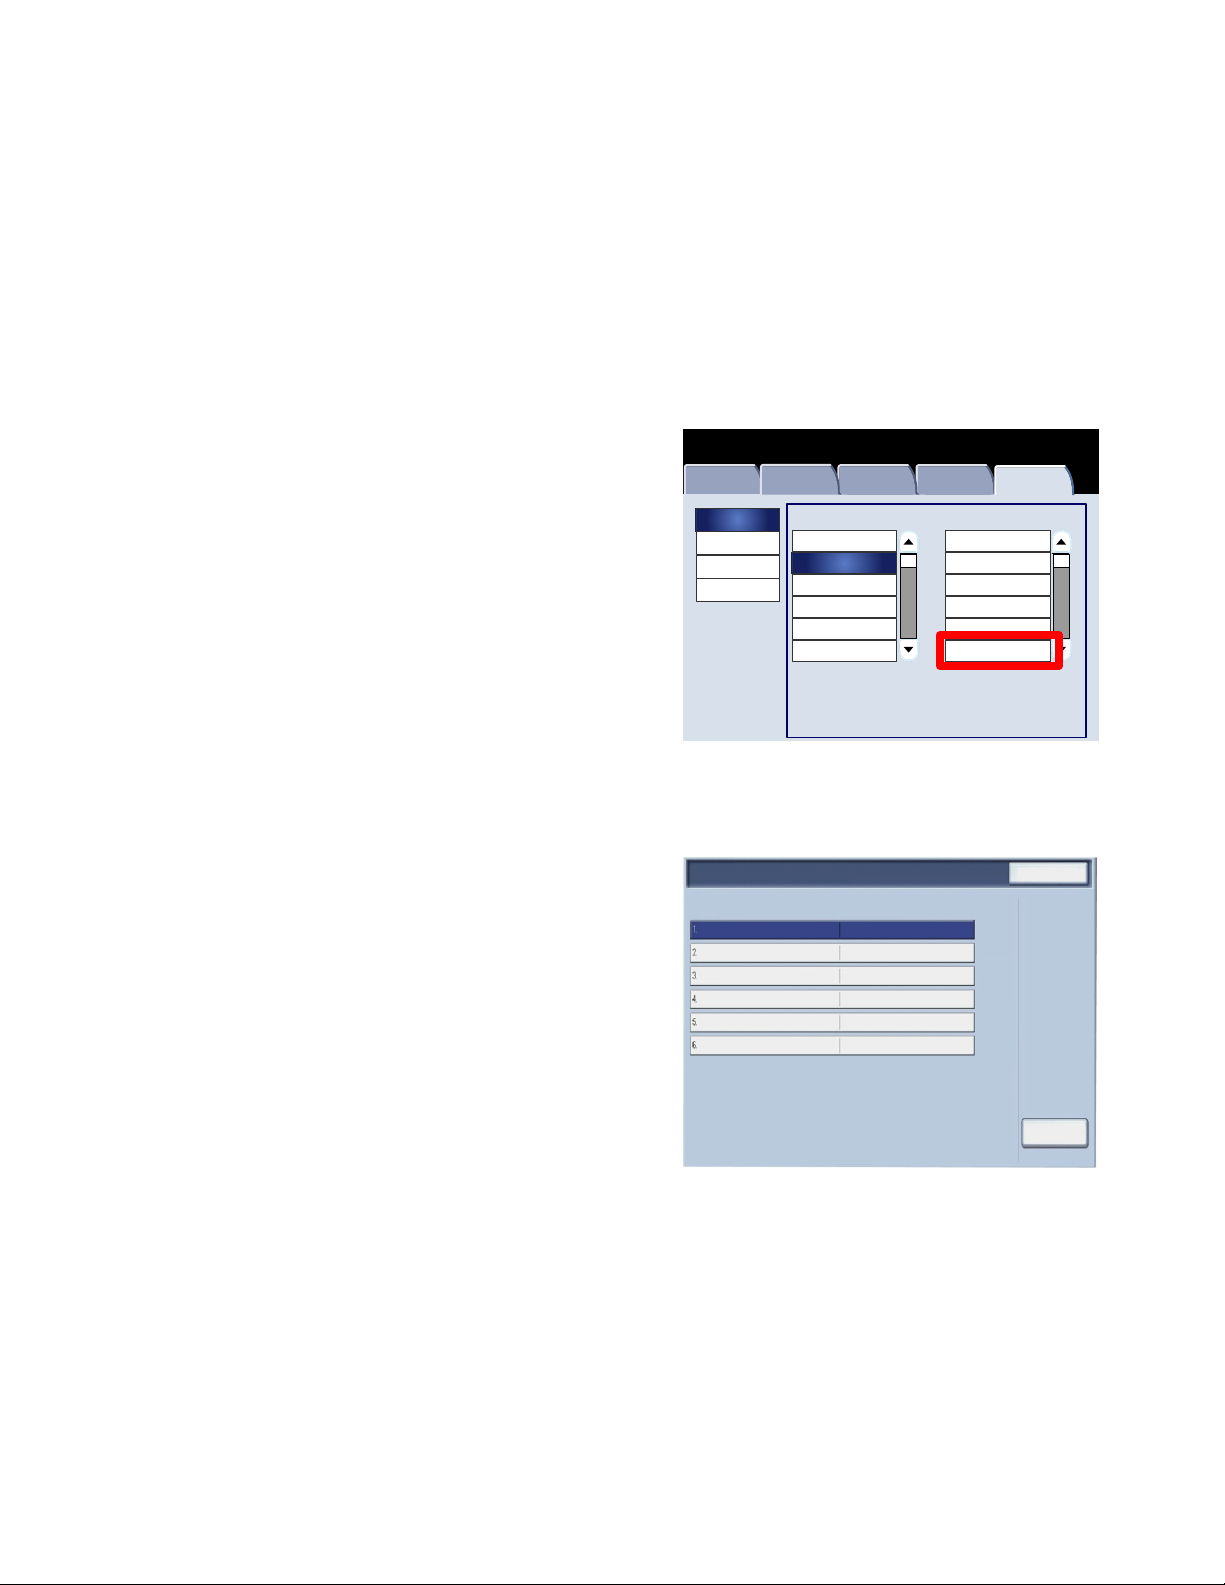
System SettingsXerox 700 Digital Color Press
Items
Custom Colors
The Custom Colors screen allows administrators to define up to six custom colors to be used on Output Color screen of
the User Interface.
Access the screen as follows:
Enter the System Administration mode.
1.
Touch the Tools tab.
2.
Touch System Settings.
3.
Machine Status
Machine
Information
System Settings
Setup and Calibration
Accounting
Authentication/Security
Settings
Faults Supplies Billing
Group
Common Service Setti ngs
Copy Service Se ttings
Scan Service Settings
Network Controll er Settings
Information
Tools
Features
Preset Buttons
Copy Defaults
Copy Control
Original Size Defaults
Reduce/Enlarge Pres ets
Custom Colors
Touch Copy Service Settings.
4.
Touch Custom Colors.
5.
Select the item to be set or changed.
6.
Touch Change Settings.
7.
Follow the screen instructions to change the settings.
8.
Touch Save.
9.
Touch Close.
10.
Custom Colors
Custom Color 1
Custom Color 2
Custom Color 3
Custom Color 4
Custom Color 5
Custom Color 6
Density
Watermark/Background Contrast
Force Waterm ark
Custom Watermark
Current Settings
0, 19, 0
Close
Off
Off
Off
Off
Change Settings
Exit the System Administration Mode.
11.
System Administration Guide 2-61

System Settings Xerox 700 Digital Color Press
Items
Scan Service Settings
Original Size Defaults
The Original Size Defaults screen allows administrators to save time for users who scan non-standard size originals.
The defaults set here are displayed on the Original Size screen within the Layout Adjustment tab.
Follow the screen instructions to change the settings.
Enter the System Administration mode.
1.
Touch the Tools tab.
2.
Touch System Settings.
3.
Touch Scan Service Settings.
4.
Touch Original Size Defaults.
5.
Select the item to be set or changed.
6.
Touch Change Settings.
7.
Follow the screen instructions to change the settings.
8.
Touch Save.
9.
Machine Status
Machine
Information
System Settings
Setup and Calibration
Accounting
Authentication/Security
Settings
Original Size Defaults
Original Size 2
Original Size 3
Original Size 4
Original Size 5
Original Size 6
Original Size 6
Original Size 8
Original Size 9
Original Size 10
Faults Supplies Billing
Group
Common Service Setti ngs
Copy Service Se ttings
Scan Service Settings
Network Controll er Settings
Original Size 1
Current Settings
8.5 x 11
8.5 x 14
11 x 17
8 x 10
3.5 x 5.0
3.5 x 5.5
4 x 6
5 x 7
5.5 x 8.5
7.25 x 10.5
Information
Features
Original Size Defaults
Output Size Defaults
Reduce/Enlarge Pres ets
Other Settings
Tools
Close
Change Settings
Touch Close.
10.
Exit the System Administration Mode.
11.
2-62
System Administration Guide

System SettingsXerox 700 Digital Color Press
Items
Output Size Defaults
The Output Size Defaults screen allows administrators to save time for users who scan non-standard size originals. The
defaults set here are displayed on the Reduce/Enlarge screen within the Layout Adjustment tab.
Follow the screen instructions to change the settings.
Enter the System Administration mode.
1.
Touch the Tools tab.
2.
Touch System Settings.
3.
Touch Scan Service Settings.
4.
Touch Output Size Defaults.
5.
Select the item to be set or changed.
6.
Touch Change Settings.
7.
Follow the screen instructions to change the settings.
8.
Touch Save.
9.
Machine Status
Machine
Information
System Settings
Setup and Calibration
Accounting
Authentication/Security
Settings
Output Size Defaults
Output Size 2
Output Size 3
Output Size 4
Output Size 5
Output Size 6
Output Size 7
Output Size 8
Output Size 9
Output Size 10
Faults Supplies Billing
Group
Common Service Setti ngs
Copy Service Se ttings
Scan Service Settings
Network Controll er Settings
Output Size 1
Current Settings
8.5 x 11
8.5 x 14
11 x 17
8 x 10
3.5 x 5.0
3.5 x 5.5
4 x 6
5 x 7
5.5 x 8.5
7.25 x 10.5
Information
Features
Original Size Defaults
Output Size Defaults
Reduce/Enlarge Pres ets
Other Settings
Tools
Close
Change Settings
Touch Close.
10.
Exit the System Administration Mode.
11.
System Administration Guide 2-63

System Settings Xerox 700 Digital Color Press
Items
Reduce/Enlarge Presets
The Reduce/Enlarge Presets screen allows administrators to set up to 12 default reduction or enlargement ratios that
are displayed on the Copy tab of the User Interface.
Access the screen as follows:
Enter the System Administration mode.
1.
Touch the Tools tab.
2.
Touch System Settings.
3.
Touch Scan Service Settings.
4.
Touch Reduce/Enlarge Presets.
5.
Select the item to be set or changed.
6.
Touch Change Settings.
7.
Follow the screen instructions to change the settings.
8.
Touch Save.
9.
Machine Status
Machine
Information
System Settings
Setup and Calibration
Accounting
Authentication/Security
Settings
Reduce/Enlarge Presets
R/E Preset 2
R/E Preset 3
R/E Preset 4
R/E Preset 5
R/E Preset 6
R/E Preset 7
R/E Preset 8
R/E Preset 9
R/E Preset 10
Faults Supplies Billing
Group
Common Service Setti ngs
Copy Service Se ttings
Scan Service Settings
Network Controll er Settings
Current Settings
R/E Preset 1
Information
Features
Tools
Original Size Defaults
Output Size Defaults
Reduce/Enlarge Pres ets
Other Settings
Close
Change Settings
Touch Close.
10.
Exit the System Administration Mode.
11.
2-64
System Administration Guide

System SettingsXerox 700 Digital Color Press
Items
Other Settings
The Other Settings screen allows administrators to review and edit a variety of common settings for the machine.
Access the screen as follows:
Enter the System Administration mode.
1.
Touch the Tools tab.
2.
Touch System Settings.
3.
Touch Scan Service Settings.
4.
Touch Other Settings.
5.
Select the item to be set or changed.
6.
Touch Change Settings.
7.
Follow the screen instructions to change the settings.
8.
Touch Save.
9.
Machine Status
Machine
Information
System Settings
Setup and Calibration
Accounting
Authentication/Security
Settings
Other Settings
Maximum Stored Pages
Saturation
Backkground Supression Level
Shadow Suppression Level
Color Space
TIFF Format
Image Transfer Screen
Force Waterm ark
Custom Watermark
Faults Supplies Billing
Group
Common Service Setti ngs
Copy Service Se ttings
Scan Service Settings
Network Controll er Settings
Current Settings
Memory Full Procedure
Off
Off
Information
Features
Original Size Defaults
Output Size Defaults
Reduce/Enlarge Pres ets
Other Settings
Tools
Close
Change Settings
Touch Close.
10.
Exit the System Administration Mode.
11.
System Administration Guide 2-65

System Settings Xerox 700 Digital Color Press
A brief description of each of the available settings follows:
Memory Full Procedure
This setting allows you to select Delete Job or Run Job when the machine memory is full.
Maximum Stored Pages
This setting allows you to choose between 1 and 999 for the maximum stored pages value.
Saturation
Select the amount of color saturation for scanned data. Select from Lower, Low, Normal, High, or Higher.
Backkground Supression Level
Select the amount of background suppression for scanned data. Select from Higher 1, Higher 2, Normal, Lower -1, or
Lower -2.
Color Space
Select if color space is to be enabled for scanned data. Select either Disabled or Enabled.
TIFF Format
Select the TIFF format for scanned data. Select either TIFF V6 or TTN2.
Image Transfer Screen
Select whether or not to display a message when the scan process is completed.
2-66
System Administration Guide

System SettingsXerox 700 Digital Color Press
Creating Job Templates
The job template is a configuration file that defines conditions, destination server, and other information for the
scanned file. A job template can be created using a Network Scanning server application such as the EFI Controller.
According to the settings in the template, documents are automatically scanned, saved in TIFF/JPEG or PDF format,
and then sent to a specified server.
Detailed information about creating and using job templates can be found in your network controller documentation.
System Administration Guide 2-67
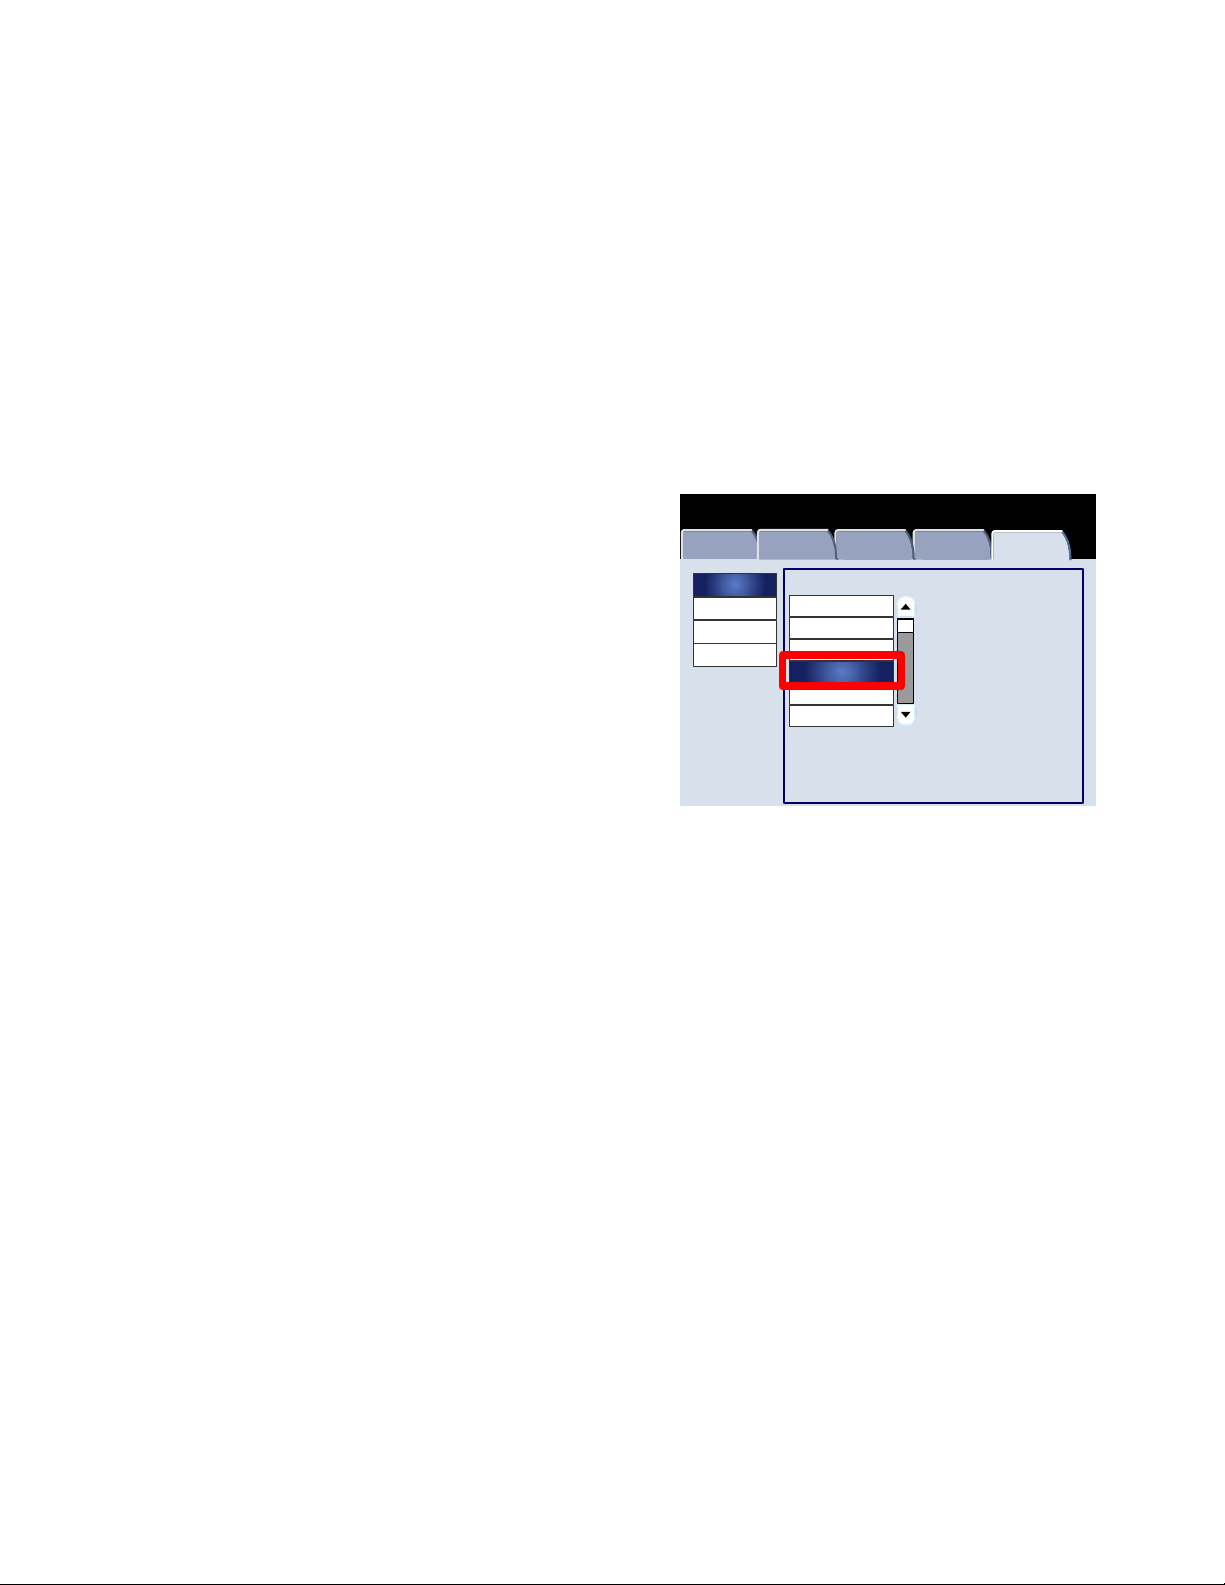
System Settings Xerox 700 Digital Color Press
Network Controller Settings
The Network Controller Settings screen allows System Administrators to specify settings for the network controller
associated with the device.
Access the screen as follows:
Enter the System Administration mode.
1.
Touch the Tools tab.
2.
Touch System Settings.
3.
Touch Network Controller Settings.
4.
Machine Status
Machine
Information
System Settings
Setup and Calibration
Accounting
Authentication/Security
Settings
Faults Supplies Billing
Group
Common Service Setti ngs
Copy Service Se ttings
Scan Service Settings
Network Controll er Settings
Information
Tools
Select the item to be set or changed.
5.
Touch Change Settings.
6.
Follow the screen instructions to change the settings.
7.
Touch Save.
8.
Touch Close.
9.
Exit the System Administration Mode.
10.
2-68
System Administration Guide

Setup and Calibration
Setup
From the Setup and Calibration menu, you can create
mailboxes, create and change the addresses in the address
book, assign paper tray attributes, create job flow
sheets/keywords, and Stored Programming.
Machine Status
Machine
Information
System Settings
Setup and Calibration
Accounting
Authentication/Security
Settings
Faults Supplies Billing
Group
Setup
Calibration
Information
Tools
Features
Stored Programi ng
Create Job Flow Sheet
Create Job Flow Sheet Keywor d
Paper Tray Attributes
System Administration Guide 3-1

Setup and Calibration Xerox 700 Digital Color Press
Stored Programming
(Not in Use)
(Not in Use)
(Not in Use)
(Not in Use)
(Not in Use)
(Not in Use)
(Not in Use)
(Not in Use)
(Not in Use)
(Not in Use)
Stored Programming
The Stored Programming screen allows administrators to store up to 40 jobs for future use.
Access the screen as follows:
Enter the System Administration mode.
1.
Touch the Tools tab.
2.
Touch Setup and Calibration.
3.
Machine Status
Machine
Information
System Settings
Setup and Calibration
Accounting
Authentication/Security
Settings
Faults Supplies Billing
Group
Setup
Calibration
Information
Tools
Features
Stored Programi ng
Create Job Flow Sheet
Create Job Flow Sheet Keywor d
Paper Tray Attributes
Touch Setup.
4.
Touch Stored Programming.
5.
Touch Store.
6.
Select the item to be set or changed.
7.
Follow the screen instructions to change the settings.
8.
Press Start.
9.
Touch Close.
10.
Job Store
Store
Store Build Job
Delete All Data
Enter/Change Name
Assign/Change Icon
Close
1.
2.
3.
4.
5.
6.
7.
8.
9.
10.
1
4
Exit the System Administration Mode.
11.
3-2
System Administration Guide

Setup and CalibrationXerox 700 Digital Color Press
Create Job Flow Sheet
Name
Name
Name
Name
Name
Name
Name
Name
Name
Name
2008/10/29
2008/10/29
2008/10/29
2008/10/29
2008/10/29
2008/10/29
2008/10/29
2008/10/29
2008/10/29
Updated
Name
Create Job Flow Sheet
The Create Job Flow Sheet screen allows administrators to assign a name, description, and transfer method to a new
Job Flow Sheet.
Access the screen as follows:
Enter the System Administration mode.
1.
Touch the Tools tab.
2.
Touch Setup and Calibration.
3.
Machine Status
Machine
Information
System Settings
Setup and Calibration
Accounting
Authentication/Security
Settings
Faults Supplies Billing
Group
Setup
Calibration
Information
Tools
Features
Stored Programi ng
Create Job Flow Sheet
Create Job Flow Sheet Keywor d
Paper Tray Attributes
Touch Setup.
4.
Touch Create Job Flow Sheet.
5.
Select the item to be set or changed.
6.
Touch Change Settings.
7.
Follow the screen instructions to change the settings.
8.
Touch Save.
9.
Touch Close.
10.
Close
Name
Name
1
Name
5
Name
Create/DeleteCreate/Delete
11.
System Administration Guide 3-3
Exit the System Administration Mode.

Setup and Calibration Xerox 700 Digital Color Press
Select Keyword
(Not in Use)
(Not in Use)
(Not in Use)
(Not in Use)
(Not in Use)
(Not in Use)
(Not in Use)
(Not in Use)
(Not in Use)
(Not in Use)
(Not in Use)
(Not in Use)
(Not in Use)
(Not in Use)
(Not in Use)
Create Job Flow Sheet Keyword
The Create Job Flow Sheet Keyword screen allows administrators to assign up to 15 searchable keywords for existing
Job Flow Sheets.
Follow the screen instructions to change the settings.
Enter the System Administration mode.
1.
Machine Status
Touch the Tools tab.
2.
Touch Setup and Calibration.
3.
Machine
Information
System Settings
Setup and Calibration
Accounting
Authentication/Security
Settings
Faults Supplies Billing
Group
Setup
Calibration
Information
Tools
Features
Stored Programi ng
Create Job Flow Sheet
Create Job Flow Sheet Keywor d
Paper Tray Attributes
Touch Setup.
4.
Touch Create Job Flow Sheet Keyword.
5.
Touch one of the Keyword buttons.
6.
Touch Create/Delete.
7.
Use the keyboard to enter the Keyword name.
8.
Touch Save.
9.
Touch Save.
10.
Touch Close.
11.
Close
Create/Delete
Exit the System Administration Mode.
12.
3-4
System Administration Guide

Setup and CalibrationXerox 700 Digital Color Press
Tray 1
Tray 2
Items
Tray 3
Tray 5
Auto Size Detect Plain
Auto Size Detect Plain
Auto Size Detect Plain
Auto Size Detect Plain
Auto Size Detect Plain
g
y
Paper Tray Attributes
The Paper Tray Attributes screen allows administrators to assign a paper size, paper type, and paper color for each
paper tray on the machine.
Follow the screen instructions to change the settings.
Enter the System Administration mode.
1.
Touch the Tools tab.
2.
Touch Setup and Calibration.
3.
Machine Status
Machine
Information
System Settings
Setup and Calibration
Accounting
Authentication/Security
Settings
Faults Supplies Billing
Group
Setup
Calibration
Information
Tools
Features
Stored Programi ng
Create Job Flow Sheet
Create Job Flow Sheet Keywor d
Paper Tray Attributes
Touch Setup.
4.
Touch Paper Tray Attributes.
5.
Select the appropriate paper tray.
6.
Touch Chan
7.
Use the keyboard to enter the Keyword name.
8.
Follow the screen instructions to change the Paper Size,
9.
e Settings.
Paper Type and Weight, Paper Color, Paper Curl, and
Alignment Adjustment settings.
Touch Save.
10.
Touch Confirm.
11.
Paper Tray Attributes
Tray 6
6.
Color Space
TIFF Format
Image Transfer Screen
Force Waterm ark
Custom Watermark
Current Settings
Close
Off
Off
Change Settings
Touch Close.
12.
13.
Exit the S
stem Administration Mode.
System Administration Guide 3-5

Setup and Calibration Xerox 700 Digital Color Press
Calibration
Calibration
When you select Calibration, you will have the opportunity to move through a series of steps to optimize the quality of
copied jobs. The machine will print a calibration pattern for you to place on the platen glass. The machine will scan
the calibration pattern, and automatically make adjustments as required.
Access the screen as follows:
Enter the System Administration mode.
1.
Touch the Tools tab.
2.
Touch Setup and Calibration.
3.
Machine Status
Machine
Information
System Settings
Setup and Calibration
Accounting
Authentication/Security
Settings
Faults Supplies Billing
Group
Setup
Calibration
Information
Tools
Features
Stored Programi ng
Create Job Flow Sheet
Create Job Flow Sheet Keywor d
Paper Tray Attributes
Touch Calibration.
4.
Select the appropriate Screen Type, Paper Supply, and
5.
Target.
Touch Start.
6.
Follow the screen instructions.
7.
Use the keyboard to enter the Keyword name.
8.
Screen Type
Copy Job
Print Job 1
Print Job 2
Paper Supply
Tray 3
8.5x11"
Plain Paper
White
Start
Close
Target
Copy Jobs Only
3-6
System Administration Guide

Authentication and Accounting
The machine has Accounting and Authentication/Security Settings that are used for numerous security measures. This
chapter describes how to adjust these settings.
Overview
While the Accounting feature restricts local and remote access to Copy, Scan and Print features,
Authentication/Security Settings restricts local and remote access to the Services area, which includes All Services, Job
Status and/or Machine Status pathways.
Accounting settings and Authentication/Security Settings features generally work independently, but there are
instances when a change in one will affect the other. As an example, if you set the Authentication feature to Login to
Local Accounts, Local Accounting is automatically set in the Accounting menu.
Only the System Administrator can set and control Accounting and Authentication/Security Settings.
The User Interface (UI) screens shown in this guide may or may not reflect the screens displayed on your
copier/printer. The UI screens vary from system to system and from marketplace to marketplace. Therefore, the
screens provided in this guide are a representation of the type of screens that may be seen on your particular system.
System Administration Guide 4-1

Authentication and Accounting Xerox 700 Digital Color Press
Accounting
Accounting is a security feature that is designed to prevent unauthorized use of the machine.
Overview
The accounting feature allows you to:
Restrict local or remote access to some or all of the Print, Copy and Scan features. You may want certain
departments or individuals to have access locally or remotely to only certain machine features.
Prevent unauthorized users from using the machine. Only users with a valid User ID can access the machine.
This allows you to determine which individuals are allowed to access the machine.
Track the number of copies, scanned pages and printed pages for any user account. This can be useful when
machine expenses are shared among various departments. As an example, the human resources and
maintenance departments can each be invoiced separately for their machine usage.
Impose restrictions on individual accounts, such as limiting the number of copy, scan, and prints jobs that are
allowed a user. As an example, you can allow the maintenance department to have unlimited access the copy
and print features, but limit scanning.
Note
When used with Accounting, the Authentication/Security Settings features provide additional security options.
The type of information that users are prompted to enter when accessing machine features depends on the Accounting
and Authentication settings.
4-2
System Administration Guide

Authentication and AccountingXerox 700 Digital Color Press
Creating/Viewing User Accounts
Creating user accounts allows you to register user account information, such as User IDs, user names, and passcodes,
and to impose restrictions:
On the number of copy, scan and print pages allowed each user using the Accounting menu.
On the Services pathways allowed using the Authentication/Security Settings menu.
A maximum of 1000 users can be registered.
Note
User IDs, and user names must be registered in Accounting before you can register users for Authentication.
Create/View User Accounts
The Create/View User Accounts screen allows administrators to assign a UserID and User Name to individual accounts
on the machine.
Access the screen as follows:
Enter the System Administration mode.
1.
Touch the Tools tab.
2.
Touch Accounting.
3.
Machine Status
Machine
Information
System Settings
Setup and Calibration
Accounting
Authentication/Security
Settings
Faults Supplies Billing
Group
Create/View
User Accounts
Reset User Accounts
System Administrator's
Meter (Copy Job)
Accounting Type
Auto Reset of User
Billing Informat i on
Copy Activity Report
Information
Tools
Touch Create/View User Accounts.
4.
System Administration Guide 4-3

Authentication and Accounting Xerox 700 Digital Color Press
UserID
Go to
0010-01000
UserID
Go to
0010-01000
5. From the Create / View User Accounts screen, perform one of the following to select a user account:
Select a (Not in Use) account that you want to create
Create/View User Accounts
and then press the Create/Delete button.
(Not in Use)
(Not in Use)
(Not in Use)
Using the numeric keypad, enter a four-digit number
from 0001 to 1000, which corresponds to a (Not in Use)
account. The entered number displays in the Go To field.
Then select the Create/Delete button.
(Not in Use)
(Not in Use)
(Not in Use)
(Not in Use)
(Not in Use)
(Not in Use)
(Not in Use) (Not in Use)
Note
You can also edit a previously created user account to reflect new user information.
Select the item to be set or changed.
6.
Touch Create/Delete.
7.
Create/View User Accounts
User Name
(Not in Use)
(Not in Use)
(Not in Use)
(Not in Use)
(Not in Use)
(Not in Use)
(Not in Use)
(Not in Use)
Close
(Not in Use)
Create / Delete
Close
When Create/Delete is selected, you can assign a
UserID, User name, and Account Limits to a specific
account.
Follow the screen instructions to change the settings.
8.
Touch Save.
9.
Touch Close.
10.
Touch Close again.
11.
Exit the System Administration Mode.
12.
(Not in Use)
(Not in Use)
(Not in Use)
(Not in Use)
(Not in Use)
(Not in Use)
(Not in Use)
(Not in Use)
(Not in Use)
(Not in Use) (Not in Use)
User Name
(Not in Use)
(Not in Use)
(Not in Use)
(Not in Use)
(Not in Use)
(Not in Use)
(Not in Use)
(Not in Use)
(Not in Use)
Create / Delete
4-4
System Administration Guide

Authentication and AccountingXerox 700 Digital Color Press
Print The Meter
Reset User Accounts
The Reset User Accounts screen allows administrators to reset account data for all user accounts, all feature access
settings, all account limits, or all authorization groups.
Access the screen as follows:
Enter the System Administration mode.
1.
Machine Status
Touch the Tools tab.
2.
Touch Accounting.
3.
Touch Reset User Accounts.
4.
Machine
Information
System Settings
Setup and Calibration
Accounting
Authentication/Security
Settings
Faults Supplies Billing
Group
Create/View
User Accounts
Reset User Accounts
System Administrator's
Meter (Copy Job)
Accounting Type
Auto Reset of User
Billing Informat i on
Copy Activity Report
Information
Tools
Select the item to be set or changed.
5.
Touch Reset.
6.
Touch Reset.
7.
Touch Close.
8.
Exit the System Administration Mode.
9.
Reset User Accounts
All User Accounts
All Feature Access Settings
All Account Limits
Total Impressions
All Authorization Groups
Meter(Print Jobs)
Close
Print The
Reset
System Administration Guide 4-5

Authentication and Accounting Xerox 700 Digital Color Press
System Administrator Meter (Copy Jobs)
556
556
System Administrator Meter (Copy Jobs)
The System Administrator Meter (Copy Jobs) screen allows administrators to view and reset the administrative
counters for both the color and black and white impression accounts.
Access the screen as follows:
Enter the System Administration mode.
1.
Machine Status
Touch the Tools tab.
2.
Touch Accounting.
3.
Touch System Administrator Meter (Copy Jobs).
4.
Machine
Information
System Settings
Setup and Calibration
Accounting
Authentication/Security
Settings
Faults Supplies Billing
Group
Create/View
User Accounts
Reset User Accounts
System Administrator's
Meter (Copy Job)
Accounting Type
Auto Reset of User
Billing Informat i on
Copy Activity Report
Information
Tools
Touch Reset.
5.
Touch Close.
6.
Exit the System Administration Mode.
7.
Close
Total Impressions
Color Black and White
Reset
4-6
System Administration Guide

Authentication and AccountingXerox 700 Digital Color Press
Accounting Type
The Accounting Type screen allows administrators to enable local accounting or network accounting on the device.
Follow the screen instructions to change the settings.
Enter the System Administration mode.
1.
Touch the Tools tab.
2.
Touch Accounting.
3.
Machine Status
Machine
Information
System Settings
Setup and Calibration
Accounting
Authentication/Security
Settings
Faults Supplies Billing
Group
Create/View
User Accounts
Reset User Accounts
System Administrator's
Meter (Copy Job)
Accounting Type
Auto Reset of User
Billing Informat i on
Copy Activity Report
Information
Tools
Touch Accounting Type.
4.
Touch the appropriate option.
5.
Accounting Disabled: The machine does not require a
user login ID and password in order to operate it.
Local Accounting: Enables the Account Administration
feature. User registration can be performed using the
touch screen or CentreWare Internet Services.
Touch Save.
6.
Exit the System Administration Mode.
7.
Accounting Type
Accounting Disabled
Local Accounting
Cancel
Save
System Administration Guide 4-7

Authentication and Accounting Xerox 700 Digital Color Press
Auto Reset of User Billing Information
Auto Reset of User Billing Information
The Auto Reset of User Billing Information screen allows administrators to automatically reset user billing
information at scheduled intervals.
Follow the screen instructions to change the settings.
Enter the System Administration mode.
1.
Touch Accounting.
2.
Touch Auto Reset of User Billing Information.
3.
Machine Status
Machine
Information
System Settings
Setup and Calibration
Accounting
Authentication/Security
Settings
Faults Supplies Billing
Group
Create/View
User Accounts
Reset User Accounts
System Administrator's
Meter (Copy Job)
Accounting Type
Auto Reset of User
Billing Informat i on
Copy Activity Report
Information
Tools
Touch the appropriate option.
4.
Touch Save.
5.
Exit the System Administration Mode.
6.
Off
Reset Every Year
Reset Every Quarter
Reset Every Month
Cancel
Save
4-8
System Administration Guide

Authentication and AccountingXerox 700 Digital Color Press
Copy Activity Report
Enabling this feature will automatically generate a printed usage report of an individual's completed Copier service
session.
Access the screen as follows:
Enter the System Administration mode.
1.
Machine Status
Touch the Tools tab.
2.
Touch Accounting.
3.
Touch Copy Activity Report.
4.
Machine
Information
System Settings
Setup and Calibration
Accounting
Authentication/Security
Settings
Faults Supplies Billing
Group
Create/View
User Accounts
Reset User Accounts
System Administrator's
Meter (Copy Job)
Accounting Type
Auto Reset of User
Billing Informat i on
Copy Activity Report
Information
Tools
Touch the appropriate option.
5.
Touch Save.
6.
Exit the System Administration Mode.
7.
Copy Activity Report
Disabled
Enabled
Cancel
Save
System Administration Guide 4-9

Authentication and Accounting Xerox 700 Digital Color Press
Authentication/Security Settings
Authentication/Security Settings works in conjunction with the Accounting feature to provide additional security for
your system.
While the Accounting feature restricts local and remote access to Copy, Scan and Print features,
Authentication/Security Settings restricts local and remote access to the Services area, which includes All Services, Job
Status and/or Machine Status pathways.
Authentication cannot be used unless Accounting is enabled in the Accounting Type menu.
The Accounting settings determine which features are available in Authentication/Security Settings.
Authentication/Security Settings are available to System
Administrator accounts, only.
Restrictions depend if the machine will be accessed locally
using the control panel, or remotely using CentreWare Internet
Services.
Machine Status
Machine
Information
System Settings
Setup and Calibration
Accounting
Authentication/Security
Settings
Faults Supplies Billing
Group
System Administrator Settings
Authentication
Allow User to Disable Act iv e
Settings
Job Status Default
Overwrite Hard Disk
Information
Tools
Features
System Administrator Login ID
System Administrator Passcode
4-10
System Administration Guide

Authentication and AccountingXerox 700 Digital Color Press
New System Admi nistrator Login
g
System Administrator Settings
System Administrator Login ID
The System Administrator Login ID is necessary to provide security against unauthorized entry to the system. If Off is
selected, the current System Administrator's passcode will become invalid.
Follow the screen instructions to change the settings.
Enter the System Administration mode.
1.
Machine Status
Touch the Tools tab.
2.
Touch Authentication/Security Settings.
3.
Machine
Information
System Settings
Setup and Calibration
Accounting
Authentication/Security
Settings
Faults Supplies Billing
Group
System Administrator Settings
Authentication
Allow User to Disable Act iv e
Settings
Job Status Default
Overwrite Hard Disk
Information
Tools
Features
System Administrator Login ID
System Administrator Passcode
Touch System Administrator Settings.
4.
Touch System Administrator Login ID.
5.
Touch On.
6.
Use the Keyboard to enter the Login ID in the fields
7.
provided.
Touch Save.
8.
Touch Save a
9.
Exit the System Administration Mode.
10.
ain.
System Administrator Login ID
Off
On
Re-enter System Administrator
Cancel
Save
Keyboard
Next
System Administration Guide 4-11

Authentication and Accounting Xerox 700 Digital Color Press
System Administrator Settings
System Administrator Passcode
The System Administrator Passcode appears in the Login Setup/Auditron Administration operation after Yes is selected
for using a password. Set the password after setting the system administrator UserID. The passcode can be from 4-12
numeric digits.
Follow the screen instructions to change the settings.
Enter the System Administration mode.
1.
Machine Status
Touch the Tools tab.
2.
Touch Authentication/Security Settings.
3.
Machine
Information
System Settings
Setup and Calibration
Accounting
Authentication/Security
Settings
Faults Supplies Billing
Group
System Administrator Settings
Authentication
Allow User to Disable Act iv e
Settings
Job Status Default
Overwrite Hard Disk
Information
Tools
Features
System Administrator Login ID
System Administrator Passcode
Touch System Administrator Settings.
4.
Touch System Administrator Passcode.
5.
Enter the passcode in the fields provided.
6.
Touch Save.
7.
Exit the System Administration Mode.
8.
System Administrator 's Passcode
New Passco de
Retype Passcode
Cancel
Save
Keyboard
Next
4-12
System Administration Guide

Authentication and AccountingXerox 700 Digital Color Press
Types of Authentication
Three types of authentication are used depending on where user information is stored.
1. Local Machine Authentication: Uses the user information registered for the Account Administration feature to
manage authentication. You need, therefore, to enable the Account Administration feature when you use Local
Machine Authentication. The print data sent directly from a computer can be received on the machine after
being authenticated by cross-checking the authentication information pre-configured on a client’s print driver
with the one registered on the machine.
2. Remote Authentication: Uses a remote authentication server to manage authentication. User information is not
registered on the machine.
Note
A registered user ID on the remote authentication server can be a maximum of 32 characters, and the password a
maximum of 128 characters. For SMB authentication, however, the password can be a maximum of 32 characters.
3. Xerox Secure Access: A system that uses a magnetic-card, IC-card, and biometrics systems for authentication. If
prompted, users must enter their user information on the machine’s control panel.
All additional topics regarding Accounting, Authentication, and Security Settings are located in the System
Administrator Tools section of this guide.
System Administration Guide 4-13

Authentication and Accounting Xerox 700 Digital Color Press
Authentication Controlled Users
Authentication controls how users access features: Users are classified into the following six types.
System Administrators: These are users who can enter System Administrator mode and change the machine settings. A
System Administrator uses a special user ID called a System Administrator ID.
Authenticated Users (with System Administrator Privileges): These are users who have System Administrator privileges.
When using a restricted service, this user must enter their user ID on the authentication screen.
Authenticated Users (with Account Administrator Privileges): These are users who are have Account Administrator
privileges. When using a restricted service, this user must enter their user ID on the authentication screen.
Authenticated Users: Users with no System Administrator or Account Administrator Privileges: When using a restricted
service, this user must enter their user ID on the authentication screen.
Unauthenticated Users: Users who are not registered with the machine. An Unauthenticated User cannot use restricted
services.
General Users: Users other than System Administrators in non-authentication mode.
4-14
System Administration Guide
 Loading...