

Page 1

Support
UK:
0905 118 0888 (25p/min)
(open Monday to Friday 9:00 - 16:00 GMT)
Denmark:
077345695
(open Monday to Friday 10:00 - 17:00 CET)
Finland:
0942597819
(open Monday to Friday 10:00 - 17:00 CET)
Norway:
021543223
(open Monday to Friday 10:00 - 17:00 CET)
Sweden:
0852507027
(open Monday to Friday 10:00 - 17:00 CET)
If you experience any problems with your software, please get in touch with our support team:
Support website: http://support.magix.net
This website will lead you to the MAGIX user service page, which, among other things, contains the
following free offers:
FAQs (frequently asked questions) and general tricks and tips. In most cases you'll find the
solution to your problem here. If not, use the Email support form:
E-mail support form. Via the special form you inform our support staff about your system. This
information is used to solve your problems quickly and competently. Simply fill out and send with
a mouse-click!
Support forum: You are not alone. Perhaps other users had a similar problem and can help you
solve yours. Our support staff are also regular contributors.
Download section: Updates, improvements and patches are likewise offered free of charge via
download Many problems you may experience are well-known to us, and which can be solved
by downloading the latest patch. Besides patches, there are also wizards for checking and
optimizing your system
Links: In the links list you will find the contact addresses of all the most important hardware
manufacturers.
You can also reach our support team by telephone:
Email: info@magix.net
Please have the following information at hand:
Program version
Configuration details (operating system, processor, memory, hard drive...)
Sound card configuration (type, driver)
Information regarding other audio software installed
Page 1
Page 2

More from MAGIX
In January 2007 Xara was acquired by MAGIX AG, Xara now operates as a wholly owned subsidiary.
MAGIX AG holds the leading market position for the distribution of photo, music and video software in
key European markets, as well as being one of the three leading market players in the USA. Xara
customers are already benefiting from MAGIX considerable distribution experience and resources.
MAGIX online
Visit us at www.magix.com
. Here you will find everything you need to know about MAGIX products and any current special offers
that may be available.
MAGIX Online Album
MAGIX Online Print Service
Catooh
MAGIX Community
Support
Current news & information
and much more. It's worth a visit...
Hint: You can register your product with your product registration number at www.magix.com
MAGIX Premium Club
Our exclusive club for all MAGIX customers who own a registered product. MAGIX Premium Club
members have access to a wide range of services:
Free product updates and services
Exclusive club events and surprises
News and info about the club and much more...
Membership is free.
You can find more information about this topic on
www.magix.com
Page 2
Page 3

MAGIX online
Visit us at www.magix.com
. Here you will find everything you need to know about MAGIX products and any current special offers
that may be available.
MAGIX Online Album
MAGIX Online Print Service
Catooh
MAGIX Community
Support
Current news & information
and much more. It's worth a visit...
Hint: You can register your product with your product registration number at www.magix.com
MAGIX Premium Club
Our exclusive club for all MAGIX customers who own a registered product. MAGIX Premium Club
members have access to a wide range of services:
Free product updates and services
Exclusive club events and surprises
News and info about the club and much more...
Membership is free.
You can find more information about this topic on
www.magix.com
Page 3
Page 4

MAGIX Premium Club
Our exclusive club for all MAGIX customers who own a registered product. MAGIX Premium Club
members have access to a wide range of services:
Free product updates and services
Exclusive club events and surprises
News and info about the club and much more...
Membership is free.
You can find more information about this topic on
www.magix.com
Page 4
Page 5
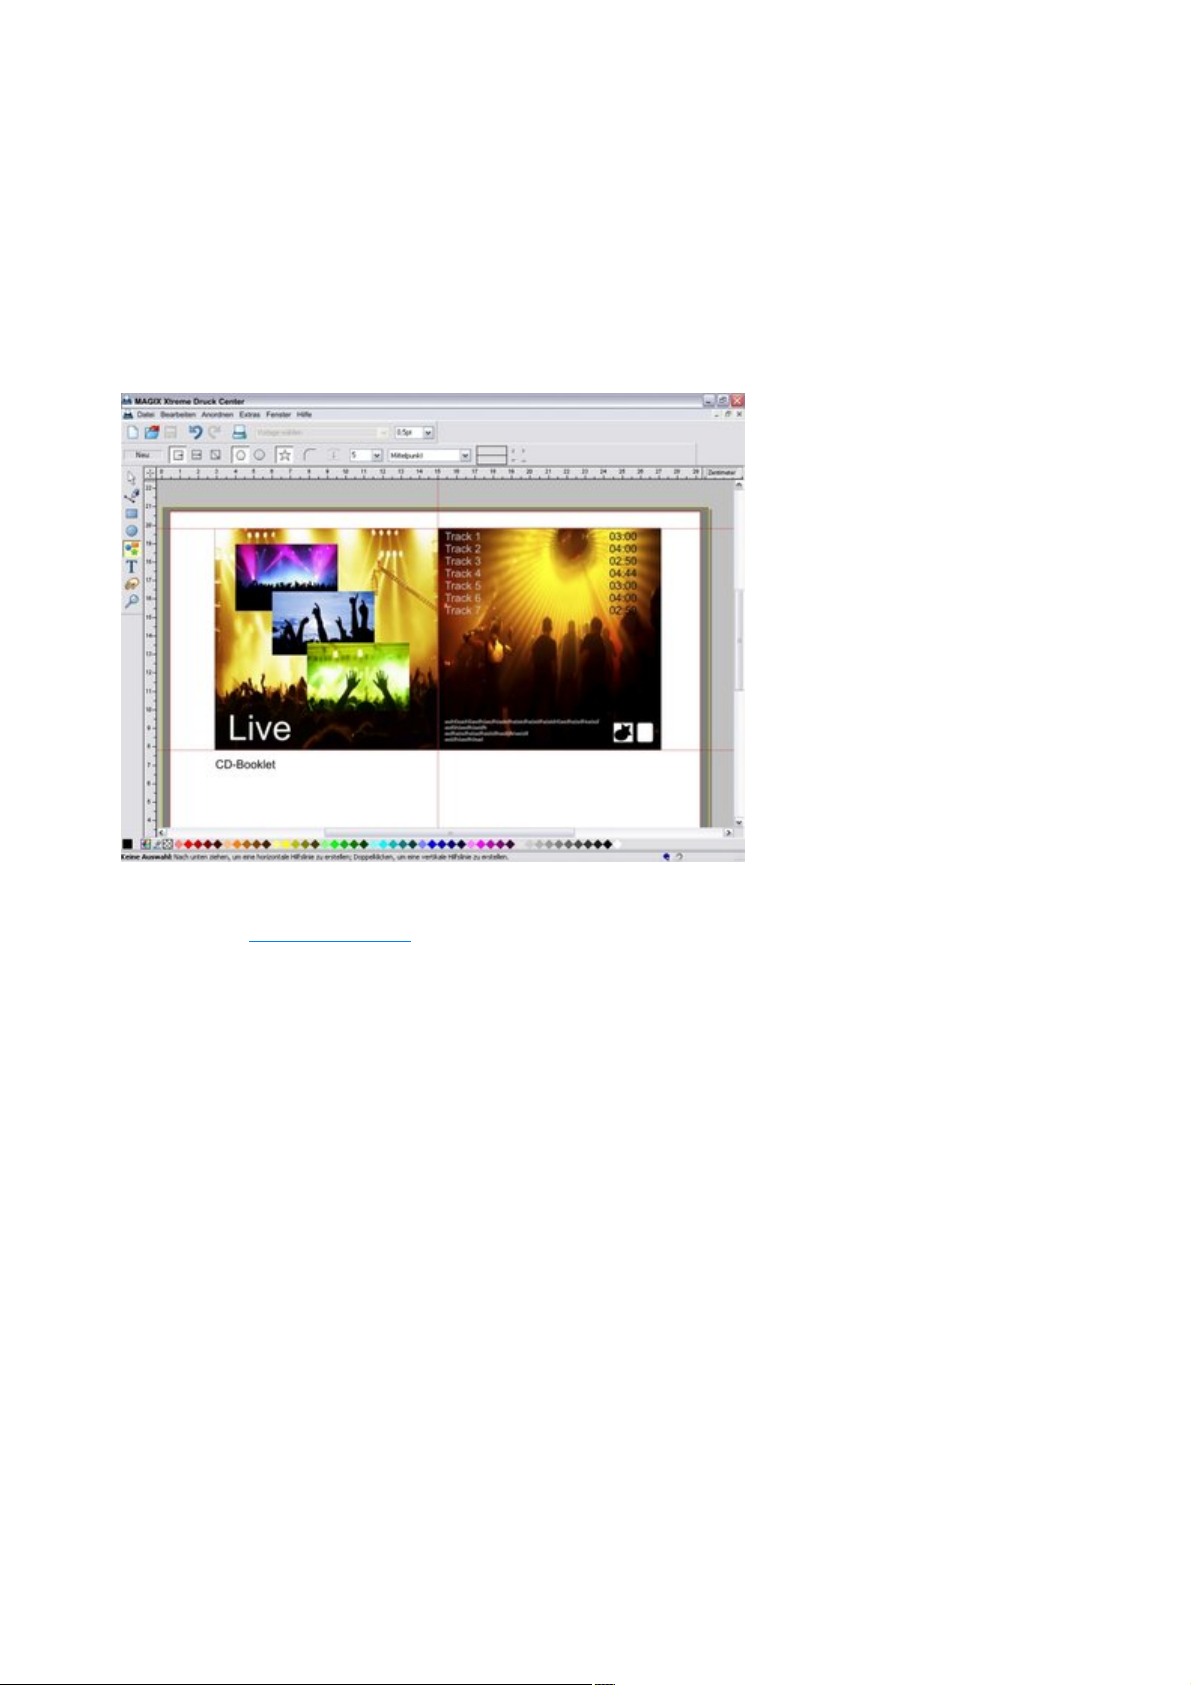
Welcome to MAGIX Xtreme Print Studio
Welcome to MAGIX Xtreme Print Studio
the ideal program for one-of-a-kind CD/DVD cases and labels. It's great for designing and printing
labels, covers, inlays, and booklets quickly and easily.
Even complete track listings, shapes, and lines can be added.
This free program perfectly rounds off the look of your homemade CDs and DVDs!
The following Short introduction
will give you a quick overview of the functions in the program; these functions are described in more
detail in the reference section.
Note: The reference section is a shortened version of the documentation for MAGIX Xtreme Graphic
Designer 2. Functions that are not available in MAGIX Xtreme Print Studio have been removed.
Nevertheless, it may be the case that figures in this help document do not always match features of the
program. In seldom cases, functions or features may be mentioned that are not available in MAGIX
Xtreme Print Studio. Please have patience and understanding in such cases.
Page 5
Page 6

Short description
Arbeitsschritte
Edit playlists
Select template
Creatively edit your cover
Printing
To create a cover for a disc quickly, proceed as follows:
Select the type of project or format
Add and design images, text, and graphics.
Print covers, labels, and inlays.
Whether covers for music CDs, movies, title images for videos or slideshows, or a label for your backup
copies, MAGIX Xtreme Print Studio makes it all possible!
Page 6
Page 7
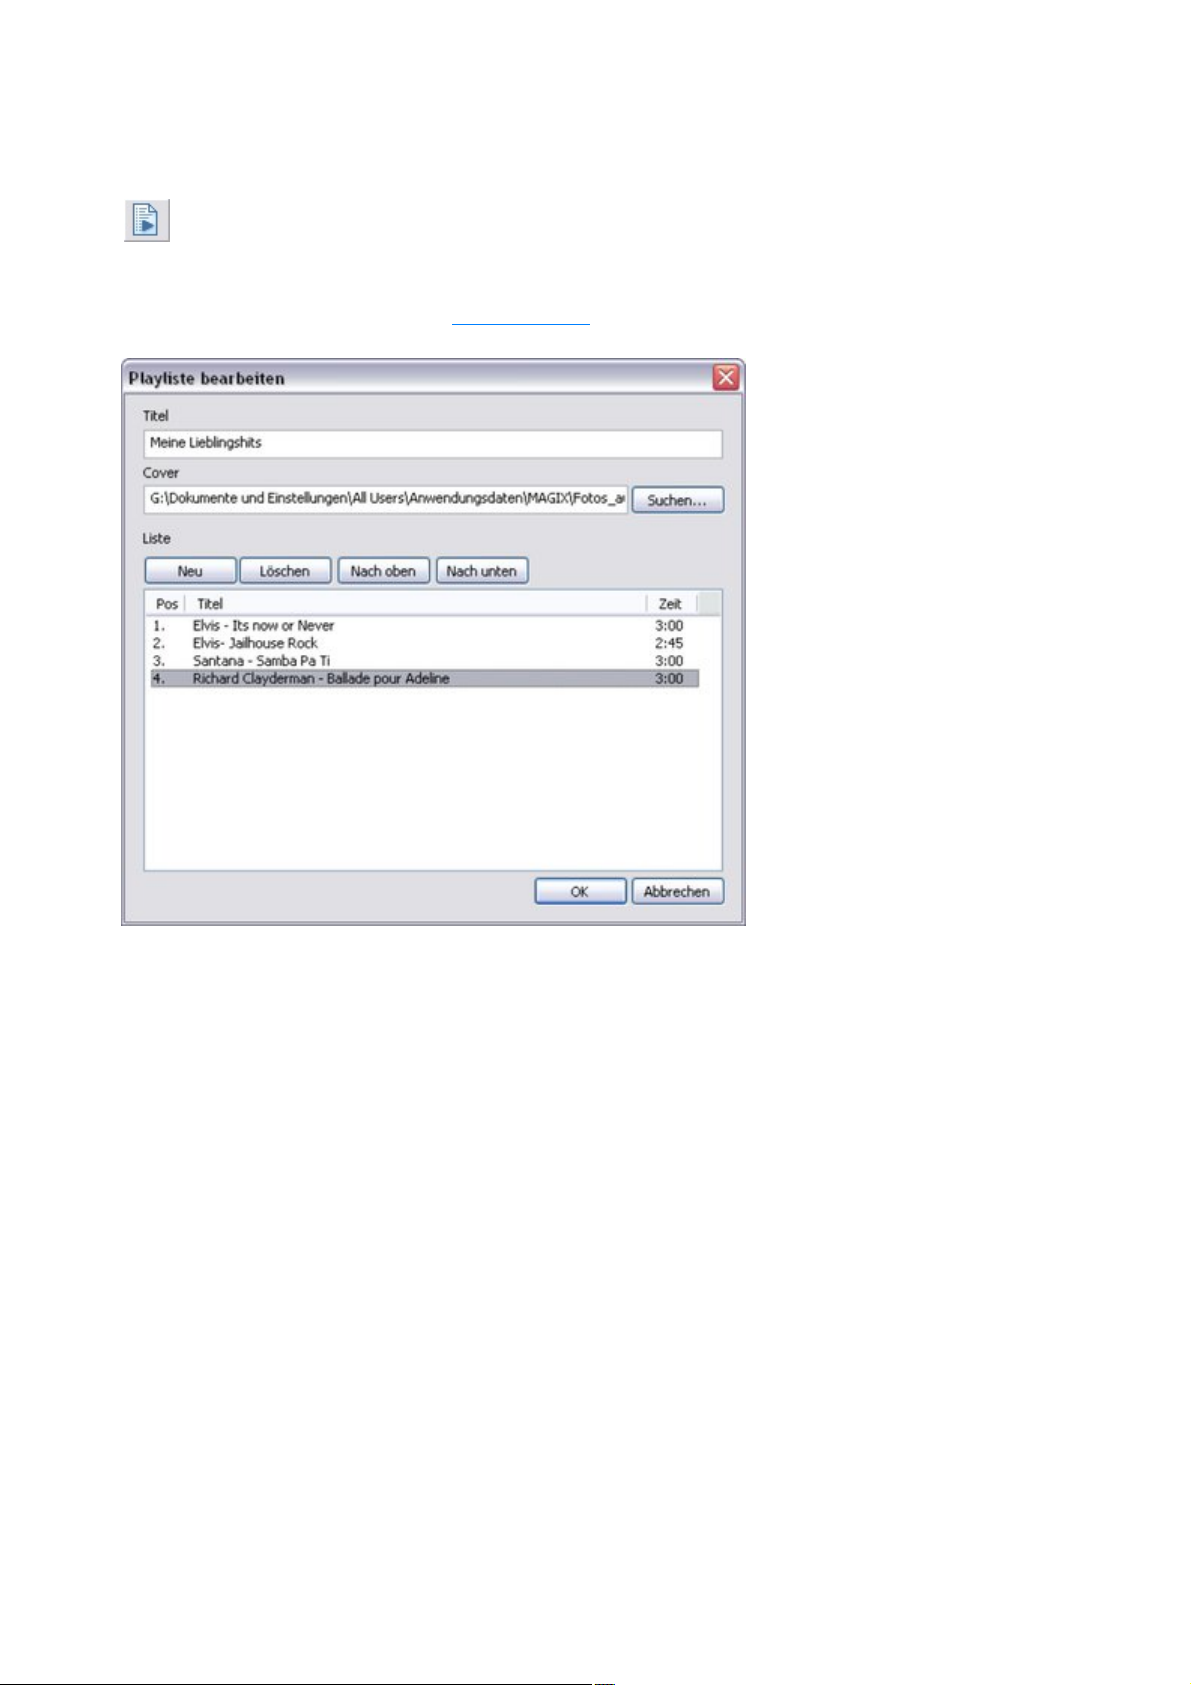
Edit playlists
Please click this button to open the playlist editor.
If MAGIX Xtreme Print Studio is opened via another program like MAGIX MP3 Maker or MAGIX
Movie Edit Pro, then the playlists will already include titles and play durations. A cover is therefore
created automatically. Read more in Select template
.
At the top, enter the title of the disc, and then select a cover image in the middle that should be loaded
into the document (this can also be added later).
The list is edited below: New creates a new entry, Up/Down moves an entry in the list, Delete
removes an entry.
Once the list has been entered completely, the dialog can be closed with OK
and a document with matching text and graphics objects will be added.
Page 7
Page 8
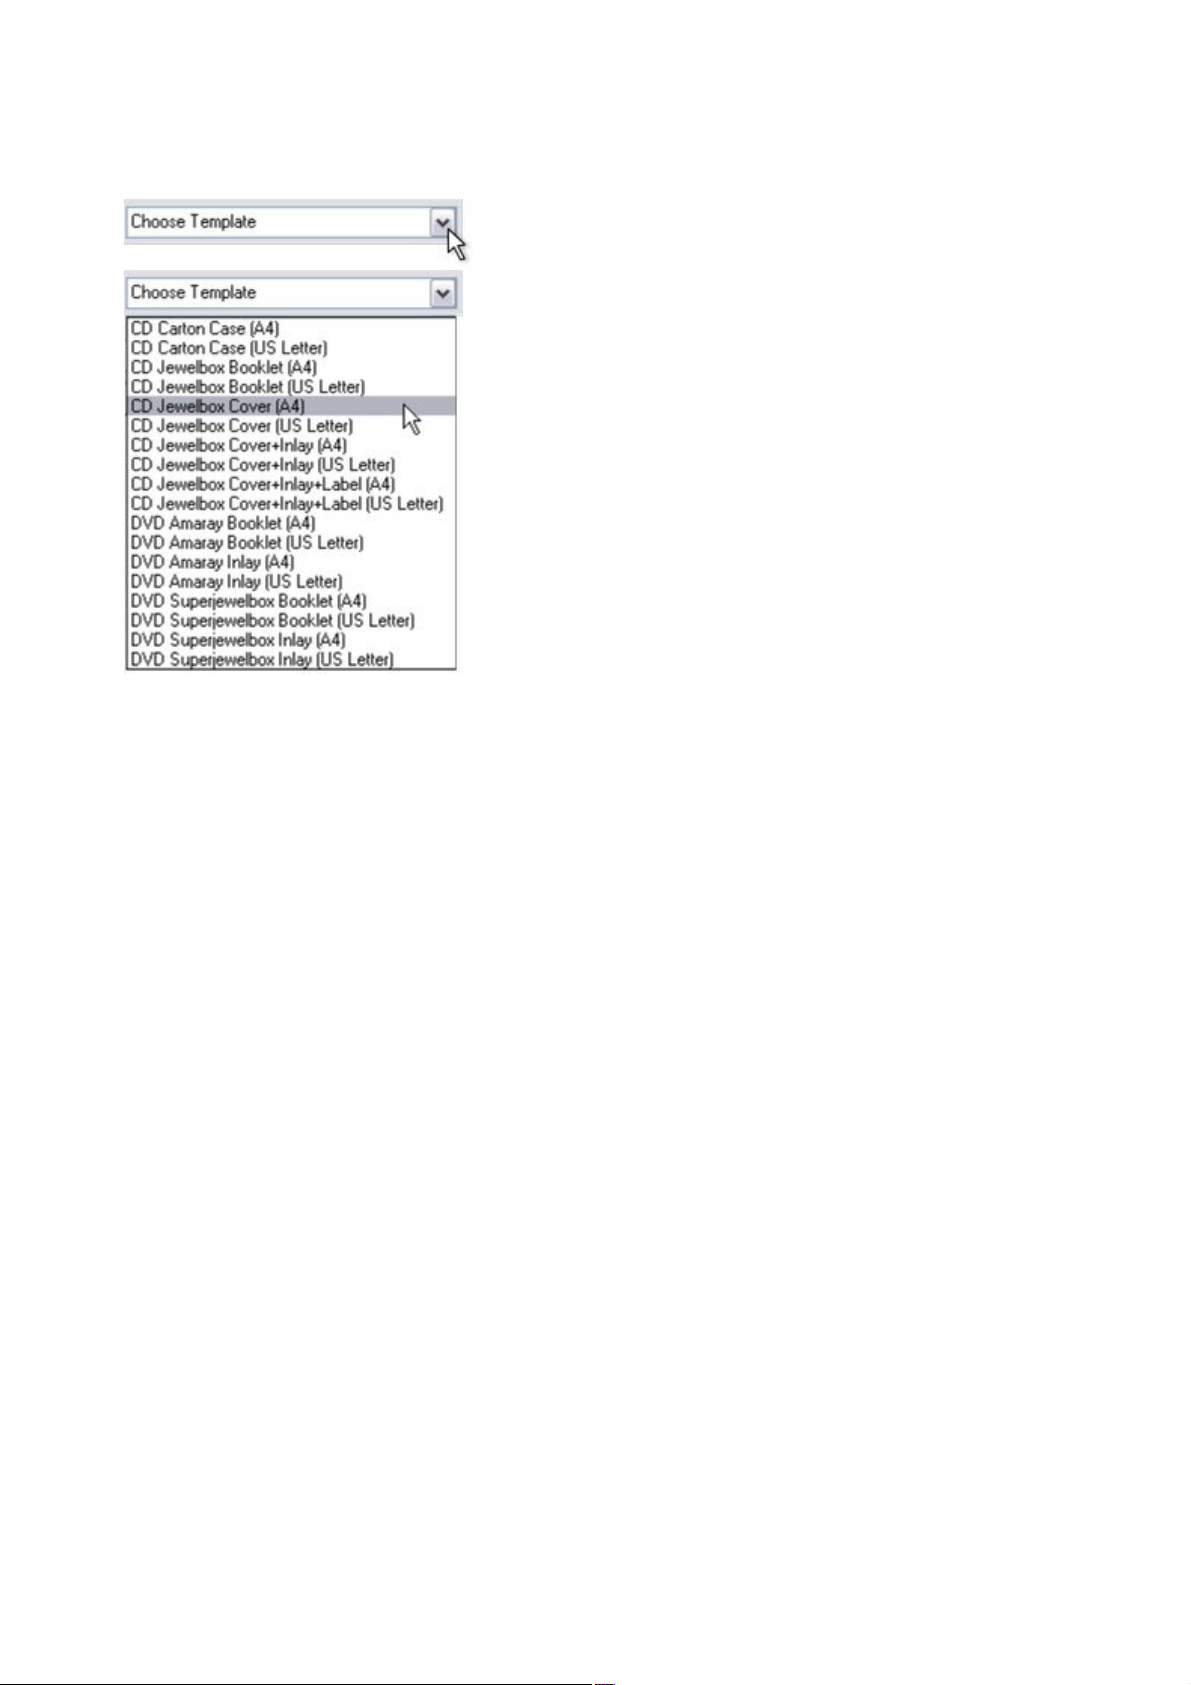
Select template
Now select a template for your cover
from the list.
A new document will be created based
on the selected template.
If you select another template later or
make changes to the playlist via the
playlist editor, a new document will be
created. For this reason, make sure
that the playlist entries are correct and
that you have selected the correct
template before
you start to add creative work to the
cover.
Page 8
Page 9
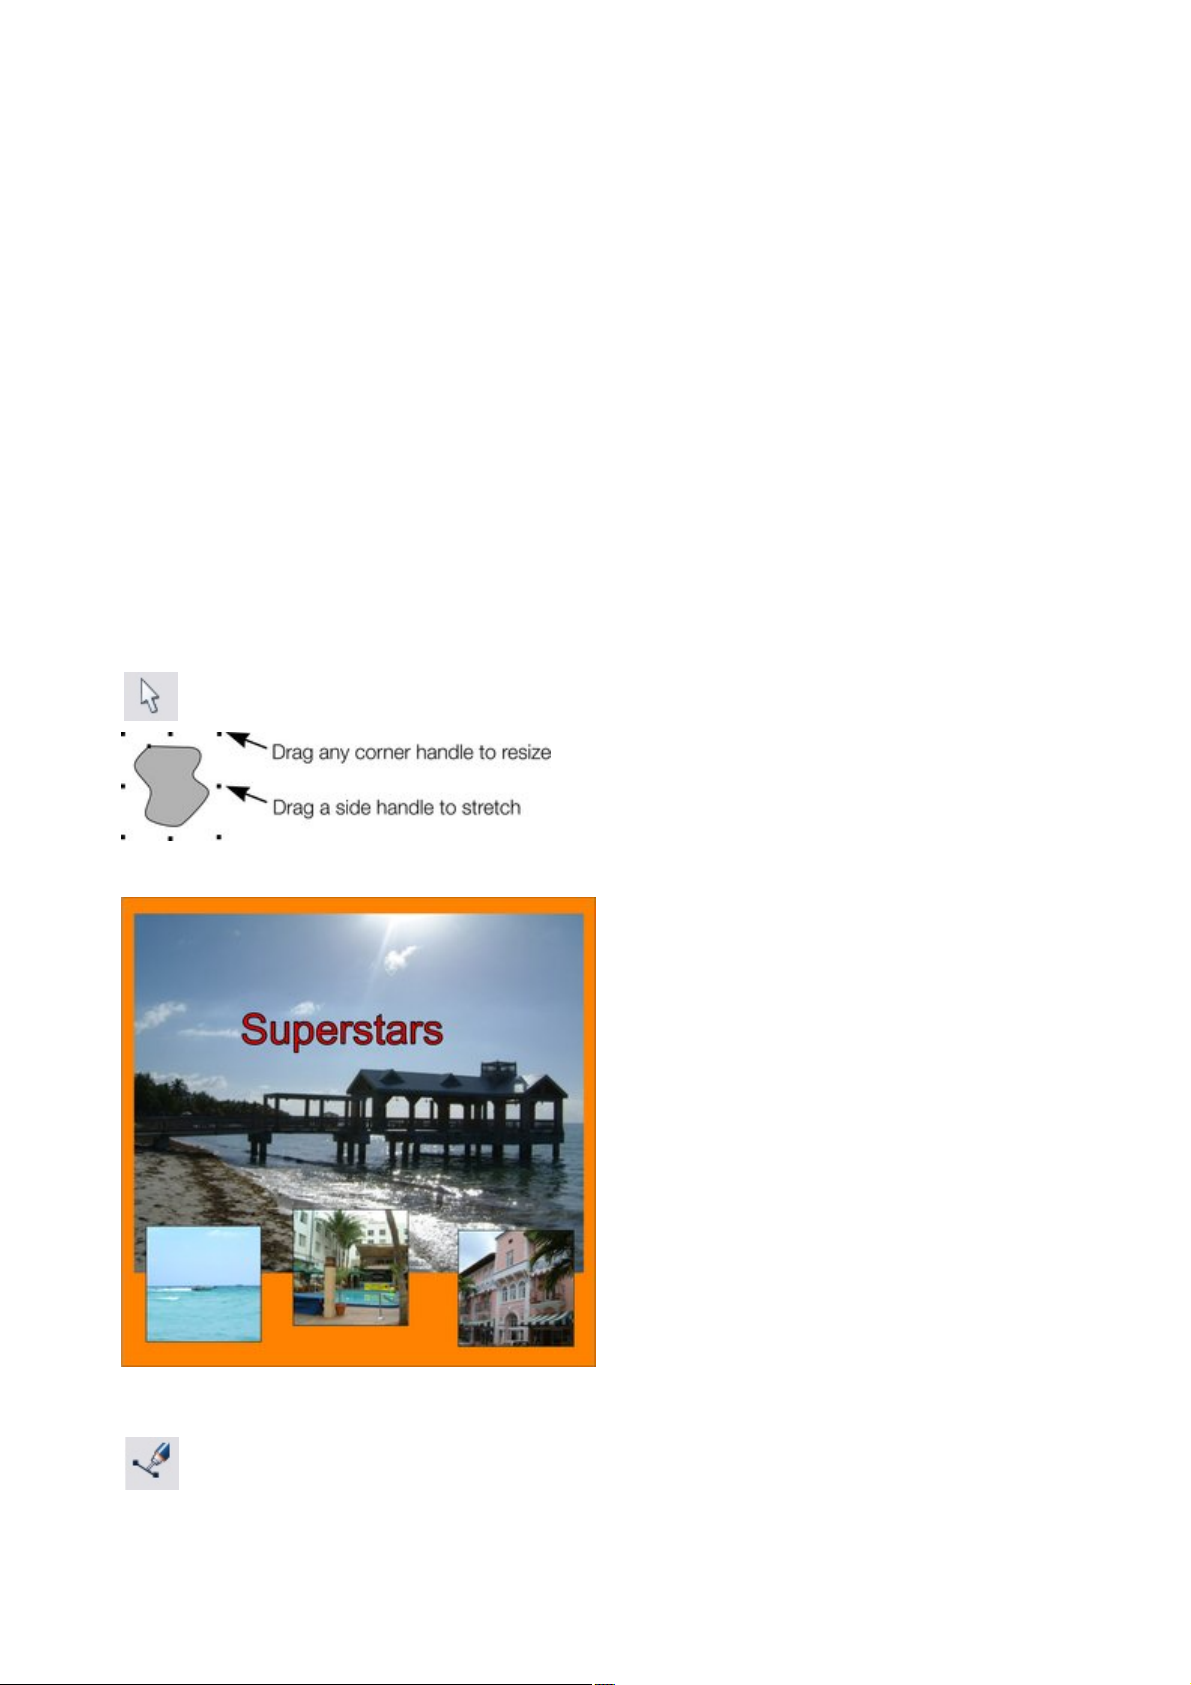
Creatively edit your cover
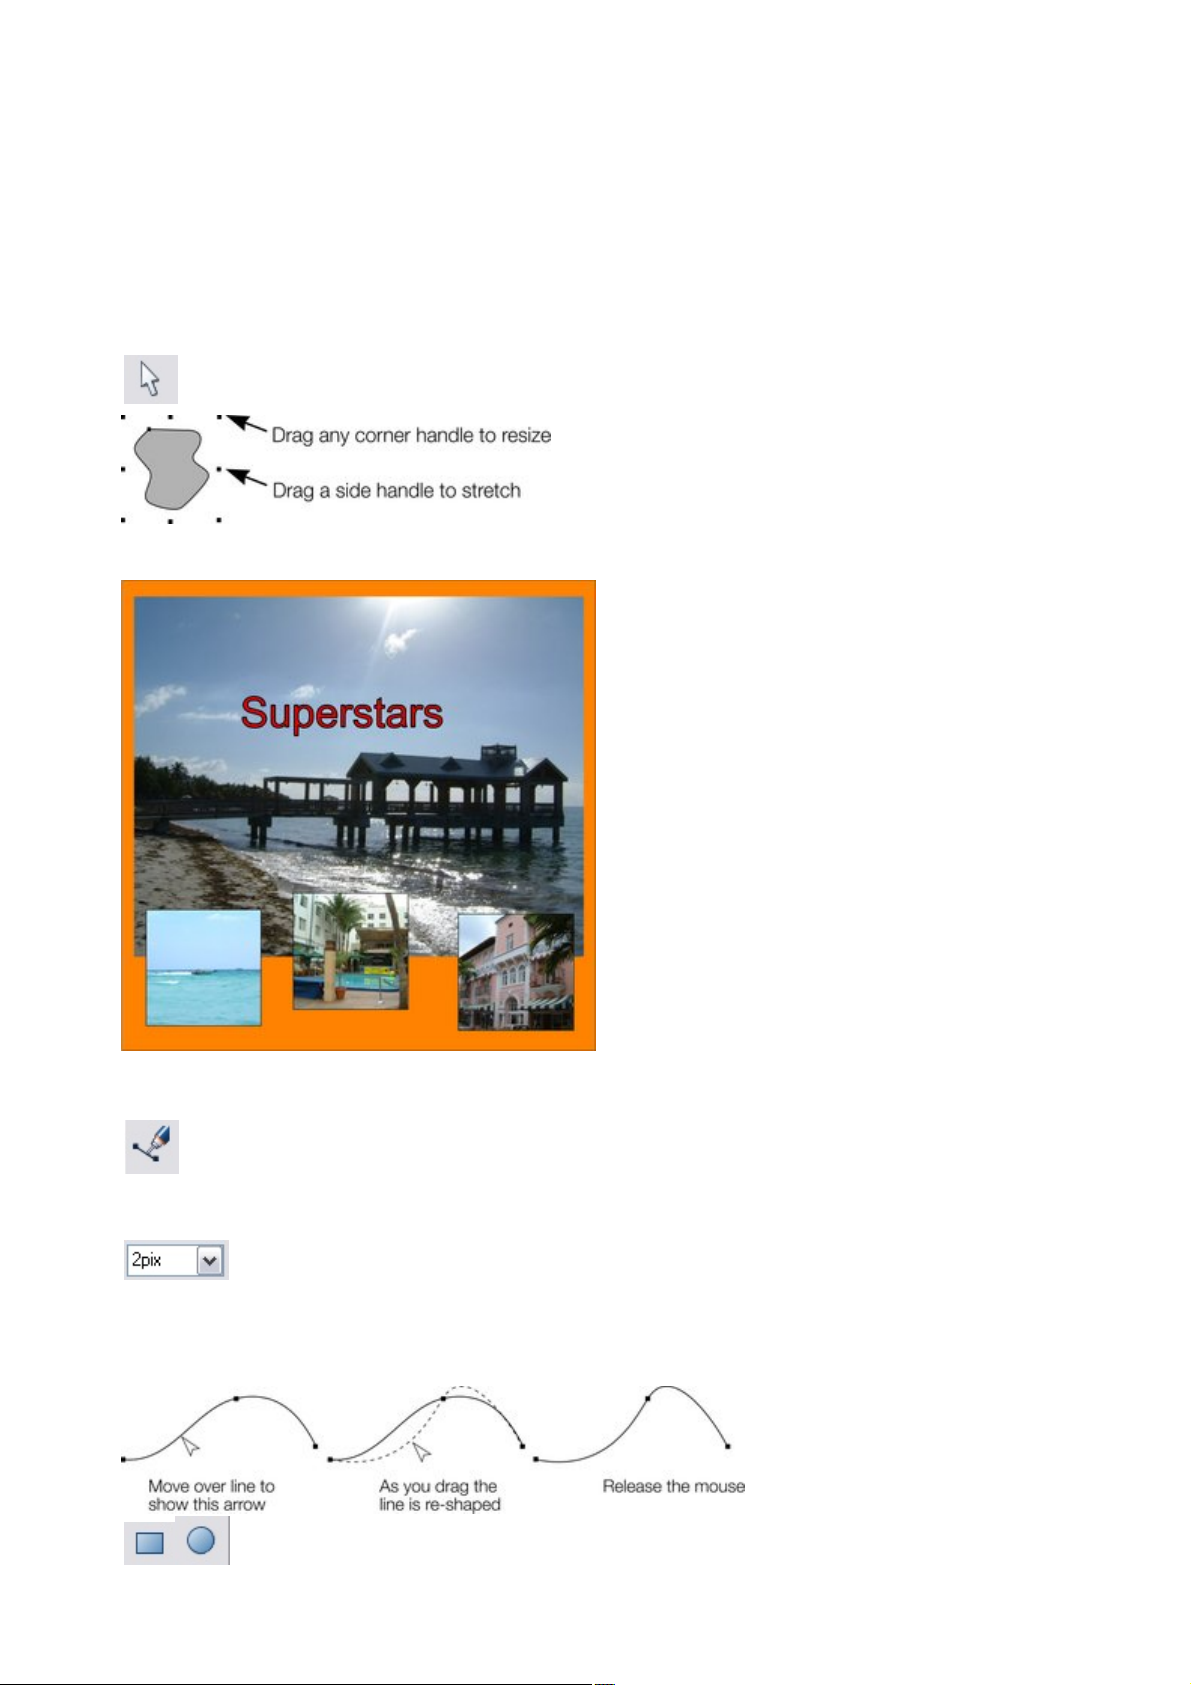
Drag the corners with the Selection
tool to make the image the desired size.
Use the pencil tool to draw lines. Click for a new straight line section;
if you drag the corner points, curved lines will be created. Finish the
line with "Shift + click".
You can edit your cover creatively with the help of the tools in the toolbar to the left. For example, you
can:
Add pictures
Add simple geometric shapes
Change the font and text
Add additional text
This chapter contains a short description of these functions; for a more detailed description, please read
the reference chapters,
Add images
To add image files for your cover, simply drag them out of the explorer onto a page in MAGIX Xtreme
Print Studio, or use the Import command from the File
menu.
Imported objects always land at the very front of the document, i.e. before available playlists. In order to
put them behind the text, use the command Move to background (shortcut: Ctrl + B) in the Arrange
menu.
Tip: You can also fill a shape (e.g. the CD label or a rectangle) with an image. Hold down the "Shift" key
as the image is dropped.
Drawing Lines and Shape
To change the line thickness, first select the object or objects which you would like to change:
Page 9
Page 10
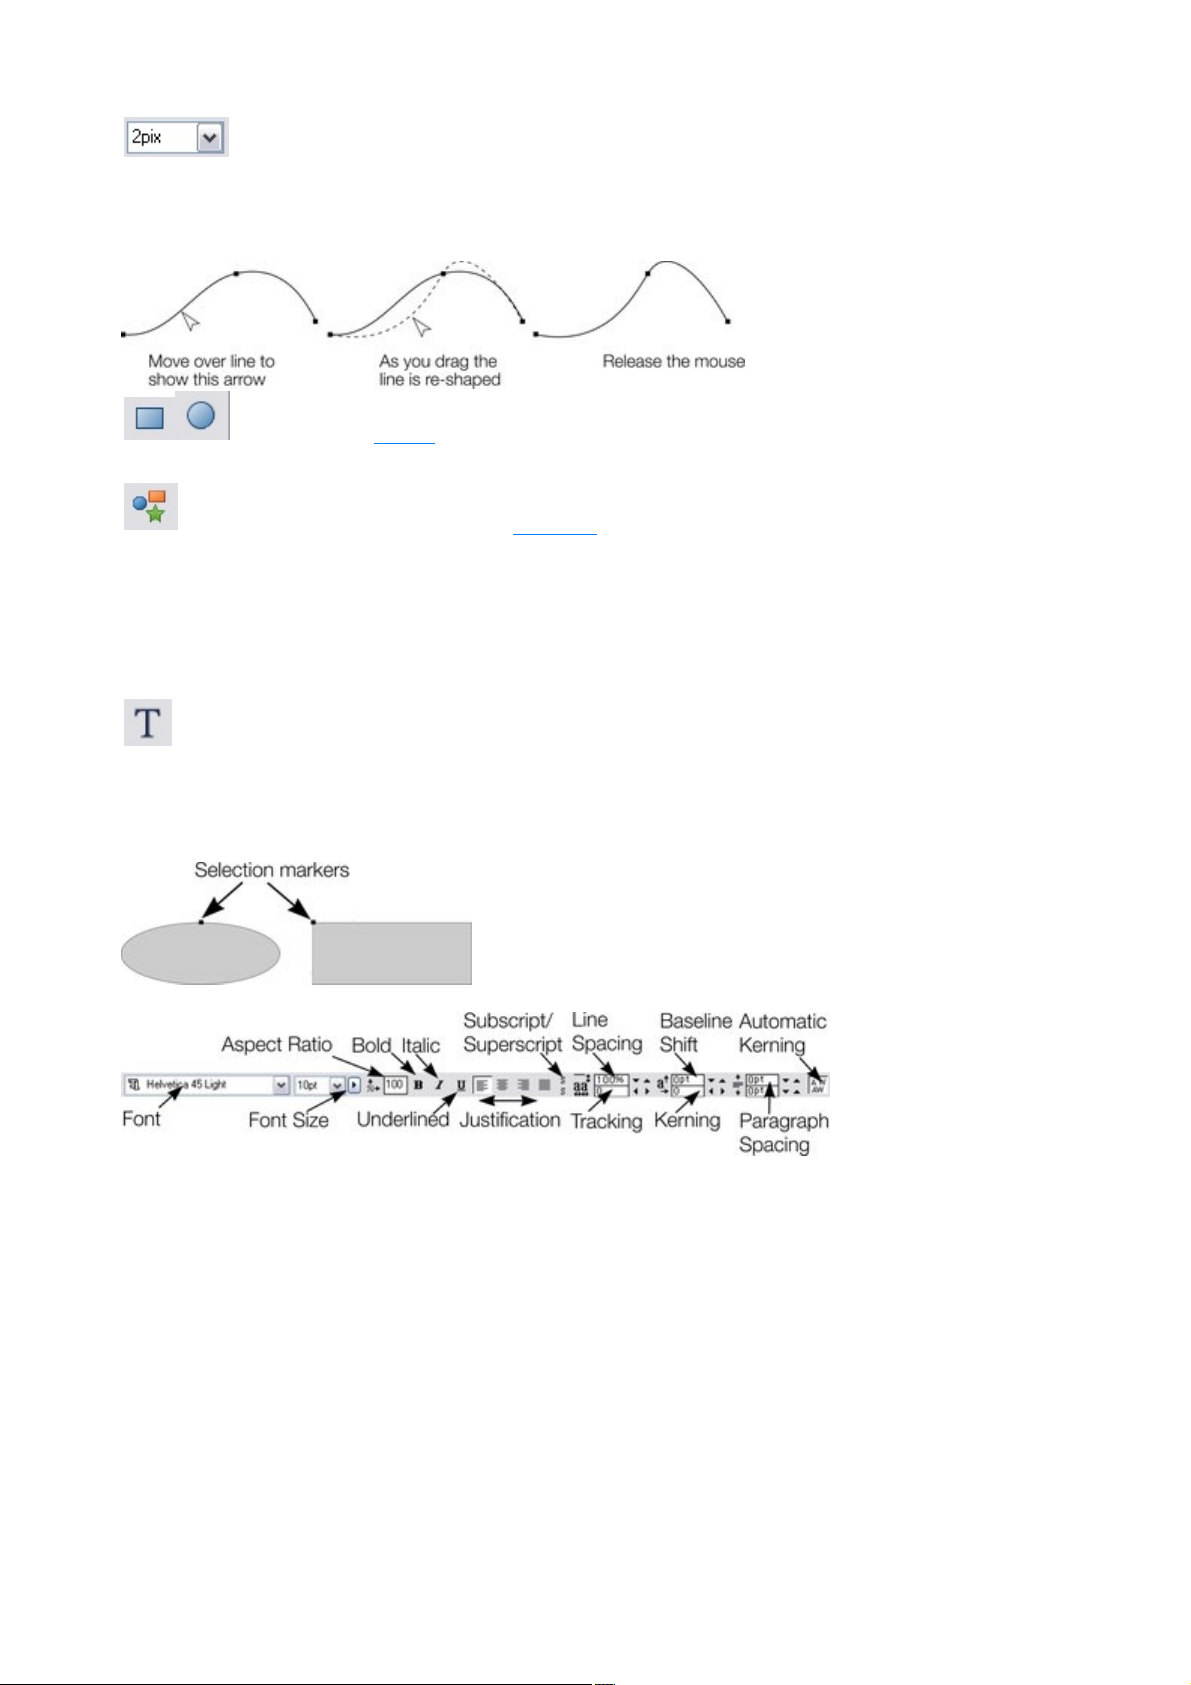
Type a new line width into the text box on the standard toolbar
or choose a default line thickness from the menu.
You can create a closed shape by ending a line back at its start point. A "+" beside the mouse pointer
Use the square and circle tools to create these shapes as frames for
text areas or images
.
With the "Quickshape" tool, you can create other polygons and
stars. More about this in the reference
section.
To edit text directly, switch to the text tool.
indicates that it is positioned over the start handle.
Lines and closed shapes can be edited retroactively.
Edit text
A text field is an object like an image or graphic and therefore cannot be freely enlarged or diminished
with the selection tool.
Next, click the text object, and you will be able to edit the text like normal.
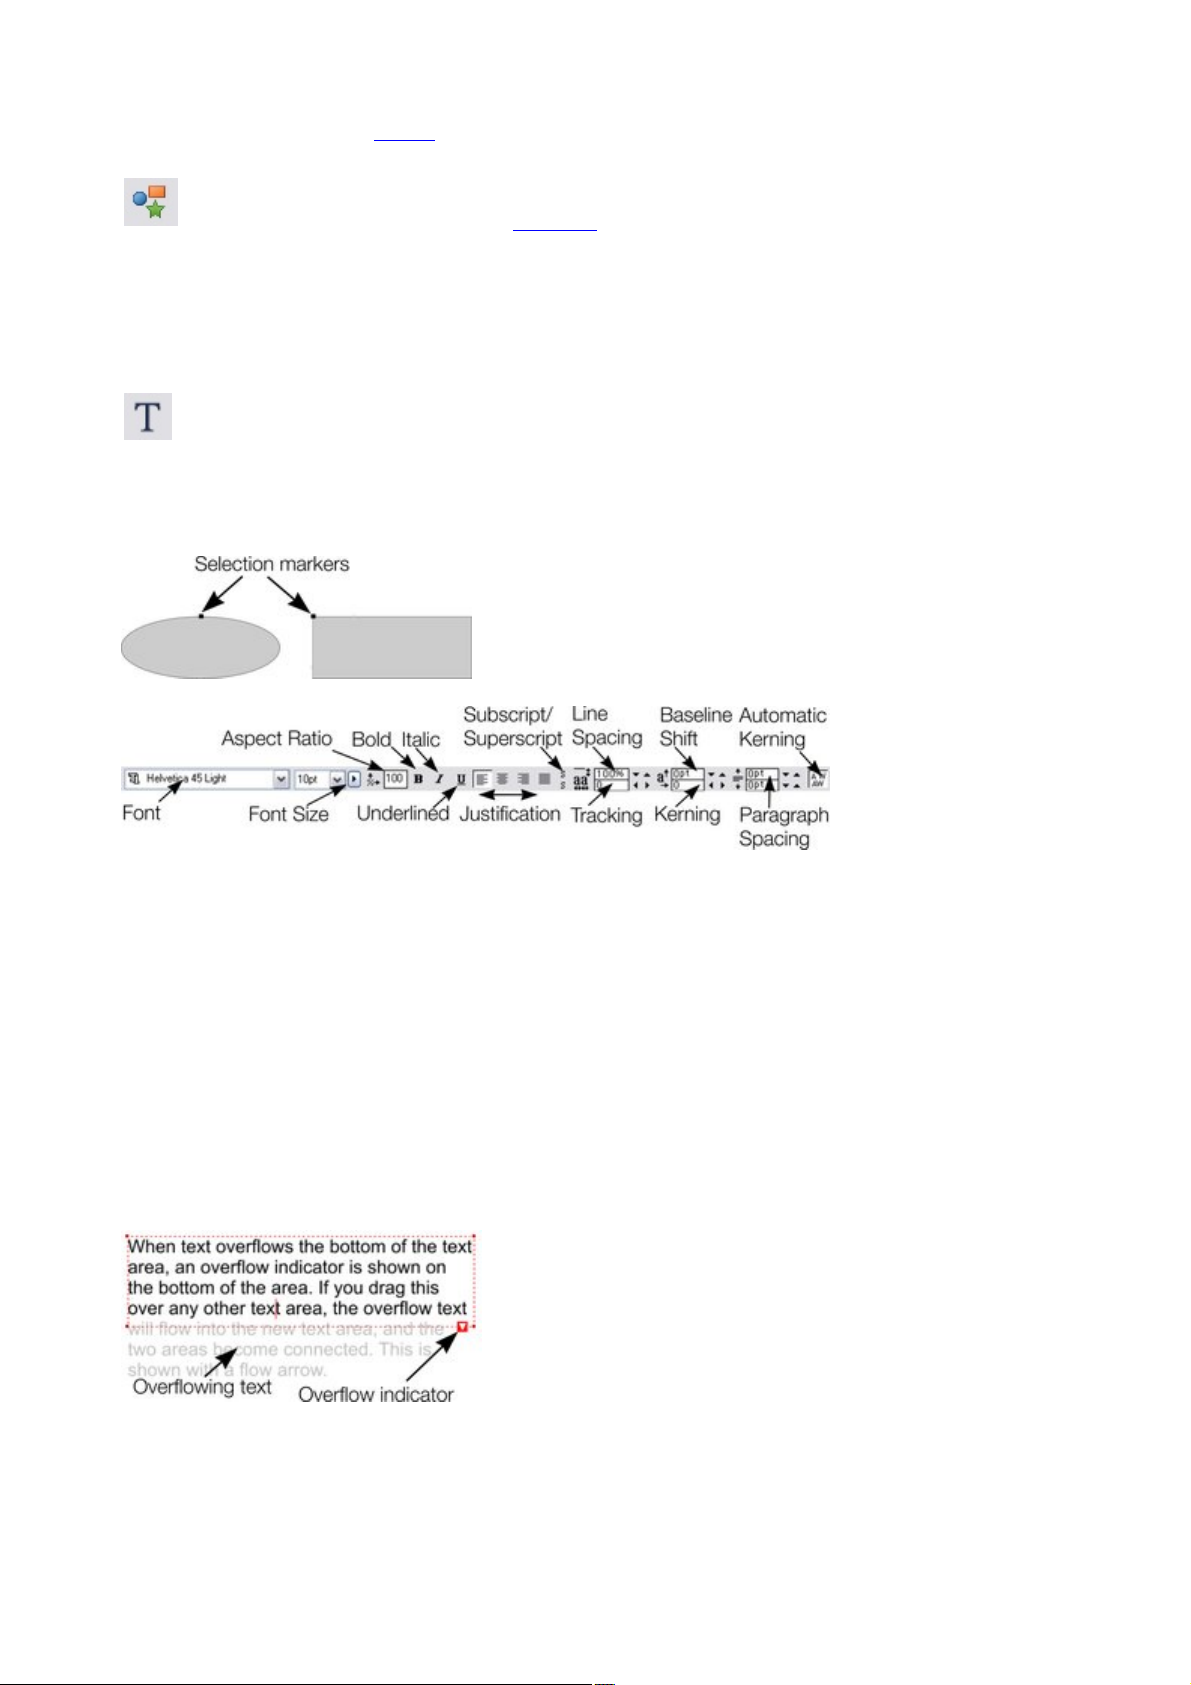
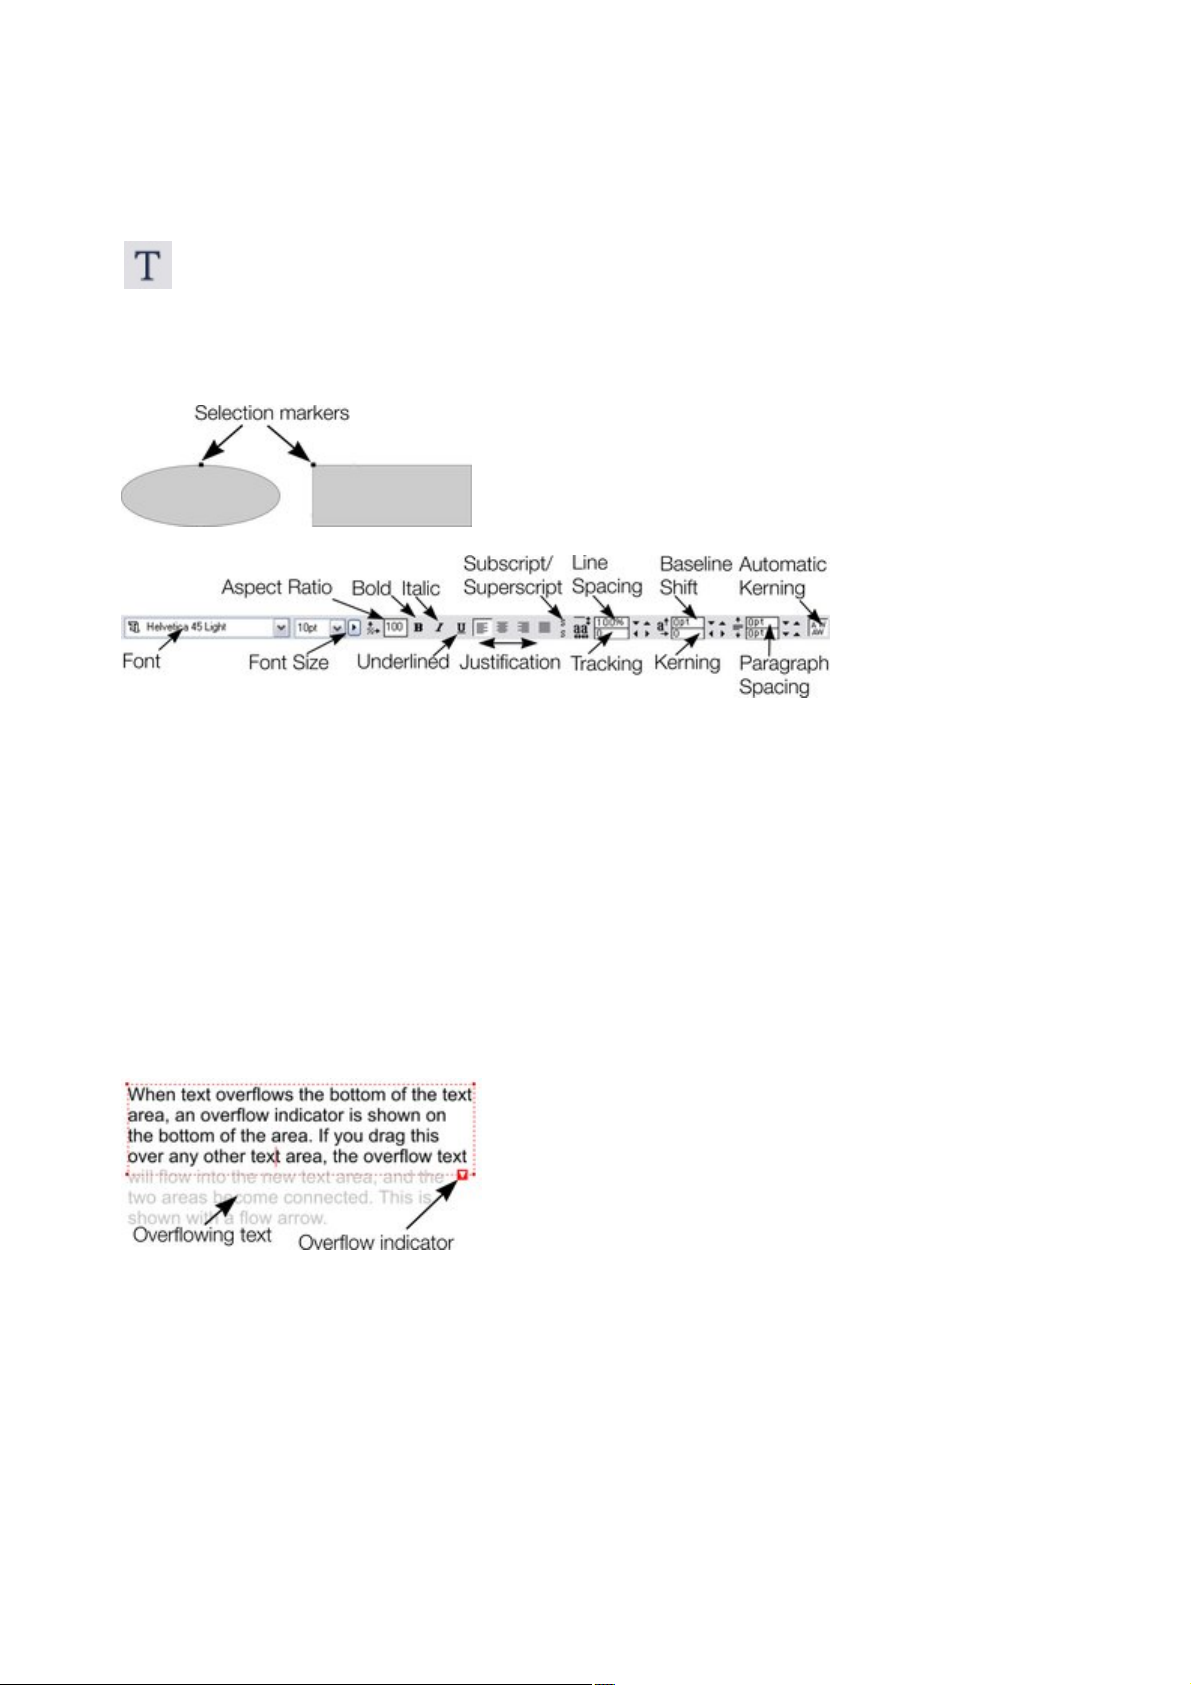
To change properties of the text like font or size, click with the text tool in a text field and then press the
"Esc" key. The text field is now completely selected, which can be recognized by the small selection
marker to the top-left.
In the infobar above, you are now able to set properties like font, size, alignment, and more.
Entering text
In the Text
Tool if you click and drag diagonally on the page you will create a rectangular text area. The blinking
cursor will be positioned in the top left corner and you can type or paste text.
A text area can contain a "flowing" text story. A text story refers to a single piece of text, flowing from
one text area to another. It's called flowing text because, like water, as you add or remove text in one
area it overflows into connected text areas or flows back from text areas.
If the text overflows the bottom of the text area the overflowing text is shown gray, although you can
continue to edit this text as usual.
If text extends past the bottom of the text area, an overflow indicator is shown on the bottom of the area.
If you drag this over any other text area, the overflow text will flow into the new text area, and the two
areas become connected.
Page 10
Page 11

Page 11
Page 12
Add images
Drag the corners with the Selection
tool to make the image the desired size.
Use the pencil tool to draw lines. Click for a new straight line section;
if you drag the corner points, curved lines will be created. Finish the
line with "Shift + click".
Type a new line width into the text box on the standard toolbar
or choose a default line thickness from the menu.
Use the square and circle tools to create these shapes as frames for
To add image files for your cover, simply drag them out of the explorer onto a page in MAGIX Xtreme
Print Studio, or use the Import command from the File
menu.
Imported objects always land at the very front of the document, i.e. before available playlists. In order to
put them behind the text, use the command Move to background (shortcut: Ctrl + B) in the Arrange
menu.
Tip: You can also fill a shape (e.g. the CD label or a rectangle) with an image. Hold down the "Shift" key
as the image is dropped.
Drawing Lines and Shape
To change the line thickness, first select the object or objects which you would like to change:
You can create a closed shape by ending a line back at its start point. A "+" beside the mouse pointer
indicates that it is positioned over the start handle.
Lines and closed shapes can be edited retroactively.
Page 12
Page 13
text areas or images
.
With the "Quickshape" tool, you can create other polygons and
stars. More about this in the reference
section.
Edit text
To edit text directly, switch to the text tool.
A text field is an object like an image or graphic and therefore cannot be freely enlarged or diminished
with the selection tool.
Next, click the text object, and you will be able to edit the text like normal.
To change properties of the text like font or size, click with the text tool in a text field and then press the
"Esc" key. The text field is now completely selected, which can be recognized by the small selection
marker to the top-left.
In the infobar above, you are now able to set properties like font, size, alignment, and more.
Entering text
In the Text
Tool if you click and drag diagonally on the page you will create a rectangular text area. The blinking
cursor will be positioned in the top left corner and you can type or paste text.
A text area can contain a "flowing" text story. A text story refers to a single piece of text, flowing from
one text area to another. It's called flowing text because, like water, as you add or remove text in one
area it overflows into connected text areas or flows back from text areas.
If the text overflows the bottom of the text area the overflowing text is shown gray, although you can
continue to edit this text as usual.
If text extends past the bottom of the text area, an overflow indicator is shown on the bottom of the area.
If you drag this over any other text area, the overflow text will flow into the new text area, and the two
areas become connected.
Page 13
Page 14
Drawing Lines and Shape
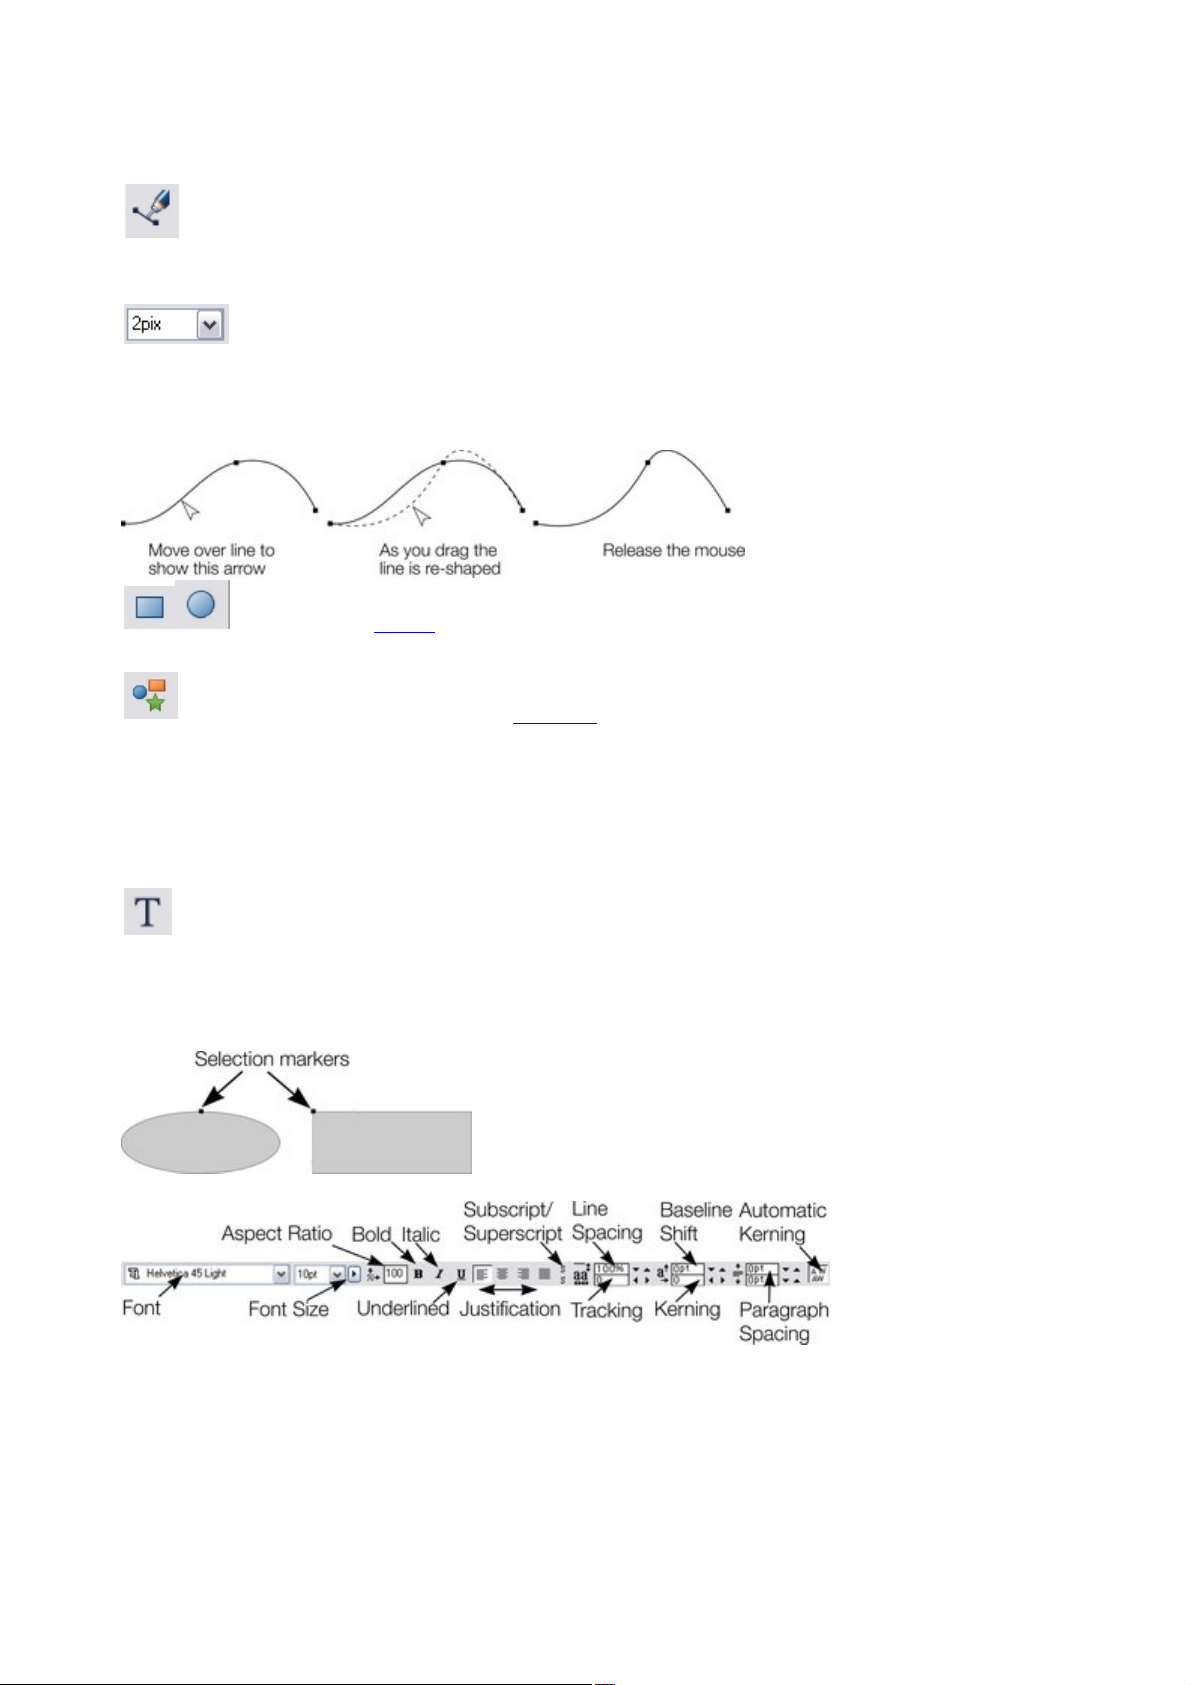
Use the pencil tool to draw lines. Click for a new straight line section;
if you drag the corner points, curved lines will be created. Finish the
line with "Shift + click".
Type a new line width into the text box on the standard toolbar
or choose a default line thickness from the menu.
Use the square and circle tools to create these shapes as frames for
text areas or images
.
With the "Quickshape" tool, you can create other polygons and
stars. More about this in the reference
section.
To edit text directly, switch to the text tool.
To change the line thickness, first select the object or objects which you would like to change:
You can create a closed shape by ending a line back at its start point. A "+" beside the mouse pointer
indicates that it is positioned over the start handle.
Lines and closed shapes can be edited retroactively.
Edit text
A text field is an object like an image or graphic and therefore cannot be freely enlarged or diminished
with the selection tool.
Next, click the text object, and you will be able to edit the text like normal.
To change properties of the text like font or size, click with the text tool in a text field and then press the
"Esc" key. The text field is now completely selected, which can be recognized by the small selection
marker to the top-left.
In the infobar above, you are now able to set properties like font, size, alignment, and more.
Entering text
In the Text
Tool if you click and drag diagonally on the page you will create a rectangular text area. The blinking
cursor will be positioned in the top left corner and you can type or paste text.
A text area can contain a "flowing" text story. A text story refers to a single piece of text, flowing from
one text area to another. It's called flowing text because, like water, as you add or remove text in one
Page 14
Page 15

area it overflows into connected text areas or flows back from text areas.
If the text overflows the bottom of the text area the overflowing text is shown gray, although you can
continue to edit this text as usual.
If text extends past the bottom of the text area, an overflow indicator is shown on the bottom of the area.
If you drag this over any other text area, the overflow text will flow into the new text area, and the two
areas become connected.
Page 15
Page 16
Edit text
To edit text directly, switch to the text tool.
A text field is an object like an image or graphic and therefore cannot be freely enlarged or diminished
with the selection tool.
Next, click the text object, and you will be able to edit the text like normal.
To change properties of the text like font or size, click with the text tool in a text field and then press the
"Esc" key. The text field is now completely selected, which can be recognized by the small selection
marker to the top-left.
In the infobar above, you are now able to set properties like font, size, alignment, and more.
Entering text
In the Text
Tool if you click and drag diagonally on the page you will create a rectangular text area. The blinking
cursor will be positioned in the top left corner and you can type or paste text.
A text area can contain a "flowing" text story. A text story refers to a single piece of text, flowing from
one text area to another. It's called flowing text because, like water, as you add or remove text in one
area it overflows into connected text areas or flows back from text areas.
If the text overflows the bottom of the text area the overflowing text is shown gray, although you can
continue to edit this text as usual.
If text extends past the bottom of the text area, an overflow indicator is shown on the bottom of the area.
If you drag this over any other text area, the overflow text will flow into the new text area, and the two
areas become connected.
Page 16
Page 17

Entering text
In the Text
Tool if you click and drag diagonally on the page you will create a rectangular text area. The blinking
cursor will be positioned in the top left corner and you can type or paste text.
A text area can contain a "flowing" text story. A text story refers to a single piece of text, flowing from
one text area to another. It's called flowing text because, like water, as you add or remove text in one
area it overflows into connected text areas or flows back from text areas.
If the text overflows the bottom of the text area the overflowing text is shown gray, although you can
continue to edit this text as usual.
If text extends past the bottom of the text area, an overflow indicator is shown on the bottom of the area.
If you drag this over any other text area, the overflow text will flow into the new text area, and the two
areas become connected.
Page 17
Page 18

Printing
Use the Print button in the Standard
toolbar to print out your finished cover.
Page 18
Page 19
Document handling
In this chapter
Changing the zoom value
Sliding the document within the window
Normal/full screen modes
On-screen grid
Rulers
Decimal point & thousands separator characters
The clipboard
Page 19
Page 20
Changing the zoom value
To zoom:
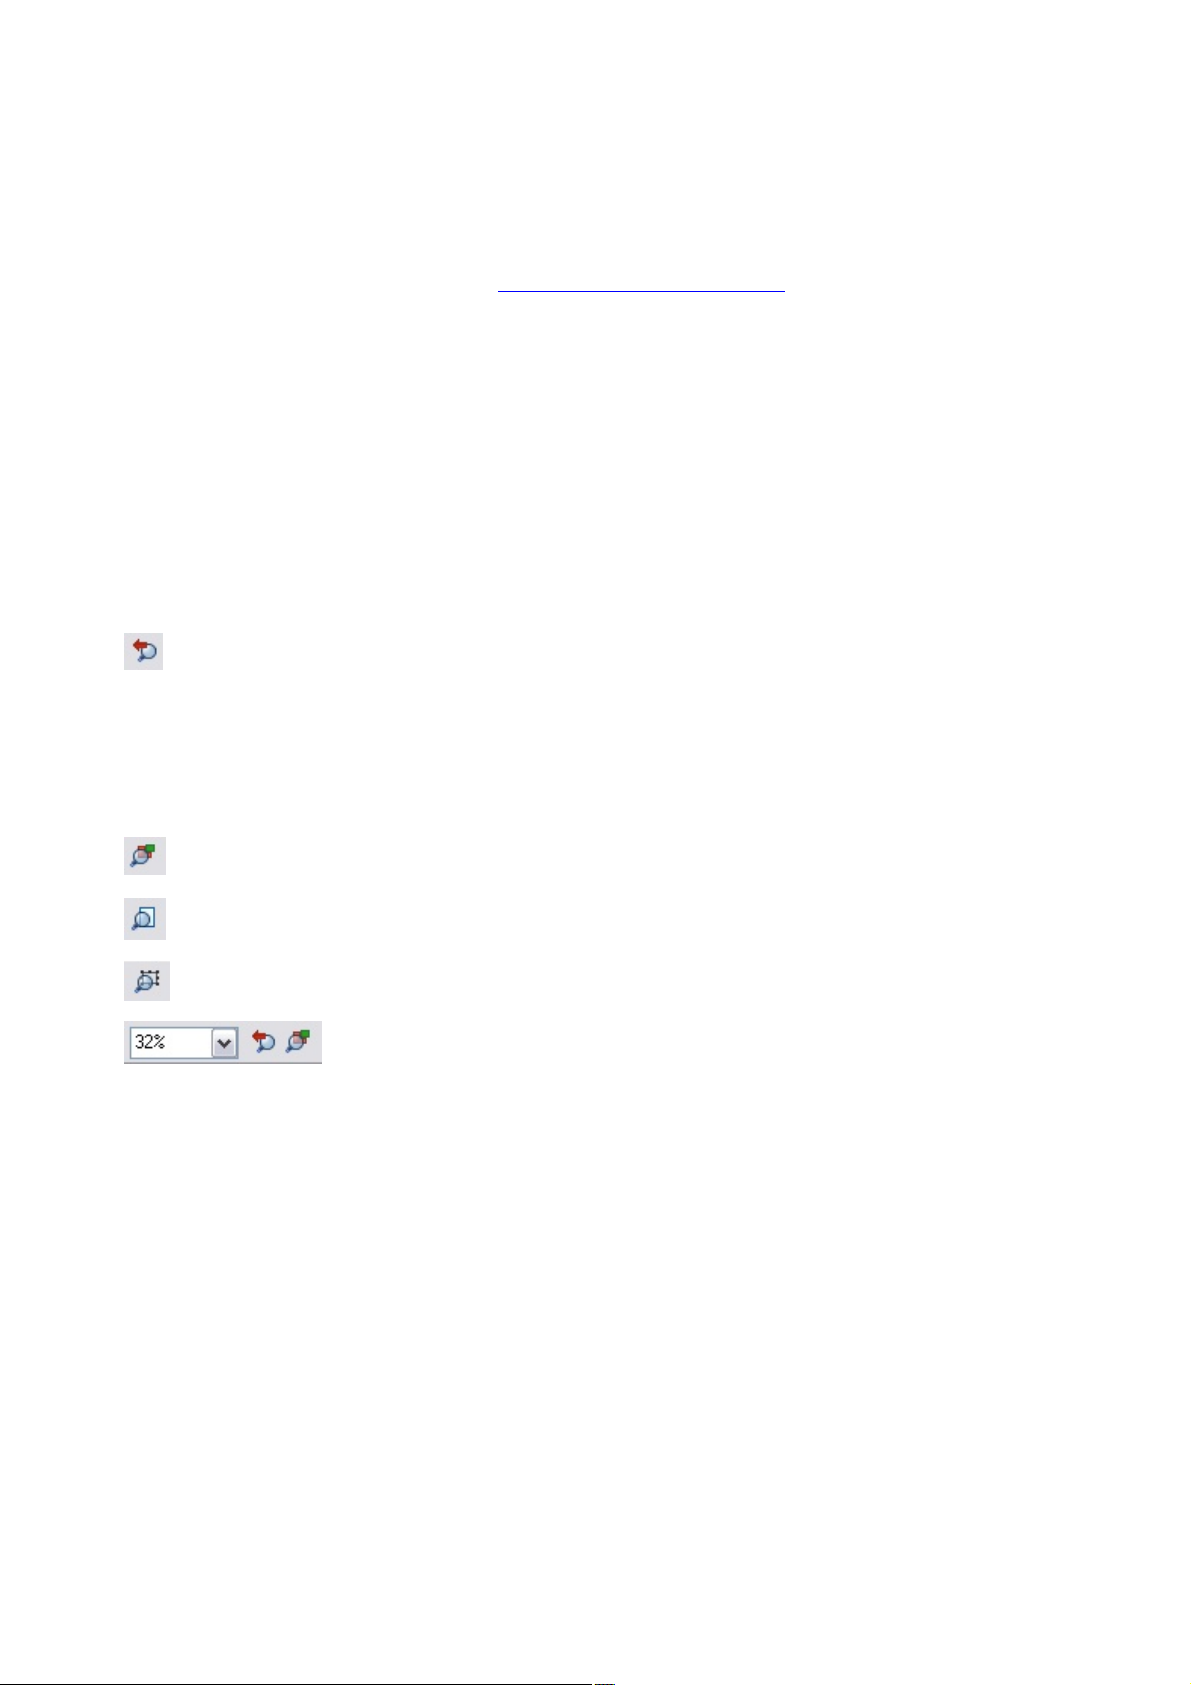
Shortcut "Ctrl + R". Click the Previous zoom
button. This is the zoom value before the current setting. Using this
button lets you flip zoom in and out on the document. This is useful
for switching between examining an area in detail and an overall
view. The previous zoom value is stored for each window. You
can swap between windows and the previous zoom values are
retained.
Shortcut "Ctrl + Shift+ J". Click the Zoom to drawing
button. The window shows all the objects in the document.
Shortcut "Ctrl + Shift+ P". Click the Zoom to Page
button. The window shows the entire page or pair of pages.
It's often useful to enlarge your view of the document to examine details or reduce your view to get an
overall impression. Scalings above 100% show an enlarged view (similar to looking through a magnifying
glass); below 100% a reduced view. The only change is your view of the document; the size of the
document itself and the objects in it are unchanged (changing the document size is described later). To
change the zoom value you can use either the Zoom Tool
, mouse, or control bars.
Some shortcuts are available for quick setting of zoom values: The plain numeric keys (1, 2, 3, 4) set the
zoom to between 100% and 400%. The number 5 key sets it to 50%.
Using the Zoom tool
Select the Zoom Tool from the Main Toolbar.
Or press "Alt + Z" to toggle between the current tool and the Zoom Tool.
Or press and hold down "Alt + Z" to temporarily swap to the Zoom Tool (release "Alt + Z" to
return to the previous tool).
Or press "Shift+ F7" to select the Zoom Tool.
Changing the zoom value using the mouse
If you have a mouse wheel:
Hold "Ctrl" and scroll your mouse wheel to change the zoom level.
You can also configure a mouse button to zoom in or out. Furthermore, you can change the mouse wheel
action between scrolling and zooming in "Utilities > Options > Mouse tab"
. The opposite action is available then by pressing "Ctrl".
Alternatively, select the Zoom
Tool, and
Click to zoom in (enlarge).
"Shift+ click" to reduce the zoom value (to see more of the document).
Drag the mouse diagonally to create a rectangle. When you release the mouse button, the area
within the rectangle is enlarged to fit the window.
Changing the zoom using the zoom InfoBar/control bar
To change the zoom:
Page 20
Page 21
Shortcut "Ctrl + Shift+ Z". Click the Zoom to Selection
button. The selected object or objects fill the window.
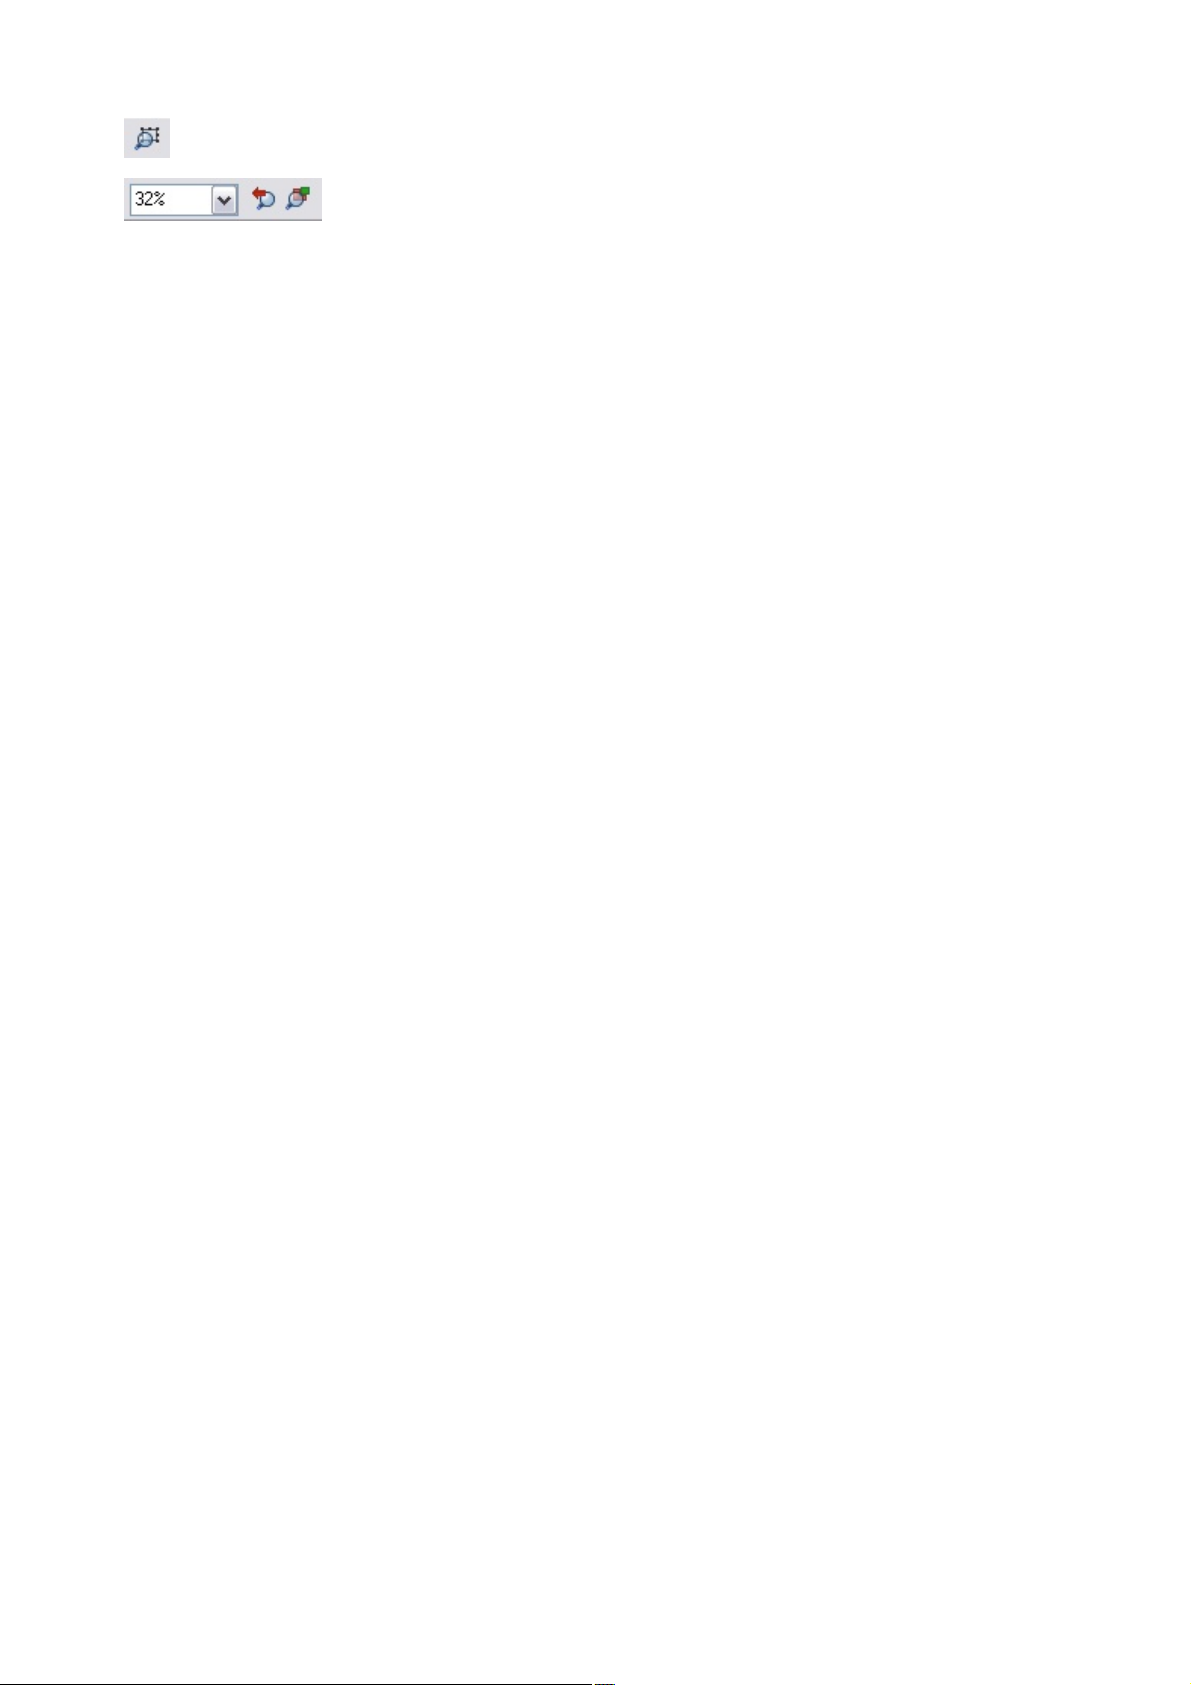
Type a value into the text box. Press "
¿" to implement the change, or select preset zoom
values including those above (page, drawing,
selected, previous) in the dropdown menu.
Page 21
Page 22
Using the Zoom tool
To zoom:
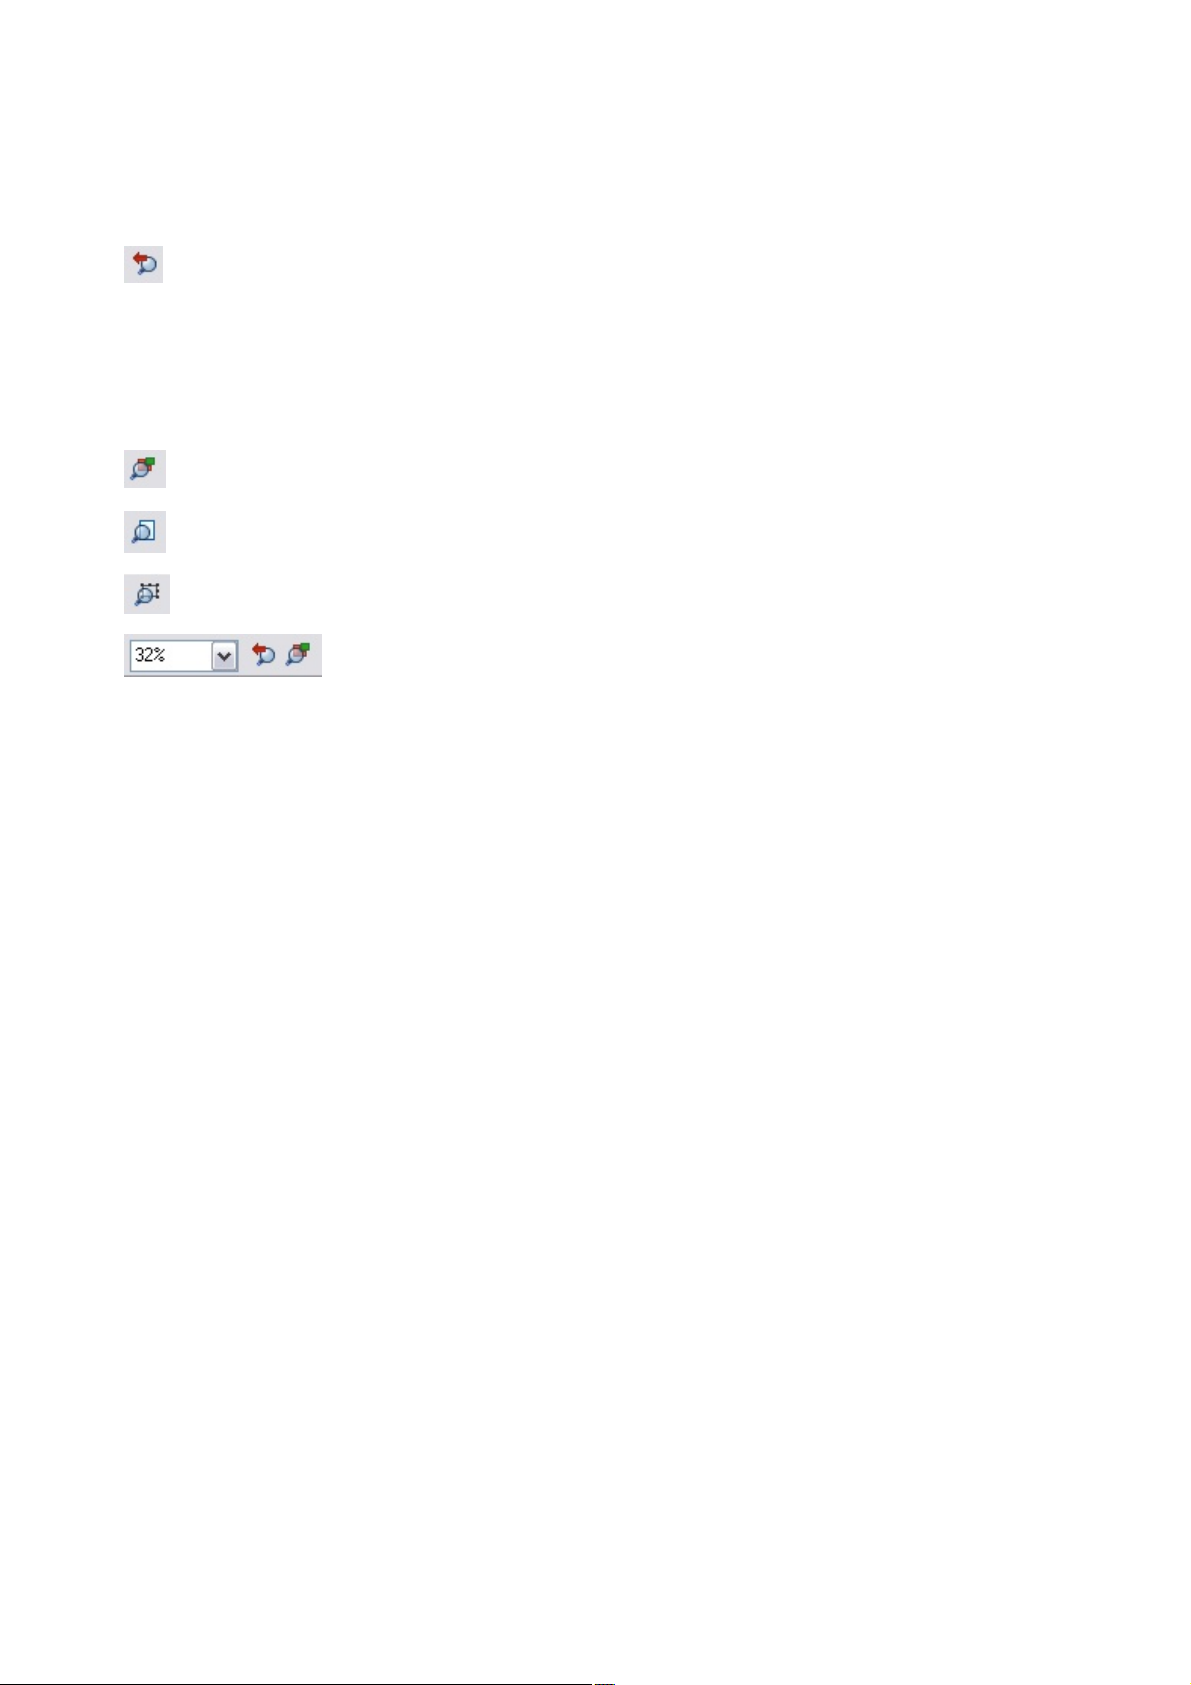
Shortcut "Ctrl + R". Click the Previous zoom
button. This is the zoom value before the current setting. Using this
button lets you flip zoom in and out on the document. This is useful
for switching between examining an area in detail and an overall
view. The previous zoom value is stored for each window. You
can swap between windows and the previous zoom values are
retained.
Shortcut "Ctrl + Shift+ J". Click the Zoom to drawing
button. The window shows all the objects in the document.
Shortcut "Ctrl + Shift+ P". Click the Zoom to Page
button. The window shows the entire page or pair of pages.
Shortcut "Ctrl + Shift+ Z". Click the Zoom to Selection
button. The selected object or objects fill the window.
Type a value into the text box. Press "
¿" to implement the change, or select preset zoom
values including those above (page, drawing,
selected, previous) in the dropdown menu.
Select the Zoom Tool from the Main Toolbar.
Or press "Alt + Z" to toggle between the current tool and the Zoom Tool.
Or press and hold down "Alt + Z" to temporarily swap to the Zoom Tool (release "Alt + Z" to
return to the previous tool).
Or press "Shift+ F7" to select the Zoom Tool.
Changing the zoom value using the mouse
If you have a mouse wheel:
Hold "Ctrl" and scroll your mouse wheel to change the zoom level.
You can also configure a mouse button to zoom in or out. Furthermore, you can change the mouse wheel
action between scrolling and zooming in "Utilities > Options > Mouse tab"
. The opposite action is available then by pressing "Ctrl".
Alternatively, select the Zoom
Tool, and
Click to zoom in (enlarge).
"Shift+ click" to reduce the zoom value (to see more of the document).
Drag the mouse diagonally to create a rectangle. When you release the mouse button, the area
within the rectangle is enlarged to fit the window.
Changing the zoom using the zoom InfoBar/control bar
To change the zoom:
Page 22
Page 23
Changing the zoom value using the mouse
Shortcut "Ctrl + R". Click the Previous zoom
button. This is the zoom value before the current setting. Using this
button lets you flip zoom in and out on the document. This is useful
for switching between examining an area in detail and an overall
view. The previous zoom value is stored for each window. You
can swap between windows and the previous zoom values are
retained.
Shortcut "Ctrl + Shift+ J". Click the Zoom to drawing
button. The window shows all the objects in the document.
Shortcut "Ctrl + Shift+ P". Click the Zoom to Page
button. The window shows the entire page or pair of pages.
Shortcut "Ctrl + Shift+ Z". Click the Zoom to Selection
button. The selected object or objects fill the window.
Type a value into the text box. Press "
¿" to implement the change, or select preset zoom
values including those above (page, drawing,
selected, previous) in the dropdown menu.
If you have a mouse wheel:
Hold "Ctrl" and scroll your mouse wheel to change the zoom level.
You can also configure a mouse button to zoom in or out. Furthermore, you can change the mouse wheel
action between scrolling and zooming in "Utilities > Options > Mouse tab"
. The opposite action is available then by pressing "Ctrl".
Alternatively, select the Zoom
Tool, and
Click to zoom in (enlarge).
"Shift+ click" to reduce the zoom value (to see more of the document).
Drag the mouse diagonally to create a rectangle. When you release the mouse button, the area
within the rectangle is enlarged to fit the window.
Changing the zoom using the zoom InfoBar/control bar
To change the zoom:
Page 23
Page 24
Changing the zoom using the zoom InfoBar/control bar
Shortcut "Ctrl + R". Click the Previous zoom
button. This is the zoom value before the current setting. Using this
button lets you flip zoom in and out on the document. This is useful
for switching between examining an area in detail and an overall
view. The previous zoom value is stored for each window. You
can swap between windows and the previous zoom values are
retained.
Shortcut "Ctrl + Shift+ J". Click the Zoom to drawing
button. The window shows all the objects in the document.
Shortcut "Ctrl + Shift+ P". Click the Zoom to Page
button. The window shows the entire page or pair of pages.
Shortcut "Ctrl + Shift+ Z". Click the Zoom to Selection
button. The selected object or objects fill the window.
Type a value into the text box. Press "
¿" to implement the change, or select preset zoom
values including those above (page, drawing,
selected, previous) in the dropdown menu.
To change the zoom:
Page 24
Page 25

Sliding the document within the window
Or select the Push Tool from the main toolbar ("H").
The quickest and easiest way to move around the document is to use the middle mouse button (normally
the mouse wheel) if you have one. Click and hold the middle button down and then move the mouse.
Release the button to return to your previous tool.
To move the document within the window you can also:
Use the scroll bars and arrows at the side of the window.
Use the mouse wheel to scroll the document up and down ("Shift + mouse wheel" for left and
right)
Or press the space bar or "Alt + X" to toggle between the current tool and the Push Tool.
Or press and hold down the space bar or "Alt + X" to temporarily switch to the Push Tool
(release key(s) to return to the previous tool). You can then use the mouse to drag the document
around in the window.
The Push Tool InfoBar is the same as the Zoom Tool
InfoBar (described above).
Displaying the scroll bars is optional. Choose "Window -> Bars -> Scrollbars"
to turn them off.
You can change the mouse wheel action between scrolling and zooming in "Utilities -> Options ->
Mouse"
. The opposite action is available then by pressing "Ctrl".
Normal/full screen modes
In normal screen mode part of the window is occupied by the title bar, menu bar, and scroll bars. This
can be inconvenient if you want the maximum possible editing area. Xtreme Print Studio has a second
screen mode, i.e.fullscreen, which displays a more streamlined screen. You can configure each screen
mode as you wish. For example, each can have its own configuration of the control bars. The
configuration is remembered and applies whenever you swap between screen modes.
Normal/full screen is controlled by "Window -> Fullscreen"
("8" on the numeric keypad).
To display the menu bar in full screen mode, move the pointer to the top of the screen.
For information on customizing control bars, see "Customizing Xtreme Print Studio
".
Page 25
Page 26

Normal/full screen modes
In normal screen mode part of the window is occupied by the title bar, menu bar, and scroll bars. This
can be inconvenient if you want the maximum possible editing area. Xtreme Print Studio has a second
screen mode, i.e.fullscreen, which displays a more streamlined screen. You can configure each screen
mode as you wish. For example, each can have its own configuration of the control bars. The
configuration is remembered and applies whenever you swap between screen modes.
Normal/full screen is controlled by "Window -> Fullscreen"
("8" on the numeric keypad).
To display the menu bar in full screen mode, move the pointer to the top of the screen.
For information on customizing control bars, see "Customizing Xtreme Print Studio
".
Page 26
Page 27

On-screen grid
To help you lay out your document, Xtreme Print Studio can display a grid on the screen (the grid
appears only on the screen; it is never printed.) The grid helps you align objects (similar to using graph
paper as a drawing aid).
Window -> Show Grid
("#") turns display of the grid on/off.
You can also choose "Window -> Snap to Grid"
. The grid points then act like magnets, and as you move objects, they snap to the nearest grid point.
Refer to the "Object Handling" for details of snapping.
The type of grid (isometric/rectangular), the 0,0 point (the origin), and spacing of grid points is controlled
by the Grid & Rulers tab
of the options dialog box. Any changes you make apply only to the selected document.
You can move the grid relative to the page by moving the rulers (0,0) point (described later).
Page 27
Page 28
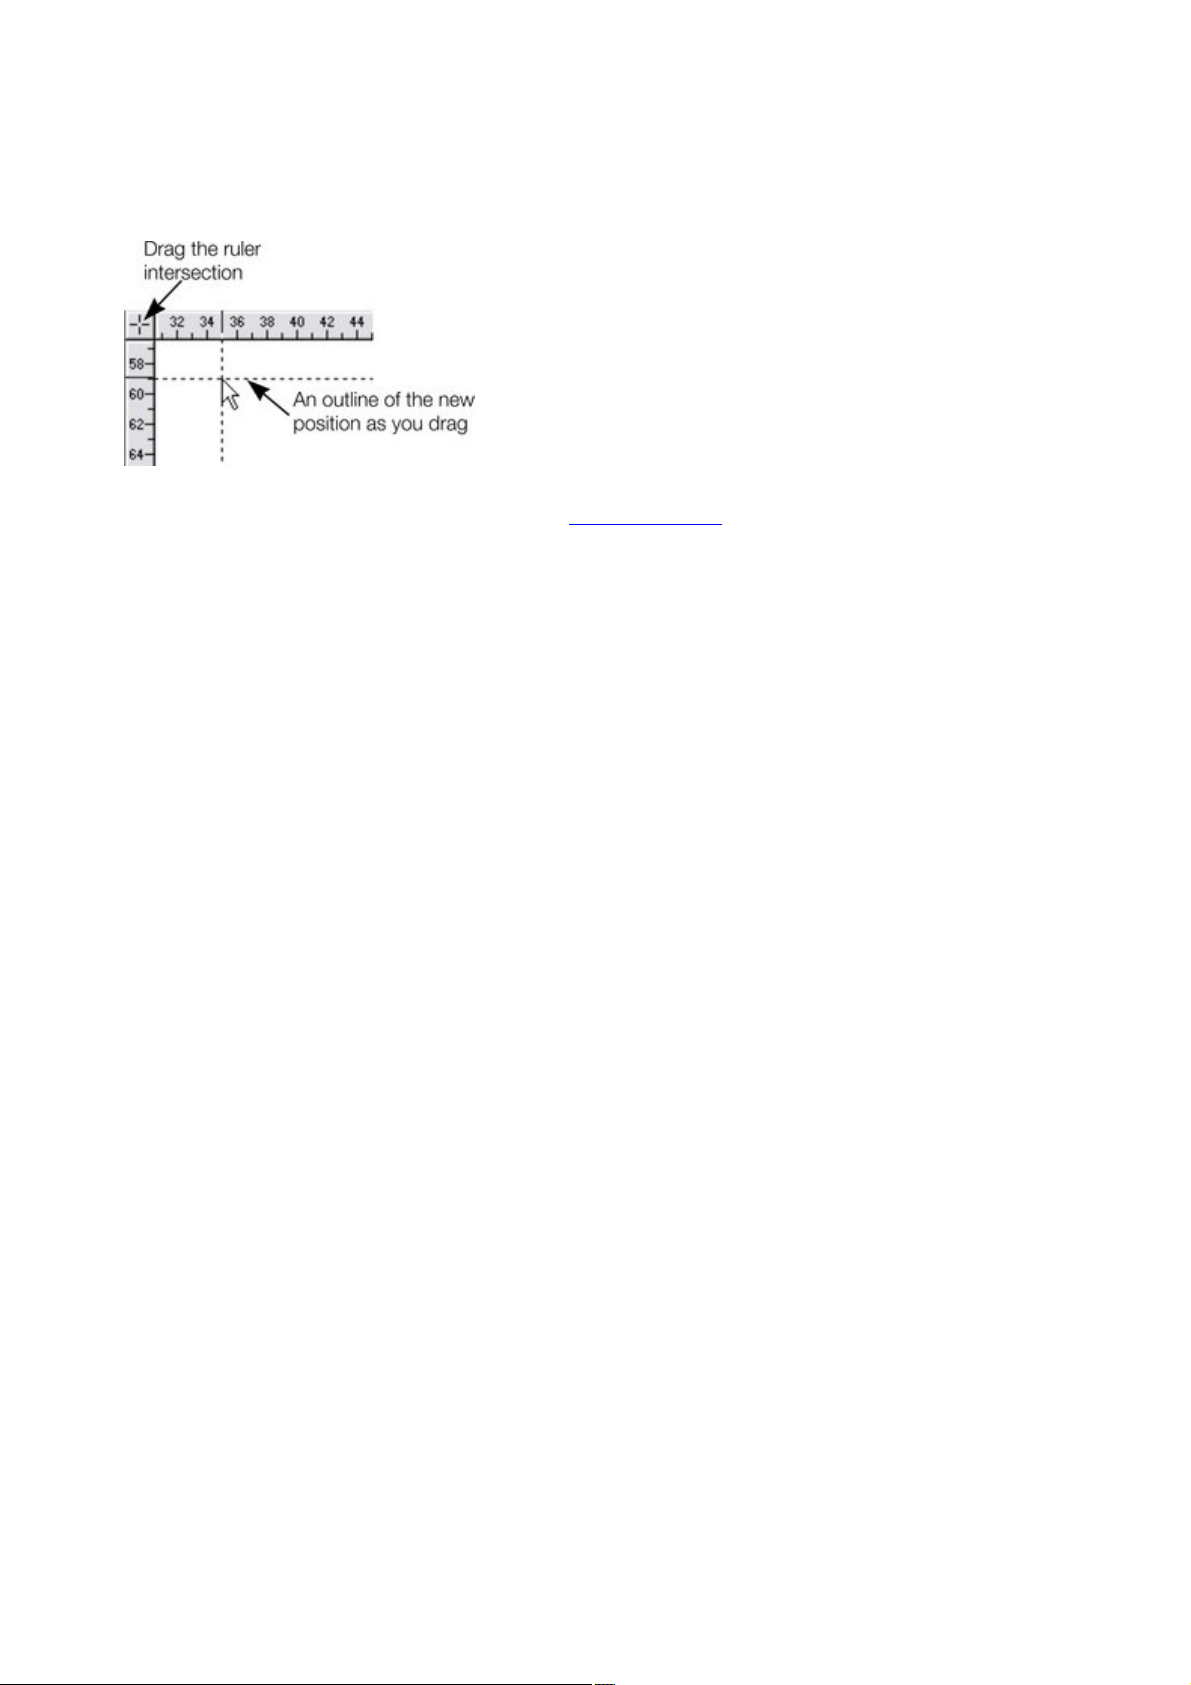
Rulers
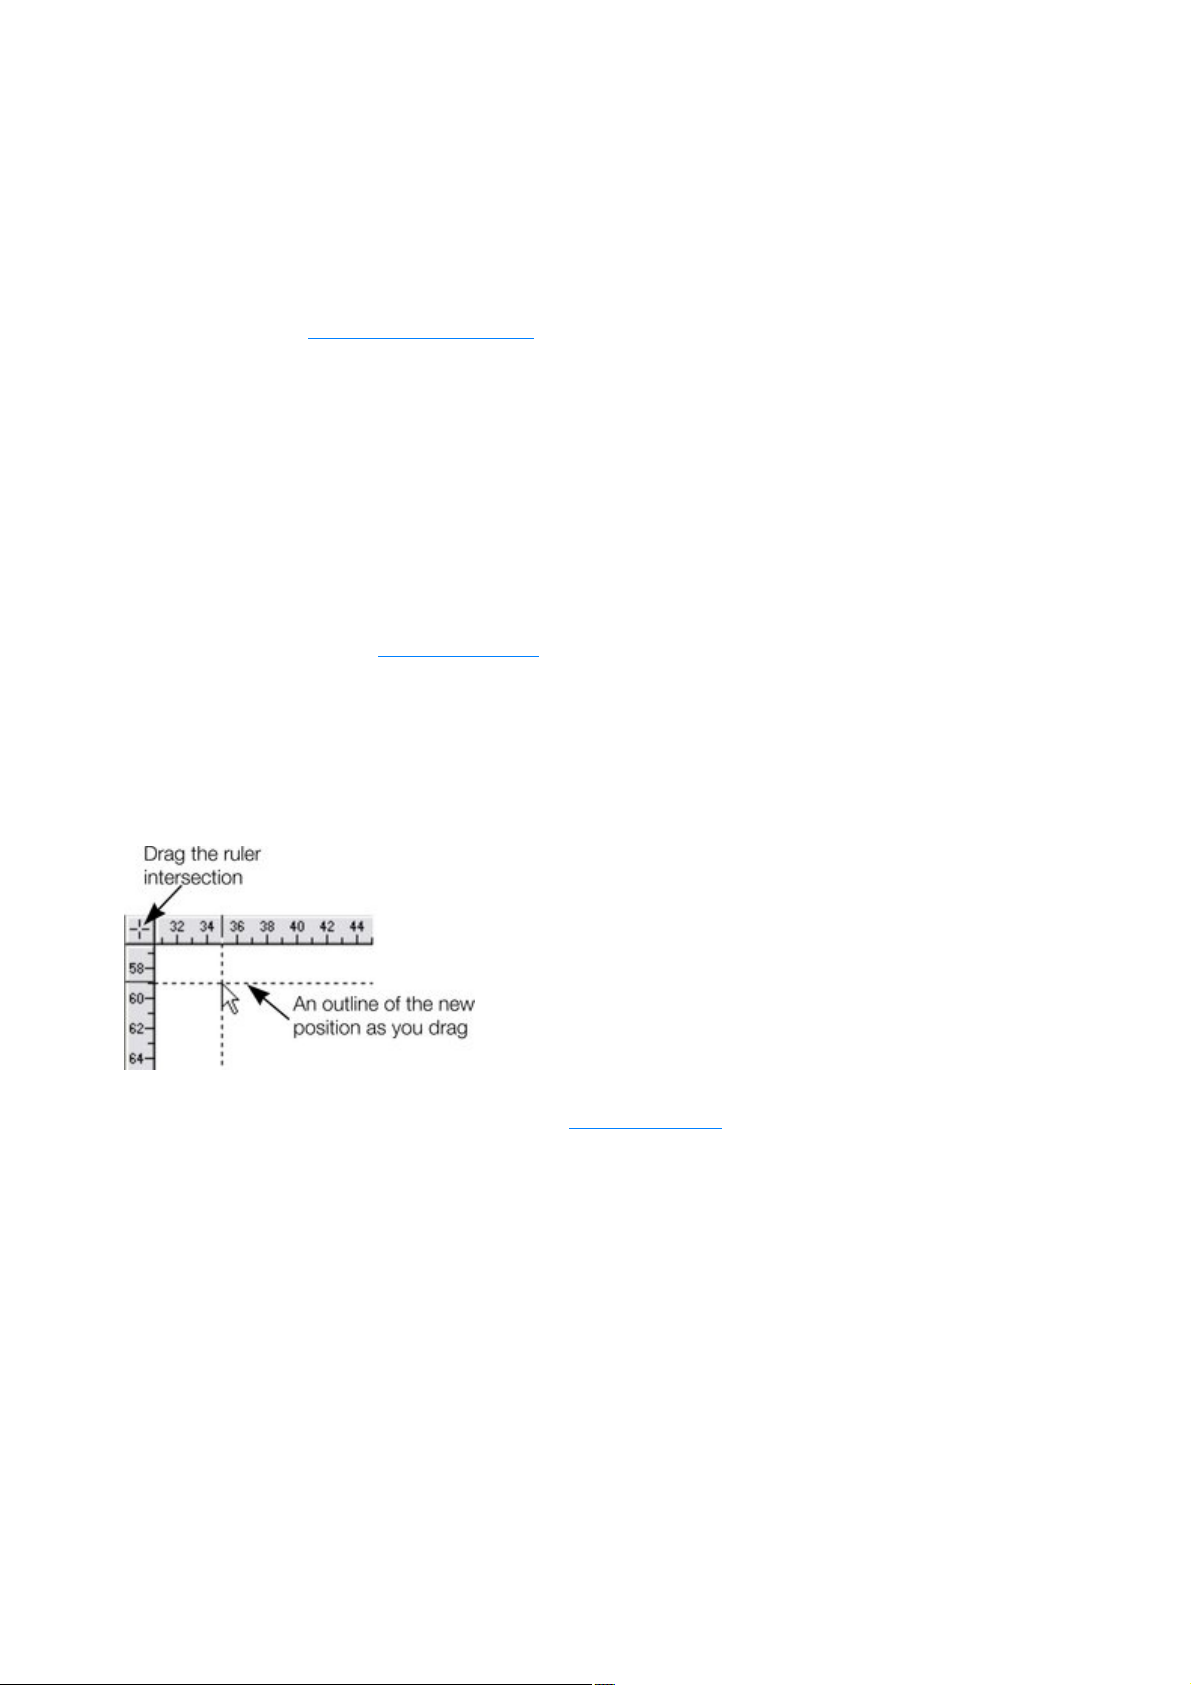
You can drag vertically or
horizontally along the rulers or over
any part of the Xtreme Print Studio
editing window. As you do, a
dotted line will outline the new
position.
This also moves the grid origin so
that divisions on the ruler always
align with the grid.
Rulers are turned off by default. To turn them on:
Press "Ctrl + Shift + R".
Or select "Window -> Bars -> Rulers".
Xtreme Print Studio uses rulers to:
Control text margins, tabs and indents in the Text Tool.
Let you know which part of the page you are viewing;
Show the current pointer X/Y position;
Apply guidelines. If "Window -> Snap to grid" is active, guidelines snap to divisions on the ruler.
For more information on guidelines, refer to the guides & guidelines section in "Object Handling".
As you create or scale objects, you can use the rulers to check their size. You can also more accurately
use the Selector
Tool (see "Selecting objects" for more information).
Rulers are displayed at the left and top of the window. A dotted line on each ruler follows the current
pointer position.
The units and number of divisions on the rulers are the same as those set for customizing the on-screen
grid. These are set using the Grid & Ruler Tab
of the options dialog box. The current units and any scaling factor are displayed on the right hand end of
the top ruler.
Changing the ruler zero points
It is often easier to measure objects if you align the origin (0,0) point of the rulers with the object. To
move the origin (0,0) point, drag the square at the intersection of the two rulers.
You can also move the zero point from under the Grid & Ruler tab
of the options dialog box.
Page 28
Page 29
Changing the ruler zero points
You can drag vertically or
horizontally along the rulers or over
any part of the Xtreme Print Studio
editing window. As you do, a
dotted line will outline the new
position.
This also moves the grid origin so
that divisions on the ruler always
align with the grid.
It is often easier to measure objects if you align the origin (0,0) point of the rulers with the object. To
move the origin (0,0) point, drag the square at the intersection of the two rulers.
You can also move the zero point from under the Grid & Ruler tab
of the options dialog box.
Page 29
Page 30

Decimal point & thousands separator characters
The characters used as a decimal point (1.23) and as a thousands separator (1,000) are those set in the
Windows Control Panel. (In Windows XP, the relevant section is the "Regional and Language options".)
Similarly, the number of digits following the decimal point is also set in "Regional and Language options".
Page 30
Page 31

The clipboard
This is a temporary store and is used like a physical clipboard. You can cut or copy part or all of your
drawing onto the clipboard. You can then transfer the clipboard contents to another part of the same
document or to another document or application.
The clipboard can only hold one item or one set of items at a time. Placing something on it overwrites any
existing contents. Objects remain on the clipboard until deleted or overwritten by either Xtreme Print
Studio or another application. This lets you paste the clipboard contents again and again if you wish.
Page 31
Page 32

Object Handling
In this chapter
The constrain key
Undo and Redo
Selector tool
Moving objects
Removing objects from the document
Duplicating and cloning
Moving objects forward and backwards
Scaling (resizing) objects
Rotating objects
Flipping objects
Stretching and squashing objects
Skewing objects
Create a guideline
Page 32
Page 33

The constrain key
The black line on the left can be
rotated to any angle within the circle.
On the right is the same line, but with
"Ctrl" held down it can only be rotated
to the positions indicated.
The "Ctrl" key has a special function in Xtreme Print Studio. It constrains the action of the current
operation in some way. For example, normally you can rotate an object to any angle. But in Xtreme Print
Studio, if you hold down "Ctrl" while you rotate an object, and the rotation is constrained to preset
angles.
Similarly, constraining a rectangle creates a perfect square and constraining an ellipse creates a perfect
circle. Release "Ctrl", and they will not be constrained.
The constrain angle feature is defined in Options -> General -> Angle constraint
.
Page 33
Page 34

Undo and Redo
In this chapter
What are undo and redo?
The undo command
The redo command
Changing the size of the undo list
Page 34
Page 35

What are undo and redo?
We all make mistakes or change our minds. Xtreme Print Studio makes it easy to correct mistakes or
cancel unwanted changes. Also, illustrations lend themselves to experimentation. Every action you make
is recorded in an undo list which lets you undo not just the last operation, but also to step back by
undoing successive operations. In this way, you can experiment freely knowing that you can always
remove anything that doesn't look correct.
Page 35
Page 36

The undo command
"Undo
" cancels the effects of the last operation. To undo an
operation:
Click Undo on the Standard control bar.
Or choose "Edit -> Undo" (the exact wording tells you what the next undo step is, i.e. undo
scale).
Or press "Ctrl + Z".
Or press the comma key (in any tool except the Text Tool).
You can repeat the undo command to step back through the sequence of previous operations.
Page 36
Page 37

The redo command
Redo cancels the last undo command. To redo the last
operation:
Click the Redo button on the Standard control bar.
Or choose "Edit -> Redo" (the exact wording tells you what the next redo step is, i.e. redo
scale).
Or press "Ctrl + Y".
Or press the period (full stop) key (in any tool except the Text Tool).
You can only redo immediately after undo. You cannot redo after changing the document (for example,
by moving or adding an object).
Page 37
Page 38

Changing the size of the undo list
By default the size of the undo list is limited by the available memory only, and with Xtreme Print Studio
being very efficient and today's computers having plenty of RAM you shouldn't run into any problems.
However, if you still wish to limit the memory your undo list can take, you can limit the list size.
To limit the list size:
Choose "Utilities -> Options".
1.
Select the "Tune ups" tab.
2.
Select a "Limited" undo size.
3.
Type in the required value followed by
4.
"M" or "m" for a value in megabytes (4M).
o
"K" or "k" for a value in kilobytes (200K).
o
Or no suffix for a value in bytes (3000).
o
Values can include decimal points (1.234M).
o
The list has a minimum size of 1024 bytes (1K).
o
Click either:
o
"OK" to make the change and close the dialog box,
o
Or "Apply now" to make the change but leave the dialog box on screen. This lets you make
o
further changes.
If the new undo list size is less than its current size you are warned that data will be lost from the undo
list. Then in future, as the list becomes full, the oldest information is automatically discarded.
Page 38
Page 39

Selector tool
The selection
tool is the main tool for selecting, moving, scaling and rotating
objects.
To use the Selector
tool:
Click on the Selector tool on the main toolbar,
or press "Alt + S", "V", or "F2".
Because the Selector Tool is the most used tool, there is an additional shortcut that lets you switch to the
Selector Tool to perform a selection or other operation, and quickly switch back to the previous tool. If
you are using another tool, you can easily switch to the Selector
Tool:
Press and release "Alt + S" to switch to the Selector Tool. Press again to return to the previous
tool, or
Hold down "Alt + S" to select the Selector Tool. Perform the required operation while the keys
are held down, then release to return to the previous tool.
Page 39
Page 40

Selecting objects
To select a single object, click on any visible part of the object.
Marquee selection
To select multiple objects, press and hold down the mouse button. Dragging the mouse draws a
selection rectangle, all objects wholly within the selection rectangle are selected.
Some other drawing programs call this marquee selection.
If you have an object in the way which is preventing you from drawing a rectangle because you end up
moving the object, hold down "Shift" while dragging out the selection rectangle.
By default, dragging a selection rectangle selects only those objects which are completely inside the
rectangle. This behavior can be changed so it's compatible with the way selection works in other
applications, whereby the objects touching the rectangle outline also become selected. Hold down "Ctrl"
while dragging to include those objects touching the selection rectangle in the selection.
The "Utilities -> Options"
dialog enables you to change the default setting for marquee selection. So you can choose to have
objects touching the selection rectangle selected, without having to hold down "Ctrl" during the drag. In
this case, holding "Ctrl" down while dragging selects only the objects wholly inside the rectangle.
Extend Selection
To select additional objects:
Shift+ click on them.
Or Shift+ drag the mouse. This draws a selection rectangle and adds objects within the rectangle
to the selection.
Select under
Tutorial movie
: Hold down "Alt" to select objects hidden by other objects. By "Alt + clicking" you can step through
several overlapping objects.
Page 40
Page 41

Marquee selection
To select multiple objects, press and hold down the mouse button. Dragging the mouse draws a
selection rectangle, all objects wholly within the selection rectangle are selected.
Some other drawing programs call this marquee selection.
If you have an object in the way which is preventing you from drawing a rectangle because you end up
moving the object, hold down "Shift" while dragging out the selection rectangle.
By default, dragging a selection rectangle selects only those objects which are completely inside the
rectangle. This behavior can be changed so it's compatible with the way selection works in other
applications, whereby the objects touching the rectangle outline also become selected. Hold down "Ctrl"
while dragging to include those objects touching the selection rectangle in the selection.
The "Utilities -> Options"
dialog enables you to change the default setting for marquee selection. So you can choose to have
objects touching the selection rectangle selected, without having to hold down "Ctrl" during the drag. In
this case, holding "Ctrl" down while dragging selects only the objects wholly inside the rectangle.
Extend Selection
To select additional objects:
Shift+ click on them.
Or Shift+ drag the mouse. This draws a selection rectangle and adds objects within the rectangle
to the selection.
Select under
Tutorial movie
: Hold down "Alt" to select objects hidden by other objects. By "Alt + clicking" you can step through
several overlapping objects.
Page 41
Page 42

Extend Selection
To select additional objects:
Shift+ click on them.
Or Shift+ drag the mouse. This draws a selection rectangle and adds objects within the rectangle
to the selection.
Select under
Tutorial movie
: Hold down "Alt" to select objects hidden by other objects. By "Alt + clicking" you can step through
several overlapping objects.
Page 42
Page 43

Select under
Tutorial movie
: Hold down "Alt" to select objects hidden by other objects. By "Alt + clicking" you can step through
several overlapping objects.
Page 43
Page 44

Selecting all objects
To select all objects:
Choose "Edit -> Select all",
Or press "Ctrl + A".
Page 44
Page 45

Deselecting an object
To deselect all objects:
Click anywhere on an unused part of the document,
Or choose "Edit -> Clear selection",
Or press "Esc".
To deselect one object from several:
Shift+ click on the object. This deselects that object. Other objects remain selected.
Selection bounds handles
Selection bounds handles let you scale and stretch selected objects see Stretching and squashing objects
for more details. Successive clicks on an object alternate between showing selection bounds and
rotation handles.
Tab
With any selected object, pressing "Tab" and "Shift+ Tab" will move through the selected objects
(previous and next object in the document).
Page 45
Page 46

Selection bounds handles
Selection bounds handles let you scale and stretch selected objects see Stretching and squashing objects
for more details. Successive clicks on an object alternate between showing selection bounds and
rotation handles.
Tab
With any selected object, pressing "Tab" and "Shift+ Tab" will move through the selected objects
(previous and next object in the document).
Page 46
Page 47

Tab
With any selected object, pressing "Tab" and "Shift+ Tab" will move through the selected objects
(previous and next object in the document).
Page 47
Page 48

Moving objects
Normal move left to right with a linear filled
object.
This also applies to rotating, skewing, scaling and
stretching objects.
To do this click the "-" key on the numeric keypad
during the move.
The same move, but pressing "-" (minus) during the
drag.
To slide an object across the page
Choose the Selector Tool.
1.
Drag the object to the required position. Hold down "Ctrl" to restrict the direction of movement
2.
to one of the constrain angles.
The constrain angles are user definable. Refer to "Customizing Xtreme Print Studio
"
Hold down "Ctrl + Alt" and you can drag the selected object even if the pointer is not over it. This is
useful when the selected object is hidden behind another object or part of a group. Release "Ctrl" and
"Alt" after you start the move unless you want to constrain the move.
You can also move objects using the arrow cursor keys. This is described on the next page.
Drop copy
During a move (and while still holding the left mouse button down) click the right mouse button or press
+ on the numeric keypad to drop a copy of the object. The original object doesn't move. You can do this
as many times as you wish to create a series of duplicated objects.
You can also hold down the right mouse button and drag a copy of the object. Left click to leave a copy
at the current mouse position.
Fills
Usually, moving an object also moves the fill with it:
Xtreme Print Studio can also move the object but not the fill origin.
Nudging objects
Usually you can move an object a small amount by using the arrow?keys to nudge the object (these keys
sometimes have other uses, especially in the Text
Tool).
Nudging is not affected by either magnetic or grid snapping (snapping is described later).
Nudge modifiers
To modify the nudge distance, use these key combinations while using the arrow keys:
Ctrl nudge 5 times the normal distance
Shift nudge 10 times the normal distance
Ctrl+Shift nudge by l/5th the normal distance
Alt nudge by 1 pixel
Alt+Shift nudge by 10 pixels
You can change the normal nudge distance under the general tab in "Utilities -> Options
". Refer to "Customizing Xtreme Print Studio".
Nudge works in most tools.
Page 48
Page 49

Cut, copy and paste
These let you move or copy an object in the same document or between different documents. The
procedure is:
Select the object.
1.
To remove the object, choose "Edit -> Cut" (or "Ctrl + X"). To copy the object but not remove
2.
it, choose "Edit -> Copy" (or "Ctrl + C"). Either option puts the object (or a copy of it) onto the
clipboard.
Choose "Edit -> Paste", "Ctrl + V", or "Insert". This pastes the clipboard contents into the
3.
document
"Ctrl + Shift+ V" pastes the clipboard contents into the same X/Y position from where they were cut or
copied. This only applies to objects cut or copied from within Xtreme Print Studio. Objects imported
from other programs are always pasted into the center of the current view.
The object remains on the clipboard so you can paste the same object several times.
Some programs can transfer data on the clipboard in two or more formats. If this applies, the menu
option reads Paste Special
. Selecting it brings up a dialog box that lets you select a format. Xtreme Print Studio automatically
highlights the recommended format.
Page 49
Page 50

Drop copy
Normal move left to right with a linear filled
object.
This also applies to rotating, skewing, scaling and
stretching objects.
To do this click the "-" key on the numeric keypad
during the move.
The same move, but pressing "-" (minus) during the
drag.
During a move (and while still holding the left mouse button down) click the right mouse button or press
+ on the numeric keypad to drop a copy of the object. The original object doesn't move. You can do this
as many times as you wish to create a series of duplicated objects.
You can also hold down the right mouse button and drag a copy of the object. Left click to leave a copy
at the current mouse position.
Fills
Usually, moving an object also moves the fill with it:
Xtreme Print Studio can also move the object but not the fill origin.
Nudging objects
Usually you can move an object a small amount by using the arrow?keys to nudge the object (these keys
sometimes have other uses, especially in the Text
Tool).
Nudging is not affected by either magnetic or grid snapping (snapping is described later).
Nudge modifiers
To modify the nudge distance, use these key combinations while using the arrow keys:
Ctrl nudge 5 times the normal distance
Shift nudge 10 times the normal distance
Ctrl+Shift nudge by l/5th the normal distance
Alt nudge by 1 pixel
Alt+Shift nudge by 10 pixels
You can change the normal nudge distance under the general tab in "Utilities -> Options
". Refer to "Customizing Xtreme Print Studio".
Nudge works in most tools.
Cut, copy and paste
These let you move or copy an object in the same document or between different documents. The
procedure is:
Select the object.
1.
To remove the object, choose "Edit -> Cut" (or "Ctrl + X"). To copy the object but not remove
2.
it, choose "Edit -> Copy" (or "Ctrl + C"). Either option puts the object (or a copy of it) onto the
clipboard.
Choose "Edit -> Paste", "Ctrl + V", or "Insert". This pastes the clipboard contents into the
3.
document
"Ctrl + Shift+ V" pastes the clipboard contents into the same X/Y position from where they were cut or
copied. This only applies to objects cut or copied from within Xtreme Print Studio. Objects imported
Page 50
Page 51

from other programs are always pasted into the center of the current view.
The object remains on the clipboard so you can paste the same object several times.
Some programs can transfer data on the clipboard in two or more formats. If this applies, the menu
option reads Paste Special
. Selecting it brings up a dialog box that lets you select a format. Xtreme Print Studio automatically
highlights the recommended format.
Page 51
Page 52

Fills
Normal move left to right with a linear filled
object.
This also applies to rotating, skewing, scaling and
stretching objects.
To do this click the "-" key on the numeric keypad
during the move.
The same move, but pressing "-" (minus) during the
drag.
Usually, moving an object also moves the fill with it:
Xtreme Print Studio can also move the object but not the fill origin.
Nudging objects
Usually you can move an object a small amount by using the arrow?keys to nudge the object (these keys
sometimes have other uses, especially in the Text
Tool).
Nudging is not affected by either magnetic or grid snapping (snapping is described later).
Nudge modifiers
To modify the nudge distance, use these key combinations while using the arrow keys:
Ctrl nudge 5 times the normal distance
Shift nudge 10 times the normal distance
Ctrl+Shift nudge by l/5th the normal distance
Alt nudge by 1 pixel
Alt+Shift nudge by 10 pixels
You can change the normal nudge distance under the general tab in "Utilities -> Options
". Refer to "Customizing Xtreme Print Studio".
Nudge works in most tools.
Cut, copy and paste
These let you move or copy an object in the same document or between different documents. The
procedure is:
Select the object.
1.
To remove the object, choose "Edit -> Cut" (or "Ctrl + X"). To copy the object but not remove
2.
it, choose "Edit -> Copy" (or "Ctrl + C"). Either option puts the object (or a copy of it) onto the
clipboard.
Choose "Edit -> Paste", "Ctrl + V", or "Insert". This pastes the clipboard contents into the
3.
document
"Ctrl + Shift+ V" pastes the clipboard contents into the same X/Y position from where they were cut or
copied. This only applies to objects cut or copied from within Xtreme Print Studio. Objects imported
from other programs are always pasted into the center of the current view.
The object remains on the clipboard so you can paste the same object several times.
Some programs can transfer data on the clipboard in two or more formats. If this applies, the menu
option reads Paste Special
. Selecting it brings up a dialog box that lets you select a format. Xtreme Print Studio automatically
highlights the recommended format.
Page 52
Page 53

Nudging objects
Usually you can move an object a small amount by using the arrow?keys to nudge the object (these keys
sometimes have other uses, especially in the Text
Tool).
Nudging is not affected by either magnetic or grid snapping (snapping is described later).
Nudge modifiers
To modify the nudge distance, use these key combinations while using the arrow keys:
Ctrl nudge 5 times the normal distance
Shift nudge 10 times the normal distance
Ctrl+Shift nudge by l/5th the normal distance
Alt nudge by 1 pixel
Alt+Shift nudge by 10 pixels
You can change the normal nudge distance under the general tab in "Utilities -> Options
". Refer to "Customizing Xtreme Print Studio".
Nudge works in most tools.
Cut, copy and paste
These let you move or copy an object in the same document or between different documents. The
procedure is:
Select the object.
1.
To remove the object, choose "Edit -> Cut" (or "Ctrl + X"). To copy the object but not remove
2.
it, choose "Edit -> Copy" (or "Ctrl + C"). Either option puts the object (or a copy of it) onto the
clipboard.
Choose "Edit -> Paste", "Ctrl + V", or "Insert". This pastes the clipboard contents into the
3.
document
"Ctrl + Shift+ V" pastes the clipboard contents into the same X/Y position from where they were cut or
copied. This only applies to objects cut or copied from within Xtreme Print Studio. Objects imported
from other programs are always pasted into the center of the current view.
The object remains on the clipboard so you can paste the same object several times.
Some programs can transfer data on the clipboard in two or more formats. If this applies, the menu
option reads Paste Special
. Selecting it brings up a dialog box that lets you select a format. Xtreme Print Studio automatically
highlights the recommended format.
Page 53
Page 54

Cut, copy and paste
These let you move or copy an object in the same document or between different documents. The
procedure is:
Select the object.
1.
To remove the object, choose "Edit -> Cut" (or "Ctrl + X"). To copy the object but not remove
2.
it, choose "Edit -> Copy" (or "Ctrl + C"). Either option puts the object (or a copy of it) onto the
clipboard.
Choose "Edit -> Paste", "Ctrl + V", or "Insert". This pastes the clipboard contents into the
3.
document
"Ctrl + Shift+ V" pastes the clipboard contents into the same X/Y position from where they were cut or
copied. This only applies to objects cut or copied from within Xtreme Print Studio. Objects imported
from other programs are always pasted into the center of the current view.
The object remains on the clipboard so you can paste the same object several times.
Some programs can transfer data on the clipboard in two or more formats. If this applies, the menu
option reads Paste Special
. Selecting it brings up a dialog box that lets you select a format. Xtreme Print Studio automatically
highlights the recommended format.
Page 54
Page 55

Removing objects from the document
Choose "Edit -> Delete", or press "Delete", or click the delete
button on the Standard
control bar.
First select the objects you want to remove. You can then either cut the objects to the clipboard or
delete them.
Cutting objects
Choose "Edit -> Cut", or press "Ctrl + X".
The advantage is that you can paste them into a different place or layer.
The disadvantage is that the existing contents of the clipboard are overwritten.
Deleting objects
The advantage is that no copy is stored, so the clipboard contents are preserved. If you accidentally
delete an object, undo retrieves it.
Page 55
Page 56

Cutting objects
Choose "Edit -> Delete", or press "Delete", or click the delete
button on the Standard
control bar.
Choose "Edit -> Cut", or press "Ctrl + X".
The advantage is that you can paste them into a different place or layer.
The disadvantage is that the existing contents of the clipboard are overwritten.
Deleting objects
The advantage is that no copy is stored, so the clipboard contents are preserved. If you accidentally
delete an object, undo retrieves it.
Page 56
Page 57

Deleting objects
Choose "Edit -> Delete", or press "Delete", or click the delete
button on the Standard
control bar.
The advantage is that no copy is stored, so the clipboard contents are preserved. If you accidentally
delete an object, undo retrieves it.
Page 57
Page 58

Duplicating and cloning
Choose "Edit -> Clone", or press "Ctrl + K".
The places a copy exactly on top of the original.
Cloning is an easy way to create concentric
shapes.
This example uses an original large letter "A"
with a black fill and a 4pt thick white outline and
a clone with no fill and a 1pt black line.
Both these options create a copy of the selected object. The original object is deselected and the
duplicate or clone becomes the selected object.
You can also duplicate an object during moving, rotating, scaling, or skewing. During the drag action
(and while still holding the left mouse button down) click the right mouse button or press "+" on the
numeric keypad to drop a copy of the object. The original object doesn't move. You can do this as many
times as you wish to create a series of duplicated objects.
So an easy way to create one or more copies of an object that is exactly horizontally or vertical aligned,
is to drag the object, hold "Ctrl" to constrain the movement, and right click (or press "+" on the numeric
keypad) for each copy required.
To quickly create a line of objects, draw one, then drag while holding "Ctrl" and right click for each copy
required.
Duplicating
Choose "Edit -> Duplicate", or press "Ctrl + D". The copy is displaced slightly, usually down and to the
right, from the original.
The duplicate distance is user definable, see "Customizing Xtreme Print Studio"
Cloning
Page 58
Page 59

Duplicating
Choose "Edit -> Clone", or press "Ctrl + K".
The places a copy exactly on top of the original.
Cloning is an easy way to create concentric
shapes.
This example uses an original large letter "A"
with a black fill and a 4pt thick white outline and
a clone with no fill and a 1pt black line.
Choose "Edit -> Duplicate", or press "Ctrl + D". The copy is displaced slightly, usually down and to the
right, from the original.
The duplicate distance is user definable, see "Customizing Xtreme Print Studio"
Cloning
Page 59
Page 60

Cloning
Choose "Edit -> Clone", or press "Ctrl + K".
The places a copy exactly on top of the original.
Cloning is an easy way to create concentric
shapes.
This example uses an original large letter "A"
with a black fill and a 4pt thick white outline and
a clone with no fill and a 1pt black line.
Page 60
Page 61

Moving objects forward and backwards
Complex illustrations have objects stacked on top of each other, such as this target:
The target on the left is made from three circles stacked on top of each other.
To ensure that objects overlay each other in the correct order, you often need to rearrange their order
from front to back. The front object always covers lower objects, and objects always cover other
objects which are further back. Each new object you create is always created on top of older ones.
The arrange menu gives you four options:
Bring to front ("Ctrl + F"): This makes the selected object the front object, and it will hide any
other object it covers.
Move forward ("Ctrl + Shift+ F"): This moves the object up a level towards the front rather like
climbing a staircase one step at a time.
Move backward ("Ctrl + Shift+ B"): This moves the object one level towards the back.
Put to back ("Ctrl + B"): This moves the object to the back.
These options move objects forwards and backwards within their layer. Move to layer in front and
Move to layer behind
lets you move objects between visible layer (invisible layers are skipped when moving objects).
Read more in "Layers"
Page 61
Page 62

Scaling (resizing) objects
With the scale line widths
button set, scaling an object also scales its line widths.
With this button unset, line widths remain unchanged.
With the lock aspect
button set, the width/height aspect ratio remains constant
as you scale the object.
The Selector
Tool must be in scale mode
(the selection bounds handles
are squares). If necessary,
click on the object to change
to scale mode.
This is part of the Selector
Tool.
Scale Line Widths button
You can toggle this button during drags by clicking "/" on the numeric keypad.
When active, the X/Y width & height values in the InfoBar include the width of the outline or brush. It's
sometimes useful to be able to see and control the exact size of the shape ignoring the line thickness.
Lock Aspect button
In other words, the shape remains in the same proportions as the original. It's recommended that this
button remains selected most of the time in order to ensure that when you resize objects they do not
become squashed.
With this button unset, you can change the aspect ratio as you scale the object, in other words, you can
stretch object one way or another when dragging a corner resize handle or when entering a new size.
Scaling using the mouse
Drag one of the corner handles. The object scales as you move the pointer diagonally. The InfoBar
shows the current scaling. The object will scale between the dragged handle and the opposite one. This
point of the object is kept in place, while every other move when scaling to the new size. To use any
other point of the object as fix point move the transformation center to it and using the InfoBar buttons to
scale
.
Hold "Shift" while dragging to scale the object around its center. This works always and independent
from the position of the transformation center.
"Ctrl + drag" scales the object in multiples of its original size (x2, x3, and so on).
To create a copy while scaling (leaving the original in place) right click, or press "+" on the numeric
keypad.
Dragging the side handles stretches or squashes the object. This is described in Stretching and squashing
objects
.
Scaling using the InfoBar
Page 62
Page 63

Type into the Scale Text boxes and press "
¿".
Scalings below 100% reduce the object. 50 halves the size of the object.
Scalings above 100% enlarge the object. 200 doubles the object size.
If Lock Aspect
is set, you can type into either text box to resize the object by the desired percentage. If this button is
unset, you can enter separate values for both the width and height.
Alternatively, type the required size of the object into the W or H text boxes. If the Lock Aspect
button is on, this scales the object and maintains the aspect ratio. You can enter the size in any unit, such
as 1 cm.
Scaling with the InfoBar buttons (or number boxes) always scales around the transformation center. You
can position this anywhere else in the object, as described in "Rotating objects
".
Page 63
Page 64

Scale Line Widths button
With the scale line widths
button set, scaling an object also scales its line widths.
With this button unset, line widths remain unchanged.
With the lock aspect
button set, the width/height aspect ratio remains constant
as you scale the object.
The Selector
Tool must be in scale mode
(the selection bounds handles
are squares). If necessary,
click on the object to change
to scale mode.
You can toggle this button during drags by clicking "/" on the numeric keypad.
When active, the X/Y width & height values in the InfoBar include the width of the outline or brush. It's
sometimes useful to be able to see and control the exact size of the shape ignoring the line thickness.
Lock Aspect button
In other words, the shape remains in the same proportions as the original. It's recommended that this
button remains selected most of the time in order to ensure that when you resize objects they do not
become squashed.
With this button unset, you can change the aspect ratio as you scale the object, in other words, you can
stretch object one way or another when dragging a corner resize handle or when entering a new size.
Scaling using the mouse
Drag one of the corner handles. The object scales as you move the pointer diagonally. The InfoBar
shows the current scaling. The object will scale between the dragged handle and the opposite one. This
point of the object is kept in place, while every other move when scaling to the new size. To use any
other point of the object as fix point move the transformation center to it and using the InfoBar buttons to
scale
.
Hold "Shift" while dragging to scale the object around its center. This works always and independent
from the position of the transformation center.
"Ctrl + drag" scales the object in multiples of its original size (x2, x3, and so on).
To create a copy while scaling (leaving the original in place) right click, or press "+" on the numeric
keypad.
Dragging the side handles stretches or squashes the object. This is described in Stretching and squashing
objects
.
Scaling using the InfoBar
Type into the Scale Text boxes and press "
¿".
Scalings below 100% reduce the object. 50 halves the size of the object.
Page 64
Page 65

Scalings above 100% enlarge the object. 200 doubles the object size.
If Lock Aspect
is set, you can type into either text box to resize the object by the desired percentage. If this button is
unset, you can enter separate values for both the width and height.
Alternatively, type the required size of the object into the W or H text boxes. If the Lock Aspect
button is on, this scales the object and maintains the aspect ratio. You can enter the size in any unit, such
as 1 cm.
Scaling with the InfoBar buttons (or number boxes) always scales around the transformation center. You
can position this anywhere else in the object, as described in "Rotating objects
".
Page 65
Page 66

Lock Aspect button
With the lock aspect
button set, the width/height aspect ratio remains constant
as you scale the object.
The Selector
Tool must be in scale mode
(the selection bounds handles
are squares). If necessary,
click on the object to change
to scale mode.
In other words, the shape remains in the same proportions as the original. It's recommended that this
button remains selected most of the time in order to ensure that when you resize objects they do not
become squashed.
With this button unset, you can change the aspect ratio as you scale the object, in other words, you can
stretch object one way or another when dragging a corner resize handle or when entering a new size.
Scaling using the mouse
Drag one of the corner handles. The object scales as you move the pointer diagonally. The InfoBar
shows the current scaling. The object will scale between the dragged handle and the opposite one. This
point of the object is kept in place, while every other move when scaling to the new size. To use any
other point of the object as fix point move the transformation center to it and using the InfoBar buttons to
scale
.
Hold "Shift" while dragging to scale the object around its center. This works always and independent
from the position of the transformation center.
"Ctrl + drag" scales the object in multiples of its original size (x2, x3, and so on).
To create a copy while scaling (leaving the original in place) right click, or press "+" on the numeric
keypad.
Dragging the side handles stretches or squashes the object. This is described in Stretching and squashing
objects
.
Scaling using the InfoBar
Type into the Scale Text boxes and press "
¿".
Scalings below 100% reduce the object. 50 halves the size of the object.
Scalings above 100% enlarge the object. 200 doubles the object size.
If Lock Aspect
is set, you can type into either text box to resize the object by the desired percentage. If this button is
unset, you can enter separate values for both the width and height.
Alternatively, type the required size of the object into the W or H text boxes. If the Lock Aspect
button is on, this scales the object and maintains the aspect ratio. You can enter the size in any unit, such
as 1 cm.
Scaling with the InfoBar buttons (or number boxes) always scales around the transformation center. You
can position this anywhere else in the object, as described in "Rotating objects
Page 66
Page 67

".
Page 67
Page 68

Scaling using the mouse
The Selector
Tool must be in scale mode
(the selection bounds handles
are squares). If necessary,
click on the object to change
to scale mode.
Drag one of the corner handles. The object scales as you move the pointer diagonally. The InfoBar
shows the current scaling. The object will scale between the dragged handle and the opposite one. This
point of the object is kept in place, while every other move when scaling to the new size. To use any
other point of the object as fix point move the transformation center to it and using the InfoBar buttons to
scale
.
Hold "Shift" while dragging to scale the object around its center. This works always and independent
from the position of the transformation center.
"Ctrl + drag" scales the object in multiples of its original size (x2, x3, and so on).
To create a copy while scaling (leaving the original in place) right click, or press "+" on the numeric
keypad.
Dragging the side handles stretches or squashes the object. This is described in Stretching and squashing
objects
.
Scaling using the InfoBar
Type into the Scale Text boxes and press "
¿".
Scalings below 100% reduce the object. 50 halves the size of the object.
Scalings above 100% enlarge the object. 200 doubles the object size.
If Lock Aspect
is set, you can type into either text box to resize the object by the desired percentage. If this button is
unset, you can enter separate values for both the width and height.
Alternatively, type the required size of the object into the W or H text boxes. If the Lock Aspect
button is on, this scales the object and maintains the aspect ratio. You can enter the size in any unit, such
as 1 cm.
Scaling with the InfoBar buttons (or number boxes) always scales around the transformation center. You
can position this anywhere else in the object, as described in "Rotating objects
".
Page 68
Page 69

Scaling using the InfoBar
Type into the Scale Text boxes and press "
¿".
Scalings below 100% reduce the object. 50 halves the size of the object.
Scalings above 100% enlarge the object. 200 doubles the object size.
If Lock Aspect
is set, you can type into either text box to resize the object by the desired percentage. If this button is
unset, you can enter separate values for both the width and height.
Alternatively, type the required size of the object into the W or H text boxes. If the Lock Aspect
button is on, this scales the object and maintains the aspect ratio. You can enter the size in any unit, such
as 1 cm.
Scaling with the InfoBar buttons (or number boxes) always scales around the transformation center. You
can position this anywhere else in the object, as described in "Rotating objects
".
Page 69
Page 70

Rotating objects
When in rotate mode, the transformation center (around which the
object rotates) initially appears in the center of the object, as shown by
a small target like this.
To quickly create a fan like this, draw a single line, then
position the transformation center in the bottom right
(click the bottom left button of the 3x3 transformation
center control on the InfoBar), and then as you drag
rotate the object, right click for each successive line you
require.
Click the arrows to the right to nudge the rotate
angle.
This is part of the Selector
Tool.
Simply click on a object again to put the selector into rotate mode, or click the rotation handles
button on the InfoBar.
To move the transformation center:
Drag the transformation center target where required.
Or use the 3x3 matrix on the InfoBar for accurate positioning.
This moves the transformation center to the corners, the center or the side mid-points of the
object or selection. The transformation center aligns with the outer edges of the object. This
means that if the object has a thick line applied, the transformation center can be outside of the
object.
Attention
: If the rotation center is moved, it remains in this location for any selected object until all objects are
deselected, at which point it returns to the center of any selected object.
Rotating using the mouse
The Selector
Tool must be in rotate/skew mode (the selection handles are arrow shaped).
Dragging the side handles stretches the object. This is described in Stretching and squashing objects
.
Drag on a corner arrow. As you drag, the object rotates around the transformation center. The InfoBar
shows the current rotate angle.
"Shift+ drag" to rotate the object around its center (the transformation center is ignored).
Hold down "Ctrl" to restrict rotation to the constrain angles.
The constrain angles are user definable. Refer to "Customizing Xtreme Print Studio".
To create a copy while rotating, click "+" on the numeric keypad while rotating, or click the right mouse
button.
Rotating by exact angles (using the InfoBar)
Type an angle into the rotate box and press "
¿". Positive angles rotate anti-clockwise and negative angles rotate clockwise.
Page 70
Page 71

Rotating objects in Resize Mode
It is possible to rotate and skew an object even if not in rotate mode. Using resize mode, move the
mouse pointer into the according small areas near the selection area handles as illustrated above. The
mouse pointer changes into a rotate or skew icon, showing you that you are now able to rotate or skew
the object by dragging with the mouse.
Page 71
Page 72

Rotating using the mouse
To quickly create a fan like this, draw a single line, then
position the transformation center in the bottom right
(click the bottom left button of the 3x3 transformation
center control on the InfoBar), and then as you drag
rotate the object, right click for each successive line you
require.
Click the arrows to the right to nudge the rotate
angle.
The Selector
Tool must be in rotate/skew mode (the selection handles are arrow shaped).
Dragging the side handles stretches the object. This is described in Stretching and squashing objects
.
Drag on a corner arrow. As you drag, the object rotates around the transformation center. The InfoBar
shows the current rotate angle.
"Shift+ drag" to rotate the object around its center (the transformation center is ignored).
Hold down "Ctrl" to restrict rotation to the constrain angles.
The constrain angles are user definable. Refer to "Customizing Xtreme Print Studio".
To create a copy while rotating, click "+" on the numeric keypad while rotating, or click the right mouse
button.
Rotating by exact angles (using the InfoBar)
Type an angle into the rotate box and press "
¿". Positive angles rotate anti-clockwise and negative angles rotate clockwise.
Rotating objects in Resize Mode
It is possible to rotate and skew an object even if not in rotate mode. Using resize mode, move the
mouse pointer into the according small areas near the selection area handles as illustrated above. The
mouse pointer changes into a rotate or skew icon, showing you that you are now able to rotate or skew
the object by dragging with the mouse.
Page 72
Page 73

Rotating by exact angles (using the InfoBar)
Click the arrows to the right to nudge the rotate
angle.
Type an angle into the rotate box and press "
¿". Positive angles rotate anti-clockwise and negative angles rotate clockwise.
Rotating objects in Resize Mode
It is possible to rotate and skew an object even if not in rotate mode. Using resize mode, move the
mouse pointer into the according small areas near the selection area handles as illustrated above. The
mouse pointer changes into a rotate or skew icon, showing you that you are now able to rotate or skew
the object by dragging with the mouse.
Page 73
Page 74

Rotating objects in Resize Mode
It is possible to rotate and skew an object even if not in rotate mode. Using resize mode, move the
mouse pointer into the according small areas near the selection area handles as illustrated above. The
mouse pointer changes into a rotate or skew icon, showing you that you are now able to rotate or skew
the object by dragging with the mouse.
Page 74
Page 75

Flipping objects
This is part of the Selector Tool. Clicking on the Flip
buttons flips the object vertically or horizontally around
the transformation center.
The scale and aspect ratio do not change; the object just flips.
Page 75
Page 76

Stretching and squashing objects
Drag one of the side handles. The object scales as you
move the pointer in the appropriate direction. The
InfoBar shows the current scaling.
The Lock Aspect
button is ignored.
This is similar to scaling objects (described in Chapter 7: Object handling) except that the object is
scaled in one direction only. Stretching and squashing are basically the same action — stretching makes
the object larger, squashing makes it smaller.
Stretching/Squashing using the mouse
The Selector
Tool must be in scale mode. (The selection handles are squares.) If necessary, click on the object to
change to scale mode.
Right click or press "+" on the numeric keypad while dragging to stretch or squash a copy of the object,
leaving the original in place.
Stretching/squashing using the InfoBar
The Lock Aspect
button must be unset (if it is set, you scale the object instead of stretching or squashing it).
Type into either the width or height text box (as appropriate) and press "
¿". Alternatively enter a % scale (width or height). So entering 200% into the top % scale box will make
the object twice as wide, but the same height.
If the Lock Aspect
is set then it will not stretch.
Page 76
Page 77

Skewing objects
This is part of the Selector
Tool.
Left is the original object, to the right
with a horizontal skew
As you drag, the object skews in the direction of
movement (vertical or horizontal).
The InfoBar shows the current skew angle.
To skew horizontally type an angle into the skew text box and
press "
¿".
1.
Click the center-right button on the 3x3 matrix on the
InfoBar.
2.
Type an angle into the skew text box and press "¿". Positive
values skew downwards, and negative upwards.
Skewing using the mouse
Switch the Selector
Tool to rotate/skew mode. (The selection handles are arrow shaped) by clicking on the object.
Drag a side arrow to skew the object.
"Shift+ drag" to skew the object around its center. Hold down "Ctrl" to restrict the skew to the constrain
angles. Right click, or press "+" on the numeric keypad as you drag to create a copy, leaving the original
where it was. Or right-drag with the mouse to create instant copies, additional copies by left clicks.
You can also skew an object in the Selector Tool's resize mode using the skew areas. Read more under
Rotating objects in resize mode
.
Skewing using the InfoBar
To skew vertically:
Create a guideline
Guidelines are vertical or horizontal lines and are a quick and easy way to align a series of objects on the
page. To create guidelines:
Select Display ruler (shortcut: Ctrl + L)
Drag the ruler onto the page.
or:
Double click the ruler to create a guideline aligned to the click point.
Deleting a guideline
Using the Selector
Tool drag the guideline onto the appropriate ruler (the vertical ruler for vertical guidelines, horizontal ruler
for horizontal).
Or, right click on the guideline and then "Delete".
Page 77
Page 78

Create a guideline
Guidelines are vertical or horizontal lines and are a quick and easy way to align a series of objects on the
page. To create guidelines:
Select Display ruler (shortcut: Ctrl + L)
Drag the ruler onto the page.
or:
Double click the ruler to create a guideline aligned to the click point.
Deleting a guideline
Using the Selector
Tool drag the guideline onto the appropriate ruler (the vertical ruler for vertical guidelines, horizontal ruler
for horizontal).
Or, right click on the guideline and then "Delete".
Page 78
Page 79

Deleting a guideline
Using the Selector
Tool drag the guideline onto the appropriate ruler (the vertical ruler for vertical guidelines, horizontal ruler
for horizontal).
Or, right click on the guideline and then "Delete".
Page 79
Page 80

The Pen Tool
The Pen
Tool has limited functionality. It is included for compatibility with
other packages that have a similar tool, although some users prefer
this way of creating lines and curves.
Drawing a straight line:
Click to create point handles.
Drawing a curved line:
Move the pointer to where you want the
point handle. Click and drag the pointer away
from the point handle. As you drag a curve is
created to this point and two curve handles
appear. These control the angle and radius of
the curve.
Page 80
Page 81

Extending the line
Make sure an end point handle is the selected handle (red outline) and then just click again to add a new
line or curve section. Each successive click places a new point handle and draws a new line segment to
the selected point handle.
Applies to the shape editor and pen tools.
Page 81
Page 82

Finishing the line
Shift+ click completes the line (keeps it selected), or press "Esc" to finish the line and de-select it. After
this, additional clicks will start a new line.
This applies also to shape editor and pen tools.
Page 82
Page 83

Changing the line width (thickness)
Type a new line width into the text box on the standard
control bar or choose the default line thickness from the menu.
To change the line thickness or the outline thickness of a shape, first select the object or objects:
Line thickness is traditionally measured in points, abbreviated to pt. 1 point is 1/72
of an inch (about 0.3mm), which is slightly less than the thickness of one screen pixel when viewed at
100% zoom.
You can use any of Xtreme Print Studio's standard measurement units.
You can enter the thickness value in any unit, and MAGIX Xtreme Print Studio will convert it to the
correct number of Points. E.g. you can enter 0.5cm, and you will get a line half a centimeter thick, but it
will show just over 14pt in the line width field.
If you have no object selected and you change the line thickness value, this changes the default for all
new lines.
Note
: A zero width line is a special case, and should not normally be used. This draws a line one device-pixel
wide. The actual size will therefore depend on the device the drawing is displayed on. On a monitor
screen one pixel is clearly visible and is never shown anti-aliased. On devices such as printers and
particularly on image setters, which have a much higher resolution, the line is almost invisible (zero width
lines in imported files are converted to 0.25pt).
nd
Page 83
Page 84

Adding a new point handle
The InfoBar shows the current mode.
Make sure the line is selected, then:
1.
If necessary, click on the end
point to select it.
2.
Position the pointer and click
to add a new section.
Make sure the line is selected, then;
1.
Click on the line to add a new point
handle into the line
2.
Drag the point handle to the required
position.
The Shape Editor
Tool has three modes, depending on whether no point handles are selected (a click will start a new line),
an end handle is selected (a click will add a new section), or one or more other point handles are
selected (you can drag or change the handles).
New: Click to start a new line,
Add: Click to extend the line,
Change: Drag or delete point handles to change.
This applies to the Shape Editor Tool only.
To the end of a line:
To the middle of a line:
To the start of a line:
If the end point is selected, clicking on the start point closes the shape (this is described in shape
handling). To add a new control handle to the start of a line:
Finish the line using Shift+ click.
1.
Click on the start handle.
2.
Position the pointer and click.
3.
Page 84
Page 85

To the end of a line:
Make sure the line is selected, then:
1.
If necessary, click on the end
point to select it.
2.
Position the pointer and click
to add a new section.
Make sure the line is selected, then;
1.
Click on the line to add a new point
handle into the line
2.
Drag the point handle to the required
position.
To the middle of a line:
To the start of a line:
If the end point is selected, clicking on the start point closes the shape (this is described in shape
handling). To add a new control handle to the start of a line:
Finish the line using Shift+ click.
1.
Click on the start handle.
2.
Position the pointer and click.
3.
Page 85
Page 86

To the middle of a line:
Make sure the line is selected, then;
1.
Click on the line to add a new point
handle into the line
2.
Drag the point handle to the required
position.
To the start of a line:
If the end point is selected, clicking on the start point closes the shape (this is described in shape
handling). To add a new control handle to the start of a line:
Finish the line using Shift+ click.
1.
Click on the start handle.
2.
Position the pointer and click.
3.
Page 86
Page 87

To the start of a line:
If the end point is selected, clicking on the start point closes the shape (this is described in shape
handling). To add a new control handle to the start of a line:
Finish the line using Shift+ click.
1.
Click on the start handle.
2.
Position the pointer and click.
3.
Page 87
Page 88

Constraining the line
When dragging a point handle, holding down the
constrain key ("Ctrl") will constrain the movement
to multiples of the constrain angle (controlled from
the options dialog, general
tab). When dragging a curve handle the angle is
constrained.
Page 88
Page 89

Changing curves
Move the curve handle towards or away from the
point handle to pull the curve in the required
direction.
Using the curve handle
Dragging the curve handle will adjust the curvature of the adjoining curve segments.
Dragging the line segment
This applies to the pen and shape editor
tools. You can also change the curve by dragging the line segment between points.
Notice the difference between dragging the line to change its shape, and clicking on the line to add a new
point handle. Dragging a straight line segment changes it to a curved line segment.
Page 89
Page 90

Using the curve handle
Move the curve handle towards or away from the
point handle to pull the curve in the required
direction.
Dragging the curve handle will adjust the curvature of the adjoining curve segments.
Dragging the line segment
This applies to the pen and shape editor
tools. You can also change the curve by dragging the line segment between points.
Notice the difference between dragging the line to change its shape, and clicking on the line to add a new
point handle. Dragging a straight line segment changes it to a curved line segment.
Page 90
Page 91

Dragging the line segment
This applies to the pen and shape editor
tools. You can also change the curve by dragging the line segment between points.
Notice the difference between dragging the line to change its shape, and clicking on the line to add a new
point handle. Dragging a straight line segment changes it to a curved line segment.
Page 91
Page 92

Creating rectangles and
Use the Quickshape Tool (described above).
Or use the Rectangle Tool ("Shift+ F3", or "M").
In the Rectangle Tool, rounded corner
rectangles can be resized (including aspect ratio
changes) while maintaining the circular corners.
squares
To create a rectangle:
This is a simplified version of the Quickshape
Tool with only options relevant to rectangles and squares.
Creating a square
To create a square rather than a rectangle, hold down "Ctrl" while dragging.
Editing rounded corner rectangles
There is one special difference when using the Rectangle Tool: Normally, if you create a rectangle with
rounded corners, the corners are perfect segments of a circle. If a rectangle is now resized with the
Selector Tool so that the aspect ratio is changed, the corners are not circular any more.
Retain rounded corners by resizing in the Rectangle Tool.
Page 92
Page 93

Creating a square
In the Rectangle Tool, rounded corner
rectangles can be resized (including aspect ratio
changes) while maintaining the circular corners.
To create a square rather than a rectangle, hold down "Ctrl" while dragging.
Editing rounded corner rectangles
There is one special difference when using the Rectangle Tool: Normally, if you create a rectangle with
rounded corners, the corners are perfect segments of a circle. If a rectangle is now resized with the
Selector Tool so that the aspect ratio is changed, the corners are not circular any more.
Retain rounded corners by resizing in the Rectangle Tool.
Page 93
Page 94

Editing rounded corner rectangles
In the Rectangle Tool, rounded corner
rectangles can be resized (including aspect ratio
changes) while maintaining the circular corners.
There is one special difference when using the Rectangle Tool: Normally, if you create a rectangle with
rounded corners, the corners are perfect segments of a circle. If a rectangle is now resized with the
Selector Tool so that the aspect ratio is changed, the corners are not circular any more.
Retain rounded corners by resizing in the Rectangle Tool.
Page 94
Page 95

Creating circles and ellipses
Select Quickshape Tool and select the Create Ellipses
button.
Or select the Ellipse Tool ("Shift+ F4", or "L").
The radius and diameter
buttons automatically create circles.
To create an ellipse or circle:
This is a simplified version of the Quickshape
Tool with only options relevant to ellipses and circles.
Creating a circle
With the bounds creation
button selected, hold down "Ctrl" while dragging to create a circle rather than an ellipse.
You can revert an ellipse into a circle at any time by double clicking on a control handle of an ellipse.
Page 95
Page 96

Creating a circle
The radius and diameter
buttons automatically create circles.
With the bounds creation
button selected, hold down "Ctrl" while dragging to create a circle rather than an ellipse.
You can revert an ellipse into a circle at any time by double clicking on a control handle of an ellipse.
Page 96
Page 97

Creating regular polygons (the
1.
Select the Quickshape Tool ("Shift + F2").
2.
Select Polygon.
3.
Select the number of sides either from the menu, or
by typing into the text box.
Select the Round corners
button or double click on a corner
point.
The polygon has extra handles (radius
handles) where the rounding starts. To
increase or decrease the radius, drag
any of the radius handles.
Quickshape Tool)
The Quickshape
Tool lets you quickly create almost any regular, symmetrical shape with sharp or rounded corners. You
can then drag the edges to bend the sides, and at any time you can change the number of sides or make
the object an ellipse, a polygon, or a star.
To create the polygon drag:
From the center outwards (Radius button),
Or from an outside edge (Diameter button),
Or diagonally to create an imaginary rectangle enclosing the polygon (Bounds creation button)
letting you distort the polygon.
Polygons with rounded corners
To remove the round corners:
Click the Round corners button.
Or double click a control handle.
Editing a polygon
The Selector Tool lets you move, rotate, resize, and skew a polygon as normal (the Selector Tool is
described in Object handling
.)
Using the Quickshape
Tool, you can resize or rotate:
Page 97
Page 98

Drag the corner handles.
Apply or remove rounded corners by clicking the round corners
button.
Change the polygon to an ellipse by clicking the create ellipse
button (ellipses are described later) or double clicking the polygon's
center.
Stellate the polygon (make it star-shaped) by clicking the starred
shapes
button (starred shapes are described later).
On the left are the original polygons. Just
drag on the sides to create curved sides.
Change the number of sides by typing the number into the menu or
selecting from it.
Or select Size & rotation in the Editable Items menu. Type the required values into the text
boxes.
You can also nudge the values using the buttons to the right.
To move:
Drag the handle in the center of the polygon.
Or use the arrow keys on the keyboard.
Or select "Center" in the editable items" menu. Type the required X/Y values into the text
boxes.
Drag the sides to make them curved. Move the pointer over the edge of the polygon (it changes to an
arrow shape). You can now drag the sides.
"Ctrl + double click" on a side, or click the restore edges
button to make the sides straight again.
Page 98
Page 99

Polygons with rounded corners
Select the Round corners
button or double click on a corner
point.
The polygon has extra handles (radius
handles) where the rounding starts. To
increase or decrease the radius, drag
any of the radius handles.
Apply or remove rounded corners by clicking the round corners
button.
Change the polygon to an ellipse by clicking the create ellipse
button (ellipses are described later) or double clicking the polygon's
center.
Stellate the polygon (make it star-shaped) by clicking the starred
shapes
button (starred shapes are described later).
On the left are the original polygons. Just
drag on the sides to create curved sides.
To remove the round corners:
Click the Round corners button.
Or double click a control handle.
Editing a polygon
The Selector Tool lets you move, rotate, resize, and skew a polygon as normal (the Selector Tool is
described in Object handling
.)
Using the Quickshape
Tool, you can resize or rotate:
Drag the corner handles.
Or select Size & rotation in the Editable Items menu. Type the required values into the text
boxes.
You can also nudge the values using the buttons to the right.
To move:
Drag the handle in the center of the polygon.
Or use the arrow keys on the keyboard.
Or select "Center" in the editable items" menu. Type the required X/Y values into the text
boxes.
Drag the sides to make them curved. Move the pointer over the edge of the polygon (it changes to an
arrow shape). You can now drag the sides.
"Ctrl + double click" on a side, or click the restore edges
button to make the sides straight again.
Page 99
Page 100

Change the number of sides by typing the number into the menu or
selecting from it.
Page 100
 Loading...