

Page 1
Page 2

2 Copyright
Copyright
This documentation is protected by law. All rights, especially the right of duplication,
circulation, and translation, are reserved.
No part of this publication may be reproduced in the form of copies, microfilms or other
processes, or transmitted into a language used for machines, especially data processing
machines, without the express written consent of the publisher.
All copyrights reserved.
All other product names are trademarks of the corresponding manufacturers. Errors in and
changes to the contents as well as program modifications reserved.
Created under licence from Dolby Laboratories. Dolby and the double D symbol are
trademarks of Dolby Laboratories.
© 1992 - 2010 Dolby Laboratories. All rights reserved.
MAGIX is a registered trademark of MAGIX AG.
Other named product names may be registered trademarks of their respective owners.
This product uses MAGIX patent pending technology.
Copyright © MAGIX AG, 2008-2010. All rights reserved.
Foreword
Thank you for choosing MAGIX Video Pro X2! Your new software offers you the tools to edit
video material at a professional level, including many special functions like DVD authoring,
multicam editing, and keyframe animation.
The intuitive functionality featured by MAGIX Video Pro X2 will help you achieve great
results even after a relatively short introductory phase. Thanks to the optimal hardware
support, you can import your audio and video recordings from any source to your
computer. Cut them and optimize them; add effects, titles, and transitions. MAGIX Video
Pro X2 provides all of the detailed editing options you need for ambitious video projects.
When you're finished, you can export your projects or burn them to disc in any
conventional format.
This documentation offers you an overview from the beginning, plus a quick start with the
program. The sections at the end provide a detailed and systematic description of the
numerous functions.
Have fun using MAGIX Video Pro X2,
The MAGIX team
Page 3

Foreword 3
Table of Contents
Copyright 2
Foreword 2
Support 9
Serial number 10
Unlocking MAGIX Video Pro X2 10
System requirements 11
Introduction 12
What is MAGIX Video Pro X2? 12
What’s new in MAGIX Video Pro X2? 12
Features 14
Notes for MAGIX Movie Edit Pro users 18
Quick start 20
Starting the program and orientation 20
DV recording 25
How to capture analog video 27
Video editing 29
Enriching movies 35
Workspaces 37
Activating the main screen 38
Media Pool 38
Toolbars 43
Program and source monitor 50
Arranger 53
Project folder 55
Adjusting the workspace 55
The "Burn" screen 56
Create new video project 57
Movie settings 57
New project settings or new movie 64
Load project 64
Save project 64
Save project as... 64
Video recording 65
Connect camera 65
Page 4

4 Foreword
Select the recording method 67
DV cameras 67
HDV camera 72
Batch recording 73
Logging 73
Analog video recording 74
Single frame 76
Audio 78
Screen 80
Recording AVCHD 81
Edit after recording 82
Creating new movies or attaching them 83
Insert object into the project 84
Select files in the Media Pool 84
Load files 84
Loading parts of longer movie files 84
MPEG-4 import 85
Automatic scene detection 85
Working with objects 87
Select objects 87
Moving objects 87
Splitting objects 87
Edit menu 87
Duplicate objects 88
Object handles 88
Shrink or interlace videos 89
Extract sound from videos 89
Save objects separately 89
Video mix 90
Magnetic objects 90
Transitions (fades) 91
Scene overview 94
Grid and snap 95
Search for and remove ads 95
Trim Objects 96
General advice for operating both trim editors 96
Trimmer for individual objects 97
Cut trimmer 98
Markers 99
Playback marker 99
Set project marker 99
Ranges (in and out points) 100
Chapter markers 101
Page 5

Scene markers 102
Ad markers 103
Multicam editing 104
Preparation 104
Source and preview images 104
Multicam edit functions 105
Synchronize video objects using the sound track 107
Titles and effects 107
3D text 107
Apply fades 107
Apply effects to objects 107
Comparison image in the source monitor 108
Video effects in the Media Pool 108
Movement effects in the Media Pool 115
Video effect plug-ins 119
Image stabilization 122
Create panorama pictures 123
Borders 124
Title Editor 124
Slideshow Maker 128
Master effects 130
TV picture 132
Audio Effects 133
Foreword 5
Animate objects 148
Preparing animations 148
Place keyframe 148
Copy keyframe 149
Display keyframes of individual parameters 149
Retroactively editing an effect's keyframes 149
Soft movement 149
Delete keyframe 150
Editing an effects curve in the object 150
Change curve shape 150
Effects curves - Additional functions 151
Add sound 152
Load and edit audio files 152
Import audio CD 152
MAGIX Soundtrack Maker 154
Tempo and beat recognition 156
Adding a sound track using MIDI songs 160
Synthesizer 162
Mixer 166
Audio effects 169
Page 6

6 Foreword
5.1 Surround 169
Using DVD audio tracks 174
Scrubbing 176
Mix down of audio objects 177
Managing video projects 178
Backup copy 178
Load backup project... 179
Importing & exporting EDL files 180
Clean-up wizard 180
Options for using the final movie 182
Create playable disc 182
Export movie 182
Export audio/video 188
Burn discs 196
Preview and editing 197
Menu 198
Templates 199
Edit disc menu 200
Burn dialog for DVD player 209
Create PC show 211
Create webDVD 211
Batch conversion 212
Open batch conversion 212
Administration 212
Queued entries for batch conversion 212
Format settings for the selected conversion process 213
Shut down PC automatically after successful export 213
Start batch conversion 213
Menus 214
File menu 214
Edit menu 220
Effects (FX) 226
Windows menu 230
Help menu 232
Context menu (right click) 234
Video objects 234
Image objects 238
Transitions 243
Audio objects 243
Text objects 247
MAGIX 3D Maker objects 250
Page 7

Program settings 254
Playback 254
Path settings 256
Video/Audio 256
System 258
Display templates 259
Display options 260
Problems and solutions 262
File will not load 262
Choppy or uneven playback 262
Problems and Remedies regarding the Auto Remix Assistant 262
Activation problems 263
Online functions 264
Integrated browser 264
MAGIX News Center 266
Embed Flash videos into your own web page 266
Keyboard shortcuts 268
Playback functions 268
Arranger view 268
Move view 269
Transport control in Media pool 269
Mouse modes 269
File menu 269
Edit menu 272
Effects menu 272
Window menu 274
Help 274
Edit keyboard shortcut 274
Foreword 7
Activate additional functions 276
Free activation (MPEG-2, MPEG-4, Dolby Digital 2.0 & 5.1) 276
Annex: Digital Video and Data Storage 277
Video Editing on the PC 277
MPEG Compression 277
General notes on AVI videos 278
Overview of the different disc types 278
MPEG-4 encoder settings 285
MPEG-4 285
AVC / H.264 290
AMR 295
AAC 296
Multiplexer 296
Page 8

8 Foreword
Appendix: MPEG Encoder Settings 298
General settings 298
Video settings 299
Advanced video settings 300
Audio settings 300
MPEG glossary 302
Motion estimation 302
Bit rate 302
Block 302
Chroma format 302
Field 303
Frame 303
GOP 303
I frames 304
Interlace 304
P frames and B frames 305
Prediction 305
Quantization scaling 306
If you still have questions... 308
Program help 308
Index 309
Page 9

Support 9
Support
If you experience any problems with your software, please contact our support team:
Support website: http://support.magix.net/contact/us
This website takes you to the MAGIX user service page; the following free offers are also
featured there:
FAQs (frequently asked questions) and general tricks and tips. In most cases, you’ll find
•
the solution to your problem here. If not, use the email support form.
Email support form: Use the special form to inform our support staff about your system.
•
This information is used to solve your problems quickly and competently. Simply fill it out
and send it with a mouse click!
Support forum: You are not alone. Perhaps other users had a similar problem and can
•
help you solve yours. Our support staff are also regular contributors.
Download section: Updates, improvements, and patches are likewise offered free of
•
charge via download. Many problems you may experience are already familiar to us, and
they can often be solved by downloading the latest patch. Besides patches, there are
also wizards for checking and optimizing your system.
Links: The links list contains the contact addresses for all of the most important
•
hardware manufacturers.
Please note: To be able to use the support, you have to register your product using the
serial number provided. This number can be found on the CD case of your installation CD
or on the inside of the DVD box.
You can also reach our support team by telephone:
UK: 0203 3183666 (Mon. - Fri., 09:00-16:00 GMT)
USA/Canada: 1-775-562-0527 (Mon.–Fri. 9 am to 5 pm EST)
Denmark: 699 18763 (Mon.- Fri. 10:00 - 17:00)
Finland (Suomi): 09 42419023 (Mon.- Fri. 11:00 - 18:00)
Norway: 210 35843 (Mon.- Fri. 10:00 - 17:00)
Sweden: 0852500713 (Mon.- Fri. 10:00 - 17:00)
You can request a free access code to the phone support hotline by using this link:
http://support.magix.net/phone. There you'll also get additional information and
explanations about phone support.
Please have the following information at hand:
• Program version
• Configuration details (operating system, processor, memory, hard drive, etc.), sound
card configuration (type, driver)
• Information regarding other audio software installed
Page 10

10 Serial number
You can also contact our support team by mail:
UK/Scandinavia: MAGIX Development Support, P.O. Box 20 09 14, 01194 Dresden,
Germany
US/Canada: MAGIX Customer Service, 1105 Terminal Way #302, Reno, NV 89502, USA
Customer service & upgrades (US only)
Periodically, MAGIX offers users who purchased their software an upgrade from a previous
product to the current version. For details about an upgrade, please call us using the
following number:
Sales Department 1-305-722-5810
Monday to Friday 9am – 5pm (EST)
Serial number
A serial number is included in each product. This serial number is required for the
installation of the software and enables usage of additional bonus services. Please store
this number in a safe place.
What can a serial number do?
With a serial number your MAGIX Video Pro X2 is clearly assigned to you and only you. This
way improved and more targeted customer service is made possible. Abuse of the
software can be prevented with a serial number, which ensures that optimum the
price/performance ratio continues is guaranteed.
Where can the serial number be found?
The serial number can be found on the reverse side of your CD/DVD case. If your product
is packed in a DVD box, then you'll find the serial number on the inside.
For the versions that have been especially optimized for the Internet (download versions),
you'll get your serial number for activating the software directly after purchasing the product
via email.
When will you need the serial number?
The serial number is required when you start or register MAGIX Video Pro X2 for the first
time.
Note: We explicitly recommend registering your product (free), since only then are you
entitled to download updates and use MAGIX support (view page 8) services.
Unlocking MAGIX Video Pro X2
After MAGIX Video Pro X2 has been installed and the serial number has been entered, the
software can be used for 30 days. After these 30 days have expired, MAGIX Video Pro X2
must be activated.
Page 11

System requirements 11
System requirements
For Microsoft® Windows® XPTM / VistaTM / 7
• Intel® Pentium® IV or AMD® AthlonTM, 2 GHz or higher
• 1 GB RAM
• 1 GB free hard disk memory and a DVD drive for program installation
• Graphics card with a screen resolution of at least 1024 x 768
• Sound card (multi-channel sound card recommended for surround sound editing)
Minimum requirements for HD editing
• Intel® PentiumTM IV 3 GHz with hyperthreading, or dual core with at least 1.3 GHz
• 2 GB RAM
• DirectX
Recommended configuration for AVCHD editing
• Intel® CoreTM 2 Quad with 2.83 GHz
• 3 GB RAM
• ATI Radeon HD 3000 series or higher with 512 MB VRAM
®
9.0c compatible graphics card, min. 128 MB graphics card memory, and
Pixelshader 2.0, ATI X300 or higher, NVIDIA GeForce 6600 or better
TM
Page 12

12 Introduction
Introduction
What is MAGIX Video Pro X2?
MAGIX Video Pro X2 is a professional video editing program for Windows PC systems.
High-performance, native HD editing, DVD authoring with up to 8 audio tracks, or keyframe
animation with Beziér curve control is directed at users with higher standards.
The program is clearly divided into intuitive modules. Videos, photos, and audio from a wide
range of sources can be transferred from various devices to PC. Longer movies can be
automatically separated into chapters or scenes. You can also do the opposite and
combine individual recordings to make a single movie.
Once your video is finished, you can use it in different ways: Transfer it back onto the tape
or to your camcorder, export it in any conventional format, or burn it directly to Blu-ray,
DVD, or another format of disc.
What’s new in MAGIX Video Pro X2?
Improved file import
MAGIX Video Pro X2's support of video formats has been improved, and new formats have
been added.
• For DVD videos, multiple audio tracks, or the corresponding
audio track (view page 84)
may be selected.
• OGG and MP3 are now read directly; conversion to the WAV format is omitted. To
import DVDs with multiple audio tracks (e.g. multi-lingual videos), the corresponding
audio track can be selected via the context menu for the respective audio object.
Creating backgrounds
Media Pool (view page 42) features useful templates for various applications. For
The
example, there are professional backgrounds for measurements, but there are also special
templates with more creative freedom and adjustable color schemes.
Performance test for your PC during AVCHD import
A performance test has been integrated into MAGIX Video Pro X2 for loading AVCHD
videos. This tests whether your computer is powerful enough to edit AVCHD material
directly.
Revised MAGIX MovieShow Maker
MAGIX Slideshow Maker (view page 128) has been completely revised. Effects and fades
can now be set and adjusted in detail. This program is accessible via "Edit -> Wizards ->
Slideshow Maker".
Object zoom
Activate this mode and click on an object to zoom in for detailed editing. This allows
individual drum hits in a loop to be edited in a very detailed way or cut. Select the object
Page 13

Introduction 13
and then you will see a button with four arrows pointing outwards on it in the lower right
section of the Arranger. Click this button again to reset the view to the original settings.
Scrubbing
Scrubbing (view page 176) originates from the time of tape machines and provides quicker
monitoring of passages of a film or piece of music. This was technically implemented in
these devices by keeping the tape head on the tape itself, but the motor doesn't drive the
tape rolls in this case. Instead the tape is "manually" set to the desired position. Scrubbing
in MAGIX Video Pro X2 is available beneath the transport controls via a large wheel, which
may be used to move the playback marker.
Audio effects animation in the Media Pool
Audio effects can also be animated in the Media Pool in the same way as video effects.
Automation curves that were normally difficult to draw can now be set and changes be
made with just few keyframes. Because these curves are object-related, the entire
arrangement remains clearly laid-out even with complex automations. The button for
animations is located in the Media Pool (like video effects).
Improved video upload
Video uploads to video portals and communities (view page 218) can now even be done in
HD quality, and in most cases, without recalculation on the video portal or community
website. Upload functions are accessible via "File -> Internet".
Revised DVD menu design
The DVD menu design function has been generally revised. You can access this option
directly via the "Burn" button.
New Title Editor
Titles, text, opening and end credits are now written directly in the preview monitor so that
you can see exactly where your titles will be positioned right away. Click the "Title" button in
the Media Pool, select a template and place it onto the track via drag & drop. You may now
edit your titles in the preview window.
Additional new MAGIX Video Pro X2 features
• Secondary color correction for impressive color effects
• Level display for audio file import
• Extended jump markers for improved project navigation
• Creation of colored surfaces/color scroll generator
• Upload videos to Vimeo
• Travel route animation
• MAGIX Music Editor with optimized user guidance
• Advanced support for Blu-ray and AVCHD discs
• Timeline zoom for individual objects
• 3-point cut
• Faster and improved direct support of Video DSLR (Canon 5D, 7D, etc.)
• Time code rendering direct into video
Page 14

14 Introduction
• Direct support of VST audio plug-ins
• Direct entry of a desired target frame rate for easy up/down video clip speed adjustment
Features
Recording
MAGIX Video Pro X2 provides the following recording options:
DV cameras: Mini DV camcorders or DV video recorders
•
• HDV cameras: HDV1 and HDV2 camcorders
Video: Analog TV, video input, VHS recorders, webcams
•
Single frame: Single and series images from webcams, video recorders, video cameras,
•
or TV cards
Audio: Microphones, cassette recorders, MiniDisc players, turntables
•
Screen: PC monitor
•
Analog capture requires capture cards compatible with DirectShow. DV capture can be
performed through an OHCI-compatible IEEE 1394 host adapter (FireWire or iLink). A TV
card can be used to record programs from TV or from your video recorder.
There is no limit to the length of your recordings. Now you may record video as long as
there is available space on your hard drive. Using real-time compression during capture
creates smaller file sizes and more available space.
Import/Export file formats
Video files: Video files in the video formats for Windows and DV-AVI type 1/2 (*.avi),
MPEG-1 and 2 (*.mpg,*.mp2,*.MPEG), QuickTime (*.mov), MAGIX video (*.mxv), Windows
Media, VOB streams from DVD (when unencrypted), AVCHD (only import), MPEG4 (*.mp-
4), XDCAM files (Sony PMW-EX4).
Audio files: Wave, MP3 (Windows Media Player 10 or higher required for export), WMA,
OGG Vorbis, MIDI files, and audio CD tracks.
Graphic files (for slideshows or as a still behind a scrolling title): Windows bitmaps (BMP),
JPEG, GIF, animated GIF, PNG, Adobe Photoshop (PSD), Tagged Image File Format (TIFF).
Text files in RTF format: You may enter texts, such as credits with any formatted text and
save them in universal text format (.rft). Loading such text into MAGIX Video Pro X2 creates
a title object.
Notes:
AVI video files in DivX™ format can only be imported with the corresponding codec
installed! The DivX codec can be downloaded from www.divx.com.
The QuickTime library has to be installed to import QuickTime files (*.mov).
Page 15

Introduction 15
Additional export formats: In addition to the above-mentioned audio and video formats, the
following formats can also be exported: RealMedia™, BMP, Snapshot function (export any
film motif as a bitmap or JPEG file). In addition, MAGIX Online Album can be used to create
a Flash video. The video to be uploaded to the MAGIX Online Album will be exported in
Windows Media format, and from there it can be exported as a Flash video.
Note: To import and export AVC and MPEG-4 files, the MEPG-4 codec must first be
activated (view page 275). A dialog will open if the codec is required.
AVCHD standard support
Files from AVCHD cameras can be either read directly or imported. Newer computers are
capable of decoding and playing this format in real-time.
MAGIX Video Pro X2 does a performance check in order to make sure that the computer
has enough computing capacity. If the check indicates that the computer is insufficient,
AVCHD material is transformed into a MPEG-2 file to allow older systems to edit it, too.
Note: To import AVCHD video, the camera drive must be installed even if you are working
with portable media (8 cm DVDs, SD memory card, etc.). Reason: AVCHD cameras use an
improved UDF file system which Windows can't handle without the driver.
AVCHD Lite
MAGIX Video Pro X2 now also supports the AVCHD Lite standard, which is used by digital
cameras for recording video (among other things).
AVCHD activation details
Attention: For AVCHD support, Dolby Digital Stereo and the MPEG-4 codec must be
activated. To convert AVCHD videos to MPEG-2, the MPEG-2 codec must be activated.
Burnable disc formats
• 1:1 copies of DVDs & (S)VCDs
• Double-layer DVDs
• VCDs (MPEG-1 on CD-R)
• S-VCDs (MPEG-2 on CD-R)
• DVD (MPEG-2 on DVD)
• miniDVDs (MPEG-2 on CD-R)
• Blu-ray Discs
• AVCHD disc to DVD and Blu-ray
• Project backups and backup copies
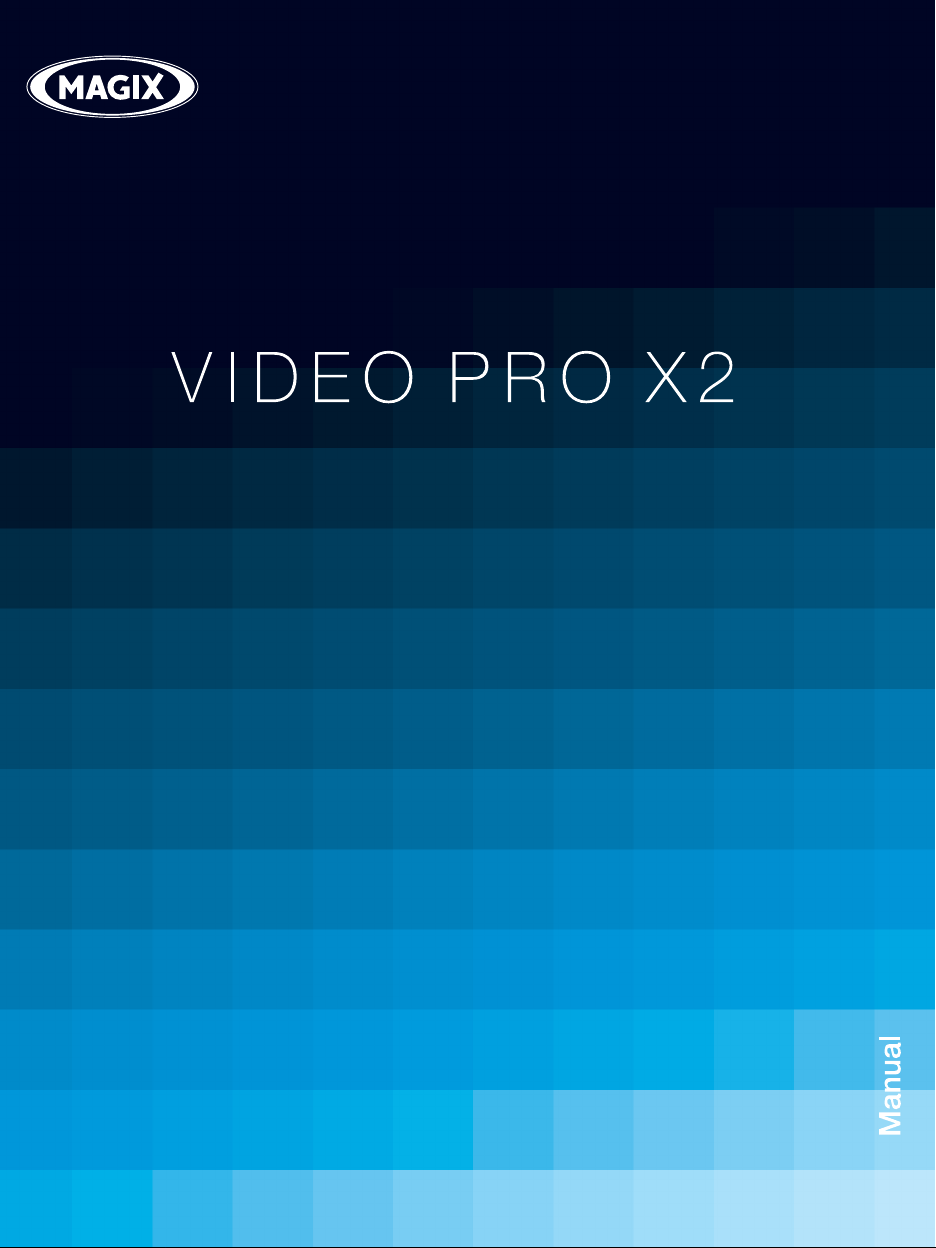
Program and source monitor
MAGIX Video Pro X2 offers two video monitors for transport control which can be used
independently. The program monitor shows the current project in the Arranger, the source
monitor offers a preview for file import from the Media Pool.
Page 16

16 Introduction
Project folder
The project folder is for storing your material. It's useful for preselecting the necessary
media for your current project. Use it to store video, audio, titling files, and even edited
versions or sections of films for use later in your projects.
Savable window layouts
MAGIX Video Pro X2 offers a flexible user interface which allows windows to be adjusted for
any working situation. Both preview monitors can be enlarged to fullscreen and moved
around, e.g. to use multiple monitors more effectively. Even the project folder, the Arranger,
and the Media Pool can be scaled and moved as a separate window.
Effects
MAGIX Video Pro X2 offers numerous effects and effects settings options as described in
detail in the chapter "Effects and titles". A short overview:
• Every object (every video, every single scene, every photo, and every audio recording)
can be provided with its own individual effects combination. Every effects combination
can be saved separately so that you can use it later on different objects. Right click the
object and choose the "Save video effects" option in the context menu.
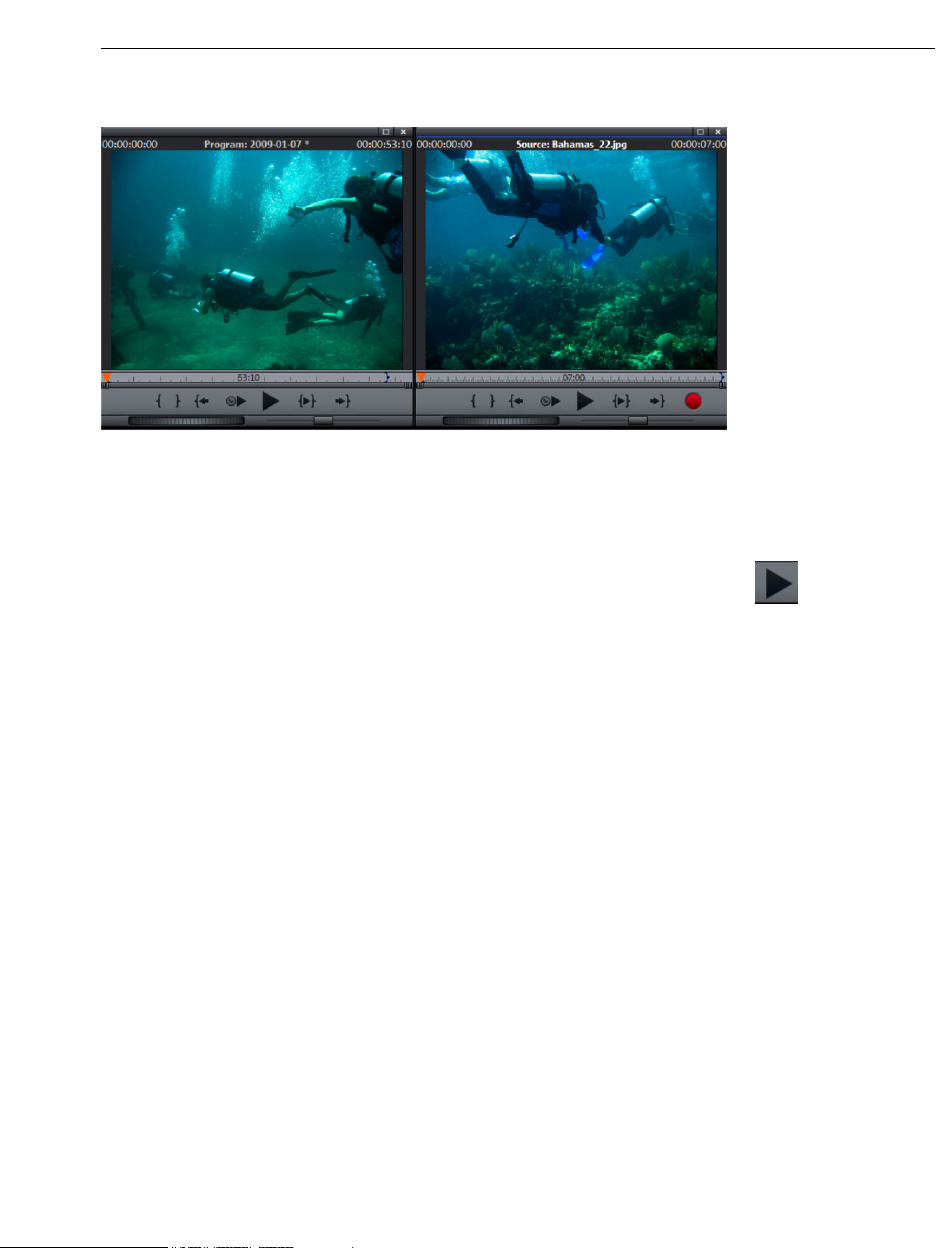
• Video effects are selected and set up in the "Effects" folder in the Media Pool. Most
effects allow "keyframes" to control their behavior. The current settings only become
effective beginning with the first selected keyframe. The next keyframe activates the
settings present at that keyframe. The area between two keyframes approximates the
corresponding effects settings ("tweening").
• Video effects can be controlled using effects curves. A curve is shown in the video's
object display which controls the application of the effect; the higher the curve, the more
intense the effect. Keyframes are indicated by curve handles, and these can be
manipulated as desired. For every curve handle, Bezier handles can be generated to
create harmonic curves and effects automations.
• Effects presets are standardized effects configurations for the most important cases.
They can be used via drag & drop; just hold down the mouse button and drag the
selected effect from the Media Pool to the desired object - finished.
• The effects mixer (”Slide FX”) combines or interweaves an assortment of recordings to
create a complex visual arrangement. To execute this effect, simply drag the transitions
to the space between two videos.
Title effects with MAGIX 3D Maker
The title editor features the MAGIX 3D Maker 3D program for especially high-quality 3D
subtitles and texts. The title editor opens when a title template is dragged from the "Title"
folder onto the track. The title editor provides access to MAGIX 3D Maker via the "As 3D
title..." button.
MultiCam editing
MAGIX Video Pro X2 enables multiCam editing for up to four cameras. The different camera
recordings can be played back in sync and edited together for a single version.
Page 17

Batch conversion
Introduction 17
Time-saving conversion of multiple movies and videos in a single target format via
conversion
(view page 212) is available under "File".
batch
Batch capturing
When video material is imported from digital sources (miniDV cameras, DV video recorders,
HDV cameras), scenes which you would like to use can be selected first and cut at once.
To save space, HD files can be converted directly into MPEG format.
Color correction
MAGIX Video Pro X2 offers
3-way color correction (view page 110) for optimizing poor or
incorrectly exposed videos. Color correction can be found in the Media Pool under
"Effects".
HD audio support
MAGIX Video Pro X2 supports audio formats that conform to Intel's High Definition audio
standard for sound cards. This means that MAGIX Video Pro X2 can be used to produce
stereo signals at a sampling rate of 192kHz (32-bit) and 8-channel signals at a sampling
rate of 96kHz (32-bit).
DVD authoring with up to 8 audio tracks
You can set your DVDs up with up to eight audio tracks. This is especially useful for
creating multilingual DVDs or DVDs with different sound formats (5.1 Surround, stereo).
More information about creating different audio tracks can be found in the chapter "
tracks
(view page 174)".
Audio
Synchronization with external devices
MAGIX Video Pro X2 features synchronization with external devices via MIDI or SMPTE
(master or slave).
Support of "Shuttle Pro V2" and "Shuttle Express" from Contour
For easy work, an easy preset has been created that enables controlling MAGIX Video Pro
X2 with "Contour Shuttle Pro V2" and "Contour Shuttle Express" quickly and efficiently.
MAGIX Soundtrack Maker
If you need a soundtrack, MAGIX Soundtrack Maker offers a massive selection of suitable
sounds for background music in different variations, from "funky" to "easy listening" –
simply add music to your movie project. The result is real movie background music with
changing moods to perfectly match your images.
Multimedia editable DVD menus
The program includes many DVD menu templates (for chapter selection, etc.) for projects
intended for TV, and some are also in 16:9 widescreen format. They can be easily inserted
during the burning process to give the DVD a professional look.
Page 18

18 Introduction
Every menu template can be customized with your own photos, thematic animations, 3D
titles, sound, intro videos, etc. Write with flowers if your video takes place on a meadow, or
with clouds if you’ve flown somewhere. A lovingly created menu always makes a great
impression. It's your video's calling card.
Media library
A license-free media library including music, video, and graphics files is included for free
use and combination. All files are clearly arranged on your DVD in a well-arranged structure.
Tip: For additional multimedia content, you can also browse the online media catalog
Catooh by clicking "File -> Internet".
Additional features
• Automatic scene recognition: Long films are divided into shorter scenes as they are
imported or retroactively.
• Metadata logging during recording
• Import of non copy-protected DVDs, including all audio tracks and chapter markers
• Master audio level display on the timeline
• Alpha channel support for AVI videos
• Sample-exact positioning for audio objects on the timeline
• Project-transfer from professional audio programs Samplitude or Sequoia via EDL
interface
• 6-channel PCM Surround on Blu-ray Discs
Notes for MAGIX Movie Edit Pro users
For users who are used to working with MAGIX Movie Edit Pro, the user interface can be
switched to the "classical" Movie Edit Pro view via "File -> Settings -> Basic settings". Also,
when the program is launched for the first time, a selection dialog appears for choosing
settings from either "Movie Edit Pro" or "Video Pro X".
Only those program settings will be changed that can be changed via "Menu -> Settings ->
Program". In the "
Program settings (view page 254)"chapter in this manual, you can learn
more in detail about the individual settings.
For everyone who has never used MAGIX Movie Edit Pro, we recommend using the "Video
Pro X" mode. This operational mode provides the most options.
The following provides a detailed overview of the differences between the operational
modes:
Video monitors
• "Movie Edit Pro" mode only has a preview monitor which is used for both program and
source monitor. When the project is stopped, files can be selected in the Media Pool and
played back with the transport control. To play back the arrangement again, the Arranger
has to be clicked first.
• "Video Pro X" mode provides two preview monitors, one program monitor for previewing
the project in the Arranger and a source monitor for previewing files in the Media Pool.
Page 19

Introduction 19
Both preview monitors have different transport controls for separate control of the
preview in the Media Pool and playback of the project. More information about the
preview monitors can be found in the corresponding section of the chapter "
objects into the project
(view page 50)".
Inserting
Keyboard layout
The preset keyboard shortcuts are different and can be displayed in both modes via "File ->
Settings -> Keyboard shortcuts". MAGIX Video Pro X2 also allows familiar shortcuts from
Movie Edit Pro to be loaded if they are easier to work with. More information about
keyboard shortcuts can be found in the chapter "
Keyboard shortcuts (view page 267)".
Loading files
• In "Video Pro X" mode, files are dragged (drag & drop) to the desired position in the
Arranger or loaded via the commands from the insert menu. For more about commands
in the insert menu, read the section "
Insert modes (view page 45)" in the chapter
"Workspaces".
• In "Movie Edit Pro" mode, files can also be loaded form the Media Pool by double-
clicking them. Videos and image files are placed in the first track at the location of the
playback marker, and the associated sound track lands on track 2. If another object is
already there, then the new object will be appended behind the last object on the first
track. Titles appear on tracks 3 and 4, and additional audio material on track 5.
Space bar behavior
Both modes allow playback to be started by pressing the space bar. Pressing the space
bar again has different effects depending on the program version:
• In "Movie Edit Pro" mode, the playback marker is placed at the last stop position.
• In "Video Pro X" mode, the playback marker is kept at the current position. This
corresponds with the functionality of a tape recorder when stopped.
Note: Playback behavior can be switched via the dialog under "File -> Settings ->
Program" and then the "Playback" tab.
Project folder
• In "Movie Edit Pro" mode, the project folder is not available.
• In "Video Pro X" mode, the project folder is a separate window on the right side of the
screen for intermediate storage or combination of any kind of project material. You can
drag files from different Media Pool folders or edited objects from the Arranger to the
project folder. More information about this can be found in the section "
Project folder
(view page 54)" in the chapter "Workspaces".
Note: In the following chapters of the documentation, we will suppose that the program is
operating in "Video Pro X" mode. If you want to operate the program in "Movie Edit Pro"
mode, then deviations may result from the processes described here. You can switch the
basic settings at any time via "File -> Settings -> Basic settings".
Page 20

20 Quick start
Quick start
This chapter explains the basic functions of MAGIX Video Pro X2 with a step-by-step
introduction. A systematic description of the program functions can be found in the
chapters and in the extensive PDF manual.
Tip: Open the tutorial video and the "Quick start" tutorial by clicking the "Help" menu.
Starting the program and orientation
Once you have installed MAGIX Video Pro X2, start the program from the Windows® Start
menu.
Start dialogs
When you start MAGIX Video Pro X2 for the first time, multiple start dialogs will be opened.
For MAGIX Movie Edit Pro users, a special dialog option is offered to select either the
"Movie Edit Pro" or "Video Pro X" interface. If you have upgraded from MAGIX Movie Edit
Pro and are interested in the differences between the different interfaces, then please read
Notes for MAGIX Movie Edit Pro users (view page 18)". We basically recommend using
the "
the program with the Video Pro X interface, since this offers the most options. Over the
course of this manual, we will assume that you have selected this interface (you can switch
the basic settings at any time via "File -> Settings -> Basic settings").
Page 21

In the next dialog, you can decide if you would like to "Load an existing project" or "Create
new project". Under "Options", you can "Create a new project folder". All data that
a
longs to the movie will be saved
be in this folder.
Quick start 21
e're still at the very beginning, so let's stick with keeping an overview of everyW thing. Click
"OK" to end the dialog and continue.
Selecting, loading, and playing videos
e program's functions. th
In the beginning, it's probably best to load a video file for test purposes and to get to know
Page 22

22 Quick start
• The Media Pool appears to the top right; this is a file manager which displays all usable
files (besides movies, also photos, images, audio files, and even RTF text files for
captions) in the current folder.
• The navigation functions exactly the same way as other file managers: folders can be
opened by double-clicking them. The arrow keys jump a step ahead or back in the folder
structure. You can also have a folder tree and all of its branches displayed.
• All of the files in the file list can be loaded and used. Find a video file, e.g. in the format
*.mpg, *mxv, or *.avi.
Page 23
• In the upper-left area, you will see two preview monitors.
Quick start 23
• The left "program" monitor is responsible for playback of objects in the Arran
right "source" monitor displays a pre
• In order to be able to play back movie files from the Media Pool in the right source
monitor, double-click the file in the file list first. Double-clicking loads the file in the
monitor first.
• To play the video, click the play button on the transport control under the
source monitor to the right..
• This method lets you select and play back different video files. Drag the selected file
down the mouse button) from the Media Pool down into the arranger. An object app
at the location on the track where you release the mouse
file.
view of files in the Media Pool.
button to represent this video
ger. The
(hold
ears
Page 24

24 Quick start
• Each object can be moved in any way in the Arranger with the mouse, i.e. horizontally
a track as well as vertically between tracks. Drag the video object on the first track all
way to the left to the beginning of the track.
on
the
Note: If the video also has a sound track available, then a corresponding audio object will
appear underneath it on track 2. Both objects are connected as a group.
• Now that the first file has been loaded into the Arranger, it can be edited, cut, and
exported. Other files can also be loaded onto the tracks to combine movies, audio files,
and photos.
• To play back the Arranger, click the play button on the transport control under the
program monitor to the left.
Tip: An even easier way to do this is by pressing the space bar on your keyboard.
• During playback, a vertical line will move across the Arranger, i.e. the playback marker
that displays the current position. You can reposition it by clicking at different locations
as desired.
Page 25

Quick start 25
• You can also define playback ranges, e.g.
playback
point, i.e.
marker will appear to indicate the out point of the playback range. The length of the
playback area is shown in the center of the section display.
marker. Clicking in the timeline ab
the start point of the playback range. If you right click further on, the end
to freeze a certain position independent of the
ove the first track lets you define an end
• The in and out points can be moved with the mouse. Left-clicking positions the "in"
point, and the right mouse button sets the "out" point.
• To play back the range, click the "Play back range" button on the transport
control under the program monitor.
Now you know how to load and play back media files in different ways. Would you like to
try to make your own movie now?
• If you want to continue with your own movie project instead of the demo, select the
"New movie" option from the "File" menu and read the next chapters of the tutorial on
analog/digital video recording.
• If you wish to continue working with the test file, simply skip the following recording
tutorials and begin rea g the "Video editing" section
din .
DV recording
• Connect the DV device (DV camcorders or DV video recorders) to your PC. Switch the
device's operating mode to "Video recorder" or "Playback".
Page 26

26 Quick start
• To open MAGIX Video Pro X2's recording dialog, click the red "Record" button on the
transport control under the source monitor.
• Select "DV camera" from the recording dialog. Uncompressed DV capture requires
approx. 220 MB per minute of video. If you would instead like to record using the m
space-saving MP
option.
• This opens the actual recording dialog. Check to see if a DV camera driver has been
selected.
• Name your recording. It's worth choosing a logical name which will allow you to find it
easily again on the hard drive.
• You can access the appropriate place on the camcorder ta
control buttons: shuttle forwards, backwards, and start/stop playback. To start
recording, click the "Record" button. Keep an eye on the remaining hard-drive space.
• Cease capturing with the "Stop" button and exit the record dialog.
Tip: In the DV recording dialog, you can set clips from the DV video which will then be
recorded one after the other (batch capturing).
EG format, then you should first activate the "Record DV as MPEG"
pe by using the remote
ore
Page 27

Quick start 27
How to capture analog video
1. Wiring
Connect the video out of your DVD or VHS recorder to the video in (TV, video or video in
graphics card) of your computer, and the audio out to the audio in on your sound card.
Due to the variety of device configurations, it is difficult to say which cables function best
with your setup. If you’re not sure, check the manual of your VCR or your TV, video, or
graphics cards.
Example:
Europe: Many VCRs and DVD players have a SCART, 3 RCA (2 for stereo sound, 1 for
video), or S-Video/optical audio line out. In such case, you will need a SCART to RCA
adapter, a cable with 3 RCA jacks, or an S-Video cable.
North America: Many VCRs and DVD players have a 3 RCA (2 for stereo sound, 1 for
video), or S-Video/optical audio line out. In such case, you will need a cable with 3 RCA
jacks, or an S-Video cable.
SCART/Cinch adapter SCART/Cinch adapter
with 3 RCA jac
card audio in, you will need a stereo RCA / mini phone plug adapter.
Therefore, you will most likely have to buy a cable with 3 RCA plugs and a stereo cinch/mini
jack adapter from your local supplier.
ks phone jack adapter
Stereo RCA/mini
t to the sound Most sound card inputs are mini phone jacks. To connect the VCR audio ou
Page 28

28 Quick start
2. Program start and record
• To open MAGIX Video Pro X2's recording dialog, click the red "Record" button on th
transport control under the source monitor.
e
• Select "Video" from the record dialog. If you would like to burn your video directly to a
DVD, then first activate the box "Burn directly to DVD".
This opens the • actual recording dialog. In the record dialog, select the appropriate driver
for your video and audio cards (if you have more than one installed). A video preview
window is now displayed.
• Name your recording. It's worth choosing a logical name which will allow you to find
easily again on the hard drive.
• Start recording now by pressing the "Record" button in the dialog and end it by pressin
the "Stop" button. Pay attention to the number of "dropped frames": If you get a readin
of more than 10 dropped frames per minute, then reduce the video quality to prevent
your PC from overloading.
• Cease capturing with the "Stop" button and exit the record dialog.
it
g
g
Page 29

Quick start 29
Video editing
meline mode Ti
All editing is done in the Arranger. Your movies are displayed according to time in
"Timeline" mode, i.e. the longer the representative object in the track, the longer the
associated movie.
H f
andles: All objects can be shortened by moving the mouse to one of the lower corners o
th s
e object until it turns into a stretch symbol. You can now stretch the object as much a
yo
u like. At the top corners of every object, you’ll find two fade handles that can be
ad e
justed to fade an object in or out. The handle at the top center can be used to adjust th
vo
lume of audio objects and the brightness of video objects.
Selection: For advanced effects editing, the objects must be selected first. Each object can
be selected by clicking it. Objects will change color to show that they have been selected.
Multiple objects can be selected by holding down "Shift". You can also click and drag out a
rectangle to select multiple objects. All objects included in the rectangle will be selected.
Page 30
30 Quick start
Editing effects: Selected objects can be edited with the effects from the Media Pool.
e settings for each effect can be made directly in the Media Pool. Most effects are
Th
ntrolled with keyframe animations or effects curves. The intensity of the effec
co t is
controlled dynamically via individual points (keyframes) or via a drawn curve (effects curve).
frames or effects curve animations can be found after the effect is Every button for the key
selected in the lower area of the Media Pool.
Note: To activate an effects curve, an initial keyframe must be set first.
Video mix (chroma key): You can mix two videos as foreground and background images.
The video on the lower track makes up the background, a video on the track above it
makes up the foreground. Backgrounds are us
foregrounds are usually people or objects that are captured in front of single-color surfaces.
If you have, for example, a recording of a dancer as the foreground in front of a blue are
a und
nd a lake as a background, then drag the background lake to a track and the foregro
da eneath the other. Now
ncer to the track beneath it and arrange it so that one is directly b
select the lower object and open the "Effects" tab in the Media Pool. The item "Chro
k nd
ey" is available under "Video effects". Select the background color of your foregrou
video and you will already see the video-mix result in your monitor – the dancer dancing on
th
e lake.
C
ontext menu: The context menu also offers a series of editing options for objects. You
ca
n open it by right-clicking on an object. Different trim editors can be opened which
en
able an exact cut with different transition parameters (for example). For video objects,
there is another context menu.
ually landscapes or animations, whereas
a
ma
Page 31
R
emoving unusable scenes
Quick start 31
One of the most important steps during import of your footage is cutting out unusable
scenes from the material. There are two options in this case:
Option 1: First, the complete material is loaded into your project and the unusable
•
scenes are cut out.
Option 2: You can cut the material already in the Media Pool, i.e. BEFORE you import it,
•
and then proceed to import only the scenes
long movies with a lot of
editing.
you need. This process is recommended for
Cutting videos in the project
Let's assume that you have already imported your film material into a project and would
to edit it now.
• Play back your video by clicking "Play" on the program monitor's transport control (or
simply press the space bar on the keyboard).
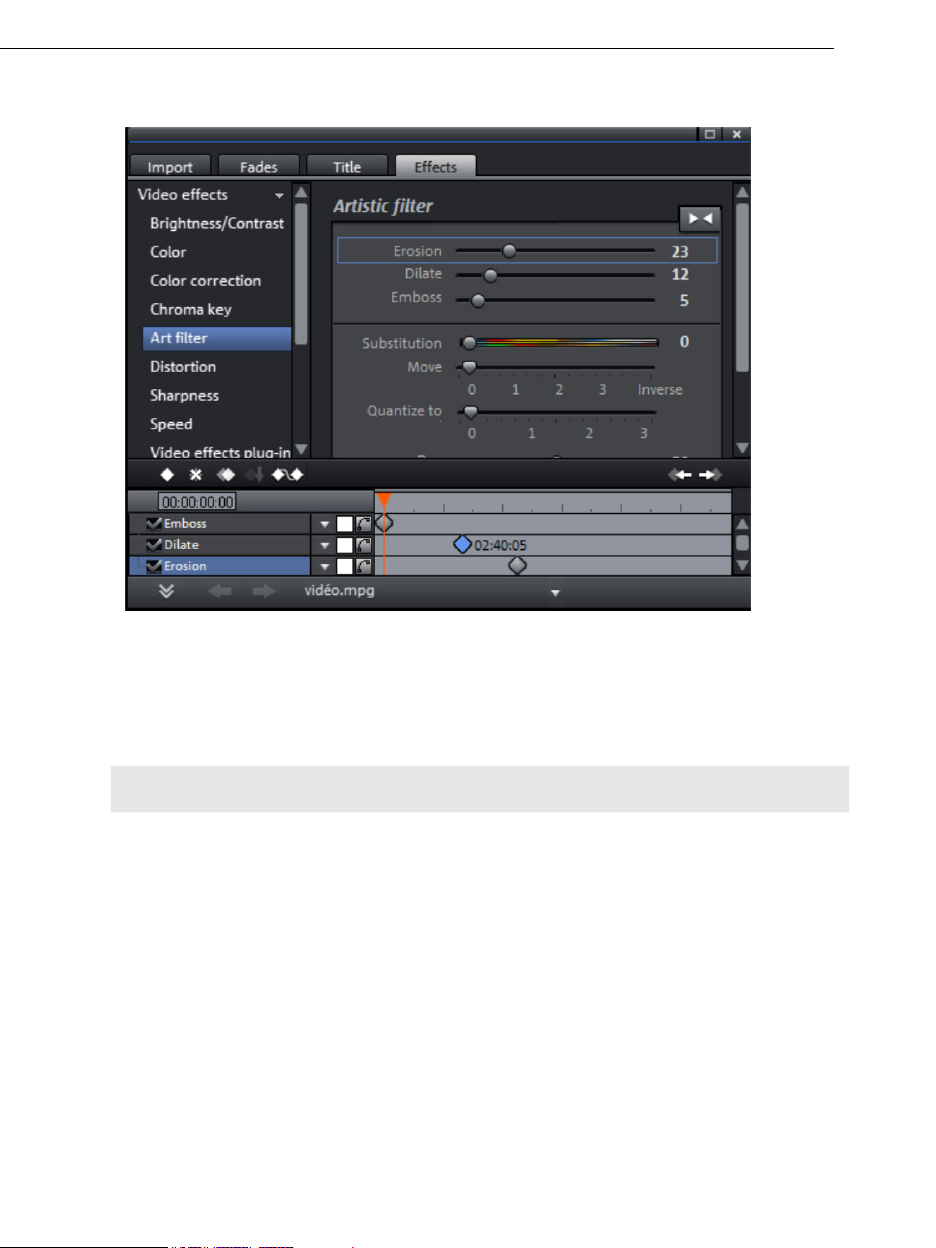
• If during playback you have reached a scene that you would like to cut out, click the
playback button in the transport control a second time. The playback marker stays near
the start of the scene to be removed.
Tip: In case of long films or to speed up the search, you can fast forward the video and
follow the action with the preview monitor. To do so, pull the playback marker across the
timeline while holding down the mouse button (but not too fast!).
like
• Set the playback marker exactly at the start of the unusable material. The zoom function
is recommended to get a better view of longer videos (the +/- buttons in the bottom right
corner).
• Press "T" on the keyboard. This will split the current scene into two sections at the
playback marker.
Page 32
32 Quick start
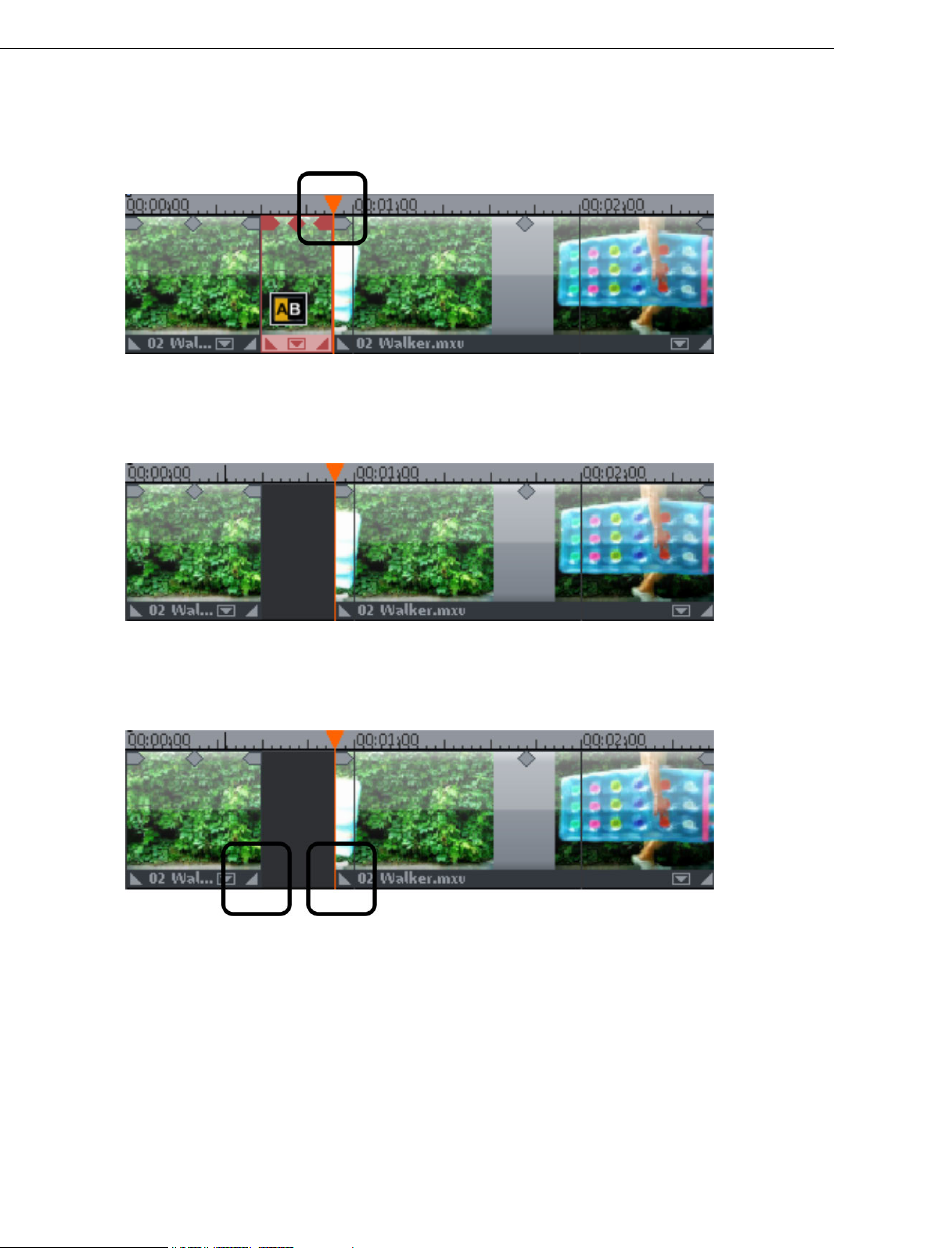
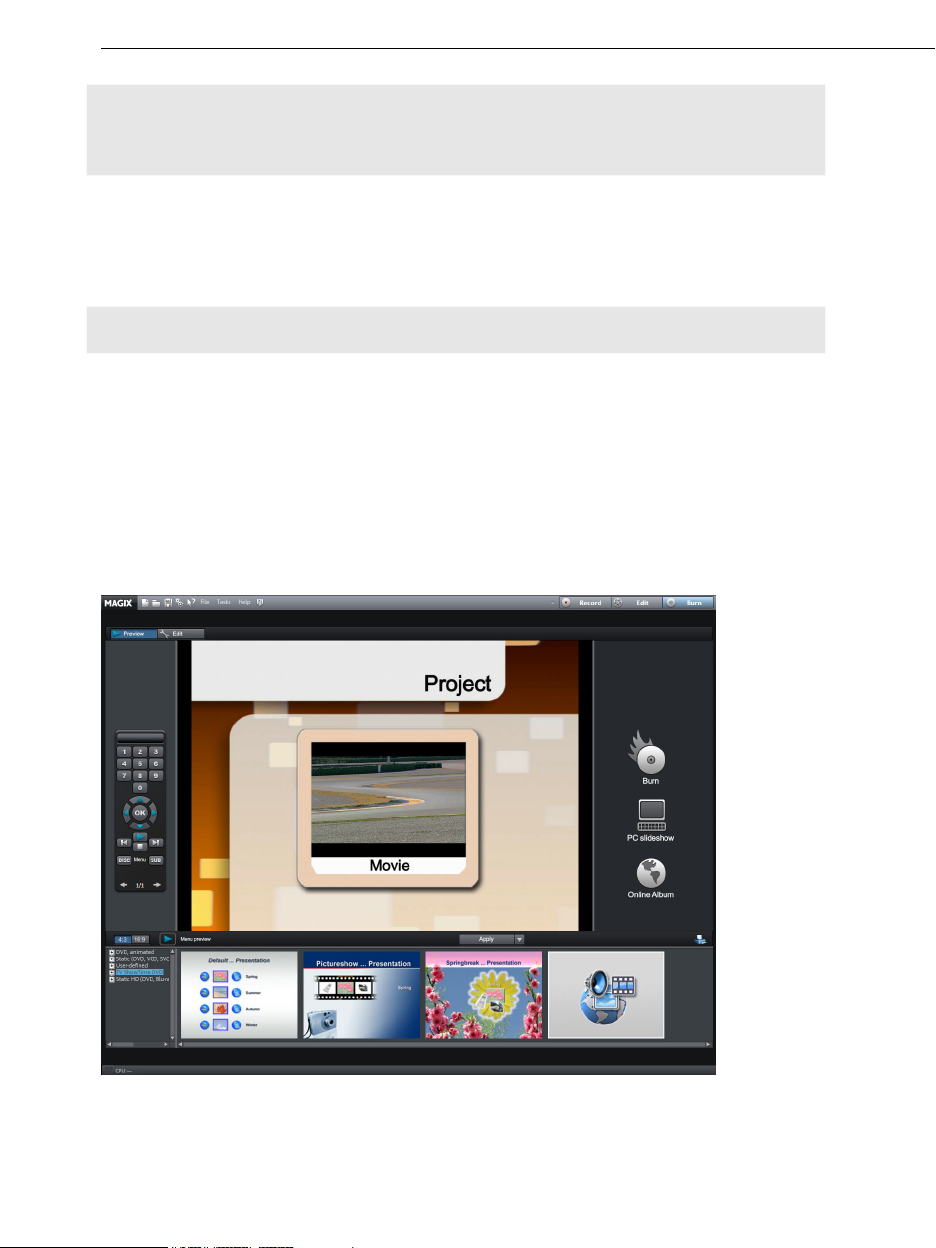
• Repeat these steps for the end of the unusable material. Find the end of the unusable
scene, place the playback marker at the end point, and then press the "T" key on the
keyboard again.
• Now you have "isolated" the unusable scene and may delete it from the video by
pressing "Del" on the keyboard. Before this, the scene must be selected by clicking it
with the mouse.
• If you weren't very precise during cutting, don't worry; By using the bottom object
handles, you can always lengthen or shorten the remaining objects and "pull" parts of the
deleted material back in or "push" remaining parts of the deleted scene away.
Page 33

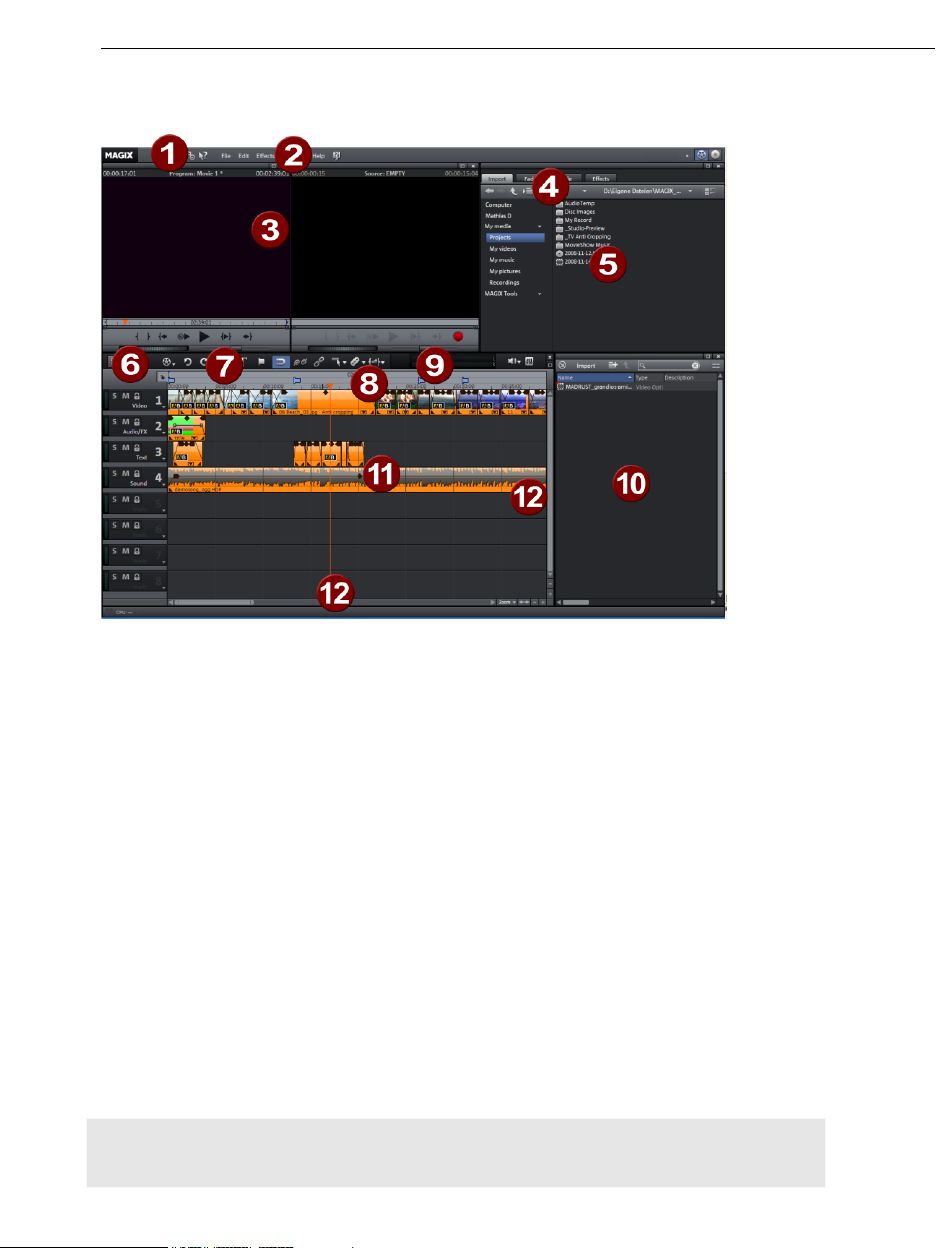
• Aft
er deletion, a gap will appear in the film sequence where the removed material was
ea
rlier. How can you remove the gap from the movie? Easy: Pull the later scenes up to
the
earlier scenes until they "dock" with each other. Please make sure that the later
sce
nes are all taken along during the pull, otherwise the gap will have simply moved to
the ter objects, use "Intelligent" mouse mode,
back of the film sequence. To pull up la
sin
ce this automatically takes all the objects found later on the timeline along with the
ob
ject being pulled.
Quick start 33
Hint: ject has not only a video track but also a sound track, then it is often If your pro
neces o sary to cut both of these tracks simultaneously. After import from the camera, vide
and sound tracks are automatically grouped, which is why all cutting and moving actions
have an effect on video and sound tracks simultaneously. However, if you have added a
separ s not yet been grouped with the video sequence, then you ate sound track which ha
should group them before starting to edit. To do so, select the video object and the audio
object via "Ctrl + mouse button", and in the "Edit" menu select the "Group" option (or click
the group tool).
Feel free to experiment with the editing functions. Nothing can go wrong, since all editing
functions (like all editing processes) are no
will remain unchanged on your hard disk.
Importing individual scenes from longer movies
If you have saved a longer video as a file on your hard disk and
of it for your project, then proceed as follows:
• Double-click the desired file in the Media Pool. Double-click the file to load it in the
source monitor and play it back using the transport controls.
• Find the range which you would like to import. Position the playback marker above the
transport control at the start position of the range and click the "Set in point" button
ndestructive. This means that all original material
only want to use a section
.
Page 34

34 Quick start
• Next, position the play ack m
button.
b arker at the end of the section and click the "Set out point"
ears highlighted in blue in t• The currently selected range app he range display. You can
e separately wplay back this rang ith the "Play back range" button.
• All range limits can be moved
the range matches the se on on the preview monitor and
drag the section onto the track. An object will appear there featuring the material you
to import. If you're not sure where you would like to use the section in the
wanted
project, you can drag in into the project folder instead of the onto the track.
Regrouping scenes
It will often be the case that you will want to move whole scenes or even groups of scenes
to a different pl
selected in any view by clicking them and moving them to the desired position (drag &
drop). You can also create scene groups which can be moved together: "Ctrl" + mouseclick lets you select more than one sce
at lie in between.
th
ace within a film. This happens completely intuitively: Single scenes can be
by holding down the mouse button and dragging. Once
that you want to import, click cti
ne, "Shift" + mouse-click selects all of the scenes
Three final tips for advanced video arranging:
• Using "
• The commands "
• If cutting and moving around parts of your project has left it a little unorganized, try using
Intelligent mouse (view page 49)" mode, you can move not only the selected
scene, but also all elements directly bordering it (like transitions, fades and scenes
following the selected scene, plus those on neighboring tracks).
Group (view page 222)" and "Ungroup (view page 222)" let you
combine any scenes into groups which can then be
the project folder. The project folder is better suited for intermediate storage of all of the
objects you want to
from the Arranger into the project folder by dragging them there (they will be removed
from the corresponding track), or you can copy th
project folder. Hold down "Shift" while you click to select multiple f
sections of files or files from the Media Pool and drag them directly into the proje
folder.
use in your movie. You can either move all of the objects directly
moved together as a block.
e objects and paste them into the
iles. You can also drag
ct
Page 35
Note: Please ensure that the project folder is reserved for the respective project at hand.
The contents will be saved together with the project and made available the next time the
same project is opened, but not when another project is opened.
Enrich
Burning DVDs and Blu-ray Discs with interactive menus
You can burn your projects onto DVD or Blu-ray discs with an interac
Note: Authoring for DVDs and Blu-ray Discs is the same for both formats.
For multiple films that are subdivided into individual scenes (chapters), the DVD selection
menu becomes even more important, allowing you to jump to each movie or chapter using
your remote control
into sensible sections. Place the start marker where you'd like to have it and choose the
option "Cha
select the option "Automatic chapter markers", a chapter marker is autom
the beginning of every scene.
ing movies
. To make sensible chapter divisions in your movie, it should be split
pter marker" from the "Edit" menu (keyboard shortcut: Shift + Enter). If you
Quick start 35
tive menu.
atically placed at
You can switch to the "Burn" screen by pressing the correspo
nding button at the top right.
At the center of the monitor, you can see a preview of the current DVD menu. All movies
appear in the uppermost entries, and all chapters appear as sub-entries.
Page 36

36 Quick start
Use the "Navigation structure" button to access the selection menu structure. You can
delete unnecessary scenes by clicking the corresponding box. The entry will be removed
from the menu, but the scene will not be removed from the movie.
If you
are satisfied with the subdivision of the movies and chapters, you can devote yourself
to the layout of the menu. At the bottom of the screen, you'll see an array of preset menu
temp
lates. Use the scroll bar to view each template. There are plenty to choose from:
• If you wish to fully apply a template, then click "Complete" on the template bar above
and double-click the template of your choice. The complete template will then be
applied.
• You can also combine the various elements of the individual templates. For example, if
you want to combine the text format of a template with the background of another one
then select "Font" first and double-click the template with th
e text of your choice. Then
select "Order" and double-click the order you like. The preview in the middle shows you
the results immediately.
• Double-click the preview picture or a menu entry to change the film or chapter name a
select a different preview picture.
• The b
utton "Design" at the top left enables detailed editing of each element.
,
nd
When all videos and chapters (scenes) are logically arranged and you are satisfied with the
selection menu, you can go a
head and burn. Use the virtual remote control to test the
behavior of finished discs to make sure that everything works as planned.
Export video as file
Besides burning your project, you can also export it as a video file. When exporting files
your entire movie is put into one file and placed into a folder of your choice on your hard
drive. The available export formats can be found in the "File" menu. If you would like to
create
videos for the Internet or send them per email, you should compress your file using a
compression format like Quicktime or RealMedia.
Page 37
Workspaces 37
Workspaces
1 Upper toolbar: These are the buttons for quickly accessing important commands.
2 Menu bar: Most functions in MAGIX Video Pro X2 can be accessed via the me
3 Program and source monitor: Here you can preview video and picture objects.
4 Templates: Here you can find the folders for transitions, titles, effects and pans. To
preview a template, simply click on it.
5 Media Pool
navigation buttons to acces
6 Buttons for overview and m
mode displays all of the objects on the first track and enables quick sorting of scenes.
The right button activates "Multicam" mode.
7 Lower toolbar: Select the "Timeline" o
editing functions.
8 Timeline: Defines the playback range. Features a scaled time
9 Peak meter: The peak meter shows the sum of the current s
10 Project folder: Provides all of the files needed for the project
11 Arranger: Drag & drop files from the Media Pool, then arrang
here.
12 Scroll bars: The lower scroll bars can be dragged apart and pushed together for
zooming with the mouse. The right scroll bar zooms into the tracks vertically. Click on
the edge of the scroll bars with the mouse button held down to change the visible
window in the Arranger.
: Load your photos and other media files via the Media Pool. Use the
s any drive or folder on your PC.
ulticam mode: Switches to "Overview" mode. Overview
r various different mouse modes for diverse
line.
ound track's volume.
.
e and edit files in detail
nu bar.
Note: Various screen elements are only available via MAGIX Video Pro X2's basic settings
("File -> Settings -> Basic settings").
Page 38
38 Workspaces
Activating the main screen
MAGIX Video Pro X2 always starts with this view. If the burn screen is visible, click the left
button in the top-right corner of the screen (active in graphic).
Media Pool
The design and operation of the Media Pool is very similar to Windows Explorer. It serves to
control and load multimedia files of all kinds: video files, audio files, fades, effects, and even
entire projects. At the same time, it is used as a window for editing different tasks.
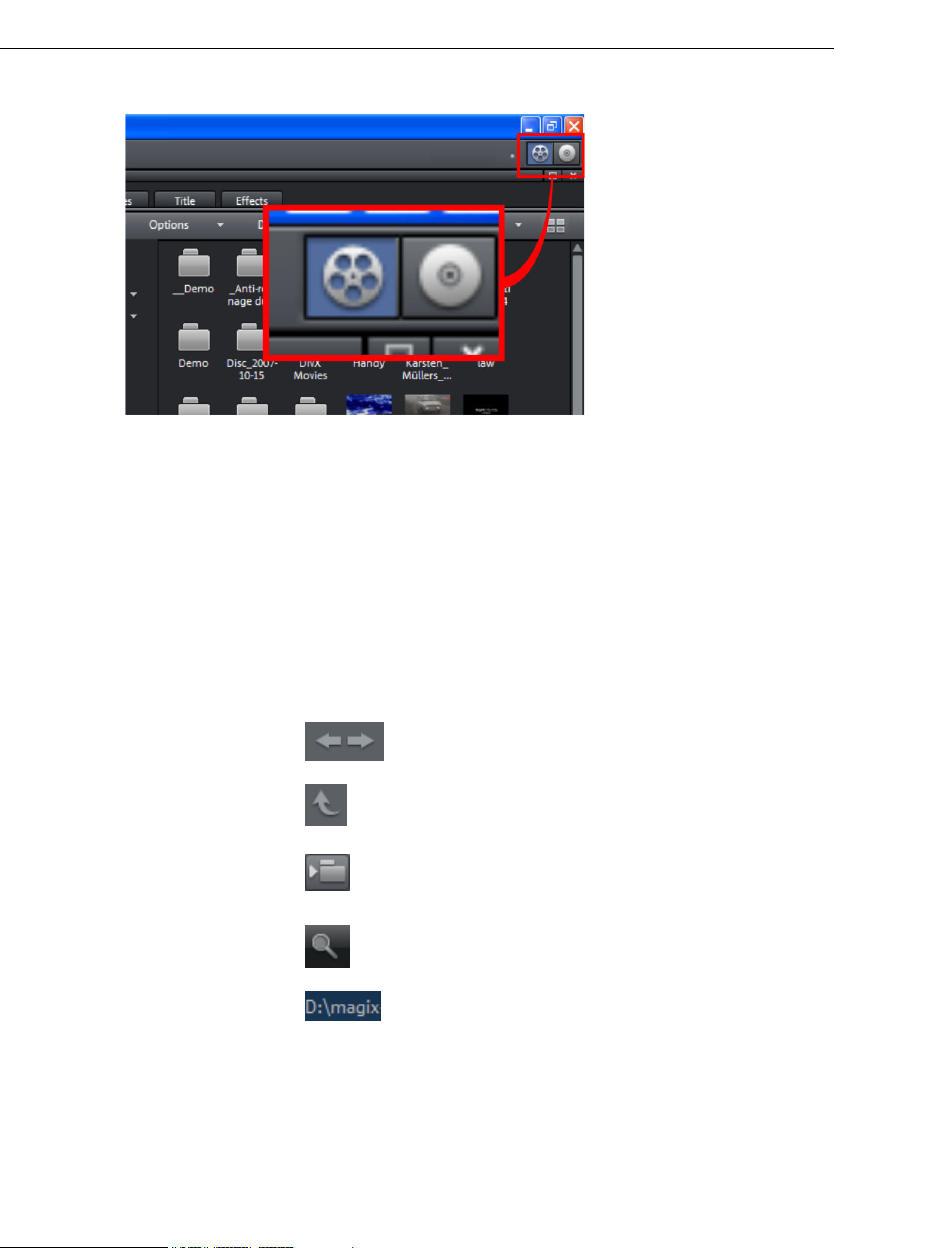
Importing
Navigation buttons
The navigation buttons let you navigate through your compu
ter’s drives and folders.
The "Back" button always returns you to the folder you Forwards/Back
last used.
Up
The "Up" button brings you to the next highest folder level.
Folder tree Here you can activate a folder tree to navigate through your
computer system.
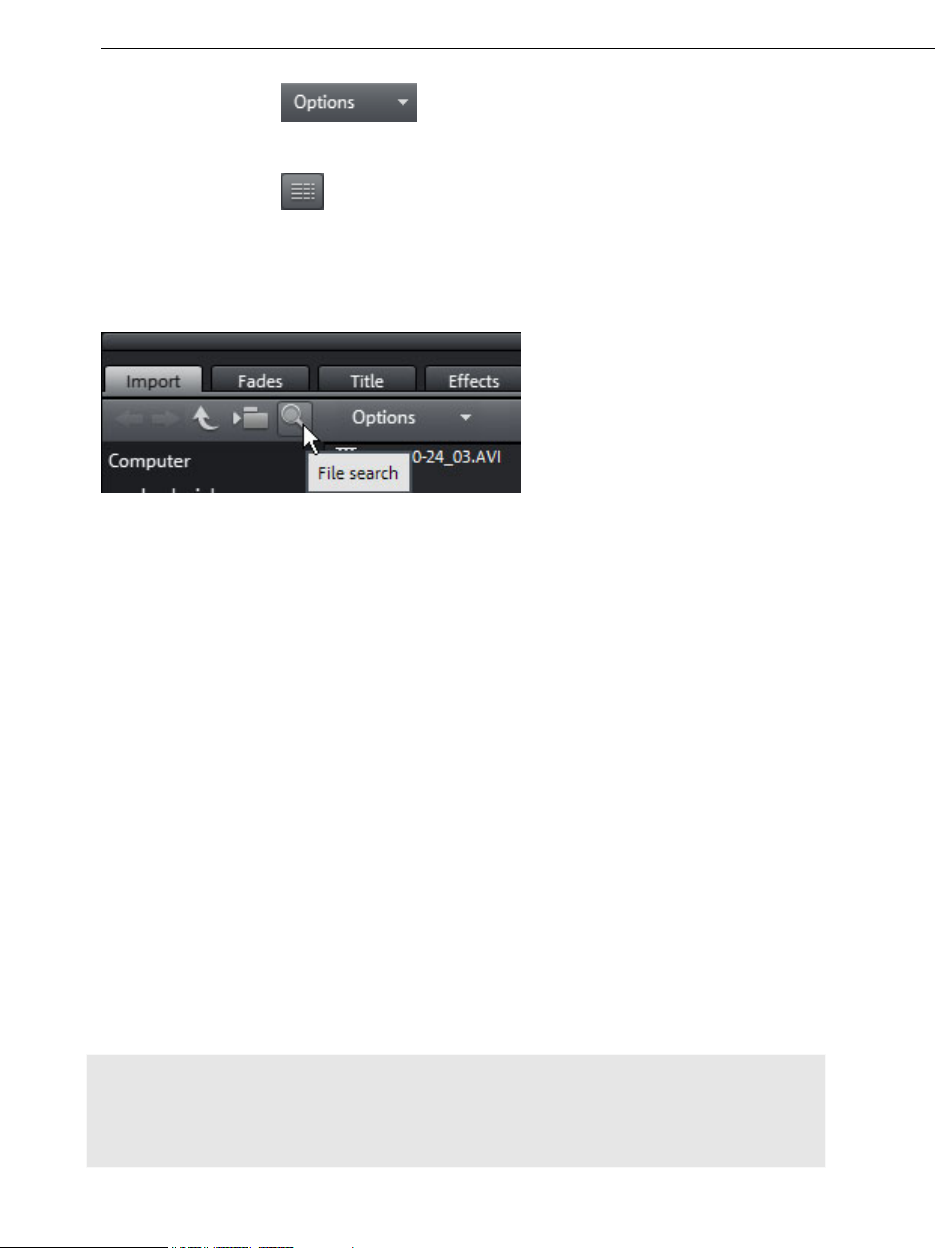
Search
To quickly find specific files, use the search function.
You can also specify file type, data and certain fol
ders
that should be searched.
Browse history list
ilsand path deta
The current folder's path is displayed in the top center.
Use the arrow button to open the menu to find the
folders you previously visited.
Page 39
Workspaces 39
Options
All functions of the context menu (switch views,
rename, or delete files, etc.) can also
be
accessed via the options button.
Display
options
Settings for how detailed the entries should be listed can
be made here.
Search
The Media Pool
activ te
a d and turned off again with the shown button.
has an easy search function for finding files on the computer. It may be
File name: Enter an ame of th
The X symbol delete ntry. A "?" may be
and "*" for any number of c
F e ty ultiple entries are separated using a
il pe: Here you can enter a file name extension. M
semicolon. Below the entry fiel
extensions.
Date: Here, you can set time period limits on your search. Choose an entry from th
Fold
r: If you don't want to search the entire computer, but only look on certain drives or in
e
e folder, you can define
a singl a certain search path.
Search depth: Here you have various
should be searched.
y part of the n e file you are looking for in the "File name" field.
s the e used as a placeholder for a single character,
haracters.
d, various presets may be selected for often-used file name
e list.
options that determine whether additional locations
• Search indexed locations
• Search indexed locatio
• Sea ect file.
rch indexed locations, the selected folder, personal files and the proj
"Index ws via the
ed locations" are folders, which are searched and cataloged in Windo
index l e files in the indicated folders will be indexed while
ist. If the index list is activated, th
and the selected folder
ns, the selected folder and personal files.
the computer is idling, so that the user's search query may be completed faster.
Note: In Microsoft Windows XP™, the indexing service is usually deactivated by default.
The search functions in Windows Vista™ may be installed with the current version of
"Windows Search". They make it possible to easily add to the indexing service. Please refer
to the installation instructions from Microsoft.
Page 40

40 Workspaces
Computer
The link button "Computer" displays the drives in the Media Pool. All drives will be listed
along with their drive letters and can be opened with a double click.
User directory
The second button featuring the user's name opens their personal folder in the Media Pool.
My media
The "My media" button lets you select "Projects", "My videos", "My music", "My images",
and "Recordings".
Projects
Switches to the folder where y
My vid
eos
Displays all found in "My documents\My videos."
usable files
our projects and videos are usually stored.
My music
Displays
the contents of the "My Documents\My Music" folder. MAGIX Music Manager also
suggests this folder for importing your music collection into the database.
My pictures
Switches to the "My documents\My pictures" folder. This folder is often used by digital
cameras and scanners to store transferred images by default
. The included MAGIX Photo
Manager program also uses this folder (e.g. during image import).
Recordings
Recordings: MAGIX Video Pro X2 stores all recordings here to access all recordings as
quickly as possible.
MAGIX tools
The "M
AGIX tools" link selects links to "Downloads", "Database", "Online A
et Media".
rn
"Inte
lbum", and
Downloads: Use this n to a
Database: Us
ea . The database first has to be created using the supplied additional pro
s rch gram, MAGIX
Manager.
Photo
butto ccess the media files that you downloaded with Catooh.
e this button to open the database view. Right-clicking opens the database
Online Album: This buttons opens MAGIX Online Album. This provides a shortcut to
uploading and deleting data. T
are many ways to upload data:
There
hile holding "Ctrl" down, select the data to be uploaded in the Media Pool, and
1. W
s MAGIX
elect "Copy" in the context menu (opened by right-clicking). Switch to the
O he context menu.
nline Album screen, open the desired folder, and select "Paste" in t
o do this, you must first register on MAGIX Online Album.
Page 41

2. In , and go to the desired directory. Open the
the Media Pool, click on "Online Album"
Workspaces 41
Windows Explorer, select the desired data with "Ctrl" held down, and drag it into the
Media Pool.
Both options will
result in your desired data being uploaded to your MAGIX Online Album.
Hint: This function requires an Internet connection. To gain access, make sure you have
your login information (email address and password) ready.
Intern e 264). It
et media: This opens MAGIX Video Pro X2's integrated browser (view pag
offers yo rent project.
u the possibility to collect media from the Internet to use in the cur
Fades
hi vides a list of all fades sorted into categories. Clicking on a category s
T s pro hows all of
the fade
To load a fade, click on it and drag it onto a scene which you would like to blend into
Alternatively, you can select the scene into which you would like to blend into before
s contained therein.
.
and
double click on the fade in the Media Pool later.
Tip: All fades will appear in the menu between two scenes, and they can also be selected
there.
Ti
tle
Title presets and the Title Editor
(view page 124) are located here. They are sorted into
various categories and can be loaded via a double-click or drag & drop. You will also find
templates for 3D titles here. The text of title objects can be changed in the program monito
by double-clicking on it.
Effects
r
Access the effects presets via "Video effects", "Movement effects", "Audio effects", and
"Design elements".
Video effects
These a e
set a more
information, see the "
M
These are movement effects you can use to animate the frame by using zoom or cam
movements. For more information, go to the "Effects and titles" chapter in "
effects in Media Pool
re the various effects which can be applied to videos and stills. The effects can b
r an object is selected in the respective effects dialog which appears. For
fte
Video effects in the Media Pool (view page 108)" chapter.
ovement effects
(view page 115)".
era
Movement
Page 42
42 Workspaces
Audio effects
In addition to many different audio effects presets (echo, reverb, equalizer, compressor,
etc.), you can also use the included synthesizer. A synthesizer can be dragged onto the
arranger like a multimedia file. It will be displayed as a synth object. Use the corresponding
control console to edit the synth sounds and melodies. The control console opens
automatically when the synthesizer is dragged onto the arrangement for the first time. A
synth object can be opened for further editing later by double clicking.
Design elements
Multi picture-in-picture: These are various effects presets for image stacking.
Collages: These work similarly to normal picture-in-picture effects, but more objects are
used. Depending on the collage, arrange the selected objects one after the other and drag
the collage onto the first object.
Portrait effects: Select individual effects which are especially suited to vertically formatted
photos.
Image objects: These are various image objects like black bars, thought bubbles for
cartoons, etc.
Intros/Outros: These are beginning and end scenes for films with various themes.
Visuals: Graphical displays of any played sounds which can be combined with other video
material.
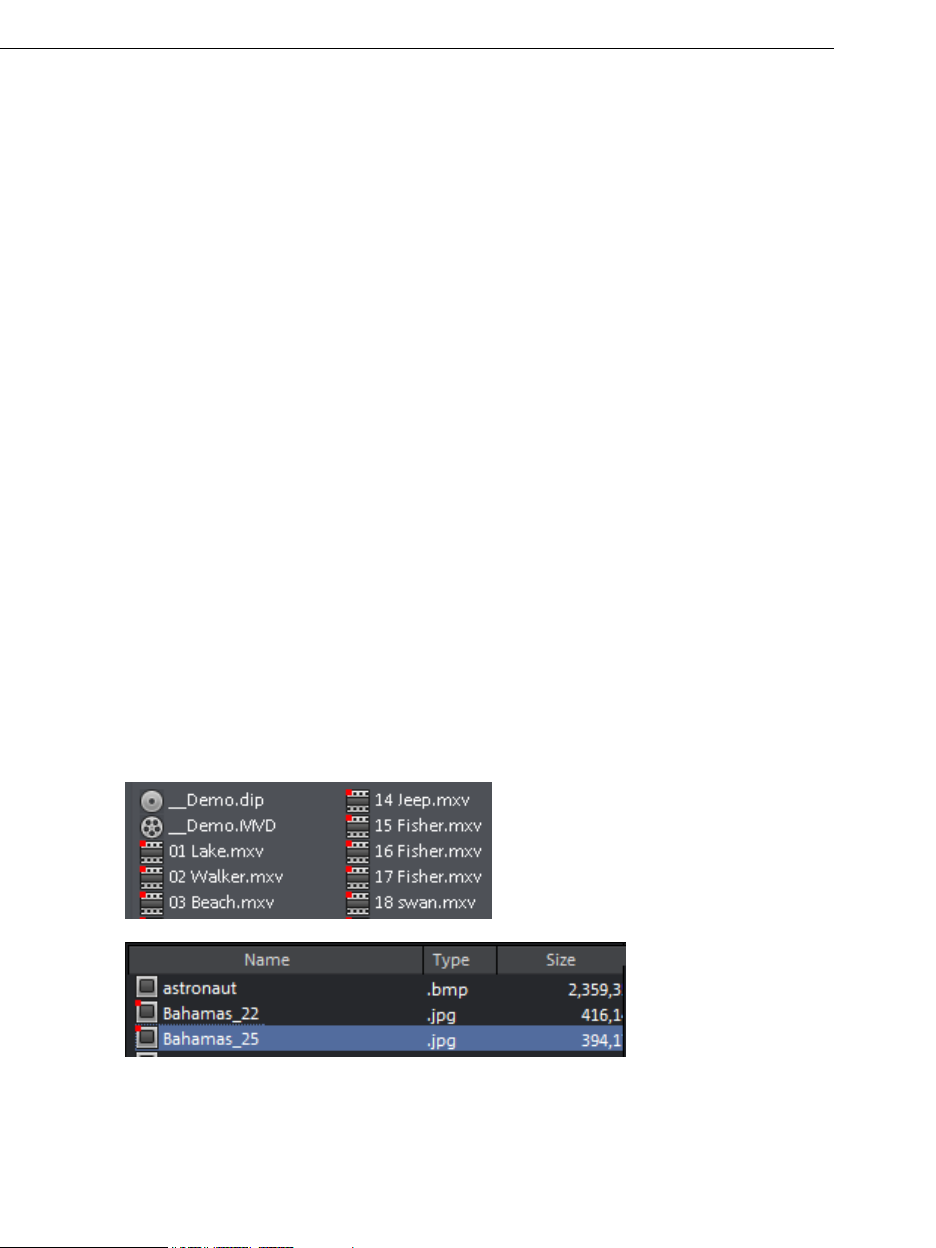
Various file list view modes
In the
file list, all of the supported multimedia files and subfolders of the currently selected
folder are displayed. Three different views (list, detail, large symbols) can be set by right
clicking on the Media Pool context menu.
List: Only file names are
listed. This view mode
displays the most files
simultaneously.
Details: In the details
section the type, size,
and date of modification
are shown for every
media file beside its
name. The list can be
sorted by clicking on
any of these details.
Page 43
Workspaces 43
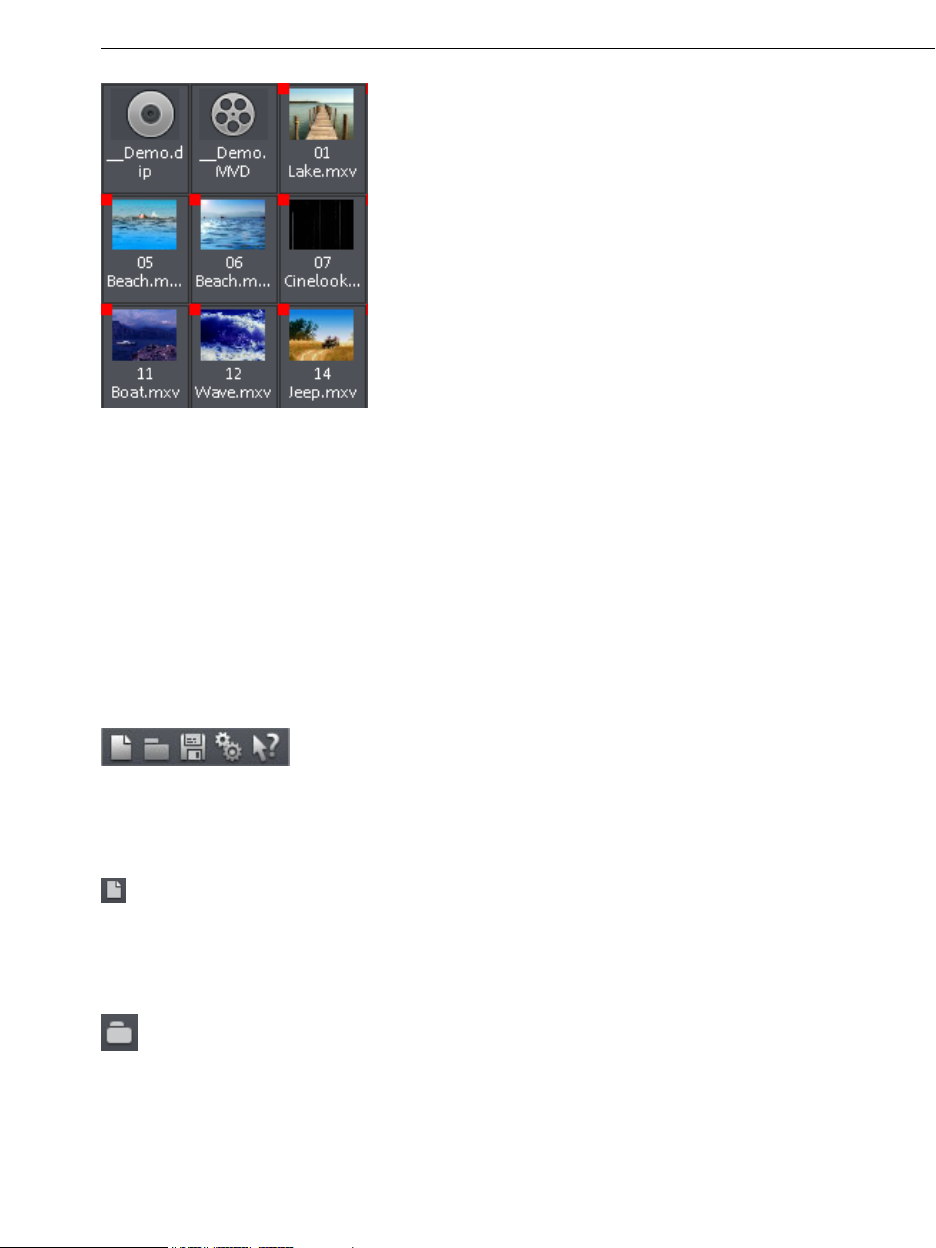
Large icons can be quite useful because they show a
preview frame for each movie and pictu
allows you to sort through the material q
disadvantage is that it takes longer for th
re file. This
uicker. One
e file list to be
displayed.
Preview function
A preview funct
by pressing
ion for all of the files in the Media Pool can be started by double-clicking or
the playback button on the source monitor.
There are also previews for effects that display their effects.
The "Extras" button or the enhanced transport control function allows you to select
sections from
chapter
a longer video file in the Media Pool and load them. Please refer to the
"Inserting objects into the project (view page 50)".
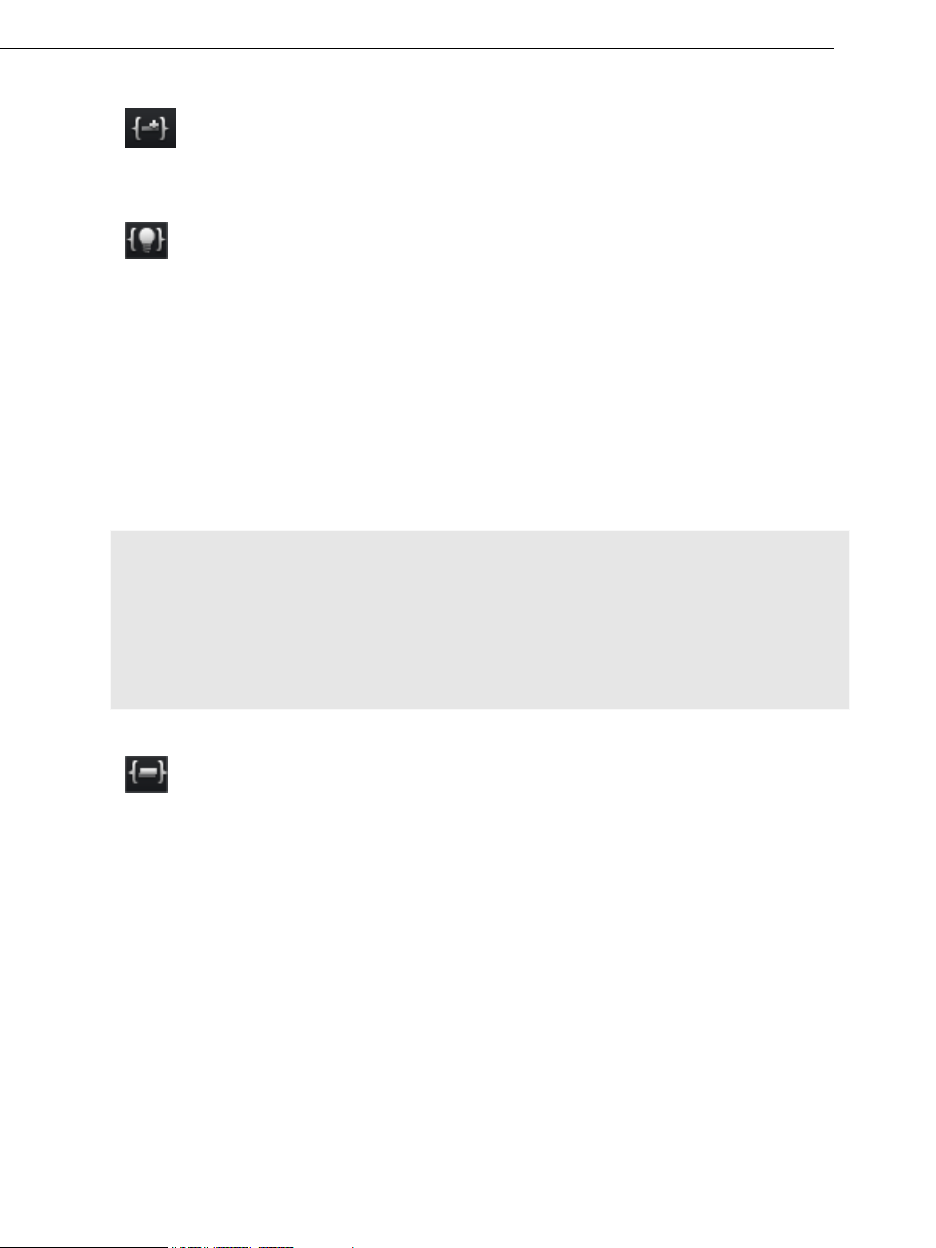
Toolbars
Upper button bar
The upper button bar can be found in the monitor to the top left. It has the following
functions:
New project
Creates a new MAGIX Video Pro X2 project. A dialog with settings for a
ew disc project or a new film
n
Keyb
oard shortcut: Shift + N
Load p
roject
(view page 63) opens to get started.
Use this option to load a movie into your disc project. Please note that
all media
files associated with it must be accessible. MAGIX Video Pro
X2 will search for all used sounds and video files in the folders in which
they were located when the movie was saved.
Keyboa
rd shortcut: Ctrl + O
Page 44

44 Workspaces
Save project
The current movie is saved with the name displayed in the project
window. If you have not yet specified a name for your project, a dialog
will open wherein MAGIX Video Pro X2 asks you to do so.
Please note: In the project file (*.MVP), all information about the used media files, cuts,
effects, and titles are saved, but not the picture and sound material itself. This is found in
the recorded or imported media files that remain unchange
d during the entire MAGIX Video
Pro X2 editing process. To save the full movie into a dedicated directory, for instance to
continue editing on
d ector
ir y".
Keyboa
rd shortcut: Ctrl + S
a different PC, please use the command "Copy movie and media into
Program settings
Opens the program settings (view page 254).
Key
board shortcut: Y
Conte
xt help
By choosing th text h entry from th
on the button to ar, the mo
e con elp e "Help" menu, or by clicking
in the p toolb use cursor will turn into an arrow
with a question mark.
Then, when you click on any button of the m
ain screen, program help describing the
control element in question will open.
Shortcut key: Alt + F1
MAGIX News Center
MAGIX can supply you with all of the latest information about your
software. In the MAGIX News Center, you will find all of the links to
current online tutorials as well as tips & tricks on individual topics or
software application examples.
You will also be informed of the availability of brand new updates and patches for your
program as well as special offers, contests, and surveys.
The news is
• Gree
• Yell
• Red
• And n the button will be grey
split into three color-coded sections:
n for practical tips & tricks for your software
ow reports the availability of new patches and updates for your product
for special offers, contests, and surveys
if there are no new messages, the
All available information is shown as soon as you click on MAGIX News Center. If you click
on one of the news items you will be forwarded to the corresponding website.
Page 45

Workspaces 45
Lower toolbar
The following buttons are available in "Overview" and "Timeline" modes:
Using the dropdown menu, you can control various movies wit
project.
Undo
Durin p o problem if
g roject editing, you can undo the last changes you made. This way it's n
you wan you can
t to experiment with critical operations. If you don't like the results, then
always revert to the previous state by using
K yboar
e d shortcut: Ctrl + Z
Restore
The "Redo
" function undoes the previous "Undo" function.
edit Select a movie to
hin a
"Undo".
Keyboard shortcut: Ctrl + Y
Delete objects
T
his function deletes the selected scene (or the selected object in
"Timeline" mode).
Keyboard shortcut: Del
Title editor
Opens the title editor (More Informationen can be found in the section
Title Editor" on page 124) for the selected photo, video, or title object.
"
Keyboard shortcut: Ctrl + T
Mute button
This button mutes the sound output. By clicking on the triangle, you
can selected which track should be played back by default.
Mixer
This option allows you to display or conceal the real-time mixer. You will
find further information, especially with regard to the integration of
effects plug-ins, in the chapter "Mixer".
Keyboard shortcut: M
Paste modes
MAGIX Video Pro X2 provides various options for how an object selected in the Media Pool
will be pasted into the project.
Page 46
46 Workspaces
Apply automatically
Pastes the file selected in the Media Pool into the arranger. Video and
image objects will always be placed behind the last object into the first
track; audio and text objects are separated into different tracks.
Intelligent ripple
Inserts an object from the Media Pool at the position of the playback
marker and simultaneously moves the objects following it.
• In contrast to automatic insertion, all objects will be inserted at the position of the
playback marker.
• Videos and images are placed on the first track. If another object is found at the
playback marker positio
(s tion).
o that the inserted object can start exactly at the point of inser
n, then it will be cut continued at the end of the inserted object
• The objects lying further along on the track will be moved further down.
• Objects on other linked tracks (all objects up to the first completely empty track) will also
be moved further down. This includes sound tracks, fades, and titles, all of which will be
moved together so that nothing gets mixed up. All objects will be moved which start at
the same pos
ition as or behind the playback marker.
Note: The prerequisite for a good ripple effect is that the soundtrack, most importantly, is
cut at the position of the playback marker. Otherwise, the elements located further down
would move down even more, while the soundtrack would stay at its old position, causing
picture and sound to separate from each other. If you would like to create an intelligent
ripple, make sure that th ints of ale starting po l objects that are to be moved are positioned
at or behind the play a his is noback m rker. If t t the case, click on the screen to cut the
corresponding object at the playback marker position.
Single-track ripple
Inserts an object from the Media Pool at the position of the playback
marker and simultaneously moves the objects on the track following it.
• The one-track ripple behaves similarly to the intelligent ripple, the difference is that only
the objects on the target track are moved.
Bordering tracks are unchanged.
• In contrast to automatic insertion, all objects will be inserted at the position of the
playback marker.
• Videos and images are placed on the first track. If another object is found at the
playback marker position, then it wi
(so that the inserted object can sta
• The objects lying further along on the track will be moved
ll be cut continued at the end of the inserted object
rt exactly at the point of insertion).
further down.
Page 47
Multitrack ripple
The object selected in the Media Pool will be inserted on the target
track at the position of the playback marker. All objects found at the
playback marker position will be split and moved down the length of
the inserted object. All objects on the track located further on will als
be moved.
Workspaces 47
o
• The multitrack ripple behaves similarly to the intelligent ripple, but the difference is that
objects on all tracks following the playback mark
er's position will be moved.
• In contrast to automatic insertion, all objects will be inserted at the position of the
playback marker
.
• Videos and images are placed on the first track. If another object is found at the
playback marker position, then it will be cut continued at the end of the inserted ob
ject
(so that the inserted object can start exactly at the point of insertion).
• If other objects are located at the playback marker position, these
will also be separated
and moved further along the track.
• Objects lying further along on all tracks will be moved further down.
Replace
Replaces the selected object with an object selected in the Media Pool.
Overwrite
Overwrites the object in the target track at the position of the start
marker with the object selected in the Media Pool.
Hint: In contrast to "Replace", no length adjustment takes place. With "Replace", any
downstream objects are moved, while "Overwrite" overwrites downstream objects as well
(sometimes only partially), depending on the length of the object being inserted in
comparison to the object being overwritten.
Cut button
You can access the individual options using the dropdown menu.
Split
This command cuts a scene at the point where the playback marker is
positioned. This way, two free-standing objects are created.
all
Keyboard shortcut: T
Remove start
This command cuts a scene at the point where the playback marker is
positioned and removes the material before the playback marker.
Keyboard shortcut: K
Page 48
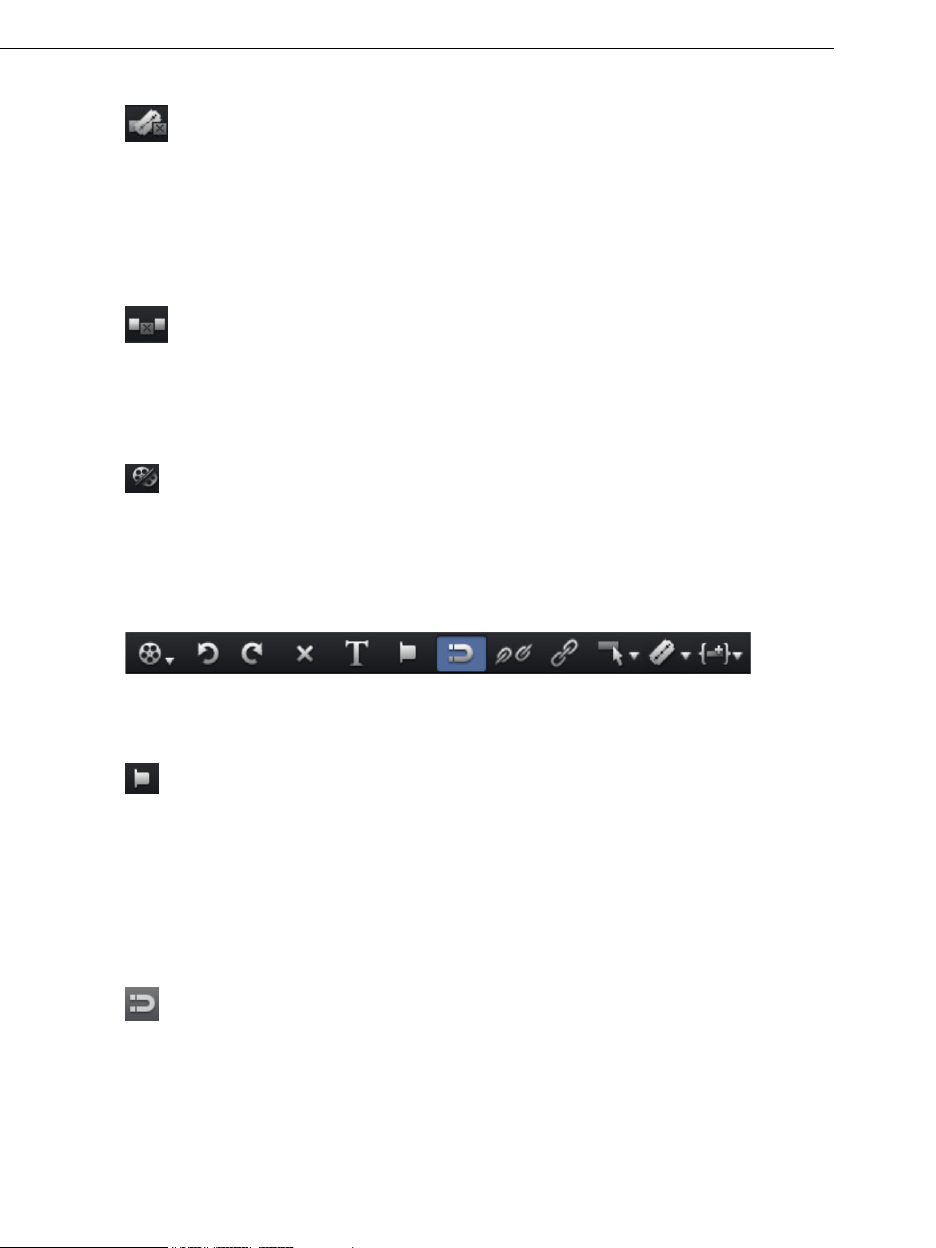
48 Workspaces
Remove end
This command cuts a scene at the point where the playback marker is
positioned and removes the material behind the back marker.
Keyboard shortcut: U
Hint: If the commands "Split" and "Remove beginning/end" are applied without a selection,
all objects at the position of the playback marker are cut.
Remove scene
This command allows
scenes that follow will
in front of the scene to
Ke oard
yb shortcut: Ctrl + Del
Split mov
K yboard
e shortcut: Alt + W
Additi
ie
Splits the movie at the playback marker position into two sections within
o e
nm project. These can be individually controlled using the "Window"
e he button "Select movie for editing" (see above).
nu or t
onal buttons in Timeline mode
you to completely remove selected scenes. The
b
e automatically moved to the end of the scene
be removed.
The following buttons are only available in "Timeline" mode:
Set chapter marker
Sets a chapter marker at the position of the playback marker. This
cre ng to
ates a chapter entry in the disc menu, in case you are planni
burn the movie to CD/DVD.
You ca re our chapter markers by right clicking and selecting "Rename". The name
n name y
then appears in the chapter menu.
Shortcut: Shi
ft + Enter
Object grid
Use this button to switch
grid is switched on, the
that everything fits in sea
the object grid on and off. When the object
objects snap into place beside one another so
mlessly.
Page 49

Form group
Orders all selected objects into groups. As soon as an object from the
group is selected, all other objects in the group will be highlighted as well
so that you can work on them collectively.
Keyboard shortcut: Ctrl + L
Ungroup objects
This turns all
selected objects into free-standing objects again.
Workspaces 49
Keyboard shortcut:
Ctrl + M
Mouse modes
MAGIX Video Pro X2 offers special mouse modes for different kinds of
editing. They can be selected using the small arrow next to the button.
.
Mouse mode for individual objects
This is the preset mouse mode which performs most of the work.
Select objects with a left click. You can move an object by dragging it to the desired
position.
K yboa
e rd shortcut: Alt + 1
Intelligent mouse mode
In principle, this mouse mode behaves like the "Single object mouse"
mode.
However, all objects that b
order the object on the same or on adjacent tracks are also
moved, starting from the mouse position. This means that all objects overlapping adjacen
tracks (fades, fade effects) and those directly connecting to the next one (hard cuts) are
together up to the next empty space in the arrangement (the technical term for this
pushed
action is "Ripple until black").
This is useful for preventing destruction of fades you have already set and want to mo
object included therein. To move individual object, switc
h to "Single object mouse" mode.
ve an
You can also drag an object vertically onto a free track, thereby breaking the connection
with the following
objects. You will then be able to move it freely without having to move
other objects with it.
t
Keyboard shortcut: Alt + 2
Page 50

50 Workspaces
Curve mouse mode
This mouse mode is used especially for drawing effects curves.
The effects curve controls the intensity of the effect: The higher the curve point, the more
intense the respective effects parameter at this location. The curves can be used for video
and image objects on the image tracks and also for audio objects on the audio tracks.
More information about this can be found in the chapter "Animate objects", section "Editing
object effects curves".
Keyboard shortcut: Alt + 3
Stretch mouse mode
This special mode is for customizing the length of objects.
With timestretching, audio objects can be expanded or compressed using the handles at
the bottom. The duration of the audio material is therefore lengthened without changing the
pitch. Playback of the video objects is accelerated/decelerated with the help of the handles
at the bottom.
Attention! If the object to be stretched or compressed is going to be animated with an
effects curve, then the option "Connect curve length with object length (view page 151)"
should be set for the effects curve.
Keyboard shortcut: Alt + 4
view audio mouse mode Pre
This mode allows you to preview audio objects (as long as the mouse
button is held down).
In this mode, objects cannot be moved or changed.
Keyboard shortcut: Alt + 8
Program and source monitor
MAGIX Video Pro X2 features two preview monitors, i.e. a program monitor for object
image output in the Arranger and a source monitor for previewing files in the Media Pool.
Setting up the preview monitor
The program and source monitors can be set up variably:
• You can adjust the size of each of the monitors. This can be accomplished by clicking
the screen with the right mouse button and selecting the desired size from the context
menu - either from the presets submenu or self-defined (“Other resolution”).
• You can also freely position both of the monitors. Click on the top bar of the monitor
window and drag it down to any position you want.
• By maintaining the original dimensionality, black frames appear if the display format of
the monitor does not correspond to that of the video played. You only need to deactivate
Page 51

Workspaces 51
this option if you want to display a distorted video intentionally, e.g. if it was incorrectly
encoded.
• The option "Display play time" displays a large time countdown in the program monitor.
This und and background
shows the current position of the playback marker. The foregro
colo justed in the context menu.
rs as well as the transparency can be ad
Tip: nd in the tab "Display Useful presets for the Arranger and video monitor can be fou
p eset gs. r s (view page 259)" in the program settin
Fullsc
reen view
The p onitors. Alternatively, double-
tion "Fullscreen" in the context menu maximizes the m
o
c k o e window. The
licln a monitor or select one and press "A + Enter" to maximize th
fu lscre pecially recommended for working with two screens; one screen for the
en view is es
film preview in the preview monitor, and the other for the Arranger.
You can also shift the monitor into full screen mode and access it via the context menu
(right mouse button). There, you can also hide and display the basic transport controls.
"Esc" returns you to the normal view (or click on "smaller" button to the right in the
fullscreen mode).
Film overview
The option "Film overview" in the "Window" menu enables an overview of the entire
Arranger. All objects in the Arranger will be displayed in the program monitor. The overview
display is especially recommended for work with long movies because the reduced
overview in the program monitor and the zoomed detailed view in the Arranger present a
good combination.
The film overview can be used for moving around in the movie and for editing certa
• When
you click on a certain object in the program monitor, the Arranger will zoom into
in parts:
that object.
• You can use the mouse to draw a frame in the preview monitor – the corresponding
section will be zoomed in the Arranger.
• When you move the playback marker in the program monitor, the Arranger playback
marker will also move correspondingly.
Tip: If you use this option very often, then try using the corresponding keyboard shortcut
("Shift + A").
Page 52
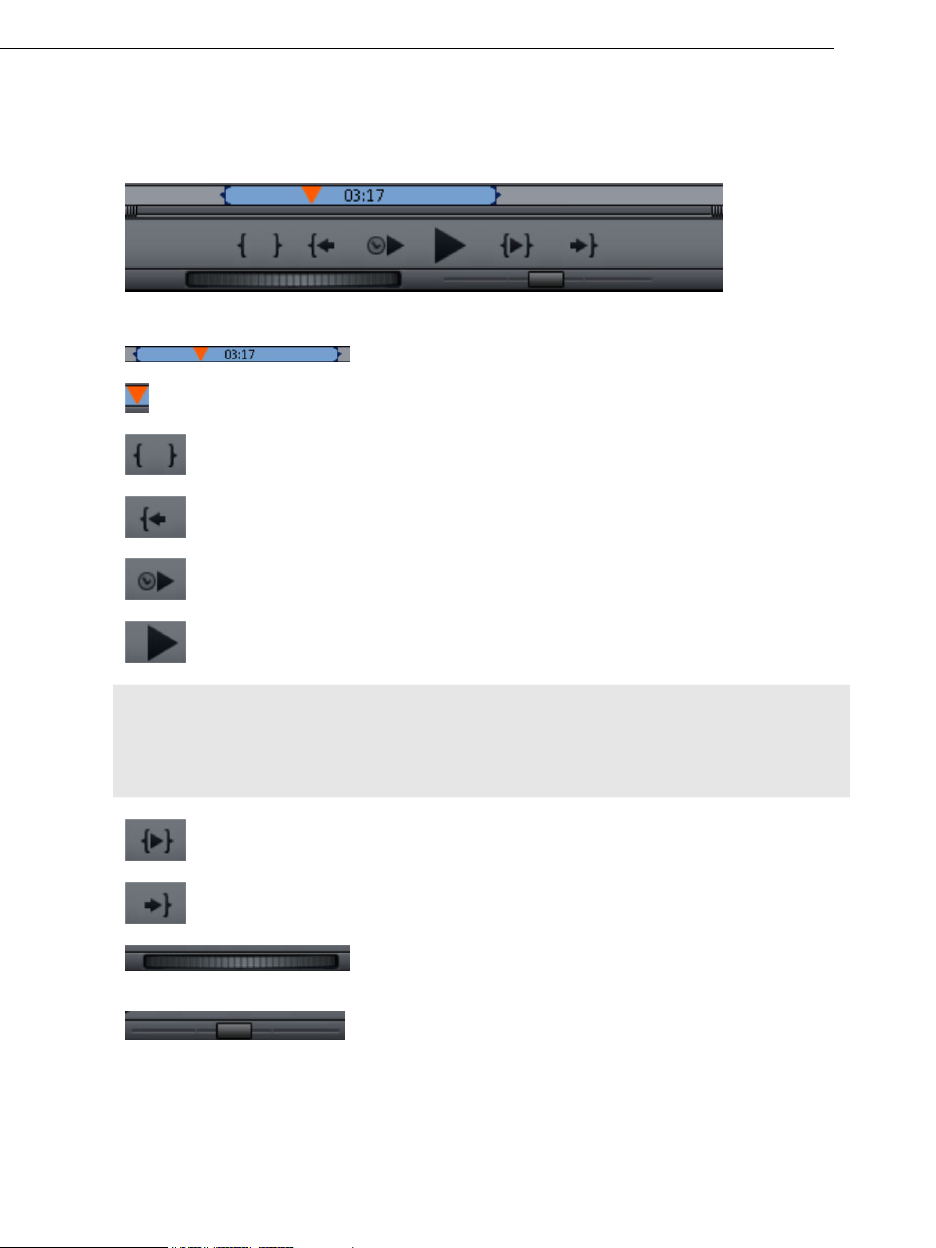
52 Workspaces
Transport control
Transport controls on the preview monitor enable you to play back video and image
material in the Arranger or as a preview in the Media Pool.
Transport control buttons
Range: Above the playback functions, the range between
the in and out points can be changed by clicking it.
Playback marker: This marker indicates the location of the image currently
displayed on-screen.
Set in/out points: Defines the start and end of the playback range.
To the start: This button sets the playback marker to the start of the current
area.
Playback by a frame: This button sets the playback marker just beh d the
current frame and plays it back.
Play/Stop (pause): The playback button in the middle starts playback
click ends playback.
in
. A second
Tip: I er the n the menu "File -> Settings -> Program -> Playback", you can set wheth
playb r following ack marker will go back to the start position (stop) after the second click o
the appropriate shortcut (space bar), or if it should stay at the current position (pause
function).
Area playback: This button plays back the current range.
To the end: This button sets the playback marker to the end of the current
range.
Jog wheel: Using this wheel, you can move
frames within the vide
o and position the playback marker
exactly at high magnifications.
Shuttle control: The further the slider control is moved to
the side, the quicker the arrangement is played in the
reached quickly.
by single
tain position can be corresponding direction. This way a cer
Page 53
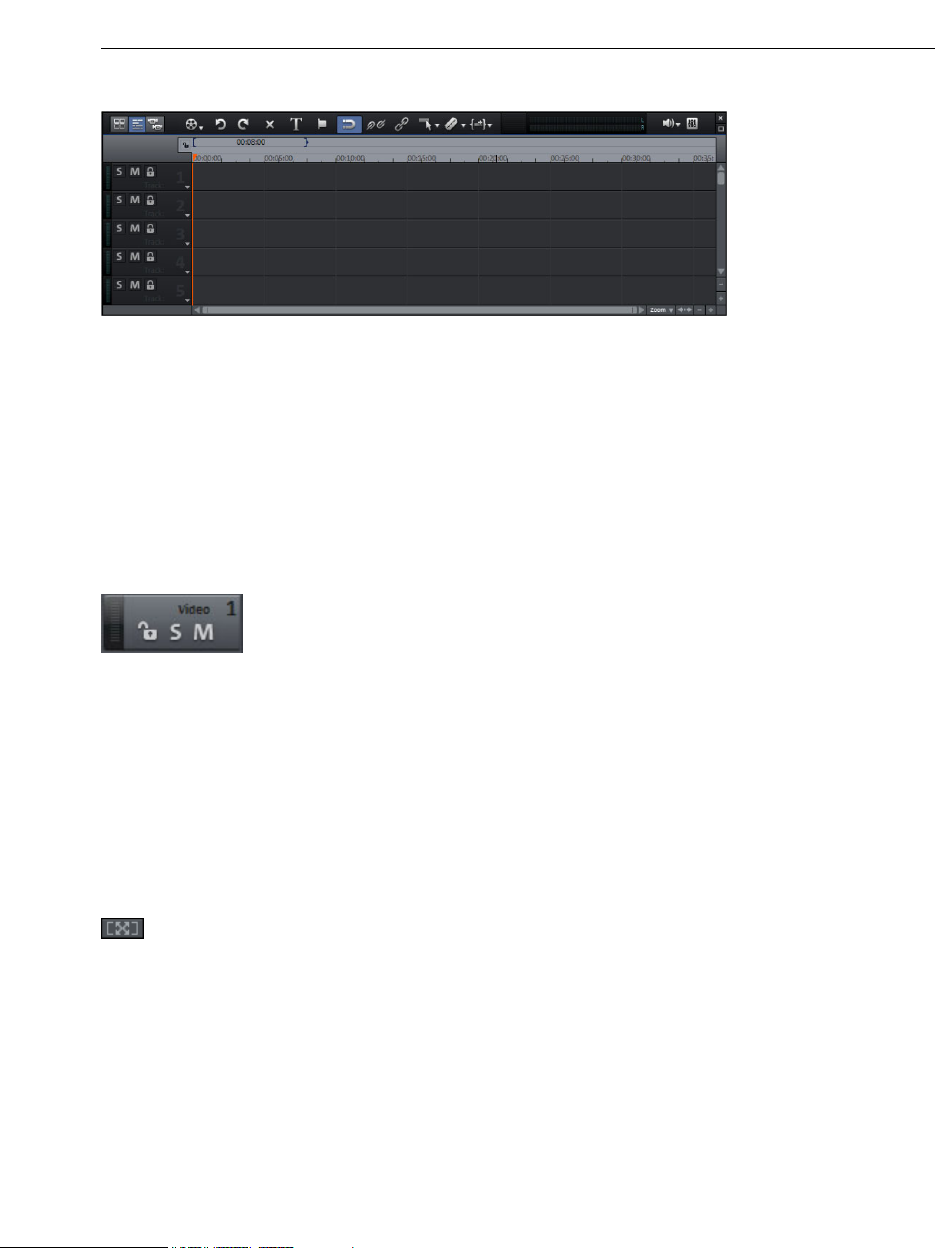
Workspaces 53
Arranger
MAGIX Video Pro X2 offers an editing interface for advanced editing: audio dubbing,
professional editing, plus precise transitions and effects editing.
Tracks
The arranger offers tracks for multimedia material positioning and editing. The number of
tracks displayed can be specified in the file menu under "Movie settings".
In principle, any object type may be placed on any of the tracks. You can also combine
video and bitmaps objects with MIDI and audio objects on any of these tracks. The
maximum length of a movie is restricted to 6 hours.
At the beginning of each track is a track box where you
can mute a single audio track with the Mute button or
play them
Solo.
Clicking the lock symbol protects all objects in a track against unwanted editing. The track
name can be changed by double clicking the text above the buttons.
Zooming
The vertical zoom function sets the number of visible tracks in the window. For a lot of
tracks, enlarging the view (zooming) is sensible for editing a single track or object.
Use the horizontal zoom function to increase the visible section of the arrangement on the
timeline.
Enlarge objects: Vertical and horizontal zoom stages are enlarged so
that all of the selected objects are able to be displayed at maximum
size.
If the function is switched off, the zoom stage will be restored.
Multiple sound tracks
MAGIX Video Pro X2 offers up to eight multi s
streams on a singl
e disc. An example of application might be the creation of multilingual
ound tracks, e.g. to include different audio
discs.
Page 54

54 Workspaces
This kind of audio stream is assigned via the track box's context menu; select "DVD audio
track 1" - "DVD audio track 8". Every multi sound track can be clearly nam ed via the
"Rename DVD audio track" entry in the context menu.
Grid and snap
The time of the arrangement is displayed by the h
orizontal course of the tracks. To
structure this course, a timeline with a grid has been positioned at the top a
track.
A grid is also displayed in the arranger area. The raster ensures that the objects always
"snap" to certain points so that they can be positioned precisely according to the beat. Tw
consecutive objects will seamlessly snap together even if they are on different tracks. This
avoids undesired gaps or overlaps.
Overview mode
bove the first
o
The "Scene overview" mode is a special view that improves manageability and
categorization of scenes. All scenes are listed one after the other (in multiple lines, like in a
text program) and can be copied, cut, moved, deleted and inserted.
In the "Overview" mode, there are no start, play, or end markers. The sce
ne being played
back has a frame around it.
Zoom fader
This slider specifies how large the photos will appear in the storyboard. The smaller the
scenes, the more of them you'll be able to fit on screen.
Maximize: Use this button to maximize the scene overview to
fullscreen.
Page 55
Workspaces 55
Project folder
This is a kind of catchall for all required files.
A dialog opens for placing files (alternatively to drag & drop via
the Media Pool) into the project folder.
Create new folder: Creates a virtual folder. You can create as
many folders as you need for sorting your media files. No
folders can be created within folders.
The "Up" button brings you to the next highest folder level.
Search box: MAGIX Video Pro X2 searches through all file
names for the text entered and then lists the results.
Settings for how detailed the entries should be listed can be
made here.
Note: Folders in the project folder are not ordinary folders that are created on the hard
drive. They are created directly in the project and are intended to keep complex projects
clearly laid-out.
Adjusting the workspace
The source and program monitors, the project folder, the Arranger, and the Media Pool can
shut off completely or freely repositioned. Individbe ual settings can be saved and reloaded.
To do this, open the menu "Window -> Workspace -> Save...". The first three workspaces
ar
e automatically assigned to F9-F11, but these can be
reassigned (view page 274).
Program settings -> Dis
U
nder "
for display presets. On systems with a connected monitor, only the first two templates
m
ake sense. The presets are explained on the right side of the dialog. All window
pr rranger, video monitor, etc. can be changed after the application of a
operties of the A
preset.
For larger arrangements, the program monitor can be used to show an overview of the
Arranger ("Window ->
Movie overvie
play templates" you will find a collection of useful presets
w (view page 231)").
Page 56
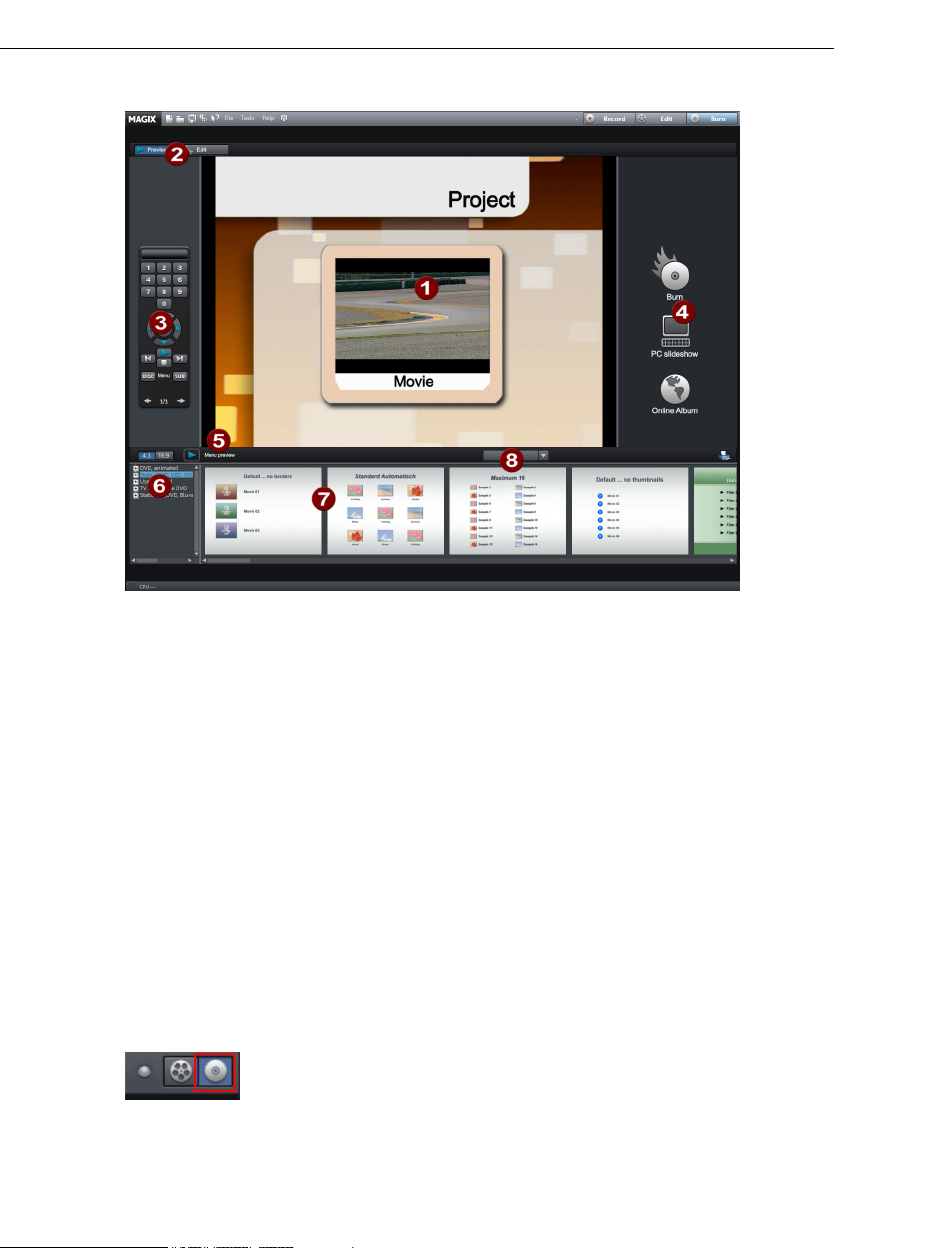
56 Workspaces
The "Burn" screen
1 Preview menu: This is a preview of the selection menu. Read more in the
"Menu (view page 213)" chapter
2 Switch views: Here you can switch between the Preview and Edit views.
3 Remote control: Check how your disc reacts when you press a button
on your remote control.
4 Output: Choose between burning a project, a show optimized f
a web show.
5
Play preview: Here you can playback the menu preview, which you can
test with the remote control.
6 Template category: Switch between different templates for designing
your menus.
7 Menu templates: Switch between different templates for d
menus.
8 Apply templates: Here you can select whether a template should be
assigned to the page, menu or all disc menus.
Functionality
You can switch to the "Burn" screen by pressing the
corresponding button at the top right.
Here you can burn your movi
them to your MAGIX Online Album as a "virtual DVD".
es (including a selection menu) onto CD or DVD or upload
or PC, or
esigning your
Page 57

All movies loaded into the project are taken into account during the burning process. If you
want to take ou
the "Edit" screen and delete some of them from the project. To do so, switch to the
corresponding movie, open the "File" menu and select "
(view page 214)".
t some of the movies that are loaded, then you will have to switch back to
Create new video project 57
Manage movies -> Remove movie
For more information about the "Burn" screen, please read the chapter "
page 196)".
Burning discs (vie
Create new video project
Movie settings
Open the movie settings via "File -> Settings -> Movie..." or by pressing "E". The following
dialog opens:
w
The buttons at the top are for the four tabs in the dialogs: "Movie settings ->
Synchronization ->Movie information" and "Project settings".
Movie settings
Name: You can enter the name of the current movie here.
Path: This is where you determine the path to the folder on your hard drive where your
movie is saved.
Page 58
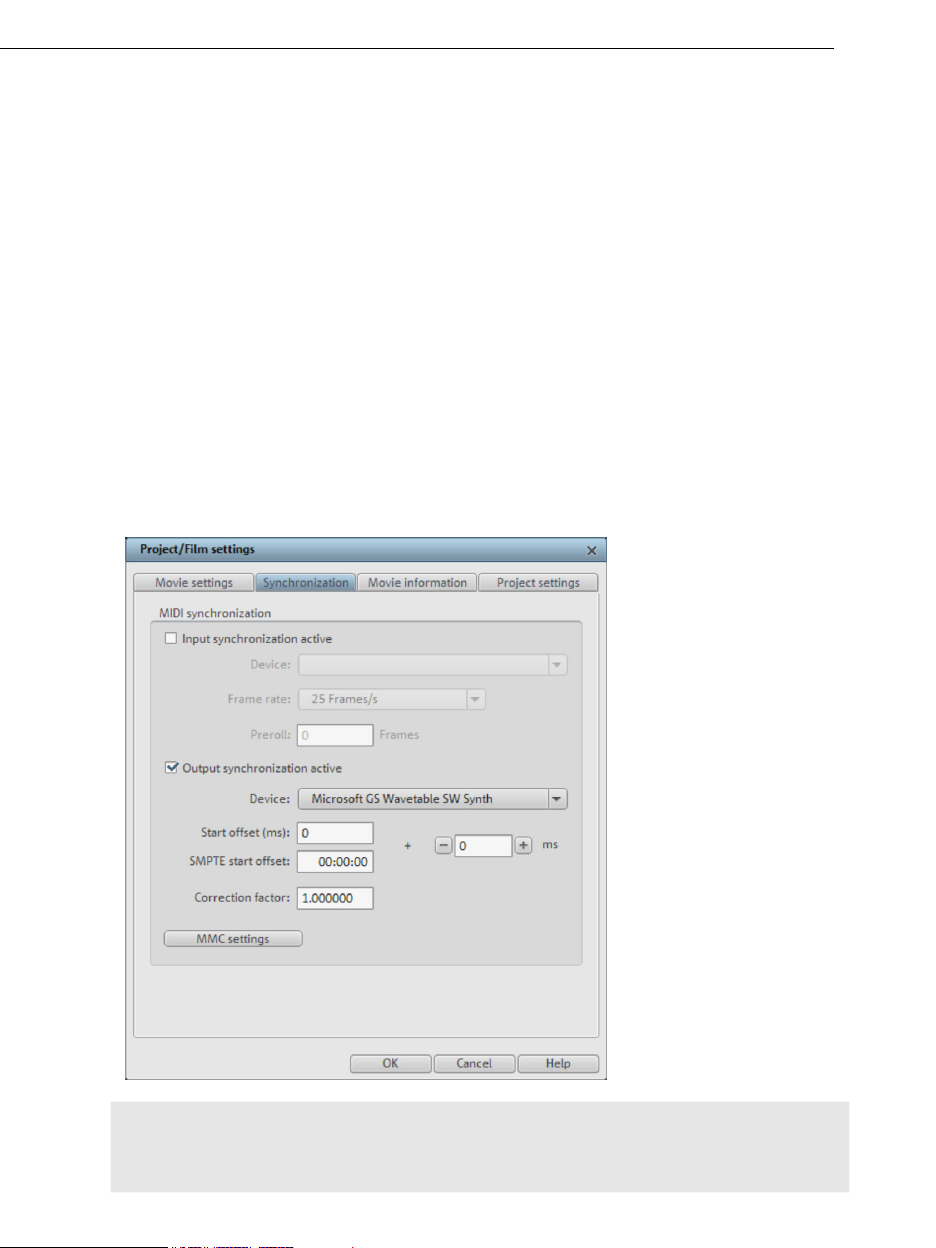
58 Create new video project
Play movie back in loop mode: The movie is then played over and over again, i.e. once
the movie reaches the end marker, it is started again from the beginning.
Cut new images to fi
the project automatically so that they fit the screen.
Number of tracks
Audio sample rate: The preset sample rate is 48 kHz. This sample rate is applied t
recordings and is also a prerequisite for DVDs. This setting guarantees optimum sound
quality. Audio material at different sample rates (e.g. CD audio at 44 kHz) is automat
adapted when loaded
material at a different sample rate or if your sound card does not support this sample rate.
Video settings: You can select the standard settings
for PAL or NTSC images or for your own fo
a width/height ratio divisible by 8.
Synchronization
Synchronization dialog
t the screen automatically: Fits all images and videos inserted into
: Changes the track number.
o all
ically
(resampling). Only change this value if you are working with sound
for the picture format and frame rate
rmat. Please note that MPEG encoding requires
Note: A description for each of the synchronization dialog's functions is provided here. A
description of how synchronization is set up can be found in the section "Synchronization
settings (view page 59)"
Page 59

Create new video project 59
Input synchronization: Select the driver via which MAGIX Video Pro X2 should receive the
MIDI timecode. This setting is a
the device set matches the S
lso used SMPTE. Note that for synchronization via SMPTE
MPTE input of your MIDI interface.
Preroll frames: E
synchronization starts. This will ensure that analog devices
reach the correct speed. In order to preve
nter a frame number that MAGIX Video Pro X2 will ignore before
first require a certain time to
nt synchronization of MAGIX
Video Pro X2 to an
invalid time, this can be skipped by means of preroll frames.
Output synchronization
: Select the driver via which MAGIX Video Pro X2 should send the
MIDI timecode. Note that for synchronization via SMPTE the device set matches the
SMPTE output of your MIDI interface.
SMPTE settings: Specify the correc
for PAL video and audio synchronization, 29.97 drop/non drop, or 30 f
t frame rate with "Type", e.g. 24 for cinematic films, 25
or NTSC video.
Start offset: Specify a period in milliseconds and SMPTE frames to be deducted from the
incoming SMPTE time before the time is applied for synchronization. With an offset of
60:00:00 (1 hour), you can therefore synchronize a tape with an SMPTE code that starts at
1 hour, MAGIX Video Pro X2, however, still starts at the tape beginning at 0.
Correction factor: Normally, this value should be at "1" (if you haven't changed it). In
seldom cases, MIDI synchronization and audio can run apart for longer arrangements. You
can accelerate the speed of the MIDI playback by slightly increasing this factor (e.g. to
1.000001).
Note: Set the check box for the corresponding item according to whether you want to
apply input or output synchronization.
Specify synchronization
MAGIX Video Pro X2 is capable of being synchronized by external sources or synchronizing
external sources.
Synchronizing MAGIX Video Pro X2 with Samplitude or Sequoia is also possible via a virtual
MIDI cable (e.g. "MIDI Yoke" or Hubi's MIDI Loopback Device"). The requirement in this
case is simply that the virtual MIDI cable has been installed successfully.
MAGIX Video Pro X2 as master
If MAGIX Video Pro X2 should synchronize external programs or sources, then proceed as
follows:
• Open the
Synchronization dialog (view page 58).
• Under "Output synchronization", set the MIDI device that is connected to the device that
MAGIX Video Pro X2 is supposed to sync with.
• In case you want to synchronize another program (e.g. Samplitude/Sequoia) via a virtual
MIDI cable with MAGIX Video Pro X2, please make sure that the corresponding MIDI
device is set in both programs. The program to be synchronized must support MTC and
be configured as the "slave".
Page 60

60 Create new video project
• For example, if you use "MIDI Yoke NT1" under "Output synchronization", then the
device "MIDI Yoke NT 1" must also be set in the MTC input of the program to be
synchronized.
MAGIX Video Pro X2 as slave
MAGIX Video Pro X2 set as the slave causes the program to follow an external source or
another program during playback.
• Open the
Synchronization dialog (view page 58).
• Under "Input synchronization", set the MIDI device that is connected to the device that
MAGIX Video Pro X2 is supposed to sync with.
• In case you want to synchronize another program (e.g. Samplitude/Sequoia) via a virtual
MIDI cable with MAGIX Video Pro X2, please mak ing MIDI
device is set in both programs. The program that ization source
e sure that the correspond
is set to be the synchron
must support MTC and be configured as the "master".
• For example, if you use "MIDI Yoke NT1" under "Input synchronization", then the device
"MIDI Yoke NT 1" must also be set in the MTC output in the master.
Synchronizing Samplitude/Sequoia with MAGIX Video Pro X2
This section should help you synchron
ize MAGIX Video Pro X2 with Samplitude/Sequoia for
Surround productions.
T e introh
is he m o Pro X2
but sen ethod
allows p
The chapter "
explains how completed Surr
MAGIX Video Pro X2 and how
Re u
Since be
install e" or "Hubi's MIDI Loopback Device". Configure the driver
duction featured here provides a single example. In this case, MAGIX Vi
t
aster: Samplitude/Sequoia follows the time information from MAGIX Vide
ds information from the transport control to MAGIX Video Pro X2. This m
layback from both programs to be started while they run synchronously.
Transferring a Su
rround project to MAGIX Video Pro X2 (view page 173)"
ound projects are transferred from Samplitude/Sequoia to
they are processed.
q irements
synchronization occurs via MTC (MIDI time code), a virtual MIDI driver must
ed. Examples are "MIDI Yok
deo Pro X2
as required so that at least two virtual MIDI devices are available.
If a Surround project is to be created, then you require a Surround-capable sound card
with at least 6 channels.
Setting up MAGIX Video Pro X2
• Open the synchro d
nization ialog
• Activate the box "Input synchronization active".
Under "Device", set the first free virtual MIDI device (e.g. "MIDI Yoke NT 1").
•
Now set the transport controls via MMC (MIDI machine control):
• Click the "MMC button" to open the "MIDI machine control".
• Activate the box "Receive MMC commands (slave)".
• Under "Device", set the second free virtual MIDI device (e.g. "MIDI Yoke NT 2").
• Close both dialogs by pressing the "OK" button.
Page 61

Setting up Samplitude/Seq
• Start Samplitude/Sequoia; MAGIX
• Open the Samplitude/S
the transport console, or se
uoia
equoia synchronization dialog. Right-click the "Sync" button on
lect the entry "Synchronization settings" in the "Options"
Video Pro X2 can remain open.
Create new video project 61
menu.
• Activate the box "Output synchronization active".
• Under "Device", set the first free virtual MIDI device (e.g. "MIDI Yoke NT 1").
ow set the transport controls via MMC (MIDI machine control):
N
Click "MMC settings" to open the "M
• IDI machine control" dialog.
• Activate the box "Send MMC commands (master)", "Transport window as remote
control for external device", and "Space bar for remote control".
Under "Device", set the second free virtual MIDI device (e.g. "MIDI Yoke NT 2").
•
Close both dialogs by pressing the "OK" button.
•
Now you can conveniently dub your movie in Samplitude/Sequoia while you edit and cut
your work in MAGIX Video Pro X2. Playback can be started from both programs and
always runs synchronously.
MIDI Machine Control (MMC)
M
MC modes
Th ol via MIDI Machine Control.
e synchronization window provides settings for remote contr
MAGIX Video Pro X2 supports synchronization of external devices via MMC. Three working
modes are provided:
Receive MMC commands (slave): If you have set up MAGIX Video Pro X2 to wo
slave, activate this option. MAGIX Video Pro X2 keeps track of the J
OG shuttle operations
rk as a
and fast forward and rewind commands of external devices. MAGIX Video Pro X2 also
receives the current playback positi
on of the device and displays it as an additional blue
cursor on the timeline.
Send MMC commands (master): MAGIX Video Pro X2 operates as master. The external
device follows the time position every time the playback cursor moves to a certain positio
n
within the arrangement.
While playing a range in MAGIX Video Pro X2, the MMC device stops once the end of the
nge is reached. If this option is
ra activated, the start and stop commands sent by the space
bar only control the MMC device.
Use transport console as remote control for external d
If you activate this option, the transport control no longer controls
directly within t
he program but instead controls the external MMC device. Play, stop, fast
evice
playback and recording
forward, rewind, and fast rewind no longer have any direct effect on playback. The record
button starts recording in synchronization with the playback of the MMC device.
Use the space bar to start playback remotely: If this option is activated, the start and stop
commands are controlled via the space bar on
the MMC device.
Page 62

62 Create new video project
Advanced options
Input MIDI device: Here you can set the MIDI device via which MAGIX Video Pro X2
should be controlled.
Output MIDI device: Select the MIDI device which is connected to the device you want to
control remotely.
MMC input ID: Enter the MAGIX Video Pro X2 input ID here. Normally this is "All".
MMC outpu
t ID: Set the input ID of the MMC device you wish to control remotely.
Normally this is "All".
Movie information
This option opens an information window:
Name: Enter the name of the current movie.
Path: The path for the folder on your hard drive where your movie is saved.
Created on: Displays the time the movie was created.
Last changed: Displays the time of the last save.
Number of objects used: Displays the number of all objects in the movie.
Number of objects used: All files used in the movie are listed here.
Keyboard shortcut: E
Page 63

Create new video project 63
Project settings
In this dialog, you can view
and change the settings for
the current film.
Automatically select preview image
MAGIX Video Pro X2 uses an automatically selected preview image.
Use image file
Clicking the folder button opens a dialog to load image files. In th
is dialog, you can navigate
to the directory where the image file is found and select it by double clicking.
Use preview
image from movie
Use the controller to select a frame from the corresponding directory.
Page 64
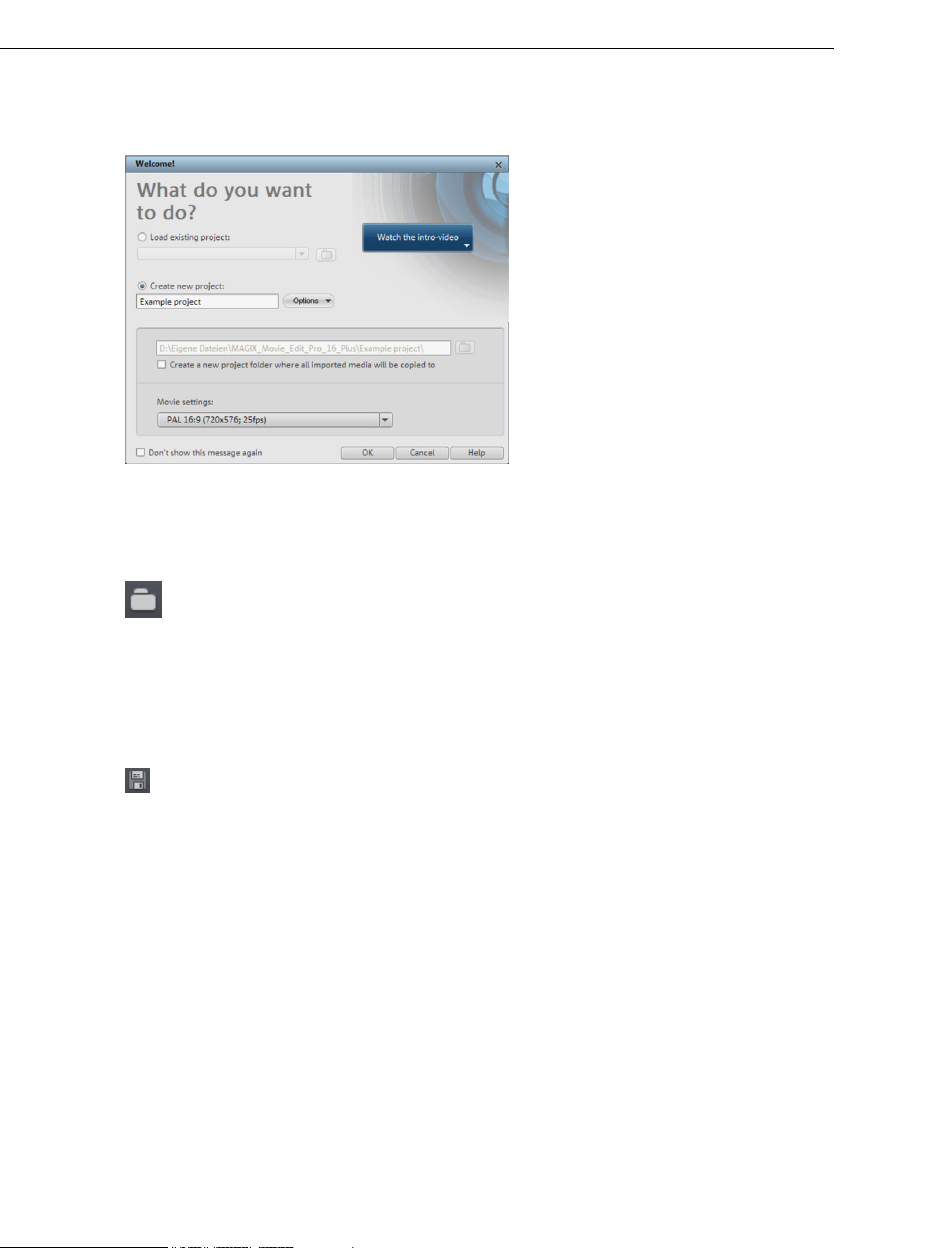
64 Create new video project
New project settings or new movie
Wh ne you start MAGIX Video Pro X2 the following dialog will open:
Decide in this dialog if you
want to "Load an existing
movie" for further editing
and burning to disc, or if
you want to "Create a
new movie". Under
"Options" you can
"Create a new movies
folder". All data that
belongs to the movie will
be saved in this folder.
We're still at the very beginning, so let's stick with keeping an overview of everything. Cli
"OK" to end the
dialog and continue.
Load project
Use this option to load a movie into your disc project. Please note that
all media files associated with it must be accessible. MAGIX Video Pro
X2 will search for all used sounds and video files in the folders in which
they were located w
hen the movie was saved.
Keyboard shortcut: Ctrl + O
Save project
The current disc project is saved with the name displayed in the project
window. If you have not yet specified a name for your project, a dialog will
open asking you to do so.
Keyboard shortcut: Shift + S
Save project as...
A dialog opens where you can specify the path and name of the video for saving.
Keyboard shortcut: Shift + O
ck
Page 65

Video recording 65
Video recording
Connect camera
Connect AVCHD camera
AVCHD cameras are available in basically three types:
Cameras with removable storage: The camera includes a slot for a memory card. Your
•
computer should feature a card reader for the associated medium so that you can simply
insert the card from the camera and import the desired material. Different camera
models c
Cameras which burn DVDs directly (usually 80 mm diameter instead of the regular
•
120 mm)
computer. For so-called "Slot in DVD" drives, look beforehand in the operational manual
whether or not 80 mm DVDs (also called 3" DVDs or MiniDVDs) are acceptable.
Note: These variants require a special UDF driver (normally included with the camera) to be
installed before the DVDs or removable storage can be imported into Windows.
• Cameras with built-in hard drives: The camera is present as a drive as soon as the
USB cable is connected to the PC. This additional drive is then visible in the Media Pool.
A separate UDF driver doesn't usually need to be installed.
an be connected via USB.
: The DVD can simply be taken out of the camera and inserted into the
Note: The variants listed here and their procedures are explained according to our
experience. We also recommend reading the camera's manual for more detailed
instructions and contacting the manufacturer in case of problems.
Connect a DV or HDV camera
MAGIX Video Pro X2 supports continuous editing of DV (digital video) files. You will require
a DV recorder or DV camera with an IEEE-1394 interface (also known as FireWire or iLink)
as well as an OHCI-standard IEEE-1394 host adapter for you
r PC. You must also have
Microsoft’s DirectX8.a (or higher) installed.
• Connect the digital output of the switched-off camera with the computer's
DV interface
(also called FireWire or iLink).
• Insert a DV cassette or the storage device into the camera.
• Switch your camera’s operating mode to "Video rec
The camera is now ready to transfer
the video to the computer.
order" or "Playback".
Note: You may also use a HDV camera in DV mode to, for example, transfer recordings in
the old DV format. We have noted problems with this mode in many cameras, and
therefore recommend that the Record mode of the camera is also switched to DV,
switching the camera off and then on again.
Page 66
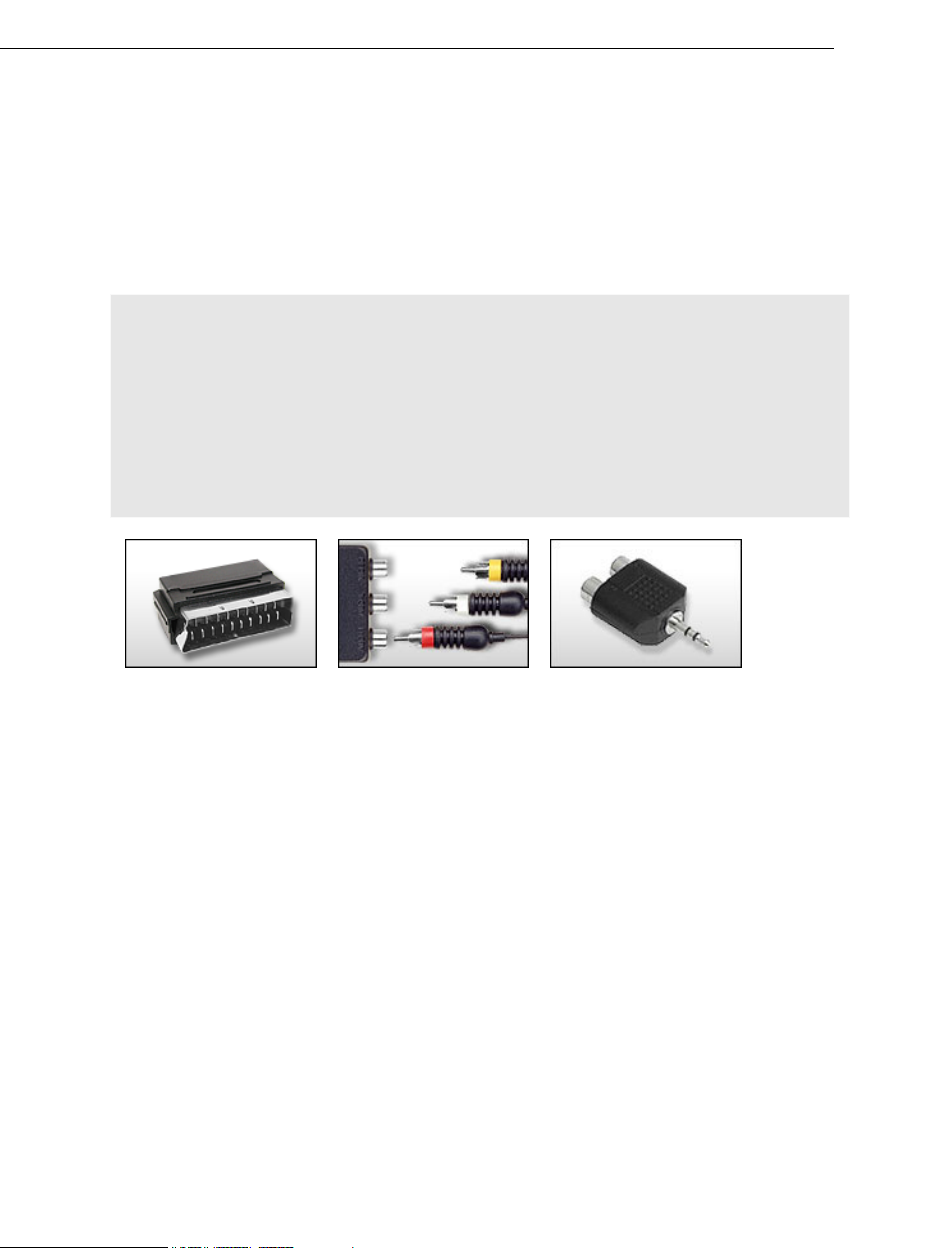
66 Video recording
Connect analogue video source
Connect the video out of your camcorder, or DVD/VHS recorder to the video in (TV, video
or video graphics card) of your computer, an, d the audio out to the line in of your sound
card.
Due to the variety of device configurations, it is difficult to say which cable will function best
with your setup. If you’re not sure, check the manual of your VCR or your TV, video, or
graphics cards.
Example:
Europe: Many VCRs and DVD players have a SCART, 3 RCA (2 for stereo sound, 1 for
video), or S-Video/optical audio line out. In such case, you will need a SCART to RCA
adapter, a cable with 3 RCA jacks, or an S-Video cable.
North America: Many VCRs and DVD players have a 3 RCA (2 for stereo sound, 1 for
video), or S-Video/optical audio line out. In such case, you will need a cable with 3 RCA
jacks, or an S-Video cable.
SCART/Cinch adapter SCART/Cinch adapter
with 3 RCA jacks
Most sound card inputs are 3.5 mini stereo jacks. To connect the VCR audio out to the
sound card audio in you will need a stereo RCA/ m
You will most li /mini jack
adapter from your local supplier.
kely have to buy a cable with 3 RCA plugs and a stereo cinch
Stereo RCA/mini
phone jack adapter
ini phono plug adapter.
Page 67
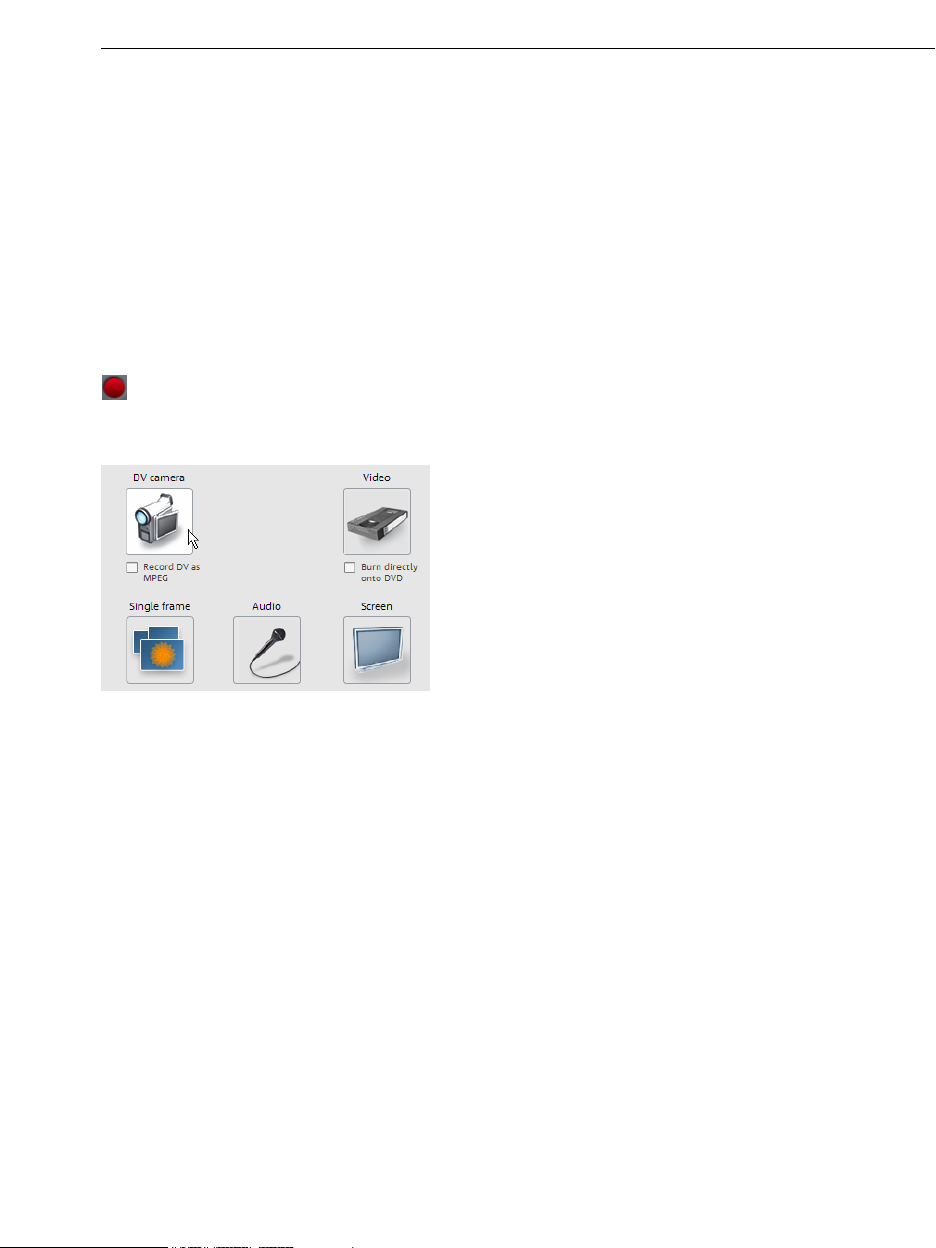
Video recording 67
Select the recording method
First, you should find out the correct recording method for your camera. The following
options are basically available:
• Analog transfer: Transformation of the analog signal into a digital data current, whereby
the actual video file is then created using the settings (Super 8, Hi8, (S)VHS, video
recorder, and other analog sources).
• Digital transfer (DV camera, HDV camera)
• Copy the finished video files from a storage medium or directly from the connected
camera to the local hard drive for AVCHD cameras, DVDs (without copy protection),
DVD cameras with built-in hard drive or removable storage. Next, import the copied file
into the project.
To start recording, click on the "Record" button under the source monitor.
The following selections are possible:
• DV cameras: For mini DV
cameras and DV video
recorders
HDV camera: For HDV1 and
•
HDV2 cameras
Video: For analog vid
•
cameras TV, analog TV, VHS
recorders (video input),
webcams
eo
Single frame: For single and series images from analog cameras, analog TV
•
, or VHS
recorders, webcams, etc.
Audio: For microphones, cassette recorders, MiniDisc players, turntables, etc.
•
Screenshots: Records directly from the computer monitor.
•
DV cameras
DV devices
MAGIX Video Pro X2 supports continuous editing of DV (digital video) files. You will require
a DV camcorder or DV recorder with an IEEE 1394 interface (also known as FireWire or
iLink) as well as an OHCI conforming IEEE 1394 host adapter for your PC.
To record digitally, the digital output of the Mini DV camcorder or DV video recorder mus
be connected to the DV interface of the PC, but remain switched off. You must also have
Microsoft's "DirectX8.a" (or higher) installed. Now switch your camcorder to "video
recorder" or "playback" (according to your particular device) and open the DV capturing
dialog.
t
Page 68

68 Video recording
Capturing DV recorders or cameras
To start recording, cli
• Select "DV camera" from requires
approx. 220 MB per min the more
space-saving MPEG form s MPEG"
option.
ck the "Record" button under the source monitor.
the recording dialog. Uncompressed DV capture
ute of video. If you would instead like to record using
at, then you should first activate the "Record DV a
• This opens the actual recording dialog. Check to see if a DV camera driver has been
selected.
• Name your recording. It's worth choosing a logical name which will allow you to find it
easily again on the hard drive.
• You can access the appropriate place on the camcorder tape by using the remote
control buttons: shuttle forwards, backwards, and start/stop playback. To start
recording, click on the "Record" button. Keep an eye on the remaining hard-drive space.
• Cease capturing with the "Stop" button and exit the record dialog. You can see the
recording in the film-strip in the low
Tip: In the DV recording dialog, you can set clips from the DV video which will then be
recorded one after the other (batch capturing). Read more on this in the chapter "Batch
processing" (view page 73)
er third of the screen.
Page 69
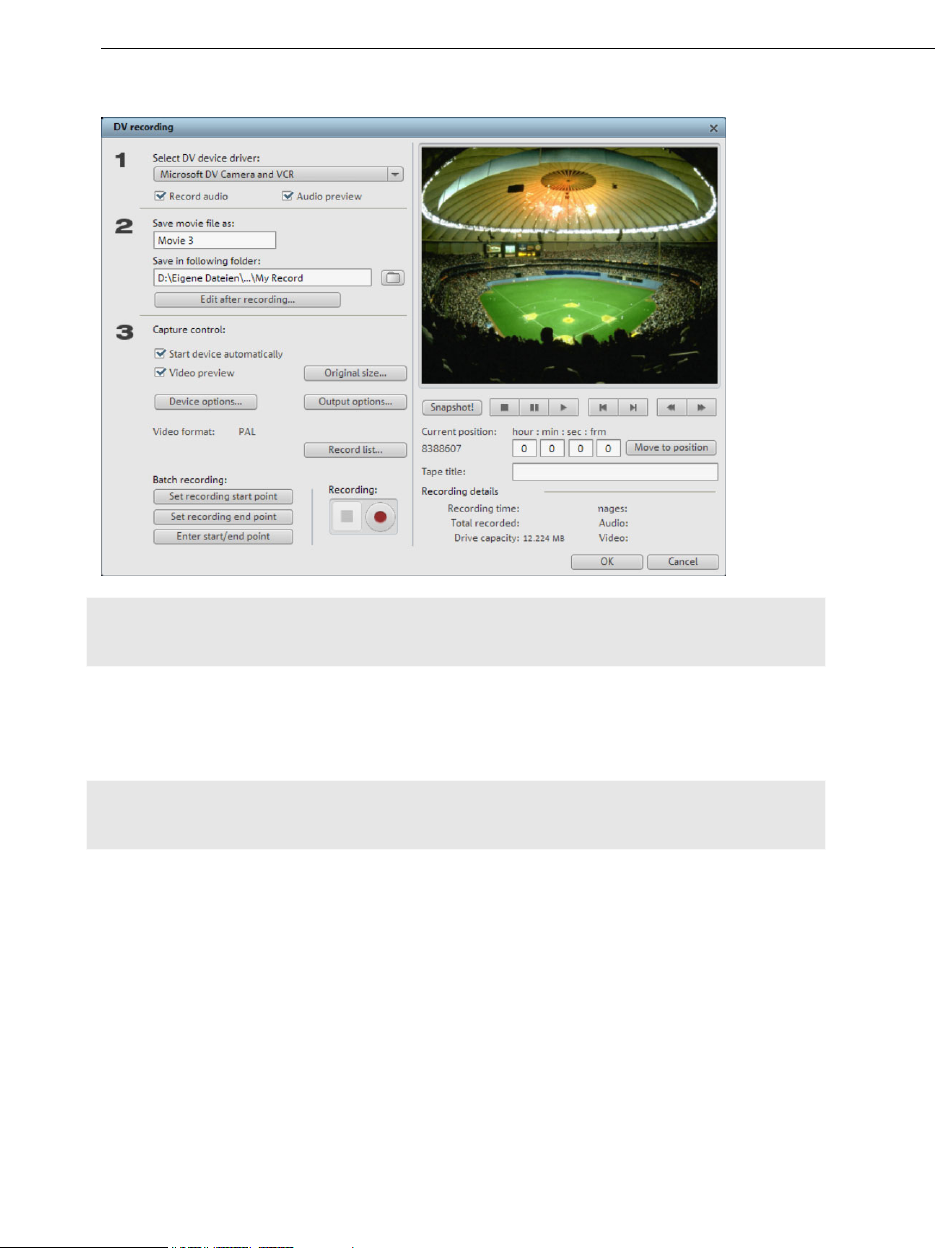
"DV capturing" dialog
Video recording 69
Note: Keep an eye on the available hard drive space before each recording. DV capture
requires approx. 220 MB per minute of video!
Select DV device driver: The device driver for your DV device should be listed here. If
"Audio recording" is deactivated, then only video without sound is recorded. "Audio
preview" activates the audio output of the recording.
Note: The audio preview is deactivated at first, since DV cameras usually include built-in
speakers.
Save video file as/save in following folder: Enter the name of the movie to be recorded.
You can also select the folder where you wish to store your video file. The default recording
directory is set by default, but you can change the Path settings settings under menu item
"File -> Program settings -> Path settings".
Edit after recording: This provides access to the automatic editin
Start device automatically: Starts the DV recorder or DV camera a
g options.
utomatically when the
"Record" button is pressed. This does not function with all digital cards/video devices.
Movie preview: On the preview monitor you can see a preview of your movie.
Original size: This option allows you to preview the video in the original size. To retu
rn to
the dialog use the "Esc" key.
Page 70
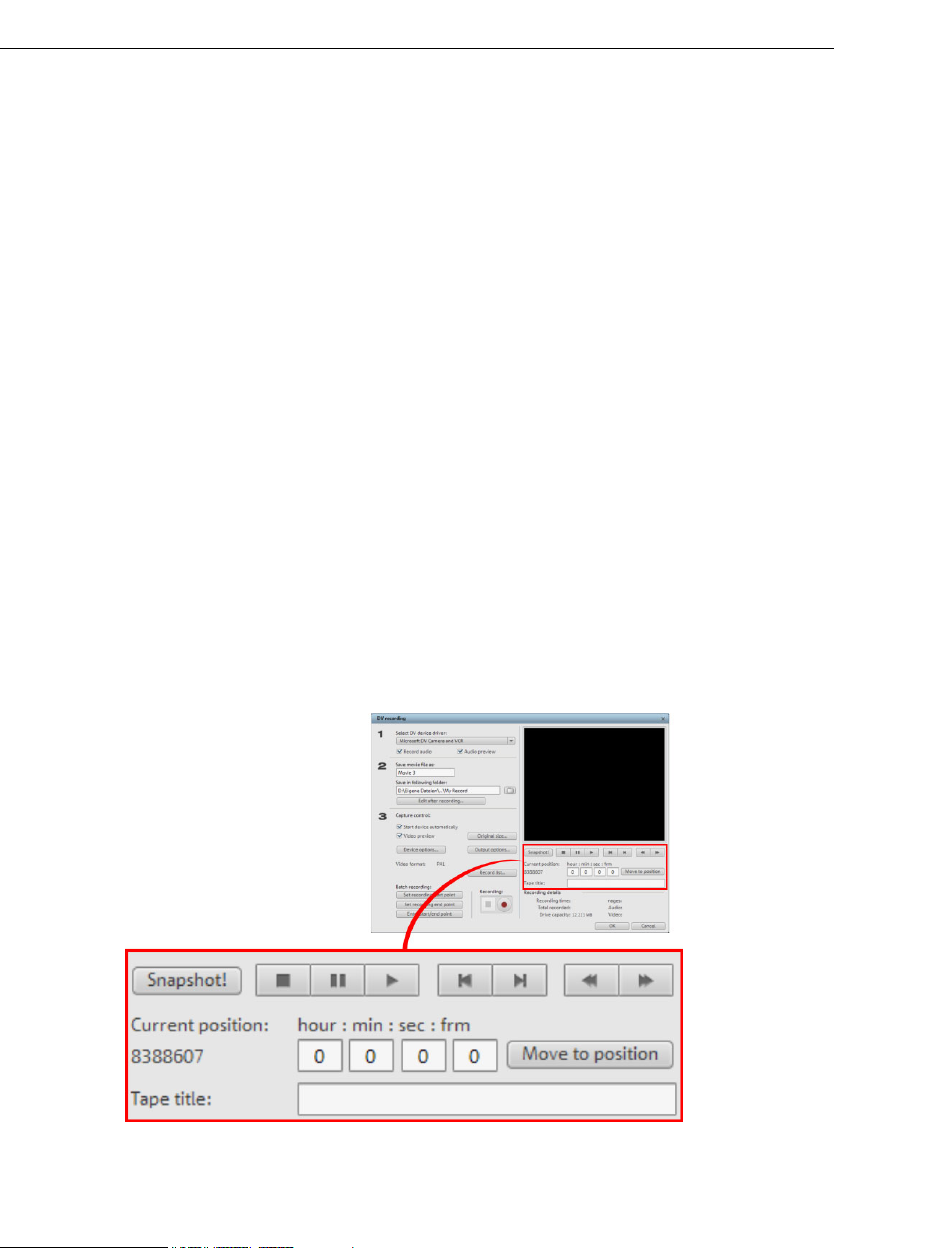
70 Video recording
Automatic capturing: Here the start and end points can be set for the capturing. This
allows you to search the entire video for all captures to be used and list them for planned
batch capture. This is then processed in sequence when the recording starts (via th
button). That way you don't need to record each scene individually. You simply determine
recording time points, and the computer takes care of the rest. To set the start and end
points precisely, click "
Enter start/end point (view page 71)"
Recording list: Use this button to view the available list of already recorded videos and
scheduled recordings. All
R heduled recordings.
ecord: Starts the recording process. Also contains the list of sc
Th capturing).
ese are processed step-by-step (batch
St
op: Stops the recording process.
entries from the list can be selected and deleted.
Snapshot! With the Snapshot! button, you can create a frozen image directly from the
preview monitor. Start the camcorder and watch the preview window. When the image you
want appears, click "Snapshot". Or you can navigate using the remote control to the
position you want, and stop there in
Pause mode. Stopped playback on the DV camera
will not deliver an image! The images are saved in the record directory as graphics files in
the set resolution.
Remote control: Digital camcorders can be controlled remotely. This does not function
with all digital cards/video devices. If your hardware does not support the remote control
function the buttons will not be usable.
e red
The transport buttons required for this are in the DV or HDV recording dialog.
Tape name: Enter a name for your tape here. MAGIX Video Pro X2 requires this name for
the DV logging feature.
Page 71
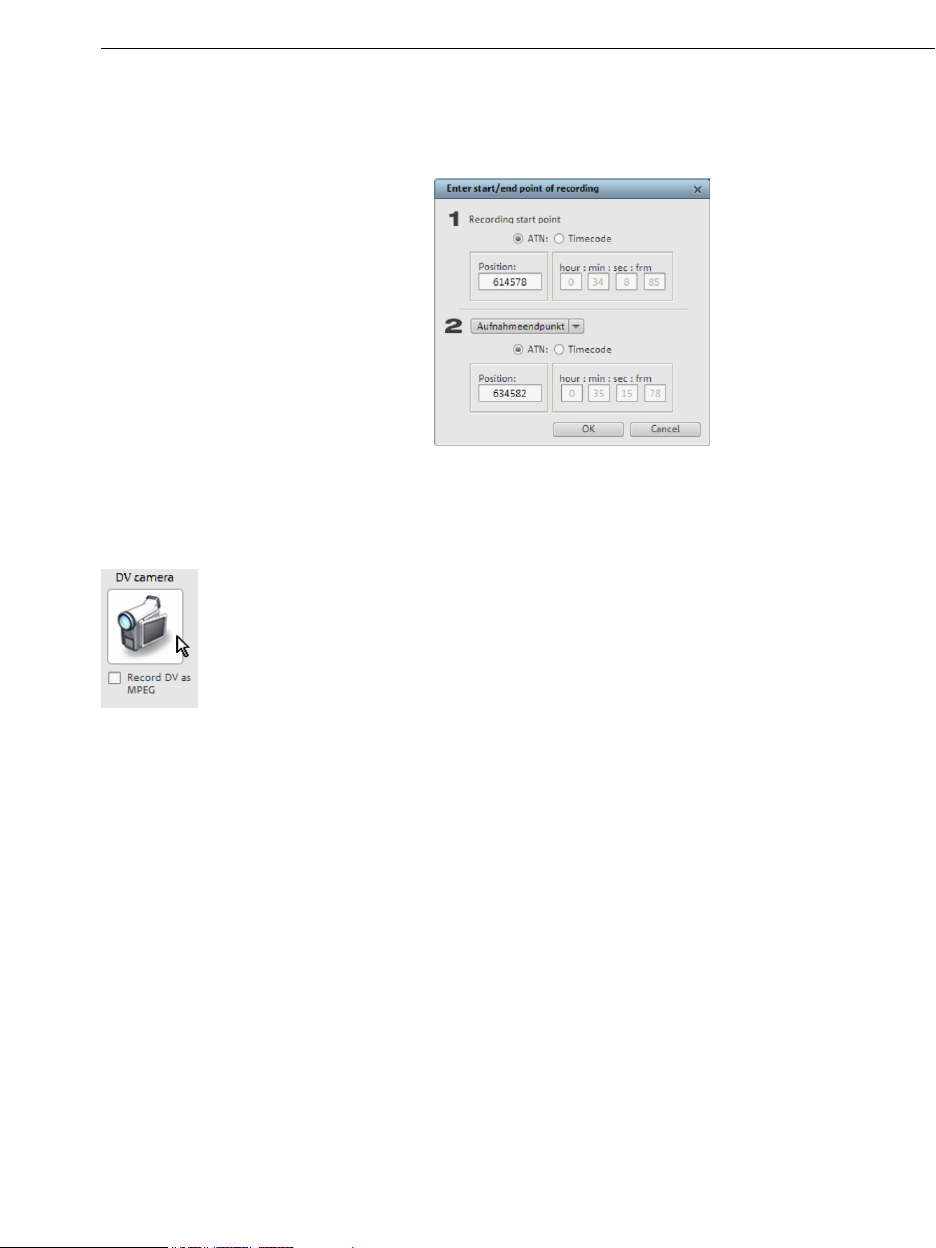
Video recording 71
Recording information: Displays various information about your recordings.
Enter start/end point:
Enter the exact start and end point or
the recording length for a scene.
Both values can be entered as ATN
(absolute track number) or as a
timecode in
hours:minutes:seconds:frames
.
DV as MPEG
The "Recording selection" dialog option allows you to transfer DV recordings directly into
the space-saving MPEG format on the hard disk.
The "Enhance" button presents the MPEG encoder settings
options.
lso burn your DV material directly to disc withYou can a
taking any interme
diate steps.
out
Page 72
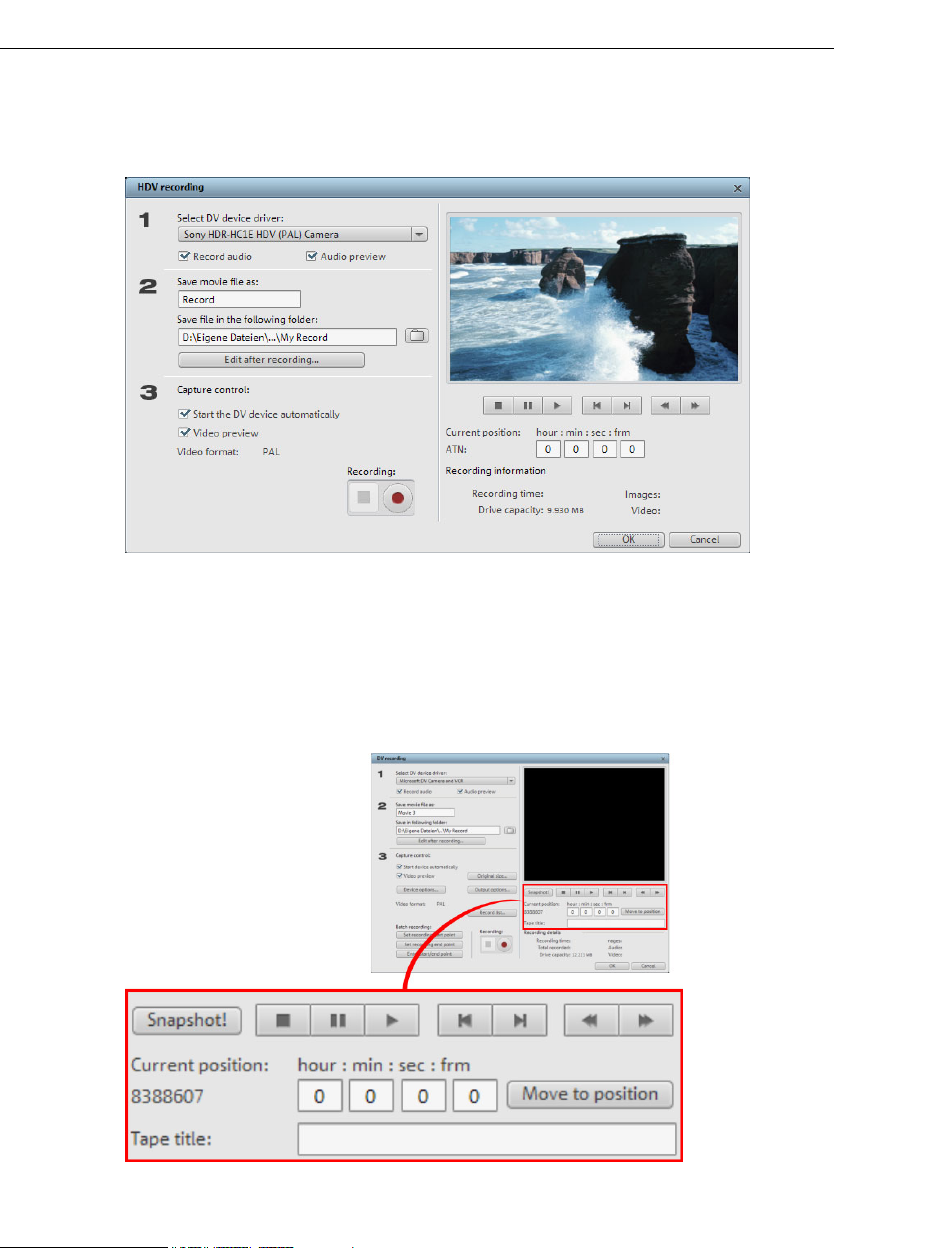
72 Video recording
HDV camera
Use this option to open the "HDV camcorder recording" dialog. To do this, you have to
connect an HDV 1 or HDV 2 camcorder.
The options in this dialog can also be found above in DV recording.
Remote control: Digital camcorders can be controlled remotely. This does not function
with all digital cards/video devices. If your hardware does not support the remote co
function the buttons will not be u
sable.
ntrol
The transport buttons required for this are in the DV or HDV recordin
g dialog.
Page 73

Video recording 73
Batch recording
Set the start and end points for the capture here. This allows you to search the entire video
for all captures to be used and then list them for planned batch capture. This is then
processed in sequence when the recording starts (via the red button). That way, you don't
need to record each scene individually. You simply determine recording time points, a
the computer takes care of the rest. To set the start a
start/end point
(view page 71)".
nd end points precisely, click "
nd
Enter
Recording list: Use this button to view the a
eduled recordings. All entries from the list can be selected and deleted.
sch
vailable list of already recorded videos and
The basis for batch recording is the recording list
in the DV recording, DV to MPEG recording, or
HDV recording's recording dialog. All recordings
listed there are "logged". Recordings for which
the correspondin
the hard disk wi
g video material is no longer on
ll appear as "planned recordings".
Click the red record button to move all video files
back to the hard disk.
Logging
Logging means that MAGIX Video Pro X2 also saves the original position and additional
information (metadata, e.g. scene, take, rating, comments, etc.) about DV video and au
files.
dio
If does not find the corresponding DV and WAV files during the loading of a video, it will
ask that the corresponding DV tape is inserted into the connected camcorder again f
or
automatic scene import.
You no longer have to save DV
time you would like to work on a film again, but do not have the space to keep the ma
AVI and audio files (which can be very large). If at a later
terial
for it on your hard disk, then you can simply delete the bulky DV AVI and audio files.
The basis for the log is the recording list in the DV recording, DV to MPEG recording, or
HDV recording's recording dialog. All recordings listed there are "logged". Recordings for
which the corresponding video material is no longer on the ha
rd disk will appear as
"planned recordings". Click the record button to move all video files back to the hard disk.
Page 74
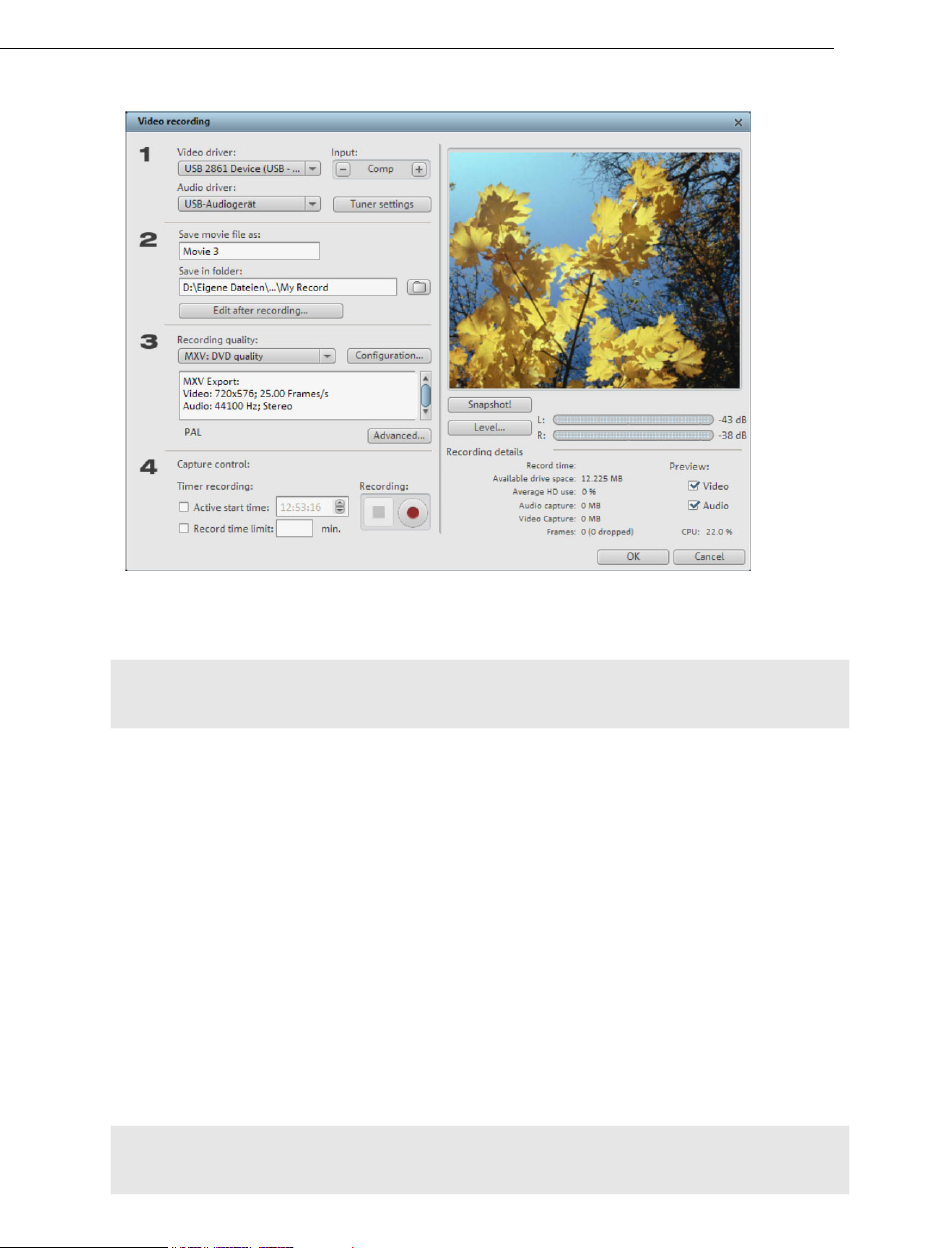
74 Video recording
Analog video recording
Video/Audio driver: Here you can set up the video card or sound card for recording. In
practically every case, the driver software supplied with the hardware must be installed.
Hint: Under "video driver" you will find a "screen capture" entry. You can read about how it
functions in the chapter "Screen (view page 80)".
Input/Tuner settings: If your video capture card supports multiple sources, i.e. your card
also has a TV tuner or multiple inputs (SVHS, composite, etc.), then you can select the
proper recording source and the TV channel to be recorded here.
Save video file as/save in following folder: Enter th
You can also select the folder where you wish to store yo
recording folder is set as default. The loca
settings" under "File -> Program settings -> F
Edit after recording: Use this to access the automatic editing options.
Recording quality: You can select from a variety of preset quality levels from the list. They
are sorted according to picture quality. Use
preset.
Presets displayed with MPEG record directly in MPEG format.
Tip: Use the presets marked MPEG if you want to burn your recordings straight away,
since smart encoding can omit laborious encoding after recording.
tion of this folder can be changed in "Path
olders".
Configuration to fine-tune the quality for the
e name of the movie to be recorded.
ur video file. The standard
Page 75

Video recording 75
Advanced...: Opens the video driver settings dialog (view page 75).
Capture control: Here you'll find the "Red" record and "Stop" buttons; these start and
p record
sto ing.
Tim t time and
er recordings active/time limit: Here you can specify a recording star
length, and thus turn your PC into a fully functioning VCR.
apshot!: With the "Snapshot" button, you can create a still image directly from the
Sn
eview monitor. The images are saved in the recordings folder as graphics files in the
pr
solution you have set.
re
Recording information
available sp
ace on the hard drive, the recorded frames, and the “dropped” frames.
Dropped frames are frames that have been left out because the computer processor is to
slow for the selected
: This shows statistical information such as the recording time,
o
image format and cannot accept all incoming frames.
Preview: Some graphics adapters allow you to reduce the system lead by deactivating the
eo preview. If you hear an "echo", deactivate the audio preview.
vid
dvanced configurations
A in the video capturing dialog
Here you can adjust certain settings for the video recording driver.
These dialog boxes, so-called “property sheets,” come with the video card drivers.
driver-speci
fic performance properties may deviate depending on the cards. We also have
These
a very limited influence on the behavior of these drivers. If you encounter any difficulties,
please contact the video card manufacturer for the la
put: Sets the crossbar of the video card.
In
e crossbar determines which video and audio inp
Th ut signal will be recorded. The
crossbars are connected i tself. In the output field, the
output (for the crossbars) is the
video
n series to the video recording chip i
input for the recording chip (video or audio decoder-
test driver updates.
in) of the video card. In the “Input” field, select the signal source that will be used by the
video card to capture for this input. Many video cards have separate crossbars for audio
and video. If you have a problem, try out the different configur
ations until the right sound
matches the right image.
Composite-in = the normal video input (typically a c
S-video = S-video input (mini-din jack)
SVHS-in = SVHS input (special ca
ble)
Tuner-in = TV signal of the integrated tuner
inch jack)
Page 76
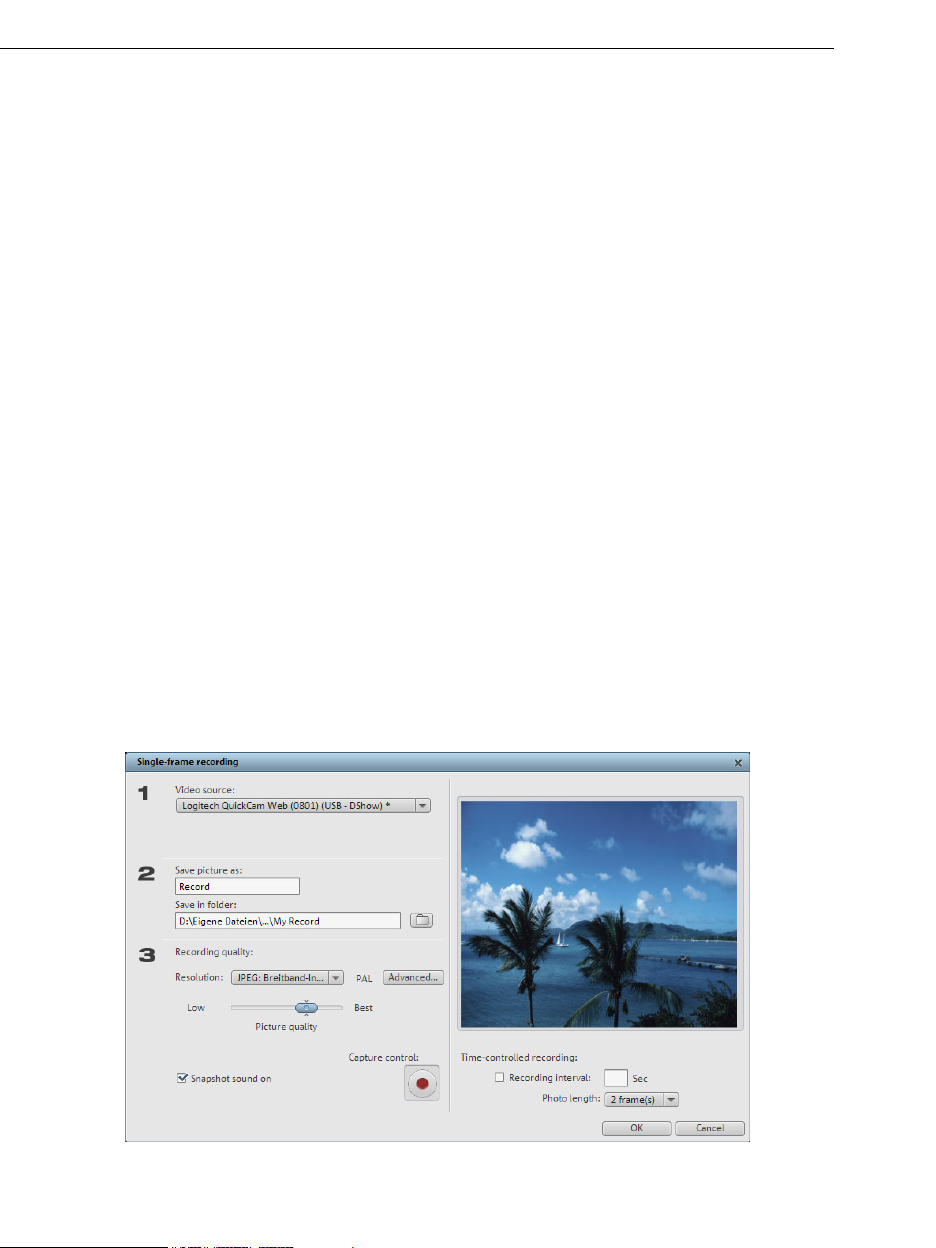
76 Video recording
Imagesetting
Video decoder: If the picture only appears in black & white or it flickers, the video standard
may be set incorrectly. In mainland Europe,
VideoProcAmp: Fine-adjustment of colors, brightness, contrast etc. We recommend
against changing any of the manufacturer’s settings.
PAL_B is used.
Format: Please do not change anything here. The capturing format is set in th
quality" option in the video recording dialog.
Station selection
This option is only available if a TV tuner is integrated into your video card.
e "Recording
Single frame
The single-frame recording function lets you record snapshots directly from the connected
video source. This requires either a video clip compatible with DirectShow, a TV card, or a
USB device such as a webcam.
The time control function allows you to automatically take snapshots. Here are just a few
examples of where it might be used:
• for creating photo stories from videos
• for animated films (stop-moti
• for video surveillance
• or for time-lapse photography
The recorded images are added to the current arrangement.
on animation)
Video source: Sets the video card to be used to take pictures.
Page 77

Video recording 77
How would you like to name the recorded JPEG file?: Enter the title of snap
e about to record. They are saved under this name and numbered conse
ar cutively. You
shots you
can also select the file path for storage.
Resolution: The resolution of the recording is defined here. It corresponds to the resolu
op ng higher
tions offered on the camera. The slider lets you set the image quality. Usi
tion
resolutions results in larger file sizes for each recording; moving the slider in the opposite
direction sets the image quality back to the preset value.
Advanced…: Opens the
video driver settings dialog.
Camera noise during recording: You can make the program play a clicking sound each
time a snapshot is taken.
Recording: The red "Record" button triggers a snapshot or alternatively a series of
recordings when using the time control function.
Time control
Photo length in frames: Specifies how long the photos appear in the slideshow.
Interval: When this function is activated, a series of images is made once the recording has
started. Snapshots are automatically saved and numbered consecutively at a preset time
interval.
For example, if you specify a two-second interval between shots and that each shot be
added at a length of 5 frames to the slideshow, then the end result is a time-lapse
recording at 10x normal speed.
Enhanced single-frame recording dialog settings
You can adjust certain settings for the video recording driver.
These dialog boxes, so-called "property sheets", come with the video card drivers. The
driver-specific features may slightly vary from driver to driver. The MAGIX team has little
direct influence on the performance of the various drivers. If you encounter any difficulties,
then please co
Input: Sets the crossbar switch of the video card. This lets y
signal is used in the recording. The crossbars are connected
ntact the video card manufacturer for the latest driver updates.
ou define what video and audio
in series to the video
recording chip itself.
Output: In the "Output" field, the video output (for the crossbars) is the input for the
recording chip (video or audio decoder in) of the video card. In the "Input" field, you selec
the signal source to be used for this input by the video card during recording.
Composite in = the normal video input (typically a ci
S-VHS in = S-VHS input (speci
al cable)
nch jack)
Tuner in = the TV signal of the built-in tuner
t
Page 78

78 Video recording
Video decoder: If the picture only appears in black & wh
standard may be set incorrectly. PAL_B is used in Ge
ite or it flickers, then the video
rmany and most European countries
(France: SECAM; US/CAN: NTSC).
VideoProcAmp: For fine tuning of colors, brightness, contrast, etc. We recommend
against changing any of the manufacturer's settings.
Format: Do not change anything here! The capture format settings can be changed under
esolution" in the "Recording" dialog box.
"R
Audio
S truments can be easily recorded in MAGIX Video Pro X2 using the
ongs, noises, or ins
audio recording function. A hooked-up microphone or various audio devices (especially a
stereo system) c
Connecting the source for recording
First of all, the source of the audio material must be connected to the sound card input.
ain, there are several possibilities which primarily depend on the type of equipment you
Ag
ve.
ha
you want to record material from a stereo system, then you can use the line-out or AUX
If
t jacks on the back of your amplifier or tape deck. This involves connecting them t
ou o the
und card input (usually red).
so
If your amplifier has no separate output (other than for the speakers), then you can use
nnection intended for headphones for your recordings. In most cases, you will need a
co
ble with two mini-stereo jack
ca s. This type of connection has the advantage of being able
to set the headphone input signal level with a separate volume. As headphone connecti
nerally are not the best, it is advised that you use the line outputs if possible.
ge
an be used as recording sources.
the
ons
hen recording cassettes from a tape deck, you can connect the tap
W e deck's line out
directly to the sound card input.
When recording from vinyl records, you should not connect the record player's output
directly with the sound card because the phono signal needs to be pre-amplified. A more
suitable method would be to use the headphone connection or an external pre-amp
.
If you are recording from a microphone, then please connect the microphone to the
microphone jack on your sound card (usually red).
Adjusting the signal level
Adjusting the signal level to the sound card is also recommend to get the best sound
quality during digital recording.
Once a recording source is connected to the sound card, the "Record" button opens the
recording dialog and starts the recording source.
Page 79

Yo recording
u can now adjust the recording level with the help of the LED display in the
dialog. For this, you must first check off "Show levels".
If
the adjustment is set too high, distortion occurs and the incoming signal must be
re
duced. If you have connected the source through either an amplifier or tape deck output
to
the sound card, you can only reduce the signal level in your sound card’s software mixer
terface. You can access the mixer directly from within the recording dialog via thein
“Recording level” button.
you reduce input sensitivity by using the inputIf fader, the resolution at which the analog
signal is digitized is also reduced. Try to set these automatic controllers to the loudest
so
und level possible!
Th
e maximum setting for an optimal level is the loudest part of the material. The loudest
pa d to be the maximum. The actual recording begins when you press
rt should be adjuste
e "Record" button. At the end of the the recording you will be asked if you want to use
th
the recording. Upon con
free track at the position of the start maker in the arrangement.
"Audio record" dialog
firmation, the newly-recorded material will be placed in the next
Video recording 79
Audio driver: Selects the sound card for the recording.
Save audio file as/ save in the following folder: Here you can select the title of the audio
file you wish to record. You can also select the folder where you wish to store the file.
Recording quality: Sets the sound quality of the recording. I
choose between medium wave radio ("AM tuner"), UKW ("FM Radio"), DAT (Digital Audio
Tape) and CD quality.
n the preset menu you can
Page 80

80 Video recording
Peakmeter (Monitor): Using the peakmeter, you can monitor the level of the incoming
l. Please read more on this in the chapter
signa
rding: This button starts the actual recording.
Reco
: Click this button to stop recording
Stop
"Adjusting levels" (view page 78)
Normalize after recording: With this option activated, your material's volume is raised
er level after recording is completed. In order to achieve good results, you should try
prop to
rd the source as loud as possible without overmodulating it. To do so, refer to the peak
reco
r reader in the recording dialog.
mete
Playback while recording: This option is particularly important for spoken comment
to a
ary,
etc. If activated, the selected movie (or selected scene if recorded in the "Edit" screen) is
played while recording. This acts as orientation for the movie.
Advanced: Use this button to open a window where you can select from special features:
Advanced options
• "Mono" creates a mono recording and requires half of the har
d drive space required for
stereo.
• "Real-time sample rate adjustment" automatically matches the sample rate of a new
to be recorded with the sample rate of
the selected movie sound track.
file
• "Ducking" (reducing the sound volume): To add narration or other sound material to a
video that already has sound volume levels set, activate the option "Automatic reduction
of sound volume of remaining audio tracks". This automatica
lly reduces the volume of
audio objects in the arranger during the recording session ("ducking"). A volume curve
controls the whole process, produces the fading in and out of effects automatically and
guarantees consistent overall volume.
Screen
Use this feature to record everything that moves on your monitor. This process is called
"screen capturing".
• Under "Recording quality", you will find various presets for different applications. You can
either record the entire monitor ("fullscreen"), a frame of variable size (e.g. to film the
Windows Media Player display), or a different video player. Click "Configuration" to make
custom size adjustments.
Hint: Because many video players work with overlay, it is recommended to open each
player before starting the capture! This way switching into "Overlay" mode can be
prevented.
Page 81
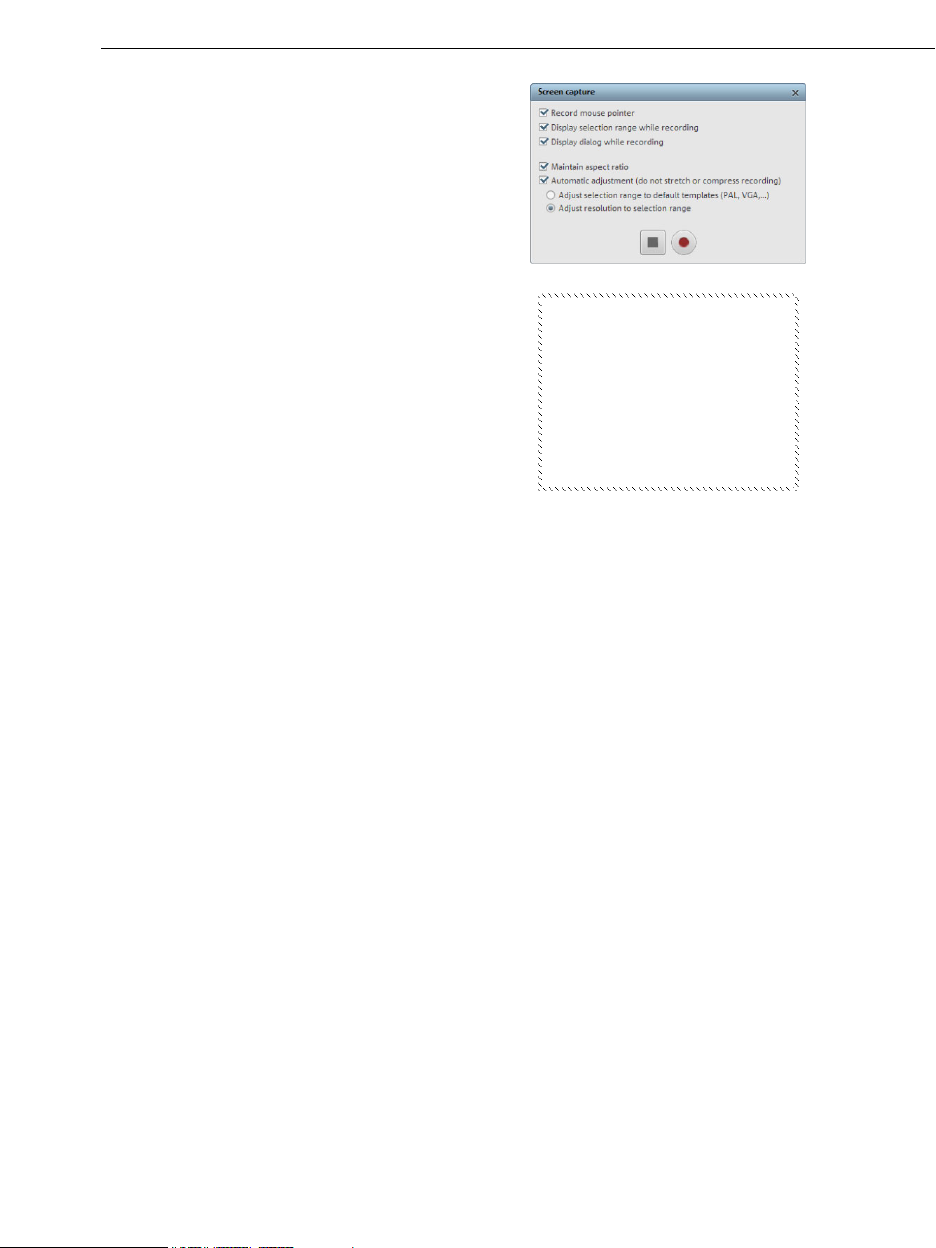
Video recording 81
• Click the "Record" button in the recor
A small dialog with a red record butto
ding dialog.
n, a black
s a frame with dashed stop button as well a
bordering appears. Activate the option "Record
mouse pointer" to record the movements of the
mouse pointer.
• Now select the screen area you wish to record,
i.e. the screen of the video player in which the
video is playing. Drag the frame over the area you
wish to record and adjust its size as required by
dragging the edges and corners.
• The actual recording process can be started by pressing the red "Record" button. The
recording starts; the record symbol appears in the task bar (tray).
• Once the video you wanted to record has come to an end, click on the "Record/Stop"
button to stop the recording. Recording ends and the recording dialog is visible once
again.
Recording AVCHD
This recording is actually not really a recording as such, but rather "only" the transfer o
already c
reated video file and its import into the existing project.
f the
A CHD uded with the camera) to be installed
V requires a special UDF driver (normally incl
before t 't necessary
he DVDs or removable storage can be imported into Windows. This isn
for AVCHD cameras with built-in hard drives. The camera is preset as a drive as soon as
the USB the Media
Pool, and sponding M2TS files can be simply dragged from the list.
cable is connected to the PC. This additional drive is then visible in
the corre
Files with the M2TS extension can easily be dragged down from the Media Pool (above
right). You will be asked during the first import if you want to convert the movi
e into the
MPEG-2 format. You should definately answer this question with "Yes", since only then will
you be able to ed
box "Don't ask me again". The advantage is that you won't have to answer this
singl i
me you import individual files. e t
Switch on hard
mode -> Direct3D hardware acceleration"). This lets you playback multiple tracks
> Video
it your movies in real time. We also recommend you activate the check
query every
ware acceleration, too (press "P -> Display options -> Playback in Arranger -
simultaneously with a modern graphics card (better than ATI Radeon 1300). Another
advantage of converting to MPEG-2 is the op
tion of using "smart encoding". The sound will
be re-encoded to guarantee synchronicity of image and audio. It is currently not possible to
maintain 5.1 sound; thi
s is automatically converted to MPEG stereo.
Page 82
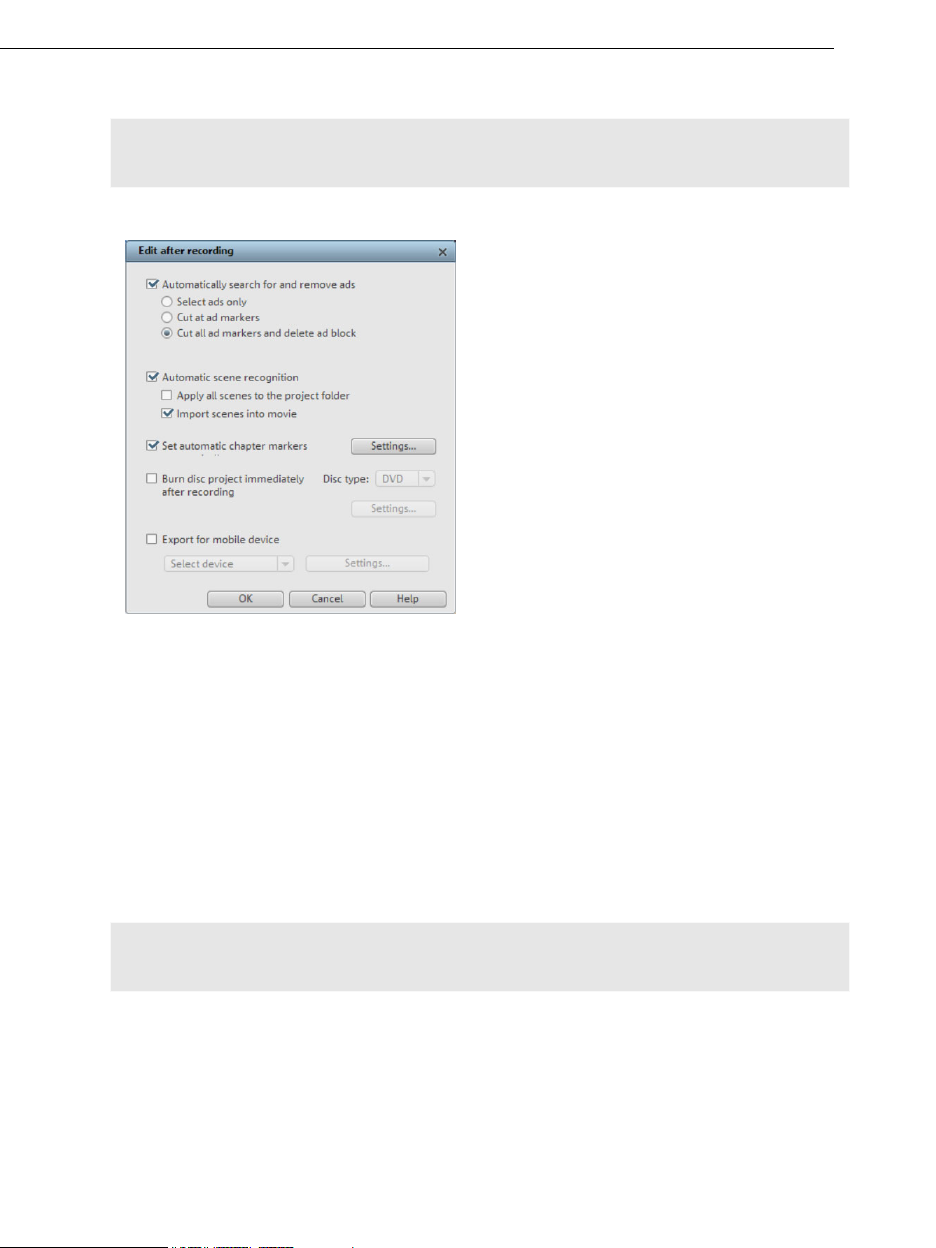
82 Video recording
AVCHD activation details
Attention: For AVCHD support, Dolby Digital Stereo and the MPEG-4 codec must be
activated. To convert AVCHD videos to MPEG-2, the MPEG-2 codec must be activated.
Edit after recording
The "Edit after recording" dialog
can be opened from all recording
alogs.
di
All editing steps from recording to
automatic burning can be carried
out without further user
involvement.
In the "Edit after recording" dialog you can:
• Automatically search for and remove ads. For more on this please read the
"Automatically search for and remov
• Split up the material i
page 85)" section for more on in the P
Set automatic chapter markers. Please read the "
•
(view page 101)" section in
Burn disc immediately: You can use this option to record and burn in a single step.
Simply select the format you would like to burn, insert a suitable blank disc into the drive,
and then press rec
Note: Make sure that the selected recording quality corresponds with the disc type (e.g.
the preset "MPEG DVD" for DVDs)!
If you use your own settings for MPEG encoding (e.g. half image resolution for long-play
DVDs), then make sure that the settings for recording and later for burning are the same so
that no new recording is necessary (Smart encoding).
After recording, the program automatically switches to the "Burn" screen, the burn window
opens, and the disc is burned. The last set layout is used for the menu layout for the DVD.
nto scenes. Please read the "
the "Edit menu" chapter in the PDF manual.
ord.
e ads" section in the PDF manual.
Automatic scene recognition (view
this DF manual.
Set chapter markers automatically
Page 83

Video recording 83
Tip: This function is particularly suitable for burning lengthy disc projects directly to disc,
since you can start recording in the evening and have the finished DVD by morning.
Export for mobile device: The recorded movie is immediately converted into the forma
t of
the selected mobile device and transferred onto the device. The list field contains the
device which has be
en selected in the "
Settings: Opens the export settings (vie
Export video/audio (view page 188)" dialog.
w page 182) for the selected target device.
Hint: If you enter a file name and memory path in the export dialog, then the path is used
but the file name is ignored. For EPG-controlled TV recordings the name of the program is
used instead.
Creating new movies or attaching them
If you record or load multiple movies one after the other, then you will need to decide for
every new film if it should be appended to the previous film or created as a new one.
Th design of the DVD burning selection
e choice you make here is important for the later
menu; movies will be entered into the first level of the menu hierarchy and scenes are
en
tered into the second level. Every movie can also be edited in detail and enriched with
ef
fects, titles, and transitions via the "Edit" screen.
Page 84

84 Insert object into the project
Insert object into the project
Select files in the Media Pool
l selection processes take place in the source monitor. View and edit material before Al
importing it. There's also a preview function for all of the files in the Media Pool.
• Double-click the desired file in the Media Pool which you would like to preview. Image
objects will be displayed immediately, video objects need to be loaded first. A preview is
also provided for special objects like titles or fades.
• Use the playback button in the source monitor to start a preview for a video object.
Audio files and synthesizer objects from the Media Pool can also be previewed via the
•
playback button.
L
oad files
M
edia files can be loaded into the Arranger from the Media Pool in several different ways:
• The fastest way: Drag the desired file from the Media Pool into the desired track. If an
object is alrea
on the next empty track below.
Load several files: If you would like to load several files, hold down the "Ctrl" key while
•
clicking on the entries you would like to use. If you would like to load a sequence of files,
hold the "Shift" key and click the first entry, then on the last. All entries present in
between will be selected. Every file can be moved from the Media Pool to the Arranger
via drag & drop.
Insert via menu command: You can also use the menu commands of the "In
•
modes" button. For more about this, read the section "Insert modes (view page 45)" in
the chapter "Workspaces".
Project folder: If you would like to combine your ma
•
project folder is recommended. It can be used as a sort of clipboard where files that may
be used in the project are sorted ahead of time. This creates a better overview and sav
repetitive, annoy
DVD files (VOB) with mu
MAGIX Video Pro X2 also loads VOB files that contain multiple audio tracks. After the VOB
file loads, simply click the audio object created and select the desired audio track.
dy present at this position, the file is inserted at the desired time position
terial separately, then using the
ing navigation through folders in the Media Pool.
ltiple audio tracks
sert
es
Note: To view and select audio objects in the arrangement, Timeline mode must be active.
oading parts of longer movie files
L
r longer videos, it is recommended to define the areas which should be loaded in
Fo to the
project before importing. An in and an out point is set to define the area for this purpose
oceed as follows:
Pr
• Select a file from the Media Pool by double-clicking it. Play it back using the play button
in the source monitor to indicate the section which you want to use in the project.
.
Page 85

Insert object into the project 85
• Either move the range markers directly by dragging them with the mouse or
set them using the buttons or the shortcuts
I and O. The shortcuts are
especially useful for exact positioning using the shuttle and the jog wheel.
• Left-click on the monitor and drag it to the Arranger. An object will appear on the track
and in the project folder simultaneously which corresponds with the selected area. You
can also drag your selectio
n into the project folder and use it in your project later by
dragging it from the project folder onto the Arranger. The file in the project folder has the
same name in this case as the original file but includes the selected range only.
• You can also drag a file fro
m the Media Pool into the project folder first and then cut it
from there with the help of the source monitor. The in and out points that result are
saved directly when the range is stretched.
• Alternatively, objects can be moved the opposite direction from the Arranger into the
project folder. In c
ase the object should appear in the project folder and in the Arranger,
hold down "Ctrl". This adds all object-associated settings (fades, effects, animations).
This enables differe
nt editing work to be done on an object and then saved in the project
folder for use later.
MPEG-4 import
MPEG -4 files can be loaded from the Media Pool just like other files using drag & drop.
Note: To import and export AVC and MPEG-4 files, the MEPG-4 codec must first be
activated (view page 275). A dialog will open if the codec is required.
Automatic scene detection
Automatic scene recognition can be opened via the "Effects" menu. The scene recognition
function analyzes the film for scene transitions and scans for drastic changes in the
brightness and color distribution within the picture.
Automatically created timestamps from digital vi
device was turned on and off) are also marked as scenes.
deo devices (the points in time at which the
Page 86

86 Insert object into the project
1. First, select "Start" from the "Search scene change" box. The search for possible
scene transitions will begins. If you have a large amount of material, then this may
take a while, but the image analysis has to be done just once for each
results are saved together with the video file.
If the scene recognition is performed again with the same source material, then th
scene transitions found are immediately displayed. If you a
resulting scene partitioning simply repeat and correct where necessary.
re still not happy with the
2. All found scene transitions in the list can be checked in the dialog. Every scene
marker can be selected or deleted. Select a scene transition from the list of found
scene transitions and use the preview images to check whether the found transition i
really a scene change or not.
Tip: This option is helpful, for example, if a camera flash was captured in the source
footage. The flash from the camera would cause a sudden brightness modification even
though there was no actual scene change.
The preview always displays the end of the previous scene and the beginning of the new
scene. If the images do not differ except for the brightness, then the scene may have been
falsely recognized. In this case select
"Delete scene marker".
recording. The
e
s
Via the zoom +/- bu
scene begins or p
You can use the
to detect different scene changes, depending on the settings.
"Action on OK" lets you specify whether the movie should be cut at the selected scene
transition or at all scene transitions and whether the found scenes should be saved as
takes.
ttons you can enlarge the part of the arranger where the selected
revious scene ended.
"Sensitivity" controller to change the sensitivity of the scene recognition
Page 87

Working with objects 87
Working with objects
Select objects
To edit or delete objects using the menus, you must first select them. To do so, simply click
on the object you wish to sele ct. Objects will change color to show that they have been
selected.
When the "Shift" key is pressed, multiple objects are selected. You can open up a rectangle
positioning the mouse over the object, then holding down the mouse button and marking
all objects within the rectangle (”elastic band selection”) by left clicking and dragging.
Any object can be combined with others to make up a group to avoid objects being
unintentionally moved out of relation to each other. Once they are combined,
clicking on
one object of a group will select the entire group. To group or ungroup objects, use the
buttons in the tool bar or the corresponding commands in the "Edit" menu.
Moving objects
Any object selection
ifferent tracks by clicking and holding the left mouse button on the selected objects. After
d
releasing the mouse button the objects appear at the new location.
If the "Shift" key is pressed while moving the object selection, then the object's horiz
time position will be maintained. The object selection can only be moved vertically (up and
down to different tracks).
can be moved (dragged) along the horizontal timeline or vertically into
ontal
Splitting objects
All objects can be split. Each object section then becomes is then split into individu
objects.
• First of all, select the object to be split.
• Position the playback marker at the position where the movie is to
be cut.
• Click on the "Cut" button or select the "Cut" option in the "Edit"
menu.
al
In order to rejoin these split objects at a later stage, simply highlight the individual parts and
select the command "Create group" to group the selected ob jects together.
Edit menu
With a click on the small arrow beside the cut button, you can access
the cut menu. There you will find further relevant commands.
Split
This command cuts a scene at the point wher
way, two free-standing objects are created.
Keyboard shortcut: T
e the playback marker is positioned. This
Page 88
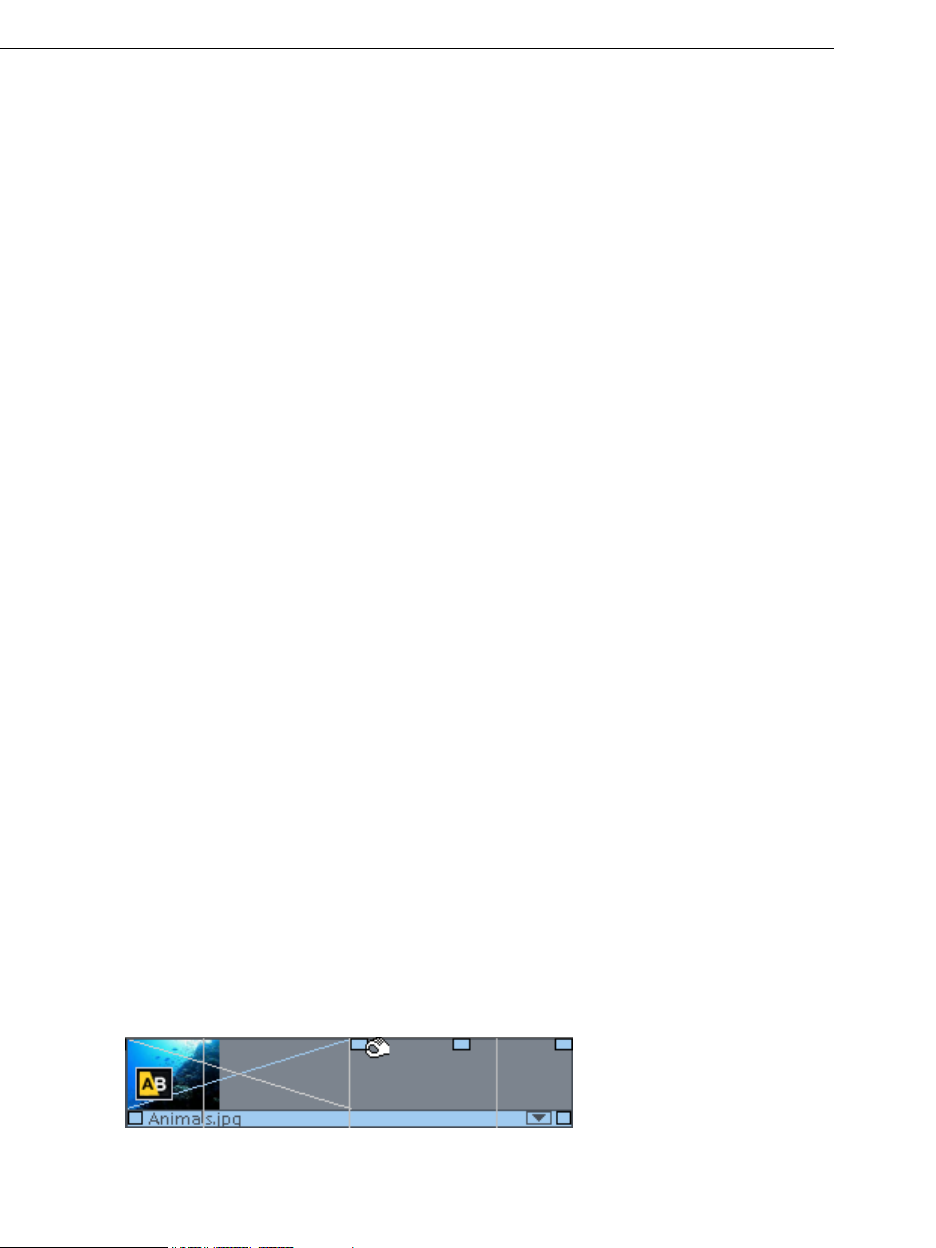
88 Working with objects
Remove start
This command cuts a scene at the point where the playback marker is positioned and
removes the material before the playback marker.
Keyboard shortcut: K
Remove object end
This command cuts a scene at the point where the playback marker is positioned and
removes the material behi
nd the back marker.
Keyboard shortcut: U
Remove scene
If you wan
t to cut a scene out of a movie retroactively, this option automatically moves all
objects, titles, and transitions on all tracks forwards so that no gaps result.
Objects on
other tracks which project into the area of the selected scene will not be moved
automatically; they will remain at the current position.
Keyboard sh
Sp
lit movie
ortcut: Ctrl + Del
This command splits a movie at the point where the playback marker is positioned, making
two separat
e movies. The part before the playback marker will remain in the arranger. The
remaining part will be erased from the current arranger and turned into a new movie, which
can be found in the "Wind
ow" menu.
Keyboard shortcut: Alt + T
Duplicate objects
It is easy to copy objects to create larger arrangements from small au
quickly. Speed up this process by clicking on the object to be copied with the mouse while
holding down the "Ctrl" key. This generates a copy which you can immediately drag to the
desired position.
dio or video loops
Object handles
All objects can be re-sized with the “object handles” on the lower edge. Move the mouse
over one of the lower corners of the object until the mouse pointer becomes a double
arrow. You can now stretch the object as much as you like.
5 "handles": Length, fade, brightness (volume)
Page 89

Working with objects 89
An object can be faded in or out using the handles to the left and right upper corners of the
object. Crossfades between different objects can be created by overlapped position
ing of
objects that are fading in and out. The length of the crossfade can be adjusted with the
.
handles
Using the brightness/volume handle located centrally at the top of the object, adjusts the
volume of audio or MIDI objects, or the brightness of video and image objects. Even if
several objects are playing simultaneously, the volume or brightness of individual objects
can still be altered.
Shrink or interlace videos
Videos can be made smaller, e.g. to show a fo
video. To do this, both videos have to be placed above each other in the arranger.
• Place one video above the other in the tracks.
• Position the foreground video on the track beneath the background video.
Note: Make sure that the mixing effect "Stamp" is active under "Video effects -> Chroma
key".
• Select the foreground video, and in the Media pool under "Effects -> Movement effects",
select the entry "Position/Size" or "Crop/Zoom".
• You can change the image area/size by holding down the mouse button and dragging
the edges of the video in the program monitor. This is also useful for placing the selected
video at the desired position in the program monitor.
For more detailed information, see the section entitled "Movement effects in Media Pool" in
the chapter "
Effects and titles (view page 107)". Nearly all preset effects may be automated
or animated. To animate effects or produce movements, please read the "Animating
(view page 147)" chapter.
objects
reground video in a cut-out of a background
Extract sound from videos
Video with sound material
object and a video object). The two objects automatically form a group.
appears in the arranger on two tracks as two objects (an audio
To edit the video and audio material separately from one another, the objects can be
separated with the
Ungroup (view page 222) function in the "Edit" menu or button in the
arranger. Now you can replace the audio or the video track, or process each file separately.
Rejoin/regroup the tracks with the ”Export arrangement” function.
Save o
bjects separately
You can easily save the object from the Arranger as separate files. Objects contain a
reference to any multimedia file or a special objects (video, sound, visual, etc.) with all
additional properties that an object can have like in
and out point, fade and effects including
effect curves that can be used in MAGIX Video Pro X2.
Page 90

90 Working with objects
In MAGIX Video Pro X2 you can use Takes for various applications.
• You can divide your videos into takes while loading into the Arranger. To do this, first
press the "Media/Film" button. The transport functions of the transport control no longer
apply to the objects in the Arranger but rather to the video file selected in the Media Pool.
• The Extras bu
tton lets you set in and out points for scenes. The selected scene can
subsequently be saved to the Takes directory.
• All scenes found by the automatic scene recognition function can be stored in the Takes
directory. This creates the basis for a quick assembly of found scenes.
• This takes directory may be used in both direction
: either as a source of takes to be
dragged into the Arranger or a destination directory for new scenes. Use the Takes
directory to build complex storyboards: The individual scenes that make up the video are
cut first, before being arranged on the tracks.
Since
• Takes also contain corresponding effects, one can store different variations of the
same movie with different effects (for example, video cleaning) in the Takes
directory. The Takes directory uses very little me
mory in contrast to rendering out the
actual video files!
Video mix
This term refers to mixing various videos while simultaneously playing them. The video
objects to be mixed must be placed one below the other in the arranger so they overlap in
time. Add a special video mix effect to the lower video, which determines the parts that will
be transparent for the upper video. This way, you look from the bottom to the top through
the arranger.
To make a dancer dance
in front of a landscape using the "blue box" effect, the
landscape must be placed on, for example, track 1 and the dancer on track 2 and the "blue
box" effect be activated for the dancer.
Tip: For further details on video effects and adjustments, see the chapter "Video effects
(view page 108)".
Magnetic objects
You can attach a video, picture, or text object to moving picture content of another video.
The "Image object" automatically completes the movement of a picture element from the
film. For example, you could use this method to insert a hat that stays on someone's head
throughout, even if the person hops through the picture. Let's roll:
• Place an image object (e.g. a photo of a hat) on a track below a video with a
corresponding image element (e.g. a walking person). The picture element should have
enough contrast in it (bright-dark difference) and should have a consistent size.
• In the Media Pool under "Effects -> Movement effects -> Position/Position", you can
match the zoom of the image object to the video and then position it precisely (i.e. add
the hat to the person).
• Right click on the image object and select the "Attach to image position in the video".
• In the "Attach to image position in the video" dialog, click on "Change size and position".
Page 91
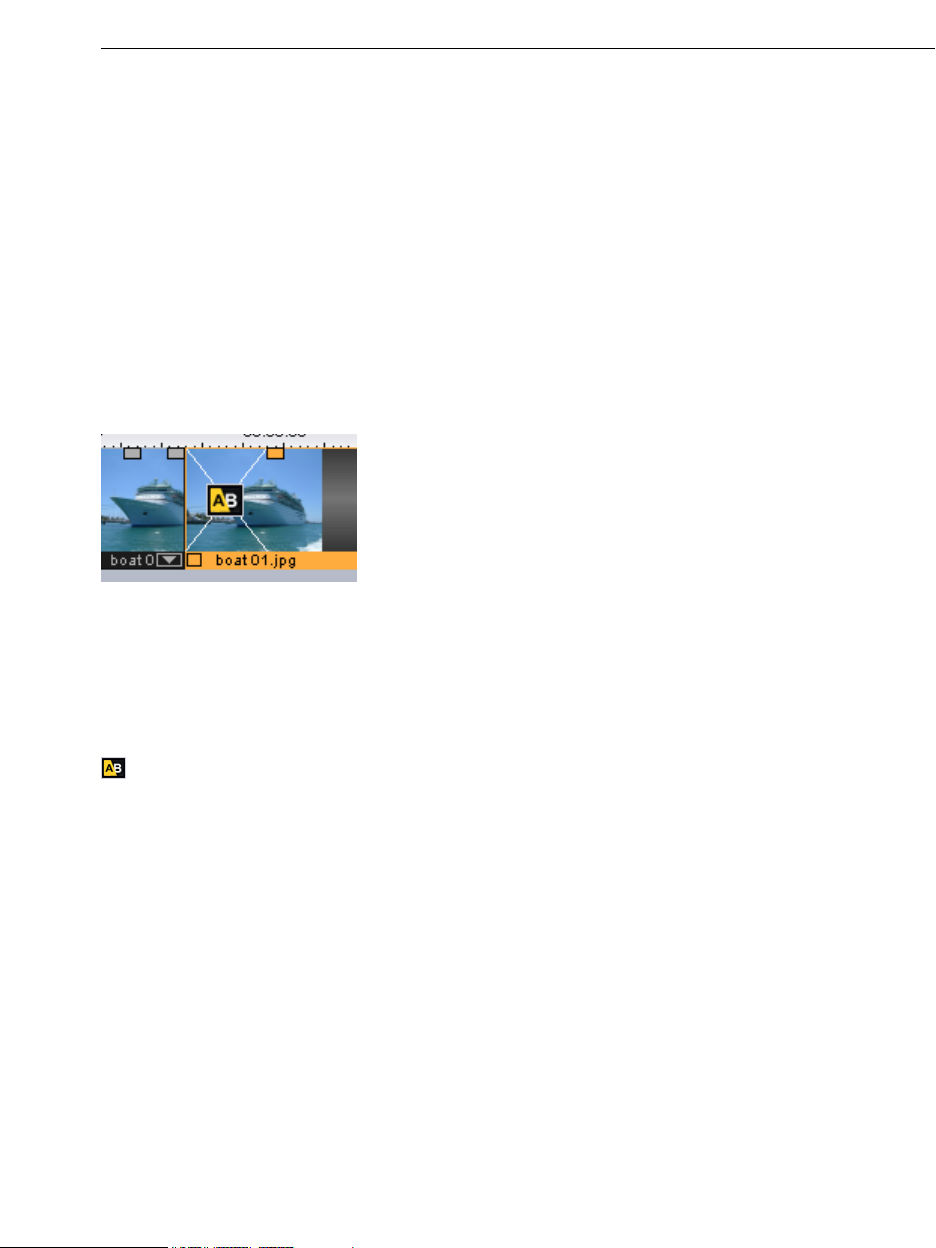
Working with objects 91
• Select an image section in the preview monitor using the mouse which you would like
the image object to follow. This section should have as high a level of contrast as
possible.
• Calculation of the object movement starts automatically.
Transitions (fades)
When importing video files into the arranger, individual objects usually follow directly after
one another. This is called a "hard cut". However, you can make scenes blend or
“transition” into each other.
This means that for the duration of a transition, two objects are shown at once and can be
mixed "faded" together in different ways. You
transition directory.
Simple crossfade
A simple transition can be created in the arranger by dragging one object over another. A
crossfade will be automatically created. During this standard transition, the brightness of
both objects is incre e. th
ration of the crossfade is displayed in the arranger by white crossing lines. You can
du
adjust the length of the crossfade by dragging the upper
the second object to the left or to the right.
ased, i. e first clip fades out while the second clip fades in. The
will find numerous blends in the Media Pool’s
handle (See "Object handles") of
To select a different fade click on the transition symbol displayed when an
object is selected.
The fade menu opens. The transition icon will change, depending on your selection.
Fades from the Media Pool
To open the fade directory, click the "Fade" button; double clicking enables a preview of
the fade in the preview monitor.
Simply drag the desired fade preset onto the border between the two objects. Only when
the mouse pointer with the transition preset is placed over a scene change will it turn into
an object symbol. The object at the back will be shifted to the front to accommodate the
transition.
The length of a transition is decided by you, so if a transition is shortened, it means that the
resulting effect is speeded up.
Page 92

92 Working with objects
Some transitions ca
fade symbol in the timelin
n be adjusted even more exactly. To do so, click the corresponding
e or in the storyboard and select "Settings". An object's fade
symbol in the Media Pool can represent an entire group of different effects.
The alpha fades (in the directory: iris, objects, random, etc.) are actually pre-produced
black and white videos combined with the alpha keying effect.
Note: Use transitions economically! Most professional movies or TV shows use hard cuts
as the rule and transitions less frequently. Videos appear unprofessional and too ornate if
fade effects are added to every change of scene.
Custom fades with Alpha-keying
Alpha keying extends the range of transition effects used in MAGIX Video Pro X2 to
produce black & white m
create such a video from any video material (also color) by exporting it as a transition
ovie transitions or selected color fade-ins and fade-outs. You can
(File -
> Export movie -> Export as transition).
The loaded movie is then exported as a black and white video in mxv format and
the fade directory. Afterwards, it will be available in the Media Pool and the fade menu
stored in
.
3D transitions
General options
3D power effects offer exciting and var
ied opportunities for creating transitions between
two videos. You will find the 3D effects in the Media Pool’s transitions directory.
To display the 3D fades as smoothly as possible, the pro
gram uses the accelerator features
of your graphics adaptor. 3D functions can be used with both software standards: Direct3D
and OpenGL. These standards are variably supported by the respective graphics car
drivers. For this reason, you can switch between di
fferent fade settings for each standard.
d
Settings
In the transition settings you can a
djust the look and reaction of the 3D transitions. To do
so, click the corresponding fade symbol in the timeline or in the storyboard and select
"Settings".
The following options are then available to you:
Anti-aliasing: An undesirable ste
p effect is usually created at the borders of 3D objects.
Anti-aliasing reduces this effect, but also requires more computer power. This setting
applies globally for all 3D fades. Switching anti-aliasing for a 3D transitions therefore
ensures that this setting is applied to all other 3D tran
Mirror X/Y: This option lets you influence the movement curve of the 3D objects
transitions. The "X axis mirror" option mirrors the movement of the object
option "Y axis mirror" mirrors the movement of the object
Rendering: Determin h s
e whic oftware standard (see above) you would like to use to render
sitions
vertically
within the
horizontally. The
(along the Y axis).
the 3D objects, i.e. OpenGL or Direct3D. Both modes use the hardware functions of the
Page 93

Working with objects 93
graphics card to
both in performa
To use Direct3D, you have to have DirectX9.0a installed. OpenGL requires an OpenGL1.1
driver.
This setting applies globally t
D transition therefore ensures th sitions also use this setting.
Hardware acceleration de
card increases the performance multiple times over; however, it may lead to problems on
some systems. If error
deactivate hardware ac
To do this, select the “ he options
“Hardware acceleration for 3D effects”. To apply these changes, you will need to restart the
program.
Troubleshooting
Problem: The 3D transition display in the video monitor is sluggish and jittery.
Solution: The performance of the 3D power effect
adapter's CPU power. To achieve a smoother display you can deactivate anti-aliasing in the
3D transitions settings dialog, or you can choose a lower resolution for your screen.
Furthermore, you should ensure that you have the latest driver for your graphics card
installed. During export or burning to disc, transitions will be dis
render the 3D transition. Nevertheless, they can produce different results,
nce as well as in the final look of the transitions.
o all 3D transitions. Switching between the render modes of a
at all other 3D tran3
activation: Hardware-accelerated rendering on the graphics
s should occur in connection with the 3D transitions, you can
celeration for calculating 3D transitions.
Program settings” item from the file menu and deactivate t
s is dependent on your graphics
played fluidly in any case.
Problem: The screen remains black or displays errors during 3D transitions.
Solution: The 3D transitions use hardware-accelerated rendering on your graphics card to
calculate the image. This can lead to compatibility problems on certain systems. Ple
ensure that you have the latest driver for your graphics card installed. In certain
circumstances, this may also fix the switchover between the render modes (in the settings
dialog of the transitions) or solve the problem by deactivating anti-aliasing.
If there are still problems, howeve
Refer to “Deactivating hardware acceleration” for more info.
Problem: A warning that there is insufficient graphics card memory for rendering the
transition is displayed when exporting or burning a slideshow containing 3D transitions.
Solution: The vid
the desired resolution. Select a lower resolution (e.g. 720 x 576) in the export dialog. If th
problem persists, deactivate the hardware acceleration as described in the section
“Deactivating hardware acceleration”.
Problem: Only a crossfade is displayed when
displayed that insufficient graphics card memory is available
eo memory on your graphics card is insufficient to render the 3D effect at
r, you can deactivate hardware acceleration completely.
previewing a 3D transition. A warning is
ase
e
Page 94

94 Working with objects
Solution: The video memory of your graphics card is insufficient to render the 3D effect at
the desired resolution. Right click the video monitor and then select a lower resolution in
“Resolution presets”. If the problem persists, try deactivating hardware acceleration as
described above.
Problem: Only a crossfade is displayed when previewing a 3D transition. A warning is
displayed that the 3D transition may not be displayed correctly.
Solution: Deactivate hardware acceleration; see "Deactivating hardware acceleration".
3D series
The 3D series are a further d
evelopment of
3D transitions (view page 92), whereby the
transitions are thematically sorted. For instance, you can make photos pop up and
disappear on a notice board or make it look as if the photos were hanging on the walls of a
gallery.
There are several options to load 3D series for photos or scene transitions:
• Click the "Fades -> 3D -> 3D series" bu
series and drag it onto the first scene or image transition where the 3D transiti
tton in the Media Pool. Select the desired 3D
on should
start.
• In the transitions menu between two scenes choose the option "3D
series". Click on the desired 3D series to select it.
You can select how many of the subsequent fades should be replaced by the 3D series in
the dialog.
S
cene overview
The "Scene overview" mode is a special view that improves manageability and
categorization of scenes. All scenes are listed one after the other (in multiple lines, like i
te inserted.
xt program) and can be copied, cut, moved, deleted and
n a
In the "Scene overview" mode, there are no start, play or end markers. The scene being
played back has a frame ar
ound it.
Page 95

Working with objects 95
Zoom fader
This slider specifies how large the photos will appear in the storyboard
. The smaller the
scenes, the more of them you'll be able to fit on screen.
Maximize: Use this button to maximize the scene overview to
fullscreen.
Grid and snap
The time of the arrangement is displayed by the horizontal course of the tracks. To
structure this course, a timeli
ne with a grid has been positioned at the top above the first
track.
A grid
is also displayed in the arranger area. The raster ensures that the objects always
"snap" can be positioned precisely according to the beat. Two
to certain points so that they
consecutive objects will seamlessly snap together even if they are on different tracks. This
avoids undesired gaps or overlaps.
Search for and remove ads
The "Ad killer" feature can be used to automatically locate and remove commercials in
recorded TV programs.
How it works: First, characteristics typical of commercials are located, and then th
e entire
section including the ads is edited and removed. This is particularly effective in movies
broadcast in 16:9 widescreen format since there are two visible black borders at the top
and bottom. The borders disappear when ads are shown, so the
ad killer detects this when
they disappear and edits the movie at these positions. Using the button "Get black value"
you can click on the b ars in the monitor a
lack b nd thus set the color shade in order to
Page 96

96 Trim Objects
improve detection. A further characteristic typical for commercials is raising (maximizing) the
volume.
Specify in this dialog wh
You also have various sear and display options.
Keyboard sh
ortcut: Shift + C
ether you want to cut the ad block immediately or highlight it first.
ch
Trim Objects
Trimming provides exact placement of object borders or transitions. MAGIX Video Pro X2
has two different trimmers, and these can be opened using the context menu for a video
image object.
General advice for operating both trim editors
Play functions: The trim window contains its own play functions that allow the object to be
played individually or in relation to the arrangement.
• The right play button plays the arrangement normally. Note: Replays can sometimes
appear shaky because the processor may be overworked, and some frames may be left
out.
• The middle play button plays the arrangement "frame-by-frame", which means no frames
are left out, but that the replay may be slower.
• The left play button renders material before playing. This method ensures a smoother
playback.
The start marker in the timeline is reset when the rewind and fast-forward functions are
activated, allowi
ng for complete control of transitions between two videos.
or
Increments: A click on the +/- buttons in both trim editors places the handle or the
within an object exactly into a frame. With the "Ctrl" key you can increase the frame
frames/sec per mouse click).
material
rate ( 5
Page 97

Trim Objects 97
Trimmer for individual objects
A schematic display of the selected object and its handles can b
trimming window.
Fade in/out (4, 5): These buttons adjust the upper fade handles of an object.
Object content (3): Here you can move the video material to be played without changing
e object length.
th
e found in the center of the
Position (2):
First frame/End fade-in (7): Toggles the left monitor between the first frame of the object
and the end of the transition.
Start fade-out/Last Frame (8): Toggles the right monitor between the start of the
transition and the last frame of the object.
Left/right arrow buttons (1, 6): Here you can adjust the lower object handles.
Next object/cut (9, 10): The buttons below and to the right skip to the next/previous
object and/or cut in the arranger. These buttons make it easy to move and trim objects in
the arrangement without having to leave the trimmer.
Keyboard shortcut: Q
Moves the object on the track.
Page 98
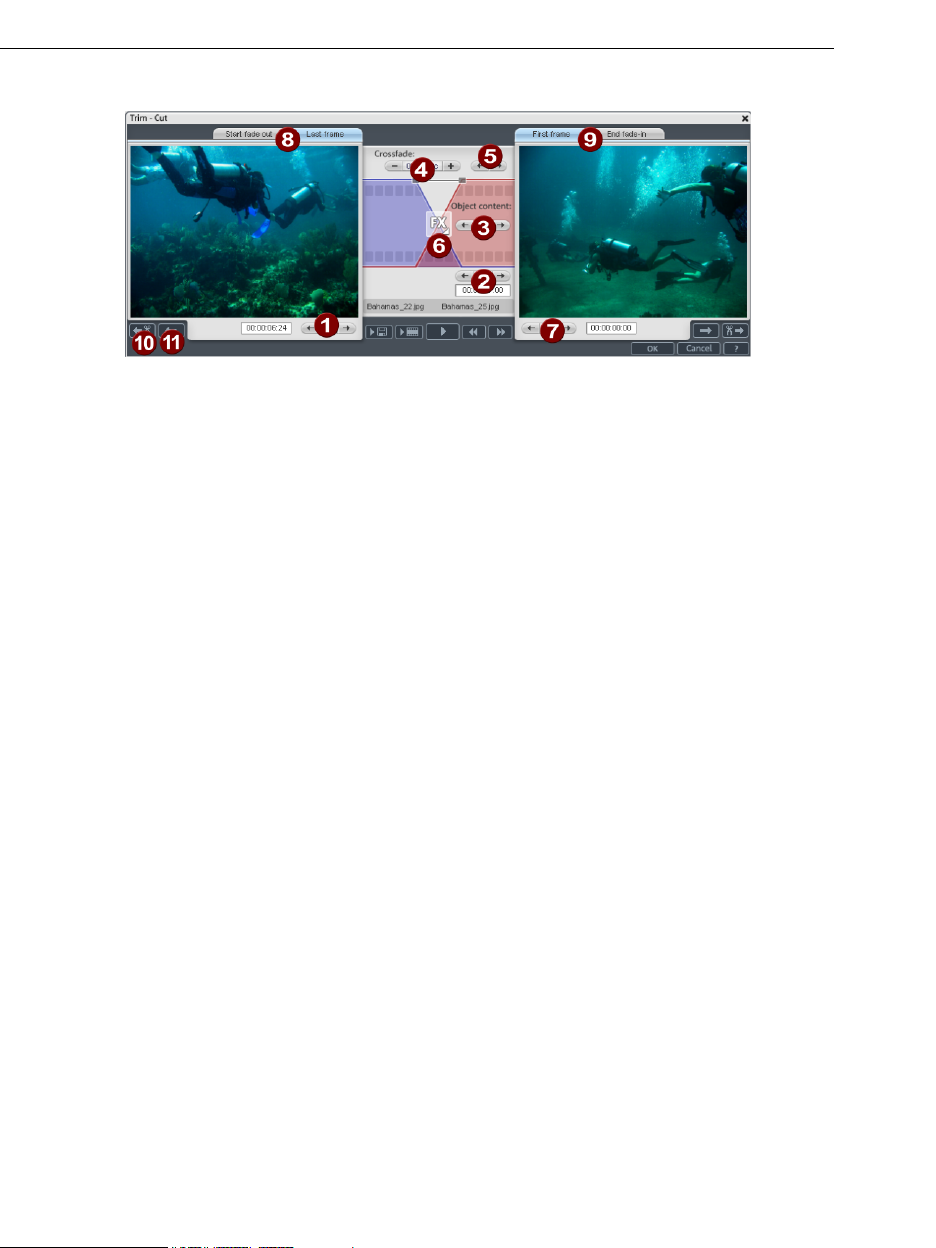
98 Trim Objects
Cut trimmer
A schematic display of the selected transition and its handles can be found at the center of
the trimming window.
Left arrow buttons (1): These buttons move the last frame of the first object while
adjusting the second. The length of the transition remains. The display indicates the relative
change in comparison with the starting situation when the trimmer was opened.
Position (2): Moves the second object. The length of the transition is changed. Th
corresponds with shifting an object in the arranger.
Object content (3): Moves the movie under the second object. The length of the object
and the object itself are not changed.
Crossfade (4): Changes the transition’s length between both objec
of equal length. The length can be numerically entered.
Middle arrow buttons (5): Shifts the existing transition. Both objects remain in their
positions, but the transition’s center p
T ns
ra ition (6): Displays the type of transition. A mouse click opens a popup window from
which a transition.
you can select
Right arrow buttons (7): Move the first fram
transition remains. Only the length of the second object changes.
Start fade-out/Last frame (8): Switches the le
and the last frame of the object.
First frame/End fade-in (9): Switches the right monitor between the first frame of the
following object and the end of the transition.
Next cut (10)/Next object (11): The buttons below and to the right skip to the
next/previous object and/or cut in the arranger. These buttons make it easy to move and
trim cuts in the arrangement without having to leave the trimmer.
oint moves.
e of the second object. The first object and the
ft monitor between the start of the transition
ts. The objects remain
is
Keyboard shortcut: N
Page 99

Markers 99
Markers
MAGIX Video Pro X2 also allows you to set various types of markers within your project.
The Lock button lets you lock all markers (jump
markers, chapter markers) against accidental
moving or deleting.
Playback marker
The playback marker indicates the point from which the material –
either the arrangement or a selected file from the Media Pool – will be
played back. There is a playback marker below each preview monitor
and an additional one above the timeline in the arranger.
The playback marker is displayed as a red triangle below the monitors. In the arranger it is
displayed as a red triangle.
In order to move the playback marker, simply double click on the desired area below the
monitor. Alternatively, you can click on the playback marker and move it by dragging it with
the mouse. While being moved, the current image will appear on the monitor, letting you
see exactly where in the material you are located.
The playback marker in the video monitor can also be moved by clicking on the lower
section of the time scale in the arranger. The playback marker will also be moved on the
program monitor, as both markers are coupled to each other.
The exact position of t
below the corresponding monitor. There, you can change the displayed values
(Hour:Minute:Second:Frame) per mouse click to reach a certain point in time. Simply
the desired value and the playback marker will jump to the corresponding position.
Tip: In the "Playback" tab under "File -> Settings -> Program", you can set whether
repeatedly pressing the space bar resets the playback marker to the current position or
moves it to the original position.
he playback marker can be seen in the time display at the top left,
enter
Set project marker
The menu provides the option of placing a project marker (view page 224) at the current
playback location. These provide a way to mark certain segments or events of interest in
the project, etc.
After selecting the menu, a dialog for entering the name of the marker to be created will
open. The first 10 project markers may be selected using the number keys 1-0 (0 accesses
th 1
e 0th marker). This allows you to jump to a particular position of a longer video
immediately, without scrolling and searching.
Page 100
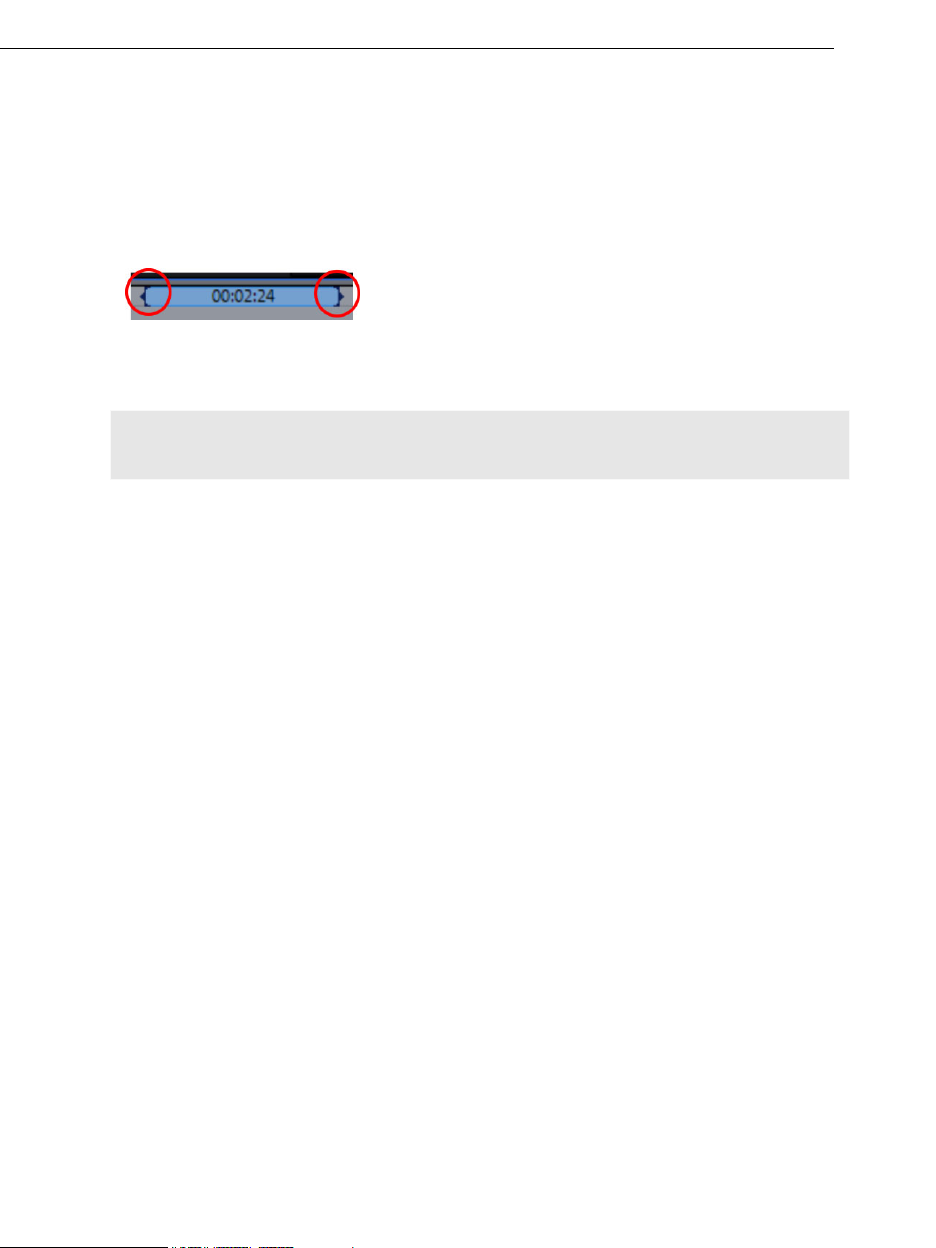
100 Markers
Project markers can be deleted or renamed at any time via the context menu. They do not
have any direct effect on the results of your work, but they can be very helpful.
Ranges (in and out points)
Range markers are the "in points" (range start)
certain range for playback that can be viewed
the bottom of the corresponding monitor.
To t point (range start), and an out point is visible
he left, you can see an in
(range end) to the right
Hint: The value between both markers shows the length of the selected area according to
the pattern Hours:Minutes:Seconds:Frames.
Ranges in the video monitor
There are various options for changing the playback area and the in/out points.
• Set the playback marker at the desired position and press "Set range start" or "Set range
end" underneath th
• Click on one of the markers below the monitor and move it to the desired position b
dragging it.
li
• C ck one of the markers in the upper-most bar in the arranger and drag it.
• Right clicking on the bar moves the out point to the position of the mouse cursor. The
ar
ea grows or shrinks in size correspondingly. Left clicking moves the in point, whereby
the area size stays constant (out point is moved as we
• You can adjust the position of the entire range by clicking the blue bar between the
markers and moving it by dragging while holding down "Crtl".
and "out points" (range end). They mark a
by pressing the "Playback range" button at
e monitor to set the in and out points.
y
ll).
Keyboard shortcut:
Set the start of the rang
e (in point) at the position of the playback marker: "I"
Set the end of the range (out point) at the position of the playback marker: "O"
Range markers in the source monitor
In/Out points are set in the source monitor in the following way:
• Set the playback marker at the desired position and press "Set range start" or "Set range
end" underneath the monitor to set the in and out points.
• Click on one of the markers below the monitor and move it to the desired position by
dragging it.
• You can adjust the position of the entire range by clicking the blue bar between the
markers and moving it by dragging.
For the exact functions of the r
Logging (view page 84)".
"
ange markers in the source monitor, please read the section
 Loading...