

Xantrex TR1512-120-60, TR2412-120-60, TR2424-120-60, TR3624-120-60, TR1524-120-60 Installation Manual
...Page 1
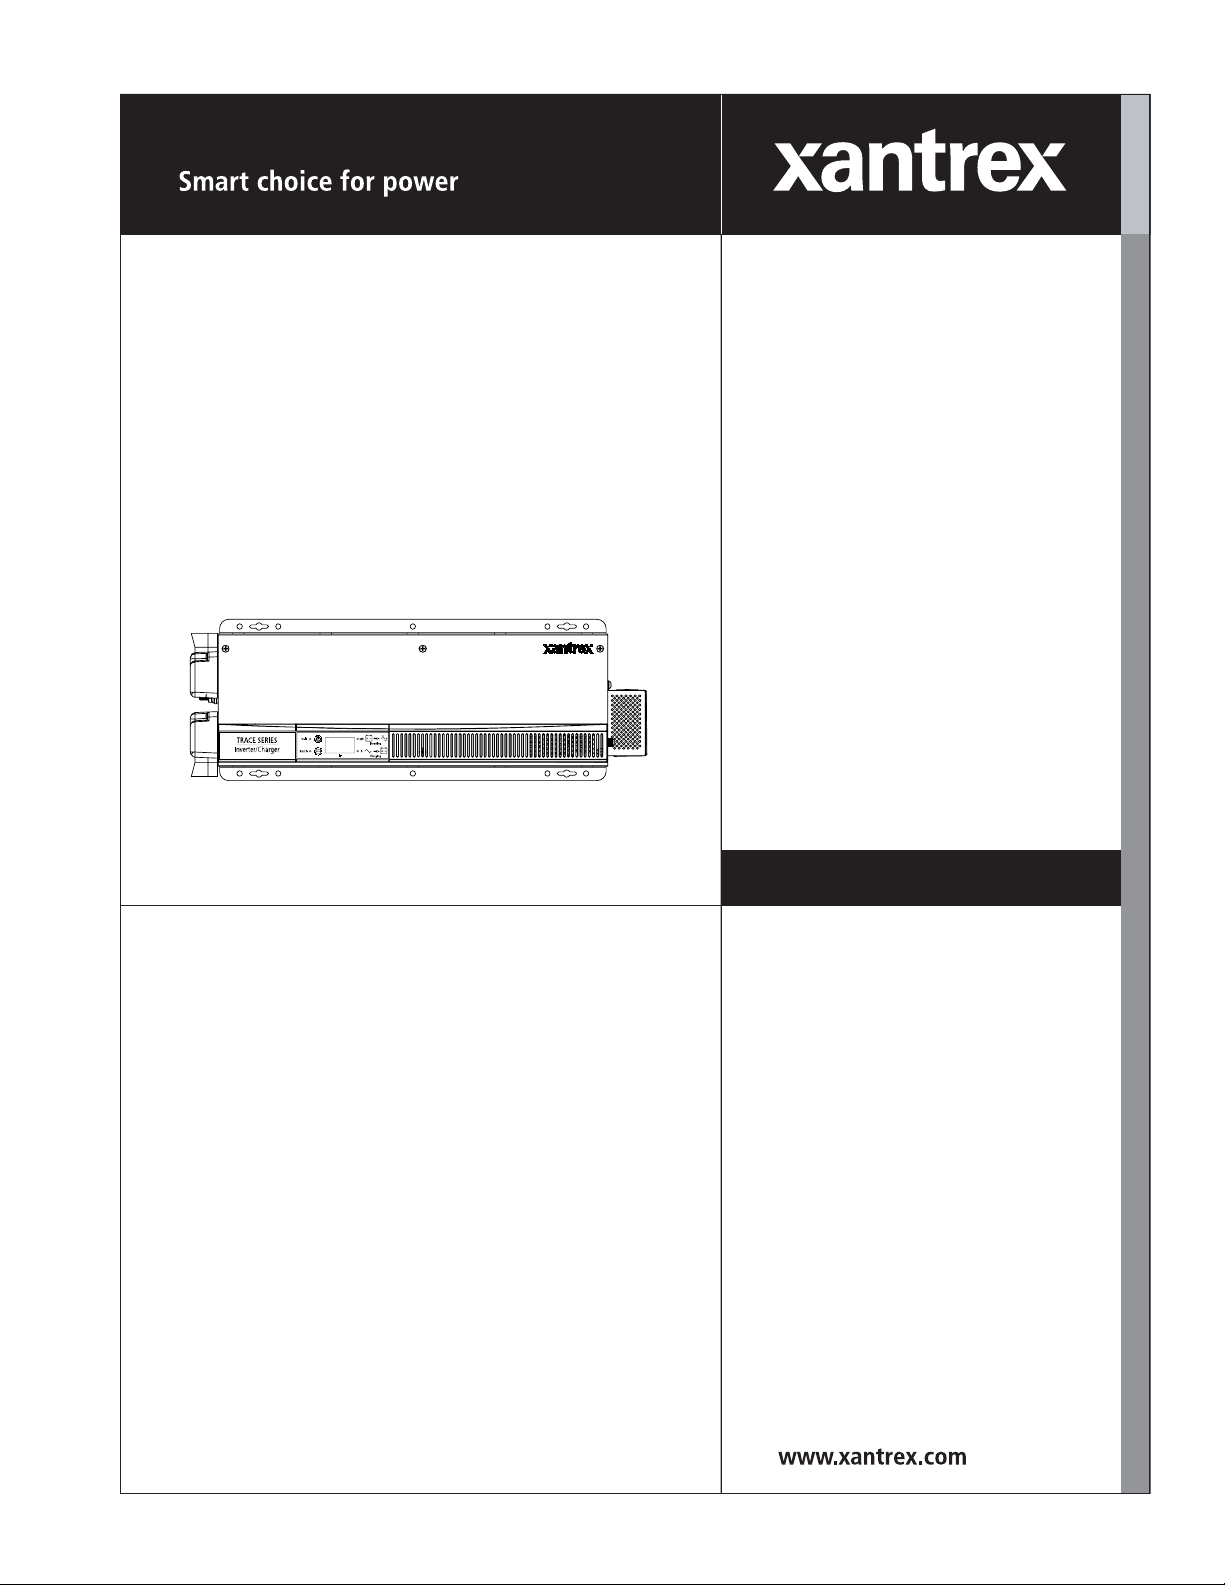
Trace Series
http://www.wholesalesolar.com/inverters.html
http://www.wholesalesolar.com/inverters.html
TR1512-120-60
TR2412-120-60
TR1524-120-60
TR2424-120-60
TR3624-120-60
TR1512-230-50
TR1524-230-50
TR2424-230-50
Installation Manual
Inverter/Charger
Page 2

http://www.wholesalesolar.com/inverters.html
http://www.wholesalesolar.com/inverters.html
Page 3

Trace Seri es Inverter/Charger
http://www.wholesalesolar.com/inverters.html
http://www.wholesalesolar.com/inverters.html
Installation Manual
This manual for use by qualified installers only
Page 4

About Xantrex
http://www.wholesalesolar.com/inverters.html
http://www.wholesalesolar.com/inverters.html
Xantrex Technology Inc. is a world-leading supplier of advanced power electronics and controls with products from small
mobile units to utility-scale systems for wind, solar, batteries, fuel cells, microturbines, and backup power applications in
both grid-connected and stand-alone systems. Xantrex products include inverters, battery chargers, programmable power
supplies, and variable speed drives that convert, supply, control, clean, and distribute electrical power.
Trademarks
Trace Series Inverter/Charger is a trademark of Xantrex International. Xantrex is a registered trademark of Xantrex
International.
Other trademarks, registered trademarks, and product names are the property of their respective owners and are used
herein for identification purposes only.
Notice of Copyright
Trace Series Inverter/Charger Installation Manual © December 2007 Xantrex International. All rights reserved.
Exclusion for Documentation
UNLESS SPECIFICALLY AGREED TO IN WRITING, XANTREX TECHNOLOGY INC. (“XANTREX”)
(
A) MAKES NO WARRANTY AS TO THE ACCURACY, SUFFICIENCY OR SUITABILITY OF ANY TECHNICAL OR OTHER
INFORMATION PROVIDED IN ITS MANUALS OR OTHER DOCUMENTATION.
(
B) ASSUMES NO RESPONSIBILITY OR LIABILITY FOR LOSSES, DAMAGES, COSTS OR EXPENSES, WHETHER SPECIAL, DIRECT,
INDIRECT, CONSEQUENTIAL OR INCIDENTAL, WHICH MIGHT ARISE OUT OF THE USE OF SUCH INFORMATION. THE USE OF
ANY SUCH INFORMATION WILL BE ENTIRELY AT THE USER’S RISK; AND
(C) REMINDS YOU THAT IF THIS MANUAL IS IN ANY LANGUAGE OTHER THAN ENGLISH, ALTHOUGH STEPS HAVE BEEN
TAKEN TO MAINTAIN THE ACCURACY OF THE TRANSLATION, THE ACCURACY CANNOT BE GUARANTEED. APPROVED
X
ANTREX CONTENT IS CONTAINED WITH THE ENGLISH LANGUAGE VERSION WHICH IS POSTED AT WWW.XANTREX.COM.
Date and Revision
December 2007 Revision A
Part Number
975-0367-01-01
Product Number
TR1512-120-60, TR2412-120-60, TR1524-120-60, TR2424-120-60, TR3624-120-60, TR1512-230-50, TR1524-230-50,
TR2424-230-50
Contac t Information
Telephone: 1 800 670 0707 (toll free North America)
Fax: 1 800 994 7828 (toll free North America)
Email: customerservice@xantrex.com
Web: www.xantrex.com
1 408 987 6030 (direct)
1 360 925 5143 (direct)
Page 5

About This Manual
http://www.wholesalesolar.com/inverters.html
http://www.wholesalesolar.com/inverters.html
Purpose
The purpose of this Installation Manual is to provide explanations and procedures
for installing the Trace Series Inverter/Charger.
Scope
The Manual provides safety guidelines, detailed planning and setup information,
and procedures for installing the inverter. It does not provide details about
particular brands of batteries. You need to consult individual battery
manufacturers for this information.
Audience
The Manual is intended for use only by qualified installers when installing the
Trace Series Inverter/Charger. Installers must be certified technicians or
electricians as this manual may not contain all required details and information
necessary for a safe and code compliant installation.
Organization
This Manual is organized into two chapters and one appendix.
Chapter 1, “Planning” contains information to pre-plan your installation of the
Trace Series Inverter/Charger.
Chapter 2, “Installation” contains information about how to plan for and install
the Trace Series Inverter/Charger.
Appendix A, “Specifications” contains information about the electrical,
environmental and regulatory specifications of the Trace Series Inverter/Charger.
975-0367-01-01 iii
This manual for use by qualified installers only
Page 6
About This Manual
http://www.wholesalesolar.com/inverters.html
http://www.wholesalesolar.com/inverters.html
Conventions Used
The following conventions are used in this guide.
WARNING
Warnings identify conditions or practices that could result in personal injury or loss of life
CAUTION
Cautions identify conditions or practices that could result in damage to the unit or other
equipment.
Important:
serious as a caution or warning.
Model Numbering
This Manual contains information for eight models of the Trace Series Inverter/
Charger.
Within this Manual, if information applies to all models of the Trace Series
Inverter/Charger then they will be referred to as the Trace Series. If information
only applies to select models then the model number will be referenced as shown
in the table below. Make sure you know which model Trace Series Inverter/
Charger you have purchased.
Model Number Input Voltage Power
TR1512-120-60 120 Vac 1500 VA 12 Volt 60 Hz
TR2412-120-60 120 Vac 2400 VA 12 Volt 60 Hz
TR1524-120-60 120 Vac 1500 VA 24 Volt 60 Hz
TR2424-120-60 120 Vac 2400 VA 24 Volt 60 Hz
TR3624-120-60 120 Vac 3600 VA 24 Volt 60 Hz
These notes describe things which are important for you to know, but not as
Battery Bank
Operating Voltage Frequency
iv 975-0367-01-01
TR1512-230-50 230 Vac 1500 VA 12 Volt 50 Hz
TR1524-230-50 230 Vac 1500 VA 24 Volt 50 Hz
TR2424-230-50 230 Vac 2400 VA 24 Volt 50 Hz
This manual for use by qualified installers only
Page 7
Abbreviations and Acronyms
http://www.wholesalesolar.com/inverters.html
http://www.wholesalesolar.com/inverters.html
AC Alternating Current
ASC Authorized Service Center
COM Communications Port
DC Direct Current
PV Photovoltaic
RE Renewable Energy
RMA Return Material Authorization
Trace Series Trace Series Inverter/Charger
Related Information
You can find more information about Xantrex Technology Inc. as well as its
products and services at www.xantrex.com.
About This Manual
975-0367-01-01 v
This manual for use by qualified installers only
Page 8

vi
http://www.wholesalesolar.com/inverters.html
http://www.wholesalesolar.com/inverters.html
Page 9
IMPORTANT SAFETY INSTRUCTIONS
http://www.wholesalesolar.com/inverters.html
http://www.wholesalesolar.com/inverters.html
SAVE THESE INSTRUCTIONS
THIS MANUAL CONTAINS IMPORTANT
INSTRUCTIONS THAT SHALL BE FOLLOWED
DURING INSTALLATION OF ALL TRACE
ERIES INVERTER/CHARGER MODELS.
S
WARNING: Limitations on use
The Trace Series is not intended for use in connection with life support systems or other
medical equipment or devices.
General
1. Before installing and using the Trace Series Inverter/Charger, read all
instructions and cautionary markings on the Trace Series Inverter/Charger and
all appropriate sections of this guide and the Trace Series Inverter/Charger
Operation Manual (Part #: 975-0391-01-01). Be sure to read all instructions
and cautionary markings for any equipment attached to this unit.
2. This unit is designed for indoor use only. Do not expose the Trace Series
Inverter/Charger to rain, snow, or spray.
3. To reduce risk of fire hazard, do not cover or obstruct the ventilation
openings. Do not install the Trace Series Inverter/Charger in a zero-clearance
compartment. Overheating may result.
4. Transformerless battery chargers are not to be used with this product family
due to the possible overheating and damage to the charger.
5. Use only attachments recommended or sold by the manufacturer. Doing
otherwise may result in a risk of fire, electric shock, or injury to persons.
6. To avoid a risk of fire and electric shock, make sure that existing wiring is in
good condition and that wire is not undersized. Do not operate the Trace
Series Inverter/Charger with damaged or substandard wiring.
7. Do not operate the Trace Series Inverter/Charger if it has received a sharp
blow, been dropped, or otherwise damaged in any way. If the Trace Series
Inverter/Charger is damaged, see the Warranty section.
975-0367-01-01 vii
This manual for use by qualified installers only
Page 10
S
http://www.wholesalesolar.com/inverters.html
http://www.wholesalesolar.com/inverters.html
afety
8. Do not disassemble the Trace Series Inverter/Charger. It contains no userserviceable parts. See Warranty for instructions on obtaining service.
Attempting to service the Trace Series Inverter/Charger yourself will void
your warranty and may result in a risk of electrical shock or fire. Internal
capacitors remain charged after all power is disconnected.
9. The Trace Series contains more than one live circuit (batteries and AC line).
Power may be present at more than one source or from more than one
location. To reduce the risk of electrical shock, disconnect both AC and DC
power from the Trace Series Inverter/Charger before attempting any
maintenance or cleaning or working on any circuits connected to the Trace
Series Inverter/Charger. Turning off controls will not reduce this risk.
10. Use insulated tools to reduce the chance of short-circuits when installing or
working with the inverter, the batteries, or a PV array.
11. Several diagrams contained within this manual are basic in nature and are
included only to depict different installation options. All details may not be
shown, and as such, local electrical codes must still be referenced.
Wiring Requirements
1. The Trace Series is designed to be permanently connected to the AC and DC
electrical systems. Xantrex recommends that all wiring be done by a certified
technician or electrician to ensure compliance with the local and national
electrical codes relevant to your installation. It is the responsibility of the
installer to ensure that the installation of the Trace Series complies with all
relevant electrical codes.
2. All wiring methods and materials shall be in accordance with local electrical
codes. When sizing conductors and conduits interfacing to the Trace Series,
both shall be in accordance with all state and local code requirements.
3. This product is intended to be installed as part of a permanently grounded
electrical system. This is the single point earth ground for the inverter system.
4. Use copper conductors only with insulation rated for 90°C (or higher).
5. The grounds on the Trace Series are marked with this symbol:
6. The AC voltage and current on the Trace Series is marked with this symbol:
WARNING Fire Hazard:
Do not install 120 volt AC stand-alone inverters onto 120/240 volt AC multi-branch
circuit wiring. This could pose a fire hazard due to an overloaded neutral return wire in
this configuration. See the Application Note titled “Multi-wire Branch Circuit Issues” on
the Xantrex website for additional information and possible solutions.
viii 975-0367-01-01
This manual for use by qualified installers only
Page 11
Explo sive Gas Precautio ns
http://www.wholesalesolar.com/inverters.html
http://www.wholesalesolar.com/inverters.html
WARNING: Explosion Hazard
Working in the vicinity of lead-acid batteries is dangerous. Batteries generate
explosive gases during normal operation. Therefore, you must read this guide and
follow the instructions exactly before installing or using your Trace Series
Inverter/Charger.
1. This equipment contains components which tend to produce arcs or sparks. To
prevent fire or explosion, do not install the Trace Series Inverter/Charger in
compartments containing batteries or flammable materials, or in locations that
require ignition-protected equipment. This includes any space containing
gasoline-powered machinery, fuel tanks, as well as joints, fittings, or other
connections between components of the fuel system.
2. To reduce the risk of battery explosion, follow these instructions and those
published by the battery manufacturer and the manufacturer of the equipment
in which the battery is installed.
S
afety
Precautions When Working With Batteries
WARNING: Explosion or Fire Hazard
Follow all instructions published by the battery manufacturer and the
manufacturer of the equipment in which the battery is installed.
1. Make sure the area around the battery is well ventilated.
2. Never smoke or allow a spark or flame near the engine or batteries.
3. Use caution to reduce the risk of dropping a metal tool on the battery. It could
spark or short circuit the battery or other electrical parts and could cause an
explosion.
4. Remove all metal items, like rings, bracelets, and watches when working with
lead-acid batteries. Lead-acid batteries produce a short circuit current high
enough to weld metal to skin, causing a severe burn.
5. Have someone within range of your voice or close enough to come to your aid
when you work near a lead-acid battery.
6. Have plenty of fresh water and soap nearby in case battery acid contacts skin,
clothing, or eyes.
7. Wear complete eye protection and clothing protection. Avoid touching your
eyes while working near batteries.
975-0367-01-01 ix
This manual for use by qualified installers only
Page 12

S
http://www.wholesalesolar.com/inverters.html
http://www.wholesalesolar.com/inverters.html
afety
Regul atory
FCC Information
for the User
8. If battery acid contacts skin or clothing, wash immediately with soap and
water. If acid enters your eye, immediately flood it with running cold water
for at least twenty minutes and get medical attention immediately.
9. If you need to remove a battery, always remove the grounded terminal from
the battery first. Make sure all accessories are off so you don’t cause a spark.
10. Always use identical types of batteries.
11. Never install old or untested batteries. Check each battery’s date code or label
to ensure age and type.
12. Batteries are temperature sensitive. For optimum performance, they should be
installed in a stable temperature environment.
13. Always recycle old batteries. Contact your local recycling center for proper
disposal information.
The Trace Series Inverter/Charger is CSA Certified to appropriate US and
Canadian standards. The 230 Vac/50 Hz models have been marked with the CE
designation for European countries. See “Safety and Electromagnetic
Compatibility Specifications” on page A–4 for more detailed information.
The Trace Series Inverter/Charger is intended to be used for residential or
commercial applications. Do NOT use this unit for applications for which it is not
listed (i.e., land vehicles or marine craft). It may not comply with the safety code
requirements or could possibly present other operational or safety hazards.
The Trace Series Inverter/Charger has been tested and found to comply with the
limits for a Class B digital device, pursuant to part 15 of the FCC Rules. These
limits are designed to provide reasonable protection against harmful interference
when the equipment is operated in a residential environment. This equipment
generates, uses and can radiate radio frequency energy and, if not installed and
used in accordance with this Installation Manual, may cause harmful interference
to radio communications. However, there is no guarantee that interference will not
occur in a particular installation. If this equipment does cause harmful
interference to radio or television reception, which can be determined by turning
the equipment on and off, the user is encouraged to try to correct the interference
by one or more of the following measures:
• Reorient or relocate the receiving antenna
• Increase the separation between the equipment and the receiver
• Connect the equipment into a circuit different from that which the receiver is
connected
x 975-0367-01-01
Consult the dealer where the equipment was purchased or an experienced radio/
TV technician for help.
This manual for use by qualified installers only
Page 13

Contents
http://www.wholesalesolar.com/inverters.html
http://www.wholesalesolar.com/inverters.html
IMPORTANT SAFETY INSTRUCTIONS
1
Planning
Unpacking and Inspection- - - - - - - - - - - - - - - - - - - - - - - - - - - - - - - - - - - - - - - - - - - - - - - - - 1–2
Pre-installation Planning- - - - - - - - - - - - - - - - - - - - - - - - - - - - - - - - - - - - - - - - - - - - - - - - - - 1–3
Location - - - - - - - - - - - - - - - - - - - - - - - - - - - - - - - - - - - - - - - - - - - - - - - - - - - - - - - - - - 1–3
Mounting - - - - - - - - - - - - - - - - - - - - - - - - - - - - - - - - - - - - - - - - - - - - - - - - - - - - - - - - - 1–4
Ventilation - - - - - - - - - - - - - - - - - - - - - - - - - - - - - - - - - - - - - - - - - - - - - - - - - - - - - - - - 1–4
Tools Required - - - - - - - - - - - - - - - - - - - - - - - - - - - - - - - - - - - - - - - - - - - - - - - - - - - - - 1–4
Hardware/Materials Required - - - - - - - - - - - - - - - - - - - - - - - - - - - - - - - - - - - - - - - - - - - - 1–5
Wiring Considerations - - - - - - - - - - - - - - - - - - - - - - - - - - - - - - - - - - - - - - - - - - - - - - - - 1–5
Grounding Considerations - - - - - - - - - - - - - - - - - - - - - - - - - - - - - - - - - - - - - - - - - - - - - - 1–6
AC Grounding - - - - - - - - - - - - - - - - - - - - - - - - - - - - - - - - - - - - - - - - - - - - - - - - - - - 1–6
DC Grounding - - - - - - - - - - - - - - - - - - - - - - - - - - - - - - - - - - - - - - - - - - - - - - - - - - - 1–6
Wire Routing - - - - - - - - - - - - - - - - - - - - - - - - - - - - - - - - - - - - - - - - - - - - - - - - - - - - - - - 1–6
Electrical Panels and Circuit Breaker Requirements - - - - - - - - - - - - - - - - - - - - - - - - - - - - - 1–7
AC Distribution Panel (Sub-Panel) - - - - - - - - - - - - - - - - - - - - - - - - - - - - - - - - - - - - - 1–7
DC Disconnect - - - - - - - - - - - - - - - - - - - - - - - - - - - - - - - - - - - - - - - - - - - - - - - - - - - 1–7
Battery Considerations - - - - - - - - - - - - - - - - - - - - - - - - - - - - - - - - - - - - - - - - - - - - - - - - 1–7
Battery Location - - - - - - - - - - - - - - - - - - - - - - - - - - - - - - - - - - - - - - - - - - - - - - - - - - 1–7
Battery Temperature - - - - - - - - - - - - - - - - - - - - - - - - - - - - - - - - - - - - - - - - - - - - - - - 1–8
Basic Configurations - - - - - - - - - - - - - - - - - - - - - - - - - - - - - - - - - - - - - - - - - - - - - - - - - 1–9
Generators - - - - - - - - - - - - - - - - - - - - - - - - - - - - - - - - - - - - - - - - - - - - - - - - - - - - - - - 1–11
- - - - - - - - - - - - - - - - - - - - - - - - - - - - - - - - - - - - -vii
2
Installation
Inverter Mounting - - - - - - - - - - - - - - - - - - - - - - - - - - - - - - - - - - - - - - - - - - - - - - - - - - - - - - 2–2
DC Wiring - - - - - - - - - - - - - - - - - - - - - - - - - - - - - - - - - - - - - - - - - - - - - - - - - - - - - - - - - - - 2–5
General DC Grounding Requirements - - - - - - - - - - - - - - - - - - - - - - - - - - - - - - - - - - - - - - 2–5
DC Circuit Grounding - - - - - - - - - - - - - - - - - - - - - - - - - - - - - - - - - - - - - - - - - - - - - - - - - 2–5
Batteries - - - - - - - - - - - - - - - - - - - - - - - - - - - - - - - - - - - - - - - - - - - - - - - - - - - - - - - - - - 2–7
Battery Types - - - - - - - - - - - - - - - - - - - - - - - - - - - - - - - - - - - - - - - - - - - - - - - - - - - 2–7
Battery Cable Sizing - - - - - - - - - - - - - - - - - - - - - - - - - - - - - - - - - - - - - - - - - - - - - - - 2–7
DC Disconnect and Over-current Protection - - - - - - - - - - - - - - - - - - - - - - - - - - - - - - - - - - 2–9
Battery Cable Connections - - - - - - - - - - - - - - - - - - - - - - - - - - - - - - - - - - - - - - - - - - 2–10
Connecting the Battery Bank to the Inverter - - - - - - - - - - - - - - - - - - - - - - - - - - - - - - - - - 2–12
Installing a Battery Temperature Sensor - - - - - - - - - - - - - - - - - - - - - - - - - - - - - - - - - 2–13
Using the COM Port - - - - - - - - - - - - - - - - - - - - - - - - - - - - - - - - - - - - - - - - - - - - - - 2–14
975-0367-01-01 xi
This manual for use by qualified installers only
Page 14

Contents
http://www.wholesalesolar.com/inverters.html
http://www.wholesalesolar.com/inverters.html
AC Wiring - - - - - - - - - - - - - - - - - - - - - - - - - - - - - - - - - - - - - - - - - - - - - - - - - - - - - - - - - -2–15
AC Distribution Panel (Sub-panel) Mounting and Conduit Installation - - - - - - - - - - - - - - -2–15
Accessing the AC Terminals - - - - - - - - - - - - - - - - - - - - - - - - - - - - - - - - - - - - - - - - - - - -2–15
AC Input to the Inverter - - - - - - - - - - - - - - - - - - - - - - - - - - - - - - - - - - - - - - - - - - - - - - -2–18
AC Output Wiring to the AC Distribution Panel (Sub-panel) - - - - - - - - - - - - - - - - - - - - - -2–19
AC Wiring - On-Grid Applications - - - - - - - - - - - - - - - - - - - - - - - - - - - - - - - - - - - - - - -2–20
AC Wiring - On-Grid Application using a Generator - - - - - - - - - - - - - - - - - - - - - - - - -2–21
AC Wiring - Off-Grid Applications - - - - - - - - - - - - - - - - - - - - - - - - - - - - - - - - - - - - - - -2–22
Series Stacking- - - - - - - - - - - - - - - - - - - - - - - - - - - - - - - - - - - - - - - - - - - - - - - - - - - - - - - -2–24
DC Wiring - - - - - - - - - - - - - - - - - - - - - - - - - - - - - - - - - - - - - - - - - - - - - - - - - - - - - - - -2–24
DC Wiring for Two Disconnect Devices - - - - - - - - - - - - - - - - - - - - - - - - - - - - - - - - -2–25
DC Wiring for One Disconnect Device - - - - - - - - - - - - - - - - - - - - - - - - - - - - - - - - - -2–26
DC Wiring With a Conduit Box - - - - - - - - - - - - - - - - - - - - - - - - - - - - - - - - - - - - - - -2–28
Battery Connections for Stacked Inverters - - - - - - - - - - - - - - - - - - - - - - - - - - - - - - - - - - -2–29
AC Wiring - - - - - - - - - - - - - - - - - - - - - - - - - - - - - - - - - - - - - - - - - - - - - - - - - - - - - - - -2–30
AC Input to Inverters - - - - - - - - - - - - - - - - - - - - - - - - - - - - - - - - - - - - - - - - - - - - - -2–30
AC Output from Inverters - - - - - - - - - - - - - - - - - - - - - - - - - - - - - - - - - - - - - - - - - - -2–31
Testing Stacked Inverters - - - - - - - - - - - - - - - - - - - - - - - - - - - - - - - - - - - - - - - - - - - - - -2–33
Start-up and Test - - - - - - - - - - - - - - - - - - - - - - - - - - - - - - - - - - - - - - - - - - - - - - - - -2–33
A
Specifications
Safety and Electromagnetic Compatibility Specifications - - - - - - - - - - - - - - - - - - - - - - - - A–4
xii 975-0367-01-01
This manual for use by qualified installers only
Page 15

Figures
http://www.wholesalesolar.com/inverters.html
http://www.wholesalesolar.com/inverters.html
Figure 1-1 On-Grid Basic Configuration (Utility Backup)- - - - - - - - - - - - - - - - - - - - - - - - - - - - - 1–9
Figure 1-2 Off-Grid Configuration - with Renewable Energy Sources- - - - - - - - - - - - - - - - - - - - 1–10
Figure 1-3 Charge Rate versus RMS AC Voltage - - - - - - - - - - - - - - - - - - - - - - - - - - - - - - - - - 1–12
Figure 2-1 Dimensions - - - - - - - - - - - - - - - - - - - - - - - - - - - - - - - - - - - - - - - - - - - - - - - - - - - - 2–2
Figure 2-2 Mounting on Construction Studs - - - - - - - - - - - - - - - - - - - - - - - - - - - - - - - - - - - - - - 2–3
Figure 2-3 Mounting on Plywood - - - - - - - - - - - - - - - - - - - - - - - - - - - - - - - - - - - - - - - - - - - - - 2–4
Figure 2-4 DC Wiring - - - - - - - - - - - - - - - - - - - - - - - - - - - - - - - - - - - - - - - - - - - - - - - - - - - - - 2–6
Figure 2-5 Battery Cable Connections - - - - - - - - - - - - - - - - - - - - - - - - - - - - - - - - - - - - - - - - - 2–11
Figure 2-6 DC Terminals on the Trace Series - - - - - - - - - - - - - - - - - - - - - - - - - - - - - - - - - - - - 2–11
Figure 2-7 Installing the DC Hardware and Covers - - - - - - - - - - - - - - - - - - - - - - - - - - - - - - - - 2–13
Figure 2-8 AC Side Cover Panels - - - - - - - - - - - - - - - - - - - - - - - - - - - - - - - - - - - - - - - - - - - - 2–16
Figure 2-9 AC Terminals for AC Input to the Inverter - - - - - - - - - - - - - - - - - - - - - - - - - - - - - - 2–18
Figure 2-10 AC Terminals for AC output to the Sub-panel - - - - - - - - - - - - - - - - - - - - - - - - - - - - 2–19
Figure 2-11 AC Wiring - On-Grid Application - - - - - - - - - - - - - - - - - - - - - - - - - - - - - - - - - - - - 2–20
Figure 2-12 AC Wiring - On-Grid Application using a Generator - - - - - - - - - - - - - - - - - - - - - - - 2–21
Figure 2-13 AC Wiring - Off-Grid Application using a Generator - - - - - - - - - - - - - - - - - - - - - - - 2–23
Figure 2-14 DC Side of the Trace Series - - - - - - - - - - - - - - - - - - - - - - - - - - - - - - - - - - - - - - - - 2–24
Figure 2-15 DC Wiring with 2 Disconnect Devices - - - - - - - - - - - - - - - - - - - - - - - - - - - - - - - - - 2–26
Figure 2-16 DC Wiring with 1 Disconnect Device- - - - - - - - - - - - - - - - - - - - - - - - - - - - - - - - - - 2–27
Figure 2-17 DC Wiring with a Conduit Box - - - - - - - - - - - - - - - - - - - - - - - - - - - - - - - - - - - - - - 2–28
Figure 2-18 Battery Connections - - - - - - - - - - - - - - - - - - - - - - - - - - - - - - - - - - - - - - - - - - - - - 2–29
Figure 2-19 AC Side of the Trace Series - - - - - - - - - - - - - - - - - - - - - - - - - - - - - - - - - - - - - - - - 2–30
Figure 2-20 AC Wiring - On-Grid Application using Series Stacking - - - - - - - - - - - - - - - - - - - - - 2–32
975-0367-01-01 xiii
This manual for use by qualified installers only
Page 16

xiv
http://www.wholesalesolar.com/inverters.html
http://www.wholesalesolar.com/inverters.html
Page 17

Tables
http://www.wholesalesolar.com/inverters.html
http://www.wholesalesolar.com/inverters.html
Table 1-1 Charge Rate versus RMS AC Voltage - - - - - - - - - - - - - - - - - - - - - - - - - - - - - - - - - 1–11
Table 2-1 Safety Ground Conductor Size (US Installations) - - - - - - - - - - - - - - - - - - - - - - - - - - - 2–5
Table 2-2 Safety Ground Conductor Size (Canadian Installations) - - - - - - - - - - - - - - - - - - - - - - 2–6
Table 2-3 Battery Charge Profiles - - - - - - - - - - - - - - - - - - - - - - - - - - - - - - - - - - - - - - - - - - - - 2–7
Table 2-4 Minimum Recommended Battery Cable Size versus Length - - - - - - - - - - - - - - - - - - - 2–8
Table 2-5 Battery Cable to Maximum Breaker/Fuse Size - - - - - - - - - - - - - - - - - - - - - - - - - - - - - 2–9
Table 2-6 Minimum Recommended Fuse Size - - - - - - - - - - - - - - - - - - - - - - - - - - - - - - - - - - - 2–10
Table 2-7 Min. Recommended Wire Size, Torque Values, and Max. Output Breaker Size - - - - - 2–17
Table A-1 Electrical Specifications - 120 Vac/60 Hz Models - - - - - - - - - - - - - - - - - - - - - - - - - -A–2
Table A-2 Electrical Specifications - 230 Vac/50 Hz Models - - - - - - - - - - - - - - - - - - - - - - - - - -A–3
Table A-3 Environmental Specifications - - - - - - - - - - - - - - - - - - - - - - - - - - - - - - - - - - - - - - - -A–4
975-0367-01-01 xv
This manual for use by qualified installers only
Page 18

xvi
http://www.wholesalesolar.com/inverters.html
http://www.wholesalesolar.com/inverters.html
Page 19

1
http://www.wholesalesolar.com/inverters.html
http://www.wholesalesolar.com/inverters.html
Planni ng
Chapter 1, “Planning” contains information to pre-plan your
installation of the Trace Series Inverter/Charger.
This manual for use by qualified installers only
Page 20

Planning
http://www.wholesalesolar.com/inverters.html
http://www.wholesalesolar.com/inverters.html
Unpacking and Inspection
Carefully unpack the inverter/charger from its shipping carton.
Important:
additional help available if necessary, to assist in lifting the unit during installation.
The unit weighs 35–45 lb (15.9–20.4 kg) (depending on model). Have
Verify all of the items listed below are present. Please call Xantrex Customer
Service if any items are missing.
❐ Trace Series Inverter/Charger
❐ Battery Temperature Sensor
❐ 1 3 ft. (0.9 m) Series Stacking Cable (120 Vac/60 Hz models only)
❐ 1 Red DC terminal cap
❐ 1 Black DC terminal cap
❐ 4!" hardware to secure terminal caps
❐ 3!" lock washers for DC/GND terminals
❐ 4!" flat washers for DC/GND terminals
❐ 3!" nuts for DC terminals
❐ 1 lower AC wiring box
❐ 1 upper AC wiring box (vented)
❐ 3!" hardware to secure AC wiring boxes
Save your proof-of-purchase. This is required if the unit should require warranty
service.
Save the original shipping carton and packing materials. If the inverter ever needs
to be returned for service, it should be shipped in the original carton. This is also a
good way to protect the inverter if it ever needs to be moved.
Record the unit’s model, serial number and date of purchase in the appropriate
fields in section “Information About Your System” on page WA–4 of the Trace
Series Inverter/Charger Operation Manual (Part #: 975-0391-01-01).
Important:
or illustrations used in this manual may not exactly match your unit. Xantrex Technology
Inc. reserves the right to update this product without notice or releasing an updated
manual when fit, form or function are not affected.
Due to continual improvement through product updates, photographs and/
See the Trace Series Inverter/Charger Operation Manual (Part #: 975-0391-01-01)
for additional information if necessary.
1–2 975-0367-01-01
This manual for use by qualified installers only
Page 21
Pre-installation Planning
http://www.wholesalesolar.com/inverters.html
http://www.wholesalesolar.com/inverters.html
WARNING: Shock hazard
Installation must only be performed by installers that are certified technicians or
electricians as this manual may not contain all required details and information necessary
for a safe and code compliant installation.
Pre-installation Planning
Location
Important:
instructions and cautionary markings on the Trace Series Inverter/Charger and all
appropriate sections of this guide. Be sure to read all instructions and cautionary markings
for any equipment attached to this unit.
Before installing and using the Trace Series Inverter/Charger, read all
Take some time prior to installing the equipment to pre-plan the installation.
Location, mounting, and ventilation should be taken into consideration before any
cabling can be done.
Inverters contain sophisticated electronic components and should be located in a
well protected, dry environment away from sources of fluctuating or extreme
temperatures and moisture. Exposure to saltwater is particularly destructive and
potentially hazardous.
Locate the inverter as close to the batteries as possible in order to keep the battery
cable length short. However, do not locate the inverter in the same compartment
as vented batteries. Batteries generate hydrogen sulfide gas which is corrosive to
electronic equipment. They also generate hydrogen and oxygen. If accumulated,
an arc caused by connecting the battery cables or switching a relay could ignite
this mixture. Mounting the inverter in a ventilated enclosure with sealed batteries
is acceptable.
975-0367-01-01 1–3
CAUTION: Corrosion Damage
If the inverter is installed in a location where it is exposed to a corrosive or condensing
environment and fails due to corrosion, it will not be covered under warranty.
Important:
sensitive electronic equipment susceptible to RFI as far away from the inverter as
possible. This includes radios and TVs.
Inverters can generate RFI (Radio Frequency Interference). Locate any
This manual for use by qualified installers only
Page 22

Planning
http://www.wholesalesolar.com/inverters.html
http://www.wholesalesolar.com/inverters.html
Mounting
Ventilation
To ols Required
The keyhole slots must not be used as the only method of mounting. The purpose
of the wall mounting requirement is to orient the inverter so that its bottom cover
will not allow burning material to be ejected in the unlikely event of an internal
fire. Use ¼ in. (6.4 mm) diameter screws or equivalent for mounting. The
mounting surface should be capable of supporting twice the weight of the inverter.
Install the inverter in a well ventilated area/enclosure for proper operation. The
inverter’s thermal shutdown point will be reached sooner than normal in a poorly
ventilated environment, resulting in reduced peak power output and surge
capability, as well as shorter inverter life.
The inverter contains an internal fan. Ensure the air vents and intakes are not
obstructed in any way. Provide a minimum clearance of 6 in. (15 cm) around the
top and bottom, plus 12 in. (30 cm) clearance around the sides of the inverter for
ventilation.
The following tools may be required to complete this installation.
❐ #2 Phillips screw driver
❐ Flat-head screwdriver (Jeweller's type)
❐ Assorted open-end wrenches
❐ Socket wrench and fittings
❐ Multimeter (True rms)
❐ Hole saw
❐ Level
❐ Wire strippers
❐ Torque wrench
❐ Electrical tape
❐ Pencil
❐ Utility knife
1–4 975-0367-01-01
This manual for use by qualified installers only
Page 23

Hardware/Materials Required
http://www.wholesalesolar.com/inverters.html
http://www.wholesalesolar.com/inverters.html
The following hardware or materials may be required to complete this installation.
❐ 4 ft. x 4 ft. (1.22 m x 1.22 m) sheet of ¾ in. (20 mm) plywood or equivalent;
or standard construction stud material, for example 2 ft. x 4 ft. (60 cm x
120 cm)
❐ #12 wood screws or ¼ in. x 1½ in. (6.5 mm x 38 mm) lag bolts or equivalent
❐ Conduit and appropriate fittings
❐ Wire nuts
Wiring Considerations
This section describes the wiring requirements and considerations. It provides the
required wire sizes, recommended lengths for conductors, and disconnect/circuit
breaker requirements. All wiring should be made with minimum 90° C copper
wire. While 90°C or higher temperature rated wiring may be used, the wire gauge
sizing must still be based in accordance with 75°C wiring ampacities from your
local electrical code for use in conjunction with typical AC over-current
protection. See “Minimum Recommended Battery Cable Size versus Length” on
page 2–8 for details.
All wiring and installation methods should conform to applicable electrical and
building codes.
Pre-plan the wire and conduit runs.
• The AC terminals accept cable sizes up to #6 AWG (13.6 mm
• The DC terminals accept any size cables that use ring terminals with 5/16 in.
(8 mm) holes and a maximum flange width of 1 5/16 in. (33 mm).
• If you intend to stack two 120 V/60 Hz units, consider the length of the
provided series stacking cable (3 ft./0.9 m).
• Due to voltage drop considerations, battery-to-inverter cabling should be only
as long as required. See Table 2-4, “Minimum Recommended Battery Cable
Size versus Length” on page 2–8 to assist you with cable sizing and length.
For maximum safety, run both AC and DC cables in conduit.
Pre-installation Planning
2
).
975-0367-01-01 1–5
This manual for use by qualified installers only
Page 24

Planning
http://www.wholesalesolar.com/inverters.html
http://www.wholesalesolar.com/inverters.html
Grounding Considerations
AC Grounding
The inverter/charger should be connected to a grounded, permanent wiring
system. Neutral and ground conductors should only be bonded at one place, and
only one place, in the system, either at the main electrical service panel or the sub
panel. The AC input and output circuits are isolated from the enclosure and the
system grounding, if required by the appropriate sections of your local electrical
code, is the responsibility of the installer.
DC Grounding
The negative battery conductor should be bonded to the grounding system at only
one point in the system. See “DC Circuit Grounding” on page 2–5. Consult your
local electrical codes for additional information and requirements.
Wire Routing
Determine all wire routes both to and from the inverter and which knockouts are
best suited for connecting the AC conduits. Possible routing scenarios include:
• AC input wiring from the main electrical service panel to the inverter/charger
(if used)
• AC input wiring from the generator to the inverter/charger (if used)
• DC input wiring from the batteries to the inverter/charger
• AC output wiring from the inverter/charger to the sub-panel
• Battery Temperature Sensor cable from the batteries to the inverter/charger (if
used)
• Remote control cable to the inverter/charger (if used)
• DC ground from the batteries to an external ground rod
• Load circuit wiring rerouted from the main service panel to the sub-panel
Check for existing electrical or plumbing prior to making cuts in the walls. Cut
holes in the walls at appropriate locations for routing wiring/cables.
1–6 975-0367-01-01
This manual for use by qualified installers only
Page 25

Electrical Panels and Ci rcuit Breaker Requirements
http://www.wholesalesolar.com/inverters.html
http://www.wholesalesolar.com/inverters.html
The following electrical panels and circuit breakers may be required for this
installation.
AC Distribution Panel (Sub-Panel)
Loads backed up by the inverter will need to be rerouted from the main electrical
panel to a sub-panel. This can be done several different ways, depending upon the
installation. Always refer to electrical codes for safe wiring practices.
DC Disconnect
Install a DC disconnect breaker or fuse in the positive (+) battery line. This
breaker protects the DC wiring in the event of an accidental short. Size the
breakers/fuses in accordance with the size of the battery cables in accordance with
your local electrical codes. Switch this breaker/disconnect OFF whenever
servicing the batteries.
Battery Considerations
Pre-installation Planning
Battery Location
The Trace Series can support either 12-volt or 24-volt battery banks, depending on
the model. The battery voltage MUST match the voltage requirements of the
inverter. To determine the correct voltage for the system see the table in “Model
Numbering” on page iv.
Locate the batteries in an accessible location. Two feet (61 cm) clearance above
the batteries is recommended for access to the battery caps. They should be
located as close to the inverter as possible without limiting access to the inverter’s
disconnects. Install the batteries to the left of a wall mounted inverter for easy
access to the DC side of the inverter and shorter cable runs.
For safety and to limit access to the batteries, a lockable, ventilated, battery
enclosure or dedicated room should be used. If an enclosure is used, it should be
vented to the outside by a 1 in. (25.4 mm) vent pipe located at the top of the
enclosure. Install an intake vent at the bottom of the enclosure to promote air
circulation. These vents exhaust explosive hydrogen gases and must not be
overlooked when designing an enclosure.
The enclosure should be made of an acid resistant material or have a finish that
resists acid to prevent corrosion. It should be capable of holding the electrolyte
from at least one battery should a leak occur.
Place a layer of baking soda on the shelves to neutralize any acid that may be
spilled in the future (lead-acid batteries only).
Enclosures located outside must be rainproof and screened to prevent access by
rodents or insects.
975-0367-01-01 1–7
This manual for use by qualified installers only
Page 26

Planning
http://www.wholesalesolar.com/inverters.html
http://www.wholesalesolar.com/inverters.html
Battery Temperature
The battery enclosure should provide a fairly stable temperature for the batteries.
If it is installed in a cold environment, insulation should be used to protect the
batteries from the cold. The insulation also provides a more consistent
temperature and better system performance.
The battery enclosure should not be installed in direct sunlight where the summer
sun can overheat the batteries. Locate the enclosure where it will be protected
from the afternoon sun and provide vents in the top and bottom of the enclosure to
provide air flow. High battery temperatures greatly shortens the life of the
batteries.
1–8 975-0367-01-01
This manual for use by qualified installers only
Page 27

Basic Configurations
http://www.wholesalesolar.com/inverters.html
http://www.wholesalesolar.com/inverters.html
The following illustrations show basic applications for the Trace Series Inverter/Charger.
They include the following configurations.
• On-Grid Configuration - Utility Backup
• Off-Grid Configuration with Renewable Energy Sources and a Generator
Consult with your system design for other possible configurations depending on site and
code requirements.
Pre-installation Planning
Figure 1-1
975-0367-01-01 1–9
On-Grid Basic Configuration (U
tility Backup
Important:
power, the inverter’s AC input connection to the main electrical panel will need to be
switched
be used like a generator to supply power when the RE sources cannot keep up with the
loads.
For Renewable Energy (RE) sources to be utilized in conjunction with grid
OFF so the inverter operates in a stand-alone configuration. The utility power can
This manual for use by qualified installers only
)
Page 28

Planning
http://www.wholesalesolar.com/inverters.html
http://www.wholesalesolar.com/inverters.html
Figure 1-2
Off-Grid Configuration - with Renewable Energy Sources
1–10 975-0367-01-01
This manual for use by qualified installers only
Page 29

Generators
http://www.wholesalesolar.com/inverters.html
http://www.wholesalesolar.com/inverters.html
Pre-installation Planning
WARNING: Shock hazard
Generators utilizing AC outputs with plug/receptacle configurations are not permitted for
connection to the AC input terminals of the Trace Series unit. Only the use of generators
that are permanently and directly connected to the Trace Series unit, without any type of
interconnecting devices, is permitted.
An AC generator can be used as an input source instead of the utility power, or can be
connected (using additional hardware) to power the loads when utility is not present
(utility outage), and to charge the batteries. The generator must be of the permanently
installed type and not a portable type unit used for emergency power (i.e. no cordconnected generators are permitted). Small emergency type (lower power) generators
may not have a stable enough voltage for the inverter to synchronize to or provide
enough current to fully charge the batteries.
The maximum charge rate the battery charger can deliver is dependant upon the AC
voltage available. The charger’s rated output is based on a utility voltage of 120 Vac
RMS for 120 Vac/60 Hz models and 230 Vac RMS for 230 Vac/50 Hz models.
Size the generator appropriately for the system, including battery charge and load
current.
Table 1-1 and Figure 1-3 demonstrates how the AC voltage available affects the charging
current.
Table 1-1
RMS AC Voltage
Available
70 Vac–90 Vac
(134 Vac–180 Vac)
90 Vac–100 Vac
(180 Vac–210 Vac)
100 Vac–110 Vac
(210 Vac–240 Vac)
110 Vac–130 Vac
(210 Vac–240 Vac)
130 Vac–140 Vac
(240 Vac–253 Vac)
a.Charger is OFF for RMS Voltages less than 70 Vac (134 Vac) or greater than 140 Vac (253 Vac).
b.Values in parenthesis are for 230 Vac/50 Hz models.
Charge Rate versus RMS AC Voltage
TR1512-120-60
TR1512-230-50 TR2412-120-60
a
14 amps 20 amps 7 amps 14 amps 14 amps
ab
a
35 amps 50 amps 17.5 amps 35 amps 35 amps
ab
70 amps 70 amps 35 amps 70 amps 70 amps
b
70 amps 100 amps 35 amps 70 amps 70 amps
b
56 amps 80 amps 28 amps 56 amps 56 amps
b
TR1524-120-60
TR1524-230-50
TR2424-120-60
TR2424-230-50 TR3624-120-60
975-0367-01-01 1–11
This manual for use by qualified installers only
Page 30

Planning
http://www.wholesalesolar.com/inverters.html
http://www.wholesalesolar.com/inverters.html
Figure 1-3
Charge Rate versus RMS AC Voltage
1–12 975-0367-01-01
This manual for use by qualified installers only
Page 31

2
http://www.wholesalesolar.com/inverters.html
http://www.wholesalesolar.com/inverters.html
Installation
Chapter 2, “Installation” contains information about how to plan for
and install the Trace Series Inverter/Charger.
This manual for use by qualified installers only
Page 32

Installation
http://www.wholesalesolar.com/inverters.html
http://www.wholesalesolar.com/inverters.html
Inverter Mounting
The Trace Series inverter can weigh as much as 45 lb. (20.4 kg). Wallboard is not
strong enough to support its weight so additional support must be used or added.
The inverter can be mounted directly to the wall studs if the wall studs are 16 in.
(40.6 cm) apart. If not, then standard size construction stud material, for example
2 ft. x 4 ft. (60 cm x 120 cm) studs or plywood can be used. Ensure a location is
selected that can support twice the inverter's weight.
WARNING: Personal Injury
Use appropriate lifting techniques. Have extra people on hand to assist in lifting the
inverter into position while it is being secured.
To secure the Trace Series to the wall studs:
1. Locate the studs and mark their location on the wall.
2. Measure the desired height from the floor for the inverter to be mounted.
3. Using a level, mark a horizontal line. The length of the line must span at least
three studs.
4. Using the dimensions illustrated in Figure 2-1, drill mounting holes into the
center of the studs for the inverter.
(
not to scale
5. Secure the inverter to the studs using ¼
" 1½ in. (6.5 mm x 38 mm) lag bolts
and washers or equivalent.
)
Figure 2-1Dimensions
2–2 975-0367-01-01
This manual for use by qualified installers only
Page 33

Inverter Mounting
http://www.wholesalesolar.com/inverters.html
http://www.wholesalesolar.com/inverters.html
To secure the Trace Series to the mounting location using standard size
construction stud material or plywood:
1. Repeat steps 1 through 3 above. See Figure 2-2 and Figure 2-3.
2. Place a pre-cut construction stud (flat side against the wall) on the marked
location and drill pilot holes through the construction stud and wall studs.
3. Secure the construction stud with #10 wood screws or equivalent. Wood
screw must penetrate 1½ in. (38 mm) into the wall studs as shown in Figure
2-2.
4. Measure 7 5/8 in. (19.4 cm) from the center of the first construction stud and
draw another level line. Place the center of the second construction stud over
this line and secure to the wall as described in Step 5.
5. Using the dimensions illustrated in Figure 2-1, drill mounting holes into the
center of the construction studs for the inverter.
6. Secure the inverter to the constriction studs using ¼ x 1½ in. (6.5 mm x
38 mm) lag bolts and washers or equivalent.
Figure 2-2
975-0367-01-01 2–3
Mounting on Construction Studs
This manual for use by qualified installers only
Page 34

Installation
http://www.wholesalesolar.com/inverters.html
http://www.wholesalesolar.com/inverters.html
Figure 2-3
Mounting on Plywood
2–4 975-0367-01-01
This manual for use by qualified installers only
Page 35

DC Wiring
http://www.wholesalesolar.com/inverters.html
http://www.wholesalesolar.com/inverters.html
This section describes the DC wiring requirements and how to make the
connections. It provides the required cable and wire sizes, recommended lengths
for cables, and disconnect/circuit breaker requirements. All wiring should be
made with minimum 90° C wire. The ground lug on the DC end of the Trace
Series is 5/16 in. (7.87 mm).
General DC Grounding Requirements
Grounding is an important part of the system installation and must be performed
correctly to ensure safe operation of the equipment. Grounding requirements vary
by country and application. Consult your local electrical codes for specific
requirements.
This product is intended to be installed as part of a permanently grounded
electrical system. This is the single point earth ground for the inverter system.
To ground the DC circuits:
1. Connect the negative (-) terminal of the battery bank to an appropriately sized
conductor and connect it to the ground bus in the DC Disconnect.
2. Connect an appropriately sized conductor to the Ground bus in the DC
Disconnect and connect it to the primary system ground.
3. Torque ground nut to 10-15 in-lb (1.1 - 1.7 Nm).
The system ground is the same ground used by the AC side of the system.
DC W
iring
DC Circuit Grounding
The ground conductor should be sized appropriately for the over-current
protection device being used. See Table 2-1 and Table 2-2 below for a portion of
the NEC and CEC codes). For installations in countries other than the USA and
Canada, different local codes and cable sizes may apply.
Table 2-1Safety Ground Conductor Size (US Installations
Size of Over-current Device
Protecting the Conductor
30 to 60 amp #10 AWG
100 amp #8 AWG
200 amp #6 AWG
300 amp #4 AWG
400 amp #3 AWG
a. Taken from NEC ANSI/NFPA 70 (2005 Edition) Table 250.122
Minimum Size of the
Copper Ground Wire
a
)
975-0367-01-01 2–5
This manual for use by qualified installers only
Page 36

Installation
http://www.wholesalesolar.com/inverters.html
http://www.wholesalesolar.com/inverters.html
Table 2-2Safet y Ground Conductor Size (Canadian Installations
Size of Over-current Device
Protecting the Conductor
30 amp #12 AWG
40 or 60 amp #10 AWG
100 amp #8 AWG
200 amp #6 AWG
300 amp #4 AWG
400 amp #3 AWG
a.Taken from CEC Part I (2006 Edition), Table 16
Minimum Size of the
Copper Ground Wire
Sample 24 V system shown
a
)
Figure 2-4DC Wiring
2–6 975-0367-01-01
This manual for use by qualified installers only
Page 37

Batteries
http://www.wholesalesolar.com/inverters.html
http://www.wholesalesolar.com/inverters.html
DC W
iring
The Trace Series can support either 12-volt or 24-volt battery banks depending on
the model. Before proceeding, ensure you have the appropriate sized batteries for
this inverter. The Trace Series will charge flooded lead-acid, or sealed Gel/AGM
lead-acid batteries so ensure that your batteries are in one of these categories.
Battery Types
Battery Cable Sizing
Table 2-3
Profile Description
Flooded Flooded lead-acid 14.6 29.2 16 32 13.4 26.8
Sealed Gel/AGM lead acid 14.1 28.2 N/A N/A 13.5 27.0
Battery Charge Profiles
Bulk/Absorp tion Equalize Float
12V 24V 12V 24V 12V 24V
Information regarding battery types, battery bank sizing and configuration can be
found on the Xantrex website under the Application Note titled "Battery Banks for
Inverter Systems".
Proper cable sizing (diameter and length) is critical to the safe and efficient
operation of an inverter system. Larger diameter cables (smaller AWG number)
have less voltage drop and are, therefore, more efficient when transferring power
to and from the batteries. If a cable is undersized (diameter too small), it could
potentially overheat, creating a fire hazard.
Cable length is another important factor. Runs should be kept as short as practical.
Longer cable runs increase resistance, thus lowering the overall efficiency of the
system. This is especially true in lower voltage systems (i.e., 12 Vdc) where,
depending upon the length of the cable run, it may be necessary to oversize the
diameter of the wire, or parallel (double) the cables.
975-0367-01-01 2–7
Important:
for the amperage of the inverter and batteries.
Only use copper cables. Always use a properly sized cable and length rated
WARNING: Fire Hazard
Undersized cables can overheat and melt, creating a fire hazard when subjected to heavy
(peak) loads.
Table 2-4 provides recommended minimum cable sizes for various cable lengths
and inverter amperages. Refer to your local electrical code requirements as
recommendations may not meet all codes. The 1 – 5 ft. (30.5 – 152 cm) column
refers to the minimum cable sizes for a North American code compliant
installation. Cable sizes covering install lengths in excess of 5 ft. (152 cm) are
Xantrex recommendations that account for DC voltage drop. DC cable runs in
excess of 10 ft. (305 cm) one-way are not recommended.
This manual for use by qualified installers only
Page 38

Installation
http://www.wholesalesolar.com/inverters.html
http://www.wholesalesolar.com/inverters.html
Important:
Run the positive and negative battery cables as close to each other as
possible by taping them together. This reduces the effects of inductance and produces a
better waveform thus increasing efficiency. See the Application Note titled "Battery Cable
Inductance" on the Xantrex website.
Table 2-4
Minimum Recommended Battery Cable Size versus Length
Inverter Model
TR1512-120-60
TR1512-230-50
TR2412-120-60
TR1524-120-60
TR1524-230-50
TR2424-120-60
TR2424-230-50
TR3624-120-60
Typical
Amperage
165 A
240 A
75 A
120 A
175 A
1 – 5 ft (30.5 – 152 cm)
b
one-way
#4/0 AWG (107 mm
350 MCM (177 mm
#2 AWG (33.6 mm
#1/0 AWG (53.5 mm
#4/0 AWG (107 mm
5 to 10 feet (152 – 305 cm)
2
) 350 MCM (177 mm2)
2
Not recommended
)
2
) #1/0 AWG (53.5 mm2)
2
) #2/0 AWG (67.4 mm2)
2
) 350 MCM (177 mm2)
a
one-way
a.Table 2-4 is based on installation with conduit using no more than three 75°C copper
conductors in a maximum 30°C ambient, and then applying the worst case conditions
between the CEC Part I 2006 Edition, Table 2 and the NEC ANSI/NFPA 2005 Edition,
Table 310.16.
b.At nominal DC voltage and maximum rated power
2–8 975-0367-01-01
This manual for use by qualified installers only
Page 39

DC Disconnect and Over-current Protection
http://www.wholesalesolar.com/inverters.html
http://www.wholesalesolar.com/inverters.html
For safety purposes and to comply with regulations, battery over-current
protection is required. Fuses and disconnects must be sized to protect the wiring in
the system and are required to open before the wire reaches its maximum current
carrying capability.
The National Electrical Code (NEC) in the US requires both over-current
protection and a disconnect switch for residential and commercial electrical
systems. Local electrical codes for other countries may also require this and
should therefore be referred to during such installations. The over-current
protection and a disconnect switch are not supplied as part of the inverter,
however, Xantrex offers a DC rated, ETL Listed, circuit breaker disconnect
module specifically designed to meet NEC compliance. Two amperage ratings are
available: a DC250 (250 amps) and a DC175 (175 amps) in either single or dual
breaker configurations for single- or dual-inverter installations.
DC W
iring
Important:
cables which may be required for long cable runs. Also, the plastic red and black covers
on the DC inverter inputs are not designed to accommodate dual cables. If dual cables are
used, the optional
Xantrex™ DC disconnects are not designed to accept doubled (paralleled)
TR-CONDUIT BOX DC conduit box must be used.
Some installations may not require conduit or a disconnect device, although
over-current protection is still required. Refer to your local electrical codes for the
proper size disconnect device for specific cable diameters. Table 2-5 provides a
guideline for selection of appropriate DC over-current protection based on cable
size used.
Table 2-5
Cable Size R equired Rating Max. Breaker/Fuse Size
#2 AWG (33.6 mm
#1/0 AWG (53.5 mm
#2/0 AWG (67.4 mm
#4/0 AWG (107 mm
350 MCM (177 mm
a.Table 2-5 is based on installation using no more than three 75°C copper conductors in
a maximum 30°C ambient, and then applying the worst case conditions between the CEC
Part I 2006 Edition, Table 2 and the NEC ANSI/NFPA 2005 Edition, Table 310.16.
b.Based on available Bussman™ JJN series of Class T fuses.
Battery Cable to Maximum Breaker/Fuse Size
2
)
2
)
2
)
2
)
2
)
115 amps 125 amps
150 amps 150 amps
175 amps 175 amps (or DC175 breaker)
230 amps 250 amps (or DC250 breaker)
310 amps 350 amps
a
b
975-0367-01-01 2–9
Important:
rating ONLY when a matching fuse size is not available, otherwise the correct fuse size
must be used (i.e. 230 amp cable size rounds up to a standard 250 amp size). Cables
enclosed in conduit or raceways have substantially lower continuous current carrying
ability, due to heating factors, than those in free air.
The NEC allows rounding to the next standard fuse size from the cable
This manual for use by qualified installers only
Page 40

Installation
http://www.wholesalesolar.com/inverters.html
http://www.wholesalesolar.com/inverters.html
In addition to the code required maximum fuse sizes outlined in Table 2-5,
Xantrex also recommends the following minimum fuse sizes be used to alleviate
the possibility of any nuisance tripping under surge, or other conditions. See Table
2-6 below for details.
Table 2-6
Cable Size R equired Rating
#2 AWG (33.6 mm
#1/0 AWG (53.5 mm
#2/0 AWG (67.4 mm
#4/0 AWG (107 mm
350 MCM (177 mm
Battery Cable Connections
WARNING: Shock hazard
Ensure the inverter is off and that AC power is disconnected from the inverter input before
disconnecting the battery cables.
WARNING: Fire hazard
If you are using fine-stranded DC cables, a corresponding agency approved crimp or
compression lug suitable for use with fine-stranded wire must also be used.
Minimum Recommended Fuse Size
2
)
2
)
2
)
2
)
2
)
100 amps
150 amps
150 amps
200 amps
300 amps
CAUTION: Equipment Damage
The inverter is not reverse polarity protected. Reversing the battery polarity on the DC
input connections will cause permanent damage to the inverter which is not covered under
warranty. Always check polarity before making connections to the inverter.
Battery cables must have crimped (or preferably, crimped and then soldered)
copper compression lugs unless aluminum mechanical lugs are used. Soldered
connections alone are not acceptable.
Figure 2-5 illustrates the proper method to connect the battery cables to the Trace
Series’s DC terminals. For installations requiring the use of conduit connections
and the corresponding optional
requirements for cable sizes larger than 2/0 AWG (70 mm
wires and 4 AWG (25 mm
must be used.
2–10 975-0367-01-01
This manual for use by qualified installers only
TR-CONDUIT BOX DC conduit box, and that have
2
) for the chassis ground wire, then right angled lugs
2
) for the DC input
Page 41

Do not place anything
http://www.wholesalesolar.com/inverters.html
http://www.wholesalesolar.com/inverters.html
between battery cable lug
and terminal surface.
Assemble exactly as shown.
2/0 Copper Compression Lug 2/0 Aluminum Mechanical Lug
DC W
iring
Figure 2-5
Battery Cable Connections
Positive (+)
Battery Terminal
Torque the
Positive (+)
Battery terminal to
10-15 ft.-lbs
(13.6 to 20.3 Nm)
Torque value for
the Ground Lug
is 10-15 in-lbs
(1.1 to 1.7 Nm)
Ground Lug
Figure 2-6DC Terminals on the Trace Series
Negative (–)
Battery Terminal
Torque the
Negative (–)
Battery terminal to
10-15 ft.-lbs
(13.6 to 20.3 Nm)
975-0367-01-01 2–11
This manual for use by qualified installers only
Page 42

Installation
http://www.wholesalesolar.com/inverters.html
http://www.wholesalesolar.com/inverters.html
Connecting the Battery Bank to the Inverter
Use the following procedure to connect the battery bank to the inverter.
WARNING: Shock Hazard
:
Ensure the inverter is off before connecting or disconnecting the battery cables and that all
AC power is disconnected from the inverter’s inputs.
To connect the battery bank to the inverter:
1. Determine the correct size battery cable to use for installation from Table 2-4
on page 2–8.
2. Determine the correct size disconnect/fuse for installation as per your local
electrical codes.
3. Identify the cables according to your local electrical codes. Ensure you
identify both ends of the cable prior to installation.
4. Connect the negative (–) cable to the battery’s negative terminal (torque to
manufacturer’s recommendations).
5. Install the over-current device (fuse or circuit breaker) between the battery’s
positive terminal and the inverter’s positive terminal. Place it as close to the
batteries as possible without being installed in the battery enclosure. Consult
your local electrical code for any distance requirements of the fuse from the
battery source.
6. Connect the (short) positive cable to the battery’s positive terminal (torque to
manufacturer’s recommendations).
7. Ensure the correct polarity of the cables with a DC voltmeter (DVM).
8. Observing battery polarity, connect the positive battery cable (from the
over-current device) to the inverter’s positive terminal.
Important:
connecting the cable to the inverter. This is normal and is caused by the inverter’s
capacitors charging up.
The next step may cause a small spark and snapping sound when
9. Observing battery polarity, connect the negative battery cable to the inverter’s
negative terminal. See Figure 2-4 on page 2–6.
10. Use an insulated ½ in. wrench or socket to tighten the 5/16 SAE nuts to
10-15 ft.-lb (13.6 to 20.3 Nm) for each inverter input terminal.
CAUTION: Equipment Damage
: Equip
Do not put anything between the cable ring terminal and the flat metal part of the terminal
as overheating of the terminal may occur. Do not apply any type of antioxidant paste until
after the battery cable wiring is tightened.
11. Apply antioxidant paste to the battery and inverter terminals.
2–12 975-0367-01-01
This manual for use by qualified installers only
Page 43

DC W
http://www.wholesalesolar.com/inverters.html
http://www.wholesalesolar.com/inverters.html
12. Install the battery terminal connection covers (red for positive, black for
negative) over the inverter’s DC terminals and secure with the screws and
washers provided. Do not over tighten.
iring
Figure 2-7
Installing the DC Hardware and Covers
Installing a Battery Temperature Sensor
The included battery temperature sensor (Xantrex part #: 808-0232-01) can easily
be installed in the system to ensure proper charging of the batteries based on
temperature. Installing a battery temperature sensor extends battery life by
preventing overcharging in warm temperatures and undercharging in cold
temperatures. The information received in this port adjusts the charger’s output
higher in cold temperatures, assuring the batteries receive a full charge, and
lowers it during warm temperatures, reducing battery gassing and providing
overcharge protection.
Important:
the charger, it only adjusts charging voltage. The battery temperature does signal the Trace
Series to shutdown if it detects temperatures outside of -20 °C – 60 °C (-4 °F – 140 °F).
To install the Battery Temperature Sensor:
1. Connect the RJ11 connector end of the battery temperature sensor wire in to
the BATTERY SENSE port located on the DC end of the Trace Series.
If the
cable is correctly routed through the conduit.
During normal operation, the battery temperature sensor does not disable
TR-CONDUIT BOX is used, make sure that the battery temperature sensor
975-0367-01-01 2–13
2. Secure the sensor to one of the batteries located in the center of the battery
bank.
This manual for use by qualified installers only
Page 44

Installation
http://www.wholesalesolar.com/inverters.html
http://www.wholesalesolar.com/inverters.html
Using the COM Port
The COM port has two different functions. It can either be used to connect a COM
cable to provide serial communications to an optional Xantrex remote control unit
TR-REMOTE ON/OFF SWITCH) or it can be used to connect the included series
(
stacking cable for when two Trace Series units are used in a series configuration
(see “Series Stacking” on page 2–24). There is one COM port, so you cannot use
both stacking interface and remote at the same time.
To use the COM port:
1. Connect one end of the COM cable or series stacking cable in to the COM
port located on the DC end of the Trace Series.
If the
TR-CONDUIT BOX is used, make sure that the cable is correctly routed
through the conduit.
2. Connect the other end of the COM cable into the
TR-REMOTE ON/OFF SWITCH
remote control unit or connect the other end of the series stacking cable in to
another Trace Series unit.
2–14 975-0367-01-01
This manual for use by qualified installers only
Page 45

AC Wiring
http://www.wholesalesolar.com/inverters.html
http://www.wholesalesolar.com/inverters.html
This section describes the AC wiring requirements and how to make the
connections.
AC Distribution Panel (Sub-panel ) Mounting and Conduit Installation
WARNING: Shock Hazard
Disconnect the power from the utility’s main breaker box before proceeding.
To mount and install the AC distribution panel and conduit:
1. Determine the location of the sub-panel and install it according to the
manufacturer’s directions.
2. Install the AC conduit between the sub-panel (output) and inverter.
3. Install conduit between the inverter (input) and the main breaker box.
4. Determine which circuits require backup. Install the appropriate branch-rated
circuit breakers into the sub-panel.
5. Install an appropriately sized branch-rated circuit breaker in the sub-panel.
This will later be wired to the inverter’s output. If two inverters are being used
in a stacked configuration, install a double-pole circuit breaker for 240 Vac
service.
AC Wiring
Accessing the AC Terminals
CAUTION: Equipment Damage
The inverter’s AC output must never be wired to the utility or generator output. This will
cause severe damage to the inverter which is not covered under warranty.
All AC wiring connects to the terminal block located on the right-hand side of the
inverter.
To access the AC terminals:
◆ Remove the side cover panels (if installed) by removing the three Phillips
screws. Units are shipped with the covers uninstalled.
975-0367-01-01 2–15
This manual for use by qualified installers only
Page 46

Installation
http://www.wholesalesolar.com/inverters.html
http://www.wholesalesolar.com/inverters.html
Screws
Figure 2-8
LINE IN
GROUND IN
AC Side Cover Panels
NEUTRAL IN
NEUTRAL OUT GROUND OUT
LINE OUT
Before wiring the input of the inverter, refer to Table 2-7 for the minimum
recommended wire size.
Important:
installations.
Refer to your local electrical codes for actual wire sizes for specific
2–16 975-0367-01-01
This manual for use by qualified installers only
Page 47

AC Wiring
http://www.wholesalesolar.com/inverters.html
http://www.wholesalesolar.com/inverters.html
Table 2-7
Min. Recommended Wire Size, Torque Values, and Max. Output Breaker Size
Inverter Model AC Input AC Output
TR1512-120-60
TR2412-120-60
TR1524-120-60
TR2424-120-60
TR3624-120-60
TR1512-230-50
TR1524-230-50
TR2424-230-50
#6 AWG (13.6 mm
#6 AWG (13.6 mm
#6 AWG (13.6 mm
#6 AWG (13.6 mm
#6 AWG (13.6 mm
#10 AWG (5.2 mm
#10 AWG (5.2 mm
#10 AWG (5.2 mm
2
) #10 AWG (3.3 mm2)
2
) #10 AWG (5.2 mm2)
2
) #10 AWG (3.3 mm2)
2
) #10 AWG (5.2 mm2)
2
) #8 AWG (8 mm2)
2
) #14 AWG (2.0 mm2)
2
) #14 AWG (2.0 mm2)
2
) #14 AWG (2.0 mm2)
Torque Value for
Terminal Connections
16 in-lbs (1.8 Nm) max. 30 amps AC
16 in-lbs (1.8 Nm) max. 30 amps AC
16 in-lbs (1.8 Nm) max. 30 amps AC
16 in-lbs (1.8 Nm) max. 30 amps AC
16 in-lbs (1.8 Nm) max. 45 amps AC
16 in-lbs (1.8 Nm) max. 15 amps AC
16 in-lbs (1.8 Nm) max. 15 amps AC
16 in-lbs (1.8 Nm) max. 15 amps AC
a
Maximum Output
Breaker Size
a.Table 2-7 is based on installation with conduit using no more than three 75°C copper conductors in a
maximum 30°C ambient, and then applying the worst case conditions between the CEC Part I 2006
Edition, Table 2 and the NEC ANSI/NFPA 2005 Edition, Table 310.16.
WARNING: Fire Hazard
To reduce the risk of fire, connect only to a circuit provided with the maximum
branch-circuit overcurrent protection noted above in accordance with your local electrical
codes.
Important:
Various local electrical codes require conduit be used in this type of
installation. Refer to the local electrical codes (for example, the NEC in the U.S.) to verify
if it is needed in your installation. Conduit fittings can be replaced with strain reliefs
where code permits.
WARNING: Shock Hazard
Disconnect the battery cables from the inverter if they are already connected.
975-0367-01-01 2–17
This manual for use by qualified installers only
Page 48

Installation
http://www.wholesalesolar.com/inverters.html
http://www.wholesalesolar.com/inverters.html
AC Input to the Inverter
To connect the AC Input to the Inverter:
1. Disconnect the main breaker at the main electrical service panel (if used) or
disconnect the AC generator.
2. Install an appropriately sized circuit breaker in the electrical service panel.
This will serve as both an AC disconnect and over-current protection. If using
a generator only, use the circuit breaker in the generator.
3. Feed the line, neutral, and ground wires (using conduit) from the inverter to
the AC source. Leave several inches/centimeters of extra wire at each end.
4. Make the connections to the inverter first. Wiring to the AC source is
performed after all connections have been made in the inverter.
a) Connect the ground wire to the inverter’s ground IN terminal.
b) Connect the neutral wire from the AC source to the inverter’s neutral IN
c) Connect the line wire from the AC source to the inverter’s LINE INPUT
terminal.
terminal.
5. Torque all connections to 16 in-lbs (1.8 Nm)
Torque the terminal
connections to
16 in-lbs (1.8 Nm) max.
LINE IN
max.
2–18 975-0367-01-01
GROUND IN
Figure 2-9
This manual for use by qualified installers only
NEUTRAL IN
AC Terminals for AC Input to the Inverter
Page 49

AC Output Wiring to the AC Distribution Panel (Sub-panel)
http://www.wholesalesolar.com/inverters.html
http://www.wholesalesolar.com/inverters.html
WARNING: Shock hazard
The ground and neutral must be bonded at one place, and only one place, in the system.
To connect the AC output wiring to the sub-panel:
1. Connect the neutral wire to the inverter’s neutral OUT terminal. Connect the
other end of this wire to the neutral bus in the sub-panel.
2. Connect the line wire to the inverter’s line OUT terminal. Connect the other
end of this wire to the sub-panel’s input circuit breaker.
3. Torque all inverter terminal block connections to 16 in-lbs (1.8 Nm) max.
4. Refer to the sub-panel manufacturer’s specifications for wire torque
requirements to sub-panel terminals.
Torque the terminal
connections to
16 in-lbs (1.8 Nm)
AC Wiring
975-0367-01-01 2–19
LINE OUT
NEUTRAL OUT GROUND OUT
Figure 2-10
Important:
and, if necessary, may be used in any combination.
The two ground connections (input and output) are common to one another and, if
necessary, may be used in any combination. It may not be necessary to use both ground
connections in your installation.
This manual for use by qualified installers only
AC Terminals for AC output to the Sub-panel
The two neutral connections (input and output) are common to one another
Page 50

Installation
http://www.wholesalesolar.com/inverters.html
http://www.wholesalesolar.com/inverters.html
AC Wiring - On-Grid Applications
The following diagrams illustrate the AC wiring for basic configurations. Consult
your system design for other possible configurations.
• Figure 2-11, “AC Wiring - On-Grid Application” on page 2–20
• Figure 2-12, “AC Wiring - On-Grid Application using a Generator” on page
2–21
• Figure 2-20, “AC Wiring - On-Grid Application using Series Stacking” on
page 2–32
Figure 2-11
2–20 975-0367-01-01
AC Wiring - On-Grid Application
This manual for use by qualified installers only
Page 51

AC Wiring - On-Grid Application using a Generator
http://www.wholesalesolar.com/inverters.html
http://www.wholesalesolar.com/inverters.html
If a generator is used as a backup for the utility, then a manual or automatic
transfer switch must be added to provide a means to switch the generator power to
the inverter’s input. The generator can be used during extended outages to
recharge the batteries and provide pass through power for the loads. Start and stop
the generator manually using the generator’s pull-cord, ON/OFF switch, etc.
AC Wiring
Figure 2-12
975-0367-01-01 2–21
AC Wiring - On-Grid Application using a Generator
This manual for use by qualified installers only
Page 52

Installation
http://www.wholesalesolar.com/inverters.html
http://www.wholesalesolar.com/inverters.html
AC Wiring - Off-Grid Applications
The following diagram illustrates the AC wiring for basic configurations. Consult
your system design for other possible configurations.
Important:
neutral-ground bond should be placed in the inverter output load panel.
For system configurations without generator or utility AC input, the
Follow the example below to complete the wiring for an off-grid application using
a generator. If you have a generator with three conductor outputs (120/240 V or
240 V input) you will need to use the auto-transformer (shown as optional in the
diagram) to combine the L1 and L2 lines to a single line. If you have a generator
with two conductor outputs (one 120 V single phase input) you do not need to
make use of the auto-transformer and your single line (L1) can be routed directly.
2–22 975-0367-01-01
This manual for use by qualified installers only
Page 53

AC Wiring
http://www.wholesalesolar.com/inverters.html
http://www.wholesalesolar.com/inverters.html
Figure 2-13
AC Wiring - Off-Grid Application using a Generator
975-0367-01-01 2–23
This manual for use by qualified installers only
Page 54

Installation
http://www.wholesalesolar.com/inverters.html
http://www.wholesalesolar.com/inverters.html
Series Stacking
Series stacking allows the AC output of two (identical) inverters to be connected
in a series configuration, providing both 120 VAC and 240 VAC, 60 Hz power for
the inverter’s loads.
DC Wiring
Battery Positive
(+) Terminal
Important:
for 230 VAC, 50 Hz models.
Only 120 VAC, 60 Hz models can be stacked. This option is not available
Series stacking can also be used to connect to 240 Vac only power systems
providing both 120 and 240 Vac outputs. Stacking is also an excellent choice for
providing power to multiwire branch circuits where stand-alone (120 VAC)
inverters may require extensive house rewiring.
The included 3 ft. (0.9 m) series stacking cable is required to connect the COM
ports of the two inverters to enable series stacking communication.
Trace Series Inverter/Chargers can be stacked whether there is one disconnect
device or two.
Important:
as INVERTER 1 (L1) and the second Trace Series as INVERTER 2 (L2).
To easily identify the Trace Series Inverter/Chargers, label one Trace Series
COM Port
Battery Temperature
Sensor Port
Battery Negative
(–) Terminal
Ventilation Holes
Ground Lug
Figure 2-14DC Side of the Trace Series
2–24 975-0367-01-01
This manual for use by qualified installers only
Page 55

DC Wiring for Two Disconnect Devices
http://www.wholesalesolar.com/inverters.html
http://www.wholesalesolar.com/inverters.html
Xantrex recommends using two disconnect devices to keep wire to manageable
sizes.
WARNING: Shock hazard
When stacking inverters, always connect the chassis of each inverter together using the
chassis ground lug, otherwise a hazardous voltage may be present between each chassis.
To connect the DC wiring with two disconnect devices (see Figure 2-15):
1. Connect the negative terminals of the two Trace Series Inverter/Chargers
together.
2. Connect INVERTER 1’s negative terminal to the negative terminal on the
battery bank.
3. Connect INVERTER 2’s negative terminal to the negative terminal on the
battery bank.
4. Connect INVERTER 1’s positive terminal to the DC disconnect 1.
5. Connect the DC disconnect 1to the positive terminal of the battery bank.
6. Connect INVERTER 2’s positive terminal to the DC disconnect 2.
S
eries Stacking
7. Connect the DC disconnect 2 to the positive terminal of the battery bank.
8. Connect the DC ground lugs of the two Trace Series Inverter/Chargers
together using heavy gauge wire (according to “Battery Cable Sizing” on
page 2–7).
9. Connect the series stacking cable to the COM port of both Trace Series
Inverter/Chargers.
975-0367-01-01 2–25
This manual for use by qualified installers only
Page 56

Installation
http://www.wholesalesolar.com/inverters.html
http://www.wholesalesolar.com/inverters.html
Figure 2-15DC Wiring with 2 Disconnect Devices
DC Wiring for One Disconnect Device
WARNING: Shock hazard
When stacking inverters, always connect the chassis of each inverter together using the
chassis ground lug, otherwise a hazardous voltage may be present between each chassis.
CAUTION
Installers must carefully size cables and circuit breakers. Remember that cable sizes will
need to be increased in order to carry twice the current for this installation. Refer to your
local electrical codes.
To connect the DC wiring with one disconnect device (see Figure 2-16):
1. Connect the negative terminals of the two Trace Series Inverter/Chargers
together.
2. Connect INVERTER 2’s negative terminal to the negative terminal on the
battery bank.
3. Connect the positive terminals of the two Trace Series Inverter/Chargers
together.
4. Connect INVERTER 1’s positive terminal to the DC disconnect.
5. Connect the DC disconnect to the positive terminal of the battery bank.
2–26 975-0367-01-01
This manual for use by qualified installers only
Page 57

S
http://www.wholesalesolar.com/inverters.html
http://www.wholesalesolar.com/inverters.html
eries Stacking
6. Connect the DC ground lugs of the two Trace Series Inverter/Chargers
together using heavy gauge wire.
7. Connect the series stacking cable to the COM port of both Trace Series
Inverter/Chargers.
Figure 2-16DC Wiring with 1 Disconnect Device
975-0367-01-01 2–27
This manual for use by qualified installers only
Page 58

Installation
http://www.wholesalesolar.com/inverters.html
http://www.wholesalesolar.com/inverters.html
DC Wiring Wi th a Conduit Bo x
Important:
stacking inverters, and is available for purchase wherever you purchased your Trace
Series Inverter/Charger.
A TR-CONDUIT BOX DC Conduit Box may be required to meet code when
2–28 975-0367-01-01
Figure 2-17DC Wiring with a Conduit Box
This manual for use by qualified installers only
Page 59

Battery Connections for Stacked Inverters
http://www.wholesalesolar.com/inverters.html
http://www.wholesalesolar.com/inverters.html
When using Trace Series Inverter/Chargers in a stacked configuration, the same
battery bank must be used for both inverters. To ensure even charging of the
batteries, each inverter must be connected to both strings as shown in Figure 2-18.
For example:
INVERTER L1 – positive cable to string 2 and negative cable to string 1
INVERTER L2 – positive cable to string 1and negative cable to string 2
S
eries Stacking
CONDUIT FOR
INVERTER 1
"
!
– + – +
12 Volt
Battery
–
12 Volt
Battery
+
Figure 2-18
CONDUIT FOR
INVERTER 2
!
"
12 Volt
Battery
+–
12 Volt
Battery
2903-00-021
Battery Connections
!"#$%&'(
!"#$%&')
24 Volt system shown
975-0367-01-01 2–29
This manual for use by qualified installers only
Page 60

Installation
http://www.wholesalesolar.com/inverters.html
http://www.wholesalesolar.com/inverters.html
AC Wiring
Breaker for
Pass-through
AC Input
Breaker for
Charger AC Input
Series stacking is used in applications where either 240 VAC loads (or a
combination of 240 VAC and 120 VAC loads) need to be powered by inverters.
One inverter (INVERTER 1 - L1) receives its input from the utility’s L1 line and
provides one 120 VAC output; while the second inverter (INVERTER 2 - L2)
receives its input from the utility’s L2 line and provides 120 VAC output (180°
out-of-phase). The combined out-of-phase voltages can power 240 VAC loads as
well as 120 VAC loads up to the power rating of the inverters.
Ventilation Holes
AC Terminal
Block
Figure 2-19
AC Side of the Trace Series
AC Input to Inverters
To connect the AC input to the inverters:
1. Connect a wire from the ground bus in the main panel to the ground IN
terminal in INVERTER 1 (L1).
2. Connect a second ground wire from the ground bus in the main panel to the
ground IN terminal in INVERTER 2 (L2).
3. Connect a wire from the neutral bus in the main panel to the neutral IN
terminal in INVERTER 1 (L1).
4. Connect a second wire from the neutral OUT terminal in INVERTER 1 (L1)
to the neutral IN terminal in INVERTER 2 (L2).
Keep this wire as short as possible.
5. Connect the line L1 from the main panel to the line IN terminal in
INVERTER 1 (L1).
6. Connect the line L2 from the main panel to the line IN terminal in
INVERTER 2 (L2).
2–30 975-0367-01-01
This manual for use by qualified installers only
Page 61

S
http://www.wholesalesolar.com/inverters.html
http://www.wholesalesolar.com/inverters.html
eries Stacking
AC Output from Inverters
120 VAC Source The output of each inverter provides 120 VAC. The voltage between the line
outputs from the L1 and L2 inverters is 240 VAC to the sub-panel.
WARNING: Shock hazard
The ground and neutral must be bonded at one place, and only one place, in the system.
To connect the AC output from the inverters:
1. Connect the neutral wire from INVERTER 2 (L2) neutral OUT terminal to the
neutral bus in the sub-panel.
2. Connect the line (120 VAC) output from INVERTER 1 (L1) line OUT
terminal to the L1 main input lug in the sub-panel.
3. Connect the line (120 VAC) output from INVERTER 2 (L2) line OUT
terminal to the L2 main input lug in the sub-panel.
4. Torque all connections in the sub-panel to the manufacture’s specifications.
975-0367-01-01 2–31
This manual for use by qualified installers only
Page 62

Installation
http://www.wholesalesolar.com/inverters.html
http://www.wholesalesolar.com/inverters.html
Figure 2-20
AC Wiring - On-Grid Application using Series Stacking
2–32 975-0367-01-01
This manual for use by qualified installers only
Page 63

Testing S tacked Inverters
http://www.wholesalesolar.com/inverters.html
http://www.wholesalesolar.com/inverters.html
S
eries Stacking
Start-up and Test
Important:
inverters must be connected to the primary unit.
Important:
120 VAC or 240 VAC output.
If the search mode is used on the Trace Series, the load that “awakens” the
Until the unit is tested, no loads must be connected to the inverter’s
To start-up and test the stacked Trace Series:
1. Switch on the inverter designated as primary or INVERTER 1 (L1).
2. The inverter designated as secondary or INVERTER 2 (L2) will automatically
turn on.
The inverter should be providing 120 VAC/240 VAC to the sub-panel.
3. Use a true RMS voltmeter and measure the voltage between the L1 terminal
and the neutral bus in the sub-panel.
This voltage should be 120 VAC.
4. Use a true RMS voltmeter and measure the voltage between the L2 terminal
and the neutral bus in the sub-panel.
This voltage should be 120 VAC.
5. Use a true RMS voltmeter and measure the voltage between the L1 terminal
and the L2 terminal in the sub-panel.
This voltage should be 240 VAC.
6. Switch off one inverter (the other inverter will automatically switch off).
7. Replace all covers and panels on the inverters and sub-panel.
8. Switch on the inverter designated as primary or INVERTER 1 (L1).
9. The inverter designated as secondary or INVERTER 2 (L2) will automatically
turn on.
10. Switch on the breakers in the main panel feeding the inverters.
Ensure the inverters start to charge the batteries and power the sub-panel.
The stacked inverter system is now ready for use.
Important:
only 120 VAC is supplied to one inverter (primary), the other inverter (secondary) will
enable its AC transfer relay. This will disconnect the AC output power to the loads
connected to the secondary inverter.
Important:
975-0367-01-01 2–33
The input source to the stacked pair should be 240 VAC with a neutral. If
Remote controls can not be used with stacked inverters.
This manual for use by qualified installers only
Page 64

2–34
http://www.wholesalesolar.com/inverters.html
http://www.wholesalesolar.com/inverters.html
Page 65

A
http://www.wholesalesolar.com/inverters.html
http://www.wholesalesolar.com/inverters.html
Specifications
Appendix A, “Specifications” contains information about the
electrical, environmental and regulatory specifications of the Trace
Series Inverter/Charger.
• Table A-1 provides the electrical specifications for the Trace
Series Inverter/Charger (120 Vac/60 Hz. models).
• Table A-2 provides the electrical specifications for the Trace
Series Inverter/Charger (230 Vac/50 Hz. models).
• Table A-3 provides physical and environmental specifications for
all models of the Trace Series Inverter/Charger.
• Information is also provided on the safety and electromagnetic
compatibility specifications for the Trace Series Inverter/Charger.
This manual for use by qualified installers only
Page 66

S
http://www.wholesalesolar.com/inverters.html
http://www.wholesalesolar.com/inverters.html
pecifications
Table A-1
Model
Electrical Specificationsa - 120 Vac/60 Hz Models
TR1512-120-60 TR2412-120-60 TR1524-120-60 TR2424-120-60 TR3624-120-60
AC Nominal Input Voltage 120 Vac 120 Vac 120 Vac 120 Vac 120 Vac
Maximum AC Input Voltage 140 Vrms 140 Vrms 140 Vrms 140 Vrms 140 Vrms
AC Input Low Transfer Voltage
(wide/narrow) 65/95 Vac 65/95 Vac 65/95 Vac 65/95 Vac 65/95 Vac
Frequency: (± 0.04% Crystal controlled)
Narrow Setting (Charge & Pass -
60 Hz 60 Hz 60 Hz 60 Hz 60 Hz
—64 Hz 55—64 Hz 55—64 Hz 55—64 Hz 55—64 Hz
55
through)
Wide Setting (Charge) 55
Wide Setting (Pass-through) 41
Maximum AC Input Current
Pass-through
Charging
Nominal AC Input Current
b
Pass-through
Charging
—68 Hz 55—68 Hz 55—68 Hz 55—68 Hz 55—68 Hz
—68 Hz 41—68 Hz 41—68 Hz 41—68 Hz 41—68 Hz
50 Aac
30 Aac
20 Aac
40 Aac
28 Aac
12 Aac
60 Aac
30 Aac
30 Aac
48 Aac
26 Aac
22 Aac
50 Aac
30 Aac
20 Aac
40 Aac
28 Aac
12 Aac
60 Aac
30 Aac
30 Aac
48 Aac
26 Aac
22 Aac
60 Aac
30 Aac
30 Aac
48 Aac
26 Aac
22 Aac
Continuous Power (@ 25°C) 1500 VA 2400 VA 1500 VA 2400 VA 3600 VA
AC Current at Max. Charge Rate
11.20 Aac
15.81
Aac 10.20 Aac 19.68 Aac 19.53 Aac
c
Rated Output Current 12.5 amps AC 20 amps AC 12.5 amps AC 20 amps AC 30 amps AC
Typical Efficiency 90% 92% 92% 93% 94%
AC Output Voltage (rms) 120 Vac 120 Vac 120 Vac 120 Vac 120 Vac
Max. Output Overcurrent Protection 30 amps AC 30 amps AC 30 amps AC 30 amps AC 45 amps AC
Surge Capability/Max. Output and Duration:
Overload 10 sec Rating 3000 VA 4800 VA 3000 VA 4800 VA 7200 VA
Short Circuit 10 sec Rating 50±5 Apk 80±8 Apk 50±5 Apk 80±8 Apk 120±12 Apk
DC Current at Rated Power 157 amps 252 amps 76 amps 120 amps 186 amps
DC Input Voltage (nominal)
d
DC Input Voltage Range
DC Charger Rate (Adjustable) ±6%
Power Factor while Charging 0.88
12.6 Vdc 12.6 Vdc 25.2 Vdc 25.2 Vdc 25.2 Vdc
11.0—15.0 Vdc 11.0—15.0 Vdc 22.0—30.0 Vdc 22.0—30.0 Vdc 22.0—30.0 Vdc
10 to 70 amps
14 to 100 amps
0.89
5 to 35 amps 10 to 70 amps 10 to 70 amps
0.88 0.92 0.93
Tare Loss 26 W 25 W 25 W 24 W 24 W
Common Specifications:
Voltage Regulation (max.) 104—127 Vac
Voltage Regulation (Typical) 108—125 Vac
Waveform modified sine wave
Load Power Factor (allowed) 0.8 to 1.0 (leading or lagging)
Adjustable Load Sensing Range
5 watts minimum to 240 watts maximum
Force Air Cooling Variable speed fan
Automatic Transfer Relay 30 amps maximum (non-continuous)
a.Specifications subject to change without notice.
b.This is the minimum AC input current required, at nominal input voltage, to obtain full continuous rated pass-through
and maximum battery charging while adhering to the 80% ampacity rule of North American electrical codes.
c.In bulk mode (at nominal input AC and nominal DC voltage).
d.Product may not meet voltage regulation specifications at other than "Input Nominal" at full-rated load.
A–2 975-0367-01-01
This manual for use by qualified installers only
Page 67

Table A-2
http://www.wholesalesolar.com/inverters.html
http://www.wholesalesolar.com/inverters.html
Electrical Specificationsa - 230 Vac/50 Hz Models
Model
TR1512-230-50 TR1524-230-50 TR2424-230-50
AC Nominal Input Voltage 230 Vac 230 Vac 230 Vac
Maximum AC Input Voltage 253 Vrms 253 Vrms 253 Vrms
AC Input Low Transfer Voltage
(wide/narrow) 120/180 Vac 120/180 Vac 120/180 Vac
Frequency: (± 0.04% Crystal controlled) 50 Hz 50 Hz 50 Hz
Narrow Setting (Charge & Pass -
—55 Hz 45—55 Hz 45—55 Hz
45
through)
Wide Setting (Charge) 45
Wide Setting (Pass-through) 41
—68 Hz 45—68 Hz 45—68 Hz
—68 Hz 41—68 Hz 41—68 Hz
Maximum AC Input Current 23 amps 23 amps 30 amps
Nominal AC Input Current 23 amps 23 amps 30 amps
Continuous Power (@ 25°C) 1500 VA 1500 VA 2400 VA
AC Current at Max. Charge Rate
b
5.88 Aac
6.00
Aac 10.44 Aac
Rated Output Current 6.4 amps AC 6.4 amps AC 10.4 amps AC
Typical Efficiency 92% 91% 94%
AC Output Voltage (rms) 230 Vac 230 Vac 230 Vac
Max. Output Overcurrent Protection 15 amps AC 15 amps AC 15 amps AC
Surge Capability/Max. Output and Duration:
Overload 10 sec Rating 3000 VA 3000 VA 4800 VA
Short Circuit 10 sec Rating 26.5±2.5 Apk 26.5±2.5 Apk 42±4 Apk
DC Current at Rated Power 158 amps 77 amps 121 amps
DC Input Voltage (nominal)
DC Input Voltage Range
c
12.6 Vdc 25.2 Vdc 25.2 Vdc
11.0—15.0 Vdc 22.0—30.0 Vdc 22.0—30.0 Vdc
DC Charger Rate (Adjustable) ±6% 0 to 70 amps 0 to 35 amps 0 to 70 amps
Power Factor while Charging 0.91 0.83 0.92
Tare Loss 23 W 21 W 22 W
Common Specifications:
Voltage Regulation (max.) ±5% (-12%, +5% TR1512-230-50 only)
Voltage Regulation (Typical) ±2. 5%
Waveform modified sine wave
Load Power Factor (allowed) 0.8 to 1.0 (leading or lagging)
Adjustable Load Sensing Range 10 watts minimum to 480 watts maximum
Force Air Cooling Variable speed fan
Automatic Transfer Relay 30 amps maximum (non-continuous)
a.Specifications subject to change without notice.
b.In bulk mode (at nominal input AC and nominal DC voltage).
c.Product may not meet voltage regulation specifications at other than "Input Nominal" at full-rated load.
975-0367-01-01 A–3
This manual for use by qualified installers only
Page 68

S
http://www.wholesalesolar.com/inverters.html
http://www.wholesalesolar.com/inverters.html
pecifications
Table A-3
Model
Trace Series only
Shipping/Packaging plus Trace Series
Ambient Temp Range
Rated Temperature
Environmental Specifications
TR1512-120-60
Dimensions
Dimensions 12.4 in. W " 11.8 in. H " 26.6 in. L (315 mm W " 300 mm H " 675 mm L)
b
Weight 40 lbs
(18 kg)
Weight 50 lbs
(22.7 kg)
Range
8.5 in. W " 7.25 in. H " 21 in. L (216 mm W " 184 mm H " 546 mm L)
42 lbs
(19 kg)
52 lbs
(23.6 kg)
a
TR2412-120-60
(18 kg)
(22.7 kg)
Invert Mode: 32 °F to 122 °F (0 °C to +50 °C)
Charge Mode: 32 °F to 104 °F (0 °C to +40 °C)
105 °F to 122 °F (+40.5 °C to +50 °C) 50% derating
40 lbs
50 lbs
TR1524-120-60
(24.9 kg)
45 lbs
(20 kg)
55 lbs
TR2424-120-60
(24.9 kg)
45 lbs
(20 kg)
55 lbs
TR3624-120-60
(23.6 kg)
TR1512-230-50
42 lbs
(19 kg)
52 lbs
42 lbs
(19 kg)
52 lbs
(23.6 kg)
TR1524-230-50
(23.6 kg)
TR2424-230-50
42 lbs
(19 kg)
52 lbs
Storage -67 °F to 167 °F (-55 °C to +75 °C)
Altitude:
Operating 15,000 feet (4570 m)
Non-operating 50,000 feet (16800 m)
Mounting wall-mount with 16 in. (40.6 cm) mounting centers
a.Specifications subject to change without notice.
b.Allows for hardware extensions such as mounting rails, DC terminals, and front panel controls.
Safety and Electromagnetic Compatibility Specifications
120 Vac/60 Hz
Models
230 Vac/50 Hz
Models
CSA 107.1
UL 1741
FCC Part 15B Class B
Ind. Canada ICES-0003 Class B
EN50178
New EMC Directive 2004/108/EC
A–4 975-0367-01-01
This manual for use by qualified installers only
Page 69

http://www.wholesalesolar.com/inverters.html
http://www.wholesalesolar.com/inverters.html
Page 70

Xantrex Technology Inc.
http://www.wholesalesolar.com/inverters.html
http://www.wholesalesolar.com/inverters.html
1 800 670 0707 Tel. toll free NA
1 408 987 6030 Tel direc t
1 800 994 7828 Fax toll free NA
1 360 925 5143 Fax direct
custo
m
erservice@xantrex.co
www.xantrex.co
m
m
975-0367-01-01
Printed in China
 Loading...