

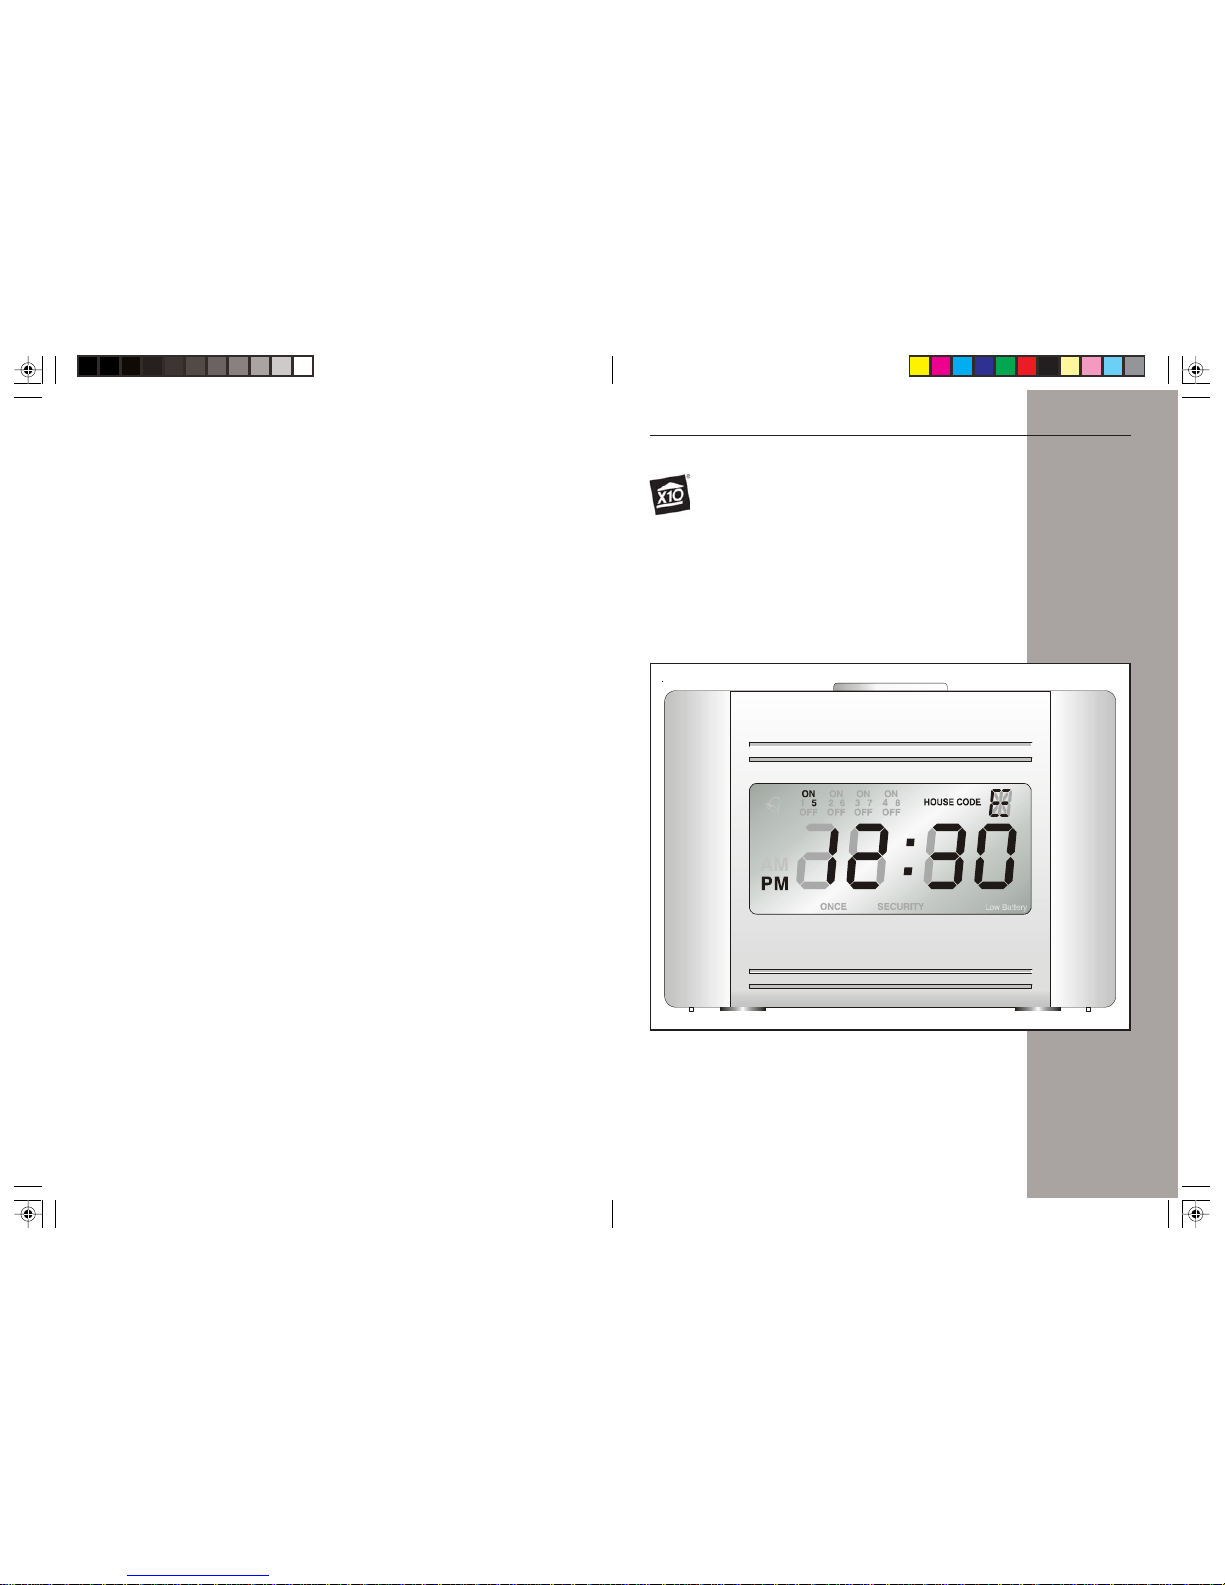
Mini Timer
Owner's Manual
Model XPMT1
PRO
32
The
X10 PRO
Mini Timer controls up to 8
X10 PRO
Modules automatically or instantly.
You can have your outside lights as well as inside lights and appliances go on and off at
preset times to give your home a lived-in look while you are away.
You can program your Modules to go on and off at the same time every day or you can
set your radio to wake you up “Once” only, for an early morning flight. There is even a
“Security” Mode that automatically varies your programmed time each day so your
home doesn’t look like it’s controlled by a timer.
You can keep the Mini Timer by your bedside and it will wake you up on weekdays. It
has a snooze feature so you can sleep a while longer and you can turn the alarm off on
weekends.
You can manually turn off your child’s radio or night light from your bedside. You can
turn on ALL lights connected to Lamp Modules and Wall Switch Modules with the touch
of a button if you hear a suspicious noise at night. You can even turn off everything in
the system with one button.
Before you begin
Keep in mind that your
X10 PRO
System will always turn lamps and appliances on or off
the instant you press the buttons. That’s obvious - but there can be some unexpected
consequences.
For example, an empty coffee pot can be remotely turned on. If that should happen,
your coffee pot may be damaged from overheating. If an electric heater is turned on by
remote control while clothing just happens to be draped over it, a fire could result.
Therefore, do not use with high power heating devices such as portable heaters.
Always be aware of what appliance you are turning on or off so that potentially
dangerous situations will not occur.
What it does
The Mini Timer plugs into any AC outlet in your home and you set it like a digital alarm
clock. Channel number 1 also activates an internal buzzer so you can us it as an alarm
clock too! You can program up to 8
X10 PRO
Modules from the Mini Timer and you also
have instant control of 8 Modules.
There is a handy snooze feature which lets you cancel the alarm buzzer by pressing
any key. This will stop the buzzer and will set the alarm off again in 10 minutes. You can
do this indefinitely.
Advancing to a particular time (in the Prog Set/Review mode) and then pressing a
number ON or OFF key will set an on or off time for that Module, every day. However, if
(within 4 seconds) you press “Once” you will change that program to occur only once, if
you press “security” you will change the program to occur at different times each day
(variably).
Introduction ................................................................................................... 3
Quick Tour...................................................................................................... 5
How to program a timed event .................................................................. 6
Special programming buttons ................................................................... 6
Setting up the Mini Timer ............................................................................. 7
Setting the clock ........................................................................................ 7
Controlling
X10 PRO
modules................................................................... 7
Programming ON and OFF times ................................................................ 9
Setting something to happen every day at the same time ...................... 9
Setting a timed event to occur once only ................................................. 9
Setting a timed event to occur in the 'Security' mode ........................... 1 0
Reviewing timer events ........................................................................... 10
If the display shows FULL ....................................................................... 11
Selector switch ........................................................................................ 11
Instantly Controlling modules .................................................................. 11
Alarm settings .............................................................................................. 12
Setting the alarm buzzer ......................................................................... 12
To cancel the wake up alarm .................................................................. 12
Suspending the wake up function........................................................... 13
Changing the Housecode .......................................................................... 13
Setting up the Modules .............................................................................. 14
Troubleshooting.......................................................................................... 16
Intercom systems .................................................................................... 16
Power interruptions .................................................................................. 16
Battery backup ......................................................................................... 16
Battery test ............................................................................................... 16
Contents Introduction
54
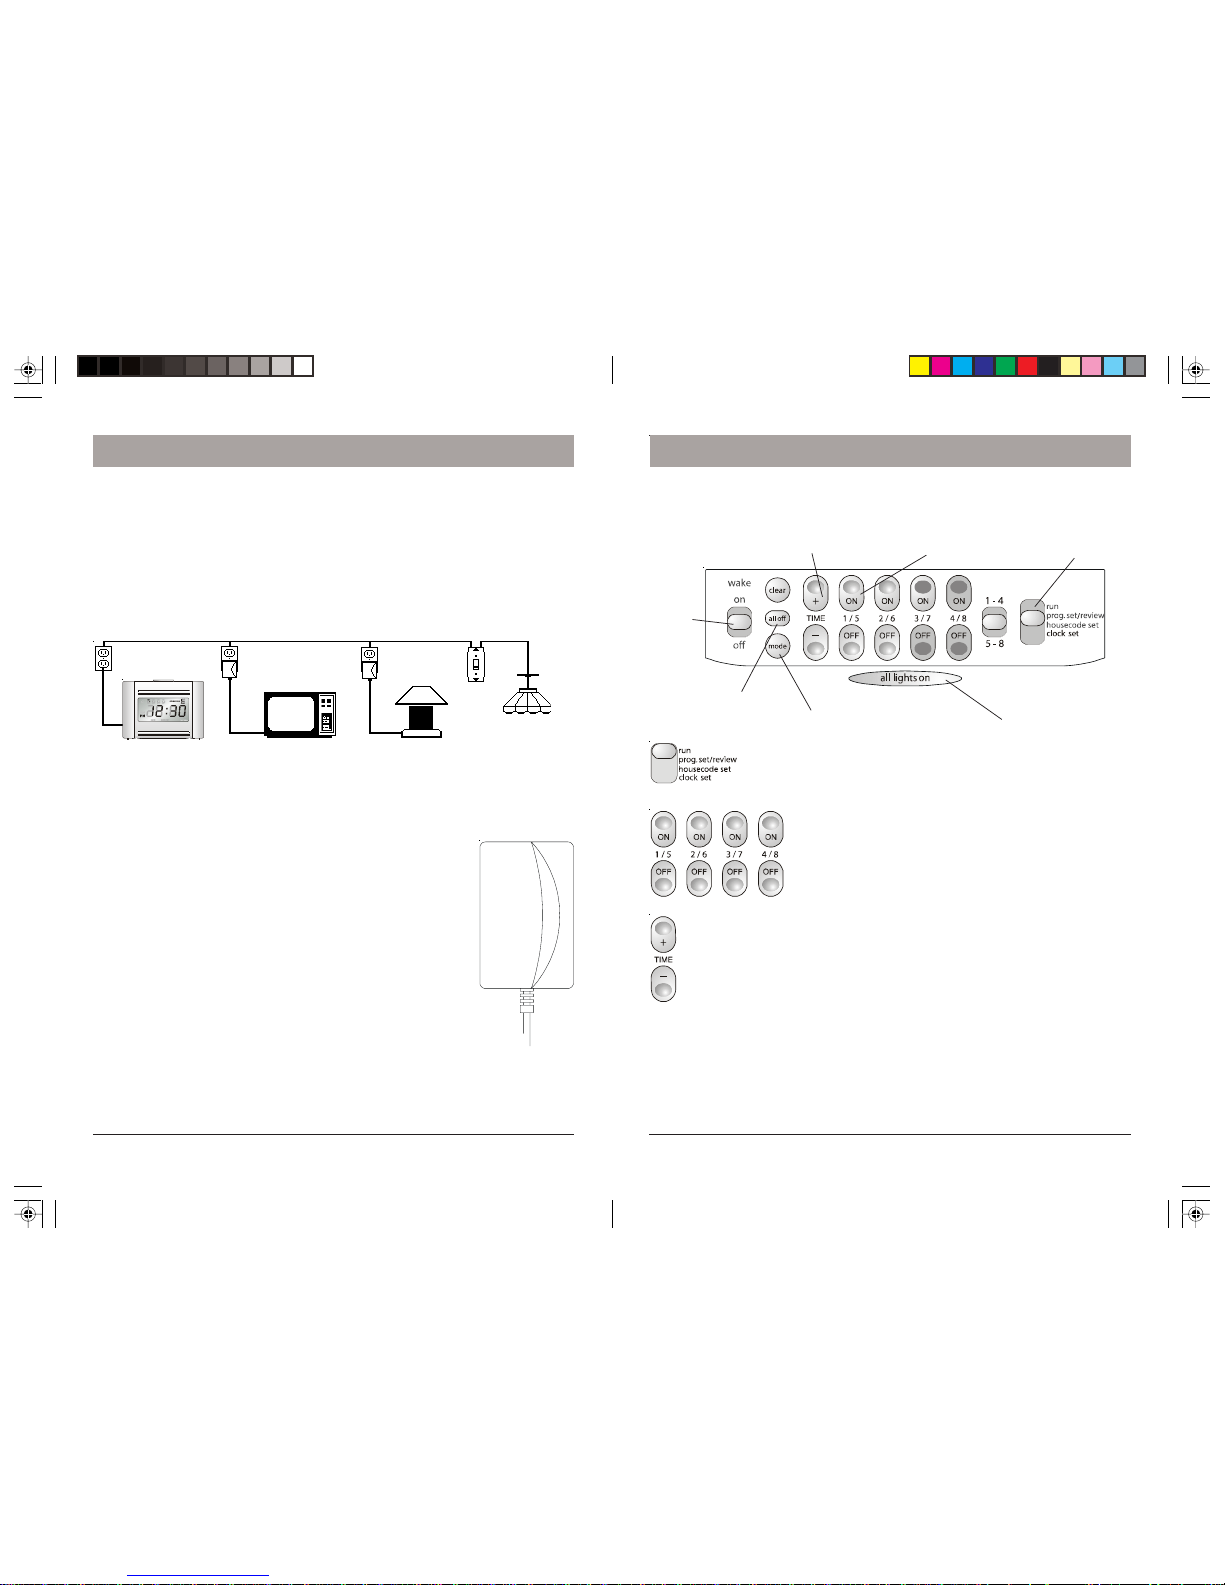
Let’s quickly review the functions of each part of the keyboard (you can go to page 7 for
a step by step tutorial if you prefer). Referring to the diagram below and the cutaway
sections that follow you will see that the keyboard on the Mini Timer consists of 7 basic
areas.
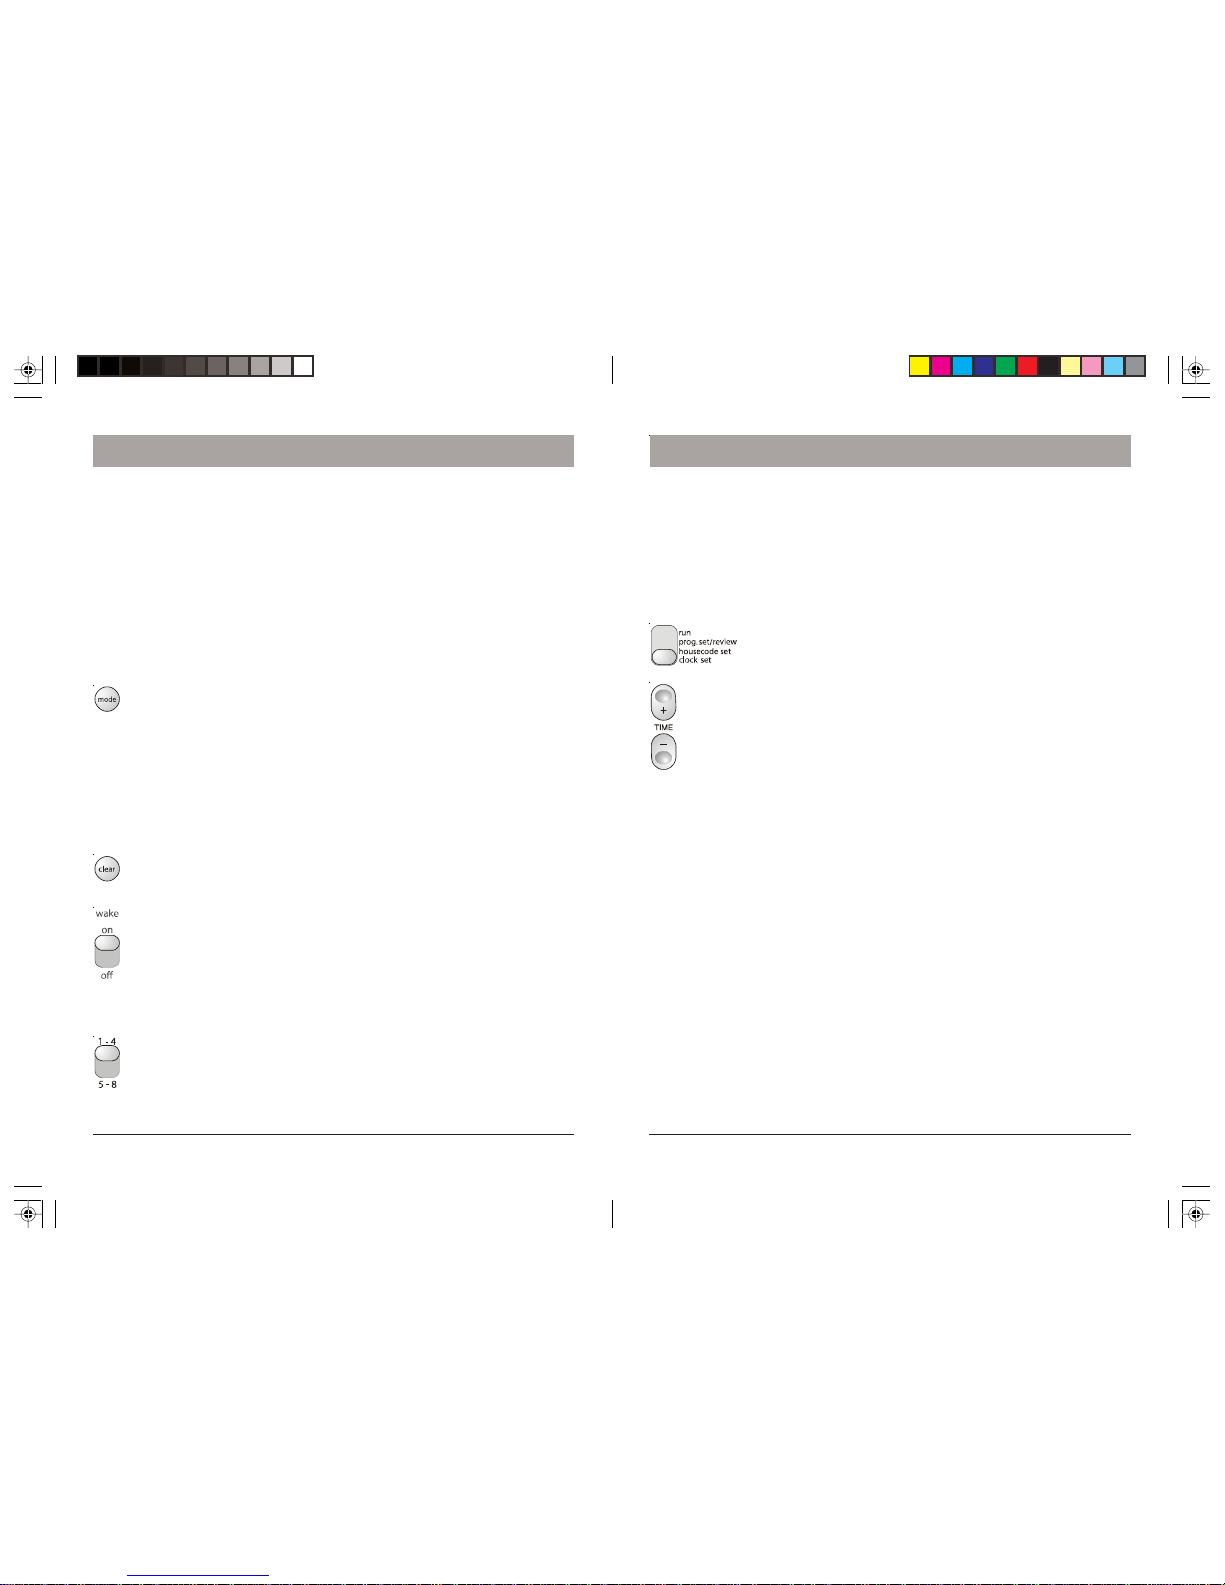
1. Mode Switch. This is used to select whether you want to
set or review a timed event, change the Housecode, or
set the clock. See page 13 to change the Housecode.
2. ON/OFF Buttons. There are 4 sets of ON/OFF buttons .
They let you turn Modules 1 through 4 (or 5 through 8)
on and off instantly by pressing either the ON or OFF
button.
In the “Prog Set/Review” mode these button are used to
set on and off times for the selected number (1 to 4 or 5
to 8).
3. Time Adjust Rocker. This is used to set the time of the
clock and the time you want to set for each programmed
event.
4. Alarm. The number 1 button also sets the time for the
internal alarm buzzer.
5.All Units Off Button. Instantly turns Off ALL Modules including Appliance Modules.
6. Mode Button cycles through Daily, Once, and Security Modes.
7.All Lights On Button. Instantly turns on ALL Lamp Modules and Wall Switch
Modules.
1. Mode
Switch
4. Set
Alarm
2. ON/OFF
Buttons
3 Time Adjust Rocker
7. All Lights On Button
5. All Units Off Button
Setting it up
Connect the power supply to the Mini Timer and plug the power
supply into any convenient AC outlet.
NOTE: you must use the power supply that came with the Mini Timer.
The power supply contains circuitry required to control your X10
PRO modules, so you CANNOT replace it with a regular 12V power
supply.
Install two AA alkaline batteries in the compartment on the back, if
desired (to protect the time and programmed events if there's a
power outage).
6. Mode Button
Introduction Quick Tour
How it works
The Mini Timer plugs into any AC outlet in your home and transmits digitally encoded
signals over your house wiring instantly or at the times you set. These signals are
received by the
X10 PRO
Modules.
You Plug a lamp up to 300 watts into a Lamp Module, an appliance such as a radio, fan,
or coffee pot into an Appliance Module and replace important indoor or outdoor security
lights up to 500 watts with the Wall Switch Module (modules sold separately).
Mini Timer
Appliance
Module
Lamp
Module
Wall Switch
Module
76
Setting the clock
Plug the Mini Timer into any convenient AC outlet. Fit two AA alkaline batteries in the
battery compartment to protect the time and program for up to 48 hours in the event of a
power outage. If the battery is low, dead, or not installed, the low battery indicator will
show in the display.
When you first plug in the Mini Timer the display will flash. It will also flash if you have
had a power outage and have not installed two AA alkaline batteries or if the batteries
are dead.
1. Set the mode switch to “Clock Set.”
2. Press the top of the “Time” rocker to advance to the correct time. A
quick press on the rocker will advance the time by 1 minute. If you
hold the rocker down the display will advance to the correct time
faster. If you overshoot, you can use the bottom rocker to go back.
How to Program a timed event
1. Place the mode switch in “Prog Set/Review” position.
2. Advance to the desired time.
3. Set the 1-4/5-8 switch to the desired position.
4. Press any of the 4 ON or OFF buttons to set an On or Off time for that Module. This
will program the Mini Timer to turn that Module on (or off) at that time every day.
5. Advance to another time, and press another ON or OFF button as desired.
6. Set the Mode switch back to RUN.
Special Programming Buttons
1. Mode button. If within 4 seconds after setting an On or Off time, you press
the “Mode” button once or twice until Once shows in the display, you will
modify the program to carry out your programmed event only Once and it
will not repeat on the next day.
Press again (within 4 seconds after setting an On or Off time) until Security
is shown in the display, to modify the program so that your lights (or
appliances) will go on or off at a slightly different time every day (within the
programmed hour). With each press the display shows whether you've
selected Once, or Security. If neither Once nor Security is displayed, the
event happens at the same time every day.
2. Clear Button. Pressing this (in the Prog/Review Mode) cancels the On time
or Off time being displayed.
3. Wakeup Switch. In the “ON” position an internal wake up buzzer will sound
at the time programmed for Module number 1. When this sounds you can
turn it off by pressing any button to obtain the “snooze” feature. This will
turn the buzzer back on in 10 minutes and will do so each time you operate
snooze.
The alarm can be cancelled by moving the Buzzer switch to “OFF” and back
to “ON” (for wake up the next morning).
4. Selector Switch. Used to select whether you want your Mini Timer to
instantly control Modules set to Unit Codes 1 thru 4 or 5 thru 8. You can
move the selector switch back and forth to achieve instant control of 8
X10
PRO
Modules. You can also move the switch during programming to select
which modules (1-4 or 5-8) you are setting times for.
Controlling X10 PRO Modules
Follow the steps below to make sure you can control your Modules before you program
the Mini Timer.
1. Install and set up all of your
X10 PRO
Modules referring to the instructions included
with them. Be sure to turn off the power at the main circuit breaker panel when
installing Wall Switch Modules.
2. Set all of your Modules to the same Housecode as the Mini Timer (default is A).
3. Set each Module to a Unit Code Between 1 and 8.
4. Set the Mode Switch on the Mini Timer to the “RUN” position.
5. To turn On a particular Module, set the selector switch to 1-4 or 5-8, then press the
ON button corresponding to the number you set on the Module you want to control.
6. To turn Off a particular Module, set the selector switch to 1-4 or 5-8, then press the
OFF button corresponding to the number you set on the Module you want to control.
The display shows On or Off next to the module number for the button you pressed.
To turn on ALL lights connected to Lamp Modules and Wall Switch Modules (with the
same Housecode as the Mini Timer), press the “All Lights On” button. This does not
affect appliances.
To turn off ALL lights AND appliances connected to any kind of
X10 PRO
Module (with
the same Housecode as the Mini Timer), including Appliance Modules, press the “All
Off” button.
Quick Tour Setting up the Mini Timer

98
Setting a timed event to occur Once only
If (within 4 seconds after setting an On or Off time) you press the “Mode” button once or
twice until Once shows in the display, you will modify the program for that particular Unit
Code to occur only Once.
The event you have programmed will happen (at the time you have programmed) within
the next 24 hours, and will then be automatically cleared from memory and will not
happen again the next day.
You can mix Once and Daily events for the same Unit Code (up to the 64 maximum
events for all 8 unit codes). See note at bottom of previous page.
Setting a timed event to occur in the “Security” mode
If you advance to a specific time, and then press one of the ON or OFF buttons, you will
set an On or Off time for that Unit Code to occur every day at exactly the same time.
If however, within 4 seconds after setting an On or Off time, you press the “Mode” button
once or twice until Security is shown in the display, you will modify the program for that
particular Unit Code to occur every day at a slightly different time each day.
The event you have programmed will happen at the time you have programmed on the
first day, and will then happen at a different time on each subsequent day (within the
hour you have programmed). For example:
If you advance to 7:35 PM, press the ON button for number 2 and then (within 4
seconds) press the Mode button once or twice until Security shows in the display, the
Module(s) set to Unit Code number 2 will go On at exactly 7:35 PM on the first day and
any time between 7:00 PM and 8:00 PM every day after that. This time will vary each
day so that the Module doesn’t go on at the same time each day (to give your home a
lived-in look).
You can mix Once, Daily, and Security events for the same Unit Code (up to the 64
maximum events for all 8 unit codes). See note at bottom of previous page.
Setting something to happen every day at the same time.
After you have installed all of your Modules and checked that they are working instantly
from the Mini Timer you are ready to program timed events.
1. Set the Mode Switch to the “Prog Set/Review” position.
2. Set the 1-4/5-8 switch as desired.
3. Press the “Time” advance rocker key to advance to the desired
on or off time. When you first press the rocker the time will
advance by 1 minute. If you hold the top of the rocker down the
display will “speed up” so you can get to the desired time faster.
When you get close to the desired time, you can “tap” the rocker
a few times to get to the exact time you want. If you overshoot,
you can press the bottom of the rocker to go back.
4. When you reach the desired time press the ON or OFF button
for the Unit Code you want to program an On or Off time for.
For example: If you advance to 12:45 PM and then press the ON button for number 2,
you will program the Module set to Unit Code 2 to go On at 12:45 PM every day.
If you advance to 7:00 AM and then press the OFF button for number 2, you will
program the Module set to Unit Code 2 to go Off at 7:00 AM every day.
You can now advance to another time and press another ON or OFF button (or the same
button) to program another time.
NOTE:
You can program a total of 64 On or Off times. These are distributed between the 8 unit
codes (selected with the 4 ON/OFF buttons). You could for example program Module
number 1 to go On 32 times and Off 32 times, but then that would use up all the memory
and you wouldn't be able to program any times for any of the other 7 unit codes. Or, you
could program modules 1 thru 8 to go On and Off 4 times each. I.E. you could program 4
On and Off times for modules 1 thru 4, then slide the selector switch to the 5-8 position
and program another 4 On and Off times for modules 5 thru 8.
If you try to set an on or off time and the memory is full, the display will read FULL. To
clear this, press the Clear button.
Setting up the Mini Timer Programming ON and OFF times

1110
If the display shows FULL
If FULL is displayed when you try to enter a programmed time, this means that you have
tried to enter an additional time when you have already used up all the available
memory. Cancel one or more of your set times by pressing a number ON (or OFF)
button, then press Clear to clear that event. Then enter another timer event. See note at
bottom of page 8.
Selector switch
1-4 position - With the “Selector” switch in the 1-4 position the 4 ON and
OFF buttons control (and set times for) Modules set to Unit Codes 1 thru 4
respectively.
5-8 position - With the “Selector” switch in the 5-8 position the 4 ON and
OFF buttons control (and set times for) Modules set to Unit Codes 5 thru 8
respectively.
Instantly Controlling Modules
With the Mode switch in the RUN position you can slide the Selector Switch back and
forth to instantly control Modules set to 1 thru 4, or 5 thru 8. Also, in the Prog Set/Review
mode you can set events for modules 1 thru 4, then move the selector switch and
program more events for modules 5 thru 8. See note at bottom of page 8 for maximum
number of events you can program..
Reviewing timer events
Set the Mode Switch in the “Prog Set/Review” position. If no events exist in memory 0:00
is displayed, otherwise the first event found in memory is displayed.
If (while in Prog/Review Mode) one of the 4 module ON (or OFF) buttons is pressed
without modifying the current time, and no events are in memory for that module, 0:00
is displayed.
If (while in Prog/Review Mode) one of the 4 module ON (or OFF) buttons is pressed
without modifying the current time, and events do exist, each press of the module ON
(or OFF) button cycles through (and displays) all the ON (or OFF) events for that particular
module. I.E. you are "Reviewing" the times that are set. The display also shows whether
the event is a Once event or a Security event. Note if it's a Security event the actual time
that the next event will occur will be shown. If neither Once nor Security is displayed, the
event is a Daily event.
If (while in Prog/Review Mode) one of the 4 module ON (or OFF) buttons is pressed after
modifying the current time, then the time is stored as a new event for that module. I.E.
you can program new events while reviewing the current programmed events.
While displaying any time for any module it can be deleted using the Clear key. All events
for a module can be cleared by pressing Clear multiple times until the display shows
0:00.
If an event time is modified and you do not want to store it to any module ON/OFF button,
press Clear. The previous event is now displayed and can be deleted if desired by
pressing Clear again.
If the Mode switch is moved after a time has been changed and without a module ON/
OFF button being pressed, this time is discarded and is not stored in memory.
Programming ON and OFF times Programming ON and OFF times

1312
Suspending the wake up function
If you set channel 1 for an On time of 7:00 AM and number 1 is your bedside lamp, at
7:00 AM every day, your bedside lamp will turn on and the internal buzzer will sound. If
you turn the Buzzer switch off on Friday nights the buzzer will not wake you up the next
morning but your bedside lamp will still turn on.
To suspend the program for channel 1 turn the Buzzer switch to OFF, AND place the
Mode switch in the “Clock Set” position. The On program for BOTH the Alarm buzzer
AND the bedside lamp will then be suspended.
You can control Modules instantly with the Mode switch in the “Clock Set” position, just
as you can when it's in the RUN position, but remember to place the Mode switch back
to RUN and put the Buzzer switch back to the ON position on Sunday night to resume
the wake-up program for weekdays.
Note: Pressing the ON button for Module number 1 with the Mode switch in the RUN
position or Clock Set position does not activate the internal buzzer. This buzzer only
sounds at the times you set.
Setting the Alarm Buzzer
With the “Wake” switch in the “ON” position, any program you set for Module
number 1 will also set the internal alarm buzzer.
A bell icon will show in the display to indicate that a time for the Buzzer is set.
Changing the Housecode
When you first plug in the Mini Timer it controls X10 PRO Modules set to Housecode A..
If you want to change the Housecode:
1. Set the Mode switch to “Housecode Set.”
2. Press the up or down "Time" rocker to select the desired
Housecode (as shown in the display).
3.Set the Mode switch back to RUN.
Alarm settings Alarm settings
For example: If you connect your bedside lamp to a Lamp Module set to Unit Code 1
and then program Module number 1 for an On time of 7:00 AM - At 7:00 AM your
bedside lamp will turn on and the internal buzzer in the Mini Timer will sound. You can
turn the buzzer off (when you wake up) by sliding the Buzzer switch to the OFF position.
You can turn off your bedside lamp by pressing the OFF button for Module 1.
You can leave the Buzzer switch in the OFF position if you don’t want to use the wake up
feature. This will not affect any programs you have entered for Module 1.
Alternatively, if the Buzzer switch is OFF and you place the Mode switch in the Clock Set
position, you will “suspend” both the buzzer AND any times you have set for Module 1.
This is useful to suspend the wake-up function on weekends. See next page.
The backlight and the buzzer do not operate when the unit is running on the backup
batteries.
To Cancel/Snooze the wake-up alarm
When the alarm sounds at the time you have set, you can cancel it in one of two ways:
1.Slide the Buzzer switch to the OFF position. This will cancel the alarm permanently.
Slide the switch back to “ON” if you want the alarm to wake you up the next morning.
2.Press any key. This will give the “snooze” feature. Pressing any key while the buzzer
is sounding will turn the buzzer off and will automatically turn it back on in 10 minutes
time. You can do this indefinitely.
The buzzer will automatically turn off, and stay off, after 10 minutes if you ignore it.
Any Module(s) you have installed and set to Unit Code 1 will turn On when the buzzer
sounds and will stay On after you turn the Buzzer switch to OFF or cancel buzzer using
the snooze feature. You will need to press the OFF button for number 1 to turn the
Module(s) off. Alternatively, you could program it/them to turn off later.

1514
Ratings
The Appliance Module can be used to control an incandescent lamp rated up to 500W.
It can also control other types of lamps such as fluorescent or energy saving lamps, low
voltage lamps, or lamps that include a dimmer control. And of course it can be used to
control appliances. Caution: Observe the ratings on the label on the back of the
Appliance Module.
Setting The Appliance Module’s
Code (modules sold separately)
Using a small screwdriver, set the red House
Code dial to the same letter as your Mini
Timer. Set the Black Unit Code dial to any
unused number.
3. Plug the Module into
the same wall outlet
as your controller (see
testing below).
2. Plug an appliance
into the Module.
1. Set the House
Code and Unit
Code.
Testing The Appliance Module
Make sure the appliance’s switch is on. Plug the Module into the same wall outlet as
your Mini Timer, press the ON and OFF buttons on the Mini Timer that correspond to
the Unit Code setting on the Module. If the Module turns On and Off you can unplug
the Module or Mini Timer and move it to its permanent location. If you can’t control the
module, contact www.x10pro.com/support for help.
Setting The Lamp Module’s Code
(modules sold separately)
Using a small screwdriver, set the red House
Code dial to the same letter as your Mini
Timer. Set the Black Unit Code dial to any
unused number.
3. Plug the Module into
the same wall outlet
as your controller (see
testing below).
2. Plug a lamp into
the Module.
1. Set the House
Code and Unit
Code.
Testing The Lamp Module
Make sure the lamp's switch is on. Plug the Module into the same wall outlet as your
Mini Timer, press the ON and OFF buttons on the Mini Timer that correspond to the
Unit Code setting on the Module. If the Module turns On and Off you can unplug the
Module or Mini Timer and move it to its permanent location. If you can’t control the
module, contact www.x10pro.com/support for help.
Setting up the Lamp Module Setting up the Appliance Module
Ratings
The Lamp Module can be used to control an incandescent lamp rated up to 300W. It is
NOT suitable for other types of lamps such as fluorescent or energy saving lamps, low
voltage lamps, or lamps that include a dimmer control. Caution: Do not connect an
appliance such as a coffee pot or heater to a Lamp Module. It may damage the Module
and/or the appliance and could cause a fire hazard. Use an Appliance Module instead.
AGC APPLIANCE MODULE
A
I
EM
O
C
GK
•
•
•
•
•
•
•
•
1
9
513
15
3
711
•
•
•
•
•
•
•
UNIT CODE
DIAL
HOUSE CODE
DIAL
UNIT CODE
DIAL
HOUSE CODE
DIAL
AGC LAMP MODULE
A
I
EM
O
C
GK
•
•
•
•
•
•
•
•
1
9
513
15
3
711
•
•
•
•
•
•
•

1716
AGC LAMP MODULE
A
I
EM
O
C
GK
•
•
•
•
•
•
•
•
1
9
513
15
3
711
•
•
•
•
•
•
•
1. If a particular Module won’t go on or off from the buttons on the Mini Timer:
Check that you have power to the outlet controlling the Module and the switch on the
light or appliance is ON.
Check that the Unit Code and Housecode on the Module are set correctly.
Try plugging the Module and the Mini Timer into the same outlet. If the Module doesn’t
work in ANY outlet, not even with the Module and the Mini Timer in the same duplex
receptacle (top and bottom) the Module may be defective. Contact www.x10pro.com/
support if you need help.
2. If you can’t control ANY Modules from the Mini Timer .
Check that there is a time displayed on the Mini Timer and that you have power to the
outlet it is plugged into.
Check that the Housecode for the Mini Timer is set correctly (see page 13). Try plugging
the Module and the Mini Timer into the same outlet. If NONE of your Modules work in
ANY outlet, not even with the Module and the Mini Timer in the same duplex receptacle
(top and bottom) the Mini Timer may be defective. Contact www.x10pro.com/support if
you need help.
Intercom systems
Intercom systems which send voice signals over existing electrical wiring may interfere
with the operation of the Mini Timer when the intercom is in use. If the Intercom system
has its own separate wiring it will not cause a problem.
Power interruptions
When the power is restored after an outage, Lamp Modules and Wall Switch Modules
will normally be OFF. Appliance Modules have a “latching relay mechanism” and will
stay as they were before the interruption.
This means that when you first plug in an Appliance Module which you have just
purchased, it may in an ON or OFF state (the state it was in before unplugging it after
factory testing).
Battery backup
If you install two AA alkaline batteries in the battery compartment of the Mini Timer your
programmed times will be protected for up to 48 hours in the event of a power outage.
The backlight and the buzzer do not operate when the unit is running on the backup
batteries.
Battery indicator
If the batteries are low, dead, or not installed, the low battery indicator will be shown in
the display. It is recommended that you check the condition of the batteries regularly
and replace them at least once every 6 months.
Troubleshooting Accessories
Modules
A wide range of switch and control modules are available from X10 PRO, all of which
can be controlled from the Mini Timer. Modules available include replacement wall
switches, X10 controlled AC outlets, screw-in lamp modules, plug-in lamp and
appliance modules and many others.
Remotes
You can add any number of Home Automation wireless remotes such as the handheld
PalmPad™ remote which controls up to 16 modules around the home (requires a
Transceiver).
Controllers
A range of plug-in controllers are available including the Touch-Tone Controller which
lets you use any touch tone telephone to call home and control X10 PRO modules, and
products which allow any Windows
™
based PC to control X10 PRO Modules.
Security System
The Modules that come with your Mini Timer system also work with X10 PRO's Wireless
Security Systems.
Remote Switch
1
9
513
A
I
EM
9-16
1-8
ON
OFF
A
C
E
G
I
K
M
O
.
.
.
.
..
.
.
1
2
3
4
5
6
7
8

1918
WARRANTY NOTES
X10 PRO (X10) warrants X10 products to be free from defective material and
workmanship for a period of two (2) years from the original date of purchase at retail.
X10 agrees to repair or replace, at its sole discretion, a defective X10 product if returned
to X10 within the warranty period and with proof of purchase.
If service is required under
this warranty:
Call
800-411-2888, or visit www.x10pro.com.

XPMT1-7/06
X10 PRO, North Las Vegas, NV 89032
www.x10pro.com Made in China
 Loading...