

Page 1
VK47A
X10 MP3 REMOTE
WITH
RF RECEIVER
OWNER’S MANUAL
Page 2

READ THIS FIRST!
S
AFETY CONSIDERATIONS
Remember to exercise good common
sense when using the Home
Automation features of your MP3
Remote - especially when controlling
unattended devices. There can be some
unexpected consequences if not used
with care. For example, an empty
coffee pot can be remotely turned on.
If that should happen, your coffee pot
could be damaged from overheating. If
an electric heater is turned on by
remote control while clothing is draped
over it, a fire could result. DO NOT USE
the remote for the control of high
power heating appliances such as
portable heaters.
Caution: To reduce the risk of electric
shock, do not disassemble any part of
the Home Automation System’s plug-in
Modules or Controllers. No userserviceable parts are inside. If you spill
liquid on a unit, disconnect the unit from
the AC outlet to prevent possible fire or
shock hazard and consult authorized
service personnel.
Powerline operated equipment or
accessories connected to any of these
units should bear the UL listing or CSA
certification mark and should not have
been modified in any way that might
defeat their safety features.
Warning: To prevent electric shock
hazard, do not expose any part of the
Home Automation System to rain or
moisture
FCC C
THIS DEVICE COMPLIES WITH PART 15
OF THE FCC RULES.
OPERATION IS SUBJECT TO THE
FOLLOWING TWO CONDITIONS:
(1) THIS DEVICE MAY NOT CAUSE
(2) THIS DEVICE MUST ACCEPT ANY
This equipment generates and uses radio
frequency energy, and if not installed
and used properly, that is, in strict
accordance with the manufacturers
instructions, it may cause interference to
radio and television reception. It has
been type tested and found to comply
with the limits for remote control devices
in accordance with the specifications in
Sub-Parts B and C of Part 15 of FCC
Rules, which are designed to provide
reasonable protection against such
interference in a residential installation.
However, there is no guarantee that
interference will not occur in a particular
installation. If this equipment does cause
interference to radio or television
reception, which can be determined by
unplugging the equipment, try to correct
the interference by one or more of the
following measures.
• Reorient the antenna of the radio/TV
• Relocate the product with respect to
• Move the product away from the
• Plug the product into an outlet on a
• If necessary , consult your local
NOTE: Modifications to this product will
void the user’s authority to operate this
product.
AUTION
HARMFUL INTERFERENCE, AND
INTERFERENCE RECEIVED,
INCLUDING INTERFERENCE THA T
MA Y CAUSE UNDESIRED
OPERATION.
experiencing the interference.
the radio/TV .
radio/TV.
different electrical circuit from the
radio/TV experiencing the
interference.
Dealer for additional suggestions.
32
Page 3

CONTENTS
INTRODUCTION ............................... 5
SETTING UP YOUR MP3 REMOTE ......... 6
PC BUTTON DESCRIPTIONS .............. 6
A/V BUTTON DESCRIPTIONS............ 7
X10 BUTTON DESCRIPTIONS ............ 8
SETTING UP THE REMOTE ................. 8
SETTING UP THE RECEIVER ................ 8
SETTING UP THE SOFTWARE.............. 8
SETTING UP FOR T V, VCR, CABLE,
SATELLITE/DSS, AND D VD ........... 11
USING THE PC BUTTON TO CONTROL
A S ECOND TV, A VCR, CABLE BOX,
SATELLITE RECEIVER, CD, OR DVD ..12
SEARCHING FOR C ODES ............... 13
IDENTIFYING C ODES FOUND USING
THE SEARCH PROCEDURE ................ 14
INTRODUCTION TO HOME CONTROL ..... 15
CONTROLLERS AND MODULES ......... 15
HOUSE CODES AND UNIT CODES ... 16
TRANSCEIVER MODULE .................. 16
LAMP MODULE ............................ 17
CONTROLLING X10 MODULES ........... 18
CHANGING THE X10 SLIDE SWITCH .... 19
CONTROLLING ALL 16 UNIT C ODES .20
CHANGING THE X10 HOUSE CODE 21
EXPANDING YOUR SYSTEM ............ 22
TROUBLESHOOTING ........................24
IMPORTANT NOTE ................. 25
WARRANTY ................................. 27
INTRODUCTION
Congratulations on your purchase of the
X10 MP3 Remote.
The X10 MP3 Remote lets you play MP3
files, DVDs, and CDs, in your PC. Now
you don’t have to be sitting at your PC to
play your MP3 files. Just a click of a
button on the MP3 remote, from across
the room does the trick!
The MP3 remote is also a Universal
Remote so you can use it to control your
TV, VCR, cable box, etc.
And the handy X10 buttons let you
control almost any light/appliance in
your home - even in another room! It’s
easy to set up. Within minutes, you can
be using your MP3 Remote to play your
favorite MP3 files, and then dim the
lights while you relax to your favorite
music.
Here are just some of the things you
can do with your X10 MP3 Remote...
• Play your favorite MP3 files from the
comfort of your armchair.
• Play DVDs in your PC without even
having to be in the same room.
• Play CDs in your PC at the touch of
a button.
• Control all your A/V equipment, TVs,
VCRs, cable boxes, etc.
• Control almost any light or appliance
in your home.
Use this manual to become familiar
with your MP3 Remote....
First, it explains how to set up your MP3
Remote to play MP3 files, DVDs, or
music CDs using your PC.
Next, it shows you how to set up the
remote to control your TV, cable box, etc.
Next it shows you how to set up an X10
Transceiver Module and Lamp Module
(sold separately) so you can use the MP3
Remote to control lights and appliances
in your home.
Lastly, the manual shows you how you
can expand your system with some of the
additional X10 products you can buy.
54
Page 4

SETTING UP
YOUR MP3 REMOTE
The X10 MP3 Remote lets you play MP3
files, DVDs, and CDs, in your PC. It’s
also a Universal Remote and it also
controls lights an appliances. The button
descriptions below are therefore split into
three sections:
PC B
UTTON DESCRIPTIONS
The following buttons perform special PC
functions after you press the PC mode
button:
POWER
PLAY, REW, FF, STOP, PAUSE
CHAN +/-, VOL +/-, MUTE
NUMBERS 0..9
PC
Press to access PC mode functions: MP3,
DVD, and CD.
POWER
Launches software application after
pressing PC followed by MP3, DVD, or
CD. Also works just like your original
remote in other modes (TV, VCR, etc.).
PLAY, REW, FF, STOP, PAUSE
Controls MP3, DVD, and CD player in
PC mode. Also works just like your
original remote in VCR mode.
CHANNEL, VOLUME, MUTE
Controls MP3, DVD, and CD player in
PC mode. Also works just like your
original remote in TV mode.
0-9
Works like your original remote.
Digits 1, 2 and 3 also function as MP3,
DVD, and CD function buttons
respectively (after you press the PC
button). When in MP3, DVD, and CD
modes the Play, Stop, FF, Rew , and
Pause buttons control your MP3, DVD, or
CD player .
A/V B
REC
UTTON DESCRIPTIONS
Works the same as on your original
remote in VCR mode.
TV, VCR, CBL, PC, SAT, DVD
Used to select the device to control. SAT
includes DSS receivers. PC accesses the
MP3, DVD, and CD features. DVD is
used for setting up and controlling a
regular DVD player (not one installed in
your PC).
TITLE
Selects another title (if available) on the
DVD, in DVD mode.
SUBTITLE
Toggles DVD Subtitle selection On/Off,
in DVD mode.
DISPLAY
T oggles DVD track/time/audio/subtitle/
title information on and off the screen, in
DVD mode.
RETURN
Returns to a previous menu.
UP/DOWN/LEFT/RIGHT DVD KEYS
Menu navigation.
OK
Menu Select/OK/Enter button.
MENU
Toggles DVD Menu on/off.
EXIT
Clear/Exit function.
SKIP BACK
Skip back to previous Chapter/Title.
SKIP FORWARD
Skip forward to next Chapter/Title.
RECALL
Last play/repeat.
SET UP
Used for programming the remote.
A-B
Toggles between TV and Video mode.
ENT
Enter, same as your original remote.
76
Page 5
X10 B
FOUR X10 ON/OFF KEYS
Lets you control X10 modules to operate
lamps and appliances around the home.
LIGHTS ON
Lets you turn all Lamp Modules and Wall
Switch Modules on at the same time.
ALL OFF
Lets you turn all Modules (including
Appliance Modules) off at the same time.
S
ETTING UP THE REMOTE
1. Push the tab and lift
2. Fit four AAA
S
ETTING UP THE RECEIVER
1. Shut down your PC.
2. Plug the cord on the MR26A Receiver
3. Reboot your PC (turn it on). The red
UTTON DESCRIPTIONS
off the battery
cover.
alkaline batteries,
taking care to
match the + and marks in the battery
compartment.
into the serial port on your PC. Locate
the receiver as far away from your PC
and your monitor as its cord allows.
LED power indicator on the receiver
should be on.
1. Use your Web Browser to download
the BOOM software from:
http://www.x10.com/support/
support_soft.htm
2. Launch the installer.
3. Follow the instructions in the installer.
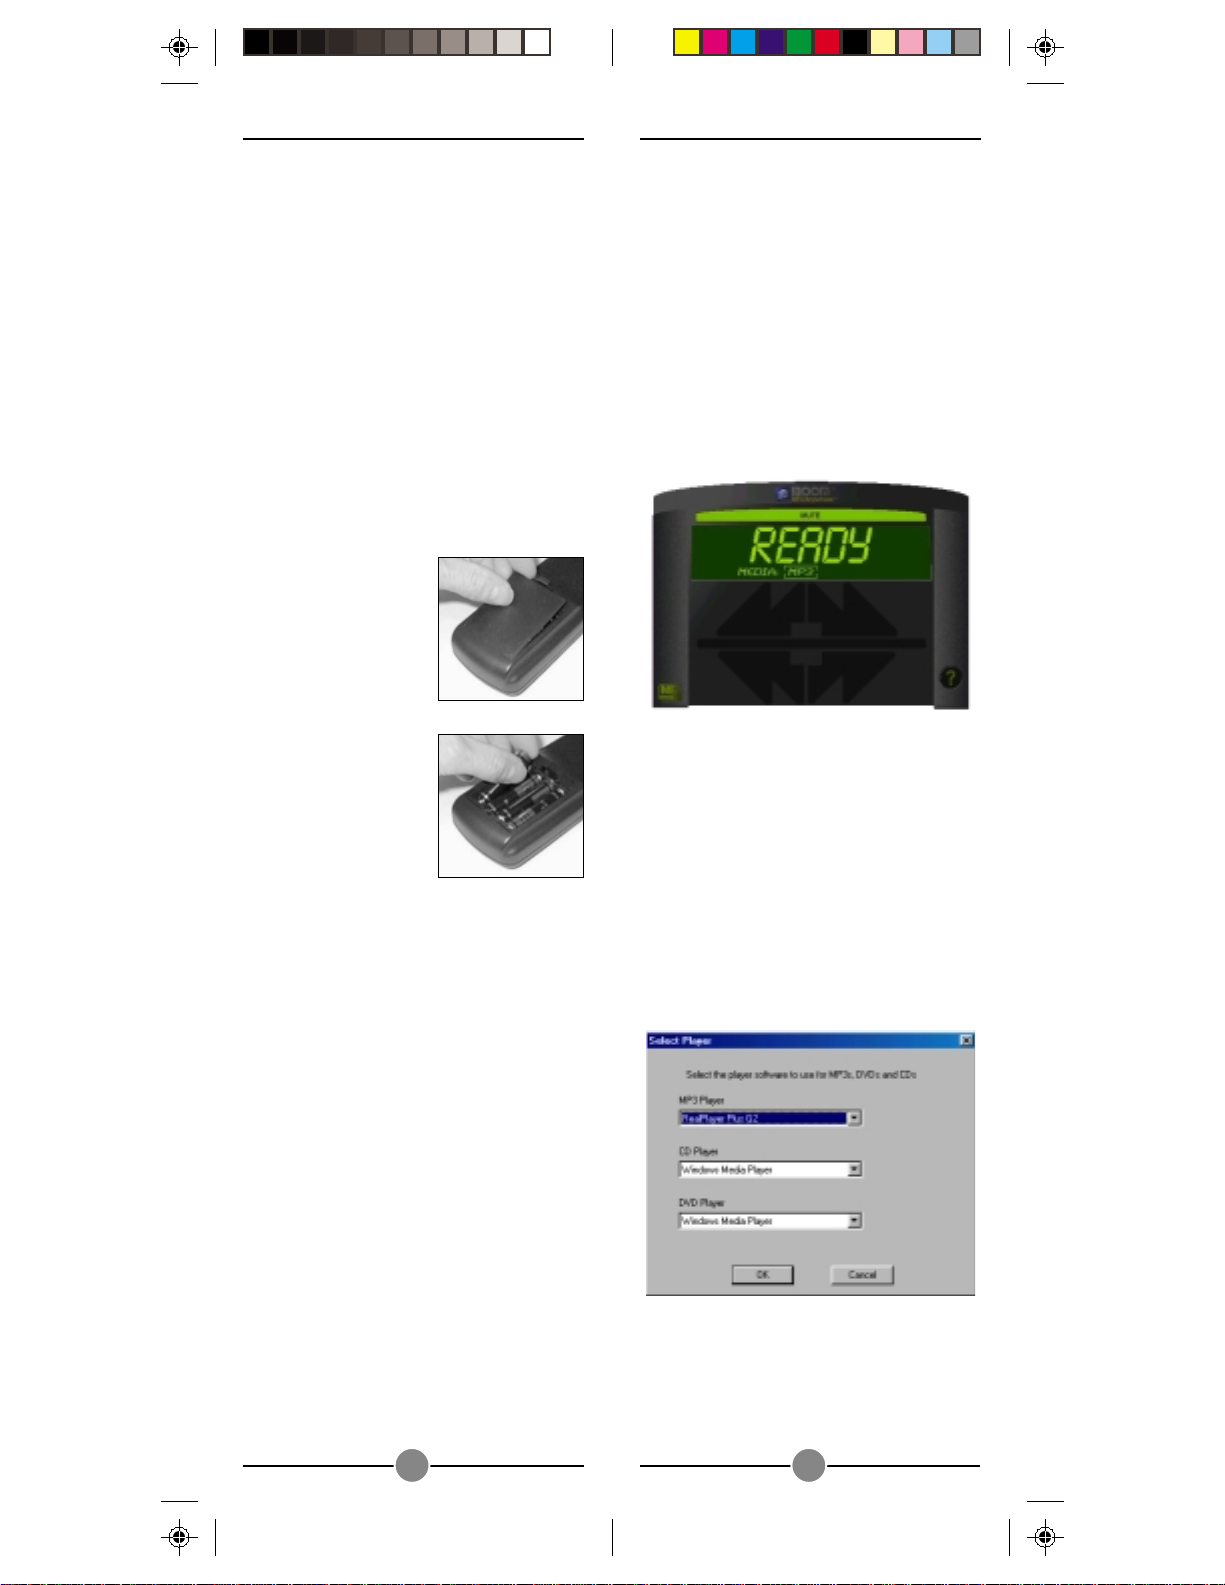
After installation is complete the Boom
software automatically launches and
picture like the one below appears.
4. Right- click on the BOOM window
and select applications for each of the
modes (i.e. MP3, CD, DVD). Note, if
you don’t have any DVD or CD
application, leave the selection box
blank or set it to the same application
as a previous selection. i.e. in the
window below there was no DVD
player installed so it was left the same
as the Windows Media Player.
S
ETTING UP THE SOFTWARE
X10’s BOOM software lets you control
an MP3 player application from the MP3
Remote. It works with Windows Media
Player, WinAmp, RealJukeBox, etc.
which you must previously have installed.
It also controls a software DVD player
and CD player in your PC.
5. Click the OK button to save the
choices.
You are now ready to use the PC remote.
98
Page 6

To launch an application:
1. Press the PC button.
2. Select the appropriate mode (MP3,
DVD, or CD) by pressing 1, 2, or 3.
The Media shown in the Boom
window changes to MP3, DVD, or
CD depending on the button you
pressed.
3. Press the Power button. The desired
application (MP3, DVD, or CD player)
is launched.
You can press Play, Stop, FF, Rew, Pause,
Mute, Vol Up, Vol Down, etc., on the
MP3 Remote and it operates your onscreen MP3 player , DVD player, or CD
player, just as if you were clicking the
buttons on your PC screen.
For more information, click on ? on the
BOOM screen for help.
S
ETTING UP FOR
ABLE
, S
C
1. Turn on the device
you want to control
(TV, VCR, cable
box, satellite
receiver, DVD,
etc.).
2. Press and hold
SETUP until the LED
indicator lights
steadily. Release
the SETUP button.
3. Press and release
the mode button
for the device you
want to control.
The LED blinks
once. Use VCR for
Laser Disks.
ATELLITE
TV, VCR,
/DSS, & DVD
Note, in addition to letting you control
an MP3 player installed in your PC, the
BOOM program also lets you control a
DVD and CD player installed in your PC.
If you press PC, then DVD (the number 2
button), the Play, Stop, Pause buttons,
etc. on the remote operate a DVD player
installed in your PC.
(The DVD button at the top of the remote
operates a regular DVD player).
Likewise, If you press PC, then CD (the
number 3 button), the Play, Stop, Pause
buttons, etc. on the remote operate a CD
player installed in your PC.
The MP3 Remote is also a Universal
Remote so you can use it to control a TV,
VCR, cables box, etc. To do this see the
following section.
4. Enter the 3 digit
Code from the
Library Code
Tables. The LED
turns off after the
last digit entered.
5. Point the remote at
the device and
press the POWER
button. Your device
should turn off.
6. Turn your device on
and press
CHANNEL+. If the
device responds,
setup is complete.
Notes:
For CD players use the PC button (see
IMPORTANT NOTE on page 25).
If your TV/VCR/Cable Box/Satellite
Receiver/DVD Player does not
respond, try the other codes for your
brand. If it still doesn’t respond, try the
Code Search method on page 13.
If some buttons do not operate your
equipment, try one of the other codes for
your brand.
1110
Page 7

U
SING THE
CONTROL
ABLE BOX
C
DVD P
P
LAYER, OR
PC
A S
, S
LAYER
CD P
BUTTON TO
ECOND
, L
TV, A VCR,
ATELLITE RECEIVER
ASER DISK
LAYER, ETC
.
The PC button is normally used to access
MP3, DVD, or CD players installed in a
PC. It can be reprogrammed to control
other items instead, but note that if you
do so you will no longer be able to
control PC functions.
on page 25 before proceeding.on page 25 before proceeding.
on page 25 before proceeding.
on page 25 before proceeding.on page 25 before proceeding.
1. Turn on the
equipment you
want to control.
2. Press and hold
SETUP until the LED
indicator lights
steadily. Release
the SETUP button.
See ImporSee Impor
See Impor
See ImporSee Impor
tant notetant note
tant note
tant notetant note
7. Turn your A/V
component on and
press CHANNEL +.
,
If it responds, setup
is complete.
S
EARCHING FOR CODES
1. Turn on the device
you want to control.
2. Press and hold
SETUP until the LED
indicator lights
steadily. Release
the SETUP button.
3. Press the PC button.
4. Press and release
the mode button
that matches the
A/V equipment
you want to
control. The LED
blinks once.
5. Enter the 3 digit
Code from the
Library Code
Tables. The LED
turns off after the
last digit entered.
6. Point the remote at
your A/V
component and
press the POWER
button. Your A/V
component should
turn off.
3. Press the mode
button* that
matches the
equipment you
want to control.
The LED blinks
once.
4. Press CHANNEL +
repeatedly** until
the device to be
controlled changes
channel.
If you go past the
code accidentally,
just press
CHANNEL repeatedly until the
channel changes
again.
5. Press and release
the ENTER button to
complete the setup.
1312
Page 8

Notes: * When searching for, or
identifying codes stored under PC, press
PC before pressing the mode key.
** You might have to press CHANNEL
+ many times (50+). If the device does
not have a Channel Up function, use the
PLAY button (VCR and DVD only) or the
POWER button.
I
DENTIFYING CODES FOUND USING
S
EARCH PROCEDURE
THE
1. Press and hold
SETUP until the LED
indicator lights
steadily. Release
the SETUP button.
2. Press the mode
button* that
matches the
equipment you
want to identify.
The LED blinks
once.
3. Press and release
SETUP. The LED
blinks once.
4. To find the first
digit, press each
number button from
0 to 9 until the LED
blinks. The number
that blinked is the
first digit of the
code.
5. Press each number
button from 0 to 9
again as above to
find the second
digit.
6. Press each number
button in turn to
find the third digit.
When the third
digit has been
found, the LED will
turn off.
HOME CONTROL
Your MP3 remote controls lights and
appliances using X10 Modules (sold
separately). Please read the following as
it will give you an understanding of how
Home Control (Home Automation) works
and will help you understand what X10
Modules you will need to purchase to
control most everything in your home.
C
ONTROLLERS AND MODULES
The first thing you need to understand is
that there are two different devices you
need to control your house; Controllers
and Modules. Any light or appliance that
you want to control is plugged into a
Module and that Module is
then plugged into a
standard AC outlet.
Modules receive
commands from Controllers. Examples include the
Lamp Module (sold
separately). The T ransceiver
Module (also sold
separately) is another
example (although it also
doubles as a controller
as described later).
Controllers are also
plugged into standard
wall outlets and send
commands to Modules
over your existing
electrical wiring in your
house without affecting
your electricity in any way.
The Transceiver Module
works as a controller when it
is used with a remote
control such as the MP3
Remote. When the Transceiver Module receives a
command from a remote
it sends digital signals
over your existing house
wiring to a Module
which receives the
signals and executes the
command.
1514
Page 9

The remote uses radio frequency (RF)
signals to send commands to the
Transceiver module. RF signals can go
right through walls, so you can use the
remote to control lights or appliances
from anywhere in your home.
H
OUSE CODES AND UNIT CODES
Each Module has a specific address
made up of a House Code (red dial on
the face of the Module) and a Unit Code
(black dial on the face of the Module).
The Remote sends a wireless signal to a
Transceiver which retransmits it over the
AC wiring to the Module. Only the
Module with a matching address
executes the command. If more than one
Module has the same address, both
Modules execute the command.
Addresses are set on the Module by
turning the two dials on the front of the
Module to the desired letter and number
(using a small screwdriver or a coin). The
House Code is selected from the letters A
through P, and the Unit Code is selected
from the numbers 1 through 16.
UNIT CODE
DIAL
You should locate the Transceiver Module
centrally in the home for maximum range
when controlled by the MP3 Remote.
1. Set the House Code
to ‘A.’
2. Plug a lamp or
appliance into the
Transceiver
Module.
3. Plug the Transceiver
Module into a
convenient AC
outlet. Fully extend
the antenna.
L
AMP MODULE
The Lamp Module (sold separately) can
be used to control any incandescent
lamp rated up to 300W. It is not suitable
for other types of lamp such as
fluorescent or energy saving lamps, or
lamps which include a dimmer control.
HOUSE CODE
DIAL
T
RANSCEIVER MODULE
The T ransceiver Module (sold separately)
receives radio frequency (RF) commands
from the MP3 Remote to operate a lamp
or appliance plugged into it. The
Transceiver Module also passes on
commands over your house wiring to
control other X10 modules (also sold
separately). Note that unlike the Lamp
Module you cannot dim or brighten a
lamp connected to the Transceiver
Module.
1. Set the House Code
to ‘A’ and the Unit
Code to ‘2.’
2. Plug a lamp into
the Lamp Module.
3. Plug the Lamp
Module into a
convenient AC
outlet.
1716
Page 10

CONTROLLING
X10 MODULES
If you have purchased and installed a
Transceiver Module, you can control it
and other X10 modules as follows:
The 4 rocker keys at the bottom of the
remote will control X10 Modules set to
1, 2, 3, and 4, from left to right. Press
the top of the rocker key to turn the
Module ON. Press the bottom of the
rocker to turn the Module OFF. Press and
hold the top rocker to brighten, and the
bottom rocker to dim lights connected to
Lamp Modules and Wall Switch
Modules (does not dim or brighten
Appliance Modules, but turns them on if
they were off).
Use the slide switch on the side of the
remote to select control of X10 Modules
set to 1-4 or 5-8.
C
HANGING THE
SWITCH
You can change 1-4/5-8 slide switch to
allow you to control X10 Modules set to
9-12/13-16:
1. Press and hold
2. Press and hold the
The above procedure changes the switch
on the side of the remote to control X10
Modules set to 9-12 or 13-16. To
change it back to 1-4/5-8, repeat the
above procedure, pressing LIGHTS ON
instead of ALL OFF.
SETTING
SETUP until the LED
indicator lights
steadily. Release
the SETUP button.
ALL OFF button
(LED blinks off) for
about 8 seconds
until the LED
indicator turns off.
X10 S
:
LIDE
The Lights On button turns on ALL lights
connected to Lamp Modules and Wall
Switch Modules (set to the same
Housecode as the remote). This button
does not affect Appliance Modules.
The All Off button turns off ALL X10
Modules set to the same Housecode as
the remote, including Appliance
Modules.
These 4 rocker keys give instant control
of 4 X10 Modules set to Unit Codes 1-4
or 5-8 no matter what mode you are in
(TV, VCR, etc.).
1918
Page 11

C
ONTROLLING ALL
C
ODES
16 U
NIT
You can set any mode key (except TV) to
become an “X10” key. You could for
example make SAT an X10 key. Pressing
SAT then puts you in X10 mode and lets
you control all 16 X10 Modules (set to
the same Housecode as the remote).
Note: Do not set PC to be an X10 key
as you will then not be able to access
any of the MP3, etc., features of the
remote. See IMPORT ANT note on page
25
Notes: You cannot dim or brighten an
Appliance Module. If the module was off
and you press Bright or Dim (VOLUME +
or VOLUME -) this will simply turn the
module on.
* The above procedure sets the remote
to transmit X10 RF codes to any X10
Transceiver. If you want it to transmit X10
IR codes to an IR543 Console press 001
in step 3 above instead of 000.
C
HANGING THE
X10
1. Press and hold
SETUP until the LED
indicator lights
steadily. Release
the SETUP button.
2. Press and release
any mode button
(except TV), e.g.
SAT.
3. Press 000.*
Once in X10 mode you can control any
X10 Module by pressing the number
button corresponding to its Unit Code,
followed by the appropriate function key
as follows:
OUSE CODE
H
:
The MP3 Remote defaults to House Code
A, and in most cases you will not need
to change this unless you are
experiencing interference from a
neighboring X10 system.
1. Press and hold
SETUP until the LED
indicator lights
steadily. Release
the SETUP button.
2. Use the number
buttons to enter the
number equivalent
to the desired
House Code
(1=A, 2=B ..16=P).
3. Press ENTER or OK
to confirm the
House Code. The
LED turns off.
X10 FUNCTIONS:
On: CHANNEL +
Off: CHANNEL –
Bright: VOLUME +
Dim: VOLUME –
All Lights On: POWER
All Units Off: MUTE
Note: The House Code you choose must
match the House Code on the X10
Transceiver and Modules you are using it
with.
2120
Page 12

A
I
EM
O
C
GK
•
•
•
•
•
•
•
•
1
9
51
3
1
5
3
71
1
•
•
•
•
•
•
•
U
N
I
T
R
e
m
o
te
C
h
im
e
H
O
U
S
E
1
9
513
A
I
EM
CONTINUOUS
MOMENTARY
U
N
IV
E
R
S
A
L
M
O
D
U
L
E
O
N
O
F
F
SOUNDER & RELAY
RELAY ONLY
SOUNDER ONLY
A
I
EM
•
•
••
1
9
51
3
•
•
••
H
e
av
y D
u
ty
A
p
plian
ce
M
o
d
u
le
U
N
I
T
H
O
U
S
E
P
o
w
e
r
A
d
a
p
te
r
OFF
T
h
e
r
m
o
s
t
a
t
S
e
t
-
B
a
c
k
C
o
n
t
r
o
l
l
e
r
LO M HI
1
9
513
A
I
EM
A
I
EM
•
•
••
1
9
513
•
•
••
CONTROLLED
1
9
51
3
A
I
EM
AB 123
IN
P
U
T
M
O
D
E
P
O
W
E
R
F
L
A
S
H
I
N
T
E
R
F
A
C
E
T
E
S
T
A
L
L
U
N
IT
S
O
F
F
EXPANDING
YOUR SYSTEM
The modules illustrated below represent
just a few of the wide range of X10
compatible Modules you can choose
from to expand your Home Automation
system. They are available from electrical
outlets, department stores and mail order
catalogs.
X10 Home Automation products also
integrate with X10 security systems, so
you can use the security remotes that
come with them to control macros and
flash lights when the security system is
tripped.
Visit our Web Site at: WWW.X10.COM
for more information on these and many
other X10 products.
Mini TMini T
Use the
program up to 4 X10 Modules
to go on and off up to twice a
day.
imer MT10A imer MT10A
Mini T
imer MT10A to
Mini TMini T
imer MT10A imer MT10A
Switch entrance or garage lights on
from your car with the convenient
Keychain Remote KR21A.
Replace your existing wall switches with
the Wall Switch Module WS467. Installs
like a regular dimmer. On/Off and
Bright/Dim functions. Other models
available for 3-way and fluorescent
lighting.
Control a ceiling light, closet light,
etc. with the convenient Screw-in
Lamp Module LM15A.
Replace existing AC wall outlets with
the Receptacle Module SR227. Has
one 15A/1800W controlled outlet
and one outlet which is always on.
Use a controller to trigger the Remote
Chime Module SC546 to call Dad
up for dinner, or warn people you’re
about to turn on the sprinklers.
The Dual Floodlight
Motion Detector PR511
turns on at dusk and/or
when it detects movement,
and sends X10 signals to
control other modules, or
trigger ActiveHome macros.
Use the isolated contacts on the
Universal Module UM506 to control
pool pumps, sprinklers, drapes and
other low voltage equipment. Includes
built in warning beeper.
The Thermostat Setback
Controller TH2807
mounts below your
Fit a Wireless Wall Switch SS13A/
SS15A anywhere you need an extra
switch - with no wires. Sends
commands to the Transceiver
Module just like a remote.
thermostat to reduce the
room temperature at night
or at the times you set to
save energy. No wiring
needed to your existing
thermostat.
Plug in a Heavy Duty Module HD245
The PowerFlash Module PF284
connects to dry contact or low voltage
to control 220V appliances such as
air conditioners and water heaters.
alarm terminals on your burglar alarm
system and flashes X10 controlled lights
when it is triggered.
Also compatible with FireCrackerAlso compatible with FireCracker
Also compatible with FireCracker
Also compatible with FireCrackerAlso compatible with FireCracker
Computer InterComputer Inter
Computer Inter
Computer InterComputer Inter
for details.for details.
for details.
for details.for details.
face. See wwwface. See www
face. See www
face. See wwwface. See www
.x10.com.x10.com
.x10.com
.x10.com.x10.com
2322
Page 13

TROUBLESHOOTING
If the remote doesn’t do anything (no
red light when you press any buttons)
• Check that the batteries are fitted
properly (observe polarity). Replace
with fresh alkaline AAA type.
If you cannot control your MP3, DVD,
or CD payer in your PC (but can control
other items, such as a TV, VCR, etc.).
• Check that you pressed the PC button
before your pressed the MP3, DVD,
or CD button. Then press Power to
launch your MP3, DVD, or CD
player.
• Make sure you have an MP3 player
installed in your PC. The MP3 remote
is compatible with RealJukeBox,
MusicMatch, Windows Media
Player, WinAmp, and many more.
Check our Web site for more details
when you download the Boom
software for use with the MP3 remote.
• Note that the DVD button at the top of
the remote controls a regular DVD
player. Press PC then the # 2 button
to control a DVD player in your PC.
• Check that you have configured the
Boom software for the type of MP3
player you are using, see page 9.
• If you have reprogrammed the PC
button to control something else,
program it back to PC operation. See
IMPORTANT note on page 25.
• Check that the receiver is properly
connected to your PC’s serial port
and that the red LED power indicator
on the receiver is on.
• Make sure the receiver is connected
to your serial port BEFORE you install
the Boom software. Reinstall it if
necessary. If installation fails, make
sure the software isn’t running during
installation. Do not change the port
you are connected to after
installation.
• Move the receiver as far away from
your PC and monitor as its cable
allows.
IMPORT ANT NOTE
The default code for the PC button is
013. You might want to change this to
use the PC button to control something
else like an audio system, for example.
Note however that if you do this the PC
button will not let you access the MP3,
DVD and CD (1, 2, 3, buttons). To
reprogram the PC button to once again
access these PC functions:
1. Press and hold SETUP until the LED
indicator remains on.
2. Release SETUP.
3. Press and release the PC button.
4. Enter the 3 digit code 0, 1, 3
5. The LED indicator turns off after the
last digit is entered.
If the Remote won’t control your A/V
equipment.
• Use manual controls or the original
remote control to confirm the
equipment is working properly.
• Be sure you pressed the device key
for the device you want to control.
• Reenter the code for your A/V
product from the code listings.
• Try searching for codes as described
on page 13.
• Replace the Remote’s batteries.
If the Transceiver Module doesn’ t
respond to the remote:
• Check the House Code on the
Transceiver Module is set to ‘A.’ If you
have changed the House Code on
the remote (see p. 21), check that it
matches the House Code on the
T ransceiver Module.
• Press the ON/OFF button on the front
of the Transceiver to confirm it
operates the equipment connected to
it.
2524
Page 14

WARRANTY
If the Transceiver Module works, but
other Modules don’t respond:
• Check that the Module has the same
House Code as the Transceiver
Module.
• Try plugging the Module into a
different outlet.
Note: if you use an RF Transceiver (such
as the RR501 or TM751) to control X10
Modules, you will be able to control up
to 16 Modules. When using a
Transceiver, when you press 1-6-ON you
turn on Module number 16. However, if
you use an IR543 Console, when you
press 1-6-ON you turn on Modules 1
AND 6. The IR543 can only control 10
Modules (1-9 plus 0=10).
Caution: Do not connect an appliance
such as a coffee pot or heater to the
Lamp Module. It may damage the
module and the appliance and could
cause a fire hazard.
12 MONTH LIMITED WARRANTY
X10 (USA) INC. (X10) WARRANTS ITS PRODUCTS TO
BE FREE FROM DEFECTIVE MATERIAL AND
WORKMANSHIP FOR A PERIOD OF ONE (1) YEAR
FROM THE ORIGINAL DATE OF PURCHASE AT RETAIL.
X10 AGREES TO REPAIR OR REPLACE, AT ITS SOLE
DISCRETION, A DEFECTIVE X10 PRODUCT IF
RETURNED TO X10 WITHIN THE WARRANTY PERIOD
AND WITH PROOF OF PURCHASE.
IF SERVICE IS REQUIRED UNDER THIS WARRANTY :
1. RETURN THE DEFECTIVE UNIT POST AGE PREPAID
TO:
X10.COM, INC.
3824 NORTH 5th St., SUITE C,
NORTH LAS VEGAS, NV 89030
2. ENCLOSE A CHECK FOR $4.00 TO COVER
HANDLING AND RETURN POSTAGE.
3. ENCLOSE A DATED PROOF OF PURCHASE.
4. ENCLOSE YOUR COMPLETED WARRANTY CARD.
5. X10 IS NOT RESPONSIBLE FOR SHIPPING
DAMAGE. UNITS TO BE RETURNED SHOULD BE
PACKED CAREFULLY.
THIS WARRANTY DOES NOT EXTEND TO ANY X10
PRODUCTS WHICH HAVE BEEN SUBJECT TO MISUSE,
NEGLECT, ACCIDENT, INCORRECT WIRING OR TO
USE IN VIOLATION OF OPERATING INSTRUCTIONS
FURNISHED BY US, NOR EXTEND TO ANY UNITS
ALTERED OR REPAIRED FOR WARRANTY DEFECT BY
ANYONE OTHER THAN X10. THIS WARRANTY DOES
NOT COVER ANY INCIDENTAL OR CONSEQUENTIAL
DAMAGES AND IS IN LIEU OF ALL OTHER
WARRANTIES EXPRESSED OR IMPLIED AND NO
REPRESENTA TIVE OR PERSON IS AUTHORIZED TO
ASSUME FOR US ANY OTHER LIABILITY IN
CONNECTION WITH THE SALE OF OUR PRODUCTS.
SOME STATES DO NOT ALLOW LIMITA TIONS ON
HOW LONG AN IMPLIED WARRANTY LASTS, AND/
OR THE EXCLUSION OR LIMITATION OF INCIDENTAL
OR CONSEQUENTIAL DAMAGES SO THE ABOVE
LIMITATIONS AND EXCLUSIONS MAY NOT APPLY TO
THE ORIGINAL CUSTOMER. THIS WARRANTY GIVES
YOU SPECIFIC RIGHTS AND YOU MAY ALSO HAVE
OTHER RIGHTS WHICH VA RY FROM STATE TO STATE.
Page 15

X10.com, Inc.
3824 North 5th St.,
Suite C, North Las Vegas,
NV 89030
Web Site: www.x10.com
E-mail: Sales@x10.com
Printed in Hong Kong
DR-VK47A-1299
 Loading...