

Page 1
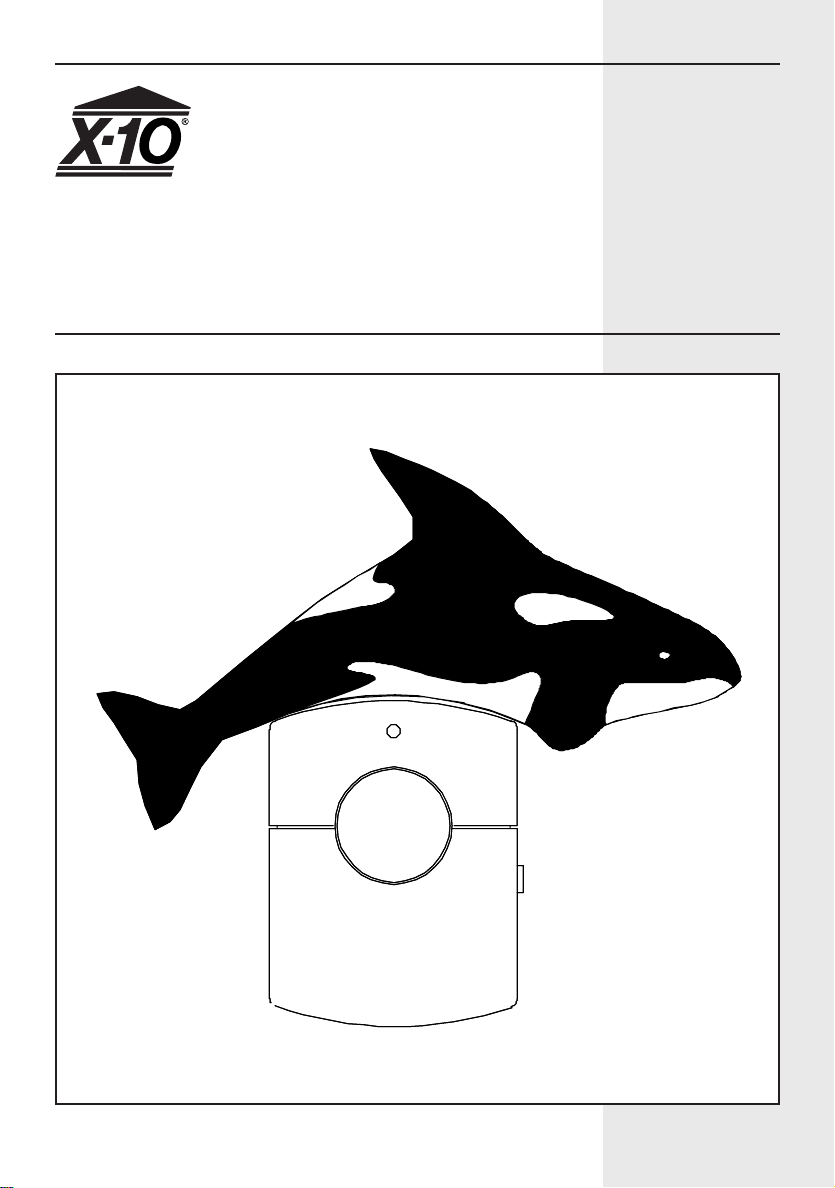
ORCA
™
Panic System
Owner's Manual
ORCA Panic System Model ORCA 2000
Page 2

READ THIS FIRST
This equipment generates and uses radio
frequency energy, and if not installed and used
properly, that is, in strict accordance with the
manufacturers instructions, may cause
interference to radio and television reception. It
has been type tested and found to comply with
the limits for remote control security devices in
accordance with the specifications in Sub-Pa rts
B and C of Par t 15 of
designed to provide reasonab le protection against
such interference in a residential installation.
Howe ver , there is no guar antee that interference
will not occur in a particular installation. If this
equipment does cause interference to radio or
television reception, which can be determined by
unplugging the equipment, try to correct the
interference by one or more of the following
measures.
• Reorient the antenna of the radio/TV
experiencing the interference.
• Relocate the Console with respect to the
radio/TV.
• Move the Console away from the radio/TV.
• Plug the Console into an outlet on a different
electrical circuit from the radio/TV experiencing
the interference.
If necessary, consult your local X-10 Dealer for
additional suggestions.
Your Console’s telephone dialer is designed to
conform to federal regulations, and you can
connect it to most telephone lines. Ho weve r, each
telephone or telephone device that you connect
to the telephone line draws power from the
telephone line. W e ref er to this power dr aw as the
device’s ringer equivalence number , or REN.
FCC Rules
, which are
If you use more than one telephone or other device
on the line, add up all the RENs. If the total is
more than five, your telephones might not ring. In
rural areas, a total REN of three might impair
ringer operation. If ringer operation is impaired,
remove one of the de vices from the line.
Note: Y ou must not connect your Console to:
• Coin-operated systems
• Party-line systems
• Most electronic key telephone systems
Y our Console’ s telephone dialer complies with P art
68 of
FCC Rules
the FCC registration number and the REN to your
telephone company . Both numbers are sho wn on
the bottom of the Console.
The telephone portion of your security Console
has been tested and found to comply with all
applicable UL and FCC standards.
In the unlikely event that your Console causes
problems on the telephone line, the telephone
company can disconnect your service. T he
telephone company attempts to notify you in
advance. If advance notice is not practical, the
telephone company notifies you as soon as
possible and advises you of your right to file a
complaint with the FCC.
Also, the telephone company can make changes
to its lines, equipment, operations, or procedures
that could affect the operation of this Console . The
telephone company notifies you of these changes
in advance, so you can tak e the necessary steps
to prevent interruption of your telephone service.
Note: The security functions of this system have
not been tested by Underwriters Laboratories .
. You must, upon request, provide
2
Page 3

CONTENTS
INTRODUCTION...................................................................................................4
SETTING UP THE CONSOLE ..............................................................................5
SETTING UP KEY CHAIN REMOTE AND PANIC BUTTONS ............................. 7
SETTING UP REMOTE MODULE AND POWERHORN ......................................8
SETTING UP FOR THE MONITORING STATION................................................9
USING THE SYSTEM .........................................................................................12
TURNING LIGHTS ON AND OFF REMOTELY .................................................. 13
BATTERY BACK UP............................................................................................14
CARE AND MAINTENANCE ..............................................................................15
TROUBLESHOOTING ........................................................................................16
3
Page 4

INTRODUCTION
Your X-10 ORCA Panic System makes
you feel secure. The system includes a
Console with a digital communicator that
connects to ORCA Monitoring Services
when you press a Panic Button. The
system includes 6 Panic Buttons, a
Lamp Module, a Powerhorn, and a
Ke ychain Remote Control.
Features:
Easy Installation- The ORCA Panic
system installation is a snap. The system
is easy to install and use.Panic Buttons
are shipped with the batteries in place
and pre-installed into the Console so all
you need to do is plug the Console in
and stick the Panic Buttons on the wall.
Built in Digital Communicator- Calls
ORCA Monitoring Ser vices when you
press one of the Panic Buttons.
X-10 Home Automation compatible-
Adding X-10 Home Automation products
such as Lamp Modules, Appliance
Modules, Wall Switch Modules, etc. is
easy with this system, because it is
already configured to control the full
range of X-10 Home Automation
products.
Automatic lighting control- An
automatic timer can be put into action
which turns lights, stereos, TVs, etc. on
and off at random times to make your
home look and sound lived in. This is
set up for you by ORCA Monitoring
Services and downloaded to the system
over the phone line..
Battery backed-up Console- If the
power fails or is cut the system doesn't
stop working. Telephone dialing and
alarm siren are still ready for action
using an easy to replace 9V alkaline
backup battery in the Console. An
indicator on the Console warns you
when the battery needs changing.
Fully expandable- You can expand the
system into a burglar alarm system by
adding Door/Window Sensors and/or
Motion Detectors. Plus you can control
lights and appliances by Remote
Control.
4
Page 5
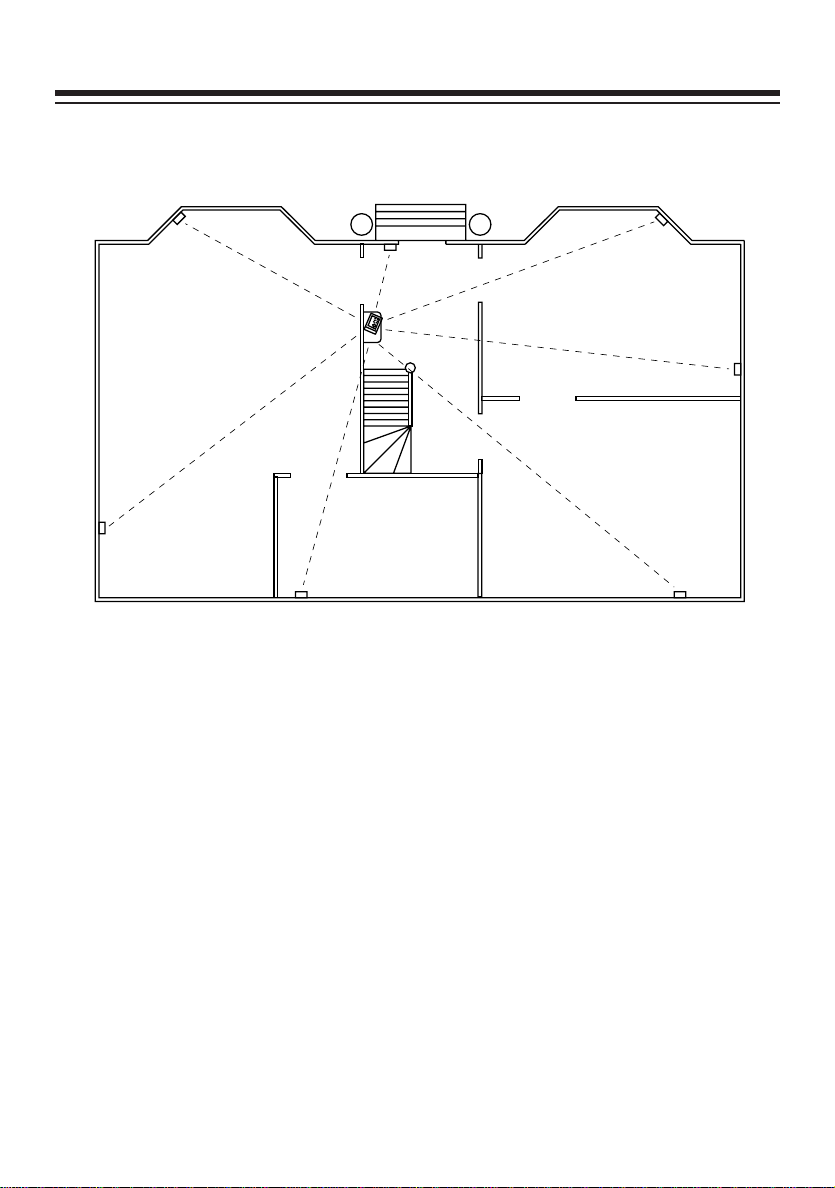
SETTING UP THE CONSOLE
Choosing a location for the
Console
Hallway
Living Room
Study
Dining Room
Kitchen
Before you select a location for the
Console, think of the areas in y our home
where you would be most likely to use
the Panic Buttons.
Select a location that is central to those
areas and that is within the Console’s
range (up to 100 feet).
Here are some other things to consider
when choosing the Console’s location:
• It must be close to a modular
telephone jack so you can easily
connect the telephone dialer.
• The Console’s loud alarm might
frighten you if you tr ip it while you are
next to it, so it is best to place the
Console in a large open area (like a
living room). But, you should also
place it close to a window so
neighbors are more likely to hear the
alarm.
The siren in the Console can be turned
off by ORCA Monitoring Services if you
prefer . You can then hide the Console in
a closet and use the Powerhorn to scare
away int ruders.
5
Page 6
Setting up the Console
1. Slide off the battery compartment
cover and clip a 9V battery onto the
battery contacts.
2. Slide the battery into the battery
compartment and replace the cover.
If your telephone wiring does not
have a modular jack, you can:
• Update the wiring yourself. Most
good electrical stores sell adapters
to convert older wiring methods to
modular wiring.
• Have the telephone company
update the wiring for you.
Note: The telephone company
charges to install the necessary
jacks.
The USOC number of the jacks to
be installed is RJ11C (or RJ11W for
a wall plate installation).
3. Plug one end of the supplied
telephone cord into the Console and
the other end of the telephone cord
into a modular telephone jack.
Warning: To reduce the risk of
electric shock, never plug a
telephone cord into a telephone line
jack until the other end of the cord
is plugged into the Console.
Note: if you already have a phone
plugged into the jack, use the
included 'T' adapter to plug the
Console and telephone into the
same jack.
6
You can use the Console with either
pulse or touch-tone phone systems.
4. Plug the Console into an AC outlet
which is not controlled by a wall
switch.
Page 7

SETTING UP KEYCHAIN REMOTE & PANIC BUTTON
The Keychain Remote and Panic Buttons are shipped with the batteries fitted and
the units pre-installed into the Console, so e verything should work straight out of the
box. If you need to re-install anything (after changing batteries for example) follow
the steps below.
Key Chain Remote
1. Install 2 AAA alkaline batteries in the
KR16A Keychain Remote's battery
compartment.
2 . Set the INST ALL/RUN s witch on the
Console to INST ALL (located under
the flip up door).
Panic Button
1. Install 2 AAA alkaline batteries in the
KR15A Panic Button's battery
compartment.
2 . Set the INSTALL/RUN s witch on the
Console to INST ALL (located under
the flip up door).
3 . Press and hold the red P anic Button
on the KR15A for about 4 seconds.
The Console chimes.
4. Set the Console's slide switch bac k
to RUN1 or RUN2.
5 . To set up additional Panic Buttons *
repeat above steps.
3. Press and hold PANIC on the
Keychain Remote for about 4
seconds. The Console chimes.
4 . Set the Console's slide switch back
to RUN1 or RUN2.
5. To set up additional key chain
remote controls* repeat above
steps.
One of the 6 included Panic Buttons is
black in color . This one can be placed in
a special compartment on the dorsal fin
of a 26" long Lucky ORCA Whale.
* You can install a combination of 16
Panic Buttons and/or Keychain
Remotes.
7
Page 8

Setting up Lamp Modules
When the alarm trips, lamps connected
to Lamp Modules set to A-1 (or other
codes on request from the monitoring
station - see pages 10 and 11) flash on
and off for the duration of the alarm.
After 4 minutes (or when you stop the
alarm) the lamps stop flashing and
remain on.
You can also control Lamp Modules set
to A-1 from the LIGHTS ON and
LIGHTS OFF buttons on the Keychain
Remote, or from the small b uttons under
the lid on the KR15A Panic Button.
Choose a lamp you want to be a part of
your Panic System. Make sure the
lamp's on/off switch is on and plug the
lamp into the Lamp Module. Plug the
Lamp Module into any con venient outlet.
Set the House Code and Unit Code dials
on the Lamp Module to A-1 (or other
codes on request from the monitoring
station - see pages 10 and 11).
Setting up the
The
POWERHORN
POWERHORN
Remote Pow erline
Siren responds to signals transmitted
by the Console (ov er your house wiring).
When you trip the panic alarm, the
POWERHORN
is also tripped and
continues to sound until about 4
seconds after the alarm is stopped.
1 . Set House Code and Unit Code dials
on the
2. Plug the
POWERHORN
POWERHORN
to A-1
into a
standard AC outlet (not one
controlled by a wall switch).
WARNING: THE
POWERHORN
is
very loud! Do not stand near it when
you trip the alarm. Prolonged
exposure could cause permanent
hearing damage.
Lamp Module
1
15
3
513
711
9
UNIT
A
O
C
EM
GK
I
HOUSE
1
•
•
15
3
•
513
•
••
711
•
9
UNIT
A
•
•
O
C
•
••
EM
••
GK
•
I
HOUSE
Power Horn
8
Page 9

SETTING UP FOR MONIT ORING BY ORCA
Introduction to digital
monitoring
The ORCA P anic System incorporates
the same digital communicator
technology found in expensiv e high-end
security systems. Features supported
include remote configuration and alarm
type confirmation.
When the Console is tripped, a loud
piercing siren sounds and lights
connected to Lamp Modules flash on and
off. It then calls ORCA Monitoring
Services and sends a digitally coded
message allowing the station operator to
identify your address , telephone number
and even the type of alarm which
occurred (in this case Panic).
Registering with ORCA
Monitoring Services.
Once you ha ve installed the system y ou
are ready to set up for monitoring. To
do this, all you need to do is:
• Fill out the enclosed monitoring
agreement and mail or fax it to ORCA
Monitoring Services.
• Call ORCA Monitoring Services at
1-800 FOR ORCA (1-800-367-6722)
and follow the instructions to have
your system initialized.
Note: Although you can register your
system as soon as it has been installed,
the ORCA Monitoring Ser vices will not
respond to alarm calls until the signed
monitoring agreement has been received
and you have been allocated y our security
code which will be notified to you by
return.
Calling Customer Service
After you have registered your system
you can easily call the customer service
center if you need help, or to change
any of the default options as follows:
• Set the Console slide switch to RUN1
or RUN2.
• Press the MONITOR button. The
Console automatically dials the
customer service number.
• Pick up the handset of a phone
connected to the same line as the
Console.
Alternatively , you can dial the telephone
number in the usual way with any
telephone connected to the same line
as the Console - just pick up the
telephone and dial 1-800-FOR ORCA
(1-800-367-6722).
9
Page 10

Options downloaded by
ORCA Monitoring Services
The options that are downloaded to y our
Console when you register it are listed
below. You can hav e most of the def ault
options changed by calling ORCA
Monitoring Services and following the
instructions given to you.
1. 1st Monitoring Station Number-
The 1st number the Console will dial
to call ORCA Monitoring Services.
2. 2nd Monitoring Station Number-
Back-up phone number for ORCA
Monitoring Services in case the first
number doesn't respond.
3. Service Station Number- Number
for the customer service station.
4. Account number- Your 8 digit
account number.
5. Exit delay- The amount of time the
Console will give you to leave the
house when armed. (0-1000
seconds). The default is 60 seconds .
Only used with optional door/window
sensors (sold separately).
6. Entry delay- The amount of time
you have to disarm the alarm when
you enter your home. (0-1000
seconds). The default is 30 seconds .
Only used with option door/window
sensors (sold separately).
7. Delay before dialing- The amount
of time the Console will wait after it
has been triggered before calling the
monitoring station (to give y ou time
to disarm the system before it dials
in case of a false alarm). The def ault
is 40 seconds.
8. Test Dial Frequency- How many
days the Console will wait to call the
service station to check-in. Default
is 30 days.
9. House/Unit Code to flash lights
The default setting is code A-1.
10.House/Unit Codes for Lived-in
look- To control lights and
appliances to make y our home look
lived in (activ e only if the Console is
armed in the away mode with
optional SH624 remote control). The
default settings are A-14, A-15, and
A-16.
11.Daylight parameters- Sets dusk
times for midwinter and midsummer
to activate lived-in look lighting
control (see option 10). Dusk times
f or the rest of the year are calculated
automatically. Defaults are 4pm in
midwinter and 10pm in midsummer.
12.Preset off time- Time for the lights
to turn off after they have been
turned on automatically at dusk
(when armed in the away mode).
10
Page 11

13.Daylight Savings Date- Date for
daylight savings time.
14.Panic Dialing ON/OFF- If this
option is set to ON, the Console will
dial out whenever PANIC is pressed
on the optional SH624 remote. If this
option is set to OFF, the Console will
only dial out when PANIC is pressed
and
the system is armed. Default is
ON.
NOTE: the system ALWAYS dials
when PANIC is pressed on the
included KR15A Panic Buttons and
KR16A Keychain Remote, whether
or not the system is armed.
15.Chirp ON/OFF- If chirp is ON, the
Console will chirp when it needs
programming by ORCA. The default
setting is OFF.
16.Siren ON/OFF- If the siren is set to
off, it will not sound when the alarm
is triggered, although the Console
will still dial out and the remote
POWERHORN
default setting is ON.
17.Flashing lights ON/OFF- If this
option is turned off, the lights will not
flash when the alarm is triggered,
although the Console will still dial
out. The default setting is ON.
18.T one or Pulse- To change the dialer
to Touch Tone or Pulse dialing. The
default seting is Tone dialing.
will still sound. The
11
Page 12

USING THE SYSTEM
Console Indicators
Zone indicators - The Console displa ys
the status of its 16 zones (8 at a time).
These zone indicators are only used if
you add optional Door/Window Sensors
or Motions Detectors (sold separately)
and are e xplained in the instructions that
accompany them.
Battery Light - Indicates that the
battery in the Console is low and needs
replacing.
Monitor Light - Indicates that you need
to call ORCA Monitoring Service at 1800-FOR-ORCA (1-800-367-6722).
Armed Light - Indicates that the unit is
armed and ready be activated from
optional sensors.
Sounding the PANIC Alarm
Note: the Console does NOT need to
be armed to respond to Panic Buttons
or the KR16A K eychain Remote. Arming
is only used with other accessories that
are sold separately.
Panic Buttons
When you press the red PANIC button
on the KR15A Panic Button the SH10A
siren that you installed earlier chimes.
If you hold the button for about 4
seconds the SH10A siren sounds a loud
95 decibel alarm. The Console sounds
its siren, flashes lights connected to
Lamp Modules (set to A-1) and calls
ORCA Monitoring Services for help.
ORCA Monitoring Services will then call
you back to verify that it wasn't a false
alarm. If it was a false alarm just give
the operator your pass word and ORCA
will not call the Police.
IMPORTANT:
If there is someone there who forces
you to tell ORCA your password, tell
them the wrong password, the y will then
dispatch the Police.
Keychain Remote
The KR16A Ke ychain Remote operates
the same way as the KR15A Panic
Buttons.
After an Alarm
When you press STOP on the K eychain
Remote the siren stops but the lights
that were flashing stay on. The Console
will still call ORCA if it had already
started to do so. Do not call ORCA to
tell them it's a false alarm. W ait for them
to call you. Otherwise you will prevent
them from getting through when they
call you to ask you f or y our password. If
they can't get through, the y will dispatch
the Police.
The ARMED indicator flashes to
indicate that an alarm has happened.
Press PANIC then STOP on the
Keychain Remote to turn off the flashing
ARMED indicator.
12
Page 13

TURNING LIGHTS ON AND OFF
Key chain Remote
Press LIGHTS ON or LIGHTS OFF to
turn on or off Lamp Modules set to A-1
(or other codes on request from ORCA
Monitoring Services - see pages 10 and
11).
Turning lights on/off from the
Console
Press LIGHTS ON or LIGHTS OFF on
the Console to turn on or off X-10
Modules set to A-1 (or other codes on
request from ORCA Monitoring
Services - see pages 10 and 11).
Panic Button
Press the small left hand (House) button
under the lid on the KR15A Panic Button
to turn on lights connected to modules
set to A1. Press the r ight hand (Unit)
button to turn off the same modules.
To change the House/Unit Code
for the KR15A:
The KR15A will normally control
modules set to A-1. To change this:
Press and hold the Unit button (under
the battery compartment lid) until the
red light blinks twice, then release
and press the button the desired
number of times for the Unit Code
you want (once for Unit Code 1, twice
for Unit Code 2, etc.). The light blinks
each time you press, and confirms
your entry by blinking about 2 seconds after your last press. Use the
same procedure to change the
Housecode (pressing the House
button instead). One press for
Housecode A, two presses for B, etc.
To confirm the code you've set: press
the House or Unit code button - the
light blinks back the appropriate
number of times for the code that is
set.
13
Page 14

BATTERY B ACK-UP
The Console’s backup battery allows the
system to work during a power outage.
The BATTERY LOW indicator on the
Console lights when you need to replace
the backup battery.
Installed remotes, Panic Buttons, and
Central Station phone numbers are
stored in Electrically Erasable
Programmable Read Only Memory
(EEPROM) which will not lose its data
even if the pow er is out and the battery
is dead.
A 9-volt alkaline battery provides at least
12 hours of backup. Replace the battery
at least once a year.
To remove all sensors, remotes and
Panic Buttons from the Consoles
memory:
• Set the Console to INSTALL.
• Press PANIC, ARM HOME and ARM
AWAY at the same time.
Note: Telephone numbers and
configuration data downloaded by
ORCA Monitoring Services (such as
entry and exit delays etc.) cannot be
erased, and can only be changed on
request by ORCA Monitoring Services.
If you replace the batteries in the
K eychain Remote or P anic Buttons y ou
might need to reinstall them as
described on page 7.
14
Page 15

CARE AND MAINTENANCE
Your Panic System is an example of
superior design and craftsmanship . The
follo wing suggestions will help you care
for your system so you can enjoy it for
years.
• Handle your system components
gently and carefully. Dropping them
can cause them to work improperly.
• Wipe the system components with
a damp cloth occasionally to keep
them clean. Do no use harsh
chemicals, cleaning solvents, or
strong detergents to clean your
system components.
• Use and store the Panic System
components only in normal
temperature environments. Extreme
temperatures can shorten the life of
electronic devices and distort or melt
plastic parts.
Note: Modifying or tampering with your
system's internal components can
cause a malfunction and might
invalidate its warranty.
If your system is not performing as it
should, call the customer service hotline
for help. (1-800-FOR-ORCA, 1-800367-6722). Our personnel can assist
you and arrange for a replacement if
necessary.
15
Page 16

TROUBLESHOOTING
PROBLEM
Lights will not turn on or off from the
LIGHTS ON or LIGHTS OFF buttons
on the Keychain Remote , Panic Buttons,
or Console.
If appliances turn off during an alarm. The system flashes lights by repetitivel y
• Be sure you set House and Unit
codes on the module(s) to the same
letter and number as downloaded to
the Console (default is A-1).
• Be sure the light you are trying to
control has its on/off switch in the on
position. Be sure its bulb is good.
• Plug the module into another outlet
near the Console.
• Check that the battery indicator on
the Remote Control comes on when
you press a button. Replace battery
and re-install remote if necessary.
• Check the House and Unit codes for
the Panic Button (default A-1). See
page 13.
transmitting A-1 on/off. Therefore any
appliances (connected to Appliance
Modules) which were on at the time of
the alarm set to A-1 will turn off.
SOLUTION
If the battery indicator on the Console
is on.
16
If you do not want this to happen, set
the Appliance Module(s) to a different
Housecode than A-1.
Replace the Console's battery. A 9V
alkaline battery provides approximately
12 hours of back-up. Replace battery at
least once a year.
Page 17

PROBLEM
SOLUTION
If the system Arms, Disarms, or trips
by itself.
If the armed indicator is flashing.
If the
POWERHORN
the alarm trips.
does not trip when
A neighbor may have a compatible
system. Re-install the complete system
so that it chooses different RF codes.
This indicates that the system has been
tripped. Also, if a zone indicator is on,
this indicates which zone was violated.
To turn the zone indicator off, and stop
the armed indicator from flashing press
PANIC then STOP on the Keychain
Remote. If a zone indicator is not on,
the violated zone will have been one of
the second eight zones. Press BYP ASS
to see which zone was tripped.
• Be sure you set the Housecode on
the
POWERHORN
and number as downloaded to the
Console (default A-1).
• Plug the
outlet near the Console.
POWERHORN
to the same letter
into another
The MONITOR light is flashing. This means that you need to call the
service station at 1-800 FOR ORCA,
for set up of the Console.
If you lose your Keychain Remote. Re-install your complete system to
prevent someone else from using the
lost Keychain Remote.
17
Page 18

Special Notes
Intercom Systems
Intercom systems which send voice
signals over existing electrical wiring
may interfere with the ability to control
Lamp Modules from your P anic System
with the intercom in use. If the intercom
system has its own separate wir ing it
will not cause a problem.
Arming
The ARM button on the Console arms
the system in the delay mode only. Use
an optional Remote Control if you want
to arm the system in the instant (min)
mode.
Note: you do not need to arm the system
to trip it from the included Panic Buttons
and Keychain Remote. Arming is only
used with optional Door/Window
Sensors and Motion Detectors.
18
Page 19

NO TES
19
Page 20

USA
CANADA
X-10 (USA) Inc.
91 Ruckman Rd.
Closter, NJ 07624.
W eb sites:
http://www .x10.com
http://www .activehome.com
http://www.orcaweb.com
20
X-10 Home Controls Inc.
1200 Aerowood Drive, Unit 20
Mississauga, Ontario L4W 2S7
DR/ORCA2000-8/25/97
 Loading...