

WTW inoLab pH 720 User manual
inoLab pH 720
Operating Manual
pH
720
Laboratory pH meter
ba75439e02 07/2004

Accuracy when
going to press
The use of advanced technology and the high quality standard of our instruments are the result of continuous development. This may result in differences between this operating
manual and your instrument.
We cannot guarantee that there are absolutely no errors in
this manual. We are sure you will understand that we cannot
accept any legal claims resulting from the data, figures or
descriptions.
Warranty
declaration
The designated instrument is covered by a warranty of three
years from the date of purchase.
The instrument warranty extends to manufacturing faults
that are determined within the period of warranty.
The warranty excludes components that are replaced during
maintenance such as batteries, etc.
The warranty claim extends to restoring the instrument to
readiness for use but not, however, to any further claim for
damages. Improper handling or unauthorized opening of the
instrument invalidates any warranty claim.
To ascertain the warranty liability, return the instrument and
proof of purchase together with the date of purchase freight
paid or prepaid.
Copyright
© Weilheim 2004, WTW GmbH
Reprinting - even as excerpts - is only allowed with the explicit written authorization of WTW GmbH, Weilheim.
Printed in Germany.

pH 720 Contents
1 Overview . . . . . . . . . . . . . . . . . . . . . . . . . . . . . . . 5
1.1 Keyboard . . . . . . . . . . . . . . . . . . . . . . . . . . . . . . 6
1.2 Display . . . . . . . . . . . . . . . . . . . . . . . . . . . . . . . . 7
1.3 Sockets. . . . . . . . . . . . . . . . . . . . . . . . . . . . . . . . 7
2 Safety. . . . . . . . . . . . . . . . . . . . . . . . . . . . . . . . . . 9
2.1 Authorized use . . . . . . . . . . . . . . . . . . . . . . . . . 10
2.2 General safety instructions. . . . . . . . . . . . . . . . 10
3 Commissioning. . . . . . . . . . . . . . . . . . . . . . . . . 13
3.1 Scope of delivery . . . . . . . . . . . . . . . . . . . . . . . 13
3.2 Initial commissioning . . . . . . . . . . . . . . . . . . . . 13
4 Operation. . . . . . . . . . . . . . . . . . . . . . . . . . . . . . 15
4.1 Switch on the instrument . . . . . . . . . . . . . . . . . 15
4.2 Measuring. . . . . . . . . . . . . . . . . . . . . . . . . . . . . 16
4.2.1 Measuring the pH value . . . . . . . . . . . . 17
4.2.2 Measuring the Redox voltage . . . . . . . . 18
4.3 Calibrating . . . . . . . . . . . . . . . . . . . . . . . . . . . . 19
4.3.1 AutoCal TEC . . . . . . . . . . . . . . . . . . . . . 21
4.3.2 AutoCal DIN . . . . . . . . . . . . . . . . . . . . . 24
4.3.3 ConCal . . . . . . . . . . . . . . . . . . . . . . . . . 27
4.4 Reset . . . . . . . . . . . . . . . . . . . . . . . . . . . . . . . . 30
5 Maintenance, cleaning, disposal. . . . . . . . . . . 31
5.1 Maintenance. . . . . . . . . . . . . . . . . . . . . . . . . . . 31
5.2 Cleaning . . . . . . . . . . . . . . . . . . . . . . . . . . . . . . 32
5.3 Disposal . . . . . . . . . . . . . . . . . . . . . . . . . . . . . . 32
6 What to do if... . . . . . . . . . . . . . . . . . . . . . . . . . . 33
7 Technical Data. . . . . . . . . . . . . . . . . . . . . . . . . . 37
8 Lists . . . . . . . . . . . . . . . . . . . . . . . . . . . . . . . . . . 41
3

Contents pH 720
4
pH 720 Overview
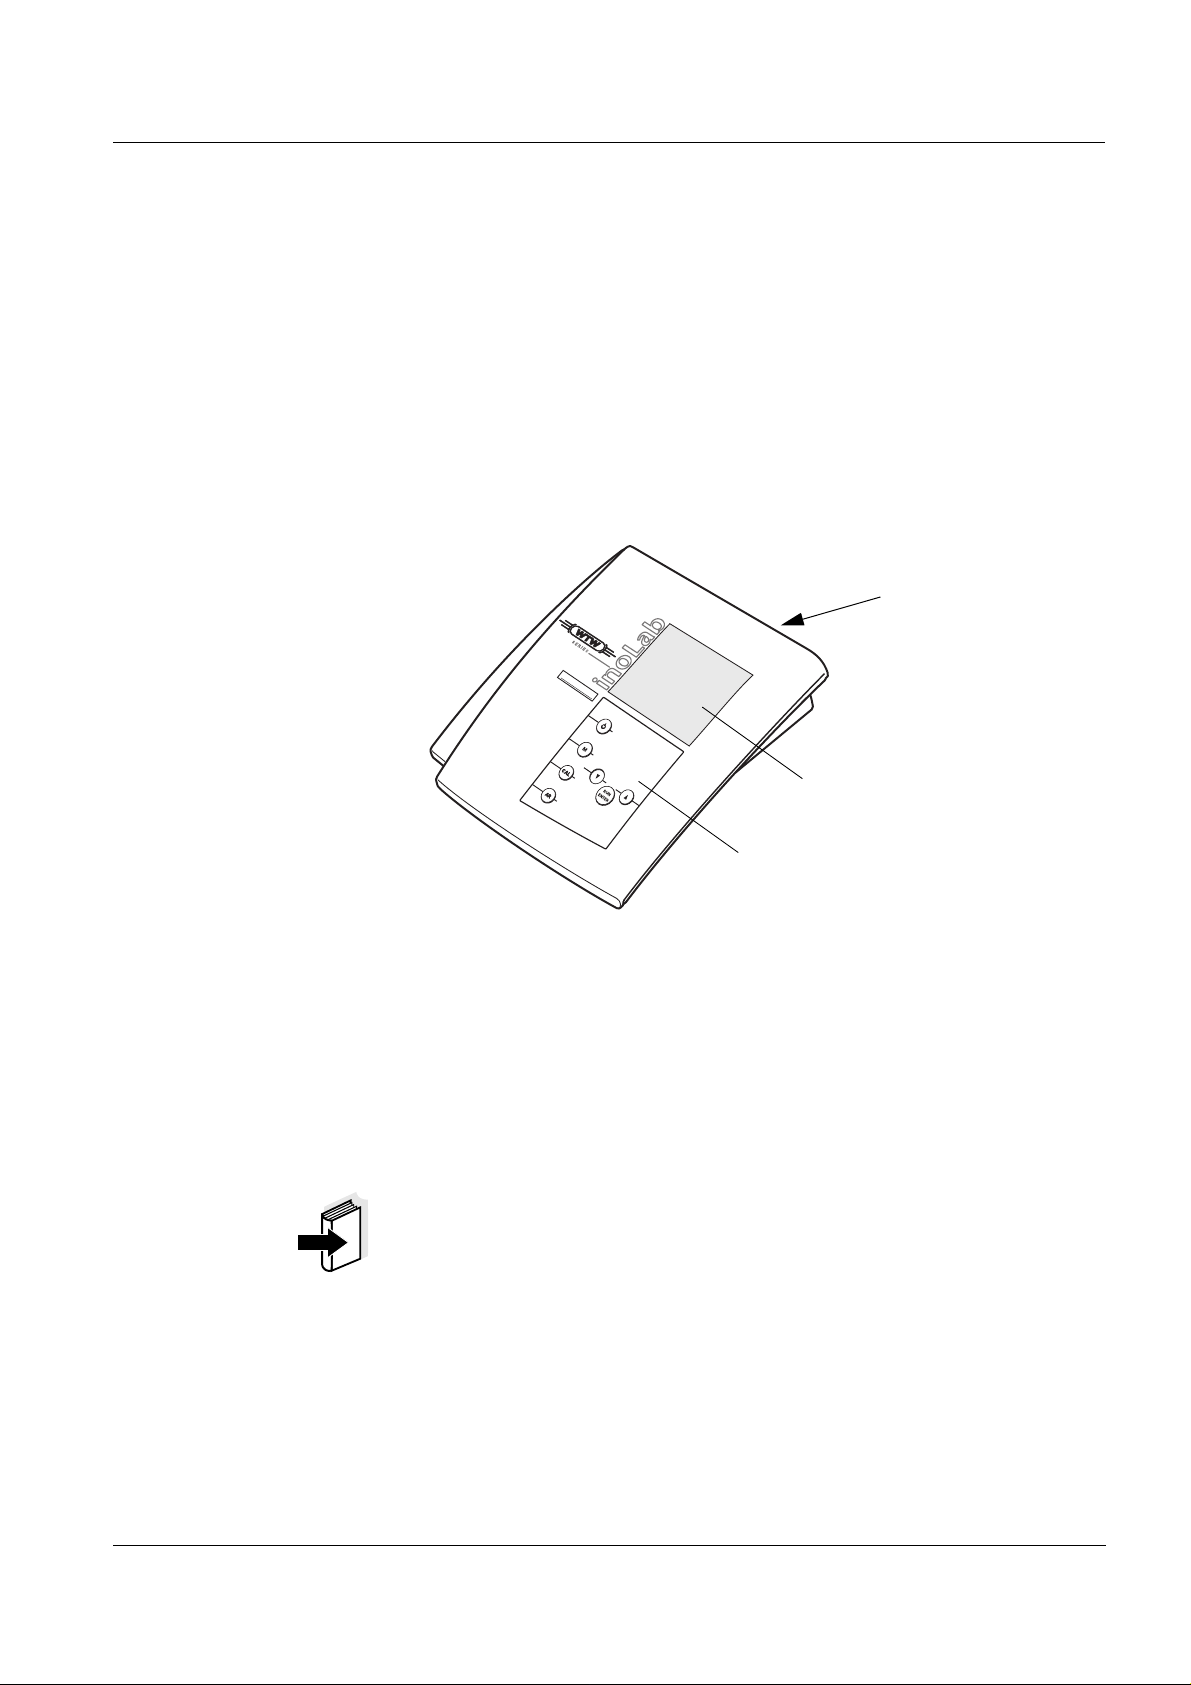
1Overview
The compact inoLab pH 720 precision pH meter lets you
perform pH measurements rapidly and reliably.
The inoLab pH 720 provides the highest degree of operating
comfort, reliability and measuring safety for all applications.
The proven MultiCal
®
calibration procedures and special
AutoRead function support your work with the pH meter.
3
p
H
720
2
1
1 Keypad
2 Display
3 Sockets
Note
The measuring instrument can also be delivered as part of
a set.
Information on this and other accessories is available in the
WTW catalog L
ABORATORY AND FIELD INSTRUMENTATION or
via the Internet.
5
Overview pH 720
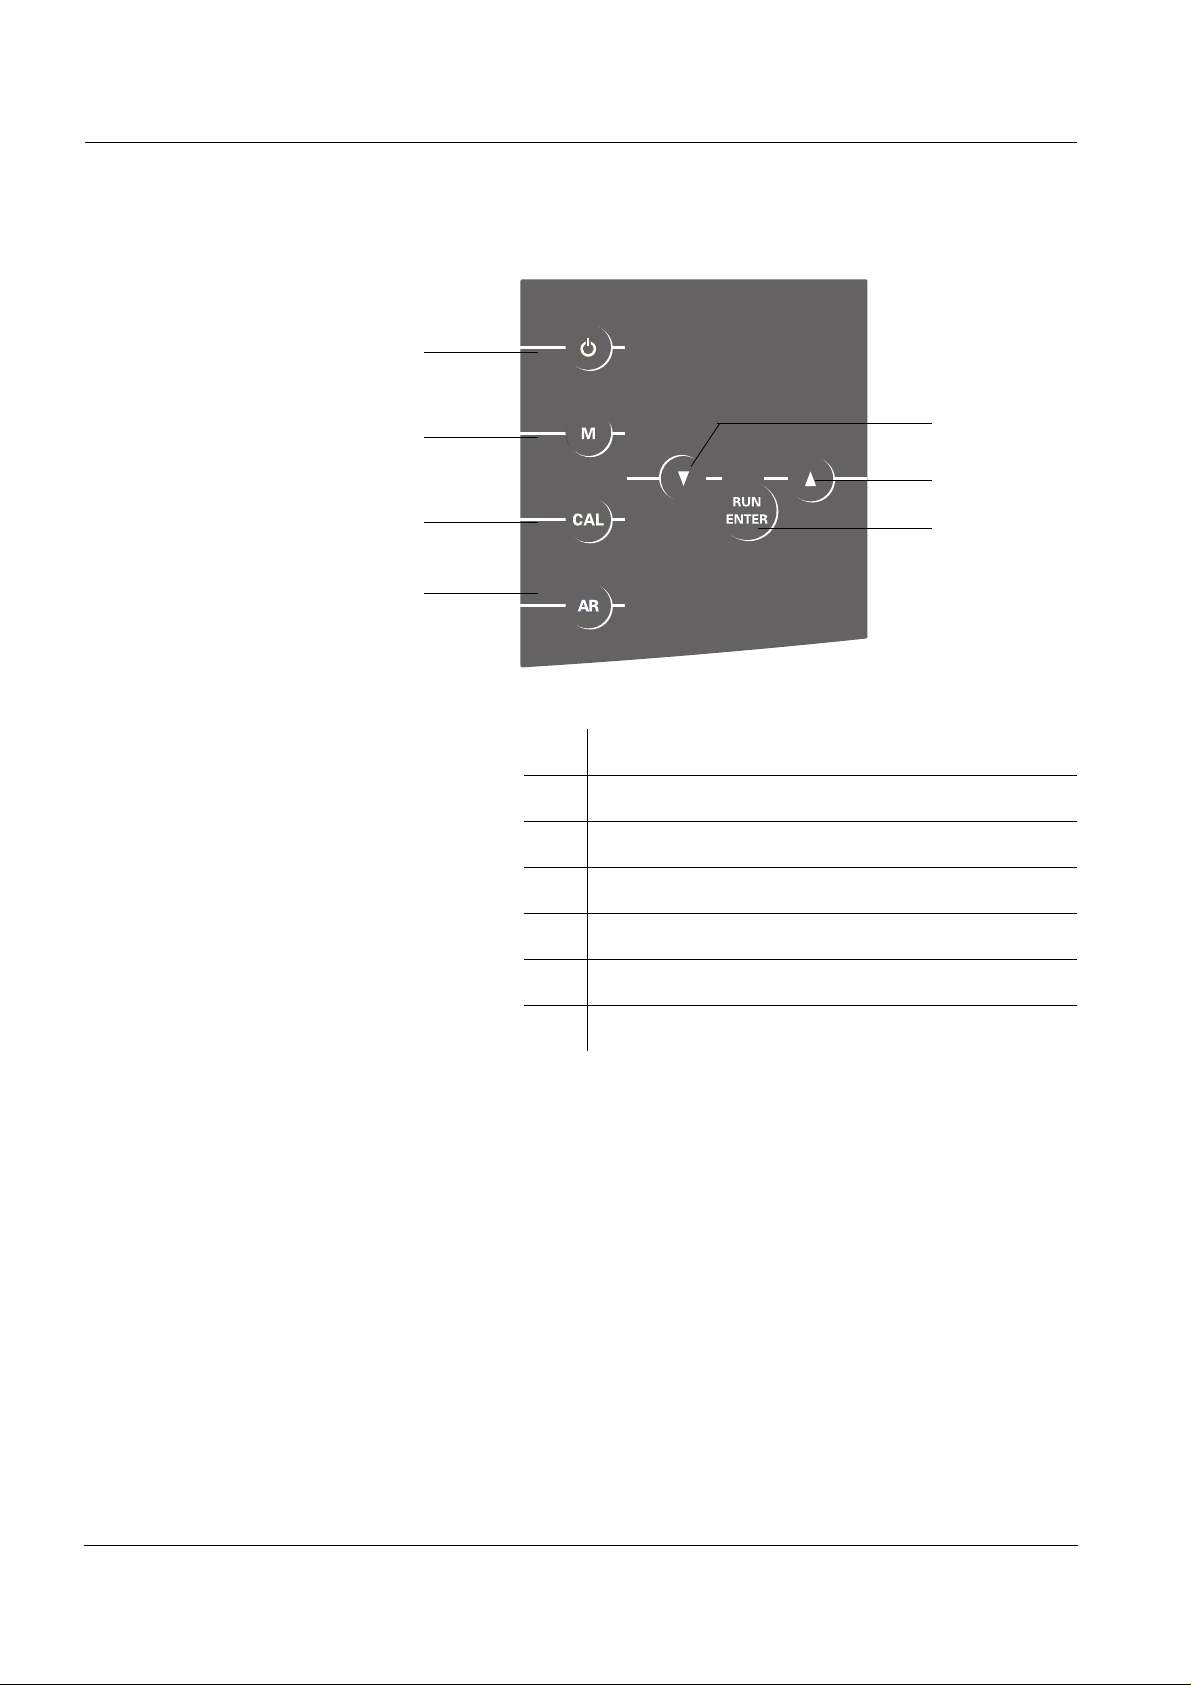
1.1 Keyboard
4
3
2
1
5
6
7
1 Activate/deactivate AutoRead function
2 Call up calibration procedure
3 Select measuring mode
4 Measuring instrument ON/OFF
5 Reduce values, scroll
6 Increase values, scroll
6
7 Confirm inputs, start AutoRead
pH 720 Overview
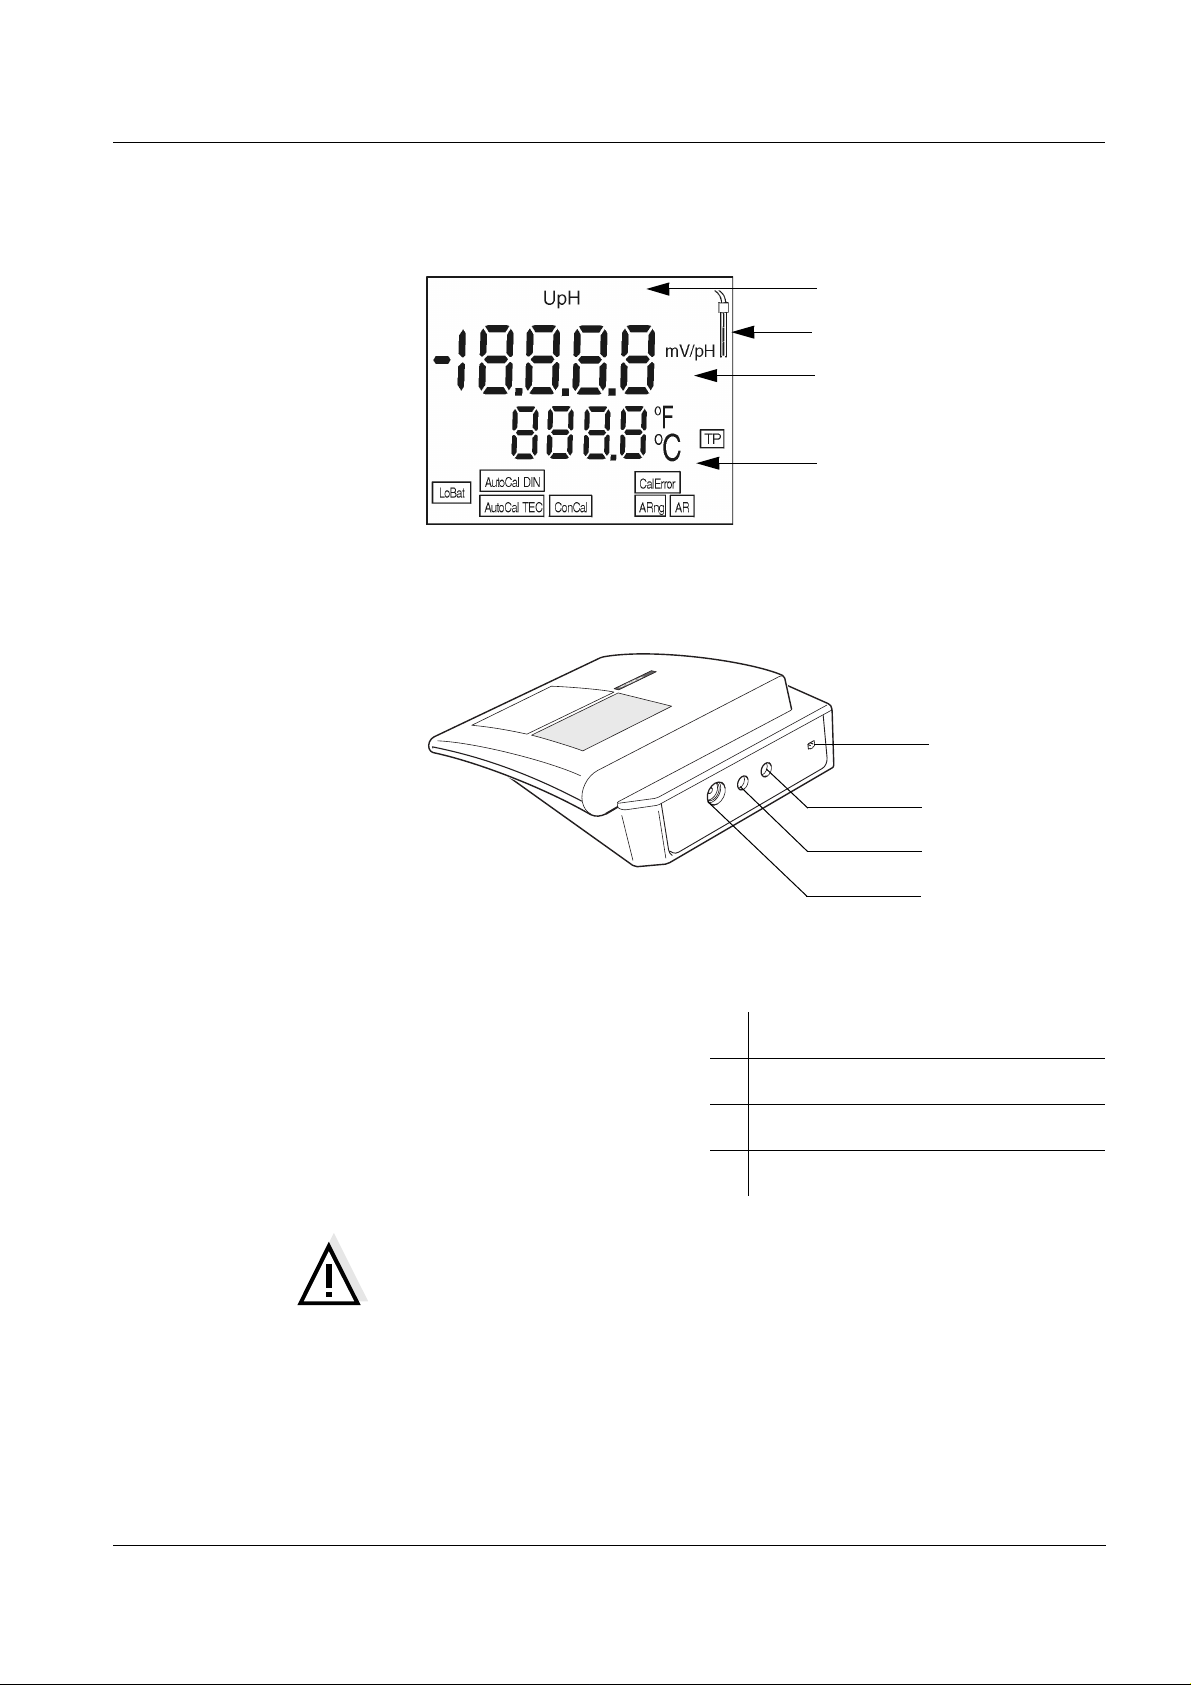
1.2 Display
Status line
Electrode symbol
Measured value display
Function and
temperature displa y
1.3 Sockets
4
3
2
1
Connectors:
1 pH electrode
2 Temperature probe
3 Reference electrode
4 Plug-in power supply (option)
Caution
Only connect probes to the instrument that cannot feed excessive voltages or currents (> SELV and > circuit with current limiter).
Almost all commercial electrodes - especially WTW electrodes - meet these requirements.
7

Overview pH 720
8
pH 720 Safety
2 Safety
This operating manual contains basic instructions that you
must follow during the commissioning, operation and maintenance of the pH meter. Consequently, all responsible personnel must read this operating manual before working with
the instrument.
The operating manual must always be available within the
vicinity of the instrument.
Target group This measuring instrument was developed for use in the lab-
oratory.
Thus, we assume that, as a result of their professional training and experience, the operators will know the necessary
safety precautions to take when handling chemicals.
Symbols used
Caution
indicates instructions that have to be followed to prevent
damage to your instrument.
Warning
indicates instructions that have to be followed to protect
yourself and the instrument from dangerous electrical voltage.
Note
Indicates notes that draw your attention to special features.
Note
Indicates cross-references to other documents, e.g. application reports, operating manuals of combination electrodes, etc.
9

Safety pH 720
2.1 Authorized use
This instrument is authorized exclusively for pH and Redox
measurements in the laboratory.
The technical specifications as given in chapter 7 T
ATA must be observed. Only the operation and running of
D
ECHNICAL
the measuring instrument according to the instructions given
in this operating manual is authorized.
Any other use is considered unauthorized.
2.2 General safety instructions
This instrument is constructed and tested in compliance with
the EN 61010-1 safety regulations for electronic measuring
instruments.
It left the factory in a safe and secure technical condition.
Function and opera-
tional safety
The smooth functioning and operational safety of the instrument can only be guaranteed if the generally applicable
safety measures and the specific safety instructions in this
operating manual are followed.
The smooth functioning and operational safety of the instrument can only be guaranteed under the climatic conditions
specified in chapter 7 T
ECHNICAL DATA.
If the instrument was transported from a cold environment to
a warm environment, the formation of condensate can lead
to the faulty functioning of the instrument. In this event, wait
until the temperature of the instrument reaches room temperature before putting the instrument back into operation.
Caution
The instrument is only allowed to be opened by personnel
authorized by WTW.
10

pH 720 Safety
Safe operation If safe operation is no longer possible, the instrument must
be taken out of service and secured against inadvertent operation.
Safe operation is no longer possible if:
l the instrument has been damaged in transport
l the instrument has been stored under adverse conditions
for a lengthy period of time
l the instrument is visibly damaged
l the instrument no longer operates as described in this
manual.
If you are in doubt contact the supplier of the instrument.
Obligations of the
operator
The operator of this measuring instrument must ensure that
the following laws and guidelines are observed when using
dangerous substances:
l EEC directives for protective labor legislation
l National protective labor legislation
l Safety regulations
l Safety datasheets of the chemical manufacturer.
11

Safety pH 720
12
pH 720 Commissioning
3 Commissioning
3.1 Scope of delivery
l Laboratory measuring instrument, inoLab pH 720
l Operating manual and short manual
l 4 x type AA Mignon 1.5 V batteries
3.2 Initial commissioning
Perform the following activities:
l Set the °C or °F
l Set the resolution
l Connect the plug-in power supply (optional).
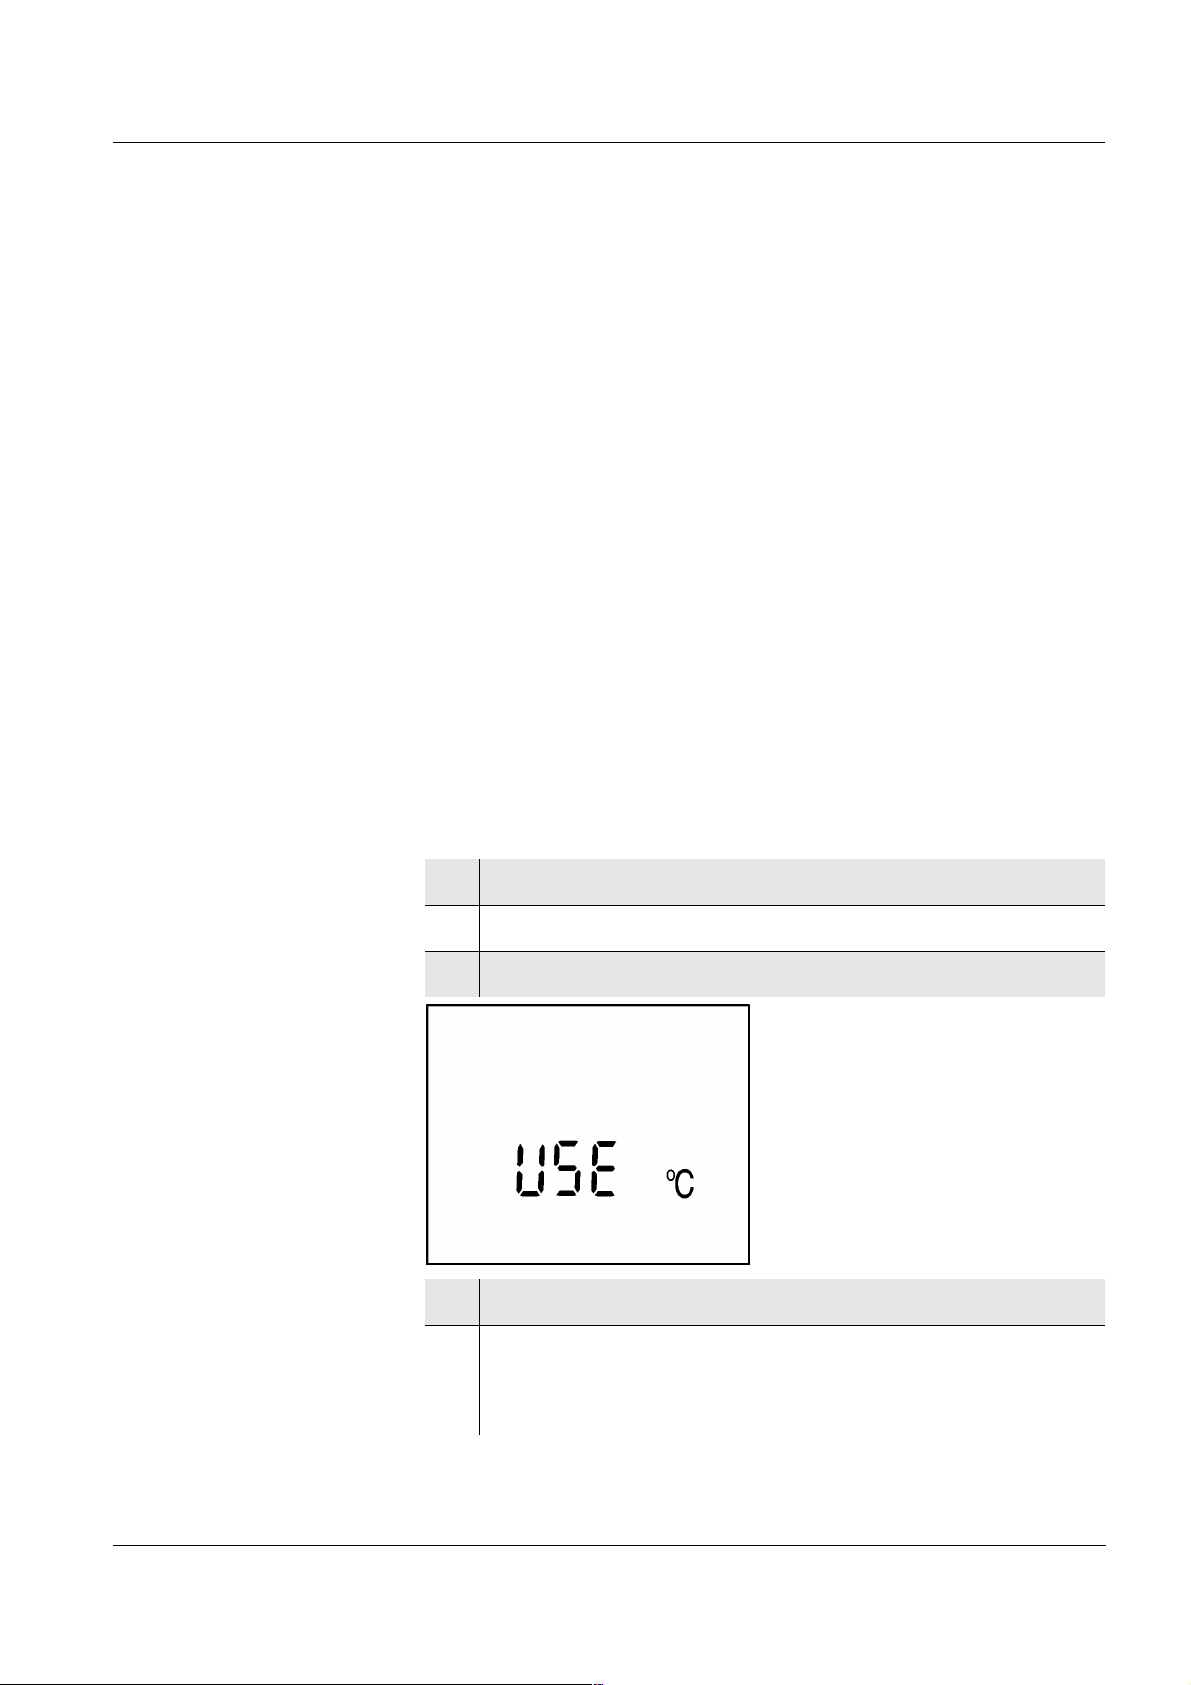
Setting °C or °F The temperature can be displayed in °C or in °F. In the de-
livery condition, the measuring instrument is preset to °C.
To change the unit proceed as follows:
1 Switch the measuring instrument off.
2 Press and hold down the
m key.
3 Press the e key.
4 Toggle between °C and °F by pressing 28.
5 Confirm with
g.
The measuring instrument switches to the measuring
mode.
13
Commissioning pH 720
Setting the
1 Press and hold down the g key.
resolution
2 Press the
m key.
The measured values are displayed with a high resolution, e. g. pH = 4.012.
3 Press the g and keys m again.
The measured values are displayed with a low resolution, e. g. pH = 4.01.
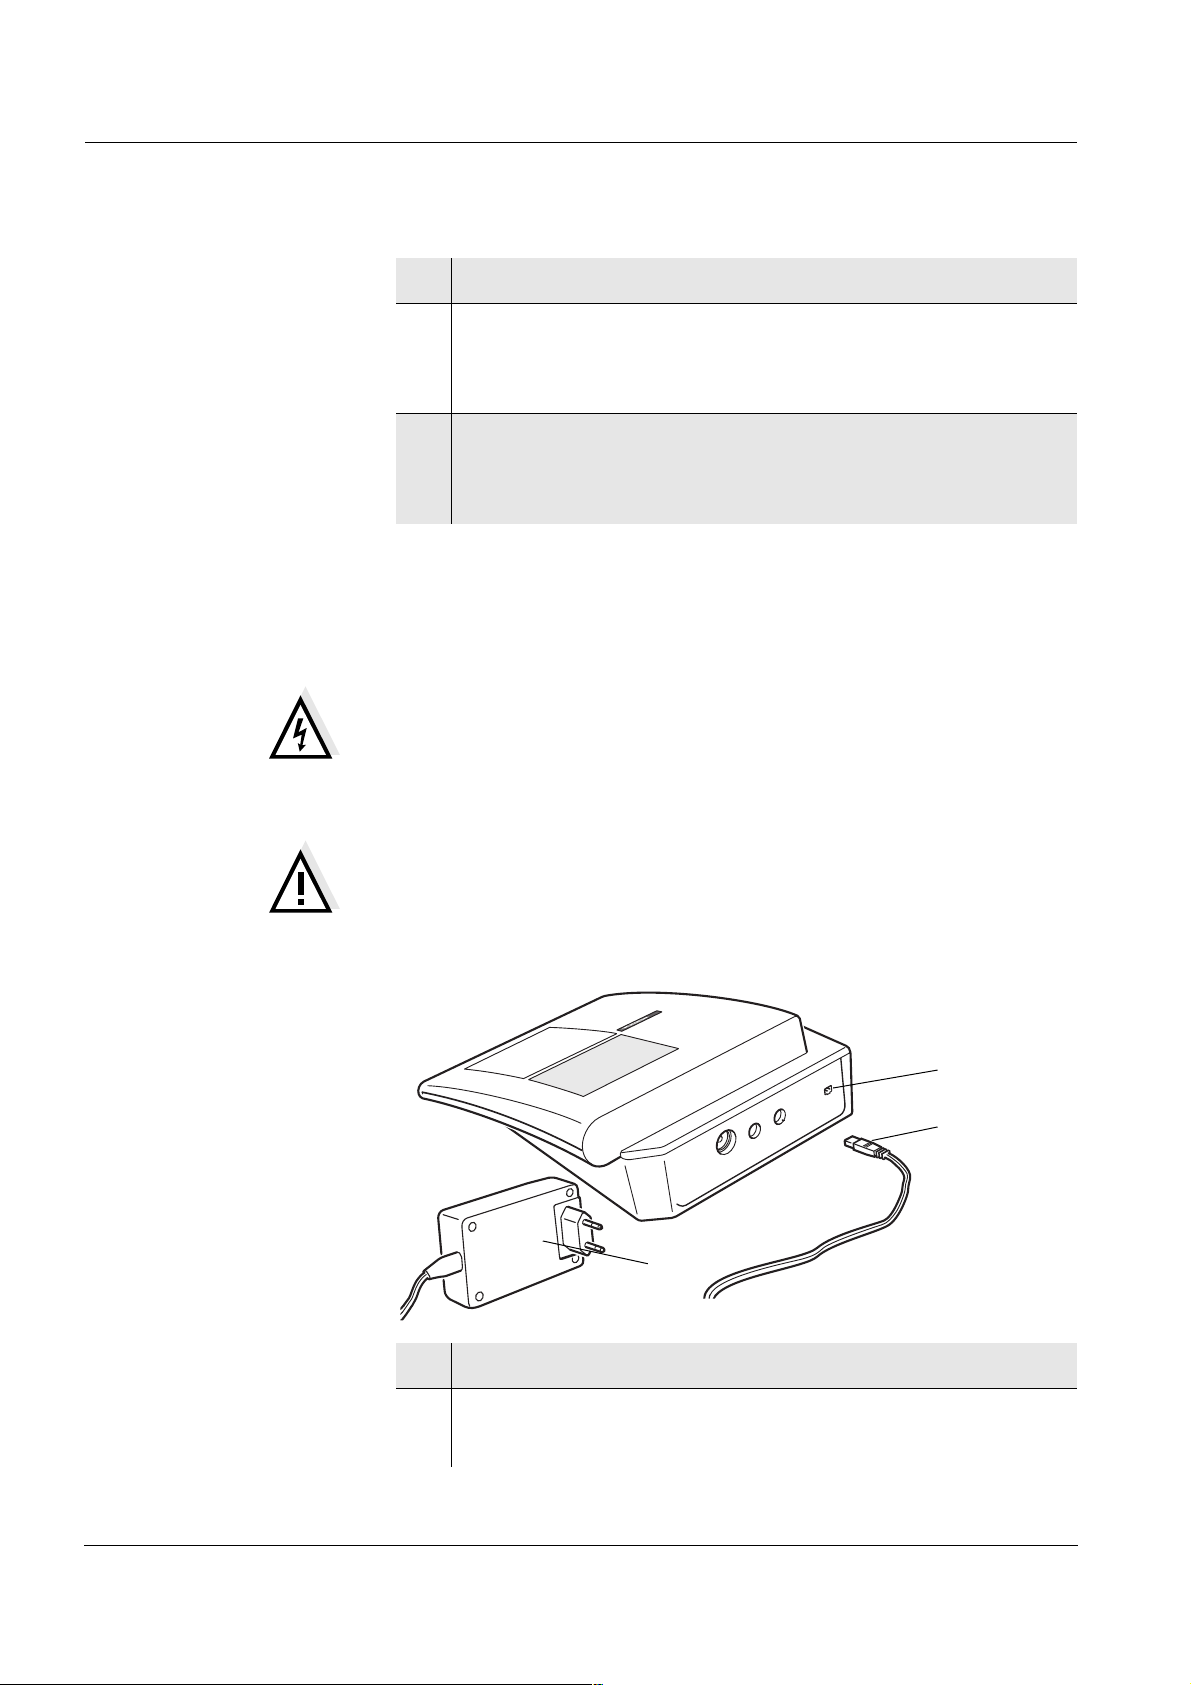
Connecting the
plug-in power
supply (optional)
The measuring instrument works battery-powered. It can,
however, also be supplied by the plug-in power supply
which is available as an accessory.
Warning
The line voltage on site must lie within the input voltage
range of the original plug-in power supply unit (see chapter
7 T
ECHNICAL DATA).
Caution
Use original plug-in power supplies only
(see chapter 7 T
ECHNICAL DATA).
2
1
14
3
1 Insert the plug (1) into the socket (2) of the pH meter.
2 Connect the original WTW plug-in power supply (3) to
an easily accessible mains socket.
pH 720 Operation
4Operation
4.1 Switch on the instrument
1 Place the instrument on a flat surface and protect it
against intense light and heat.
2 Press the
The Display test appears briefly on the display.
The instrument then switches automatically to the
previously selected measuring mode.
3 Connect the pH electrode to the instrument.
The measuring instrument is ready for operation.
Note
The instrument has an energy saving feature to avoid unnecessary battery depletion.
The energy saving feature switches the instrument off if no
key has been pressed for an hour.
The energy saving feature is not active if the instrument is
supplied by the plug-in power supply.
e key.
15
 Loading...