

Page 1

Electric Chain Saw EN
Tronçonneuse électrique prime F
Sierra eléctrica ES
HELPLINE NUMBER
HELPLINE NUMBER
1-866-354-WORX (9679)
WG309 WG310
P07
P21
P37
Page 2

4
1
2
5
6 7
3
8
1
4
1
3
1
2
9
11
15
16
10
17
18
20
23 24
21
292725 26 28
Page 3
H
I
4
J1
1
2
22
15
10
9
A B C
11 10
0.12-0.24”
(3-6mm)
EN: Bar / F: Bar
ES: Barra de guía
D E F1
1
19
20
18
J2
K2
J3
9
K3
1
2
K1
L
Y
Z
Z
Y
6"
(15 cm)
kg
2" to 4"
(5 a 10 cm)
2
F2 G1 G2
1
2
H
I
J1
M1 M2 M3
EN: Injecting grease to lubricate
F: Injectez la graisse pour lubrifier
4
a
ES: Inyectando grasa para lubricar
ON P
Page 4

1. REAR HANDLE
2. ON/OFF SWITCH
3. LOCK-OFF BUTTON
4. OIL LEVEL WINDOW
5. OIL FILLER CAP
6. FRONT HANDLE
7. HAND GUARD
8. BUMPER SPIKE
9. GUIDE BAR
10. CHAIN
11. CHAIN TENSIONING KNOB
12. CHAIN COVER
13. EXTENSION CORD HOLDER
14. REAR HAND GUARD
15. DRIVE SPROCKET
16. CHAIN DIRECTION SYMBOL
17. OIL OUTLET
18. BAR CLAMP
19. FASTENING BAR BOLT
20. BAR LOCATING TABS
21. BAR AND CHAIN STORAGE/TRANSPORTATION COVER
22. BAR TENSIONING PLATE (SEE FIG. A)
23. EXTENSION POLE HANDLE
24. LOCKING COLLAR
25. CLAMPING LEVER
26. INNER POLE
27. HANDLE BRACKET
28. KNOB
29. RECEPTACLE CORD
TECHNICAL DATA
WG309 WG310
Voltage 120V~60Hz
Amps 8 A
Bar length 10“ 8”
Chain speed 8.5m/s
Oil tank capacity 120ml
Chain pitch 3/8”
Number of chain links 40 34
Chain gauge 0.050” 0.043”
Chain type A1-40 A0-34
Bar type P010-50SR P08-43SR
Weight(chain & bar included) 10lbs 9.5lbs
Protection class
/II
ACCESSORIES
Chain 1
Bar 1
Transportation Cover 1
Extend pole 1
Only use the appropriate accessories intended for this tool. Accessory information can be found
on the product packaging, at a WORX dealer or on our website at www.worx.com.
76
* Not all the accessories illustrated or described are included in standard delivery.
Chain Saw ENChain Saw EN
Page 5

WARNING: Some dust created by
power sanding, sawing, grinding,
drilling and other construction activities
contains chemicals known to the state
of California to cause cancer, birth
defects or other reproductive harm.
Some examples of these chemicals are:
• Lead from lead-based paints;
• Crystalline silica from bricks and
cement and other masonry products
and
• Arsenic and chromium from
chemically-treated lumber.
Your risk from these exposures varies,
depending on how often you do this
type of work. To reduce your exposure
to these chemical:
• Work in a well ventilated area, and
• Work with approved safety
equipment, such as those dust masks
that are specially designed to filter
out microscopic particles.
WARNING: This product maybe
contains lead, phthalate or other
chemicals known to the State of
California to cause cancer, birth defects
and other reproductive harm. Please
wash your hands after use.
General Power Tool
SafeTy warninGS
WARNING: Read all safety warnings
and instructions. Failure to follow
the warnings and instructions may result in
electric shock, fire and/or serious injury.
Save all warnings and instructions for
future reference.
The term power tool in the warnings refer to
your electric (corded) power tool or batteryoperated (cordless) power tool.
1) Work area safety
a) Keep work area clean and well lit.
Cluttered or dark areas invite accidents.
b) Do not operate power tools in
explosive atmospheres, such as in the
presence of flammable liquids, gases
or dust. Power tools create sparks which
may ignite the dust or fumes.
c) Keep children and bystanders
away while operating a power tool.
Distractions can cause you to lose control.
2) Electrical safety
a) Power tool plugs must match the
outlet. Never modify the plug in
any way. Do not use any adapter
plugs with grounded power tools.
Unmodified plugs and matching outlets
will reduce risk of electric shock.
b) Avoid body contact with grounded
surfaces such as pipes, radiators,
ranges and refrigerators. There is an
increased risk of electric shock if your body
is grounded.
c) Do not expose power tools to rain or
wet conditions. Water entering a power
tool will increase the risk of electric shock.
d) Do not abuse the cord. Never use
the cord for carrying, pulling or
unplugging the power tool. Keep cord
away from heat, oil, sharp edges or
moving parts. Damaged or entangled
cords increase the risk of electric shock.
e) When operating a power tool
outdoors, use an extension cord
suitable for outdoor use. Use of a cord
suitable for outdoor use reduces the risk of
electric shock.
f) If operating a power tool in a damp
location is unavoidable, use a ground
fault circuit interrupter (GFCI)
protected supply. Use of an GFCI
reduces the risk of electric shock.
3) Personal safety
a) Stay alert, watch what you are
doing and use common sense when
operating a power tool. Do not use
a power tool while you are tired or
under the influence of drugs, alcohol
or medication. A moment of inattention
while operating power tools may result in
serious personal injury.
b) Use personal protective equipment.
Always wear eye protection. Protective
equipment such as dust mask, nonskid safety shoes, hard hat, or hearing
protection used for appropriate conditions
will reduce personal injuries.
c) Prevent unintentional starting. Ensure
the switch is in the off-position before
connecting to power source and/or
battery pack, picking up or carrying
the tool. Carrying power tools with your
finger on the switch or energizing power
tools that have the switch on invites
accidents.
d) Remove any adjusting key or wrench
before turning the power tool on. A
wrench or a key left attached to a rotating
part of the power tool may result in
personal injury.
e) Do not overreach. Keep proper
footing and balance at all times. This
enables better control of the power tool in
unexpected situations.
f) Dress properly. Do not wear loose
clothing or jewelry. Keep your hair,
clothing and gloves away from
moving parts. Loose clothes, jewelry or
long hair can be caught in moving parts.
g) If devices are provided for the
connection of dust extraction and
collection facilities, ensure these are
connected and properly used. Use of dust
collection can reduce dust-related hazards.
4) Power tool use and care
a) Do not force the power tool. Use
the correct power tool for your
application. The correct power tool will
do the job better and safer at the rate for
which it was designed.
b) Do not use the power tool if the
switch does not turn it on and off.
Any power tool that cannot be controlled
with the switch is dangerous and must be
repaired.
c) Disconnect the plug from the power
source and/or the battery pack from
the power tool before making any
adjustments, changing accessories,
or storing power tools. Such preventive
safety measures reduce the risk of starting
the power tool accidentally.
d) Store idle power tools out of the
reach of children and do not allow
persons unfamiliar with the power
tool or these instructions to operate
the power tool. Power tools are
dangerous in the hands of untrained users.
e) Maintain power tools. Check for
misalignment or binding of moving
parts, breakage of parts and any other
condition that may affect the power
tools operation. If damaged, have the
power tool repaired before use. Many
accidents are caused by poorly maintained
power tools.
f) Keep cutting tools sharp and clean.
Properly maintained cutting tools with
sharp cutting edges are less likely to bind
and are easier to control.
g) Use the power tool, accessories and
tool bits etc., in accordance with
these instructions and in the manner
intended for the particular type of
power tool, taking into account the
working conditions and the work to
be performed. Use of the power tool for
operations different from those intended
could result in a hazardous situation.
5) Service
a) Have your power tool serviced by
a qualified repair person using only
identical replacement parts. This will
ensure that the safety of the power tool is
maintained.
Chain Saw SafeTy
warninGS
1. Keep all parts of the body away from
the saw chain when the chain saw is
operating. Before you start the chain
saw, make sure the saw chain is not
contacting anything. A moment of
inattention while operating chain saws may
cause entanglement of your clothing or
body with the saw chain.
2. Always hold the chain saw with your
right hand on the rear handle and your
left hand on the front handle. Holding
the chain saw with a reversed hand
98
Chain Saw ENChain Saw EN
Page 6
configuration increases the risk of personal
injury and should never be done.
3. Hold the power tool by insulated
gripping surfaces only, because the
saw chain may contact hidden wiring
or its own cord. Saw chains contacting
a live wire may make exposed metal parts
of the power tool live and could give the
operator an electric shock.
4. Wear safety glasses and hearing
protection. Further protective
equipment for head, hands, legs
and feet is recommended. Adequate
protective clothing will reduce personal
injury by flying debris or accidental contact
with the saw chain.
5. Do not operate a chain saw in a tree.
Operation of a chain saw while up in a tree
may result in personal injury.
6. Always keep proper footing and
operate the chain saw only when
standing on fixed, secure and level
surface. Slippery or unstable surfaces
such as ladders may cause a loss of
balance or control of the chain saw.
7. When cutting a limb that is under
tension be alert for spring back. When
the tension in the wood fibers is released the
spring loaded limb may strike the operator
and/or throw the chain saw out of control.
8. Use extreme caution when cutting
brush and saplings. The slender material
may catch the saw chain and be whipped
toward you or pull you off balance.
9. Carry the chain saw by the front
handle with the chain saw switched
off and away from your body. When
transporting or storing the chain saw
always apply the guide bar cover.
Proper handling of the chain saw will
reduce the likelihood of accidental contact
with the moving saw chain.
10.Follow instructions for lubricating,
chain tensioning and changing
accessories. Improperly tensioned
or lubricated chain may either break or
increase the chance for kickback.
11.Keep handles dry, clean, and free from
oil and grease. Greasy, oily handles
are slippery causing loss of control.
12.
Cut wood only. Do not use chain
saw for purposes not intended. For
example: do not use chain saw for
cutting plastic, masonry or non-wood
building materials. Use of the chain saw
for operations different than intended could
result in a hazardous situation.
CAUSES AND OPERATOR PREVENTION
OF KICKBACK:
Kickback may occur when the nose or tip of the
guide bar touches an object, or when the wood
closes in and pinches the saw chain in the cut.
Tip contact in some cases may cause a
sudden reverse reaction, kicking the guide bar
up and back towards the operator.
Pinching the saw chain along the top of the
guide bar may push the guide bar rapidly back
towards the operator.
Either of these reactions may cause you to
lose control of the saw which could result in
serious personal injury. Do not rely exclusively
upon the safety devices built into your saw.
As a chain saw user, you should take several
steps to keep your cutting jobs free from
accident or injury.
Kickback is the result of tool misuse and/or
incorrect operating procedures or conditions
and can be avoided by taking proper
precautions as given below:
- Maintain a firm grip, with thumbs
and fingers encircling the chain saw
handles, with both hands on the saw
and position your body and arm to
allow you to resist kickback forces.
Kickback forces can be controlled by the
operator, if proper precautions are taken.
Do not let go of the chain saw.
- Do not overreach and do not cut
above shoulder height. This helps
prevent unintended tip contact and
enables better control of the chain saw in
unexpected situations.
- Only use replacement bars and
chains specified by the manufacturer.
Incorrect replacement bars and chains may
cause chain breakage and/or kickback.
- Follow the manufacturer’s sharpening
and maintenance instructions for the
saw chain. Decreasing the depth gauge
height can lead to increased kickback.
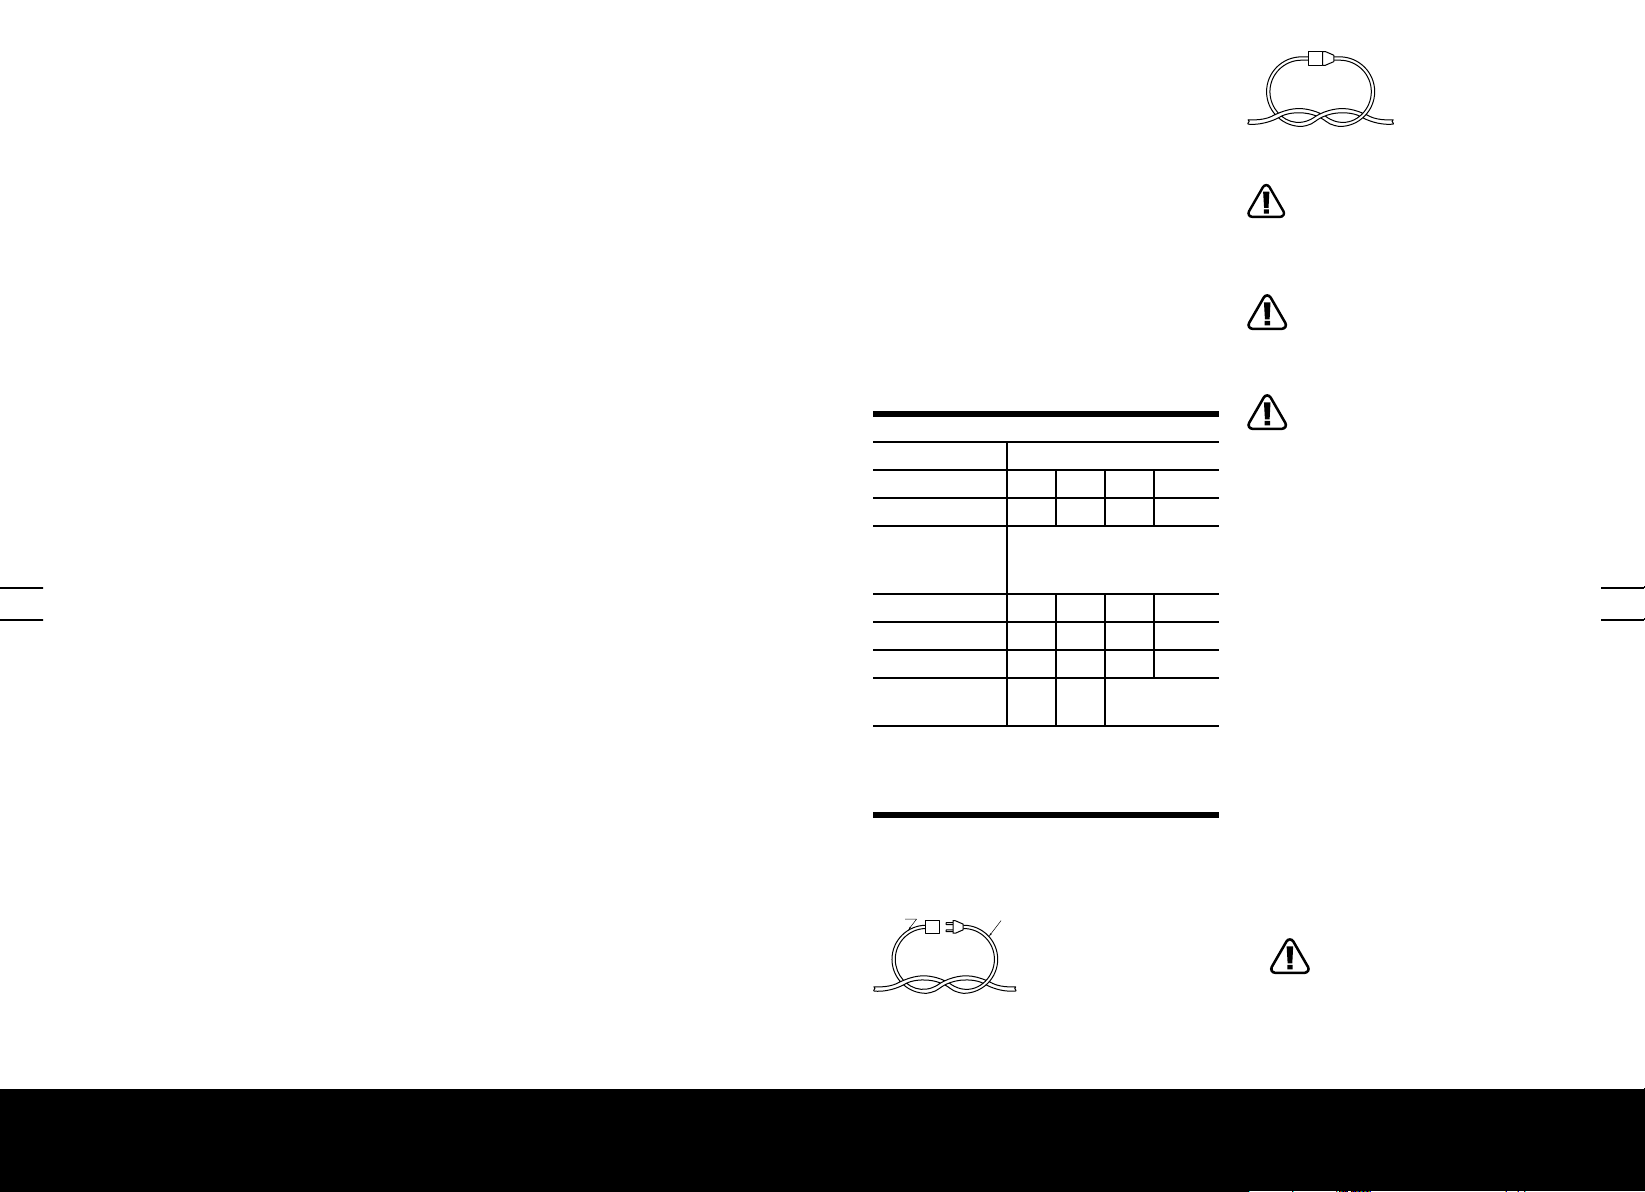
SAFETY RULES FOR EXTENSION CORD
Make sure your extension cord is in good
condition. When using an extension cord,
be sure to use one heavy enough to carry
the current your product will draw. An
undersized extension cord will cause a drop
in line voltage resulting in loss of power and
overheating. Table 1 shows the correct size to
use depending on cord length and nameplate
ampere rating. If in doubt, use the next
heavier gage. The smaller the gage number,
the heavier the cord. To reduce the risk of
disconnection of appliance cord from the
extension cord during operating:
I) Make a knot as shown in Figure 1; or
II) Use one of the plug-receptacle retaining
straps or connectors described in this manual.
Table 1 Minimum gauge for extension cords
Volts Total length of cord in feet
120V 25 50 100 150
240V 50 100 200 300
Ampere rating
more than not
more than
0-6 18 16 16 14
6-10 18 16 14 12
10-12 16 16 14 12
12-16 14 12
NOTE: Only the applicable parts of the Table
need to be included. For instance, a 120volt product need not include the 240-volt
heading.
Figure 1
METHOD OF SECURING EXTENSION
CORD
CORD
SET
(A) TIE CORD AS SHOWN
APPLIANCE CORD
AWG
Not
recommended
(B) CONNECT PLUG AND RECEPTACLE
For chain saw with the extended
pole safety warnings
IMPORTANT SAFETY
INSTRUCTIONS
WARNING: When using electric
gardening appliances, basic safety
precautions should always be followed to
reduce the risk of fire, electric shock, and
personal injury, including the following:
WARNING: Read all instructions
FOR ALL APPLIANCES
a) Avoid dangerous environment. Don’t
use appliances in damp or wet locations.
b) Don’t use in rain.
c) Keep children away. All visitors should
be kept at a distance from work area.
d) Dress properly. Do not wear loose
clothing or jewelry. They can be caught
in moving parts. Use of gloves and
substantial footwear is recommended
when working outdoors. Wear protective
hair covering to contain long hair.
e) Use safety glasses. Always use eye
protection plus a dust mask if operation is
dusty.
f) Use right appliance. Do not use
appliance for any job except that for which
it is intended.
g) Ground Fault Circuit Interrupter
(GFCI) protection should be provided
on the circuit(s) or outlet(s) to be
used for the gardening appliance.
Receptacles are available having built-in
GFCI protection and may be used for this
measure of safety.
h) WARNING! To reduce the risk of
electric shock, use only with an
extension cord intended for outdoor use,
such as an extension cord of cord type
SW-A, SOW-A, STW-A, STOW-A, SJW-A,
SJOW-A, SJTW-A. or SJTOW-A.
1110
Chain Saw ENChain Saw EN
Page 7
i) Avoid Unintentional Starting - Don’t
Y
Z
2”
2”
22
3
Y
Z
2”
2”
22
3
carry plugged-in appliance with finger
on switch. Be sure switch is off when
plugging in.
j) Don’t Abuse Cord - Never carry
appliance by cord or yank it to
disconnect from receptacle.
Keep cord from heat, oil, and sharp edges.
k) Don’t grasp the exposed cutting blades or
cutting edges when picking up or holding
the appliance.
l) Don’t Force Appliance - It will do the job
better and with less likelihood of a risk of
injury at the rate for which it was designed.
m) Don’t Overreach - Keep proper footing and
balance at all times.
n) Stay Alert - Watch what you are doing.
Use common sense. Do not operate
appliance when you are tired.
o) Disconnect Appliance - Disconnect the
appliance from the power supply when not
in use, before servicing, when changing
accessories such as blades, and the like.
p) Store Idle Appliances Indoors - When not in
use, appliances should be stored indoors in
dry, and high or locked-up place - out of
reach of children.
q) Maintain Appliance With Care - Keep
cutting edge sharp and clean for
best performance and to reduce the
risk of injury. Follow instructions for
lubricating and changing accessories.
Inspect appliance cord periodically, and if
damaged, have it repaired by an authorized
service facility. Inspect extension cords
periodically and replace if damaged. Keep
handles dry, clean, and free from oil and
grease.
r) Check Damaged Parts - Before further
use of the appliance, a guard or
other part that is damaged should be
carefully checked to determine that it
will operate properly and perform its
intended function. Check for alignment
of moving parts, binding of moving parts,
breakage of parts, mounting, and any other
condition that may affect its operation. A
guard or other part that is damaged should
be properly repaired or replaced by an
authorized service center unless indicated
elsewhere in this manual.
SAVE THESE
INSTRUCTIONS
FOR ALL DOUBLE-INSULATED
APPLIANCES
1) Replacement Parts.
When servicing use only identical replacement
parts.
2) Polarized Appliance Connections
To reduce the risk of electric shock, this
appliance has a polarized plug (one blade is
wider than the other) and will require the use
of a polarized extension cord. The appliance
plug will fit into a polarized extension cord
only one way. If the plug does not fit fully
into the extension cord, reverse the plug.
If the plug still does not fit, obtain a correct
polarized extension cord. A polarized
extension cord will require the use of a
polarized wall outlet. This plug will fit into the
polarized wall outlet only one way. If the plug
does not fit fully into the wall outlet, reverse
the plug. If the plug still does not fit, contact a
qualified electrician to install the proper wall
outlet. Do not change the equipment plug,
extension cord receptacle, or extension cord
plug in any way.
Keep the pole chain saw a sufficient distance
away from electrical power lines.
INSTRUCTIONS CONCERNING THE
PROPER TECHNIQUES FOR BASIC
FELLING, LIMBING, AND CROSSCUTTING
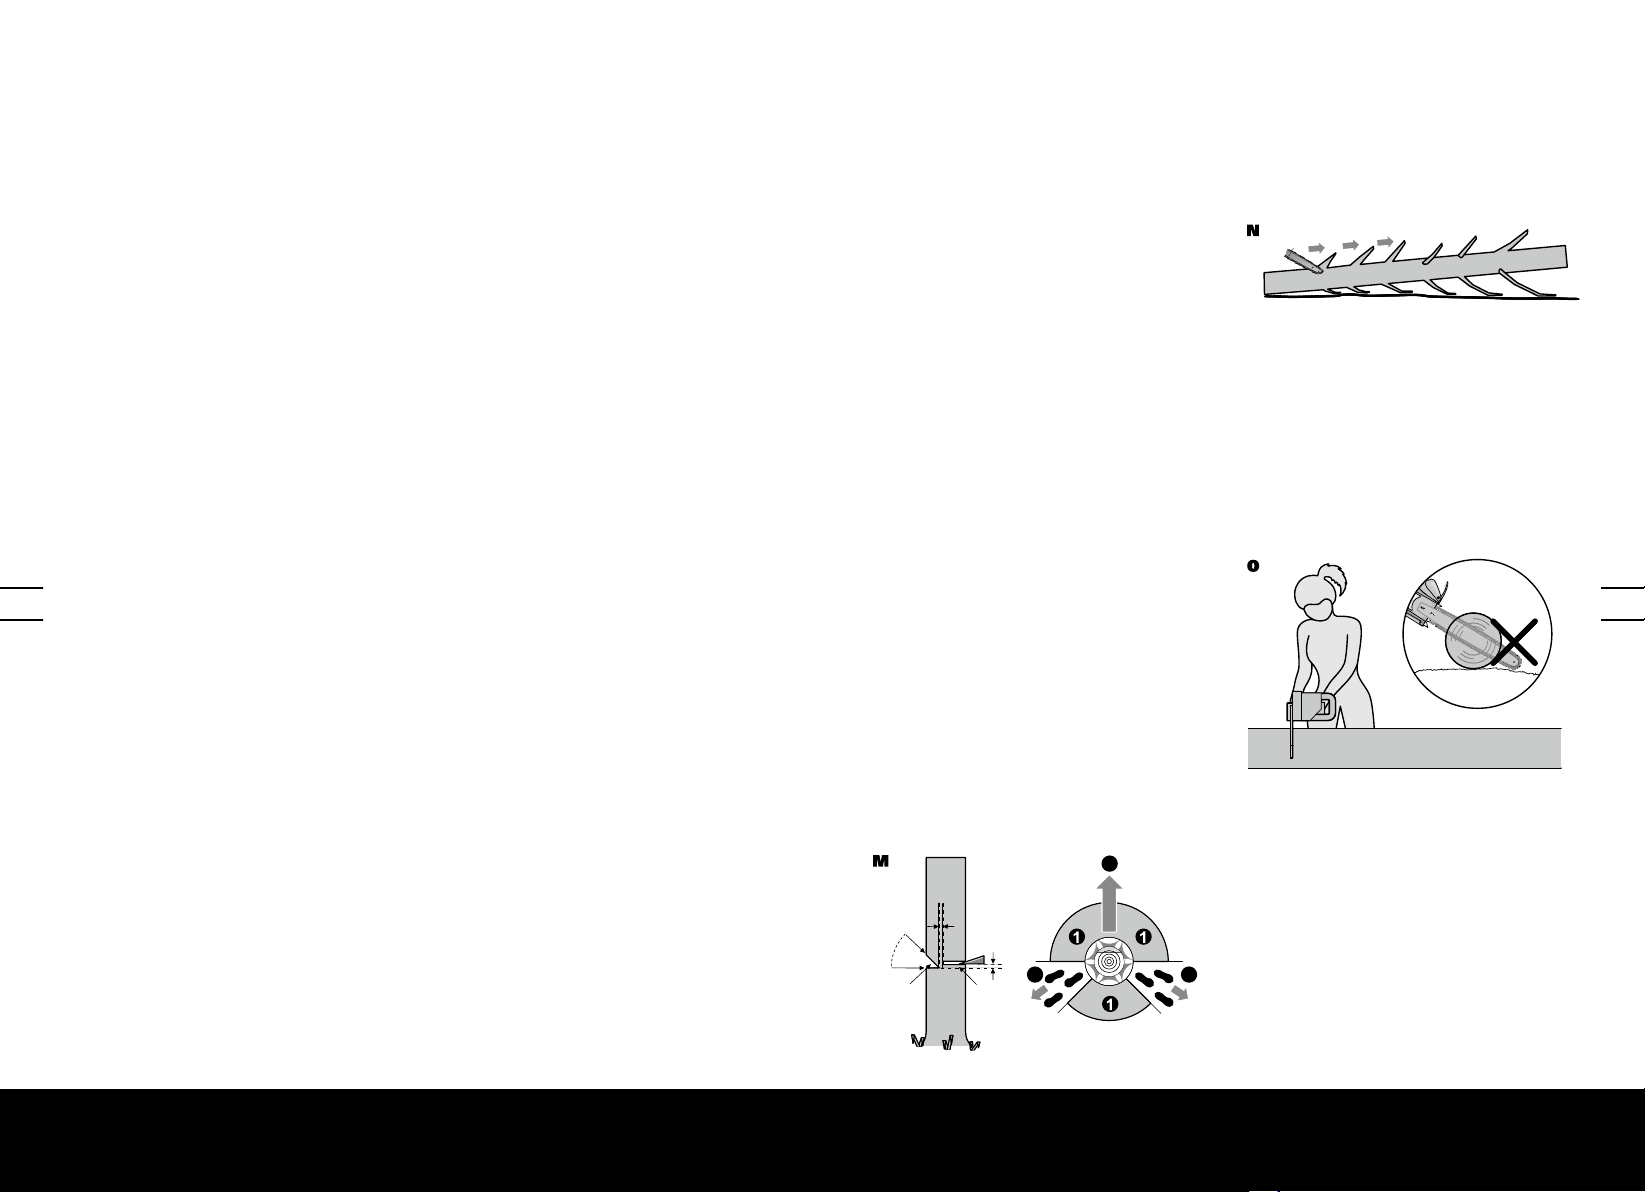
1. Felling a tree
When bucking and felling operations are
being performed by two or more persons at
the same time, the felling operations should
be separated from the bucking operation by
a distance of at least twice the height of the
tree being felled. Trees should not be felled in
a manner that would endanger any person,
strike any utility line or cause any property
damage. If the tree does make contact with
any utility line, the company should be
notified immediately.
The chain saw operator should keep on the
uphill side of the terrain as the tree is likely to
The escape path should extend back and
diagonally to the rear of the expected line of
fall as illustrated in Figure M.
Before felling is started, consider the natural
lean of the tree, the location of larger branches
and the wind direction to judge which way the
tree will fall.
Remove dirt, stones, loose bark, nails, staples
and wire from the tree.
2. Notching undercut
Make the notch 1/3 the diameter of the
tree, perpendicular to the direction of falls
as illustrated in Figure M. Make the lower
horizontal notching cut first. This will help to
avoid pinching either the saw chin or the guide
bar when the second notch is being made.
3. Felling back cut
Make the felling back cut at least 50 mm
higher than the horizontal notching cut as
illustrated in Figure M. Keep the felling back
cut parallel to the horizontal notching cut.
Make the felling back cut so enough wood is
left to act as a hinge. The hinge wood keeps
the tree from twisting and falling in the wrong
direction. Do not cut through the hinge.
As the felling gets close to the hinge, the tree
should begin to fall. If there is any chance
that the tree may not fall in desired direction
or it may rock back and bind the saw chain,
stop cutting before the felling back cut is
complete and use wedges of wood, plastic or
aluminium to open the cut and drop the tree
along the desired line of fall.
When the tree begins to fall remove the chain
saw from the cut, stop the motor, put the
chain saw down, then use the retreat path
planned. Be alert for overhead limbs falling
and watch your footing.
3
2”
X
Z
W
Y
2”
22
4. Limbing a tree
Limbing is removing the branches from a
fallen tree. When limbing leave larger lower
limbs to support the log off the ground.
Remove the small limbs in one cut as
illustrated in Figure N. Branches under tension
should be cut from the bottom up to avoid
binding the chain saw.
5. Bucking a log
Bucking is cutting a log into lengths. It is
important to make sure your footing is firm
and your weight is evenly distributed on both
feet. When possible, the log should be raised
and supported by the use of limbs, logs or
chocks. Follow the simple directions for easy
cutting.
When the log is supported along its entire
length as illustrated in Figure O, it is cut from
the top (overbuck).
1312
When the log is supported on one end, as
illustrated in Figure P, cut 1/3 the diameter
from the underside (underbuck). Then make
the finished cut by overbucking to meet the
first cut.
roll or slide downhill after it is felled.
An escape path should be planned and
cleared as necessary before cuts are started.
Chain Saw ENChain Saw EN
Page 8

Y
Z
2”
2”
22
2
2/3
1
1/3
2
2/3
1
1/3
1
2
2/3
1/3
1
1/3
2
When the log is supported on both ends, as
illustrated in Figure Q, cut 1/3 the diameter
from the top (overbuck). Then make the
finished cut by underbucking the lower 2/3 to
meet the first cut.
1
1/3
2
When bucking on a slope always stand on the
uphill side of the log, as illustrated in Figure R.
SYMBOL
When “cutting through”, to maintain complete
control release the cutting pressure near the
end of the cut without relaxing your grip on
the chain saw handles. Don’t let the chain
To reduce the risk of injury, user
must read instruction manual
Wear head protection
contact the ground. After completing the cut,
wait for the saw chain to stop before you
2/3
move the chain saw. Always stop the motor
before moving from tree to tree.
Wear ear protection
protective gloves
Wear eye protection
Wear dust mask
Protective gloves
Warning of danger from overhead
m
0
1
electric-power lines
Double insulation
2/3
Do not expose to rain
Remove plug from the mains
1514
immediately if the cable is
damaged or cut.
Contact of the guide bar tip with
any object should be avoided
Tip contact can cause the guide
bar to move suddenly upward and
backward, which can cause serious
injury
Always use two hands when
operating the chain saw
Chain Saw ENChain Saw EN
Page 9

ASSEMBLY
WARNING! Do not connect the
chain saw to the power supply
before it is completely assembled.
Always use gloves when handling the
chain.
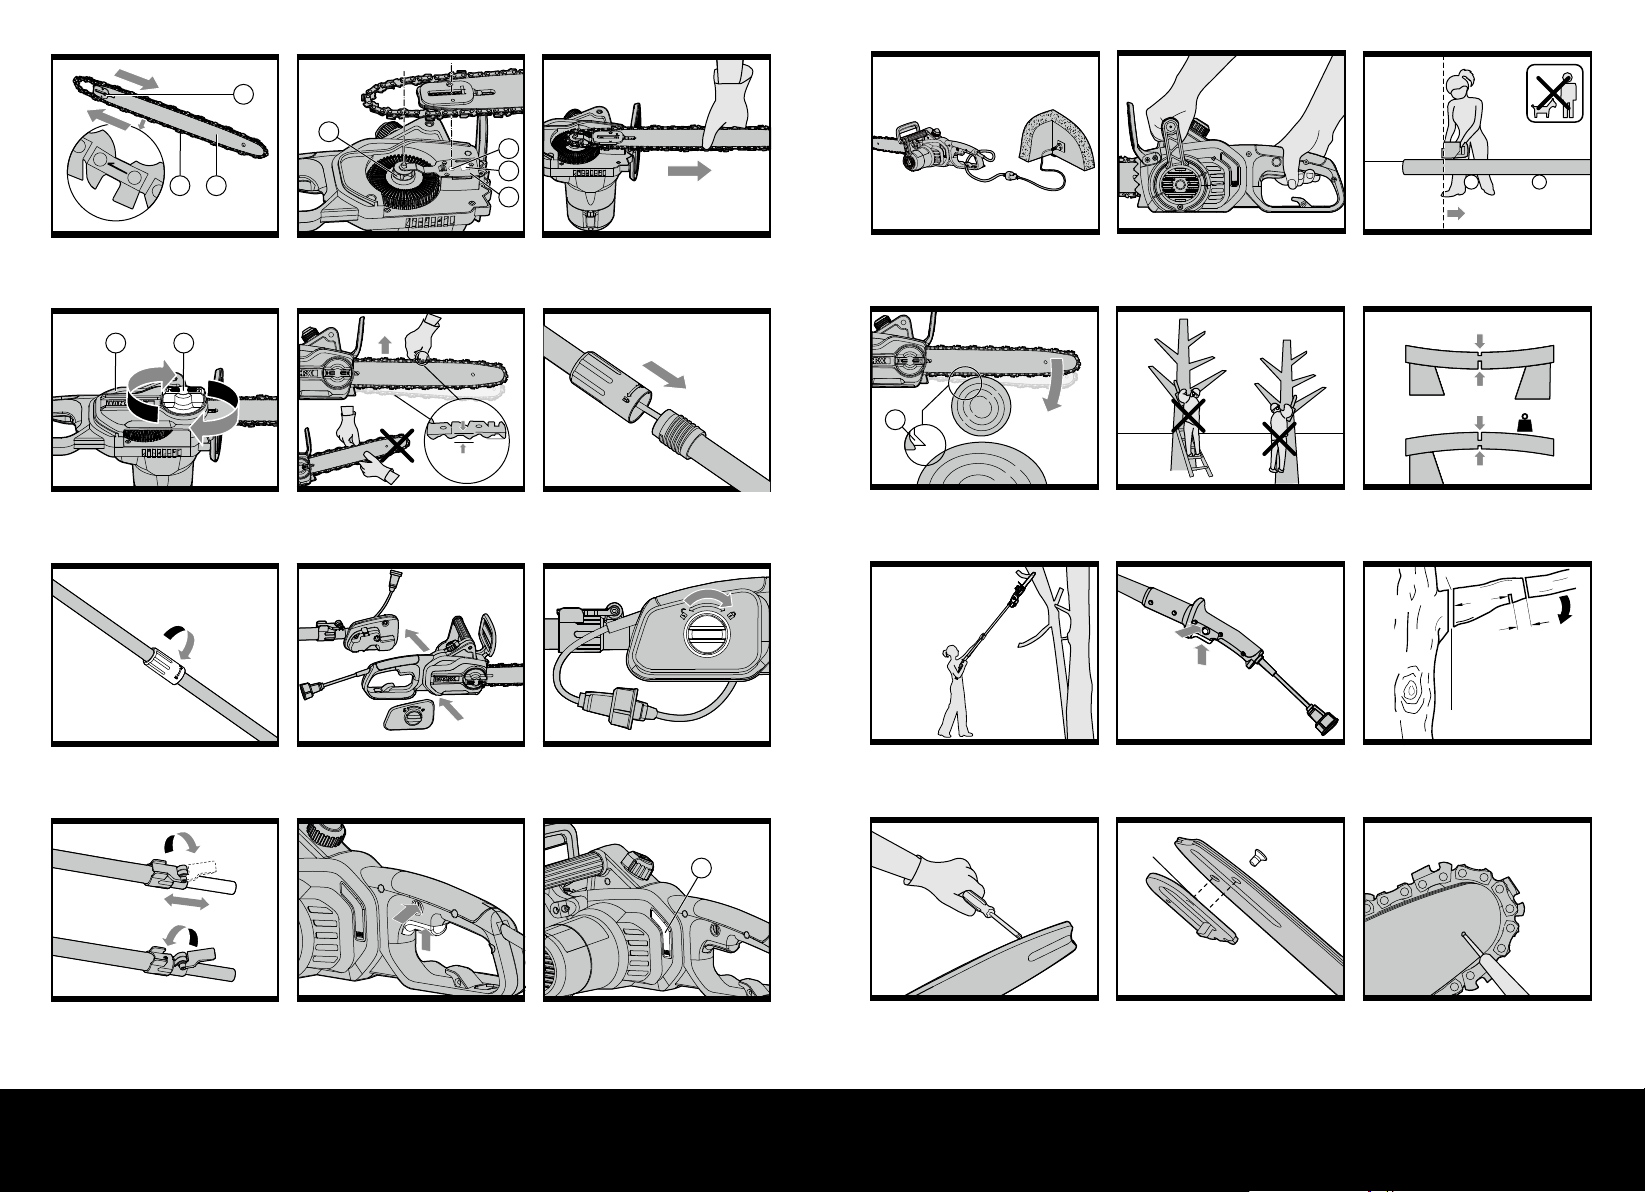
CHAIN AND GUIDE BAR ASSEMBLY
1. Unpack all parts carefully.
2. Place the chain saw on a solid, level
surface.
3. Use only genuine WORX chains
designed for Guide Bar.
4. Slide the Chain(10) in the slot around
the Guide Bar (9). Ensure the Chain is in
correct running direction by comparing
it to the Chain Direction Symbol (16)
found on the saw body. Ensure the Bar
Tensioning Plate (22) is facing outward.
(See fig. A)
5. Fit the Chain onto the Drive Sprocket
(15), so that the Fastening Bar Bolt (19)
and the two Bar Locating Tabs (20) on the
Bar Clamp (18) fit into the keyway of the
opening on the Guide Bar (9). (See fig. B)
6. Check to see if all parts are seated properly.
(See fig. C)
7. Fit the Chain Cover (12) and tighten
the Chain Cover by turning the Chain
Tensioning Knob (11) clockwise until it is
tight. (See fig. D)
WARNING: The chain is not
yet tensioned. Tensioning the
chain applies as described under
“TENSIONING CHAIN”. The chain now
needs to be inspected to make sure it is
properly tensioned.
TENSIONING CHAIN (See Fig. E)
NOTE: New saw chains will stretch. Check
the chain tension frequently when first used
and tighten when the Chain (10) becomes
loose around the Guide Bar (9).
WARNING:
• Unplug chain saw from power source
before adjusting saw chain tension.
• Cutting edges on chain are sharp.
Use protective gloves when handling
chain.
• Maintain proper chain tension always.
A loose chain will increase the risk
of kickback. A loose chain may jump
out of guide bar groove. This may
injure operator and damage chain. A
loose chain will cause chain, bar, and
sprocket to wear rapidly.
1. Place the chain saw on any suitable flat
surface.
2. Turn the Chain Tensioning Knob (11)
clockwise until it is hand tight. The tension
is automatically set while the Chain
Tensioning Knob is being tightened.
The ratchet mechanism prevents the chain
tension from loosening.
3. Double check the tension set by the
automatic Chain Tensioning Knob. The
correct chain tension is reached when the
Chain (10) can be raised approx. 0.12–
0.24” (3-6mm) from the Guide Bar (9) in
the center. This should be done by using
one hand to raise the chain against the
weight of the machine.
4. The Chain will stretch from use and lose
proper tension. To turn knob counter
clockwise (3x), secure the chain cover, and
retension the chain simply repeat steps 1 3 listed above.
ASSEMBLING THE EXTENSION POLE
(WHEN USED WITH OPTIONAL POLE
ATTACHMENT)
Align and insert the handle of extension
pole into the shaft. Rotate the locking
collar clockwise to lock. (See Fig. F)
Note: Make sure that the shaft is firmly
locked in place.
ASSEMBLING THE EXTENSION POLE TO
THE MACHINE
1. Insert the pole bracket into the saw. (Fig
G1)
NOTE: Pole bracket holds trigger in “ON”
position.
2. Slide the handle bracket onto
clamping bolt.
3. Screw the knob tightly.
4. Plug saw power cord into receptacle
cord at end of inner pole.(Fig G2)
WARNING!
• Before attaching the power cord of
the machine to the power cord of the
Extension Pole, make sure that the
tool is switched off and unplugged
from the power supply.
• When using this machine with the
Extension Pole, make sure to first
attach the power cord of the machine
to the power cord of the extension
pole, and then attach the power
cord of the extension pole to power
supply.
• ELECTROCUTION HAZARD:
Never use the Saw or Extension Pole
in an area with overhead power lines
or where the branch being cut can
come into contact with overhead
power lines.
ADJUSTING POLE LENGTH
The pole saw has a telescoping pole
assembly that will extend from 89.7 inches
(WG309)/ 87.4 inches (WG310) (fully retracted)
to 119.4 inches (WG309) /117.1 (WG310) (fully
extended). A cam levered collet is used to
hold the pole in position at any extended
length.
1. To extend the pole, loosen the clamping
lever as shown in Fig H. Pole will slide
freely.
2. Pull inner pole section out to desired
length of extension. Note: only extend pole
to minimum length required to reach limb
that is being cut.
3. To lock pole in position, tighten clamping
lever as shown in Fig. H.
LUBRICATION
IMPORTANT: The chain saw is
not supplied filled with oil. It is
essential to fill with oil before use.
Never operate the chain saw without
chain oil or at an empty oil tank level, as
this will result in extensive damage to
the product.
NOTE: Chain life and cutting capacity depend
on optimum lubrication. Therefore, the chain
is automatically oiled during operation.
Filling oil tank:
1. Set chain saw on any suitable surface with
Oil Filler Cap (5) facing upward.
2. Clean area around the Oil Filler Cap with
cloth and unscrew the cap by turning it
counter clockwise.
3. Add WORX bar and chain oil until reservoir
is full.
4. Avoid dirt or debris entering oil tank, refit
Oil Filler Cap (5) and tighten by turning
clockwise until hand tight.
IMPORTANT: To allow venting of
the oil reservoir, small breather
channels are provided between the Oil
Filler Cap and the strainer, to prevent
leakage ensure machine is left in a
horizontal position (Oil Filler Cap (5)
uppermost) when not in use.
It is important to use only the
recommended oil (ISO VG32)to avoid
damage to the chain saw. Never use
recycled/old oil. Use of non approved oil
will invalidate the warranty.
Checking the Automatic Oiler
Proper functioning of the automatic oiler
can be checked by running the chain saw
and pointing the tip of the Guide chain bar
(7) towards a piece of cardboard or paper
on the ground. If an increasing oil pattern
develops on the cardboard, the automatic
oiler is operating fine. If there is no oil pattern,
despite a full oil reservoir, contact WORX
customer service agent or WORX approved
service agent.
CAUTION: Do not touch the ground
with the chain. Ensure safety
clearance of 12”.
OPERATION
1. SWITCHING ON AND OFF (See Fig. I)
ATTENTION: Check the voltage and
current supply: The voltage and
current supply must comply with the
ratings on the product plate.
For switching on the tool, press the Lock-
1716
Chain Saw ENChain Saw EN
Page 10

off Button (3), then fully press the On/Off
Switch (2) and hold in this position. The LockOff Button can now be released.
For switching off, release the On/Off Switch.
2. CUTTING
IMPORTANT: Is the oil reservoir
filled? Check the Oil Level Window
(4) prior to starting and regularly during
operation. Refill oil when oil level is low.
A full oil tank will last approx. 20
minutes depending on sawing intensity
and stops (See Fig. J1).
Check recent replaced chain tension
about every 10 minutes during
operation.”
(1) Connect saw to extension cord. Connect
extension cord to power supply. (See Fig.
J2 )
(2) Make sure section of log to be cut is not
laying on the ground. This will keep the
chain (10) from touching the ground as it
cuts through the log.
Touching the ground while the Chain is
moving is dangerous and will dull the
Chain.
(3) Use both hands to grip saw. Always use left
hand to grip Front Handle(6)and right hand
to grip Rear Handle (1). Use a firm grip.
Thumbs and fingers must wrap around saw
handles (See Fig.J3 ).
(4) Make sure your footing is firm. Keep
shoulder width feet apart. Divide your
weight evenly on both feet.
(5) When ready to make a cut, push the Lock-
off Button (3) completely in with the right
thumb and squeeze the trigger. This will
turn saw on. Releasing the trigger will turn
the saw off. Make sure the saw is running
at full speed before starting a cut.
(6) When starting a cut, slowly place moving
chain against the wood. Hold saw firmly in
place to avoid possible bouncing or skating
(sideways movement) of saw.
(7) Guide the saw using light pressure and
do not put excessive force on the saw. The
motor will overload and can burn out. It will
do the job better and safer at the rate for
which it was intended.
(8) Remove the saw from a cut with the saw
running at full speed. Stop the saw by
releasing the On/off Switch (2). Make sure
the chain has stopped before setting the
saw down.
(9) Keep practicing on scrap logs in a secure
working area until you get the hang of it
and can saw with ease, using a fluid motion
and a steady cutting rate.
KICKBACK SAFETY DEVICES ON THIS
SAW
This saw has a low-kickback chain and reduced
kickback Guide Bar. Both items reduce the
chance of kickback. However, kickback can still
occur with this saw.
The following steps will reduce the risk of
kickback.
• Usebothhandstogripsawwhilesawis
running. Use firm grip. Thumbs and fingers
must wrap around saw handles.
• Keepallsafetyitemsinplaceonsaw.Make
sure they work properly.
• Donotoverreachorcutaboveshoulder
height.
• Keepsolidfootingandbalanceatalltimes.
• Standslightlytoleftsideofsaw.Thiskeeps
your body from being in direct line with
chain.
• DonotletGuideBarnosetouchanything
when chain is moving.
• Nevertrycuttingthroughtwologsatsame
time. Only cut one log at a time.
• DonotburytheGuideBarnoseortry
plunge cut (boring into wood using Guide
Bar nose).
• Watchforshiftingofwoodorotherforces
that may pinch chain.
• Useextremecautionwhenreenteringa
previous cut.
• Useonlythelow-kickbackchainandGuide
Bar(9)that were supplied with this chain
saw.
• Neveruseadullorloosechain.Keepchain
sharp with proper tension.
HOW TO USE SAW SAFELY
1. Use the chain saw only with secure footing.
2. Hold the chain saw at the right-hand side of
your body (See Fig. K1).
3. The Chain(10)must be running at full speed
before it makes contact with the wood.
4. Use the metal Bumper Spikes (8) to secure
the saw onto the wood before starting to
cut.
5. Use the Bumper Spikes as a leverage point
(a) while cutting. (See Fig. K2)
6. Do not operate the chain saw with
arms fully extended, attempt to saw
areas which are difficult to reach, or
stand on a ladder while sawing (see
Fig. K3).
Never use the chain saw above shoulder
height
CUTTING WOOD UNDER TENSION (See
fig. L)
WARNING: When cutting a limb that
is under tension, use extreme
caution. Be alert for wood springing
back. When wood tension is released,
limb could spring back and strike
operator causing severe injury or death.
When sawing logs supported on both ends,
start the cut from above(Y) about 1/3 of the
diameter into the log and then finish the cut
(Z) from below, in order to avoid contact of the
chain saw with the ground. When sawing logs
supported on only one end, start the cut from
below (Y) about 1/3 of the diameter into the
log and finish the cut from above (Z) in order
to avoid log splitting or jamming of the chain
saw.
OPERATION FOR POLE SAW
Cutting with extension pole (when used
with optional pole attachment)
1. Connect saw to extension cord. Connect
extension cord to power supply.
2. Use both hands to grip Pole Saw. Use only
designated grip areas when operating Pole
Saw (see Figure M1). Use firm grip. Thumbs
and fingers must wrap around Pole Saw
handle and pole.
3. Make sure your footing is firm. Keep feet
apart. Divide your weight evenly on both
feet.
4. When ready to make a cut, press in trigger
switch lock-out and squeeze trigger switch
(see Figure M2). This will turn Pole Saw on.
Releasing trigger switch will turn Pole Saw
off. Make sure saw is running at full speed
before starting a cut.
5. When starting a cut, place moving chain
against wood. Hold Pole Saw firmly in
place to avoid possible bouncing or skating
(sideways movement) of saw.
6. Guide Pole Saw using light pressure. Do
not force Pole Saw. The motor will overload
and can burn out. It will do the job better
and safer at the rate for which it was
intended.
7. Remove Pole Saw from a cut with saw
running at full speed. Stop Pole Saw by
releasing trigger. Make sure chain has
stopped before setting Pole Saw down.
TRIMMING A TREE (PRUNING)
WARNING: Avoid kickback.
Kickback can result in severe injury
or death.
See Kickback, to avoid risk of kickback.
WARNING: Do not operate Pole Saw
while
• in a tree
• on a ladder or any other unstable
surface
• in any awkward position
You may lose control of Pole Saw
causing severe injury.
WARNING: Do not extend arms
above shoulders when using Pole
Saw.
CAUTION: Seek professional help if
facing conditions beyond your ability.
Trimming a tree is the process of cutting limbs
from a living tree. Make sure your footing
is firm. Keep feet apart. Divide your weight
evenly on both feet.
Follow directions below to trim a tree.
1. Make first cut six inches from tree trunk on
underside of limb. Use top of guide bar to
make this cut. Cut 1/3 through diameter of
limb (see Figure M3).
2. Move two to four inches farther out on
limb. Make second cut from above limb.
Continue cut until you cut limb off.
3. Make third cut as close to tree trunk as
possible on underside of limb stub. Use
top of guide bar to make this cut. Cut 1/3
through diameter of stub.
4. Make fourth cut directly above third cut. Cut
down to meet third cut. This will remove
limb stub.
1918
Chain Saw ENChain Saw EN
Page 11

SAW MAINTENANCE
Follow maintenance instructions in this
manual. Proper cleaning of saw and chain and
Guide Bar maintenance can reduce chances of
kickback. Inspect and maintain saw after each
use. This will increase the service life of your
saw.
Note: Even with proper sharpening, risk of
kickback can increase with each sharpening.
MAINTENANCE AND
STORAGE OF CHAIN SAW
If the replacement of the supply cord is
necessary, this has to be done by the
manufacturer or his agent in order to avoid a
safety hazard.
1. Unplug chain saw from power source
• Whennotinuse
• Beforemovingfromoneplacetoanother
• Beforeservicing
• Beforechangingaccessoriesor
attachments, such as saw chain and guard
2. Inspect chain saw before and after
each use. Check saw closely if guard or
other part has been damaged. Check for
any damage that may affect operator safety
or operation of saw. Check for alignment or
binding of moving parts. Check for broken
or damaged parts. Do not use chain saw if
damage affects safety or operation. Have
damage repaired by authorized service
center. To locate an authorized service
center, visit www.worxyardtools.com
3. Maintain chain saw with care.
• Neverexposesawtorain.
• Keepchainsharp,clean,andlubricatedfor
better and safer performance.
• Followstepsoutlinedinthismanualto
sharpen chain.
• Keephandlesdry,clean,andfreeofoiland
grease.
• Keepallscrewsandnutstight.
• Inspectpowercordoften.Ifdamaged,have
repaired by authorized service center.
• Nevercarrychainsawbypowercord.
• Neveryankpowercordtounplugit.
• Keeppowercordfromheat,oil,andsharp
edges.
• Inspectextensioncordsoftenandreplaceif
damaged.
4. When servicing, use only identical
replacement parts.
5. When not in use, always store chain
saw
• inahighorlockedplace,outofchildren’s
reach
• inadryplace
Bar Maintenance
To maximize bar life, the following bar
maintenance is recommended.
The bar rails that carry the chain should be
cleaned before storing the tool or if the bar or
chain appear to be dirty.
The rails should be cleaned every time the
chain is removed.
Turn the bar over, top rail becoming bottom
and bottom rail becoming top, around every 5
hours of use.
To clean the Bar rails:
1. Remove chain cover and bar and chain. (see
section ASSEMBLY)
2. Using a wire brush, screwdriver or similar
tool, clear the residue from the inner
groove of the bar (See Fig. N).
3. Make sure to clean oil passages thoroughly
Conditions which require Guide Bar(9)
maintenance:
• Sawcutstoonesideoratanangle.
• Sawhastobeforcedthroughthecut.
• Inadequatesupplyofoiltothebarand
chain.
Check the condition of the guide bar each time
the chain is sharpened. A worn guide bar will
damage the chain and make cutting difficult.
After each use, with unit disconnected from
power source, clean all sawdust from the
guide bar and sprocket hole.
When rail top is uneven, use a flat file to
restore square edges and sides.
File Rail Edges
and Sides
Square
Worn Groove Correct Groove
Replace the guide bar when the groove is
worn, the guide bar is bent or cracked, or
when excess heating or burring of the rails
occurs. If replacement is necessary, use only
the guide bar specified for your saw in the
repair parts list or on the decal located on the
chain saw.
Replacing Bar & Chain
Replace chain when cutters are too worn
to sharpen or when chain stops. Only use
replacement chain noted in this manual.
Always include new Drive Sprocket(15) when
replacing chain. This will maintain proper
driving of chain.
Inspect Guide Bar before sharpening chain. A
worn or damaged Guide Bar is unsafe. A worn
or damaged Guide Bar will damage chain. It
will also make cutting harder.
Fit the Bar Tensioning Plate (22) catch into the
new bar by tightening the screw clockwise. The
catch protrude (a) must be fitted into the bar
hole. (See Fig O)
SHARPENING SAW CHAIN
WARNING: Unplug chain saw from
power source before servicing.
Severe injury or death could occur from
electrical shock or body contact with
moving chain.
Cutting edges on chain are sharp. Use
protective gloves when handling chain.
Keep chain sharp. Your saw will cut faster and
more safely. A dull chain will cause undue
sprocket, guide bar, chain, and motor wear. If
you must force chain into wood and cutting
creates only sawdust with few large chips,
chain is dull.
LUBRICATE SPROCKET
WARNING: Wear heavy duty gloves
when performing any maintenance
or service to this tool. Always unplug the
tool before performing any service or
maintenance on this tool.
NOTE:
It is not necessary to remove the chain or bar
when lubricating the sprocket
1. Clean the bar and sprocket
2. Using a grease gun, insert the tip of the gun
into the lubrication hole and inject grease
until it appears at the outside edge of the
sprocket tip (See Fig.P).
3. To rotate the sprocket release the chain
stop and pull the chain by hand until
the ungreased side of the sprocket is in
line with the grease hole. Repeat the
lubrication procedure.
2120
Chain Saw ENChain Saw EN
Page 12

TROUBLESHOOTING TABLE
The following table gives checks and actions that you can perform if your machine does not
operate correctly. If these do not identify/remedy the problem, contact your service agent.
WARNING: Switch off and remove plug from mains before investigating fault.
Symptom Possible Cause Remedy
Chain saw fails to
operate
Chain saw
operates
intermittently
Dry chain No oil in reservoir
Chain/chain bar
over-heats
22
Chain saw rips,
vibrates, does not
saw properly
No power
Mains socket faulty
Extension cord damaged
Fuse faulty
Extension cord damaged
Loose connection
Internal wiring defective
On/Off switch defective
Vent in oil filler cap clogged
Oil passage clogged
No oil in reservoir
Vent in oil filler cap clogged
Oil passage clogged
Chain is over tensioned
Dull chain
Chain tension too loose
Dull chain
Chain worn out
Chain teeth are facing in the wrong
direction
Check power
Use another socket
Check cord, replace
Replace fuse
Check cord, replace
Contact service agent 1-866-354WORX (9679)
Contact service agent 1-866-354WORX (9679)
Contact service agent 1-866-354WORX (9679)
Refill oil
Clean cap
Clean oil passage outlet
Refill oil
Clean cap
Clean oil passage outlet
Adjust chain tension
Sharpen chain or replace
Adjust chain tension
Sharpen chain or replace
Replace chain
Reassemble with chain in correct
direction
1. POIGNÉE ARRIÈRE
2. COMMUTATEUR
3. BOUTON DE VERROUILLAGE
4. INDICATEUR DE NIVEAU D’HUILE
5. BOUCHON D’HUILE
6. POIGNÉE AVANT
7. PROTÈGE-MAINS
8. POINTE PARE-CHOC
9. GUIDECHAÎNE
10. CHAÎNE
11. BOUTON DE VERROUILLAGE / POIGNÉE DE TENSIONNEMENT DE LA CHAÎNE
12. PLAQUE DE COUVERTURE
13. PORTE-RALLONGE
14. ÉCRAN DE PROTECTION ARRIÈRE DE LA MAIN
15. PIGNON D’ENTRAÎNEMENT
16. SYMBOLE POUR LA DIRECTION DE COUPE ET LA RÉVOLUTION
17. SORTIE D’HUILE
18. SERRE LAME
19. BOULON DE FIXATION
20. DOIGTS DE GUIDAGE POUR GUIDE-CHAÎNE
21. COUVERCLE DE PROTECTION POUR LA LAME
22. DOIGT D’ENTRAÎNEMENT DU TENSIONNEMENT DE LA CHAÎNE(Fig.A)
23. POIGNÉE DE LA PERCHE D’EXTENSION
24. COLLIER DE FIXATION
25. MANETTE DE SERRAGE
26. PERCHE INTERNE
27. SUPPORT DE LA POIGNÉE
28. BOUTON
29. RÉCEPTACLE DU CORDON D’ALIMENTATION
2322
* Tous les accessoires illustrés ou décrits ne sont pas inclus dans une livraison
standard.
Tronçonneuse électrique prime FChain Saw EN
Tronçonneuse électrique prime F
Page 13

DONNÉES TECHNIQUES
WG309 WG310
Tension 120V~60Hz
Courant assigné 8 A
Longueur du guide 10“ 8”
Vitesse de chaîne 8.5m/s
Capacité du réservoir d’huile 120ml
Pas de chaîne 3/8”
Nombre de maillons de
chaînes
Indicateur de chaîne 0.050” 0.043”
Type de chaîne A1-40 A0-34
Type de barre P010-50SR P08-43SR
Poids de la machine 10lbs 9.5lbs
Double isolation
40 34
/II
ACCESSOIRES
Chaîne 1
Guidechaîne 1
Protecteur pour le transport 1
Perche d’extension 1
N’utilisez que les accessoires compatibles à cet outil. Les informations des accessoires peuvent
être trouvées sur l’emballage du produit, chez un détaillant WORX ou sur notre site Web
www.worxtools.com.
AVERTISSEMENT! Certaines des
poussières produites en utilisant
des outils électriques sont considérées
par l’État de Californie comme
susceptibles de provoquer le cancer,
des anomalies congénitales et d’autres
problèmes de reproduction. Voici des
exemples de ces produits chimiques:
• Plomb issu de peinture à base de
plomb
• Silice crystalline issue de briques
et du ciment et autres produits de
maçonnerie
• Arsenic et chrome issus de bois traité
chimiquement
Votre risque de ces expositions varie en
fonction de la fréquence à laquelle vous
effectuez ce travail. Pour réduire votre
exposition à ces produits chimiques:
• Travaillez dans une zone bien ventilée;
• Portez un équipement de sécurité
approuvé, tel que des masques
antipoussières spécialement
conçus pour éliminer les particules
microscopiques par filtrage.
AVERTISSEMENT! Ce produit peut
contenir du plomb, des phtalates ou
d’autres agents chimiques connus dans
l’État de Californie pour causer le cancer,
des malformations congénitales et
d’autres problèmes lies à la reproduction.
Lavez vos mains après chaque utilisation.
aVerTiSSeMenTS
GeneraUX ConCernanT
la SeCUriTe DeS
oUTilS eleCTriQUeS
AVERTISSEMENT! Lisez et assimilez
toutes les instructions. Le non-
respect des instructions ci-après peut entraîner
un risque de choc électrique, d’incendie et/ou
de blessures graves.
Conservez tous les avertissements et
instructions pour pouvoir les consulter
ultérieurement.
L’expression « outil électrique » dans tous
les avertissements énumérés ci-dessous se
réfère à votre outil électrique fonctionnant sur
secteur (branché) ou à batterie (sans-fil).
1. AIRE DE TRAVAIL
a) Veillez à ce que l’aire de travail soit
propre et bien éclairée. Le désordre
et le manque de lumière favorisent les
accidents.
b) N’utilisez pas d’outils électriques
dans un milieu présentant un risque
d’explosion, par exemple en présence
de liquides, de gaz ou de poussières
inflammables. Les outils électriques
créent des étincelles qui pourraient
enflammer les poussières ou les vapeurs.
c) Gardez à distance les curieux, les
enfants et les visiteurs lorsque vous
travaillez avec un outil électrique. Ils
pourraient vous distraire et vous faire faire
une fausse manoeuvre.
2. SÉCURITÉ ÉLECTRIQUE
a) Les fiches des outils électriques
doivent correspondre aux prises
murales. Ne jamais modifier la fiche
de quelque façon que ce soit. Ne
pas utiliser de fiches d’adaptation
avec des outils électriques mis à
la terre (mis à la masse). Des fiches
non modifiées et des prises qui leur
correspondent réduiront le risque de choc
électrique.
b) Évitez tout contact corporel avec des
surfaces mises à la terre (tuyauterie,
radiateurs, cuisinières, réfrigérateurs,
etc.). Le risque de choc électrique est plus
grand si votre corps est en contact avec la
terre.
c) N’exposez pas les outils électriques
à la pluie ou à l’eau. La présence d’eau
dans un outil électrique augmente le risque
de choc électrique.
d) Ne maltraitez pas le cordon. Ne
transportez jamais l’outil par son
2524
Tronçonneuse électrique prime F Tronçonneuse électrique prime F
Page 14

cordon et ne débranchez jamais
la fiche en tirant sur le cordon.
N’exposez pas le cordon à la chaleur,
à des huiles, à des arrêtes vives ou à
des pièces en mouvement. Un cordon
endommagé augmente le risque de choc
électrique.
e) Lorsque vous utilisez un outil
électrique à l’extérieur, utilisez un
prolongateur adapté à une utilisation
en extérieur. L’utilisation d’un cordon
adapté à une utilisation extérieure réduit le
risque de choc électrique.
f) Si vous devez utiliser un outil
électrique dans un endroit humide,
utilisez un dispositif de courant
résiduel (RCD) d’alimentation
protégée. L’utilisation d’un RCD réduit le
risque de choc électrique.
3. SÉCURITÉ DES PERSONNES
a) Restez alerte, concentrez-vous sur
votre travail et faites preuve de
bon sens. N’utilisez pas un outil
électrique si vous êtes fatigué ou sous
l’influence de drogues, d’alcool ou de
médicaments. Un instant d’inattention
lors de l’utilisation d’outils électriques peut
entraîner des blessures graves.
b) Utilisez des accessoires de sécurité.
Portez toujours une protection
oculaire. De l’équipement de sécurité
tel que le masque antipoussière, les
chaussures de sécurité antidérapantes, des
casques durs ou des protections antibruit
utilisés dans des conditions appropriées
réduiront les blessures corporelles.
c) Évitez les démarrages accidentels.
Avant d’insérer la batterie dans l’outil,
assurez-vous que son interrupteur
est en position « OFF » (Arrêt) ou
verrouillée. Le fait de transporter un outil
avec le doigt sur la détente/l’interrupteur
ou d’insérer la batterie dans un outil dont
la détente est en position « ON » (Marche)
peut causer un accident.
d) Retirer les clés de réglage avant de
mettre l’outil sous tension. Une clé
restée attachée à une partie mobile de
l’outil pourrait entraîner des blessures
corporelles.
e) Ne vous penchez pas trop en avant.
Maintenez un bon appui et restez en
équilibre en tout temps. Une bonne
stabilité vous permet de mieux réagir à une
situation inattendue.
f) Habillez-vous convenablement. Ne
portez ni vêtements ottants ni bijoux.
Gardez les cheveux, les vêtements
et les gants éloignés des pièces en
mouvement. Les vêtements flottants, les
bijoux ou les cheveux longs risquent d’être
happés par des pièces en mouvement.
g) Si un sac de récupération de
la poussière est fourni avec un
connecteur pour aspirateur, assurez
vous qu’il est correctement relié et
utilisé de façon appropriée. L’utilisation
de ce système réduit les dangers physiques
et physiologiques liés à la poussière.
4. UTILISATION ET ENTRETIEN DE
L’OUTIL
a) Ne forcez pas l’outil. Utilisez l’outil
approprié à la tâche. L’outil approprié
fonctionne mieux et de façon plus
sécuritaire. Respectez aussi la vitesse de
travail qui lui est propre.
b) N’utilisez pas un outil si l’interrupteur
ne le met pas en marche ou ne peut
l’arrêter. Un outil qui ne peut être contrôlé
par l’interrupteur est dangereux et doit être
réparé.
c) Débranchez la batterie de l’outil ou
mettez son interrupteur en position
« OFF » (Arrêt) ou « LOCKED »
(Verrouillé) avant d’effectuer un
réglage, de changer d’accessoire ou
de ranger l’outil. De telles mesures de
sécurité préventive réduisent le risque de
démarrage accidentel de l’outil.
d) Rangez les outils hors de portée
des enfants et d’autres personnes
inexpérimentées. Les outils sont
dangereux dans les mains d’utilisateurs
novices.
e) Prenez soin de bien entretenir
les outils. Soyez attentif à tout
désalignement ou coincement des
pièces en mouvement, à tout bris ou
à toute autre condition préjudiciable
au bon fonctionnement de l’outil. Si
vous constatez qu’un outil est endommagé,
faites-le réparer avant de vous en servir. De
nombreux accidents sont causés par des
outils en mauvais état.
f) Les outils de coupe doivent être
toujours bien affûtés et propres. Des
outils bien entretenus, dont les arêtes sont
bien tranchantes, sont moins susceptibles
de se coincer et plus faciles à contrôler.
g) Utilisez l’outil électrique, les
accessoires et les forets etc., en
conformité avec ces instructions et
de la manière conçue pour le type
particulier d’outil électrique, prend en
compte les conditions de travail et le
travail qui doit être accompli. L’emploi
de l’outil électrique pour des opérations
différentes de celles pour lesquelles il a
été conçu pourrait entraîner une situation
dangereuse.
5. ENTRETIEN
a) Ayez votre outil électrique entretenu
par un réparateur agréé n’utilisant que
des pièces de rechange identiques.
Cela assurera que la sécurité de l’outil
électrique est maintenue.
ConSiGneS De
SéCUriTé PoUr la SCie
à Chaîne
1. Tenez la scie à chaîne bien éloignée
des parties de votre corps lorsque
celle-ci est en marche. Avant de
mettre en marche la scie à chaîne,
veillez à ce qu’elle ne soit en contact
avec aucun objet. Vos vêtements
peuvent s’accrocher à la scie à chaîne
ou alors votre corps peut s’y coller
pendant un moment d’inattention lors du
fonctionnement du matériel.
2. Toujours tenir la poignée arrière de la
scie à chaîne avec votre main droite
et la poignée avant avec votre main
gauche. Évitez d’inverser la position des
mains, car ceci pourrait augmenter le
risque de blessure et ne doit jamais être
fait.
3. Tenez l’outil électrique par ses
surfaces de prise isolées uniquement,
car la chaîne de la scie peut entrer
en contact avec un câblage dissimulé
ou son propre câble. Les chaînes de la
scie qui entrent en contact avec un câble
conducteur peuvent rendre conducteurs
les pièces en métal de l’outil électrique
et causer ainsi un choc électrique à
l’opérateur.
4. Portez des lunettes de sécurité et des
protège-oreilles. Des équipements
de protection supplémentaires pour
la tête, les mains, les jambes et les
pieds sont recommandés. Portez des
vêtements de protection adaptés afin
de réduire les risques de blessure par
des débris volants ou d’éviter un contact
accidentel avec la chaîne de scie.
5. Évitez de faire fonctionner la scie à
chaîne lorsque vous vous trouvez
sur un arbre. Faire fonctionner une scie
à chaîne tout en haut d’un arbre peut
entraîner des blessures.
6. Gardez toujours une bonne assise et
ne faites fonctionner la scie à chaîne
que lorsque vous êtes debout sur une
surface fixe, sécurisée et plane. Les
surfaces glissantes ou instables telles que
les échelles peuvent entraîner une perte
d’équilibre ou de contrôle de la scie à
chaîne.
7. Lors de la coupe d’une branche sous
tension, faites attention au retour de
celle-ci. Lorsque la tension des fibres de
bois est relâchée, la branche semblable à
un ressort peut frapper l’opérateur et/ou
rendre la scie à chaîne incontrôlable.
8. Soyez extrêmement prudent lors de la
coupe de la broussaille et des jeunes
arbres. Le matériau fin peut être pris dans
la chaîne et vous frapper ou vous faire
perdre l’équilibre.
9. Portez la scie à chaîne par la poignée
avant lorsqu’elle est en arrêt, et
éloignez-la de votre corps. Lors du
transport ou du stockage de la scie à
chaîne, toujours rabattre le protecteur de
guide-chaîne. Une manipulation appropriée
2726
Tronçonneuse électrique prime F Tronçonneuse électrique prime F
Page 15

de la scie à chaîne permettra de réduire la
probabilité de contact accidentel avec la
chaîne en mouvement.
10.
Respectez les instructions relatives
à la lubrication, à la tension de
la chaîne et au remplacement des
accessoires. Une chaîne ayant une
tension inappropriée ou mal lubrifiée peut
soit casser ou augmenter le risque de recul.
11.
Gardez les poignées sèches, propres
et exemptes d’huile et de graisse. Les
poignées contenant de la graisse ou de
l’huile sont glissantes et causent une perte
de contrôle.
12.
Uniquement destinée à la coupe de
bois. Évitez d’utiliser une scie à chaîne
à d’autres ns que celles prévues. Par
exemple : évitez d’utiliser une scie
à chaîne pour couper des matières
plastiques, du matériau de maçonnerie
ou des matériaux de construction
autre que le bois. L’utilisation de la
scie à chaîne à d’autres fins que celle
prévue pourrait entraîner une situation
dangereuse.
CAUSES ET PRÉVENTION DU RECUL DE
L’OPÉRATEUR:
Un recul peut se produire lorsque le nez ou
le bout de la guide-chaîne touche un objet ou
lorsque le bois se resserre et pince la chaîne de
la tronçonneuse dans la coupe.
Dans certains cas, un contact du bout peut
provoquer une réaction inverse extrêmement
rapide, propulsant la guide-chaîne vers le haut
et vers l’arrière en direction de l’opérateur. Un
pincement de la chaîne de la tronçonneuse le
long de la partie supérieure de la guidechaîne
peut repousser rapidement la guide-chaîne
vers l’opérateur. Ces réactions peuvent toutes
deux provoquer une perte de contrôle de la
tronçonneuse pouvant entraîner des blessures
graves pour l’utilisateur.
Ne pas compter exclusivement sur les
dispositifs de sécurité de la scie. En tant
qu’utilisateur d’une scie à chaîne, vous devez
prendre des mesures nécessaires pour
effectuer vos travaux de coupe sans accident
ou blessure.
Le recul est le résultat d’une mauvaise
utilisation de l’outil et/ou du non-respect
des procédures ou conditions d’utilisation, il
peut être évité en respectant les précautions
indiquées ci-dessous :
- Tenez fermement l’équipement, les
pouces et les doigts refermés sur les
deux poignées ; vous devez tenir la
scie à chaîne avec vos deux mains
et votre corps et vos bras doivent
être placés dans une position qui
vous permet de résister aux forces
de recul. Les forces de recul peuvent
être contrôlées par l’opérateur, si les
précautions nécessaires sont prises. Évitez
de lâcher la scie à chaîne.
- Évitez de trop vous pencher en avant
et de couper à une hauteur au-dessus
du niveau des épaules. Cela permet
d’éviter tout contact involontaire avec
l’embout et permet un meilleur contrôle
de la scie à chaîne en cas de situation
inopinée.
- Utilisez uniquement des barres et
chaînes de rechange spécifiées par
le fabricant. Les barres et chaînes de
rechange inadaptées peuvent provoquer
une cassure et/ou recul de la chaîne.
- Respectez les instructions relatives
à l’affûtage et à l’entretien de la
chaîne de la scie fournies par le
fabricant. Diminuer la hauteur du
limiteur de profondeur peut entraîner une
augmentation de recul.
LES RÈGLES DE SÉCURITÉ RELATIVES À
LA RALLONGE ÉLECTRIQUE
Assurez-vous que votre rallonge électrique
est en bon état. Lorsque vous utilisez une
rallonge électrique, assurez-vous qu’elle
puisse soutenir l’intensité du courant
demandé par votre produit. Une rallonge
électrique trop petite cause une baisse de la
tension d’alimentation, entraînant une perte
de puissance et une surchauffe. Le tableau
1 montre le calibre approprié en fonction de
la longueur de la rallonge électrique et de
l’ampérage indiqué sur la plaque signalétique.
Dans le doute, utilisez le calibre supérieur.
Plus le calibreest petit, plus la rallonge
électrique est grosse. Afin de réduire le risque
de déconnexion de l’appareil et de la rallonge
électrique alors qu’il est en fonction :
i-1) Faites un nœud tel qu’illustré en Figure 1
i-2) Utilisez une courroie de retenue ou les
connecteurs décrits dans ce manuel.
Table 1 Calibre minimum de la rallonge
électrique
Tension
électrique
120V 25 50 100 150
240V 50 100 200 300
Ampérage
supporté (A)
0-6 18 16 16 12
6-10 18 16 14 12
10-12 16 16 14 12
12-16 14 12
REMARQUE: Seules des parties pertinentes
du tableau doivent être incluses. Par
exemple, un produit d’une tension de 120
volts peut ne pas comporter une extrémité
de 240 volts.
Figure 1
MÉTHODE POUR SÉCURISER LA
RALLONGE ÉLECTRIQUE
RALLONGE
ÉLECTRIQUE
(A) ATTACHEZ LA RALLONGE
ÉLECTRIQUE TEL QU’ILLUSTRÉ
(B) CONNECTEZ FICHE ET PRISE
CONSIGNES DE SÉCURITÉ POUR
UNE SCIE À CHAÎNE AVEC PERCHE
D’EXTENSION
Longueur totale de la rallonge
électrique, en pieds
AWG
Déconseillé
CORDON ÉLECTRIQUE DE
L’APPAREIL
ConSiGneS De
SéCUriTé
AVERTISSEMENT! Lors de l’utilisation
d’appareils électriques de jardinage, des
précautions de base doivent être observées
afin de réduire les risques de feu, choc
électrique, et blessure grave, incluant ce qui
suit :
POUR TOUS LES APPAREILS
1. Évitez les environnements dangereux.
N’utilisez pas les appareils dans des
environnements très humides ou mouillés.
2. N’utilisez pas sous la pluie.
3. Tenez les enfants éloignés. Tous les
visiteurs devraient se tenir éloignés de
l’aire de travail.
4. Habillez-vous convenablement. Ne portez
pas des vêtements lâches ou des bijoux.
Ils peuvent se prendre dans les pièces
en mouvement. L’utilisation de gants de
caoutchouc et chaussures épaisses est
recommandée lors de travaux extérieurs.
Portez une protection pour cheveux afin de
contenir les cheveux longs.
5. Utilisez des lunettes de sécurité Toujours
porter un masque pour le visage ou pour la
poussière si l’opération est poussiéreuse.
6. Utilisez le bon appareil. N’utilisez pas
l’appareil pour tout autre travail que pour
celui auquel il est destiné.
7. Un disjoncteur différentiel devrait être
utilisé sur le(s) circuit(s) et prise(s)
murale(s) destinée(s) à l’appareil de
jardinage. Des prises de défaut à la terre
sont disponibles et peuvent être utilisées
également.
8. AVERTISSEMENT ! Afin de réduire
le risque de choc électrique, utilisez
seulement avec une rallonge électrique
destinée à un usage extérieur, tel que les
rallonges de types SW-A, SOW-A, STW-A,
STOW-A, SJW-A, SJOW-A, SJTW-A. ou
SJTOW-A.
9. Évitez les démarrages non intentionnels.
Ne transportez pas les appareils alors
qu’ils sont connectés et que vous avez le
doigt sur le commutateur. Soyez certain
que le commutateur est en position « OFF
» lorsque connecté.
2928
Tronçonneuse électrique prime F Tronçonneuse électrique prime F
Page 16

10. Ne soumettez pas le cordon d’alimentation
Y
Z
2”
2”
22
3
électrique à des abus. Ne transportez
jamais l’appareil par le cordon
d’alimentation électrique et ne tirez pas
d’un coup sec pour le déconnecter. Tenez
le cordon d’alimentation électrique éloigné
de la chaleur, de l’huile, et des arêtes
tranchantes.
11. Ne saisissez pas les lames de coupe
exposées ou les arêtes de coupe lorsque
vous soulevez ou tenez l’appareil.
12. Ne forcez pas l’appareil. Il fera un meilleur
travail et sera moins dangereux en
travaillant à la charge pour laquelle il est
conçu.
13. N’essayez pas d’utiliser l’appareil hors
de votre portée normale. Gardez votre
équilibre et les pieds bien ancrés au sol.
14. Restez alerte. Faites attention à ce que vous
faites. Utilisez votre bon sens. N’utilisez pas
l’appareil lorsque vous êtes fatigué.
15. Déconnectez l’appareil. Déconnectez
l’appareil de l’alimentation électrique
lorsqu’il n’est pas utilisé, avant d’en
faire l’entretien, lors du changement
d’accessoires tels que lames, et autres
accessoires du même genre.
16. Entreposez à l’intérieur les appareils
qui ne sont pas utilisés fréquemment.
Lorsqu’inutilisés, les appareils devraient
êtres entreposés à l’intérieur dans un
endroit sec, élevé et gardé sous clef, hors
de la portée des enfants.
17. Entretenez les appareils avec soin. Gardez
les arêtes de coupe aiguisées et propres
pour une meilleure performance et risque
réduit de blessure. Suivez les instructions
pour lubrifier et changer les accessoires.
Inspectez le cordon d’alimentation
électrique de l’appareil périodiquement,
et si endommagé, faites le réparer par un
dépôt de service autorisé. Inspectez les
cordons prolongateurs périodiquement
et remplacez si endommagés. Gardez les
poignées sèches, propres, et libres d’huile
et de graisse.
18. Vérifier les pièces endommagées. Avant
d’employer l’appareil, une garde ou
autre pièce endommagée devrait être
soigneusement vérifiée afin de déterminer
qu’elle fonctionnera correctement et
exécutera la fonction pour laquelle elle a
été conçue. Vérifier l’alignement des parties
mobiles, leur pincement, la brisure de
pièces, montage, et toute autre condition
qui peut affecter son opération. Une garde
ou autre pièce endommagée devrait être
correctement réparée ou remplacée par un
centre de service autorisé à moins d’avis
contraire ailleurs dans ce manuel.
GarDez CeS
inSTrUCTionS
POUR TOUS LES APPAREILS
ÉLECTRIQUES À DOUBLE ISOLATION
1) Pièces de remplacement
Lors de l’entretien de l’appareil, n’utilisez que
des pièces identiques de remplacement.
2) Connexions polarisées des appareils
électriques
Afin de réduire le risque de choc électrique,
cet outil a une fiche de connexion polarisée
(une des lames est plus large que l’autre) et
requiert l’utilisation d’une rallonge électrique
polarisée. La fiche de l’appareil s’accouple
seulement dans un sens avec une rallonge
électrique polarisée. Si la fiche ne s’accouple
pas complètement avec la rallonge électrique,
tournez la fiche. Si la fiche ne s’accouple
toujours pas, utilisez une rallonge électrique
polarisée. Une rallonge électrique polarisée
nécessite une prise murale polarisée. Cette
fiche entre seulement d’une seule façon à la
prise murale polarisée. Si la fiche ne rentre pas
complètement dans la prise murale, tournez
la fiche. Si la fiche ne rentre toujours pas,
contactez un électricien qualifié afin d’installer
une prise murale appropriée. Ne changez pas
la fiche de l’équipement, ou l’une des fiches de
la rallonge électrique, de quelque façon que
ce soit.
Tenez la scie à chaîne à perche à une distance
raisonnable des lignes électriques.
LES INSTRUCTIONS RELATIVES AUX
TECHNIQUES DE COUPE, D’ABATTAGE,
D’ÉBRANCHAGE ET DE TRONÇONNAGE
DE BASE APPROPRIÉES.
1. Coupe d’un arbre
Si deux ou plusieurs personnes participent
aux travaux de tronçonnage et d’abattage
en meme temps, prévoir un espace suffi
sant entre les différentes opérations. Il faut
une distance au moins égale à deux fois la
hauteur de l’arbre à abattre.
Lors de l’abattage d’un arbre, bien étudier
les alentours. Ne mettre personne en
danger. Veiller à ne pas heurter de lignes de
services publics et à ne pas causer de dégâts
matériels. Si l’arbre heurte une ligne de
service public, contacter immédiatement les
responsables.
Lors de l’abattage d’un arbre, rester du côté
amont de la pente car il pourrait rouler ou
glisser après sa chute.
Avant d’abattre un arbre, prévoir un chemin
de dégagement et le dégager. Le chemin
de fuite devrait s’étendre à l’arrière et en
diagonale derrière la ligne de chute prévue
comme illustrée dans la figure M.
Étudier l’inclinaison naturelle de l’arbre,
l’emplacement des grosses branches et la
direction du vent. Ceci aide à juger où l’arbre
va tomber.
Débarrasser l’arbre où l’on va effectuer les
entailles de saleté, cailloux, écorce détachée,
clous, agrafes et fi l de fer qui pourraient s’y
trouver.
2. Siffl et d’abattage
Faites une entaille de 1/3 de diamètre de
l’arbre, perpendiculairement à la direction de
chute comme illustré sur la figure M.
Faire l’entaille horizontale la plus basse en
premier ce qui aidera à éviter le pincement de
la scie à chaîne ou de la barre guide lorsque la
seconde entaille est effectuée.
3. Coupe opposée
Faites une coupe opposée d’au moins 50
mm plus haute que la coupe horizontale par
encochage, selon l’illustration de la figure
M. Gardez la coupe opposée parallèle à la
coupe horizontale par encochage. Réalisez la
coupe opposée de telle sorte qu’une grande
quantité de bois serve plus tard comme une
charnière. La charnière du bois empêche
l’arbre de se tordre et de tomber dans la
mauvaise direction. Évitez de couper à travers
la charnière.
Lorsque le trait d’abattage approche de la
charnière, l’arbre doit commencer à tomber.
Si nécessaire, enfoncer des coins dans le trait
d’abattage pour contrôler la direction de la
chute. Si l’arbre revient en arrière et pince
la chaîne, enfoncer des coins dans le trait
d’abattage pour libérer la tronçonneuse.
Lorsque l’arbre commence à tomber, faire très
rapidement les opérations suivantes :sortir
la tronçonneuse du trait d’abattage ;lâcher la
gâchette pour arrêter la tronçonneuse;poser
la tronçonneuse sur le sol ;s’éloigner par le
chemin de dégagement.
3
2”
X
Z
W
Y
2”
22
4. Ébranchage (Voir Fig. N)
L’ébranchage est la coupe des branches
d’un arbre tombé. Ne pas retirer les grosses
branches sous l’arbre qui soutiennent le tronc
surélevé. Retirer chaque branche d’une seule
coupe. Pour éviter le pincement, entamer
l’entaille sur des branches libres, à partir du
dessus de la branche. Pour les branches sous
tension, entamer l’entaille à partir du dessous
de la branche.
5. Tronçonnage d’une bille
Le tronçonnage d’une bille se fait en la
coupant en tronçons. Veiller à maintenir
un bon équilibre. Garder les pieds écartés.
3130
Tronçonneuse électrique prime F Tronçonneuse électrique prime F
Page 17

Y
Z
2”
2”
22
3
Y
Z
2”
2”
22
2
2/3
1
1/3
2
2/3
1
1/3
1
2
2/3
1/3
Y
Z
2”
2”
22
3
Y
Z
2”
2”
22
2
2/3
1
1/3
2
2/3
1
1/3
1
2
2/3
1/3
Répartir le poids également sur les deux
Répartir le poids également sur les deux
pieds. Se tenir légèrement à gauche de la
pieds. Se tenir légèrement à gauche de la
tronçonneuse. Ceci évite que le corps ne soit
tronçonneuse. Ceci évite que le corps ne soit
en prolongement direct de la chaîne. Autant
en prolongement direct de la chaîne. Autant
que possible, soulever la bille ou le tronçon
que possible, soulever la bille ou le tronçon
audessus du sol. Pour ce faire, utiliser des
audessus du sol. Pour ce faire, utiliser des
branches, tronçons, cales, etc. Procéder de la
branches, tronçons, cales, etc. Procéder de la
façon suivante pour tronçonner une bille.
façon suivante pour tronçonner une bille.
Tronçonner la bille à partir du dessus.
Tronçonner la bille à partir du dessus.
(Voir Fig. O).
(Voir Fig. O).
La bille est soutenue à une extrémité, Faire la
La bille est soutenue à une extrémité, Faire la
première entaille sur le dessous de la
première entaille sur le dessous de la
bille. Scier sur le tiers du diamètre de la bille.
bille. Scier sur le tiers du diamètre de la bille.
Cette entaille permet d’éviter la production
Cette entaille permet d’éviter la production
d’éclats de bois. (Voir Fig. P)
d’éclats de bois. (Voir Fig. P)
1
1
1/3
1/3
2
2
Quand le billot est soutenu aux deux bouts,
Quand le billot est soutenu aux deux bouts,
tel qu’illustré, coupez 1/3 le diamètre à partir
tel qu’illustré, coupez 1/3 le diamètre à partir
du tronçonnage au sommet. Par la suite,
du tronçonnage au sommet. Par la suite,
terminez la coupe en tronçonnant le 2/3 plus
terminez la coupe en tronçonnant le 2/3 plus
pas pour rencontrer la première coupe. (Voir
pas pour rencontrer la première coupe. (Voir
Fig. Q)
Fig. Q)
2
1
1
1/3
1/3
2
2/3
2/3
SYMBOLES
Afin de réduire les risques de
blessure, l’utilisateur doit lire ce
mode d’emploi.
Portez une protection auditive
Portez un protecteur oculaire
Portez un masque antipoussières
Portez un casque de protection.
Portez des gants de protection.
Portez des chaussures de sécurité.
m
0
1
Avertissement de danger relatif aux
lignes électriques aériennes.
Lors du tronçonnage sur une pente, toujours
Lors du tronçonnage sur une pente, toujours
se tenir vers le haut de la grume comme
se tenir vers le haut de la grume comme
illustré à la figure R. Lors de la « réalisation
illustré à la figure R. Lors de la « réalisation
de la coupe », pour maintenir un contrôle
de la coupe », pour maintenir un contrôle
complet, relâchez la pression de coupe près
complet, relâchez la pression de coupe près
de la fin de coupe sans relâcher votre prise
de la fin de coupe sans relâcher votre prise
sur les poignées de la scie à chaîne. Évitez de
sur les poignées de la scie à chaîne. Évitez de
laisser la chaîne toucher le sol. Après avoir
laisser la chaîne toucher le sol. Après avoir
terminé la coupe, laissez s’arrêter la chaîne
terminé la coupe, laissez s’arrêter la chaîne
de la scie avant de déplacer la scie à chaîne.
de la scie avant de déplacer la scie à chaîne.
Toujours arrêter le moteur avant de passer
Toujours arrêter le moteur avant de passer
d’un arbre à un arbre.
d’un arbre à un arbre.
Double isolation
Évitez de laisser l’équipement sous
la pluie
Retirez la fiche du secteur
immédiatement si le câble est
endommagé ou coupé
3332
Évitez le contact avec le nez de
guide
2/3
2/3
AVERTISSEMENT! Prenez garde
aux effets de rebond
Tenez la tronçonneuse
adéquatement avec les deux mains.
Tronçonneuse électrique prime F Tronçonneuse électrique prime F
Page 18

ASSEMBLAGE
AVERTISSEMENT! Avant de régler
la tension de la chaîne, débrancher
le cordon de la prise de courant.
Porter des gants de protection pour
manipuler la chaîne.
ASSEMBLAGE DU GUIDE-CHAÎNE ET DE
LA CHAÎNE
1. Déballez les pièces avec précaution.
2. Placez la tronçonneuse sur une surface
plane.
3. N’utilisez que des chaînes WORX
authentiques conçues pour les guidechaînes.
4. Glissez la chaîne (10) dans la fente autour
du guide-chaîne (9). En vous référant au
symbole de chaîne (16), assurez-vous
que la chaîne est dans la bonne direction
de coupe. Assurez-vous que le doigt
d’entraînement du tensionnement de la
chaîne (22) est face à l’extérieur. (Fig. A)
5. Placez la chaîne autour du pignon
d’entraînement (15), de sorte que le boulon
de la barre de fixation (19) et les deux
pattes de centrage de la barre (20) sur
la bride de serrage (18) correspondent
parfaitement avec la rainure de clavette
de l’ouverture sur la barre de guidage (9).
(Voir fig. B)
6. Vérifiez que toutes les pièces sont
parfaitement fixées. (Voir fig. C)
7. Montez le protecteur de chaîne (12) et
serrez-le en tournant le bouton de tension
de la chaîne (11) dans le sens horaire
jusqu’à ce qu’il soit serré.(Voir fig. D).
MISE EN GARDE :La chaîne
n’est pas encore tensionnée.
Le tensionnement de la chaîne doit
être effectué tel qu’expliqué dans «
Tensionnement de la chaîne ». Il faut, à
ce point, vérifier que la chaîne est bien
tendue.
TENSION DE LA CHAÎNE (Fig.E)
REMARQUE: Les nouvelles chaînes ont
tendance à s’étirer. Vérifi ez fréquemment la
tension de la chaîne les premières fois que
vous vous en servirez; resserrez la chaîne
lorsqu’elle semble lâche au niveaudu guidechaîne.
MISE EN GARDE :
• Avant de régler la tension de la
chaîne, débrancher le cordon de la
prise de courant.
• Les tranchants de la chaîne sont
affûtés. Porter des gants de
protection pour manipuler la chaîne.
Toujours maintenir la chaîne tendue
correctement.
• Une chaîne détendue augmente le
risque de recul. De plus, elle risque
de sauter hors de la rainure de la
guidechaîne. Ceci pourrait blesser
l’utilisateur et endommager la chaîne.
En outre, une chaîne détendue
provoque l’usure rapide de la chaîne,
de la guide-chaîne et du pignon.
1. Déposer la chaîne à plat.
2. Tournez le bouton de verrouillage/poignée
de tension de la chaîne (11) dans le sens
des aiguilles d’une montre avec cliquetis
jusqu’à l’obtention de la bonne tension
de chaîne. La tension correcte de la
chaîne sera atteinte automatiquement. Le
mécanisme à cliquet empêche la tension
de la chaîne de se desserrer.
3. Revérifier le réglage de tension de la
manette d’auto tension. La bonne tension
de chaîne est obtenue lorsque le de la
chaîne peut être monté à environ0.12-0.24‘’
(3-6 mm)du guide-chaîne au centre. Ceci
doit être effectué en utilisant une main
afin d’élever la chaîne contre le poids de la
machine.
4. La chaîne s’étire au cours de l’utilisation et
perd de sa tension. Pour tourner le bouton
dans le sens antihoraire (3x), fixez le
protecteur de chaîne, et tendez de nouveau
la chaîne, répétez simplement les étapes 1
à 3 ci-dessus.
ASSEMBLAGE DE LA PERCHE
D’EXTENSION (LORSQUE LA FIXATION
DE LA PERCHE OPTIONNELLE EST
UTILISÉE
Alignez et insérez la poignée de la
perche d’extension dans l’arbre. Tournez
le collier de fixation dans le sens des
aiguilles d’une montre pour verrouiller.
(Voir Fig. F1, F2)
Remarque : Assurez-vous que l’arbre est
fermement verrouillé en place.
ASSEMBLAGE DE LA PERCHE
D’EXTENSION À LA MACHINE
1. Fixez le support de la perche à la scie.
(Fig. G1)
Remarque : Le support de la perche
maintien le déclencheur sur la position «
ON » (marche).
2. Faites glisser le support de la poignée
sur le boulon de fixation.
3. Vissez fermement le bouton.
4. Branchez le cordon d’alimentation de
la scie dans son réceptacle situé à
l’extrémité interne de la perche. (Fig
G2)
AVERTISSEMENT
Avant de brancher le cordon
d’alimentation électrique de l’outil au
cordon de la perche, assurez-vous que
l’outil soit éteint et débranché.
Lorsque vous utilisez cette machine
avec la perche d’extension, assurezvous d’attacher le cordon d’alimentation
de la machine à celui de la perche
d’extension, puis branchez le cordon
d’alimentation de la perche d’extension
à l’alimentation.
DANGER D’ÉLECTROCUTION:
N’utilisez jamais la scie ou sa perche
d’extension dans une zone avec des
lignes électriques aériennes ou une
zone où des branches coupées peuvent
tomber sur des lignes électriques
aériennes.
RÉGLAGE DE LA LONGUEUR DE LA
PERCHE
La scie possède un assemblage pour
perche télescopique pouvant aller
de 89.7 pouces(WG309)/ 87.4 pouces
(WG310) (complètement rétractée) à 119.4
pouces (WG309) /117.1 pouces (WG310)
(complètement détendue).
Un collier avec levier de serrage permet de
maintenir la tige à la longueur de travail
désirée.
1. Pour rallonger la tige, desserrer le levier de
serrage comme illustré dans la Figure H.
La perche peut alors glisser librement.
2. Tirez sur le tronçon interne de la perche
pour le sortir à la longueur voulue.
Remarque : Sortez la perche seulement à la
longueur minimale requise pour atteindre
la branche que vous voulez couper.
3. Pour verrouiller la tige à la longueur
désirée, serrer le levier de serrage comme
illustré dans la Figure H.
LUBRIFICATION
AVERTISSEMENT! la tronçonneuse
ne vient pas remplie d’huile. Vous
devez absolument la remplir d’huile
avant de l’utiliser. Ne faites jamais
fonctionner la tronçonneuse sans huile à
chaîne ou lorsque le réservoir d’huile est
vide, car cela pourrait causer de graves
dommages au produit.
Une lubrification optimale influence la
durée de vie de la chaîne et sa capacité
de coupe. Par conséquent, la chaîne est
automatiquement huilée par la sortie d’huile
pendant le fonctionnement.
REMPLISSAGE DU RÉSERVOIR D’HUILE:
1. Mettez la tronçonneuse sur n’importe
quelle surface en prenant soin de placer
le bouchon de remplissage d’huile vers le
haut.
2. Nettoyez la zone se trouvant autour du
bouchon de remplissage d’huile avec
un linge et prenez soin de dévisser le
bouchon.
3. Ajoutez l’huile pour tronçonneuse WORX
jusqu’à ce que le réservoir soit plein.
N’importe quelle marque d’huile pour
chaîne et lame-guide peut être utilisée.
4. Évitez que de la saleté ou des débris
ne s’infiltrent dans le réservoir d’huile,
remettez le bouchon de remplissage
d’huile (5) et serrez.
AVERTISSEMENT: Afin de
permettre au réservoir d’huile de
ventiler, de petits canaux de reniflards
sont insérés entre le bouchon de
remplissage d’huile et la crépine. Afin
d’éviter les fuites, assurez-vous que
la machine est en position horizontale
(bouchon de remplissage d’huile (5) en
3534
Tronçonneuse électrique prime F Tronçonneuse électrique prime F
Page 19

dessous) lorsque vous ne l’utilisez pas.
An d’éviter des dommages à la
tronçonneuse, il est important
d’utiliser seulement l’huile (ISO VG32)
recommandée. N’utilisez jamais d’huile
recyclée/vieille. L’utilisation d’une huile
non approuvée annule la garantie.
VÉRIFICATION DE L’HUILEUSE
AUTOMATIQUE
Vous pouvez vérifier le bon fonctionnement
de l’huileuse automatique en faisant
fonctionner la tronçonneuse et en pointant
le bout du guide-chaîne vers un morceau de
carton ou vers le sol. Attention : Ne laissez pas
la chaîne toucher le sol. Assurez-vous qu’il y a
un espace sécuritaire de 12 ‘’. Si l’huile semble
se distribuer, alors l’huileuse automatique
fonctionne correctement. Si l’huile ne semble
pas se distribuer malgré que le réservoir soit
plein, communiquez avec un agent du service
à la clientèle ou un agent de service approuvé
WORX.
OPÉRATION
1. INTERRUPTEUR MARCHE/ARRÉT DE
SÉCURITÉ (Fig. I)
AVERTISSEMENT! Utiliser
uniquement la tension de courant
électrique indiquée sur la plaque
signalétique de la tronçonneuse.
Pour mettre en marche, appuyez sur le bouton
de verrouillage (3), puis appuyez sur et
maintenez enfoncé le bouton On/Off (marche/
arrêt) (2). Le bouton de verrouillage peut à
présent être relâché.
Pour mettre en arrêt, relâchez le bouton On/
Off (marche/arrêt).
2. COUPE
-le réservoir d’huile est-il rempli? Vérifiez
l’indicateur de niveau d’huile (4) avant de
démarrer et faites-le régulièrement pendant
la période d’utilisation. Remplissez l’huile
lorsque le niveau est bas. Un remplissage de
réservoir d’huile durera environ 12 minutes
selon l’intensité du sciage et la fréquence des
arrêts. (Fig. J1)
Vérifiez la tension de la nouvelle chaîne
remplacée environ toutes les dix minutes
pendant la période d’utilisation.
1 Relier la tronçonneuse à une rallonge
électrique. Brancher la rallonge à une prise
de courant.(Fig.J2)
2 La section de bille à tronçonner ne doit
pas se trouver sur le sol. Ceci évite que
la chaîne ne touche le sol à la fi n du
tronçonnage. Une chaîne en mouvement
qui touche le sol s’émousse.
3 Se servir des deux mains pour tenir la
tronçonneuse. Toujours utiliser la main
gauche pour saisir la poignée avant et la
main droite pour saisir la poignée arrière.
Tenir fermement. Les pouces et les doigts
doivent entourer les poignées. (Fig. J3)
4. Veiller à maintenir un bon équilibre.
Garder les pieds écartés. Répartir le poids
également sur les deux pieds.
5. Lorsqu’on est prêt à faire une coupe,
pousser complètement vers l’avant avec
le pouce droit le bouton de verrouillage
et appuyer sur la gâchette. Ceci met la
tronçonneuse en marche. Elle s’arrête
quand on lâche la gâchette. S’assurer que
la chaîne tourne à la vitesse maximum
avant d’entamer l’entaille.
6. Au moment d’entamer l’entaille, placer
la chaîne en mouvement contre le bois.
Tenir la tronçonneuse fermement en place
pour éviter qu’elle rebondisse ou dérape
(movement latéral).
7. Dirigez la scie en utilisant une légère
pression et ne pas mettre de force
excessive sur la scie. Il fonctionnera de
façon plus effi cace et plus sûre à la vitesse
pour laquelle il a été prévu.
8. Retirer la tronçonneuse d’une coupe en
gardant la tronçonneuse à pleine vitesse.
Arrêter la tronçonneuse en relâchant
la gâchette. S’assurer que la chaîne est
arrêtée avant de poser la tronçonneuse.
9. Continuez de pratiquer sur des billots qui
ne servent plus dans un environnement
de travail sécuritaire jusqu’à ce que
vous arriviez à maîtriser l’outil et que
vous puissiez scier aisément, avec un
mouvement fluide et un flux de coupe
constant.
DISPOSITIFS DE PROTECTION CONTRE
LE RECUL SUR CETTE TRONÇONNEUSE
Cette tronçonneuse est munie d’une chaîne
à faible recul et d’une guide-chaîne à recul
réduit. Ces deux éléments réduisent le risque
de recul. Cependant, celui-ci peut encore se
produire.
On peut prendre les mesures suivantes pour
réduire le risque de recul :
• Seservirdesdeuxmainspour
tenir la tronçonneuse pendant son
fonctionnement. Tenir l’outil d’une poigne
ferme. Les pouces et les doigts doivent
enveloper les poignées.
• Touslesdispositifsdesécuritédoiventêtre
maintenus en place sur la tronçonneuse.
S’assurer qu’ils fonctionnent correctement.
• Nepasessayerd’atteindretroploinnide
couper au-dessus de la hauteur de
l’épaule.
• Garderenpermanenceunsolideappuiau
sol et un bon équilibre.
• Setenirlégèrementàgauchedel’outil.
Le corps n’est pas ainsi en prolongement
direct de la chaîne.
• Nepaslaisserlenezdelaguide-chaîne
toucher quelque chose quand la chaîne est
en mouvement.
• Nejamaisessayerdecouperdeuxbilles
en même temps. En couper seulement une
à la fois.
• Nepasenfouirlenezdelaguide-chaîneni
essayer de couper en plongeant (faire un
trou dans le bois en enfonçant le nez de la
guide-chaîne).
• Surveillerlemouvementduboisoules
autres forces qui pourraient pincer la
chaîne.
• Fairetrèsattentionquandonrepénètre
dans une entaille.
• Utiliserlachaîneàfaiblereculet
la guidechaîne fournies avec cette
tronçonneuse.
• Nejamaisutiliserunechaîneémoussée
ou détendue. Maintenir la chaîne affûtée et
tendue correctement.
COMMENT UTILISER UNE SCIE DE
FAÇON SÉCURITAIRE
1. Veiller à maintenir un bon équilibre.
2. Tenez la tronçonneuse sur le côté droit de
votre corps. (Fig. K1)
3. Voir Rallonges Électriques pour connaître
le calibre approprié.
4. Avant de commencer à couper, utilisez le
maillon de prise dents en métal afin de
fixer la tronçonneuse au bois.
5. Lors de la coupe, utilisez le maillon de
prise dents avec la prise. (Fig.K2)
6. Ne pas opérer une scie à chaîne avec les
bras en extension complète, tentez de scier
des secteurs qui sont difficiles à atteindre,
ou tenez-vous sur une échelle en sciant.
(voir la Fig. K3).
Ne pas couper de branches au-dessus
de la hauteur de l’épaule.
COUPER DU BOIS SOUS TENSION (Fig.
L)
AVERTISSEMENT: Pour couper une
branche sous tension, faire très
attention. Veiller au bois qui fait ressort:
quand la tension disparaît, la branche
projetée risque de heurter l’utilisateur,
entraînant des blessures graves ou la
mort.
La bille est soutenue aux deux extrémités.
Faire la première entaille à partir du dessus
de la bille. Scier sur le tiers du diamètre
de la bille. Faire la seconde entaille sur le
dessous de la bille, directement au-dessous
de la première. La bille est soutenue à une
extrémité,faire la première entaille sur le
dessous de la Bille. Scier sur le tiers du
diamètre de la bille. Faire la seconde entaille
directement au-dessus de la première. Aller
jusqu’à la rencontre de la première entaille.
Ceci permet d’éviter le pincement de la guidechaîne et de la chaîne.
FONCTIONNEMENT DE LA
SCIE À PERCHE
Coupe avec la perche d’extension
(LORSQUE LA FIXATION DE LA PERCHE
OPTIONNELLE EST UTILISÉE)
3736
Tronçonneuse électrique prime F Tronçonneuse électrique prime FSierra eléctrica ES
Page 20

1. Relier la tronçonneuse à une rallonge
électrique. Brancher la rallonge à une prise
de courant.
2. Servez-vous de vos deux mains pour
saisir la scie à perche. Ne saisissez que
les parties designees pour la prise pour
utiliser la scie à perche (voir fig. M1). Votre
prise doit être ferme. Le pouce et les doigts
doivent être complètement refermés sur la
perche et la poignée.
3. Veiller à maintenir un bon équilibre.
Garder les pieds écartés. Répartir le poids
également sur les deux pieds.
4. Lorsque vous êtes prêt à faire une coupe,
enfoncez le verrouillage d’interdiction de
la gâchette, puis appuyez sur la gâchette
(voir fig.M2). Ceci met en marche la scie.
Pour mettre la scie à l’arrêt, vous relâchez
la gâchette. S’assurer que la chaîne tourne
à la vitesse maximumavant d’entamer
l’entaille.
5. Au moment d’entamer l’entaille, placer la
chaîne en mouvement contre le bois. Tenez
la scie à perche fermement en place, afin
d’éviter lesrebonds et les effets de poussée
latérale de la scie.
6. Pour guider la scie à perche, n’exercez
qu’une légère pression. Ne la forcez pas.
Le moteur serait surchargé et pourrait
griller. Il fonctionnera de façon plus
efficace et plus sûre à la vitesse pour
laquelle il a été prévu.
7. Retirez la scie du trait de coupe à plein
régime. Arrêtez la scie à perche en
relâchant la gâchette. Assurez-vous que la
chaîne a cessé de tourner avant de poser la
scie au sol.
TAILLE D’UN ARBRE (ÉLAGAGE)
AVERTISSEMENT : Éviter la
réaction de recul qui peut
provoquer des blessures graves ou la
mort. Voir Recul, pour éviter les risques
de recul.
AVERTISSEMENT : N’utilisez pas la scie
à perche pendant
•dansunarbre,
•suruneéchelleoutouteautresurface
instable,
•dansunepositioninstable.
Vous risquez de perdre le contrôle de la scie
et de causer des blessures graves.
AVERTISSEMENT : Ne portez pas
les bras au-dessus de la hauteur
des épaules lorsque vous utilisez la scie
à perche.
AVERTISSEMENT : Si l’utilisateur estime
les conditions de travail au-delà de ses
capacités, il lui est conseillé de faire
appel à un professionnel.
La taille d’un arbre est la coupe des branches
de l’arbre sur pied. Veiller à maintenir un bon
équilibre. Garder les pieds écartés. Répartir le
poids également sur les deux pieds. Procéder
de la façon suivante pour la taille d’un arbre.
1. Faire la première entaille à 15 cm (6 po) du
tronc, sur le dessous de la branche. Utiliser
le haut de la guide-chaîne pour faire cette
entaille. Couper sur 1/3 du diamètre de la
branche. (Voir la figure M3)
2. Avancer de 5 à 10 cm (2 à 4 po) plus loin
sur la branche. Faire la seconde entaille à
partir du dessus de la branche. Continuer
jusqu’à ce que la branche soit sectionnée.
3. Faire la 3ème entaille aussi près du tronc
que possible, sur le dessous du reste de la
branche. Utiliser le haut de la guide-chaîne
pour faire cette entaille. Couper sur 1/3 du
diamètre du reste de la branche.
4. Faire la 4ème entaille juste au-dessus de
la 3ème. Tailler pour rencontrer la 3ème
entaille. Ceci enlève le reste de la branche.
ENTRETIEN DE LA SCIE
Suivre les instructions d’entretien fi gurant
dans ce manuel. Les risques de recul peuvent
être réduits par le nettoyage et l’entretien
adéquats de l’outil, de la chaîne, de la guidechaîne. Après chaque utilisation, inspecter la
tronçonneuse et l’entretenir. Ceci prolonge sa
durée en service.
REMARQUE : Même si la chaîne est
affûtée correctement, le risque de recul peut
augmenter à chaque affûtage.
ENTRETIEN ET REMISAGE
DE LA TRONÇONNEUSE
Le remplacement du câble d’alimentation
doit être effectué par le fabricant ou son
mandataire, le cas échéant, afin d’éviter une
violation des règles de sécurité.
1. Débrancher le cordon de la prise de
courant:
•quandonn’utilisepaslatronçonneuse,
•avantdeladéplacerd’unendroitàunautre,
•avantdeprocéderàsonentretien,
•avantdechangerdesaccessoires,telsque
la chaîne et l’écran de protection de la
tronçonneuse.
2. Inspecter la tronçonneuse avant
et après chaque utilisation. Bien
contrôler l’outil si une protection ou une
pièce quelconque a été endommagée. Bien
vérifi er pour déceler tout dégât pouvant
affecter la sécurité de l’utilisateur ou le
fonctionnement de l’outil. Vérifi er que les
pièces mobiles sont bien alignées et ne
sont pas coincées. Vérifi er qu’il n’y a pas
de pièces cassées ou endommagées. Ne
pas utiliser la tronçonneuse si les dégâts
affectent la sécurité ou son fonctionnement.
Faire remettre l’outil en état par un réparateur
agréé. Consulter www.worxyardtools.com
pour trouver un centre de service autorisé.
3. Se servir de l’outil avec précaution :
• Nejamaisl’exposeràlapluie.
• Garderlachaîneaffûtée,propreetlubri
ée pour améliorer le rendement et la
sécurité.
• Suivrelaprocéduredécritedansce
manuel pour l’affûtage de la chaîne.
• Garderlespoignéessèches,propreset
sans traces d’huile ou de graisse.
• Gardervisetécrousbienserrés.
• Inspectersouventlecordond’alimentation
électrique. S’il est abîmé, le faire remettre
en état par un réparateur agréé.
• Nejamaistransporterlatronçonneuse
en la tenant par le cordon d’alimentation
électrique.
• Nejamaistirersurlecordonpour
débrancher la fi che de la prise de courant.
• Tenirlecordonàl’écartdelachaleur,de
l’huile et des bords coupants.
• Inspectersouventlesrallongesetles
remplacer si elles sont abîmées.
4. Pour la réparation, utiliser uniquement
des pièces de rechange identiques.
5. Lorsqu’on ne s’en sert pas, toujours
ranger la tronçonneuse
• dansunendroitenhauteurouverrouillé,
hors de la portée des enfants,
• dansunendroitsec,
• dansunemalettedetransportouavecun
fourreau recouvrant la guide-chaîne.
Entretien de la lame
Les entretiens suivants sont recommandés
pour faire durer la lame le plus longtemps
possible.
Il faut nettoyer la rainure de la lame qui guide
la chaîne avant de ranger la scie où lorsque la
chaîne semble sale.
La rainure doit aussi être nettoyée que la
chaîne est retirée.
Renverse la lame, la rainure du haut devenant
celle du bas et vice versa environ toutes les 5
heures d’utilisation.
POUR NETTOYER LA RAINURE DE LA
LAME:
1. Retirer le couvercle de chaîne puis la lame
et la chaîne. (voir section MONTAGE)
2. À l’aide d’une brosse métallique, d’un
tournevis ou d’un outil également adéquat,
nettoyer la rainure de la lame en enlevant
les résidus. FIG N
3. S’assurer de nettoyer à fond les passages
d’huile.
CONDITIONS DEMANDANT L’ENTRETIEN
DE LA LAME-GUIDE :
• Lascietired’uncôtéoucoupeenangle.
Il faut appuyer sur la scie pour qu’elle
puisse passer à travers le morceau à
couper.
• Ledébitd’huileestinsufsantpour
lubrifier adéquatement la lame et la chaîne.
• Vérierl’étatdelalame-guideàchaque
aiguisage des dents de la chaîne. Une
lame-guide usée endommagera la chaîne
et rendra la coupe difficile.
Après chaque utilisation et après avoir
débranché la scie, nettoyer la lame-guide et
l’orifice de pignon de la sciure de bois.
Lorsque la rainure du haut est inégale, utiliser
une lime plate pour redonner des bords
3938
Tronçonneuse électrique prime F Tronçonneuse électrique prime F
Page 21

carrés et des parois droites.
Les bords et les
parois du guide
doivent être
limés
à angle droit.
Rainure usée Rainure conforme
Remplacer la lame-guide lorsque la rainure
est usée, la lame-guide est tordue ou
fendillée, ou lorsque la rainure chauffe trop ou
s’ébarbe. S’il est nécessaire de la remplacer,
n’utiliser que la lame-guide spécifiée
pour votre scie dans la liste des pièces de
rechange ou sur le décalque apposé sur la
tronçonneuse.
REMPLACEMENT DE LA CHAÎNE/ GUIDECHAÎNE
Remplacer la chaîne lorsque les taillants
sont trop usés pour être affûtés ou lorsque la
chaîne casse. Utiliser uniquement la chaîne
de rechange spéci- fi ée dans ce manuel.
Toujours remplacer le pignon d’entraînement
par un neuf lors du remplacement de la
chaîne. On obtient ainsi l’entraînement correct
de la chaîne.
Inspecter la guide-chaîne avant d’affûter
la chaîne. Une guide-chaîne usée ou
endommagée présente des dangers. Elle
endommage la chaîne. Le sciage devient
également plus diffi cile.
Positionnez le doigt d’entraînement du
tensionnement dans le nouveau guide en
resserrant la vis dans le sens des aiguilles
d’une montre. Le doigt fendu (a) doit être fixé
au trou du guide. (Fig. O)
AFFÛTAGE DE LA CHAÎNE
AVERTISSEMENT: Avant de
procéder à l’entretien, débrancher
la tronçonneuse de la prise de courant.
Des blessures graves ou la mort
peuvent être provoquées par les chocs
électriques et le contact du corps avec
la chaîne en mouvement.
AVERTISSEMENT : Les tranchants
de la chaîne sont affûtés. Porter
des gants de protection pour manipuler
la chaîne.
Maintenir la chaîne affûtée. La tronçonneuse
scie plus rapidement et de façon plus
sécuritaire. Une chaîne émoussée provoque
l’usure prématurée du pignon, de la
guide-chaîne, de la chaîne et du moteur.
Si l’utilisateur est contraint de forcer sur la
chaîne pour la faire entrer dans le bois et si
le sciage ne produit que de la sciure avec
peu de gros copeaux, c’est que la chaîne est
émoussée.
LUBRIFIER LE PIGNON
AVERTISSEMENT!
Mettre des gants de travail
pendant la réparation ou l’entretien de
cet appareil.
Toujours débrancher la scie avant sa
réparation ou son entretien.
REMARQUE:
Il n’est pas nécessaire de retirer la chaîne ou
la lame pendant la lubrification du pignon.
1. Nettoyer la lame et le pignon
2. À l’aide d’une pipette de graissage, insérer
le bec de la pipette dans l’orifice de
lubrification et injecter la graisse jusqu’à ce
qu’elle apparaît au bord extérieur du bout
pignon. Fig.P
3. Pour faire pivoter le pignon, relâcher la
butée d’arrêt de la chaîne et tirer la chaîne
à la main jusqu`à ce que le côté non
graissé du pignon soit aligné avec le trou
de graissage. Reprendre la procédure de
lubrification.
TABLEAU DE DÉPANNAGE
le tableau suivant vous propose des vérifications et des mesures correctrices si votre outil
ne fonctionne pas correctement. Si le tableau d’identifie pas ou ne permet pas de corriger le
problème, contactez votre agent de maintenance.
AVERTISSEMENT: Éteignez l’appareil et débranchez la prise électrique avant
d’effectuer une vérification pour corriger le problème.
Symptôme Cause possible Solution
La scie à chaîne
ne fonctionne pas
La scie à chaîne
fonctionne
de manière
intermittente
Chaîne sèche Plus d’huile dans le réservoir
La chaîne/le
guide-chaîne
surchauffe
La scie à chaîne
saute, vibre
et ne scie pas
correctement
Pas d’alimentation
Prise électrique endommagée
Cordon électrique endommagé
Fusible sauté
Cordon électrique endommagé
Connexion lâche
Câblage interne défectueux
Interrupteur On/Off défectueux
Aération du bouchon de
remplissage d’huile bouchée
Passage de l’huile bouché
Plus d’huile dans le réservoir
Aération du bouchon de
remplissage d’huile bouchée
Passage de l’huile bouché
La chaîne est trop tendue
Chaîne émoussée
Tension de la chaîne trop faible
Chaîne émoussée
Chaîne usée
Les dents de la chaîne sont
pointées dans le mauvais sens
Vérifiez l’alimentation
Utilisez une autre prise électrique
Vérifiez le cordon électrique, et
remplacez-le
Remplacez le fusible
Vérifiez le cordon électrique, et
remplacez-le
Contactez l’agent de maintenance
1-866-354-WORX (9679)
Contactez l’agent de maintenance
1-866-354-WORX (9679)
Contactez l’agent de maintenance
1-866-354-WORX (9679)
Remplissez d’huile
Nettoyez le bouchon
Nettoyez le tuyau de passage de
l’huile
Remplissez d’huile
Nettoyez le bouchon
Nettoyez le tuyau de passage de
l’huile
Ajustez la tension de la chaîne
Affutez la chaîne ou remplacez-la
Ajustez la tension de la chaîne
Affutez la chaîne ou remplacez-la
Remplacez la chaîne
Remontez la chaîne dans le bon
sens
4140
Tronçonneuse électrique prime F Tronçonneuse électrique prime F
 Loading...