


2 in 1 Grass Trimmer/Edger EN
Coupe gazon/Taille-bordure 2 en 1 F
2 en 1 - Cortadora de cesped/Ribeteadora ES
P 06
P 12
P 19
WG112


�
A B C
D E F
G H I
J

76
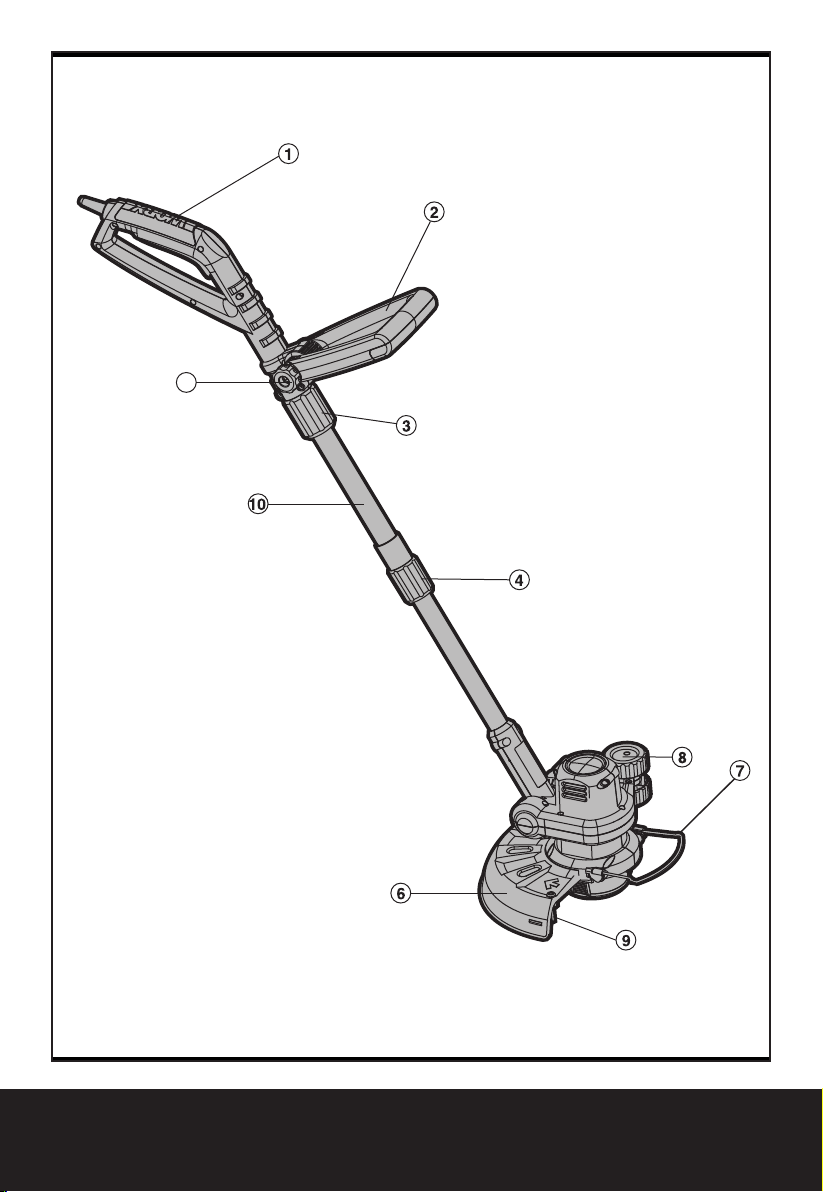
1. REAR HANDLE
2. AUXILIARY HANDLE
3. UPPER LOCKING KNOB
4. LOWER LOCKING KNOB
5. AUXILIARY HANDLE LOCKING KNOB
6. SAFETY GUARD
7. SPACER GUARD
8. EDGER WHEEL
9. LINE CUTTER
10. TELESCOPIC SHAFT
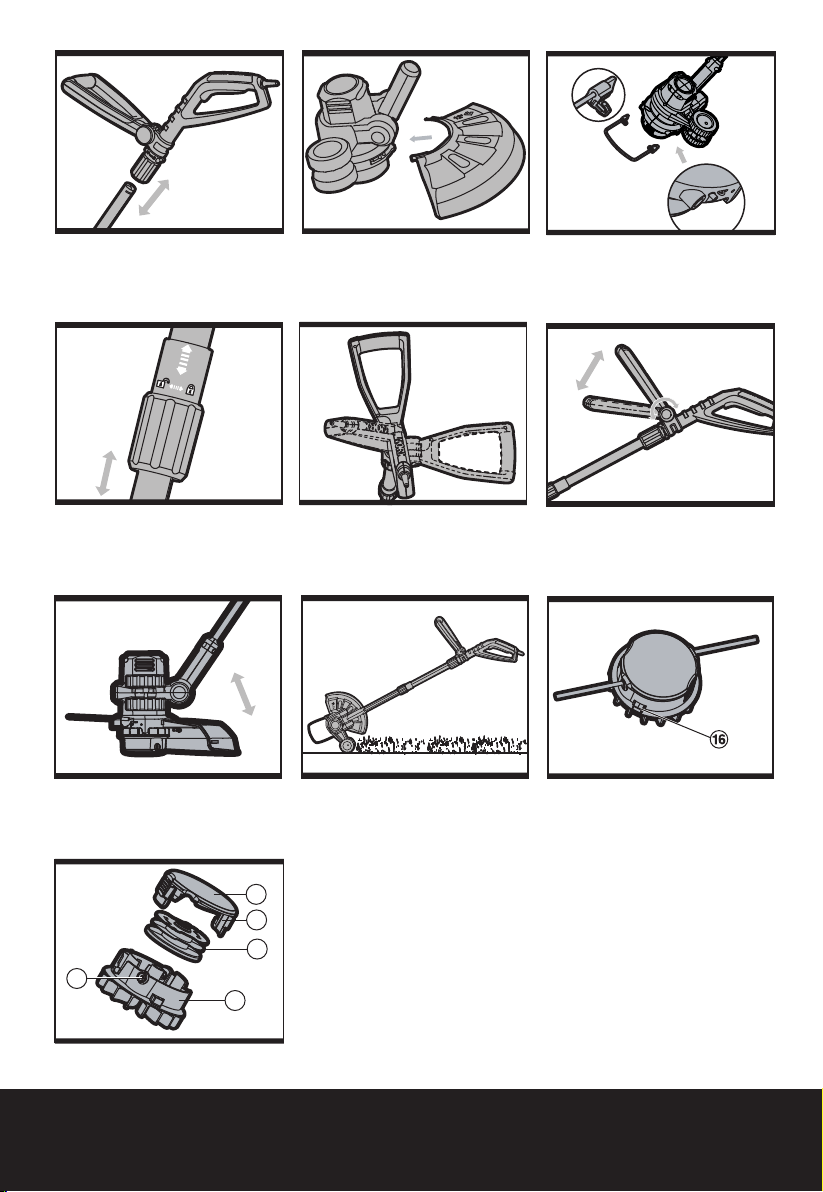
11. CUTTING HEAD COVER (
12. CAP RELEASE LATCH (
13. SPOOL (
14. CUTTING HEAD (
15. EYELET (
16. LINE FEED BUTTON (
See Fig J)
See Fig J)
See Fig J)
See Fig J)
See Fig J)
See Fig I)
TECHNICAL DATA
Rated volts 120 V ~ 60 Hz
Rated current 4.5 A
Rated no load speed 8800 /min
Cutting diameter 12”
Line diameter 0.065”
Machine weight 7 lbs
Description Model Uses Spool:
12” 2 in 1 Grass trimmer/Edger WG102 WA0002
12” 2 in 1 Grass trimmer/Edger WG112 WA0007
15” 2 in 1 Grass trimmer/Edger WG103 WA0002
15” 2 in 1 Grass trimmer/Edger WG113 WA0007
Spools can be purchased on-line at www.worxpowertools.com or call our HELPLINE
at 1-866-354-9679.
2 in 1 Grass Trimmer/Edger EN
76
SAFETY INSTRUCTIONS
WARNING! When using electric
gardening appliances, basic safety
precautions must always be followed to
reduce the risk of fire, electric shock, and
serious injury, including the following:
READ ALL INSTRUCTIONS
1. FOR ALL DOUBLE-
INSULATEDAPPLIANCES
a) Replacement parts. When servicing use
only identical replacement parts.
b) Polarized appliance connections. To reduce
the risk of electric shock, this appliance
has a polarized plug (one blade is wider
than the other} and will require the use of
a polarized extension cord. The appliance
plug will fit into a polarized extension
cord only one way. If the plug does not fit
fully into the extension cord, reverse the
plug. If the plug still does not fit, obtain
a correct polarized extension cord. A
polarized extension cord will require the
use of a polarized wall outlet. This plug
will fit into the polarized wall outlet only
one way. If the plug does not fit fully into
the wall outlet, reverse the plug. If the
plug still does not fit, contact a qualified
electrician to install the proper wall outlet.
Do not change the equipment plug,
extension cord receptacle, or extension
cord plug in any way.
2. FOR ALL APPLIANCES
a) Avoid dangerous environment. Don’t use
appliances in damp or wet locations.
b) Don’t use in rain.
c) Keep children away. All visitors should be
kept at a distance from work area.
d) Dress properly. Do not wear loose
clothing or jewelry. They can be caught
in moving parts. Use of protective gloves
and substantial footwear is recommended
when working outdoors. Wear protective
hair covering to contain long hair.
e) Use safety glasses. Always use face or
dust mask if operation is dusty.
f) Use right appliance. Do not use appliance
for any job except that for which it is
intended.
g) Ground Fault Circuit Interrupter (GFCI)
protection should be provided on the
circuit(s) or outlet(s) to be used for the
gardening appliance. Receptacles are
available having built-in GFCI protection
and may be used for an added measure of
safety.
h) WARNING! To reduce the risk of
electric shock, use only with an
extension cord intended for outdoor use,
such as an extension cord of cord type
SW-A, SOW-A, STW-A, STOW-A, SJW-A,
SJOW-A, SJTW-A. or SJTOW-A.
i) Extension cord! Make sure your extension
cord is in good condition. When using an
extension cord, be sure to use one heavy
enough to carry the current your product
will draw. An undersized extension cord
will cause a drop in line voltage resulting
in loss of power and overheating. Table 1
shows the correct size to use depending
on cord length and nameplate ampere
rating. If in doubt, use the next heavier
gage. The smaller the gage number, the
heavier the cord. To reduce the risk of
disconnection of appliance cord from the
extension cord during operating:
i) Make a knot as shown in Figure 2
ii) Use one of the plug-receptacle retaining
straps or connectors described in this
manual.
Table 1 Minimum gauge for extension
cords
Volts Total length of cord in feet
120V
240V 50 100 200 300
Ampere Rating More
than Not more than
0-6 18 16 16 12
0-7 18 16 14 12
0-8 16 16 16 12
0-9 14 12 Not recommended
NOTE-Only the applicable parts of the Table need to
be included. For instance, a 120-volt product need not
include the240-volt heading.
25 50 100 150
AWG
76
76
2 in 1 Grass Trimmer/Edger EN

98
Figure 2 Method of securing extension
cord
(A) tie cord as show
(B) connect plug and receptacle
j) Avoid unintentional starting. Don’t
k) Don’t abuse cord. Never carry appliance
l) Don’t grasp the exposed cutting blades or
m) Don’t force appliance. It will do the job
n) Don’t overreach. Keep proper footing and
o) Stay alert. Watch what you are doing. Use
p) Disconnect appliance. Disconnect the
q) Store idle appliances indoors. When not in
r) Maintain appliance with care. Keep
CORD
SET
carry plugged-in appliance with finger
on switch. Be sure switch is off when
plugging in.
by cord or yank it to disconnect from
receptacle. Keep cord from heat, oil, and
sharp edges.
cutting edges when picking up or holding
the appliance.
better and with less risk of injury at the
rate for which it was designed.
balance at all times.
common sense. Do not operate appliance
when you are tired.
appliance from the power supply when
not in use, before servicing, when
changing accessories such as blades, and
the like.
use, appliances should be stored indoors
in dry, and high or locked-up place, out of
reach of children.
cutting edge sharp and clean for
APPLIANCE CORD
best performance and to reduce the
risk of injury. Follow instructions for
lubricating and changing accessories.
Inspect appliance cord periodically,
and if damaged, have it repaired by
an authorized service facility. Inspect
extension cords periodically and replace
if damaged. Keep handles dry, clean, and
free from oil and grease.
s) Check damaged parts. Before further use
of the appliance, a guard or other part that
is damaged should be carefully checked
to determine that it will operate properly
and perform its intended function. Check
for alignment of moving parts, binding
of moving parts, breakage of parts,
mounting, and any other condition that
may affect its operation. A guard or other
part that is damaged should be properly
repaired or replaced by an authorized
service center unless indicated elsewhere
in this manual.
3. EDGER-TRIMMERS
a) Keep guards in place and in working
order.
b) Keep blades sharp.
c) Keep hands and feet away from cutting
area.
4. CULTIVATORS, GRASS SHEARS
a) Keep hands away from blades.
Save these instructions.
2 in 1 Grass Trimmer/Edger EN
98
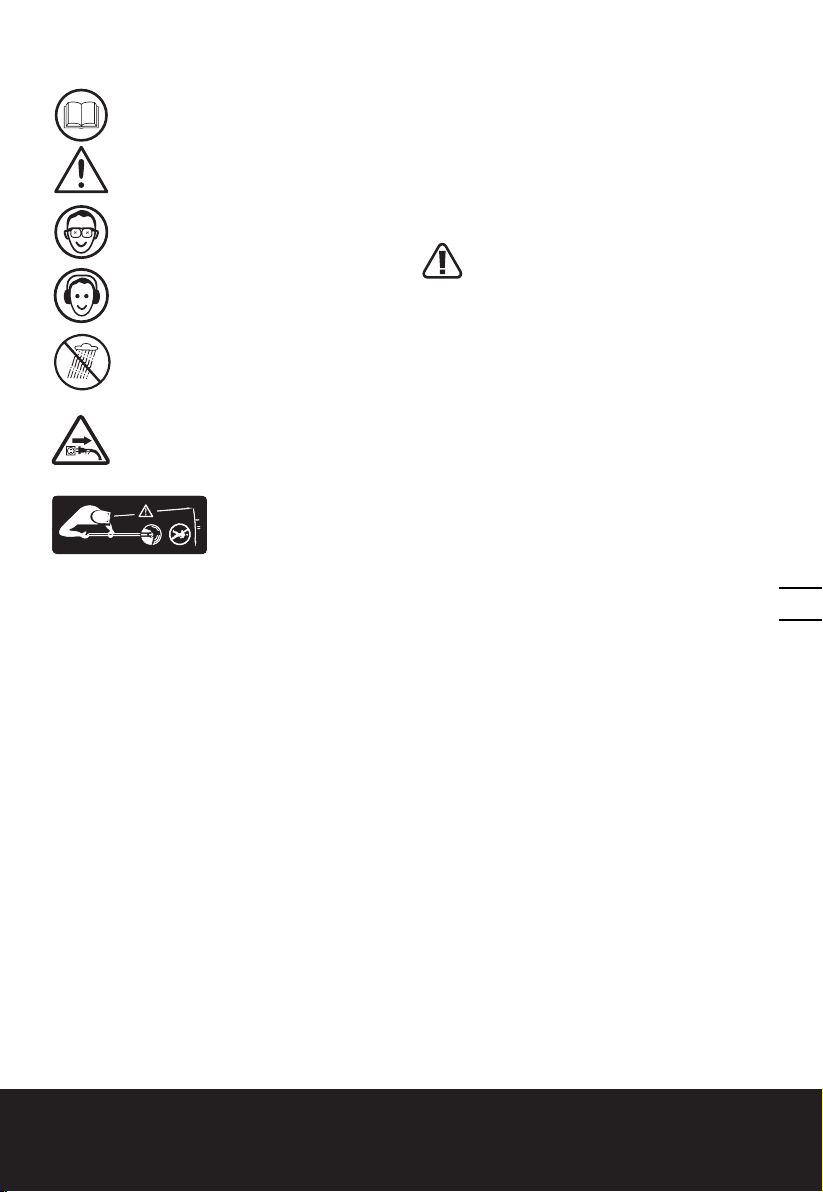
SYMBOLS
Read the manual
Warning
OPERATING INSTRUCTIONS
CONNECTING THE MAIN HANDLE
ANDSHAFT (See A).
Turn the upper adjustment knob (3) clockwise
to loosen it. Insert telescopic shaft into the
main handle until it clicks into place (See
A).Retighten by turning anti-clockwise.
Wear eye protection
Wear ear protection
To avoid possibility of electric
shock, do not use in damp or wet
conditions.
Switch off! Remove plug from
power supply before adjusting,
cleaning or if cable is entangled
or damaged
Keep all other people, including
children, pets and bystanders
outside the 50 feet hazard zone,
stop the trimmer immediately if
you are approached.
CONNECTING THE SAFETY GUARD
WARNING: NEVER USE THE
TRIMMER WITHOUT FITTING THE
GUARD.
Slide the safety guard onto the trimmer head
by using the trimmer head grooves (See B),
Secure the safety guard by using the screw
provided, located inside of the guard.
CONNECTING THE SPACER GUARD
Snap the Spacer Guard into the trimmer head
(See C), when not required, rotate the spacer
guard underneath the safety guard and clip
into place.
ADJUSTING THE HEIGHT (See D)
Unscrew the lower adjustment knob (4) extend
the telescopic shaft, then retighten.
ROTATING THE MAIN HANDLE (See E)
Unscrew the upper adjustment knob (3), rotate
the main handle 90 degrees clockwise, then
retighten.
ADJUSTING THE AUXILIARY HANDLE
(See F)
Rotate the handle release lever (5)
anticlockwise, then adjust the auxiliary handle
(2) to desired position, and then tight the lever
clockwise
98
98
ADJUSTING THE TRIMMER HEAD ANGLE
Grip the trimmer head with one hand and
the shaft with the other. Change the angle by
applying adequate force. You will hear a heavy
click for each angle adjustment, which is part
of the ratchet mechanism. The clicking sound is
normal and is not a defect of the tool (See G).
ON/OFF TRIGGER
Press and hold the trigger to operate the
trimmer. Release to stop
2 in 1 Grass Trimmer/Edger EN
 Loading...