

Page 1

Electric Circular Saw EN
Пила дисковая электрическая RU
Elektriline ketassaag ET
Elektriskais ripzāģis LV
Elektrinis diskinis pjūklas LT
WX423 WX423.1
P07
P18
P30
P41
P52
Page 2

Original instructions EN
Перевод исходных инструкций RU
Algsete juhiste tõlge ET
Oriģinālo instrukciju tulkojums LV
Originalių instrukcijų vertimas LT
Page 3

38 2
10
16
15
4
1
9
7
12
6
11
5
Page 4

A
1
2
13
14
17
B
D1
C
2
1
D2
Page 5

E2E1
D2
D1
F1
G1
2
1
F2
3
G2
Page 6

G1
G2
G3 G4
G5
Page 7

1. LOCK OFF BUTTON
2. SOFT GRIP HANDLE
3. HEX KEY
4. ON/OFF SWITCH
5. SPINDLE LOCK BUTTON
6. LOWER BLADE GUARD
7. LOWER GUARD LEVER
8. FIXED UPPER GUARD
9. DUST EXTRACTION OUTLET
10. VACUUM ADAPTER
11. DEPTH ADJUSTMENT LEVER
12. BASE PLATE
13. SAW BLADE (See Fig. A)
14. BLADE BOLT (See Fig. A)
15. PARALLEL GUIDE
16. PARALLEL GUIDE CLAMPING FIXTURE
17. OUTER FLANGE (See Fig. A)
Not all the accessories illustrated or described are included in standard delivery.
7
Electric Circular Saw EN
Page 8

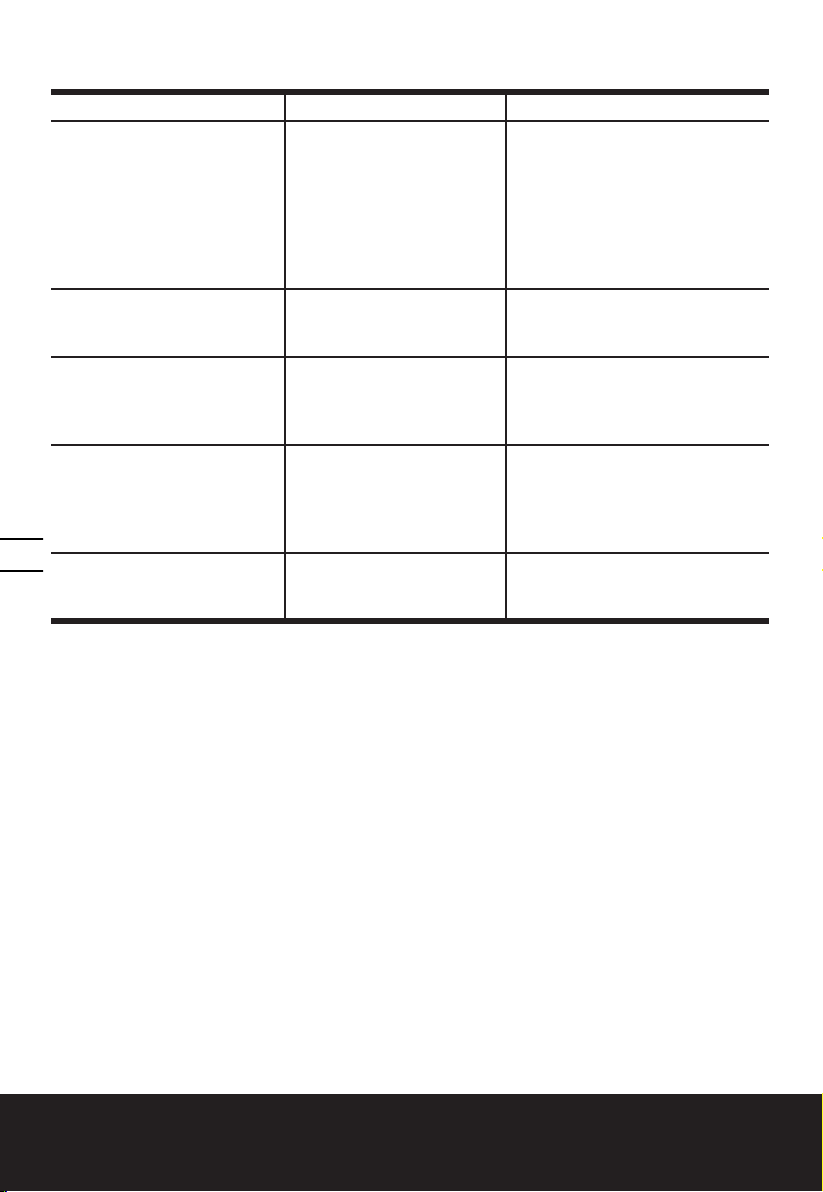
TECHNICAL DATA
Type WX423 WX423.1 (4 - designation of machinery, representative of Saw)
Voltage
Rated power 400W
No load (rated) speed 3600/min
Blade size 85mmx15mm
TCT blade 85mmx1.2mmx15mmx24T
HSS blade 85mmx1.2mmx15mmx44T
Diamond disc 85mmx1.2mmx15mmx60G
Max cutting depth 27mm
Recommended maximum material thickness
Wood 27mm
Aluminum 3mm
PVC pipe (radius) 13mm
Tile 8mm
Sheet steel 0.91mm
8
Protection class
Bare tool weight 1.4kg
Spindle thread size M5
Saw blade thickness
TCT blade 0.8mm
HSS blade 0.65mm
Diamond disc
230–240V~50Hz
/ll
0.8mm
NOISE INFORMATION
A weighted sound pressure LpA: 82dB(A)
A weighted sound power LwA: 93dB(A)
KPA& KWA 3.0dB(A)
Wear ear protection.
Electric Circular Saw EN
Page 9

VIBRATION INFORMATION
Vibration total values (triax vector sum) determined according to EN 60745:
Cutting wood: a
Vibration emission value:
The declared vibration total value may be used for comparing one tool with another, and may
also be used in a preliminary assessment of exposure.
WARNING: The vibration emission value during actual use of the power tool can differ
from the declared value depending on the ways in which the tool is used dependant on the
following examples and other variations on how the tool is used:
How the tool is used and the materials being cut or drilled.
The tool being in good condition and well maintained
The use the correct accessory for the tool and ensuring it is sharp and in good condition.
The tightness of the grip on the handles and if any anti vibration accessories are used.
And the tool is being used as intended by its design and these instructions.
This tool may cause hand-arm vibration syndrome if its use is not adequately managed.
WARNING: To be accurate, an estimation of exposure level in the actual conditions of use
should also take account of all parts of the operating cycle such as the times when the tool
is switched off and when it is running idle but not actually doing the job. This may
significantly reduce the exposure level over the total working period.
Helping to minimise your vibration exposure risk.
ALWAYS use sharp chisels, drills and blades
Maintain this tool in accordance with these instructions and keep well lubricated (where appropriate)
If the tool is to be used regularly then invest in anti vibration accessories.
Avoid using tools in temperatures of 10°C or less
Plan your work schedule to spread any high vibration tool use across a number of days.
Uncertainty K = 1.5m/s²
Cutting metal: a
Uncertainty K = 1.5 m/s²
< 2,5m/s2
h,W
< 2,5m/s
h,M
2
9
ACCESSORIES
WX423 WX423.1
TCT Blade: 24T for wood
Parallel Guide
Vacuum Adaptor
Hex Key
Diamond disc
HSS Blade 44T
We recommend that you purchase your accessories from the same store that sold you the tool.
Use good quality accessories marked with a well-known brand name. Choose the type according
to the work you intend to undertake. Refer to the accessory packaging for further details. Store
personnel can assist you and offer advice.
1 1
1 1
1 1
1 1
/ 1
/ 1
Electric Circular Saw EN
Page 10
SAFETY INSTRUCTIONS
FOR ALL SAWS
a) DANGER: Keep hands away from
cutting area and the blade. If both
hands are holding the saw, they cannot be
cut by the blade.
b) Do not reach underneath the
workpiece. The guard cannot protect you
from the blade below the workpiece.
c) Adjust the cutting depth to the
thickness of the workpiece. Less than
a full tooth of the blade teeth should be
visible below the workpiece.
d) Never hold piece being cut in your
hands or across your leg. Secure
the workpiece to a stable platform. It is
important to support the work properly to
minimize body exposure, blade binding, or
loss of control.
e) Hold the power tool by insulated
gripping surfaces only, when
performing an operation where the
cutting tool may contact hidden
10
wiring or its own cord. Contact with a
“live” wire will also make exposed metal
parts of the power tool “live” and could
give the operator an electric shock.
f) When ripping always use a rip fence
or straight edge guide. This improves
the accuracy of cut and reduces the chance
of blade binding.
g) Always use blades with correct size
and shape (diamond versus round) of
arbour holes. Blades that do not match
the mounting hardware of the saw will run
eccentrically, causing loss of control.
h) Never use damaged or incorrect blade
washers or bolt. The blade washers and
bolt were specially designed for your saw,
for optimum performance and safety of
operation.
FURTHER SAFETY
INSTRUCTIONS FOR ALL
SAWS
Kickback causes and related warnings
- Kickback is a sudden reaction to a pinched,
bound or misaligned saw blade, causing an
uncontrolled saw to lift up and out of the
workpiece toward the operator.
- When the blade is pinched or bound tightly
by the kerf closing down, the blade stalls
and the motor reaction drives the unit
rapidly back toward the operator.
- If the blade becomes twisted or misaligned
in the cut, the teeth at the back edge of the
blade can dig into the top surface of the
wood causing the blade to climb out of the
kerf and jump back toward the operator.
Kickback is the result of saw misuse and/or
incorrect operating procedures or conditions
and can be avoided by taking proper
precautions as given below.
a) Maintain a firm grip on the saw and
position your arm to resist kickback
forces. Position your body to either
side of the blade, but not in line with
the blade. Kickback could cause the saw
to jump backwards, but kickback forces
can be controlled by the operator, if proper
precautions are taken.
b) When blade is binding, or when
interrupting a cut for any reason,
release the trigger and hold the
saw motionless in the material until
the blade comes to a complete
stop. Never attempt to remove the
saw from the work or pull the saw
backward while the blade is in motion
or kickback may occur. Investigate and
take corrective actions to eliminate the
cause of blade binding.
c) When restarting a saw in the
workpiece, center the saw blade in
the kerf and check that saw teeth are
not engaged into the material. If saw
blade is binding, it may walk up or kickback
from the workpiece as the saw is restarted.
d) Support large panels to minimize the
risk of blade pinching and kickback.
Large panels tend to sag under their own
weight. Supports must be placed under
the panel on both sides, near the line of cut
and near the edge of the panel.
e) Do not use dull or damaged blades.
Unsharpened or improperly set blades
produce narrow kerf causing excessive
Electric Circular Saw EN
Page 11

friction, blade binding and kickback.
f) Blade depth and bevel adjusting
locking levers must be tight and
secure before making cut. If blade
adjustment shifts while cutting, it may
cause binding and kickback.
g) Use extra caution when sawing into
existing walls or other blind areas. The
protruding blade may cut objects that can
cause kickback.
ADDITIONAL SAFETY
RULES FOR YOUR
CIRCULAR SAW
1. Always wear a dust mask, hearing
protection and eye protection.
2. Only use saw blades recommended in the
specification.
3. Use only blade diameter(s) in accordance
with the markings.
SAFETY INSTRUCTIONS
FOR SAWS WITH INNER
PENDULUM GUARD
Lower Guard Function
a) Check lower guard for proper closing
before each use. Do not operate the
saw if lower guard does not move
freely and close instantly. Never
clamp or tie the lower guard into the
open position. If saw is accidentally
dropped, lower guard may be bent.Raise
the lower guard with the retracting handle
and make sure it moves freely and does
not touch the blade or any other part, in all
angles and depths of cut.
b) Check the operation of the lower
guard spring. If the guard and the
spring are not operating properly,
they must be serviced before use.
Lower guard may operate sluggishly due
to damaged parts, gummy deposits, or a
build-up of debris.
c) Lower guard may be retracted
manually only for special cuts such
as "plunge cuts" and "compound
cuts." Raise lower guard by retracting
handle and as soon as blade enters
the material, the lower guard must be
released. For all other sawing, the lower
guard should operate automatically.
d) Always observe that the lower guard
is covering the blade before placing
saw down on bench or floor. An
unprotected, coasting blade will cause the
saw to walk backwards, cutting whatever is
in its path. Be aware of the time it takes for
the blade to stop after switch is released.
ADDITIONAL SAFETY
RULES FOR YOUR
CUTTING-OFF MACHINES
a) The guard provided with the tool must
be securely attached to the power
tool and positioned for maximum
safety, so the least amount of wheel
is exposed towards the operator.
Position yourself and bystanders away
from the plane of the rotating wheel.
The guard helps to protect operator from
broken wheel fragments and accidental
contact with wheel.
b) Use only bonded reinforced or
diamond cut-off wheels for your
power tool. Just because an accessory
can be attached to your power tool, it does
not assure safe operation.
C) The rated speed of the accessory
must be at least equal to the
maximum speed marked on the power
tool. Accessories running faster than their
rated speed can break and fly apart.
d) Wheels must be used only for
recommended applications. For
example: do not grind with the side
of cut-off wheel. Abrasive cut-off wheels
are intended for peripheral grinding, side
forces applied to these wheels may cause
them to shatter.
e) Always use undamaged wheel flanges
that are of correct diameter for your
selected wheel. Proper wheel flanges
support the wheel thus reducing the
possibility of wheel breakage.
f) Do not use worn down reinforced
wheels from larger power tools.
11
Electric Circular Saw EN
Page 12

Wheels intended for a larger power tool
are not suitable for the higher speed of a
smaller tool and may burst.
g) The outside diameter and the
thickness of your accessory must
be within the capacity rating of your
power tool. Incorrectly sized accessories
cannot be adequately guarded or
controlled.
h) The arbour size of wheels and flanges
must properly fit the spindle of
the power tool. Wheels and flanges
with arbour holes that do not match the
mounting hardware of the power tool will
run out of balance, vibrate excessively and
may cause loss of control.
i) Do not use damaged wheels. Before
each use, inspect the wheels for chips
and cracks. If power tool or wheel is
dropped, inspect for damage or install
an undamaged wheel. After inspecting
and installing the wheel, position
yourself and bystanders away from
the plane of the rotating wheel and
12
run the power tool at maximum no
load speed for one minute. Damaged
wheels will normally break apart during
this test time.
j) Wear personal protective equipment.
Depending on application, use face
shield, safety goggles or safety
glasses. As appropriate, wear dust
mask, hearing protectors, gloves and
shop apron capable of stopping small
abrasive or workpiece fragments.
The eye protection must be capable of
stopping flying debris generated by various
operations. The dust mask or respirator
must be capable of filtrating particles
generated by your operation. Prolonged
exposure to high intensity noise may cause
hearing loss.
k) Keep bystanders a safe distance away
from work area. Anyone entering
the work area must wear personal
protective equipment. Fragments of
workpiece or of a broken wheel may fly
away and cause injury beyond immediate
area of operation.
I) Hold the power tool by insulated
gripping surfaces only, when
performing an operation where
the cutting accessory may contact
hidden wiring or its own cord. Cutting
accessory contacting a “live” wire may
make exposed metal parts of the power
tool “live” and could give the operator an
electric shock.
m) Position the cord clear of the spinning
accessory. lf you lose control, the cord
may be cut or snagged and your hand or
arm may be pulled into the spinning wheel.
n) Never lay the power tool down until
the accessory has come to a complete
stop. The spinning wheel may grab the
surface and pull the power tool out of your
control.
o) Do not run the power tool while
carrying it at your side. Accidental
contact with the spinning accessory could
snag your clothing, pulling the accessory
into your body.
p) Regularly clean the power tool’s air
vents. The motor’s fan will draw the
dust inside the housing and excessive
accumulation of powdered metal may
cause electrical hazards.
q) Do not operate the power tool near
flammable materials. Sparks could ignite
these materials.
r) Do not use accessories that require
liquid coolants. Using water or other
liquid coolants may result in electrocution
or shock.
KICKBACK AND RELATED
WARNINGS
Kickback is a sudden reaction to a pinched or
snagged rotating wheel. Pinching or snagging
causes rapid stalling of the rotating wheel
which in turn causes the uncontrolled power
tool to be forced in the direction opposite of
the wheel’s rotation at the point of the binding.
For example, if an abrasive wheel is snagged
or pinched by the workpiece, the edge of the
wheel that is entering into the pinch point can
dig into the surface of the material causing
the wheel to climb out or kick out. The wheel
Electric Circular Saw EN
Page 13

may either jump toward or away from the
operator, depending on direction of the
wheel’s movement at the point of pinching.
Abrasive wheels may also break under these
conditions.
Kickback is the result of power tool misuse
and/or incorrect operating procedures or
conditions and can be avoided by taking
proper precautions as given below.
a) Maintain a firm grip on the power
tool and position your body and
arm to allow you to resist kickback
forces. Always use auxiliary handle, if
provided, for maximum control over
kickback or torque reaction during
start-up. The operator can control torque
reactions or kickback forces, if proper
precautions are taken.
b) Never place your hand near the
rotating accessory. Accessory may
kickback over your hand.
C) Do not position your body in line with
the rotating wheel. Kickback will propel
the tool in direction opposite to the wheel’s
movement at the point of snagging.
d) Use special care when working
Corners, sharp edges etc. Avoid
bouncing and snagging the accessory.
Corners, sharp edges or bouncing have a
tendency to snag the rotating accessory
and cause loss of control or kickback.
e) Do not attach a saw chain,
woodcarving blade, segmented
diamond wheel with a peripheral
gap greater than 10mm or toothed
saw blade. Such blades create frequent
kickback and loss of control.
f) Do not “jam” the wheel or apply
excessive pressure. Do not attempt
to make an excessive depth of cut.
Overstressing the wheel increases the
loading and susceptibility to twisting or
binding of the wheel in the cut and the
possibility of kickback or wheel breakage.
g) When wheel is binding or when
interrupting a cut for any reason,
switch off the power tool and hold
the power tool motionless until the
wheel Comes to a complete stop.
Never attempt to remove the wheel
from the cut while the wheel is in
motion otherwise kickback may occur.
lnvestigate and take corrective action to
eliminate the cause of wheel binding.
h) Do not restart the cutting operation
in the workpiece. Let the wheel reach
full speed and carefully re-enter the
cut. The wheel may bind, walk up or
kickback if the power tool is restarted in the
workpiece.
i ) Support panels or any oversized
workpiece to minimize the risk of
wheel pinching and kickback. Large
workpieces tend to sag under their own
weight. Supports must be placed under the
workpiece near the line of cut and near the
edge of the workpiece on both sides of the
wheel.
j) Use extra caution when making a
“pocket cut” into existing walls or
other blind areas. The protruding wheel
may cut gas or water pipes, electrical
wiring or objects that can cause kickback.
ADDITIONAL SAFETY
RULES
1. Always wear a dust mask.
13
Electric Circular Saw EN
Page 14

SYMBOLS
14
To reduce the risk of injury, user
must read instruction manual
Double insulation
Warning
Wear ear protection
Wear eye protection
Wear dust mask
Waste electrical products must not
be disposed of with household
waste. Please recycle where
facilities exist. Check with your local
authorities or retailer for recycling
advice.
Wood
Aluminium
Metal
Incorrect
Correct
Lock
Unlock
Diamond disc
Before any work on the machine
itself, pull the mains plug from the
socket outlet.
Wear protective gloves
HSS blade
TCT blade
Electric Circular Saw EN
Page 15
OPERATING INSTRUCTIONS
NOTE: Before using the tool, read the
instruction book carefully.
INTENDED USE:
The tool is intended for ripping and crosscutting wood and other materials in straight
cutting lines, while resting firmly on the work
piece.
ASSEMBLY AND OPERATION
Action Figure
Saw blade Assembly and
Removing
Safety On/Off Switch See Fig. B
Sawdust Removal See Fig. C
Cross and Rip Cutting See Fig. D1, D2
Parallel Guide See Fig. E1, E2
Cutting Depth Adjusting See Fig. F1, F2
Pocket Cutting
See Fig. A
See Fig. G1,
G2, G3, G4, G5
WORKING HINTS FOR YOUR
TOOL
If your power tool becomes too hot, please
run your circular saw no load for 2-3 minutes
to cool the motor. Avoid prolonged usage at
very low speeds.
Protect saw blades against impact and shock.
Cutting with extreme force can significantly
reduces the performance capability of the tool
and reduces the service life of the saw blade.
Sawing performance and cutting quality
depend essentially on the condition and the
tooth count of the saw blade. Therefore, use
only sharp saw blades that are suited for the
material being cut.
Choice of blades: 24 teeth for general work,
approx. 40 teeth for finer cuts, more than 40
teeth for very fine cuts into delicate surfaces,
diamond for tile, cement board, etc.
Only use saw blades recommended.
MAINTAIN TOOLS WITH
CARE
Remove the plug from the socket before
carrying out any adjustment, servicing or
maintenance.
Keep tools sharp and clean for better and
safer performance. Follow instructions for
lubricating and changing accessories. Inspect
tool cords periodically and if damaged, have
repaired by authorized service facility. Your
power tool requires no additional lubrication
or maintenance. There are no user serviceable
parts in your power tool. Never use water or
chemical cleaners to clean your power tool.
Wipe clean with a dry cloth. Always store
your power tool in a dry place. Keep the
motor ventilation slots clean. Keep all working
controls free of dust.
If the supply cord is damaged, it must be
replaced by the manufacturer, its service
agent or similarly qualified persons in order to
avoid a hazard.
Periodically clear dust and chips from guard
and base to ensure proper performance.
ENVIRONMENTAL
PROTECTION
Waste electrical products must not be
disposed of with household waste.
Please recycle where facilities exist.
Check with your local authorities or retailer for
recycling advice.
15
Electric Circular Saw EN
Page 16
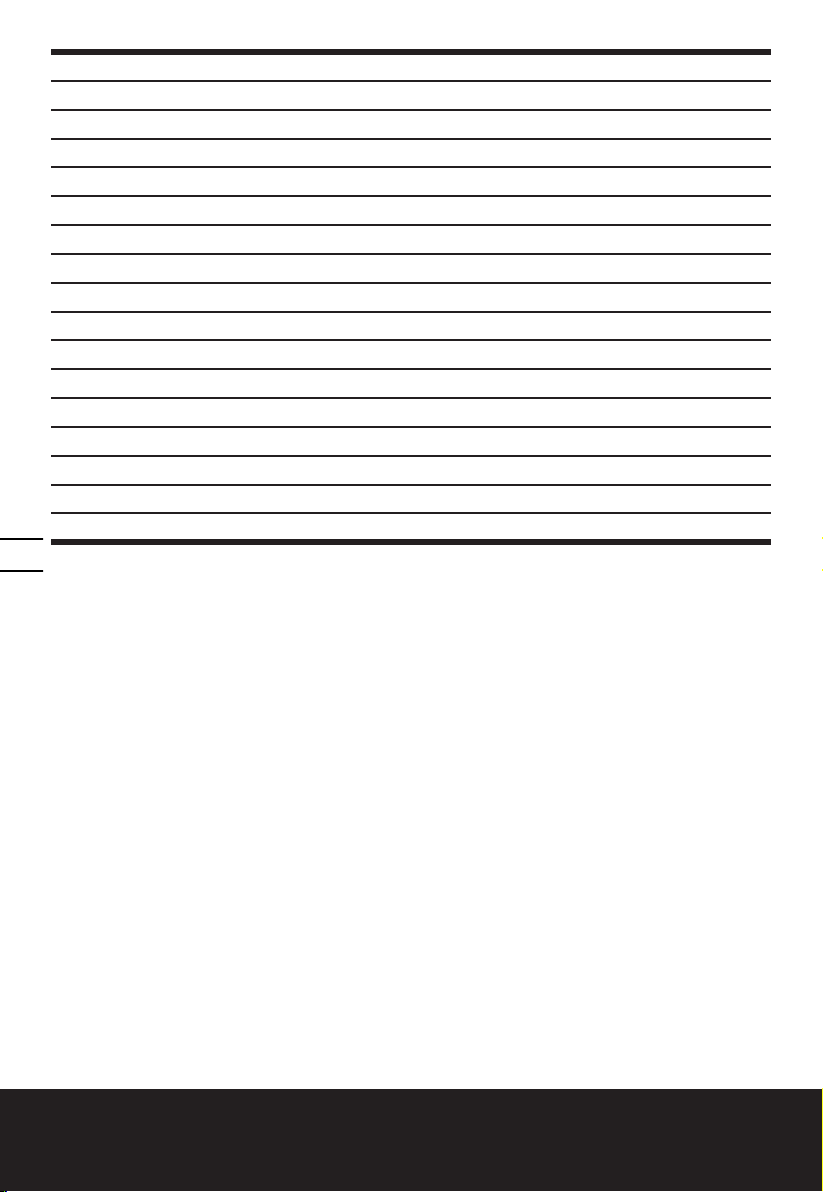
TROUBLE SHOOTING
Symptom Possible Causes Possible Solution
Tool will not start when
operating the on/off switch.
Cutting depth is less than
that is set.
Blade spins or slips
Blade will not cut a straight
line.
16
Blade kicks back when
beginning a cut
Power cord not plugged in.
Power cord is broken.
Carbon brush has worn
down
Sawdust accumulated at
the rear of the base.
Blade is not tightly
engaged with the spindle.
Blade is dull.
Blade is not mounted
properly.
Saw is not being guided
properly.
Blade is not spinning fast
enough
Check to make sure power cord
is connected well into a working
outlet.
Unplug the power cord. Replace
it using a qualified maintenance
person.
Replace the carbon brush using a
qualified maintenance person.
Shake out sawdust. Consider
connecting a vacuum for dust
collection.
Remove the blade, and
reassemble it as described in
Saw blade Assembly and
Removing section.
Mount a new, sharp blade on
the saw.
Check that blade is properly
mounted.
Use a parallel guide.
Allow the saw blade to reach full
speed prior to beginning a cut in
the material.
Electric Circular Saw EN
Page 17

PLUG REPLACEMENT
( UK & IRELAND ONLY )
If you need to replace the fitted plug then
follow the instructions below.
IMPORTANT
The wires in the mains lead are colored in
accordance with the following code:
BLUE =NEUTRAL
Brown = Live
As the colors of the wires in the mains lead of
this appliance may not correspond with the
colored markings identifying the terminals
in your plug, proceed as follows. The wire
which is colored blue must be connected to
the terminal which is marked with N. The wire
which is colored brown must be connected to
the terminal which is marked with L.
WARNING! Never connect live or neutral
wires to the earth terminal of the plug. Only
fit an approved 13ABS1363/A plug and the
correct rated fuse.
NOTE: If a moulded plug is fitted and has to
be removed take great care in disposing of the
plug and severed cable, it must be destroyed
to prevent engaging into a socket.
13 Amp fuse approved
to BS1362
Connect
Blue to N
(neutral)
Outer sleeve
firmly clamped
Brown L (live)
Cable grip
DECLARATION OF
CONFORMITY
We,
POSITEC Germany GmbH
Konrad-Adenauer-Ufer 37
50668 Köln
Declare that the product,
Description WORX Electric Circular Saw
Type WX423 WX423.1 (4-designation of
machinery, representative of Saw)
Function Cutting various materials with a
rotating toothed blade
Complies with the following Directives,
2006/42/EC
2004/108/EC
2011/65/EU
Standards conform to:
EN 55014-1
EN 55014-2
EN 61000-3-2
EN 61000-3-3
EN 60745-1
EN 60745-2-5
EN 60745-2-22
The person authorized to compile the technical
file,
Name: Russell Nicholson
Address: Positec Power Tools (Europe)
Ltd, PO Box 152, Leeds, LS10 9DS, UK
17
Suzhou 2014/12/24
Allen Ding
Deputy Chief Engineer,Testing & Certification
Electric Circular Saw EN
Page 18
1. КНОПКА БЛОКИРОВКИ ВЫКЛЮЧАТЕЛЯ
2. МЯГКАЯ НАКЛАДКА НА РУКОЯТКЕ
3. ГАЕЧНЫЙ КЛЮЧ
4. ВЫКЛЮЧАТЕЛЬ ПИТАНИЯ
5. КНОПКА БЛОКИРОВКИ ШПИНДЕЛЯ
6. НИЖНЕЕ ОГРАЖДЕНИЕ ДИСКА
7. РЫЧАГ ПОДВИЖНОГО КОЖУХА
8. ФИКСИРОВАННАЯ ВЕРХНЯЯ ЧАСТЬ ОГРАЖДЕНИЯ
9. ВЫХОД ПЫЛЕУДАЛЕНИЯ
10. АДАПТЕР ПЫЛЕОТВОДА
11. РЫЧАГ НАСТРОЙКИ ГЛУБИНЫ ПРОПИЛА
12. ПЛИТА ОСНОВАНИЯ
13. ПИЛЬНЫЙ ДИСК (См. A)
14. ПРИЖИМНОЙ БОЛТ ДИСКА (См. A)
15. ПАРАЛЛЕЛЬНЫЙ УПОР
16. ЗАЖИМНОЕ УСТРОЙСТВО ПАРАЛЛЕЛЬНОЙ НАПРАВЛЯЮЩЕЙ
17. ШАЙБА ПРИЖИМНАЯ (См. A)
Не все принадлежности, иллюстрированные или описанные включены в
стандартную поставку.
Пила дисковая электрическая RU
Page 19

ТЕХНИЧЕСКИЕ ХАРАКТЕРИСТИКИ
Моделей WX423 WX423.1(4-обозначение инструмента, класс пил)
Номинальное напряжение:
Потребляемая мощность 400Вт
Скорость без нагрузки 3600/мин
Диаметр пильного диска 85mmx15mm
Ленточная пила с режущими частями из карбида вольфрама 85ммX1.2ммX15ммX24T
Пила из инструментальной стали 85ммX1.2ммX15ммX44T
Алмазный диск 85ммX1.2ммX15ммx60G
Максимальная глубина разреза 27мм
Рекомендуемая максимальная толщина материала
дерево 27мм
Алюминий 3мм
Полихлорвиниловая трубка(диаметр) 13мм
Плитка 8мм
Тонколистовое железо 0.91мм
Двойная изоляция
Вес 1.4кг
Размер резьбы шпинделя M5
Толщина диска пилы
Ленточная пила с режущими частями из карбида вольфрама 0.8мм
Пила из инструментальной стали 0.65мм
Алмазный диск
230 – 240В~ 50Гц
0.8мм
1918
/ll
ХАРАКТЕРИСТИКИ ШУМА
Звуковое давление LpA: 82Дб(A)
Акустическая мощность LwA: 93Дб(A)
KPA& KWA 3.0Дб(A)
Наденьте защиту слуха.
Пила дисковая электрическая RU
Page 20

ХАРАКТЕРИСТИКИ ВИБРАЦИИ
Суммарные значения вибрации, определенные согласно EN 60745:
Обрезка дерева: a
Уровень вибрации:
Заявленное общее значение вибрации может использоваться для сравнения инструментов
между собой, а также для предварительной оценки воздействия.
ВНИМАНИЕ: вибрация, производимая при работе механизированного инструмента,
может отличаться от заявленных значений в зависимости от способов использования
устройства. Ниже перечислены некоторые условия, от которых зависит интенсивность вибрации:
Способ использования инструмента и свойства обрабатываемого материала.
Состояние инструмента и уровень техобслуживания
Тип используемых принадлежностей и их техническое состояние.
Сила удержания рукояток и наличие противовибрационных средств.
Используемые рабочие инструменты, соответствие применения инструментов их назначению.
При неправильном обращении данное устройство может стать причиной
синдрома дрожания рук
ВНИМАНИЕ: для точной оценки воздействия вибрации во время эксплуатации
необходимо также учитывать все этапы рабочего процесса, включая время, когда
устройство выключено или включено, но бездействует. Эти перерывы значительно снижают
общее влияние вибрации в ходе всего рабочего цикла.
Следующие рекомендации помогут снизить опасность воздействия вибрации при работе.
ВСЕГДА пользуйтесь только острыми инструментами (резцами, сверлами, пилами и т.д.)
Проводите техобслуживание в соответствии с указаниями, тщательно смазывайте устройство в
соответствующих местах
Если устройство используется регулярно, приобретите противовибрационные средства.
Избегайте применения устройства при температурах ниже 10oC
Распределите задачи так, чтобы работы, сопровождающиеся высоким уровнем вибрации,
проводились через большие промежутки времени.
Погрешность K = 1.5m/s²
Обрезка металла: a
Погрешность K = 1.5 m/s²
< 2,5m/s2
h,W
< 2,5m/s
h,M
2
ПРИНАДЛЕЖНОСТИ
WX423 WX423.1
Режущий диск с твердосплавными напайками: 24T для
дерева
Параллельный упор
Адаптер пылеотвода
Гаечный ключ
Алмазные диски
Пильный Диск (44T HSS)
Рекомендуется приобретать все принадлежности в том же магазине, где был приобретен
инструмент. Используйте качественные принадлежности с указанием общеизвестной
торговой марки. За более подробной информацией обратитесь к разделу «Рекомендации по
использованию перфоратора» в этой инструкции или сведениям на упаковке принадлежностей.
Помощь и консультацию можно также получить у продавца.
1 1
1 1
1 1
1 1
/ 1
/ 1
Пила дисковая электрическая RU
Page 21

инструкции по технике
безопасности для всех
пил
a) ВНИМАНИЕ! Держите руки
подальше от зоны разреза и
от диска. Если удерживать пилу
обеими руками, их нельзя поранить диском.
b) Зона под заготовкой является
опасной. Защитные кожухи не
предотвратят травму в этой зоне.
c) Отрегулируйте глубину распиловки
в соответствии с толщиной
обрабатываемого изделия. Внизу
обрабатываемого изделия диск должен
выступать менее чем на полный зуб.
d) При пилении никогда не держите
заготовку в руках и на коленях.
Надежно закрепляйте заготовку
при пилении. Должным образом
закрепляйте деталь для минимизации
риска ранения оператора, заклинивания
диска или потери контроля.
e) Удерживайте инструмент за
изолированные поверхности при
выполнении работ, когда режущий
инструмент может задеть скрытую
электропроводку или собственный
кабель. При контакте с проводкой под
напряжением металлические детали
инструмента также находятся под
напряжением, что может привести к
поражению оператора электрическим
током.
f) При продольной распиловке всегда
используйте направляющую
планку либо параллельный упор.
Это улучшает точность разреза и снижает
вероятность заклинивания пильного диска.
g) Всегда используйте пильные
диски с необходимыми внешним
диаметром и посадочными
размерами. Диски с неправильными
посадочными размерами будут вызывать
биения и потерю контроля.
h) Никогда не используйте
поврежденные или неподходящие
шайбы и болт крепления диска.
Шайбы и болт крепления специально
предназначены для вашей пилы для
достижения оптимальной эффективности и
безопасности эксплуатации.
Дополнительные
инструкции по технике
безопасности для всех
пил
Обратный удар и соответствующие
предупреждения
- отдача является внезапной реакцией
на зажатие, заклинивание или
смещение пильного диска, приводящей
к неуправляемому отскоку пилы из
обрабатываемого изделия в направлении
оператора;
- когда диск зажимается или заклинивается
в закрывающемся пропиле, диск
останавливается и реакцией двигателя
инструмент отбрасывается назад в
направлении оператора;
- если диск искривлен или смещен в
разрезе, зубья задней кромки диска
могут вгрызаться в поверхность дерева,
приводя к подъему диска из пропила и
отбрасыванию его назад в направлении
оператора.
Отдача является результатом неправильного
обращения с пилой и/или неправильных
приемов работы, либо условий работы.
Ее можно избежать, применяя меры
предосторожности, описанные ниже.
а) Крепко удерживайте пилу и
располагайте руки так, чтобы
противостоять силе отдачи.
Располагайтесь с одной стороны
диска, а не в линию с диском. Отдача
может привести к отбрасыванию
пилы назад, но силу отдачи оператор
может контролировать, если приняты
соответствующие меры предосторожности.
b) Если диск заклинивает либо
если по любой другой причине
резание прекращается, отпустите
выключатель и удерживайте пилу
без движения в материале, пока
диск полностью не остановится.
Никогда не пытайтесь извлечь пилу
из изделия или оттащить пилу назад,
пока диск вращается либо существует
возможность отдачи. Разберитесь и
внесите коррективы для устранения
причины заклинивания полотна.
2120
Пила дисковая электрическая RU
Page 22

c) При перезапуске пилы,
находящейся в изделии,
установите пильный диск по центру
пропила и проверьте, чтобы зубья
пилы не находились в сцеплении
с материалом. Если пильный диск
заклинило, при перезапуске пилы он может
вырваться вверх или создать отдачу.
d) Поддерживайте большие панели
для минимизации опасности
заклинивания диска и отдачи.
Большие панели имеют тенденцию к
провисанию под своим собственным весом.
Следует установить подставки по обе
стороны панели, вблизи линии разреза и
вблизи края панели.
e) Не используйте тупые либо
поврежденные диски. Не заточенные
либо неправильно заточенные диски
делают узкий пропил, приводя к
чрезмерному трению, заклиниванию диска
и отдаче.
f) Фиксирующие рычаги глубины
диска и регулировки наклона
должны быть плотно и надежно
затянуты перед выполнением
пропила. Если регулировочные
приспособления смещаются во время
распиловки, это может привести к
заклиниванию и отдаче.
g) Будьте чрезвычайно осторожны,
распиловки в существующие
стены либо иные слепые зоны.
Выступающий диск может натолкнуться на
предметы, что приведет к отдаче.
закрывается быстро. Никогда не
зажимайте и не закрепляйте подвижный
кожух в открытом положении. При
случайном падении пилы подвижный кожух
может погнуться. Поднимите подвижный
кожух с помощью возвратной рукоятки и
убедитесь, что он перемещается свободно
и не задевает за диск или за иные детали
при всех углах и глубинах распиловки.
b) Проверьте работу пружины
подвижного кожуха. Если кожух
и пружина не работают, как
следуетих необходимо починить
перед использованием пилы.
Подвижный кожух может работать
медленно по причине повреждения
деталей, вязких отложений или накопления
отходов резания.
c) Подвижный кожух можно
возвращать обратно вручную
только при особых пропилах, таких
как “врезание”. Поднимите подвижный
кожух возвратной рукояткой и, как только
диск войдет в материал, подвижный
кожух следует отпустить. При всех иных
видах пропилов подвижный кожух должен
работать автоматически.
d) Всегда обращайте внимание, чтобы
подвижный кожух покрывал диск
перед тем, как ставить пилу на
верстак или на пол. Незащищенный,
движущийся по инерции диск приведет
к движению пилы назад, распиливая
все на своем пути. Учитывайте время,
необходимое для остановки пилы после
отпускания выключателя.
ИНСТРУКЦИИ
ПО ТЕХНИКЕ
БЕЗОПАСНОСТИ
ДЛЯ ЦИРКУЛЯРНОЙ
ПИЛЫ С ПОДВИЖНЫМ
КОЖУХОМ
НИЖНЯЯ Функция Защиты
а) Перед каждым использованием
проверьте, правильно ли закрыт
подвижный кожух. Не работайте
с пилой, если подвижный кожух
не перемещается свободно и не
ДОПОЛНИТЕЛЬНЫЕ
ПРАВИЛА ТЕХНИКИ
БЕЗОПАСНОСТИ
ПРИ РАБОТЕ С
ЦИРКУЛЯРНОЙ ПИЛОЙ
1. Всегда надевайте респиратор, защитные
наушники и защитные очки.
2. Используйте только пильные диски,
рекомендованные в инструкции.
3. Используйте диски диаметра (диаметров),
указанных на маркировке.
Пила дисковая электрическая RU
Page 23

ДОПОЛНИТЕЛЬНЫЕ
ПРАВИЛА ТЕХНИКИ
БЕЗОПАСНОСТИ при
работе на отрезных
станках
a) Защита, которой оснащен
инструмент, должна быть надежно
прикреплена к электроинструменту
и для большей безопасности
должна располагаться так, чтобы
как можно меньшая часть диска
была расположена в направлении
оператора. Ваше положение, а так же
всех остальных присутствующих, должно
быть вне плоскости вращающегося колеса.
Защита помогает предохранить оператора
от отделившихся фрагментов диска, а
также избежать случайного контакта с
диском.
b) Используйте для Вашего
электроинструмента только
обрезные диски с алмазным
покрытием. Крепление детали к вашему
электроинструменту еще не гарантирует
безопасную эксплуатацию.
c) Номинальная частота вращения
детали должна быть не ниже,
чем предельная скорость,
обозначенная на станке. Диски,
вращающиеся со скоростью выше
положенной, могут разрушиться и
разлететься.
d) Круги должны использоваться
только для рекомендованных
способов применения. Например,
запрещается шлифовать боковой стороной
круга, предназначенного для абразивного
отрезания. Круги для абразивного резания
предназначены для резки периферией
круга; приложение боковых усилий к таким
кругам может вызвать их разрушение.
e) Для используемого круга всегда
используйте неповрежденные
фланцы круга соответствующего
размера и формы. Соответствующие
фланцы круга поддерживают круг,
уменьшая возможность его разрушения.
Фланцы кругов для отрезания могут
отличаться от фланцев шлифовальных
кругов.
f) Запрещается использовать стертый
армированный шлифовальный
диск от более мощных станков.
Диски, предназначенные для более
мощного станка, не подходят для работы
на более высоких скоростях меньших по
размеру станков и могут разрушиться в
процессе работы.
g Наружный диаметр и толщина
насадки должны соответствовать
техническим характеристикам
электроинструмента. Насадки
неправильного размера невозможно
оградить и контролировать.
h) Размер оси дисков и фланцев
должен соответствовать шпинделю
электроинструмента. Диски и фланцы,
не соответствующие установленному
шпинделю электроприбора, будут иметь
нарушенный баланс и чрезмерную
вибрацию, что может привести к потере
контроля над электроинструментом.
i) Не используйте поврежденные
диски. Перед каждым использованием
тщательно осмотрите диски на наличие
сколов и трещин. В случае падения
электроинструмента или диска, следует
проверить диск на наличие повреждений
или установить неповрежденный диск.
После осмотра и установки диска,
убедитесь, что все присутствующие
находятся вне плоскости вращения диска,
затем включите электроинструмент
на максимальное число оборотов
холостого хода в течение одной минуты.
Поврежденные диски обычно разрушаются
в течение этого времени.
j) Необходимо одевать средства
индивидуальной защиты. В
зависимости от способа применения
используйте защитную маску, защитный
щиток или защитные очки. При
необходимости одевайте пылезащитную
маску, средства защиты органов слуха,
перчатки и рабочий фартук для защиты от
мелкого отшлифованного материала или
фрагментов заготовки. Средства защиты
глаз должны защищать от летящего
2322
Пила дисковая электрическая RU
Page 24

мусора, образующегося при различных
операциях. Пылезащитная маска или
респиратор должны задерживать частицы,
образующиеся во время выполнения
операции. Длительное воздействие шума
высокой интенсивности может привести к
потере слуха.
k) Все, кто находится рядом, должны
покинуть зону проведения работ.
Все, кто входит в зону проведения работ,
должны одевать средства индивидуальной
защиты. Фрагменты заготовки или
сломанного диска могут отлететь в сторону
и стать причиной травм за пределами
рабочей территории.
I) При проведении работ, где
режущая насадка может задеть
скрытую электропроводку или
кабель инструмента, держите
электроинструмент только
за изолированные рукоятки.
Соприкосновение режущей насадки с
проводом под напряжением может сделать
металлические части электроинструмента
проводниками тока и привести к поражению
оператора электрически током.
m) Располагайте кабель вдали от
вращающейся насадки. В случае
потери контроля, шнур может быть
перерезан или затянуться петлей. При
этом ваша рука может быть затянутой во
вращающийся диск.
n) Никогда не кладите
электроинструмент на пол,
пока насадка полностью не
остановится. Вращающийся диск
может зацепить поверхность и тем самым
вывести станок из-под контроля.
o) Не включайте электроинструмент
во время его переноски сбоку.
Случайное соприкосновение с
вращающейся насадкой может привести к
захвату одежды и травмам.
p) Регулярно очищайте
вентиляционные отверстия
электроинструмента. Вентилятор
двигателя будет втягивать пыль внутрь
корпуса, и избыточное накопление
металлической пыли может привести к
опасности поражения электрическим током.
q) Не эксплуатируйте
электроинструмент рядом с
легковоспламеняющимися
материалами. Может произойти
возгорание этих материалов от искр.
r) Не используйте насадки,
требующие жидких охладителей.
Использование воды и других жидких
охладителей может привести к поражению
электрическим током.
Обратный удар и
соответствующие
предупреждения
Отдача-это внезапная реакция при
возникновении зажимов или помех для
вращающегося диска. Зажимы или помехи
являются причиной быстрой остановки
вращающегося диска, тем самым заставляя
вышедший из-под контроля электроприбор
двигаться в противоположном вращению
диска направлении.
Например, если шлифовальный круг зажат
или захвачен заготовкой, застрявший
край круга может врезаться в поверхность
материала и вызвать выброс круга наружу или
обратный удар. Круг может быть выброшен по
направлению к оператору или от оператора
в зависимости от направления движения
круга в месте зажатия, а также при таких
обстоятельствах шлифовальные круги могут
разрушаться.
Обратный удар является результатом
неправильного использования и (или)
нарушения правил или условий эксплуатации,
и его можно предотвратить, выполняя
приведенные ниже меры предосторожности.
a) Крепко держите
электроинструмент и располагайте
свое тело и руку так, чтобы
выдержать обратный удар. Всегда
используйте вспомогательную рукоятку при
ее наличии для максимального контроля
обратного удара или реактивного крутящего
момента во время пуска. При соблюдении
соответствующих мер предосторожности
оператор может контролировать силу
реактивного крутящего момента или
Пила дисковая электрическая RU
Page 25

обратного удара.
b) Никогда не держите руку рядом
с вращающейся насадкой. При
обратном ударе может произойти захват
руки насадкой.
C) Не становитесь в плоскости
вращения диска. обратный удар может
отбросить инструмент в направлении,
противоположном движению круга в месте
зажатия.
d) Проявляйте особую осторожность
при обработке углов, острых краев
и т.д., избегайте сотрясения и зажатия
насадки. При обработке углов, острых
краев и при сотрясении вращающаяся
насадка может застрять и привести к
потере управления или обратному удару.
e) Не прикрепляйте цепь от пилы,
лезвие для деревообработки,
сегментированный алмазный
режущий диск с промежутками
более 10 мм или зубчатую
ленточную пилу. Такие лезвия могут
вызывать частые отскоки и привести к
потере управляемости.
f) Не защемляйте диск и не
оказывайте на него чрезмерного
давления. Не пытайтесь достичь
излишней глубины среза. Избыточное
напряжение круга увеличивает нагрузку и
вероятность перекашивания или заедания
круга в срезе и вероятность обратного
удара или разрушения круга.
g) При заедании круга или при
прекращении операции отрезания
по какой-либо причине выключите
электроинструмент и держите его
неподвижно до полной остановки
круга. Не пытайтесь извлечь диск во
время движения. Это может послужить
причиной возникновения отдачи.
Определите причину заедания круга и
устраните ее.
h) Не возобновляйте операцию
отрезания при нахождении круга
в заготовке. После того, как круг
наберет полную скорость, осторожно
повторно введите его в срез. При пуске
электроинструмента с кругом, находящимся
в заготовке, круг может застрять, выйти из
среза или может произойти обратный удар.
i ) Поддерживайте панели и крупные
заготовки для сведения к
минимуму риска зажатия круга и
обратного удара. Крупные заготовки
могут перекашиваться под собственным
весом. Рядом с линией резания и рядом с
краем заготовки по обеим сторонам круга
под заготовку необходимо установить
опоры.
j) Соблюдайте особую осторожность
при выполнении небольших
прорезей в уже существующих
стенах или других глухих
поверхностях. Выступающий круг может
перерезать газовые или водопроводные
трубы, электропроводку или задеть другие
предметы и вызвать обратный удар.
Дальнейшие
инструкции по технике
безопасности
1. Всегда надевайте респиратор.
2524
Пила дисковая электрическая RU
Page 26

УСЛОВНЫЕ
ОБОЗНАЧЕНИЯ
Для сокращения риска травмы
пользователь должен прочитать
руководство по эксплуатации
прибора
Двойная изоляция
Предупреждение
Наденьте защитные наушники
Наденьте защитные очки
Наденьте респиратор
Отходы электротехнической
продукции не следует утилизировать
с бытовыми отходами. Они должны
быть доставлены в местный центр
утилизации для надлежащей
переработки.
дерево
металлу
Алюминий
Неверный
Верный
Заблокировать
Разблокировать
Алмазный диск
Перед выполнением каких-либо
работ над аппаратом отключите
вилку из сетевой розетки.
Надевайте защитные рукавицы
Пила из инструментальной стали
Ленточная пила с режущими
частями из карбида вольфрама
Пила дисковая электрическая RU
Page 27

ЭКСПЛУАТАЦИЯ
ВНИМАНИЕ: Перед использованием
инструмента, внимательно прочитайте
руководство по эксплуатации.
НАЗНАЧЕНИЕ
Данное устройство предназначено для
продольного и поперечного разрезания по
прямой линии лесоматериалов, при его
установке на обрабатываемой детали.
МОНТАЖ И
ЭКСПЛУАТАЦИЯ
Действие Рисунок
Монтаж и демонтаж
лезвия
Выключатель питания СМ. B
Удаление опилок СМ. C
Перекрестный и
продольный разрез
Регулировка
параллельного упора
Регулировка глубины
разреза
Внутренние пропилы
СМ. A
СМ. D1, D2
СМ. E1, E2
СМ. F1, F2
СМ. G1, G2, G3,
G4, G5
РЕКОМЕНДАЦИИ ПО
ИСПОЛЬЗОВАНИЮ
ЦИРКУЛЯРНОЙ ПИЛЫ
Если электроинструмент перегрелся, дайте
ему поработать 2-3 минуты на холостом
ходу для охлаждения двигателя. Избегайте
длительной работы на очень низких скоростях.
Предохраняйте пильные диски от ударов
и тряски. Чрезмерная подача значительно
снижает производительность инструмента
и сокращает срок службы пильного диска.
Производительность и качество пиления
главным образом зависят от состояния и
формы зубьев пильного диска. Поэтому для
работы с материалом подходят только острые
пильные диски.
Выбор дисков: используйте диски с 24
зубцами для обычной работы, примерно с
40 зубцами для точного пиления, более чем
с 40 зубцами для очень точного пиления
материалов с хрупкой поверхностью.
Рекомендуется использовать только
ленточные пилы.
ТЕХНИЧЕСКОЕ
ОБСЛУЖИВАНИЕ
До выполнения любых работ по
регулировке, обслуживанию и уходу
следует вынуть вилку электропитания
из розетки.
Данный электроинструмент не требует
дополнительной смазки или технического
обслуживания. В инструменте отсутствуют
детали, подлежащие обслуживанию
пользователем. Никогда не используйте
воду или химические чистящие средства
для чистки электроинструмента. Протирайте
его сухой тканью. Всегда храните
электроинструмент в сухом месте. Содержите
в чистоте вентиляционные отверстия
двигателя. Очищайте от пыли все рабочие
органы управления. Некоторое искрение,
заметное сквозь вентиляционные отверстия,
является нормальным и не наносит вред
электроинструменту.
Не все принадлежности, иллюстрированные
или описанные включены в стандартную
поставку.
Периодически проводите очистку
кожуха и основания от пыли и стружки
в целях обеспечения надлежащей
производительности.
ЗАЩИТА
ОКРУЖАЮЩЕЙ СРЕДЫ
Отходы электротехнической продукции
не следует утилизировать с бытовыми
отходами. Они должны быть
доставлены в местный центр утилизации для
надлежащей переработки.
2726
Пила дисковая электрическая RU
Page 28

ПОИСК И УСТРАНЕНИЕ НЕИСПРАВНОСТЕЙ
Признак Возможные причины
Инструмент не работает при
нажатии выключателя.
Глубина резания меньше
установленной
Лезвие проворачивает или
проскальзывает
Лезвие не режет по прямой
линии.
Лезвие совершает отскок при
начале резания
Кабель питания не
подключен.
Кабель питания поврежден.
Угольная щетка износилась
Пыль накопилась в задней
части основания.
Лезвие недостаточно
крепко соединяется со
шпинделем.
Лезвие затупилось.
Лезвие установлено
ненадлежащим образом.
Пила направляется
ненадлежащим образом.
Лезвие вращается
недостаточно быстро
Возможные способы
устранения
Убедитесь в том, что кабель
питания надлежащим образом
подсоединен к исправной
розетке.
Отключите кабель питания от
сети. Замените его при помощи
квалифицированного техника.
Замените угольную щетку при
помощи квалифицированного
техника.
Стряхните пыль. Рассмотрите
вариант присоединения
вакуумного блока для сбора
пыли.
Снимите лезвие и установите
его так, как описано в разделе
МОНТАЖ И ДЕМОНТАЖ
ЛЕЗВИЯ.
Установите на пилу новое острое
лезвие.
Проверьте правильность
установки лезвия.
Используйте кромочные
направляющие.
Дождитесь, пока лезвие
достигнет максимальной
скорости до начала резания
Пила дисковая электрическая RU
Page 29

ДЕКЛАРАЦИЯ
СООТВЕТСТВИЯ
Мы,
POSITEC Germany GmbH
Konrad-Adenauer-Ufer 37
50668 Köln
Заявляем, что продукция,
Марки WORX Пила дисковая
электрическая
Тип WX423 WX423.1 (4-обозначение
инструмента, класс пил)
Функции Резки различных материалов
с вращающимся зубчатым лезвием
Соответствует положениям Директив,
2006/42/EC
2004/108/EC
2011/65/EU
И стандарта
EN 55014-1
EN 55014-2
EN 61000-3-2
EN 61000-3-3
EN 60745-1
EN 60745-2-5
EN 60745-2-22
2928
Лицо с правом компилирования данного
технического файла,
Имя: Russell Nicholson
Адрес: Positec Power Tools (Europe)
Ltd, PO Box 152,Leeds,LS10 9DS,UK
Suzhou 2014/12/24
Allen Ding
Заместитель главного инженера, Тестирование
и сертификация
Пила дисковая электрическая RU
Page 30

1. LUKUSTUS VÄLJAS (LOCK-OFF) NUPP
2. PEHME PINNAGA KÄEPIDE
3. KUUSKANTVÕTI
4. SISSE/VÄLJA-TURVALÜLITI
5. SPINDLI LUKUSTUSNUPP
6. ALUMINE TERAKAITSE
7. ALUMISE TERATÕKKE HOOB
8. FIKSEERITUD ÜLEMINE TERAKAITSE
9. TOLMUVÄLJUTUSOTSIK
10. TOLMUIMEJA ÜLEMINEK
11. SÜGAVUSE SEADMISE KANG
12. ALUSPLAAT
13. SAETERA (Vt Joonis A)
14. TERA POLT (Vt Joonis A)
15. PARALLEELJUHIK
16. PARALLEELJUHIKU KINNITUSKLAMBER
17. VÄLINE ÄÄRIK (Vt Joonis A)
30
Mitte kõik kirjeldatud ja joonistel kujutatud lisavarustuskomponendid ei kuulu
standardvarustusse.
Elektriline ketassaag ET
Page 31

TEHNILISED ANDMED
Tüüp WX423 WX423.1(4- masina märgistus, sae suhtes)
Nimipinge
Nimivõimsus 400W
Tühikiirus 3600/min
Saeketta läbimõõt 85mmx15mm
TCT-ketas 85mmx1.2mmx15mmx24T
HSS-ketas 85mmx1.2mmx15mmx44T
Teemantketas 85mmx1.2mmx15mmx60G
Maksimaalne lõikesügavus 27mm
Materjali soovituslik maksimaalne paksus
Puit 27mm
Alumiinium 3mm
PVC-toru (läbimõõt) 13mm
Kiviplaadid 8mm
Lehtteras 0.91mm
Kaitseklass
Masina kaal 1.4kg
Võlli keerme mõõt M5
Saetera paksus
TCT-ketas 0.8mm
HSS-ketas 0.65mm
Teemantketas
230–240V~50Hz
/ll
0.8mm
31
MÜRA ANDMED
Mõõdetud helirõhk LpA: 82dB(A)
Mõõdetud müra võimsustase LwA: 93dB(A)
KPA& KWA 3.0dB(A)
Kasutage kuulmiskaitset.
Elektriline ketassaag ET
Page 32

INFORMATSIOON VIBRATSIOONI KOHTA
Vibratsiooni koguväärtused (kolmesuunalise vektori summa), mis on määratud EN 60745 järgi:
Puidu saagimiseks: a
Vibratsiooni
emissiooniväärtus:
Deklareeritud vibratsiooni koguväärtust võib kasutada tööriistade omavaheliseks võrdlemiseks ja
ka vibratsioonimõju eelnevaks hindamiseks.
HOIATUS: Vibratsiooni emissiooniväärtus elektriseadme tegeliku kasutamise ajal võib
erineda märgitud väärtusest, sõltuvalt sellest, kuidas tööriista kasutatakse (vt näited
allpool):
Kuidas tööriista kasutatakse ning millised on lõigatavad või puuritavad materjalid.
Kui heas seisundis tööriist on ning kuidas seda hooldatakse.
Kas kasutatakse õigeid lisatarvikuid ning veendutakse, et tööriist on terav ja heas seisundis.
Kui tugevalt hoitakse käepidemest ning kas kasutatakse vibratsioonivastaseid lisatarvikuid.
Kas tööriista kasutatakse sihtotstarbeliselt, järgides selle ehitust ning kasutusjuhiseid.
Tööriist võib põhjustada käsivarre ja käe vibratsioonisündroomi, kui selle kasutamine
pole õigesti korraldatud
HOIATUS: Kui hinnatakse vibratsiooniga kokkupuutumise taset tegelikes
32
kasutustingimustes, tuleb arvestada ka kasutustsükli kõiki osi, näiteks aega, kui seade on
välja lülitatud ja kui see on käivitatud, kuid seda hetkel ei kasutata. See võib märkimisväärselt
vähendada vibratsiooniga kokkupuutumist tööperioodi kestel.
Minimeerimaks vibratsiooniga kokkupuutumise riske:
Kasutage ALATI teravaid peitleid, puure ja terasid
Hooldage tööriista vastavalt käesolevatele juhistele ning hoidke seda korralikult määrituna (kui
see on vajalik)
Kui tööriista kasutatakse regulaarselt, muretsege vibratsioonivastased lisatarvikud.
Vältige tööriista kasutamist temperatuuril alla 10oC
Planeerige oma töögraafik nii, et suurt vibratsiooni tekitavat tööriista kasutataks hajutatult üle
mitme päeva.
Määramatuse K = 1.5m/s²
Metalli saagimine: a
Määramatuse K = 1.5 m/s²
< 2,5m/s2
h,W
< 2,5m/s
h,M
2
TARVIKUD
WX423 WX423.1
TCT tera: 24T puidule
Paralleeljuhik
Tolmuimeja üleminek
Kuuskantvõti
Teemantketas
HSS 44T Saetera
Me soovitame osta kogu lisavarustuse samast poest, kust tööriista. Kasutage hea kvaliteediga
lisavarustust tuntud tootjalt. Valige saetera vastavalt plaanitavale tööle. Täpsema teabe saamiseks
vaadake lisavarustuse pakendit. Ka poe personal võib aidata ja soovitada.
1 1
1 1
1 1
1 1
/ 1
/ 1
Elektriline ketassaag ET
Page 33

TÖÖOHUTUSJUHEND
a) HOIATUS: Hoidke käed lõikealast
ja terast eemale. Kui mõlemad käed
hoiavad saest kinni, ei saa tera neid lõigata.
b) Ärge pange kätt töödeldava detaili
alla. Kate ei kaitse teid tera eest töödeldava
detaili all.
c) Reguleerige lõike sügavus töödeldava
detaili paksusele. Töödeldava detaili
alt ei tohiks paista rohkem, kui pool tera
hammast.
d) Ärge kunagi hoidke lõigatavat
detaili oma käes või asetatuna üle
jala. Asetage töödeldav detail kindlale
alusele. Tööd tuleb korralikult toetada, et
minimeerida kokkupuudet kehaga, tera
blokeerumist ja kontrolli kaotamist.
e) Hoidke elektritööriista isoleeritud
hoidmis pindadest üksnes, kui on
oht, et lõikur võib puudutada varjatud
juhtmeid või oma enda kaablit.
Kokkupuude pingestatud juhtmega
pingestab ka elektritööriista metallosad ja
annab kasutajale elektrilöögi.
f) Kasutage lõhestamisel alati
lõikepiirajat või sirge ääre juhti. See
parandab lõike täpsust ja vähendab tera
blokeerumise võimalust.
g) Kasutage alati õige võlliavade suuruse
ja kujuga (teemant või ümar) terasid.
Terad, mis ei vasta sae paigaldusriistvarale
töötavad ekstsentriliselt ja põhjustavad
kontrolli kaotamist.
h) Ärge kunagi kasutage vigastatud
või valesid teraseibe või -polte.
Teraseibid ja polt on spetsiaalselt teie sae
jaoks loodud – optimaalse võimsuse ja
tööohutuse jaoks.
TÄIENDAVAD
OHUTUSJUHISED KÕIGI
SAAGIDE
Tagasilöögi ja seotud hoiatused
- tagasilöök on pigistatud, kinnitunud või
vale joondusega saetera äkkreaktsioon,
mis põhjustab kontrollimatu sae tõusmist
töödeldavast detailist kasutaja poole;
- kui tera on pigistatud või kinnitunud
tihedalt sulgevasse lõikesse, jääb tera
seisma ja mootori reaktsioon liigutab
seadme kiiresti tagasi kasutaja poole;
- kui tera lõikes kõverdub või joondus
muutub, võivad tera tagumises ääres
olevad hambad kaevuda puidu ülemise
pinna sisse, mille tulemusena tuleb tera
lõikest välja ja hüppab tagasi kasutaja
poole.
Tagasilöök on sae väärtarvituse ja/või valede
tööprotseduuride või -tingimuste tulemuseks
ja seda saab vältida alljärgnevate õigete
ettevaatusabinõude kasutamisel.
a) Säilitage mõlema käega saele tugev
haare ja asetage oma käed tagasilöögi
jõudu takistavalt. Asetage oma käed
tera ühele küljele, kuid mitte teraga samale
joonele. Tagasilöök võib põhjustada sae
hüppamist tahapoole, kuid kasutaja
tagasilöögi jõudusid piirata õigete
ettevaatusabinõude kasutamisega.
b) Kui tera hakkab kinnituma või kui
lõikamist on vaja mingil põhjusel
peatada, vabastage päästik ja hoidke
saagi liikumatult materjali sees kuni
tera on täielikult peatunud. Ärge mitte
kunagi proovige saagi eemaldada tööst
või tõmmata saagi tagasi, kui tera liigub,
sest siis võib toimuda tagasilöök. Uurige ja
eemaldage tera kinnitumise põhjused.
c) Sae taaskäivitamisel töödeldava detaili
sees, asetage sae tera lõike keskele
ja kontrollige, et sae hambad ei oleks
materjali sees. Kui sae tera jääb kinni,
võib see sae taaskäivitamisel liikuda üles
või lüüa töödeldavalt detaililt tagasi.
d) Toestage suuri paneele, et
minimeerida tera kinnitumise ja
tagasilöögi ohtu. Suured paneelid
painduvad tihti oma massi all. Toed
tuleb asetada paneeli mõlema külje
alla, lõikejoone lähedale ja paneeli ääre
lähedale.
e) Ärge kasutage nürisid või vigastatud
terasid. Teritamata või valesti paigaldatud
terad tekitavad kitsaid lõikeid ja
põhjustavad liigset hõõrdumist, tera
kinnitumist ja tagasilööke.
f) Tera sügavuse ja kaldenurga
33
Elektriline ketassaag ET
Page 34

reguleerimise lukustamishoovad
peavad enne lõikamist olema
turvaliselt kinnitatud. Kui tera
regulatsioon lõikamise ajal muutub, võib
see põhjustada kinnitumist ja tagasilööke.
g) Olge seinade või tundmatute alade
saagimise ajal eriti ettevaatlik. Välja
ulatuv tera võib lõigata esemeid, mis
võivad põhjustada tagasilööke.
TEIE KETASSAE OHUTUSE
LISAREEGLID
1. Kandke alati tolmurespiraatorit,
kuulmiskaitsevahendit ja silmakaitseid.
2. Kasutage ainult kirjelduses soovitatud
saeterasid.
3. Kasutage ainult sellise diameetriga
lõiketera, mis vastab märgistusele.
SEESMISE PENDELTERAKAITSEGA
KETASSAAGIDE
OHUTUSJUHISED
Alumise kaitsekatte funktsionaalsus
a) Kontrollige enne iga kasutamist
alumise kaitsekatte korralikku
sulgemist. Ärge kasutage saagi, kui
alumine kaitsekate ei liigu vabalt ega
sulgu koheselt. Ärge klammerdage
ega siduge alumist kaitsekatet avatud
asendisse. Kui saag kogemata kukub,
34
võib alumine kaitsekate murduda. Tõstke
alumist kaitsekatet koos tagasi tõmmatava
käepidemega ja veenduge, et see liiguks
vabalt ja ei puudutaks tera ega muid osasid
ühegi lõike nurga ja sügavuse korral.
b) Kontrollige alumise kaitsekatte vedru
töötamist. Kui kaitsekate ja vedru ei tööta
korralikult, tuleb neid enne kasutamist
hooldada. Alumine kaitsekate võib töötada
loiult vigastatud osade, kummi sade või
jäätmete kogunemise tõttu.
c) Alumist kaitsekatet võib käsitsi
tagasi tõmmata ainult eriliste lõigete
jaoks nagu „vertikaalsaagimine” ja
„kombineeritud lõiked”. Tõstke alumist
kaitsekatet tagasitõmmatavast käepidemest
ning sel hetkel, kui tera siseneb materjali
sisse, tuleb kaitsekate vabastada. Muu
saagimise ajal peab alumine kaitsekate
töötama automaatselt.
d) Jälgige alati, et enne sae asetamist
pingile või põrandale kataks
alumine kaitsekate tera. Kaitsmata,
mahajooksev tera paneb sae tagurpidi
liikuma ja lõikab kõike, mis jääb selle
teele. Arvestage ajaga, mis kulub teral
pärast lüliti vabastamist peatumiseks.
TEIE LÕIKEMASINATE
LISAOHUTUSREEGLID
a) Maksimaalse ohutuse tagamiseks
peab elektritööriista juurde kuuluv
kaitsekate olema kindlalt seadme
külge kinnitatud ja paiknema selliselt,
et kasutajapoolsel küljel oleks katmata
võimalikult väike osa kettast. Seadme
kasutaja ja juuresviibijad ei tohi paikneda
pöörleva kettaga ühel joonel. Tööriista jaoks
mitte-ettenähtud kettaid ei saa adekvaatselt
kaitsta, seetõttu on nende kasutamine
ebaturvaline.
b) Kasutage elektritööriista ainult
teemantketastega. Isegi kui
elektritööriista külge on võimalik
paigaldada muid lisatarvikuid, ei taga miski
nende kasutamisel ohutust.
c) Lisatarviku nimikiirus peab olema
vähemalt võrdne tööriistale märgitud
maksimaalse kiirusega. Lisatarvikud,
mille kiirus ületab nende nimikiiruse,
võivad puruneda.
d) Kettaid tuleb kasutada ainult
ettenähtud otstarbel. Näiteks: ärge
lihvige lõikeketta küljega Abrasiivsed
lõikekettad on ette nähtud perifeerseks
lihvimiseks, nendele rakenduvad külgjõud
võivad põhjustada ketaste purunemist.
e) Kasutage kahjustamata kettaflantse,
mis on valitud ketta jaoks sobiva
suuruse ja kujuga. Õiged kettaflantsid
toetavad ketast, vähendades seeläbi ketta
purunemise võimalust.
f) Ärge kasutage kulunud tugevdatud
kettaid, mis on mõeldud suurematele
elektritööriistadele. Suuremale
elektritööriistadele mõeldud kettad ei talu
Elektriline ketassaag ET
Page 35

väiksele seadmele iseloomulikku suuremat
kiirust ja võivad puruneda.
g) Lisatarviku välisdiameeter ja
paksus peavad vastama tööriista
jõudlusnäitajatele. Vales mõõdus
lisatarvikute kasutamisel ei saa tagada
piisavat kaitset ega nende valitsemist.
h) Ketaste ja äärikute võlliava suurus
peab vastama täpselt elektritööriista
võlli suurusele. Kettad ja äärikud,
mille võlliava ei vasta elektritööriista
paigaldusdetailide mõõtudele, lähevad
tasakaalust välja, vibreerivad kõvasti ja
võivad põhjustada kontrolli kaotamise
seadme üle.
i) Ärge kasutage defektseid kettaid. Enne
iga kasutuskorda kontrollige, et kettal ei
oleks täkkeid ega mõrasid. Elektritööriista
või ketta mahapillamise korral kontrollige,
et see poleks kahjustatud, või paigaldage
defektideta ketas. Pärast ketta kontrollimist
ja paigaldamist jälgige, et te ise ega
juuresviibijad ei seisaks pöörleva kettaga
ühel joonel, ja lülitage elektritööriist üheks
minutiks maksimaalsele tühikäigukiirusele.
Katsetamise käigus defektiga kettad
üldjuhul purunevad.
j) Kandke isiklikke kaitsevahendeid.
õltuvalt rakendusest kasutage
näokaitset, kaitseprille ja ohutusprille.
Vajadusel kandke tolmumaski,
kuulmiskaitseid, kindaid ja põlle, mis
kaitseb väikeste lenduvate abrasiivosakeste
või töödeldava materjali tükkide eest.
Silmakaitsed peavad pakkuma küllaldast
kaitset lendava prügi eest, mis tekib
erinevatel töödel. Tolmumask või
respiraator peab filtreerima osakesi,
mis töö käigus tekivad. Pikemaajalisem
viibimine mürarikkas keskkonnas võib
kahjustada kõrvakuulmist.
k) Hoidke kõrvalolijad tööalast ohutus
kauguses. Kõik isikud, kes sisenevad
tööalasse , peavad kandma isiklikke
kaitsevahendeid. Purunenud lisatarviku
tükid võivad lenduda ja põhjustada
inimvigastusi ka nendele, kes ei viibi
töökoha vahetus läheduses.
I) Hoidke tööriista isoleeritud
hoidmispindadest, kui on oht, et lõikur
võib puudutada varjatud juhtmeid
või enda kaablit. Lõikuri kokkupuude
elektrijuhtmega võib pingestada tööriista
avatud metallosad, mille tulemusel võib
operaator saada elektrilöögi.
m) Paigutage toitejuhe nii, et see ei
takerduks pöörlevasse lisaseadmesse.
Kontrolli kaotamisel võite kogemata juhtme
läbi lõigata või võib see kuskile kinni jääda.
Samuti võib käsi pöörleva ketta vastu
sattuda.
n) Ärge pange tööriista mitte kunagi
maha enne, kui see on täielikult
seiskunud. Pöörlev ketas võib saetava
pinna külge takerduda, mille tagajärjel
võite kaotada elektritööriista üle kontrolli.
o) Ärge käivitage tööriista, kui te kannate
seda küljel. Juhuslik kokkupuude
pöörleva lisatarvikuga võib põhjustada
tööriista takerdumise teie riietesse ja
tõmmata lisatarviku kehasse.
p) Puhastage regulaarselt tööriista
õhutusavasid. Mootori ventilaator
tõmbab seadme korpusse tolmu ja
pulbrilise metalli ülemäärane kogunemine
võib põhjustada elektrilöögi.
q) Ärge kasutage tööriista tuleohtlike
materjalide läheduses. Lenduvad
sädemed võivad need materjalid süüdata.
r) Ärge kasutage lisatarvikuid, mis
nõuavad jahutusvedelikke. Vee
või jahutusvedelike kasutamine võib
põhjustada surmava elektrilöögi või
elektrišoki
TAGASILÖÖGI JA SEOTUD
HOIATUSED
Tagasilöök on äkiline reaktsioon pöörleva ketta
kinnikiilumisele või pitsumisele. Kinnikiilumise
või pitsumise tagajärjel pöörlev ketas takerdub
järsult, mis omakorda põhjustab kontrolli
alt väljunud elektritööriista paiskumise ketta
pöörlemisele vastupidises suunas.
Näiteks, kui abrasiivketas on töödeldavasse
materjali kinni kiilunud või jäänud, siis võib
ketta kinnijäänud serv tungida materjali
pinnasse, põhjustades ketta väljaronimist
ja -viskumist. Ketas võib hüpata operaatori
35
Elektriline ketassaag ET
Page 36

poole või temast kaugemale, sõltuvalt ketta
liikumisest kinnijäämise kohas. Abrasiivkettad
võivad sellistes olukordades ka puruneda.
Tagasilöök on tööriista väärkasutuse ja/või
ebaõigete töövõtete rakendamise tulemus
ja seda saab vältida, juhindudes alltoodud
ettevaatusabinõudest.
a) Hoidke tööriista tugevalt kinni ja
viige oma keha ja käsi asendisse, mis
võimaldab vastu seista tagasilöögi
jõule. Kasutage lisakäepidet, kui see
on olemas, et kontrollida maksimaalselt
tagasilööki või pöördemomendi reaktsiooni
seadme käivitamisel. Asjakohaste
ettevaatusabinõude rakendamisel saab
operaator kontrollida pöördemomendi
reaktsiooni või tagasilöögi jõudu.
b) Ärge kunagi asetage oma kätt
pöörleva lisatarviku lähedale. Lisatarvik
võib anda teie käele löögi.
c) Jälgige, et te ei paikneks pöörleva
kettaga ühel joonel. Tagasilöök tõukab
tööriista selle kinnijäämise kohas ketta
pöörlemisele vastupidises suunas.
d) Töötage eriti ettevaatlikult nurkade,
36
teravate servade jne piirkonnas,
vältige lisatarviku tagasipõrkamist ja
kinnijäämist. Nurgad, teravad servad ja
tagasipõrked võivad pöörlevat lisatarvikut
takistada ja põhjustada kontrolli kaotamise
või tagasilöögi.
e) Ärge paigaldage saeketti,
puunikerdustera, segmentidega
teemantketast servapiluga üle 10
mm ega hambulist saeketast. Sellised
tarvikud põhjustavad tihti tagasilöögi või
kontrolli kaotuse seadme üle.
f) Vältige ketta kinnikiilumist ja ärge
rakendage liigset jõudu. Ärge üritage
teha liiga sügavat lõiget. Liigse surve
avaldamine kettale suurendab koormust
ja teeb selle vastuvõtlikumaks ketta
väänamisele või kinnijäämisele lõikekohas
ning muudab tõenäolisemaks ketta
tagasilöögi või purunemise.
g) Kui ketas on kinni jäänud või kui
te katkestate lõikamise mis tahes
põhjusel, siis lülitage tööriist välja
ja hoidke seda paigal, kuni ketas
täielikult seiskub. Ärge üritage ketast
saelõikest eemaldada enne seiskumist,
muidu võib tekkida tagasilöök. Uurige
olukorda ja rakendage asjakohaseid
meetmeid, et kõrvaldada ketta kinnijäämise
põhjus.
h) Ärge taasalustage töödeldava detaili
lõikamist. Laske kettal jõuda täiskiiruseni
ja sisestage see ettevaatlikult lõikesse.
Ketas võib kinni jääda, välja ronida või
tagasi lüüa, kui tööriist taaskäivitatakse
materjalis.
i ) Toetage töödeldavaid paneele või
mis tahes mittegabariitseid detaile,
et minimeerida ketta pitsitamist ja
tagasilööke. Suured töödeldavad detailid
võivad enda raskuse all läbi vajuda.
Töödeldava detaili alla paigutatavad toed
peavad jääma lõikejoone ja materjali serva
lähedale ketta mõlemal küljel.
j) Olge eriti ettevaatlik, tehes
“taskulõiget” olemasolevasse seina
või teistesse kaetud kohtadesse.
Ketta väljaulatuv osa võib lõikuda gaasivõi veetorudesse või elektrijuhtmetesse
või esemetesse, mis võivad põhjustada
tagasilöögi.
TEIE OHUTUSE
LISAREEGLID
1. Kandke alati tolmumaski.
Elektriline ketassaag ET
Page 37

SÜMBOLID
Vigastusohu vähendamiseks peab
kasutaja lugema käsiraamatut.
Topeltisolatsioon
Hoiatus
Kasutage kuulmiskaitset
Kasutage kaitseprille
Kasutage tolmumaski
Elektriseadmete jäätmeid
ei tohi eemaldada koos
olmejäätmetega. Võimalusel
viige ümbertöötlemisele.
Ümbertöötlemise kohta uurige
kohalikult omavalitsuselt või
jaemüüjalt.
Puit
Alumiinium
Metalli
Vale
Õige
Lukus
37
Lahti
Teemantketas
Enne mis tahes töid masinal
eemaldage pistik elektrivõrgust.
Kandke kaitsekindaid
HSS-ketas
TCT-ketas
Elektriline ketassaag ET
Page 38

KASUTUSJUHISED
MÄRKUS: Enne tööriista kasutamist
lugege hoolikalt kasutusjuhendit.
teemantketas kiviplaatide, tsementtahvlite jms
saagimiseks.
Kasutage ainult soovitatud saekettaid.
SIHIPÄRANE KASUTAMINE:
Seade on mõeldud puidu ja muude
materjalide piki- ja ristisaagimiseks, toetudes
selle käigus saetavale detailile.
KOKKUPANEMINE JA
KASUTAMINE
Toiming Joonis
Saeketta Paigaldamine
Ja Eemaldamine
Sisse/välja-turvalüliti Vt Joonis B
Saepuru Eemaldamine Vt Joonis C
Risti- ja Pikisaagimine Vt Joonis D1, D2
Paralleeljuhik Vt Joonis E1, E2
Lõikesügavuse
Reguleerimine
38
Ava Saagimine
Vt Joonis A
Vt Joonis F1, F2
Vt Joonis G1, G2,
G3, G4, G5
NÄPUNÄITEID TEIE
KETASSAE KASUTAMISEKS
Kui teie elektritööriist muutub liiga kuumaks,
laske oma kreissael 2-3 minutit töötada
tühikäigul, et mootorit jahutada. Vältige
pikemaajalist kasutamist väga madalal
kiirusel.
Kaitske saeterasid põrutuste ja löökide
eest. Liigne etteanne vähendab oluliselt
masina jõudlust ja vähendab saetera tööiga.
Saagimise tulemuslikkus ja lõikamise kvaliteet
sõltuvad olulisel määral saetera hammaste
seisukorrast ja kujust. Seepärast kasutage
ainult teravaid saeterasid, mis on töödeldava
materjali jaoks sobivad.
Saeketta valimine: 24 hambaga ketas
üldtöödeks, umbes 40 hambaga ketas
peenemateks lõigeteks, üle 40 hambaga ketas
ülipeenteks saetöödeks hapra materjali korral,
HOOLDUS
Enne kui asute teostama mistahes
reguleerimis-, hooldus- või remonttöid,
tuleb tööriista toitejuhtme pistik
pistikupesast lahti ühendada.
Tõhusama ja ohutuma töö tagamiseks
hoolitsege, et seadmed oleksid puhtad ja
teravad. Järgige lisatarvikute vahetamise ja
määrimise juhiseid. Kontrollige korrapäraselt
seadme juhtmeid ja kahjustuste korral
laske need volitatud teeninduskeskuses
ära parandada. Teie elektritööriist ei vaja
täiendavat määrimist ega hooldamist.
Teie elektritööriistas ei ole kasutaja poolt
hooldatavaid osi. Ärge kasutage oma
elektritööriista puhastamiseks vett ega
keemilisi puhastusaineid. Pühkige kuiva
lapiga. Hoidke oma elektritööriista alati kuivas
kohas. Hoidke mootori ventilatsiooniavad
puhtana. Hoidke kõik nupud tolmuvabana.
Kui te näete ventilatsiooniavades vilkumas
sädemeid, on see normaalne ja ei kahjusta
teie elektritööriista.
Kui voolujuhe on viga saanud, tuleb ohu
vältimiseks pöörduda selle asendamiseks
tootja, tema hooldusesinduse või muu
sarnase kvalifikatsiooniga isiku poole.
Korraliku töötamise tagamiseks puhastage
perioodiliselt terakaitset ja alusplaati
saepurust.
KESKKONNAKAITSE
Elektriseadmete jäätmeid ei tohi
kõrvaldada koos olmejäätmetega.
Võimalusel viige need
ümbertöötlemisele. Ümbertöötlemise
kohta uurige kohalikult omavalitsuselt või
jaemüüjalt.
Elektriline ketassaag ET
Page 39

TÕRKEOTSING
Sümptom Võimalikud põhjused Võimalik lahendus
Toitelüliti ei pane seadet
tööle.
Lõikesügavus on määratud
väärtusest väiksem.
Ketas keerleb või libiseb
Ketta lõikejoon ei ole sirge.
Saagimist alustades tekib
ketta tagasilöök.
Toitejuhe ei ole vooluvõrku
ühendatud.
Toitejuhe on katki.
Süsihari on kulunud.
Saetalla tagumisse ossa
koguneb saepuru.
Ketas ei asetse tihedalt võlli
vastas.
Ketas on nüri.
Ketas on valesti
paigaldatud.
Saagi ei juhita õigesti.
Ketas ei pöörle piisavalt
kiiresti.
Kontrollige, et toitejuhe oleks
korralikult ühendatud töötavasse
elektrikontakti.
Eemaldage toitejuhe
vooluvõrgust. Laske pädeval
hooldustehnikul see välja
vahetada.
Laske pädeval hooldustehnikul
süsihari välja vahetada.
Raputage saepuru välja. Tolmu
kogumiseks võite seadmega
ühendada tolmuimeja.
Eemaldage ketas ja paigaldage
see tagasi vastavalt jaotisele
SAEKETTA PAIGALDAMINE
JA EEMALDAMINE.
Paigaldage saele uus terav ketas.
Kontrollige, kas ketas on õigesti
paigaldatud.
Kasutage servajuhikut.
Enne kui alustate saagimist,
laske saekettal saavutada
täiskiirus.
39
Elektriline ketassaag ET
Page 40

NÕUETELE VASTAVUSE
AVALDUS
Meie,
POSITEC Germany GmbH
Konrad-Adenauer-Ufer 37
50668 Köln
Avaldame, et toode,
Kirjeldus WORX Elektriline ketassaag
Tüüp WX423 WX423.1 (4- masina
märgistus, sae suhtes)
Ametikoht Erinevate materjalide
lõikamiseks pöörlevate hammastatud
lõiketeradega
Vastab järgmistele direktiividele,
2006/42/EC
2004/108/EC
2011/65/EU
Vastab standarditele
EN 55014-1
EN 55014-2
EN 61000-3-2
40
EN 61000-3-3
EN 60745-1
EN 60745-2-5
EN 60745-2-22
Isik, kellel on volitused tehnilise faili
koostamiseks,
Nimi Russell Nicholson
Aadress Positec Power Tools (Europe)
Ltd, PO Box 152,Leeds,LS10 9DS,UK
Suzhou 2014/12/24
Allen Ding
Asetäitja Peainsener, Testimise ja sertitseerimine
Elektriline ketassaag ET
Page 41

1. FIKSATORA ATLAIŠANAS POGA
2. MĪKSTS ROKTURIS
3. SEŠSTŪRA ATSLĒGA
4. DROŠĪBAS IESLĒGŠANAS/IZSLĒGŠANAS SLĒDZIS
5. ASS FIKSĒŠANAS POGA
6. APAKŠĒJAIS ASMENS AIZSARGS
7. APAKŠĒJĀ AIZSARGA SVIRA
8. NOSTIPRINĀTS AUGŠĒJAIS AIZSARGS
9. PUTEKĻU NOSŪKŠANAS ATVERE
10. PUTEKĻU SŪCĒJA ADAPTERS
11. DZIĻUMA REGULĒŠANAS SVIRA
12. PAMATA PLATE
13. ZĀĢA PLĀTNE (Skat. A attēlu)
14. ASMENS SKRŪVE (Skat. A attēlu)
15. PARALĒLĀ VADOTNE
16. PARALĒLĀS VADOTNES PIEVIENOŠANAS STIPRINĀJUMS
17. ĀRĒJĀ UZMALA (Skat. A attēlu)
Standarta piegādē nav iekļauti visi piederumi, kas šeit parādīti vai aprakstīti.
41
Elektriskais ripzāģis LV
Page 42

TEHNISKIE DATI
Tips WX423 WX423.1(4- Iekārtas apzīmējums, zāģa raksturojums)
Nominālais spriegums:
Nominālā jauda 400W
Nominālais ātrums bez slodzes 3600/min
Asmens izmēri 85mmx15mm
TCT disks 85mmx1.2mmx15mmx24T
HSS disks 85mmx1.2mmx15mmx44T
Dimanta disks 85mmx1.2mmx15mmx60G
Maksimālais griešanas dziļums 27mm
Ieteicamais maksimālais materiāla biezums
Koks 27mm
Alumīnijs 3mm
PVC caurule (rādiuss) 13mm
Flīze 8mm
Lokšņu tērauds 0.91mm
42
Dubulta izolācija
Ierīces svars 1.4kg
Vārpstas vītnes izmērs M5
Zāģa plātnes biezums
TCT disks 0.8mm
HSS disks 0.65mm
Dimanta disks
230–240V~50Hz
/ll
0.8mm
INFORMÂCIJA PAR TROKSNIS
Vidējais svērtais skaņas spiediens LpA: 82dB(A)
Vidējā svērtā skaņas jauda LwA: 93dB(A)
KPA& KWA 3.0dB(A)
Lietojiet ausu aizsargus.
Elektriskais ripzāģis LV
Page 43

INFORMĀCIJA PAR VIBRĀCIJU
Kopçjâ vibrâcijas vçrtîba (triax vektoru summa) noteikta saskaòâ ar EN 60745:
Griešanas koka: a
Vibrâcijas emisijas vçrtîba:
Norādītā vibrācijas kopējā vērtība to var izmantot viena rīka salīdzināšanai ar citu, un var arī izmantot
sākotnējās pakļaušanas iedarbībai novērtēšanai.
Uzmanību: Vibrācijas emisijas vērtība elektriskās ierīces lietošanas laikā var atšķirties no
uzrādītās vērtības atkarībā no tā, kā ierīce tiek izmantota, ņemot vērā šādus piemērus un citus
ierīces izmantošanas veidus:
kā tiek lietota ierīce un slīpēti vai urbti materiāli;
ierīce ir labā stāvoklī un tiek labi uzturēta;
ierīcei tiek izmantots atbilstošs piederums pārliecinoties, ka tas ir ass un labā stāvoklī;
satvēriena blīvums pie rokturiem un antivibrācijas piederumu izmantošana;
vai ierīce tiek lietota atbilstoši tās modelim un šai instrukcijai.
Šī ierīce var izraisīt plaukstas-rokas vibrācijas sindromu, ja tā netiek atbilstoši
lietota.
Nenoteiktīb K = 1.5m/s²
Metāla griešana: a
Nenoteiktīb K = 1.5 m/s²
< 2,5m/s2
h,W
< 2,5m/s
h,M
2
Uzmanību: Pareiza lietošana nozīmē arī to, ka pakļaušanas līmenis reālajos lietošanas
apstākļos jāizvērtē visā ierīces darbināšanas cikla laikā, piemēram, laikā, kad ierīce ir izslēgta, un,
laikā, kad tā strādā tukšgaitā un neveic uzdevumu. Tas visā lietošanas laikā var ievērojami samazināt
pakļaušanas līmeni.
Ieteikumi vibrācijas riska pakļautības samazināšanai.
VIENMĒR izmantojiet asus griežņus, urbjus un asmeņus.
Uzturiet šo ierīci, ievērojot instrukciju, un eļļojiet to (kad nepieciešams).
Ja ierīci jāizmanto regulāri, tad iegādājieties antivibrācijas piederumus.
Neizmantojiet ierīces 10oC vai mazāk grādu temperatūrā.
Ieplānojiet savus darbus tā, lai augstas vibrācijas ierīces tiktu izmantotas sadalīti vairāku dienu garumā.
PIEDERUMI
WX423 WX423.1
TCT asmens: 24T kokam
Paralēlā vadotne
Putekļu sūcēja adapters
Sešstūra atslēga
Dimanta disks
HSS asmens 44T
Visus palīgpiederumus ieteicams iegādāties veikalā, kurā pirkāt ierīci. Lietojiet labas kvalitātes piederumus, kas ražoti labi zināmā uzņēmumā. Izvēlieties veicamajam darbam atbilstīgus uzgaļus. Plašāku
informāciju skatiet uz piederumu iepakojuma. Arī pārdevēji var sniegt palīdzību vai padomu.
1 1
1 1
1 1
1 1
/ 1
/ 1
43
Elektriskais ripzāģis LV
Page 44

NORĀDĪJUMI PAR
DARBA DROŠĪBU
a) UZMANĪBU! Sargiet rokas no
zonas, kur tiek veikts griezums,
un no zāģa plātnes. Ja zāģi turat ar abām
rokām, tās neskars asmens.
b) Neliecieties zem apstrādājamā
materiāla. Aizsargs nevar pasargāt jūs no
asmens zem apstrādājamā materiāla.
c) Noregulējiet zāģēšanas dziļumu
atbilstīgi apstrādājamā materiāla
biezumam. Zem apstrādājamā materiāla
jābūt redzamam mazāk nekā pilnam asmens
zobam.
d) Nekad neturiet zāģējamo materiālu
rokās vai pāri kājai. Nostipriniet materiālu
uz stabilas pamatnes. Pareiza materiāla
nostiprināšana ir svarīga, lai mazinātu risku
gūt ķermeņa ievainojumu, salocīt plātni vai
zaudēt kontroli.
e) Strādājot vietās, kur griešanas
instruments var skart slēptus vadus,
kas ir zem sprieguma, vai pats
44
savu vadu, turiet elektroierīci aiz
izolētajiem rokturiem. Kontakts ar vadu
zem sprieguma var pakļaut spriegumam arī
ierīces metāla daļas un radīt strāvas triecienu
operatoram.
f) Gareniskas zāģēšanas gadījumā
lietojiet zāģēšanas barjeru vai
taisnas malas vadīklu. Tas uzlabo
griezuma precizitāti un mazina plātnes
saliekšanas iespēju.
g) Vienmēr lietojiet pareiza izmēra
un formas plātnes (rombveida
vai apaļas) asij. Plātnes, kas neatbilst
zāģa montāžas aprīkojumam, darbosies
ekscentriski, veicinot kontroles zudumu.
h) Nekad nelietojiet bojātas vai
nepareizas plātņu paplāksnes vai
skrūvi. Plātnes paplāksnes un skrūve ir īpaši
paredzētas šim zāģim optimālai tā darbībai un
drošai darbībai.
PAPILDU DROŠĪBAS
NOTEIKUMI VISIEM
ZĀĢIEM
Atsitiena un saistītie brīdinājumi
- atsitiens ir pēkšņa reakcija uz iespiestu,
atlecošu vai nepareizi centrētu zāģa plātni un
nekontrolētu zāģa pacelšanu no apstrādājamā
materiāla operatora virzienā;
- kad plātne ir cieši iespiesta vai iestrēgusi
iegriezumā, tā apstājas, bet motora reakcija
virza ierīci strauji atpakaļ operatora virzienā;
- Ja plātne zāģēšanas laikā sagriežas vai zaudē
līdzeno gaitu, plātnes aizmugurējās malas
zobi var iestrēgt koksnes augšējā virsmā,
liekot asmenim izlekt no iegriezuma operatora
virzienā.
Atsitiens rodas zāģa nepareizas lietošanas un/vai
nepareizu darba procedūru vai apstākļu rezultātā,
un no tā var izvairīties, ievērojot tālāk norādītos
piesardzības noteikumus.
a) Turiet zāģi stingri ar abām rokām
tādā stāvoklī, ka jūsu rokas spēj
izturēt atsitiena spēku.. Ķermenim
jāatrodas vienā vai otrā asmens pusē, bet
ne pretī plātnes kustības līnijai. Atsitiens
var likt zāģim lekt atpakaļ, tomēr operators
var kontrolēt atsitiena spēku, ja ievēro
piesardzības pasākumus.
b) Ja plātne iestrēgusi vai pārtrauc
zāģēt kāda iemesla dēļ, atlaidiet
mēlīti un turiet zāģi nekustīgi
materiālā, līdz asmens pilnīgi
apstājas.. Nekad nemēģiniet izņemt zāģi
no apstrādājamā materiāla un nevelciet to
atpakaļ, kamēr asmens ir kustībā vai kamēr
var rasties atsitiens. Apziniet situāciju un
veiciet koriģējošas darbības, lai mazinātu
asmens iestrēgšanu kokā.
c) Atsākot zāģēt materiālā, centrējiet
plātni iegriezumā un pārbaudiet, vai
zāģa zobi neiesprūst materiālā. Ja
zāģa plātne iestrēgst, tā var izlēkt no materiāla
vai radīt atsitienu, kad zāģi iedarbina no jauna.
d) Lielas materiāla plāksnes atbalstiet,
lai mazinātu risku asmenim iestrēgt
vai radīt atsitienu.
e) Lieliem paneļiem ir tendence
ieliekties no sava svara. Zem paneļa
abās pusēs griezuma līnijas un paneļa malas
Elektriskais ripzāģis LV
Page 45

tuvumā ir jānoliek atbalsti.
f) Neizmantojiet neasas vai bojātas
zāģa plātnes. Neasināti vai nepareizi
ievietotas plātnes veido šauru griezumu, kas
veicina spēcīgu frikciju, plātnes saspiešanu un
atsitienu.
g) Asmens dziļuma un slīpuma
regulēšanas svirām pirms zāģēšanas
uzsākšanas ir jābūt cieši pievilktām
un drošām. Ja zāģēšanas laikā regulēšanas
iestatījums mainās, tas var būt par iemeslu
asmens iestrēgšanai un atsitienam.
h) Veicot zāģēšanai esošās sienās
vai citās slēptās vietās, esiet īpaši
uzmanīgi. Asmens var skart tādus objektus,
kuri var radīt atsitienu.
vai apakšējais aizsargs nosedz
asmeni. Neaizsargāts, brīvs asmens var
radīt zāģa kustību atpakaļ, griežot visu, kas
ir ceļā. Ņemiet vērā, ka asmenim pēc mēlītes
atlaišanas vajadzīgs laiks, lai apstātos.
PAPILDU DROŠĪBAS
NOTEIKUMI RIPZĀĢIM
1. Vienmēr valkājiet putekļu masku, dzirdes
aizsarglīdzekļus un aizsargbrilles.
2. Lietojiet tikai tādas zāģa plātnes, kas
norādītas specikācijā.
3. Lietojiet tikai tādu asmens diametru, kas atbilst
atzīmēm.
DROŠĪBAS NOTEIKUMI
RIPZĀĢIM AR IEKŠĒJU
SVĀRSTA AIZSARGU
Apakšējais Aizsargs Funkcija
a) Pirms lietošanas pārbaudiet, vai
apakšējais aizsargs pareizi aizveras.
Nestrādājiet ar zāģi, ja apakšējais aizsargs
nekustas brīvi un neaizveras Nekad
neiespīlējiet un nepiesieniet apakšējo aizsargu
atvērtā stāvoklī. Ja zāģis nejauši nokrīt
zemē, apakšējais aizsargs var tikt salocīts.
Paceliet apakšējo aizsargu ar atvelkošo
rokturi un pārbaudiet, vai tas kustas brīvi un
neskar asmeni vai citas daļas visos leņķos un
griezuma dziļumos.
b) Pārbaudiet apakšējā aizsarga
atsperes darbību. Ja aizsargs un
atspere nedarbojas pareizi, pirms
lietošanas jāveic to apkope. Apakšējais
aizsargs var darboties gausi bojātu detaļu,
lipīgu nosēdumu vai uzkrājušos netīrumu dēļ.
c) Apakšējais aizsargs manuāli jāpaceļ
uz augšu tika īpašu griezumu,
piemēram, “gremdētu griezumu”
un “sarežģītu griezumu” gadījumā.
Paceliet apakšējo aizsargu ar atvilkšanas
rokturi, un, tikko asmens ieiet materiālā,
tas jāatlaiž. Visos citos zāģēšanas veidos
aizsargam jādarbojas automātiski.
d) Pirms zāģa novietošanas uz
darbgalda vai grīdas pārbaudiet,
PAPILDUS DROŠĪBAS
NOTEIKUMI
NOZĀĢĒŠANAS
MAŠĪNĀM
a) Aizsargs, kas ietilpst rīka
komplektācijā, ir cieši jāpiestiprina
pie elektrorīka un jānovieto
maksimālai drošībai, lai operatora
virzienā tiktu atsegts vismazākais
zāģripas iespējamais apjoms.
Pārvietojieties projām no rotējošā
diska plaknes pats un lieciet to darīt
blakusstāvētājiem. Aizsargs palīdz pasargāt
operatoru no salūzuša diska gabaliem un no
nejaušas saskares ar to.
b) Izmantojiet ar elektroinstrumentam
tikai ar līmēta armējuma vai dimanta
nogriešanas diska. Tas, ka piederumu var
pievienot šai elektroierīcei, nenozīmē, ka ir
garantēta droša darbošanās.
C) Uzrādītajam piederuma darba
ātrumam ir jābūt vismaz vienādam
ar elektroierīces maksimālo ātrumu,
kas uzrādīts uz elektroierīces.
Piederumi, kas tiek darbināti ātrāk, nekā to
nominālais darba ātrums, var izjukt.
d) Diski ir jālieto tikai paredzētajiem
nolūkiem. Piemēram: neslīpējiet ar
nogriešanai paredzētā diska sānmalu.
Abrazīvie nogriešanas diski ir paredzēti
slīpēšanai ar malu, tiem pieliktie sāniskie spēki
45
Elektriskais ripzāģis LV
Page 46

var izraisīt sabrukšanu.
e) Vienmēr izmantojiet nebojātas disku
apmales, kam ir pareizs izmērs
un forma, kas atbilst izvēlētajam
diskam. Pareizi diski atloki atbalsta disku,
tādējādi samazinot diska salūšanas iespēju.
f) Neizmantojiet stipri nodilušus
pastiprinātus diskus no lielākiem
elektrorīkiem. Lielākām elektroierīcēm
paredzētais disks nav piemērots mazākās
elektroierīces lielākam ātrumam un var
sabrukt.
g) Piederuma ārējam diametram
un biezumam ir jāiekļaujas
elektroierīces pieļaujamajos
parametros. Nepareiza izmēra piederumus
nevar atbilstoši aizsargāt vai vadīt.
h) Montāžas cauruma izmēram diskiem
un aplokiem ir pareizi jāsader ar
elektroierīces vārpstu. Piederumi
ar caurumiem, kas neatbilst elektroierīces
stiprinājumiem, var izraisīt disbalansu, stipri
vibrēt un var izsaukt kontroles zaudēšanu pār
instrumentu.
i) Nelietojiet bojātu piederumu. Pirms
46
katras lietošanas reizes apskatiet
diskus vai tur nav atlūzumi un
plaisas. Ja elektroierīce vai disks
tiek nomests, apskatiet, vai nav
bojājumu, vai uzstādiet nebojātu
disku. Pēc diska apskatīšanas un
uzstādīšanas novietojiet sevi un apkārtējos
prom no rotējošā diska plaknes un padarbiniet
elektroierīci pie maksimāla bezslodzes ātruma
vienu minūti. Bojāti piederumi parasti sabrūk
šīs pārbaudes laikā.
j) Lietojiet personīgos aizsarglīdzekļus.
Atkarībā no pielietojuma, lietojiet sejas
aizsargu, aizsargbrilles vai acenes. Ja
nepieciešams, lietojiet putekļu masku,
dzirdes aizsarglīdzekļus, cimdus un darba
priekšautu, kas spēj aizturēt sīkas abrazīva
un apstrādājamā materiāla daļiņas. Redzes
aizsarglīdzekļiem jāspēj aizturēt gružus, kas
rodas dažādās operācijās. Putekļu maskai vai
respiratoram jāspēj noltrēt daļiņas, kas rodas
darba laikā. Ilgstošs stiprs troksnis var izraisīt
dzirdes zudumu.
k) Neļaujiet apkārtējiem tuvoties darba
vietai tuvāk par drošo attālumu.
Visiem, kas atrodas darba zonā, jālieto
personīgie aizsarglīdzekļi. Apstrādājamā
materiāla vai bojāta piederuma šķembas var
aizlidot ārpus tiešās darba zonas un izraisīt
ievainojumu.
I) Strādājot vietās, kur griešanas
instruments var skart slēptus vadus,
kas ir zem sprieguma, vai pats
savu vadu, turiet elektroierīci aiz
izolētajiem rokturiem. Kontakts ar vadu
zem sprieguma var pakļaut spriegumam arī
ierīces metāla daļas un radīt strāvas triecienu
operatoram.
m) Novietojiet barošanas auklu attālu
no rotējošā piederuma. Ja jūs zaudējat
kontroli, auklu var pārgriezt vai aizķert, un
jūsu plaukstu vai roku var ieraut rotējošā
piederumā.
n) Nekad nenolieciet elektroierīci nost,
līdz piederums ir pilnībā apstājies.
Rotējošs piederums var aizķerties aiz virsmas
un izraut elektroierīci no jūsu kontroles.
o) Nedarbiniet elektroierīci, pārnēsājot
to sev pie sāniem. Nejaušs kontakts ar
rotējošu piederumu var aizķert jūsu apģērbu,
pieraujot piederumu pie jūsu ķermeņa.
p) Regulāri iztīriet elektroierīces
ventilācijas atveres. Motora ventilators
ievelk putekļus korpusā un pārmērīga metāla
putekļu uzkrāšanās var izraisīt elektrisku
apdraudējumu.
q) Nedarbiniet elektroierīci degošu
materiālu tuvumā. Dzirksteles var
aizdedzināt šos materiālus.
r) Nelietojiet piederumus, kuriem
nepieciešama dzesēšana ar
šķidrumu. Ūdens vai cita dzesētāja
izmantošana var izraisīt elektrisku triecienu vai
nāvējošu traumu.
ATSITIENA UN
SAISTĪTIE BRĪDINĀJUMI
Atsitiens ir pēkšņa reakcija uz iesprūdušu
vai aizķērušos rotējošu ripu. Iesprūšana vai
aizķeršanās izraisa strauju rotējošā piederuma
apstāšanos, kas, savukārt, liek nevadāmai
elektroierīcei pārvietoties piederuma rotācijai
pretējā virzienā ap saskares punktu.
Elektriskais ripzāģis LV
Page 47

Piemēram, ja abrazīvais disks aizķeras vai
iesprūst apstrādājamā materiālā, diska mala, kas
ieiet sprūšanas punktā, var iegrauzties materiāla
virsmā, izraisot diska izraušanos vai izlēkšanu
ārā. Disks var lēkt pretim vai projām no operatora,
atkarībā no diska kustības virziena iesprūšanas
punktā. Šādos apstākļos abrazīvie diski var arī
sabrukt.
Atsitiens rodas elektroierīces nepareizas
lietošanas un/vai nepareizu darba procedūru
vai apstākļu rezultātā, un no tā var izvairīties,
ievērojot tālāk norādītos piesardzības
noteikumus.
a) Uzturiet elektroierīcei ciešu
satvērienu un novietojiet savu
ķermeni un roku tā, lai ļautu jums
pretoties atsitiena spēkiem. Vienmēr
izmantojiet palīgrokturi, ja tāds ir, lai maksimāli
kontrolētu atsitienu vai griezes reakciju,
palaižot ierīci. Operators var kontrolēt griezes
reakciju vai atsitiena spēku, ja veic atbilstošus
piesardzības pasākumus.
b) Nekad nenovietojiet savas rokas
rotējoša piederuma tuvumā. Piederums
var atsisties pret jūsu roku.
c) Nenovietojiet savu ķermeni vienā
līnijā ar rotējošu disku. Atsitiens virzīs
ierīci virzienā, kas ir pretējs diska kustībai
iesprūšanas vietā.
d) Esiet sevišķi piesardzīgi, apstrādājot
stūrus, asas malas u.c., izvairieties
no piederuma atsišanās un
iesprūšanas. Stūriem, asām malām vai
atsperīgām vietām ir tendence iespiest
rotējošo piederumu un izraisīt kontroles
zudumu vai atsitienu.
e) Nepievienojiet zāģēšanas ķēdi,
kokgriešanas asmeni, segmentētu
dimanta disku ar perifērijas spraugu
lielāku par 10 mm vai zāģēšanas
plātni ar zobiem. Šādi asmeņi izraisa
biežus atsitienus un vadības zaudēšanu.
f) Neieķīlējiet disku un nepielietojiet
pārmērīgu spiediena spēku.
Necentieties izdarīt pārāk dziļus griezumus.
Diska pārslodze palielina slodzi un uzņēmību
pret diska sašķiebšanu vai iesprūšanu
griezumā un atsitiena vai diska sabrukšanas
iespēju.
g) Ja disks ir iestrēdzis vai pārtrauc
griezt jebkāda iemesla dēļ, izslēdziet
elektroierīci un turiet elektroierīci
nekustīgi, līdz disks pilnīgi apstājas.
Nekad nemēģiniet izņemt nogriešanas disku
no griezuma, kamēr disks ir kustībā, jo tas
var dot atsitienu. Apziniet situāciju un veiciet
koriģējošas darbības, lai novērstu diska
iestrēgšanu.
h) Nepārstartējiet griešanas darbību
darba detaļā. Ļaujiet diskam uzņemt
pilnus apgriezienus un uzmanīgi
ievadiet to griezumā. Ritenis var iestrēgt,
iet atpakaļ vai atsisties atpakaļ, ja elektroierīce
tiek pārstartēta darba detaļā.
i) Atbalstiet paneļus vai lielas detaļas,
lai mazinātu risku diskam iestrēgt un
dot atsitienu. Lielām detaļām ir tendence
ieliekties no sava svara. Atbalsti ir jānovieto
zem darba detaļas tuvu griešanas līnijai un
tuvu darba detaļas malai abās diska pusēs.
j) Veicot “iegremdētus griezumus”
esošās sienās vai citās slēptās
vietās, esiet īpaši uzmanīgi. Caurejošs
disks var pārgriezt gāzes vai ūdensvada
caurules, elektrisko instalāciju vai skart tādus
objektus, kuri var radīt atsitienu.
PAPILDU DROŠĪBAS
NOTEIKUMI
1. Vienmēr valkājiet putekļu masku.
47
Elektriskais ripzāģis LV
Page 48

SIMBOLI
48
Lai samazinātu traumas risku,
lietotājam ir jāizlasa rokasgrāmata
Dubulta izolācija
Uzmanību
Lietojiet ausu aizsargus
Lietojiet aizsargbrilles
Lietojiet putekļu masku
Elektropreču atkritumus nedrīkst
izmest kopā ar mājsaimniecības
atkritumiem. Nododiet nolietotās
ierīces speciālajās savākšanas vietās.
Par otrreizējās pārstrādes savākšanas
vietām konsultējieties ar vietējām
iestādēm vai pārdevēju.
Koks
Alumīnijs
Metāls
Nepareizi
Pareizi
Bloķēts
Atbloķēts
Dimanta disks
Pirms jebkāda darba, kas saistīta ar
pašu mašīnu, uzsākšanas, izņemiet
kontaktdakšu no sienas ligzdas
Nēsājiet aizsargcimdus
HSS disks
TCT disks
Elektriskais ripzāģis LV
Page 49

EKSPLUATĀCIJA
PIEZĪME: Pirms darbarīka lietošanas
rūpīgi izlasiet grāmatu ar norādījumiem.
PIELIETOJUMS:
Elektroierīce ir paredzēta koka un citu materiāli
garenzāģēšanai un šķērszāģēšanai pa taisnu
zāģēšanas līniju, atbalstot to cieši uz darba
detaļas.
MONTĀŽA UN
EKSPLUATĀCIJA
Darbība Attēls
Zāģēšanas asmens
uzlikšana un noņemšana
Drošības ieslēgšanas/
izslēgšanas slēdzis
Zāģu skaidu izņemšana Skat. C attēlu
Šķērszāģēšana un
garenzāģēšana
Paralēlā vadotne Skat. E1, E2 attēlu
Griešanas dziļuma
regulēšana
Iedziļinājumu griešana
Skat. A attēlu
Skat. B attēlu
Skat. D1, D2 attēlu
Skat. F1, F2 attēlu
Skat. G1, G2, G3,
G4, G5 attēlu
dekoratīvās virsmās, dimanta disks īzēm,
cementa plāksnēm, utt.
Lietojiet tikai tādas zāģa plātnes, kas norādītas
specikācijā.
TEHNISKĀ APKOPE
Pirms jebkuru regulēšanas, remonta
vai apkopes darbu veikšanas izņemiet
kontaktu no kontaktligzdas.
Uzturiet ierīces asas un tīras labākai un drošākai
veiktspējai. Ievērojiet instrukcijas eļļošanai
un piederumu nomaiņai. Periodiski apskatiet
elektroierīču vadus un, ja tie ir bojāti, salabojiet
tos autorizētā apkopes darbnīcā. Elektroierīcei
nav nepieciešama papildu eļļošana vai apkope.
Elektroierīcē nav detaļu, kuru apkope būtu
jāveic lietotājam. Nekad netīriet ierīci ar ūdeni
vai ķīmiskiem tīrīšanas līdzekļiem. Tīriet ierīci ar
sausu lupatiņu. Vienmēr glabājiet elektroierīci
sausā vietā. Sekojiet, lai motora atveres ir tīras.
Visiem ierīces vadības elementiem jābūt tīriem
no putekļiem. Ja ventilācijas atverēs pamanāt
dzirksteles, tas ir normāli un nebojās elektroierīci.
Ja tīkla aukla ir bojāta, lai izvairītos no briesmām,
tā ir jānomaina ražotājam, servisa pārstāvim vai
līdzīgai kvalicētai personai.
Periodiski iztīriet putekļus un atgriezumus no
aizsarga un pamatnes, lai nodrošinātu pareizu
darbību
49
IETEIKUMI DARBAM AR
RIPZĀĢI
Ja elektroierīce pārāk sakarst, darbiniet ripzāģi
bez slodzes 2 - 3 minūtes, lai atdzesētu motoru.
Izvairieties ierīci lietot ļoti lielā ātrumā ilgstoši.
Sargājiet zāģa asmeņus no triecieniem vai
grūdieniem. Spiežot zāģi pārāk spēcīgi, ierīces
veiktspēja samazinās un vienlaicīgi saīsinās arī
zāģa asmens kalpošanas mūžs. Zāģēšanas
gaita un griezuma kvalitāte ir būtiski atkarīga no
zāģa asmens tehniskā stāvokļa un zobu formas.
Tādēļ izmantojiet tikai asus zāģa asmeņus, kas ir
piemēroti darbam ar attiecīgo materiālu.
Asmeņu izvēle: 24 zobi vispārīgam darbam,
aptuveni 40 zobi smalkākiem griezumiem,
vairāk nekā 40 zobi ļoti smalkiem griezumiem
VIDES AIZSARDZĪBA
Elektropreču atkritumus nedrīkst izmest
kopā ar mājsaimniecības atkritumiem.
Nododiet nolietotās ierīces speciālajās
savākšanas vietās. Par otrreizējās pārstrādes
savākšanas vietām konsultējieties ar vietējām
iestādēm vai pārdevēju.
Elektriskais ripzāģis LV
Page 50

PROBLĒMU NOVĒRŠANA
Defekti Iespējamie cēloņi Iespējamais risinājums
Elektroierīce nepalaižas,
ieslēdzot ieslēgšanas/
izslēgšanas slēdzi.
Griešanas dziļums ir mazāks
nekā iestatīts.
Asmens griežas vai izslīd
Asmens negriež taisnā līnijā.
Sākot griešanu, asmens izdara
50
atsitienu
Nav ieslēgts barošanas vads
Barošanas vads ir bojāts
Ogles suka ir nodilusi
Zāģu skaidas uzkrājušās
pamatnes aizmugurē.
Asmens nav cieši
nostiprināts uz vārpstas.
Asmens ir nodilis.
Asmens nav pareizi
uzmontēts.
Zāģis netiek pareizi virzīts.
Asmens negriežas pietiekami
ātri
Pārbaudiet, lai pārliecinātos, ka
barošanas vads ir labi pievienots
strādājošā sienas kontaktligzdā.
Izslēdziet barošanas vadu.
Nomainiet to, izmantojot kvalicētu
apkopes personu.
Nomainiet oglekļa suku, izmantojot
kvalicētu apkopes personu.
Izkratiet laukā zāģu skaidas.
Apsveriet putekļsūcēja
pievienošanu putekļu savākšanai.
Noņemiet asmeni un samontējiet
to atpakaļ, kā aprakstīts nodaļā
Zāģa asmens montāža un
noņemšana.
Uzstādiet zāģim jaunu, asu asmeni.
Pārbaudiet vai asmens ir pareizi
uzmontēts.
Lietojiet paralēlo vadotni
Ļaujiet zāģa asmenim sasniegt
pilnu ātrumu, pirms uzsākt
materiāla griešanu.
Elektriskais ripzāģis LV
Page 51

ATBILSMES
DEKLARÂCIJA
Mçs,
POSITEC Germany GmbH
Konrad-Adenauer-Ufer 37
50668 Köln
Paziòojam, ka prece:
Apraksts WORX Elektriskais ripzāģis
Tips WX423 WX423.1 (4- Iekārtas
apzīmējums, zāģa raksturojums)
Funkcija Dažādu materiālu griešana,
izmantojot rotējošu robaino asmeni
Atbilst ðâdâm direktîvâm:
2006/42/EC
2004/108/EC
2011/65/EU
Atbilst ðâdiem normatîviem:
EN 55014-1
EN 55014-2
EN 61000-3-2
EN 61000-3-3
EN 60745-1
EN 60745-2-5
EN 60745-2-22
Iesaistītā organizācija, kam sniegts paziņojums
Nosaukums Russell Nicholson
Adrese Positec Power Tools
(Europe)Ltd, PO Box 152,Leeds,LS10
9DS,UK
51
Suzhou 2014/12/24
Allen Ding
DeputAts Galvenais Inženieris, Testēšana un
Sertikācija
Elektriskais ripzāģis LV
Page 52

1. FIKSATORIAUS IŠJUNGIMO MYGTUKAS
2. RANKENA SU MINKŠTA DANGA
3. ŠEŠIAKAMPIS RAKTAS
4. SAUGOS ĮJUNGIMO / IŠJUNGIMO JUNGIKLIS
5. SUKLIO FIKSAVIMO RANKENĖLĖ
6. APATINIS APSAUGINIS DISKO GAUBTAS
7. APATINĖS APSAUGINĖS DETALĖS SVIRTIS
8. STACIONARUS VIRŠUTINIS APSAUGINIS GAUBTAS
9. DULKIŲ IŠTRAUKIMO ANGA
10. VAKUUMO ADAPTERIS
11. GYLIO REGULIAVIMO SVIRTIS
12. PAGRINDO PLOKŠTĖ
13. PJŪKLO GELEŽTĖ (Žr. A)
14. GELEŽTĖS VARŽTAS (Žr. A)
15. LYGIAGRETUS KREIPTUVAS
16. LYGIAGREČIOJO KREIPTUVO FIKSAVIMO DETALĖ
17. IŠORINIS FLANŠAS (Žr. A)
52
Ne visi pavaizduoti ar aprašyti priedai yra įtraukti į standartinį komplektą.
Elektrinis diskinis pjūklas LT
Page 53

TECHNINIAI DUOMENYS
Tipas WX423 WX423.1(4- įrenginio paskirtis, pjūklo atstovas)
Nominali įtampa:
Nominali galia 400W
Nominalus sūkių skaičius be apkrovos: 3600/min
Disko dydis 85mmx15mm
TCT diskas 85mmx1.2mmx15mmx24T
HSS diskas 85mmx1.2mmx15mmx44T
Deimantinis diskas 85mmx1.2mmx15mmx60G
Maks. pjovimo gylis 27mm
Rekomenduojamas maksimalus ruošinio storis
Mediena 27mm
Aliuminis 3mm
PVC vamzdžiai (spindulys) 13mm
Plytelės 8mm
Lakštinis plienas 0.91mm
Dviguba izoliacija
Mašinos svoris 1.4kg
Veleno sriegių dydis M5
Pjovimo disko storis
TCT diskas 0.8mm
HSS diskas 0.65mm
Deimantinis diskas
230–240V~50Hz
0.8mm
53
/ll
TRIUKŠMO DUOMENYS
Ávertintas triukšmo lygis LpA: 82Дб(A
Ávertinta garso galia LwA: 93Дб(A
KPA& KWA 3.0Дб(A
Dėvėkite ausų apsaugą.
Elektrinis diskinis pjūklas LT
Page 54

INFORMACIJA APIE VIBRACIJĄ
Visos vibracijos vertės (triašio vektoriaus suma), nustatytos pagal EN 60745:
Pjovimo mediena: a
Vibracijos skleidimo vertė
Kad bendra paskelbtosios vibracijos vertė gali būti naudojama vienam įrankiui palyginti su kitu, ir taip
pat gali būti naudojama preliminariam poveikio įvertinimui.
ĮSPĖJIMAS: naudojant elektrinį įrankį, vibracijos skleidimo vertė gali skirtis nuo paskelbtos
vertės, priklausomai nuo įrankio naudojimo būdų, atsižvelgiant į šiuos pavyzdžius ir kitus įrankio
naudojimo variantus:
Įrankio naudojimo būdo ir pjaunamos ar gręžiamos medžiagos.
Įrankis yra geros būklės ir gerai prižiūrimas.
Tinkamų įrankio priedų naudojimas ir užtikrinimas, kad jis būtų aštrus ir geros būklės.
Rankenų suėmimo tvirtumas ir ar naudojami apsaugos nuo vibracijos priedai.
Be to, įrankis yra naudojamas taip, kaip numato jo konstrukcija ir šios instrukcijos.
Šis įrankis gali sukelti rankų vibracijos sindromą, jei naudojamo metu nėra atitinkamai valdomas.
Neapibrėžtumas K = 1.5m/s²
Metalo pjovimas: a
Neapibrėžtumas K = 1.5 m/s²
< 2,5m/s2
h,W
< 2,5m/s
h,M
2
54
ĮSPĖJIMAS: siekiant tikslumo, nustatant skleidimo lygį konkrečiomis sąlygomis reikia taip pat
atsižvelgti į visas darbo ciklo dalis, kaip antai laikotarpius, kai įrankis išjungiamas ir kai jis veikia
tuščiąja eiga, o ne atliekant darbą. Tai gali ženkliai sumažinti skleidimo lygį visu darbo laikotarpiu.
Kaip padėti sumažinti vibracijos skleidimo pavojų
VISADA naudokite aštrius kaltus, grąžtus ir peilius.
Įrankį prižiūrėkite laikydamiesi šių instrukcijų ir visada gerai sutepkite (kai taikoma).
Jei įrankį reikia naudoti reguliariai, įsigykite apsaugos nuo vibracijos priedus.
Nenaudokite įrankio esant 10oC ar žemesnei temperatūrai.
Sudarykite darbo tvarkaraštį, kad didelę vibraciją skleidžiančio įrankio naudojimo laikotarpį
suskirstytumėte į kelias dienas.
PRIEDAI
WX423 WX423.1
TCT diskas: 24T medienai
Lygiagretus kreiptuvas
Vakuuminis adapteris
Šešiakampis raktas
Deimantinis diskas
HSS diskas 44T
Visus priedus rekomenduojame įsigyti parduotuvėje, kurioje pirkote įrankį. Naudokite geros kokybės
priedus, pažymėtus gerai žinomu prekės ženklu. Išsamesnės informacijos ieškokite šio vadovo darbinių
patarimų skyriuje arba ant priedų pakuotės. Patarti gali ir parduotuvės personalas.
1 1
1 1
1 1
1 1
/ 1
/ 1
Elektrinis diskinis pjūklas LT
Page 55

SAUGOS INSTRUKCIJOS
a) DĖMESIO: Rankas laikykite
toliau nuo pjovimo srities ir
geležtės. Jei abiem rankomis laikysite
pjūklą, geležtė negalės pjauti.
b) Nesilenkite po darbine detale.
Apsauginė detalė negali apsaugoti jūsų nuo
geležtės po apdirbama detale.
c) Pjovimo gylį sureguliuokite iki
apdirbamos detalės storio. Po
apdirbama detale turi matytis mažiau nei pusė
geležtės danties.
d) Niekada pjaunamos detalės
nelaikykite rankose ar pasidėję ant
kojos. Apdirbamą detalę pritvirtinkite prie
stabilios platformos. Svarbu tinkamai pritvirtinti
detalę, kad būtų minimalus kontaktas su kūnu,
kad nesusiliestų geležtė ar neprarastumėte
kontrolės.
e) Atlikdami veiksmą, kai pjovimo
įrankis gali prisiliesti prie paslėptų
laidų ar savo kabelio, elektra
valdomą įrankį laikykite už izoliuotų
paėmimo paviršių. Kontaktas su
veikiančiu laidu „įjungs“ atidengtas metalines
elektra maitinamo įrankio dalis ir nutrenks
operatorių.
f) Skaldydami visada naudokite
skaldymo kreiptuvą arba tiesų krašto
kreiptuvą. Tai pagerina pjovimo tikslumą ir
sumažina geležtės susilietimo tikimybę.
g) Visada naudokite geležtę su teisingo
dydžio ir formos (rombo ar apvalios
formos) ašies angomis. Geležtė,
neatitinkanti pjūklo montavimo aparatūros
veiks ekscentriškai, todėl pjūklo galite
nesuvaldyti.
h) Niekada nenaudokite sugadintų
ar neteisingų geležtės poveržlių
ar varžtų. Geležtės poveržlės ir varžtai
yra specialiai sukurti jūsų pjūklui ir suteikia
optimalų efektyvumą ir naudojimo saugumą.
TOLESNĖS SAUGOS
INSTRUKCIJOS VISIEMS
PJŪKLAMS
Atšokimo priežastys ir susiję įspėjimas
- atšokimas – tai staigi reakcija į sugnybtą,
sulenktą ar neteisingai sulygiuotą pjūklo
geležtę, kuri sukelia nekontroliuojamą
pjūklo pakilimą nuo apdirbamos detalės link
operatoriaus;
- kai geležtė stipriai sugnybiama ar sulenkiama
uždaromos įpjovos, ji nustoja veikti ir
variklis įrenginį greitai paslenka atgal link
operatoriaus;
- jei geležtė pjaunant susukama ar neteisingai
sulygiuojama, dantys ties galine geležtės
briauna gali įsikasti į viršutinį medienos
paviršių ir taip geležtė išlipa iš įpjovos bei
atšoka atgal link operatoriaus.
Atšokimą sukelia neteisingas pjūklo naudojimas
ir / arba neteisingos naudojimo procedūros ar
sąlygos ir to galima išvengti laikantis atitinkamų
toliau aprašytų saugos priemonių.
a) Pjūklą tvirtai laikykite abiem
rankomis, o rankas padėkite taip,
kad atlaikytumėte atšokimą.
Atsistokite vienoje geležtės pusėje,
tačiau ne vienoje linijoje su ja. Dėl
atšokimo pjūklas gali šoktelėti atgal, tačiau
jas gali kontroliuoti operatorius, imdamasis
atitinkamų atsargumo priemonių.
b) Kai geležtė sukimba arba dėl kokios
nors priežasties nutraukiamas
pjovimas, atleiskite spragtuką ir
palaikykite pjūklą nejudindami
medžiagoje, kol geležtė visiškai
sustos. Niekada nebandykite ištraukti pjūklo
iš dėtelės ar traukti jo atgal, kol geležtė juda ar
gali atšokti. Patikrinkite ir imkitės pataisomųjų
veiksmų, kad pašalintumėte geležtės sukibimo
priežastį.
c) Toliau tęsdami detalės pjovimą
pjūklo geležtę nustatykite ties
įpjovos centru ir patikrinkite,
ar pjūklo dantys nėra sukibę su
medžiaga. Jei pjūklo geležtė sukibusi, ji gali
pakilti į viršų arba atšokti nuo detalės pjūklą
įjungus.
d) Norėdami minimaliai sumažinti
geležtės sugnybimo ir atšokimo
pavojų palaikykite dideles detales.
Didelės detalės gali nulinkti nuo savo pačių
svorio. Po detale abiejose pusėse, šalia
pjovimo linijos ir prie detalės krašto reikia
padėti atramas.
e) Nenaudokite atšipusių ar sugadintų
geležčių. Naudojant nepaaštrintas ar
netinkamai nustatytas geležtes gaunama
siaura įpjova, kuri sukelia didelę trintį, geležčių
sukibimą ir atšokimą.
55
Elektrinis diskinis pjūklas LT
Page 56

f) Geležtės gylis ir nuožulnumą
reguliuojančios ksavimo svirtys
turi būti standžios ir tvirtos prieš
pradedant jauti. Jei pjaunant geležtės
sureguliavimas pasislenka, geležtė gali sulinkti
ir atšokti.
g) Pjaudami link sienų ar kitų aklinų
vietų elkitės itin atsargiai. Išsikišusi
geležtė gali supjaustyti atšokimą sukeliančius
daiktus.
SAUGOS INSTRUKCIJA
DISKINIAM PJŪKLUI SU
VIDINIU ŠVYTUOKLĖS
APSAUGINE DETALE
Apatinė Apsauga Funkcija
a) Prieš kiekvieną naudojimą
patikrinkite, ar apatinė apsauginė
detalė tinkamai uždaryta. Pjūklo
nenaudokite, jei apatinė apsauginė detalė
laisvai nejuda ir nuolat užsidaro. Niekada
nesuspauskite ar nesuriškite apatinės
56
apsauginės detalės atviroje padėtyje. Pjūklą
atsitiktinai numetus gali sulinkti apatinė
apsauginė detalė. Apatinę apsauginę
detalę pakelkite su ištraukiama rankena ir
patikrinkite, ar ji laisvai juda visais pjovimo
kampais ir gyliais ir nelieskite geležtės ar bet
kurios kitos dalies.
b) Patikrinkite apatinės apsauginės
detalės spyruoklės veikimą. Jei
apsauginė detalė ir spyruoklė veikia
netinkamai, prieš naudojimą jas reikia
pataisyti. Apatinė apsauginė detalė tingiai gali
veikti dėl sugadintų detalių, gumos nuosėdų ar
susikaupusių nuolaužų.
c) Apatinę apsauginę detalę
neautomatiškai reikia ištraukti tik
specialiam pjovimui, pvz., kišamam
arba sudėtiniam pjovimui. Apatinę
atsarginę detalę pakelkite už ištraukiamos
rankos, o kai tik geležtė įeis į medžiagą,
apatinę atsarginę detalę reikia atleisti.
Visokiam kitokiam pjovimui apatinė atsarginė
detalė turi veikti automatiškai.
d) Visada prieš pjūklą padėdami ant
suolo ar grindų stebėkite, ar apatinė
atsarginė detalė dengia geležtę.
Neapsaugota, kabotažo geležtė pjūklą privers
slinktis atbulai, pjaunant viską, kas pasitaikytų
kelyje. Atminkite, kiek laiko prireikia geležtei
sustoti atleidus jungiklį.
PAPILDOMOS SAUGOS
TAISYKLĖS DISKINIAM
PJŪKLUI
1. Visada dėvėkite kaukę nuo dulkių, klausos ir
akių apsaugos priemones.
2. Naudokite tik specikacijose
rekomenduojamas pjūklo geležtes.
3. Naudokite tik ženklais nurodyto skersmens
geležtes.
PAPILDOMOS PJOVIMO
PRIETAISŲ NAUDOJIMO
SAUGOS TAISYKLĖS
a) Norint užtikrinti maksimalią saugą,
pateiktą apsauginį skydą privaloma
tvirtai pritvirtinti prie elektrinio
įrankio, kad būtų neuždengta
minimali disko dalis. Nesiartinkite prie
besisukančio disko plokštumos patys ir
neleiskite artyn pašalinių žmonių. Apsauginis
skydelis apsaugo operatorių nuo nulūžusių
disko fragmentų ir atsitiktinio kontakto su
disku.
b) Su šiuo elektriniu įrankiu naudokite
tik korundinius arba deimantinius
pjovimo diskus. Vien tai, kad priedas gali
būti pritvirtintas prie Jūsų prietaiso, neužtikrina
saugaus darbo su juo.
C) Nominalus priedo greitis turi būti
bent jau lygus didžiausiam galimam
greičiui, nurodytam ant elektros
prietaiso. Priedai, veikiantys didesniu nei
projektiniu prietaiso greičiu gali netikėtai
atitrūkti nuo prietaiso.
d) Diskai turi būti naudojami tik
rekomenduojamoms operacijoms.
Pavyzdžiui: nešlifuokite su pjovimo
disko šonu. Šlifuojamojo pjovimo diskai yra
skirti periferiniam šlifavimui, o tokius diskus
veikiančios šoninės jėgos gali sutrupinti juos.
e) Visuomet naudokite neapgadintas,
Elektrinis diskinis pjūklas LT
Page 57

pasirinktam diskui tinkamo
skersmens diskų junges. Tinkamos
diskų jungės laiko diską ir taip sumažina disko
sulaužymo galimybę.
f) Nenaudokite nuo didesnių elektrinių
įrankių nuimtų, susidėvėjusių
korundinių diskų. Diskas, skirtas
didesniam elektros prietaisui, netinka
didesniam mažesnio įrankio greičiui ir gali
trūkti.
g) Išorinis Jūsų priedo skersmuo ir
storis turi atitikti Jūsų elektros
prietaiso našumo koecientą.
Netinkamo dydžio priedai negali būti deramai
apsaugoti ar valdomi.
h) Užmaunamų diskų ar anšų skylutės
dydis turi atitikti elektros prietaiso
suklį. Priedai, kurių skylės neatitinka
metalinės prietaiso detalės, ant kurios
montuojami tokie priedai, išsibalansuos ir
smarkiai vibruos, dėl ko galite nesuvaldyti
prietaiso.
i) Nenaudokite pažeisto priedo.
Kiekvieną kartą prieš pradėdami
naudoti diskus, patikrinkite, ar
juose nėra nuolaužų ir įtrūkimų. Jeigu
elektrinis įrankis arba diskas buvo numestas,
patikrinkite, ar nėra pažeidimų arba naudokite
nepažeistą diską. Patikrinę ir uždėję diską,
atsistokite atokiai nuo besisukančio disko
vietos ir neleiskite artyn pašalinių asmenų;
paleiskite elektrinį įrankį vienai minutei
maksimaliu pajėgumu be apkrovos. Pažeisti
priedai šio bandymo metu paprastai sulūžta.
j) Dėvėkite asmeninės apsaugos
priemones. Priklausomai nuo
prietaiso naudojimo, dėvėkite
antveidžius, užtamsintus akinius
ir apsauginius akinius. Jei reikia,
dėvėkite nuo dulkių apsaugančias kaukes,
klausos apsaugos priemones, pirštines
ir darbinę prijuostę, galinčią sustabdyti
smulkias šlifavimo metu atsiskiriančias
daleles ar šlifuojamos medžiagos
fragmentus. Naudojama akių apsauga turi
gebėti sustabdyti lekiančias nuolaužas,
generuojamas įvairių operacijų metu. Nuo
dulkių apsaugančios kaukės ir respiratoriai
turi gebėti ltruoti daleles, susidarančias Jūsų
vykdomos operacijos metu. Ilgą laiką veikiami
didelio triukšmo, galite apkursti.
k) Pasirūpinkite, kad šalia dirbantys
asmenys laikytųsi saugaus atstumo
nuo darbo zonos. Visi į darbinę zoną
patenkantys asmenys turi dėvėti asmeninės
apsaugos priemones. Apdorojamos
medžiagos arba sulūžusio priedo fragmentai
gali nuskristi ir sužaloti asmenis, esančius
iškart už darbinės zonos.
I) Atlikdami veiksmą, kai pjovimo
įrankis gali prisiliesti prie paslėptų
laidų ar savo kabelio, elektra
valdomą įrankį laikykite už izoliuotų
paėmimo paviršių. Kontaktas su
veikiančiu laidu „įjungs“ atidengtas metalines
elektra maitinamo įrankio dalis ir nutrenks
operatorių.
m) Laidą nutieskite taip, kad jis būtų
atokiai nuo besisukančio priedo.
Nesuvaldžius prietaiso, laidas gali būti
nupjautas arba užkabintas, o Jūsų plaštaka
arba ranka įtraukta į besisukantį priedą.
n) Nepadėkite prietaiso (laikykite
pakeltą) tol, kol priedas visiškai
nustoja suktis. Besisukantis priedas gali
išskirti į paviršių, o prietaisas ištrūkti Jums iš
rankų.
o) Nešdami prietaisą nuleistą šone,
būtinai jį išjunkite. Atsitiktinio kontakto su
besisukančiu priedu metu Jūsų rūbai gali būti
įtraukti, o prietaisas priartėti prie Jūsų.
p) Reguliariai valykite ventiliacines
elektros prietaiso angas. Variklio
ventiliatorius trauks dulkes į korpuso vidų, o
pernelyg didelis susikaupęs metalo miltelių
kiekis gali sąlygoti su elektra susijusius
pavojus.
q) Nenaudokite elektros prietaiso arti
degių medžiagų. Kibirkštys gali uždegti
tokias medžiagas.
r) Nenaudokite priedų, kuriems reikia
aušinimo skysčio. Vandens ar kitų
aušinimo skysčių naudojimas gali sąlygoti
elektros šoką.
57
Elektrinis diskinis pjūklas LT
Page 58

ATŠOKIMO PRIEŽASTYS
IR SUSIJĘ ĮSPĖJIMAS
Atatranka yra staigi reakcija į užsikirtusį arba
įstrigusį besisukantį diską. Užsikirtęs arba įstrigęs
besisukantis priedas greitai stabdomas, dėl ko
nekontroliuojamas elektros prietaisas užstrigimo
taške stumiamas kryptimi, priešinga priedo sukimos krypčiai.
Pavyzdžiui, jei šlifavimo diskas užsikerta arba
užstringa šlifuojamoje medžiagoje, užstrigęs
disko kraštas gali užsikabinti už medžiagos
paviršiaus ir “išlipti” arba iššokti. Diskas gali staigiai artėti prie arba tolti nuo operatoriaus, priklausomai nuo disko judėjimo krypties užsikirtimo
taške. Tokiomis aplinkybėmis šlifavimo diskas gali
ir sulūžti.
Atatranką lemia netaisyklingas elektros prietaiso
naudojimas ir (arba) netinkamos eksploatacinės
sąlygos; atatrankos galima išvengti, pritaikius
toliau nurodytas tinkamas apsaugos priemones.
a) Tvirtai laikykite elektrinį įrankį
ir stovėkite taip, kad jūsų kūnas
bei ranka netrukdytų priešintis
58
atatrankos jėgoms. Visuomet naudokite
pagalbinę rankeną, jei pridėta, kuri leidžia
optimaliai kontroliuoti atatranką arba
sąsūkos momento reakciją paleidimo metu.
Operatorius gali kontroliuoti sąsūkos momento
reakcijas ar atatrankos jėgas, pritaikęs
tinkamas apsaugos priemones.
b) Rankas visuomet laikykite atokiai
nuo besisukančio priedo. Priedas gali
atsitrenkti į Jūsų ranką.
c) Nestovėkite vienoje linijoje su
besisukančiu disku. Atatrankos jėga
pasuks prietaisą kryptimi, priešinga disko
judėjimo krypčiai užsikirtimo taške.
d) Būkite itin atsargūs, apdorodami
kampus, aštrius kraštus ir pan.,
neleiskite prietaisui šokinėti ir
užsikabinti. Apdorojant kampus, aštrius
kraštus arba prietaisui šokinėjant, priedas
dažnai stringa, dėl ko operatorius praranda
prietaiso kontrolę ir patiria atatranką.
e) Nenaudokite pjūklo grandinės,
medžio raižymo disko, segmentuoto
deimantinio disko, jeigu šoninis
tarpelis yra didesnis nei 10 mm, arba
dantyto pjovimo disko. Tokie diskai
dažnai sukelia atatranką ir įrankis tampa
nevaldomas.
f) „Neįstrigdykite“ disko ir pernelyg
nespauskite jo. Nemėginkite atlikti
pernelyg gilių pjūvių. Per didelis diskui
tenkantis slėgis padidina apkrovą ir disko
susisukimo arba užstrigimo įpjovoje tikimybę,
o taip pat atatrankos arba disko sulūžimo
galimybę.
g) Diskui stringant arba kai dėl kokių
nors priežasčių pjovimas yra
nutraukiamas, išjunkite elektrinį
įrankį ir laikykite įrankį ruošinyje,
nejudindami jo, kol diskas visiškai
sustos. Niekada nebandykite traukti disko
iš pjūvio, kai diskas sukasi, nes gali susidaryti
atatranka. Ištirkite ir imkitės tinkamų veiksmų,
kad pašalintumėte disko užstrigimo priežastį.
h) Nepradėkite pjauti, kai jo diskas yra
ruošinyje. Palaukite, kol diskas ims
suktis visu greičiu, tada vėl atsargiai
nuleiskite jį į pjūvį. Vėl paleidus elektrinį
įrankį ruošinyje, jis gali užstrigti, iššokti arba
gali vėl įvykti atatranka.
i) Paremkite plokštes arba kitus labai
didelius ruošinius, kad maksimaliai
sumažėtų pavojus suspausti diską
ir sukelti atatranką. Dideli paviršiai gali
įlinkti nuo savo pačių svorio. Atramos turi
būti padėtos po apdorojamu paviršiumi, šalia
pjovimo linijos ir šalia apdorojamo paviršiaus
krašto abiejose disko pusėse.
j) Ypač atsargiai darykite “kišenines”
įpjovimas į sienas ar kitas aklinas
plokštumas. Prasikišęs diskas gali įpjauti
dujų arba vandens tiekimo vamzdžius,
elektros laidus ar objektus, kurie gali sąlygoti
atatranką..
PAPILDOMOS SAUGOS
TAISYKLĖS
1. Visada dėvėkite kaukę nuo dulkių.
Elektrinis diskinis pjūklas LT
Page 59

ŽENKLAI
Kad nesusižalotų, vartotojas turi
perskaityti prietaiso eksploatavimo
vadovą
Dviguba izoliacija
Įspėjimas
Dėvėkite ausų apsaugą
Dėvėkite akių apsaugą
Dėvėkite kaukę nuo dulkių
Elektrinės atliekos neturi būti
išmetamos kartu su buitinėmis
atliekomis. Jei turite galimybę,
perdirbkite jas. Patarimo dėl
perdirbimo kreipkitės į vietinius
specialistus ar atstovą.
Mediena
Aliuminis
Metalas
Netinkamai
Tinkamai
Užrakinti
59
Atrakinti
Deimantinis diskas
Prieš pradėdami bet kokius prietaiso
reguliavimo ar remonto darbus,
išjunkite jo kištuką iš elektros lizdo.
Mūvėkite apsaugines pirštines
HSS diskas
TCT diskas
Elektrinis diskinis pjūklas LT
Page 60

NAUDOJIMO
INSTRUKCIJOS
Pastaba: prieš naudodamiesi įrankiu,
atidžiai perskaitykite instrukcijas.
deimantiniai diskai plytelėms, cemento plokštėms
ir pan.
Naudokite tik specikacijose rekomenduojamas
pjūklo geležtes.
NUMATYTA PASKIRTIS:
Įrankis skirtas tvirtai atremtiems medienos ir kitų
medžiagų ruošiniams pjauti ir pjaustyti tiesia linija.
SURINKIMAS IR
NAUDOJIMAS
Veiksmas Paveikslėlis
Pjovimo disko uždėjimas ir
nuėmimas
Saugos įjungimo /
išjungimo jungiklis
Pjuvenų pašalinimas Žr. C
Įstrižasis pjovimas ir
pjaustymas
Lygiagretusis kreiptuvas Žr. E1, E2
60
Pjovimo gylio reguliavimas Žr. F1, F2
Įleidžiamasis pjovimas
Žr. A
Žr. B
Žr. D1, D2
Žr. G1, G2, G3,
G4, G5
DARBINIAI PATARIMAI
DISKINIAM PJŪKLUI
Jei elektra valdomas įrankis per daug įkaista,
paleiskite diskinį pjūklą be apkrovos 2-3
minutėms, kad atauštų variklis. Stenkitės ilgai
nenaudoti esant itin mažam greičiui.
Saugokite pjūklo geležtes nuo mechaninio
poveikio ir smūgių. Per didelė apkrova
akivaizdžiai sumažina prietaiso našumą ir
trumpina pjūklo geležčių tinkamumo naudojimui
laiką. Pjūklo našumą (greitį) ir pjovimo kokybė
lemia pjūklo geležtės būklė ir dantelių forma.
Todėl naudokite tik aštrias geležtes, kurios tinka
apdorojamai medžiagai.
Diskų pasirinkimas: 24 dantukų diskai įprastam
darbui, maždaug 40 dantukų diskai tikslesniems
pjūviams, daugiau nei 40 dantukų diskai labai
tiksliam ruošinių trapiais paviršiais pjovimui,
PRIEŽIŪRA
Prieš reguliuodami, apžiūrėdami ar
remontuodami įrankį, atjunkite jį nuo
maitinimo šaltinio.
Kad darbas vyktų geriau ir saugiau, įrankiai
visuomet turi būti aštrūs. Vadovaukitės
nurodymais, kaip tepti ir keisti priedus.
Reguliariai tikrinkite įrankių laidus ir, jeigu jie
pažeisti, atiduokite pataisyti į įgaliotąjį techninės
priežiūros centrą. Jūsų elektrinio įrankio tepti
ar tvarkyti papildomai nereikia. Jūsų elektra
maitinamame įrankyje nėra dalių, kurias turėtų
tvarkyti vartotojas. Niekada elektra maitinamam
įrankiui valyti nenaudokite vandens ar cheminių
valiklių. Nuvalykite sausu skudurėliu. Visada
elektra valdomą įrankį laikykite sausoje vietoje.
Variklio ventiliacijos angas laikykite švarias.
Visus darbinius valdiklius laikykite be dulkių.
Jei ventiliacijos angose pamatysite kibirkščių
– tai normalu ir jūsų elektra valdomo įrankio
nesugadins.
Jei elektros maitinimo laidas yra pažeistas,
siekiant išvengti pavojaus, jį pakeisti turi
gamintojas, jo paslaugų agentas ar panašią
kvalikaciją turintys asmenys.
Reguliariai valykite dulkes ir pjuvenas nuo
apsauginio gaubto bei pagrindo, kad įrankis
tinkamai veiktų.
APLINKOS APSAUGA
Elektrinės atliekos neturi būti išmetamos
kartu su buitinėmis atliekomis. Jei turite
galimybę, perdirbkite jas. Patarimo dėl
perdirbimo kreipkitės į vietinius specialistus ar
atstovą.
Elektrinis diskinis pjūklas LT
Page 61

TRIKČIŲ ŠALINIMAS
Požymis Galimos priežastys Galimas sprendimas
Neprijungtas elektros laidas.
Įrankis neįsijungia, naudojant
įjungimo / išjungimo jungiklį
Pjovimo gylis yra mažesnis, nei
nustatytas.
Diskas prasisuka arba
praslysta
Diskas pjauna ne tiesia linija
Pradėjus pjauti, diskas atšoka
Nutrūko maitinimo laidas.
Nusidėvėjo anglinis šepetėlis
Pagrindo gale prisikaupė
pjuvenų.
Diskas netvirtai užveržtas ant
veleno.
Diskas atbuko.
Netinkamai sumontuotas
diskas.
Netinkamai kreipiamas
pjūklas.
Diskas sukasi nepakankamai
greitai.
Patikrinkite, ar maitinimo laidas
yra tinkamai prijungtas prie įrankio
išvesties lizdo.
Atjunkite maitinimo laidą. Atiduokite
įrankį kvalikuotam techninės
priežiūros specialistui, kad pakeistų
laidą.
Atiduokite įrankį kvalikuotam
techninės priežiūros specialistui,
kad pakeistų anglinį šepetėlį.
Pašalinkite pjuvenas. Jei įmanoma,
išsiurbkite dulkių siurbliu.
Nuimkite diską ir vėl jį
sumontuokite, kaip aprašyta
skyriuje „Pjovimo disko
nuėmimas ir uždėjimas“.
Sumontuokite ant pjūklo naują
aštrų diską.
Įsitikinkite, ar diskas sumontuotas
tinkamai.
Naudokite lygiagretųjį kreiptuvą.
Prieš pradėdami pjauti ruošinį,
palaukite, kol pjovimo diskas
pasieks maksimalų greitį.
61
Elektrinis diskinis pjūklas LT
Page 62

ATITIKTIES
DEKLARACIJA
Mes,
POSITEC Germany GmbH
Konrad-Adenauer-Ufer 37
50668 Köln
Deklaruojame, kad gaminys,
Aprašymas WORX Elektrinis diskinis
pjūklas
Tipas WX423 WX423.1 (4- įrenginio
paskirtis, pjūklo atstovas)
Pareigos Įvairių medžiagų pjovimas
besisukančiu dantytuoju disku
Atitinka šias direktyvas,
2006/42/EC
2004/108/EC
2011/65/EU
Standartai atitinka:
EN 55014-1
EN 55014-2
EN 61000-3-2
62
EN 61000-3-3
EN 60745-1
EN 60745-2-5
EN 60745-2-22
Asmuo, įgaliotas kompiliuoti techninį failą,
Pavadinimas Russell Nicholson
Adresas Positec Power Tools
(Europe)Ltd, PO Box 152,Leeds,LS10
9DS,UK
Suzhou 2014/12/24
Allen Ding
Vyriausiasis inžinierius Pavaduotojas, Testavimas ir
Sertikavimas
Elektrinis diskinis pjūklas LT
Page 63

Page 64

www.worx.com
Copyright © 2015, Positec. A ll Rights Res erved.
2PSC16APK11006A0
 Loading...