

WorldSpace TONGSHI User Manual

TONGSHI
WorldSpace Radio
User Manual
Please read this manual carefully and follow its instructions before using
Tongshi WorldSpace Radio (“Radio”).
Precautions:
♦
This Radio is designed to perform optimally when used with the genuine
Tongshi designated accessories (“Tongshi Accessories”). You may use
non-Tongshi Accessories with this Radio. However, Tongshi makes no
warranties concerning, and is not responsible for damages resulting from,
use of non Tongshi Accessories.
♦
While the power is on, the Radio’s internal or external wire should not be
unplugged or disconnected. This misuse may damage the Radio, antenna
or computer permanently.
♦
Never place the Radio in close proximity to electric motors or other
equipment generating strong magnetic fields that may cause malfunctions
or corrupt image data.
Trademark Acknowledgements:
♦
TONGSHI is a trademark of Xi’an Tongshi Data Corp. Limited.
♦
Xi’an Tongshi Technology Limited (“Xi’an Tongshi”) is authorized to use
TONGSHI as agreed.
♦
♦
♦
WorldSpace is a trademark of WorldSpace Corp.
Xi’an Tongshi is authorized to use
WorldSpace as agreed.
Other names and products not mentioned above may be registered
trademarks or trademarks of their respective companies.
♦
Copyright@2003 Xi’an Tongshi Technology Limited.
♦
All rights reserved.
Disclaimers:
♦
While every effort has been made to ensure that the information contained
in this manual is accurate and complete, no liability can be accepted for any
errors or omissions.
♦
Xi’an Tongshi reserves the right to change the specifications of the
hardware and software described herein at any time without prior notice.
♦
Any software not provided upon the sale of the Radio may be considered
additional accessories to be purchased from Xi’an Tongshi or third parties.
♦
No part of this manual may be reproduced, transmitted, transcribed, stored
in a retrieval system, or translated into any language in any form, by any
means, without the prior written permission of Xi’an Tongshi.
♦
Xi’an Tongshi makes no warranties for damages resulting from corrupted or
lost data due to a mistaken operation or malfunction of the Radio, Tongshi
1

Accessories, the software, personal computers, peripheral devices, or use
of non Tongshi Accessories.
♦
Xi’an Tongshi has no influence over the contents or services delivered by
the Radio and will not be responsible for the contents or services in any
respects.
♦
Please note that the Radios are intended for personal use and should never
be used in a manner that infringes upon or contravenes international or
domestic copyright laws and regulations.
♦
The Radio’s warranty is only effective in the country of sale. If a problem
arises while the Radio is in use, please contact the dealer who sold you the
Radio.
CONTENT
Chapter One Preparing the Radio
1. Services ---------------------------------------------------------------------- 3
2. Product View and Technical Features ---------------------------------------- 3
3. Face ---------------------------------------------------------------------------- 4
4. Buttons ------------------------------------------------------------------------- 4
5. Connectors --------------------------------------------------------------------- 5
6. LCD Display ------------------------------------------------------------------ 5
7. Remote Control ---------------------------------------------------------------- 6
Chapter Two Radio Service Mode
1. Install Batteries ---------------------------------------------------------------- 6
2. Connect Antenna --------------------------------------------------------------- 7
3. Fix Antenna --------------------------------------------------------------------- 7
4. Setup Radio -------------------------------------------------------------------- 7
5. Play and Enjoy ----------------------------------------------------------------- 8
6. Advanced Setup ---------------------------------------------------------------- 8
Chapter Three Computer Service Mode
1. Preparing Computer ---------------------------------------------------------- 10
2. Install Software --------------------------------------------------------------- 10
3. Connect Radio with Computer ----------------------------------------------- 12
4. Install DAMB-R Driver -------------------------------------------------------- 12
5. Radio Services ---------------------------------------------------------------- 12
6. Data Services ----------------------------------------------------------------- 16
7. Setup Radio ------------------------------------------------------------------- 16
Appendix A Service Website of Xi’an Tongshi Corp ---------------- 18
Appendix B Tongshi Accessories ---------------------------------------- 18
Appendix C Mobile Reception ------------------------------------------- 19
Appendix D Install DAMB-R Driver Manually ---------------------- 19
2
Appendix E Force to Reinstall DAMB-R Driver -------------------- 21
TM
Appendix F Country-List for AsiaStar
Appendix G Country-List for AfriStar
----------------------------- 22
TM
----------------------------- 23
Chapter One Preparing the Radio
1. Services
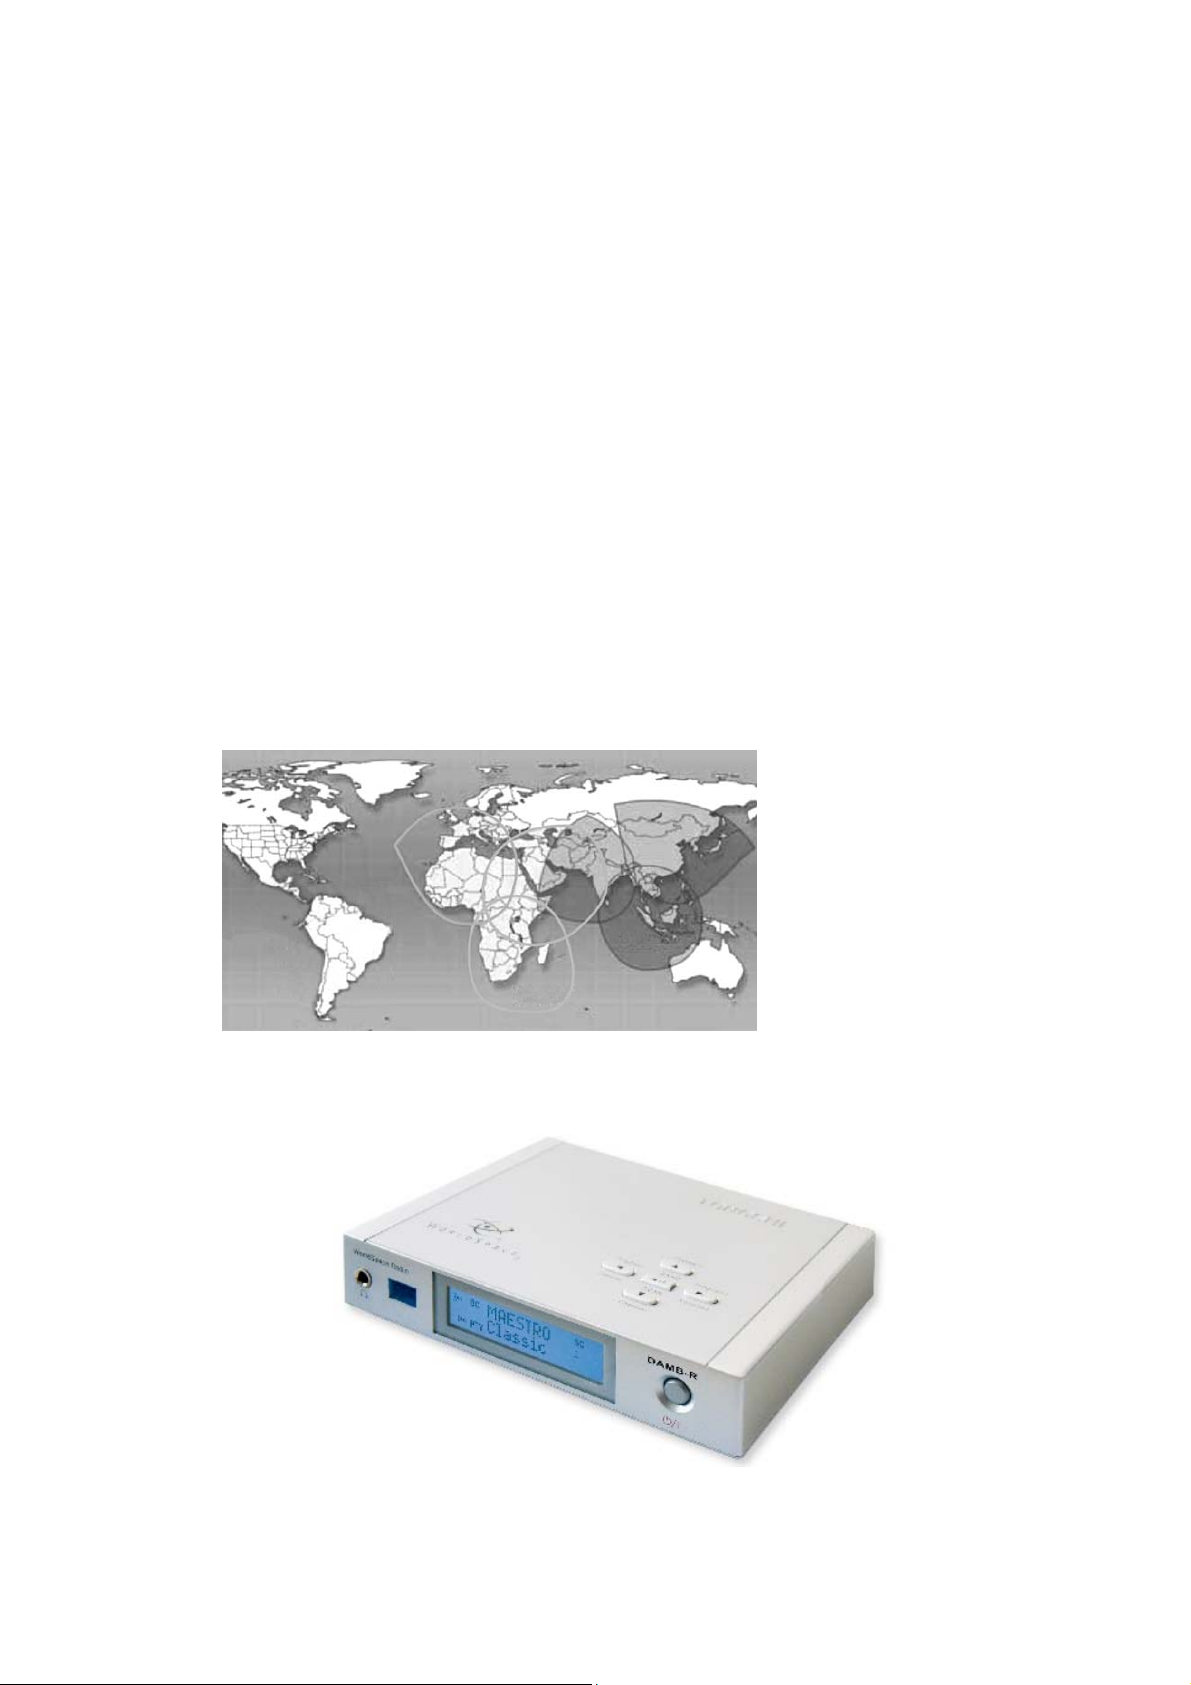
The Radio, along with a hand-size satellite antenna, is able to receive
abundant satellite audio and data programs in most of the areas in Asia and
Africa via WorldSpace satellites (AsiaStar, AfriStar) under suitable satellite
signal reception conditions. Due to the strong reception technical capability,
the Radio may be equipped to enjoy the WorldSpace satellite services in
suitable mobile conditions.
WorldSpace Satellite Coverage Map:
2. Product View and Technical Features
3
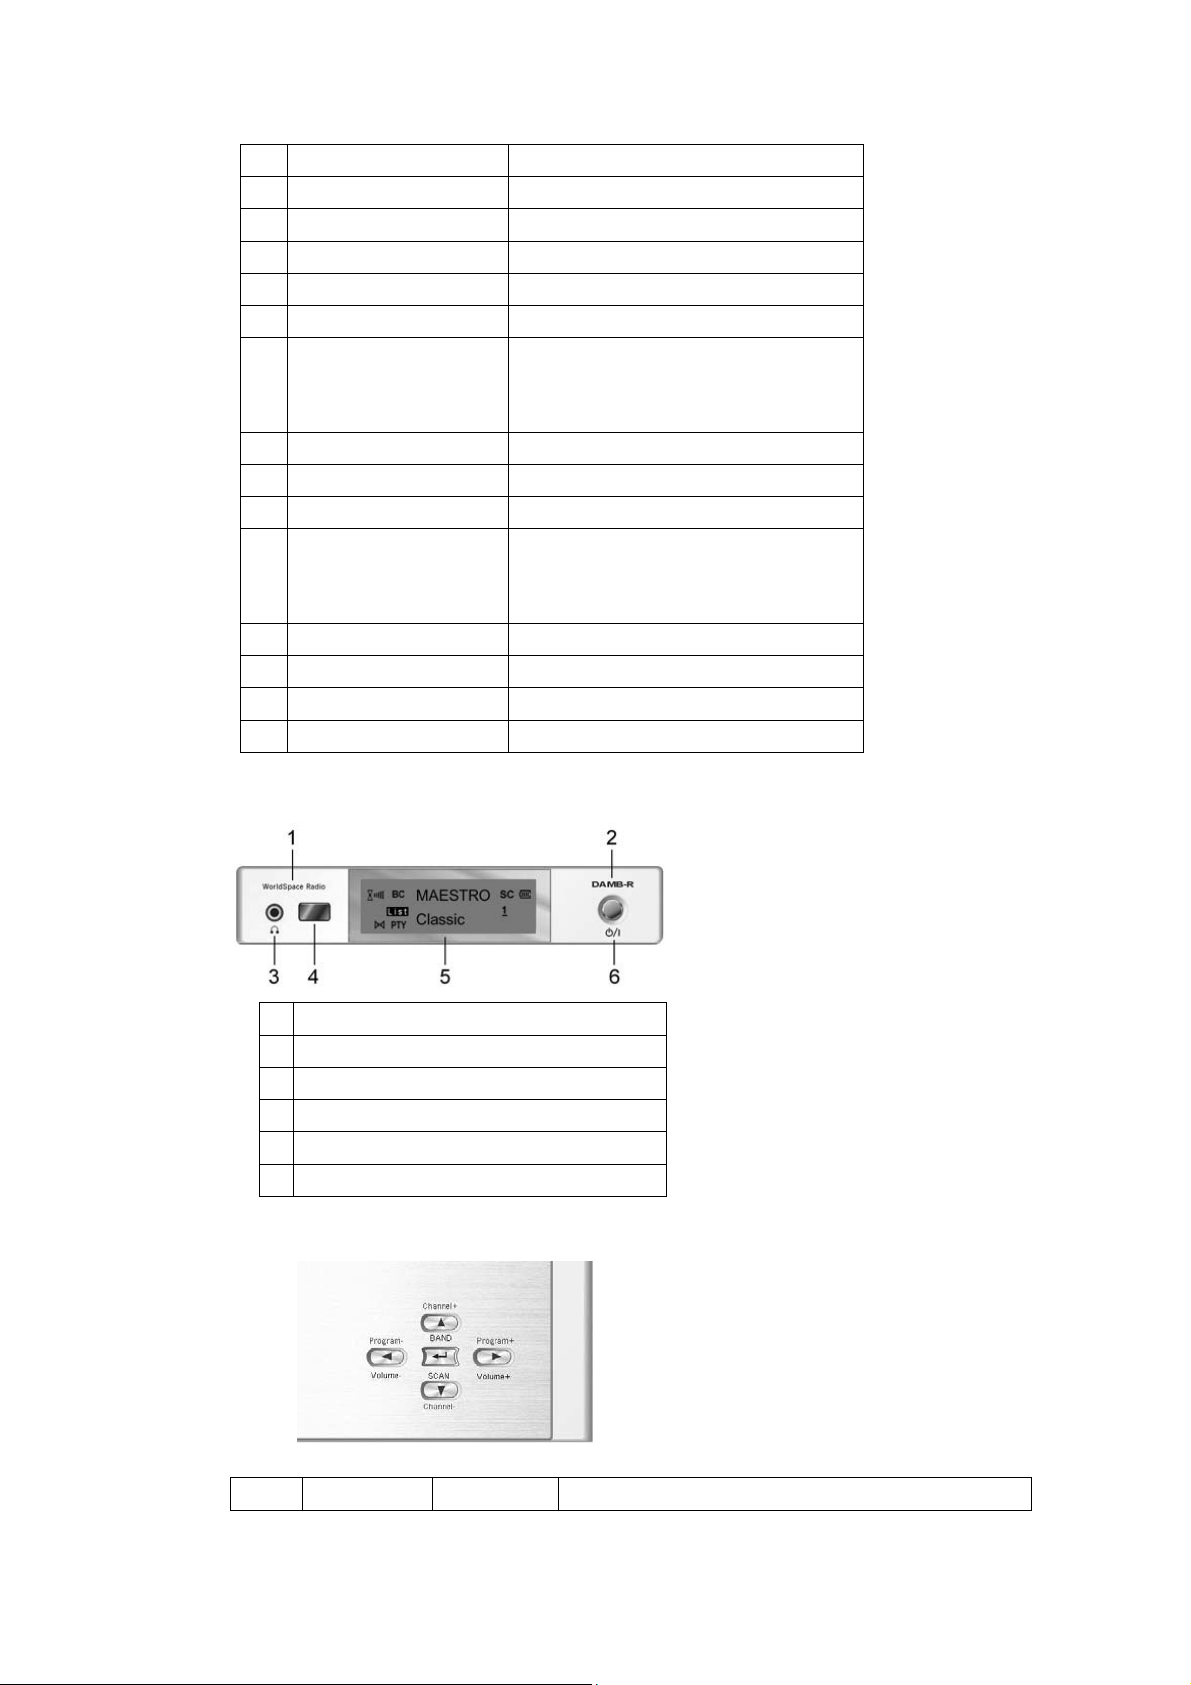
3. Face
Item Spec
1 Band WorldSpace band
2 RF frequency 1452-1492 MHz
3 Modulation QPSK
4 Audio coding MPEG 1, 2, 2.5 Layer 3
5 Inputs WorldSpace Antenna
6 Outputs Earphone
Line Out
USB 1.1 Interface
7 Display LCD Display with EL backlight
8 Preset Channel 12 Programs
9 Tier of password 12 tiers
10 Power Source 2 AA Batteries
DC Adapter
USB
11 Power Consumption Less than 1 Watt
12 Computer Services DATA Receiving up to 128 Kbps
13 Dimensions 120mm*90mm*25mm
14 Weight Approx: 168g (without batteries)
1 Product’s name: WorldSpace Radio
2 Product’s type: DAMB-R
3 Earphone jack
4 Infrared reception window
5 LCD display
6 Power switch
4. Buttons
Five buttons placed on top of Radio. They are:
Sign Buttons’ Operation Functions
4
Channel+
BAND
Channel-
SCAN
Program-
Volume-
Program+
Volume+
Ok Click
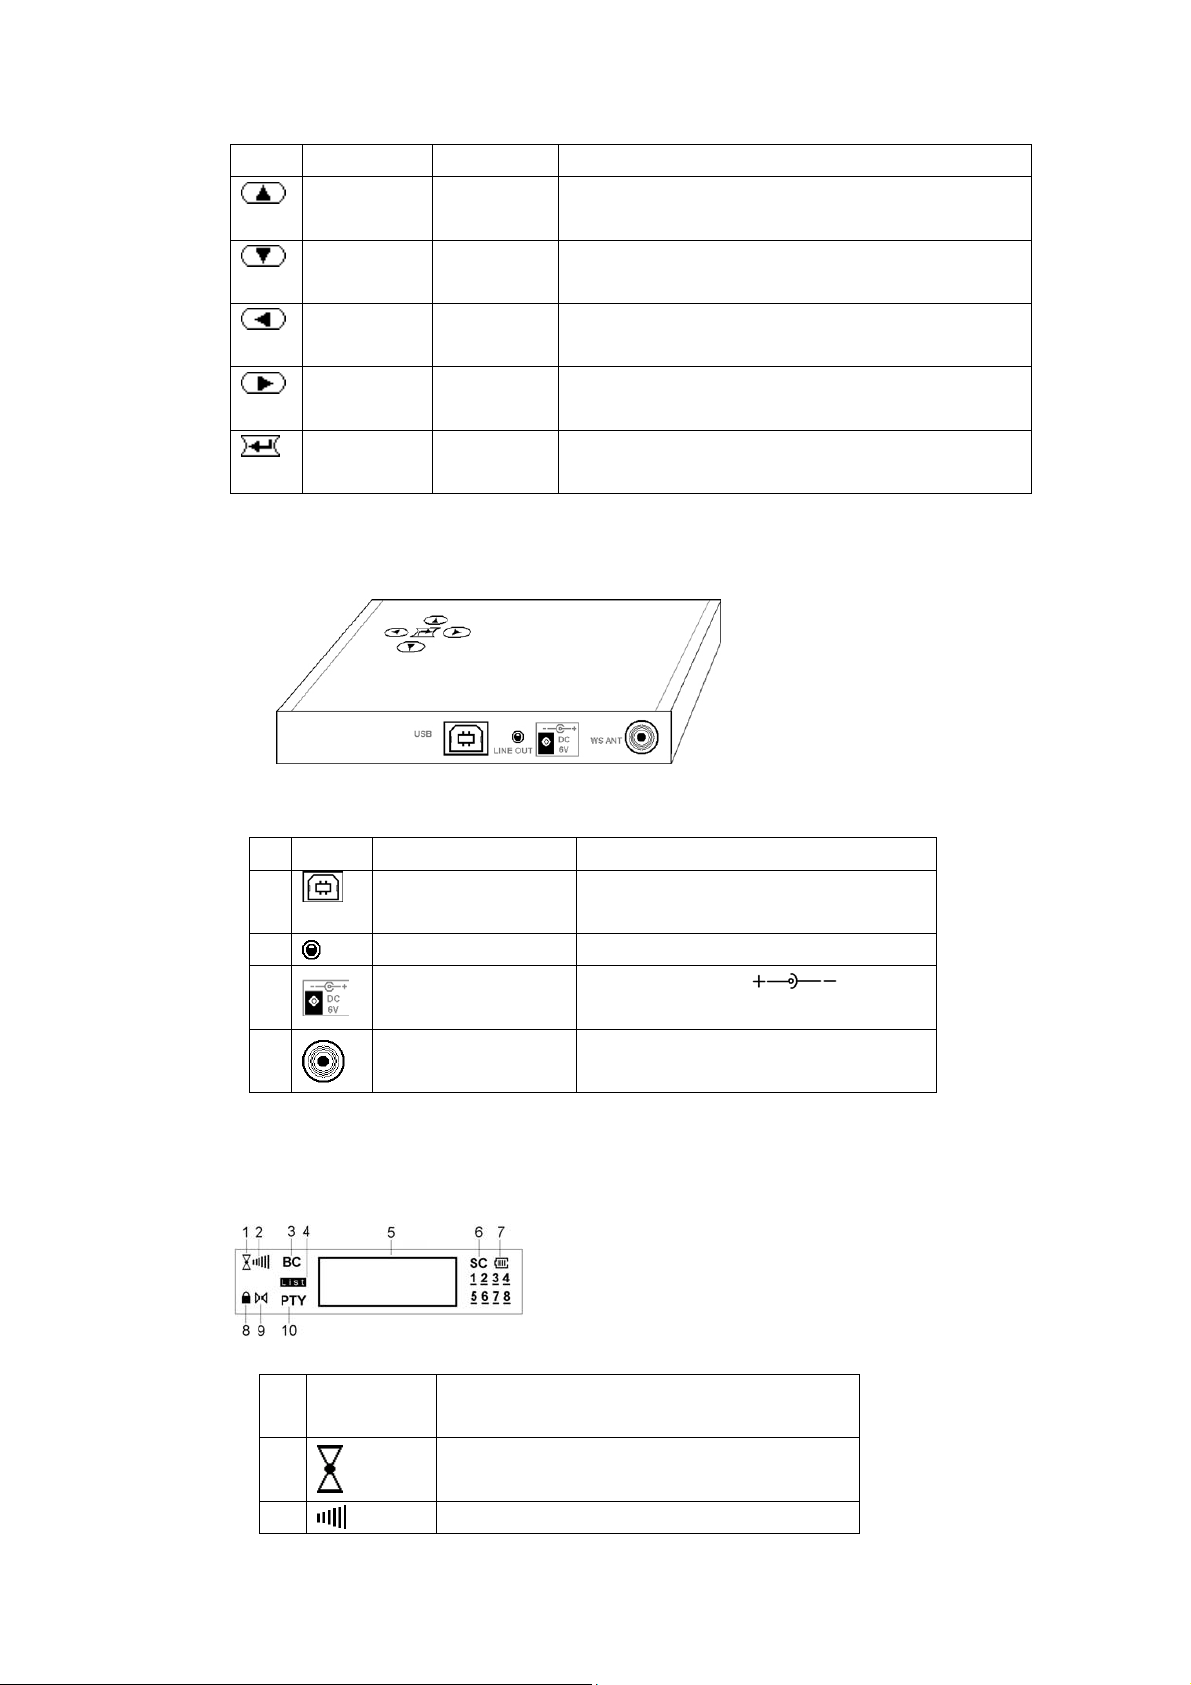
5. Connectors
Names
Click
Press
Click
Press
Click
Press
Click
Press
Press
Access all channels in upper direction
Skip channels’ bands
Access all channels in lower direction
Enter scan mode
Skip to previous prefixed program
Decrease volume
Skip to next prefixed program
Increase volume
Display status
Store or erase program
Four connectors placed in rear of Radio. They are:
Sign Name Functions
1
2
3
4
Note: USB connector shall be used in computer service mode only.
6. LCD Display
In front of Radio, there is LCD display:
USB connector Connect to Computer with USB
cable
Line out jack Connect to sound system
DC-input
connector
F-Type connector Connect to WS ANT
Power supply
DC:6V, Peak Current:300mA
Display
segments
1
2
Show satellite signal on/off.
If the sign appears, you can play Radio.
Receiving quality.
Meaning
5
3 BC Broadcast Channel.
4
5
6 SC Service component.
7
8
9
10 PTY Program type
11 1 2 … 8 SC index
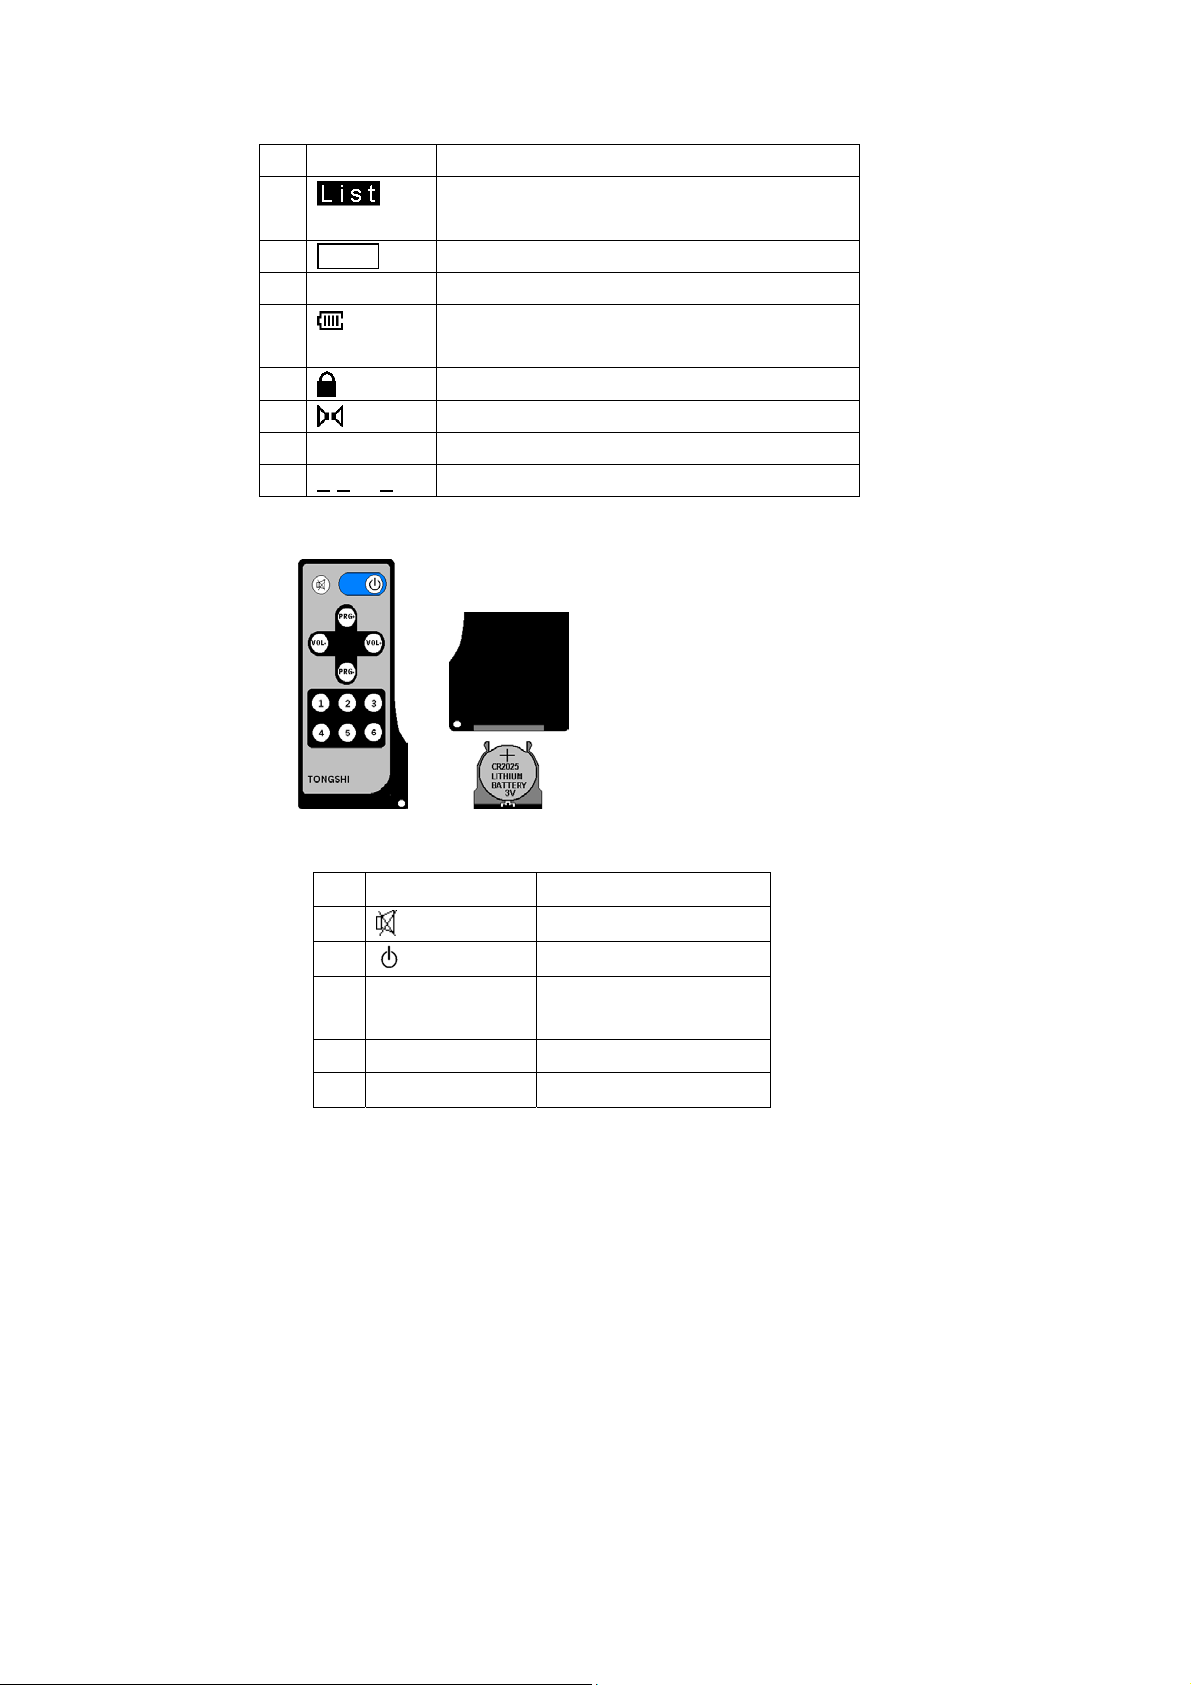
7. Remote Control
Preset mode on/off.
It will appear when you skip programs.
Window, show character strings.
Showing battery status.
Only appear when batteries used.
Encrypted services
Mono/stereo
Twelve keys placed on face of Remote Control. They are:
Sign Function
1
2
3 PRG+ / PRG- Next/previous
4 VOL+ / VOL- Adjust volume
5 1,2, … 6 Select program
Note: When the lithium battery CR 2025 is used up, please change it
according to up figure.
Warning: Put the lithium battery out of children’s reach.
Mute
Power off switch
program
Chapter Two Radio Service Mode
In this mode, you can control Radio through buttons or keys.
1. Install Battery
6
There are 3 ways for Radio power supply: Battery, DC adapter (AC/DC adapter
or Car power adapter) and USB. Batteries will stop working when DC adapter
or USB used.
Put 2 AA batteries into battery box of Radio. Both “Ni-MH” and “Alkaline” are
usable.
2.Connect Antenna
Connect antenna cable with Radio F-Type connector.
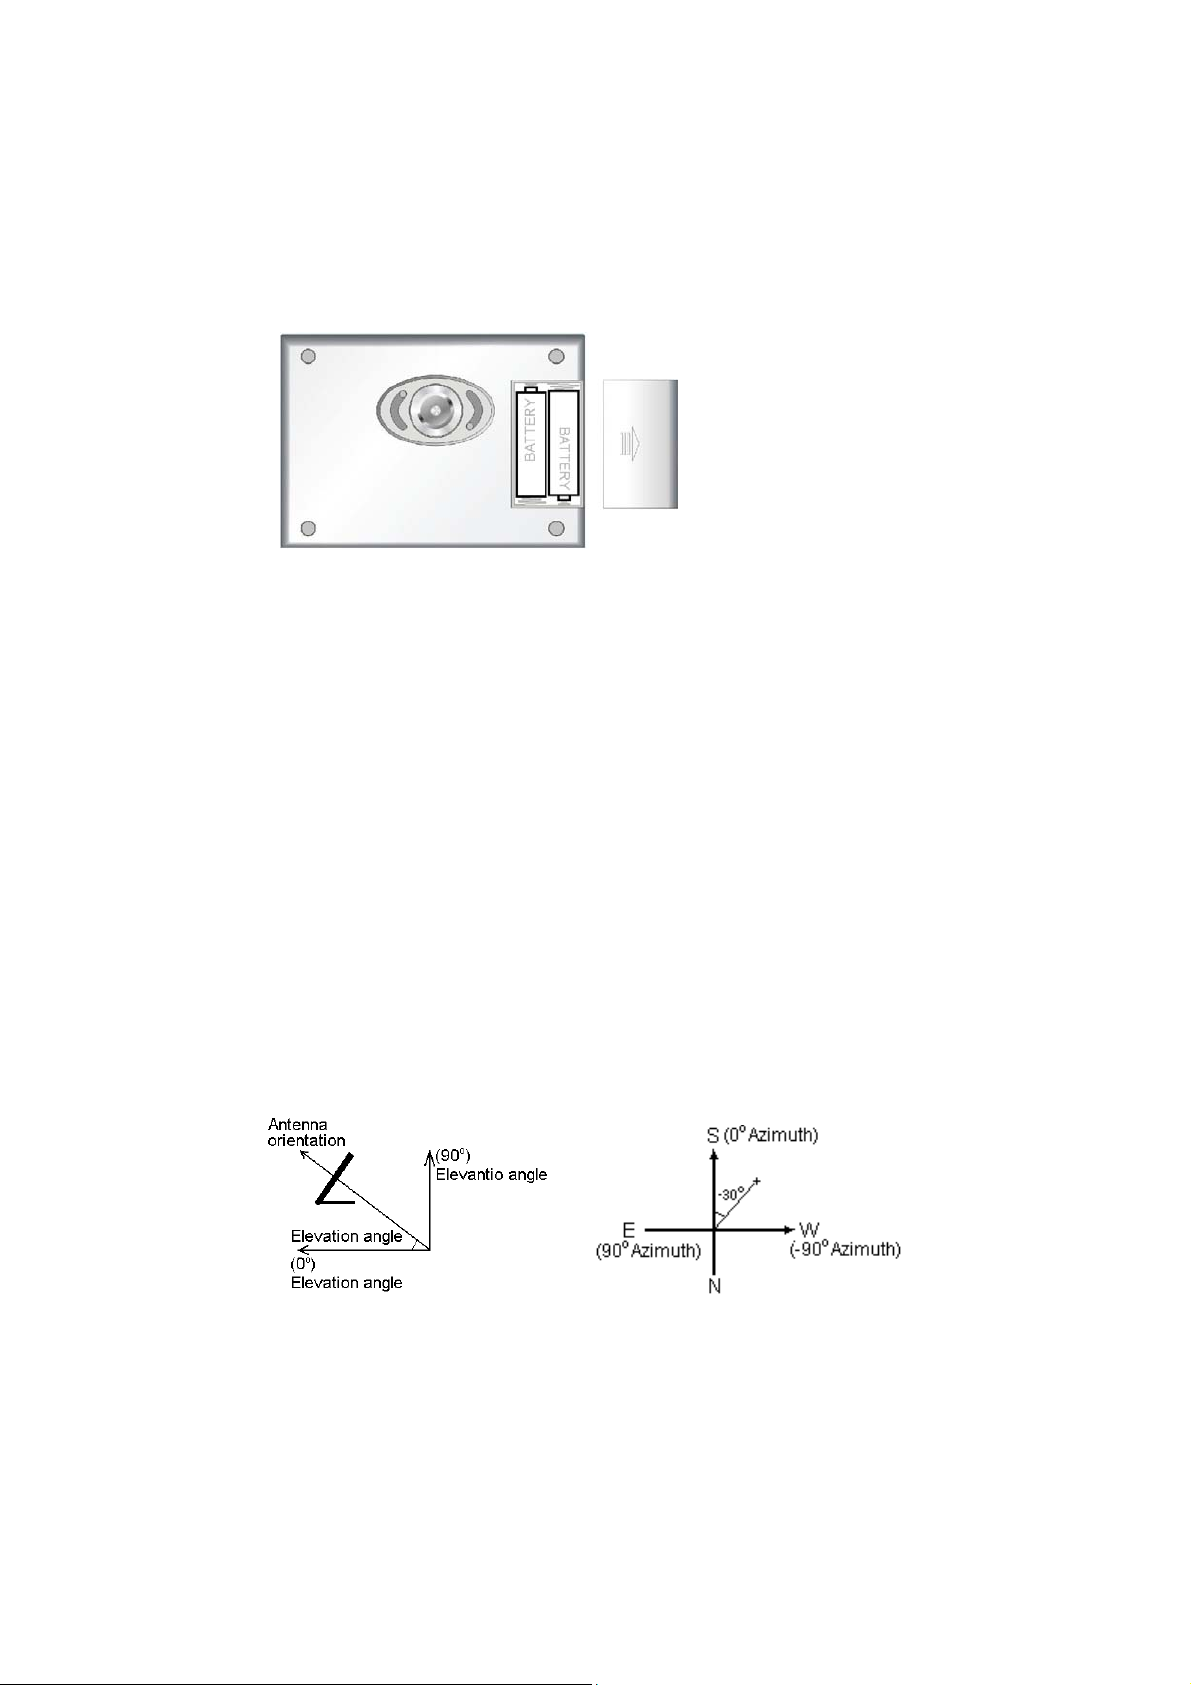
3.Fix Antenna
In general, you only need to set up Antenna within line of sight of the
WorldSpace Satellite you want to receive the services from. For example, from
your location, AfriStar is at your Southwest direction, if you can make Antenna
face southwest without blockage of sky, you may receive its signal. After some
angle and direction adjustments, you will have a better reception.
For more precise and professional analysis, here is certain operation:
♦
Elevation angle and azimuth are related with user’s location.
♦
Please check the relevant angle information from Appendix F and G of this
manual.
♦
Adjust antenna orientation and make it face to WorldSpace Satellites.
For example, in Shanghai, you can find out values of Elevation angle and
Azimuth from Appendix F: Elevation angle=49 and Azimuth=-30. Then, put
0
antenna face to up sky (49
) of southwest (-300).
Note: Approximate orientation is enough.
7
4.Setup Radio
You must do initial setup for the first usage. The setup can be done by
computer also. Please view chapter three, section 7.
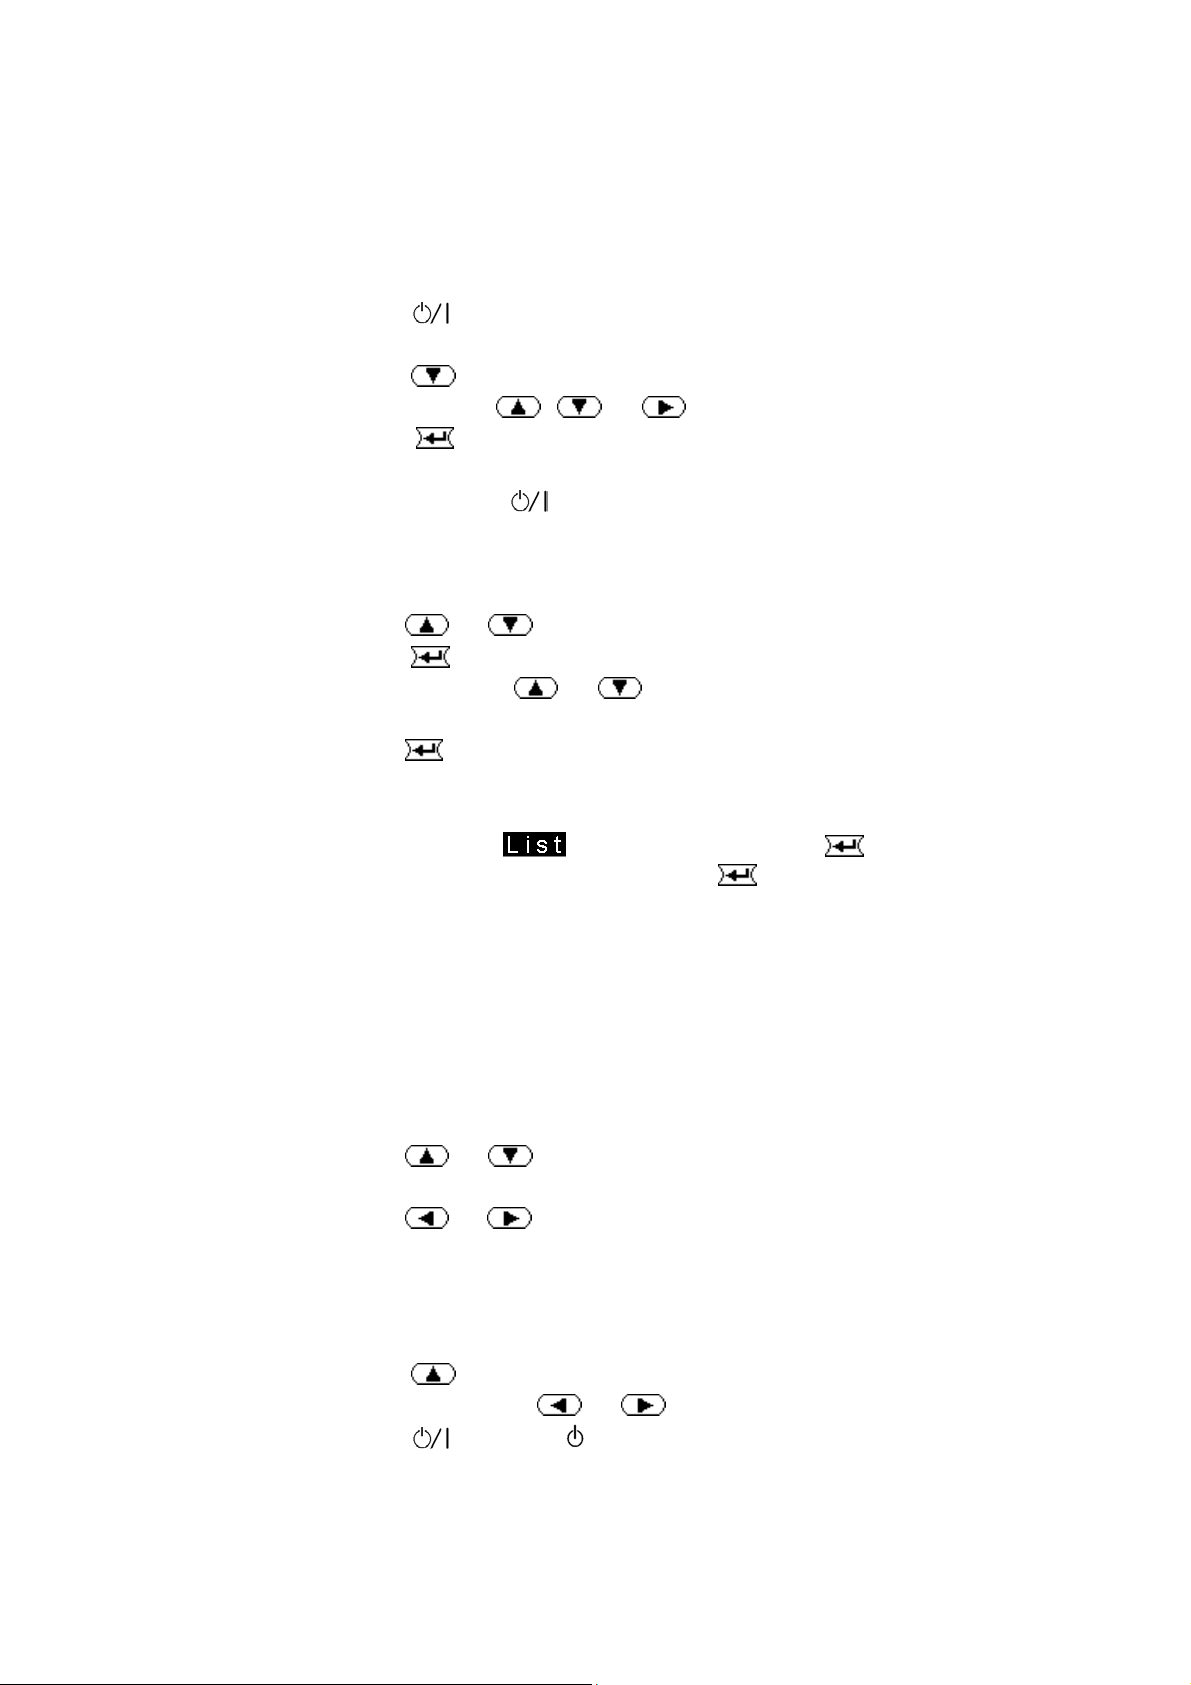
1) Power On:
♦
Press
button to turn on Radio.
2) Scan:
Press
♦
♦
Press
Note: Press
button for 2 seconds, into scan mode.
, or select star and band manually.
scan and save all channels. Please wait about 2
minutes.
Note: Press
cancels scan operation.
3) Preset Channels as Programs:
You can preset 12 favorite channels as programs. Remote control or
buttons can access these programs easily.
Click
♦
♦
Press
or button to select a channel.
button for 2 seconds to get into preset menu.
Note: Click
or button can skip digits from 1 to 12 in
preset menu.
Click
♦
button to save channel as present program.
♦ Repeat above steps till all 12 programs are preset.
Note: In preset mode (
seconds can delete the program or press
sign appeared), Press button for 2
button for 5 seconds can
delete all programs.
5.Play and Enjoy
You can play and enjoy Radio by select channel or preset program. This
function can be achieved by the following operations:
Select a Channel:
♦
Click
or button to skip channels.
Select Preset Program:
Click
♦
or button to skip programs.
♦ ♦ Press PRG+/- key to skip programs or press digital number keys 1,
2, …6 by Remote control.
Note:
Press
Press and hold on
♦
Press
♦
button for 2 seconds, Radio will skip to another band.
or button can adjust volumes.
button or key for 3 seconds can turn off Radio.
6. Advanced Setup
8
 Loading...