

Woodstream WFC3 User Manual

IC Radio Standards Specification: RSS-247
Manufacturer: Woodstream Corporation
Certification Exhibit
FCC ID: SNA-WFC3
IC: 9458A-WFC3
FCC Rule Part: 15.247
ACS Project: 15-2122
Model: WFC3
User Manual
3998 FAU Blvd. Suite 310 Boca Raton, FL 33431 Tel: 561-961-5585 Fax: 561-961-5587
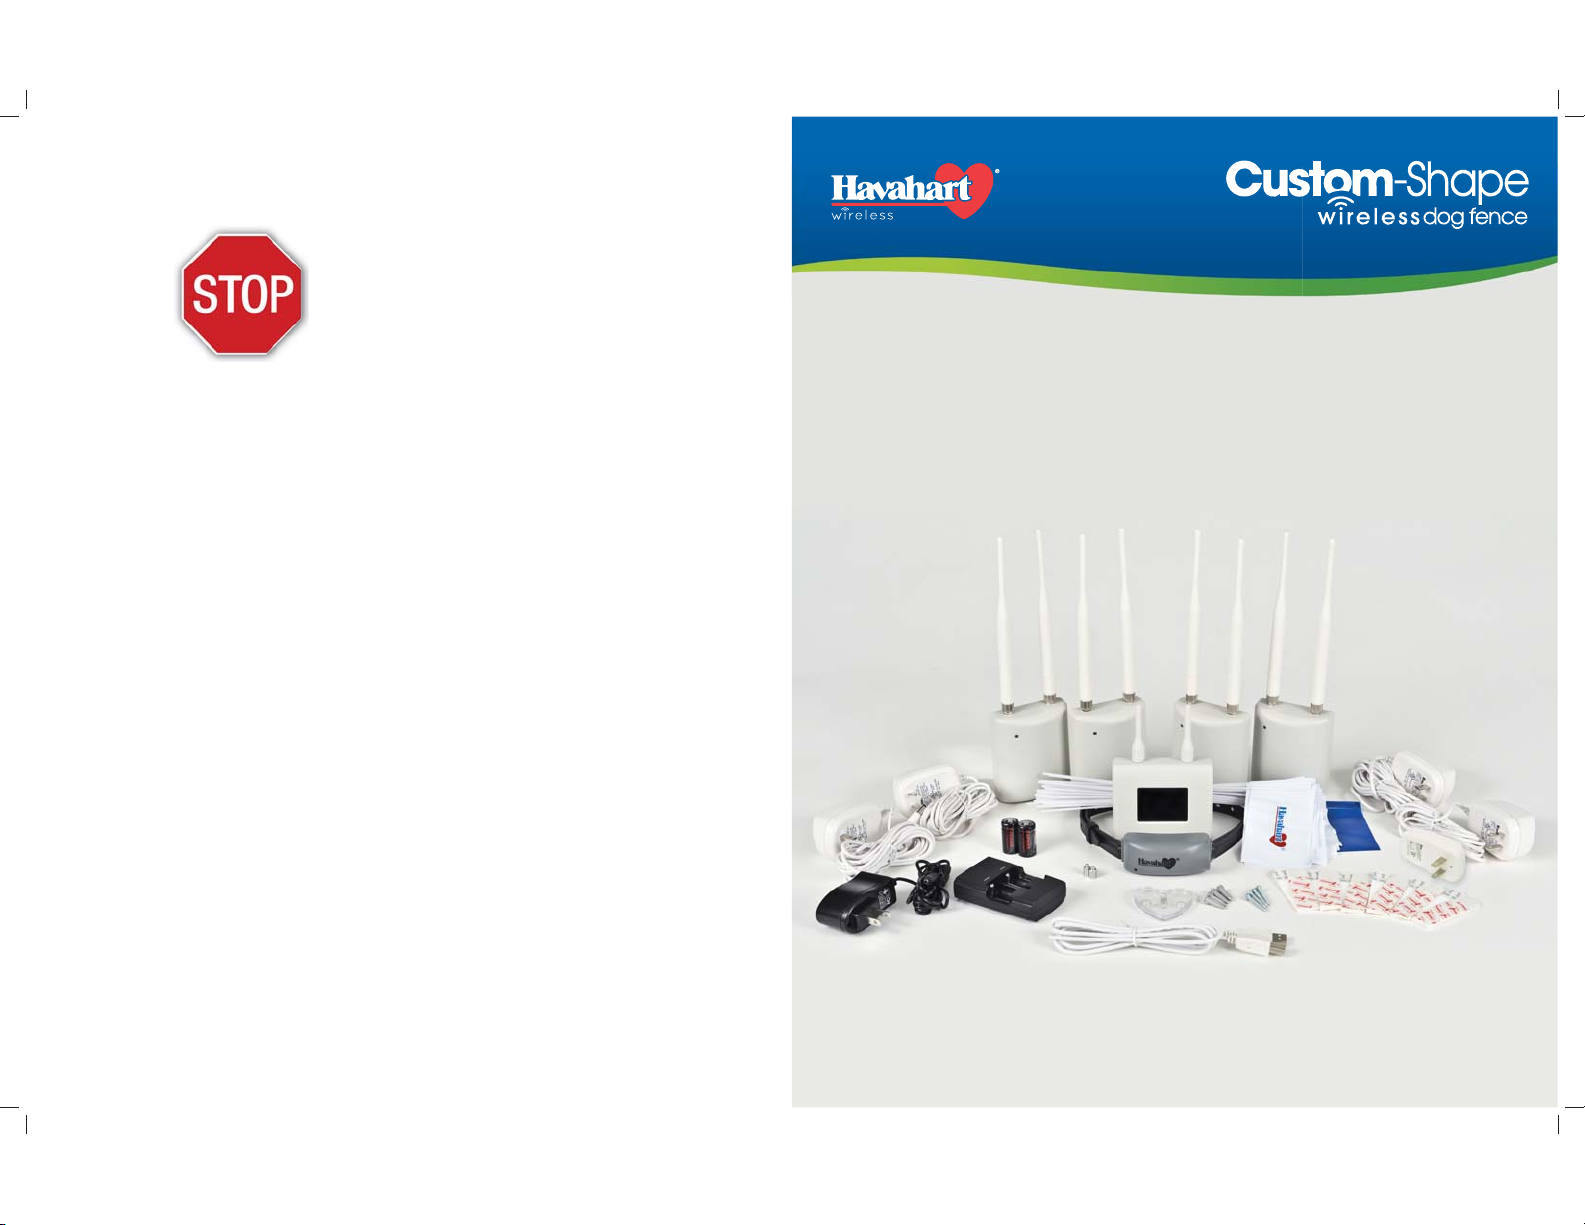
DO NOT RETURN THIS PRODUCT
TO THE STORE FOR ANY REASON.
CONTACT HAVAHART® WIRELESS DIRECTLY!
CALL 1-800-800-1819, OPTION 1.
Instruction Manual
Havahart ® Wireless
Woodstream Corporation
69 North Locust Street
Lititz, PA 17543 | 1-800-800-1819
www.HavahartWireless.com
PRIOR TO INSTALLATION
Fully Charge the System Controller
and Batteries for 3 hours.
AVERAGE SYSTEM SETUP TIME IS 2 HOURS.
Model 5144G
Welcome
Table of Contents
Congratulations and thank you for choosing the Custom-Shape Wireless
Dog Fence from Havahart® Wireless — the leading innovator
of digital wireless fence solutions.
Featuring breakthrough, patented, wireless technology, the Custom-Shape
Wireless Dog Fence is designed to maximize the freedom and safety of your
dog, with minimal effort, investment and impact on your property. It is the
industry’s most-advanced, wireless dog containment system.
The Custom-Shape Wireless Dog Fence gives you all the advantages of a
professionally-installed, underground wire fence system without all the hassles
and costs. Our revolutionary technology allows you to shape the wireless
fence to the specific configuration of your yard — maximizing the space for
your dog to roam. It also allows you to add Custom Exclusion Zones thereby
keeping your dog out of your garden or swimming pool. There are no wires to
bury or break, no back pains from digging, and no wasted money on trenching
— just a fast & easy setup that creates freedom for your dog to roam!
IMPORTANT MESSAGE
Proper training of your dog is the most critical element in ensuring the
success of your wireless dog fence. Consult the training section of this
manual once you have set up your wireless dog fence.
!
NOTE: To ensure your complete
satisfaction and your dog’s safety, please
read and follow all of these instructions
carefully. Should you need assistance, our
Consumer Care Specialists are ready to
help. Call 1-800-800-1819, and press “1”.
Register Your Havahart® Wireless
Fence at www.HavahartWireless.com/
customerservice/product-registration
to ACTIVATE YOUR WARRANTY.
Thank you for purchasing the CustomShape Wireless Dog Fence from
Havahart® Wireless!
IMPORTANT SAFETY REMINDERS .............................................................................................................................
SYSTEM COMPONENTS ...............................................................................................................................................
KEY DEFINITIONS, TECHNOLOGY & HOW IT WORKS ...........................................................................................
- Roaming Area
- Trigger Zone
- Exclusion Zone
- Controller
- Bases
®
- Havahart
Wireless Collar
- The Technology Behind the System
- How it Works
GETTING STARTED .......................................................................................................................................................................
- Quick Checklist
- Planning Your Fence Boundary & Exclusion Zones
INSTALLING THE CUSTOM-SHAPE WIRELESS DOG FENCE ..........................................................................................
Setting Up the Bases
1
.............................................................................................................................................
- Installing the Bases
- Accessing the Wireless Fence Tracker
- Activating the Bases
Setting Up the Fence Boundary/Trigger Zone
2
- Placing Fence Boundary Training Flags
- Recording the Fence Boundary/Trigger Zone
- Removing the Fence Boundary/Trigger Zone
- Removing/Resetting System Bases
3
- What are Exclusion Zones (ExZones)?
- Placing Exclusion Zone Training Flags
- Recording an Exclusion Zone
- Naming an Exclusion Zone
- Removing an Exclusion Zone
- Deactivating /Reactivating an Exclusion Zone
4
- Installing a Battery
- Activating a Collar
- Naming a Collar
- Adjusting the Correction Level of a Collar
- Testing the Trigger Zone
- Removing a Collar
- Recharging a Battery
- System Monitoring / Checking Battery Status
- Fitting a Collar
5
TRAINING YOUR DOG ..................................................................................................................................................................
FACTORS AFFECTING SIGNAL STRENGTH ...........................................................................................................................
TERMS OF USE AND LIMITATION OF LIABILITY ................................................................................................................
WARRANTY INFORMATION .....................................................................................................................................................
- Advanced Base Setup - Manual Distance Entry
Setting Up the Exclusion Zones (Optional)
Setting Up the Collar(s)
Wireless Fence Tracker Examples
.......................................................................................................................................
.......................................................................................................... 27
...................................................................................
............................................................................................
3
4
5
7
8
8
13
16
21
29
36
39
40
Table of Contents
Havahart® Custom-Shape Wireless Dog Fence
1
www.HavahartWireless.com
Havahart® Custom-Shape Wireless Dog Fence
1-800-800-1819, Option 1
2
System ComponentsImportant Safety Reminders
To ensure the safe and effective operation of your Custom-Shape Wireless Dog Fence, please read and follow all
safety guidelines and instructions:
• The Custom-Shape Wireless Dog Fence is designed for dogs older than 6 months that weigh more
Important Safety Reminders
than 8 pounds.
• It is necessary to fully charge the system Controller and Batteries for 3 hours PRIOR TO INSTALLATION.
• All Bases must be installed indoors and should not be exposed to moisture.
• Each Base must be plugged into a properly grounded 120V AC outlet.
• Changes or modifications to any system component may cause permanent system damage and will
void manufacturer warranties.
• To prevent system damage due to unexpected power surges, it is recommended that you unplug the
Bases from the wall outlets during thunderstorms. All settings will be retained in system memory. Also do not
attempt to install the system during stormy weather.
• To help prevent skin irritation and increase battery life, do not leave the Collar on your dog for more than
12 consecutive hours.
• Always remove the Collar from your dog before adjusting any of the system components or settings.
• The system is intended to provide safe containment of your dog. All components should be kept out of
the reach of children.
• Follow your established leash laws. There may be cases where this system will be prohibited by law.
• Proper training of your dog is the most critical element in ensuring the safe and successful operation
of your wireless dog fence.
DO NOT RETURN THIS PRODUCT
TO THE STORE FOR ANY REASON
CONTACT HAVAHART® WIRELESS DIRECTLY!
CALL 1-800-800-1819, OPTION 1.
Havahart® Custom-Shape Wireless Dog Fence
3 4
www.HavahartWireless.com
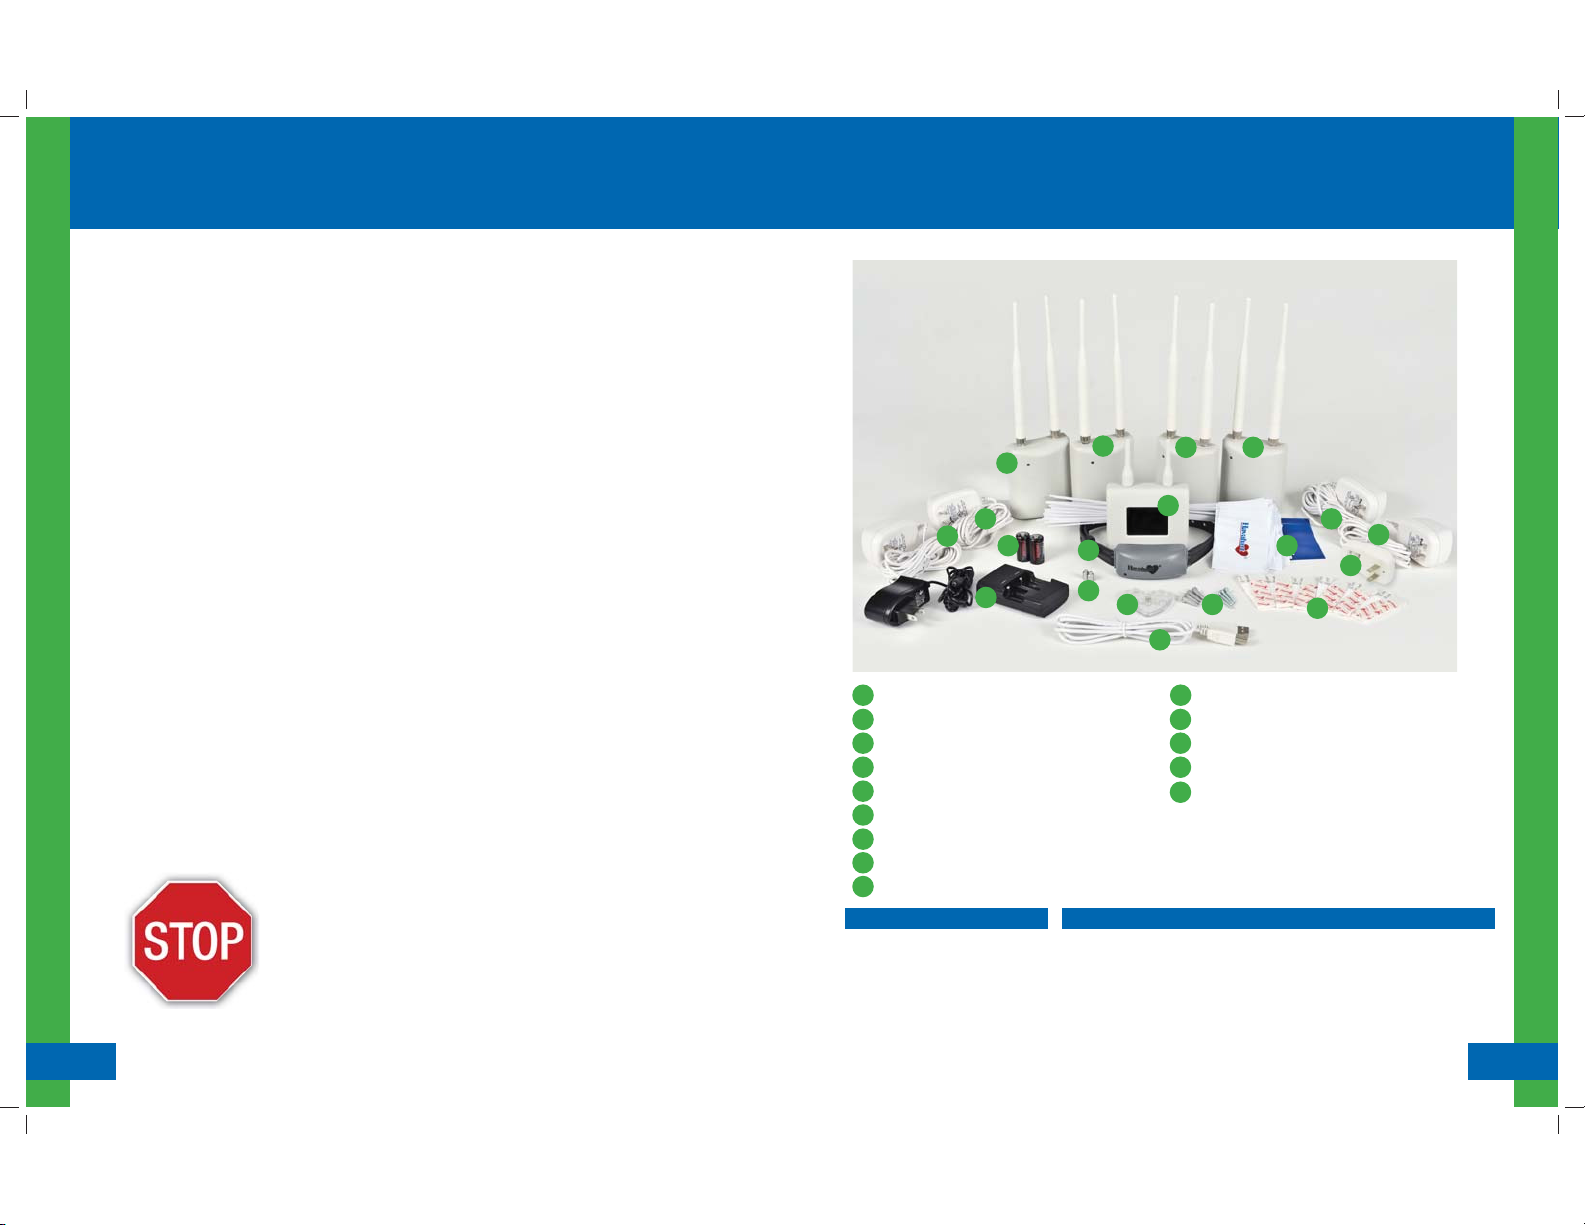
Ensure that the following components are
included with your system. If a component is
missing, please call 1-800-800-1819, Option 1.
D
F
J
K
A J
Controller
B
USB Cable
C
USB AC Adapter
D M
Master Base
E
3 Bases
F
4 AC Adapter Power Cords For Bases
G
Removable Wall-Mount Adhesive Strips
H
4 Screws and 4 Wall Anchors
I
Collar
Other Items You May Need:
• Scissors
• Tape Measure
• Screw Driver
• Permanent Marker
• Isopropyl Rubbing Alcohol
• Soft Cloth
E
I
L
M
B
Additional Accessories Available For Purchase:
• Extra Collar - 5144GX
• 25 Flag Pack - HW25FLAGPACK
• Heart-Shaped Collar Tester - HWHEARTSCT
• 2 Base Antennas - HW2ANT
• 2 Pack of Batteries - HW2REBATPACK
• Battery Charger - HWBATRECHARG
E E
A
N
H
2 RCR123 Batteries For Collar
K
Battery Charger
L
Extra Set Of Collar Probes For Short-Haired Dogs
Heart-Shaped Collar Tester
74 White Training Flags, 1 Blue Training Flag
N
Instructional DVD
Quick Setup Guide
Troubleshooting Guide
Havahart® Custom-Shape Wireless Dog Fence
Model 5144G
FF
F
C
G
• Collar Battery Cap - HWCBATCAP
• 2 Long Probes - HW2LPROBES
• 2 Short Probes - HW2SPROBES
• AC Adapter - HWACCORD
• USB Cable - HWUSB
• USB AC Adapter - HWUSBACADAPT
1-800-800-1819, Option 1
System Components
Key Definitions, Technology & How it Works
R
O
A
M
IN
G
A
R
E
A
R
O
A
A
M
IN
G
A
R
E
A
A
Deck
Master Base A
Base D
Base C
Base B
Key Definitions:
Roaming Area: Area inside the Trigger Zone where your dog is free to roam and play. Capable of forming
a Custom-Shape of up to 500 feet in any direction.
Trigger Zone: The zone, which may be 6 to 13 feet wide, located at the edge of the Roaming Area that forms the fence
boundary. Correction is triggered by your dog crossing into the Trigger Zone which can be set to Tone Only (auditory alarm) or
static correction. The speed of your dog as he crosses the Trigger Zone will influence where the correction is delivered inside the
Trigger Zone.
Exclusion Zone: This is a targeted area where you wish to restrict your dog’s access, such as a large flowerbed, pool or patio. It
Key Definitions, Technology & How it Works
must be at least 12 feet by 12 feet wide. Also each zone cannot be located within
20 feet of another zone, fence boundary or Base.
Controller: Auditory alerts and the touch screen provide
intuitive navigation for setting up, activating and
managing your fence with ease. The
Controller houses a state-of-the-art
transceiver that enables
communication with the system. It will
notify you if your dog breaches the Fence
Boundary, if there is a problem with any of
the fence components or if the Battery life of the
Collaris running low. The Controller can manage up
to 2 Collars.
Bases: The system features a Master Base and 3 additional
Bases. Each Base houses a state-of-the-art transceiver that enables
the Bases to work together to determine the location of your dog while
in your yard.
®
Havahart
Wireless Collar: The comfortable, water-proof Collar houses a state-of-the-art
radio transceiver with advanced antenna assembly, a rechargeable RCR123 battery, and two correction Probes.
The Collar communicates continuously with the Bases to track the real-time location of your dog. The Collar can be
programmed to Tone Only (auditory correction) or one of 5 different static correction levels. The default correction level is
Tone Only. The Havahart® Wireless Collar features exclusive Integrated Motion Sensor Technology, which allows the Collar to
go to sleep when it is not in motion to conserve and optimize Battery life.
Trigger Zone
Trigger Zone
The Technology Behind the System:
The Custom-Shape Wireless Dog Fence is driven by nanoLOC TRX 2.4 GHz transceivers that have been enhanced with
complex algorithms, strategic distortion filtering and modular signal amplification to deliver advanced time-of-flight-ranging
technology and precision event-stamp mapping. Time-of-flight is the time it takes for a signal to travel from a Base to the
Collar and back at the speed of light. By continually ranging or communicating to the Collar to determine the time-of-flight,
each Base is able to track the real-time distance to your dog. When radio signals are sent from the antennas of the Bases,
they propagate in a spherical manner. At least 3 Bases providing 1 common point of intersection between 3 of their spherical
radio signals are needed to accurately pinpoint the real-time location of the Controller or the Collar. Because each of the
Bases is at the same relative height throughout the home, the intersection of the 3 spherical signals is known as trilateration.
As the Controller moves along the flag line, the Master Base records each trilaterated point of your wireless fence, thereby
memorizing the location of the entire fence. This process of memorization is known as event stamp mapping. It is also used
to record the location of Exclusion Zones. These enhancements comprise the core of the patented elements that provide an
unparalleled level of technical sophistication in the wireless dog fencing industry.
How it Works:
The Custom-Shape Havahart® Wireless System has the following key components: a Wireless Collar, a Controller and 4 Bases.
Each component contains an advanced transceiver that enables constant communication with each of the other components.
The Wireless Fence Tracker allows you to see the location of your wireless Fence Boundary and all System components. It also
aids in the installation and testing of your Fence Boundary. After accessing the the Wireless Fence Tracker on line , you use the
Controller to add each Base to the System. This allows the Bases to begin communication with each other and establish their
positions relative to one another. The Bases are represented by antennas on the Wireless Fence Tracker Screen. The Bases track
the position of the Controller wherever it goes. This allows you to create virtually any shape of wireless fence. With the Controller
in hand, you walk around your property to record your Fence Boundary. The Controller is represented by blue circles on the
Wireless Fence Tracker screen. After you have finished recording, your new Fence Boundary will be represented by a green line
on the screen of your Wireless Fence Tracker. The Bases will track the Controller again if you record Exclusion Zones.
After a Collar had been added to the system and fitted to
your dog, the Bases will track the real-time location of your
dog as it moves around in the Roaming Area. The Collar
will be represented by red circles on the Wireless Fence
Tracker screen. If your dog reaches the Fence Boundary
or an Exclusion Zone (a red circle touches the green line
on the Wireless Fence Tracker screen), the System will
send a command to the Collar to take action and correct
(tone or static - based on user settings). The green fence
line on your Wireless Fence Tracker will turn red if your
dog breaches the fence boundary. The correction is not
constant. It is a repetitive pulse. The Collar will correct your
dog until one of the following two conditions is met:
1. Your dog returns back into the Roaming Area. The
system then returns to normal operating mode.
2. The Collar’s Safety Time-Out Feature stops the correction cycle after 30 seconds. The red fence line on the Wireless Fence
Tracker will turn yellow when this happens. After the correction cycle times out, your dog will NOT be corrected for
returning to the Roaming Area. The Collar will revert to normal operating mode only when your dog is back inside the
Roaming Area. The yellow fence line on the Wireless Fence Tracker will also revert to green . After that, the Controller will
not send another correction command until your dog moves back to the Fence Boundary or an Exclusion Zone.
This first-of-its-kind, cutting-edge Custom-Shape Wireless Dog Fence gives you the advantage of allowing your dog to go to
the edge of your property while keeping him safe and out of designated areas.
Key Definitions, Technology & How it Works
Havahart® Custom-Shape Wireless Dog Fence
5
www.HavahartWireless.com
Havahart® Custom-Shape Wireless Dog Fence
1-800-800-1819, Option 1
6
Getting Started
O
E
O
A
e
Installing the Custom-Shape Wireless Dog Fence
Getting Started
QUICK CHECKLIST
Before you begin the installation process,
be sure to check the following:
• Make sure that you have all system components
ready and available.
• Charge the Controller and Batteries for 3 hours. Connect
the Controller, via the USB Cable, to your computer while it
is turned on or to the USB AC Adapter.
• If a Found New Hardware screen appears when you connect the
Controller to your computer, press Cancel.
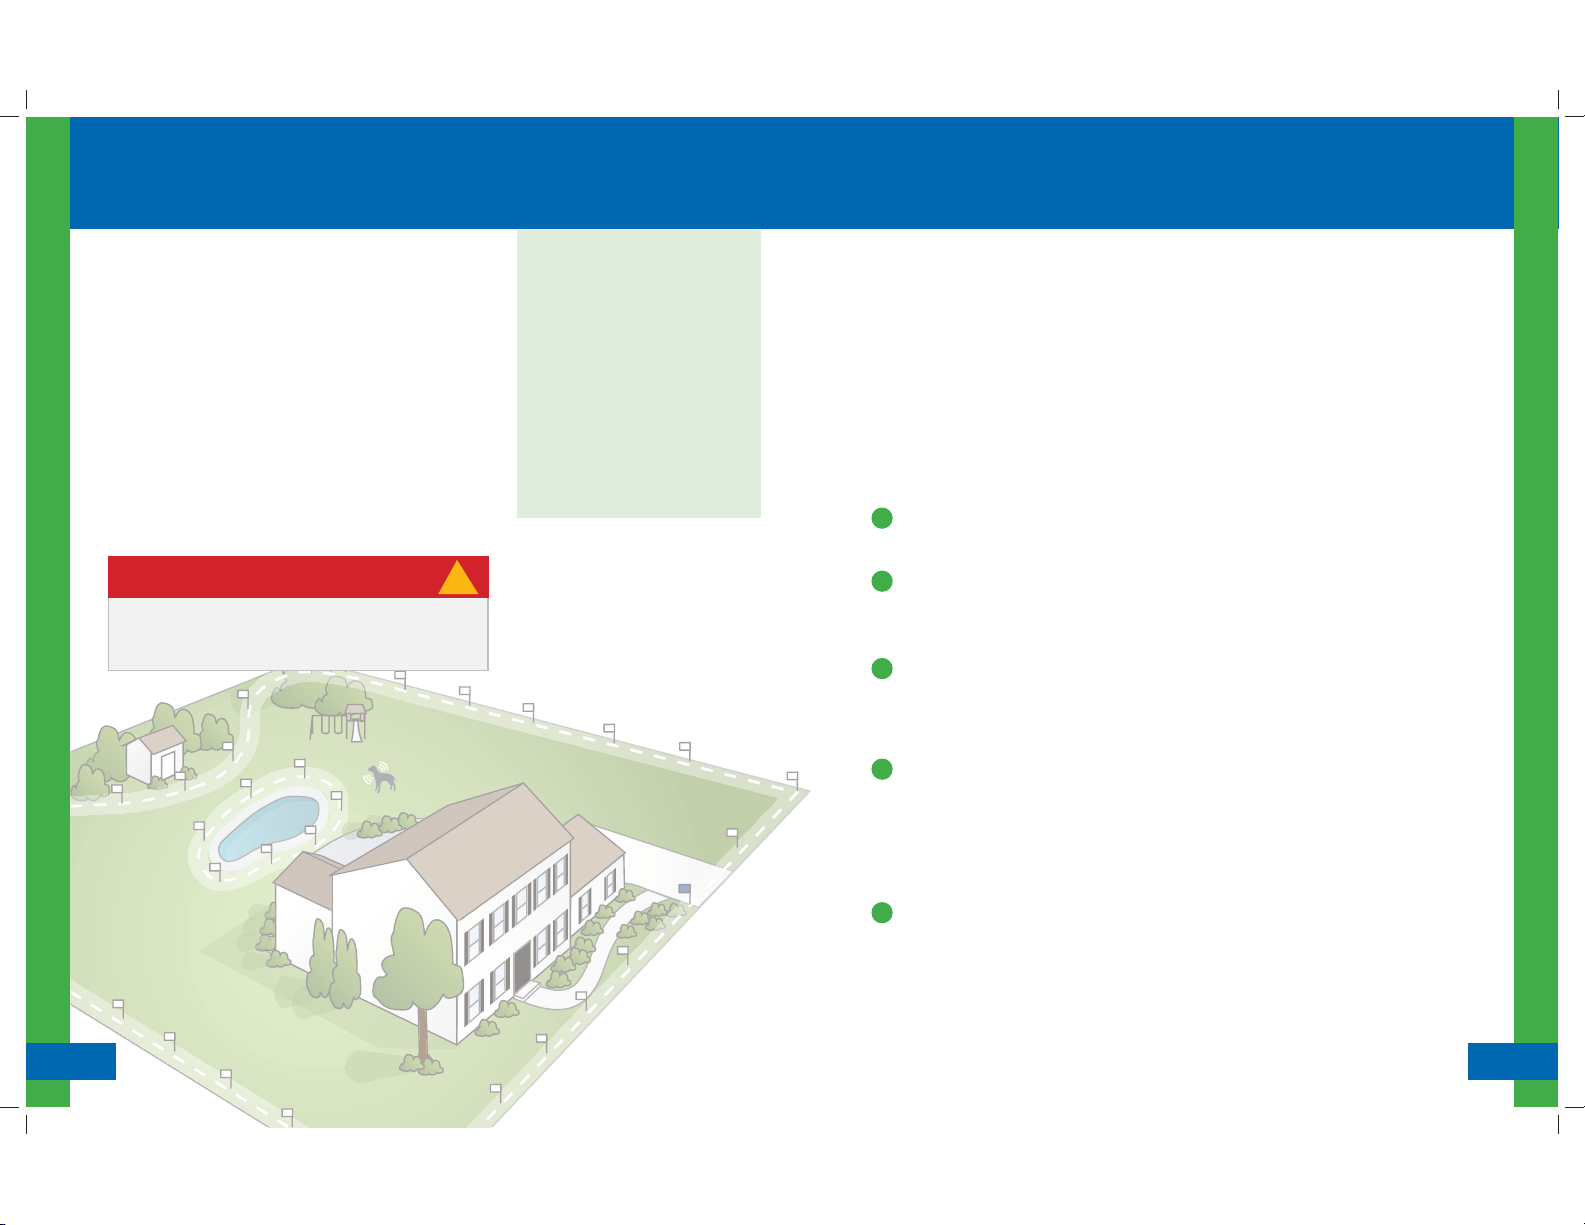
IMPORTANT MESSAGE
Make sure your house is inside the
enclosed boundary or your dog will
get corrected inside your home.
Your Fence Boundary / Trigger Zone
should be NO closer than 10 feet to ANY
ROAD, SIDEWALK OR THOROUGHFARE
FOR YOUR DOG’S SAFETY.
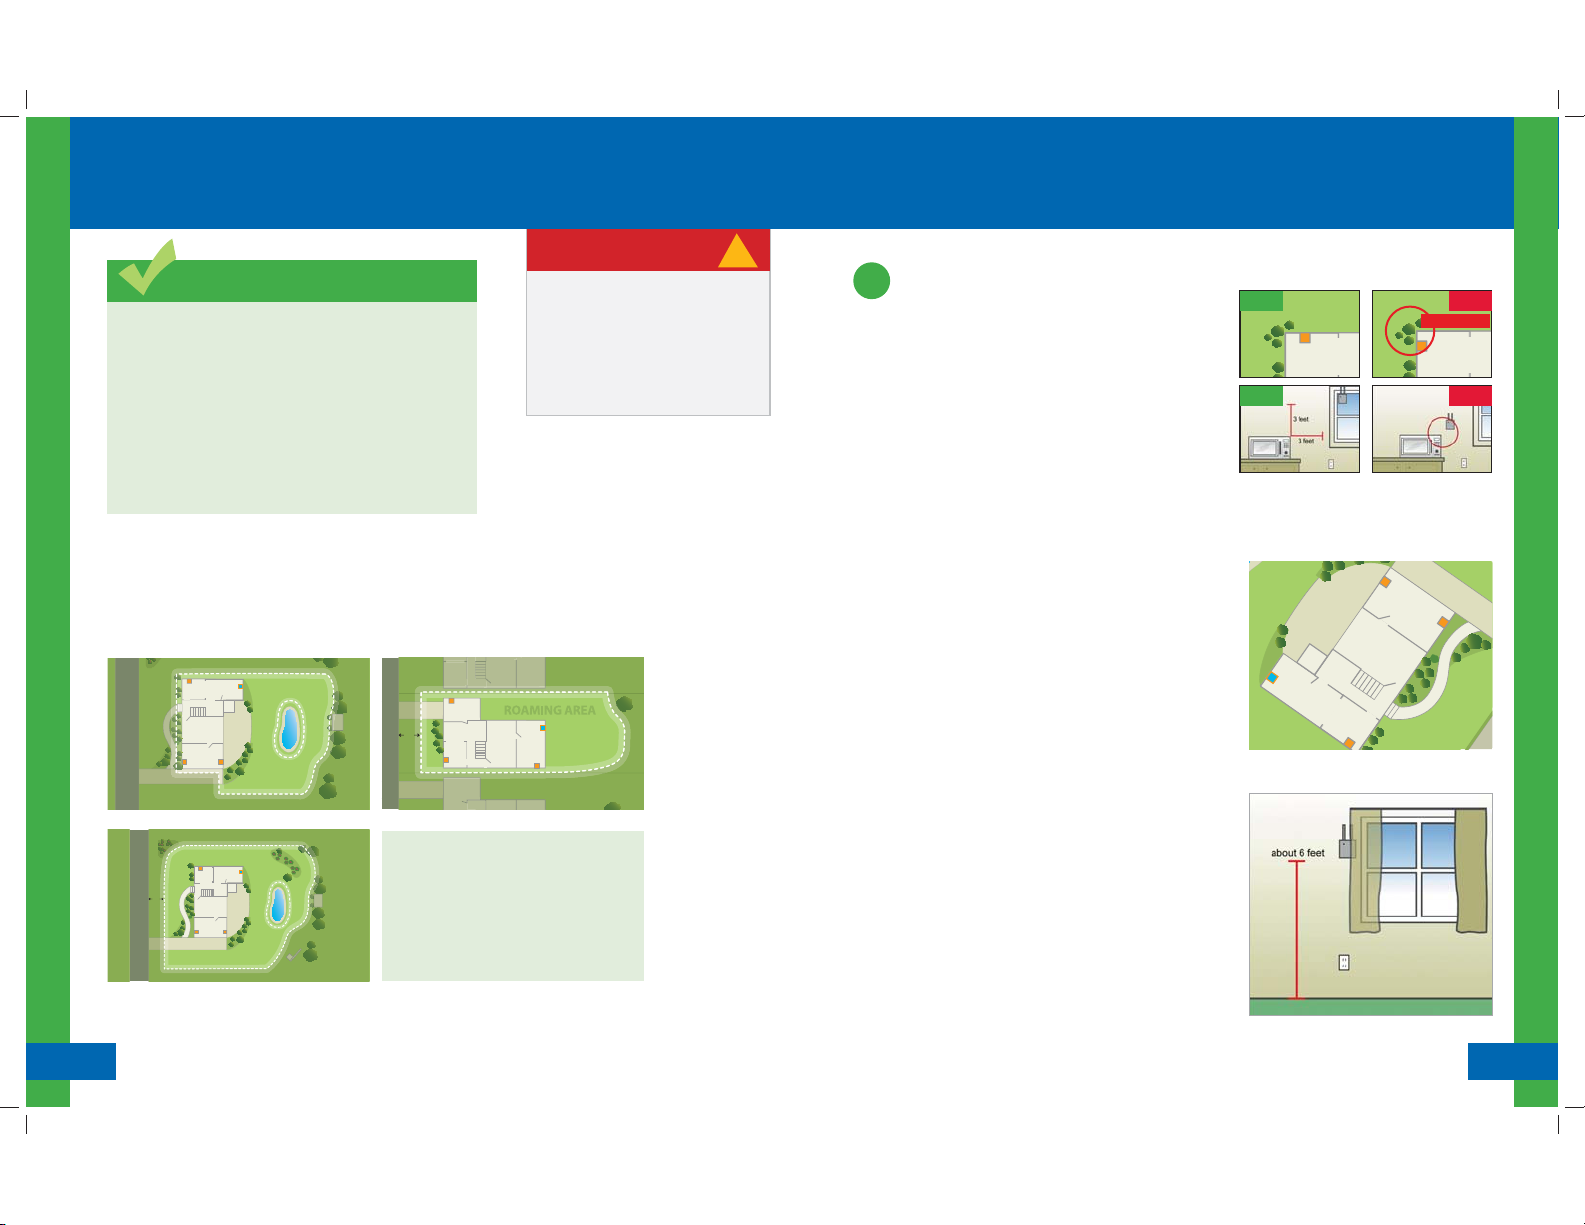
Planning Your Wireless Fence Boundary & Exclusion Zones:
Because the Custom-Shape Wireless Dog Fence is so flexible, there are an infinite number of installation layout options you
can design. Prior to installation, it is important to map out how you envision the layout of your wireless fence to ensure it suits
the custom shape of your yard while providing your dog optimum freedom and safety.
The following are sample layouts, which you may consider implementing on your property:
Master Base
Trigger Zone
Base
Master Base
Trigger Zone
Deck
Deck
R
AMING ARE
Trigger Zone
R
AMING AREA
Exclusion Zone
Trigger Zone
Exclusion Zone
Trigger Zone
Base
10 ’
Base
Narrow Yard Coverage
NOTE: The Fence Boundary or Exclusion
Zone cannot be within 20 feet of a Base
or the Collar may deliver corrections near
the Base inside the home.
Master Base
Base
Trigger Zone
Back Yard Coverage
10 ’
Entire Yard Coverage
Base
Base
Base
Base
Base
!
Setting Up the Bases
1
Installing the Bases:
• The best choice to place your Bases is on windows or outer walls
in the furthest corners of your home, near 120V AC power
outlets, spaced as far apart as possible, but a minimum of 20 feet
apart. Increasing the distance between the Bases will increase their
tracking accuracy.
• If Bases must be in the same area, such as a garage, it is better to
place Bases on adjacent walls than on the same wall.
• Do NOT place the Bases within 3 feet of metal objects, such as
mirrors, microwaves, home appliances, an electric power meter,
air conditioning units, metal grates/fences, metal screened
porches, downspouts, large bushes or other objects immediately
outside the wall. Move the Bases so that they have the best
communication path to the outside.
Position all 4 Bases at the far corners inside of your home and near a
power outlet (including the attached garage if it applies).
1. Install the Master Base A first. To identify it from the rest of
the Bases, the Master Base A is the only Base to have a USB port on
the bottom next to the power port.
Position the Master Base A in an interior corner wall near the
2.
area where your dog spends most of his time outdoors (see
Illustration A). Make sure a power outlet is nearby.
3. Using the removable wall-mount adhesive strips or screw
& wall anchor, mount the Master Base A on the appropriate
wall, approximately 6 feet off the ground or at eye level
(see Illustration B). Do not plug in the Master Base A at
this time.
4. There is no difference between the other 3 Bases. Attach them
to walls in the remaining 3 corners, approximately 6 feet off the
ground or at eye level.. Do NOT plug them in at this time.
Good
Base
OBSTRUCTIONS
Base
Good
Base placement away from
increases
obstructions
signal strength.
Base placement
obstructions decreases
signal strength.
near
Bases need to be a minimum of 20 feet apart.
Illustration A
Base B
garage
Base
C
Deck
Master Base
A
Base D
Bad
Bad
Setting Up the Bases
Illustration B
Havahart® Custom-Shape Wireless Dog Fence
7
www.HavahartWireless.com
Havahart® Custom-Shape Wireless Dog Fence
1-800-800-1819, Option 1
8
Installing the Custom-Shape Wireless Dog Fence
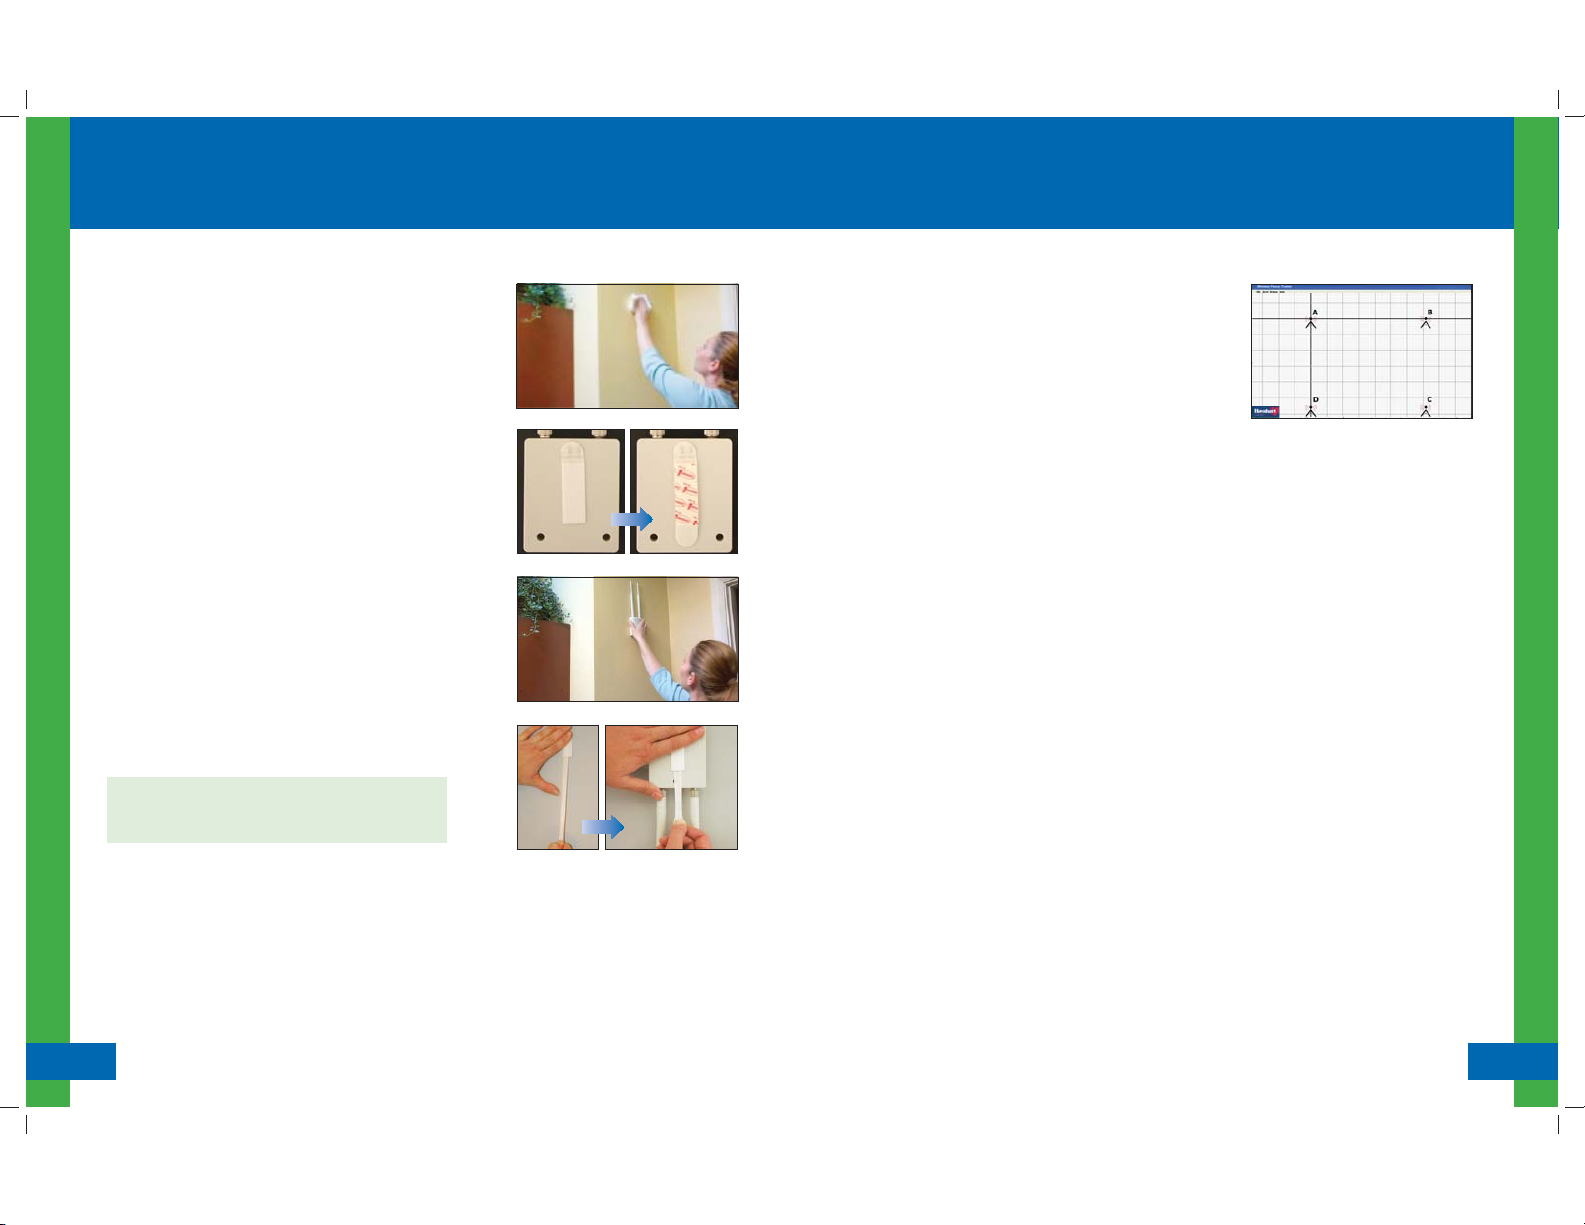
To attach using the removable wall-mount adhesive strips:
Setting Up the Bases
• Clean the surface of the desired location of the Base with isopropyl
rubbing alcohol, wipe gently with a soft cloth and let dry. DO NOT
USE household cleaners (see Figure 1.0).
• Separate strips (if still connected) at the perforation.
• Peel the liner from the back of one of the strips and attach it
vertically to the middle of the Base with the release-tab pointed
upward toward the antennas (see Figure 1.1a).
• Connect another strip to the strip on the Base by pressing the
fasteners of both strips firmly together until they snap. The
release-tab on the other strip should point downward away
from the antennas - the opposite direction of the release-tab of
the strip on the Base (see Figure 1.1b).
• Peel the liner from the back of the other strip and attach it to the
wall with the release-tab facing downward toward the floor and
the Base antennas facing upward toward the ceiling (see Figure 1.2).
To remove the adhesive strips:
• Pull the Base gently from the wall by disconnecting the fasteners.
DO NOT pull the strips off the Base or the wall.
• Start with the strip on the wall. Press one hand on the end of the
strip opposite the release-tab and use your other hand to pull
the release-tab slowly straight down against the wall, stretching it
at least 12 inches until the strip releases. Repeat for the strip
attached to the Base (see Figures 1.3a & b).
NOTE: The removable wall-mount adhesive strips are not
recommended for wallpaper. Apply to surfaces above 50˚F .
Adhesive could soften and lose adhesion above 105˚F.
Figure 1.1a
Figure 1.3a
Figure 1.0
Figure 1.2
Screen 1.2
Figure 1.1b
Figure 1.3b
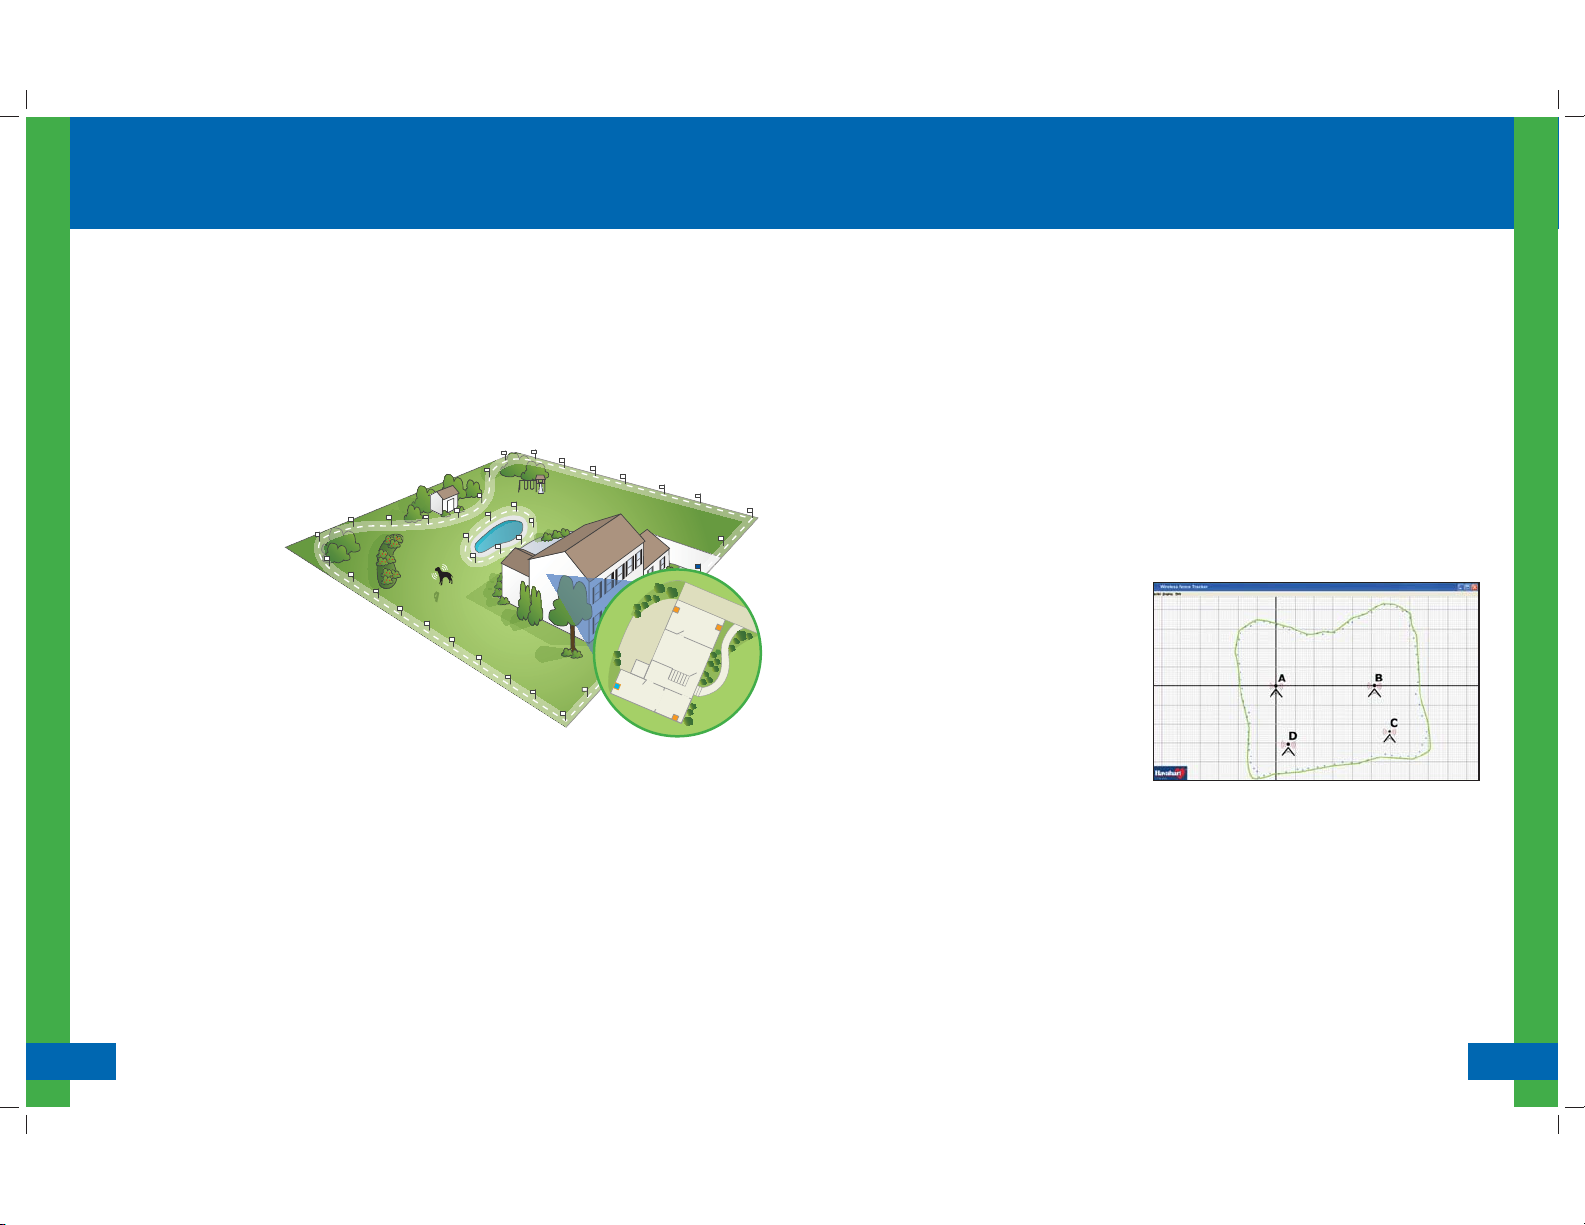
Accessing the Wireless Fence Tracker:
The Wireless Fence Tracker program allows you to see approximately
where your wireless fence boundary lies and where your dog is and has
been in relation to your Base locations. Your home computer will need
internet access in order to operate.
1. Make sure the computer is located within 6 feet of the Master Base A.
2. To access the Fence Tracker Software, visit
www.HavahartWireless.com/myaccount.
3. Create an account to gain secure access to the program.
4. The Wireless Fence Tracker Grid should appear with 4 Bases on the
screen (see Figure 2.3). At this time, these Bases do not yet
represent your Bases.
5. Disconnect the fully charged Controller from the USB cable.
6. Connect your computer to the Master Base A via the USB cable.
Setting Up the Bases
Figure 2.0
Havahart® Custom-Shape Wireless Dog Fence
9
www.HavahartWireless.com
Havahart® Custom-Shape Wireless Dog Fence
1-800-800-1819, Option 1
10
 Loading...