

Wolf Garten RQ 745, RQ 742 Instruction Manual
www.WOLF-Garten.com
Gebrauchsanweisung
Instruction manual
Mode d’emploi
Istruzione d’uso
Gebruiksaanwijzing
Brugsanvisning
Käyttöohje
Bruksanvisning
Bruksanvisning
Návod k použití
Használati utasítás
Instrukcja obsługi
RQ 745
RQ 742
- Beschreibung - Description - Description - Denominazione - Omschrijving -
- Beskrivelse - Selostus - Betegnelse - Beskrivning - Popis - Leírás - Opis -
2
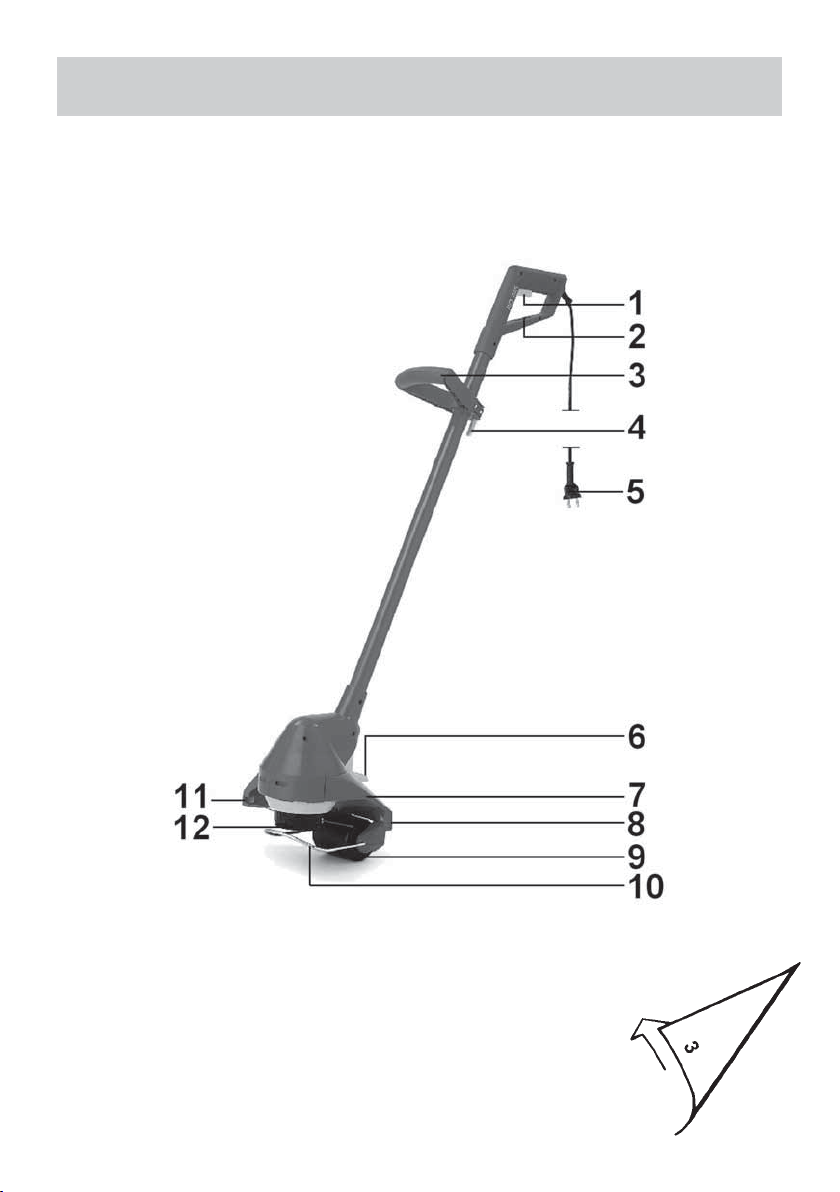
- Beschreibung - Description - Description - Denominazione - Omschrijving -
- Beskrivelse - Selostus - Betegnelse - Beskrivning - Popis - Leírás - Opis -
Zweifinger-Sicherheitsschalter
1.
Kabelzugentlastung
2.
Mittelgriff
3.
Schnellspannverschluss
4.
16m Kabel (RQ 742)
5.
Fußtaste für Winkelverstellung
6.
Lüftungsschlitze
7.
Schutzschirm
8.
Bodenrolle (RQ 745)
9.
Gleitkufe
10.
Fadenmesser
11.
Fadenkassette
12.
Interrutore di sicurezza
1.
a due dita
Guida cavo
2.
Maniglia centrale
3.
Aggancio rapido
4.
16m cavo (RQ 742)
5.
Pedale per regolazione angolo
6.
Le apporture di raffredamento
7.
L‘ombrello protettivo
8.
Rotella da terra (RQ 745)
9.
Slitta
10.
Estremitá del filo
11.
Filocasetta
12.
Kahden sormen turvakatkaisin
1.
Johdonpidin
2.
Apukahva
3.
Pikalukko
4.
16m Kabel (RQ 742)
5.
Kulmansäädön poljin
6.
Tuuletusaukot
7.
Turvalaite
8.
Turkirulla (RQ 745)
9.
Jalas
10.
Terän reuna
11.
Nailonsiimakela
12.
1.
Two-finger safety control switch
2.
Cable tension relief
3.
Middle handle
Quick toggle-type fastener
4.
16m cable (RQ 742)
5.
Foot switch for angle adjustment
6.
Air-vents
7.
Safety-cover
8.
Ground roller (RQ 745)
9.
Skid
10.
Knife edge
11.
Cord spool
12.
Tweevoudige veiligheidsschakelaar
1.
Kabelgeleider en
2.
trekontlaster geintegreerd
Middengreep
3.
Snelspansluiting
4.
16m Kabel (RQ 742)
5.
Voetknop voor hoekverstelling
6.
Ventilatiekanaal
7.
Beschermkap
8.
Bodemrol (RQ 745)
9.
Glijslede
10.
Draadmes
11.
Draadcassette
12.
To-finger sikkerhetsbryter
1.
Strekkavlastning for kabel
2.
Mellomhåndtak
3.
Hurtiglås
4.
16m kabel (RQ 742)
5.
Fodpedal for vinkelstilling
6.
Luftspalte
7.
Beskyttelsesskjerm
8.
Bakkehjul (RQ 745)
9.
Glideskinne
10.
Trådkniven
11.
Trådsnelle
12.
Interrupteur de sécurite
1.
à deux doigts
Fixe-câble
2.
Poignée centrale
3.
Serrage rapide
4.
16m câble (RQ 742)
5.
Pédale de réglage angulaire
6.
Les fentes d‘aeration
7.
L‘écran de protection
8.
Rouleau de sol (RQ 745)
9.
Patin
10.
Couteau
11.
Cassette de fil nylon
12.
1.
Tofinger-sikkerhedsafbryder
2.
Kabeltrækaflstning
3.
Mellemhåndtag
4.
Hurtiglås
5.
16m kabel (RQ 742)
6.
Fodpedal til vinkelindstilling
Ventilationsspalte
7.
Beskyttelsesskærm
8.
Bundrulle (RQ 745)
9.
Glideskinne
10.
Trådkniven
11.
Snørekassette
12.
Dubbelfingers-
1.
säkerhetsströmbrytare
Avlastningsanordning för elsladden
2.
Mellanskaft
3.
Snabbkoppeling
4.
16m kabel (RQ 742)
5.
Fotpedal för vinkelinställning
6.
Ventilationsöppningar
7.
Trådskydd
8.
Rullhjul (RQ 745)
9.
Glidbåge
10.
Trådkniven
11.
Trådkassett
12.
Bezpečnostní spínač
1.
Omezovač tahu kabelu
2.
Střední rukojeť
3.
Rychloupínací spoj
4.
16 m kabelu (RQ 742)
5.
Pedál pro nastavení úhlu
6.
Větrací otvor
7.
Ochranný kryt
8.
(RQ 745)
Válec
9.
Lyžina
10.
Nůž na ořez struny
11.
Kazeta se strunou
12.
1.
kétujjas biztonsági kapcsoló
2.
kábelkihúzás gátló
3.
középső fogantyú
4.
gyors feszítőzár
5.
16 m kábel
a szögbeállítás lábkapcsolója
6.
szellőzőrés
7.
védőernyő
8.
talajgörgő
9.
10.
csúszótalp
Késél
11.
szálkazetta
12.
(RQ 742)
(RQ 745)
3
1.
Dwupalcowy włącznik bezpieczeństwa
Zabezpieczenie przed
2.
splątaniem kabla
Uchwyt pomocniczy
3.
Zamek szybkomocujący
4.
Kabel 16m (RQ 742)
5.
6.
Przycisk nożny regulacji kąta
7.
Otwór wentylacyjny
8.
Obudowa zabezpieczająca
9.
Rolka podłogowa
Płoza
10.
Nożyk odcinający żyłkę
11.
Szpula
12.
(RQ 745)
- Betrieb - Operation - Utilisation - Messa in opera - In werking stellen -
- Drift - Käyttö - Drift - Användning - Provoz - Üzemeltetés - Eksploatacja -
- Wartung - Maintence - Entretien - Manutenzione - De verzorging - Veldigeholdese -
- Huolto - Vedlikehold - Underhåll - Údržba - Karbantartás - Konserwacja -
4
- Inhalt - Contents - Sommaire - Contenuto -
- Inhoud - Inhold - Sisällys - Innhold - Innehåll -
Sicherheitshinweise
Betriebszeiten
Betrieb
Wartung
Beseitigung von Störungen
Garantiebedingungen
Technische Daten
Garantie
Konformitätserklärung
Safety instructions
Operating times
Operating
Maintenance
Faults and how to remedy
Guarantee terms
Technical Data
Guarantee
Declaration of Conformity
Consignes de sécurité
Tranches horaires
Utilisation
Entretien
Comment remédier aux pannes
Conditions de la garantie
Données techniques
Garanitie
Déclaration de conformité
Indicazioni di sicurezza
Tempo d‘esercizio
Messa in opera
Manutenzione
Interventi di riparazione
Condizioni di garanzia
Dati tecnici
Garanzia
Dichiarazione di Conformità
S.
S.
S.
S.
S.
S.
S.
S.
S.
S.
S.
S.
S.
S.
S.
S.
S.
S.
S.
S.
S.
S.
S.
S.
S.
S.
S.
S.
S.
S.
S.
S.
S.
S.
S.
S.
6 - 7
7
7 - 8
8
9
9
51 - 52
54
56
10 - 11
11
11 - 12
12
12
13
51 - 52
54
56
13 - 14
15
15
16
16
16
51 - 52
54
56
17 - 18
18
18 - 19
19
20
20
51 - 52
54
56
Turvaohjeet
Käyttöajat
Käyttö
Huolto
Häiriöiden poistaminen
Takuuehdot
Tekniset tiedot
Takuu
Vastaavuustodistus
Sikkerhetsmerknader
Driftstider
Drift
Vedlikehold
Fjerning av feil
Garantibetingelser
Tekniske Data
Garaniti
Overensstemmelseserklæring
Säkerhetsanvisningar
Drifttider
Användning
Underhåll
Åtgärder vid störningar
Garantivillkor
Tekniska Data
Garaniti
Konformitetsintyg
Bezpečnostní pokyny
Provozní doby
Provoz
Údržba
Odstranění závad
Záruční podmínky
Tecknické údaje
Záruka
Prohlášení o shodě
S.
S.
S.
S.
S.
S.
S.
S.
S.
S.
S.
S.
S.
S.
S.
S.
S.
S.
S.
S.
S.
S.
S.
S.
S.
S.
S.
S.
S.
S.
S.
S.
S.
S.
S.
S.
28 - 29
30
30
31
31
31
51 - 52
54
55
32 - 33
33
33 - 34
34
34
35
51 - 52
54
55
35 - 36
37
37
38
38
38
51 - 52
54
55
39 - 40
40
40 - 41
41
42
42
51 - 52
54
55
Veiligheidsvoorschriften
Gebruikstijden
In werking stellen
De verzorging
Opheffen van storingen
Garantievorwaarden
Technische gegevens
Garanitie
Conformiteitsverklaring
Sikkerhedshenvisninger
Driftstider
Drift
Vedligeholdelse
Afhjælpning af fejl
Garantibetingelser
Tekniske Data
Garaniti
konformitetserklæring
S.
S.
S.
S.
S.
S.
S.
S.
S.
S.
S.
S.
S.
S.
S.
S.
S.
S.
21 - 22
22
22 - 23
23
24
24
51 - 52
54
56
25 - 26
26
26 - 27
27
27
28
51 - 52
54
55
Biztonsági előírások
Üzemidők
Üzemeltetés
Karbantartás
A hibák elhárítása
Garanciális feltételek
Műszaki adatok
Garancia
Megfelelőségi nyilatkozat
Wskazówki bezpieczeństwa
Czasy robocze
Eksploatacja
Ostrzeżenie
Usunięcie zakłóceń
Warunki gwarancji
Parametry techniczne
Gwarancja
Oświadczenie zgodności
S.
S.
S.
S.
S.
S.
S.
S.
S.
S.
S.
S.
S.
S.
S.
S.
S.
S.
43 - 44
44
44 - 45
45
46
46
51 - 52
54
55
47 - 48
48
48 - 49
49
50
50
51 - 52
54
55
5
Sicherheitshinweise
Diese Maschine kann ernste Verletzungen verursachen! Lesen Sie die Gebrauchsanweisung sorgfältig,
und machen Sie sich mit den Bedienungselementen und dem richtigen Gebrauch des Gerätes vertraut.
Der Benutzer ist verantwortlich für Unfälle mit anderen Personen oder deren Eigentum. Beachten Sie die
Hinweise, Erläuterungen und Vorschriften.
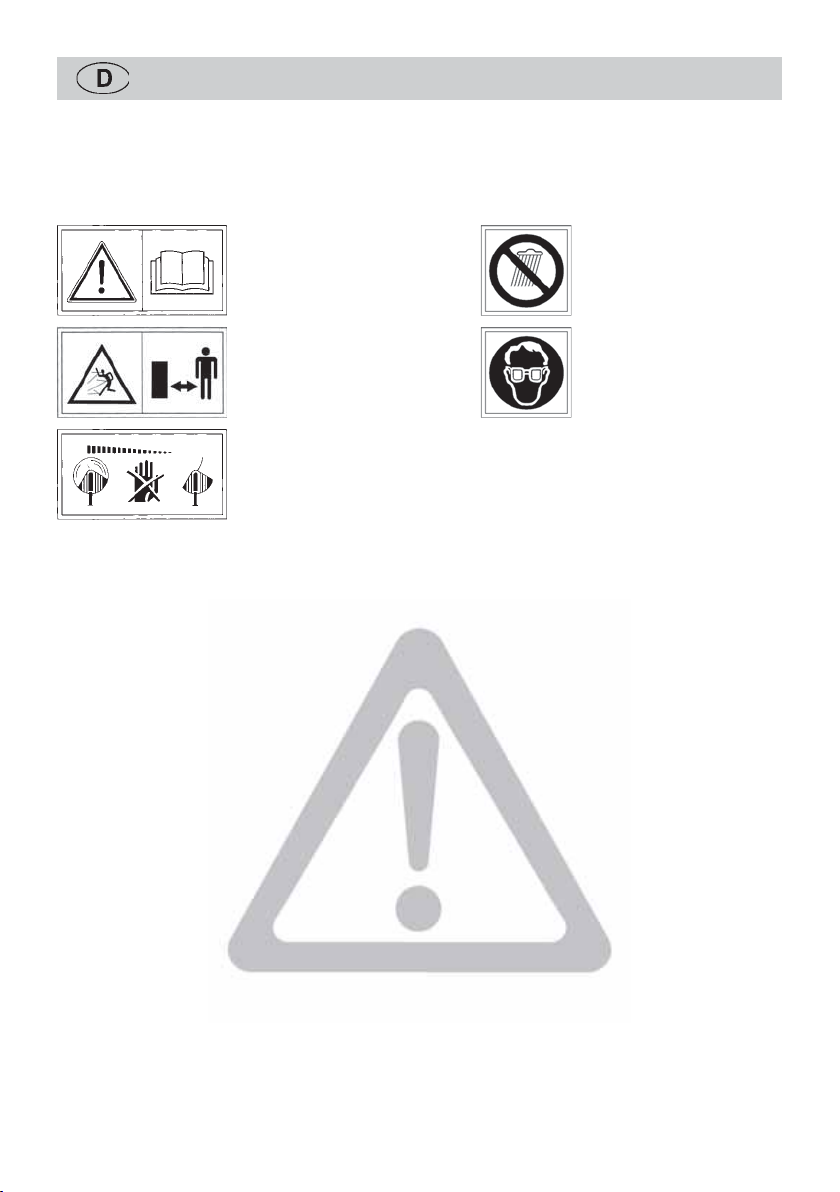
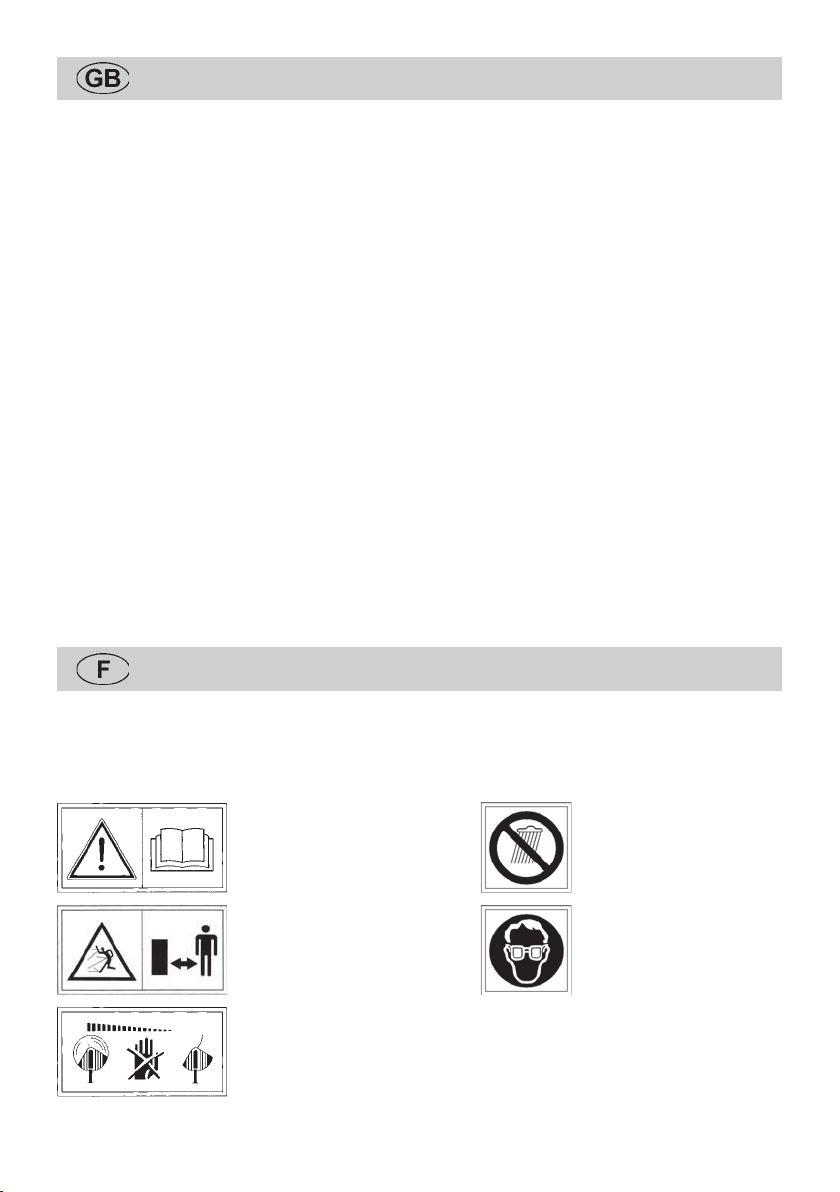
Bedeutung der Symbole
Achtung!
Lesen Sie vor Inbetriebnahme
die Gebrauchsanweisung!
Nicht dem Regen aussetzen!
Dritte aus dem Gefahrenbereich
fernhalten!
Werkzeug läuft nach!
1. Allgemeine Hinweise
• Dieser Rasenkantentrimmer ist für die Pflege von Rasenkanten sowie kleineren Gras- und Rasenflächen
im privaten Bereich vorgesehen. Dieser Trimmer sollte nicht in öffentlichen Anlagen, Parks, Sportstätten, an
Straßen usw. sowie in der Land- und Forstwirtschaft eingesetzt werden.
• Wegen körperlicher Gefährdung des Benutzers darf der Rasentrimmer nicht gebraucht werden:
- zum Trimmen von Büschen, Hecken und Sträuchern;
- zum Schneiden von Blumen;
- zum Zerkleinern im Sinne der Kompostierung.
• Aus Sicherheitsgründen dürfen Jugendliche unter 16 Jahren sowie Personen, die mit der Handhabung nicht
vertraut sind, diesen Rasentrimmer nicht benutzen.
• Das Gerät darf nicht in Betrieb genommen werden, wenn sich Personen (insbesondere Kinder) oder Tiere in
unmittelbarer Nähe befinden; Sie sind für die Schäden verantwortlich.
•
Unterbrechen Sie den Gebrauch der Maschine, wenn Personen, vor allem Kinder oder Haustiere in der Nähe sind.
• Benutzen Sie die Maschine nur bei Tageslicht oder guter künstlicher Beleuchtung.
• Den Trimmer nur bei trockenem Wetter benutzen und nicht im Regen liegenlassen.
• Montieren Sie nie metallische Schneidelemente.
2. Vor dem Einsatz
• Säubern Sie den Rasen von Fremdkörpern wie Äste, Steine, Draht usw. Achten Sie auch während des
Trimmens auf Fremdkörper.
• Das außen am Gerät installierte Anschlusskabel und das Verlängerungskabel müssen regelmäßig auf
Beschädigung und Alterung (Brüchigkeit) untersucht werden. Nur in einwandfreiem Zustand benutzen!
• Benutzen Sie niemals ein Gerät mit beschädigten Schutzeinrichtungen oder Abdeckungen.
• Aus Sicherheitsgründen sind nur Originalersatzteile oder vom Hersteller freigegebene Teile zu verwenden.
Beim Austausch Einbauhinweise beachten!
• Vor dem Einstellen oder Säubern des Gerätes oder vor dem Prüfen, ob die Anschlussleitung verschlungen
oder verletzt ist, das Gerät ausschalten und den Netzstecker ziehen.
• Vor Inbetriebnahme der Maschine und nach irgendwelchem Aufprall, prüfen Sie die Anschlussleitung auf
Anzeichen von Verschleiß oder Beschädigung, und lassen Sie notwendige Reparaturen durchführen.
3. Das Kabel
• Bitte arbeiten Sie mit WOLF-Sicherheitskabeln. Als Anschluss dürfen nur Leitungen verwendet werden, die
nicht leichter sind als Gummischlauchleitungen HO7 RN-F nach DIN/VDE 0282 mit einem Mindestquerschnitt
von 3 x 1,5 mm².
• Die Kupplungen der Anschlusskabel müssen aus Gummi oder gummiüberzogen sein und der Norm DIN/VDE
0620 entsprechen.
• Benutzen Sie eine Fehlerstromeinrichtung (RCD) mit einem Fehlerstrom von nicht mehr als 30 mA.
• Anschlusskabel an der Zugentlastung befestigen. Nicht an Kanten, spitzen oder scharfen Gegenständen
scheuern lassen. Kabel nicht in Türritzen oder Fensterspalten durchführen.
Augenschutz tragen!
6
Sicherheitshinweise
4. Beim Arbeiten:
Halten Sie immer Hände und Füße von der Schneideinrichtung entfernt vor allem, wenn Sie den Motor einschalten.
•
• Seien Sie vorsichtig gegen Verletzungen an jede Einrichtung, die zum Abschneiden der Fadenlänge dient.
Nach dem Herausziehen eines neuen Fadens halten Sie die Maschine immer in ihrer normale Arbeitsposition,
bevor sie eingeschaltet wird.
• Den Rasentrimmer beim Einschalten parallel zum Rasen halten, da sonst Verletzungsgefahr gegeben ist.
Auch beim Arbeiten Sicherheitsabstand zum rotierenden Faden einnehmen. Nicht in den rotierenden Faden greifen.
•
• Tragen Sie immer geeignete Arbeitskleidung; keine weite Kleidung etc. die vom Schneidwerkzeug erfasst
werden kann. Festes Schuhwerk! Schützen Sie auch Ihre Beine (z. B. durch lang Hosen).
• Augenschutz tragen!
• Beim Transport zu den einzelnen Arbeitsstellen, ist der Motor abzustellen.
• Üben Sie besondere Vorsicht beim Rückwärtsgehen. Stolpergefahr!
• Halten Sie die Anschlussleitungen von den Schneidwerkzeugen fern.
• Wenn die Anschlussleitung während des Gebrauchs beschädigt wird, muss sie sofort vom Netz getrennt
werden. Leitung nicht berühren bevor sie vom Netz getrennt ist.
• Bei Arbeitsunterbrechungen lassen Sie den Trimmer nie unbeaufsichtigt liegen. Bitte an einem sicheren Ort
aufbewahren.
• Die am Gerät installierten Schalteinrichtungen dürfen nicht entfernt oder überbrückt werden (z. B. durch
Anbinden des Tastschalters am Griff).
• Die Fadenbox nicht auf den Boden stoßen und nicht an Mauerkanten anschlagen. Hat die Fadenbox einmal
einen starken Stoß erlitten, ist auf eine verstärkte Vibration am Griff zu achten. Wenn dies der Fall ist, muss
das Gerät von einer Kundendienstwerkstatt überprüft werden.
5. Nach dem Arbeiten
• Ziehen Sie nach dem Gebrauch den Netzstecker und überprüfen Sie die Maschine auf Beschädigung.
• Beim Abstellen: Achtung, Gefahr! Schneidwerkzeug läuft nach!
• Immer den Stillstand des Schneidwerkzeuges abwarten.
• Wartungs- und Reinigungsarbeiten am Gerät, sowie das Abnehmen der Schutzeinrichtungen oder der
Austausch der Fadenkassette, dürfen nur bei stillgesetztem Motor und abgeschaltetem Schneidwerkzeug
und nur, wenn der Netzstecker abgezogen ist, vorgenommen werden. Nur Original-WOLF-Fadenkassetten
verwenden, Einbauhinweise beachten!
Der Fadenschneider darf nicht mit fließendem Wasser, insbesondere nicht unter Hochdruck gereinigt werden.
•
•
Reparaturen am Gerät dürfen nur von WOLF-Service-Stationen und autorisierten Werkstätten vorgenommen werden.
• Achten Sie darauf, dass Luftöffnungen frei von Verschmutzungen sind.
• Lagern Sie die Maschine nicht in Reichweite von Kindern.
Betriebszeiten
Bitte regionale Vorschriften beachten.
Erfragen Sie die Betriebszeiten bei Ihrer örtlichen Ordnungsbehörde.
Betrieb
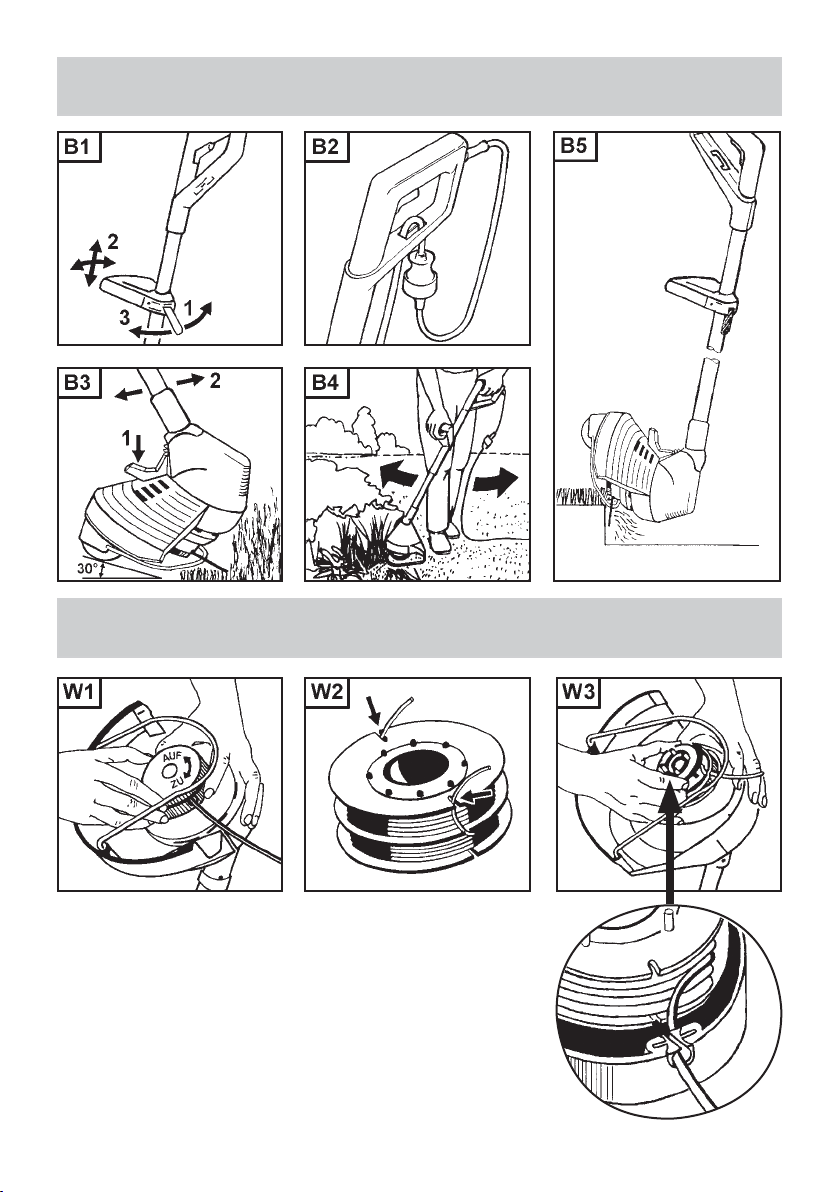
Mittelgriff einstellen (Abb. B1)
Der Mittelgriff kann individuell auf Ihre Körpergröße eingestellt werden (Tipp: 20 cm vom Obergriff).
1. Schnellbefestigung lösen.
2. Mittelgriff in Arbeitsstellung bringen.
3. Schnellbefestigung feststellen.
Anschlusskabel befestigen (Abb. B2)
Zur Zugentlastung das Anschlusskabel nach Abbildung montieren.
Anschluss an die Steckdose
Das Gerät kann an jede Steckdose angeschlossen werden (Wechselstrom 230 V, 50 Hz).
Achtung!
Bitte arbeiten Sie mit WOLF-Sicherheitskabeln. Als Anschluss dürfen nur Leitungen verwendet
werden, die nicht leichter sind als Gummischlauchleitungen HO7 RN-F nach DIN/VDE 0282 mit
einem Mindestquerschnitt von 3 x 1,5 mm².
7

Betrieb
Stielneigung einstellen (Abb. B3)
• Die Stielneigung wird mit der Fußtaste (1) eingestellt.
• Fünf Einstellungen sind möglich (obere Stellung = Parkstellung).
Arbeitsstellung
Für Kantenschnitt und Freischneiden sollte man die mittlere Einstellung wählen (30°).
Freischneiden (Abb. B4)
Beim Freischneiden (ohne Bodenkontakt) sollte man das Gerät halbkreisförmig vor dem Körper
schwingen.
Senkrechtes Trimmen (Abb. B5)
Zum Trimmen von Rasenkanten geeignet.
1. Mittelgriff um 180° drehen.
2. Stielneigung in die niedrigste Stellung.
Trimmen mit der Bodenrolle (RQ 745)
Ideal für kleine Flächen, unter Büschen, Bäumen und an Hängen. Stielneigung: mittlere bis
niedrigste Stellung.
Tipps zum Trimmen
• Höheres Gras langsam und stufenweise schneiden.
• Gerät mit Schneidfaden nur so nahe an Bäume und Sträucher heranführen, dass die Rinde
nicht verletzt wird.
• Zu starkes Berühren von Mauern oder Grasplatten führt zu großem Fadenverschleiß.
•
Wird durch Verschleiß der Schneidfaden zu kurz, das Gerät einfach ausschalten. Der Faden stellt
sich dann automatisch nach.
•
Bei jedem Ein- und Ausschalten stellt sich der Faden automatisch 6-12 mm nach. Häufiges An-
und Abschalten ohne Grund führt daher zu erhöhtem Fadenverschleiß.
•
Sie erhöhen die Lebensdauer Ihres Trimmers, wenn Sie vor oder nach jedem Trimmen, die
Lüftungsschlitze reinigen und die Unterseite des Gerätes von Grasresten säubern.
• Das Mähgut kompostieren oder als Abdeckung des Bodens unter Sträuchern nutzen.
Wartung
Fadenkassette RQ-F5 austauschen
Achtung! Schneidwerkzeug läuft nach! Vor allen Arbeiten am Gerät Netzstecker ziehen!
1.
Spulengehäuse festhalten, Deckel in Pfeilrichtung „AUF“ drehen und abnehmen, leere Fadenkassette
entnehmen (Abb. W1).
2.
Um ein unbeabsichtigtes Abspulen zu vermeiden, Fadenenden der neuen Fadenkassette vor dem
Einlegen nicht aus den Halteschlitzen nehmen (Abb. W2).
3.
Fadenkassette über den roten Knopf schieben (runde Nocken müssen zum Deckel zeigen).
Fadenenden in die Fadenführungen einlegen, korrekte Spurlage der Fäden von der Fadenkassette
zur Fadenführung kontrollieren, Deckel aufsetzen, andrücken, und in Pfeilrichtung „ZU“ bis zur
hörbaren Rastung drehen (Abb. W3).
Achtung! Achten Sie auf korrekten Sitz des Deckels. Beim Aufsetzen müssen die Pfeilmarkierungen
zur Fadenführung zeigen!
Vor dem Einschalten: Rasentrimmer parallel zum Boden halten, da sonst Verletzungsgefahr besteht.
8

Beseitigung von Störungen
Problem Ursache Abhilfe
Fadenkassette RQ-F5 (7120 080)
austauschen.
Teile mit Bürste vom Schmutz
säubern.
Fadenspule entnehmen, ggf.
Faden mit leichtem Zug neu
aufwickeln und Spule einlegen.
Verschweißten Fadenteil entfernen,
ggf. Faden mit leichtem Zug neu
aufwickeln und Spule einlegen.
Automatische
Fadennachstellung
funktioniert nicht
Spule leer
Verzahnung zwischen rotem Knopf
und Fadenspule verschmutzt.
• Schneidfaden ist abgerissen und
in die Fadenbox eingezogen.
• Schneidfaden hat sich auf der
Spule verklemmt.
Schneidfaden ist auf der Spule
verschweißt.
Im Zweifelsfall immer eine WOLF Service-Werkstatt aufsuchen.
Achtung, Trimmer vor jeder Prüfung, Reinigung oder Arbeiten an der Spule abstellen
und Netzstecker ziehen.
Bei Rückfragen: WOLF-Garten GmbH & Co KG, Kundenservice, Industriestr. 83-85,
D-57518 Betzdorf, Tel. (0 27 41) 28 15 00, Fax (0 27 41) 28 12 99.
Internet: www.WOLF-Garten.com
Garantiebedingungen
Die vom Verkäufer ausgefüllte Garantiekarte bzw. den Kaufbeleg bitte sorgfältig aufbewahren.
Für die Dauer von 24 Monaten vom Kaufdatum an leistet die Firma WOLF-Garten eine dem jeweiligen Stand der
Technik und dem Verwendungszweck/Anwendungsgebiet entsprechende Garantie.
Die gesetzlichen Rechte des Endverbrauchers werden durch die nachstehenden Garantierichtlinien nicht beeinträchtigt.
Voraussetzungen für den 24monatigen Garantieanspruch:
• Einsatz des Gerätes für den ausschließlich privaten Gebrauch.
• Im gewerblichen Bereich oder Verleihgeschäft reduziert sich die Garantie auf 12 Monate.
• Sachgemäße Behandlung und Beachtung aller Hinweise in der Gebrauchsanweisung, die Bestandteil unserer
Garantiebedingungen ist.
• Beachtung der vorgeschriebenen Wartungsintervalle.
• Keine eigenmächtige Änderung der Konstruktion.
• Einbau von original WOLF Ersatzteilen/Zubehör.
• Vorlage der ausgefüllten Garantiekarte und/oder des Kaufnachweises.
Die Garantie erstreckt sich nicht auf den normalen Verschleiß von Messern, Messerbefestigungsteilen wie
Reibscheiben, Keil-/Zahnriemen, Laufräder/Reifen, Luftfilter, Zündkerzen und Zündkerzenstecker. Bei eigenmächtiger
Reparatur erlischt automatisch sofort jeglicher Garantieanspruch. Auftretende Fehler und Mängel, deren Ursachen auf
Material- oder Fertigungsfehler zurückzuführen sind, werden ausschließlich durch unsere Vertragswerkstätten (der
Verkäufer hat das Recht zur Nachbesserung) in Ihrer Nähe oder, falls er näher liegt, durch den Hersteller beseitigt.
Über die Garantieleistung hinausgehende Ansprüche sind ausgeschlossen. Ein Anspruch auf Ersatzlieferung besteht
nicht. Etwaige Transportschäden sind nicht uns, sondern dem zuständigen Transportträger zu melden, da sonst die
Ersatzansprüche an diese Unternehmen verloren gehen.
9
Safety instructions
This machine can cause serious injury! Read the operating instructions carefully and familiarize yourself
with all the operating elements and with the correct use of the device. The user is responsible for accidents
involving other people or their property. Pay attention to the instructions, explanations, and regulations.
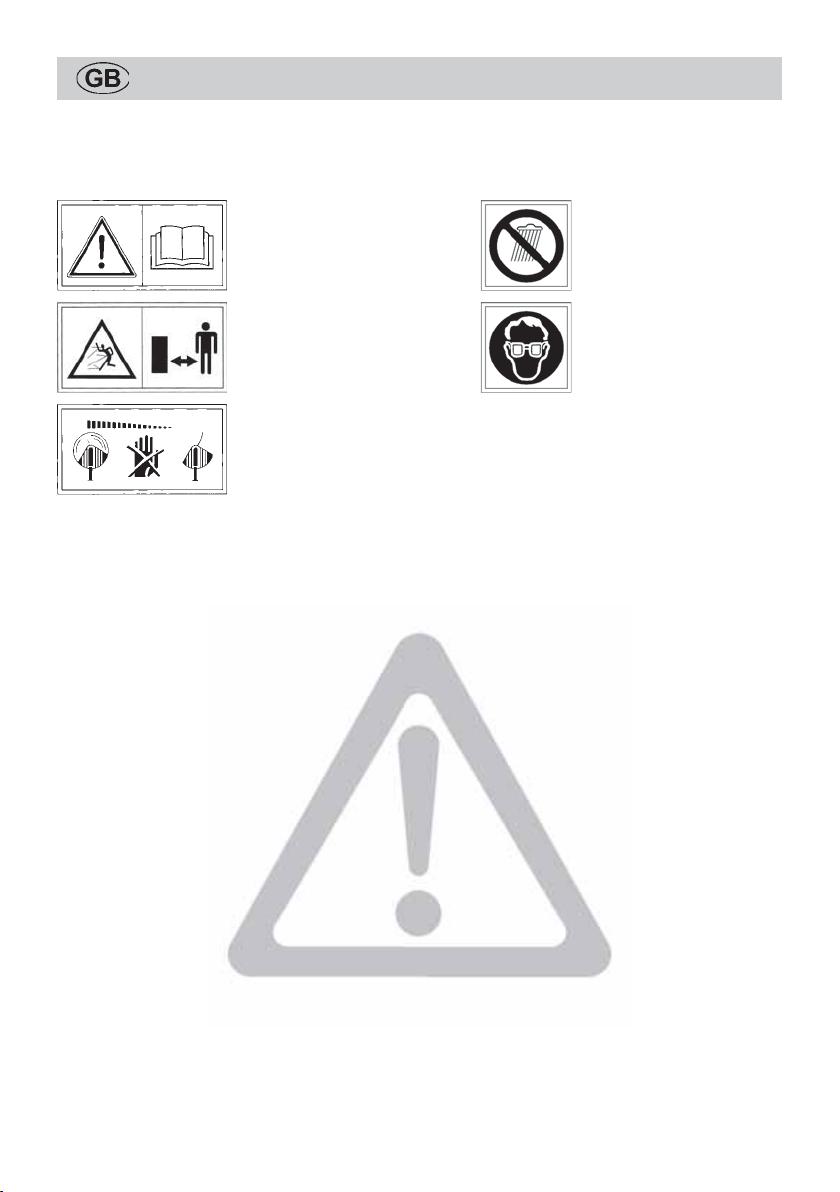
Symbol defi nition
Warning!
Read the operating instructions
before placing in service!
Do not expose to moisture!
Keep bystanders away!
Wear protective goggles!
Tool is coasting!
1. General
• This trimmer is ideal for trimming lawn edges and small lawn areas in private gardens. The trimmer should
not be used in public gardens, parks, sports grounds, streets etc. and in farming and forestry.
• Because of possible accidents the trimmer must not be used for:
- trimming of bushes and hedges
- cutting of flowers
- cutting garden by-products for composting
• For safety reasons, the trimmer is not for use by persons below 16 years of age and persons who are not
familiar with its handling.
• Make sure that no persons (in particular children) or pets are in the vicinity of the working area. You are
responsible for damages.
• Never operate the unit in the presence of individuals (particularly children) or animals.
• Only operate the unit in daylight hours or if adequate artificial lightning is available.
• Use trimmer when the weather is dry and do not leave it outside when it rains.
• Use a residual current device (RCD) rated for a residual current not greater than 30 mA.
• Never install metal cutting elements.
2. Before operating
• Before starting the trimmer, clear all string, wire etc. away from the area to be cut. Whilst cutting look out for
foreign objects.
• All cable must be inspected regularly for signs of damage or ageing. Use only in perfect condition!
• Tool must not be used when the safety device or the covering is damaged.
• For safety reasons only original WOLF spare-parts or parts appointed by the manufacturer shall be used.
Please note the installation instructions!
• Before adjusting or cleaning the tool and before checking for a caught or damaged connecting cable, switch
off the tool and disconnect the mains plug.
• Before starting the unit, and after any impacts, examine the unit for signs of wear or damage. Have any
detected damage repaired immediately.
3. Cable
• This cable connectors must be made of rubber or must be rubber-lined and must conform to national
legislation as applicable.
• The cables‘ plugs must be made of rubber or must be rubber-coated and correspond to DIN/VDE 0620.
• Use a residual current device (RCD) rated for a residual current not greater than 30 mA.
• Do not allow the cable to strike the ground or edges of walls.
• Repairs should be done by experts.
4. Working
• Always keep hands and feet well clear of the cutting mechanism, particularly when starting the unit.
• Avoid injury from each of the components which serve to cut the line length. After pulling out a new length of
line, always hold the unit in its normal operating position before starting it.
• When starting the trimmer hold its base parallel to the lawn area in order to avoid accidents.
10

Safety instructions
• Keep your hands away from the moving cord.
• Wear eye protection!
• Always wear appropriate working clothes and sound footwear when using the trimmer.
• Before carrying the trimmer to the next lawn area to be cut, switch it off.
• Be careful when you go backwards. You may stumble!
• Keep the cable away from the cutting tool.
• Should the powercord be damaged during use, immediately disconnect it from the mains. Do not touch the
cable until it has been disconnected from the mains.
• Never leave the trimmer without supervision. Store it in a safe place.
• The switches installed shall not be removed or bridged over, e. g. by binding the switch to the handle.
•
Do not allow the cord spool to strike the ground or edges of working area. If the cord spool receives a hard knock, this
will cause a strong vibration on the handle. If this occurs, the trimmer should be checked by a qualified service centre.
5. After operating
• After using the unit, disconnected the power cord from the wall outlet and inspect the unit for damage.
• When switching off the trimmer: Attention: the cutting tool does not stop immediately!
• Always wait for the cutting tool is stop.
•
Before examining or cleaning the tool or before removing the safety device or the cord spool, switch off and
disconnect the trimmer from the mains. Only use original WOLF cord spools and note the installation instructions!
• The cutting knife should not be cleaned under running water or under high-pressure.
• Faults shall only be repaired by appointed service centres or by the manufacturer.
• Make sure all air holes are free of dirt.
• Do not store the unit within reach of children.
Operating times
Please convider the individual country spezification.
Operation
How to adjust the central handle (fig. B1)
The central handle may be adjusted individually depending on the height of the user.
Recommendation: 20 cm from the upper handle.
1. Open the quick-fixing device.
2. Slide the central handle to your working position.
3. Tighten the quick-fixing device.
Mounting the extension cable (fig. B2)
See illustration
Connection to power source
Alternating current, 230 V, 50 Hz. The tool can be connected to any mainssocket.
Attention!
To connect tool to mains use only approved extension cable (HO7 RN-F3 G1.0).
Adjust main shaft angle (fig. B3)
• Use foot switch to adjust main shaft angle.
• Five positions are possible (Upper position = park position).
Working position
For edge cutting and free cutting approx set shaft angle to middle position (30°).
Free cutting (fig. B4)
For free cutting (no ground contact) swing device in a semicircle before your body.
Vertical trimming (fig. B5)
For trimming of lawn edges.
1. Turn the middle handle by 180°
2. Set shaft angle to lowest position.
11

Operation
Trimming with the ground roller (RQ 745)
Ideal for small areas, under bushes, trees and on slopes. Set shaft angle to medium or lowest
position.
Trimming hints
• Trim high grass in stages and move the trimmer slowly.
Move trimming head only as close to tree trunks and bushes as necessary.
•
• Trimming too closely along walls or concrete slabs wears out line unnecessarily.
If nylon line is worn simply switch off motor - more line will then extend from the spool
•
automatically when restarted.
Each time the machine is switched on and off about 6 - 12 mm of line will be fed out from
•
the spool automatically. Avoid switching the unit off and on unnecessarily in order to prevent the
unnecessary wear of line.
• The life of your trimmer will be prolonged if you clean the ventilating slits before or after
each trimming session and remove any remaining grass from the bottom of the device.
• Compost the mowings well or use them to cover the ground underneath bushes.
Maintenance
Replacing thread cartridge
Attention! Cutting tool coasts to stop! Disconnect plug before any maintenance work on the tool!
1.
Hold spool case, turn cover in „AUF“ (open) direction of the arrow and remove it, remove
empty thread cartridge (fig. W1).
To prevent unintended unwinding do not remove the thread ends of the new thread cartridge
2.
from the retaining slits before inserting the cartridge
3.
Push thread cartridge over red button (round cams must be directed towards the cover).
Place thread ends into thread guide, check for correct run of the threads from the thread
cartridge to the thread guide, replace cover, push it down and turn it in the „ZU“ (close)
direction of the arrow until it clicks into position (fig. W3).
Attention! Check for correct position of the cover. When replacing the cover, the arrow
markings must be directed towards the thread guide. Before switching on: Hold lawn trimmer
parallel to the ground in order to prevent injury.
(fig. W2).
Faults and how to remedy
Problem Possible cause Remedy
Spool is empty. Fit new spool.
Dirt and debris in spool drive
Automatic line feed
mechanism is not
working.
When in doubt, always consult a WOLF service workshop.
Important: Switch off the trimmer and disconnect the mains plug before inspecting,
cleaning or working on the thread.
mechanism.
Line is torn and stuck inside spool.
Line is „welded“ to itself or to
spool through heat build-up.
12
Clean parts with a brush.
Remove spool, check tightness of
winding and replace spool in the
usual way.
Remove welded line section, check
tightness of winding and replace
spool in the usual way.
Guarantee terms
Please carefully retain the guarantee card completed by the seller, or the proof of purchase.
The company WOLF-Garten provides a guarantee for 24 months from the date of purchase. This guarantee is in
accordance with the relevant state of technology and the utilisation purpose / area of application.
The consumer’s statutory rights are not affected by the following guarantee guidelines.
Pre-conditions for the 24-month guarantee entitlement:
- Deployment of the device solely for private use.
The guarantee is reduced to 12 months in the commercial sector or leasing business.
-
Proper handling and observance of all information given in the operating manual, which forms part of our guarantee terms.
- Observance of the prescribed maintenance intervals.
- No unauthorised alteration of the design.
- Installation of original WOLF replacement parts / accessories.
- Presentation of the completed guarantee card and/or proof of purchase.
This guarantee does not extend to normal wear-and-tear on blades, blade mounting components or friction disks,
V-belts/toothed belts, running wheels/tyres, air fi lters, spark plugs and spark plug connectors. Any guarantee claim
shall be immediately void in the event of unauthorised repairs. Faults and defects which can be traced to material
or manufacturing faults will be rectifi ed exclusively by our contracted workshops (the seller has the right to remedy
a defect) in your vicinity, or by the manufacturer if the latter is closer. Any claims going beyond the provision of a
guarantee are ruled out. There is no entitlement to a replacement. Any transport damage should be reported not to
us but to the shipper in question since, otherwise, any compensation claims vis-à-vis the shipper would be voided.
Consignes de sécurité
Cette machine peut causer des blessures graves ! Veuillez lire avec attention le mode d‘emploi et
vous familiariser avec les éléments de commande et l‘utilisation correcte de l‘appareil. L‘utilisateur
est responsable des accidents survenant à des tiers ou à leur propriété. Respectez les consignes,
explications et règlements.
Signifi cation des symboles
Attention!
Lisez le mode d‘emploi
avant la mise en service!
Eloignez les tiers de la zone
dangereuse!
L‘outil marche à vide!
13
Ne pas exposer à la pluie!
Portez des protections pour
les yeux!

Consignes de sécurité
1. En général
• L’appareil est idéal pour l’entretien des bords de pelouses et de petites pelouses privées. Cette tondeuse
apparaat uitzetten en de stekker eruit halen. à fil WOLF n’est pas à utiliser dans les jardins publics, les
parcs, les stades étc. et même pas dans l’agriculture et activité forestière.
• A cause d’accidents possibles, l’appareil ne doit pas être utilisé:
- pour tondre des buissons, haies et des arbrisseaux;
- pour découper des fleurs
- pour couper des résidus jardinières en morceaux.
• Ne laissez pas utiliser cet appareil par des jeunes de moins de 16 ans et par des personnes qui ne se sont
pas familiarisés avec l’opération de cette tondeuse.
• Arrèter l’appareil, lorsque des personnes, mais surtout des enfants ou des animaux domestiques, se trouvent
à procimité.
• Veillez à ce qu’il n’y ait personne (particulièrement des enfants) a proximité immédiate de l’appareil en action.
Vous êtes responsable.
• N’utiliser l’appareil qu’à la lumière du jour ou à luminosité artificielle èquivalente.
• Ne l’utilisez pas quand l’herbe est mouilleé et ne le laissez pas dehors quand il pleut.
• Ne jamais monter d’éléments de coupe métalliques.
2. Avant la mise en marche
• Enlevez tous les corps étrangers (ficelles, fils de fer étc.) de la surface à tondre et même pendant la tonte
regardez bien s’il n’en reste pas.
• Vérifiez régulièrement le bon état du cáble d’alimentation. Regardez bien s’il n’est pas croqué ou dénudé
ou simplement usé. N’utilisez jamais l’appareil lorsque le câble d’alimentation n’est pas dans un état
impéccable.
• N’utilisez jamais l’appareil lorsque l’écran de protection ou le dispositif de sécurité est endommagé.
• Pour des raisons de sécurité n’utilisez que des pièces d’origine ou agrées par WOLF. Observez les
instructions de montage.
• Débranchez la fiche avant d’ajuster ou nettoyer l’appareil ou avant de vérifier si le câble d’alimentation s’est
entrelacé ou endommagé.
• Avant de mettre l’appareil en marche ou après un choc, contrôler son état d’usure et d’emdommagement et
faire effectuer les réparations nécessaires.
3. Câbles
• Les accouplements des câbles de raccord doivent être en caoutchouc ou recouverts de caoutchouc et
satisfaire aux consignes nationales correspondantes.
• Les prises et fiches des câbles de rallonge doivent être moulées (DIN/VDE 0620).
•
Utilisez un dispositif de protection de courant de défaut (RCD) avec un courant de défaut n’excédant pas 30 mA.
• Ne frappez pas le câble d’alimentation contre le sol ou ne le cognez pas contre un mur.
• Les reparations doivent étre éffectuées par des spécialistes.
4. L’appareil en opération
• Ne pas mettre les mains et les pieds à proximité du dispositif de coupe, surtout pour démarrer le moteur.
• Veiller à ne pas se blesser au niveau du dispositif de découpe du fi l coupe-bordures. Après avoir tiré une
nouvelle longueur de fi l, tenir l’appareil dans sa position de travail avant de le mettre en marche.
• Gardez l’appareil parallèle à la pelouse lors de la mise en marche.
• N’approchez pas la main ou le pied du fi l en rotation.
• Porter des lunettes de protection!
• Portez toujours des vêtements adéquats et des chaussures fermées pour tondre.
• Pour transporter la tondeuse jusqu’à l’autre pelouse à tondre, coupez toujours le moteur.
• Gardez le câble d’alimentation à l’écart de la tondeuse.
• Si l’appareil abîme le câble d’alimentation pendant l’utilisation, débranchez immédiatement la fi che mâle de
la prise de secteur. Ne touchez jamais le câble tant qu’il n’est pas débranché du secteur.
• Toujours surveiller la tondeuse. Gardez l’appareil dans une bonne place.
• Les parties élèctriques installées ne doivent pas être enlevées. N’attachez jamais l’interrupteur à la poignée.
• Ne frappez pas la cassette de fi l contre le sol ou ne la cognez pas contre un mur. Si malgré toutes vos précautions, la cassette reçoit un solide coup et que vous constatez de fortes vibrations dans la poignée, faites
vérifi er l’appareil par une des nombreuses stations service WOLF.
5. Après l’opération
• Après utilisation, débrancher l’appareil et rechercher toute trace d’endommagement.
• Attention! Le système de coupe continue à tourner quelques instants après la rupture de courant!
• Toujours attendre l’arrêt complèt du système de coupe.
•
Avant d’éffectuer une réparation, un entretien ou un nettoyage quelconque de l’appareil et avant d’enlever l’écran de
protection ou de remplacer la cassette de fi l, coupez toujours le moteur et attendez l’ârret du système de coupe. Retirez la
fi che de la prise de courant! N’utilisez que des cassettes de fi l d’origine WOLF. Observez les conseil du mode d’emploi.
• Ne pas nettoyer le couteau au jet d’eau ou à haute pression.
•
Les réparations doivent être éffectuées par une des nombreuses stations service WOLF ou des ateliers agrées.
• Les orifi ces de ventilation doivent rester propres.
• Remiser l’appareil hors de portée des enfants.
14

Tranches horaires
Observez les dispositions spécifiques de la lloi nationale.
Utilisation
Réglez la poignée centrale (Fig. B1)
La poignée centrale peut être réglée individuellement selon la taille de lusager (Recommendation:
20 cm au-dessous de la poignée supérieure).
1. Desserrez le dispositif de blocage rapide.
2. Mettez la poignée centrale dans la position de travail.
3. Resserez le dispositif de blocage rapide.
Fixation du cable d’alimentation (Fig. B2)
Fixer le cable d’alimentation (voir illustration).
Raccordement à la source de courant
Courant alternatif 230 V. 50 Hz. L’appareil peut être raccordé à toute prise de courant.
Connexion à la prise de courant
L’appareil ne doit pas être utilisé qu’avec des câbles de rallonge agrés (HO7-RN-F3 G1.0).
Réglage de l’inclinaison du manche (Fig. B3)
• Réglage de l’inclinaison du manche à l’aide de la pédale (1).
• 5 options de positions (Position supérieure de l’inclinaison = arrêt fi xe).
Position de travail
Position de travail pour la coupe des bords du gazon et la coupe non guidée à l’angle de 30°
env. Position centrale de l’inclinaison du manche (2).
Pour une coupe non guidée (Fig. B4)
(sans contact avec le sol) faites des mouvements en demi-cercle en tenant la tondeuse devant vous.
Coupe verticale des bords du gazon. (Fig. B5)
1. Tournez la poignée centrale à 180°.
2. Position inférieure de l’inclinaison du manche.
Coupe avec le rouleau de sol (RQ 745)
Idéal pour de petites surfaces de gazon, au-dessous de buissons et d’arbres et sur des pentes.
Position centrale ou inférieure de l’inclinaison du manche.
Conseils d’utilisation
• Couper l’herbe haute lentement et en dégradé.
•
Ne pas toucher les arbres ni les buissons avec le fi l tranchant de l’appareil afi n de ne pas blesser
l’écorce.
• Un contact trop fort avec les dalles ou les murs conduit à une usure importante du fi l.
•
Si suite à l’usure, le fi l tranchant devient trop court, il suffi t simplement d’arrêter la débroussailleuse
et le fi l s’allonge automatiquement.
•
Lors de chaque enclenchement et déclenchement le fi l s’allonge automatiquement de 6 à 12 mm.
L’enclenchement et le déclenchement trop fréquent et sans raison augmentent l’usure du fi l.
•
Vous pouvez augmenter la durée de vie de votre tondeuse en nettoyant les fentes d’aé
et la face inférieure de la tondeuse avant ou après chaque emploi.
• Compostez l’herbe coupée ou utilisez- la pour couvrir le sol au-dessous d’arbrisseaux.
ration
15
Entretien
Remplacement de la bobine de fi l
Attention! Le couteau continue de fonctionner! Retirez la fi che de secteur avant de commencer
tous travaux sur l’appareil.
Maintenez fermement le boîtier de bobine, tournez le couvercle en direction de la fl èche «AUF»
1.
(ouvert) et enlevez le couvercle. Retirez la bobine de fi l vide. (Fig. W1).
2.
Important! N’enlevez pas les extrémités de fi l des fentes de fi xation dans la bobine de remplacement
afi n d’éviter le défi lement non intentionnel de la bobine (Fig. W2).
3.
Poussez la bobine de fi l sur le bouton rouge (les cames rondes doivent être positionées en direction
du couvercle). Insérez les extrémités de fi l dans les guide-fi ls, contrôlez l’alignement correct des fi ls
entre la bobine de fi l et le guide-fi l, remettez le couvercle, poussez-le bien et tournez-le en direction
de la fl èche „ZU» (ferme) jusqu’à ce que vous entendiez un clic (Fig. W3).
Attention! Prenez garde à ce que le couvercle soit positionné correctement. Quand vous remettez
le couvercle, les fl èches doivent être dirigées vers le guide-fi lo.
Avant la mise en marche: Tenez la tondeuse à gazon parallèlement au sol. Sinon vous risquez de
vous blesser.
Comment remédier aux pannes
Dysfonctionnements
Causes possible Réparation
Bobine de fil vide. Voir ´change de la cassette de fil.
L‘avancement
automatique du fil
ne fonctionne pas
Réglage incorrecte avec bouton
bloqué et bobine de fil sale.
• Le fil tranchant est arraché ou
grippé dans la boîte du fil.
•
Le fil tranchant a collé sur la bobine.
Le fil tranchant est soudé sur la
bobine.
Nettoyer les pièces sales avec
une brosse.
Prendre la bobine de fil. Dérouler
à nouveau un fil en tirant
légèrement et remettre la bobine.
Enlever la partie du fil soudée.
Dérouler à nouveau un fil en tirant
légègerement et remettre la bobine.
Attention: pour toutes les autres pannes adressez-vous S. V. PI. à notre service-client réparation.
Conditions de la garantie
La carte de garantie remplie par les vendeurs ou le justifi catif d’achat doivent être conservés avec soin.
La société Wolf-Garten fournit une garantie selon l’état actuel de la technique et l’objectif d’utilisation / le domaine
d’application pour une durée de 24 mois à partir de la date d’achat.
Les droits légaux du consommateur fi nal ne sont pas entravés par les directives suivantes en matière de garantie.
Conditions préalables à l’application de la garantie de 24 mois :
- Utilisation de l‘appareil exclusivement à usage privé.
Dans le secteur professionnel ou pour les sociétés de location, la garantie est de 12 mois.
- Manipulation réglementaire et respect de toutes les consignes fi gurant dans le mode d‘emploi, qui fait partie de nos
conditions de garantie.
- Respect de la périodicité prescrite pour la maintenance.
- Pas de modifi cation arbitraire de la construction.
- Montage de pièces détachées / accessoires WOLF originaux.
- Présentation de la carte de garantie remplie et/ou de la preuve d‘achat.
La garantie ne s’applique pas à l’usure normale des dents ni aux pièces de fi xation de ces dents telles que les
disques de friction, les courroies trapézoïdales / dentées, les roues/pneus, le(s) fi ltre(s) à air, les bougies /cosses
d’allumage. En cas de réparation arbitraire, tout droit à la garantie est automatiquement supprimé. Les défauts et les
imperfections dont les causes sont attribuées à un défaut de matériau ou de fabrication sont réparés exclusivement
par nos ateliers partenaires (le vendeur a droit aux améliorations) situés près de chez vous ou le fabricant s’il
plus proche. Les droits dépassant les limites de la garantie sont exclus. Un droit à une livraison compensatrice n’existe
pas.
Les dommages éventuels survenus pendant le transport ne doivent pas être communiqués à notre société mais
au transporteur concerné pour conserver les droits à indemnité envers cette entreprise.
16
est
Indicazioni di sicurezza
Questa macchina può causare gravi ferite! Leggete attentamente le istruzioni d‘uso, cercando di
impratichirVi al massimo dei suoi comandi e usate nel modo più corretto possibile la macchina.
L‘utente è rsponsabile degli incidenti occorsi ad altre persone o a cose di loro proprietà. Vi preghiamo
di seguire scrupolosamente le istruzioni, le spiegazioni e le prescrizioni.
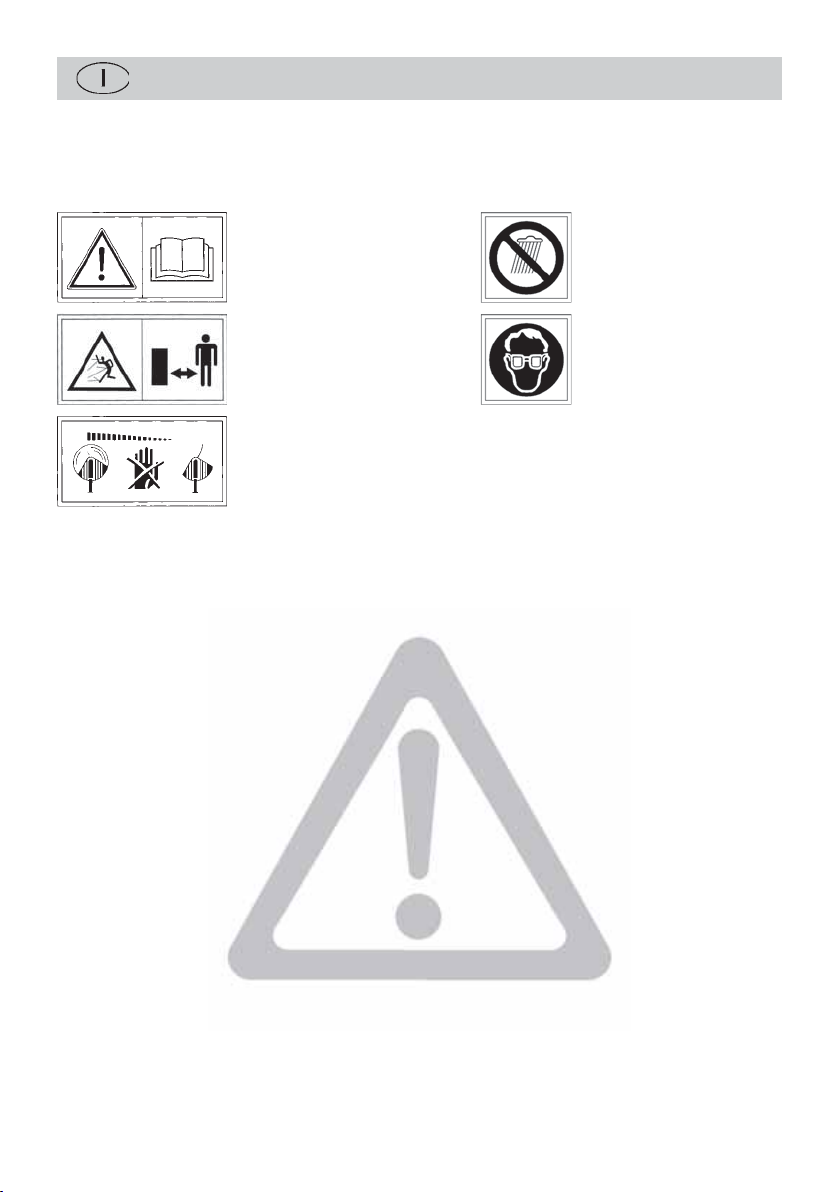
Signifi cato dei simboli
Attenzione!
Leggere attentamente le
istruzioni d‘uso prima della
messa in funzione!
Non esporre alla pioggia!
Tenere lontano i non addetti ai
Proteggere gli occhi!
lavori dalla zona di pericolo!
L‘utensile continua a
funzionare!
1. Avvertenze generali
• Questa rotofalce è stata progettata per la manutenzione di bordure, nonché di superfi ci erbose e piccoli prati.
Questa rotofalce non va usato per impiante pubblici, parchi, centri sportivi, vicino a strade ecc. nonché in
agricoltura o in silvicoltura.
• Per salvaguardare l’incolumità fi sica dell’utente, la rotofalce non deve essere utilizzata:
- per spuntare siepi, cespugli e macchie;
- per tagliare fi ori;
- per sminuzzare prodotti destinati alla produzione di compost
• Per ragioni di sicurezza, la rotofalce non deve essere utilizzata da ragazzi di età inferiore a 16 anni, nonché
da persone che non ne conoscono il funzionamento.
• Interrompere la macchina se nelle vicinanze si trovano persone, soprattutto bambini o animali domestici.
• L’apparecchio non può essere messo in funzione se persone (in particolare bambini) o animali si trovano
nelle sue immediate vicinanze; sarete responsabili per i danni eventualmente provocati.
• Utilizzare la macchina solo durante il giorno oppure se vi è una buona illuminazione artifi ciale.
• Usare la rotofalce soltanto quando il tempo è asciutto e non lasciarla esposta.
• Non installare mai elementi di taglio in metallo.
2. Prima dell ’utilizzo
• Ripulire l’erba da corpi estranei quali rametti, pietre, pezzi di ferro ecc. Fare attenzione ai corpi estranei
anche durante la tosatura.
•
Il cavo dell’alimentazione installato sull’esterno dell’apparecchio e la prolunga devono essere controllati regolarmente
in relazione a eventuali danni ed allo stato di invecchiamento. Utilizzarli solo se sono in perfette condizioni.
• Non utilizzare mai l’apparecchio se vi sono dispositivi di sicurezza o coperture danneggiate.
• Per ragioni di sicurezza devono essere utilizzati soltanto ricambi originali o approvati dal produttore. Nella
sostituzione, rispettare le istruzioni per l’installazione!
• Spegnere l’attrezzo e staccare la spina prima di regolare o pulire l’attrezzo o di controllare se il cavo di
collegamento sia attorcigliato o danneggiato.
• Prima della messa in funzione e in seguito ad urto, eseguire un controllo accurato della macchina per
verifi care l’eventuale presenza di usura o danni, e fare eseguire i lavori di riparazione necessari.
3. Cavoi:
• I giunti dei cavi di collegamento devonno essere di gomma o rivestiti in gomma, ed essere conformi alle
prescrizioni nazionali.
• I raccordi del cavo di alimentazione devono essere in gomma o rivestiti in gomma ed essere conformi alla
norma DIN/VDE 0620.
• Adoperi un apparecchio di protezione contro la corrente di difetto (RCD) con una corrente di difetto non
superiore a 30 mA.
• Non lasciare che il cavo dell’alimentazione sfreghi contro oggetti a punta o taglienti. Non schiacciare il cavo
sotto porte o fi nestre.
• Far eseguire eventuali riparazioni del cavo soltanto da esperti.
17
 Loading...