

Page 1

GRILL MODULE
USE AND CARE GUIDE
GUÍA DE USO Y MANTENIMIENTO
GUIDE D’UTILISATION ET D’ENTRETIEN
GUIDA ALL’USO E ALLA MANUTENZIONE
BEDIENUNGS-UND PFLEGEANLEITUNG
GIDS VOOR GEBRUIK EN ONDERHOUD
Page 2

GRILL MODULE
SAFETY PRECAUTIONS
Contents
2 Safety Precautions
4 Grill Module Features
4 Grill Module Operation
7 Care Recommendations
7 Troubleshooting
7 Wolf Warranty
Customer Care
The model and serial number are printed on the enclosed
product registration card. Both numbers are also listed on
the product rating plate. Refer to page 4 for rating plate
location. For warranty purposes, you will also need the date
of installation and name of your authorized Wolf dealer.
Record this information below for future reference.
If your product ever needs attention, be sure to use a Wolf
factory certied service provider.
SERVICE INFORMATION
Model Number
Serial Number
Date of Installation
Certied Service Name
Certied Service Number
Authorized Dealer
Dealer Number
Important Note
To ensure this product is installed and operated as safely
and efciently as possible, take note of the following types
of highlighted information throughout this guide:
IMPORTANT NOTE highlights information that is especially
important.
CAUTION indicates a situation where minor injury or product
damage may occur if instructions are not followed.
WARNING states a hazard that may cause serious injury or
death if precautions are not followed.
IMPORTANT INSTRUCTIONS
IMPORTANT NOTE: Read all safety instructions
before using this appliance.
• Read this guide carefully before using this appli-
ance to reduce risk of re, electric shock or
injury.
• This appliance must be properly installed and
serviced by a qualied installer, service agency
or gas supplier and grounded by a qualied
technician.
WARNING
This appliance can be used by children aged
from 8 years and above and persons with
reduced physical, sensory or mental capabilities or lack of experience and knowledge if
they have been given supervision or instruction concerning use of the appliance in a safe
way and understand the hazards involved.
Children shall not play with the appliance.
Cleaning and user maintenance shall not be
made by children without supervision.
WARNING
The appliance and its accessible parts
become hot during use. Care should
be taken to avoid touching heating elements. Children less than 8 years of age
shall be kept away unless continuously
supervised.
WARNING
Unattended cooking on a hob with fat or
oil can be dangerous and may result in
re. NEVER try to extinguish a re with
water, but switch off the appliance and
then cover ame e.g. with a lid or a re
blanket.
CAUTION
The cooking process has to be supervised. A short term cooking process has
to be supervised continuously.
2 | English
Page 3

SAFETY PRECAUTIONS
IMPORTANT INSTRUCTIONS
GENERAL SAFETY PRECAUTIONS
• Always use dry pot holders. Wet or damp pot holders can
cause steam burns. Do not use a towel or bulky cloth in place
of pot holders.
• Do not leave children alone or unattended in the area where
this appliance is in use. Never allow children to sit or stand on
the appliance.
• Never leave this appliance unattended when in use. Boilovers
and greasy spills may smoke or ignite.
• Do not use water on grease res. Smother the ame or use a
dry chemical or foam-type extinguisher.
• Do not repair or replace any part of this appliance unless
specically recommended in literature accompanying this
appliance.
• Do not store or use gasoline or other ammable vapors and
liquids in the vicinity of this or any other appliance.
• Do not heat unopened food containers, such as baby food jars
and cans. Pressure build-up may cause the container to burst
and cause injury.
• Do not use a steam cleaner.
• Danger of re: Do not store items on the cooking surfaces.
SAVE THESE INSTRUCTIONS
wolfappliance.com | 3
Page 4

GRILL MODULE
GRILL MODULE OPERATION
Grill Module Features
FEATURES
1
Product Rating Plate (bottom of module)
2
Control Panel
3
Control Panel Lock
4
Timer Display
5
Grilling Grate
6
Dual Heating Elements
7
Ceramic Briquette Rack
8
Removable Grease Collection Pan
5
3
Grill module.
GRILL MODULE ASSEMBLY
For proper operation, the grill module must be assembled
in the correct alignment. Refer to the illustration below.
Insert the grease collection pan into the grill module with the
hole for the receptacle facing front. Place the briquette rack
into the grease collection pan. Plug the heating elements
into the receptacle at the front of the module. Position the
grilling grate with feet seated into corner dimples.
Getting Started
Before you start cooking, please take some time to read this
use and care guide. It will be to your benet to familiarize
yourself with the safety practices, features, operation and
care recommendations of your Wolf grill module.
To ensure all residual oil from the manufacturing process
has been removed, heat the grill module on
mately 10 minutes. A small amount of smoke and odor is
normal. Clean the grill module thoroughly with hot water and
a mild detergent prior to use. Rinse and dry with a soft cloth.
for approxi-
Sabbath
This appliance is certied by Star-K to meet strict religious
regulations in conjunction with specic instructions found
on www.star-k.org.
Refer to care recommendations on page 7.
5
4
6
7
2
1
Grill module assembly.
8
4 | English
Page 5

GRILL MODULE OPERATION
Grill Operation
CONTROL PANEL
The control panel features illuminated touch controls.
A power level indicator for front and rear heating elements
displays the heat setting from
tration below.
Indicators on the control panel will illuminate to indicate
specic module operation. Refer to the chart below.
CONTROL PANEL
Element(s) On
Control Panel Locked
On/ Off
Low
High
Timer Set
Hot Surface
to . Refer to the illus-
CONTROL PANEL LOCK
The control panel lock feature prevents unwanted module
operation. Touch and hold
unlock the control panel.
for three seconds to lock and
will illuminate when the control
panel is locked.
The control panel will automatically lock after 10 minutes
of inactivity. This automatic lock feature can be disabled
through the extended options menu. Refer to page 6.
When the module is powered up for the rst time and after a
power outage, the module will default to lock mode.
POWER LEVEL
When the heating element is activated, the power level
indicator will illuminate indicating the level of heat. The
lowest heat is represented by the small ame, varying levels
of heat by additional indicators (dots), and the highest heat
by all indicators including the large ame. Refer to the chart
below.
SETTING POWER LEVEL USES
Low 1–6 indicators Holding food to keep warm.
Medium 6–7 indicators Grilling breads.
Medium High 7-8 indicators Grilling fresh sausage and
High 8–10 (large ame)
indicators
marinated pork.
Searing and grilling meats,
grilling vegetables.
POWER LEVEL INDICATOR
Setting controls:
1 To activate a heating element, touch for the desired
element (front and/or rear) on the control panel. The
power level indicator will ash and all indicators for that
element will ash. Refer to the illustration below.
2 To complete the activation, touch for highest heat,
for lowest heat, or touch the desired preset power
level indicator.
3 To change the heat setting while the element is on, touch
or slide to the desired preset power level.
4 To turn the element off, touch .
PREHEAT
Preheat the grill module for approximately 10 minutes before
adding food. Food is cooked directly on the grilling grate.
Control panel.
POWER LEVEL
INDICATOR
Power level indicator.
wolfappliance.com | 5
Page 6

GRILL MODULE OPERATION
Grill Operation
TIMER
The timer can be set in one-minute increments up to 99
minutes. Once a time is set,
panel and the countdown is visible on the timer display.
Refer to the illustration below. The timer is independent from
module operation.
Setting timer:
1 Touch .
2 Touch and hold + or – until the desired time is shown
on the timer display. Timer will begin the countdown in
minutes.
3 Timer will chime with one minute left and complete the
countdown in seconds.
4 When complete, timer will chime and continue to chime
Timer control.
until
is touched.
will illuminate on the control
HOT SURFACE INDICATOR
will illuminate on the control panel and will remain on
until the unit has cooled. It may remain illuminated even
when the grill module is off.
ALL OFF
When one or both heating elements are on, will illuminate on the control panel. To turn off both elements at the
same time, touch
.
EXTENDED OPTIONS
The extended options feature allows the user to set preferences for volume, tone, control panel lock and Sabbath
feature.
Setting extended options:
1 To unlock the control panel, touch and hold for
3 seconds.
2 To enter extended options mode, touch and hold for
5 seconds.
3 Power level 1 on the rear element control will be dis-
played and ‘VO’ will appear on the timer display.
Touch
or on the front element control to adjust
volume.
4 Touch + on the timer control to adjust tone. Power level
2 on the rear element control will be displayed and ‘Fr’
will appear on the timer display.
Touch
or on the front element control to adjust
tone.
5 Touch + on the timer control to adjust the automatic
control panel lock. Power level 3 on the rear element
control will be displayed and ‘Lo’ will appear on the timer
display.
Touch
or on the front element control to turn the
automatic lock feature off or on.
6 Touch + on the timer control to enter Sabbath mode.
Power level 4 on the rear element control will be displayed. Touch
on the front element control to initiate
Sabbath feature. ‘SA’ will appear on the timer display.
Touch
on the front element control to activate or
deactivate the feature.
7 Touch to conrm settings.
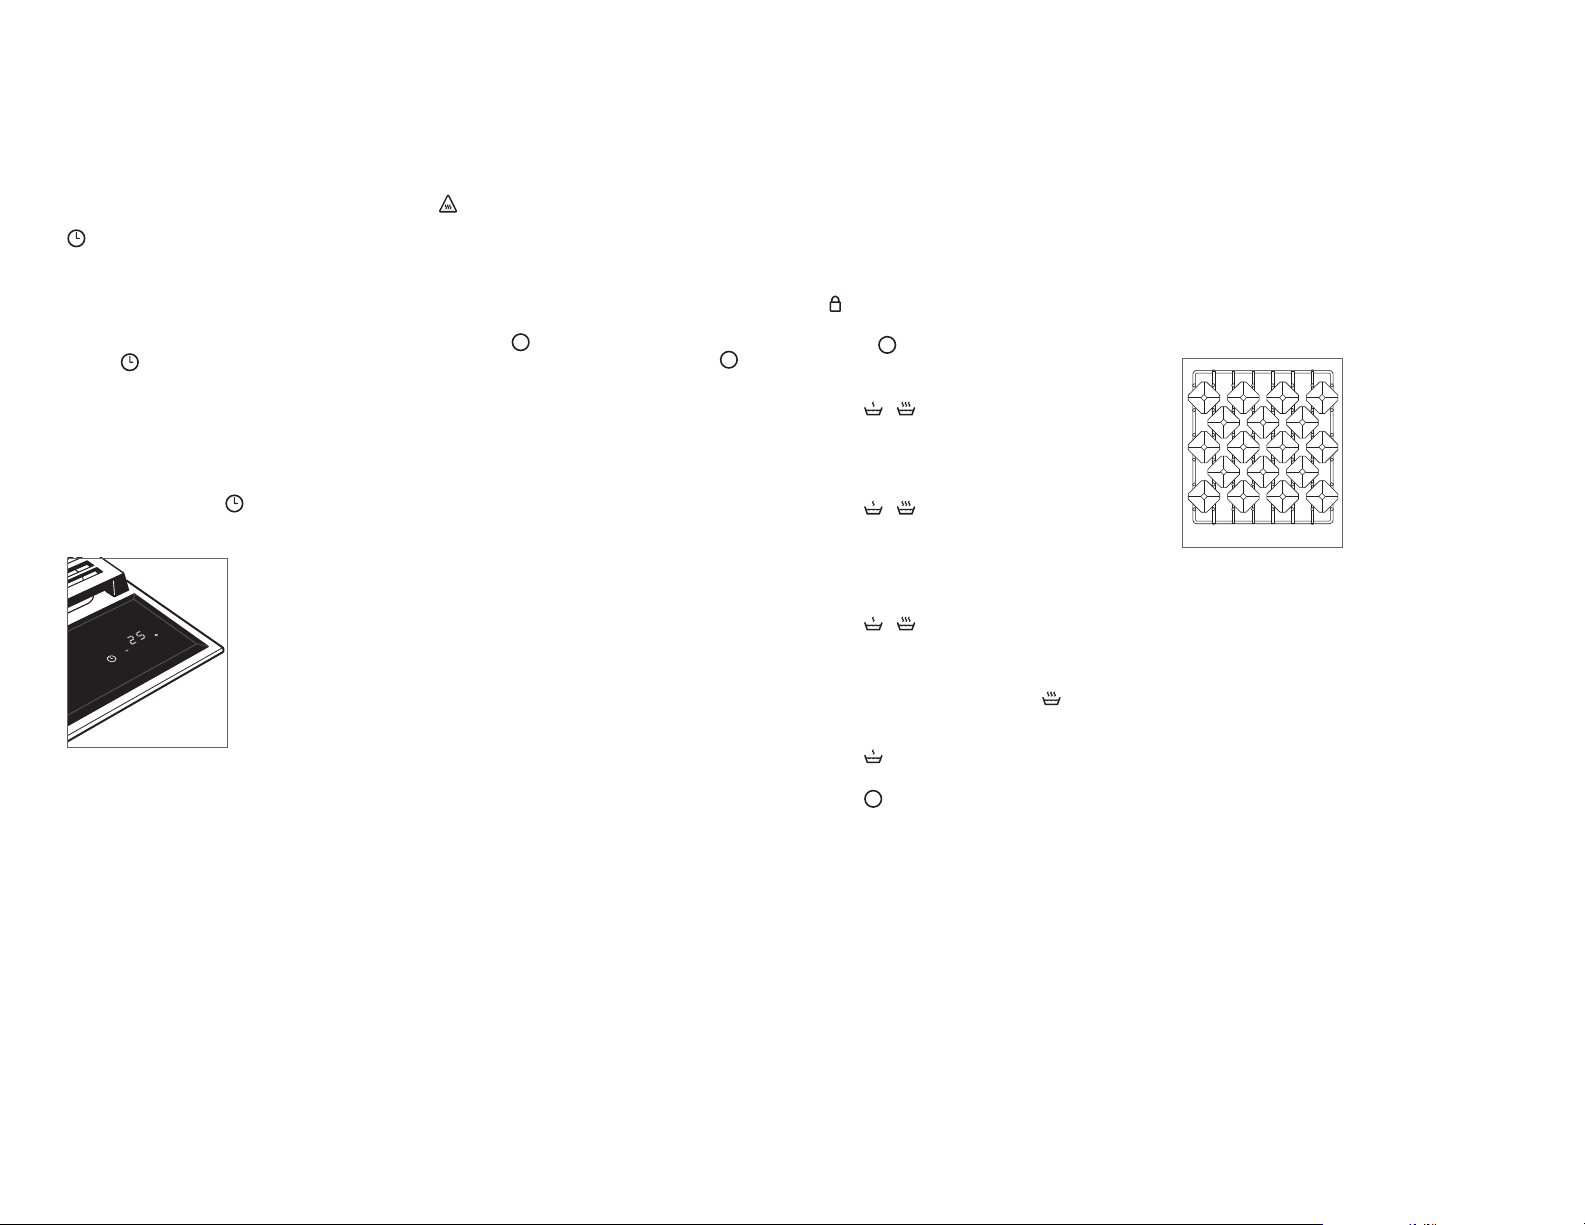
BRIQUETTE RACK
The ceramic briquettes and briquette rack are dishwasher
safe. The briquettes should be separated from the rack
if placed in a dishwasher. For proper arrangement of the
briquettes, refer to the illustration below.
Do not operate the grill module without the briquettes and
rack installed.
Briquette rack.
FRONT
6 | English
Page 7

CARE RECOMMENDATIONS
TROUBLESHOOTING
Care Recommendations
CLEANING
Stainless steel Use a nonabrasive stainless steel cleaner and
Control panel Use a spray degreaser to remove ngerprints
Grilling grate
Heating element Do not immerse in water. If food particles are
Ceramic
briquettes
Briquette rack Place rack in dishwasher or wash using a mild
Grease collection
pan
apply with a soft lint-free cloth. To bring out
the natural luster, lightly wipe surface with a
water-dampened microber cloth followed by a
dry polishing chamois. Always follow the grain
of stainless steel.
and food soil. Spray on a cloth before wiping
panel.
IMPORTANT NOTE: Do not spray cleaners
directly on the control panel.
After grilling, operate grill on
minutes to burn off excess grease. Remove all
burned-on food particles. Clean with a nonabrasive cleaner such as liquid detergent and
hot water, or a paste of baking soda and water.
Do not immerse in water. Spray degreasers and
mild abrasive cleaners may be used.
burned-on, wipe clean by hand using a damp
cloth.
Place briquettes in dishwasher or wash using
a mild detergent and soft cloth. Allow to cool
before placing them back on the rack. Refer to
page 6 for proper arrangement.
detergent and soft cloth.
Before cleaning, remove all excess grease and
burned-on food particles. Wash in hot water
with mild detergent. Rinse and dry.
for ve
Troubleshooting
OPERATION
Grill module does not operate.
• Verify power is on.
• Verify electrical power to module and home circuit
breaker is on.
• Module is in lock mode. Touch and hold
seconds to unlock control panel.
Module temperature issue.
• Contact your authorized Wolf dealer for recommenda-
tions.
SERVICE
• Maintain the quality built into your product by contacting
Wolf factory certied service.
• When contacting service, you will need the model and
serial number of your product. Both numbers are listed
on the product rating plate. Refer to page 4 for rating
plate location.
• For warranty purposes, you will also need the date of
installation and name of your authorized Wolf dealer. This
information should be recorded on page 2 of this guide.
for three
Wolf Appliance International Limited Warranty
FOR RESIDENTIAL USE
FULL TWO YEAR WARRANTY*
For two years from the date of original installation, this Wolf Appliance product warranty covers all parts
and labor to repair or replace, under normal residential use, any part of the product that proves to be
defective in materials or workmanship. All service provided by Wolf Appliance under the above warranty
must be performed by Wolf factory certied service, unless otherwise specied by Wolf Appliance, Inc.
Service will be provided during normal business hours.
LIMITED FIVE YEAR WARRANTY
For ve years from the date of original installation, Wolf Appliance will repair or replace the following parts
that prove to be defective in materials or workmanship: stainless steel briquette trays, gas valves, drip
pans, electronic control boards and electric heating elements. If the owner uses Wolf factory certied
service, the service provider will repair or replace these parts with the owner paying for all other costs,
including labor. If the owner uses non-certied service, the owner must contact Wolf Appliance, Inc. (using
the information below) to receive repaired or replacement parts. Wolf Appliance will not reimburse the
owner for parts purchased from non-certied service or other sources.
For more information regarding your Wolf product warranty, contact your authorized Wolf dealer.
Warranties must comply to all country, state, city, local and or ordinance.
*Stainless steel (doors, panels, handles, product frames and interior surfaces) are covered by a limited
60-day parts and labor warranty for cosmetic defects.
Sub-Zero, Sub-Zero & Design, Sub-Zero & Snowake Design, Dual Refrigeration, The Living Kitchen, Great American Kitchens The Fine Art of Kitchen Design, Wolf, Wolf &
Design, Wolf Gourmet, W & Design, red colored knobs, Cove, and Cove & Design, are registered trademarks and service marks of Sub-Zero Group, Inc. and its subsidiaries.
All other trademarks are property of their respective owners in the United States and other countries.
wolfappliance.com | 7
Page 8

MÓDULO DE PARRILLA
PRECAUCIONES DE SEGURIDAD
Índice
2 Precauciones de seguridad
4 Características del módulo de parrilla
4 Funcionamiento del módulo de parrilla
7 Recomendaciones de mantenimiento
7 Localización y solución de problemas
7 Garantía Wolf
Atención al cliente
El modelo y el número de serie están impresos en la tarjeta
de registro del producto que se adjunta. Esta información
también se muestra en la placa de datos del producto.
Consulte la página 4 para observar la ubicación de la placa
de datos. Para cuestiones relacionadas con la garantía,
también necesita saber la fecha de instalación y el nombre
de su distribuidor autorizado de Wolf. Guarde la siguiente
información para tenerla como referencia en el futuro.
Si alguna vez su producto necesita asistencia, asegúrese
de acudir a un servicio técnico autorizado de Wolf.
INFORMACIÓN SOBRE EL MANTENIMIENTO
Referencia del modelo
Número de serie
Fecha de instalación
Nombre del servicio certicado
Número de servicio certicado
Distribuidor autorizado
Número del distribuidor
Nota importante:
Para garantizar que este producto se instala y funciona de
la forma más ecaz y segura posible, tenga en cuenta la
información que se destaca en esta guía:
Cuando aparece
que resulta especialmente importante.
PRECAUCIÓN indica una situación en la que se pueden
sufrir heridas leves o provocar daños al producto si no
se siguen las instrucciones.
AVISO indica el peligro de que se produzcan heridas graves
o incluso la muerte si no se respetan las precauciones.
NOTA IMPORTANTE, se resalta información
INSTRUCCIONES IMPORTANTES
NOTA IMPORTANTE: lea íntegramente las
instrucciones de seguridad antes de utilizar
este electrodoméstico.
• Lea detenidamente esta guía antes de utilizar
la unidad para reducir el riesgo de que se
produzca un incendio, una descarga eléctrica
o de sufrir lesiones.
• La instalación y el mantenimiento de este
aparato deben ser realizados por un instalador
cualicado, un centro de asistencia técnica
o el proveedor de gas, y su conexión a tierra
debe ser realizada por un técnico certicado.
AVISO
Este aparato puede ser utilizado por niños
de más de ocho años y personas con
discapacidades físicas, sensoriales o mentales,
o con falta de experiencia o conocimientos,
siempre y cuando cuenten con supervisión o
se les haya enseñado cómo utilizarlo de forma
segura y comprendan los peligros que supone.
Los niños no deben jugar con el aparato. Los
niños no pueden realizar las tareas de limpieza
y mantenimiento sin supervisión.
AVISO
El aparato y sus zonas accesibles pueden
calentarse durante su uso. Tenga cuidado
de no tocar los elementos calorícos.
Mantenga alejados a los niños menores
de ocho años, salvo que estén bajo
supervisión permanente.
AVISO
Dejar desatendida una hornilla
encendida con grasa o aceite puede ser
peligroso e incluso provocar un incendio.
NUNCA intente apagar un fuego con
agua, en su lugar apague el aparato y,
a continuación, cubra la llama con una
tapa o con una manta ignífuga.
PRECAUCIÓN
El proceso de cocción tiene que ser
supervisado. Un breve proceso de cocción
a corto plazo debe ser supervisado de
forma continua.
2 | Español
Page 9

PRECAUCIONES DE SEGURIDAD
INSTRUCCIONES IMPORTANTES
PRECAUCIONES GENERALES DE SEGURIDAD
• Utilice siempre elementos aislantes secos. Si los elementos
aislantes están húmedos o mojados pueden producirle
quemaduras por vapor. No utilice un paño de cocina o
un paño acolchado en lugar de un elemento aislante.
• No debe dejar a los niños solos o desatendidos en el área en
la que se esté utilizando este aparato. No permita que los
niños se sienten o estén de pie sobre la placa.
• No deje nunca el aparato desatendido cuando esté encendido.
Los derrames y las salpicaduras de grasa pueden producir
humo o incendiarse.
• No utilice agua para apagar los incendios producidos por
grasa. Baje la llama o utilice un agente químico seco o un
extintor de espuma.
• No repare ni sustituya ninguna pieza de este aparato, a menos
que esto se recomiende especícamente en los documentos
proporcionados con este aparato.
• No almacene ni utilice gasolina ni otros vapores ni líquidos
inamables cerca de este o de otros aparatos.
• No caliente recipientes con alimentos que estén cerrados, por
ejemplo, envases de comida para bebés o latas. La formación
de presión puede hacer que el recipiente explote y causar
heridas personales.
• No utilice un limpiador a vapor.
• Peligro de incendio: no deje elementos sobre las supercies
de cocción.
GUARDE ESTAS INSTRUCCIONES
wolfappliance.com | 3
Page 10

MÓDULO DE PARRILLA
FUNCIONAMIENTO DEL MÓDULO DE PARRILLA
Características del módulo de parrilla
CARACTERÍSTICAS
1
Placa de datos del producto (en la parte inferior del módulo)
2
Panel de control
3
Bloqueo del panel de mandos
4
Pantalla del temporizador
5
Rejilla de la parrilla
6
Elementos calorícos dobles
7
Rejilla de briquetas de cerámica
8
Bandeja de recogida de grasas extraíble
3
Módulo de parrilla.
5
4
MONTAJE DEL MÓDULO DE PARRILLA
Para que funcione de manera correcta, el módulo de parrilla
debe instalarse con la alineación correcta. Observe la
siguiente ilustración.
Inserte la bandeja de recogida de grasas en el módulo de
parrilla con el hueco para el recipiente orientado hacia la
parte delantera del módulo. Coloque la rejilla de briquetas
en la bandeja de recogida de grasas. Enchufe los elementos
calorícos en el recipiente de la parte delantera del módulo.
Coloque la rejilla de la parrilla con los pies asentados en los
oricios de las esquinas.
6
7
2
1
Montaje del módulo de parrilla.
Primeros pasos
Antes de comenzar a cocinar, lea detenidamente esta
guía de uso y mantenimiento. Le recomendamos
que se familiarice con las prácticas de seguridad, las
características, el funcionamiento y las recomendaciones
de mantenimiento del módulo de rejilla de Wolf.
Para asegurarse de que se ha eliminado todo los restos
de aceite del proceso de fabricación, caliente el módulo
de parrilla en
pequeña cantidad de humo y olor es normal. Limpie a
fondo el módulo de parrilla con agua caliente y detergente
suave antes de usarlo. Aclare y seque con un paño suave.
Consulte la sección Recomendaciones de mantenimiento
en la página 7.
5
8
durante cerca de 10 minutos. Una
Sabbath
Este aparato lleva el certicado Star-K que indica que
cumple rigurosas normas religiosas e instrucciones
especícas que aparecen en la página www.star-k.org.
4 | Español
Page 11

FUNCIONAMIENTO DEL MÓDULO DE PARRILLA
Funcionamiento de la parrilla
PANEL DE MANDOS
El panel de control presenta mandos táctiles iluminados.
Un indicador del nivel de potencia para los elementos
calorícos delanteros y traseros muestra el calor congurado
a . Observe la siguiente ilustración.
de
Los indicadores del panel de mandos se iluminarán para
señalar una operación del módulo determinada. Observe
la tabla que aparece más abajo.
PANEL DE MANDOS
Elemento/s encendido/s
Panel de mandos bloqueado
Encendido/Apagado
Bajo
Alto
Temporizador
Supercie caliente
BLOQUEO DEL PANEL DE MANDOS
La función de bloqueo del panel de mandos evita que el
módulo se ponga en funcionamiento de forma inoportuna.
Mantenga pulsado
y desbloquear el panel de mandos.
durante tres segundos para bloquear
se iluminará cuando
el panel de mandos esté bloqueado.
El panel de mandos se bloqueará automáticamente tras
diez minutos de inactividad. Esta opción de bloqueo
automático puede deshabilitarse en el menú de opciones
avanzadas. Consulte la página 6.
Cuando el módulo se enciende por primera vez o en el caso
de que se produzca un corte de energía, entrará de manera
predeterminada en el modo de bloqueo.
NIVEL DE POTENCIA
Cuando el elemento caloríco está activado, un indicador
del nivel de potencia se iluminará señalando el nivel de
calor. El calor más bajo está representado por la llama
pequeña, variando los niveles de calor mediante indicadores
adicionales (puntos), y el calor más alto por todos los
indicadores y la llama grande. Observe la tabla que aparece
más abajo.
CONFIGURACIÓN
Bajo 1–6 indicadores
Medio 6-7 indicadores Tostar pan.
Medio Alto 7-8 indicadores Asar salchichas frescas
Alto 8-10 indicadores
NIVEL
DE POTENCIA
(llama grande)
USOS
Guardar los alimentos para
mantenerlos calientes.
y cerdo marinado.
Soasar y asar carne,
asar verduras.
INDICADOR DEL NIVEL DE POTENCIA
Controles de conguración:
1 Para activar un elemento caloríco, toque para el
elemento deseado (delantero o trasero) en el panel de
mandos. El indicador de nivel de potencia parpadeará,
así como todos los indicadores de ese elemento.
Observe la siguiente ilustración.
2 Para terminar la activación, pulse para aumentar el
para disminuirlo o bien toque el indicador de
calor,
nivel de potencia deseado.
3 Para cambiar el calor congurado mientras el elemento
está en funcionamiento, pulse o deslice al nivel de
potencia deseado.
4 Para apagar el elemento, pulse .
PRECALENTAMIENTO
Precaliente el módulo de parrilla durante 10 minutos
aproximadamente antes de echar los alimentos. Los
alimentos se cocinan directamente en la rejilla de la parrilla.
Panel de mandos.
INDICADOR DEL NIVEL
DE POTENCIA
Indicador del nivel de potencia.
wolfappliance.com | 5
Page 12
FUNCIONAMIENTO DEL MÓDULO DE PARRILLA
Funcionamiento de la parrilla
TEMPORIZADOR
El temporizador puede congurarse en incrementos de
un minuto hasta 99 minutos. Tras establecer una hora,
se iluminará en el panel de mandos y la cuenta atrás
aparecerá en la pantalla del temporizador. Observe la
siguiente ilustración. El temporizador es independiente del
funcionamiento del vaporizador.
Programar el temporizador:
1 Pulse .
2 Pulse o mantenga pulsad + o – hasta visualizar la hora
deseada en la pantalla del temporizador. El temporizador
empezará la cuenta atrás en minutos.
3 El temporizador pitará cuando quede un minuto
y terminará la cuenta atrás en segundos.
4 Cuando haya nalizado, el temporizador pitará y seguirá
pitando hasta que pulse
Mando del temporizador.
.
INDICADOR DE SUPERFICIE CALIENTE
se iluminará en el panel de manos y permanecerá
encendido hasta que la unidad se enfríe. Podrá permanecer
encendido incluso cuando el módulo de parrilla esté
apagado.
TODO APAGADO
Cuando uno o ambos elementos calorícos estén
encendidos,
apagar ambos elementos al mismo tiempo, pulse
se iluminará en el panel de mandos. Para
.
OPCIONES AVANZADAS
Las opciones avanzadas permiten al usuario congurar
las preferencias de volumen, tono, bloqueo del panel
de mandos y función Sabbath.
Congurar las opciones ampliadas:
1 Para desbloquear el panel de manos, mantenga pulsado
durante tres segundos.
2 Para acceder al modo de opciones ampliadas, mantenga
pulsado
3 Aparecerá el nivel de potencia 1 en el mando del
durante 5 segundos.
elemento trasero y «VO» en la pantalla del temporizador.
Pulse
o en el mando del elemento frontal para
ajustar el volumen.
4 Pulse + en el mando del temporizador para ajustar el
tono. Aparecerá el nivel de potencia 2 en el mando del
elemento trasero y «Fr» en la pantalla del temporizador.
Pulse
o en el mando del elemento frontal para
ajustar el tono.
5 Pulse + en el mando del temporizador para ajustar el
bloqueo automático del panel del mandos. Aparecerá
el nivel de potencia 3 en el mando del elemento trasero
y «Lo» en la pantalla del temporizador.
Pulse
o en el mando del elemento frontal para
apagar o encender el bloqueo automático.
6 Pulse + en el mando del temporizador para entrar en
el modo Sabbath. Aparecerá el nivel de potencia 4 en
el mando del elemento trasero. Pulse
en el mando
del elemento frontal para iniciar el modo Sabbath. «SA»
aparecerá en la pantalla del temporizador.
Pulse
en el mando del elemento frontal para activar
o desactivar la función.
7 Pulse para congurar los ajustes.
REJILLA DE BRIQUETAS
Las briquetas cerámicas y la rejilla de briquetas son aptas
para el lavavajillas. Las briquetas deben separarse de la
rejilla si se colocan en el lavavajillas. Para la disposición
de las briquetas, consulte la siguiente ilustración.
No ponga en funcionamiento el módulo de parrilla sin
las briquetas y la rejilla instaladas.
DELANTERO
Rejilla de briquetas.
6 | Español
Page 13

RECOMENDACIONES DE MANTENIMIENTO
LOCALIZACIÓN Y SOLUCIÓN DE PROBLEMAS
Recomendaciones de mantenimiento
LIMPIEZA
Acero inoxidable Utilice un limpiador de acero inoxidable no
Panel de control Utilice un limpiador en spray para eliminar las
Rejilla
de la parrilla
Elemento
caloríco
Briquetas
de cerámica
Rejilla
de briquetas
Bandeja
de recogida
de grasas
abrasivo y aplíquelo con un paño suave que
no deje pelusas. Para que el acero inoxidable
adquiera un brillo natural, frote suavemente
la supercie con un paño de microbra
empapado en agua y con una gamuza seca
para pulir. Siga siempre la dirección del acero
inoxidable.
huellas y las manchas de alimentos. Aplique
el producto de limpieza sobre un paño antes
de limpiar el panel.
NOTA IMPORTANTE: no aplique los
limpiadores directamente sobre el panel
de control.
Tras asar, ponga la parrilla en funcionamiento
durante cinco minutos para quemar el
exceso de grasa. Retire todas las partículas
de alimentos quemados. Limpie con un
limpiador no abrasivo, como un detergente
líquido en agua caliente o bicarbonato sódico
y agua. No las sumerja en agua. Pueden
utilizarse desengrasantes con pulverizador
y limpiadores no demasiado abrasivos.
No las sumerja en agua. Si tiene restos de
comida quemados, límpielos utilizando un
paño húmedo.
Coloque las briquetas en el lavavajillas o
lávelas utilizando un detergente suave y un
paño suave. Deje que se enfríen antes de
colocarlas en la rejilla. Para obtener más
información sobre la disposición adecuada,
consulte la página 6.
Coloque la rejilla en el lavavajillas o lávelas
utilizando un detergente suave y un paño
suave.
Antes de limpiarla, quite el exceso de grasa
y los restos de alimentos quemados. Lávelas
con agua caliente y con detergente suave.
Aclare y séquelas.
Localización y solución de problemas
FUNCIONAMIENTO
El módulo de parrilla no funciona.
• Compruebe si está encendido.
• Compruebe la red eléctrica del módulo y asegúrese
de que los fusibles no están fundidos.
• El módulo está en el modo de bloqueo. Mantenga
pulsado
el panel de mandos.
Problemas con la temperatura del módulo.
• Póngase en contacto con su distribuidor Wolf para
obtener más recomendaciones.
SERVICIO
• Mantenga la calidad de su producto al ponerse en
contacto con el servicio técnico autorizado de Wolf.
• Le recomendamos que anote la referencia del modelo
y el número de serie del producto cuando se ponga
en contacto con el servicio de asistencia técnica.
Esta información se muestra en la placa de datos
del producto. Consulte la página 4 para observar
la ubicación de la placa de datos.
• Para cuestiones relacionadas con la garantía, también
necesita saber la fecha de instalación y el nombre de su
distribuidor autorizado de Wolf. Esta información está
incluida en la página 2 de esta guía.
durante tres segundos para desbloquear
Garantía limitada internacional de Wolf Appliance
PARA USO DOMÉSTICO
GARANTÍA COMPLETA DE DOS AÑOS*
Durante dos años después de la fecha de instalación original, esta garantía de su producto de Wolf
Appliance cubre todas las piezas y la mano de obra necesarias para reparar o sustituir cualquier parte del
producto que se compruebe que tiene defectos de material o mano de obra, siempre y cuando se haya
realizado un uso doméstico del mismo. El servicio certicado de fábrica de Wolf llevará a cabo todos
los servicios proporcionados por Wolf Appliance en virtud de la garantía anterior, a menos que Wolf
Appliance, Inc. especique lo contrario. El servicio se proporcionará durante el horario laboral normal.
GARANTÍA LIMITADA DE CINCO AÑOS
Durante cinco años después de la fecha de instalación original, Wolf Appliance reparará o sustituirá
las siguientes piezas que se compruebe que tengan defectos de material o mano de obra: bandejas
de briquetas de acero inoxidable, válvulas de gas, bandejas de recogida de grasa, tableros de mandos
electrónicos y elementos calorícos. Si el propietario utiliza el servicio certicado de fábrica de Wolf, el
proveedor de este servicio reparará o sustituirá estas piezas y el propietario pagará todos los demás
gastos, incluida la mano de obra. Si el propietario utiliza un servicio no certicado, deberá ponerse en
contacto con Wolf Appliance, Inc. (utilizando para ello la información incluida más abajo) para recibir las
piezas reparadas o de sustitución. Wolf Appliance no reembolsará al propietario el dinero pagado por
piezas compradas al servicio u otros proveedores no certicados.
Para obtener más información con respecto a su garantía de producto de Wolf, póngase en contacto
con su distribuidor autorizado de Wolf. Las garantías deben cumplir con todas las normativas nacionales,
estatales, municipales y locales.
*Las partes de acero inoxidable (puertas, paneles, manillas, marcos del producto y supercies interiores)
están cubiertas por una garantía limitada de 60 días para piezas y mano de obra por defectos estéticos.
Sub-Zero, Sub-Zero & Design, Sub-Zero & Snowake Design, Dual Refrigeration, The Living Kitchen, Great American Kitchens The Fine Art of Kitchen Design, Wolf, Wolf
& Design, Wolf Gourmet, W & Design, los mandos de color rojo, Cove y Cove & Design son marcas registradas y marcas de servicio de Sub-Zero Group, Inc. y sus liales.
Todas las demás marcas son propiedad de sus respectivos propietarios en los Estados Unidos y en otros países.
wolfappliance.com | 7
Page 14
DOMINO GRIL
MESURES DE SÉCURITÉ
Table des matières
2 Mesures de sécurité
4 Caractéristiques du gril
4 Cuisson au gril
7 Consignes d'entretien
7 Dépistage des pannes
7 Garantie Wolf
Entretien par le client
Les référence et numéro de série sont imprimés sur la Carte
d'enregistrement du produit ci-jointe. Ces deux numéros
gurent sur la plaque des caractéristiques du produit. Pour
repérer l'emplacement de la plaque des caractéristiques,
reportez-vous à la page 4. Pour les besoins de la garantie,
vous devrez aussi fournir la date d'installation et le nom de
votre revendeur agréé Wolf. Consignez ces renseignements
pour pouvoir vous y reporter ultérieurement.
En cas de besoin, assurez-vous de contacter un prestataire
agréé par l'usine Wolf.
SERVICE APRÈS-VENTE
Référence de modèle
Numéro de série
Date d'installation
Nom du prestataire agréé
Numéro du service certié
Revendeur agréé
Numéro du revendeur
Remarque importante
Pour garantir une installation de ce produit aussi sûre
et efcace que possible, veuillez faire particulièrement
attention aux mentions mises en évidence tout au long
de ce guide, notamment :
REMARQUE IMPORTANTE met l'accent sur un
renseignement particulièrement important.
MISE EN GARDE signale un danger qui pourrait causer
une blessure mineure ou endommager le produit si vous
ne suivez pas les instructions.
AVERTISSEMENT signale un danger qui pourrait causer
des blessures graves voire fatales si vous ne prenez pas
certaines précautions.
CONSIGNES IMPORTANTES
REMARQUE IMPORTANTE : Lisez toutes les
instructions et les mesures de sécurité avant
d'utiliser cet appareil.
• An de minimiser les risques d'incendie,
de choc électrique et de blessure, lisez avec
attention ce guide avant d'utiliser cet appareil
ménager.
• Cet appareil doit être correctement installé et
réparé par un poseur ou un prestataire agréé
et mis à la terre par un technicien qualié.
AVERTISSEMENT
Cet appareil peut être utilisé par des enfants
de 8 ans et plus et par des personnes dont les
capacités physiques, sensorielles ou mentales
sont diminuées ou n'ayant ni l'expérience
ni les connaissances requises, à condition
qu'ils soient étroitement surveillés ou qu'ils
aient reçu des consignes concernant l'usage
sécuritaire de l'appareil et qu'ils comprennent
les risques qu'ils courent. Ne laissez pas les
enfants jouer avec cet appareil. Le nettoyage
et l'entretien ne doivent pas être assurés par
les enfants sans surveillance étroite.
AVERTISSEMENT
L'appareil ménager et ses pièces
accessibles peuvent devenir chauds
pendant l'utilisation. Prendre des
précautions pour éviter tout contact avec
les éléments chauffants. Les enfants de
moins de huit ans doivent être tenus à
l'écart à moins qu'ils soient surveillés en
permanence.
AVERTISSEMENT
La cuisson sur une plaque chauffante
sans surveillance avec de l'huile ou des
matières grasses peut être dangereuse et
pourrait provoquer un incendie. N'essayez
JAMAIS d'éteindre un feu avec de l'eau.
Désactivez l'appareil puis recouvrez la
amme avec, par exemple, un couvercle
ou une couverture d'extinction.
MISE EN GARDE
Il faut surveiller la cuisson. Une cuisson
rapide doit être surveillée sans interruption.
2 | Français
Page 15

MESURES DE SÉCURITÉ
CONSIGNES IMPORTANTES
MESURES DE SÉCURITÉ GÉNÉRALES
• Utilisez toujours des poignées sèches. La vapeur dégagée par
des poignées mouillées ou humides pourrait provoquer des
brûlures. N'utilisez pas de serviette ou de torchon encombrant
en guise de poignées.
• Ne laissez pas d'enfant seul ou sans surveillance à proximité
de cet appareil ménager en fonctionnement. N'autorisez jamais
les enfants à s'asseoir ou à se tenir debout sur l'appareil.
•
Ne laissez jamais l'appareil en fonctionnement sans surveillance.
Les débordements par bouillonnement et les déversements
de graisse pourraient produire de la fumée ou s'enammer.
• Ne jetez pas d'eau sur les feux de graisse. Étouffez la amme
ou utilisez un extincteur à poudre chimique ou à mousse.
• Ne réparez et ne remplacez aucune pièce de cet appareil sauf
si cela est expressément recommandé dans la documentation
fournie avec l'appareil.
• N'entreposez pas ni n'utilisez pas d'essence ou d'autres
produits ou liquides inammables à proximité de cet appareil
ou de tout autre appareil ménager.
•
Ne chauffez pas de contenants de nourriture fermés, tels que
les conserves et les boîtes d'aliments pour bébé. De la pression
pourrait s'accumuler, faire exploser le contenant et provoquer
des blessures.
• N'utilisez pas de nettoyeur à la vapeur.
• Risque d'incendie : Ne rangez pas d'objets sur les surfaces
de cuisson.
CONSERVEZ CES CONSIGNES
wolfappliance.com | 3
Page 16

DOMINO GRIL
CUISSON AU GRIL
Caractéristiques du gril
CARACTÉRISTIQUES
1
Plaque des caractéristiques du produit (sous le domino)
2
Panneau de commande
3
Verrouillage du panneau de commande
4
Afchage de la minuterie
5
Grille
6
Résistances chauffantes doubles
7
Grille pour les briquettes en céramique
8
Ramasse-graisse amovible
5
3
Domino gril.
ASSEMBLAGE DU GRIL
Pour assurer un fonctionnement adéquat, le domino gril
doit être assemblé de façon à être correctement aligné.
Reportez-vous à l'illustration ci-après.
Insérez le ramasse-graisse dans le gril, l'orice pour la prise
faisant face à l'avant. Placez la grille pour les briquettes dans
le ramasse-graisse. Branchez les résistances électriques dans
la prise à l'avant du gril. Positionnez la grille en plaçant les
pieds dans les encoches des coins.
Pour vous lancer
Avant de commencer à cuisiner, veuillez prendre le temps
de lire le présent guide d'utilisation et d'entretien. En effet,
vous avez tout intérêt à vous familiariser avec les mesures
de sécurité, les caractéristiques, le fonctionnement et les
consignes d'entretien qui s'appliquent au domino gril Wolf.
Nettoyez le gril en le faisant chauffer pendant
10 minutes pour que tous les résidus d'huile provenant du
processus de fabrication soient éliminés. Un peu de fumée
et une légère odeur pourraient se dégager. C'est tout à
fait normal. Nettoyez minutieusement le gril avec de l'eau
environ
Mode Sabbat
Cet appareil électroménager a reçu la certication Star-K.
Il répond aux strictes exigences religieuses établies et
aux instructions spéciques que vous pouvez consulter
à www.star-k.org.
chaude et un détergent doux avant de l'utiliser. Ensuite,
rincez-le et séchez-le à l'aide d'un torchon doux. Reportezvous à la rubrique Consignes d'entretien, page 7.
5
4
6
7
8
2
1
Assemblage du gril.
4 | Français
Page 17

CUISSON AU GRIL
Cuisson au gril
PANNEAU DE COMMANDE
Le panneau de commande est doté de touches lumineuses
à efeurement. Un témoin de niveau de puissance pour les
résistances chauffantes avant et arrière afche le réglage
de chaleur pour chaque commande de
vous à l'illustration ci-après.
Les témoins sur le panneau de commande s'allument pour
indiquer la fonction du gril en opération. Reportez-vous au
tableau ci-après.
PANNEAU DE COMMANDE
Résistance(s) On (en marche)
Panneau de commande verrouillé
On (Marche)/Off (Arrêt)
Low (Bas)
High (temp. élevée)
Minuterie programmée
à . Reportez-
VERROUILLAGE DU PANNEAU DE COMMANDE
La fonction de verrouillage du panneau de commande
empêche le fonctionnement du gril par inadvertance.
Pour verrouiller et déverrouiller le panneau de commande,
maintenez la touche
enfoncée pendant trois secondes.
va s'allumer lorsque le panneau de commande est
verrouillé.
Le panneau de commande va se verrouiller automatiquement
au bout de 10 minutes d'inactivité. Cette fonction de
verrouillage automatique peut être désactivée par le biais
du menu des options enrichies. Reportez-vous à la page 6.
Lorsque le gril est mis sous tension pour la première fois,
ou s'il y a eu une coupure de courant, par défaut, le domino
se met en mode Verrouillage.
NIVEAU DE PUISSANCE
Lorsqu'une résistance chauffante est activée, un témoin de
niveau de puissance s'allume au-dessus de la commande
correspondante indiquant le niveau de chaleur. La chaleur la
plus faible est représentée par la petite amme, les niveaux
divers de chaleur par des témoins supplémentaires (points)
et la chaleur la plus forte par tous les témoins, y compris la
grande amme. Reportez-vous au tableau ci-après.
RÉGLAGE
Low (Bas) Témoins 1–6 Garder les aliments au chaud.
Medium
(Moyen)
Medium High
(Moyen élevé)
High
(temp. élevée)
NIVEAU DE
PUISSANCE
Témoins 6-7 Griller le pain.
Témoins 7-8 Griller les saucisses fraîches
Témoins 8-10
(grande amme)
USAGES
et le porc mariné.
Saisir et griller les viandes,
griller les légumes.
TÉMOIN DE NIVEAU DE PUISSANCE
Réglage des commandes :
1 Pour activer une résistance chauffante, efeurez
pour le foyer désiré (avant et/ou arrière) sur le panneau
de commande. Le témoin de niveau de puissance va
clignoter et tous les témoins pour ce foyer vont clignoter.
Reportez-vous à l'illustration ci-après.
2 Pour nir l'activation, efeurez la touche pour la
chaleur la plus forte, la touche
pour la chaleur la plus
basse, ou efeurez le témoin de niveau de puissance
préréglé voulu.
3 Pour changer le réglage de chaleur pendant que la
résistance chauffante est activée, efeurez ou faites
glisser jusqu'au niveau de puissance préréglé désiré.
4 Pour désactiver la résistance chauffante, efeurez
la touche
.
PRÉCHAUFFAGE
Préchauffez le gril pendant 10 environ avant de déposer
la nourriture sur le gril. Les aliments sont cuits directement
sur la grille.
Surface chaude
Panneau de commande.
TÉMOIN DE NIVEAU
DE PUISSANCE
Témoin de niveau de puissance.
wolfappliance.com | 5
Page 18

CUISSON AU GRIL
Cuisson au gril
MINUTERIE
La minuterie peut être réglée par intervalles d'une minute
jusqu'à 99 minutes au plus. Une fois la minuterie réglée,
la touche
et le compte à rebours s'afche sur l'écran de la minuterie.
Reportez-vous à l'illustration ci-après. La minuterie est
indépendante du fonctionnement du gril.
Réglage de la minuterie :
1 Efeurez la touche .
2 Efeurez « + » ou « - » et maintenez la touche enfoncée
3 La minuterie retentira lorsqu'il restera une minute et le
4 Une fois le temps écoulé, la minuterie retentira et
Commande de la minuterie.
va s'allumer sur le panneau de commande
jusqu'à ce que la durée voulue s'afche. Le compte à
rebours commence en minutes.
compte à rebours se fera alors en secondes.
continuera à sonner jusqu'à ce que la touche
soit efeurée.
INDICATEUR DE SURFACE CHAUDE
La touche va s'allumer au panneau de commande et va
rester allumée jusqu'à ce que le gril ait refroidi. Elle restera
allumée même lorsque le gril sera arrêté.
TOUS LES FOYERS OFF (DÉSACTIVÉS)
Lorsqu'une ou plusieurs résistances chauffantes sont
activées, la touche
s'allume sur le panneau de
commande. Pour désactiver les deux foyers simultanément,
efeurez la touche
.
OPTIONS ENRICHIES
Les options enrichies permettent à l'utilisateur de régler
les préférences pour le volume, la tonalité, le verrouillage
du panneau de commande et le mode sabbat.
Programmation des options enrichies :
1 Pour déverrouiller le panneau de commande, appuyez
sur le symbole
et maintenez-le enfoncé pendant
3 secondes.
2
Pour programmer le mode des options enrichies, efeurez
la touche et maintenez-la enfoncée pendant 5 secondes.
3 Le niveau de puissance 1 sur la commande du foyer
arrière s'afchera et « VO » s'afchera sur l'écran de
la minuterie.
Efeurez la touche
ou sur la commande du foyer
avant pour régler le volume.
4
Efeurez « + » sur la commande de la minuterie pour régler
la tonalité. Le niveau de puissance 2 sur la commande
du foyer arrière s'afchera et « Fr » s'afchera sur l'écran
de la minuterie.
Efeurez la touche ou sur la commande du foyer
avant pour régler la tonalité.
5 Efeurez « + » sur la commande de la minuterie pour
régler le verrouillage automatique du panneau de
commande. Le niveau de puissance 3 sur la commande
du foyer arrière s'afchera et « Lo » s'afchera sur l'écran
de la minuterie.
Efeurez la touche
ou sur la commande du
foyer avant pour activer ou désactiver le verrouillage
automatique du panneau de commande.
6
Efeurez « + » sur la commande de la minuterie pour
introduire le mode sabbat. Le niveau de puissance 4 sur la
commande du foyer arrière s'afchera. Efeurez la touche
sur la commande du foyer avant pour lancer le mode
sabbat. « SA » s'afche sur l'écran de la minuterie.
Efeurez la touche sur la commande du foyer avant
pour activer ou désactiver la fonction.
7 Efeurez la touche pour conrmer les réglages.
GRILLE POUR LES BRIQUETTES
La grille pour les briquettes et les briquettes en céramique
passent au lave-vaisselle. Les briquettes doivent être retirées
de la grille lorsqu'on les lave au lave-vaisselle. Pour bien les
arranger, consultez l'illustration ci-après.
N'utilisez pas le gril sans que les briquettes et la grille aient
été installées.
Grille pour les briquettes.
AVANT
6 | Français
Page 19

CONSIGNES D’ENTRETIEN
DÉPISTAGE DES PANNES
Consignes d'entretien
NETTOYAGE
Acier inoxydable Utilisez un nettoyant non abrasif pour acier
Panneau
de commande
Grille
Résistance
chauffante
Briquettes
en céramique
Grille pour
les briquettes
Ramasse-graisse Avant de nettoyer, enlevez tous les excès de
inoxydable que vous appliquerez à l'aide d'un
chiffon doux non pelucheux. An de faire
ressortir le lustre naturel, essuyez légèrement
la surface avec un chiffon en microbre
humide, puis avec une peau de chamois
sèche. Déplacez toujours le chiffon dans
le sens du grain de l'acier inoxydable.
Utilisez un dégraissant aérosol pour enlever
les traces de doigts et les taches d'origine
alimentaire. Pulvérisez tout d'abord le produit
sur un chiffon avant d'essuyer le panneau.
REMARQUE IMPORTANTE : Ne pulvérisez pas
directement les produits nettoyants sur
le panneau de commande.
Une fois la cuisson au gril terminée, laissez
chauffer le gril sur pendant cinq minutes
pour faire brûler les graisses résiduelles. Retirez
toutes les particules de nourriture brûlées.
Nettoyez avec un produit nettoyant non abrasif
comme du détergent liquide dans de l'eau
chaude ou une solution de bicarbonate de
soude et d'eau. Ne les plongez pas dans l'eau !
Il est possible d'utiliser les dégraissants aérosols
et les produits nettoyants abrasifs doux.
Ne les plongez pas dans l'eau ! Si les
particules de nourriture sont brûlées, essuyez
manuellement à l'aide d'un chiffon humide.
Mettez les briquettes au lave-vaisselle ou
lavez-les à l'aide d'un détergent et d'un chiffon
doux. Laissez refroidir avant de les remettre sur
la grille. Reportez-vous à la page 6 pour savoir
comment les placer.
Mettez la grille au lave-vaisselle ou lavez-la
à l'aide d'un détergent et d'un chiffon doux.
graisse et les particules de nourriture brûlées.
Lavez à l'eau chaude avec un détergent doux.
Rincez et séchez.
Dépistage des pannes
FONCTIONNEMENT
Le gril domino ne marche pas.
• Vériez que l'appareil est sous tension.
• Vériez si le gril est sous tension et si le disjoncteur
de la maison est activé.
• Le gril est en mode Verrouillage. Pour déverrouiller
le panneau de commande, maintenez la touche
enfoncée pendant trois secondes.
Problème avec la température du gril.
• Pour de plus amples renseignements, adressez-vous
à votre revendeur Wolf .
SERVICE
•
Maintenez la qualité qui fait partie intégrante de votre
en contactant un prestataire agréé par l'usine Wolf.
appareil
• Si vous nous contactez pour un service après-vente,
vous devrez fournir la référence modèle et le numéro
de série de votre appareil. Ces deux numéros gurent
sur la plaque des caractéristiques du produit. Pour
repérer l'emplacement de la plaque des caractéristiques,
reportez-vous à la page 4.
• Pour les besoins de la garantie, vous devrez aussi fournir
la date d'installation et le nom de votre revendeur agréé
Wolf. Ces renseignements doivent être consignés à la
page 2 de ce guide.
Garantie international limitée Wolf Appliance
À USAGE MÉNAGER
GARANTIE TOTALE DE DEUX ANS*
La garantie des appareils Wolf Appliance couvre, pendant deux ans à compter de la date de l’installation
initiale, tous les frais de pièces et de main d’œuvre pour réparer ou remplacer, dans des conditions
d’utilisation ménagère normales, toute pièce du produit qui présenterait des défauts causés par des vices
de matériau ou de fabrication. Tous les services offerts par Wolf Appliance dans le cadre de la garantie
dénie ci-dessus doivent être exécutés par un prestataire agréé par l’usine Wolf, sauf en cas d’exception
particulière spéciée par Wolf Appliance, Inc. Les services seront exécutés pendant les heures normales
ouvrées.
GARANTIE LIMITÉE DE CINQ ANS
Wolf Appliance s’engage à réparer ou remplacer, pendant cinq ans à compter de la date de l’installation
initiale, les pièces suivantes qui présenteraient des défauts causés par des vices de matériau ou de
fabrication : plateau à briquettes en acier inoxydable, robinets de gaz, cuvettes des brûleurs, les panneaux
de commande électroniques et les résistances chauffantes. Si le propriétaire de l’appareil a recours à un
prestataire agréé par l’usine Wolf, celui-ci va réparer ou remplacer ces pièces et le propriétaire couvrira
tous les autres frais, y compris les frais de main-d’œuvre. Si le propriétaire a recours à un prestataire
non agréé, il doit contacter Wolf Appliance, Inc. (vois les coordonnées ci-après) pour recevoir les pièces
de rechange ou les pièces réparées. Wolf Appliance ne remboursera pas le propriétaire pour les pièces
achetées auprès de prestataires ou de tout autre fournisseur non agréés.
Pour plus de détails concernant la garantie des produits Wolf, veuillez contacter votre concessionnaire
agréé Wolf. Les garanties doivent respecter la législation en vigueur au niveau national, régional ou local.
*Les pièces en acier inoxydable (portes, panneaux, poignées, parties du cadre et surfaces intérieures) sont
couvertes par une garantie limitée de 60 jours pour pièces et main d’œuvre pour tout vice cosmétique.
Sub-Zero, Sub-Zero & Design, Sub-Zero & Snowake Design, Dual Refrigeration, The Living Kitchen, Great American Kitchens The Fine Art of Kitchen Design, Wolf, Wolf
& Design, Wolf Gourmet, W & Design, la couleur rouge comme celle qui est appliquée aux boutons, Cove, et Cove & Design, sont des marques déposées et des marques
de services de Sub-Zero Group, Inc. et de ses liales. Toutes les autres marques de commerce ont été brevetées par leurs propriétaires respectifs aux États-Unis ou
dans d’autres pays.
wolfappliance.com | 7
Page 20

MODULO CON GRILL
PRECAUZIONI DI SICUREZZA
Indice
2 Precauzioni di sicurezza
4 Funzionalità del modulo con grill
4 Funzionamento del modulo con grill
7 Consigli per la manutenzione
7 Risoluzione dei problemi
7 Garanzia Wolf
Assistenza clienti
I numeri di serie e di modello sono stampati sulla cedola di
registrazione del prodotto. I due numeri sono riportati anche
sulla targhetta identicativa del prodotto. Consultare pagina
4 per la posizione dell'etichetta identicativa. Ai ni della
garanzia sono inoltre necessari la data di installazione e il
nome del rivenditore Wolf autorizzato presso il quale è stato
effettuato l'acquisto. Annotare le seguenti informazioni a
titolo di riferimento futuro.
Se il prodotto richiede assistenza, rivolgersi a un servizio
di assistenza certicato Wolf.
INFORMAZIONI SUL SERVIZIO DI ASSISTENZA
Numero del modello
Numero di serie
Data di installazione
Nome di assistenza certicato
Numero di assistenza certicato
Rivenditore autorizzato
Numero del rivenditore
Nota importante
Per garantire un'installazione e un funzionamento sicuri
ed efcaci del prodotto, prestare attenzione alle seguenti
informazioni evidenziate all'interno della guida:
NOTA IMPORTANTE evidenzia informazioni di particolare
rilievo.
ATTENZIONE indica una situazione in cui possono vericarsi
lesioni e danni di lieve entità al prodotto, in caso di mancata
osservanza delle istruzioni.
AVVERTENZA indica un rischio che potrebbe causare gravi
lesioni o morte in caso di mancata osservanza delle precauzioni.
ISTRUZIONI IMPORTANTI
NOTA IMPORTANTE: leggere tutte le istruzioni
relative alla sicurezza prima di utilizzare questo
elettrodomestico.
• Prima di utilizzare l'elettrodomestico, leggere
attentamente la presente guida per ridurre il
rischio di incendio, folgorazione o lesioni alle
persone.
•
L'installazione dell'apparecchio e l'assistenza
devono essere effettuate da un installatore,
centro di assistenza o azienda del gas qualicati.
L'apparecchio deve essere collegato a terra da
un tecnico qualicato.
AVVERTENZA
Questo elettrodomestico può essere utilizzato da
bambini di età superiore a 8 anni e da persone
con ridotte capacità siche, sensoriali o mentali
o prive dell'esperienza e competenza necessaria,
a condizione che abbiano ricevuto supervisione
o istruzioni adeguate per un utilizzo sicuro
dell'apparecchio e che ne abbiano compreso i
potenziali pericoli. I bambini non devono giocare
con l'elettrodomestico. Le operazioni di pulizia
e manutenzione non devono essere eseguite da
bambini senza la necessaria supervisione.
AVVERTENZA
L'elettrodomestico e le parti accessibili
al suo interno possono diventare bollenti
durante l'utilizzo. Fare attenzione a evitare
di toccare gli elementi riscaldanti. Tenere i
bambini minori di 8 anni a debita distanza
o sotto costante controllo.
AVVERTENZA
Pentole con olio bollente non sorvegliate
sul piano cottura possono rappresentare
potenziali cause di incendi e altri pericoli.
Non tentare MAI di spegnere un incendio
con l'acqua, ma spegnere il fornello e
coprire la amma con un coperchio o
una coperta ignifuga, ad esempio.
ATTENZIONE
È necessario tenere d'occhio il processo
di cottura. È necessario controllare
costantemente anche un processo di
cottura di breve durata.
2 | Italiano
Page 21

PRECAUZIONI DI SICUREZZA
ISTRUZIONI IMPORTANTI
PRECAUZIONI GENERALI DI SICUREZZA
• Usare sempre una presina asciutta. Presine bagnate o umide
possono causare ustioni. Non usare uno stronaccio o panno
grosso al posto delle presine.
•
Non lasciare bambini incustoditi in prossimità dell'elettrodomestico
funzionante. Impedire a bambini di sedersi o stare in piedi
sull'elettrodomestico.
• Non lasciare mai l'elettrodomestico incustodito quando in
funzione. Fuoriuscite o schizzi di olio potrebbero causare
fumo o amme.
•
Non utilizzare l'acqua sulle amme provocate da olio. Soffocare
il fuoco o le amme o utilizzare un estintore chimico o a schiuma.
• Non riparare né sostituire alcuna parte dell'apparecchio se
non specicamente consigliato nella documentazione di
accompagnamento.
• Non conservare o usare benzina o altri liquidi e liquidi volatili
inammabili in prossimità di questo o altri elettrodomestici.
• Non riscaldare contenitori di alimenti chiusi come vasetti
di omogeneizzati e scatolette. La formazione di pressione
potrebbe causare esplosioni e lesioni.
• Non utilizzare un pulitore a vapore.
• Pericolo di incendio: non conservare oggetti direttamente
sui piani cottura.
CONSERVARE QUESTE ISTRUZIONI
wolfappliance.com | 3
Page 22

MODULO CON GRILL
FUNZIONAMENTO DEL MODULO CON GRILL
Funzionalità del modulo con grill
FUNZIONALITÀ
1
Targhetta identicativa del prodotto (sotto il modulo)
2
Pannello di controllo
3
Blocco del pannello di controllo
4
Display del timer
5
Griglia di cottura
6
Doppi elementi riscaldanti
7
Griglia con bricchetta
8
Contenitore per la raccolta del grasso rimovibile
5
3
Modulo con grill.
MONTAGGIO DEL MODULO CON GRILL
Per funzionare correttamente, il modulo con grill deve essere
allineato nel modo giusto. Fare riferimento alla gura riportata
di seguito.
Inserire il contenitore per la raccolta del grasso nel modulo con
grill con il foro verso l'alto. Posizionare la bricchetta all'interno
del contenitore per la raccolta del grasso. Collegare gli elementi
riscaldanti al contenitore nella parte anteriore del modulo.
Posizionare la griglia per cottura con i piedi inseriti all'interno
dei fori angolari.
Introduzione
Prima di iniziare a cucinare, è importante dedicare qualche
minuto alla lettura della presente guida all'uso e alla
manutenzione. È essenziale acquisire dimestichezza con
le procedure di sicurezza, le caratteristiche, il funzionamento
e i consigli di manutenzione del modulo a griglia Wolf.
Per garantire la rimozione di tutto l'olio residuo del processo
di fabbricazione, riscaldare il modulo a griglia sul
circa 10 minuti. Sarà naturale sentire leggeri odori o del
fumo. Pulire accuratamente il modulo a griglia con acqua
calda e un detergente delicato prima dell'uso. Sciacquare
ed asciugare con un panno morbido. Consultare la sezione
per
Sabbath
Questo elettrodomestico è certicato da Star-K per soddisfare
rigorose norme religiose ed istruzioni speciche contenute sul
sito www.star-k.org.
relativa ai consigli per la manutenzione a pagina 7.
4
6
7
2
1
Montaggio del modulo con grill.
5
8
4 | Italiano
Page 23

FUNZIONAMENTO DEL MODULO CON GRILL
Funzionamento con grill
PANNELLO DI CONTROLLO
Il pannello di controllo presenta comandi tattili con illuminazione.
Un indicatore del livello di potenza per gli elementi riscaldanti
anteriore e posteriore visualizza il calore impostato da
Fare riferimento alla gura riportata di seguito.
Gli indicatori sul pannello di controllo si accendono indicando
la specica operazione del modulo. Consultare la tabella
riportata di seguito.
PANNELLO DI CONTROLLO
Elementi accesi
Pannello di controllo bloccato
On/ Off
Basso
Alto
Impostazione timer
Supercie calda
a .
BLOCCO DEL PANNELLO DI CONTROLLO
La funzione di blocco del pannello di controllo impedisce
l'azionamento indesiderato del modulo. Per bloccare
e sbloccare il pannello di controllo, premere e mantenere
premuto
per tre secondi. si accende quando il pannello
di controllo è bloccato.
Il pannello di controllo si blocca automaticamente dopo
10 minuti di inattività. Questa funzione di blocco automatica
può essere disabilitata dal menu delle opzioni estese. Fare
riferimento a pagina 6.
Quando il modulo viene acceso per la prima volta o dopo
un'interruzione dell'alimentazione, attiva automaticamente
la modalità di blocco.
LIVELLO POTENZA
Quando viene attivato un elemento riscaldante, l'indicatore
del livello di potenza si accende indicando il livello di calore.
Il calore minimo è rappresentato dalla amma piccola, i
livelli variabili di calore da indicatori supplementari (puntini)
e il calore massimo da tutti gli indicatori, inclusa la amma
grande. Consultare la tabella riportata di seguito.
IMPOSTAZIONE
Basso Indicatori 1-6 Mantenere caldo il cibo.
Medio Indicatori 6-7 Usare il grill con il pane.
Medio Alto Indicatori 7-8 Usare il grill con salse fresche
Alto Indicatori 8-10
LIVELLO
POTENZA
(amma grande)
FUNZIONE
e carne di maiale marinata.
Scottare e grigliare carne
e verdure.
INDICATORE LIVELLO POTENZA
Impostazione dei comandi:
1 Per attivare un elemento riscaldante, toccare per
l'elemento desiderato (anteriore e/o posteriore) sul
pannello di controllo. L'indicatore del livello di potenza
lampeggia e tutti gli indicatori di quell'elemento anche.
Fare riferimento alla gura riportata di seguito.
2 Per completare l'attivazione, toccare per il massimo
per il minimo calore o toccare l'indicatore del
calore,
livello di potenza predenita desiderato.
3
Per cambiare l'impostazione del calore a elemento acceso,
toccare o far scorrere il dito sul livello di potenza predenita
desiderato.
4 Per spegnere l'elemento, toccare .
PRERISCALDAMENTO
Preriscaldare il modulo con grill per circa 10 minuti prima
di aggiungere del cibo. Il cibo viene cucinato direttamente
sulla griglia per la cottura.
Pannello di controllo.
INDICATORE
LIVELLO POTENZA
Indicatore livello potenza.
wolfappliance.com | 5
Page 24

FUNZIONAMENTO DEL MODULO CON GRILL
Funzionamento con grill
TIMER
Il timer può essere impostato a incrementi di un minuto no
a 99 minuti. Una volta impostato il tempo, si accende
pannello di controllo e sul display del timer compare il conto
alla rovescia. Fare riferimento alla gura riportata di seguito.
Il timer è indipendente dal funzionamento del modulo.
Impostazione del timer:
1 Toccare .
2 Tenere premuto su + o - no a visualizzare il tempo
richiesto sul display del timer. Il timer inizia il conto alla
rovescia in minuti.
3
Il timer emette un segnale acustico a un minuto dal
termine e porta a termine il conto alla rovescia in secondi.
4 Una volta esaurito, il timer emette un segnale acustico
e continua a emetterlo no a quando non si tocca
Comandi del timer.
sul
.
INDICATORE SUPERFICIE CALDA
Si accende sul pannello di controllo e rimarrà acceso
no al completo raffreddamento dell'unità. Può restare
acceso anche se il modulo con grill è spento.
TUTTO SPENTO
Quando uno o entrambi gli elementi riscaldanti sono accesi,
si accende
entrambi gli elementi nello stesso momento, toccare
sul pannello di controllo. Per spegnere
.
OPZIONI ESTESE
Le opzioni estese consentono all'utente di selezionare
le preferenze per le opzioni di volume, suoni, blocco del
pannello di controllo e Giorno sabbatico.
Impostazione delle opzioni estese:
1 Per sbloccare il pannello di controllo, tenere premuto
su
per 3 secondi.
2 Per accedere alla modalità Opzioni estese, toccare
e mantenere premuto
3 Verrà visualizzato il livello di potenza 1 sul comando
per 5 secondi.
dell'elemento posteriore e comparirà il messaggio “VO”
sul display del timer.
Toccare
o sul comando dell'elemento anteriore
per regolare il volume.
4 Toccare + sul comando del timer per regolare il suono.
Verrà visualizzato il livello di potenza 2 sul comando
dell'elemento posteriore e comparirà il messaggio “Fr”
sul display del timer.
Toccare
o sul comando dell'elemento anteriore
per regolare il suono.
5 Toccare + sul comando del timer per regolare il blocco
automatico del pannello di controllo. Verrà visualizzato il
livello di potenza 3 sul comando dell'elemento posteriore
e comparirà il messaggio “Lo” sul display del timer.
Toccare o sul comando dell'elemento anteriore
per disattivare o attivare la funzione di blocco automatico.
6 Toccare + sul comando del timer per attivare la modalità
Sabbath. Viene visualizzato il livello di potenza 4 sul
comando dell'elemento posteriore. Toccare
sul
comando dell'elemento anteriore per avviare la funzione
Giorno sabbatico. Sul display del timer compare "SA".
Toccare
sul comando dell'elemento anteriore per
attivare o disattivare la funzionalità.
7 Toccare per confermare le impostazioni.
GRIGLIA CON BRICCHETTA
Le bricchette in ceramica e le griglie in bricchetta sono
lavabili in lavastoviglie. Le bricchette devono essere separate
dalla griglia quando vengono inserite in una lavastoviglie. Per
sistemare le bricchette in modo appropriato,fare riferimento
alla gura riportata di seguito.
Non usare il modulo con grill senza aver installato le bricchette
e la griglia.
FRONTALE
Griglia con bricchetta.
6 | Italiano
Page 25

CONSIGLI PER LA MANUTENZIONE
RISOLUZIONE DEI PROBLEMI
Consigli per la manutenzione
PULIZIA
Acciaio
inossidabile
Pannello di
controllo
Griglia di cottura
Elemento
riscaldante
Bricchette
in ceramica
Griglia con
bricchetta
Contenitore per
la raccolta
del grasso
Applicare un detergente per acciaio inox non
abrasivo utilizzando un panno morbido privo di
lanugine. Per far risaltare la lucentezza naturale,
pulire delicatamente la supercie con un panno
in microbra inumidito e quindi con un panno
di camoscio asciutto. Seguire sempre la trama
dell'acciaio inossidabile.
Usare uno sgrassatore spray per rimuovere
impronte digitali e macchie di alimenti. Per pulire
il pannello spruzzare prima il detergente su un
panno.
NOTA IMPORTANTE: non spruzzare detergenti
spray direttamente sul pannello di controllo.
Dopo la cottura, portare il grill su per circa
cinque minuti al ne di eliminare il grasso in
eccesso. Rimuovere tutti i resti di cibo bruciato.
Pulire le superci con detergenti liquidi non
abrasivi e acqua calda. In alternativa, è possibile
usare una miscela di bicarbonato e acqua. Non
immergere in acqua. È possibile usare sgrassatori
spray e detergenti leggermente abrasivi.
Non immergere in acqua. Se i resti di cibo sono
bruciati, pulire a mano utilizzando un panno umido.
Posizionare le bricchette nella lavastoviglie
o lavarle usando un detergente delicato e un
panno morbido. Lasciare raffreddare prima di
rimetterle sulla griglia. Consultare pagina 6 per
sistemare l'oggetto in modo appropriato.
Posizionare la griglia nella lavastoviglie o lavarla
usando un detergente delicato e un panno
morbido.
Prima della pulizia, rimuovere tutto il grasso
in eccesso e i resti di cibo bruciato. Lavare
con acqua calda e un detergente delicato.
Sciacquare e asciugare.
Risoluzione dei problemi
FUNZIONAMENTO
Il modulo con grill non funziona.
• Vericare che l'alimentazione sia accesa.
• Vericare che l'interruttore del modulo e l'interruttore
generale dell'abitazione siano accesi.
• Il modulo è in modalità di blocco. Per sbloccare il
pannello di controllo, tenere premuto
Problemi di temperatura del modulo.
• Rivolgersi al rivenditore autorizzato Wolf per i dettagli.
ASSISTENZA
• Per preservare la qualità del prodotto, rivolgersi
a un centro autorizzato Wolf.
• Prima di contattare un centro di assistenza, tenere
a portata di mano il numero di modello e di serie
dell'unità. Entrambi i numeri sono indicati sulla targhetta
identicativa del prodotto. Consultare pagina 4 per la
posizione dell'etichetta identicativa.
Ai ni della garanzia è inoltre necessario disporre della data
•
di installazione e del nome del rivenditore Wolf autorizzato
presso cui è stato effettuato l'acquisto. Tale informazione
dovrebbe essere disponibile a pagina 2 della presente guida.
per tre secondi.
Garanzia limitata internazionale dei prodotti Wolf Appliance
PER USO DOMESTICO
GARANZIA COMPLETA DI DUE ANNI*
Questa garanzia sui prodotti Wolf Appliance copre, no a due anni dopo la data di installazione, tutte le
parti e tutti i lavori di riparazione o sostituzione, in condizione di normale uso residenziale, di ogni parte
del prodotto che si dimostri difettosa nei materiali o nella fabbricazione. Tutti i servizi di riparazione/
manutenzione resi da Wolf, coperti dalla suddetta garanzia, devono essere eseguiti da centri autorizzati
Wolf, se non diversamente specicato da Wolf Appliance, Inc. Il servizio di riparazione/manutenzione sarà
fornito durante i regolari orari di lavoro.
GARANZIA LIMITATA DI 5 ANNI
Per cinque anni dalla data di installazione originale, Wolf Appliance ripara o sostituisce le seguenti parti che
rivelino difetti di materiale o manodopera: vassoi con griglia in acciaio, valvole del gas, vaschette, schede
elettroniche di controllo e elementi riscaldanti elettrici. Se il proprietario utilizza un centro di assistenza
certicato Wolf, il centro assistenza riparerà o sostituirà le summenzionate parti ed al proprietario
spetteranno tutti gli altri costi, inclusa la manodopera. Se il proprietario si rivolge ad un centro assistenza
non certicato, il proprietario dovrà contattare Wolf Appliance, Inc. (utilizzando le informazione che trova
in basso) per ricevere le parti riparate o sostituite. Wolf Appliance non rimborserà il proprietario per parti
ordinate presso un centro assistenza non certicato o altri.
Per maggiori informazioni sulla garanzia dei prodotti Wolf, contattate il vostro rivenditore autorizzato Wolf.
Le garanzie devono osservare le leggi di tutti i paesi, stati, città, località.
*L’acciaio inossidabile (porte, pannelli, maniglie, telaio del prodotto e le superci interne) è coperto da una
garanzia limitata di 60 giorni su parti e manodopera per difetti cosmetici.
Sub-Zero, Sub-Zero & Design, Sub-Zero & Snowake Design, Dual Refrigeration, The Living Kitchen, Great American Kitchens The Fine Art of Kitchen Design, Wolf, Wolf
& Design, Wolf Gourmet, W & Design, red colored knobs, Cove e Cove & Design, sono marchi registrati e marchi di servizio di Sub-Zero Group, Inc. e delle sue sussidiarie.
Tutti gli altri marchi registrati sono di proprietà dei rispettivi titolari negli Stati Uniti e in altri paesi.
wolfappliance.com | 7
Page 26

GRILLMODUL
SICHERHEITSHINWEISE
Inhaltsverzeichnis
2 Sicherheitshinweise
4 Leistungsmerkmale des Grillmoduls
4 Bedienung des Grillmoduls
7 Pegeempfehlungen
7 Fehlersuche
7 Wolf-Garantie
Kundendienst
Modell- und Seriennummer nden Sie auf der beiliegenden
Produktregistrierungskarte. Beide Nummern sind auch auf
dem Produkttypenschild aufgeführt. Die Typenschildposition
ist auf Seite 4 angegeben. Für Garantiezwecke benötigen Sie
außerdem das Datum der Installation und den Namen Ihres
Wolf-Vertragshändlers. Zeichnen Sie die nachstehenden
Informationen für zukünftige Nachschlagezwecke auf.
Wenn irgendwelche Arbeiten an Ihrem Produkt notwendig
sind, ziehen Sie auf jeden Fall einen vom Wolf-Werk
zugelassenen Serviceanbieter hinzu.
SERVICEINFORMATIONEN
Modellnummer
Seriennummer
Datum der Installation
Name des zertizierten Service
Nummer des zertizierten Service
Vertragshändler
Händlernummer
Wichtiger Hinweis
Um eine möglichst sichere und efziente Installation dieses
Produkts zu gewährleisten, beachten Sie bitte die folgenden
Arten hervorgehobener Informationen in der gesamten
Anleitung:
WICHTIGER HINWEIS hebt Informationen hervor,
die besonders wichtig sind.
VORSICHT ist ein Hinweis auf eine Situation, die bei
Nichtbeachtung der Anweisungen zu geringfügigen
Personen- oder Sachschäden führen kann.
WARNUNG weist auf eine Gefahr hin, die bei Nichtbeachtung
der Anweisungen zu schweren Verletzungen oder zum Tod
führen kann.
WICHTIGE ANWEISUNGEN
WICHTIGER HINWEIS: Lesen Sie alle
Sicherheitshinweise, bevor Sie den Herd benutzen.
• Lesen Sie diese Anleitung sorgfältig durch,
bevor Sie dieses Gerät benutzen, um der Gefahr
von Brand, Stromschlag oder Verletzungen
vorzubeugen.
•
Dieses Gerät muss von einem qualizierten
Installierer, Fachbetrieb oder Gaslieferanten
ordnungsgemäß angeschlossen und gewartet und
von einem qualizierten Techniker geerdet werden.
WARNUNG
Dieses Gerät kann von Kindern ab 8 Jahren
und von Personen mit eingeschränkten
physischen, sensorischen oder mentalen
Fähigkeiten oder fehlenden Erfahrungen/
Kenntnissen benutzt werden, wenn diese
beaufsichtigt werden oder Anweisungen für
die sichere Verwendung des Geräts erhalten
haben und die damit zusammenhängenden
Gefahren verstehen. Kinder dürfen mit
dem Gerät nicht spielen. Reinigungs- und
Wartungsarbeiten dürfen von Kindern nicht
ohne Aufsicht durchgeführt werden.
WARNUNG
Das Gerät und die zugänglichen Teile
werden während der Verwendung heiß.
Achten Sie darauf, die Heizelemente
nicht zu berühren. Kinder unter 8 Jahren
müssen ferngehalten werden, es sei
denn, sie werden ständig beaufsichtigt.
WARNUNG
Das unbeaufsichtigte Kochen auf
einem Kochfeld mit Fett oder Öl kann
gefährlich sein und zu einem Brand
führen. Versuchen Sie NIE, einen Brand
mit Wasser zu löschen. Schalten Sie
stattdessen das Gerät aus, und decken
Sie die Flammen z.B. mit einem Deckel
oder einer Feuerlöschdecke ab.
VORSICHT
Der Kochvorgang muss überwacht
werden. Ein kurzzeitiger Kochvorgang
muss ständig überwacht werden.
2 | Deutsch
Page 27

SICHERHEITSHINWEISE
WICHTIGE ANWEISUNGEN
ALLGEMEINE SICHERHEITSHINWEISE
•
Immer trockene Topappen verwenden. Nasse oder feuchte
Topappen können Dampfverbrennungen verursachen. Keine
Handtücher oder dicke Lappen anstelle der Topappen verwenden.
• Kinder nie allein oder unbeaufsichtigt lassen, wenn dieses
Gerät verwendet wird. Kindern nie erlauben, sich auf das Gerät
zu setzen oder zu stellen.
• Das eingeschaltete Gerät nie unbeaufsichtigt lassen.
Überlaufende Flüssigkeiten und Fette können Rauch erzeugen
oder sich entzünden.
• Brennendes Fett nicht mit Wasser löschen. Die Flamme
ersticken oder eine Trockenchemikalie bzw. einen
Löschschaum verwenden.
• Teile dieses Geräts dürfen nur dann repariert oder ersetzt
werden, wenn dies in der beigefügten Dokumentation
spezisch empfohlen wird.
•
Kein Benzin bzw. keine sonstigen entzündlichen Flüssigkeiten
(auch Flüssigkeiten, die entzündliche Dämpfe entwickeln können)
in der Nähe dieses Geräts oder anderer Geräte aufbewahren.
• Keine ungeöffneten Lebensmittelbehälter wie beispielsweise
Babynahrung und Dosen erhitzen. Der aufgestaute Druck kann
zum Bersten des Behälters und zu Verletzungen führen.
• Keinen Dampfreiniger verwenden.
• Brandgefahr: Keine Gegenstände auf den Kochächen
aufbewahren.
DIESE ANLEITUNG AUFBEWAHREN
wolfappliance.com | 3
Page 28

GRILLMODUL
BEDIENUNG DES GRILLMODULS
Leistungsmerkmale des Grillmoduls
LEISTUNGSMERKMALE
1
Typenschild des Produkts (Unterseite des Moduls)
2
Bedienfeld
3
Verriegelung des Bedienfelds
4
Timer-Display
5
Grillrost
6
Doppelheizelemente
7
Keramikbrikett-Rost
8
Herausnehmbare Fettauffangschale
3
Grillmodul
5
4
ZUSAMMENBAUEN DES GRILLMODULS
Um ordnungsgemäß funktionieren zu können, muss das
Grillmodul in der richtigen Ausrichtung zusammengebaut
werden. Siehe Abbildung unten.
Die Fettauffangschale so in das Grillmodul einführen, dass
das Loch für die Anschlussbuchse in Richtung Vorderseite
weist. Den Brikettrost in die Fettauffangschale legen. Die
Heizelemente in die Anschlussbuchse an der Vorderseite
des Moduls einstecken. Den Grillrost so positionieren,
dass die Füße in den Eckenmulden ruhen.
6
7
2
1
Zusammenbauen des Grillmoduls
Erste Schritte
Bevor Sie mit dem Kochen beginnen, nehmen Sie sich
die Zeit, diese Bedienungs- und Pegeanleitung zu lesen.
Es wird auf jeden Fall für Sie von Vorteil sein, sich mit den
sicheren Arbeitspraktiken, den besonderen Merkmalen, der
Bedienung sowie unseren Empfehlungen für das Grillmodul
von Wolf vertraut zu machen.
Um sicherzustellen, dass das gesamte Öl vom
Herstellungsprozess entfernt wurde, müssen Sie das
Grillmodul ca. 10Minuten lang auf
zu einer geringfügigen Rauch- und Geruchsentwicklung
kommen, was normal ist. Das Grillmodul mit heißem
Wasser und einem milden Reinigungsmittel gründlich
reinigen. Anschließend mit einem weichen Tuch abwischen
und trocknen. Siehe Pegeempfehlungen auf Seite 7.
5
8
aufheizen. Es kann
Sabbat
Dieses Gerät ist von Star-K zertiziert und entspricht den
strengen religiösen Vorschriften im Zusammenhang mit
spezischen Anweisungen, die unter www.star-k.org zu
nden sind.
4 | Deutsch
Page 29

BEDIENUNG DES GRILLMODULS
Grillbetrieb
BEDIENFELD
Das Bedienfeld ist mit beleuchteten Berührungsbedienelementen ausgestattet. Eine Leistungsstufenanzeige für das
vordere und hintere Heizelement gibt die Wärmeeinstellung
bis an. Siehe Abbildung unten.
von
Die Anzeigen auf dem Bedienfeld leuchten und weisen auf den
spezischen Modulbetrieb hin. Siehe das Diagramm unten.
BEDIENFELD
Element(e) ein
Bedienfeld verriegelt
Ein /Aus
Niedrig
Hoch
Timer eingestellt
Heiße Oberäche
VERRIEGELUNG DES BEDIENFELDS
Mit der Verriegelungsfunktion kann eine unerwünschte
Bedienung des Moduls verhindert werden.
berühren und
drei Sekunden lang gedrückt halten, um das Bedienfeld zu
verriegeln und entriegeln.
leuchtet, wenn das Bedienfeld
gesperrt ist.
Das Bedienfeld wird automatisch nach 10 Minuten ohne
Aktivität gesperrt. Diese automatische Sperrfunktion kann
über das Menü der erweiterten Optionen deaktiviert werden.
Siehe Seite 6.
Wenn das Modul zum ersten Mal in Betrieb genommen
wird oder wenn der Strom ausfällt, kehrt das Modul
standardmäßig zum Verriegelungsmodus zurück.
LEISTUNGSSTUFE
Bei Aktivierung des Heizelements leuchtet eine
Leistungsstufenanzeige und zeigt die Heizstufe an. Die
niedrigste Wärme wird von der kleinen Flamme dargestellt,
unterschiedliche Wärmestufen durch zusätzliche Anzeigen
(Punkte) und die höchste Wärme von allen Anzeigen
einschließlich der großen Flamme. Siehe das Diagramm unten.
EINSTELLUNG LEISTUNGSSTUFE VERWENDUNG
Niedrig 1-6 Anzeigen Warmhalten von Speisen
Mittel 6-7 Anzeigen Grillen von Brot
Mittel/Hoch 7–8 Anzeigen Grillen von frischen
Hoch 8–10 Anzeigen
(große Flamme)
Würsten und mariniertem
Schweineeisch
Anbraten und
Grillen von Fleisch,
Grillen von Gemüse
LEISTUNGSSTUFENANZEIGE
Bedienelemente einstellen:
1
Zum Aktivieren eines Heizelements für das gewünschte
Element (vorne und hinten) auf dem Bedienfeld berühren.
Die Leistungsstufenanzeige blinkt, und alle Anzeigen für
dieses Element blinken. Siehe Abbildung unten.
2 Zum Abschließen der Aktivierung für die höchste
Wärme,
für die niedrigste Wärme berühren, oder
die gewünschte voreingestellte Leistungsstufenanzeige
berühren.
3 Zum Ändern der Wärmeeinstellung, während das
Element eingeschaltet ist, die gewünschte voreingestellte
Leistungsstufe berühren oder über sie fahren.
4 Zum Ausschalten des Elements berühren.
VORHEIZEN
Das Grillmodul ca. 10 Minuten vorheizen, bevor Sie das
Grillgut auegen. Die Speisen werden direkt auf dem
Grillrost zubereitet.
Bedienfeld
LEISTUNGSSTUFEN-
ANZEIGE
Leistungsstufenanzeige
wolfappliance.com | 5
Page 30

BEDIENUNG DES GRILLMODULS
Grillbetrieb
TIMER
Der Timer kann in Schritten von einer Minute bis zu
99 Minuten eingestellt werden. Nach Einstellung der Zeit
leuchtet
erscheint auf dem Timer-Display. Siehe Abbildung unten.
Der Timer ist unabhängig vom Modulbetrieb.
Timer einstellen:
1 berühren.
2 + oder – berühren und gedrückt halten, bis die
3 Am Timer ertönt ein Glockenton, wenn noch eine Minute
4
Timer-Bedienelement
auf dem Bedienfeld, und der Countdown
gewünschte Zeit im Timer-Display angezeigt wird.
Der Timer beginnt den Countdown in Minuten.
verbleibt. Dann läuft der Countdown in Sekunden ab.
Bei Beendigung ertönt am Timer solange ein Glockenton,
bis
berührt wird.
ANZEIGE FÜR HEISSE FLÄCHE
leuchtet auf dem Bedienfeld und bleibt beleuchtet, bis
das Gerät abgekühlt ist. Es kann beleuchtet bleiben, selbst
wenn das Grillmodul ausgeschaltet ist.
ALLES AUS
Wenn ein oder mehrere Heizelemente eingeschaltet sind,
leuchtet
Ausschalten beider Elemente
auf dem Bedienfeld. Zum gleichzeitigen
berühren.
ERWEITERTE OPTIONEN
Mit den erweiterten Optionen kann der Benutzer seine
bevorzugten Einstellungen für Lautstärke, Ton, Sperre
des Bedienfelds und Sabbatfunktion festlegen.
Erweiterte Optionen einstellen:
1 Zum Entriegeln des Bedienfelds berühren und
3 Sekunden lang gedrückt halten.
2 Zum Aufrufen des Modus für erweiterte Optionen
berühren und 5 Sekunden lang gedrückt halten.
3 Auf der hinteren Elementbedientaste wird Leistungsstufe
1 angezeigt, und auf dem Timer-Display erscheint „VO“.
oder auf der vorderen Elementbedientaste
berühren, um die Lautstärke einzustellen.
4 + auf der Timer-Bedientaste berühren, um den Ton
anzupassen. Auf der hinteren Elementbedientaste wird
Leistungsstufe 2 angezeigt, und auf dem Timer-Display
erscheint „Fr“.
oder auf der vorderen Elementbedientaste
berühren, um den Ton einzustellen.
5 + auf der Timer-Bedientaste berühren, um die
automatische Bedienfeldverriegelung anzupassen.
Auf der hinteren Elementbedientaste wird Leistungsstufe
3 angezeigt, und auf dem Timer-Display erscheint „Lo“.
oder auf der vorderen Elementbedientaste
berühren, um die automatische Verriegelungsfunktion
aus- oder einzuschalten.
6 + auf der Timer-Bedientaste berühren, um den
Sabbatmodus aufzurufen. Auf der hinteren
Elementbedientaste wird Leistungsstufe 4 angezeigt.
auf der vorderen Elementbedientaste berühren,
um die Sabbatfunktion zu aktivieren. Auf dem TimerDisplay erscheint „SA“.
auf der vorderen Elementbedientaste berühren,
um die Funktion zu aktivieren bzw. zu deaktivieren.
7 berühren, um die Einstellungen zu bestätigen.
BRIKETTROST
Die Keramikbriketts und der Brikettrost sind
spülmaschinenfest. Die Briketts sollten vom Rost
abgenommen werden, bevor Sie sie in die Spülmaschine
legen. Die korrekte Anordnung der Briketts entnehmen
Sie der nachstehenden Abbildung.
Das Grillmodul nicht bedienen, wenn die Briketts und der
Rost nicht eingelegt sind.
Brikettrost
VORNE
6 | Deutsch
Page 31

PFLEGEEMPFEHLUNGEN
FEHLERSUCHE
Pegeempfehlungen
REINIGUNG
Edelstahl Einen nicht scheuernden Edelstahlreiniger
Bedienfeld Fingerabdrücke und Verschmutzungen durch
Grillrost
Heizelement
Keramikbriketts Briketts in Spülmaschine geben oder mit einem
Brikettrost Rost in Spülmaschine geben oder mit einem
Fettauffangschale Vor der Reinigung alle Fettrückstände und
verwenden und mit einem weichen, fusselfreien
Tuch auftragen. Einen natürlichen Glanz
erzielen Sie, indem Sie die Oberäche
mit einem mit Wasser angefeuchteten
Mikrofasertuch, dann mit einem trockenen
Polierleder leicht abwischen. Stets in Richtung
der Maserung des Edelstahls arbeiten.
Essensreste mit einem Entfettungsspray
entfernen. Zuerst auf ein Tuch sprühen,
bevor Sie das Bedienfeld abwischen.
WICHTIGER HINWEIS: Reinigungsmittel nicht
direkt auf das Bedienfeld sprühen.
Nach dem Grillen den Grill fünf Minuten
lang auf
zu verbrennen. Alle angebrannten
Lebensmittelreste entfernen. Mit einem
nicht scheuernden Reinigungsmittel, z.B.
Flüssigreiniger und heißem Wasser oder einer
Paste aus Natriumbikarbonat und Wasser,
reinigen. Nicht in Wasser tauchen. Es können
Entfettungssprays und milde Scheuermittel
verwendet werden.
Nicht in Wasser tauchen. Wenn Lebensmittelreste
angebrannt sind, mit einem feuchten Tuch mit der
Hand sauber wischen.
milden Reinigungsmittel und weichen Tuch
reinigen. Abkühlen lassen, bevor sie wieder
auf den Rost gelegt werden. Die korrekte
Anordnung nden Sie auf Seite 6.
milden Reinigungsmittel und weichen Tuch
reinigen.
angebrannten Lebensmittelreste entfernen.
In heißem Wasser mit einem milden Spülmittel
abwaschen. Abspülen und trocknen.
betreiben, um Fettrückstände
Fehlersuche
BEDIENUNG
Das Grillmodul funktioniert nicht.
• Sicherstellen, dass der Strom eingeschaltet ist.
• Sicherstellen, dass die Stromzufuhr zum Modul und
der Schutzschalter im Haus eingeschaltet sind.
• Modul ist im Verriegelungsmodus.
Sekunden lang gedrückt halten, um das Bedienfeld zu
entriegeln.
Problem bei der Modultemperatur
Empfehlungen erhalten Sie von Ihrem Wolf-Vertragshändler.
•
SERVICE
• Halten Sie die in Ihr Produkt integrierte Qualität
aufrecht, indem Sie sich an ein zugelassenes WolfKundendienstzentrum wenden.
• Wenn Sie sich mit dem Kundendienst in Verbindung
setzen, benötigen Sie die Modell- und Seriennummern
Ihres Produkts. Beide Nummern sind auf dem
Produkttypenschild aufgeführt. Die Typenschildposition
ist auf Seite 4 angegeben.
• Für Garantiezwecke benötigen Sie außerdem das
Datum der Installation und den Namen Ihres WolfVertragshändlers. Diese Informationen sollten auf
Seite 2 dieser Anleitung aufgezeichnet werden.
berühren und drei
Wolf Appliance International – Eingeschränkte Garantie
NICHT ZUM GEWERBLICHEN GEBRAUCH
VOLLSTÄNDIGE ZWEIJAHRESGARANTIE*
Ab dem Datum der ersten Installation deckt diese Produktgarantie von Wolf Appliance für die Dauer
von zwei Jahren alle Teile und Lohnkosten für die Reparatur oder den Austausch von Teilen des
Produktes ab, an dem bei normalem, nicht-gewerblichem Gebrauch Material- oder Verarbeitungsmängel
festgestellt wurden. Alle von Wolf Appliance im Rahmen der vorstehenden Garantie erbrachten Leistungen
müssen, wenn von Wolf Appliance, Inc. nicht anderweitig festgelegt, von einem zugelassenen WolfKundendienstzentrum erbracht werden. Die Leistungen werden zu den normalen Geschäftszeiten erbracht.
EINGESCHRÄNKTE FÜNF-JAHRES-GARANTIE
Ab dem Datum der ersten Installation repariert oder ersetzt Wolf Appliance fünf Jahre lang die folgenden
Teile, bei welchen Material- oder Verarbeitungsmängel festgestellt wurden: Brikettschalen aus Edelstahl,
Gasventile, Auffangwannen, elektronische Steuerplatinen und elektrische Heizelemente. Wenn der Eigentümer
ein zugelassenes Wolf-Kundendienstzentrum verwendet, führt der Serviceanbieter die Reparaturarbeiten
oder den Ersatz dieser Teile aus, wobei der Eigentümer für alle anderen Kosten aufkommt, einschließlich
Arbeitskosten. Wenn der Eigentümer einen nicht zugelassenen Serviceanbieter verwendet, muss sich der
Eigentümer mit Wolf Appliance, Inc. (anhand der nachstehenden Informationen) in Verbindung setzen, um
reparierte oder Ersatzteile zu erhalten. Wolf Appliance erstattet dem Eigentümer keine Kosten für Teile, die
von einem nicht zugelassenen Servicezentrum oder anderen Quellen erworben wurden.
Weitere Informationen zur Produktgarantie von Wolf erhalten Sie von Ihrem Wolf-Vertragshändler. Die
Garantien müssen allen Landes-, Bundes-, Orts- und lokalen Vorschriften entsprechen.
*Für Edelstahl (Türen, Bleche, Griffe, Produktrahmen und Innenächen) gilt eine eingeschränkte Garantie
von 60 Tagen für Teile und Lohnkosten zur Behebung von Schönheitsfehlern.
Sub-Zero, Sub-Zero & Design, Sub-Zero & Snowake Design, Dual Refrigeration, The Living Kitchen, Great American Kitchens The Fine Art of Kitchen Design, Wolf, Wolf
& Design, Wolf Gourmet, W & Design, rotfarbige Schaltknebel, Cove und Cove & Design sind eingetragene Marken und Servicemarken der Sub-Zero Group, Inc. und ihrer
Tochtergesellschaften. Alle anderen Marken sind das Eigentum ihrer jeweiligen Besitzer in den Vereinigten Staaten und anderen Ländern.
wolfappliance.com | 7
Page 32

GRILLMODULE
VEILIGHEIDSMAATREGELEN
Inhoud
2 Veiligheidsmaatregelen
4 Functies van grillmodule
4 Bediening van grillmodule
7 Aanbevelingen voor onderhoud
7 Probleemoplossing
7 Wolf-garantie
Klantenservice
Het model en serienummer staan op de bijgesloten
productregistratiekaart. Beide nummers staan ook op het
producttypeplaatje. Zie pagina 4 voor locatie typeplaatje. Voor
de garantie moet ook de installatiedatum en de naam van uw
erkende Wolf-dealer bekend zijn. Noteer die gegevens hieronder.
Als er ooit naar uw product moet worden gekeken, maak
dan gebruik van een door Wolf erkende serviceprovider.
SERVICE-INFORMATIE
Modelnummer
Serienummer
Installatiedatum
Naam gecerticeerde service
Nummer gecerticeerde service
Erkende dealer
Dealernummer
Belangrijke opmerking
Let voor een veilige en efciënte installatie en bediening
van dit product op de volgende soorten aanduidingen in
deze handleiding:
BELANGRIJK duidt op informatie van bijzonder belang.
VOORZICHTIG duidt op een situatie waar licht letsel of
schade kan optreden als instructies niet worden gevolgd.
WAARSCHUWING duidt op gevaar voor ernstig letsel
of overlijden als de voorzorgsmaatregelen niet worden
nageleefd.
BELANGRIJKE INSTRUCTIES
BELANGRIJK: Lees alle instructies voordat u dit
apparaat gebruikt.
• Lees deze handleiding zorgvuldig voordat
u dit apparaat gebruikt om risico op brand,
elektrische schokken of letsel te verminderen.
• Dit apparaat moet door een gekwaliceerde
installateur, servicebureau of gasleverancier
correct worden geïnstalleerd en onderhouden
en door een gekwaliceerd technicus worden
geaard.
WAARSCHUWING
Dit apparaat mag door kinderen van 8 jaar
of ouder gebruikt worden en door personen
met lichamelijke, zintuiglijke of verstandelijke
beperkingen of met onvoldoende ervaring of
kennis, mits onder toezicht of voorzien van
instructies over het veilig gebruik van het
apparaat en zij de hieraan verbonden risico's
hebben begrepen. Zorg ervoor dat kinderen
niet spelen met het apparaat. Reiniging en
gebruiksonderhoud mag niet zonder toezicht
door kinderen uitgevoerd worden.
WAARSCHUWING
Het apparaat en de toegankelijke delen
worden heet tijdens gebruik. Zorg dat u
geen verwarmingselementen aanraakt.
Kinderen jonger dan 8 jaar moeten op
afstand worden gehouden, tenzij ze
onder continu toezicht staan.
WAARSCHUWING
Zonder toezicht koken op een kookplaat
met vet of olie kan gevaarlijk zijn en
brand veroorzaken. Probeer nooit een
brand met water te blussen, maar
schakel het toestel uit en dek vervolgens
de vlam af met een deksel of een
branddeken.
VOORZICHTIG
Op het kookproces moet worden
toegezien. Op een kort kookproces
moet permanent worden toegezien.
2 | Nederlands
Page 33

VEILIGHEIDSMAATREGELEN
BELANGRIJKE INSTRUCTIES
ALGEMENE VEILIGHEIDSMAATREGELEN
• Gebruik altijd droge pannenlappen. Natte of vochtige
pannenlappen kunnen brandwonden van stoom veroorzaken.
Gebruik geen handdoek of grote doeken in plaats van een
pannenlap.
• Laat kinderen niet alleen of zonder toezicht bij dit toestel.
Laat kinderen nooit bij het apparaat zitten of staan.
• Laat het apparaat niet zonder toezicht wanneer in gebruik.
Overkokende substanties en gemorste vetten kunnen roken
of ontbranden.
• Gebruik geen water om brandend vet te blussen. Smoor
de vlammen of gebruik een droge chemische stof of
schuimblusapparaat.
• Repareer of vervang geen onderdelen van dit apparaat, tenzij
dat in de documentatie die bij dit apparaat is geleverd expliciet
wordt aanbevolen.
• Bewaar of gebruik geen benzine of andere brandbare
vloeistoffen of gassen in de buurt van dit toestel.
• Warm geen ongeopende voedselhouders op, zoals potten met
babyvoedsel of blikjes. Door oplopende druk kan de houder
barsten en letsel veroorzaken.
• Gebruik geen stoomreiniger.
• Brandgevaar: Plaats geen artikelen op de kookoppervlakken.
BEWAAR DEZE INSTRUCTIES
wolfappliance.com | 3
Page 34

GRILLMODULE
BEDIENING VAN GRILLMODULE
Functies van grillmodule
FUNCTIES
1
Typeplaatje van product (onderkant van module)
2
Bedieningspaneel
3
Vergrendeling van bedieningspaneel
4
Weergave tijdklok
5
Grillrooster
6
Dubbele verwarmingselementen
7
Keramisch briketrek
8
Verwisselbare vetopvangpan
5
3
Grillmodule
MONTAGE VAN GRILLMODULE
Voor een goede werking moet de grillmodule in de juiste
uitlijning worden gemonteerd. Zie de afbeelding hieronder.
Plaats de vetopvangpan in de grillmodule met het gat
voor de opvang naar de voorkant. Plaats het briketrek
in de vetopvangpan. Steek de verwarmingselementen in
de opvanger aan de voorkant van de module. Plaats het
grillrooster met de voetjes in de hoekkuiltjes.
Aan de slag
Neem voordat u gaat koken even de tijd om deze gebruiksen onderhoudsgids te lezen. U zult er baat bij hebben om
u vertrouwd te maken met de veiligheidspraktijken, de
eigenschappen, de werking en de onderhoudsaanbevelingen
van deze grillmodule van Wolf.
Om te zorgen dat alle overgebleven olie uit het productieproces
is verwijderd, verwarmt u de grillmodule
10 minuten voor. Een kleine hoeveelheid rook en geur is normaal.
Reinig de grillmodule voor gebruik grondig met warm water en
ongeveer
Sabbat
Dit toestel is gecerticeerd door Star-K en voldoet aan
strikte religieuze voorschriften in combinatie met specieke
instructies op www.star-k.org.
een mild schoonmaakmiddel. Spoel schoon en maak droog met
een zachte doek. Raadpleeg de onderhoudstips op pagina 7.
5
4
6
7
2
1
Montage van grillmodule
8
4 | Nederlands
Page 35

BEDIENING VAN GRILLMODULE
Bediening van grillmodule
BEDIENINGSPANEEL
Het bedieningspaneel is voorzien van verlichte
aanraakpunten. Een stroomvermogensindicator voor de
verwarmingselementen aan voor- en achterzijde geeft de
warmte-instelling weer van
hieronder.
Indicatoren op het bedieningspaneel gaan branden om
bepaalde functies van de module aan te geven. Zie de
tabel hieronder.
BEDIENINGSPANEEL
Element(en) aan
Bedieningspaneel vergrendeld
Aan / uit
Laag
Hoog
Timer ingesteld
tot Zie de afbeelding
VERGRENDELING BEDIENINGSPANEEL
De vergrendelingsfunctie zorgt dat module niet ongewild
in werking treedt. Houd
drie seconden ingedrukt om
het bedieningspaneel te vergrendelen en te ontgrendelen.
brandt als het bedieningspaneel is vergrendeld.
Het bedieningspaneel wordt na 10 minuten inactiviteit
automatisch vergrendeld. Deze automatische
vergrendelingsfunctie kan worden uitgeschakeld
via het uitgebreide optiemenu. Zie pagina 6.
Als de module voor het eerst wordt ingeschakeld en
ook na een stroomstoring treedt de module standaard
in vergrendelingsmodus.
VERMOGEN
Wanneer het verwarmingselement wordt ingeschakeld, gaat
de stroomvermogensindicator branden om de hoeveelheid
warmte aan te geven. De laagste hitte wordt aangegeven
door de kleine vlam, verschillende warmteniveaus door
aanvullende indicatoren (punten), en de hoogste warmte
door alle indicatoren, inclusief de grote vlam. Zie de tabel
hieronder.
INSTELLING VERMOGEN GEBRUIK
Laag 1–6 indicatoren Voedsel warm houden.
Medium 6-7 indicatoren Brood bakken.
Middelhoog 7-8 indicatoren Grillen van verse worst en
Hoog 8–10 (grote vlam)
indicatoren
gemarineerd varkensvlees.
Dichtschroeien en grillen van
vlees, grillen van groenten.
VERMOGENSINDICATOR
Instellen van bedieningselementen:
1
Om een verwarmingselement in te schakelen, tik op op
het bedieningspaneel voor het gewenste element (voorzijde
en/of achterzijde). De stroomvermogensindicator knippert
en alle indicatoren voor dat element knipperen. Zie de
afbeelding hieronder.
2 Om de activering te voltooien, tik op voor de hoogste
verwarming,
voor de laagste verwarming, of tik op de
gewenste vooringestelde stroomvermogensindicator.
3 Om de warmte-instelling te wijzigen terwijl het element
aan staat, tik of schuif naar het gewenste vooringestelde
vermogensniveau.
4 Om het element uit te schakelen, tik op .
VOORVERWARMEN
Verwarm de grillmodule ongeveer tien minuten vóór voordat
u voedsel toevoegt. Voedsel wordt rechtstreeks op het
grillrooster bereid.
Heet oppervlak
Bedieningspaneel
VERMOGENSINDICATOR
Stroomvermogensindicator
wolfappliance.com | 5
Page 36

BEDIENING VAN GRILLMODULE
Bediening van grillmodule
TIMER
De timer kan in stappen van één minuut op maximaal
99 minuten worden ingesteld. Zodra een tijd is ingesteld,
gaat
op het bedieningspaneel branden en wordt het
aftellen zichtbaar op het display van de timer. Zie de
afbeelding hieronder. De timer loopt onafhankelijk van
de module.
Timer instellen:
1 Tik op .
2 Houd + of – ingedrukt totdat de gewenste tijd op het
display van de timer wordt weergegeven. Timer begint
met aftellen in minuten.
3 Timer geeft signaal af als één minuut resteert en telt
dan af in seconden.
4 Na het aftellen laat de timer een signaal klinken totdat
op
wordt getikt.
Timerbediening
INDICATOR VAN HEET OPPERVLAK
gaat branden op het bedieningspaneel totdat de module
is afgekoeld. De indicator kan blijven branden, ook als de
grillmodule is uitgeschakeld.
ALLES UIT
Wanneer één of beide verwarmingselementen aan staan,
branden op het bedieningspaneel. Tik om beide
gaat
elementen op hetzelfde moment uit te schakelen op
UITGEBREIDE OPTIES
Via de uitgebreide opties kan de gebruiker voorkeuren
instellen voor volume, toon, vergrendeling van het
bedieningspaneel en sabbatfunctie.
Instelling uitgebreide opties:
1 Om het bedieningspaneel te ontgrendelen, tik op
en houd 3 seconden ingedrukt.
2 Voor het openen van de uitgebreide opties, tik op
.
en houd 5 seconden ingedrukt.
3 Vermogensniveau 1 wordt op het achterste
besturingselement weergegeven en 'VO' verschijnt
op het timerdisplay.
Tik op
of op het voorste besturingselement om
het volume te wijzigen.
4 Tik op + op de timerbediening om de toon te
wijzigen. Vermogensniveau 2 wordt op het achterste
besturingselement weergegeven en 'Fr' verschijnt op
het timerdisplay.
Tik op
of op het voorste besturingselement
om de toon te wijzigen.
5 Tik op + op de timerbediening om de automatische
vergrendeling van het bedieningspaneel te wijzigen.
Vermogensniveau 3 wordt op het achterste
besturingselement weergegeven en 'Lo' verschijnt
op het timerdisplay.
Tik op
of op het voorste besturingselement
om de automatische vergrendelingsfunctie uit of in
te schakelen.
6 Tik op + op de timerbediening om de sabbatmodus
te openen. Stroomniveau 4 op het achterste
besturingselement wordt weergegeven. Tik op
het voorste besturingselement om de sabbatfunctie te
initiëren. 'SA' verschijnt op het timerdisplay.
Tik op
op het voorste besturingselement om de
sabbatfunctie in of uit te schakelen.
7 Tik op om de instellingen te bevestigen.
op
BRIKETREK
De keramische briketten en het briketrek zijn
vaatwasmachinebestendig. De briketten moeten worden
gescheiden van het rek als ze in een vaatwasser worden
geplaatst. Zie de afbeelding hieronder voor een juiste
plaatsing van de briketten.
Gebruik de grillmodule niet zonder de briketten en het rek.
VOORZIJDE
Briketrek
6 | Nederlands
Page 37

AANBEVELINGEN VOOR ONDERHOUD
PROBLEEMOPLOSSING
Aanbevelingen voor onderhoud
REINIGEN
Roestvrij staal
Bedieningspaneel Sproei met ontvettingsmiddel om
Grillrooster
Verwarmingselement
Keramische briketten Plaats briketten in de vaatwasser of was
Briketrek Plaats het briketrek in de vaatwasser of
Vetopvangpan Verwijder voor het reinigen alle overtollige
Gebruik een niet-schurend roestvrijstalen
reinigingsmiddel en breng dit aan met een
zachte, pluisvrije doek. Om de natuurlijke
glans tevoorschijn te brengen, wrijft u
het oppervlak licht in met een vochtige
microvezeldoek gevolgd door een droge
zeemleren lap. Wrijf altijd mee in de richting
van de korrel van het roestvrij staal.
vingerafdrukken en voedselresten
te verwijderen. Sproei op een doek
voordat u het paneel reinigt.
BELANGRIJK: Sproei reinigingsmiddelen
niet rechtstreeks op het bedieningspaneel.
Schakel de grill na het grillen gedurende
vijf minuten in op om overtollig vet te
verbranden. Verwijder alle aangebakken
voedseldeeltjes. Reinig het rooster met een
niet-schurend schoonmaakmiddel zoals
vloeibaar afwasmiddel en warm water, of
een pasta van baking soda en water. Het
apparaat niet in water onderdompelen.
Sproei-ontvetters en mild schurende
reinigingsmiddelen mogen worden gebruikt.
Het apparaat niet in water onderdompelen.
Als voedseldeeltjes zijn aangebakken,
veeg deze met een vochtige doek weg.
ze af met een mild afwasmiddel en een
zachte doek. Laat ze afkoelen alvorens ze
terug op het rek te plaatsen. Zie pagina 6
voor de juiste plaatsing.
was het af met een mild afwasmiddel en
een zachte doek.
vet en aangebakken voedseldeeltjes.
Reinigen met warm water en milde zeep.
Goed afspoelen en afdrogen.
Probleemoplossing
BEDIENING
Grillmodule werkt niet.
• Controleer of de stroom is ingeschakeld.
• Controleer of de elektrische stroom naar de module
en de stroomonderbreker zijn ingeschakeld.
• Module bevindt zich in vergrendelingsmodus. Houd
drie seconden ingedrukt om het bedieningspaneel te
ontgrendelen.
Probleem met de moduletemperatuur
Neem contact op met uw erkende Wolfdealer voor advies.
•
ONDERHOUD
•
Handhaaf de kwaliteit die in uw product is ingebouwd door
contact op te nemen met de erkende onderhoudsdienst
van de Wolf-fabriek.
• Houd het model- en serienummer van uw product bij
de hand bij het opnemen van contact. Beide nummers
staan op het producttypeplaatje. Zie pagina 4 voor
locatie typeplaatje.
• Voor de garantie moet ook de installatiedatum en de
naam van uw erkende Wolf-dealer bekend zijn. Deze
informatie moet op bladzijde 2 van deze handleiding
worden genoteerd.
Beperkte internationale garantie op Wolf Appliance
VOOR HUISHOUDELIJK GEBRUIK
Gedurende twee jaar vanaf de datum van de oorspronkelijke installatie dekt deze productgarantie van
Wolf Appliance alle onderdelen en arbeid die bij normaal huishoudelijk gebruik nodig zijn voor reparatie
of vervanging van een deel van het product dat defect blijkt te zijn qua materiaal of vervaardiging. Alle
onderhoud door Wolf Appliance onder de bovenstaande garantie moet door een door Wolf-fabriek
erkende dienst worden uitgevoerd, tenzij anders aangegeven door Wolf Appliance, Inc. Het onderhoud
wordt tijdens normale kantooruren uitgevoerd.
Gedurende vijf jaar vanaf de datum van de oorspronkelijke installatie zal Wolf Appliance de volgende
onderdelen repareren of vervangen die defect blijken te zijn qua materiaal of vervaardiging: gasbranders
(behalve uiterlijk), elektrische verwarmingselementen, ventilatormotoren (ventilatiekappen), elektronische
controleborden, magnetronbuizen en inductiegeneratoren. De onderdelen worden gratis gerepareerd of
vervangen, waarbij de eigenaar betaalt voor alle andere kosten, inclusief arbeid. Alle onderhoud door
Wolf Appliance onder de bovenstaande garantie moet door een door Wolf-fabriek erkende dienst worden
uitgevoerd, tenzij anders aangegeven door Wolf Appliance, Inc. Het onderhoud wordt tijdens normale
kantooruren uitgevoerd.
Voor meer informatie over de productgarantie van Wolf kunt u contact opnemen met uw dealer. Garanties
moeten voldoen aan alle verordeningen op landelijk, provinciaal en gemeentelijk niveau.
*Roestvrij staal (deuren, panelen, handgrepen, productframes en inwendige oppervlakken) worden gedekt
door een beperkte garantie voor cosmetische defecten op onderdelen en arbeid van 60 dagen.
VOLLEDIGE GARANTIE VAN TWEE JAAR*
BEPERKTE GARANTIE VAN VIJF JAAR
Sub-Zero, Sub-Zero & Design, Sub-Zero & Snowake Design, Dual Refrigeration, The Living Kitchen, Great American Kitchens, The Fine Art of Kitchen Design, Wolf, Wolf
& Design, Wolf Gourmet, W & Design, red colored knobs, Cove en Cove & Design zijn gedeponeerde handelsmerken en dienstmerken van Sub-Zero Group, Inc. en diens
dochters. Alle andere handelsmerken zijn eigendom van hun respectievelijke eigenaren in de Verenigde Staten en andere landen.
wolfappliance.com | 7
Page 38

烤架模块
安全注意事项
目录
2 安全注意事 项
4 烤架 模块 特点
4 烤架模块操作
7 保养建议
7 故障排除
7 Wolf质保
客户服务
型号和序列号打印在随附的产品注册 卡上。这两个编号同样列
于产品铭牌上。铭牌位置参见第4页 。出 于 质 保 目 的 ,您 还 需 要 知
悉安装日期和 授权 的Wolf经销商名称。记录以下信息,以供日后
参考。
如果您的产品需要护理,请务必采用Wolf工厂认证的服务 提供
者的 服务。
服务信息
型号
序列号
安装日期
经认证的服 务部门名称
经认证的服 务部门号码
授权经销商
经销商号码
重要提示
为确保尽可能安全高效地安装和操作本产品,请注意本指南中以
下突出 显示 的信 息类 型:
重要提示突出显示 尤为重 要的 信息。
注意表示如果不遵守说明,可能会导致轻微的人身伤害或产品
损坏的情况。
警告表示如果不遵守注意事项,可能会导致严重伤害或死亡的
危险。
重要说明
重要提示:在使用本电器之前,请阅读所有安全说明。
• 在使用本电器之前,请仔细阅读本指南,以降低火
灾 、触 电 或 受 伤 的 风 险 。
• 本设备必须由有资质的安装人员、服务代理商或燃
气供应商予以妥善安装及提供服务,并由有资质的
技术人员进行接地。
警告
如果已获得有关安全地使用本电器的监督或指导并
了 解 相 关 危 险 ,则 本 设 备 可 供 8岁及以上的儿童以及
身体、感觉或心理能力降低或缺乏经验和知识的人
员使用。儿童不得玩耍本电器。儿童不得在没有监督
的情况下进行清洁和用户维护。
警告
该设备及其易触及部件在使用过程中会变热。
应小心避免接触发热元件。8岁以下的儿童应
远离本设备,除非专人看 管。
警告
在有脂肪或油的烧烤盘上无人值守烹饪可能
有危险,并可能导致火灾。切勿尝试用水扑灭
火,但应关闭设备,然后盖住火焰,例如用盖
子或防火毯。
注意
必须监督烹饪过程。必须持续监督短期烹饪过
程。
2 | 中文
Page 39

安全注意事项
重要说明
一般安全注意事项
• 始终使用干燥的锅垫。潮湿或湿润的锅垫可能导致蒸汽烫伤。不要
使用毛巾或大块布来代替锅垫。
• 不要将单独或无人看管的儿童留在使用本产品的区域。切勿允许儿
童坐在或站在设备上。
• 使用时,切勿将本设备置于无人看管的境况。飞沫和油脂溢出可能会
冒烟或起火。
• 切勿用水扑灭油脂引起的火情。用厚物闷住火焰或者使用干粉或泡
沫式灭火器。
• 请勿修理或更换本产品的任何部件,除非在本产品随附的说明中特
别推荐。
• 请勿在本产品或任何其他产品附近储存或使用汽油或其他易燃蒸气
和液体。
• 请勿加热未开封的食品容器,如婴儿食品瓶和罐。压力积聚可能导致
容器爆裂并造成伤害。
• 请勿使用蒸汽清洁器。
• 火灾危险:切勿将物品存放在煎盘上。
保存此类指南
wolfappliance.com | 3
Page 40

烤架模块
烤架模块操作
烤架 模块特点
特点
产 品 铭 牌( 模 块 底 部 )
1
控制面板
2
控制面板锁定
3
定时器显示屏
4
烧烤炉篦
5
双加热元件
6
陶瓷压块烤架
7
可拆卸集油盘
8
3
烤架模 块。
入门指南
烤架模块组装
为了正确操作,必须以正确的 对齐方式 组装烤 架模块。参见下
图。
保持插座的孔朝前,将集油盘插入烤架模块。将压块烤架放入集
油 盘 中 。 将 加 热 元 件 插 入 模 块 前 部 的 插 座 。放 置 烤 架 ,使 支 脚 坐
落在角落凹处。
5
4
2
1
6
7
烤架模块组装。
在开始烹饪之前,请花些时间阅读本使用和维护指南。该指南有
助于您了解Wolf烤架模块的安全守则、功能、操作和保养建议。
为确保完除去制造过程中的所有残留油渍,请在
块加热约10分钟。有少量烟雾和气 味是正常的。使用前,用热水
和温和的清洁剂彻底清洁烤 架模块。冲洗并用软布擦干。参见第
7页的维护建 议。
5
8
上将烤架 模
安息日
本产品通过犹太认证,符 合严格的宗教法规以及www.star-k.org
网站上的特别指示。
4 | 中文
Page 41

烤架模块操作
烤架操作
控制面板
控制面板具有发光触摸控件。前部和后部加热元件的功率水平
指示灯显 示从
控制面板上的指示灯将亮起,以指示特定的模块操作。参见以下
图表。
控制面板
到 的加 热设 置。参见下图。
元件接通
控制面 板已锁定
开/关
低
高
定时器设置
热表面
控制面板锁定
控制面板锁定功能可防止意外的模块操作。触摸并按住 三秒
钟 ,可 锁 定 和 解 锁 控 制 面 板 。
锁定控制面板时灯将亮起。
无操作10分钟后,控制面板将自动锁定。可通过扩展选项菜单禁
用此自动锁定功能。参见第6页。
当模块首次通电和断电后,模块将默认为锁定模式。
功率水平
激活加热元件后,功率水平 指示灯 将亮起,以指示加热水平。
最低热量由小火焰 加以表 示,通过 附加 指示 灯(小圆点)表示
变化的热量水平,最高热量由包括大火焰在内的所有指示灯加
以 表 示 。参 见 以 下 图 表 。
设置 功 率水平 使用
低
中
中高
高
1-6个指示灯
6-7个指示灯 烤面包.
7-8个指示灯
8-10( 大 火 焰 )个 指 示 灯
装食 物以保 温。
烤新鲜的香肠 和腌制的猪肉
轻 煎 和 烤 肉 、烤 蔬 菜 。
功率水平指 示灯
设置 控件:
1 要激活加热元件,请触摸 ,以选择控制面板上所需的元件
(前和 /或后)。功率水平指示灯将闪烁,并且该元件的所有
指 示 灯 都 将 闪 烁 。参 见 下 图 。
2 要完成激活,最高热量请触摸 ,最 低 热 量 请 触 摸 ,或
触摸 所 需的预 设功率 水平 指 示灯。
3 要在元件打开时更改加热设置,请触摸或滑动到所需的预设
功率水平。
4 要 关 闭 元 件 ,请 触 摸 。
预热
在添加食物前,预热烤架模块约10分钟。直接在烧烤炉篦烹饪
食物。
控制面 板。
功率 水平 指 示灯。
功率水平指示灯
wolfappliance.com | 5
Page 42

烤架模块操作
烤架操作
定时器
以一分钟增量设置定时器,最大值为99分 钟 。设 定 时 间 后 ,
将在控制面板上亮起,并且在定时器显示屏上显示倒计时。参见
下 图 。定 时 器 独 立 于 模 块 操 作 。
设置 定时 器:
1 触摸
2 触摸并按住+或–,直至所需时间显示在计时器显示屏上。
3 剩余一分钟时,定时器会鸣响,并以秒为单位完成倒计时。
4 倒计时完成后,定时器会鸣响并持续发出鸣叫声,直至触摸
定时器控 制。
。
计时器将以分钟为单位开始倒计时。
才停止。
热表面指示灯
将在控制面板上亮起并保持开启状态,直至设备冷却。即使
烤架模块关闭,该指示灯也可能保持点亮。
全部关闭
当一 个 或两 个加热 元 件 开启 时, 将 在 控 制 面 板 上 亮 起 。要 同
时 关 闭 两 个 元 件 ,请 触 摸
。
扩展选项
扩展选项功能允许用户设置偏好的音量、音调、控制面板锁定
和“安息日”功能。
设置 扩展 选项:
1 要 解 锁 控 制 面 板 ,触 摸 并 按 住 3秒钟。
2 要 进 入 扩 展 选 项 模 式 ,请 触 摸 并 按 住 5秒钟。
3 将显示后部元件控制上的功率水平1,并且定时器显示屏上
将显示“VO”。
触摸前部元件 控制上的
4 触摸定时器控制上的+,调 节 音 调 。将 显 示 后 部 元 件 控 制 上
或 ,调 节 音 量 。
的功率水平 2,并且定时器显示屏上将显示“Fr”。
触摸前部元件 控制上的
5 触摸定时器控制上的+,调 节 自 动 控 制 面 板 锁 定 。将 显 示 后 部
或 ,调 节 音 调 。
元件控制上的功率水平3,并且定时器显示屏上将显示“Lo”。
触摸前部元件 控制上的
或 ,以 关 闭 或 打 开 自 动 锁 定
功能。
6 触摸定时器控制上的+,进 入 “安息日”模 式 。将 显 示 后 部 元 件
控制上的功率水平4。触 摸 前 部 元 件 控 制 上 的
,启 动 安 息
日功能。“SA”将显示在定时器显示屏上。
触摸前部元件 控制上的
7 触摸
,确 认 设 置 。
,以 启 用 或 停 用 该 功 能 。
压块烤架
陶瓷压块和压块烤架可放入洗碗机中清洗。如果放置在洗碗机
中,则压块应与烤架分开。要正确布置压块,请参见下图。
如果未安装 压块和 烤架,不要 操作烤架模块。
压块烤架。
正面
6 | 中文
Page 43

保养建议
故障排除
保养建议
清洁
不锈钢 使用非磨蚀性的不锈 钢清洁剂并使用无绒软布清
控制面板 使用喷雾脱脂剂清除指纹和食物污垢。在擦拭面
烧烤炉篦
加热元件 请勿浸入水中。如果烧焦食物残渣,请使用湿布
陶瓷压块 将压块放入洗碗机中清洗,或使用温和的洗涤剂
压块烤架 将烤架放入洗碗机中清洗,或使用温和的洗涤剂
集油盘 清 洁前,清除所有多余的油脂和烧焦的食物残 渣。
洁 。为 了 产 生 自 然 光 泽 ,先 用 蘸 水 的 超 细 纤 维 布 轻
轻擦拭煎盘,然后用打光麂皮擦干。始终沿着不锈
钢的纹理方向擦 拭。
板之前喷洒在布上。
重要 提示:切勿将清洁剂直接喷洒在 控制面板上。
烧 烤 后 ,在
油脂。除去所有烧焦的食物残渣。使用非磨蚀性清
洁剂(如液体洗涤剂和热水)或者小苏打和水的混
合物进行清洁。请勿浸入水中。可以使用喷雾脱脂
剂和温和的研磨清洁剂。
擦拭。
和软布清洗。让压块冷却,然后将其放回烤架。
有 关 正 确 布 置 ,请 参 见 第 6页。
和软布清洗。
使用温和的 洗涤剂在 热水中清洗。冲 洗并干燥。
上运行烤架5分 钟 ,以 烧 除 多 余 的
故障排除
操作
烤架模块不工作。
• 核 实电 源已打开。
• 核 实 模块 和家中断 路器 的电源已打开。
• 模块处于锁定模式。触摸并按住
模块温 度问题。
• 有 关 建 议 ,请 联 系 授 权 的 Wolf经销商。
服务
• 与 Wolf工厂认证 的服 务 部门 联系,以保 证产品的 内在 质量。
• 在联系服务 部门时,您需要提供产品的型号和序列号。这两
个编号都列在产品铭牌上。铭牌位置参见第4页。
• 出于质保目的,您还需要提供安装日期和经授权的Wolf经销
商名称。此信息应记录在本指南的第2页中。
三 秒 钟 ,解 锁 控 制 面 板 。
Wolf Appliance国际有限质保
供住宅使用
两年质保*
自最初安装之日起两年,在正常住宅使用的情况下,证明在材料或工艺方面存在缺陷的产品的任何部分的
维修或更换的所有零部件和人工均包含在Wolf Appliance产品质保范围内。除非Wolf Appliance, Inc.另有规
定,Wolf Appliance根据上述质保条款提供的所有服务必须由Wolf工厂认证的服务部门执行,我们将在正常
营业时间内提供服务。
五年有限质保
从最初安装之日起五年内,Wolf Appliance将维修或更换以下在材料或工艺方面存在缺陷的部件:不锈钢压
块托盘、气阀、集油盘、电子控制板和电加热元件。如果物主使用Wolf工厂认证的服务,该服务提供者将修
理或更换这些部件,但物主需支付包括人工费在内的所有其他费用。如果物主使用非认证服务,则物主必须
联络Wolf Appliance, Inc.(使用以下信息),以获得修理或更换用部件。Wolf Appliance不报销物主从非认
证服务机构或其他来源购买的部件所产生的费用。
有关Wolf产品质保的更多信息,请与授权的Wolf经销商联系。质保必须遵守所有国家、州、城市、地方法
规和/或法令。
*有限的60天零件和人工质保涵盖不锈钢(门、面板、把手、产品框架和内表面)的外观缺陷。
Sub-Zero、Sub-Zero & Design、Sub-Zero & Snowake Design、Dual Refrigeration、The Living Kitchen、Great American Kitchens、The Fine Art of Kitchen
Design、Wolf、Wolf & Design、Wolf Gourmet、W & Design、red colored knobs、Cove和Cove & Design均为Sub-Zero Group,Inc.及其子公司的注册商标和服务标记。
所有其他商标均为其各自所有者在美国和其他国家(或地区)的财产。
wolfappliance.com | 7
Page 44

WOLF APPLIANCE, INC. P.O. BOX 44848 MADISON, WI 53744 WOLFAPPLIANCE.COM 800.222.7820
9012954 REV-A 2/2017
 Loading...