

Wisco 680-2 Service Manual
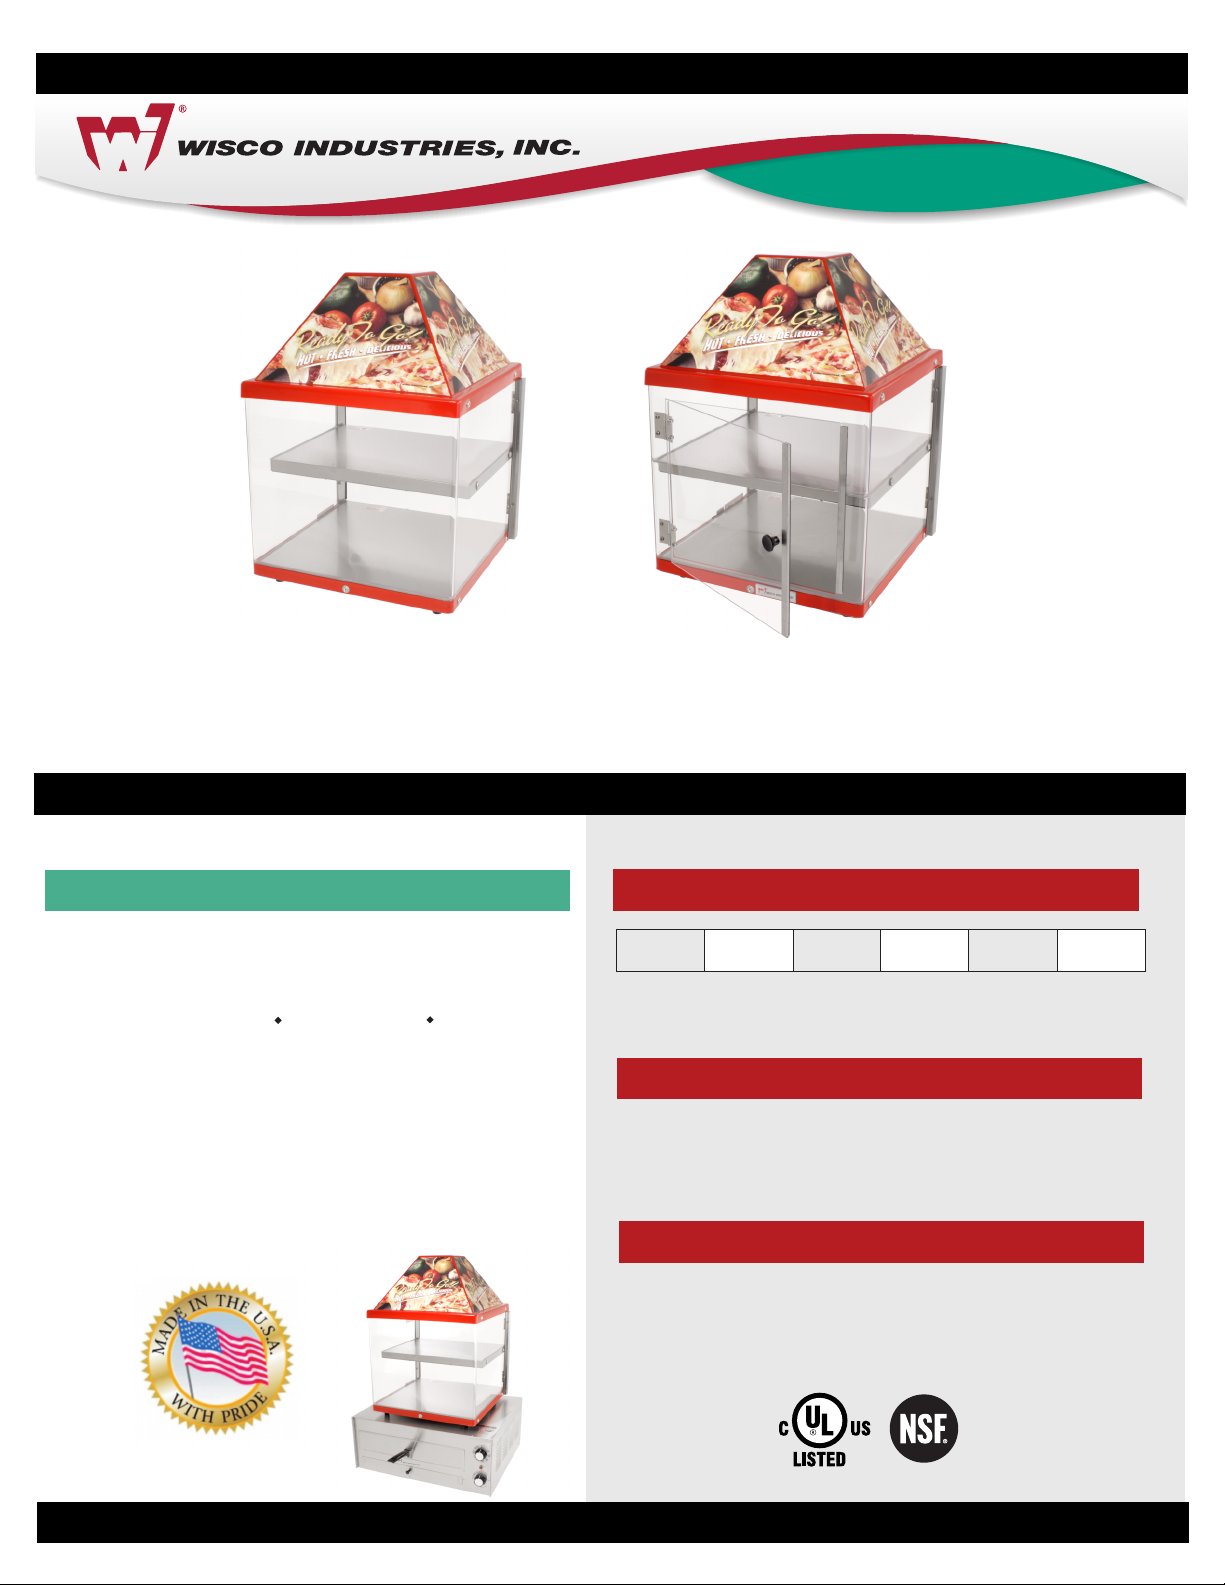
FOOD WARMING/MERCHANDISING CABINET
MODEL 680-1 (Single Door)
MODEL 680-2 (2 Door pass through)
This warmer provides bottom heat to keep crusts crisp. The illuminated shelves are thermostatically controlled
to provide temperature flexibility. Also ideal for holding cookies, biscuits, muffins and other foods at proper
serving temperatures.
FEATURES:
- Red hood with pizza pictured “Ready To Go”
graphic panels (#I013757)
- Adjustable thermostat
- Temperatures from 80 F to above 150 F
- 2 heated, illuminated shelves
- Each shelf accommodates up to a 16” pizza
- Optional racks available (1 per shelf)
FLAT (#0016777) or
3/4” RAISED (#0016289)
- Great for placing on top of the Wisco
Model 560 pizza oven for a space saving
feature
ELECTRICAL DATA:
VOLTS:
120 2.1 260
- Best when operated on an individual branch circuit
- 5’ power cord length
AMPS:
WATTS:
DIMENSIONS:
Outside: 24”H x 18”W x 18”D
Inside: 13-1/2”H x 17”W x 17”D
SHIPPING INFORMATION:
SHIPPING DIMENSIONS: 24”L x 24”W x 32”H
SHIPPING WEIGHT: 37 lbs.
FP140026
08/08/14
P.O. Box 10 • Oregon, WI 53575 • Ph: 608.835.3106 • Fx: 608.835.8273 • wiscoind.com • wiscomade.com

IMPORTANT: Read the following safety and operation instructions to avoid injury and to avoid damage to equipment or property.
!
!
!
!
Plug unit into a properly grounded electrical outlet of the correct voltage, size and plug configuration for this unit. We recommend usage
on an individual branch circuit of at least 15 amps for best results. Failure to do so may result in decreased performance of the warmer.
Only shatter resistant light bulbs which meet or exceed NSF Standards specifically designed for food holding units must be used.
Breakage of bulbs not specially coated could result in personal injury and/or food contamination.
Exterior surfaces on unit may get hot. Use caution when touching these areas to avoid injury.
Unplug oven when not in use
EQUIPMENT SET UP
Once the unit has been taken out of the shipping carton and has been unpackaged, check to make sure
that all light bulbs are securely in their sockets.
CLEANING INSTRUCTIONS
!
Unit is not waterproof. Do Not submerge in water. Do not operate if unit has been submerged in water.
!
!
It is recommended that the interior and exterior surfaces be cleaned daily with a mild soap and damp
cloth. Stubborn stains on base of unit and/or shelves may be removed with a non-abrasive cleaner and
a damp cloth. Usage of an abrasive cleanser could scratch or damage the finish of your unit.
STEP 1: Unplug unit from electrical supply
STEP 2: Let unit cool before cleaning
STEP 3: Clean with warm soapy water and a soft cloth only
Unplug unit from power source and allow to cool completely before performing any maintenance or cleaning.
The use of any type of ammonia, alcohol or chlorine based household cleaners will cause cracking of the door/enclosure and is
not covered under any warranty. Use warm soapy water and a soft cloth only.
TO REPLACE DISPLAY LIGHT & SHELF BULBS
!
Disconnect the power supply and wait until unit has cooled completely before replacing any lights or bulbs.
Only shatter resistant light bulbs which meet or exceed NSF Standards specifically designed for food holding units must be used.
Breakage of bulbs not specially coated could result in personal injury and/or food contamination.
P.O. Box 10 • Oregon, WI 53575 • Ph: 608.835.3106 • Fx: 608.835.8273 • wiscoind.com • wiscomade.com
WIRING DIAGRAM:
EXPLODED VIEW:
PARTS LIST:
OPERATION:
This warmer is designed to maintain food product at or above the optimum temperature. It is not designed or
intended to heat up or cook food to the serving temperature. Product is to be prepared to a temperature of
above 160 F before placing in the warmer. Do not place product on its side as this will affect the internal holding
temperatures of the product.
TEMPERATURE
The amount of product placed in the warmer will affect the performance of the warmer. We suggest
periodically checking the internal temperature of the product and adjusting the temmperature settings if
necessary. Keep door(s) closed when not serving.
The following temperatures are APPROXIMATE and can vary due to unit location, electrical supply, product
used, etc. *Intended as a guideline only.
SETTING THERMOMETER READING
1 85 F
2 105 F
!
3 140 F
4 165 F
5 Above 190 F
1. Plug unit in.
2. Before loading prepared food product into warmer, you must preheat the unit for 30 minutes at a setting
of 4 or 5 on the thermostat dial. After the preheat time has elapsed you can then go ahead and place the
previously prepared food product inside.
3. Set thermostat to desired level.
* Pizza should be placed on a standard aluminum pizza pan and not directly on the warmer shelf. This will
keep product from drying out for a longer period of time and will also help keep the cabinet cleaner.
* When placing your product on pizza pans we recommend a setting of 4 or 5. Settings vary depending on
product weight, consistency and personal preference.
!
NOTES:
OPERATING INSTRUCTIONS
CAUTION: Pans get hot. Use hot pads/oven mitts when removing pans from the food warmer.
P.O. Box 10 • Oregon, WI 53575 • Ph: 608.835.3106 • Fx: 608.835.8273 • wiscoind.com • wiscomade.com
P.O. Box 10 • Oregon, WI 53575 • Ph: 608.835.3106 • Fx: 608.835.8273 • wiscoind.com • wiscomade.com
P.O. Box 10 • Oregon, WI 53575 • Ph: 608.835.3106 • Fx: 608.835.8273 • wiscoind.com • wiscomade.com
P.O. Box 10 • Oregon, WI 53575 • Ph: 608.835.3106 • Fx: 608.835.8273 • wiscoind.com • wiscomade.com

WIRING DIAGRAM:EXPLODED VIEW:PARTS LIST:TROUBLESHOOTING:
!
Unplug unit from power source and allow to cool completely before performing any maintenance or cleaning.
Unit not working:
- Check power switch position, power cord and/or electrical circuit
Display light not working:
- Tighten or replace bulb
Shelf light not working:
- Replace bulb
Unit not heating properly:
- Has food been prepared in advance and placed in warmer at proper serving temperature?
- Check heat settings. Is it at correct setting for your food product?
Food product drying out:
- Are you placing food product directly on shelf or on an aluminum pan as recommended?
- Is your food product being left in the warmer past its shelf life?
* Shelf life is determined by personal preference and can vary greatly dependant upon the product,
how it is packaged, etc.
NOTES:
P.O. Box 10 • Oregon, WI 53575 • Ph: 608.835.3106 • Fx: 608.835.8273 • wiscoind.com • wiscomade.comP.O. Box 10 • Oregon, WI 53575 • Ph: 608.835.3106 • Fx: 608.835.8273 • wiscoind.com • wiscomade.comP.O. Box 10 • Oregon, WI 53575 • Ph: 608.835.3106 • Fx: 608.835.8273 • wiscoind.com • wiscomade.comP.O. Box 10 • Oregon, WI 53575 • Ph: 608.835.3106 • Fx: 608.835.8273 • wiscoind.com • wiscomade.com
 Loading...