

Page 1
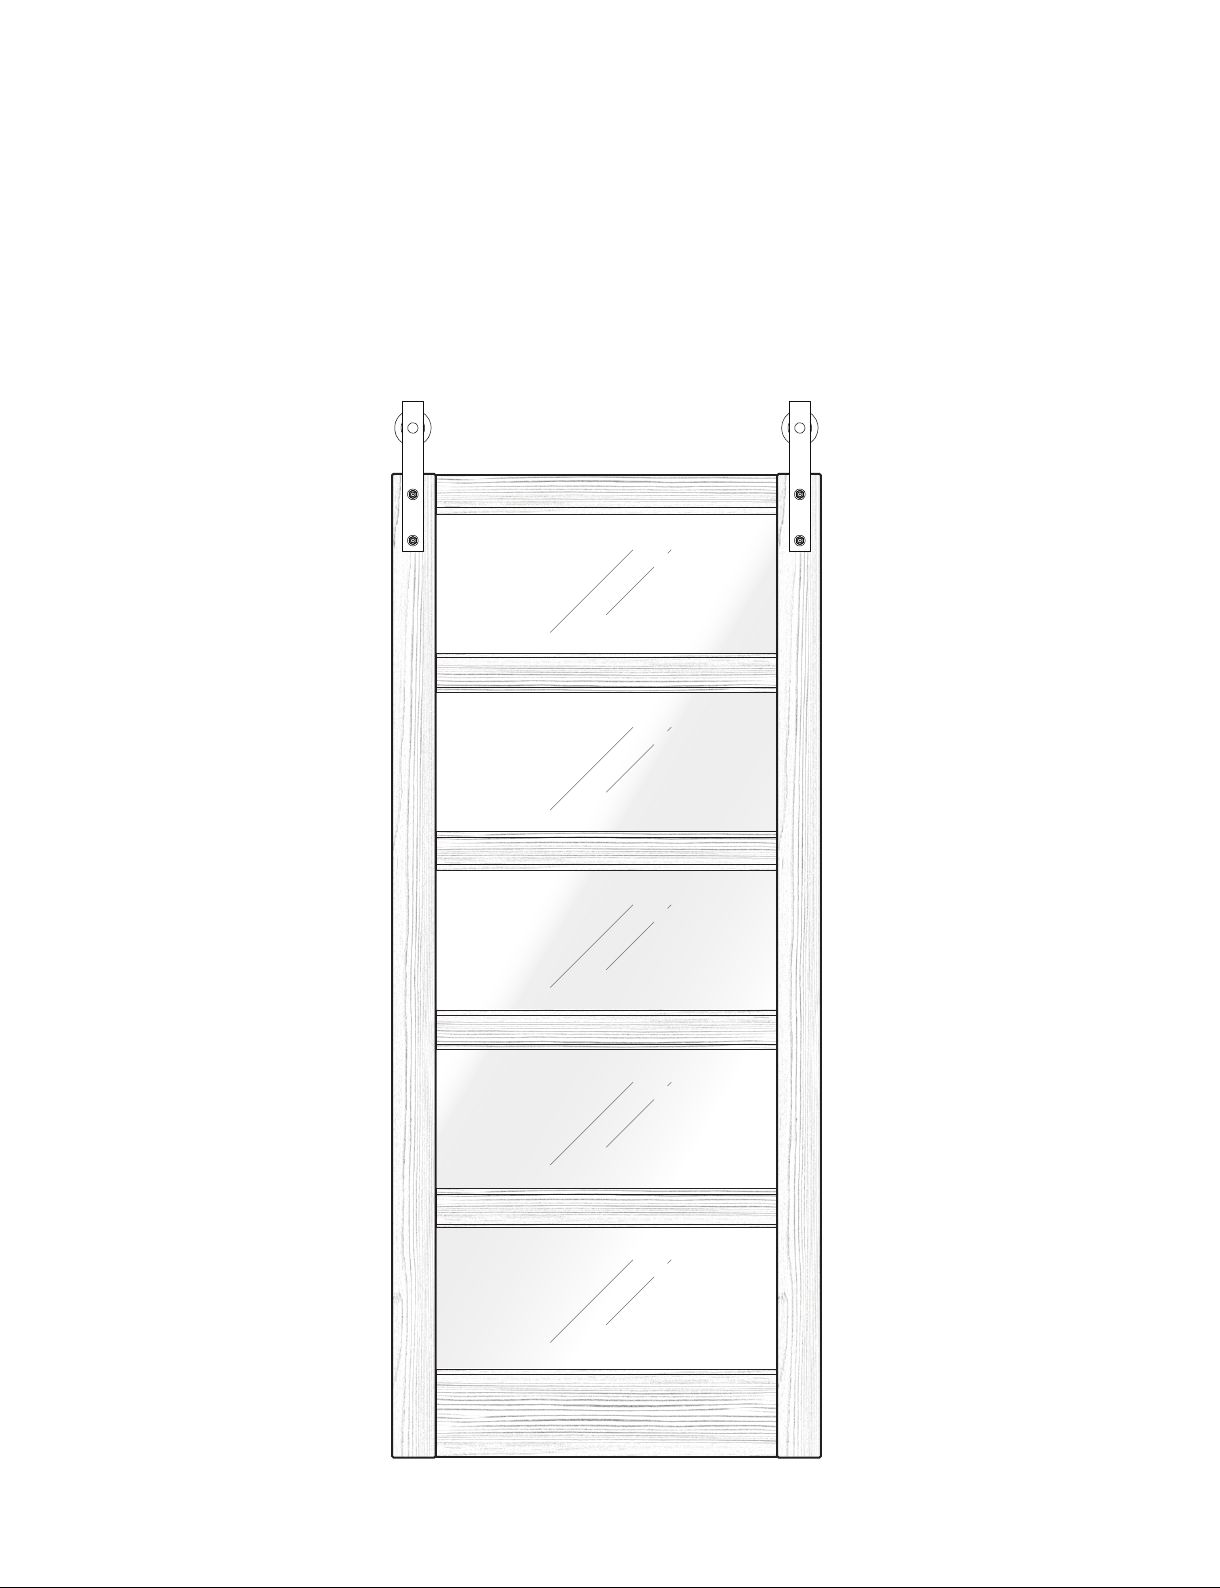
GLASS BARN DOOR
ASSEMBLY INSTRUCTIONS
Page 2
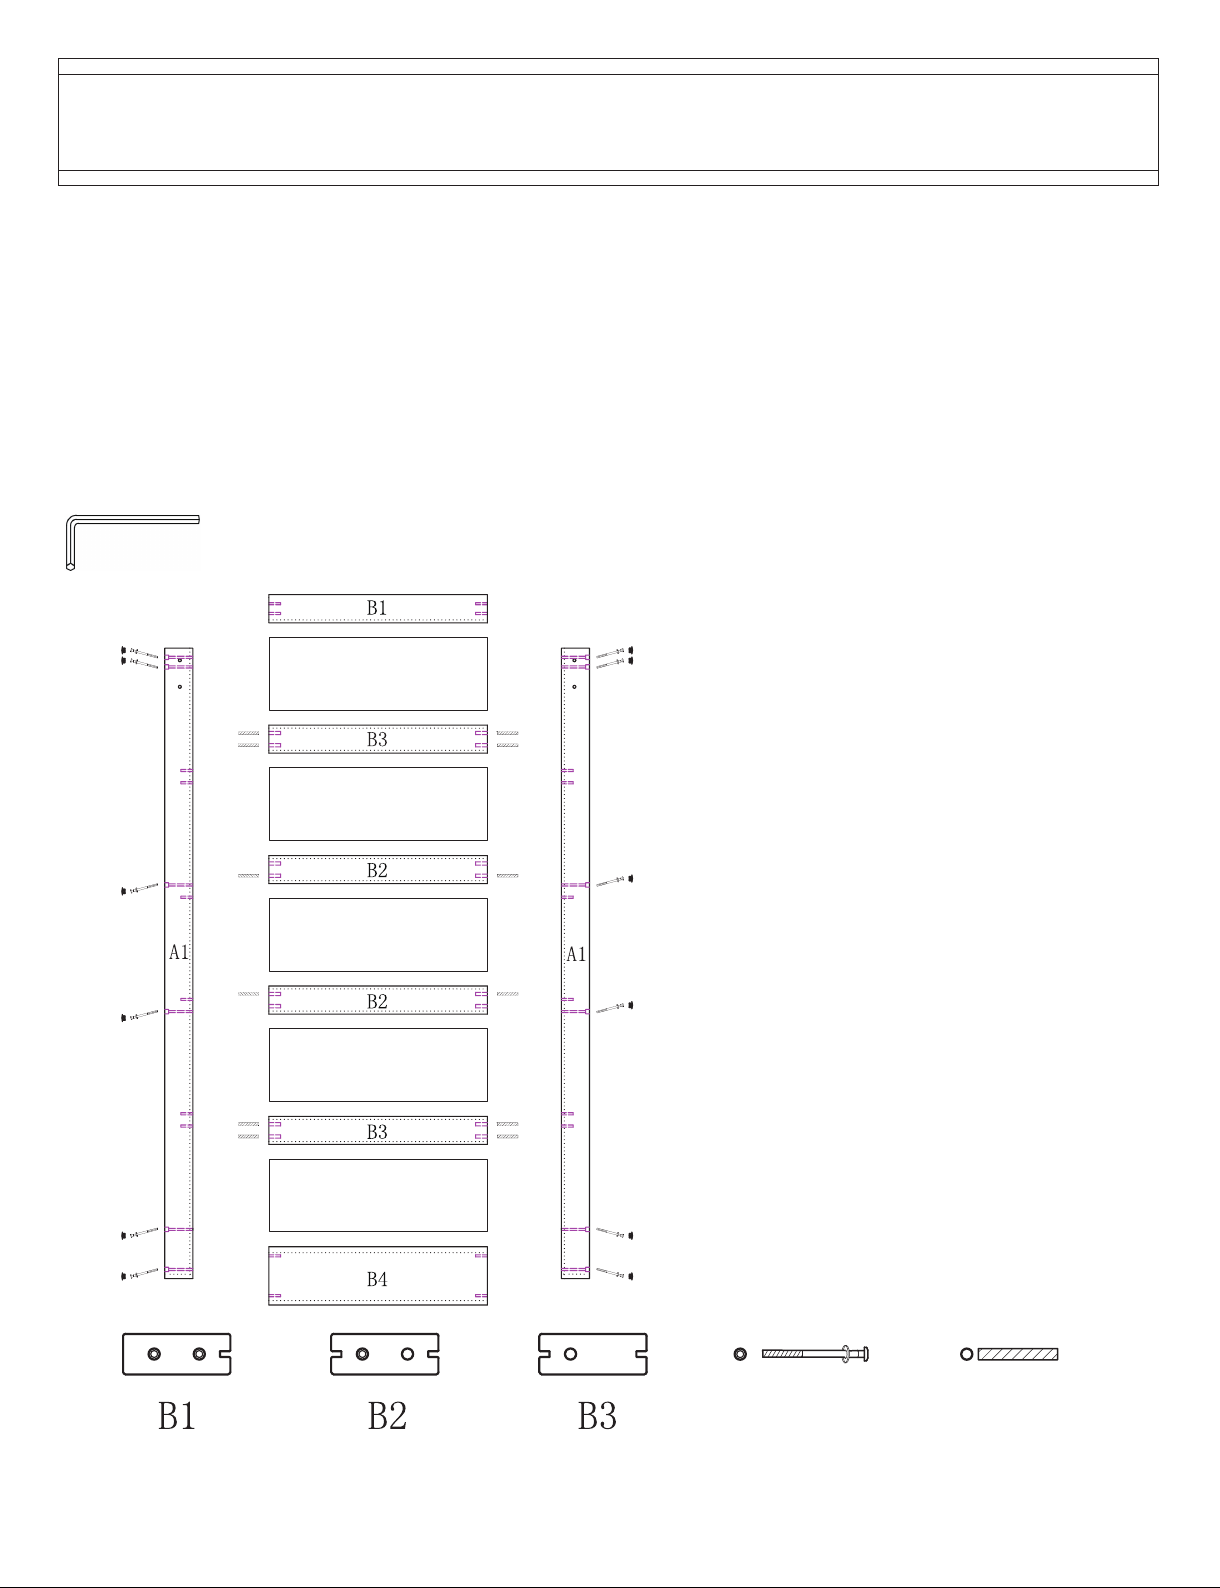
DOOR PANEL ASSEMBLY INSTRUCTIONS
For best results, carefully follow the instructions in this guide.Glue and other adhesives are not required, and we do not recommend their use
during the assembly process.
First, remove all parts from the box and place them on a flat, open surface. Then, using the guide drawings at the bottom of this page, identify
each slat. Next, follow the drawing on the left to place each part as shown.
Make sure to pay special attention to the direction of the tongues and grooves on each piece. A1 and A2‘s groove are facing inside. B4 is
wider than B1,B2 and B3.
F
TEMPERED GLASS
TEMPERED GLASS
TEMPERED GLASS
TEMPERED GLASS
TEMPERED GLASS
D
Description QTY
A1
E
Side Stile
B1
Top Rail
B2
Rail with 2 different holes
B3
Rail with 2 same holes
B4
Bottom Rail
D
Carriage Bolts
E
Hole Sticker
F
Allen Key
2
1
2
2
1
12
12
1
Carriage Bolt Wood Plug
Page 3
1
3
2
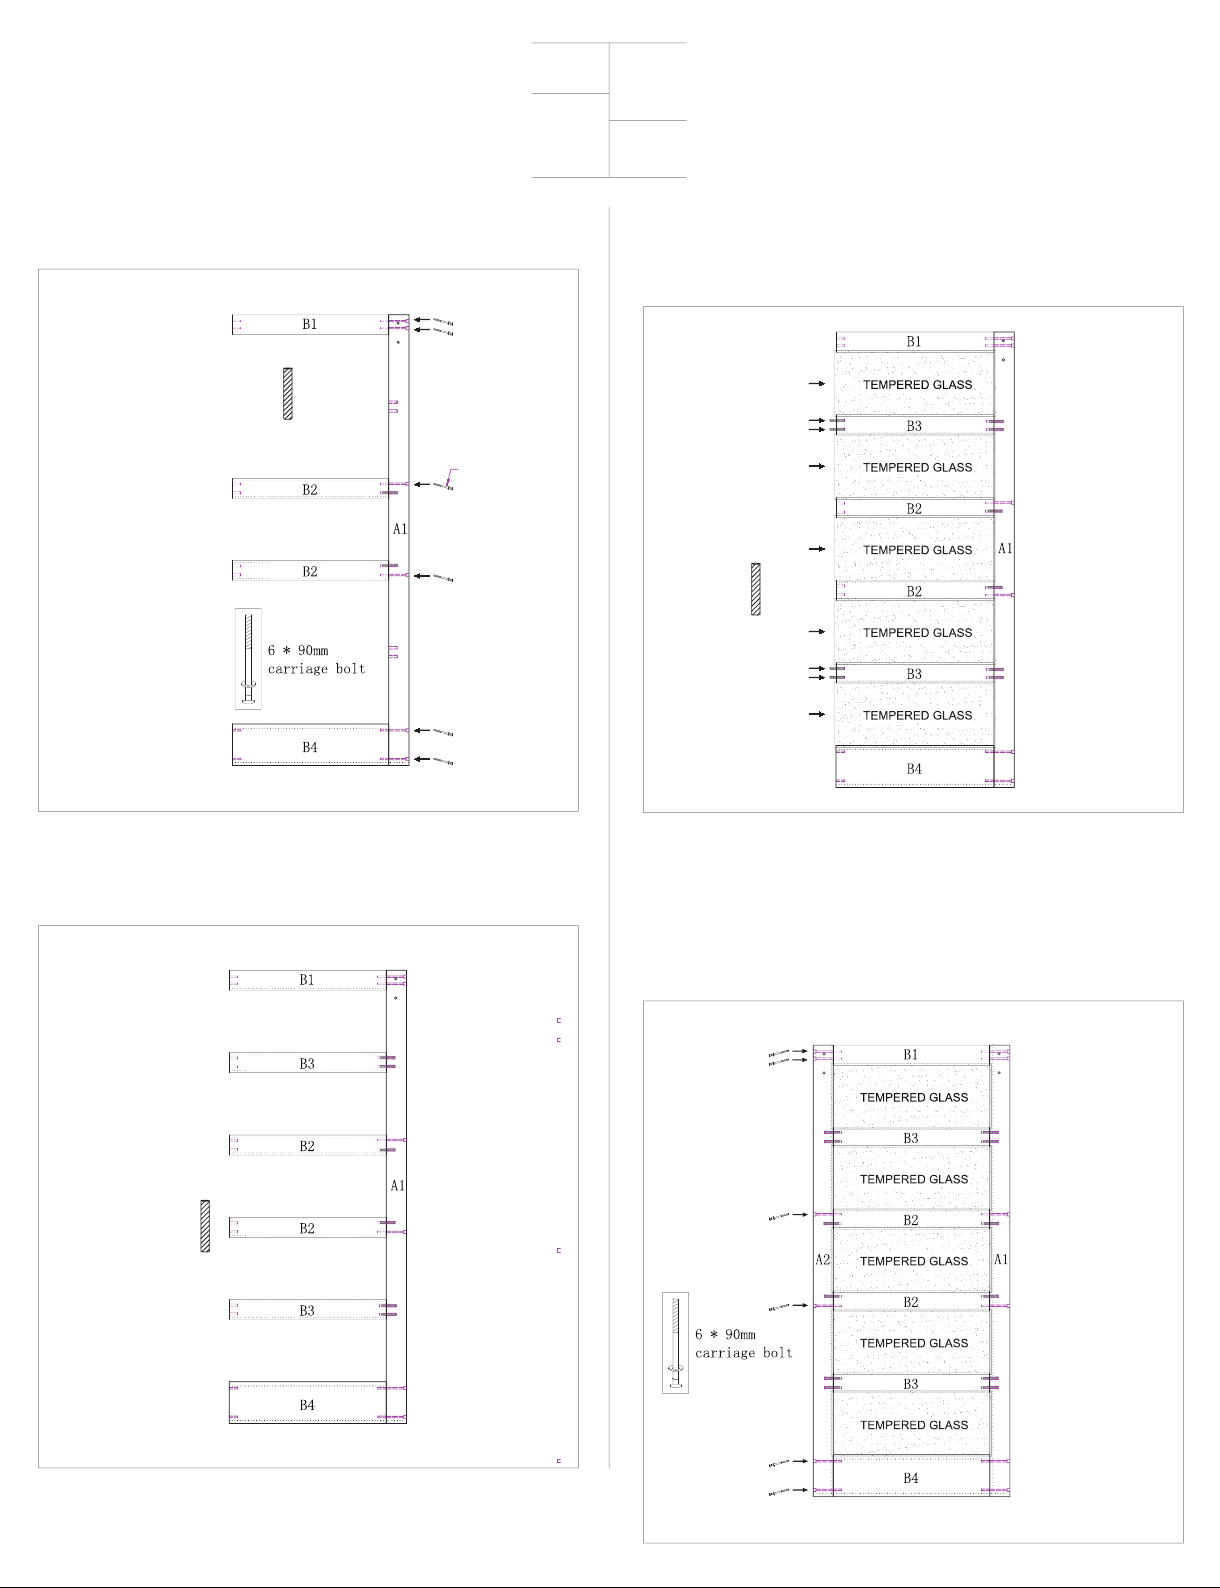
ONE
Attach B1 (top slat) and B4(lower slat)to stile A1 by inserting the tongues
into the groove of A1 and fastening with four carriage bolts.
Using one wood plug and one carriage bolt to connect each B2 with stile A1.
wood plug
carriage bolt
4
THREE
Gently slide five tempered glass into A1’s groove following the instruction.
Then insert 2 wood plugs into each left side of B3 slat and 1 wood plug into each
left side of B2 slat.
wood plug
TWO
Using two wood plugs to connect each B3 with stile A1. Make sure that
each slats of B1,B2 and B3 is tightly connected with A1.
wood plug
FOUR
Align stile A2‘s holes with wood plugs and make sure all the tempered
glass is align with stile’s groove.
In the end, fasten A2 with all B1 B2 and B4 with 12 carriage bolts . After
making sure all the bolts are tightened, place the included plastic trim
covers on top of the bolts. Then your door is ready to hang.
 Loading...