

Page 1
P30L User Manual
Revision 1.0
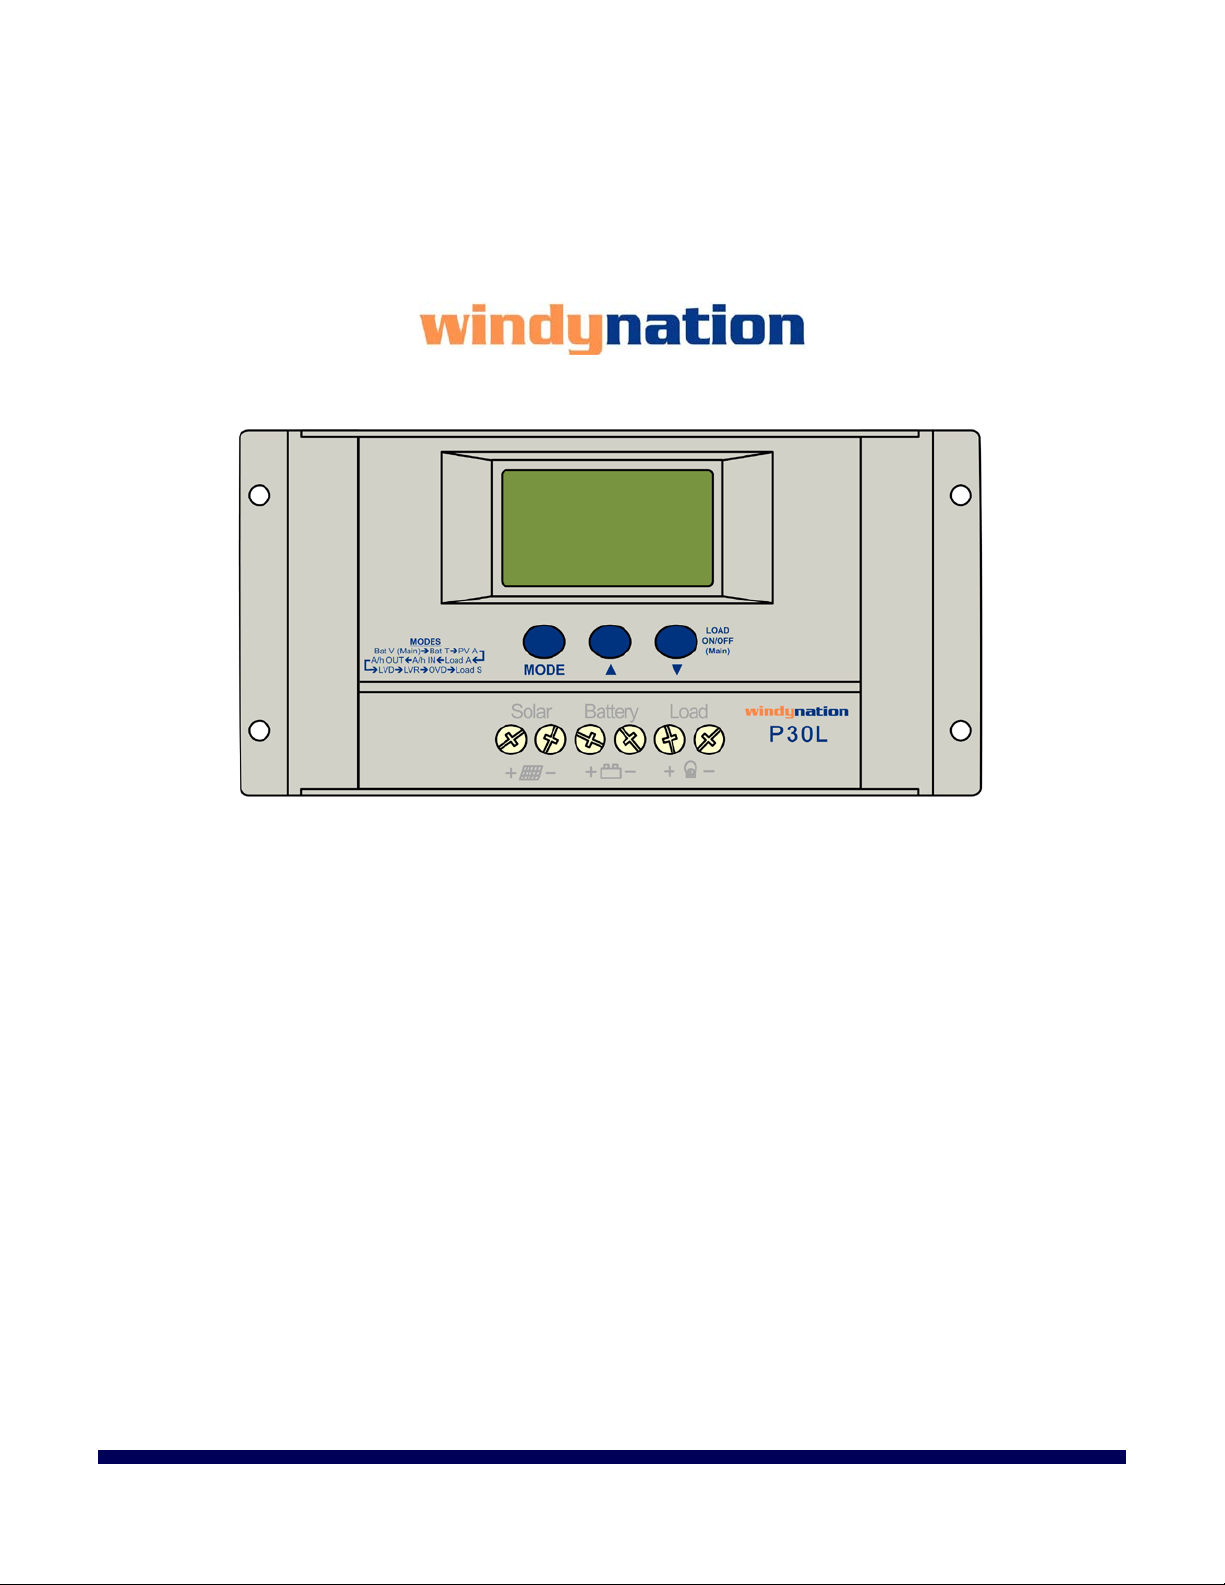
P30L LCD 30A Solar Charge Controller
CHC-LCD-30
User’s Manual
Page 1 of 16
windynation
01/20/2014
Page 2

P30L User Manual
Revision 1.0
Table of Contents
1 Introduction ................................................................................................................................................... 3
1.1 Features .............................................................................................................................................. 3
1.2 Safety Information ............................................................................................................................... 3
1.3 Specifications ...................................................................................................................................... 4
1.3.1 Electrical Specifications .................................................................................................................. 4
1.3.2 Physical Specifications ................................................................................................................... 4
2 Installation .................................................................................................................................................... 4
2.1 Electrostatic (ESD) Precautions ......................................................................................................... 4
2.2 Mounting ............................................................................................................................................. 4
2.3 Connections ........................................................................................................................................ 5
2.4 Parallel Connections ........................................................................................................................... 7
3 Operation ...................................................................................................................................................... 7
3.1 Button Definitions ................................................................................................................................ 8
3.2 LCD Graphic Indicators ...................................................................................................................... 8
3.3 LCD Interface Cycle ............................................................................................................................ 9
3.4 Interface Definitions ............................................................................................................................ 9
3.4.1 Battery Voltage – MAIN Interface ................................................................................................... 9
3.4.2 Battery Temperature ..................................................................................................................... 10
3.4.3 PV – Solar Panel Output Current .................................................................................................. 10
3.4.4 Load Current ................................................................................................................................. 10
3.4.5 PV – Solar Panel Generated Charge............................................................................................ 10
3.4.6 Load Consumed Charge ............................................................................................................... 11
3.4.7 Low Voltage Disconnect ............................................................................................................... 11
3.4.8 Low Voltage Reconnect ................................................................................................................ 11
3.4.9 Over Voltage Disconnect .............................................................................................................. 12
3.4.10 Load Mode – Timed Control ..................................................................................................... 12
3.5 Error Conditions ................................................................................................................................ 13
3.5.1 Low Voltage Protection ................................................................................................................. 13
3.5.2 Overload Protection ...................................................................................................................... 13
3.5.3 Short-Circuit Protection ................................................................................................................. 13
3.5.4 Solar Panel Connection ................................................................................................................ 14
3.5.5 Load In-Rush ................................................................................................................................ 14
4 Application .................................................................................................................................................. 14
4.1 Wire Gauge Reference ..................................................................................................................... 14
4.1.1 Wire Thickness ............................................................................................................................. 14
5 Troubleshooting And Support ..................................................................................................................... 14
5.1 Maintenance & Care ......................................................................................................................... 14
5.2 Troubleshooting ................................................................................................................................ 14
5.3 Support ............................................................................................................................................. 15
5.4 Warranty ........................................................................................................................................... 15
5.4.1 Restrictions ................................................................................................................................... 15
5.4.2 Warranty Claims & Return Procedures......................................................................................... 15
5.4.3 Disclaimer ..................................................................................................................................... 16
5.4.4 Limitation of Liability...................................................................................................................... 16
Page 2 of 16
windynation
01/20/2014
Page 3

P30L User Manual
Revision 1.0
1 INTRODUCTION
The WindyNation P30L Solar Charge Controller provides an intelligent multifunctional charging and power
management solution for the solar charging of 12 and 24 volt battery systems. Operation is conveniently
presented and parameters are controlled via a customized LCD display screen interface.
The controller features an automatic 12V or 24V DC detect function that will identify the battery voltage upon
initial battery connection and uses Pulse-Width Modulation (PWM) allowing for a highly efficient and batteryfriendly charge control. An external temperature sensor provides software controlled charge compensation
that accurately adjusts the over-discharge and over-charge voltages to maximize your batteries’ life.
Built in protection includes overload, short circuit, reverse polarity, lightning/surge, PV panel reverse current,
over charging, and discharging protection. In the event of a short circuit or overload event, the system will be
protected and remain undamaged.
The enclosure is made of durable plastic with visual LCD graphic symbols to provide status indications of
charge, battery status, and system faults.
Read this manual carefully before installing or using the controller and keep it for future reference.
1.1 FEATURES
Compact size is easy to mount on wall or panel.
Visual LCD display
User adjustable operation
Intelligent PWM Charging Mode
Automatic battery charging temperature compensation
User settable charging & discharging voltage parameters
User settable working modes of loads
Accumulative function of charging & discharging AH
Protection for battery bank discharging
Protection for battery low voltage
Battery reverse polarity protection
Delayed auto restart after overloading protection
Charge controller maintains batteries and extends battery life
Convenient screw terminals for wiring
Separate connections for PV panel, battery, and load
Built-in overload and short circuit protection
User selectable on, off, and time modes
Wide operating temperature range -14 +140
1.2 SAFETY INFORMATION
Please read the installation and operating instructions carefully prior to use. Pay special attention to the
IMPORTANT and WARNING statements in the manual.
WARNING:
Never install during a lightning storm or where unsafe voltages are present.
Solar panels produce power when exposed to light. Shade solar panels whenever solar panel wires are
exposed.
Do not use with equipment that exceeds the rated power for this device.
Page 3 of 16
windynation
01/20/2014
Page 4
P30L User Manual
Parameter
CHC-LCD-30
Rated Charge Current
30 Amps
Rated Load Current
30 Amps
Typical Idle Consumption
At idle < 5mA
Maximum Solar Input Voltage
48V DC
Rated Working Voltage
12V DC or
24V DC Battery Systems
Float Charging Voltage
(adjustable)
13.8V DC
27.6V DC
Low Voltage Protection
(adjustable)
10.7V DC
21.4V DC
Low Voltage Recovery
(adjustable)
12.5V DC
25.0V DC
No Load Loss
<30mA
Loop Voltage Drop
<170mV
Temperature Compensation
-4.0 mV/Cell/oC
Parameter
Value
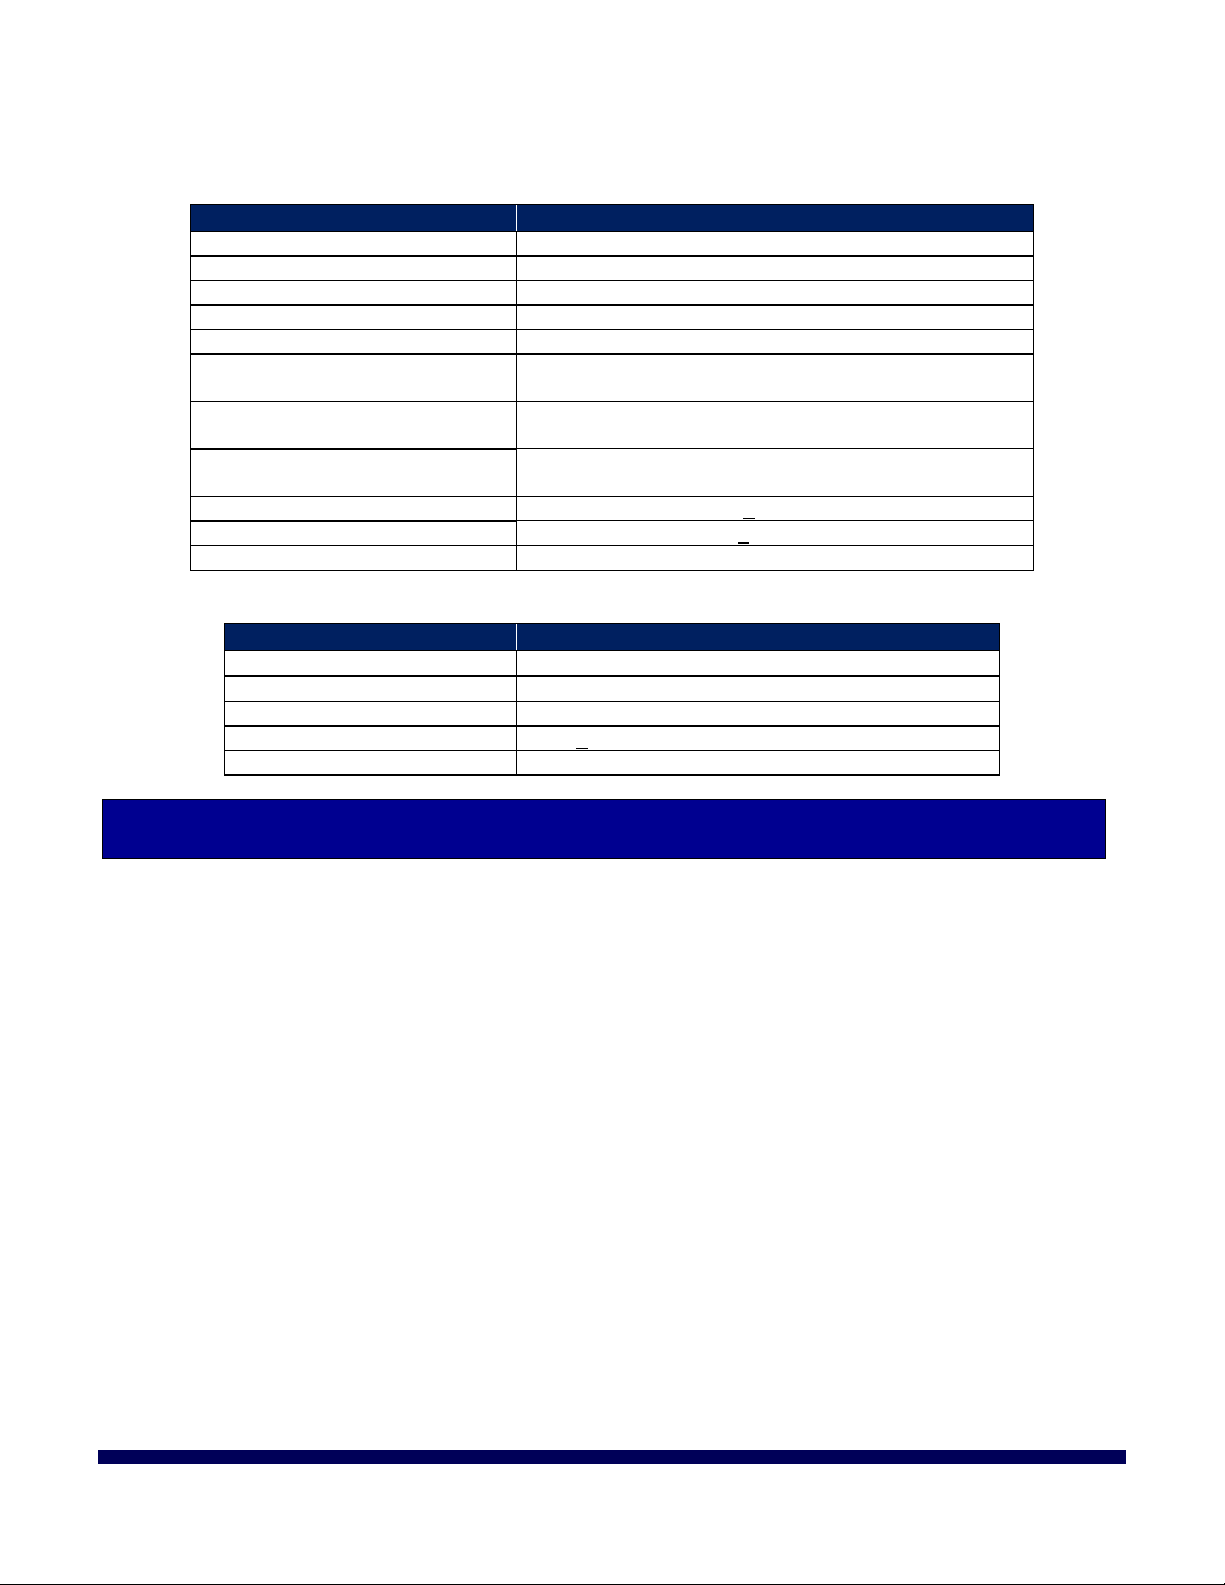
Dimension (H x W x D)
3.54” (90mm) x 7.40” (188mm) x 1.89” (48mm)
Unit Weight
12.7 oz. (360g)
Operating Temperature
14oF to 140oF (-10oC to 60oC)
Operating Humidity
<90% relative humidity (non-condensing)
Wire Size
Up to 16mm2 (7AWG)
Revision 1.0
1.3 SPECIFICATIONS
1.3.1 Electrical Specifications
1.3.2 Physical Specifications
2 INSTALLATION
Insure all terminating connections are clean and tight to prevent arcing and overheating.
The controller must be installed in an area that satisfies all of the following conditions:
1. Dry: Avoid any location where water can contact the controller
2. Cool: Ambient air temperature between 30°F and 105°F (0°C and 40°C)
3. Ventilated: Allow at least 4 in (10 cm) of clearance above and below and at least 1 in (25 mm) on
each side for proper air flow.
2.1 ELECTROSTATIC (ESD) PRECAUTIONS
All electronic circuits may be damaged by static electricity. To minimize the likelihood of electrostatic
damage, discharge yourself by touching an electrical ground (e.g.: copper pipe) prior to handling the unit and
avoid touching components on the circuit boards. The risk of electrostatic damage is highest when relative
humidity is below 40%.
2.2 MOUNTING
Mounting is optional; however, the environment must be dry and protected from water.
1. The controller can be mounted on a vertical or horizontal surface. If mounted vertically, the unit
should be oriented such that neither end is at the top so foreign material cannot settle into the
unit.
2. Install four user-supplied fasteners through the four mounting slots and into the mounting
surface.
3. Tighten all the fasteners to ensure the controller cannot slide in any direction.
Page 4 of 16
windynation
01/20/2014
Page 5
P30L User Manual
Revision 1.0
IMPORTANT: For best results, mount the charge controller and batteries as close to the panels as practical.
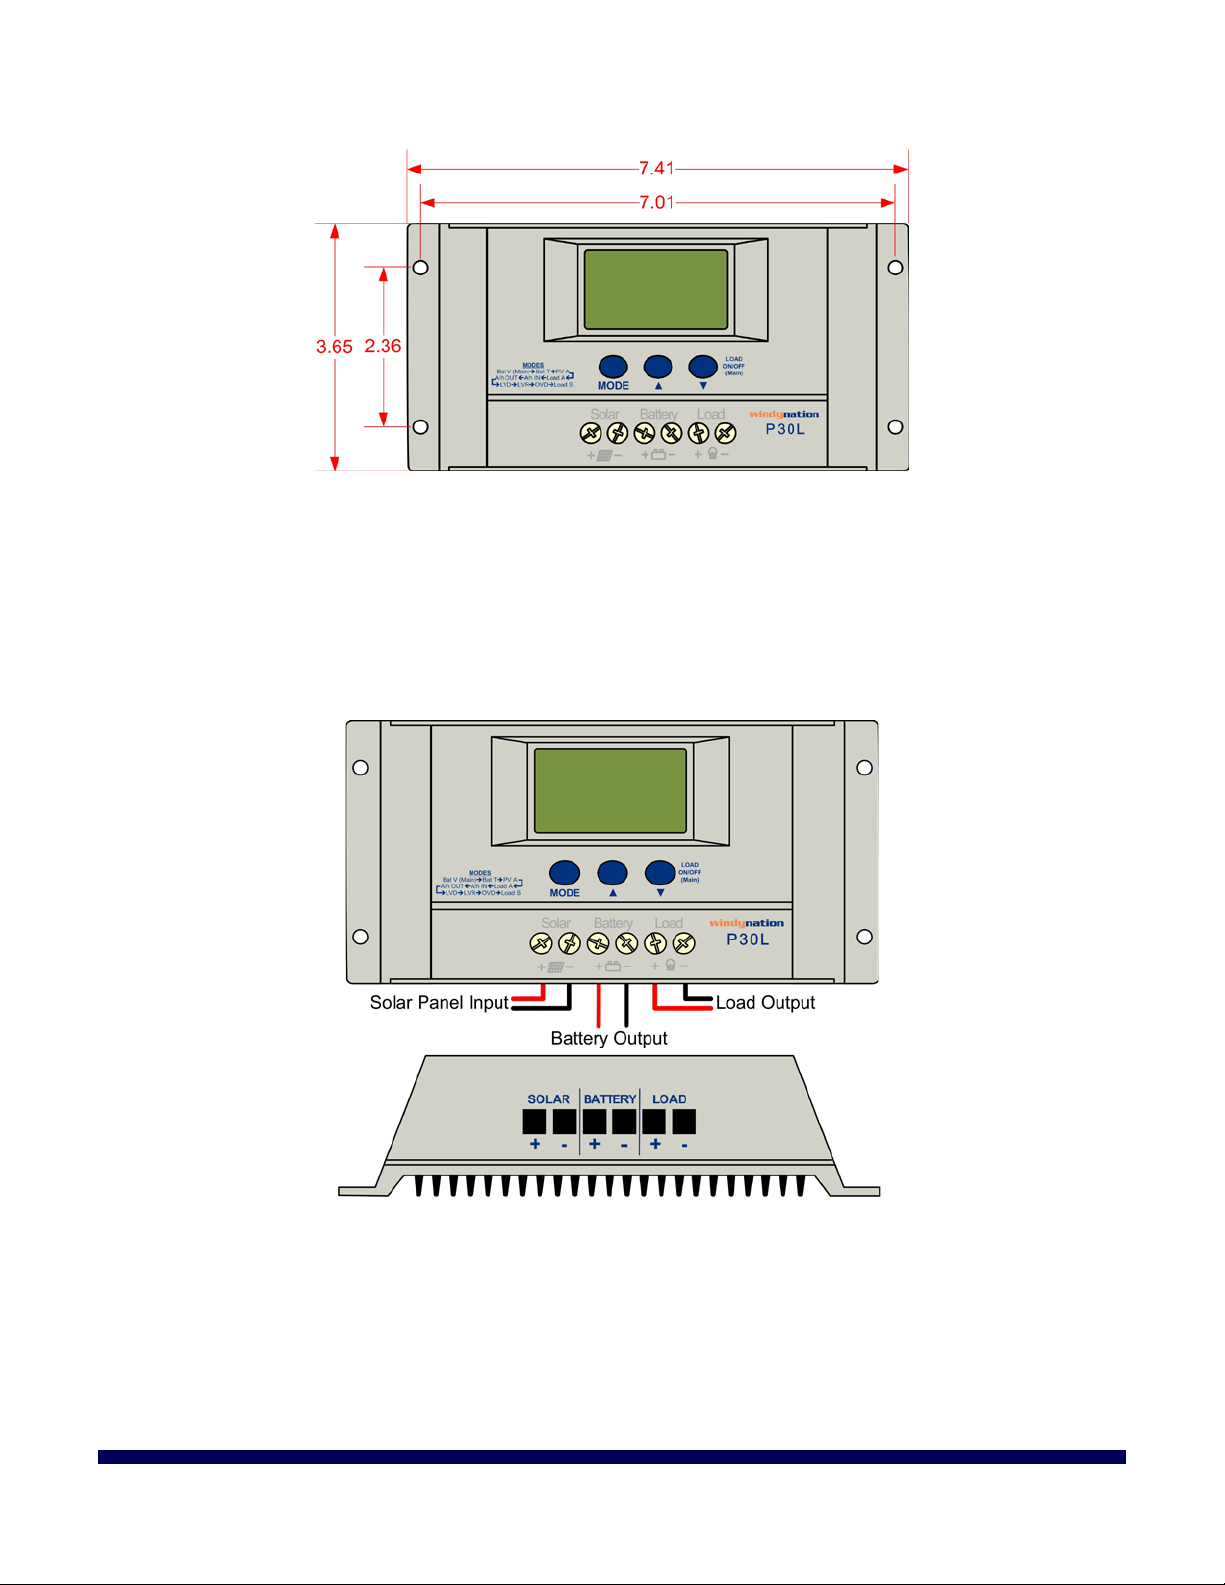
2.3 CONNECTIONS
WARNING: Loose connectors result in excessive voltage drop and may over heat wires, which can cause
the wire insulation to melt. This can cause electrical fires. Verify all connections are secure and have no
voltage drop.
IMPORTANT: The NEC requires that the wires carrying the system current never exceed 80% of the
conductor’s current rating (sizing recommendations are located in Section 4).
IMPORTANT: The screw-down terminals on the charge controller accept 7~26AWG wire.
IMPORTANT: Strip the wire ends approximately 0.3” (7.6mm) before connecting to the charge controller.
Use caution when handling the stripped wires to avoid electric shock.
1) Connect the Battery
Connect the charge controller to the battery BEFORE connecting the solar panels to the charge controller.
Insert the battery wiring to the BATTERY terminals on the front of the charge controller and tighten the
terminals from the top of the controller using a screwdriver to ensure a good connection is made. Be sure to
note the polarity of each terminal; the charge controller self-protection feature will prevent damage from
Page 5 of 16
windynation
01/20/2014
Page 6

P30L User Manual
Revision 1.0
reverse polarity connections, but the charge controller will not function until the battery is connected properly.
A 40 amp fuse needs to be placed in the positive wire connecting the charge controller to the battery.
2) Connect the Solar Panel (PV) Array
Insert the solar panel wiring to the SOLAR terminals on the front of the charge controller and tighten the
terminals from the top of the controller using a screwdriver to ensure a good connection is made. Be sure to
note the polarity of each terminal; the charge controller self-protection feature will prevent damage from
reverse polarity connections, but the charge controller will not function until the PV Array is connected
properly. A 40 amp fuse needs to be placed in the positive wire connecting the charge controller to the solar
panel(s).
WARNING: High voltages may be present on the solar panel output wiring. Solar panels produce electricity
when exposed to light. Make sure the solar panels are placed in the shade and are NOT in direct sunlight.
Use caution and avoid touching any conductors in the system circuit to avoid electric shock.
3) Connect the Load (Optional)
This step is optional and only required if you want to power a small (less than 30A) DC load through the
charge controller. Connect the wires from the appliance to the LOAD terminals on the front of the charge
controller and tighten the terminals from the top of the controller using a screwdriver to ensure a good
connection is made. Be sure to note the polarity of each terminal; the charge controller self-protection feature
will prevent damage from reverse polarity connections, but the charge controller will not function until the
load is connected properly. A 40 amp fuse needs to be placed in the positive wire connecting the charge
controller to the load.
4) Connect the Battery Temperature Sensor – BTS (Optional)
The charge voltage required by batteries changes with battery temperature. Temperature compensation of
the charge voltage enhances battery performance and life, and decreases battery maintenance. Automatic
temperature compensation can be provided through use of the optional battery temperature sensor
(included). The Temperature compensation is -4.0 mV/Cell/
o
C.
1) Plug the provided BTS cable into the socket labeled “BTS” located on the left side of the controller as
shown below.
2) Connect the ring terminal on the BTS directly to the negative battery stud, or use an adhesive to
Page 6 of 16
attach the sensor to any side of the battery to be monitored, below the electrolyte level as shown
below. Mounting the sensor directly on the battery stud is more reliable against vibration and will
provide a good thermal connection to the battery as well. It is best to place the sensor between
batteries and place the batteries in an insulated box to reduce the influence of the ambient
temperature outside the battery enclosure.
windynation
01/20/2014
Page 7

P30L User Manual
Revision 1.0
CAUTION: High power electrical systems pose dangers and it is the user's responsibility to be familiar with
these dangers and take any necessary action to ensure safe use. Shorting a battery or connecting your
controller to a battery can supply huge currents and have serious consequences including explosions,
causing fire, damage to equipment, and personal injury including death.
2.4 PARALLEL CONNECTIONS
Multiple controllers can be installed in parallel on the same battery bank to achieve higher charging current.
For example, connecting two units in parallel can allow for 60 amps of charging current, and connecting
three units in parallel can allow for up to 90 amps of charging current.
Additional parallel controllers can also be added in the future, however, each Controller must have its own
PV array as shown below.
3 OPERATION
Once the controller is properly connected, the main display interface will appear in the LCD and the current
battery voltage will be displayed. Press the ‘UP’ or ‘DOWN’ buttons to cycle through the ten different
interfaces available on the P30L controller. The cycle pattern of the interfaces is presented in Section 3.3
and the definition of each interface is presented in Section 3.4. Some of the parameters presented can be
reset. In order to reset an eligible interface, press the ‘MODE’ button for at least 5 seconds and the
parameter should reset. Similarly, some parameters are user configurable. In order to set an eligible
interface, press the ‘MODE’ button for at least 5 seconds. The number on the interface will start to blink or
flicker and the parameter value can be adjusted using the ‘UP’ or ‘DOWN’ buttons. Once the desired value
Page 7 of 16
windynation
01/20/2014
Page 8

P30L User Manual
Button
Name
Description
LCD Symbol
Description
Revision 1.0
is set, press the mode button for over 5 seconds to exit the setting interface, and the number will
stop blinking or flickering.
3.1 BUTTON DEFINITIONS
DOWN / LOAD
3.2 LCD GRAPHIC INDICATORS
MODE
UP
Toggles the active LCD interface in a circular motion
as defined in Sec 3.1.3
Positive (+) parameter adjustments. Holding button
for >5 seconds will reset parameters.
Negative (-) parameter adjustments. At “MAIN”
interface screen, will turn the LOAD on and off.
Stop power supply to LOADs
Supply power to LOADs, No current drawn from Load
Supply power to LOADs, Load is drawing current
Page 8 of 16
Load Icon
Solar Panel Icon
Battery Icon
Load Light Control Icon
Load Timing Control Icon
windynation
01/20/2014
Page 9

P30L User Manual
LOAD ON
Load State
Charging State
Battery Capacity
Discharge State
System Working Condition
Revision 1.0
Stop Charge to Battery
Full Charging to Battery
Float Charging to Battery
Normal Working Condition
Error/Abnormal Working Condition
Battery Capacity
3.3 LCD INTERFACE CYCLE
3.4 INTERFACE DEFINITIONS
The P30L has ten different graphical interfaces. Each interface contains different information. The Main
Interface displays the current state of the Load, PV charging, Load discharging, battery capacity, and overall
system working condition as shown below.
3.4.1 Battery Voltage – MAIN Interface
This is the MAIN Interface and the displayed number is the present battery voltage (displayed in Volts).
Page 9 of 16
windynation
01/20/2014
Page 10

P30L User Manual
LOAD ON
Battery Voltage
BTS Temperature
PV Current
Load Current
Revision 1.0
By pressing the ‘DOWN / LOAD’ button from this interface, you can turn the load ON or OFF.
NOTE: The Load on/off function is not available in any other interface.
3.4.2 Battery Temperature Interface
The value displayed in this interface is the temperature at the Battery Temperature Sensor (BTS) as
described in Section 2.3 (displayed in degrees Celsius). The temperature is used for the temperature
compensation of battery charging.
3.4.3 PV – Solar Panel Output Current Interface
The value displayed in this interface is the input current to the controller from the solar panels; i.e.: the
current being generated by the solar panels (displayed in Amps).
The value displayed in this interface is the output current from the controller to the load; i.e.: the current
being consumed by the load (displayed in Amps).
The value displayed in this interface is the cumulative, generated charge of the solar panels displayed in
Amp-hours (Ah). For example, if 5 amps is supplied to the battery from the solar panel(s) for 1 hour, then 5
Ah will be displayed on the LCD.
Page 10 of 16
3.4.4 Load Current Interface
3.4.5 PV – Solar Panel Generated Charge Interface
windynation
01/20/2014
Page 11

P30L User Manual
Solar Generated Charge
Load Consumed Charge
LVD Set Value
LVR Set Value
Revision 1.0
NOTE: Press the ‘MODE’ button for over 5 seconds to clear/reset the cumulative, generating charge (Ah).
3.4.6 Load Consumed Charge Interface
The value displayed in this interface is the cumulative, consumed charge of the Load displayed in Amp-hours
(Ah).
NOTE: Press the ‘MODE’ button for over 5 seconds to clear/reset the cumulative, consumed charge (Ah).
3.4.7 Low Voltage Disconnect Interface
The value displayed in this interface is the Low Voltage Disconnect protection voltage set for the controller. If
the battery voltage is lower than the set protection voltage, the controller will automatically disconnect the
load to prevent the battery from over-discharging. The Low Voltage Disconnect is user settable.
NOTE: To change the LVD voltage, press the ‘MODE’ button for over 5 seconds until the number starts to
blink / flicker. The controller will enter the adjustable mode, where you can use the ‘UP’ and ‘DOWN’ buttons
to adjust the parameter. After the value has been set, press the ‘MODE’ button for over 5 seconds to exit the
adjustable mode and store the setting.
3.4.8 Low Voltage Reconnect Interface
The value displayed in this interface is the Low Voltage Reconnect voltage set for the controller. After the
controller enters into a low voltage protection state (Section 3.4.7), and the battery voltage recovers to the
value set for the Low Voltage Reconnect , the controller will reconnect the load automatically.
NOTE: To change the LVR voltage, press the ‘MODE’ button for over 5 seconds until the number starts to
blink / flicker. The controller will enter the adjustable mode, where you can use the ‘UP’ and ‘DOWN’ buttons
Page 11 of 16
windynation
01/20/2014
Page 12

P30L User Manual
Value
Mode
Function
24h
Normal (Default)
Load is supplied continuous power.
Load is supplied power at nighttime and continues working
night time and remain on for a period of 2 hours.
Load starts to supply power after dark and stops at dawn
(sunrise).
OVD Set Value
Load Mode Set Value
Revision 1.0
to adjust the parameter. After the value has been set, press the ‘MODE’ button for over 5 seconds to exit the
adjustable mode and store the setting.
3.4.9 Over Voltage Disconnect Interface
The value displayed in this interface is the value at which the charge controller will stop charging the battery.
When the battery voltage reaches this voltage, the controller will disconnect the charging solar panel(s) to
prevent the battery from overcharging. After the battery voltage drops below the Over Voltage Disconnect
value, the controller will reconnect the charging solar panel(s).
NOTE: To change the OVD value, press the ‘MODE’ button for over 5 seconds until the number starts to
blink / flicker. The controller will enter the adjustable mode, where you can use the ‘UP’ and ‘DOWN’ buttons
to adjust the parameter. After the value has been set, press the ‘MODE’ button for over 5 seconds to exit the
adjustable mode and store the setting.
3.4.10 Load Mode – Timed Control Interface
The P30L charge controller has a mode setting function to set specific operation parameters. It is preset to
the factory default of normal control (24 hours). In ‘Normal’ mode, the load will draw from the battery at all
times, and the PV panel will charge the battery when sunlight is available. It is also possible to have the load
remain on for a set duration, and when that set time period has elapsed, the load will switch off. The duration
setting is available in increments of 1 hour and 1-23 hour delays can be selected.
NOTE: To change the Load Control value, press the ‘MODE’ button for over 5 seconds until the number
starts to blink / flicker. The controller will enter the adjustable mode, where you can use the ‘UP’ and ‘DOWN’
buttons to adjust the parameter. After the value has been set, press the ‘MODE’ button for over 5 seconds to
exit the adjustable mode and store the setting.
1h – 23h Timed Control
for the specified duration (in hours). For example, if the Load
Control Value is set to 2h, then the load will be turned on at
0h Light Control
IMPORTANT: There is a 10 minute delay before turning on the load in order to make sure it is really dark
and not a passing cloud etc.
Page 12 of 16
windynation
01/20/2014
Page 13

P30L User Manual
Revision 1.0
3.5 ERROR CONDITIONS
3.5.1 Low Voltage Protection
If the battery voltage is lower than the protection voltage (Section 3.4.7), the controller will enter the low
voltage protection state and the load will be disconnected. The use of solar panels or an alternate charger is
required to charge the battery to the recovery level (Section 3.4.8). The controller will enter into the normal
working state and power will be supplied to the load once the battery voltage exceeds the Low Voltage
Protection voltage.
When in Low Voltage Protection State, the LCD will look similar to the image below.
3.5.2 Overload Protection
If the Load is drawing a current 1.2 times the rated current of the controller for three (3) seconds or more, the
controller will enter into an Overload Protection State. When in this state, any loads applied will need to be
removed one by one until power is again supplied to the loads. The controller will supply power to the loads
automatically within seconds of being within an acceptable level or you may repeatedly press the ‘DOWN’
button to recover the power supply. However, if the load is not at an acceptable level, the controller will go
back into the protection state.
When in Overload Protection State, the LCD will look similar to the image below and the Load Icon will blink
or flicker.
3.5.3 Short-Circuit Protection
If a shorted circuit is detected in the Load, the controller will enter into a short-circuit protection state. When
in this state, check the loads and/or connecting cables for any damage or short-circuiting. Once the problem
has been identified and corrected, repeatedly press the ‘DOWN’ button to recover the power supply.
When in Short-Circuit Protection State, the LCD will look similar to the image below and the Load Icon will
blink or flicker.
Page 13 of 16
windynation
01/20/2014
Page 14

P30L User Manual
AWG
Diameter
inches (mm)
Ohms per
1000ft
Break
Force
Square
mm2
14
0.064 (1.63)
2.525
119 lbs
2.08
10
0.102 (2.59)
0.999
314 lbs
5.26
6
0.162 (4.11)
0.395
760 lbs
13.30
2
0.258 (6.54)
0.156
1930 lbs
33.62
0 (1/0)
0.325 (8.25)
0.098
3060 lbs
53.49
000 (3/0)
0.410 (10.4)
0.062
4860 lbs
85.01
Problem
Possible Remedies
Revision 1.0
3.5.4 Solar Panel Connection
If the Solar Panel Icon is blinking or flickering, it means the controller does not detect the existence of
solar panels. Check that all the connections with the solar panels are making good contact and are in good
condition. Check the connection terminals on the controller for any open-circuit conditions.
3.5.5 Load In-Rush
If the Load Icon is blinking or flickering when you turn on the load, it means the starting in-rush current
for the load is more than twice that of the rated working current. Please lower or remove the load and restart
the controller.
4 APPLICATION
4.1 WIRE GAUGE REFERENCE
4.1.1 Wire Thickness
16 0.051 (1.29) 4.016 75 lbs 1.30
12 0.081 (2.05) 1.588 197 lbs 3.30
8 0.129 (3.26) 0.628 480 lbs 8.30
4 0.204 (5.19) 0.249 1210 lbs 21.15
1 0.289 (7.35) 0.124 2430 lbs 42.41
00 (2/0) 0.365 (9.27) 0.078 3860 lbs 67.43
0000 (4/0) 0.460 (11.68) 0.049 6120 lbs 107.22
5 TROUBLESHOOTING AND SUPPORT
The Controller requires minimal care. It is recommended to inspect all the connections at least two times per
year for insulation damage or corrosion and to ensure all connections are tight and secure.
5.1 MAINTENANCE & CARE
Clean the area around the controller of any dirt or debris with a cloth.
Tighten the screws on the terminals. Inspect for loose, broken, or burnt wire connections.
Inspect batteries for cracked or bulging cases and corroded terminals.
Make sure the PV array is clean and remove any debris.
5.2 TROUBLESHOOTING
Page 14 of 16
windynation
01/20/2014
Page 15

P30L User Manual
to battery LCD
1. Check if the solar panel cables are connected properly.
the battery and it may be damaged.
1. Load open circuit.
after the battery has finished charging.
Revision 1.0
2. Check to make sure the correct battery is being used.
3. Check all wiring connections to make sure they are in their designated
The charge
indicator doesn't appear
when the solar panel is
exposed to sunlight.
locations and make sure that there are no loose connections.
4. Measure the PV array open-circuit voltage and confirm normal limits.
5. Measure the PV voltage and the battery voltage at the controller terminals.
a. If voltage at terminals is within specifications, PV array is charging battery.
b. If the PV voltage is within specifications to the open circuit voltage rating of the
panels, but the battery voltage is low, the charge controller may not be charging
The ‘LOAD ON’ indicator
is on but there is no power
output.
2. Check cables and connections and any other load switches.
3. Over discharge of the battery. The controller will resume normal operation
5.3 SUPPORT
If you are experiencing technical problems, and cannot find a solution in this manual, you can contact Windy
Nation Inc. for further assistance.
Call: (805) 323-6445
Email: support@windynation.com
Write: 398 South Kalorama Street, Unit C, Ventura, CA 93001
For challenging issues or to just ask a question, consider using our FREE Community Forums! Consult our
community of DIY'ers for fast answers to all your questions.
Post on our Forums: http://www.windynation.com/community/
5.4 WARRANTY
Windy Nation warrants that the Power Controller (the “Product”), will be free from manufacturing defects in
materials and workmanship under normal authorized use consistent with product instructions for a period of
one (1) year from the date the original purchaser (“Customer”) receives the Product (the “Warranty Period”).
This warranty extends only to the original purchaser. The Customer’s sole and exclusive remedy and the
entire liability of Windy Nation, its suppliers and affiliates for breach of the warranty is, at Windy Nation’s
option, either (i) to replace the Product (or defective component part(s)) with a new or reconditioned Product
(or component part(s)); (ii) to repair the reported problem; or (iii) to refund the purchase price of the Product.
Repaired or replaced products are warranted for the remainder of the original warranty period only. No
employee, agent, dealer or other person is authorized to give any warranties on behalf of Windy Nation not
expressly set forth in this limited warranty.
5.4.1 Restrictions
No warranty will apply if the Product (i) has been altered or modified except by Windy Nation; (ii) has not
been installed, operated, repaired, or maintained in accordance with instructions supplied by Windy Nation;
(iii) has been subjected to abnormal physical, thermal or electrical stress, misuse, negligence, or accident. If
Windy Nation determines that the problem with the Product is not due to a manufacturing defect in Windy
Nation’s workmanship or materials, or otherwise does not qualify for warranty repair, then the Customer will
be responsible for the costs of all necessary repairs and expenses incurred by Windy Nation.
5.4.2 Warranty Claims & Return Procedures
To be eligible for service under this warranty, the Customer must submit a service request within the
Warranty Period by contacting Windy Nation in writing or via telephone and obtaining a Returned Materials
Authorization (“RMA”) number. This RMA must be obtained before returning any product under this warranty.
Notification must include a description of the alleged defect, the manner in which the Product was used, the
Page 15 of 16
windynation
01/20/2014
Page 16

P30L User Manual
Revision 1.0
serial number (if applicable), and the original purchase date in addition to the name, address, and telephone
number of the Customer. Within five (5) business days of the date of notification, Windy Nation will provide
the Customer with an RMA number and the location to which the Customer must return the defective
Product. Any Product returned for warranty service shall be shipped at the expense and risk of the
Customer. The Customer must return the entire Product kit (or, if authorized by Windy Nation, the defective
component parts), within fifteen (15) days after issuance of the RMA number. Windy Nation will be under no
obligation to accept any returned Product that does not have a valid RMA number. Customer’s failure to
return the Product within fifteen (15) days of its receipt of an RMA number may result in cancellation of the
RMA. All parts that Windy Nation replaces shall become Windy Nation’s property on the date Windy Nation
ships the repaired Product or part back to the Customer. Windy Nation will use all reasonable efforts within
thirty (30) days of receipt of the defective Product to repair or replace such Product. If a warranty claim is
invalid for any reason, the Customer will be charged at Windy Nation’s then-current rates for services
performed and will be charged for all necessary repairs and expense incurred by Windy Nation. If Windy
Nation determines that a warranty claim is valid, it will ship the repaired or replaced Product to Customer at
Windy Nation’s cost.
5.4.3 Disclaimer
EXCEPT FOR THE EXPRESS LIMITED WARRANTY SET FORTH IN THE PREVIOUS PARAGRAPH,
WINDY NATION DISCLAIMS ALL WARRANTIES, EXPRESS, IMPLIED AND STATUTORY INCLUDING,
WITHOUT LIMITATION, THE IMPLIED WARRANTIES OF MERCHANTABILITY AND FITNESS FOR A
PARTICULAR PURPOSE WITH RESPECT TO ANY PRODUCTS PROVIDED BY WINDY NATION. NO
ORAL OR WRITTEN INFORMATION OR ADVICE GIVEN BY WINDY NATION, ITS DEALERS,
DISTRIBUTORS, AGENTS OR EMPLOYEES SHALL IN ANY WAY INCREASE THE SCOPE OF THIS
WARRANTY. WINDY NATION DOES NOT WARRANT THAT THE QUALITY OR PERFORMANCE OF THE
PRODUCTS WILL MEET YOUR REQUIREMENTS OR THAT YOU WILL BE ABLE TO ACHIEVE ANY
PARTICULAR RESULTS FROM USE OR MODIFICATION OF THE PRODUCTS.
Some jurisdictions do not allow the limitation or exclusion of implied warranties or how long an implied
warranty may last, so the above limitations may not apply to you. In any such jurisdiction, the warranty shall
be limited to the minimum warranty and period required by law.
WINDY NATION EXPRESSLY DISCLAIMS ALL LIABILITY FOR BODILY INJURIES OR DEATH THAT MAY
OCCUR, DIRECTLY OR INDIRECTLY, BY USE OF THE PRODUCT BY ANY PERSON.
5.4.4 Limitation of Liability
UNDER NO CIRCUMSTANCES WILL WINDY NATION OR ITS AFFILIATES OR SUPPLIERS BE LIABLE
OR RESPONSIBLE FOR ANY LOSS OF USE, INTERRUPTION OF BUSINESS, LOST PROFITS, LOST
DATA, OR INDIRECT, SPECIAL, INCIDENTAL, OR CONSEQUENTIAL DAMAGES OF ANY KIND
REGARDLESS OF THE FORM OF ACTION, WHETHER IN CONTRACT, TORT (INCLUDING
NEGLIGENCE), STRICT LIABILITY OR OTHERWISE, EVEN IF WINDY NATION OR ITS AFFILIATE OR
SUPPLIER HAS BEEN ADVISED OF THE POSSIBILITY OF SUCH DAMAGE.
Some states do not allow the exclusion or limitation of incidental or consequential damages, so these
limitations may not apply to you. Neither Windy Nation nor its affiliates or suppliers will be held liable or
responsible for any damage or loss to any items or products connected to, powered by or otherwise attached
to the Product. The total cumulative liability to Customer, from all causes of action and all theories of liability,
will be limited to and will not exceed the purchase price of the Product paid by Customer. This warranty gives
the Customer specific legal rights and the Customer may also have other legal rights that vary from state to
state.
Page 16 of 16
windynation
01/20/2014
 Loading...