

Page 1

1
Microphone
User Guide
for SCOLA™
talk
and
SCOLA™
teach
transmitters
Page 2

2
Contents
Microphones for SCOLA™talk .....................3
Preparing SCOLA™
talk
for an external microphone ....4
Lapel microphone ..............................6
Placing the microphone clip ...................6
Boom microphone .............................8
Placing the boom microphone .................8
Microphones for SCOLA
™
teach ..................10
Connecting the microphone .....................11
Lapel microphones ............................11
Placing the microphone clip ..................12
Wearing the neck cord ......................13
Boom microphone ............................14
Placing the boom microphone ................14
Page 3
Microphone user guide for SCOLAtalk
3
Microphones for SCOLA™
talk
1.
2.
1. Omnidirectional lapel microphone
2. Directional boom microphone
Page 4
4
Microphone user guide for SCOLAtalk
Illustration 2
Preparing SCOLA™
talk
for an external microphone
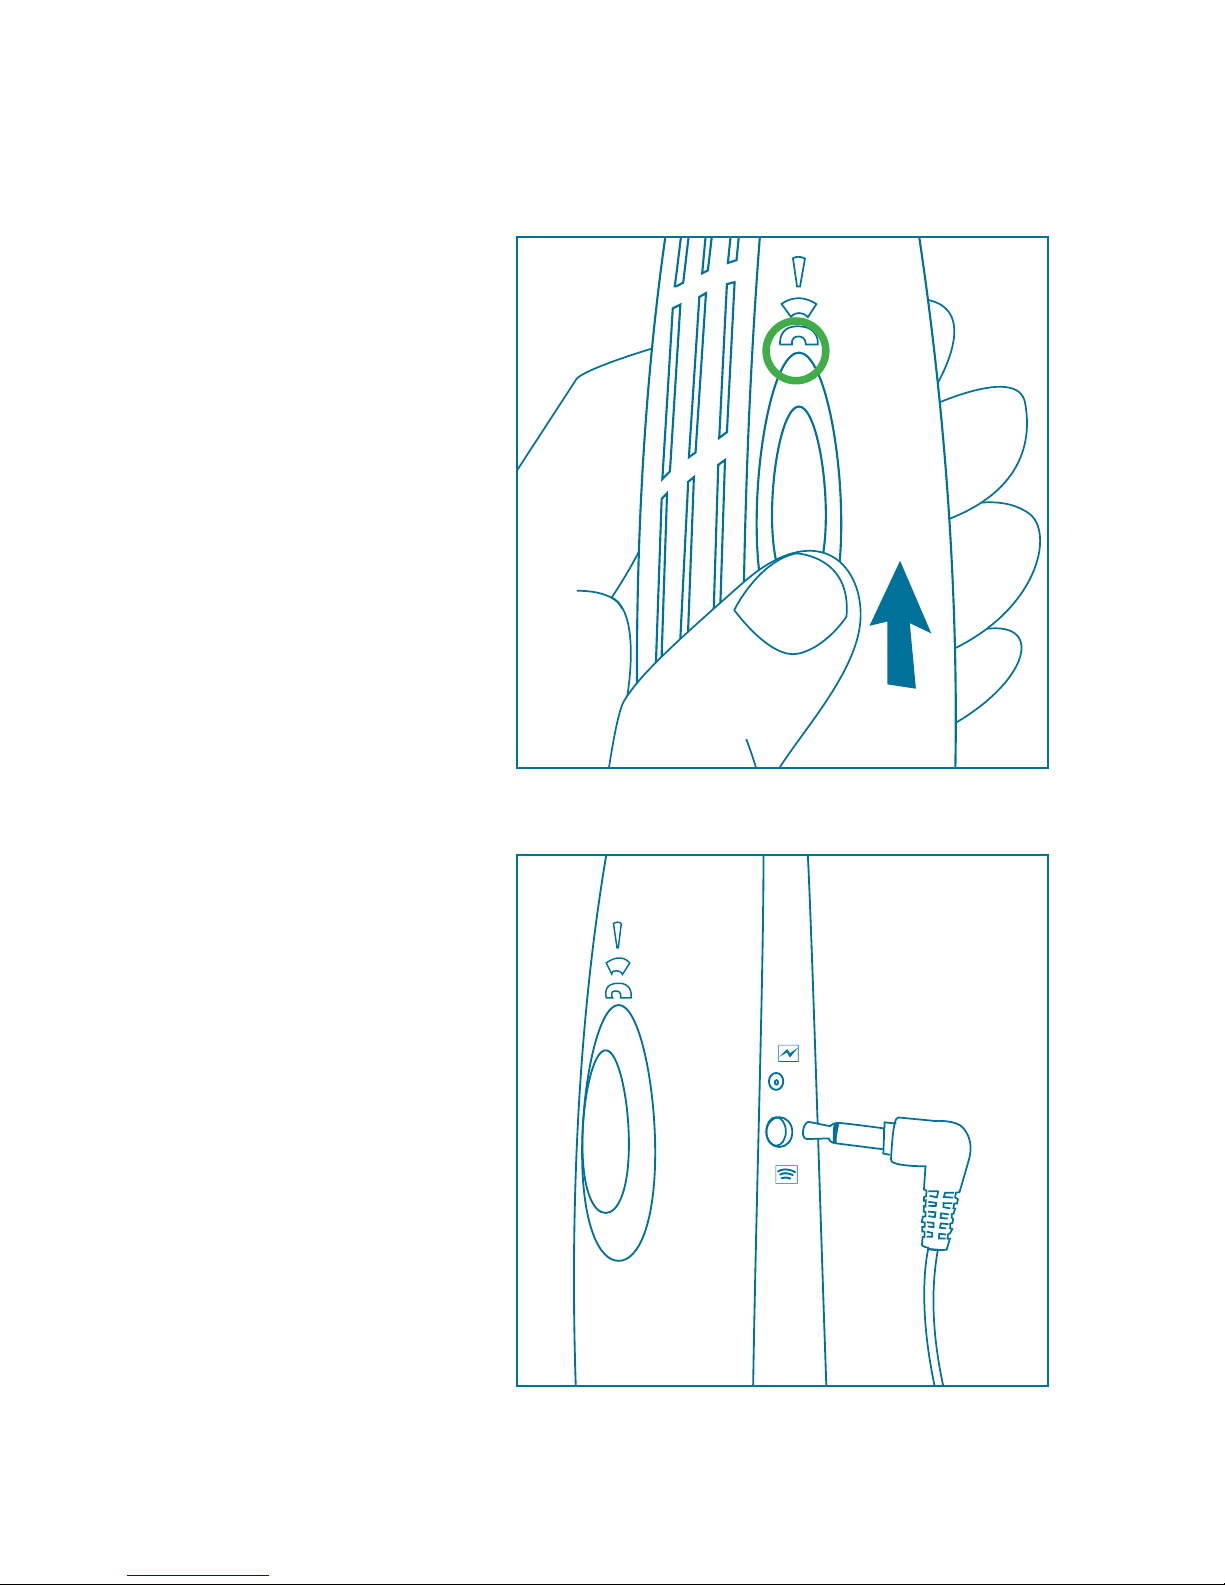
1. Switch to omni
mode on the front of
SCOLAtalk
(Illustration 1).
Illustration 1
2. Plug the microphone
cord into the
microphone jack on
SCOLAtalk
(Illustration 2).
Page 5

5
Microphone user guide for SCOLAtalk
HI
Illustration 3
3. Push the audio button
with a pen or paperclip once to set it to
“HI” (high input sensitivity) (Illustration 3).
Tip!
You can switch from the
external microphone to
the built-in directional
microphones by moving
the slide switch to position dir (
) or superdir
(
).
LO
Illustration 4
After using the external
microphone remember
to push the audio button
again in order to switch
back to “LO” (low input
sensitivity)
(Illustration 4).
Page 6

6
Microphone user guide for SCOLAtalk
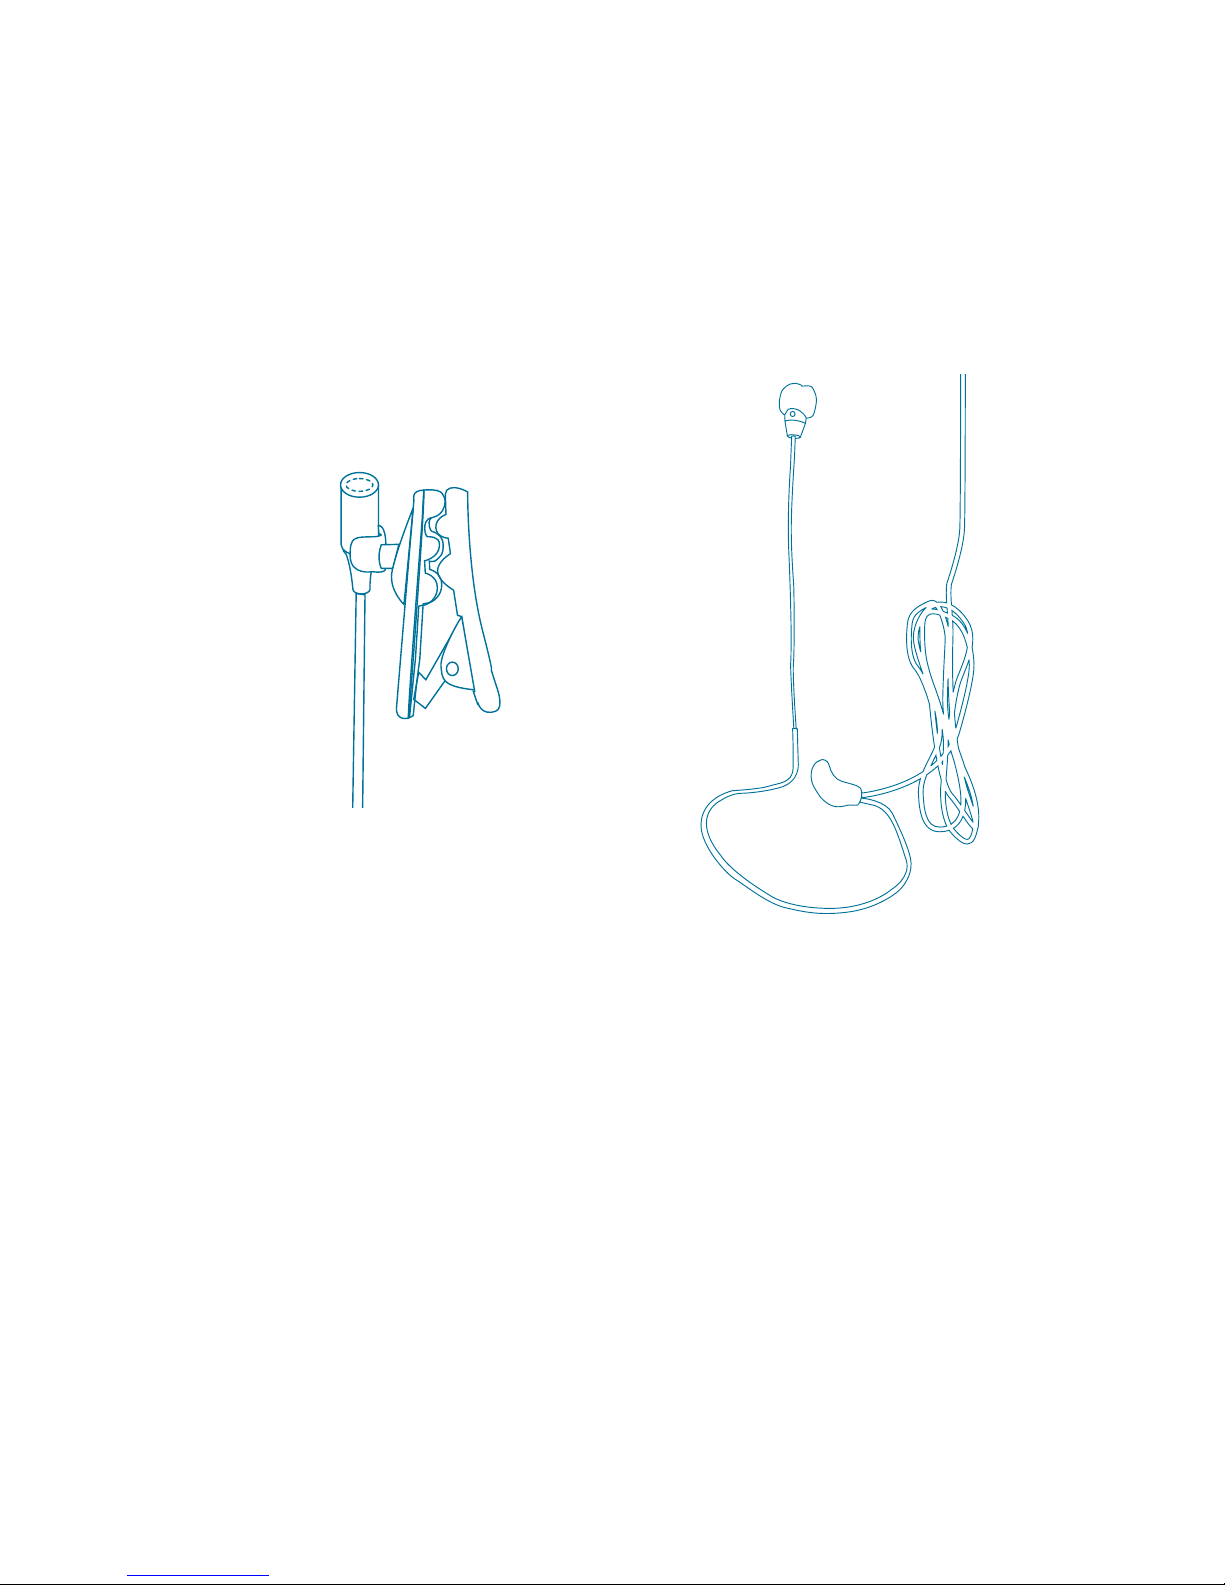
Lapel microphone
Illustration 5 Illustration 6
Illustration 7
The omnidirectional
lapel microphone is
a small, lightweight
microphone worn on the
upper body.
Placing the
microphone clip
The correct placement is in the centre
of the upper body and
as close to the user’s
mouth as possible
(Illustration 7).
Page 7

7
Microphone user guide for SCOLAtalk
The microphone clip
can also be extended to
stand on a table
(Illustrations 8 and 9).
Illustration 8
Illustration 9
Page 8

8
Microphone user guide for SCOLAtalk
Illustration 10
Boom microphone
The directional boom microphone for the SCOLAtalk
transmitter is designed for
especially noisy environments. The advantage of
this mi crophone is that its
signal remains unchanged
even if the speaker turns
their head.
Placing the boom
microphone
Hang the microphone behind the left ear
(Illustration 10).
Note:
Due to the directionality of the microphone, we
recommend that the boom
microphone be worn on the
left ear.
Page 9

9
Microphone user guide for SCOLAtalk
The microphone can then be
placed in an optimal talking
position close to the mouth
(Illustrations 11 and 12).
Illustration 12
Illustration 11
Page 10

10
Microphone user guide for SCOLAteach
1. 2. 3.
Microphones for SCOLA™
teach
1. Omnidirectional lapel microphone
2. Directional lapel microphone
3. Directional boom microphone
Note: The microphone cord on
SCOLAteach works as an antenna.
The microphone has to be connected in
order to transmit.
Page 11

11
Microphone user guide for SCOLAteach
Plug the microphone cord
into the microphone jack on
SCOLAteach (Illustration
13).
Lapel microphones
Illustration 14 shows an
omnidirectional microphone
and illustration 15 a directional microphone.
There are two different clips
for the two types of microphone.
Illustration 16 shows the
clip for an omnidirectional
microphone and illustration
17 the clip for a directional
microphone.
Connecting the microphone
Illustration 16 Illustration 17
Illustration 13
Illustration 15
Illustration 14
Page 12

12
Microphone user guide for SCOLAteach
Insert the microphone into
the clip (Illustration 18).
Placing the microphone
clip
The correct placement is
in the centre of the upper
body and as close to the
user’s mouth as possible
(Illustration 21).
Illustration 19 Illustration 20 Illustration 21
Illustration 18
Page 13

13
Microphone user guide for SCOLAteach
Illustrations 22 to 24 show how to
adjust and wear the neck cord.
Wearing the neck cord
Illustration 22
Attach the microphone clip
to the neck cord. The microphone symbol (
) should face
outwards.
Illustration 23
Illustration 25
Illustration 24
For easy removal of the neck
cord gently pull it out of the
part with the microphone symbol (Illustration 25).
Page 14

14
Microphone user guide for SCOLAteach
Illustration 26
The directional boom microphone for the SCOLAteach
transmitter is designed for
especially noisy environments. The advantage of
this mi crophone is that its
signal remains unchanged
even if the speaker turns
their head.
Placing the boom
microphone
Hang the microphone
behind the left ear (Illustration 26).
Note:
Due to the directionality of
the microphone, we
recommend that the boom
microphone be worn on the
left ear.
Boom microphone
Page 15

15
Microphone user guide for SCOLAteach
The microphone can then
be placed in an optimal
talking position close to the
mouth (Illustrations 27 and
28).
Illustration 28
Illustration 27
Page 16

Widex,
DK-3500 Vaerloese
Denmark
•
www.widex.com
¡9 502 1407 001{¤
Printed by FB / 09-08
9 502 1407 001 #01
¡#01v¤
 Loading...