

Widex ME-CIC, ME-CIC-TR, ME-IIC, ME-IIC-TR User Instructions

USER INSTRUCTIONS
The MeNU™ SerieS
ME-CIC/IIC-TR • ME-CIC/IIC model
Completely-in-canal/Invisible-in-canal

2
YOUR WIDEX HEARING AID
(To be filled out by the hearing care professional)
MENU
MENU
MENU
Date: ______________________________________
Battery size: 10
Vent: Short
Fulllength
None

3
Programs:
6 Master
Music
TV
Standard
Acclimatisation
AudibilityExtender
Zen

CONTENTS
DESCRIPTIONOFTHEHEARINGAID................................
Acousticindicators ...............................................
Thebattery ......................................................
Insertingthebattery ...........................................
Lowbatteryindication..........................................
Turningthehearingaidonandoff.................................
Rightleftidentification...........................................
Positioningthehearingaid .......................................
Removingthehearingaid ........................................
Volumeadjustment ..............................................
Listeningprograms...............................................
Switchingbetweenthelisteningprograms.......................
CLEANING .....................................................
Thehearingaid ..................................................
Thesoundoutlet .................................................
Thereliefvent....................................................
Themicrophoneopening .........................................
4

NANOCAREWAXGUARD........................................
ChangingtheNanoCarewaxguard................................
ACCESSORIES ..................................................
INCASEOFMALFUNCTION......................................
CARINGFORYOURHEARINGAID ................................
WARNINGS....................................................
ADVICE........................................................
SYMBOLS......................................................
5
6
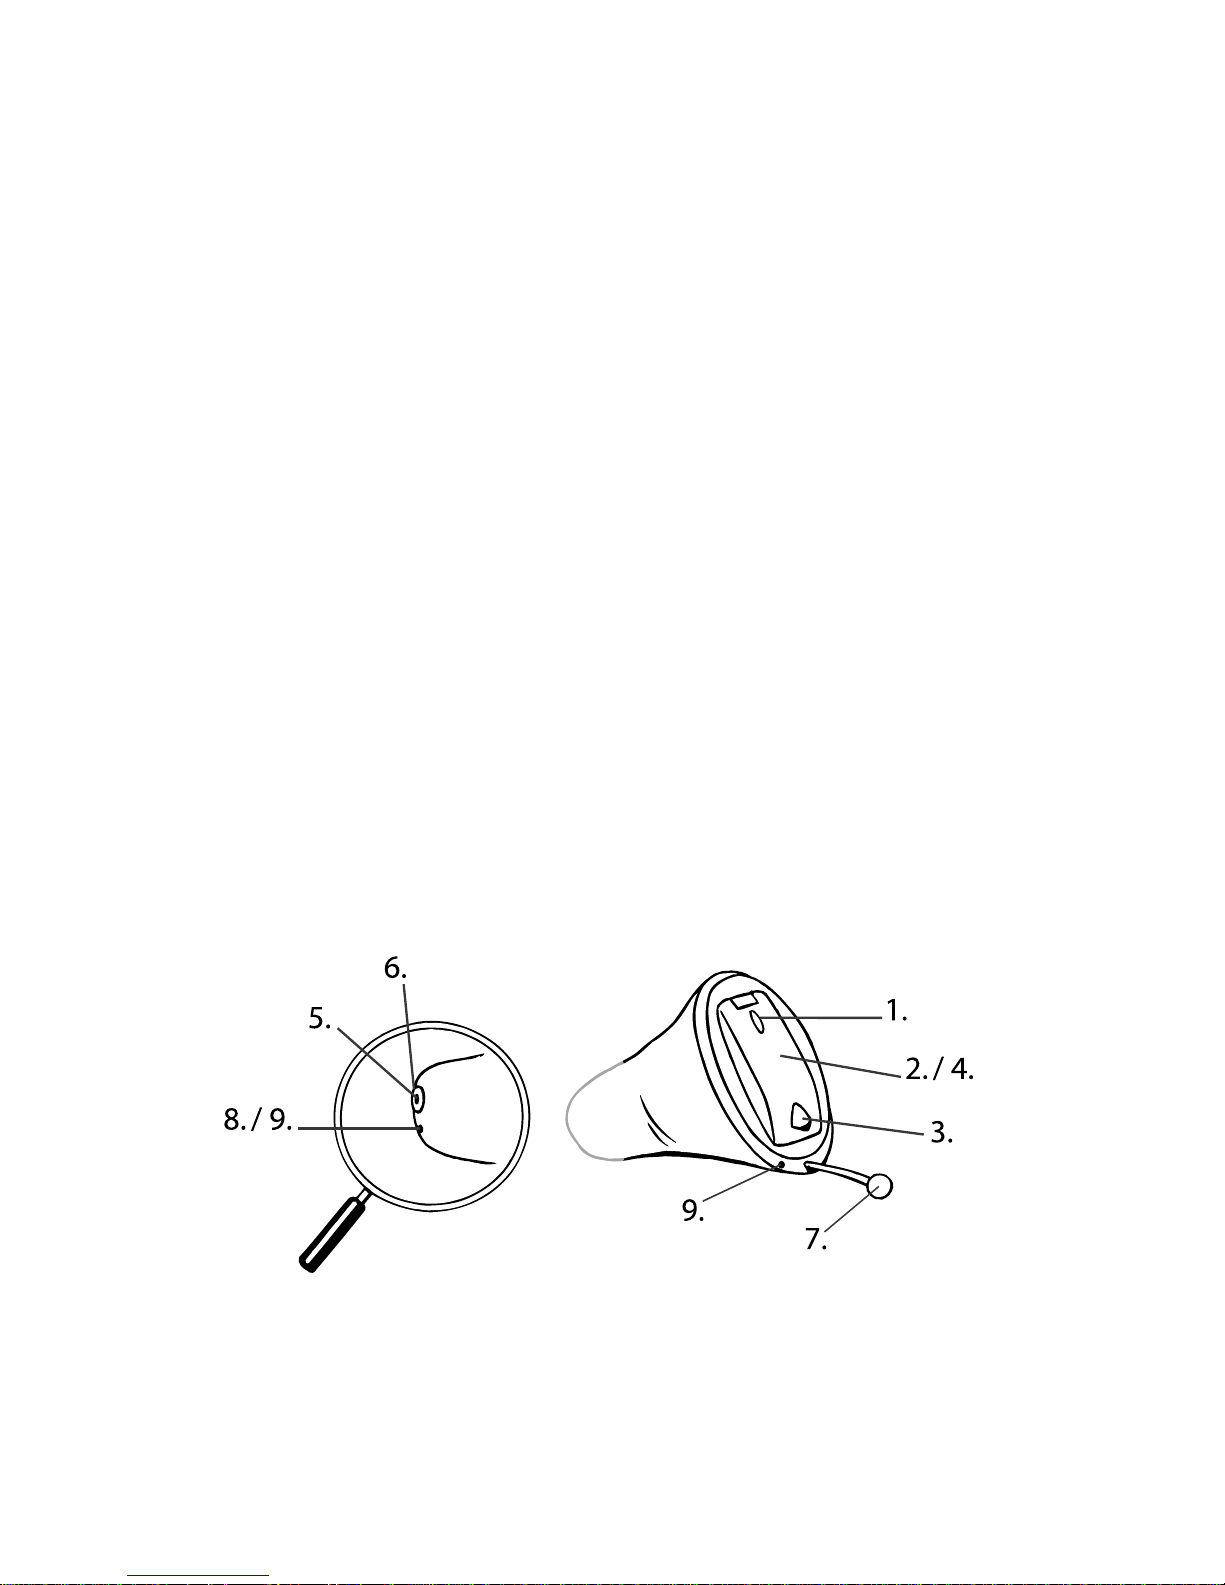
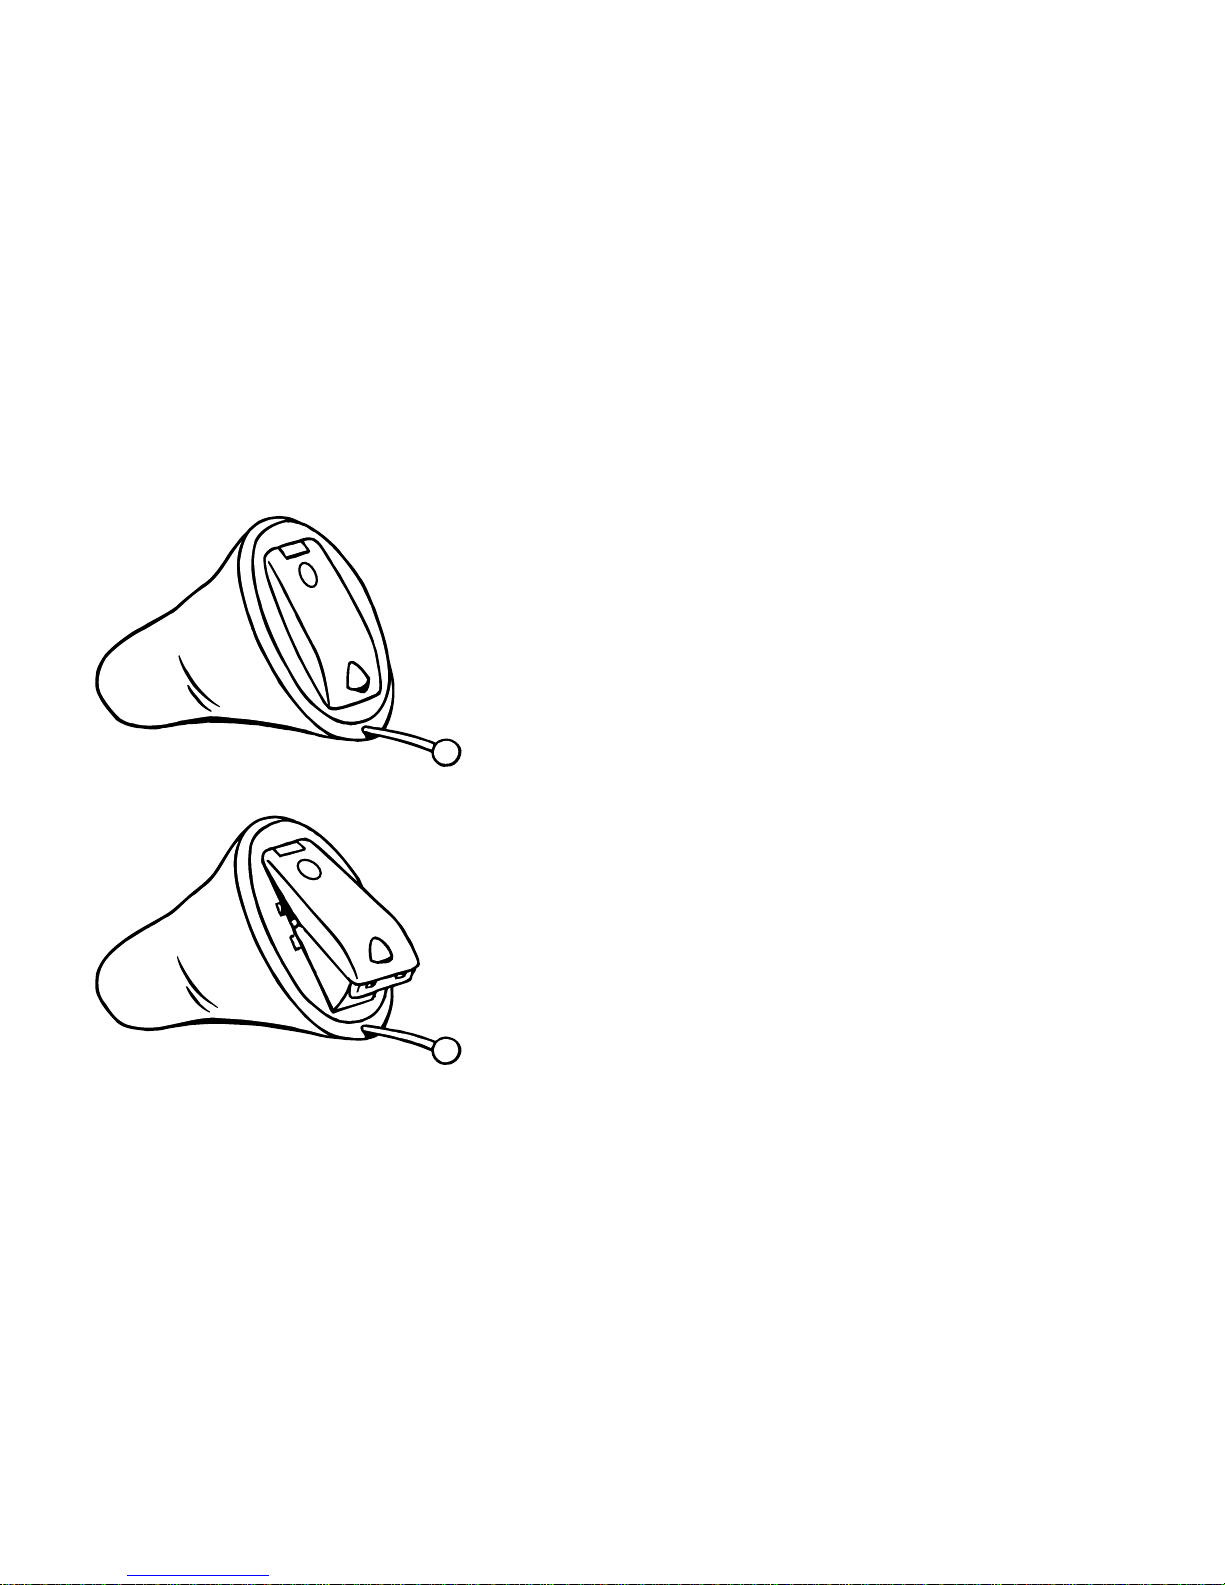
DESCRIPTION OF THE HEARING AID
1. Microphone opening
2. Battery drawer
3. Nail grip
4. On/off function
5. Sound outlet
6. NanoCare wax guard
7. Extraction cord
8. Relief vent (short)
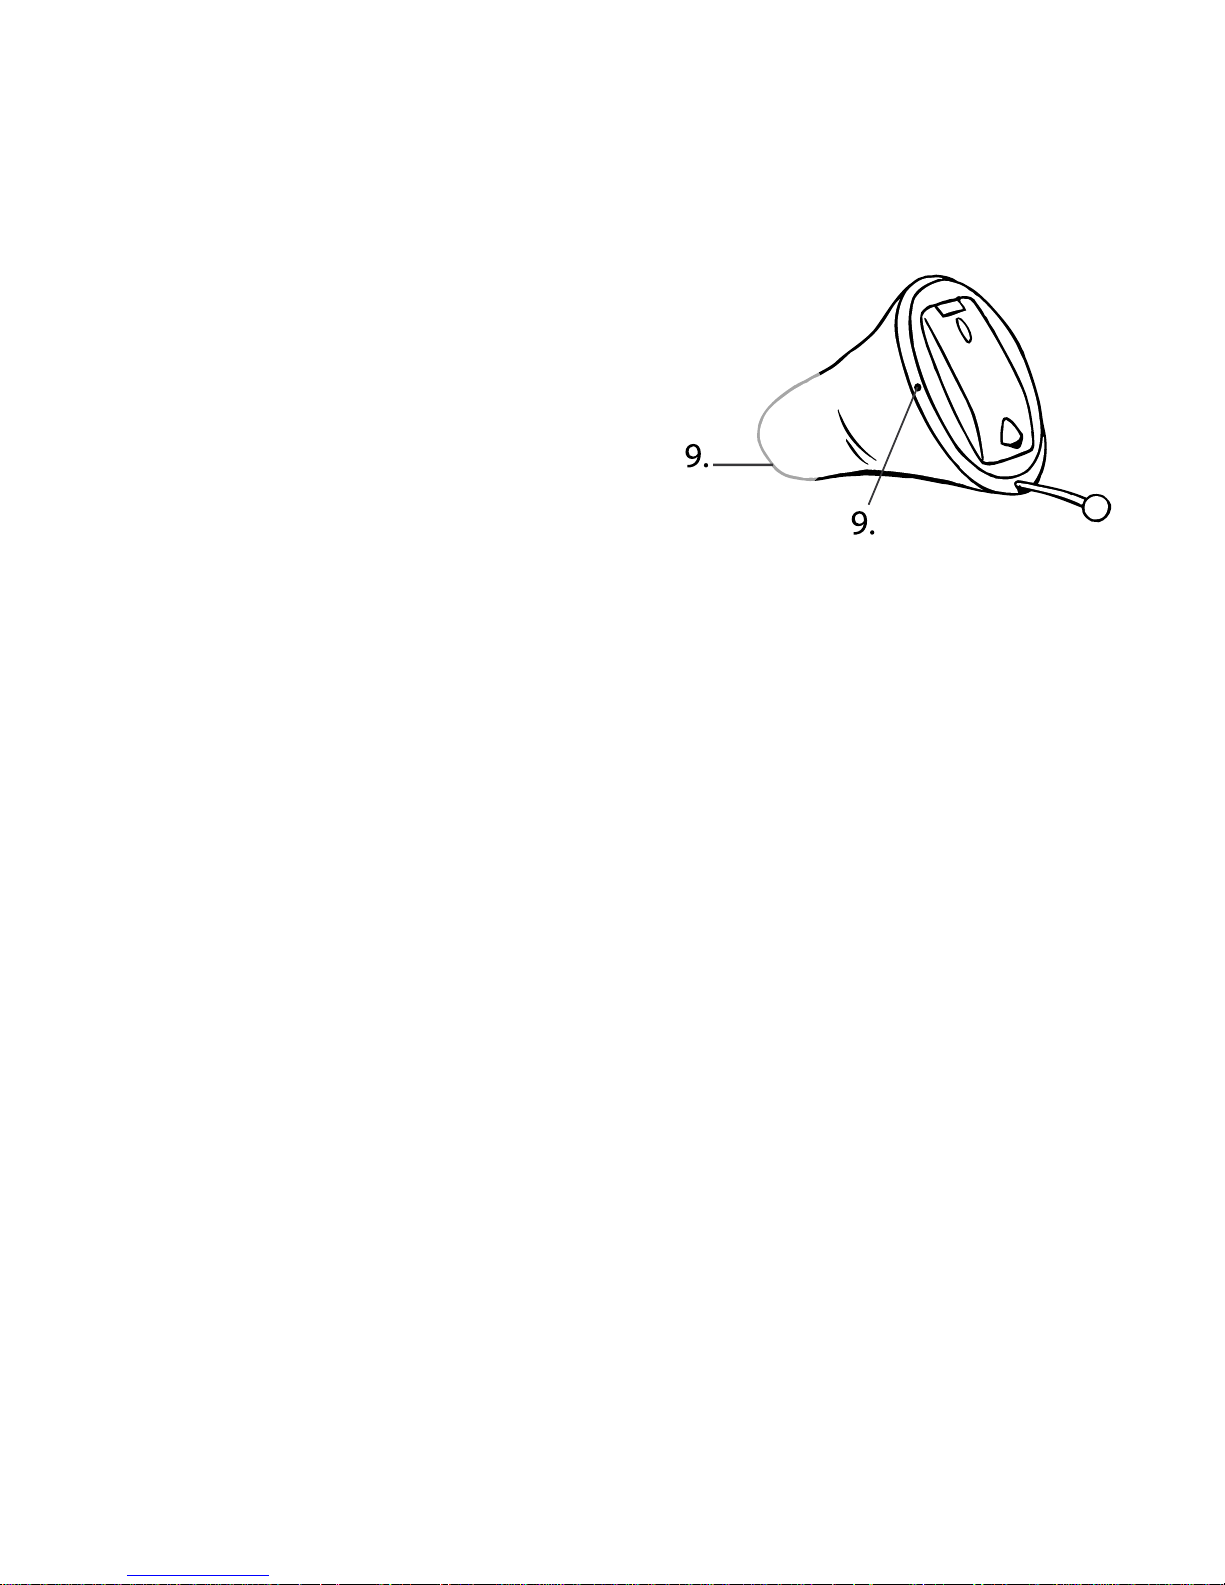
9. Relief vent (full length)
7
Anotherexampleofhowafulllength
ventmaybepositioned
If you need help to identify the serial number (usually six or seven digits)
on the product, please contact your hearing care professional.
Your hearing aid may be provided with a listening program called
Zen. It makes musical tones (and sometimes a rushing noise) in
the background. These sounds are shaped according to your
hearing loss.
On page 2 of this booklet your hearing care professional can indicate the type of vent used in your hearing aid, if any.
8
WARNING
This booklet contains important information and instructions. Please
read this booklet carefully before you start using the hearing aid.
NOTE
Your hearing aid and accessories may not look exactly as illustrated in
this booklet. We also reserve the right to make any changes considered
necessary.

9
Intended use
The hearing aids are intended as air conduction amplification
devices to be used in everyday listening environments. The hearing aids may be provided with the Zen program intended to provide a relaxing sound background (i.e. music/noise source) for
adults who desire to listen to such a background in quiet.
Indications for use
The devices are indicated for individuals with a range of hearing
loss severity from minimal (10 dB HL) to moderately severe (75
dB HL) and all hearing loss configurations.
They are to be programmed by licensed hearing care professionals (audiologists, hearing aid specialists, otolaryngologists) who
are trained in hearing (re)habilitation.

10
Acoustic indicators
The hearing aid may be set to produce a signal to indicate the
use of certain functions. The signal may be tones (SmartTone) or
a spoken message (SmartSpeak)*. The signal can also be deactivated.
Functions
Default
settings
Other
settings
Adjusting volume via remote control Tone Off
Confirming RC program key use
Clicking
sound
Off
Changing program
via remote control
Tones Message/off
Starting up the hearing aid Tone Message/off
Warning about low battery 4 tones Message/off
Service reminder Off Message
* SmartSpeak not available as a standard feature
11
The battery
We recommend zinc-air batteries. Use a size 10 battery for the
hearing aid.
To obtain replacement batteries, please consult your hearing care
professional. It is important to take note of the expiry date and
the recommendations on the battery pack regarding disposal of
used batteries. Otherwise there is a risk that the battery life may
be reduced.
Inserting the battery
Before inserting a new battery into the hearing
aid, remember to remove the adhesive tab. Once
the tab has been removed, the battery will start
functioning after a few seconds.
12
CAUTION
Do not use batteries if there is a sticky residue from the tab or other unwanted substance, as this can cause the hearing aid to malfunction.
13
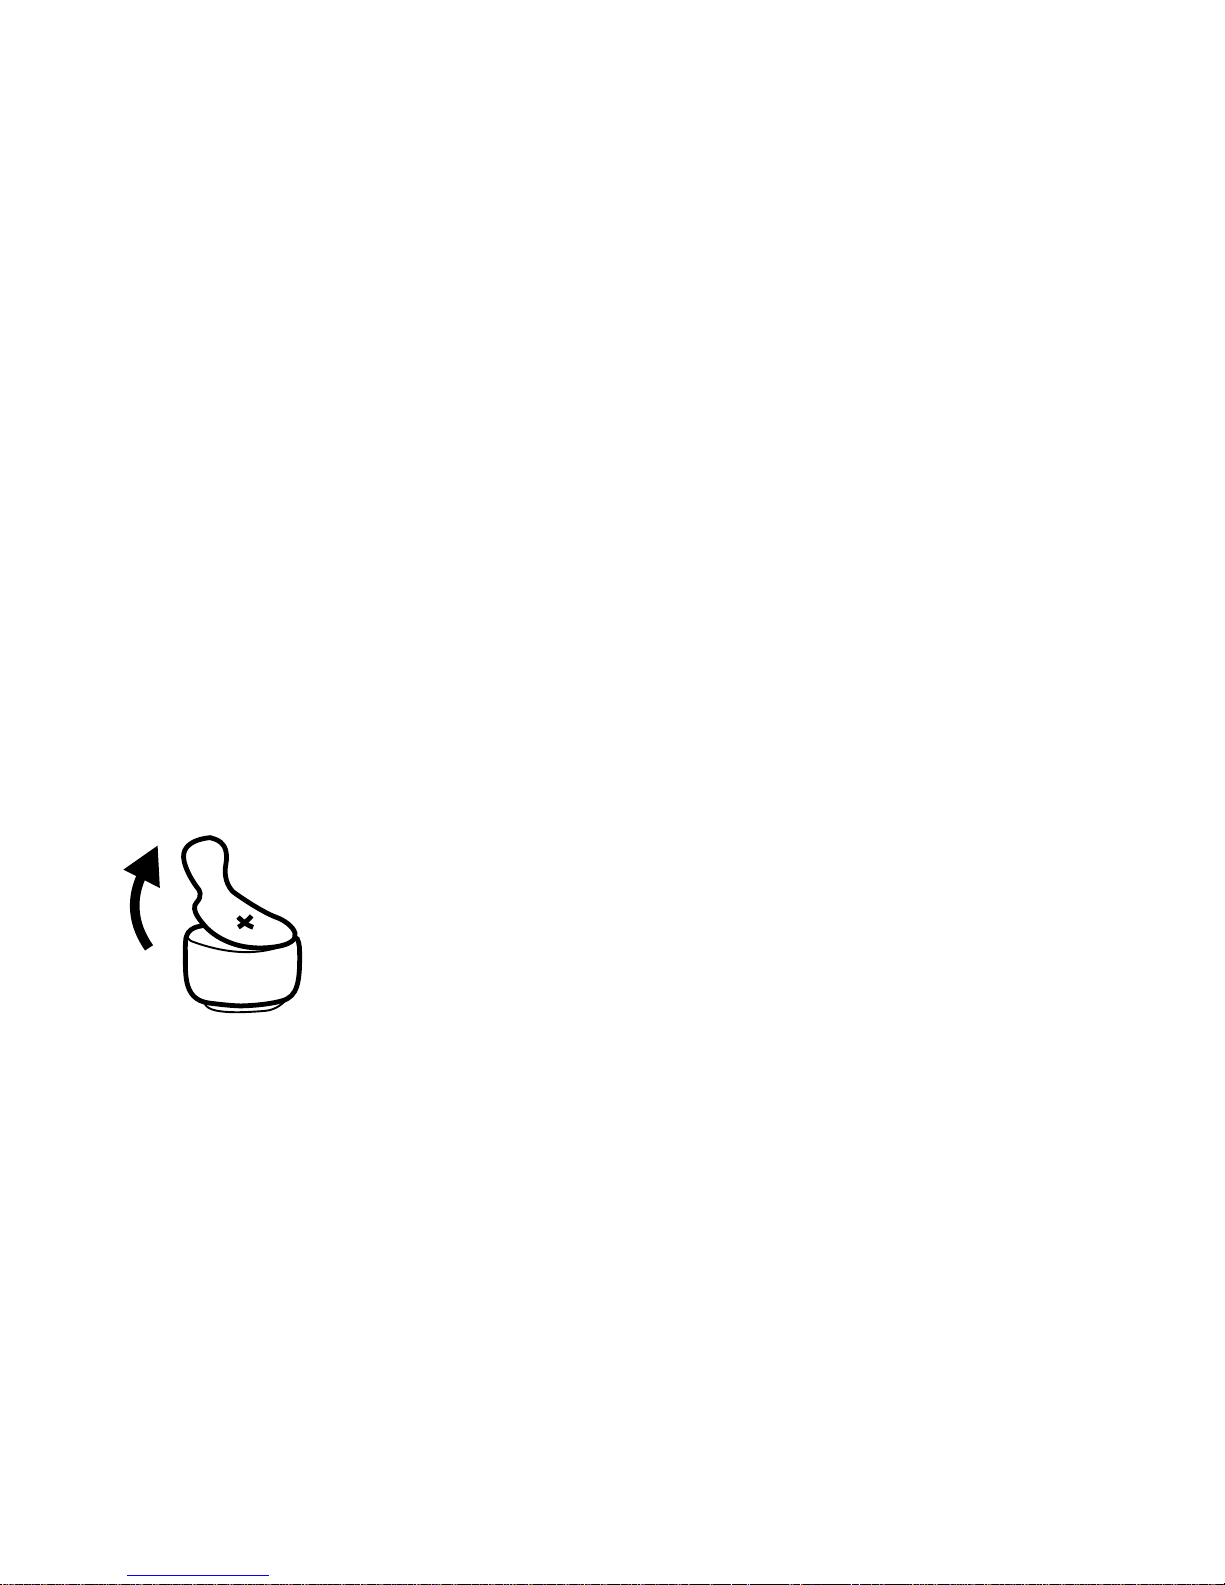
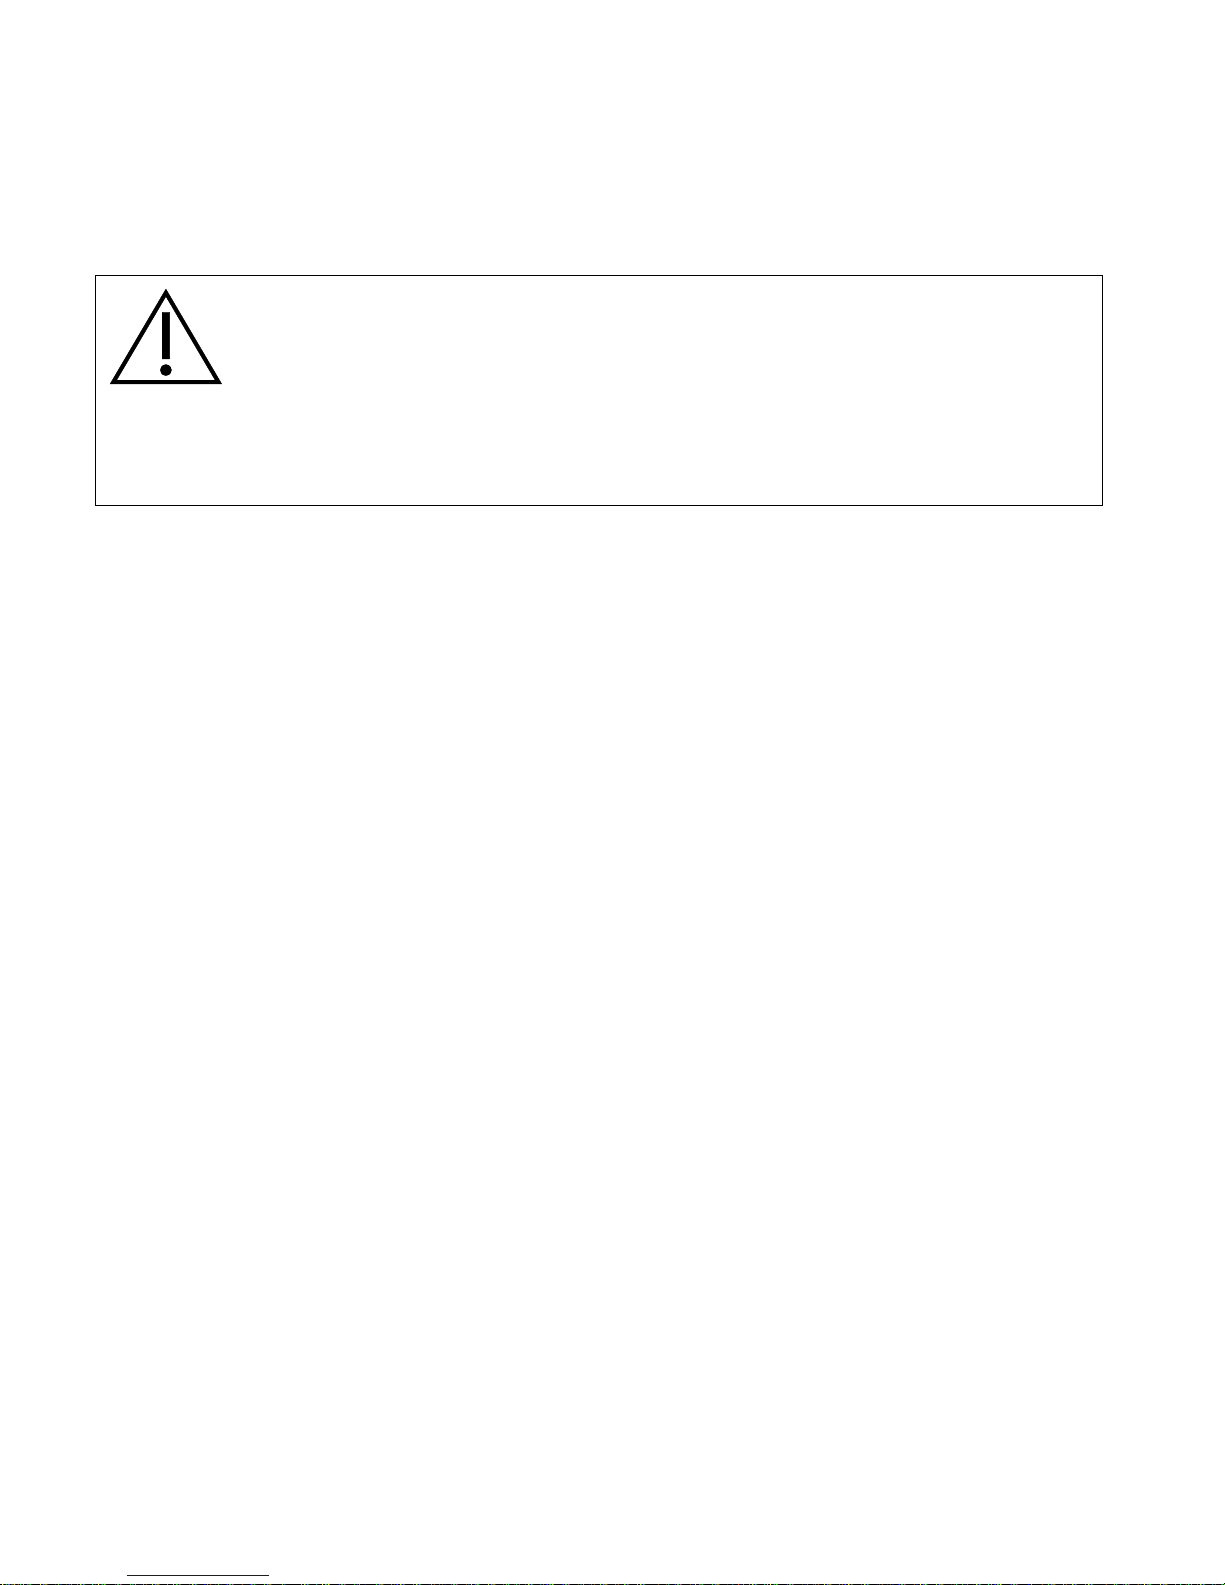
Use the nail grip to open the battery
drawer. Do not press the battery drawer
beyond the open position.
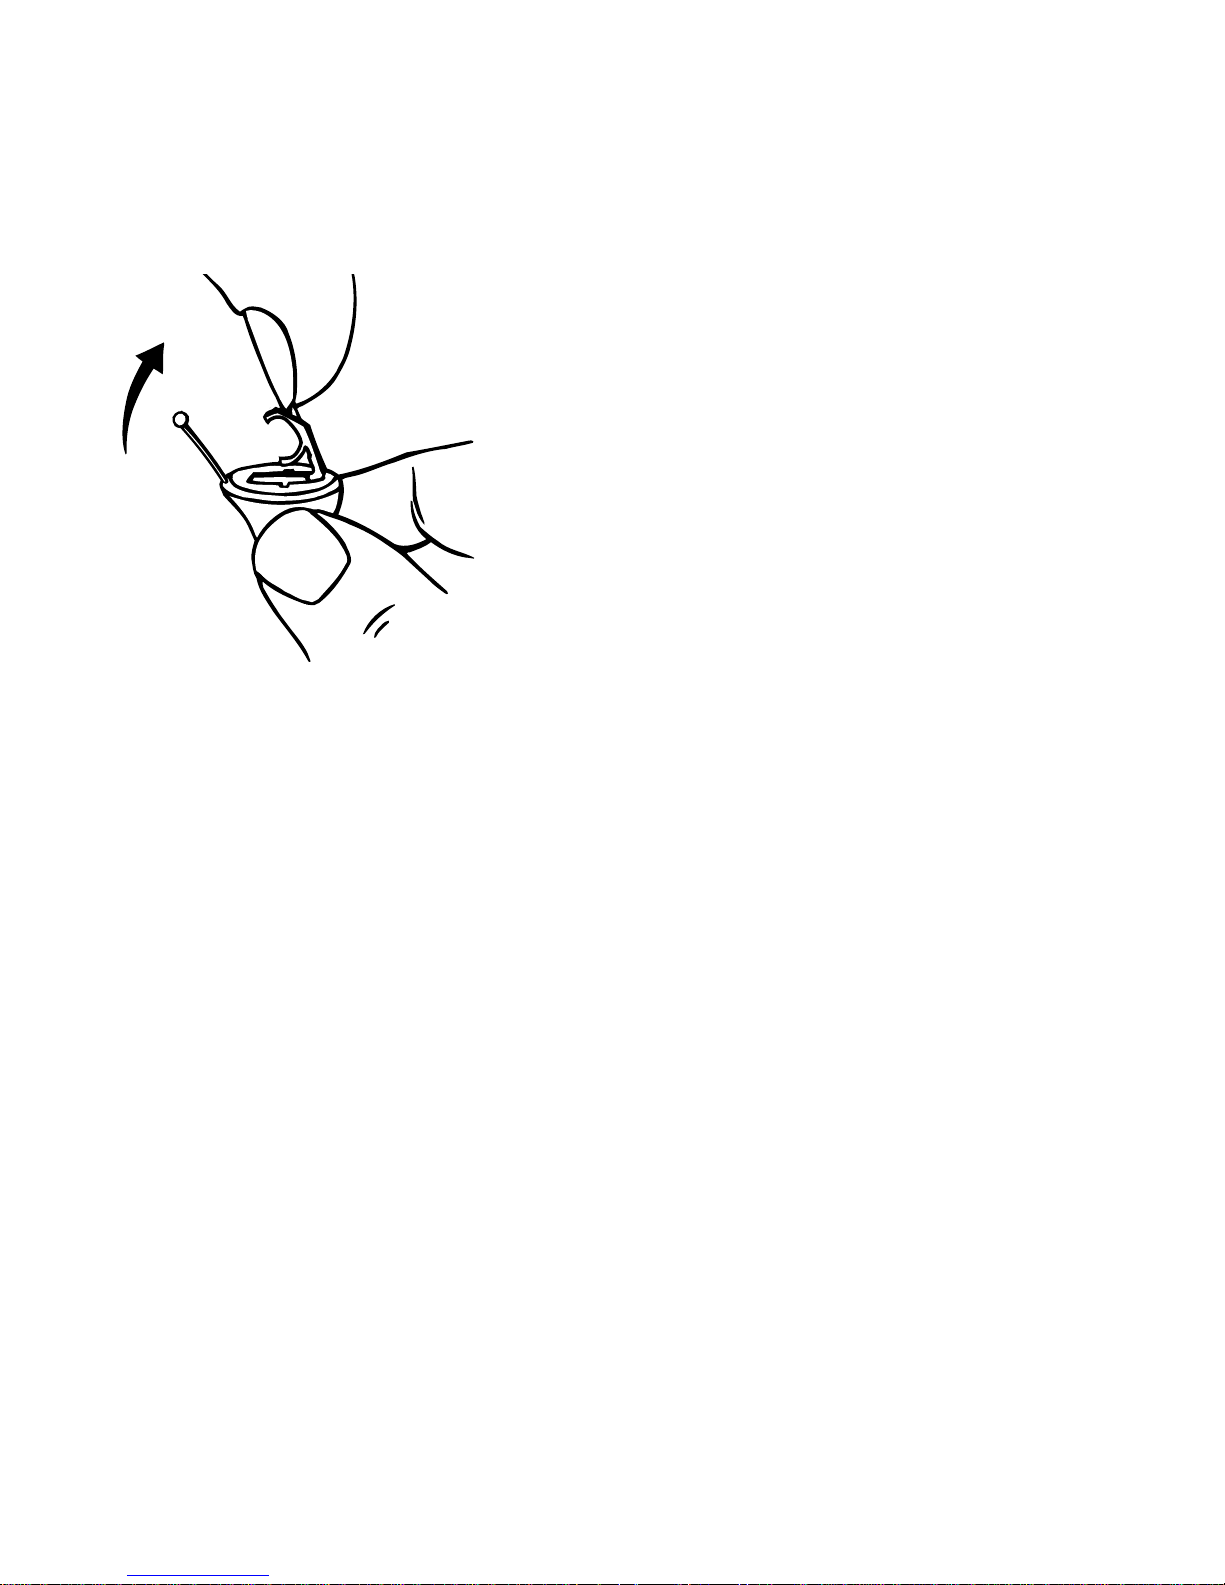
Place the battery in the drawer so that the small plus (+) sign on
the battery is visible when you hold the hearing aid as shown.
14
You can use the battery magnet provided to steer the battery into
place.
If the battery drawer does not close easily, the battery is incorrectly inserted.
When changing battery, it is a good idea to hold the hearing aid
over a table.
15
Low battery indication
An acoustic indicator will sound when the battery is nearly
exhausted, unless this function has been disabled (see page
10). We recommend that you always have a spare battery
with you.
WARNING
Never leave an exhausted battery in the hearing aid. Exhausted batter-
ies may leak, damaging the hearing aid.
WARNING
Your hearing aid may stop functioning, for instance if the battery is exhausted. You should be aware of this possibility, in particular when you
are in traffic or are otherwise dependent on warning signals.
16
Turning the hearing aid on and off
The battery drawer of the hearing aid also functions as the on/
off switch.
Close the battery drawer to turn on the
hearing aid. An acoustic indicator will
indicate that the hearing aid has been
switched on unless this function has
been disabled.
Open the battery drawer to turn off the
hearing aid.
Please remember to turn off the hearing aid when it is not in use.
Remove the battery if the hearing aid will not be used for several days.
17
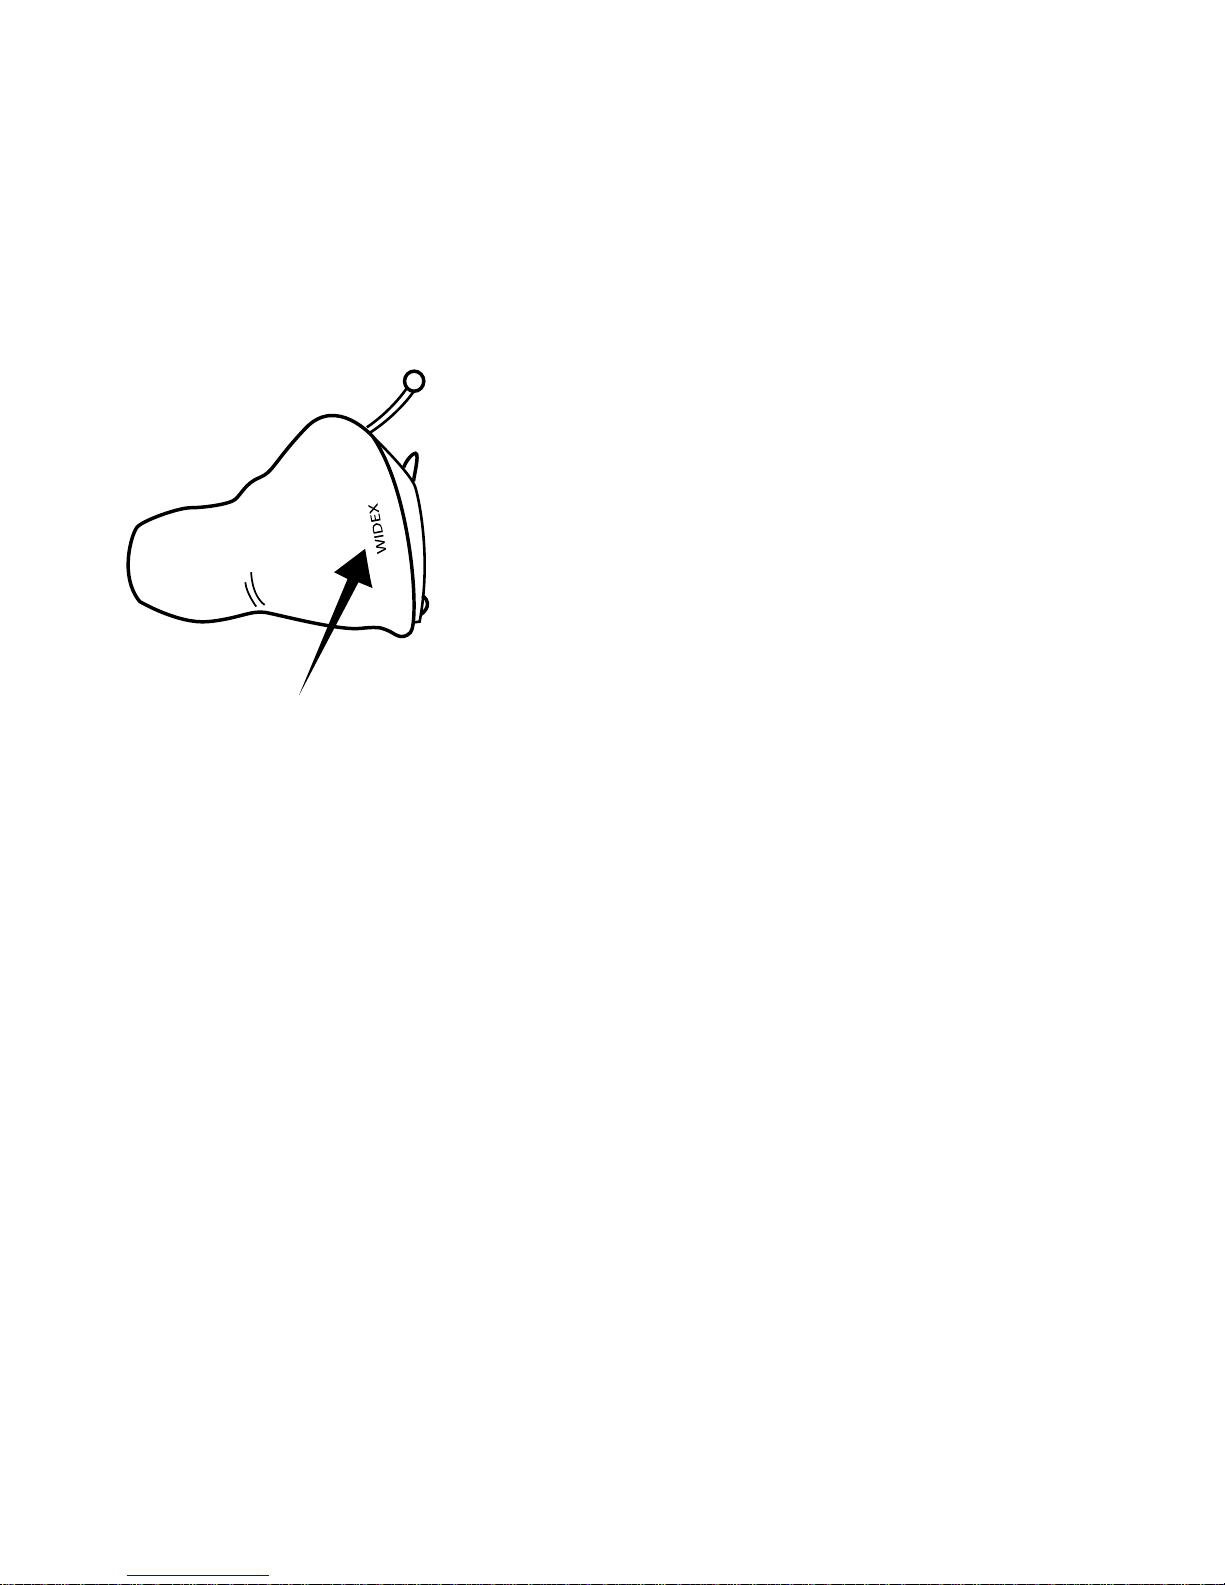
Right/left identification
Your hearing aids will be marked with a
red Widex logo for the right ear and a blue
logo for the left ear, or they may have a
red or a blue shell, respectively. The arrow
shows the position of the logo.
18
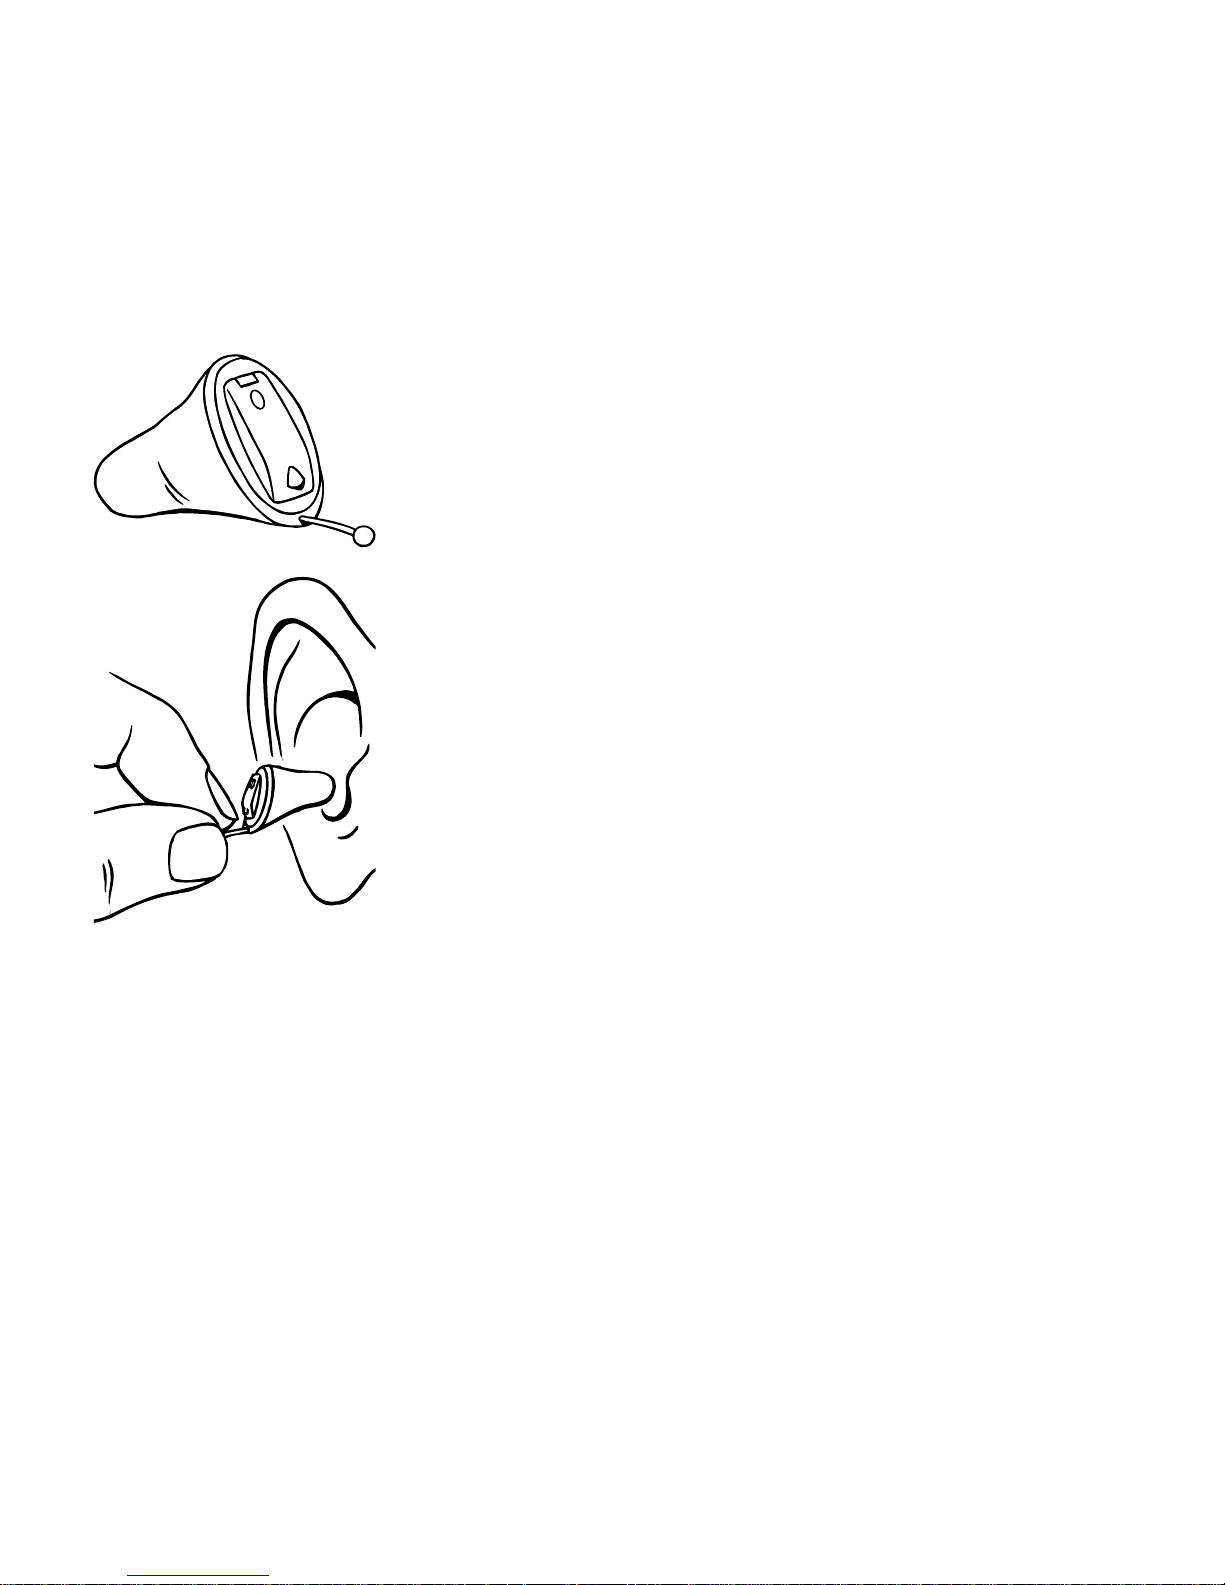
Positioning the hearing aid
Close the battery drawer completely.
Hold your hearing aid by the extraction
cord with your thumb and forefinger. Slowly
guide the hearing aid into your ear canal
until you feel resistance.
19
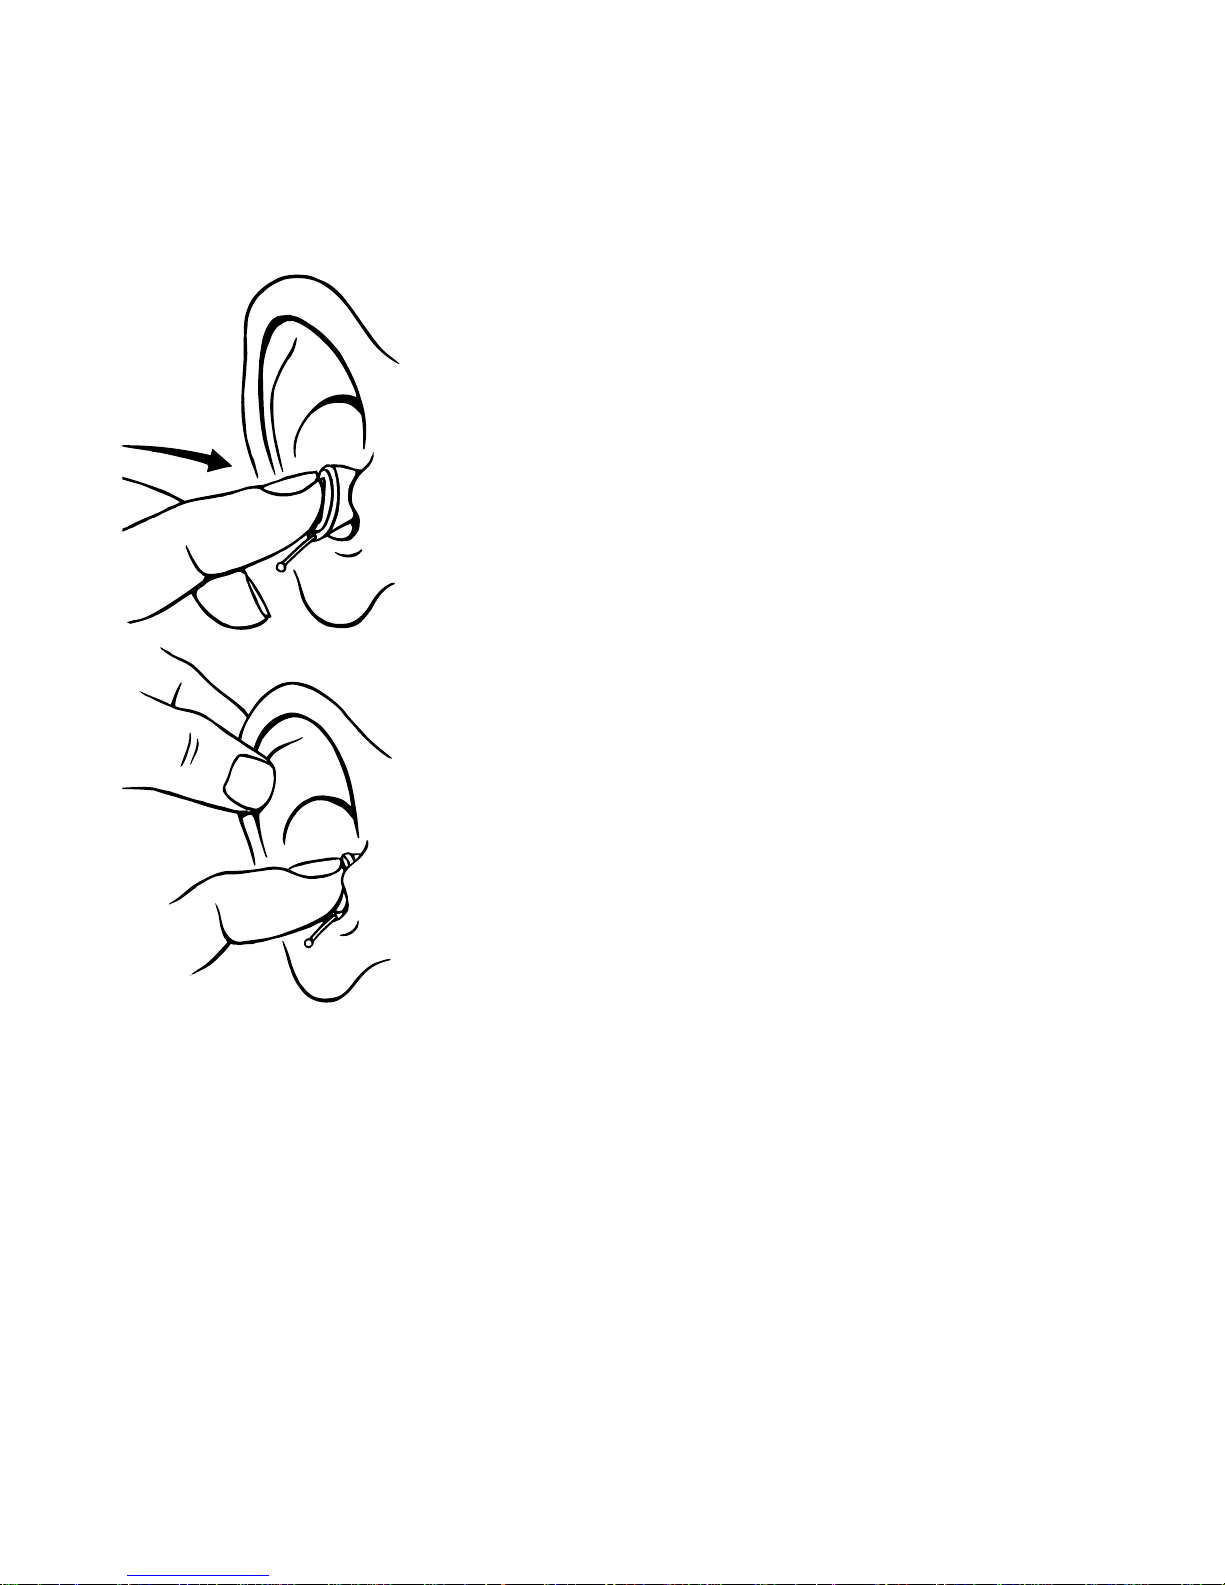
Let go of the extraction cord and use the tip
of your forefinger to gently push the hearing aid into your ear until it rests comfortably in your canal.
To help position the hearing aid properly
you could pull the outer ear backwards and
upwards with the opposite hand.
If your hearing aid does not fit or sit properly, causing discomfort, irritation, redness or the like, contact your hearing care professional.
20
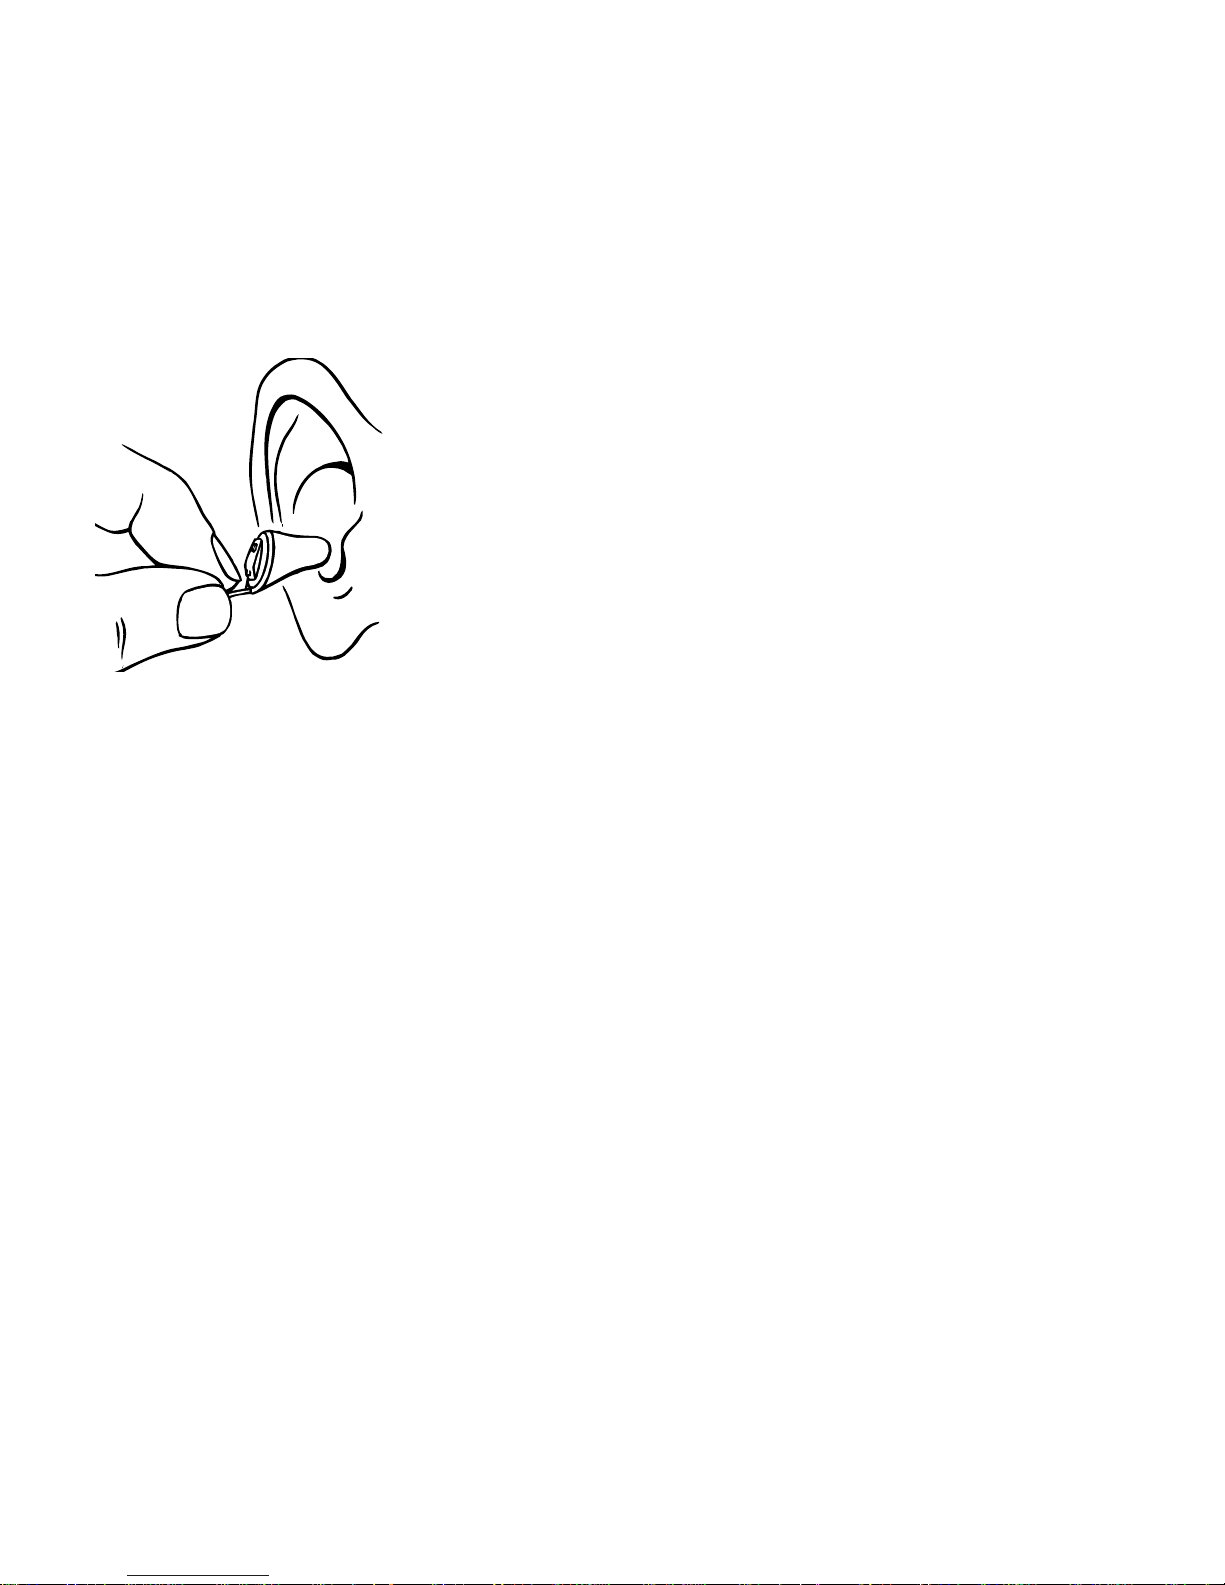
Removing the hearing aid
Gently pull the extraction cord with your
thumb and forefinger.
If it is difficult, you can try to move the hearing aid carefully from side to side while pulling the extraction cord. It may also help to
pull the outer ear backwards and upwards
with the opposite hand.
 Loading...