

Whirlpool WRS555SIHV, WRS555SIHZ Dispensing Guide
SSiiddee--BByy--SSiiddee WWaatteerr aanndd IIccee DDiissppeennssiinngg GGuuiiddee
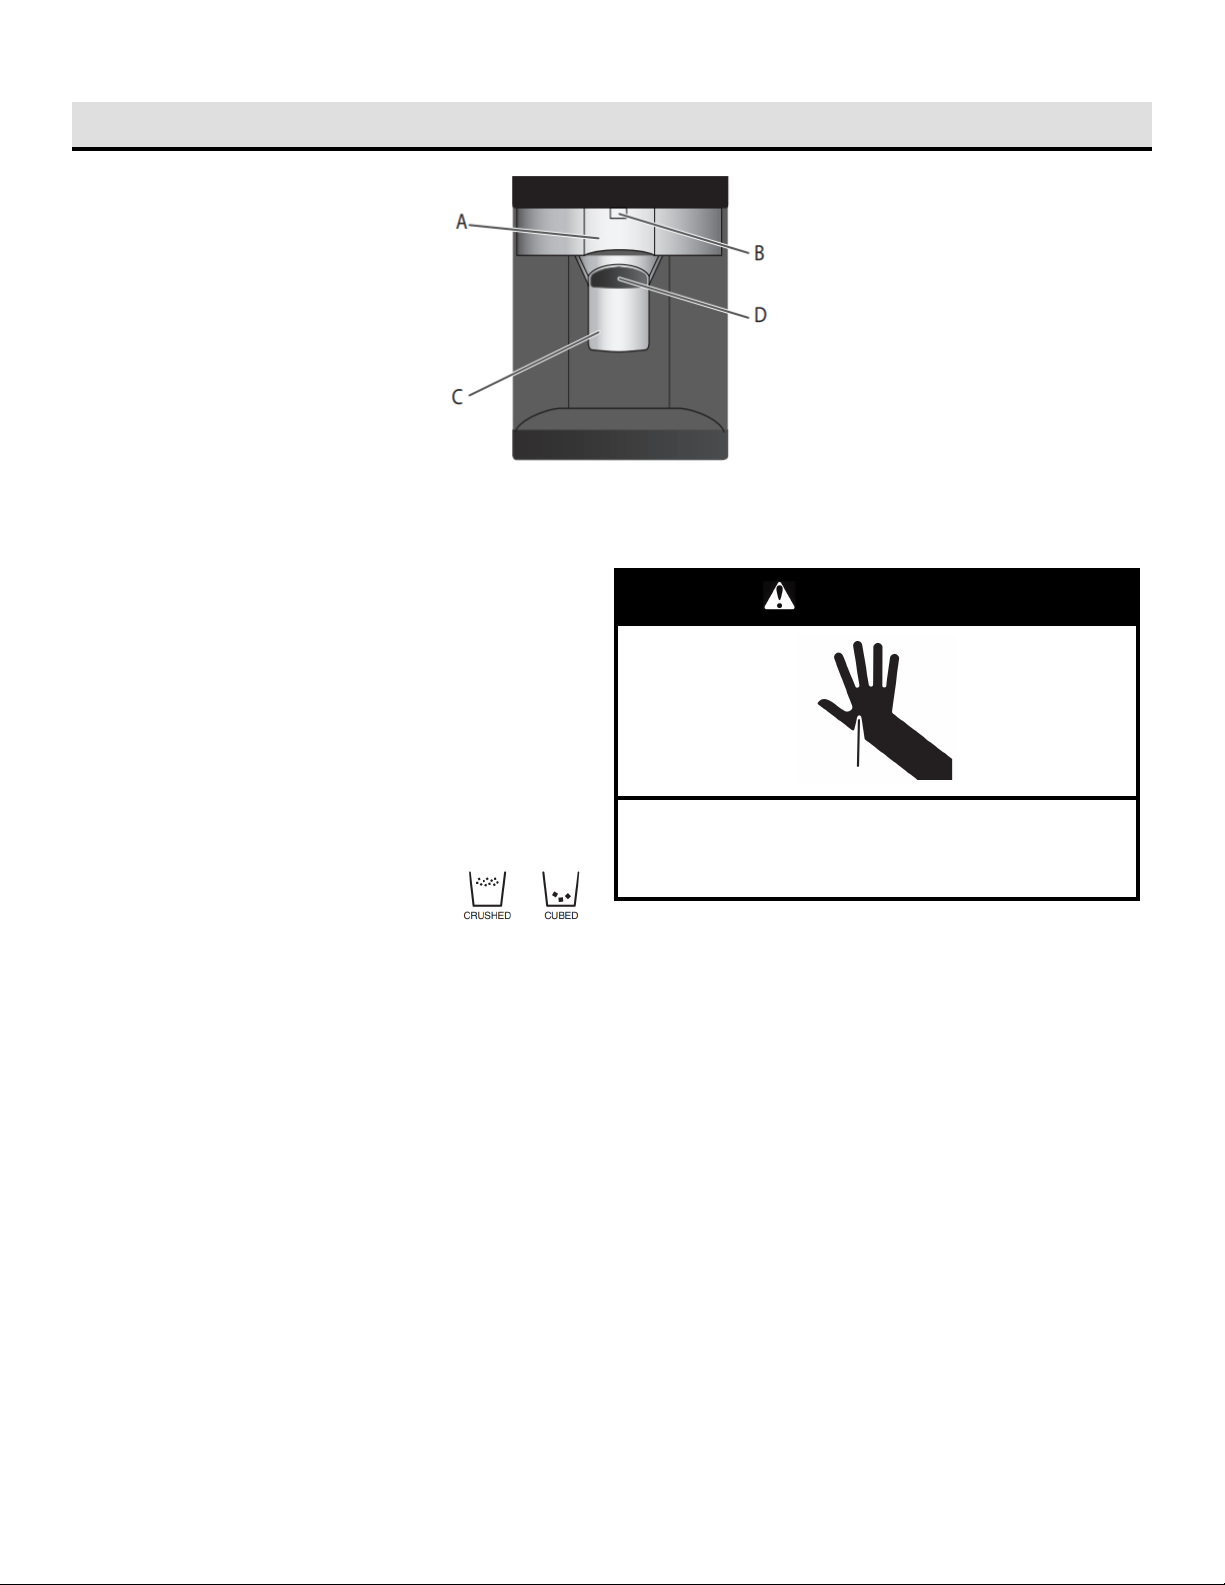
A. Water dispenser paddle
B. Water dispenser spout
TO DISPENSE WATER:
1. Press a sturdy glass against the water dispenser lever. Hold the
glass close to the water dispenser spout to ensure that the water
dispenses into the glass.
2. Remove the glass to stop dispensing
IMPORTANT
to catch small spills and allow for easy cleaning. There is no drain in the
tray. To empty and clean the tray, push down on the back of the
removable tray and pull out.
TO DISPENSE ICE:
Ice dispenses from the ice maker storage bin in the freezer when the
dispenser paddle is pressed. To turn off the ice maker, see the “Ice
Maker and Storage Bin” section in the Owner’s Manual.
Before dispensing ice, select which type of ice you
prefer by pressing the “Ice Type” button. The
display screen indicates which type of ice is
selected.
For crushed ice, cubes are crushed before being dispensed. This may
cause a slight delay when dispensing crushed ice. Noise from the ice
crusher is normal, and pieces of ice may vary in size. When changing
from crushed to cubed, a few ounces of crushed ice will be dispensed
along with the first cubes.
: The small tray at the bottom of the dispenser is designed
C. Ice dispenser paddle
D. Ice guide
1. Make sure the desired type of ice is selected.
WARNING
Cut Hazard
Use a sturdy glass when dispensing ice.
Failure to do so can result in cuts.
2. Press a sturdy glass against the dispenser lever. Hold the glass
close to the ice guide to ensure that the ice dispenses into the
glass.
IMPORTANT
paddle in order to activate the ice dispenser. Pressing hard will not
make the ice dispense faster or in greater quantities.
3. Remove the glass to stop dispensing
: You do not need to apply a lot of pressure to the
W11512524A

Pizza Pocket Assembly
2
Assembly Instructions
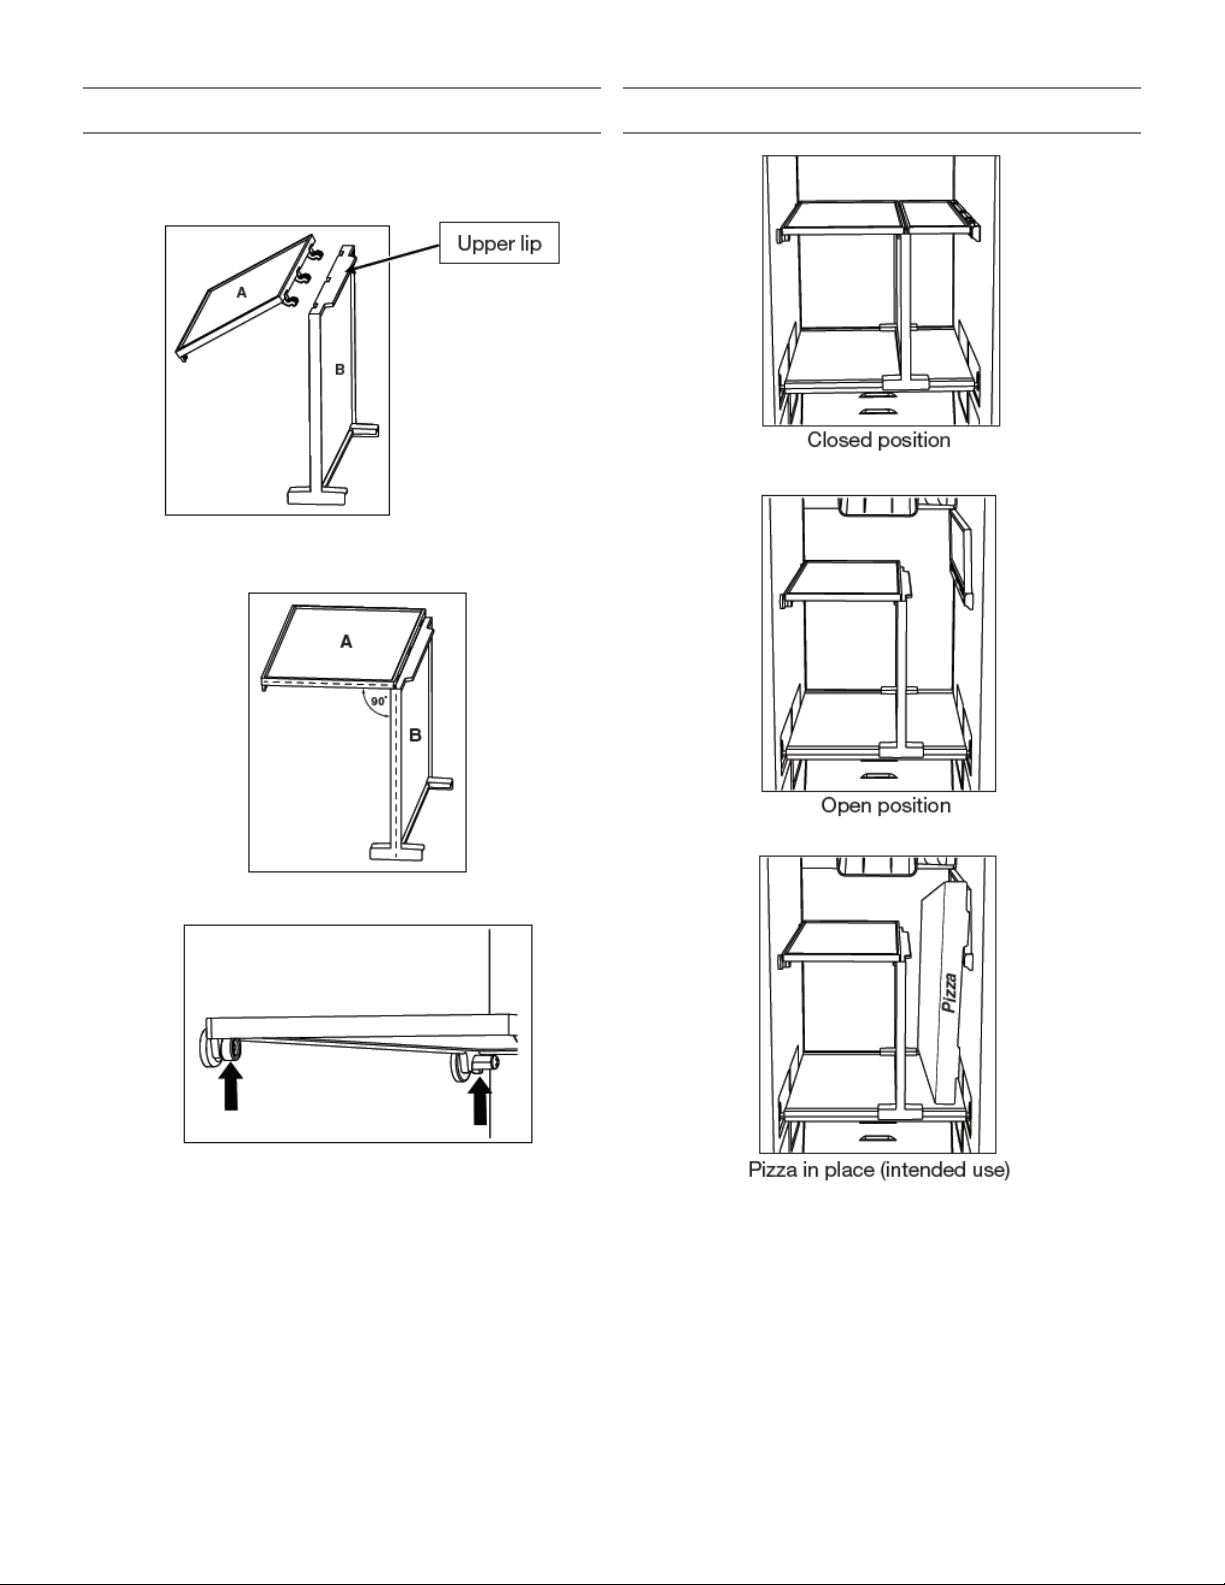
1. Insert three hooks on part “A” into their corresponding slots on
part “B”. Ensure the hooks fit into the side opposite to the
upper lip.
2. Assemble parts A and B at angle 90°.
NOTE
: Do not exceed angle more than 90°.
Application Overview
3. Place the assembly onto the studs on the liner wall.
3
 Loading...