

Whirlpool WRF736SDAF, WRF736SDAT, WRF759SLAB, WRF759SLAF, WRF759SLAM Quick Reference Guide
...
QUICK REFERENCE GUIDE
GUIDE DE RÉFÉRENCE RAPIDE
www.whirlpool.com www.whirlpool.ca
U.S.: 1-800-253-1301 Canada: 1-800-807-6777
W10417005A
COOLING AND NOISE
Cooling
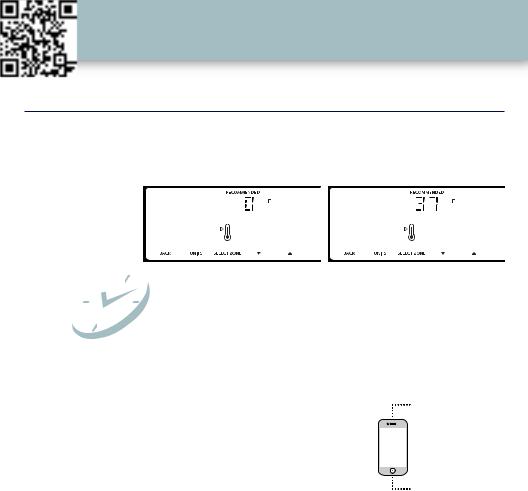
Make sure the controls are set to the recommended temperatures for normal household use.
NOTE: Areas such as a garage or porch may experience hotter or colder temperatures and higher humidity than inside the home. You may need to adjust the temperature to accommodate for these conditions.
Freezer - 0˚F (-18˚C)
Fridge - 37˚F (3˚C)
24 |
• Before storing food, wait 24 hours for your refrigerator to |
||||
cool completely. |
|
|
|
||
• If you adjust the control settings, allow 24 hours for the |
|||||
temperature to change between adjustments. |
|||||
|
|
• Make sure the air vents inside the refrigerator and freezer |
|||
|
|
compartments are not blocked by stored food. |
|||
Noise |
|
|
|
|
|
The compressor in your new refrigerator operates quietly. |
|
|
|
||
Due to this reduction in operating noise, you may notice |
|
|
|
||
unfamiliar noises that are normal. To listen to normal |
|
|
|
||
Scan |
|
|
|||
refrigerator sounds, go to www.whirlpool.com/product_help |
|
||||
and search for “normal sounds” OR scan the QR code |
here |
|
|||
located to the right. |
|
|
|
|
|
|
|
|
|
||
|
|
|
|
|
|
|
Buzzing and |
Heard when the water valve opens and closes to dispense |
|
||
|
Clicking |
and/or fill the ice maker. If the refrigerator is not connected |
|
||
|
|
to the water line, turn OFF the ice maker. |
|
||
|
|
|
|
|
|
|
Pulsating/Whirring |
Fans/compressor adjusting to optimize performance |
|||
|
|
|
|
|
|
|
Hissing/Dripping |
Flow of refrigerant, or flow of oil in the compressor |
|
||
|
|
|
|
|
|
|
Rattling/Banging |
Move water line away from the refrigerator cabinet or fasten |
|||
|
|
the excess line to the cabinet. |
|
|
|
|
|
|
|
|
|
|
Popping |
Contraction/expansion of inside walls, especially during |
|
||
|
|
initial cool-down |
|
|
|
|
|
|
|
|
|
|
Water running/ |
May be heard when ice melts during the defrost cycle and |
|||
|
Gurgling |
water runs into the drain pan |
|
|
|
|
|
|
|
|
|
|
Creaking/Cracking/ |
May be heard as ice is being ejected from the ice maker |
|
||
|
Grinding |
mold |
|
|
|
|
|
|
|
|
|
2

WATER FILTER
Water Filter Installation/Flushing/Replacement
Do not use with water that is microbiologically unsafe or of unknown quality without adequate disinfection before or after the system. Systems certified for cyst reduction may be used on disinfected waters that may contain filterable cysts.
Installation
1.Take the water filter out of its packaging and remove the cover from the O-rings. Be sure the O-rings are still in place after the cover is removed.
NOTE: See the water filter certification and performance data information in the Use & Care Guide.
2.The water filter compartment is located in the right-hand
side of the refrigerator ceiling. Push up on the door to release the catch, then lower the door.
3.Align the arrow on the water filter label with the cutout
notch in the filter housing and insert the filter into the housing
4.Turn the filter clockwise until it locks into the housing.
NOTE: If the filter is not correctly locked into the housing, the water dispenser will not operate. Water will not flow from the dispenser.
5.Lift the filter up into the compartment. Close the filter compartment door completely.
Flushing
IMPORTANT: After connecting the refrigerator to a water source replacing the water filter, flush the water system to force air from the water line to keep the dispenser from dripping.
1.Use a sturdy container to depress and hold the water dispenser pad for 5 seconds, then release it for 5 seconds. Repeat until water begins to flow.
2.Continue depressing and releasing the dispenser pad
(5 seconds on, 5 seconds off) until a total of 3 gal. (12 L) of water has been dispensed.
Replacement
Press OPTIONS and select Filter Status to display the percentage of use remaining in the water filter (from 99% to 0%).
ALSO
The water filter status lights will let you know when to change your water filter.
• ORDER (Yellow) - Order a replacement water filter.
• REPLACE (Red) - Replace the water filter.
3

ICE AND WATER
Ice and Water
Ice Maker Operation
1. Connect the refrigerator to the household water
the ice maker.
Style 1 - Push up on the latch on the left-hand side ice compartment to open the door. The ice maker located on the left-hand side of the ice compartment
• Move the switch to the (left) ON position.
Style 2 - Lower the wire shutoff arm to turn the ice ON.
2. Wait 24 hours for the refrigerator to become cold enough to make ice. If there is no ice after 48 hours,
make sure the water line is connected to the refrigerator, the water supply is turned on and the ice maker is turned on.
3. Discard the first three batches of ice produced.
4. It will take approximately 2 to 3 days for the ice bin to fill completely following installation.
NOTE: The ice maker should produce approximately 3 lbs
(1.4 kg) of ice per day under normal operation.
Style 2
Ice Maker and Dispensers
Hollow ice cubes, slow or no water flow
If the ice cubes are hollow or have an irregular shape, or the water flow decreases, it could be because of low water pressure.
•Make sure the water filter is locked in its compartment. Replace the water filter every 6 months or if it is clogged.
•Make sure you have adequate water supply pressure; check the Reverse Osmosis (RO) system, if applicable.
•Make sure the water line is free of kinks and/or restrictions.
Dispenser or Ice System Jams, No/Slow/Little Ice Production
Clumping
•Ice shavings collect in the dispenser chute and may Occasionally dispense cubed ice to clean out the ice chute.
•If necessary, remove the ice clogging the storage bin and plastic utensil.
•An ice cube may be jammed in the ice maker ejector. arm using a plastic utensil.
•Warmth, humidity, or lack of use may cause the ice to clump. regularly. If clumping occurs, clean the storage bin.
4
 Loading...