

Page 1

EN
Quick guide
THANK YOU FOR BUYING A WHIRLPOOL PRODUCT
In order to receive a more complete assistance, please
register your product on www . whirlpool . eu/ register
Before using the appliance carefully read the Safety
Instruction.
PRODUCT DESCRIPTION
FIRST TIME USE
Wait at least two hours, after the installation, before connecting
the appliance to the power supply. Connect the appliance to the
power supply it starts the operation automatically. The ideal storage
temperatures for the food are preset in the factory.
After turning the appliance on, you must wait for 4- 6 hours for the
correct storage temperature to be reached for a normally lled
appliance. Position the antibacterial anti-odour lter in the fan as
demonstrated in the lter packaging (if available). If the audible signal
sounds, it means that the temperture alarm has intervened: press the
button to switch o the acoustic alarms.
CONTROL PANEL
4.6.8. 7.
2.5.3.1. 1. Freezer and refrigerator compartment
temperature indicator
2. Fast cool
3. 6
th
Sense Fresh Control and Fan indicator
4. On/stand-by
5. Alarm indicator
6. Turning o the sound alarm
7. Black out alarm indicator
8. Temperature button
6TH SENSE FRESH CONTROL
The appliance is automatically able to quickly reach the optimal
internal preservation temperature. The 6
th
Sense Fresh Control function
enables to control also the humidity of the appliance. In order for it to
function correctly, the fan must also be turned on. It is possible to turn
the function on/o (see Fan description).
FAN*
The Fan improves temperature distribution inside the product,
allowing better preservation of stored food and reduction of excess
humidity. By default, the fan is switched on. You can turn the fan on/
o by pressing for 3 seconds Stand by
and Fast Cooling
buttons. The lit 6
th
Sense Fresh Control symbol indicates that the fan
is on and therefore the 6
th
Sense Fresh Control function is on. If the
ambient temperature exceeds 27°C, or if drops of water are present
on the glass shelves, it is essential that the fan is on to ensure the
proper preservation of the food. Deactivation of the fan allows energy
consumption to be optimised.
Note: the fan restarts automatically after a power cut or after turning o
the appliance. Do not obstruct the air intake area with food items.
ANTIBACTERIAL FILTER*
Remove it from the box placed in the Fruit and vegetable drawer and
insert into the cover of fan. The replacement procedure is included in
the lter box.
ON/STANDBY
Press the button for 3 seconds to turn the appliance o (the
control panel and the light will remain turned o). Press the button
again briey to reactivate the appliance.
Note: This does not disconnect the appliance from the power supply.
FREEZER AND REFRIGERATOR
COMPARTMENT TEMPERATURE
It is possible to set a dierent temperature of the appliance by pressing
the "Temp ." button.
LEDs lit Set temperature
Low High
High (less cold)
Medium-high
Medium
Medium-low
Low (colder)
FAST COOL
Press the button
for 3 seconds to quickly cool the
refrigerator compartment or 6 hours before putting large quantities
of food to freeze in the freezer compartment. When the function is
turned on the icon lights up. The function turns o automatically after
36 hours, or manually by pressing the button again for 3 seconds.
Note: Avoid a direct contact between the fresh food and the food that is
already frozen.
TURNING OFF THE SOUND ALARM
To turn o the sound alarm, briey press the
button.
* Available only on certain models
Page 2
* Available only on certain models
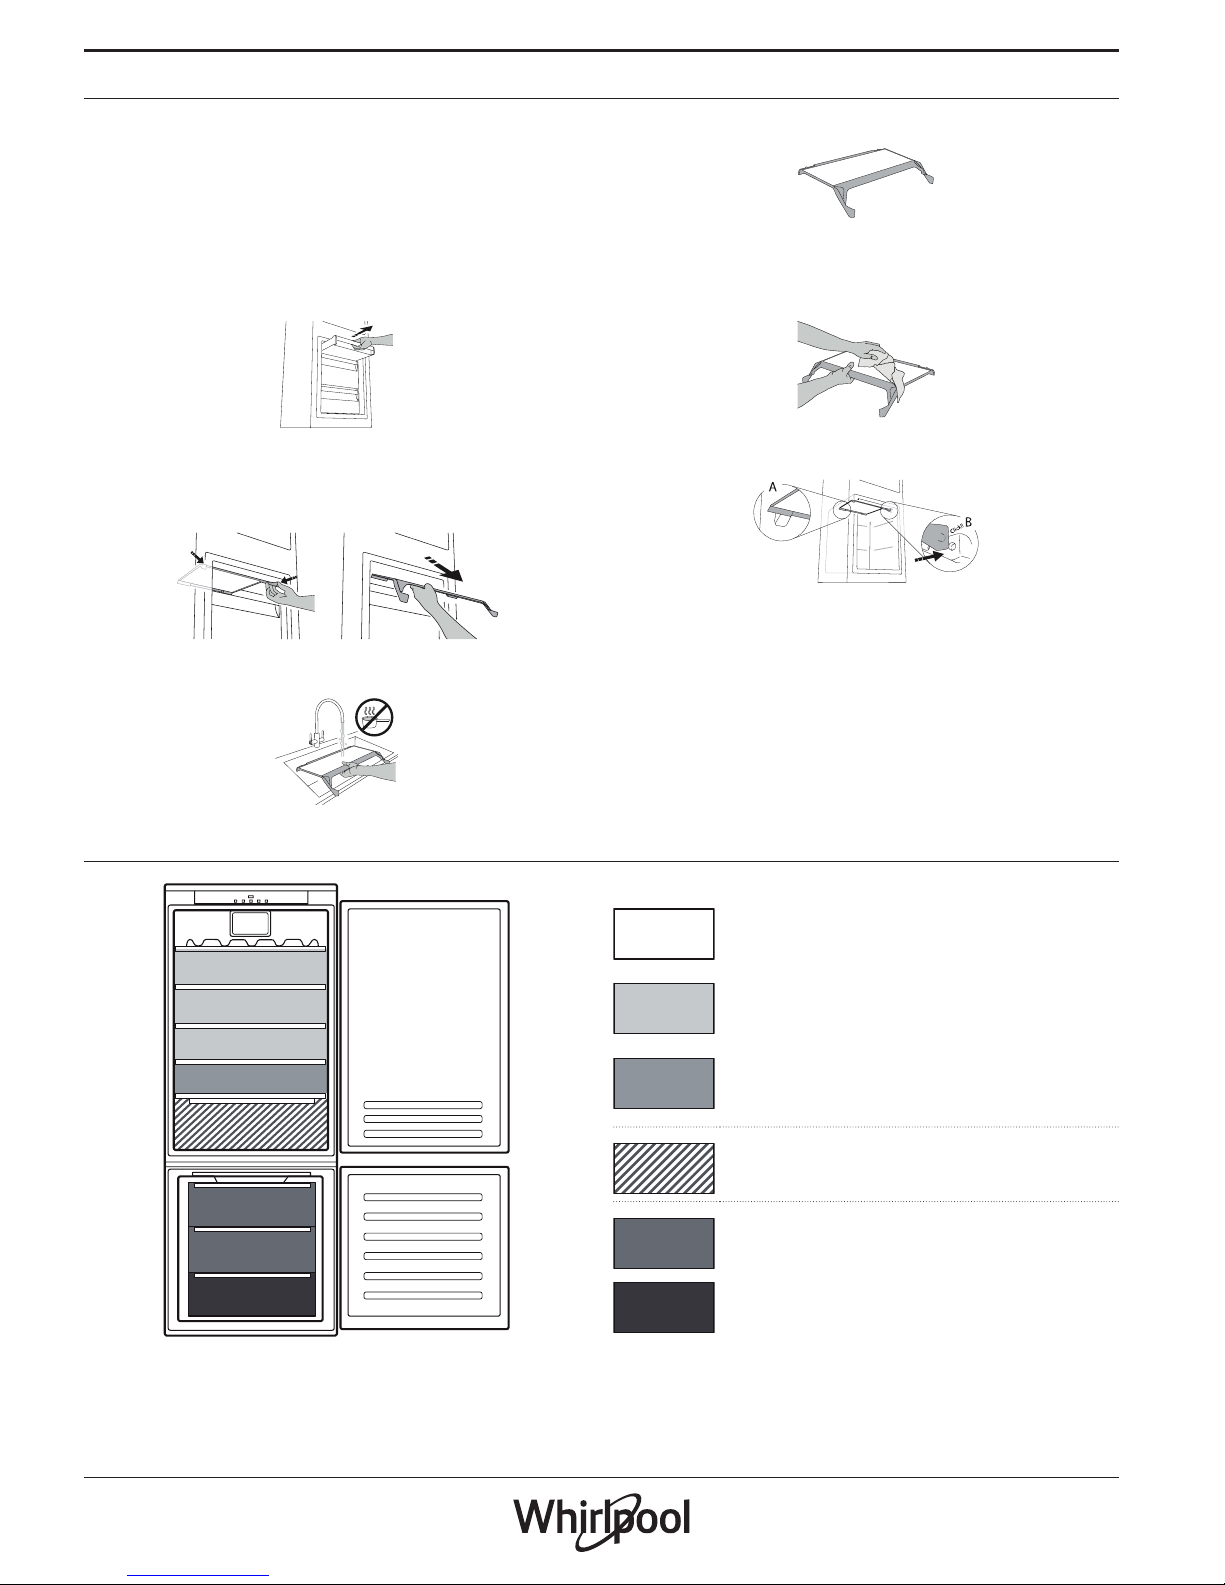
STOP FROST SYSTEM*
The STOP FROST SYSTEM facilitates the defrost procedure for the
freezer compartment.
The STOP FROST accessory is designed to collect some of the frost
that forms in the freezer compartment and it is easy to remove and
clean, therefore reducing the time needed to defrost the freezer
compartment.
To remove the frost on the STOP FROST accessory follow the cleaning
procedure demonstrated below.
PROCEDURE TO CLEAN THE STOP FROST ACCESSORY
1. Open the freezer compartment door and remove the upper
drawer.
2.
Unfasten the STOP FROST accessory and remove it, taking care not
to drop it on the glass shelf below.
Note: if the accessory is jammed or dicult to remove, do not keep
trying to remove it, but proceed with the complete defrost of the
freezer compartment.
3. Close the door of the freezer compartment.
4. Remove the frost on the accessory by rinsing it under running (not
hot) water.
5. Let the accessory drip dry and dry the plastic parts with a soft
cloth.
6.
Reinsert the accessory by placing the back part on the projections
shown in gure, then refasten the handle of the accessory to the
clasps above.
7.
Reinsert the upper drawer and close the door of the freezer
compartment.
It is possible to clean the STOP FROST accessory on its own without
completely defrosting the freezer compartment.
Cleaning the STOP FROST accessory regularly helps to reduce the need
to completely defrost the freezer compartment.
Note: the product specications, including volume and energy, are
calculated without the STOP FROST accessory.
HOW TO STORE FOOD AND BEVERAGE
Legend
TEMPERATE ZONE
Suggested for storage of tropical fruit, cans, drink, eggs,
sauces, pickles, butter, jam
COOL ZONE
Suggested for storage of chese, milk, daily food,
delicatessen, yogurt
COOLEST AREA
Suggested for storage of cold cuts, desserts, meat and
sh
FRUIT & VEGETABLE DRAWER
FREEZER DRAWERS
FREEZING ZONE DRAWER
(Max cool zone)
Suggested to freeze fresh/cooked food
Page 3
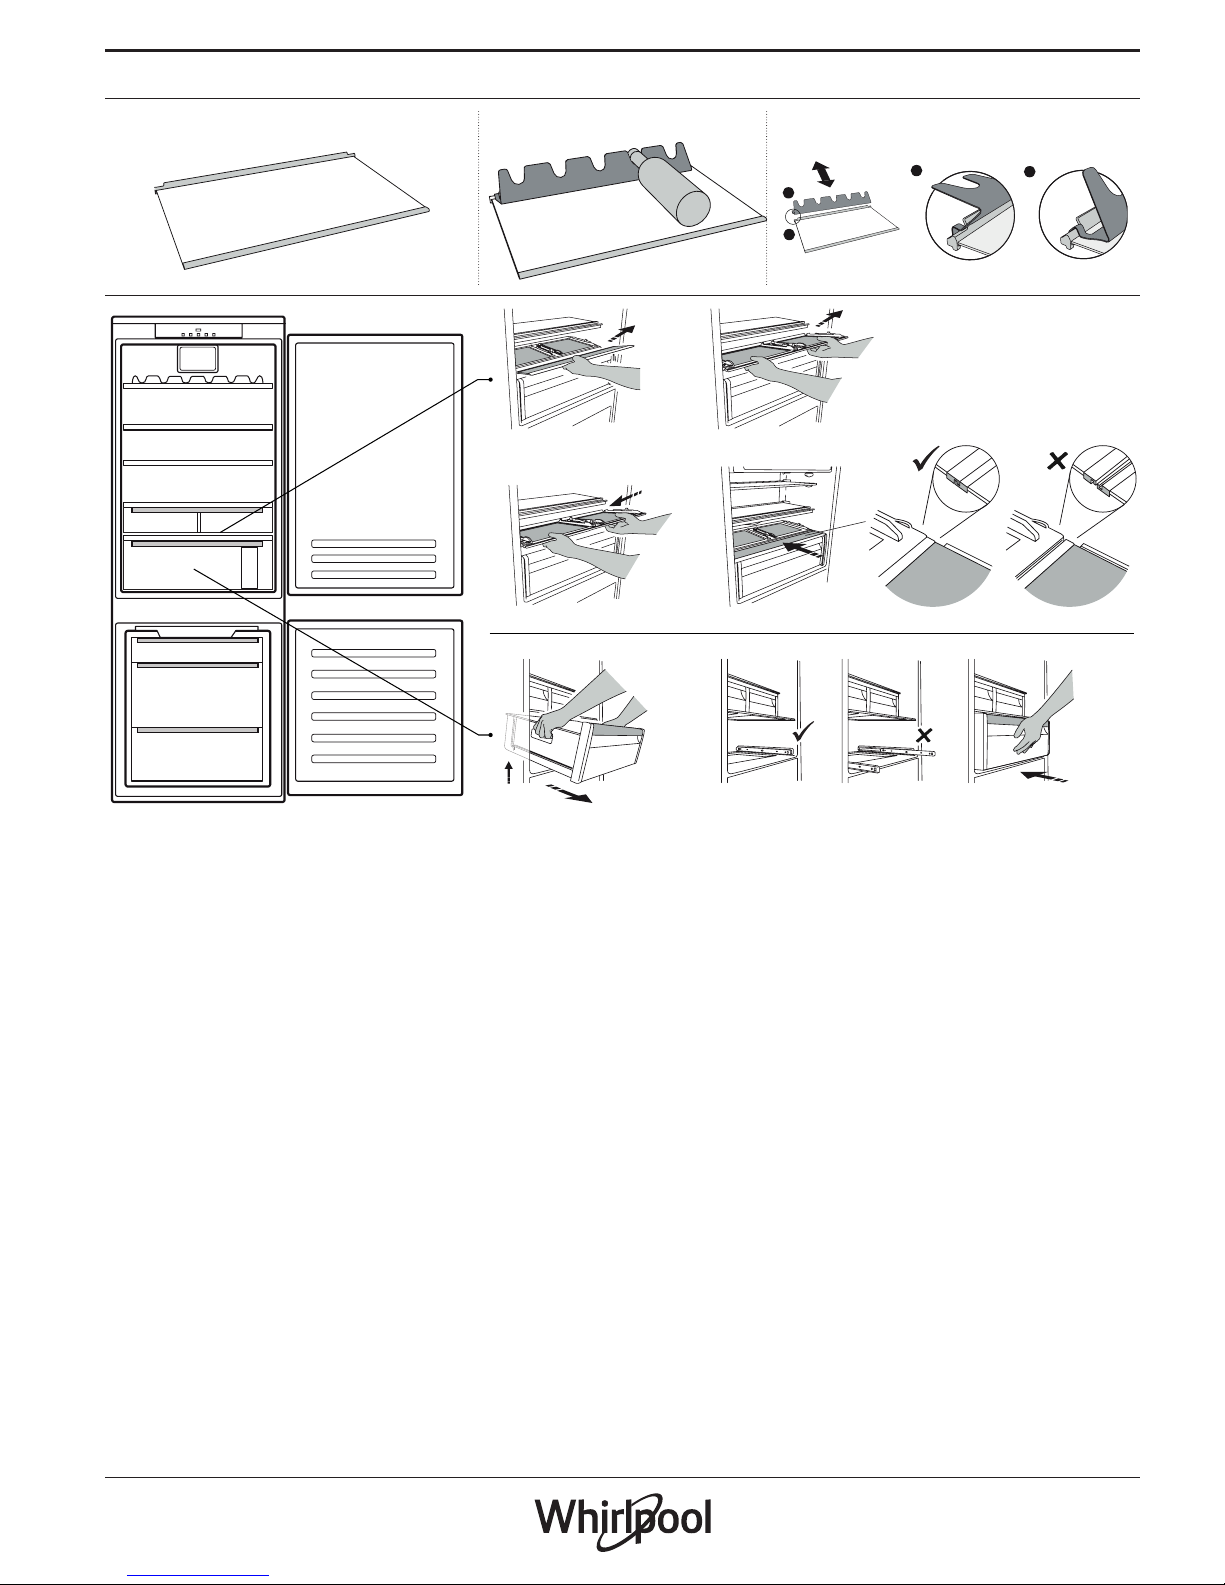
ACCESSORIES*
GL ASS SHE LVES BOTTLE RACK
1
2
1
2
21
12
211
* Available only on certain models
Page 4
40 001111763 6
You can download the Safety Instructions, User Manual, Product Fiche and Energy data by:
• Visiting our website docs . whirlpool . eu
• Using QR Code
• Alternatively, contact our After-sales Service (See phone number in the warranty booklet). When
contacting our After-sales Service, please state the codes provided on your product's identication plate.
TROUBLESHOOTING
What to do if... Possible reasons Solutions
The control panel is
switched o, the appliance
does not work.
There may be an appliance power
supply problem.
Check that:
• there is not a power outage;
• the plug is properly inserted in the power socket and the mains
double-pole switch (if present) is in the correct position (i.e. allows
the appliance to be powered);
• the household electrical system protection devices are ecient;
• the power cable is not damaged.
The inside light does not
work.
The light may need to be replaced. • Contact the authorised Technical Assistance Service.
The appliance may be in On / Stand-by
mode.
• Turn the appliance on pressing the On/Stand-by button.
The temperature inside the
compartments is not low
enough.
There could be various causes (see
“Solutions”).
Check that:
• the doors close properly;
• the appliance is not installed near a heat source;
• the set temperature is adequate;
• the circulation of air through the ventilation of the appliance is
ensured.
There is water on the
bottom of the refrigerator
compartment.
The defrost water drain is blocked. Clean the defrosting water drain (see section “Cleaning and
maintenance”).
The front edge of the
appliance, at the door
gasket, is hot.
This is not a defect. It prevents
condensation from forming.
No solution is necessary.
The red
icon is ashing
and a sound signal is
activated
Door open alarm
It is activated when the refrigerator
compartment door remains open for a
prolonged period of time.
To turn the sound signal o, close the open door of the product.
The red
icon is ashing,
a sound signal is activated
and the
icon is
activated.
Blackout alarm
It is activated when there is a prolonged
interruption to the power supply which
has caused an increase in temperature
in the freezer compartment.
Note: until the blackout alarm is
deactivated, you cannot set a dierent
temperature for the product.
Turning o the sound signal. Check the condition of the food before
consuming it. After pressing the button, the temperature display will
again show the temperature set. If the freezer compartment has not
yet reached the optimal temperature for the preservation of the food,
the freezer compartment temperature alarm may activate (see freezer
compartment temperature alarm).
The red
icon is lit up
(without ashing), a sound
signal is activated and the
temperature indicators is
ashing.
Freezer compartment temperature
alarm
The freezer compartment temperature
alarm indicates that the compartment
is not at the optimum temperature. This
may occur: when using for the rst time,
after defrosting and/ or cleaning, when
freezing large quantities of food or
when the door to the freezer does not
close completely.
To turn o the sound signal, briey press the “Turn o sound alarm”
button (the temperature indicators will stop ashing). When the
optimum temperature conditions have been reached, the red icon will
automatically turn o. If the freezer compartment temperature alarm
continues, contact the Authorised Technical Assistance Service.
The temperature indicators
for the refrigerator
compartment are ashing
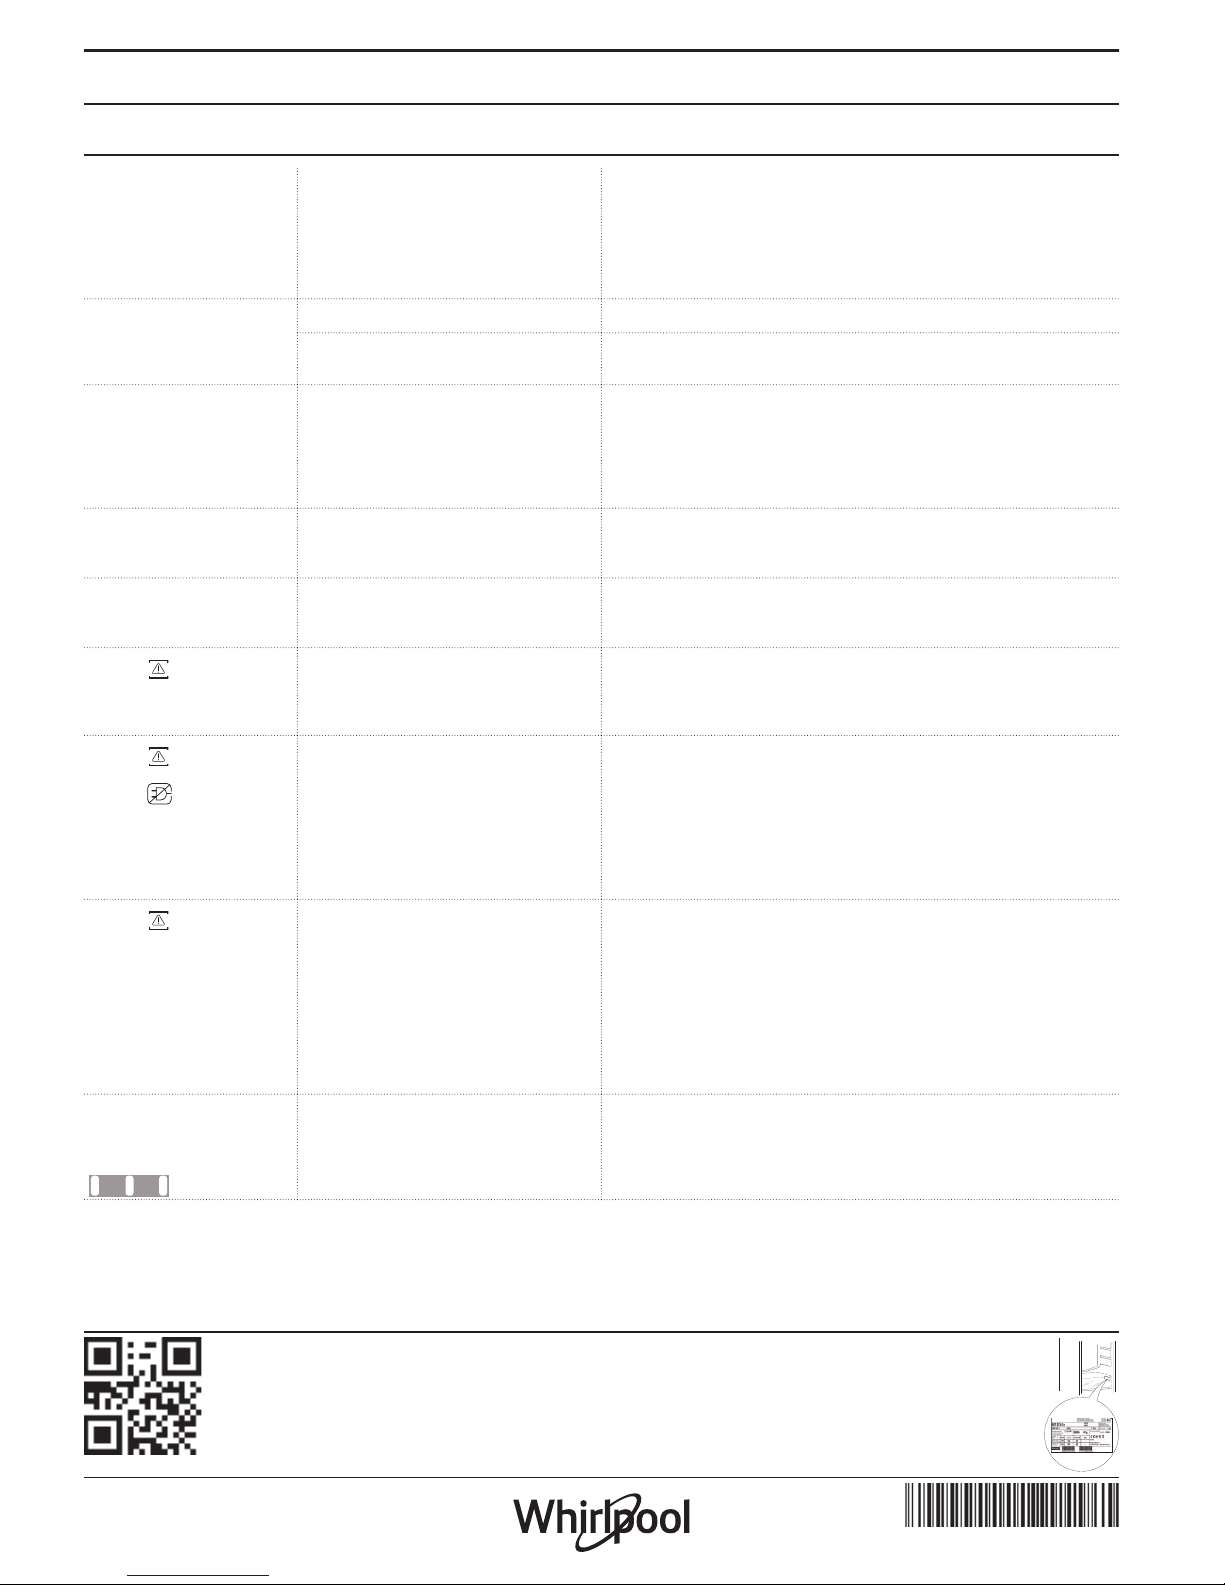
as shown in the gure:
Malfunction alarm
The alarm indicates the malfunction of a
technical component.
Call the authorized Technical Assistance Service.
 Loading...